(ubt) – billing format – provider's instructions guide
TRANSCRIPT

1
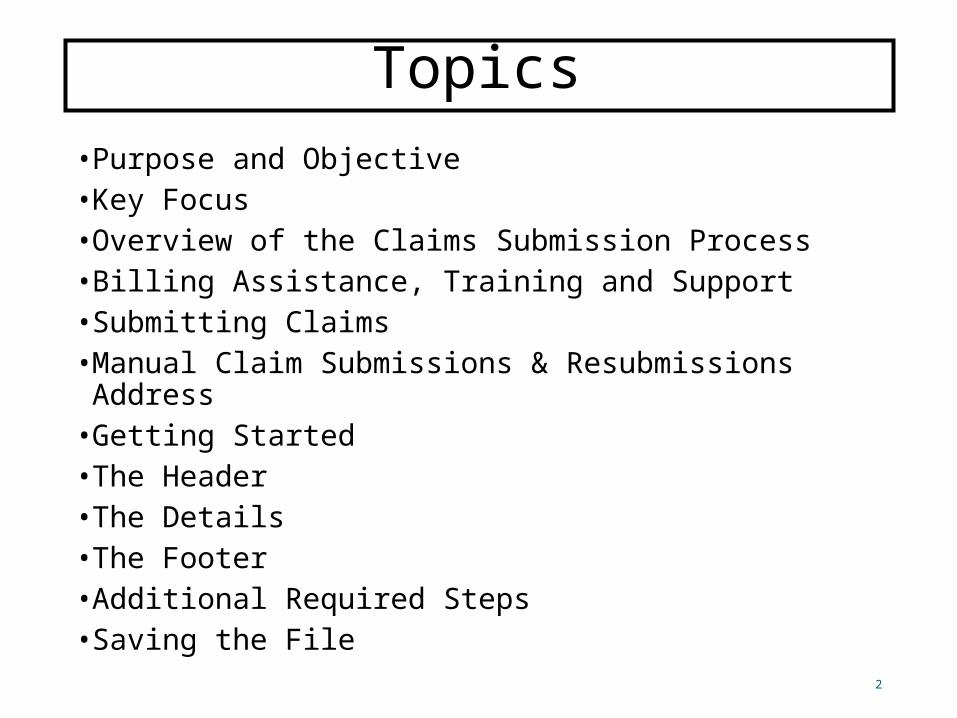
Topics• Purpose and Objective• Key Focus•Overview of the Claims Submission Process • Billing Assistance, Training and Support• Submitting Claims•Manual Claim Submissions & Resubmissions Address•Getting Started• The Header• The Details• The Footer• Additional Required Steps• Saving the File
2

Purpose and Objective
3
• The purpose and objective of this presentation is to provide DDD Long Term Care (LTC)/Home and Community Based Service (HCBS) providers an overview and analysis of the billing submission process along with contact information for questions or concerns.
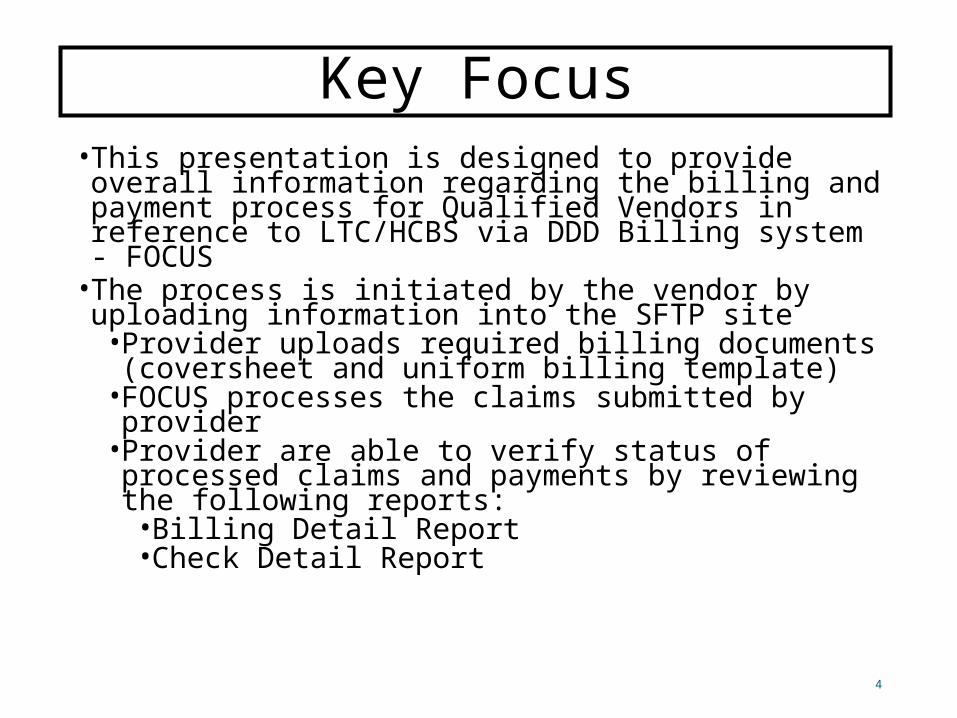
Key Focus•This presentation is designed to provide overall information regarding the billing and payment process for Qualified Vendors in reference to LTC/HCBS via DDD Billing system - FOCUS•The process is initiated by the vendor by uploading information into the SFTP site•Provider uploads required billing documents (coversheet and uniform billing template) •FOCUS processes the claims submitted by provider •Provider are able to verify status of processed claims and payments by reviewing the following reports:•Billing Detail Report•Check Detail Report
4
Overview of the Claims Submission Process
5
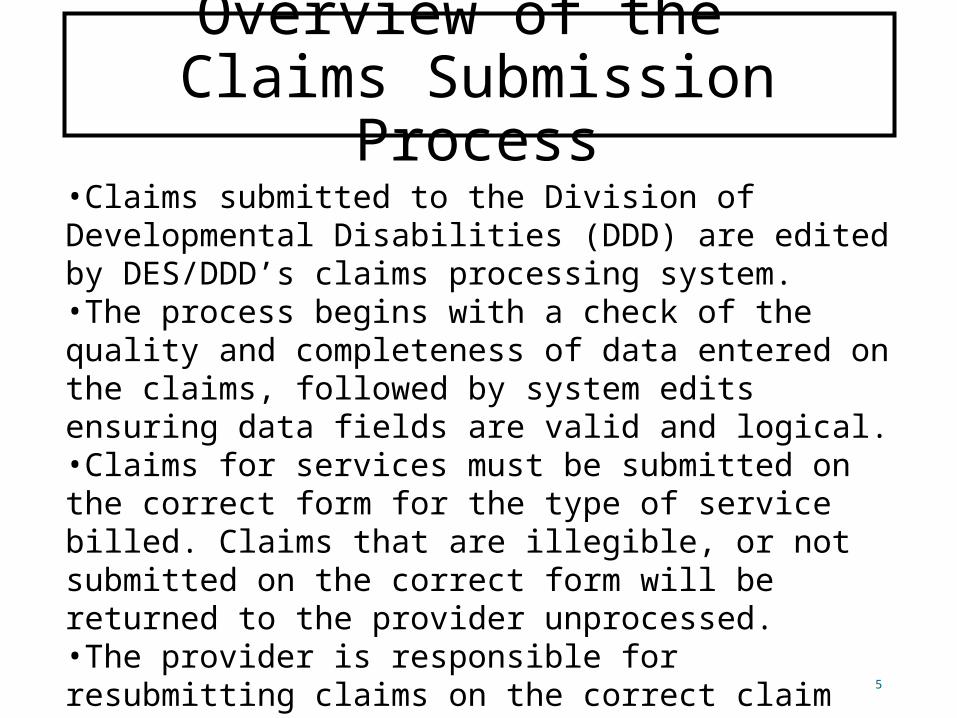
•Claims submitted to the Division of Developmental Disabilities (DDD) are edited by DES/DDD’s claims processing system. •The process begins with a check of the quality and completeness of data entered on the claims, followed by system edits ensuring data fields are valid and logical. •Claims for services must be submitted on the correct form for the type of service billed. Claims that are illegible, or not submitted on the correct form will be returned to the provider unprocessed. •The provider is responsible for resubmitting claims on the correct claim type within the appropriate time frame.
Billing Assistance, Training and Support
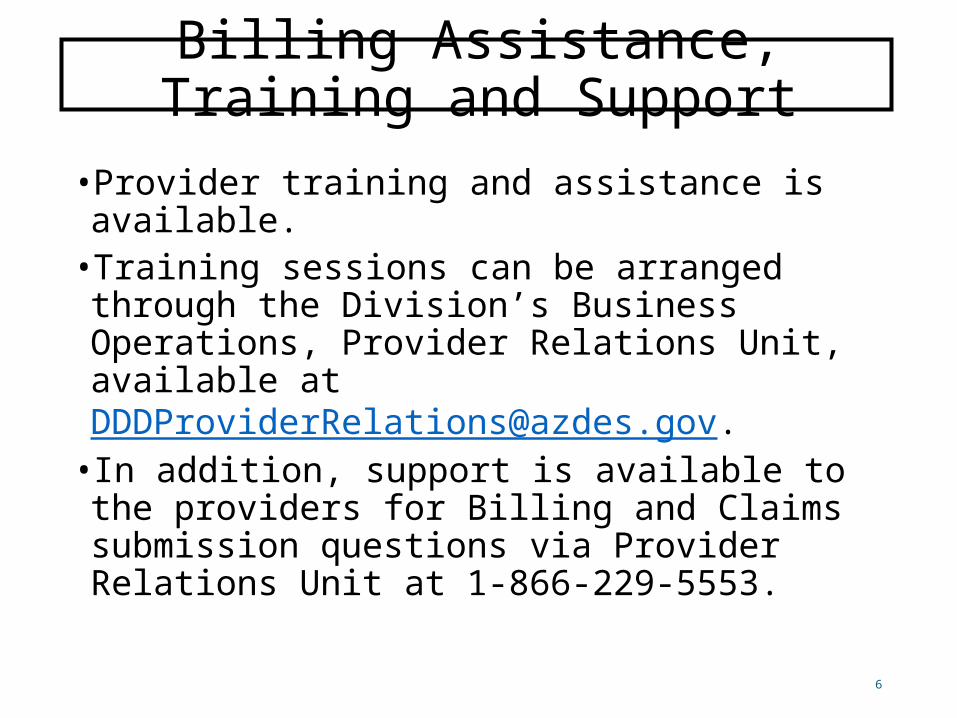
•Provider training and assistance is available. •Training sessions can be arranged through the Division’s Business Operations, Provider Relations Unit, available at [email protected]. • In addition, support is available to the providers for Billing and Claims submission questions via Provider Relations Unit at 1-866-229-5553.
6
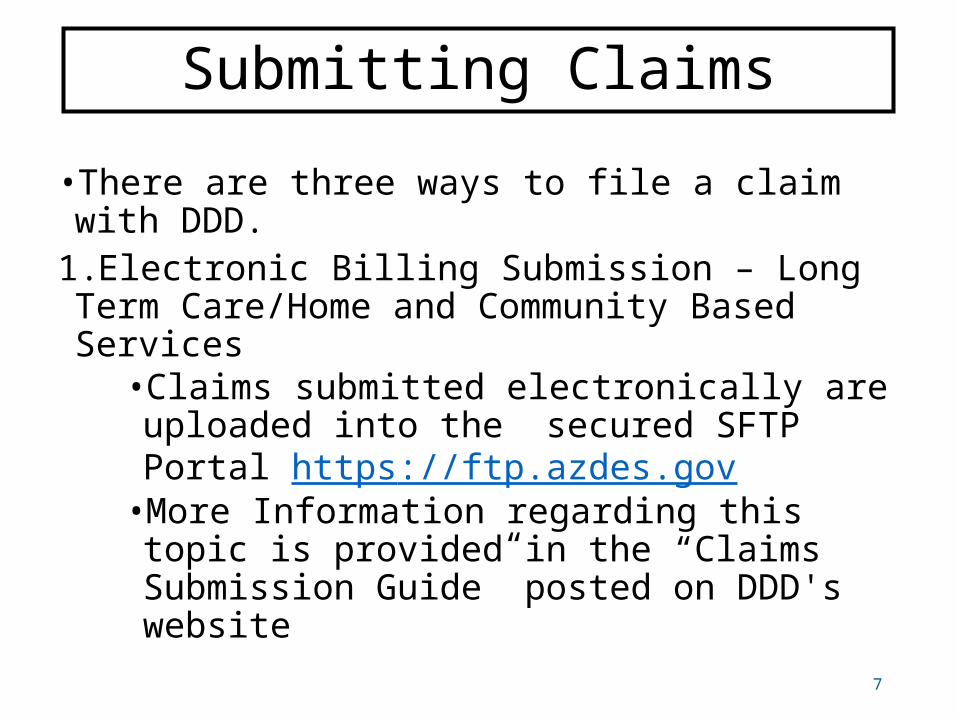
Submitting Claims•There are three ways to file a claim with DDD.
1.Electronic Billing Submission – Long Term Care/Home and Community Based Services•Claims submitted electronically are uploaded into the secured SFTP Portal https://ftp.azdes.gov•More Information regarding this topic is provided in the “Claims Submission Guide” posted on DDD's website
7
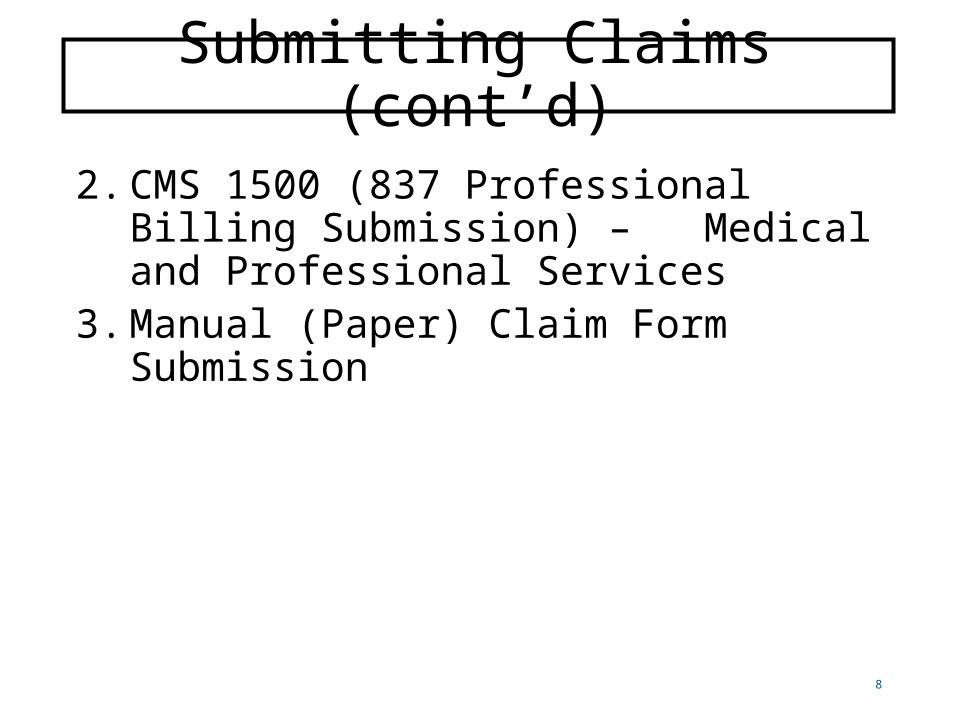
Submitting Claims (cont’d)2. CMS 1500 (837 Professional Billing
Submission) – Medical and Professional Services
3. Manual (Paper) Claim Form Submission
8
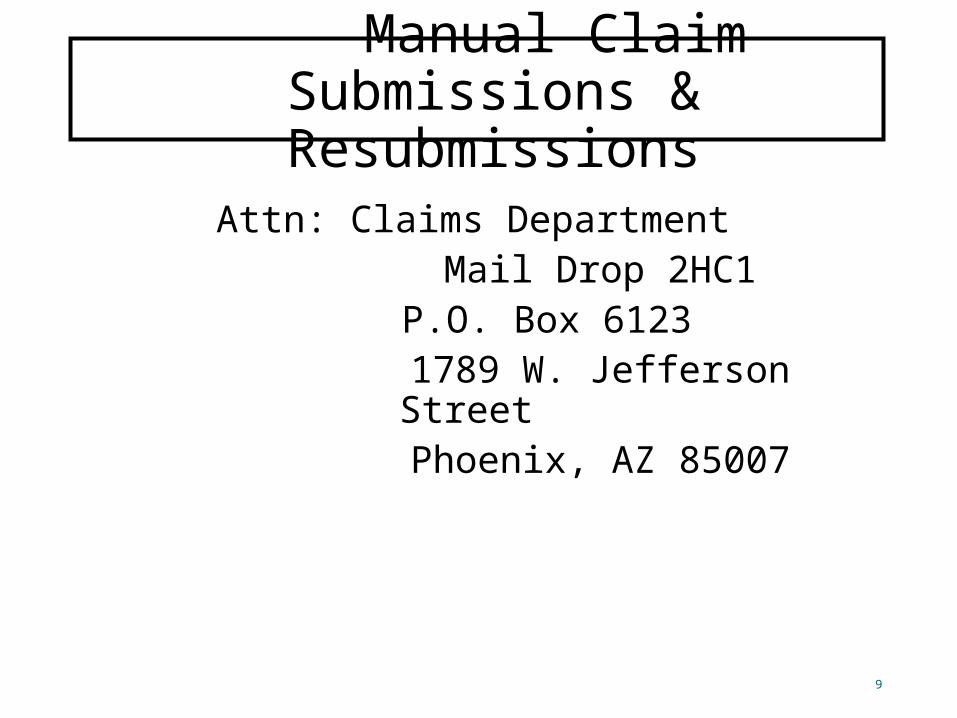
Manual Claim Submissions & Resubmissions
Attn: Claims Department Mail Drop 2HC1
P.O. Box 6123 1789 W. Jefferson Street
Phoenix, AZ 85007
9
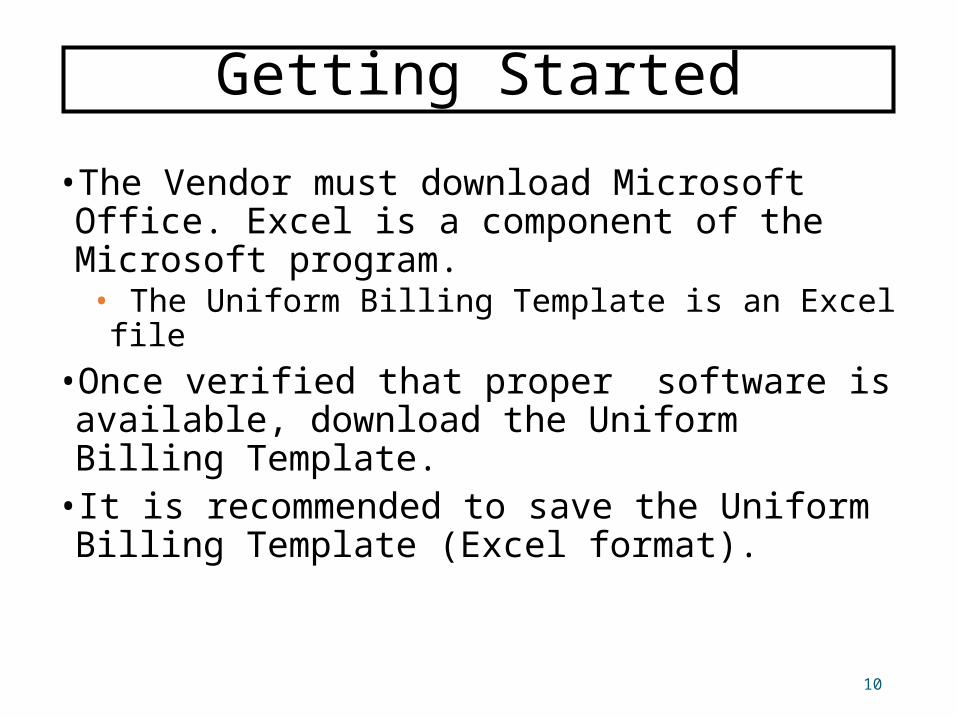
Getting Started•The Vendor must download Microsoft Office. Excel is a component of the Microsoft program. • The Uniform Billing Template is an Excel file
•Once verified that proper software is available, download the Uniform Billing Template.• It is recommended to save the Uniform Billing Template (Excel format).
10
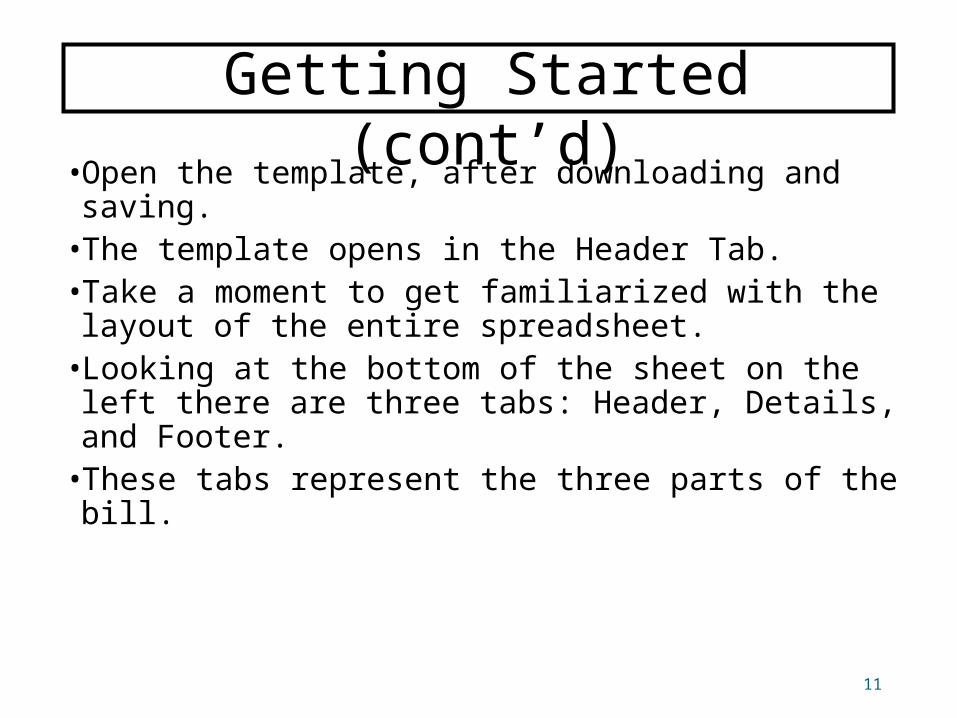
•Open the template, after downloading and saving.•The template opens in the Header Tab.•Take a moment to get familiarized with the layout of the entire spreadsheet.•Looking at the bottom of the sheet on the left there are three tabs: Header, Details, and Footer. •These tabs represent the three parts of the bill.
11
Getting Started (cont’d)
12
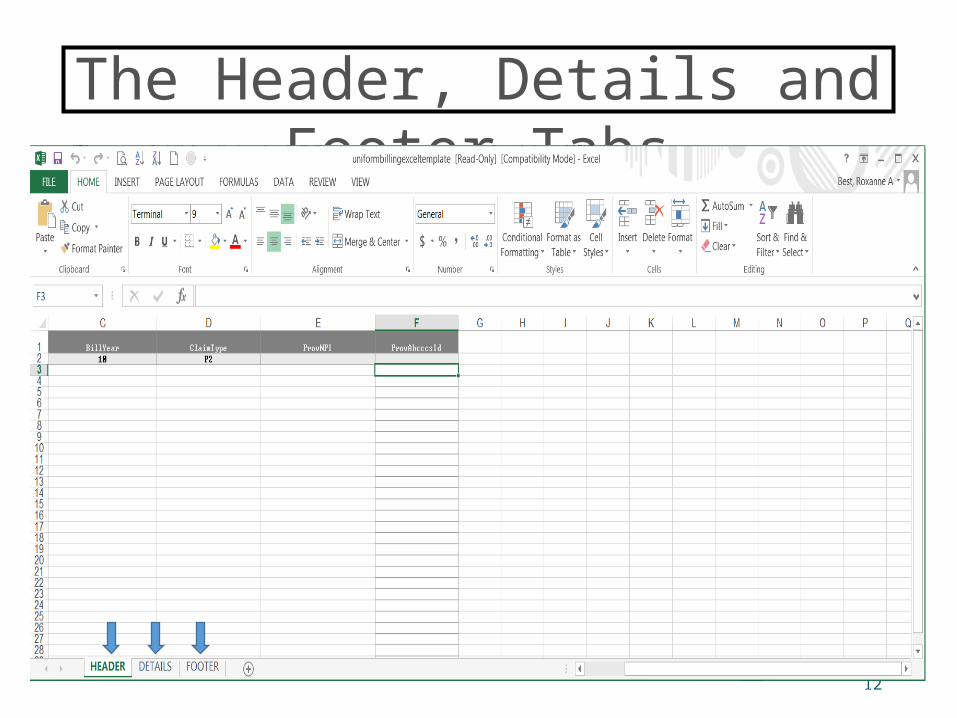
The Header, Details and Footer Tabs
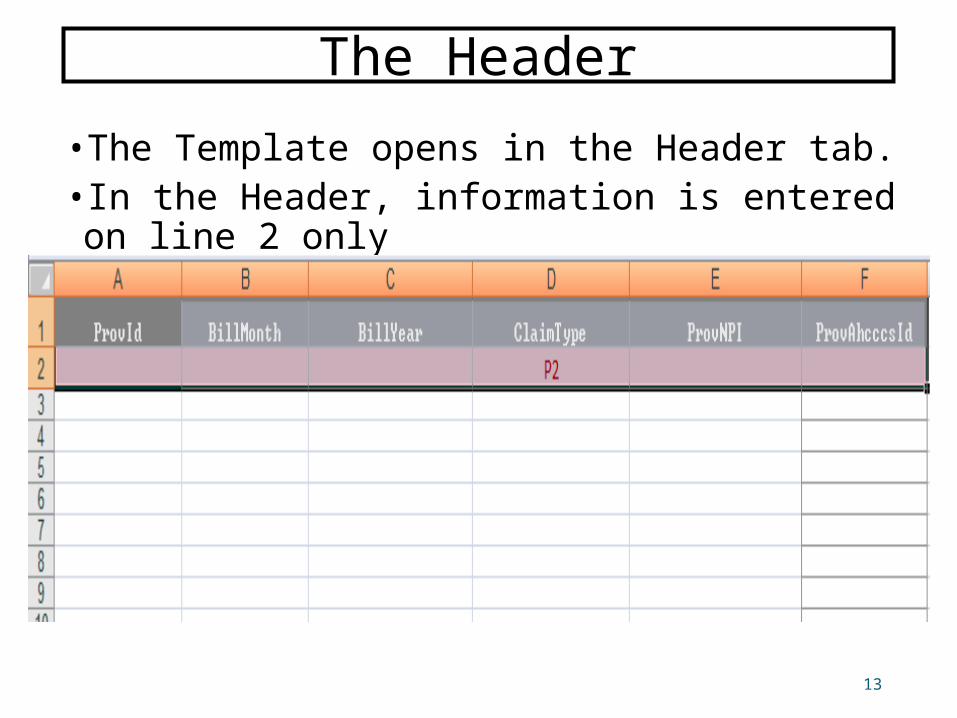
The Header•The Template opens in the Header tab.• In the Header, information is entered on line 2 only
13
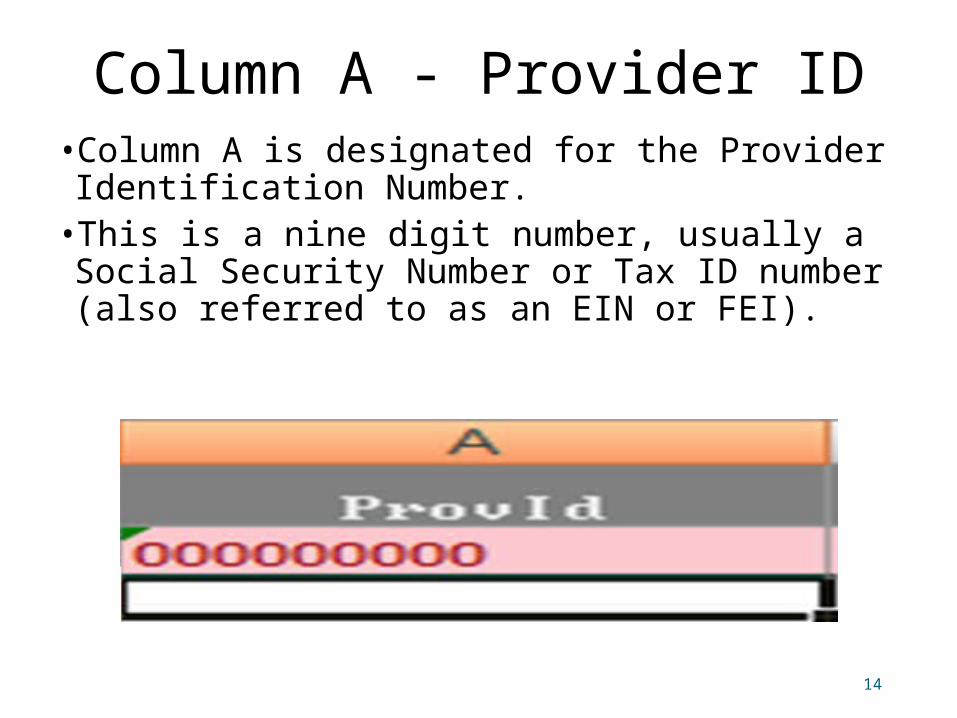
Column A - Provider ID•Column A is designated for the Provider Identification Number. •This is a nine digit number, usually a Social Security Number or Tax ID number (also referred to as an EIN or FEI).
14

Column B - Bill Month•Column B is designated for the Month that the services were delivered. If billing several months, then the Bill Month should be the most recent month.•The Bill Month column is entered in the template as a three character abbreviation (Jan, Feb, Mar…….)
15
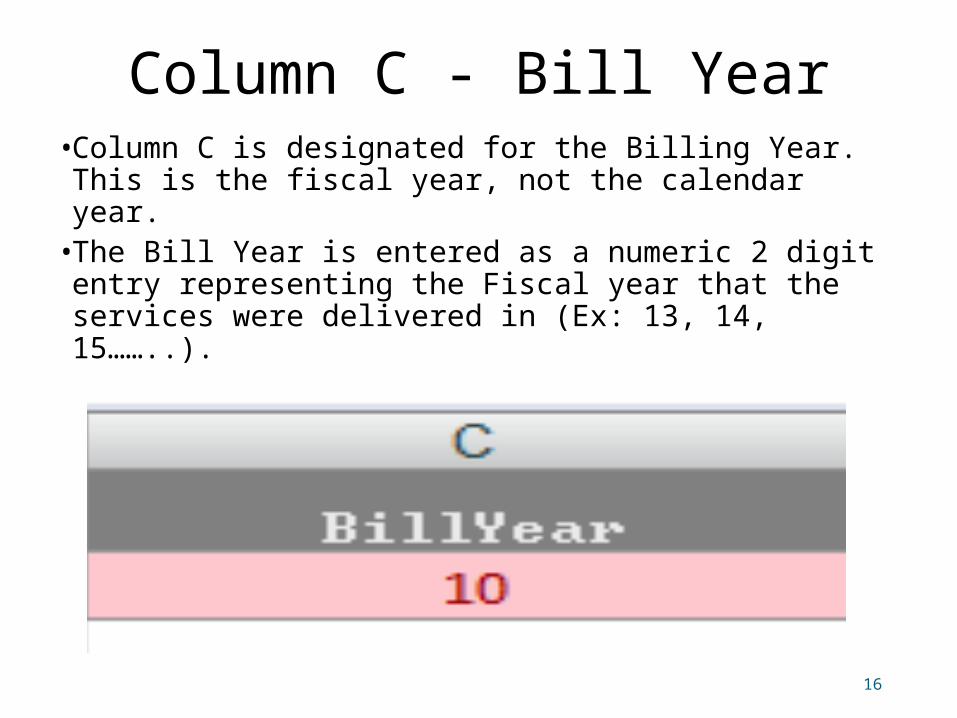
Column C - Bill Year•Column C is designated for the Billing Year. This is the fiscal year, not the calendar year. •The Bill Year is entered as a numeric 2 digit entry representing the Fiscal year that the services were delivered in (Ex: 13, 14, 15……..).
16
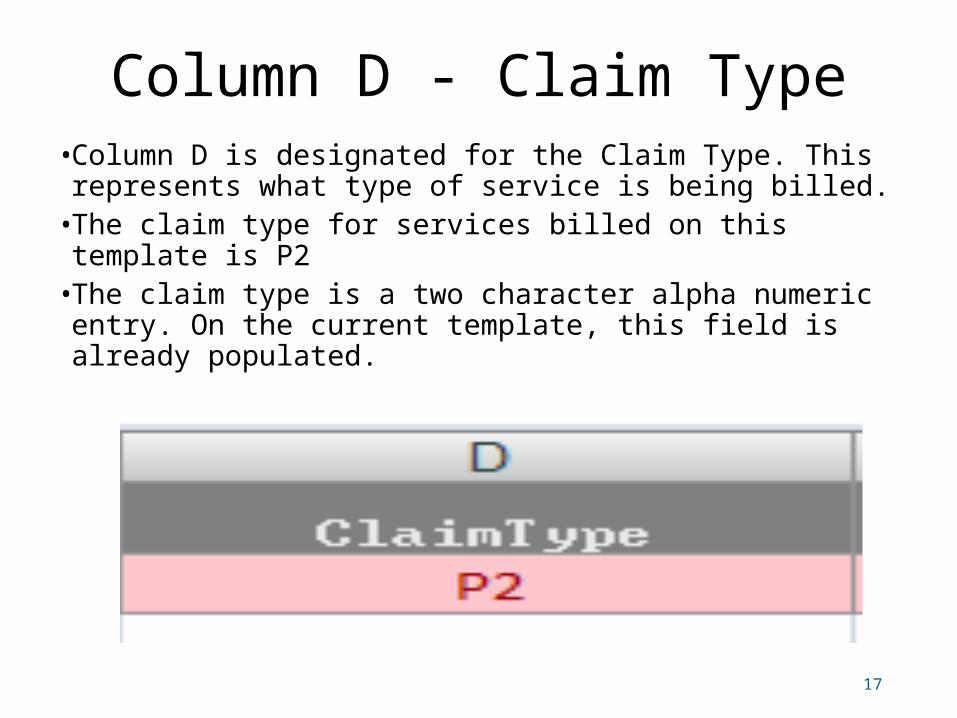
Column D - Claim Type•Column D is designated for the Claim Type. This represents what type of service is being billed. •The claim type for services billed on this template is P2•The claim type is a two character alpha numeric entry. On the current template, this field is already populated.
17
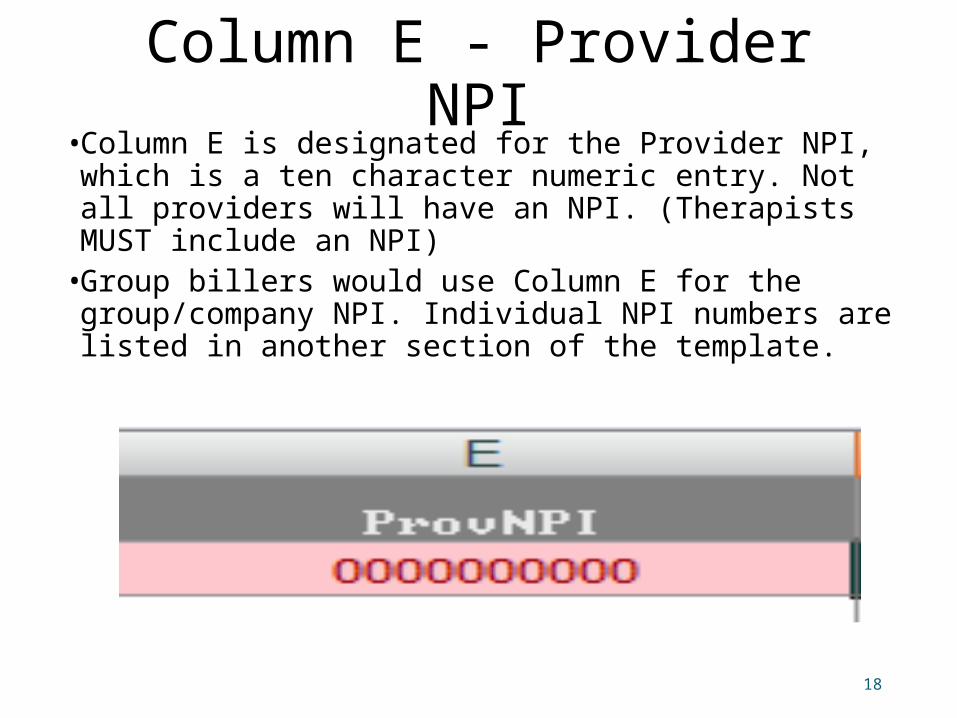
Column E - Provider NPI•Column E is designated for the Provider NPI, which is a ten character numeric entry. Not all providers will have an NPI. (Therapists MUST include an NPI) •Group billers would use Column E for the group/company NPI. Individual NPI numbers are listed in another section of the template.
18
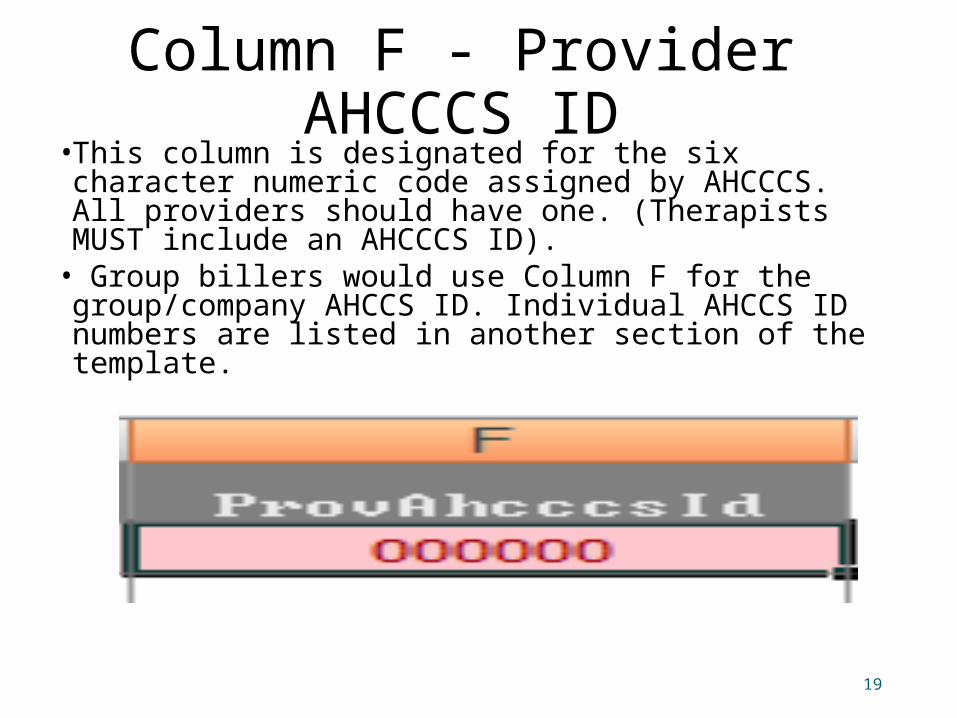
Column F - Provider AHCCCS ID
•This column is designated for the six character numeric code assigned by AHCCCS. All providers should have one. (Therapists MUST include an AHCCCS ID).• Group billers would use Column F for the group/company AHCCS ID. Individual AHCCS ID numbers are listed in another section of the template.
19

•After inputting the necessary information into the header, it’s time to move on to the Details tab.•Go to the bottom of the screen where the three tabs are located and click on “Details”.•The Details tab is for recording specific claim information. This is where the actual claim dates and services are entered.
20
The Details/Claim Data
21
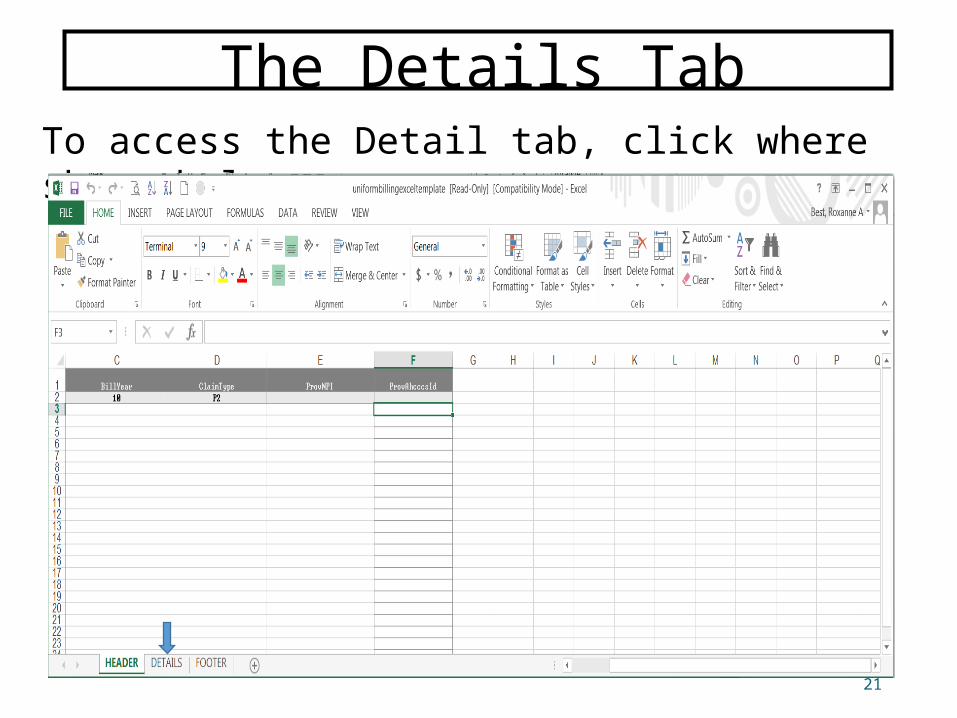
The Details TabTo access the Detail tab, click where shown below.
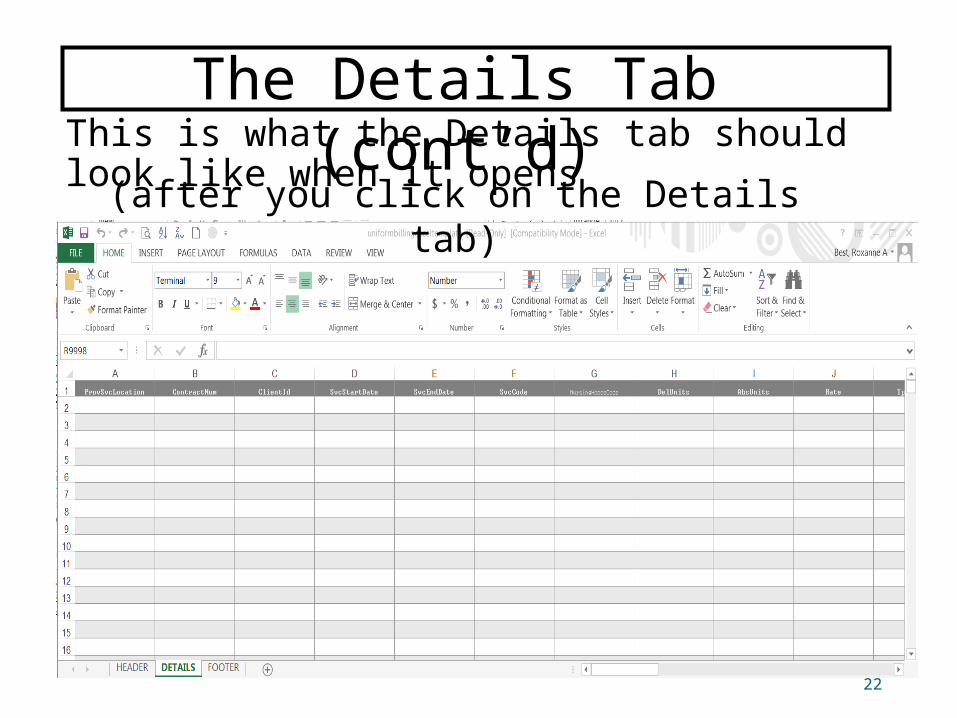
This is what the Details tab should look like when it opens
22
The Details Tab (cont’d)(after you click on the Details tab)
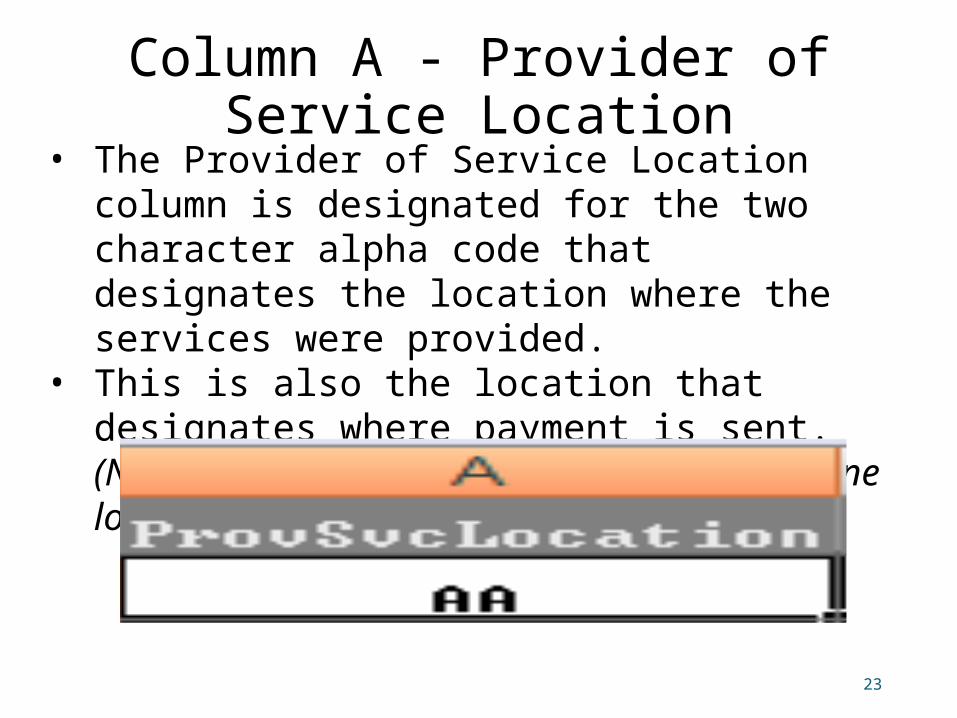
Column A - Provider of Service Location
23
• The Provider of Service Location column is designated for the two character alpha code that designates the location where the services were provided.
• This is also the location that designates where payment is sent. (Note: Some providers may have more than one location, for example: AA, BA……)
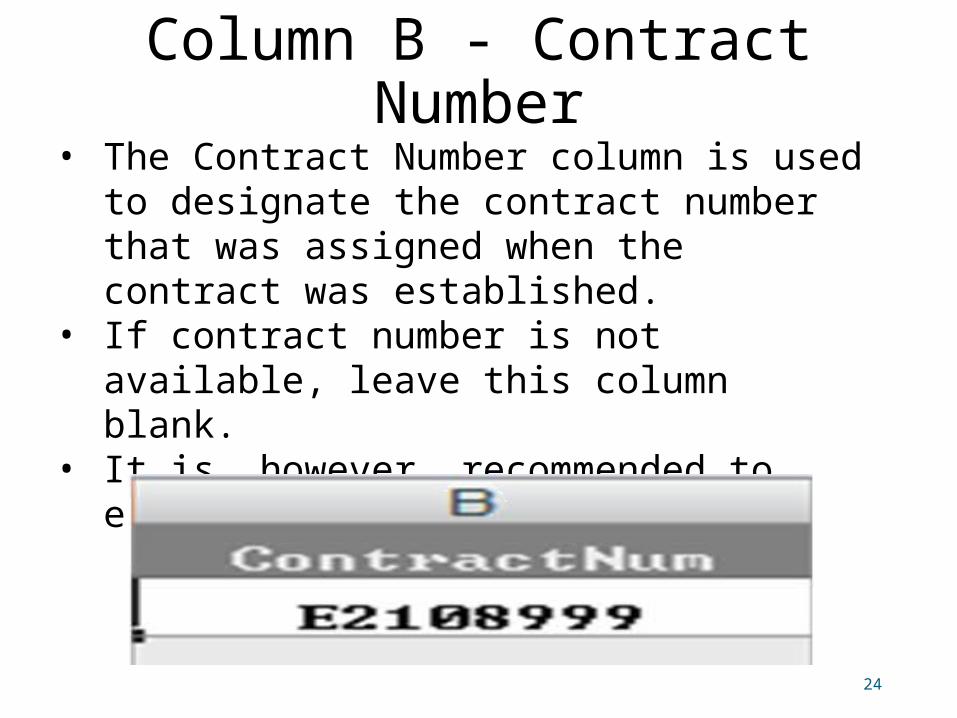
Column B - Contract Number
24
• The Contract Number column is used to designate the contract number that was assigned when the contract was established.
• If contract number is not available, leave this column blank.
• It is, however, recommended to enter the contract number.
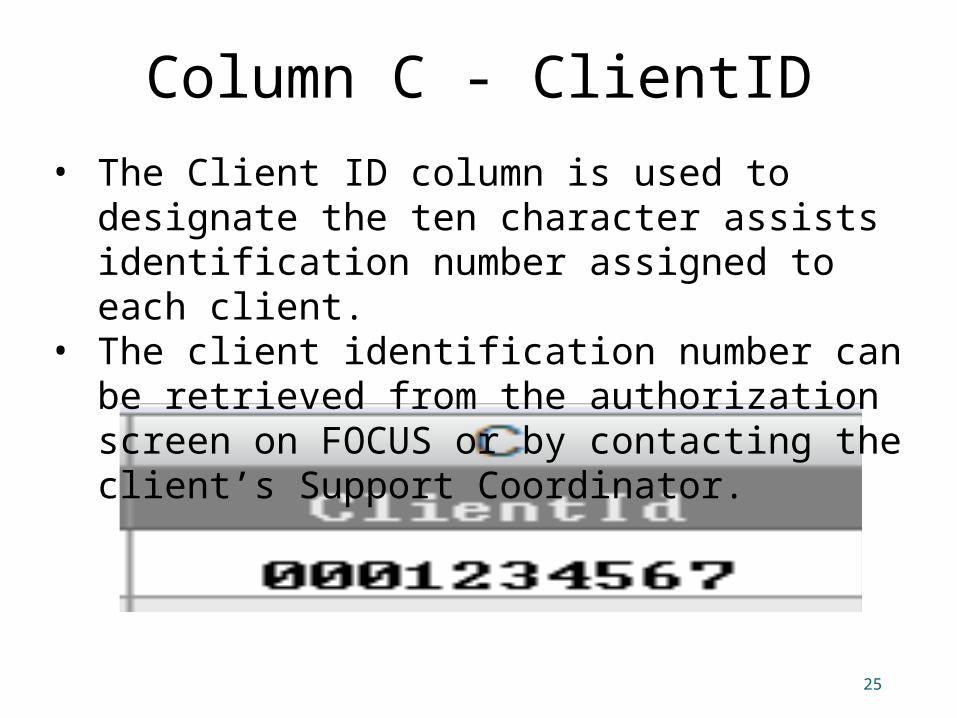
Column C - ClientID
25
• The Client ID column is used to designate the ten character assists identification number assigned to each client.
• The client identification number can be retrieved from the authorization screen on FOCUS or by contacting the client’s Support Coordinator.
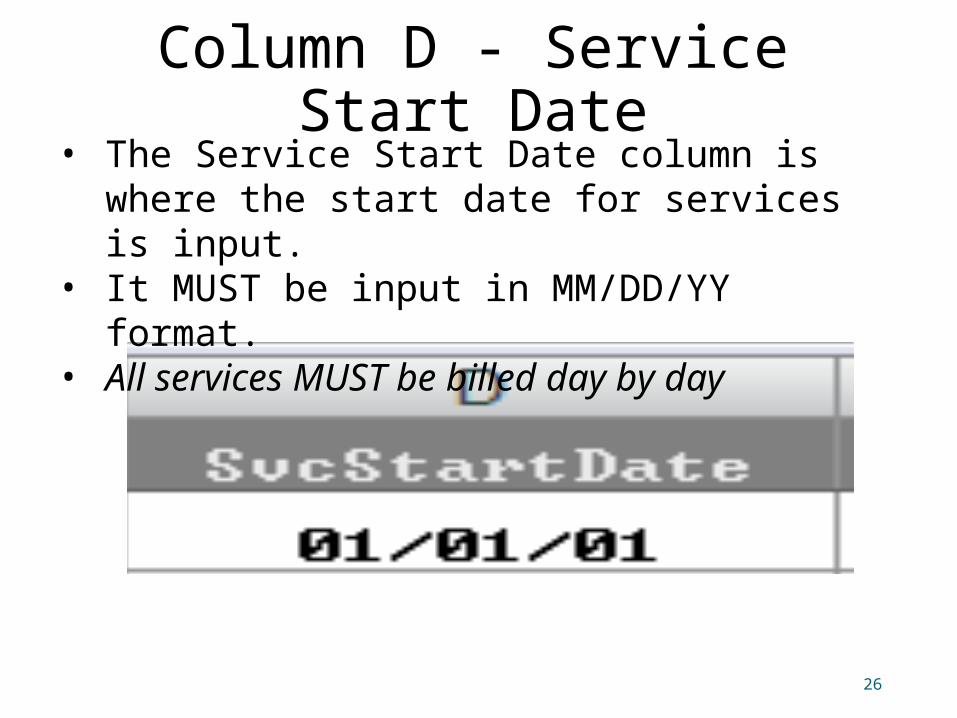
Column D - Service Start Date
26
• The Service Start Date column is where the start date for services is input.
• It MUST be input in MM/DD/YY format.• All services MUST be billed day by day
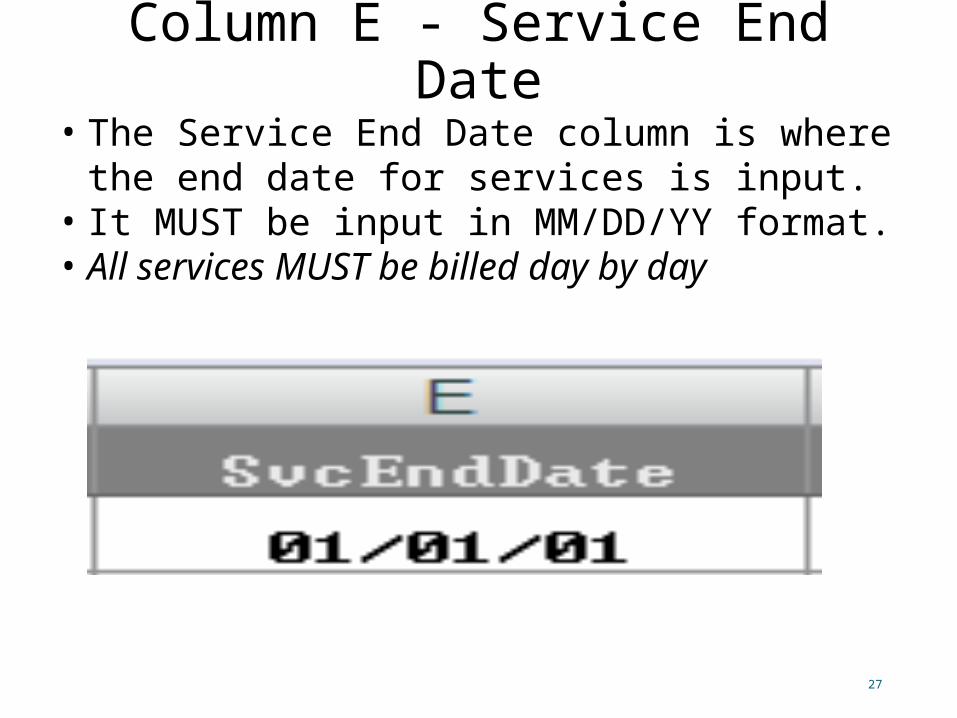
27
Column E - Service End Date• The Service End Date column is where the
end date for services is input. • It MUST be input in MM/DD/YY format. • All services MUST be billed day by day
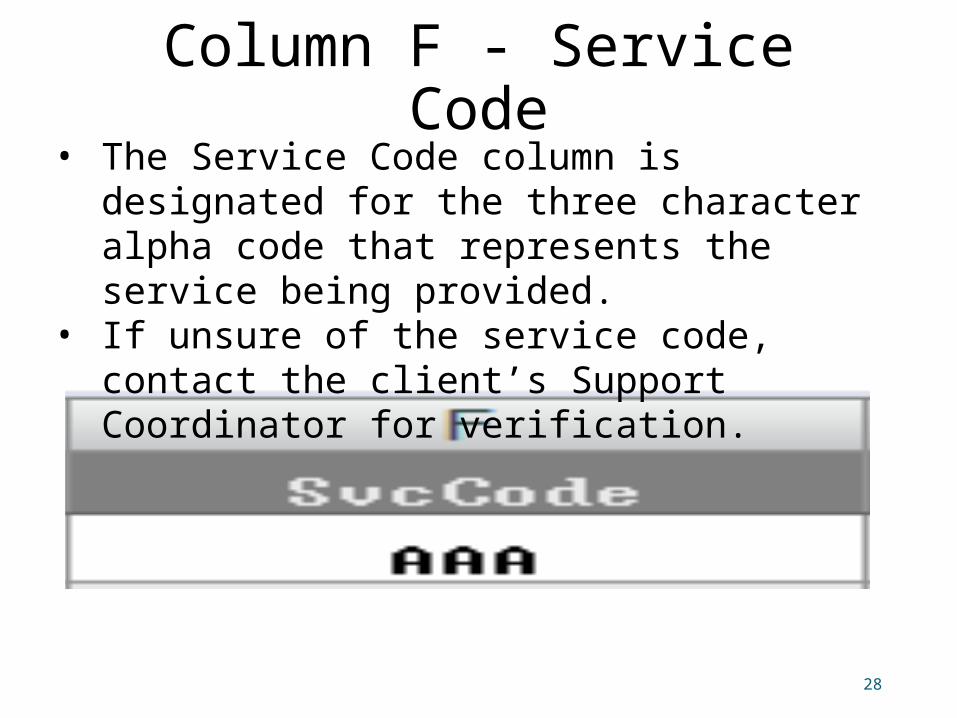
Column F - Service Code
28
• The Service Code column is designated for the three character alpha code that represents the service being provided.
• If unsure of the service code, contact the client’s Support Coordinator for verification.
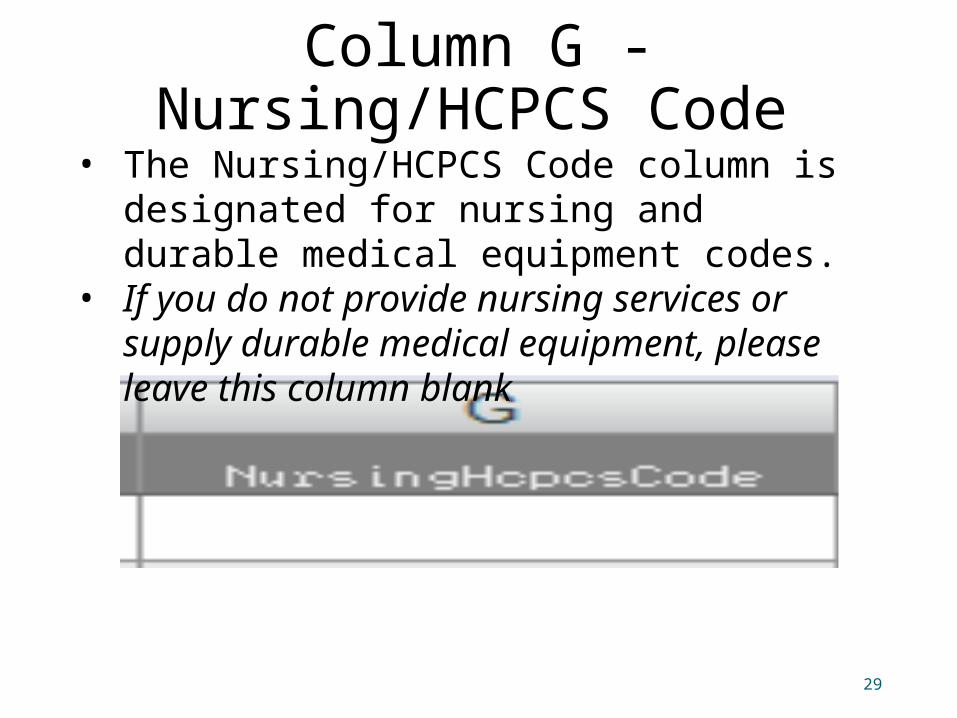
Column G - Nursing/HCPCS Code
29
• The Nursing/HCPCS Code column is designated for nursing and durable medical equipment codes.
• If you do not provide nursing services or supply durable medical equipment, please leave this column blank
30
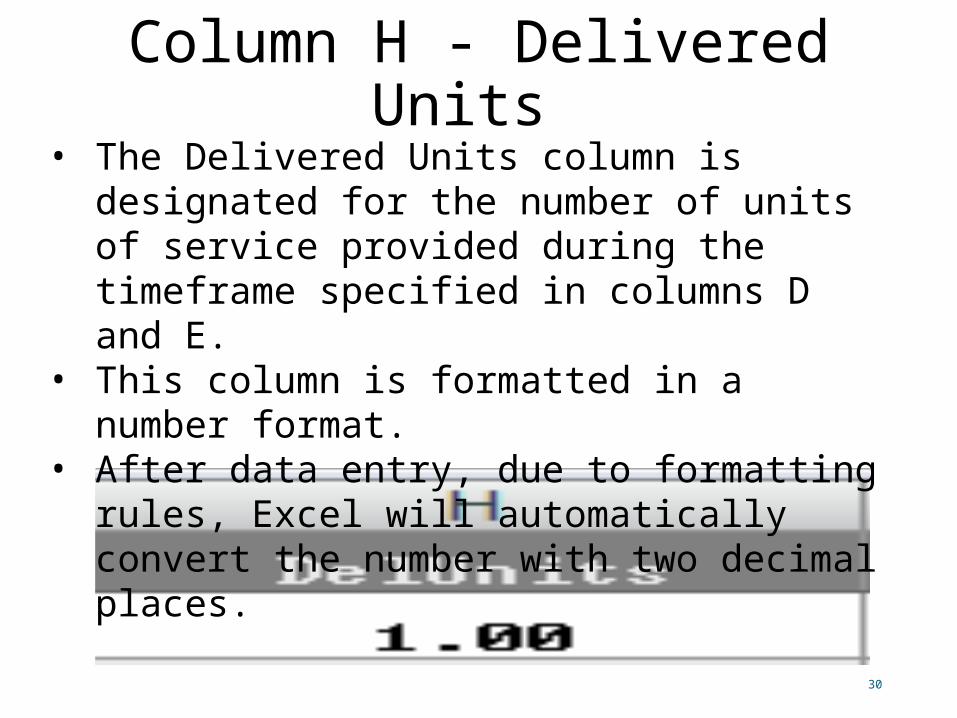
Column H - Delivered Units• The Delivered Units column is designated
for the number of units of service provided during the timeframe specified in columns D and E.
• This column is formatted in a number format.
• After data entry, due to formatting rules, Excel will automatically convert the number with two decimal places.
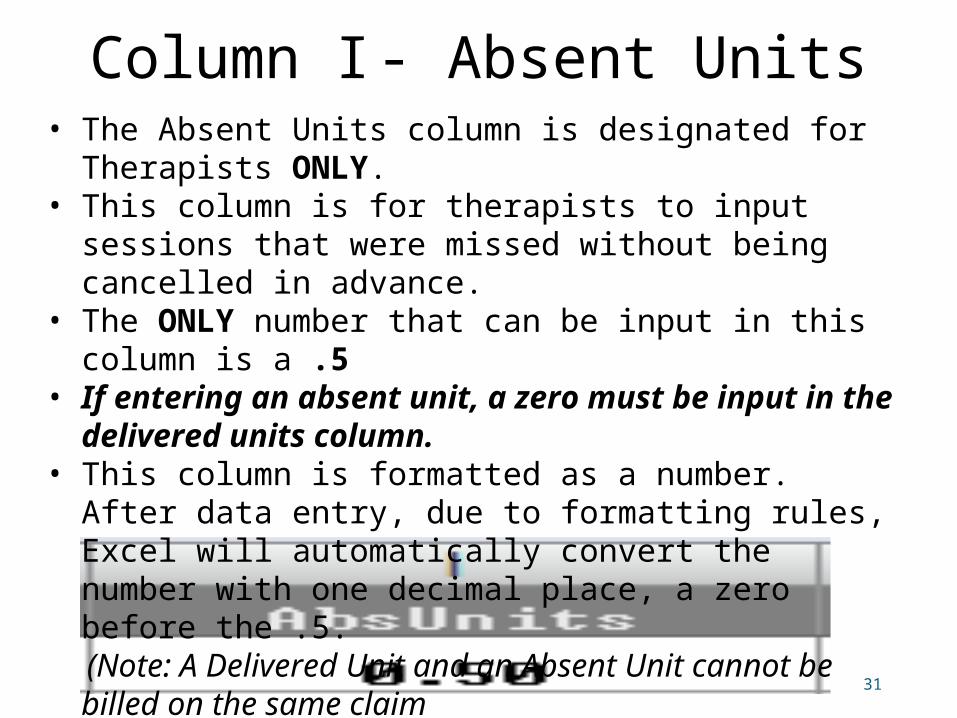
Column I - Absent Units
31
• The Absent Units column is designated for Therapists ONLY.
• This column is for therapists to input sessions that were missed without being cancelled in advance.
• The ONLY number that can be input in this column is a .5
• If entering an absent unit, a zero must be input in the delivered units column.
• This column is formatted as a number. After data entry, due to formatting rules, Excel will automatically convert the number with one decimal place, a zero before the .5.
(Note: A Delivered Unit and an Absent Unit cannot be billed on the same claim
line)
Column J - Rate
32
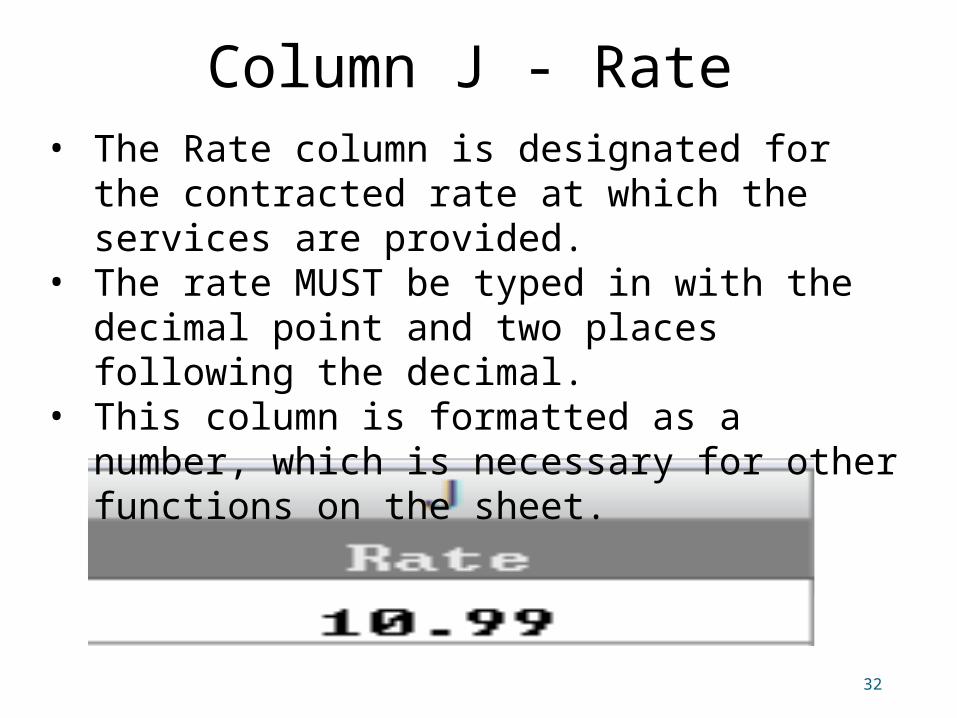
• The Rate column is designated for the contracted rate at which the services are provided.
• The rate MUST be typed in with the decimal point and two places following the decimal.
• This column is formatted as a number, which is necessary for other functions on the sheet.
33
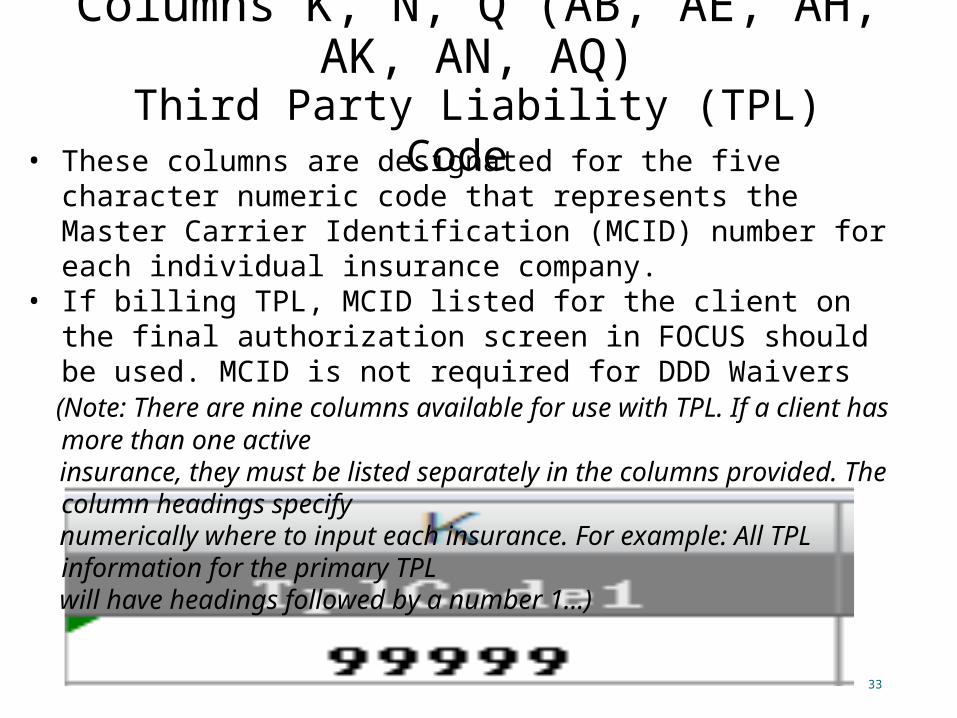
Columns K, N, Q (AB, AE, AH, AK, AN, AQ)
Third Party Liability (TPL) Code• These columns are designated for the five character
numeric code that represents the Master Carrier Identification (MCID) number for each individual insurance company.
• If billing TPL, MCID listed for the client on the final authorization screen in FOCUS should be used. MCID is not required for DDD Waivers
(Note: There are nine columns available for use with TPL. If a client has more than one active
insurance, they must be listed separately in the columns provided. The column headings specify
numerically where to input each insurance. For example: All TPL information for the primary TPL
will have headings followed by a number 1…)
34
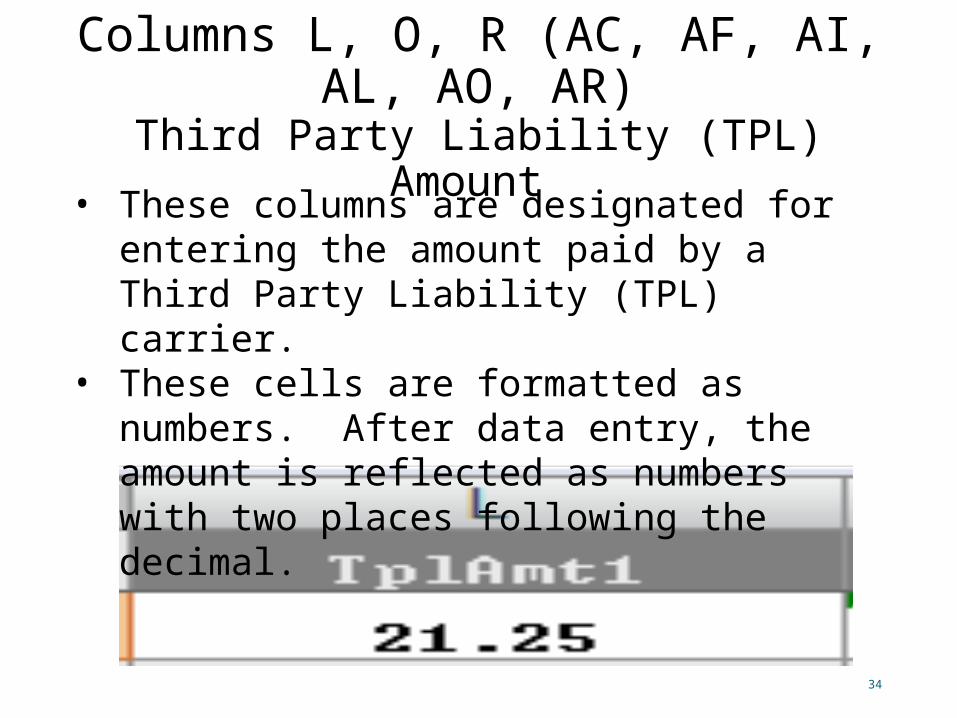
Columns L, O, R (AC, AF, AI, AL, AO, AR)
Third Party Liability (TPL) Amount • These columns are designated for
entering the amount paid by a Third Party Liability (TPL) carrier.
• These cells are formatted as numbers. After data entry, the amount is reflected as numbers with two places following the decimal.
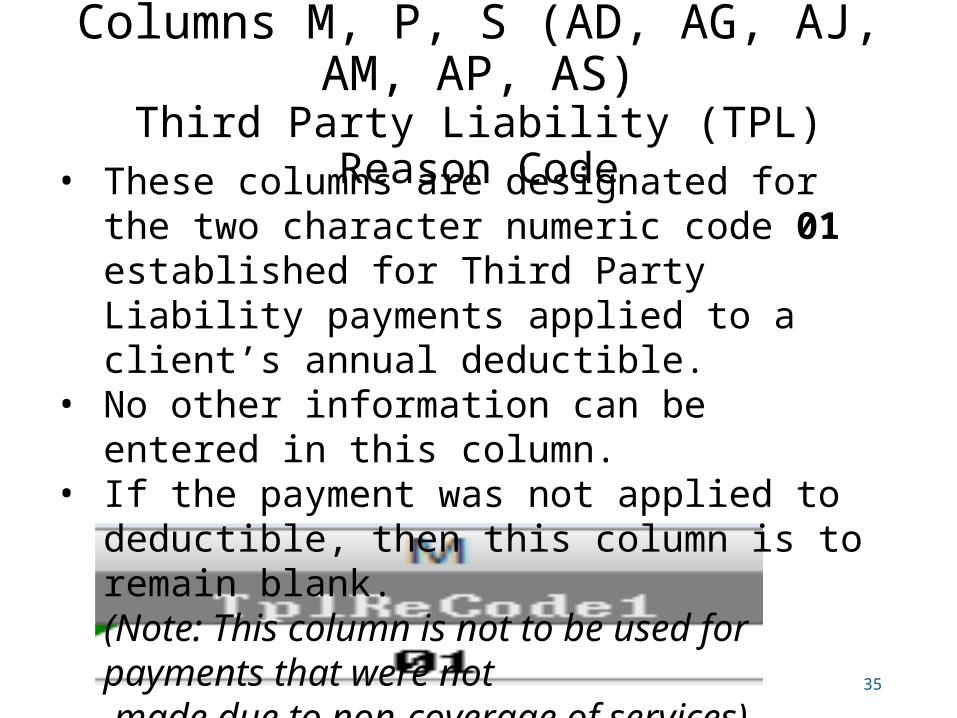
Columns M, P, S (AD, AG, AJ, AM, AP, AS)
Third Party Liability (TPL) Reason Code
35
• These columns are designated for the two character numeric code 01 established for Third Party Liability payments applied to a client’s annual deductible.
• No other information can be entered in this column.
• If the payment was not applied to deductible, then this column is to remain blank.
(Note: This column is not to be used for payments that were not
made due to non-coverage of services)
36
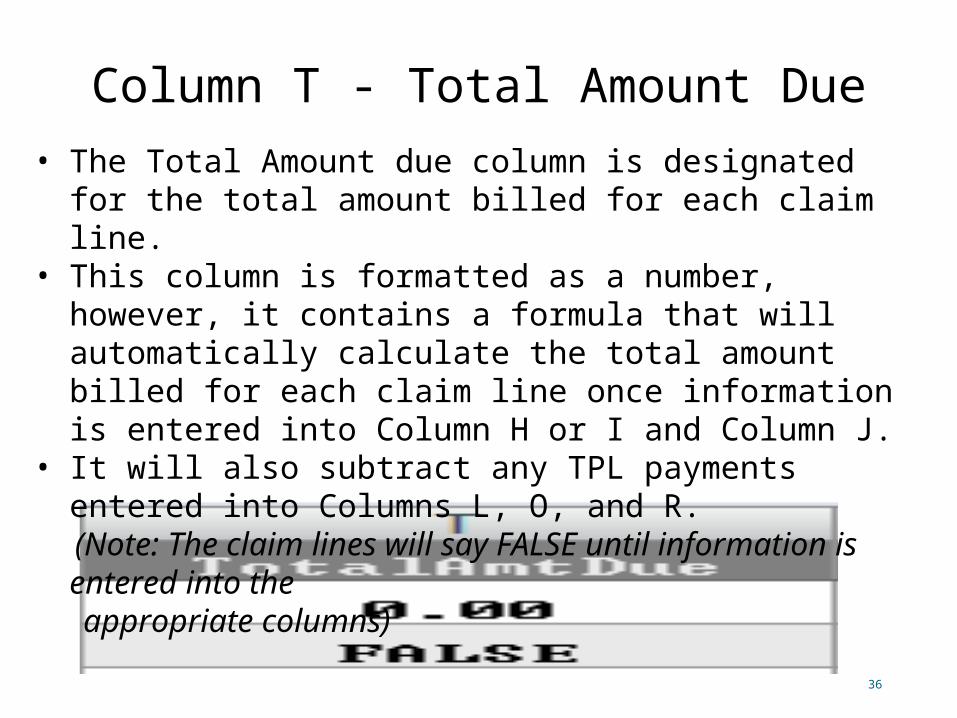
Column T - Total Amount Due• The Total Amount due column is designated for the
total amount billed for each claim line. • This column is formatted as a number, however, it
contains a formula that will automatically calculate the total amount billed for each claim line once information is entered into Column H or I and Column J.
• It will also subtract any TPL payments entered into Columns L, O, and R.
(Note: The claim lines will say FALSE until information is entered into the
appropriate columns)
37
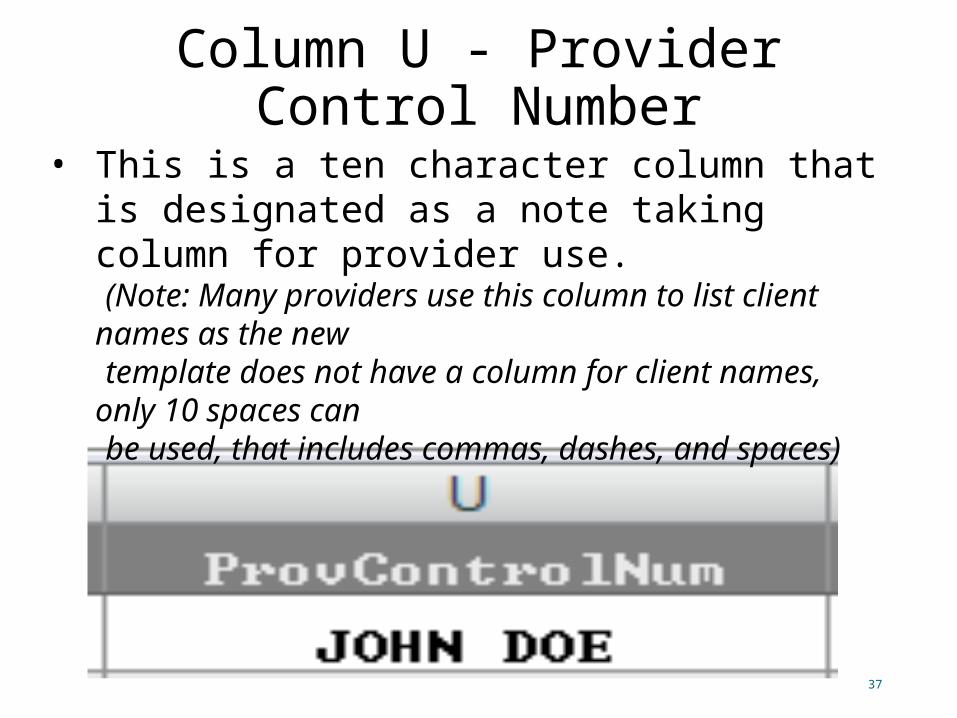
Column U - Provider Control Number
• This is a ten character column that is designated as a note taking column for provider use.
(Note: Many providers use this column to list client names as the new
template does not have a column for client names, only 10 spaces can
be used, that includes commas, dashes, and spaces)
38
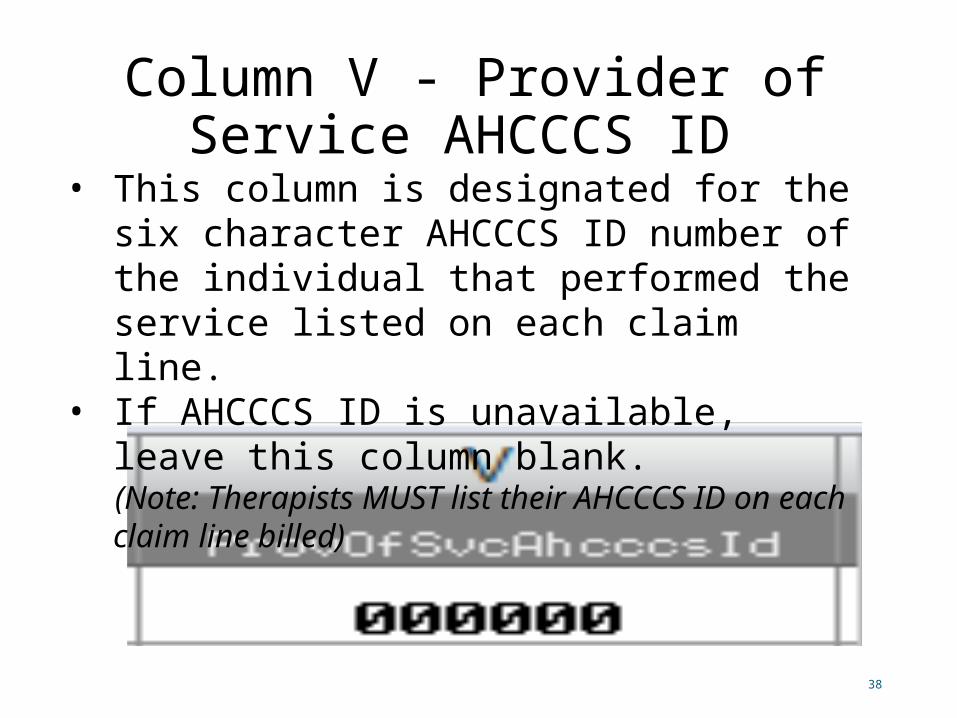
Column V - Provider of Service AHCCCS ID
• This column is designated for the six character AHCCCS ID number of the individual that performed the service listed on each claim line.
• If AHCCCS ID is unavailable, leave this column blank.
(Note: Therapists MUST list their AHCCCS ID on each claim line billed)

39
Column W - Provider of Service NPI• This column is designated for the ten
character NPI number of the individual that performed the service listed on each claim line.
• If NPI is not available, leave this column blank.
(Note: Therapists MUST list their NPI number on each claim line billed)
40
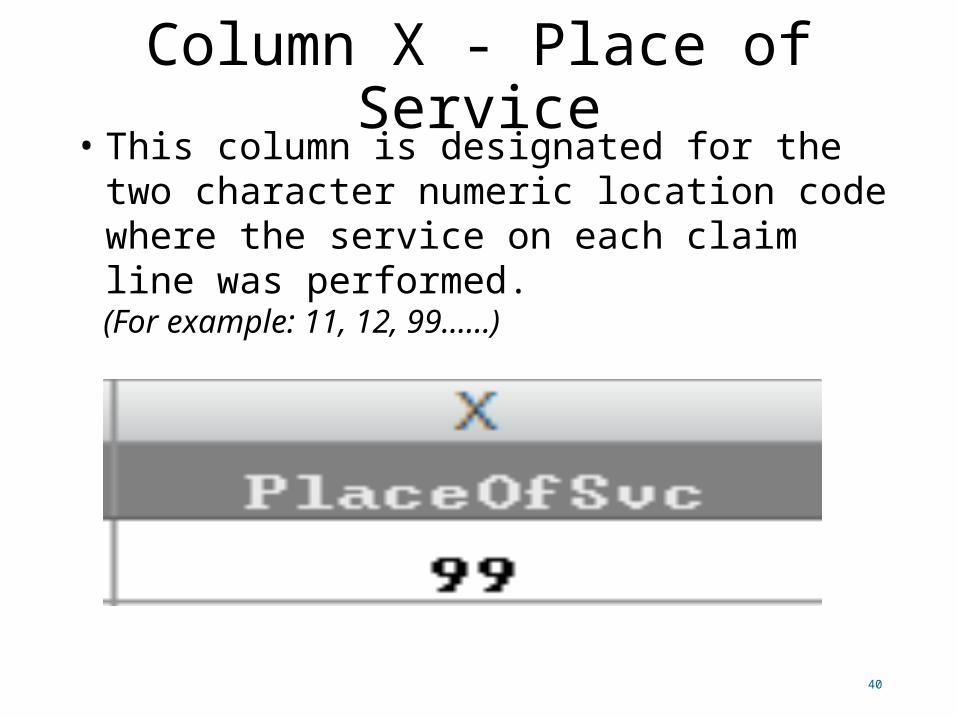
Column X - Place of Service
• This column is designated for the two character numeric location code where the service on each claim line was performed.
(For example: 11, 12, 99……)
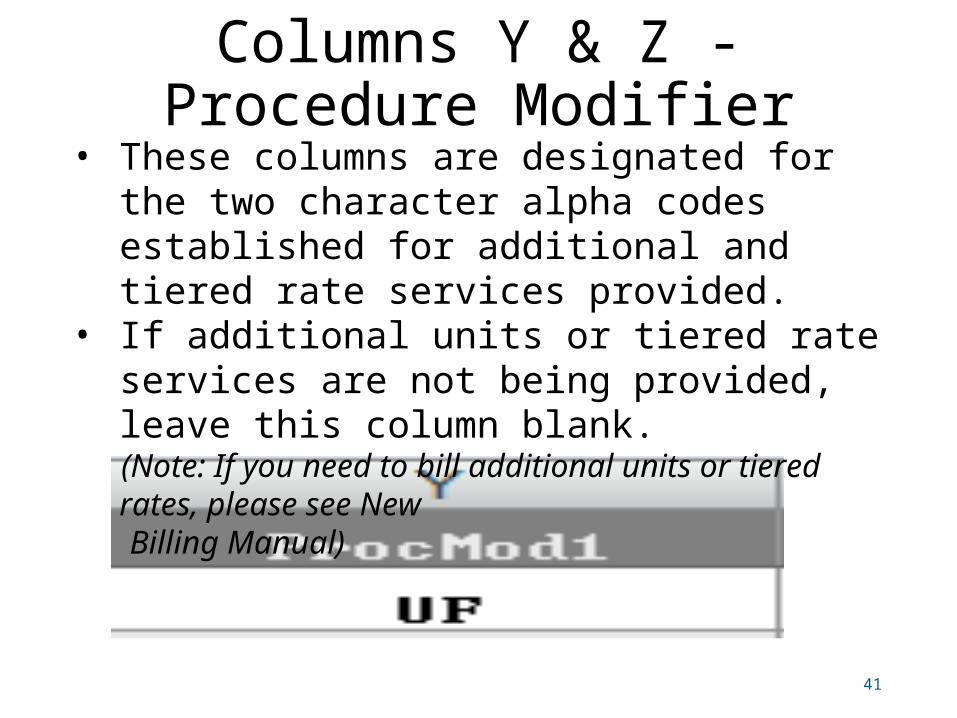
Columns Y & Z - Procedure Modifier
41
• These columns are designated for the two character alpha codes established for additional and tiered rate services provided.
• If additional units or tiered rate services are not being provided, leave this column blank.
(Note: If you need to bill additional units or tiered rates, please see New
Billing Manual)
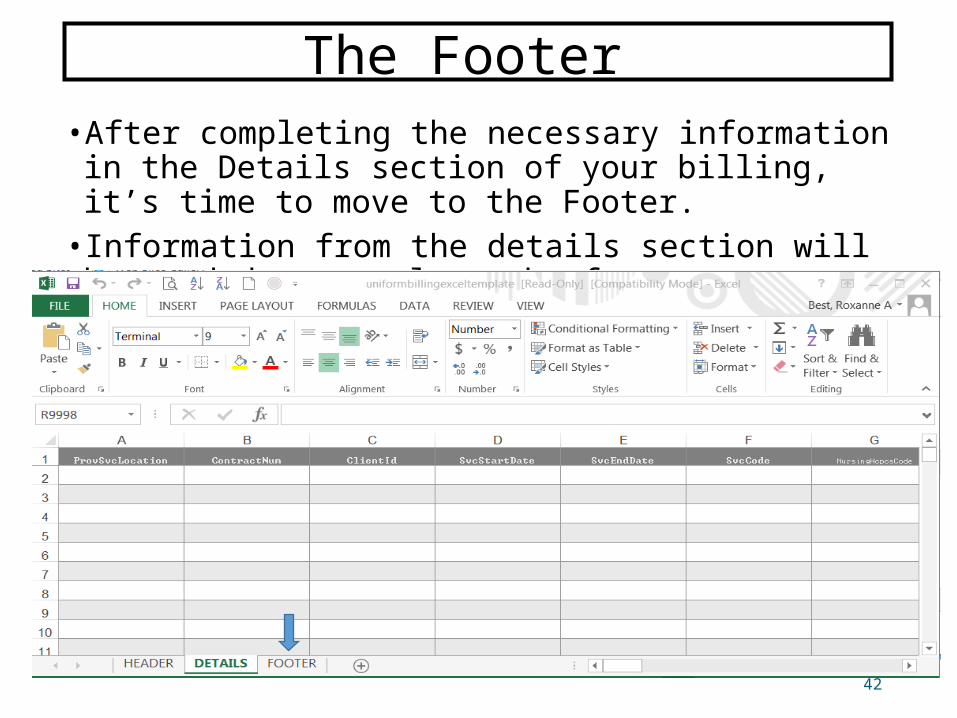
• After completing the necessary information in the Details section of your billing, it’s time to move to the Footer. • Information from the details section will be needed to complete the footer.
42
The Footer
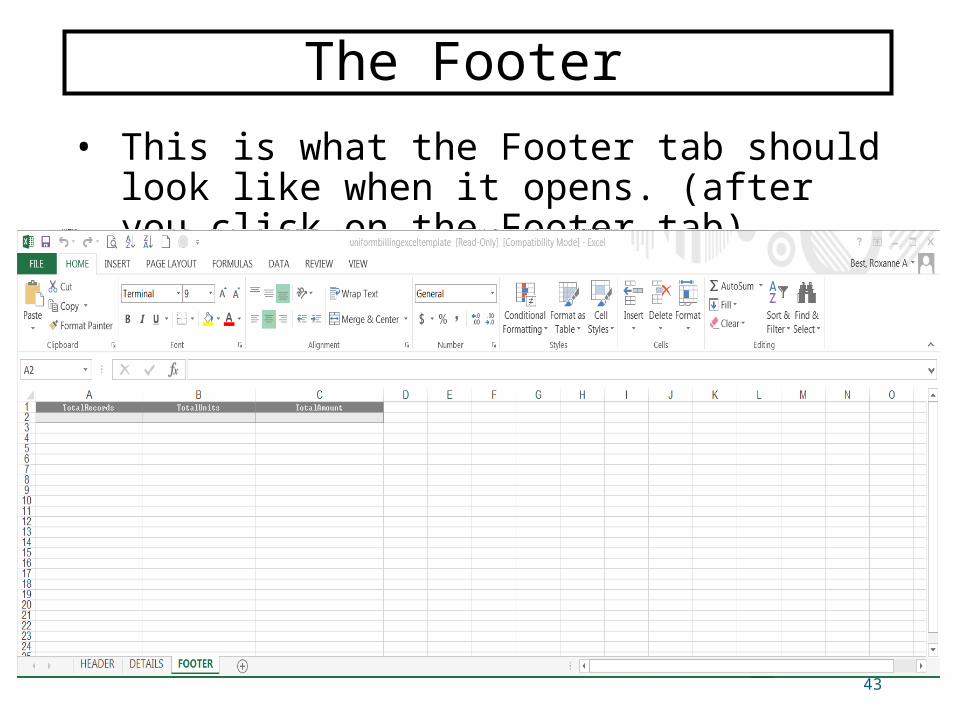
• This is what the Footer tab should look like when it opens. (after you click on the Footer tab)
43
The Footer
The Footer (cont’d)•The Footer is basically a summary of what is being billed.•The Footer does not ask for specific claim information.• In the Footer, data is entered on line 2 only
44
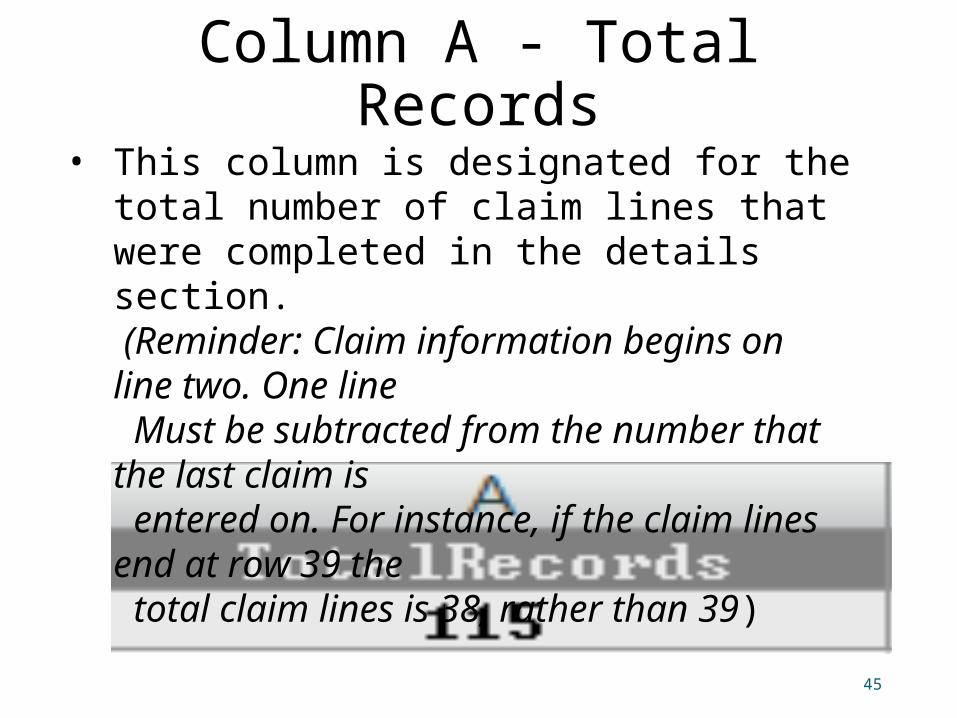
Column A - Total Records
45
• This column is designated for the total number of claim lines that were completed in the details section.
(Reminder: Claim information begins on line two. One line
Must be subtracted from the number that the last claim is
entered on. For instance, if the claim lines end at row 39 the
total claim lines is 38, rather than 39)
Column B - Total Units
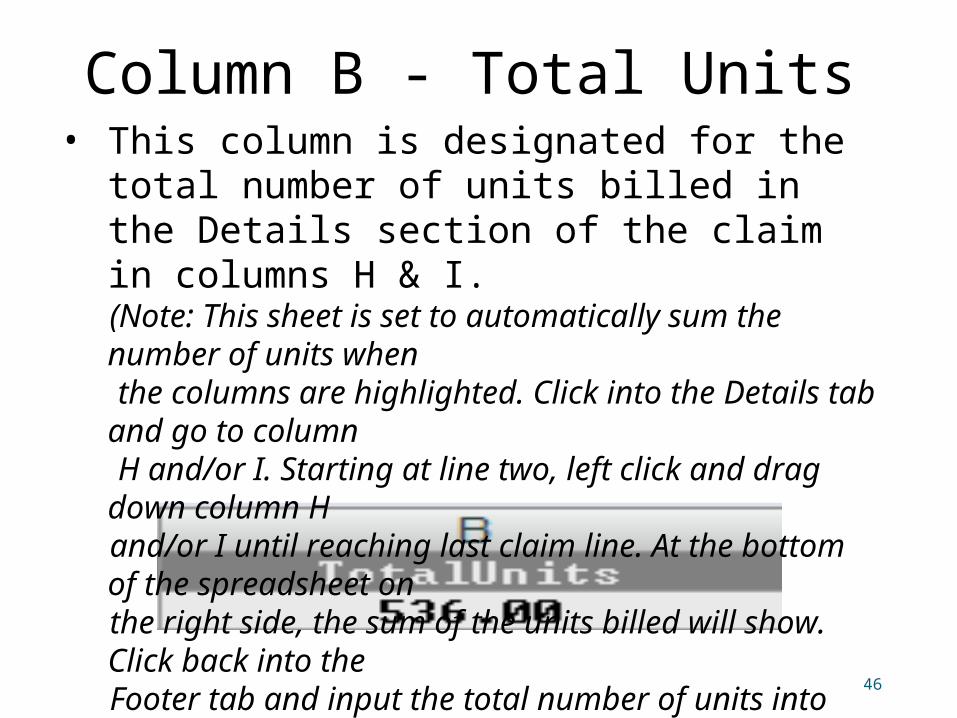
46
• This column is designated for the total number of units billed in the Details section of the claim in columns H & I.
(Note: This sheet is set to automatically sum the number of units when
the columns are highlighted. Click into the Details tab and go to column
H and/or I. Starting at line two, left click and drag down column H
and/or I until reaching last claim line. At the bottom of the spreadsheet on
the right side, the sum of the units billed will show. Click back into the
Footer tab and input the total number of units into column B)
47
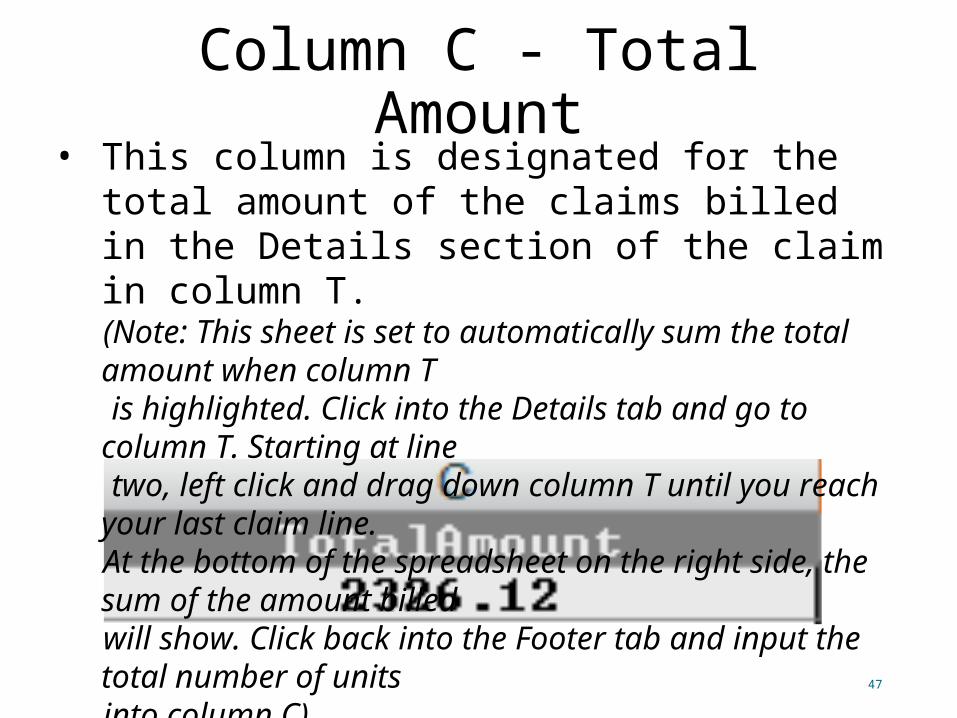
Column C - Total Amount• This column is designated for the total
amount of the claims billed in the Details section of the claim in column T.
(Note: This sheet is set to automatically sum the total amount when column T
is highlighted. Click into the Details tab and go to column T. Starting at line
two, left click and drag down column T until you reach your last claim line.
At the bottom of the spreadsheet on the right side, the sum of the amount billed
will show. Click back into the Footer tab and input the total number of units
into column C)
Additional Required Steps• After completing the footer, excess data must be
cleared from Column T in the details section of the uniform billing template by following the steps below:
• First, click on the number in the left margin that represents the next claim line under the last claim line. The entire line should highlight across.
• Next, hold down the Control and Shift keys at the same time. Push the down arrow and the rest of the sheet should be highlighted.
• Next, right click in the highlighted area. A box should pop up.
• Click on Clear Contents. Using these steps, all formulas and formatting can be removed from unused claim lines.
48
Saving the File•The last step is to save the Uniform Billing Template. •Go to the “office button” at the top of the screen, select “Save As”.•The file can be saved in any excel format.•The file can be saved in Excel using the following format:
The providers assigned 4 character alpha code (ABCD) Two digits for the current Fiscal Year ( 16 )
Two digits for the Month ( 07 ) Any three digits (001) EXAMPLE: ABCD1607001.xls
(Note: the program will automatically add the xls after you enter the file name)
49
The End•Once you have saved the file it is ready for upload to the FTP folder in order to be submitted to DDD.•Please do not forget to complete the cover sheet and upload the Uniform Billing Template along with the coversheet. Both Documents are required.•Make sure the naming configuration on the coversheet is the same as the billing template• If you have any questions, please contact the Provider Relations Unit at [email protected]
Thank you!
50