tips and tricks for creating cm14 reports - oracle primavera collaborate 14
TRANSCRIPT

REMINDER
Check in on the
COLLABORATE mobile app
Tips and Tricks for Creating CM14 Reports
Prepared by:
Thomas Everritt
Vice President, PM Systems
Hill International, Inc.
Technical considerations and setup
How to create CM14 reports using BI Publisher
Session ID#: 15411

■ Founded in 1976
■ Over 4,000 Employees in over 100 offices worldwide
■ Hill is the largest independent U.S. construction management (for fee only) according to Engineering News-Record (June 13, 2013)
■ Hill has managed more than 10,000 projects valued at over $500 billion
■ Hill has resolved more than 50,000 claims valued over $100 billion

Thomas Everritt Vice President, PM Systems
■ Information Technology Management – 13 years
■ Construction Industry – 8 years
■ Primavera Contract Management – 4 years
■ CM14 – 2 years
■ CM Environment
▪ Two CM14
▪ Four CM13.1
▪ Over 1000 users, 50 project groups, and 200 projects

Where to Get Resources
■ Help in BI Publisher Web Application and Word Plugin
■ Report Designer's Guide for Oracle Business Intelligence Publisher http://docs.oracle.com/cd/E23943_01/bi.1111/e22254/toc.htm
■ Oracle BI Publisher Desktop <version> for xx bit Office on Windows http://www.oracle.com/technetwork/middleware/bi-publisher/downloads
■ Knowledge Article 1458950.1 How To Create a New Contract Management Report or Form within BI Publisher
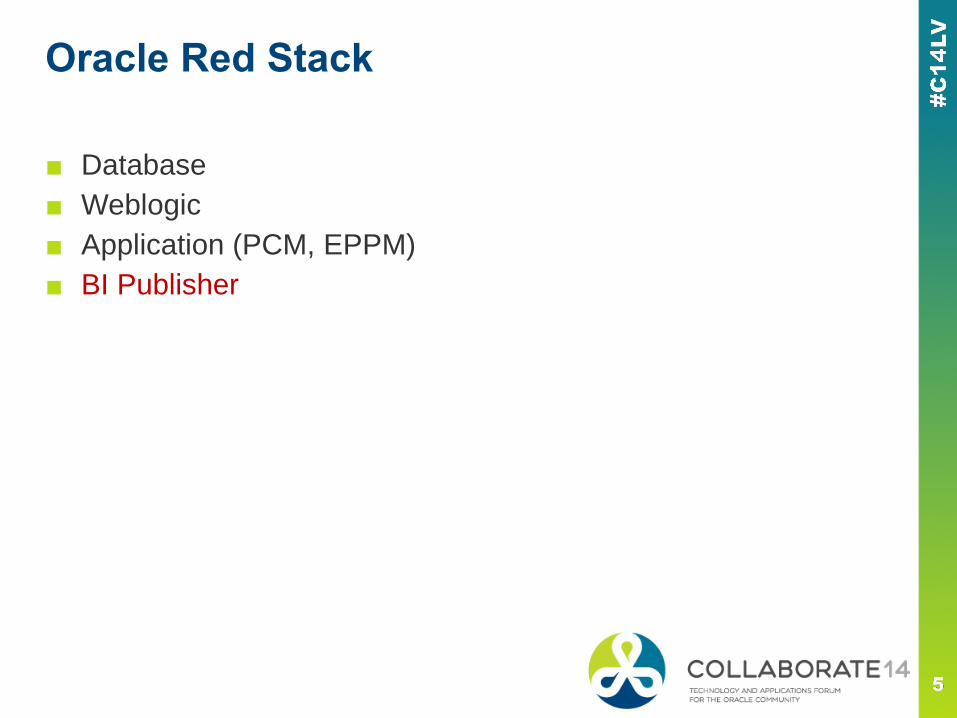
Oracle Red Stack
■ Database
■ Weblogic
■ Application (PCM, EPPM)
■ BI Publisher

Licensing
■ Check with your Oracle Representative
■ My Information
▪ Read access is included in the PCM and EPPM license
▪ Edit access license must be purchased for each named user.
The price is very reasonable
▪ If you connect to any other application outside of PCM and
EPPM, you must purchase full licensing

Capabilities
■ Input: Microsoft SQL and Oracle databases
■ Output: pdf, html, xml, doc, rtf, xls, csv, ppt, interactive
■ Scheduling
■ Letter templates moved to BIP

Caveats - General
■ Check the CM14 software compatibly matrix
■ Primavera
▪ CM14 and EPPM setup and reports are very different
▪ CM14 and EPPM functionality is very different
— Most CM14 reports use the web console while EPPM reports use
RTF documents
— CM14 reports are run from modules while EPPM reports are run from
a separate tab
— No CM14 run time parameters
▪ Quality control wasn’t perfect
■ Browsers: I believe Firefox esr works best
▪ Internet Explorer throws erroneous errors
▪ Chrome doesn’t display XML correctly

Caveats - General
■ Web Application versus Word Plugin
▪ Must use Web Application for:
— Data model creation and updating
— Linking data model to the report
▪ Use Word Plugin for line breaks with multiple lines of text and
advanced functions
■ Word Plugin: x86 and x64 version based on Microsoft Office rather than operating system

Caveats – Infomaker Users
■ No run time parameters
■ No graphics based data (SQL) view
■ Web based BIP
▪ No way to hide fields
▪ No if then statements
— Example: If data = 0 then “”
▪ No line breaks with multiple lines of text
▪ Grid layout based rather than pallet

Administration
■ Data Sources
▪ JDBC
■ Security
▪ Roles are assigned
— Data Source
— Built-in roles
▪ Users are assigned to
a role
▪ Roles are applied to
folders
Administration

Home
Open Catalog from one of these links

Catalog Menu
■ Folders
▪ Forms
▪ Reports
▪ Letters
■ Tasks
▪ Copy, cut, paste,
delete
▪ Rename
▪ Permissions
▪ Upload, download

How to Open Report for Editing
1. Navigate Folders
2. Click Edit

Design Lessons Learned
■ Start from an existing report
▪ Always have a backup copy and save often
▪ If you need to keep the existing report as well as a new version
of the report, Save as a new Report
▪ If you don’t need the existing report, Save as a new Layout
Template then set it as the default from View a List
■ Process
▪ Run XML from data model
▪ Run the report from BI Publisher
▪ Then import to CM14 and run from the CM14 module

How to Obtain Parameter Data to Run XML Or Report
■ Reports
▪ VENDOR_TYPE
▪ PROJECT_NAME
■ Forms
▪ VENDOR_TYPE
▪ MASTER_KEY
https://pcm.hillintl.com/exponline/documentrequestforward.do? projectname=9R27L & basesysitemtype=MTG & masterkey=9791bd68f3d34c529d42fb65a2 & action=show
Warning: I have had problems using the CM14 Sample Projects master keys in BIP due to special characters

How to Change or Navigate to the Data Model
Select (change) Data Model Go to Data Model
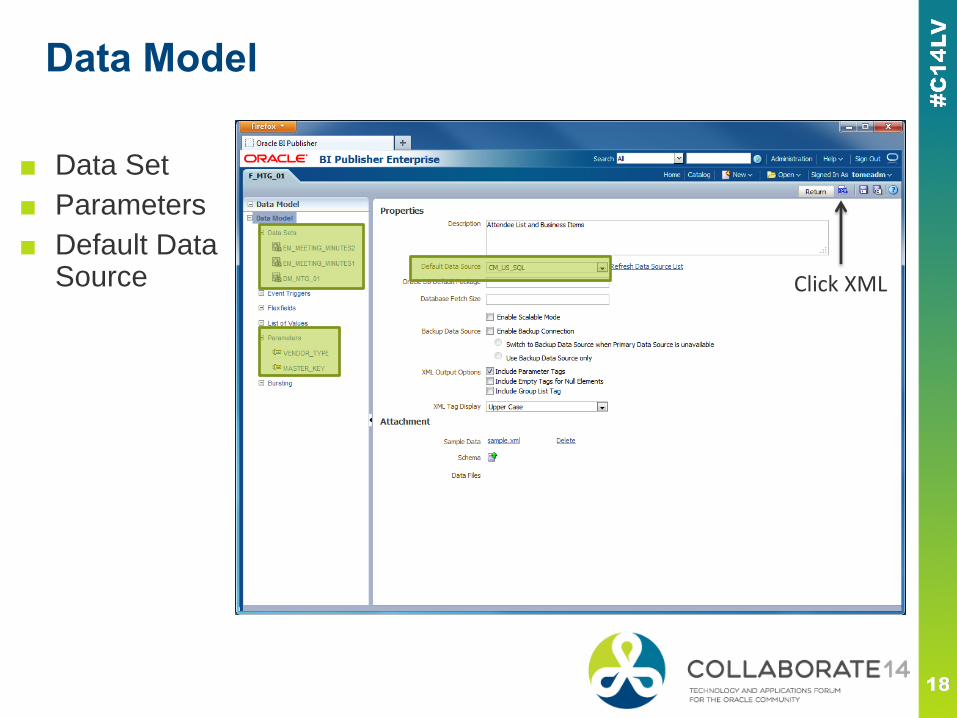
Data Model
■ Data Set
■ Parameters
■ Default Data Source Click XML
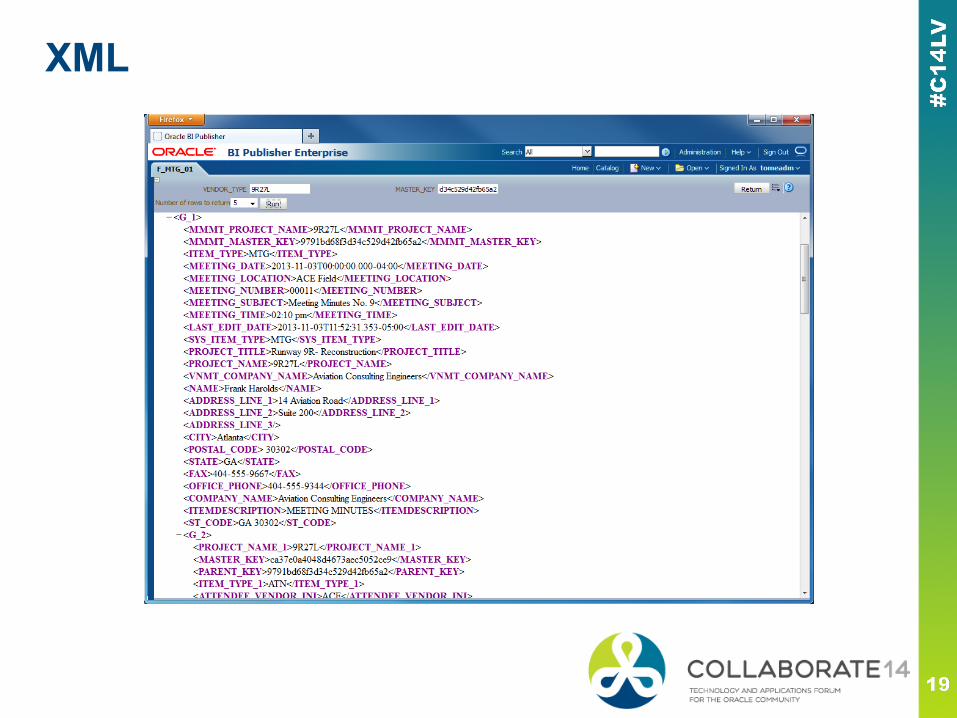
XML
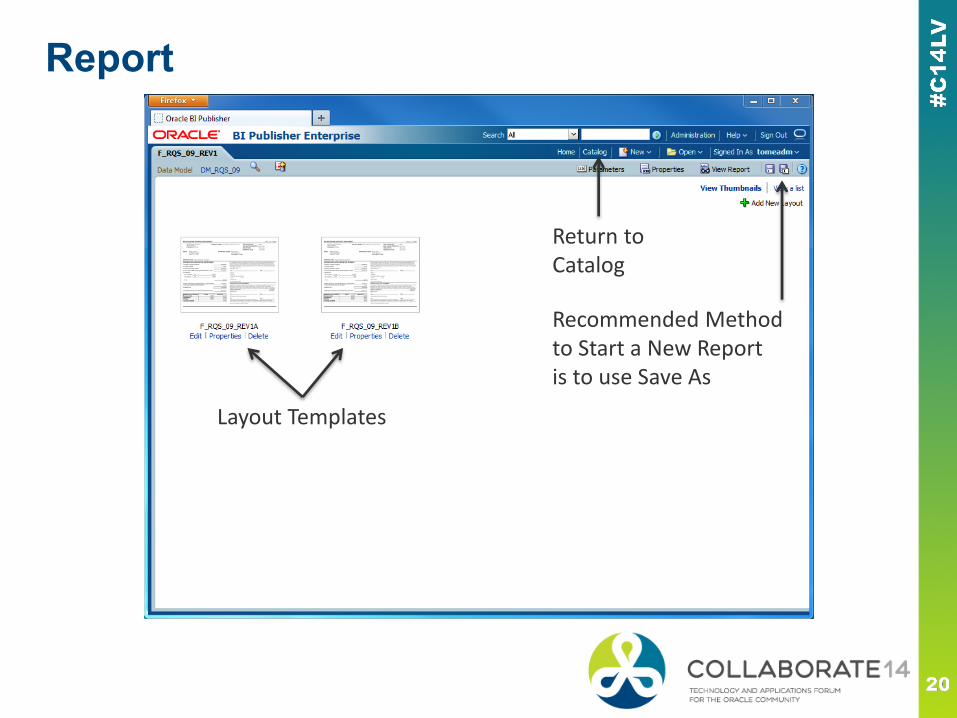
Report
Layout Templates
Return to Catalog
Recommended Method to Start a New Report is to use Save As

How to Save a Layout Template
Click Save As

How to Change the Default Layout Template
1. Click View a list
2. Select Default Layout
Formats Default Format
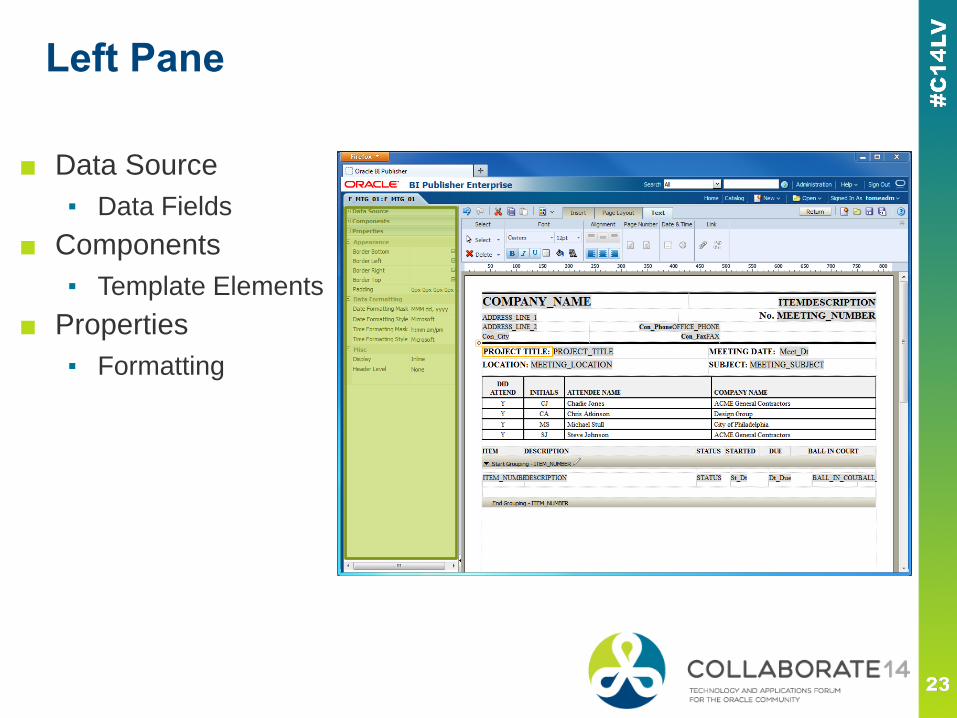
Left Pane
■ Data Source
▪ Data Fields
■ Components
▪ Template Elements
■ Properties
▪ Formatting

Static Toolbar
■ Undo, Redo
■ Cut, Copy, Paste
■ Preview
■ Return
■ New, Save, Save as

Dynamic Toolbar
■ Insert
▪ Components
▪ Page Elements
■ Page Layout
▪ Orientation
▪ Header and Footer
■ Component
▪ Layout Grid
▪ Text
▪ Image
▪ Repeating Section
▪ Data Table

Design Area
■ Not a pallet like InfoMaker where you drag template components
■ Grid based
▪ Align components using
Layout Grids and Cells
▪ Place components inside
Layout Cell

How to Set Page Properties
■ Click in an area outside the Components on the Design Area
■ Select Properties from the Left Pane

Layout Grid Cell
■ Font
▪ Type, size, bold, italics, underline, color
▪ Borders
▪ Background color
■ Alignment inside cell
■ Insert and delete rows and columns
■ Join and Unjoin cells
■ Adjust height and width with mouse or properties

How to Draw a Line
■ Select Layout Grid Cell
■ Select Properties from Left Pane
■ Click Ellipses (…) to set border

Text
■ Font
▪ Type, size, bold, italics, underline, color
▪ Borders
▪ Background color
■ Alignment (use layout grid cell)
■ Insert page number, date and time, hyperlink

How to Use Text and Data within the Same Layout Cell
■ Insert Text component
■ Drag and Drop Data
■ Select Text component
■ Select Properties from Left Pane
■ Change Display from Block to Inline

How to Set Data Format
■ Select Data Field
■ Select Data Formatting from Dynamic Toolbar and select format
or
■ Select Properties from Left Pane and enter Formatting Mask

Insert an Image
■ Insert image
▪ Formats: gif, jpg, png,
bmp
▪ Size limit: 10MB but
recommend much smaller
■ Insert URL
■ Resize with mouse or properties

Data Table
■ Filter
■ Conditional format rows
■ Show summary row
Simple table of data

Data Table
■ Font
▪ Type, size, bold, italics, underline, color
▪ Borders
▪ Background color
▪ Alignment
■ Other Functions
▪ Grouping and sort
▪ Conditional Formatting
▪ Formula

Data Table
■ Filtered by Attended
■ Grouped and sorted by Company Name
■ Sorted by Initials
■ Summary row is displayed
■ Used formula to add count to Attendee Name
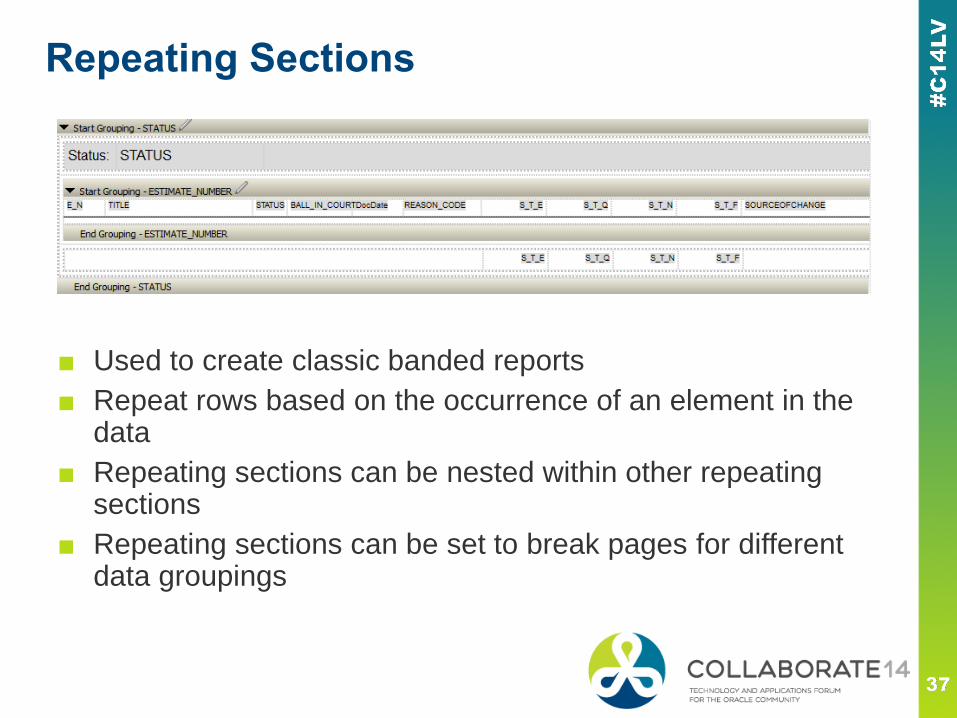
Repeating Sections
■ Used to create classic banded reports
■ Repeat rows based on the occurrence of an element in the data
■ Repeating sections can be nested within other repeating sections
■ Repeating sections can be set to break pages for different data groupings

Repeating Sections
■ Element - Specify the element for which the section repeats. For
example, if the dataset contains sales information for several
countries. If you select COUNTRY as the repeat-by element, then
the section of the layout repeats for each unique country occurring
in the dataset.
■ Group Detail - If you have nested sections, then select this option.
To continue the previous example, assuming there are unique data
rows for each city and grouping by country, then this option creates
a section that repeats for each city.

BIP Word Plugin
■ RTF format with script
■ Ribbon
▪ Logon
▪ Open Report and Layout Template
▪ Load Data
▪ Insert Field, Table, Repeating Group
▪ Preview PDF
▪ Field Browser

Files
■ Default file location <driveletter>:\Oracle\Middleware\user_projects\domains\bifoundation_domain\config\bipublisher\repository\Reports
■ Default sub-folders
▪ PCM: US Sql
▪ EPPM: P6Reports
■ Format
▪ xdo: Report
▪ xdm: Data Model

How to Setup Reports for Multiple Project Groups
■ Setup new Data Source in the Web Application Administration
■ Copy the US SQL report folder and rename it (data source name)
■ Use Web Application to change every Data Model and Report
▪ Connect Data Model to Data Source
▪ Connect Report to Data Model
or
■ Use text editor like NotePad++ or Developer’s Notepad to search
and replace all occurrences in the new report folder
▪ xdo to connect Report to Data Model
— <dataModel url="/US Sql/Reports/BUL/DM_R_BUL_01.xdm"/> change to new
folder location
▪ xdm to connect Data Model to Data Source
— defaultDataSourceRef="US_SQL" and <sql dataSourceRef="US_SQL">
change to new data source

Tips and Tricks for Creating CM14 Reports
Questions?

Please complete the session evaluation We appreciate your feedback and insight
You may complete the session evaluation either
on paper or online via the mobile app