the navigator - ipms-houston.org · january: basic figure painting ... 1/72 scale dana mathes 1st...
TRANSCRIPT
The Navigator—June 2018
1
Navigator The
The Newsletter of Alamo Squadron The San Antonio chapter of the International Plastic Modelers’ Society A registered 501c-7
June 2018 IPMS/USA Chapter of the Year:
1998-1999 & 2004-2005
IPMS/USA Regional Chapter of the Year: 2016
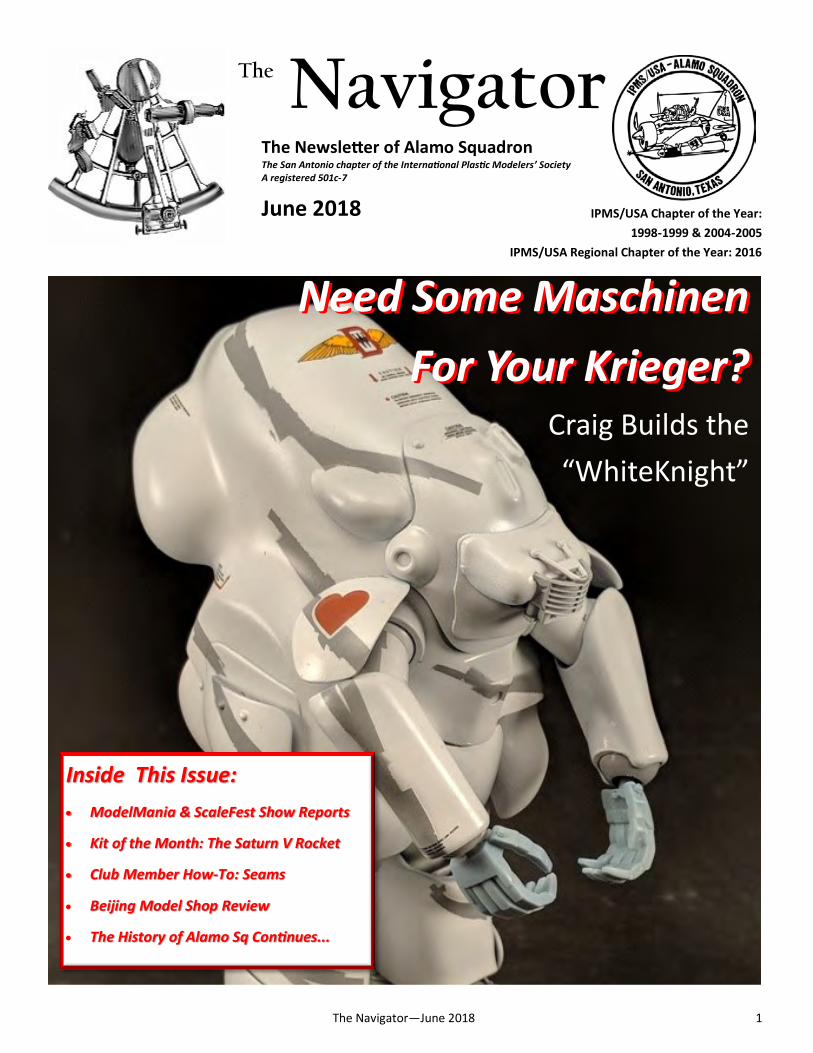
Need Some Maschinen
For Your Krieger?
Need Some Maschinen
For Your Krieger? Craig Builds the
“WhiteKnight”
Inside This Issue:
• ModelMania & ScaleFest Show Reports
• Kit of the Month: The Saturn V Rocket
• Club Member How-To: Seams
• Beijing Model Shop Review
• The History of Alamo Sq Continues...
The Navigator—June 2018
2
By Herb Scranton III IPMS #48314
President’s Column
President’s Message - June 2018
Greetings fellow members,
Summer is finally here with the wonderful moderate
temperatures of south Texas. What a nice change
from the snow, ice and freezing cold of winter.
Whoops I was thinking of my childhood home in
Connecticut. When I was a kid we did a lot of our
modeling in the winter and summers were spent out-
side. Now that I live in San Antonio where the weath-
er is pretty moderate year round I find that my model-
ing is spread out throughout the whole year. This got
me thinking about then and now.
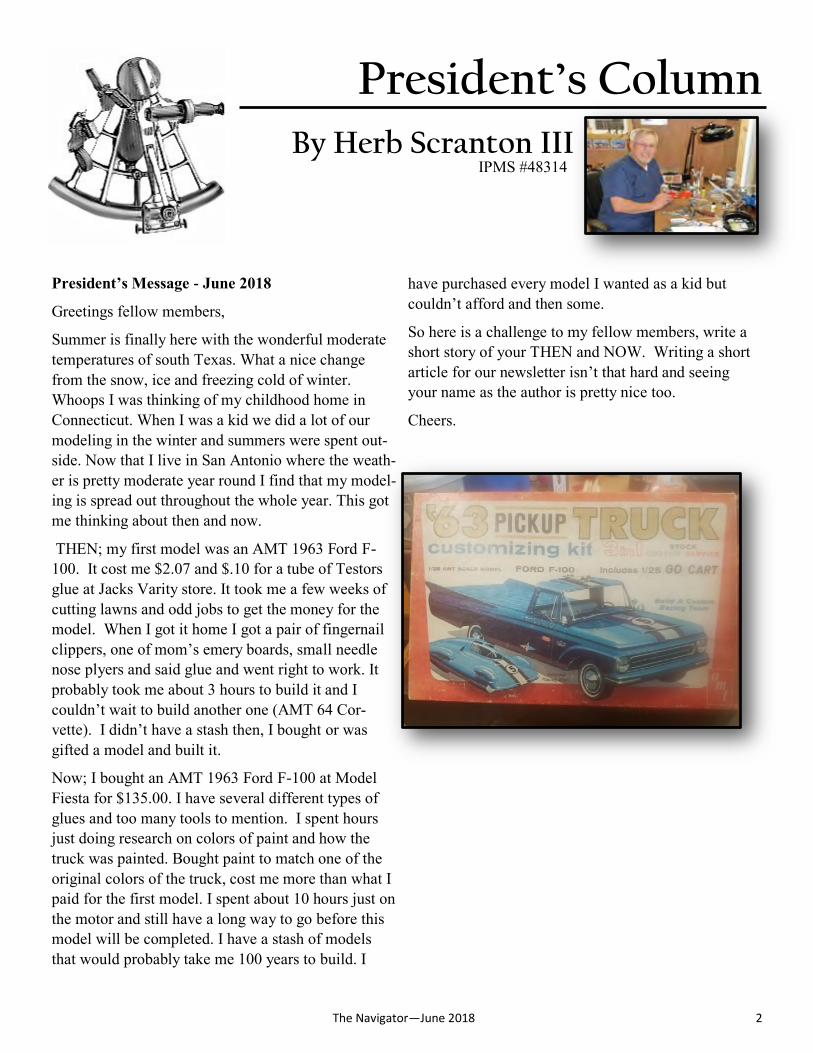
THEN; my first model was an AMT 1963 Ford F-
100. It cost me $2.07 and $.10 for a tube of Testors
glue at Jacks Varity store. It took me a few weeks of
cutting lawns and odd jobs to get the money for the
model. When I got it home I got a pair of fingernail
clippers, one of mom’s emery boards, small needle
nose plyers and said glue and went right to work. It
probably took me about 3 hours to build it and I
couldn’t wait to build another one (AMT 64 Cor-
vette). I didn’t have a stash then, I bought or was
gifted a model and built it.
Now; I bought an AMT 1963 Ford F-100 at Model
Fiesta for $135.00. I have several different types of
glues and too many tools to mention. I spent hours
just doing research on colors of paint and how the
truck was painted. Bought paint to match one of the
original colors of the truck, cost me more than what I
paid for the first model. I spent about 10 hours just on
the motor and still have a long way to go before this
model will be completed. I have a stash of models
that would probably take me 100 years to build. I
have purchased every model I wanted as a kid but
couldn’t afford and then some.
So here is a challenge to my fellow members, write a
short story of your THEN and NOW. Writing a short
article for our newsletter isn’t that hard and seeing
your name as the author is pretty nice too.
Cheers.
The Navigator—June 2018
3
IPMS National Convention 2018: Build It, Bring It,
Show It!
June 1st means we are exactly 2 months away from the 2018 IPMS/USA National Convention, this year hosted by our good friends in Phoenix. Dates of the convention are 1-4 August. There has been discussion about this Nats at previous meetings as logistical plans are being made by several members to attend this year’s big show. If you are interested in attending please get with Len and he can help you work your plans for a successful visit. Be sure to check out the site: www.ipmsusanationals2018.org to take care of several items: reserve your hotel room, purchase your banquet tickets, and register for the convention. Re-member, in order to participate in the contest - with unlimited model entries free with registration - you have to be a current IPMS/USA member.
Kit of the Month
Each month a member will bring one of their recent acquisitions and open it to let others peek inside the box. With a few brief comments and few questions answered, we will get to know what’s in the box and if we will rush home to order a copy. When you are ready to present, contact and coordinate with Len at [email protected]
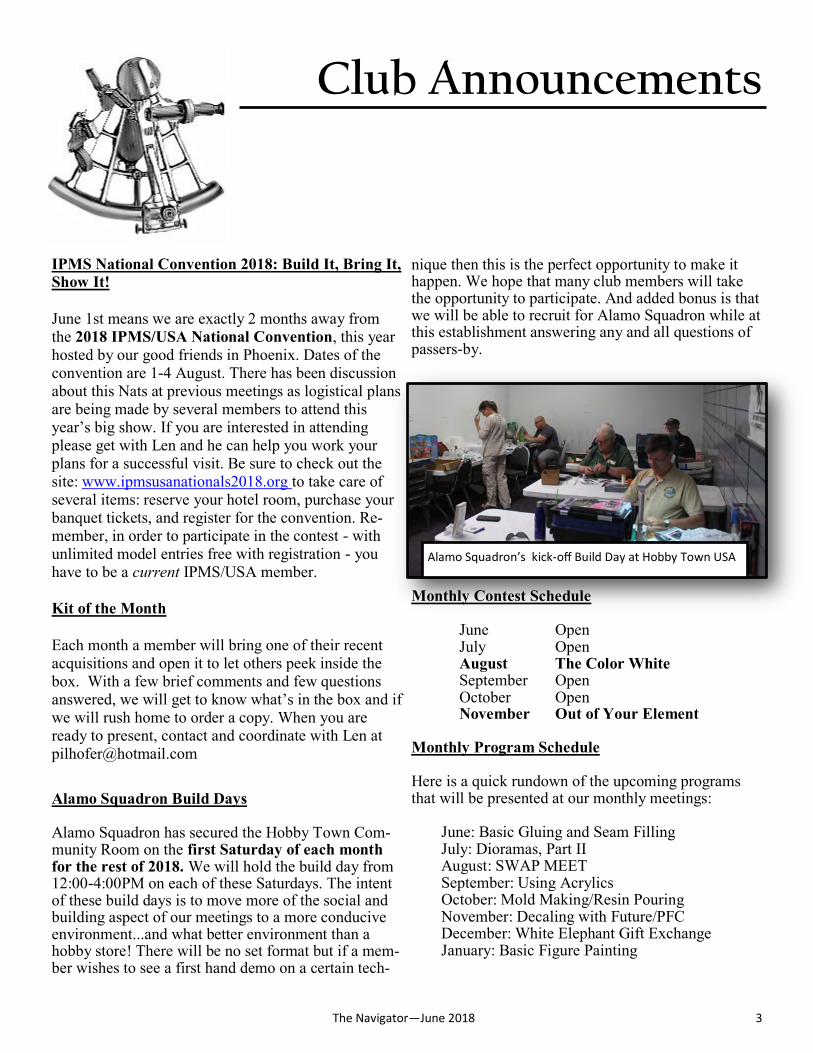
Alamo Squadron Build Days Alamo Squadron has secured the Hobby Town Com-munity Room on the first Saturday of each month for the rest of 2018. We will hold the build day from 12:00-4:00PM on each of these Saturdays. The intent of these build days is to move more of the social and building aspect of our meetings to a more conducive environment...and what better environment than a hobby store! There will be no set format but if a mem-ber wishes to see a first hand demo on a certain tech-
nique then this is the perfect opportunity to make it happen. We hope that many club members will take the opportunity to participate. And added bonus is that we will be able to recruit for Alamo Squadron while at this establishment answering any and all questions of passers-by.
Monthly Contest Schedule June Open
July Open August The Color White September Open October Open November Out of Your Element
Monthly Program Schedule Here is a quick rundown of the upcoming programs that will be presented at our monthly meetings:
June: Basic Gluing and Seam Filling July: Dioramas, Part II August: SWAP MEET September: Using Acrylics October: Mold Making/Resin Pouring November: Decaling with Future/PFC December: White Elephant Gift Exchange January: Basic Figure Painting
Club Announcements
Alamo Squadron’s kick-off Build Day at Hobby Town USA
The Navigator—June 2018
4
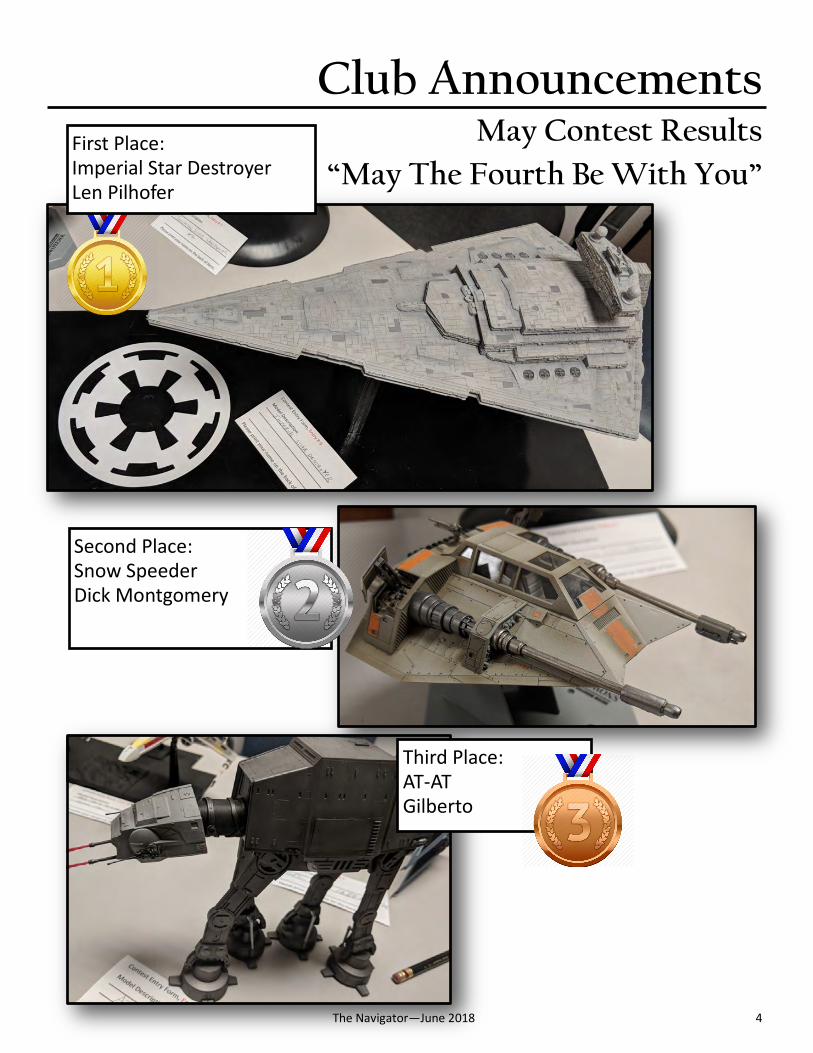
Club Announcements May Contest Results
“May The Fourth Be With You” First Place: Imperial Star Destroyer Len Pilhofer
Second Place: Snow Speeder Dick Montgomery
Third Place: AT-AT Gilberto

The Navigator—June 2018
5
The Saturn V
Kit(s) of the Month
Presented by Craig Gregory IPMS #49320
W ho doesn’t love the Saturn V, the
heavy-lift system that landed men on
the moon and lofted Skylab into orbit?
Original there where the Airfix’s and
Revell’s 1/144th offerings, then Revell’s 1/96th scale
kit and most recently, Dragon’s 1/72nd scale monster.
Airfix’s 1/144th scale model makes a decent “stack”
display; it lacks the details to show any of the internal
details. Airfix’s version is more dimensionally correct
that Revell’s 1/144th offering. And its toyish stage
interconnect would require a lot of modification to
display the stack disassembled. But of course an am-
bitious and skilled modeler would have little trouble.
Airfix also offers a Skylab version. Note that if you
purchase the Skyab version, it includes the sprue trees
for the Apollo payload.
Revell’s 1/96th scale kit offers more detail and with the
omnipresent aftermarket offerings, these details can be
easily improved. There are some dimensional errors
that are easily corrected. This kit may be the happy
medium in size/prize and accuracy.
Of course you can never wrong with bigger, right?
Enter Dragon’s 1/72nd scale behemoth; both Apollo
and Skylab kits are available. But at last, the detail is
not what I hoped for. There are many small engine
details that I was hoping to see in this kit. For exam-
ple, some of the helium tanks and plumbing that is vis-
ible around the engines of the 2nd and 3rd stages.
I have a few other Saturn’s in other scales and hope to
eventually put together a collection to enter in contests
called “Saturn’s in Scales”. (As long as I plan to build
them, I get to add to my stash, right?)
The Navigator—June 2018
6
ModelMania 2018
Show Report
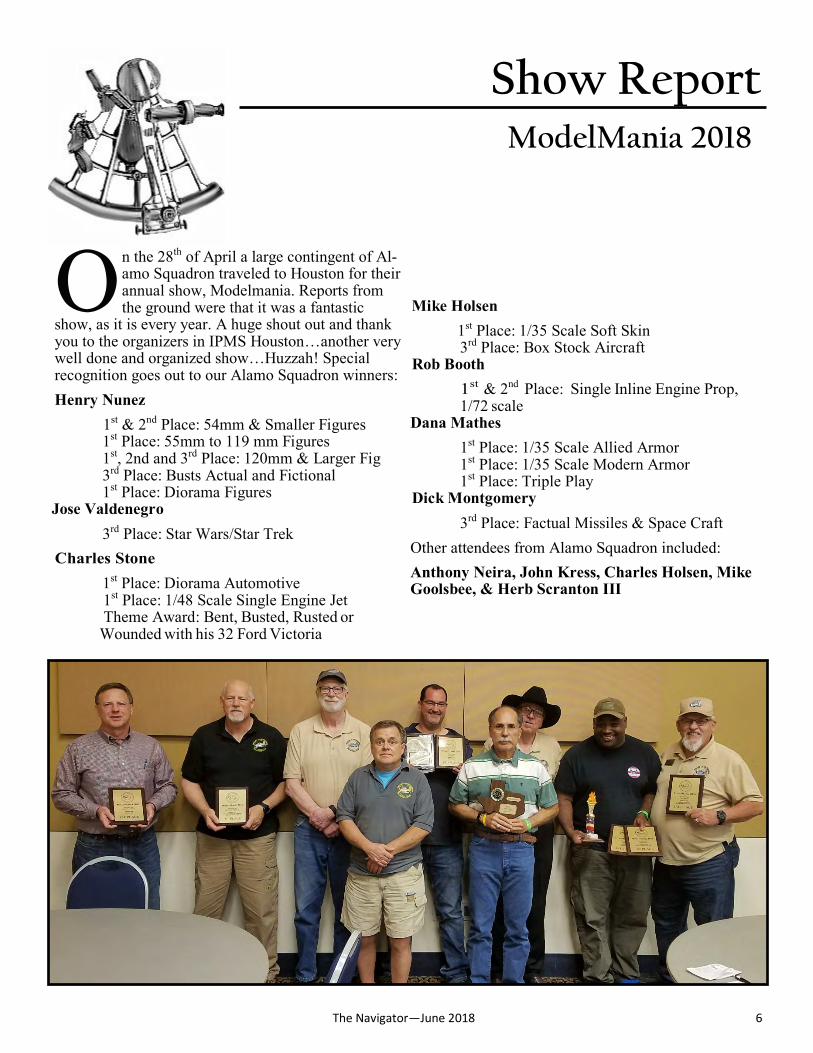
O n the 28th of April a large contingent of Al-amo Squadron traveled to Houston for their annual show, Modelmania. Reports from the ground were that it was a fantastic
show, as it is every year. A huge shout out and thank you to the organizers in IPMS Houston…another very well done and organized show…Huzzah! Special recognition goes out to our Alamo Squadron winners:
Henry Nunez
1st & 2nd Place: 54mm & Smaller Figures 1st Place: 55mm to 119 mm Figures 1st, 2nd and 3rd Place: 120mm & Larger Fig 3rd Place: Busts Actual and Fictional 1st Place: Diorama Figures
Jose Valdenegro
3rd Place: Star Wars/Star Trek
1st Place: Diorama Automotive 1st Place: 1/48 Scale Single Engine Jet Theme Award: Bent, Busted, Rusted or Wounded with his 32 Ford Victoria
Mike Holsen
1st Place: 1/35 Scale Soft Skin 3rd Place: Box Stock Aircraft
Rob Booth
& 2nd Place: Single Inline Engine Prop, 1/72 scale
Dana Mathes
1st Place: 1/35 Scale Allied Armor 1st Place: 1/35 Scale Modern Armor 1st Place: Triple Play
Dick Montgomery
3rd Place: Factual Missiles & Space Craft
Other attendees from Alamo Squadron included:
Anthony Neira, John Kress, Charles Holsen, Mike Goolsbee, & Herb Scranton III

The Navigator—June 2018
7
ScaleFest 2018
Show Report
Story and Photos by Rob Booth IPMS #37548
I PMS – NCT held their annual Scalefest show on
Saturday, June 2, 2018 in the Grapevine, Texas
Convention Center. Alamo Squadron members
in attendance included myself, Dana Mathes,
John Kress and Chris Settle.
The show was well attended, and most categories
were full of excellent examples of modelling skill.
The vendor area was full, with lots of bargains to be
had. I purchased several CMK and other aftermarket
bargains from Squadron’s overstock and scratch and
dent room, along with a few surprise bargain kits in
the large vendor room.
Winners included John Kress in Civil Aircraft and Da-
na Mathes who scored several Armor medals and cap-
tured the “Best Miscellaneous” class award for his
Triathalon entry. I managed a first in the Tilt/Rotary
category for my 1/48 Piasecki H-21, a second for my
1/72 Spitfire Mk II LR (to a Best-in-Show winning
scratch-built floatplane, I might add) in the Conver-
sions, Vacuform and Scratchbuild category, and a
third place for my 1/72 Spitfire Mk IXc in a 1/72 sin-
gle-engine aircraft split. Also garnering a first place
out of the two club/group build entries was the Collec-
tion of Tex Hill’s aircraft that Dick Montgomery and I
have been putting together. This was our first try in a
contest, and it was well received.
A well-deserved Best of Show went to a completely scratch-built WWI era Gallaudet D-1 float plane. Ab-solutely stunning scratch build work! All in all it was a good show, and congratulations to all the guys at NCT for a job well done.
ScaleFest 2018 Best of Show: Scratchbuilt Gallaudet Floatplane
John Kress’ Winning Lockheed Vega
Rob Booth’s Flying Banana Hauled Home Some Hardware
Dana Mathes took Best of the Misc Class with his Triathlon
The Navigator—June 2018
8
ScaleFest 2018
Show Report
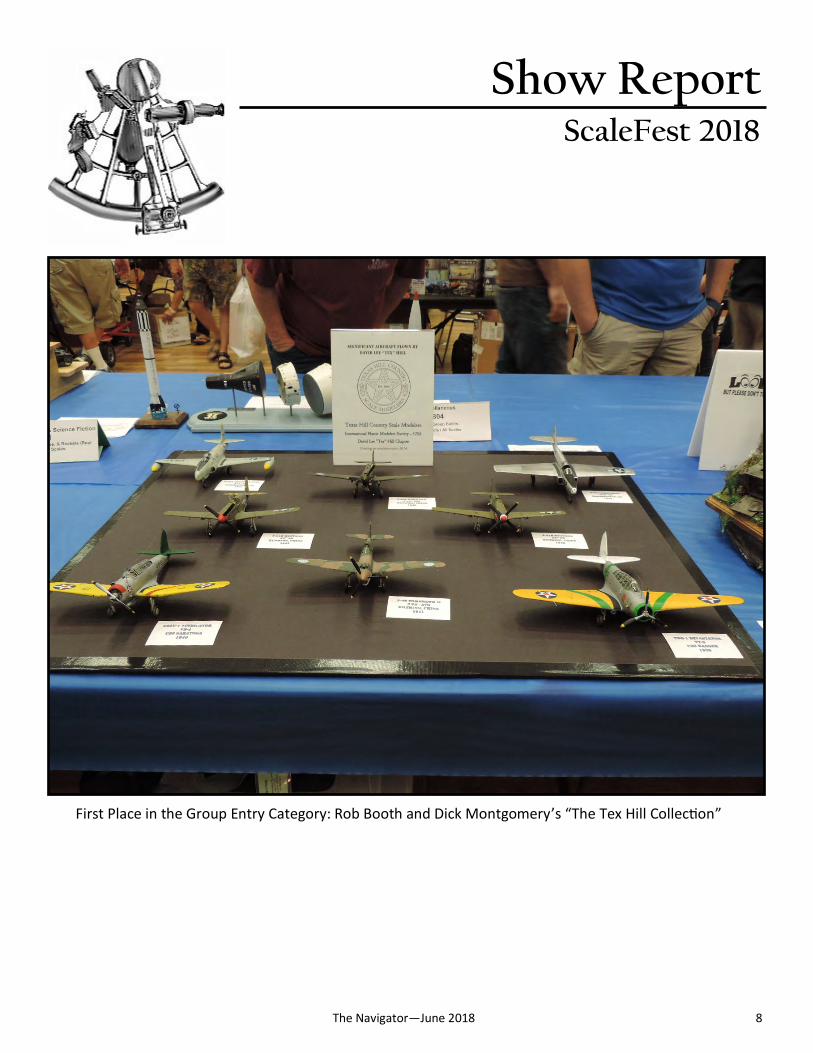
First Place in the Group Entry Category: Rob Booth and Dick Montgomery’s “The Tex Hill Collection”

The Navigator—June 2018
9
Club Member How-To
S eams are created anytime parts are joined
with a butt joint. Almost all aircraft models
will have seam lines where the fuselage or
wing halves are glued together. The secret to
a good seam is proper parts preparation. In addition to
the usual parts prep:
Sometimes alignment pins interfere with proper align-
ment; remove them if needed. Although not classified
as flash, a defect along the joint seam where the halves
of the mold were joined during manufacturing. It will
materialize as a raised ridge of plastic along the seam
line. It is usually easier to deal with it now. The mat-
ing surfaces between parts may not be true; sand the
mating surface with sandpaper while laying the sand-
paper inverted on a flat surface.
Using an aircraft fuselage as an example, always start
with the top seam. The bottom seam is not as visible
and we want to optimize fit and alignment for the best
seam along the top of the fuselage.
Begin by securely gluing the fuselage halves together
at one end. Begin at the nose as any imperfections in
the tail are easier to repair and are usually less noticea-
ble. Slowly work down the top seam using thin liquid
cement. Use capillary action to draw cement from the
applicator into the seam.
Manipulate the seam into proper alignment while the
cement sets. Ideally a bead of liquefied plastic oozes
out from the joint when compressed. Be careful not to
touch the seam as this will draw cement out of the
joint, along your finger and out onto the model sur-
face. (There are no extra modeling points for finger-
prints.) Do not use masking tape to secure the joint
either, as again, cement will be drawn out of the seam
and onto the surface of the model.
Inevitably there will be some clean up or repair of
glue seams. If the proper steps were taken during glu-
ing, these imperfections will be minor and easily cor-
rected. But all problems eventually lead back to im-
properly mated surfaces; either kit induced or intro-
duced by the builder. There are 2 types of seam prob-
lems: the surfaces on each side of the joint are not lev-
el, or there are gaps along the joint; sometimes both.
The severity of the issue also determines the course of
action.
To lower the high side: use a lower girt sanding stick
and sand away material from the high side. When
done, apply liquid surface primmer to the seam and re-
sand with a finer girt sanding stick To raise the low
side: apply plastic putty to the low side of the seam.
After the putty completely hardens, sand smooth con-
centrating on the puttied area. When satisfied, apply
liquid surface primmer and re-sand with a finer girt
sanding stick.
Hopefully the surfaces on each side of the seam are
even and there are small gaps to deal with. Minor to
small gap widths can be filled with liquid surface pri-
mer; larger gaps with plastic putty. Note that most
putties shrink with age. Where possible reduce the
amount of putty needed by filling the gap with strips
of thin styrene sheet. As always, apply a coat of liquid
plastic primmer and sand with a fine-grade sanding
stick.
You can protect raised surface detail by applying
masking tape over the detail. With raised panel lines
that cross the seam, try protecting the detail with a fin-
ger nail while sanding. For model with engraved pan-
el lines, use an engraving tool to lightly restore any
damaged lines.
Gluing and Repairing Seams by Craig Gregory
IPMS#49320
The Navigator—June 2018
10
Cover Story Building the WhiteKnight
Model, Photos, and Story by Craig Gregory
IPMS#49320
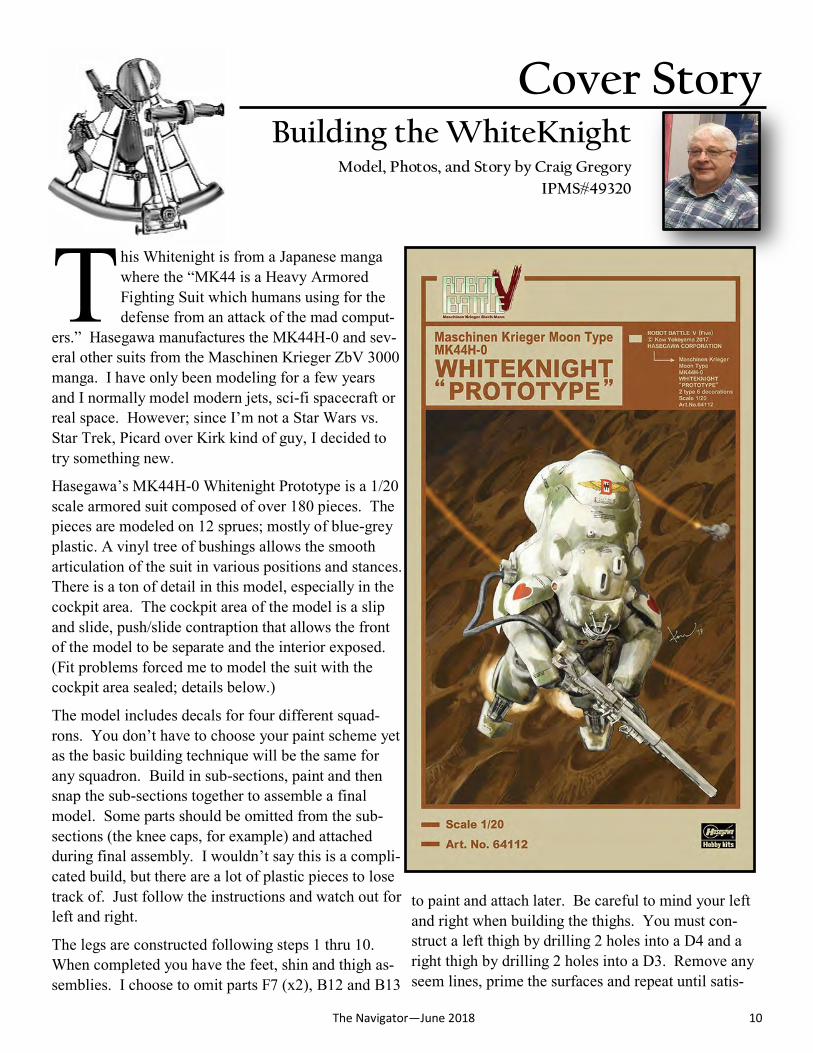
T his Whitenight is from a Japanese manga
where the “MK44 is a Heavy Armored
Fighting Suit which humans using for the
defense from an attack of the mad comput-
ers.” Hasegawa manufactures the MK44H-0 and sev-
eral other suits from the Maschinen Krieger ZbV 3000
manga. I have only been modeling for a few years
and I normally model modern jets, sci-fi spacecraft or
real space. However; since I’m not a Star Wars vs.
Star Trek, Picard over Kirk kind of guy, I decided to
try something new.
Hasegawa’s MK44H-0 Whitenight Prototype is a 1/20
scale armored suit composed of over 180 pieces. The
pieces are modeled on 12 sprues; mostly of blue-grey
plastic. A vinyl tree of bushings allows the smooth
articulation of the suit in various positions and stances.
There is a ton of detail in this model, especially in the
cockpit area. The cockpit area of the model is a slip
and slide, push/slide contraption that allows the front
of the model to be separate and the interior exposed.
(Fit problems forced me to model the suit with the
cockpit area sealed; details below.)
The model includes decals for four different squad-
rons. You don’t have to choose your paint scheme yet
as the basic building technique will be the same for
any squadron. Build in sub-sections, paint and then
snap the sub-sections together to assemble a final
model. Some parts should be omitted from the sub-
sections (the knee caps, for example) and attached
during final assembly. I wouldn’t say this is a compli-
cated build, but there are a lot of plastic pieces to lose
track of. Just follow the instructions and watch out for
left and right.
The legs are constructed following steps 1 thru 10.
When completed you have the feet, shin and thigh as-
semblies. I choose to omit parts F7 (x2), B12 and B13
to paint and attach later. Be careful to mind your left
and right when building the thighs. You must con-
struct a left thigh by drilling 2 holes into a D4 and a
right thigh by drilling 2 holes into a D3. Remove any
seem lines, prime the surfaces and repeat until satis-
The Navigator—June 2018
11
Cover Story Building the WhiteKnight
fied with the sub-assemblies. Protect the ball-joints
from paint and be sure to prime and parts omitted
from construction.
The body is constructed following steps 12 thru 24,
but I would attack it as 4 sub-assemblies: the hatch
(step 12), the body front (steps 13 thru 17), the pilot’s
seat (steps 18 thru 20) and the body back (steps 20
thru 24).
The hatch, body front and pilot’s seat are straight for-
ward. During primary construction I omitted the riv-
et detail. I omitted attaching the hinged armored sec-
tions at this time as well; I figured I might break
them off while handing the model. I omitted at this
time parts A18, A8 and C16 from the pilot’s seat as-
sembly.
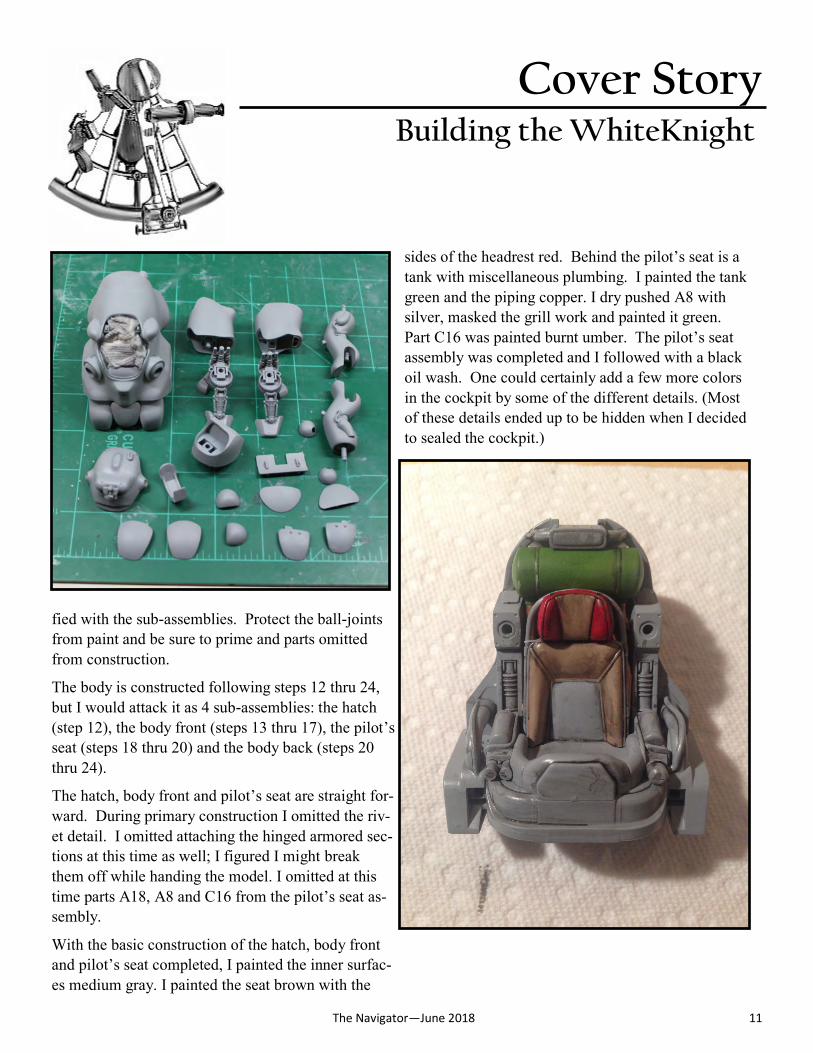
With the basic construction of the hatch, body front
and pilot’s seat completed, I painted the inner surfac-
es medium gray. I painted the seat brown with the
sides of the headrest red. Behind the pilot’s seat is a
tank with miscellaneous plumbing. I painted the tank
green and the piping copper. I dry pushed A8 with
silver, masked the grill work and painted it green.
Part C16 was painted burnt umber. The pilot’s seat
assembly was completed and I followed with a black
oil wash. One could certainly add a few more colors
in the cockpit by some of the different details. (Most
of these details ended up to be hidden when I decided
to sealed the cockpit.)

The Navigator—June 2018
12
Cover Story Building the WhiteKnight
During the dry fit of the front and back halves of the
body, I found a major fit problem between parts A1,
A2 and M2. Part A2 flared too much at the top and
when pinched to bring it in alignment with A1, bowed
away from part M2. I decided to forgo being able to
remove the body front. I permanently glued the body
front and back together and commenced on filling/
shaping the seam. After all the seam work was done I
applied the rivets (parts B1) to the body. I did not at-
tach the waste armor (D25 x2) or the shoulder armor
(D25 x2).
Most of my surfaces were already primed while
checking for and repairing seams. I gave everything 1
final primer coat and masked off a crude camouflage
pattern. I separated the model back into its sub-
assemblies for painting. And painted the model
(except for the feet) gloss white; gloss will help when
applying the decals. A light coat of clear gloss was
applied in preparation for the decals. I had no prob-
lems with the decals. They released from the carrier
and laid down easily. I did have to use Solvaset to set-
tle the decals around the complex curve of the shoul-
der plates. I completed the model by applying a clear
coat of satin varnish.
In retrospect I could have left the cockpit unsealed.
However, I couldn’t think on how I would display the
model in competition without building a mini diorama
to hold the front and rear body shells for display. By
taking my time and “reading” the instructions (looking
at the pictures because they are in Japanese), I mistook
a left side part for a right side part only once. The
overall fit is excellent, except where noted. The decals
are excellent. It was a mostly enjoyable build.
The Navigator—June 2018
13
Feature Story Beijing Model Run
M y story of plastic model hunting in the
Middle Kingdom started with my trip
in January 2016 and I just recently re-
turned from another trip to Beijing in
November 2016. Here is my travel blog from these
two visits and an experience I had in February 2014.
(And now updated with a trip in March/April 2018.)
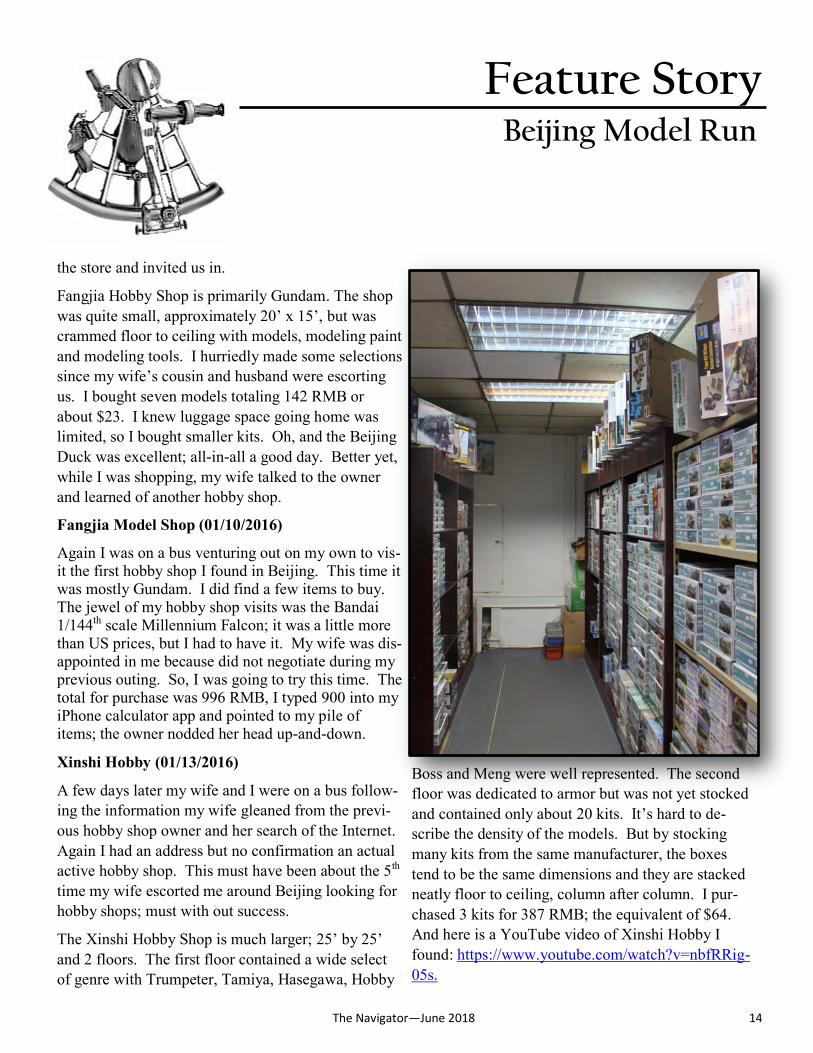
My first Chinese plastic modeling experience was in
February 2014 when I visited my wife’s hometown
Zigong in Sichuan province. She refers to it a small
city of “only 1.2 million”. While walking we crossed
a minor intersection using the ever present under-
ground passageways. Under this intersection was a
small plaza lined with simple 10’ wide cubby holes
with a metal door that was rolled down when closed.
Luckily they were open because there was no signage.
Alone one of the walls I spotted several stacks of plas-
tic models. Only a fellow modeler would have spotted
them.
I can’t really remember what models were there, but
after a few minutes of rummaging I found two Hobby
Boss 1/72nd modern jet fighters. Of course, and this is
typical of these types of shops, there were no prices.
My wife approached the shop keeper and inquired,
who did a quick Internet search, typed something on a
calculator and answered 120 RMB each, or about $19
at the time. My wife asked me if I wanted to buy
them and I said yes, because I knew the negations pro-
cess was to follow. After hearing many words I didn’t
understand, but seeing body language I did, my wife
asked me if 140 RMB was OK. So I purchased both
models for about $22. We passed the shop two other
times, but we never found the door open again.
Fangjia Model Shop (01/10/2016)
During my January 2016 trip to Beijing, my wife’s
cousin and husband were to treat us to Beijing Duck.
They picked us up at our apartment and we drove to a
local tourist area just north of the Forbidden City. I
didn’t know that my wife had asked them to search for
a street address of a hobby shop I had found on the
Internet. So I was wondering why we began zigzag-
ging thru the streets of Beijing as I knew or destina-
tion was a few blocks to the west of us. I was embar-
rassed when my wife told me what we were looking
for. After counting down the street numbers on the
buildings, a quick U-turn in traffic and double parking
on a busy street to get out of the car, but we had found
it.
The only features recognizable of a hobby shop were
the boxes of Gundam models in the window. The
hours were posted in the window stating that they
should be open. As a peered thru the window of a
closed hobby shop, my wife inquired in the adjacent
shop as to if the hobby shop was actually open for
business. She came back telling me that the shop
owner had just had a baby and the store’s hours were
erratic. As we mulled around in front of the store
contemplating our next move, a young man ap-
proached and ask if we were there waiting for the hob-
by shop to open. We said yes (I guess that is what my
wife said.) The young man got out his cell phone,
called the store owner and told them there was some-
one waiting for the hobby shop to open. Within 10
minutes a woman carrying a baby graciously opened
Story and Photos by Craig Gregory
IPMS# 49320
The Navigator—June 2018
14
Feature Story
the store and invited us in.
Fangjia Hobby Shop is primarily Gundam. The shop
was quite small, approximately 20’ x 15’, but was
crammed floor to ceiling with models, modeling paint
and modeling tools. I hurriedly made some selections
since my wife’s cousin and husband were escorting
us. I bought seven models totaling 142 RMB or
about $23. I knew luggage space going home was
limited, so I bought smaller kits. Oh, and the Beijing
Duck was excellent; all-in-all a good day. Better yet,
while I was shopping, my wife talked to the owner
and learned of another hobby shop.
Fangjia Model Shop (01/10/2016)
Again I was on a bus venturing out on my own to vis-it the first hobby shop I found in Beijing. This time it was mostly Gundam. I did find a few items to buy. The jewel of my hobby shop visits was the Bandai 1/144th scale Millennium Falcon; it was a little more than US prices, but I had to have it. My wife was dis-appointed in me because did not negotiate during my previous outing. So, I was going to try this time. The total for purchase was 996 RMB, I typed 900 into my iPhone calculator app and pointed to my pile of items; the owner nodded her head up-and-down.
Xinshi Hobby (01/13/2016)
A few days later my wife and I were on a bus follow-
ing the information my wife gleaned from the previ-
ous hobby shop owner and her search of the Internet.
Again I had an address but no confirmation an actual
active hobby shop. This must have been about the 5th
time my wife escorted me around Beijing looking for
hobby shops; must with out success.
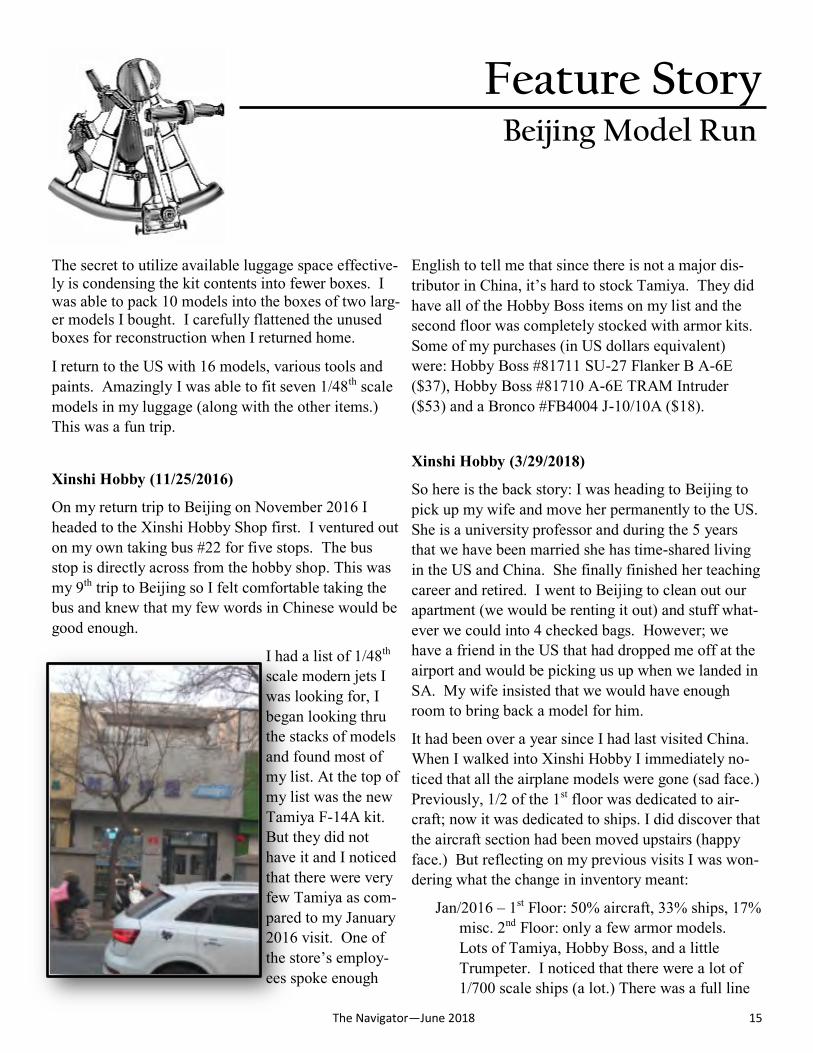
The Xinshi Hobby Shop is much larger; 25’ by 25’
and 2 floors. The first floor contained a wide select
of genre with Trumpeter, Tamiya, Hasegawa, Hobby
Boss and Meng were well represented. The second
floor was dedicated to armor but was not yet stocked
and contained only about 20 kits. It’s hard to de-
scribe the density of the models. But by stocking
many kits from the same manufacturer, the boxes
tend to be the same dimensions and they are stacked
neatly floor to ceiling, column after column. I pur-
chased 3 kits for 387 RMB; the equivalent of $64.
And here is a YouTube video of Xinshi Hobby I
found: https://www.youtube.com/watch?v=nbfRRig-
05s.
Beijing Model Run
The Navigator—June 2018
15
Feature Story
The secret to utilize available luggage space effective-ly is condensing the kit contents into fewer boxes. I was able to pack 10 models into the boxes of two larg-er models I bought. I carefully flattened the unused boxes for reconstruction when I returned home.
I return to the US with 16 models, various tools and
paints. Amazingly I was able to fit seven 1/48th scale
models in my luggage (along with the other items.)
This was a fun trip.
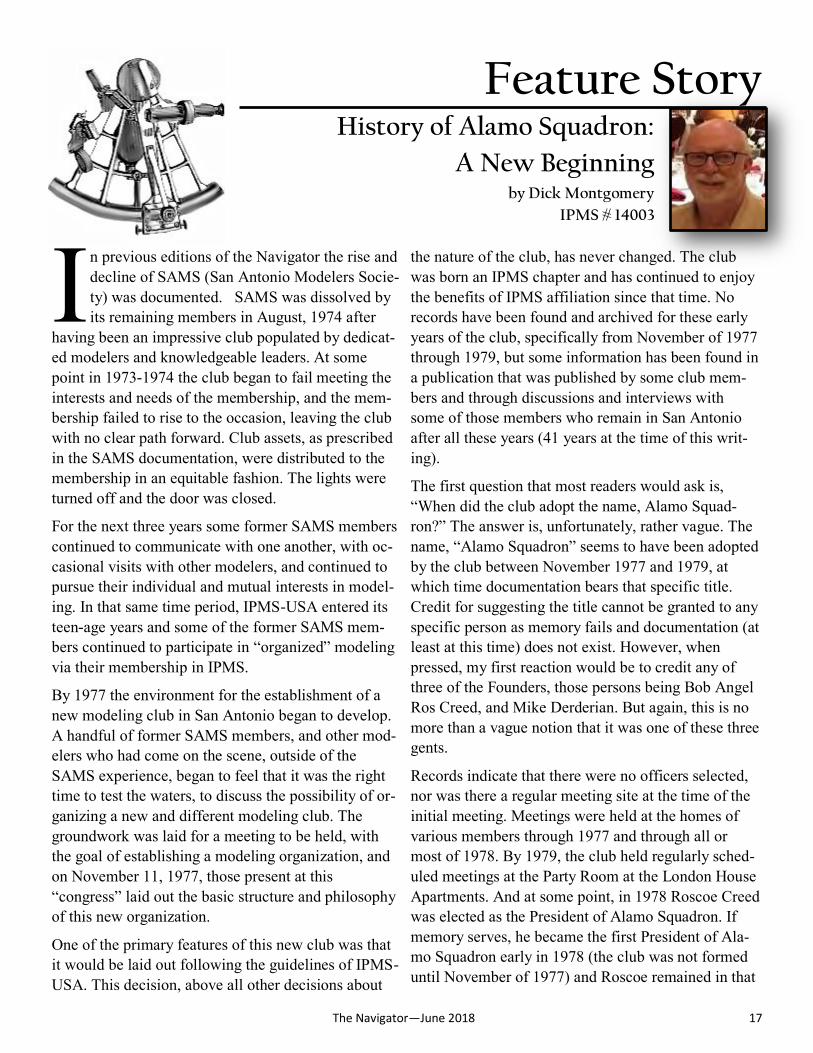
Xinshi Hobby (11/25/2016)
On my return trip to Beijing on November 2016 I
headed to the Xinshi Hobby Shop first. I ventured out
on my own taking bus #22 for five stops. The bus
stop is directly across from the hobby shop. This was
my 9th trip to Beijing so I felt comfortable taking the
bus and knew that my few words in Chinese would be
good enough.
I had a list of 1/48th
scale modern jets I
was looking for, I
began looking thru
the stacks of models
and found most of
my list. At the top of
my list was the new
Tamiya F-14A kit.
But they did not
have it and I noticed
that there were very
few Tamiya as com-
pared to my January
2016 visit. One of
the store’s employ-
ees spoke enough
English to tell me that since there is not a major dis-
tributor in China, it’s hard to stock Tamiya. They did
have all of the Hobby Boss items on my list and the
second floor was completely stocked with armor kits.
Some of my purchases (in US dollars equivalent)
were: Hobby Boss #81711 SU-27 Flanker B A-6E
($37), Hobby Boss #81710 A-6E TRAM Intruder
($53) and a Bronco #FB4004 J-10/10A ($18).
Xinshi Hobby (3/29/2018)
So here is the back story: I was heading to Beijing to
pick up my wife and move her permanently to the US.
She is a university professor and during the 5 years
that we have been married she has time-shared living
in the US and China. She finally finished her teaching
career and retired. I went to Beijing to clean out our
apartment (we would be renting it out) and stuff what-
ever we could into 4 checked bags. However; we
have a friend in the US that had dropped me off at the
airport and would be picking us up when we landed in
SA. My wife insisted that we would have enough
room to bring back a model for him.
It had been over a year since I had last visited China.
When I walked into Xinshi Hobby I immediately no-
ticed that all the airplane models were gone (sad face.)
Previously, 1/2 of the 1st floor was dedicated to air-
craft; now it was dedicated to ships. I did discover that
the aircraft section had been moved upstairs (happy
face.) But reflecting on my previous visits I was won-
dering what the change in inventory meant:
Jan/2016 – 1st Floor: 50% aircraft, 33% ships, 17%
misc. 2nd Floor: only a few armor models.
Lots of Tamiya, Hobby Boss, and a little
Trumpeter. I noticed that there were a lot of
1/700 scale ships (a lot.) There was a full line
Beijing Model Run

The Navigator—June 2018
16
Feature Story
of Tamiya, Vallejo and Mr. Color paints.
Nov/2016 – 1st Floor: 50% aircraft, 33% ships,
17% misc. 2nd Floor: 100% armor; Meng &
Trumpeter mainly. There was a large display
of armor built by the store owner and figured
that the large increase in armor inventory was
primarily due to his interest. The stock of
Tamiya paints was thin and very few Tamiya
kits in general; I was told that it was just very
hard to get Tamiya imported consistently.
Mar/2018 – 1st Floor: 50% ships, 505 MISC. 2ND
Floor: 50% armor, 50% aircraft. There were a
lot of Tamiya kits and fewer Trumpeter kits;
of course a lot of Hobby Boss and Meng ar-
mor. There was a total restock of Tamiya
paints.
If they are stocking what is selling, it looks like inter-
est in aircraft and armor is decreasing while interest
in ships is increasing. I noticed that the Fangjia Mod-
el Shop has gone totally Gundam and Anime. I think
Xinshi Hobby is staying mostly out of the market seg-
ment.
So my big find this trip? I bought 24 bottles of Tami-
ya paint to round out my supply $1.59 each. I now
have almost all the colors in X and XF. I bought a
Hobby Boss 1/48 A-4F as a gift for a friend; $25.15.
Remember that all most all of our luggage was need-
ed to move my wife to the US.
Can someone explain global trade to me? Why does a
bottle of Tamiya paint cost $1.59 in China and $2.25
in the US?
Beijing Model Run
The Navigator—June 2018
17
Feature Story History of Alamo Squadron:
A New Beginning by Dick Montgomery
IPMS # 14003
I n previous editions of the Navigator the rise and
decline of SAMS (San Antonio Modelers Socie-
ty) was documented. SAMS was dissolved by
its remaining members in August, 1974 after
having been an impressive club populated by dedicat-
ed modelers and knowledgeable leaders. At some
point in 1973-1974 the club began to fail meeting the
interests and needs of the membership, and the mem-
bership failed to rise to the occasion, leaving the club
with no clear path forward. Club assets, as prescribed
in the SAMS documentation, were distributed to the
membership in an equitable fashion. The lights were
turned off and the door was closed.
For the next three years some former SAMS members
continued to communicate with one another, with oc-
casional visits with other modelers, and continued to
pursue their individual and mutual interests in model-
ing. In that same time period, IPMS-USA entered its
teen-age years and some of the former SAMS mem-
bers continued to participate in “organized” modeling
via their membership in IPMS.
By 1977 the environment for the establishment of a
new modeling club in San Antonio began to develop.
A handful of former SAMS members, and other mod-
elers who had come on the scene, outside of the
SAMS experience, began to feel that it was the right
time to test the waters, to discuss the possibility of or-
ganizing a new and different modeling club. The
groundwork was laid for a meeting to be held, with
the goal of establishing a modeling organization, and
on November 11, 1977, those present at this
“congress” laid out the basic structure and philosophy
of this new organization.
One of the primary features of this new club was that
it would be laid out following the guidelines of IPMS-
USA. This decision, above all other decisions about
the nature of the club, has never changed. The club
was born an IPMS chapter and has continued to enjoy
the benefits of IPMS affiliation since that time. No
records have been found and archived for these early
years of the club, specifically from November of 1977
through 1979, but some information has been found in
a publication that was published by some club mem-
bers and through discussions and interviews with
some of those members who remain in San Antonio
after all these years (41 years at the time of this writ-
ing).
The first question that most readers would ask is,
“When did the club adopt the name, Alamo Squad-
ron?” The answer is, unfortunately, rather vague. The
name, “Alamo Squadron” seems to have been adopted
by the club between November 1977 and 1979, at
which time documentation bears that specific title.
Credit for suggesting the title cannot be granted to any
specific person as memory fails and documentation (at
least at this time) does not exist. However, when
pressed, my first reaction would be to credit any of
three of the Founders, those persons being Bob Angel
Ros Creed, and Mike Derderian. But again, this is no
more than a vague notion that it was one of these three
gents.
Records indicate that there were no officers selected,
nor was there a regular meeting site at the time of the
initial meeting. Meetings were held at the homes of
various members through 1977 and through all or
most of 1978. By 1979, the club held regularly sched-
uled meetings at the Party Room at the London House
Apartments. And at some point, in 1978 Roscoe Creed
was elected as the President of Alamo Squadron. If
memory serves, he became the first President of Ala-
mo Squadron early in 1978 (the club was not formed
until November of 1977) and Roscoe remained in that
The Navigator—June 2018
18
Feature Story
office until August of 1980. No other officers have
been identified although I would be surprised to find
that there were not others, or at least a Vice-President.
In 1981 Tom Ward succeeded Roscoe as the club’s
President and remained in that office for one year.
Once again, no other officers can be identified in the
rather thin collection of publications or paperwork that
is currently included in the club archive.
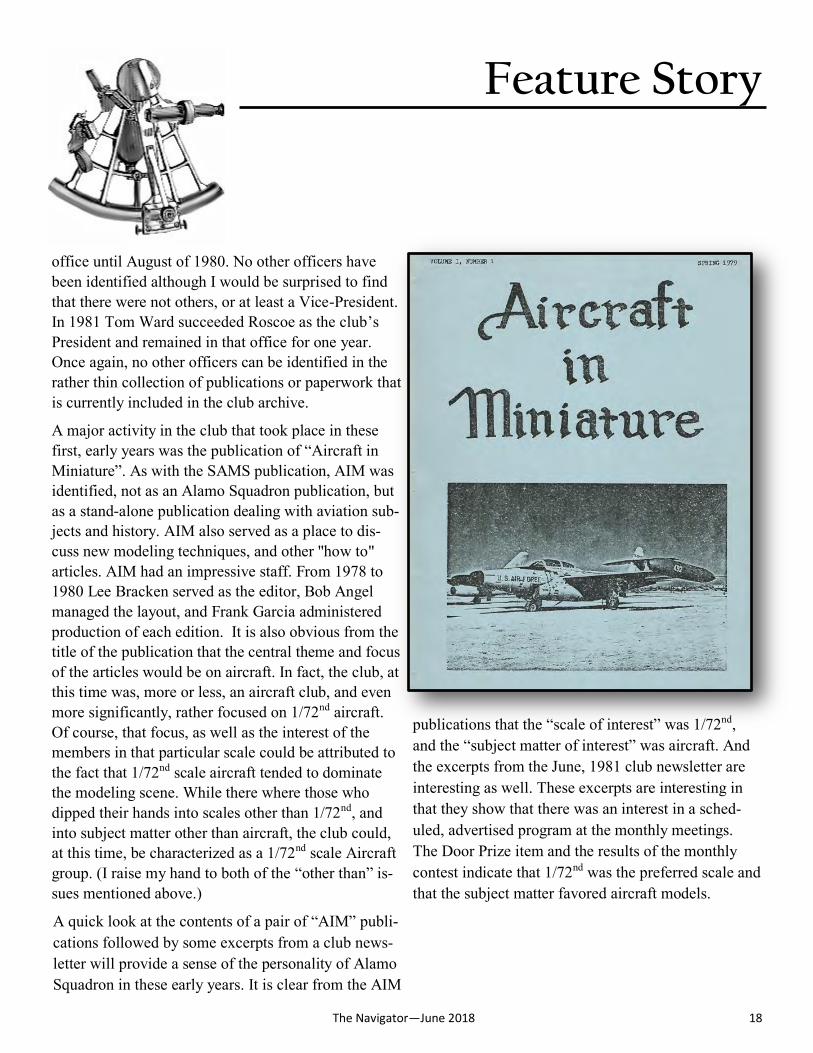
A major activity in the club that took place in these
first, early years was the publication of “Aircraft in
Miniature”. As with the SAMS publication, AIM was
identified, not as an Alamo Squadron publication, but
as a stand-alone publication dealing with aviation sub-
jects and history. AIM also served as a place to dis-
cuss new modeling techniques, and other "how to"
articles. AIM had an impressive staff. From 1978 to
1980 Lee Bracken served as the editor, Bob Angel
managed the layout, and Frank Garcia administered
production of each edition. It is also obvious from the
title of the publication that the central theme and focus
of the articles would be on aircraft. In fact, the club, at
this time was, more or less, an aircraft club, and even
more significantly, rather focused on 1/72nd aircraft.
Of course, that focus, as well as the interest of the
members in that particular scale could be attributed to
the fact that 1/72nd scale aircraft tended to dominate
the modeling scene. While there where those who
dipped their hands into scales other than 1/72nd, and
into subject matter other than aircraft, the club could,
at this time, be characterized as a 1/72nd scale Aircraft
group. (I raise my hand to both of the “other than” is-
sues mentioned above.)
A quick look at the contents of a pair of “AIM” publi-
cations followed by some excerpts from a club news-
letter will provide a sense of the personality of Alamo
Squadron in these early years. It is clear from the AIM
publications that the “scale of interest” was 1/72nd,
and the “subject matter of interest” was aircraft. And
the excerpts from the June, 1981 club newsletter are
interesting as well. These excerpts are interesting in
that they show that there was an interest in a sched-
uled, advertised program at the monthly meetings.
The Door Prize item and the results of the monthly
contest indicate that 1/72nd was the preferred scale and
that the subject matter favored aircraft models.
The Navigator—June 2018
19
Feature Story
A Review of the first issue of “Aircraft In Miniature”:
AIM - Volume 1, No. 1 Spring 1979 edited by Lee
Bracken, layout by Bob Angel, production by Frank
Garcia.
• The Spares Box- Kit Review by Bob An
gel featuring six 1/72nd scale aircraft.
• “The F-89 Scorpion” by Lee Bracken
• “The Dauntless Revisited” by Bob Angel
• AIM - Volume 1, No. 2 Summer 1979 edit-
ed by Lee Bracken, layout by Bob Angel,
production by Frank Garcia.
• Hawaiian Air Nat. Guard Markings by Lee
Bracken
• The Spares Box- Kit Review by Bob Angel
featuring twenty three 1/72nd scale air-
craft kits.
• “The F3H Demon” by Lee Bracken
• Late War Irvings by Bob Angel
• Texans (AT-6) at Luke by Bob Angel
From the club newsletter, June 21, 1981 ---Written by
Roscoe Creed, President June, 1981:
And finally, from the newsletter, there is a preview of an activity that has come to personify Alamo Squad-ron, that being the hosting of an annual model contest. Here’s that excerpt from the newsletter.
This excerpt is clearly an indication that the club, in June of ’81, was entertaining the idea of a large “super” contest, but that is a story for the next article in this “History of Alamo Squadron”.
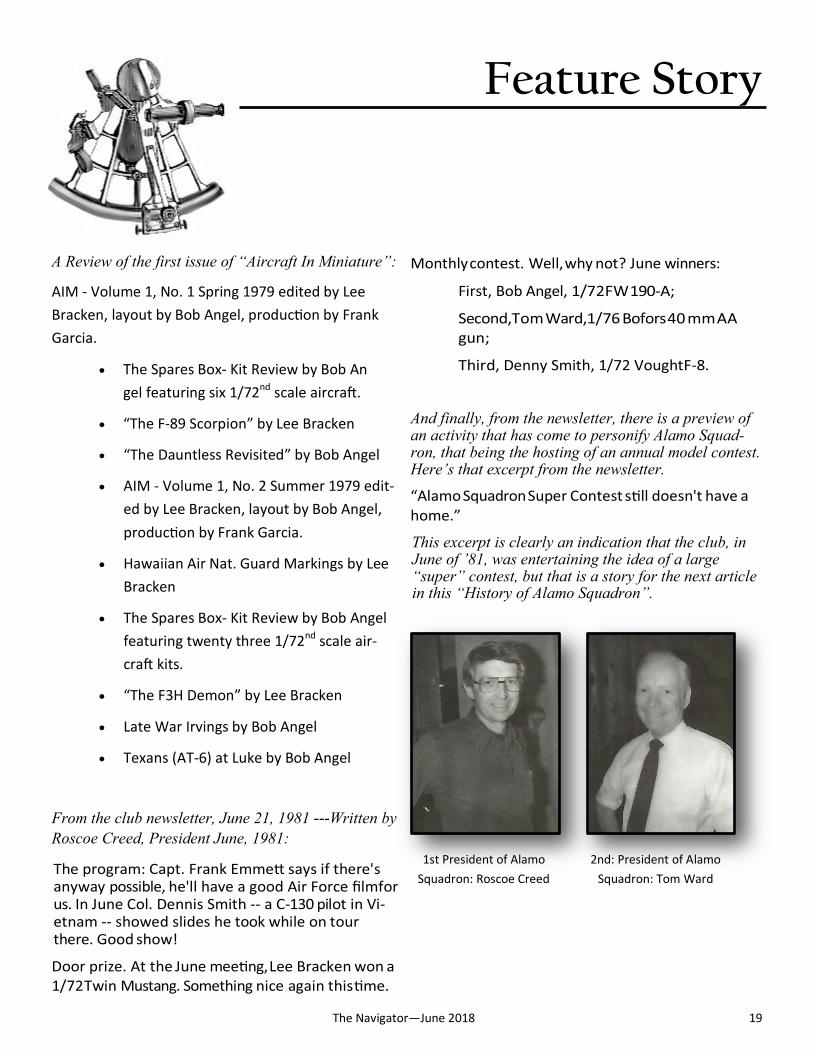
1st President of Alamo
Squadron: Roscoe Creed
2nd: President of Alamo
Squadron: Tom Ward
The Navigator—June 2018
20
Upcoming Events IPMS Region 6
Next Meeting: Thursday, June 7th, 2018 at 7:00PM
Location: Northside Ford of San Antonio
June 8, 2018
SoonerCon 2018
Council Road Baptist Church
7903 NW 30th
Bethany, OK, 73008
July 21, 2018
HAMS Annual Model Show & Contest
Cypress Creek Christian Community Center
6823 Cypresswood Drive, Spring, TX 77379
https://www.ipms-hams.org/annual-contest/
1-4 August, 2018
IPMS/USA National Convention
Phoenix Convention Center
100 N 3rd St, Phoenix, AZ 85004
http://www.ipmsusanationals2018.org
September 8, 2018
SuperCon
Bob Duncan Community Center 2800 S. Center St. Vandergriff Park, Arlington, TX
http://www.fortworthscalemodelers.org/SuperCon.html
The Navigator—June 2018
21
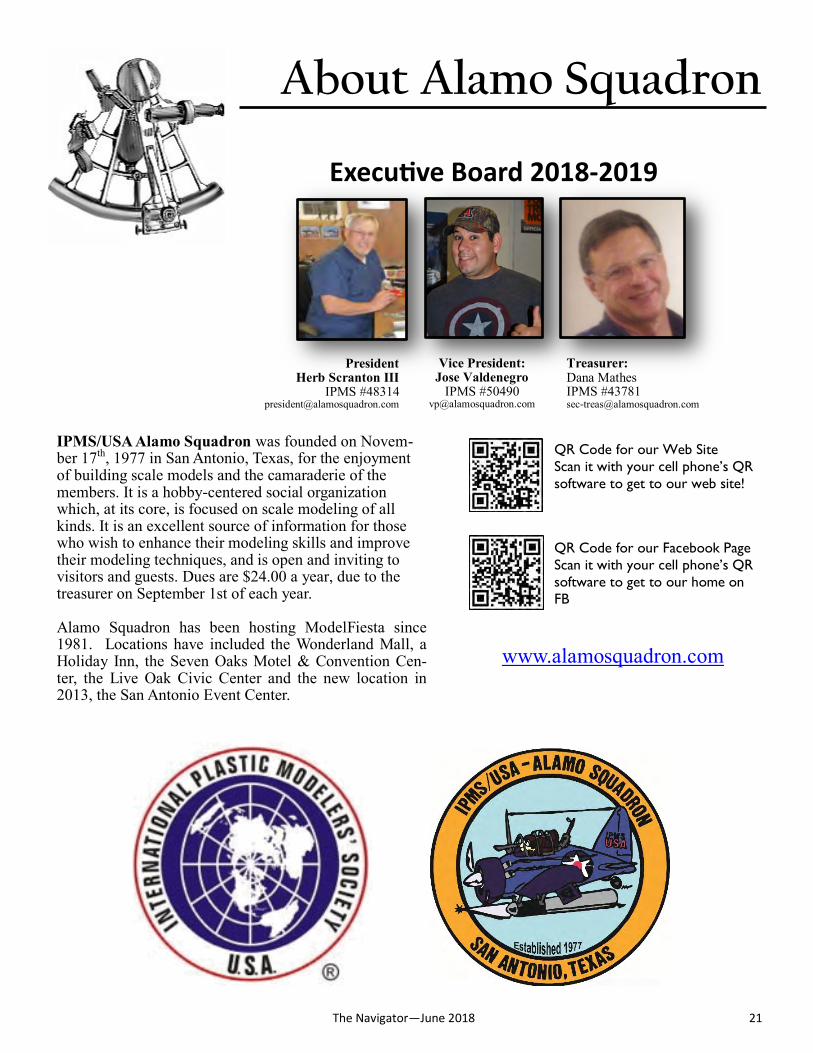
Vice President: Jose Valdenegro
IPMS #50490 [email protected]
President Herb Scranton III
IPMS #48314 [email protected]
Treasurer: Dana Mathes IPMS #43781 [email protected]
Executive Board 2018-2019
IPMS/USA Alamo Squadron was founded on Novem-ber 17th, 1977 in San Antonio, Texas, for the enjoyment of building scale models and the camaraderie of the members. It is a hobby-centered social organization which, at its core, is focused on scale modeling of all kinds. It is an excellent source of information for those who wish to enhance their modeling skills and improve their modeling techniques, and is open and inviting to visitors and guests. Dues are $24.00 a year, due to the treasurer on September 1st of each year. Alamo Squadron has been hosting ModelFiesta since 1981. Locations have included the Wonderland Mall, a Holiday Inn, the Seven Oaks Motel & Convention Cen-ter, the Live Oak Civic Center and the new location in 2013, the San Antonio Event Center.
QR Code for our Web Site
Scan it with your cell phone’s QR
software to get to our web site!
QR Code for our Facebook Page
Scan it with your cell phone’s QR
software to get to our home on
FB
About Alamo Squadron
www.alamosquadron.com

The Navigator—June 2018
22
https://www.hobbytown.com/san-antonio-tx/l108
http://www.ipmsusa.org/
https://www.hillcountryhobby.com
Email:[email protected]
Final Words ...
Alamo Squadron’s newsletter, “The Navigator”,
is published monthly by IPMS/USA Alamo
Squadron of San Antonio, for the enjoyment of the
members of Alamo Squadron and its friends
around the world. Articles, reviews, news items,
and other hobby-related contributions are very
welcome. Send text file, photos, and web sites as
well as feedback to our editor, Len Pilhofer: