tennis · pdf filetennis for beginners . 1. tennis: an introduction . h. ave you been struck...
TRANSCRIPT
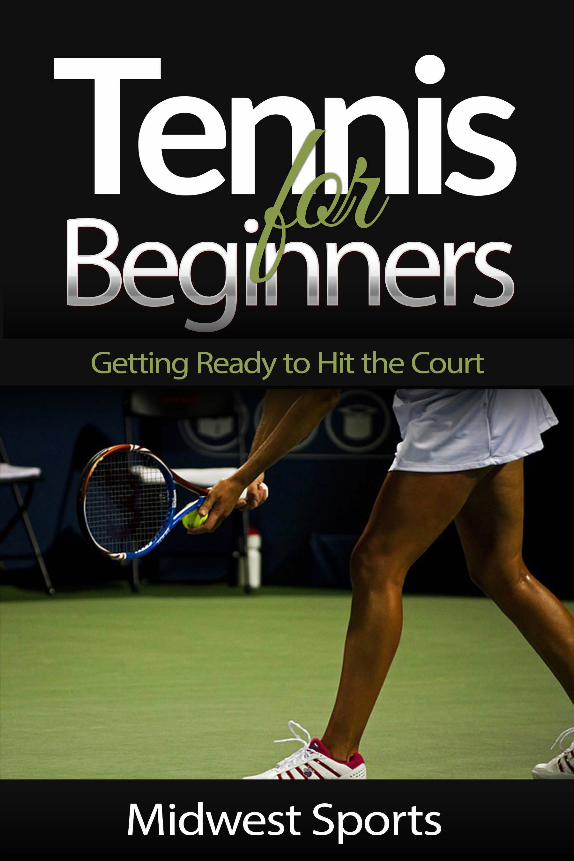
Tennis
for Beginners
Getting Ready to Hit the Court
Midwest Sports

i
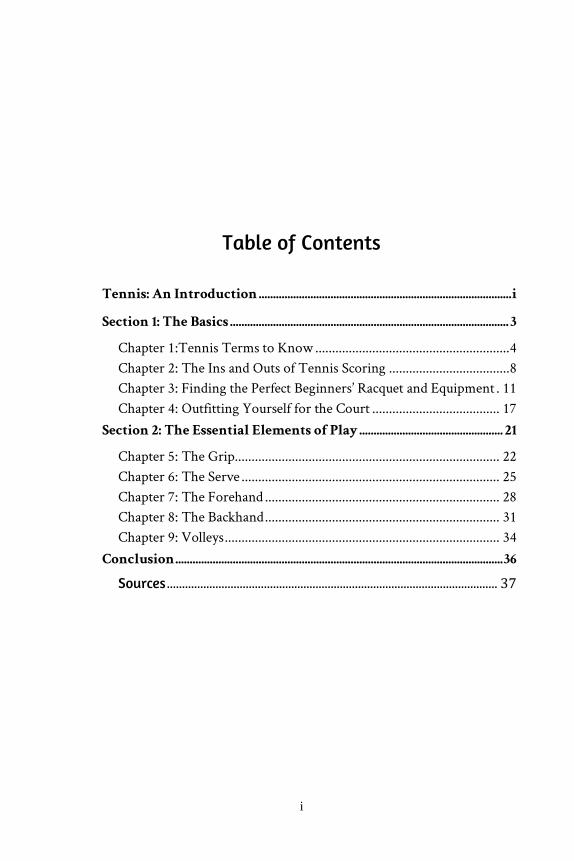
Table of Contents
Tennis: An Introduction ........................................................................................ i
Section 1: The Basics ................................................................................................. 3
Chapter 1:Tennis Terms to Know .......................................................... 4
Chapter 2: The Ins and Outs of Tennis Scoring .................................... 8
Chapter 3: Finding the Perfect Beginners’ Racquet and Equipment . 11
Chapter 4: Outfitting Yourself for the Court ...................................... 17
Section 2: The Essential Elements of Play .................................................. 21
Chapter 5: The Grip............................................................................... 22
Chapter 6: The Serve ............................................................................. 25
Chapter 7: The Forehand ...................................................................... 28
Chapter 8: The Backhand ...................................................................... 31
Chapter 9: Volleys .................................................................................. 34
Conclusion .................................................................................................................. 36
Sources ............................................................................................................. 37

ii
TENNIS FOR BEGINNERS
1
Tennis:
An Introduction
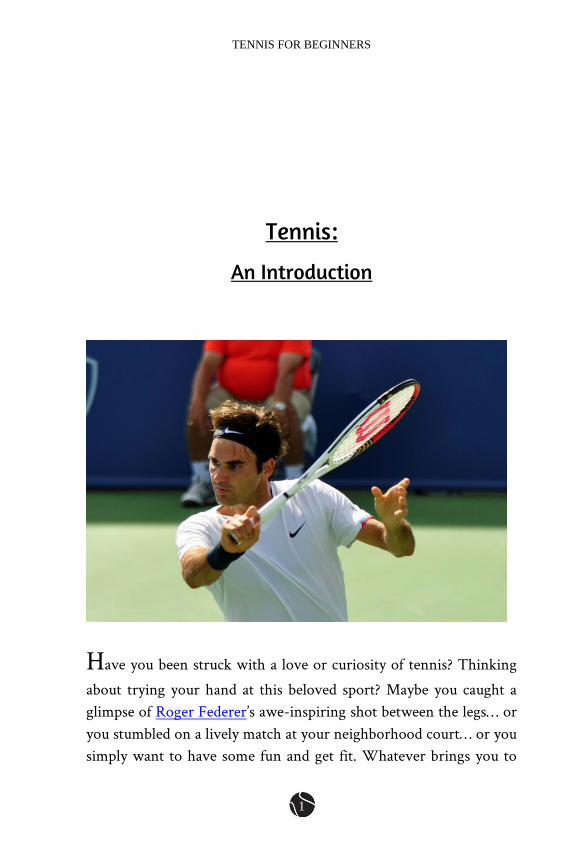
Have you been struck with a love or curiosity of tennis? Thinking
about trying your hand at this beloved sport? Maybe you caught a
glimpse of Roger Federer’s awe-inspiring shot between the legs… or
you stumbled on a lively match at your neighborhood court… or you
simply want to have some fun and get fit. Whatever brings you to
MIDWEST SPORTS
2
the court, there’s quite a bit of information and skills to learn as you
begin your tennis journey.
Before you shell out for expensive tennis lessons, let’s go over some
basics of the game, including important terms, scoring, rules,
equipment, and basic apparel. We’ll provide you with the ins and
outs of tennis racquets, tennis balls, tennis strings, tennis shoes, and
more. Then we’ll introduce you to the essential elements of how to
play tennis, from serves on the baseline to volleys at the net.
By the end, you’ll have a foundational understanding of the game and
be ready to find your way forward. Like with most sports, learning
how to play tennis is all about practice, practice, and more practice.
We can’t promise you’ll be the next Nadal or Sharapova, but
remember us if you happen to make it to the top!
TENNIS FOR BEGINNERS
3
Section 1:
The Basics
“The primary conception of tennis is to get the ball over the net and at the same time to keep it within bounds of the court; failing this, within the
borders of the neighborhood.” – Elliot Chaze
Beginner tennis players may be a bit flustered when confronted with
the rules and terms of tennis, but it’s not as complicated as it looks!
It’s a logical and sensible system that starts small with points and
progresses to games, sets, and finally the match. The scoring and
rules ingeniously ensure a victor for every match – there are no ties
in tennis. You can’t split a point, a game, or a set. This is the ultimate
sport for competitors who strive to be the best, and there’s always a
clear and decisive winner. Before we get into the details of scoring,
let’s go over some basic terms you’ll need to know.
MIDWEST SPORTS
4
Chapter 1 Tennis Terms to Know
The language of tennis is often befuddling. While there are many
theories exploring the emergence of confusing terms like “love” and a
scoring system that inexplicably jumps from zero to 15 to 30 to 40, at
the end of the day one simply has to shrug the shoulders and play. On
the plus side, many tennis terms are easier to remember due to their
uniqueness! As you continue reading, feel free to return to this
chapter if you stumble across an unfamiliar term.
Ace: a point won on a legal serve that is not touched by the opponent.
Advantage or ad: when a player scores a point after deuce (a score of
40-40), he or she is said to have the “advantage.” If this player earns a
point while holding the advantage, he or she wins the game. If he or
she does not earn a point, the score returns to deuce.
Alley: area of the court between the singles and doubles sidelines. In
singles play, the alley is out of bounds; in doubles play, it is in
bounds.
Backhand: a basic tennis shot that is swung around the body with the
back of the hand facing forward.
TENNIS FOR BEGINNERS
5
Baseline: the boundary line at the farthest back end of each side of the
court.
Crosscourt: hitting the tennis ball diagonally across the court to the
opponent.
Drop shot: a shot hit lightly (usually with backspin) to just go over the
net, catching opponents off guard.
Doubles: tennis played with a team of two players on each side of the
court.
Double fault: when a server hits two faults in a row and loses a point
Deuce: a 40-40 game score. Once the score reaches deuce, a player
must earn two consecutive points to win the game.
Fault: a serve that falls out of the proper area of play.
Foot fault: a fault during the serve resulting from a player stepping on
or over the baseline or across the center mark before striking the
tennis ball.
Forehand: a basic tennis shot that is swung with the front of the hand
facing forward toward the ball.
Grand Slam: A player wins the Grand Slam when he or she wins all
four major tournaments in a calendar year.
MIDWEST SPORTS
6
Grip: how a player holds the racquet. There are several different
grips, and players often change grips during a game depending on
the type of shot played.
Groundstroke: a shot – either backhand or forehand – that is hit after
the ball bounces once off the ground.
Head: the main stringed face of a tennis racquet.
Lob: a tennis shot that is hit high in the air with the intention of
either winning a point over an opponent who is up close to the net
or providing time to move into a better position.
Love: a score of zero. For example, a game score of 30-0 would be
called “thirty-love.”
Match point: when a player is one point away from winning the
match.
Overhead: a stroke that is hit when the ball is over one’s head. An
overhead shot is often strongly hit and is also known as a “smash.”
Passing shot: a tennis shot that is hit past an opponent who is at the
net, as opposed to a lob which is hit high in the air over the
opponent.
Point: a point is won when you or your opponent cannot return the
ball before it bounces twice. Other ways to earn a point:
You or your opponent hit the tennis ball into the net
You or your opponent serve two faults in a row (a double
fault)
You or your opponent hit the ball out of bounds
TENNIS FOR BEGINNERS
7
Rally: a sequence of back-and-forth shots between opponents.
Serve: the starting point shot of a game that is hit to the opponent
diagonally across the court into the “service box,” a square part of the
court marked by service lines and sidelines.
Spin: the way in which a ball rotates through the air. Spin can be
applied to a shot so that the ball’s bounce and trajectory are affected.
Sweet spot: the center spot on the head of the racquet that makes the
best contact with the ball.
Volley: a tennis shot that is hit before the ball bounces on the player’s
side of the court.
MIDWEST SPORTS
8
Chapter 2 The Ins and Outs of Tennis Scoring
Maybe you’ve stumbled
across a tennis match
while channel surfing
and been enamored with
the competitive back-
and-forth action. But to
truly appreciate the game
and all its drama, you need to understand how to keep score. The
tennis scoring system is designed to ensure a winner at the end of
each game, set, and match. If you win enough games, you’ll win sets,
and if you win enough sets, you win the match.
That easy! Let’s get more specific:
Game-Set-Match
A player must achieve at least 4 points to win a game
A player must win at least 6 games to win a set
A player must win no less than 2 sets (sometimes 3) to win a
match
TENNIS FOR BEGINNERS
9
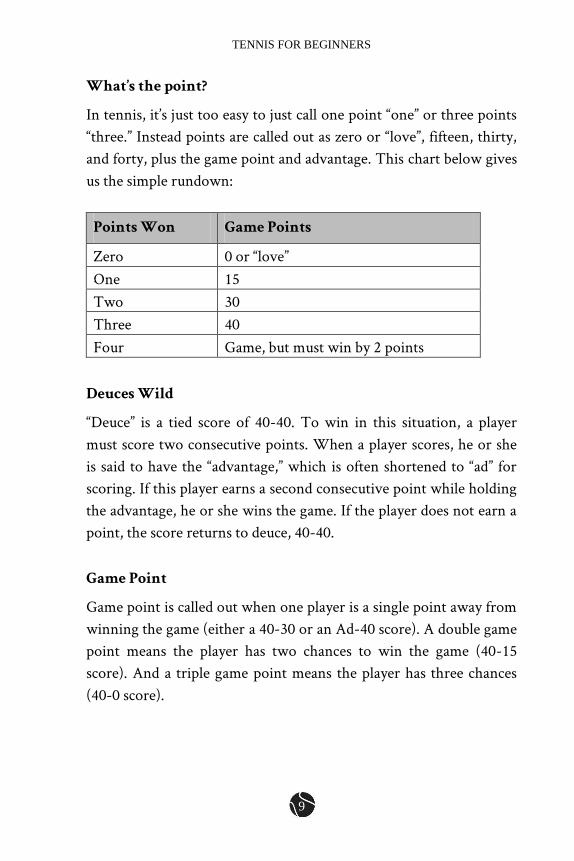
What’s the point?
In tennis, it’s just too easy to just call one point “one” or three points
“three.” Instead points are called out as zero or “love”, fifteen, thirty,
and forty, plus the game point and advantage. This chart below gives
us the simple rundown:
Points Won Game Points
Zero 0 or “love”
One 15
Two 30
Three 40
Four Game, but must win by 2 points
Deuces Wild
“Deuce” is a tied score of 40-40. To win in this situation, a player
must score two consecutive points. When a player scores, he or she
is said to have the “advantage,” which is often shortened to “ad” for
scoring. If this player earns a second consecutive point while holding
the advantage, he or she wins the game. If the player does not earn a
point, the score returns to deuce, 40-40.
Game Point
Game point is called out when one player is a single point away from
winning the game (either a 40-30 or an Ad-40 score). A double game
point means the player has two chances to win the game (40-15
score). And a triple game point means the player has three chances
(40-0 score).
MIDWEST SPORTS
10
Winning a Set
The scoring in sets functions much like the scoring in games, but on
a larger scale. A set is won when a player has won at least six games
and has a two-game advantage (just like a game requires a two-point
advantage). You can win a set with a score of 6-0, 6-1, 6-2, 6-3, or 6-
4. If a set is tied 5-5 and a player wins a game, the set will continue
until one player achieves a two-game advantage (such as 7-5, 9-7,
etc.). In many playing formats though, if the set score reaches 6-6 a
tiebreak will be played.
Tiebreak
In order to keep a match within reasonable time constraints a
tiebreak game is played once the game score reaches 6-6. In a
tiebreak, players play single points alternating serves 2 points at a
time. The first player to 7 points (winning by 2) wins the tiebreak
game and hence the set.
Winning a Match
Last but certainly not least we come to the match. Match scoring is
set up with odd numbers to ensure a winner. Most competitive
matches are won by winning two sets out of three. In the men’s
Grand Slam tournaments, players must win three out of five sets to
claim match victory. At its simplest: whichever player wins the
majority of sets in a match is the ultimate victor.
TENNIS FOR BEGINNERS
11
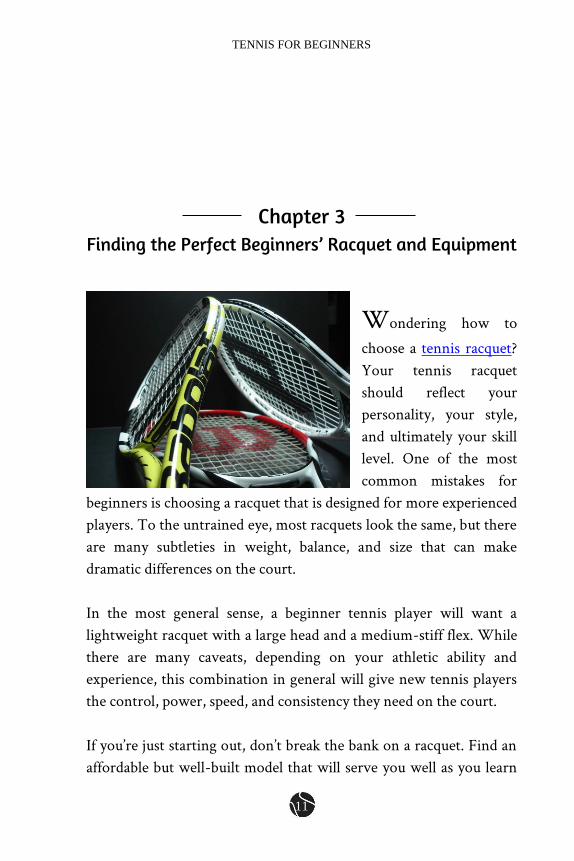
Chapter 3 Finding the Perfect Beginners’ Racquet and Equipment
Wondering how to
choose a tennis racquet?
Your tennis racquet
should reflect your
personality, your style,
and ultimately your skill
level. One of the most
common mistakes for
beginners is choosing a racquet that is designed for more experienced
players. To the untrained eye, most racquets look the same, but there
are many subtleties in weight, balance, and size that can make
dramatic differences on the court.
In the most general sense, a beginner tennis player will want a
lightweight racquet with a large head and a medium-stiff flex. While
there are many caveats, depending on your athletic ability and
experience, this combination in general will give new tennis players
the control, power, speed, and consistency they need on the court.
If you’re just starting out, don’t break the bank on a racquet. Find an
affordable but well-built model that will serve you well as you learn
MIDWEST SPORTS
12
the basic movements of the game. A more expensive racquet won’t
make you any better a player if you’ve failed to master the
fundamentals.
But just because you wont be dropping half of your next paycheck on
the latest racquet technology, doesn’t mean you can’t find the perfect,
well-designed starter racquet. Let’s discuss how to choose a tennis
racquet, starting with the different types of racquet materials on the
market today.
Racquet Materials
Aluminum
An aluminum tennis racquet is a great affordable option for
beginners who are simply looking to get on the court and hit the ball
around. Aluminum racquets aren’t particularly lightweight or
durable, but will serve new players well without requiring big
dollars. A fair amount of feel allows players to get a sense of where
the ball is moving off the racquet. Many junior racquets are made
from aluminum for cost purposes.
Graphite
If you’re planning to invest a bit in the game, take lessons, or join a
team, you’ll want to choose graphite, which is less affordable but
lighter, longer lasting, and a higher quality than aluminum.
Titanium
Beginners tread with caution! Titanium is a space-age fiber that is
extremely light and stiff. When used in conjunction with graphite, a
lightweight, powerful combination can be achieved. This stiffness
can wreak havoc on your arm and shoulder if proper technique is not
TENNIS FOR BEGINNERS
13
employed. Players who are prone to injury should avoid titanium
racquets.
Weight & Balance
Beginners should look for a medium-weight racquet between 9 and
10 ounces. Lighter racquets provide more maneuverability but cause
more shock to transfer to your arm and shoulder. If you choose a
racquet that is too heavy you’ll have trouble with control and feel. It’s
best to start with a medium weight until you have more experience
and a better sense of your game.
You should also be mindful of balance, which refers to the
distribution of weight throughout the racquet. Racquets with greater
weight toward the handle end are referred to as “head light” while
those with more weight toward the head are referred to as – you
guessed it: “head heavy.” You’ll also find racquets that are evenly
balanced.
Head
The head size is an important element for beginners. The smaller the
head, the more control you will have, but beginners will appreciate
the margin for error and bigger sweet spot provided by a larger head;
around 100-115 square inches would be your best bet. This larger
surface area allows for greater power and fewer missed hits.
Professionals tend to use mid-sized heads ranging from 85 to 100
square inches.
Grip size
When we refer to grip size, we mean the circumference of the
handle. For women, you’ll be anywhere between 4 1/8” and 4 3/8” –
men between 4 3/8” and 4 5/8”. It’s really all about comfort when it

MIDWEST SPORTS
14
comes to the grip. It’s always better to err on the smaller side as can
always add more diameter later on with grip tape. A simple way to
find your grip size involves just a ruler and your playing hand:
Hold your playing hand out flat and look at the three main
creases in your palm.
Locate the middle crease and use a ruler to measure from
this crease up the line between your middle finger and ring
finger to the point equal to the top of your ring finger.
Length
More racquet length can give you more power, but this comes at the
expense of control. If you’re just starting out, go for a standard length
of 27 inches.
Junior Racquets
There are plenty of smaller racquet options for young beginners.
Babolat, Head, Wilson, and many other top manufacturers offer
shorter-length racquets ranging from 19 to 26 inches, allowing kids
between the ages of 4 and 12 to take to the court with the same
quality enjoyed by adults. These racquets also feature smaller grip
sizes 4 inches and under to accommodate smaller hands. Below is a
helpful chart to help determine the correct racquet length for a
younger player.
Age Height Racquet Length
Up to 5 years old 35-44 inches 19 inches
5 to 7 years old 40-48 inches 21 inches
7 to 9 years old 44-50 inches 23 inches
9 to 10 years old 50-60 inches 25 inches
10 to 12 years old 55+ inches 26+ inches
TENNIS FOR BEGINNERS
15
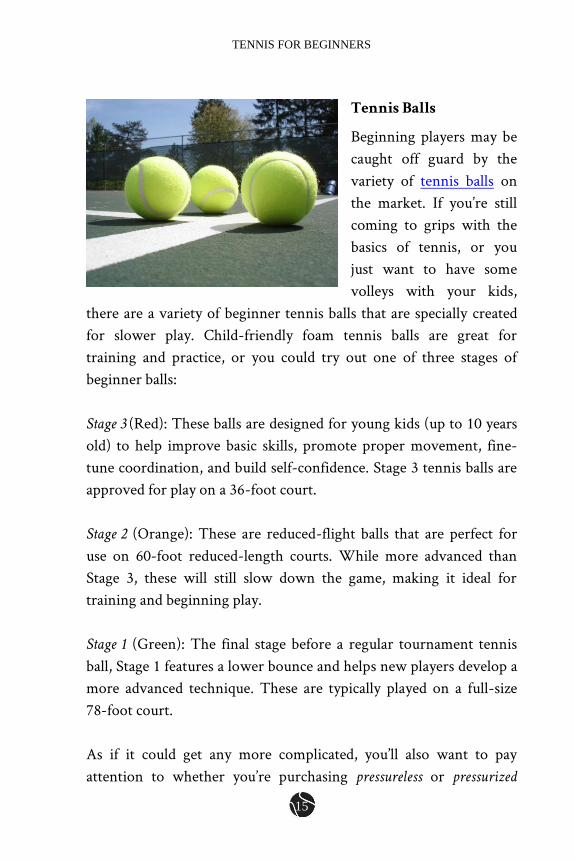
Tennis Balls
Beginning players may be
caught off guard by the
variety of tennis balls on
the market. If you’re still
coming to grips with the
basics of tennis, or you
just want to have some
volleys with your kids,
there are a variety of beginner tennis balls that are specially created
for slower play. Child-friendly foam tennis balls are great for
training and practice, or you could try out one of three stages of
beginner balls:
Stage 3 (Red): These balls are designed for young kids (up to 10 years
old) to help improve basic skills, promote proper movement, fine-
tune coordination, and build self-confidence. Stage 3 tennis balls are
approved for play on a 36-foot court.
Stage 2 (Orange): These are reduced-flight balls that are perfect for
use on 60-foot reduced-length courts. While more advanced than
Stage 3, these will still slow down the game, making it ideal for
training and beginning play.
Stage 1 (Green): The final stage before a regular tournament tennis
ball, Stage 1 features a lower bounce and helps new players develop a
more advanced technique. These are typically played on a full-size
78-foot court.
As if it could get any more complicated, you’ll also want to pay
attention to whether you’re purchasing pressureless or pressurized
MIDWEST SPORTS
16
tennis balls. Pressureless balls are often used by beginners for practice
or recreational play. Their bounce is produced from a rubber shell
rather than from inside air. As a result, pressureless tennis balls don’t
lose bounce like standard pressurized balls – bounce actually increases
over time as the ball’s felt wears down.
On the other side of the court you have pressurized balls, which are
more common and used for tournament tennis. Internal air pressure
is used to give greater bounce, spin, and speed right out of the can.
Unfortunately this fresh feel fades over time. One study found that
most pressurized tour tennis balls have a lifespan of just two weeks,
and many are used for only a single match.
If you’re just getting started, pressureless balls are perfectly fine, and
even ideal for practice. But if you’re looking for the feel and
playability of a true tennis ball, be sure to try out pressurized balls as
well.
Regular Duty vs. Extra Duty
One other bit of information before we move on: when it comes to
choosing the right tennis ball, the type of court you play on matters.
If you happen to play on clay or indoor courts, regular duty tennis
balls are ideal. These have a thinner layer of outer felt that is
designed to reduce the absorption of clay on impact. If instead you
practice or play on hard courts, you’ll want extra duty balls. Extra
duty felt will last longer on demanding hard courts and grass
surfaces.
TENNIS FOR BEGINNERS
17
Chapter 4 Outfitting Yourself for the Court
As a beginner, don’t feel the need to don an entire new wardrobe of
tennis apparel. It may be fun to look the part, but hitting the court in
an expensive tennis outfit won’t help you master the fundamentals.
Only practice, practice, and more practice will have you looking like
a pro.
Despite this truth, a racquet isn’t the only thing you need to prepare
yourself for success on the court. A solid pair of tennis shoes will go a
long way toward helping improve your footwork and coordination.
And while not a necessity, lightweight, high-quality apparel is a great
way to stay cool and nimble through hours of practice and play. In
this chapter, we’ll go over everything you need to know about tennis
shoes, apparel, and accessories.
Tennis Shoes
Maybe you’re thinking, “Why would I need special shoes for tennis?”
But you’ll want to think twice before throwing on your old beat up
pair of running shoes before you hit the court. Tennis is a physical
game, and your feet tend to bear the brunt of the abuse.
MIDWEST SPORTS
18
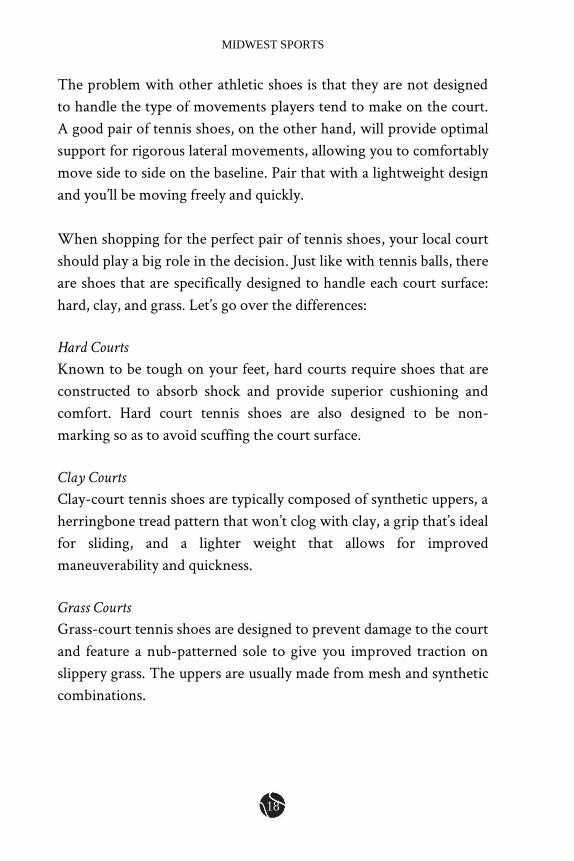
The problem with other athletic shoes is that they are not designed
to handle the type of movements players tend to make on the court.
A good pair of tennis shoes, on the other hand, will provide optimal
support for rigorous lateral movements, allowing you to comfortably
move side to side on the baseline. Pair that with a lightweight design
and you’ll be moving freely and quickly.
When shopping for the perfect pair of tennis shoes, your local court
should play a big role in the decision. Just like with tennis balls, there
are shoes that are specifically designed to handle each court surface:
hard, clay, and grass. Let’s go over the differences:
Hard Courts
Known to be tough on your feet, hard courts require shoes that are
constructed to absorb shock and provide superior cushioning and
comfort. Hard court tennis shoes are also designed to be non-
marking so as to avoid scuffing the court surface.
Clay Courts
Clay-court tennis shoes are typically composed of synthetic uppers, a
herringbone tread pattern that won’t clog with clay, a grip that’s ideal
for sliding, and a lighter weight that allows for improved
maneuverability and quickness.
Grass Courts
Grass-court tennis shoes are designed to prevent damage to the court
and feature a nub-patterned sole to give you improved traction on
slippery grass. The uppers are usually made from mesh and synthetic
combinations.
TENNIS FOR BEGINNERS
19
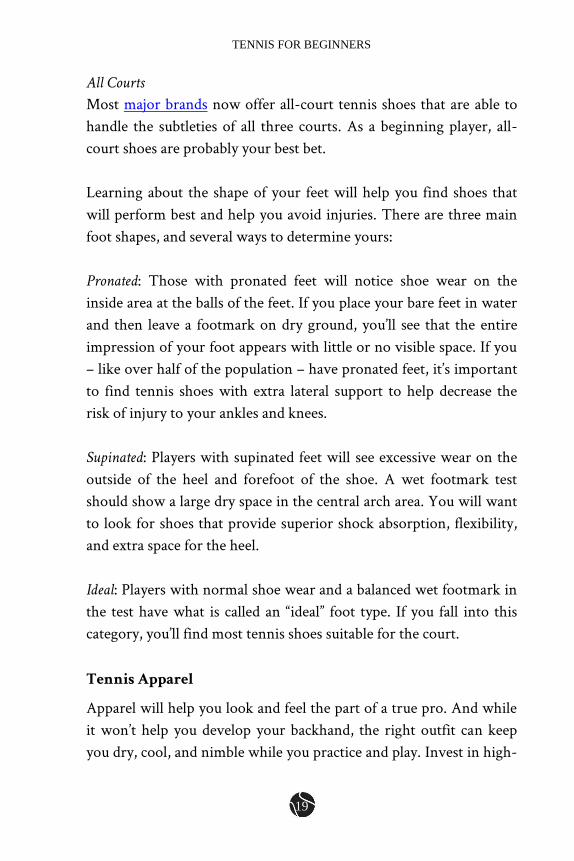
All Courts
Most major brands now offer all-court tennis shoes that are able to
handle the subtleties of all three courts. As a beginning player, all-
court shoes are probably your best bet.
Learning about the shape of your feet will help you find shoes that
will perform best and help you avoid injuries. There are three main
foot shapes, and several ways to determine yours:
Pronated: Those with pronated feet will notice shoe wear on the
inside area at the balls of the feet. If you place your bare feet in water
and then leave a footmark on dry ground, you’ll see that the entire
impression of your foot appears with little or no visible space. If you
– like over half of the population – have pronated feet, it’s important
to find tennis shoes with extra lateral support to help decrease the
risk of injury to your ankles and knees.
Supinated: Players with supinated feet will see excessive wear on the
outside of the heel and forefoot of the shoe. A wet footmark test
should show a large dry space in the central arch area. You will want
to look for shoes that provide superior shock absorption, flexibility,
and extra space for the heel.
Ideal: Players with normal shoe wear and a balanced wet footmark in
the test have what is called an “ideal” foot type. If you fall into this
category, you’ll find most tennis shoes suitable for the court.
Tennis Apparel
Apparel will help you look and feel the part of a true pro. And while
it won’t help you develop your backhand, the right outfit can keep
you dry, cool, and nimble while you practice and play. Invest in high-
MIDWEST SPORTS
20
quality shirts, shorts, dresses, hats, and headbands that are
comfortable, practical, and stylish.
Shirts and shorts made with 100% cotton should be avoided, as they
tend to retain sweat and slow you down. Many brands, like Nike and
adidas, utilize special lightweight fabrics and materials that are
designed to keep the sweat away from your body and out of your
eyes – and don’t doubt it, there will be sweat! Stocking up on a few of
these specialty shirts, dresses, or headbands is just one more
advantage you can take to the court.
In the end you’ll want to try and find the best combination of
comfort, performance, and style – and there’s plenty out there to
choose from. Every season you’ll find new collections from top
brands featuring the latest fashions and high-tech designs.
TENNIS FOR BEGINNERS
21
Section 2:
The Essential Elements of Play
“The depressing thing about tennis is that no matter how good I get, I’ll
never be as good as a wall.” – Mitch Hedberg
Now that you’ve got your racquet, equipment, and apparel, you’re
ready to try your hand at the basic elements of play. In this section,
we’ll cover some tennis essentials that will help get you started.
MIDWEST SPORTS
22
#1
#2
#3
#4
#5
#8
#7
#6
#1
#8
#7
#6
#5
#2
#3
#4
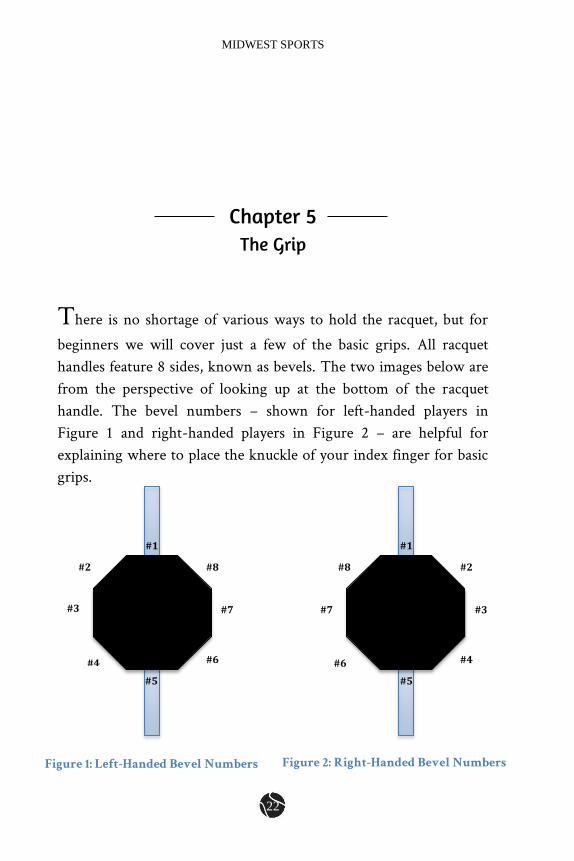
Chapter 5 The Grip
There is no shortage of various ways to hold the racquet, but for
beginners we will cover just a few of the basic grips. All racquet
handles feature 8 sides, known as bevels. The two images below are
from the perspective of looking up at the bottom of the racquet
handle. The bevel numbers – shown for left-handed players in
Figure 1 and right-handed players in Figure 2 – are helpful for
explaining where to place the knuckle of your index finger for basic
grips.
Figure 1: Left-Handed Bevel Numbers Figure 2: Right-Handed Bevel Numbers

TENNIS FOR BEGINNERS
23
Continental
Also known as the Hammer or Chopper grip. This important basic
grip is perfect for many types of shots, and is a good starting point
for beginners. Simply place the big knuckle of your index finger over
bevel #2, which should feel like you’re holding a hammer or axe.
Make sure your hand is spread out across the grip with your
knuckles at about a 45-degree angle to the handle. This is an easy,
natural grip that can be used while beginners learn the fundamentals
of tennis. And while it may not give you pro-level topspin, the
Continental Grip is still utilized by professionals for serving,
volleying, overhead shots, and slicing. Its versatility makes it a great
place to start.
Eastern Forehand
One of the more basic forehand grips, the Eastern Forehand is
achieved by placing the index finger’s base knuckle on bevel #3. It’s
referred to as the “hand shake” grip, as you are essentially shaking
hands with the racquet. Players also appreciate how the Eastern
Forehand grip can easily be slid up to the Continental grip for volleys
and serves, and most players – including Roger Federer – utilize the
Eastern Forehand grip for their forehand groundstroke.
Semi-Western Forehand
One of the most popular grips on the tour, the Semi-Western
Forehand grip is accomplished by placing the base knuckle of your
index finger on bevel #4. This grip is used to add topspin and power,
as your hand more or less rests under the racquet, encouraging
upward movement on the swing. This one might prove difficult for
players just starting out.
Eastern Backhand
MIDWEST SPORTS
24
This popular backhand grip is achieved by placing the index finger
base knuckle directly on top of bevel #1. Players should have their
knuckles straight the handle, as if showing a fist toward the
oncoming ball.
Double-Handed Backhand
The basic two-handed backhand grip starts with holding the racquet
in a Continental grip (bevel #2), and then placing your left hand (or
right, if you’re left handed) on top in an Eastern Forehand grip
(bevel #6).
When you’re just starting out learning the basics, don’t worry too
much about switching between grips. Stick with the basic
Continental Grip until you feel more comfortable with the basic
movements of the game – the rest will come later!
TENNIS FOR BEGINNERS
25
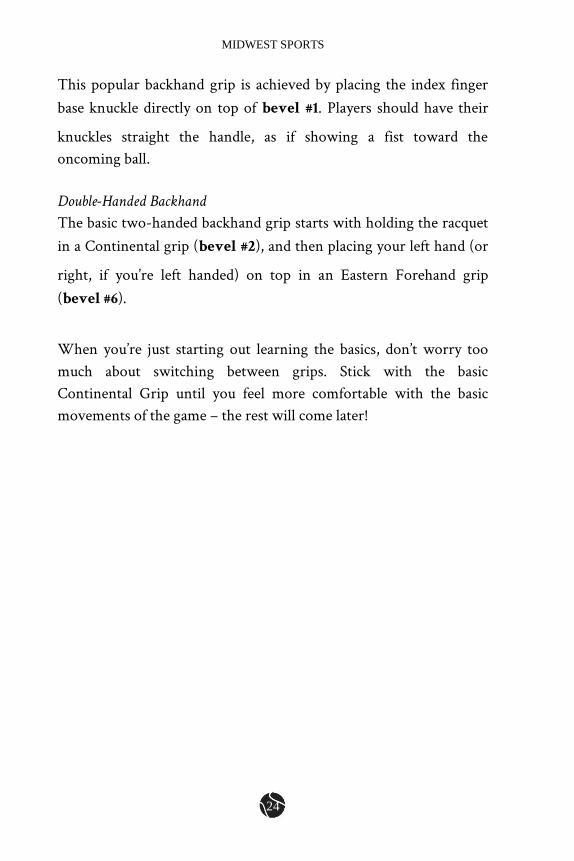
Chapter 6 The Serve
The serve is, of course, what starts it
all off. It’s the first shot in a point, and
is hit with control and precision by
pro players at mind-boggling speeds.
It is one of the most difficult shots to
learn, and requires hours and hours of
practice. Here we’ll briefly cover the
rules of a serve, outline the basic form,
and lay the groundwork for future
skill building.
The Rules
A player will serve to the alternate side of the baseline into the cross-
court service box. At no point can the server’s foot move in front of
the baseline on the court prior to touching the ball with the racquet.
If you fail to land the ball in play the first time, you can try again. But
if you fail two times in a row, it is considered a double fault and the
point is lost. A “let” is called when the ball touches the net and lands
in play.
Play is stopped right away, and you’re allowed another try.
MIDWEST SPORTS
26
The Form
Ensure you are standing behind the baseline, close to the center
mark, on the opposite side to which you are serving. Stand sideways,
pointing your left foot toward the opposite post and your right foot
straight ahead, parallel with the baseline.
As mentioned earlier, players most commonly use The Continental
grip when serving. Be sure to not grip too tightly either, as a looser
grip will actually provide more power and allow for a smoother
form. Similarly, be sure to keep a light grip on the tennis ball at your
fingertips. The actual movement of the serve has several steps:
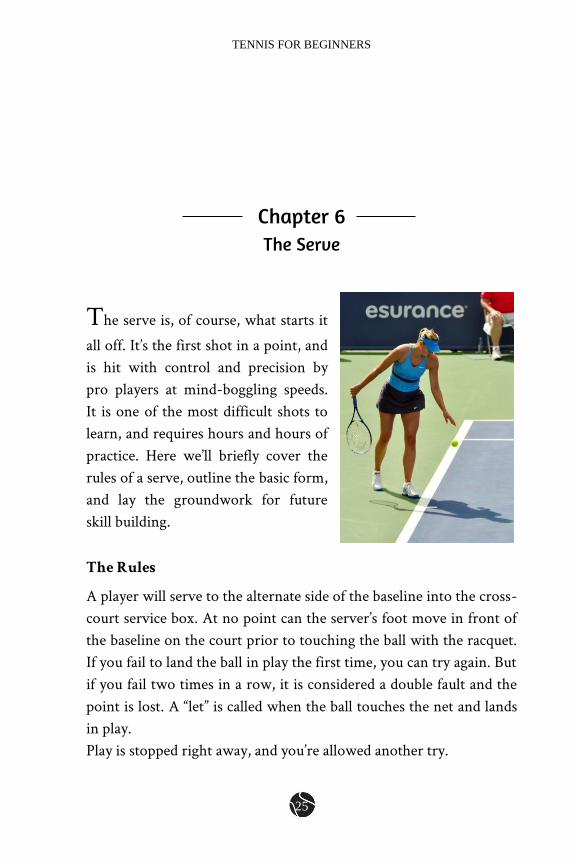
1. Toss the ball high up into the air slightly in front of you.
“Toss” may be a bit misleading, as you should really be letting go of
the ball at the top of your reach. The higher you can reach before
letting go, the less time the ball is left alone in the air at the mercy of
wind and gravity. Release the ball at the very least over your head,
and even higher if possible.
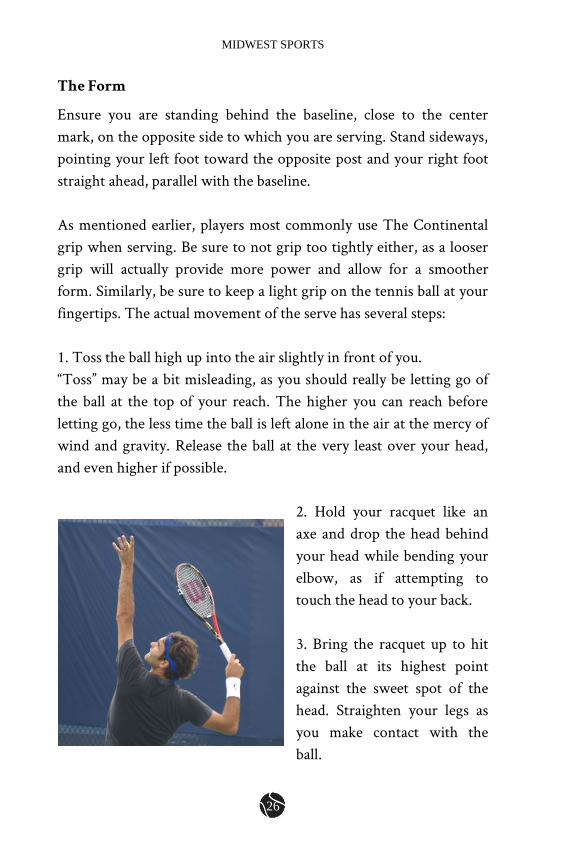
2. Hold your racquet like an
axe and drop the head behind
your head while bending your
elbow, as if attempting to
touch the head to your back.
3. Bring the racquet up to hit
the ball at its highest point
against the sweet spot of the
head. Straighten your legs as
you make contact with the
ball.

TENNIS FOR BEGINNERS
27
4. After hitting the ball, follow through the swing by brining the
racquet down toward your opposite foot.
5. Fall forward into the court after you’ve swung, but don’t cross the
baseline with your feet before making contact with the ball.
Some more tennis serve tips:
Keep your eyes on the ball. After you’ve served you’ll need to
get yourself into an ideal position to play your opponent’s
return. The best way to do this is to watch how the ball
moves coming off the head of your racquet and landing on
the opposite side of the court.
Transfer your weight from your back leg to your front leg. A
powerful serve is not all about arm strength. It’s important to
load weight on your back leg as you toss the ball in the air so
as to spring forward, transferring it to the front leg on the
follow through.
Having trouble with the Continental? Use an Eastern Forehand
Grip. Some beginners may find it easier to try the Eastern
Forehand grip while serving. This usually results in a flatter
serve (no topspin), but as a novice, spin is not a huge priority
before learning the fundamentals.
Don’t snap your wrist. A common mistake for beginners,
snapping your wrist will throw off your serve and could lead
to arm injury.
MIDWEST SPORTS
28
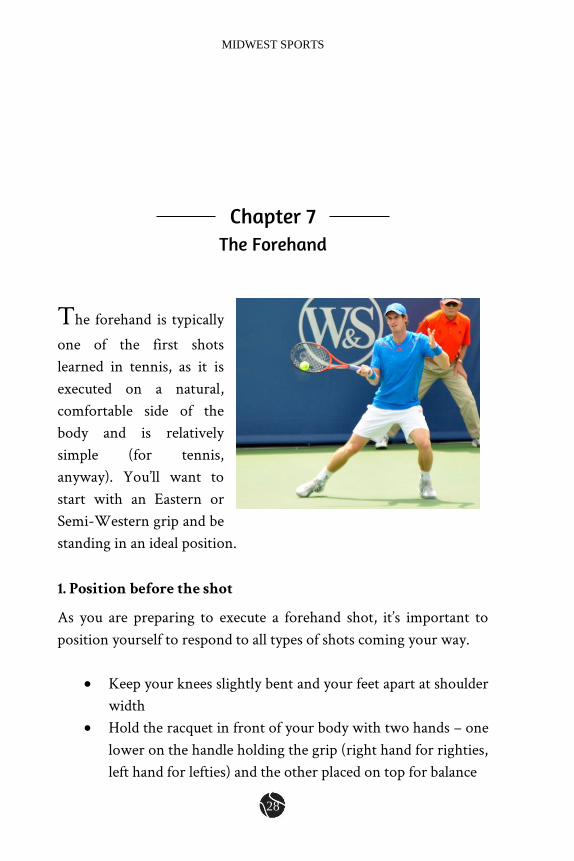
Chapter 7 The Forehand
The forehand is typically
one of the first shots
learned in tennis, as it is
executed on a natural,
comfortable side of the
body and is relatively
simple (for tennis,
anyway). You’ll want to
start with an Eastern or
Semi-Western grip and be
standing in an ideal position.
1. Position before the shot
As you are preparing to execute a forehand shot, it’s important to
position yourself to respond to all types of shots coming your way.
Keep your knees slightly bent and your feet apart at shoulder
width
Hold the racquet in front of your body with two hands – one
lower on the handle holding the grip (right hand for righties,
left hand for lefties) and the other placed on top for balance
TENNIS FOR BEGINNERS
29
Pivot with your outside foot and turn shoulders parallel to
the net
Lean forward slightly on the pads of your feet
2. Prepare to strike the ball
Move into position, preparing to hit the ball when it’s a
comfortable reach away. You don’t want to fully extend your
arm, but hit the ball when it is near your front hip
Shift your weight to the back leg
Extend your racquet arm back while keeping your non-
hitting hand parallel to the ground for improved balance
3. Strike the ball
Avoid rotating the racquet and be sure to keep a secure grip
on the handle
Ensure the racquet is straight and the face open
Angle your swing from low to high, and facilitate this
movement through bending your knees, shoulder, and
elbows
Push off the ground
Rotate your upper body as you swing
Stretch your non-racquet arm across the body to the sideline
4. Follow Through
Extend your follow through, moving the racquet smoothly
across you body toward the direction the ball is traveling
Helps maintain your balance and produce spin
As you’ll hear us say again and again, learning even the most basic
shots in tennis comes down to practice. It’s nearly impossible to
think about every step in the swing process as you are playing, but if

MIDWEST SPORTS
30
you isolate each mechanism during practice and drill it into muscle
memory, you’ll find it becoming quite fluid and natural over time.
TENNIS FOR BEGINNERS
31
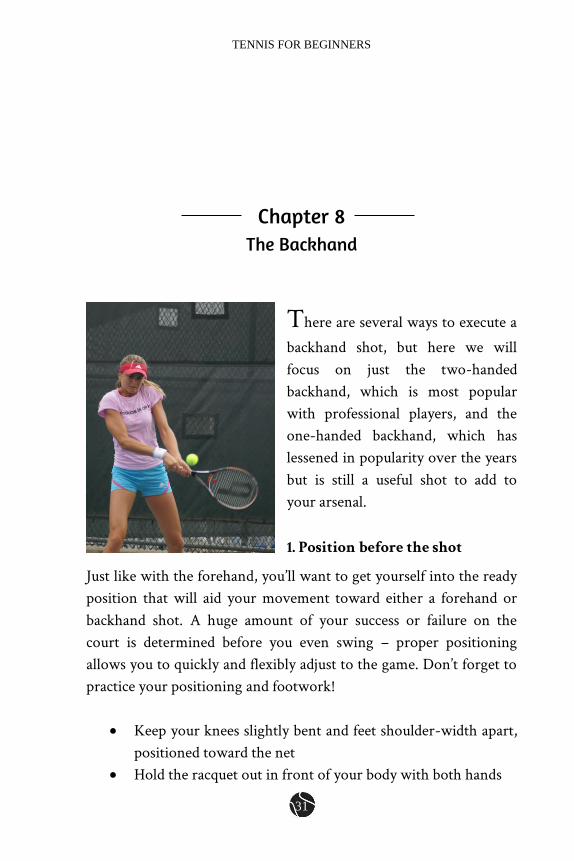
Chapter 8 The Backhand
There are several ways to execute a
backhand shot, but here we will
focus on just the two-handed
backhand, which is most popular
with professional players, and the
one-handed backhand, which has
lessened in popularity over the years
but is still a useful shot to add to
your arsenal.
1. Position before the shot
Just like with the forehand, you’ll want to get yourself into the ready
position that will aid your movement toward either a forehand or
backhand shot. A huge amount of your success or failure on the
court is determined before you even swing – proper positioning
allows you to quickly and flexibly adjust to the game. Don’t forget to
practice your positioning and footwork!
Keep your knees slightly bent and feet shoulder-width apart,
positioned toward the net
Hold the racquet out in front of your body with both hands
MIDWEST SPORTS
32
Two-handed backhand: players should utilize a
Continental grip with their dominant hand (right for
righties, left for lefties) and a Semi-Western or Eastern
Forehand grip for the non-dominant hand on top.
One-handed backhand: players should utilize the Eastern
Backhand grip
Step forward with your right foot (opposite for left-handers)
and pivot on your left, turning your shoulders parallel to the
net
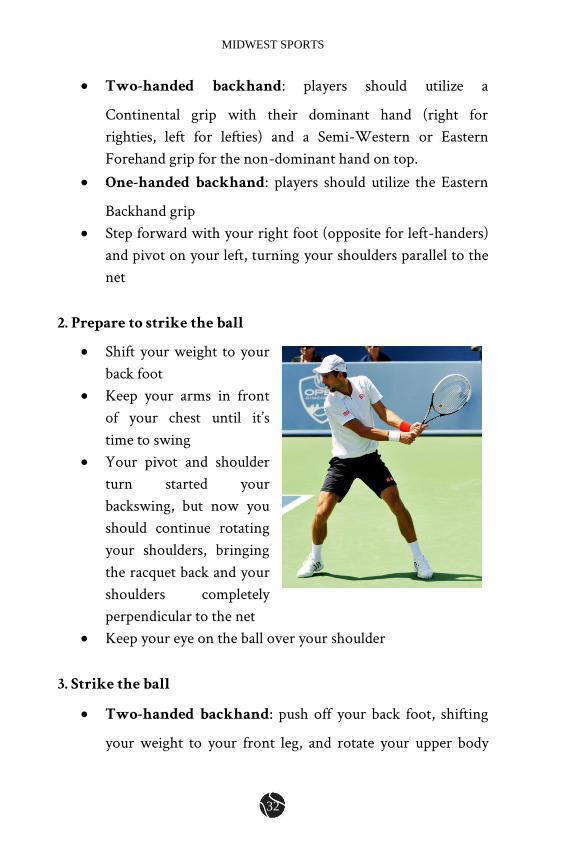
2. Prepare to strike the ball
Shift your weight to your
back foot
Keep your arms in front
of your chest until it’s
time to swing
Your pivot and shoulder
turn started your
backswing, but now you
should continue rotating
your shoulders, bringing
the racquet back and your
shoulders completely
perpendicular to the net
Keep your eye on the ball over your shoulder
3. Strike the ball
Two-handed backhand: push off your back foot, shifting
your weight to your front leg, and rotate your upper body
TENNIS FOR BEGINNERS
33
toward the ball, dropping the racquet down through the
swing zone about a foot below the ball
One-handed backhand: step forward with your front foot
and drop your racquet while straightening your swinging
racquet arm. Keep your non-hitting hand on the racquet
handle until your hitting arm is straightened just before
contact
Make contact with the ball waist high just out in front of
your body
4. Follow Through
Two-handed backhand: Extend a relaxed follow through
in the direction you are hitting the ball and continue rotating
your upper body. Bend your elbows and bring the racquet
across your body and over your shoulders
One-handed backhand: follow through and straighten
your non-hitting arm behind you for improved balance and
positioning
These backhands are not easy shots, and will require hours and hours
of practice. Just like the forehand, you may have trouble
remembering all the steps when you’re out playing. Remember to
slow the game down and isolate each step, developing muscle
memory with repetition. Over time (and lots of practice!) your
backhand will transform into one effortlessly correct fluid motion!
MIDWEST SPORTS
34
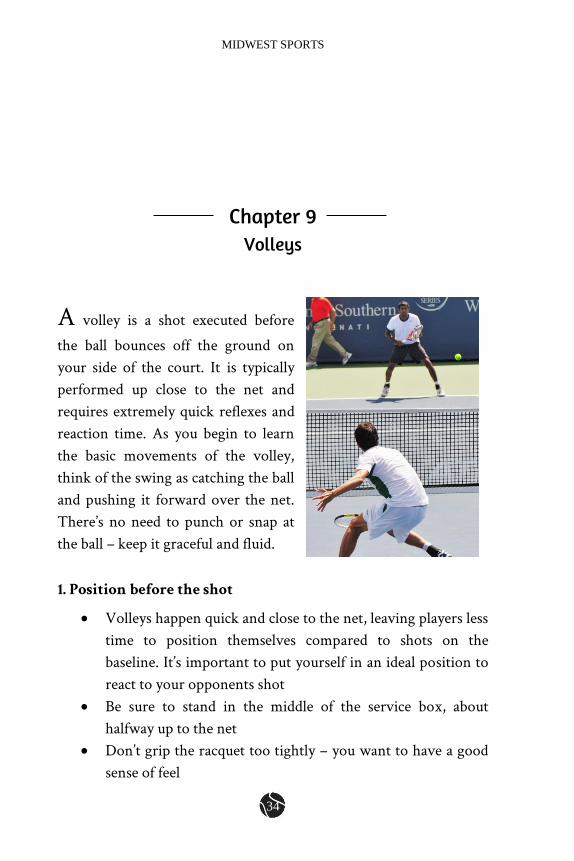
Chapter 9 Volleys
A volley is a shot executed before
the ball bounces off the ground on
your side of the court. It is typically
performed up close to the net and
requires extremely quick reflexes and
reaction time. As you begin to learn
the basic movements of the volley,
think of the swing as catching the ball
and pushing it forward over the net.
There’s no need to punch or snap at
the ball – keep it graceful and fluid.
1. Position before the shot
Volleys happen quick and close to the net, leaving players less
time to position themselves compared to shots on the
baseline. It’s important to put yourself in an ideal position to
react to your opponents shot
Be sure to stand in the middle of the service box, about
halfway up to the net
Don’t grip the racquet too tightly – you want to have a good
sense of feel
TENNIS FOR BEGINNERS
35
Like we mentioned earlier, most professional players utilize
the Continental grip for both forehand and backhand volleys
2. Prepare to strike the ball
There’s no need for a backswing on a volley shot. Keep your
swing compact and don’t bring your racquet arm back past
your shoulder point
If you’re executing a backhand volley, be sure to keep your
not-hitting arm extended out behind you for improved
balance
3. Strike the ball
With a volley, players should keep the racquet face open at
the point of contact, swinging with a slight upward motion.
Remember: it’s as if you are catching the tennis ball and
pushing it over the net
Be sure to direct the ball in such a way that your opponent is
has trouble keeping up
After you’ve made contact, quickly return to the ready
position so you are in an ideal spot to respond to your
opponent’s next shot
Coming up on the net is designed to put pressure on your opponent,
and can often lead to winning shots. There are risks, however, as you
lessened your ability to cover the entire court. Be sure to practice
volleying in all directions, both with a forehand and a backhand.

MIDWEST SPORTS
36
Conclusion
Tennis isn’t easy! It’s a game that demands extreme physicality and
energy alongside pinpoint control and precision. And in many ways,
this is what makes it so attractive to millions of players around the
globe. It’s a game that presents new challenges and subtleties at every
level.
As you begin your
journey, remember to
slow down your game and
master the fundamentals
before moving on to more
complex movements and
shots. Maybe more than
any other sport, tennis is
won and lost on the
basics. If you build a solid foundation of skills, you’ll be well on your
way to success.
TENNIS FOR BEGINNERS
37
Sources
http://www.rulesofsport.com/sports/tennis.html
http://www.livestrong.com/article/140007-tennis-rackets-
beginners/
http://www.tennis.com/shop/2012/02/new-to-tennis-a-brief-
racquet-primer-for-beginners/34762/#.VKxURFv4v8s
http://xrocker30.hubpages.com/hub/Basic-Tennis-Terms
http://www.tenniscompanion.org/
http://en.wikipedia.org/wiki/Grip_%28tennis%29
http://www.busy-tennis-players.com/tennis-grips.html
http://www.theguardian.com/lifeandstyle/2009/jun/28/tenni
s-learn-grips
http://www.wikihow.com/Serve-a-Tennis-Ball
http://www.optimumtennis.net/how-to-serve-in-tennis.htm
http://www.optimumtennis.net/tennis-forehand-tips.htm
http://www.fuzzyyellowballs.com/video-tennis-
lessons/forehand/forehand-fundamentals/
http://www.wikihow.com/Hit-a-Backhand
http://www.fuzzyyellowballs.com/video-tennis-
lessons/backhand/two-handed-backhand-fundamentals/
http://www.optimumtennis.net/tennis-backhand-
technique.htm
http://www.optimumtennis.net/tennis-volley-tips.htm
http://news.bbc.co.uk/sport2/hi/tennis/skills/4237072.stm