technology training guide for micro and … · briquette making ... implementing and evaluating the...
TRANSCRIPT
1
TECHNOLOGY TRAINING GUIDE FOR MICRO AND SMALL ENERGY ENTERPRISES
Authors: Lydia Muchiri & Emmanuel Cyoy 2014
2
Contents
TECHNOLOGY GUIDE FOR MICRO AND SMALL ENTERPRISES IN ENERGY ............................ 1
1.0 Introduction to Energy ......................................................................................................................... 6
1.1 Structure and Use of Training Guide ............................................................................................ 10
1.2 Topics Covered ................................................................................................................................. 11
1.3 Rationale ............................................................................................................................................. 11
1.4 Training Objectives .......................................................................................................................... 11
1.5 Training Methodology ................................................................................................................... 12
1.6 Observation and findings ............................................................................................................. 12
2.0 TOPIC 1: SOLAR TECHNOLOGY ................................................................................................. 14
2.1: Trainer’s Guide ................................................................................................................................. 15
2.2: Teacher’s notes ................................................................................................................................ 15
Solar Technology-Definition and importance .............................................................................. 15
2.3: Types of solar panels .................................................................................................................... 16
2.4: How the solar system works ....................................................................................................... 19
2.5: ARRANGEMENTS OF SOLAR ENERGY TO OTHER COMPONENTS .............................. 20
3.0: TOPIC 2: IMPROVED COOK STOVES-ICS .................................................................................... 24
3.1: Trainer’s Guide ................................................................................................................................. 25
3.1: Teacher’s notes ................................................................................................................................ 25
3.3: Types of Improved Cook Stoves .............................................................................................. 26
3.4: TYPES OF JIKOS ............................................................................................................................... 28
3.5: Testing quality liners ...................................................................................................................... 29
3.6: Materials used in ICS assembling ............................................................................................. 30
3
4.0: TOPIC 3: Briquette technology................................................................................................. 31
4.1: Trainers guide .................................................................................................................................. 32
4.2: Teacher’s notes ................................................................................................................................ 32
4.3: Commonly used binding agents include: .............................................................................. 34
4.4: Types of carbonized briquettes ................................................................................................. 35
4.5: Production Procedures for Briquettes ..................................................................................... 36
4.6: Maxing the materials/ ingredient and Making of the briquettes .................................. 40
a) Using Starch as Binder (Cassava flour or corn flour) ......................................................... 40
b) Using Molasses as binder ........................................................................................................... 40
c) Using Soil as Binder ....................................................................................................................... 41
d) Adding water: .................................................................................................................................. 41
e) Moulding/compaction into briquettes .................................................................................. 41
4.7: Making your own charcoal for carbonized briquettes (carbonization of Biomass
materials using drum Kiln) ................................................................................................................... 43
a) What you need ............................................................................................................................... 43
b) Requirements .................................................................................................................................. 43
4.8: Preparing the equipment/ Making Drum Kiln ...................................................................... 44
a) The cover ....................................................................................................................................... 45
b) Making charcoal .......................................................................................................................... 46
c) Filling the drum ........................................................................................................................... 46
Lighting the fire ....................................................................................................................................... 47
Sealing the drum refer to figure 5 below ....................................................................................... 48
Charcoal ...................................................................................................................................................... 50

4
Mixing ......................................................................................................................................................... 52
Briquette Making .................................................................................................................................... 52
4.9: BRIQUETTE PRESSING MACHINES............................................................................................ 53
I) reciprocating ram/Piston press ............................................................................................. 53
II) Screw press extrusion ............................................................................................................... 53
iii) Roller briquette press ................................................................................................................ 53
iv) Manual press and low pressure briquetting ................................................................. 54

5
ACRONYMS
RE Renewable Energy
ICS Improved Cook Stoves
AC Alternate Current
DC Direct Current
VOLT Voltage
PV Photovoltaic
AWG American Wire Gauge
KCJ Kenya Ceramic Jiko

6
1.0 Introduction to Energy
Energy is important in everyone's life, whether you notice it or not. Without it people
would have a harder time waking up and an even harder time getting anywhere. Energy
is important whether it is solar energy, mechanical energy, nuclear power, or the energy
your body makes that allows you to talk, move, and walk.
Energy does things for us. It moves cars along the road and boats in the water. It bakes
a cake in the oven and keeps ice frozen in the freezer. It plays our favorite songs and
lights our homes at nights so we can read a good book. Energy helps our bodies grow
and our minds think. Energy is a doing, moving,
working thing. Energy is defined as the ability to do work, and that work can be divided
into five
main tasks:
1. Energy gives us light.
2. Energy gives us heat.
3. Energy makes things move.
4. Energy makes things grow.
5. Energy makes technology work.
Forms of Energy
you probably already have a good idea that energy takes different forms. Energy can
light our homes or heat them. There are six forms of energy:
Mechanical
Mechanical energy puts something in motion. It moves cars and lifts elevators. It pulls,
pushes, twists, turns, and throws. A machine uses mechanical energy to do work and so
do our bodies! We can throw a ball or move a pencil across paper.

7
Kinetic energy is a kind of mechanical energy. It is the energy of a moving object. A
moving car has kinetic energy. A stalled car does not; however, if it's poised at the top of
a hill, it may have potential energy.
Potential energy is the energy an object has because of its position. Potential energy is
resting or waiting energy. A spring is a good example of potential energy. Energy can be
stored in the spring by stretching or compressing it. The sum of an object's kinetic and
potential energy is the object's mechanical energy.
Chemical
Chemical energy is the energy stored in food, wood, coal, petroleum, and other fuels.
During photosynthesis, sunlight gives plants the energy they need to build complex
chemical compounds. When these compounds are broken, the stored chemical energy
is released in the form of heat or light. What happens to a wood log in a fireplace?
Burning the wood breaks up the compounds, releasing the stored chemical energy in
the form of thermal and radiant energy.
Electrical
Electrical energy is a kind of kinetic energy. It is the energy of moving electrons.
Everything in the world is made up of tiny particles called atoms. Atoms are made up of
even tinier particles called electrons, protons, and neutrons. Electricity is produced when
something upsets the balancing force between electrons and protons in atoms. We can
use electricity to perform work like lighting a bulb, heating a cooking element on a
stove, moving a motor.
Radiant
Radiant energy is commonly called light energy. But light energy is only one kind of
radiant energy. All waves emit energy. Radio and television waves are other types of
8
radiant energy. So are gamma rays and x-rays. Light waves do work by wiggling the
receptors in the back of our eyes.
Thermal
Thermal energy, or heat energy, is also a special kind of kinetic energy. It is the energy
of moving or vibrating molecules. The faster the molecules move, the hotter an object
becomes and the more thermal energy it possesses. Thermal energy can do work for us
or it can be the result of doing work. Do this: Rub your hands together quickly. What do
you feel? You should feel heat. When two objects slide against each other they produce
friction which transforms into heat.
Nuclear
Nuclear energy is energy locked in the nucleus of the atom. It is the force that binds the
nucleus of the atom together. The energy can be released when atoms are combined or
split apart. Nuclear power plants split atoms in a process called fission. The sun
combines atoms in a process call fusion. In both fission and fusion, mass is converted
into energy, according to Einstein's Theory, E = mc2.
Difference between Renewable and Non Renewable energy
Non-Renewable Energy commonly refers to ‘conventional energy’. These are mainly
fossil fuels such as coal and oil. These are produced over millions of years and cannot be
replaced or replenished. These fuels are considered to be un-clean and harmful to the
environment because they produce adverse smoke and gases when burnt. They are not
sustainable fuels.
Renewable Energy (RE) is often known as a clean and modern form of energy. This is
because it pollutes less than conventional fossil fuels. Renewable energy comes from
9
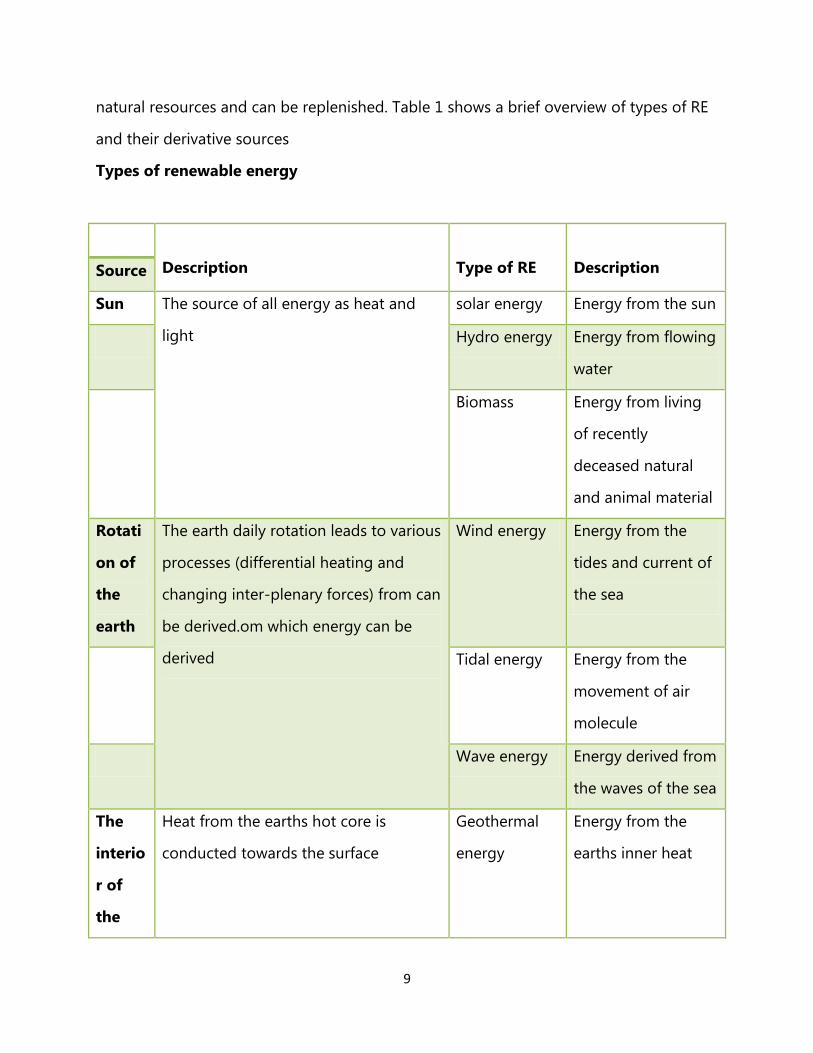
natural resources and can be replenished. Table 1 shows a brief overview of types of RE
and their derivative sources
Types of renewable energy
Description
Type of RE
Description Source
Sun The source of all energy as heat and
light
solar energy Energy from the sun
Hydro energy Energy from flowing
water
Biomass Energy from living
of recently
deceased natural
and animal material
Rotati
on of
the
earth
The earth daily rotation leads to various
processes (differential heating and
changing inter-plenary forces) from can
be derived.om which energy can be
derived
Wind energy Energy from the
tides and current of
the sea
Tidal energy Energy from the
movement of air
molecule
Wave energy Energy derived from
the waves of the sea
The
interio
r of
the
Heat from the earths hot core is
conducted towards the surface
Geothermal
energy
Energy from the
earths inner heat
10
earth
Entrepreneurs do not have quality equipment to facilitate the production of quality
briquettes. Those with equipment take too long to have them repaired once they break
down. The machine fabricators available are few and have to serve an increasing number
of entrepreneurs who are scattered across the county.
Briquette producers and ICS producers prefer to use cash from personal savings to start
up their businesses. They are however willing to take up loans to facilitate the
acquisition of bigger production space and equipment. Financial institutions do not
have loan packages tailor made for briquette entrepreneurs.
The biggest concern for entrepreneurs remains identification of markets beyond the
household level. Eateries and institutions still feel that briquettes would not fit into their
fuel energy sources.
Standardization of briquettes will help in market penetration and increase consumer
confidence as they purchase briquettes.
NB: The facilitator of this training is not limited to the trainer’s notes. The trainer’s notes
are only for guidance through the whole training process.
1.1 Structure and Use of Training Guide
This trainer’s manual has been developed to provide detailed and comprehensive set of
guidelines for planning, implementing and evaluating the business and development
services for the entrepreneurs.
The purpose of this trainer’s manual is specific, rather than general, which prepares
individual trainers to effectively implement a highly specialized developmental training,
using a refined training methodology
11
1.2 Topics Covered
The three topics covered in this manual will provide potential entrepreneurs an
opportunity to experience their strengths and weaknesses as entrepreneurs and to tap
their potential for enhanced performance. This means looking at the entrepreneur’s
personal behaviour, identifying ways to improve it, developing key technological skills
and guiding them in through the whole training programme.
1.3 Rationale
Rationale can be defined as the reason for something. In a manual for training the
entrepreneurs, the rationale would explain why you need to do the behaviors that the
guide is suggesting.
1.4 Training Objectives
The training objectives for this guide provides the clear guidelines and develop the
training program in less time because objective focus specifically on need. It helps in
adhering to a plan. It tells the trainee that what is expected out of him at the end of the
training program. Training objective is of great significance from a number of
stakeholder perspectives,
1. Trainer
2. Trainee
3. Evaluator
Trainer- The training objective is also beneficial to trainer because it helps the trainer to
measure the progress of trainees and make the required adjustments. Also, trainer
comes in a position to establish a relationship before objective and particular segment
of training.
12
Trainee-The training objective is beneficial to the trainer because it helps in reducing
the anxiety of the trainee up to some extent. Not, knowing anything or going to a place
which is unknown creates anxiety that can negatively affect learning. Therefore, it is
important to keep participants aware of the happenings, rather than keeping it surprise.
Secondly, it helps in increase in concentration, which is the crucial factor to make the
training successful. The objective creates an image of the training program in trainee’s
mind that actually helps in gaining attention.
Thirdly, if the goals are set to be challenging and motivating, then the likelihood of
achieving those goals is much higher than the situation in which no goal is set.
Therefore, training objectives helps in increasing the probability that the particular will
be successful in training.
Evaluator-It becomes easy for the training evaluator to measure the progress of the
trainers because the objectives define the expected performance of the trainees.
Training objective is an important tool to judge the performance of the participant.
1.5 Training Methodology
The training methodology in the manual gives the trainer time for expression and also it
generates an active class. It is important for the trainees to be actively involved in the
learning process.
1.6 Observation and findings
Once we passed through the total process of training, we arrived at certain conclusions.
The biggest barrier to distribution is transportation and the implicated costs.
Raw materials for briquette production are becoming harder to come by as more
charcoal dealers become aware of the value addition potential for the charcoal dust.

13
Entrepreneurs of briquettes are still not able to price their products to reflect changes in
production costs.
14
2.0 TOPIC 1: SOLAR TECHNOLOGY
Module 1: Solar Technology
Rationale By understanding that there is a notable growing need for
countries to reduce their emissions and achieve greater energy
independence while facing these factors
Increasing volatility in fossil fuel prices
Significant increase in energy demand and CO2 emissions
in emerging countries
Decreased nuclear generation in the energy mix of developed and
developing countries
Content Types of solar panel
How the solar system works
Instruction on how to use a solar panel
Objective By the end of the topic, participants will be able:
To Define Solar Technology
To mention at least three types of solar technology
To pinpoint at least three characteristic for each solar panel
To explain how solar system works and its arrangements
Duration 60MINS
Training
Methodology
Case Study
Resources Flip charts
Flipchart stands
Marker pens
15
Masking tape
2.1: Trainer’s Guide
Training Methodology
Case study
The trainees are given the case study below to study
The trainees are asked to discuss the elements of the case study e.g.
the lesson learned.
The trainees are asked to discuss the importance of having a home
solar in relation to the case study.
2.2: Teacher’s notes
Theory on Solar Energy
Solar Technology-Definition and importance
Solar panels convert sunlight to electricity as the sun's rays strike the silicon crystals in
the panels. The electricity is channeled through wires into the electrical system of a
building or home to reduce the need for traditional power. The solar panel use the sun’s
energy and light to provide heat, light, hot water, electricity and even cooling, for
homes, and industry’s ( http://bit.ly/1bQJp5A ) .The importance of solar technology is
found in the light of the following:
Renewable source of energy: solar power or sunlight is a natural resource which
is not going to end till the end of human race.
16
Environment friendly: energy that comes from the sun is ecofriendly and carries
no bad rays with it.
Inexpensive and easy to get: As this is the natural power and we never used to
pay for wind, water in the oceans ,light from the sun and oxygen we get from the
plants. We directly store this energy on solar panels which are very affordable
and give work for years. Solar energy is not going to end soon; therefore we can
use it as long as the planet exists.
Easy to store: solar panels are the mediums through which we can convert energy
into electricity and use it at homes and industries.
Cheap way to produce electricity: Solar energy is now helping small business
owners and household to generate electricity for themselves, at very cheap rates.
Electricity that is produced with the help of this energy is used by them only, and
they can cut their expense on utility bill easily. They can use it as a cooker, water
heater, light and to operate much other equipment’s at the houses or farms and
small offices.
2.3: Types of solar panels
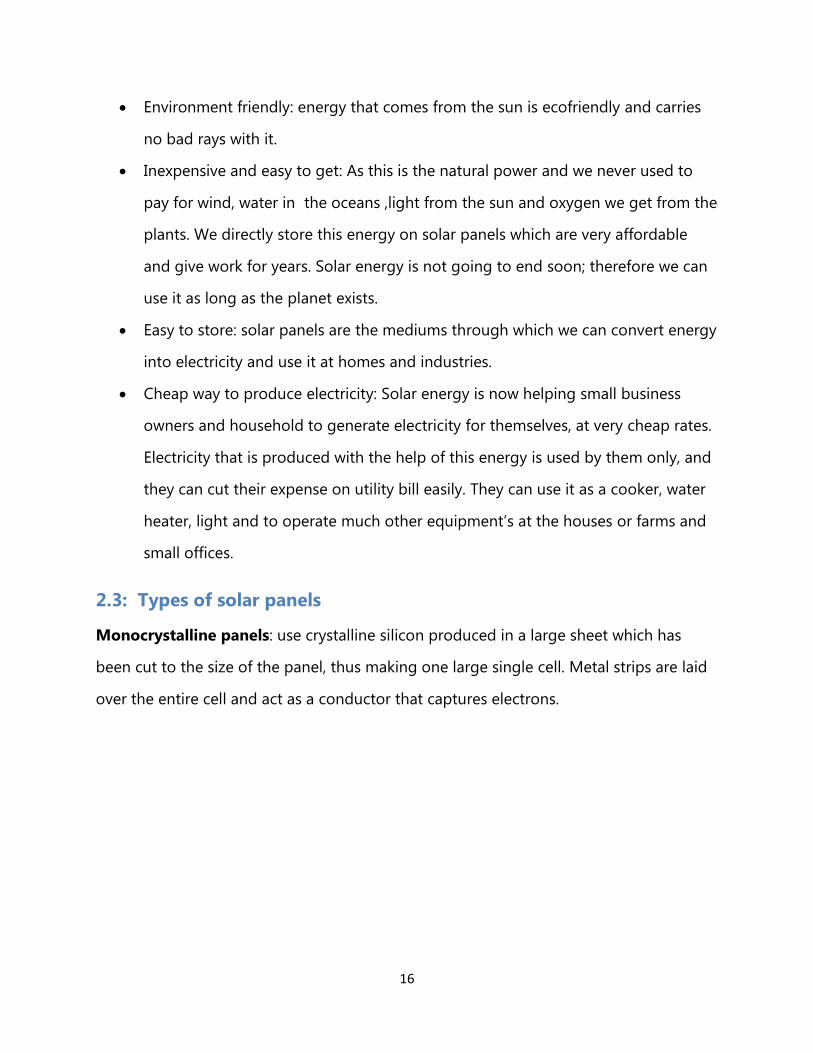
Monocrystalline panels: use crystalline silicon produced in a large sheet which has
been cut to the size of the panel, thus making one large single cell. Metal strips are laid
over the entire cell and act as a conductor that captures electrons.
17
Characteristics of monocrystalline solar panel
It has a lifespan between 20-25yrs
It is more than poly crystalline expensive
It is very sensitive to light
It has 3.5 watts
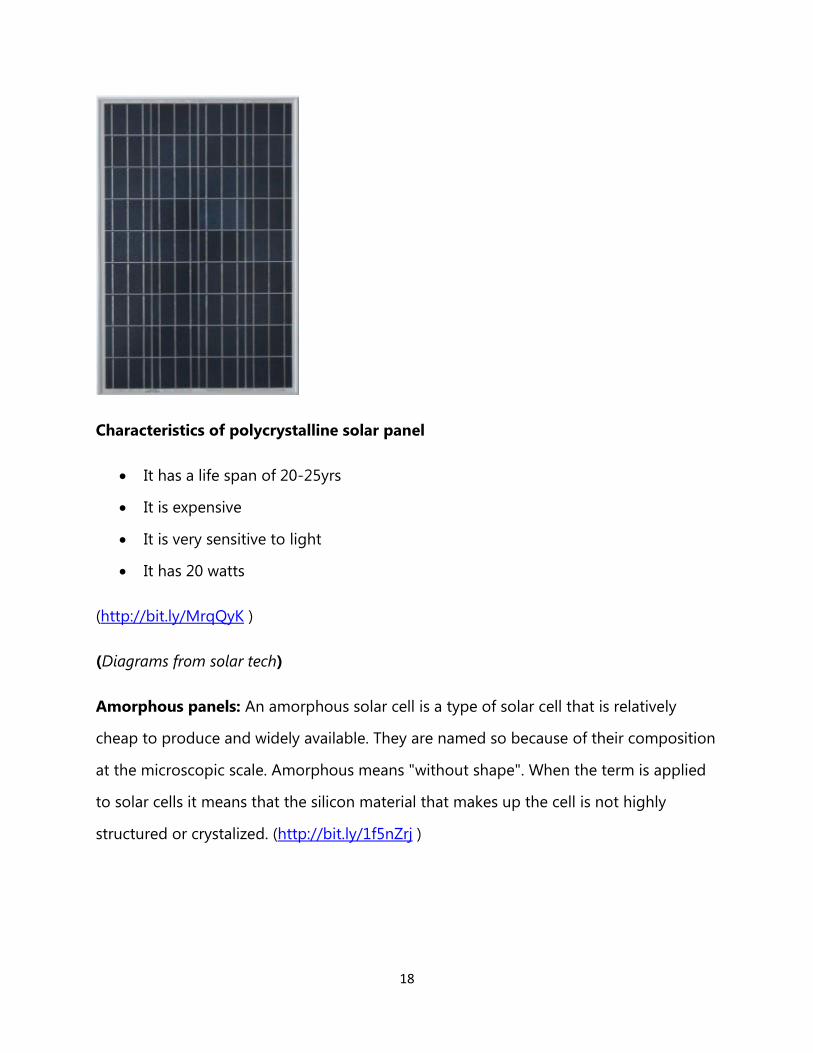
Polycrystalline panels: use a bunch of small cells put together instead of one large
cell. Poly panels are slightly less efficient than mono panels. (http://bit.ly/MrqQyK )
18
Characteristics of polycrystalline solar panel
It has a life span of 20-25yrs
It is expensive
It is very sensitive to light
It has 20 watts
(http://bit.ly/MrqQyK )
(Diagrams from solar tech)
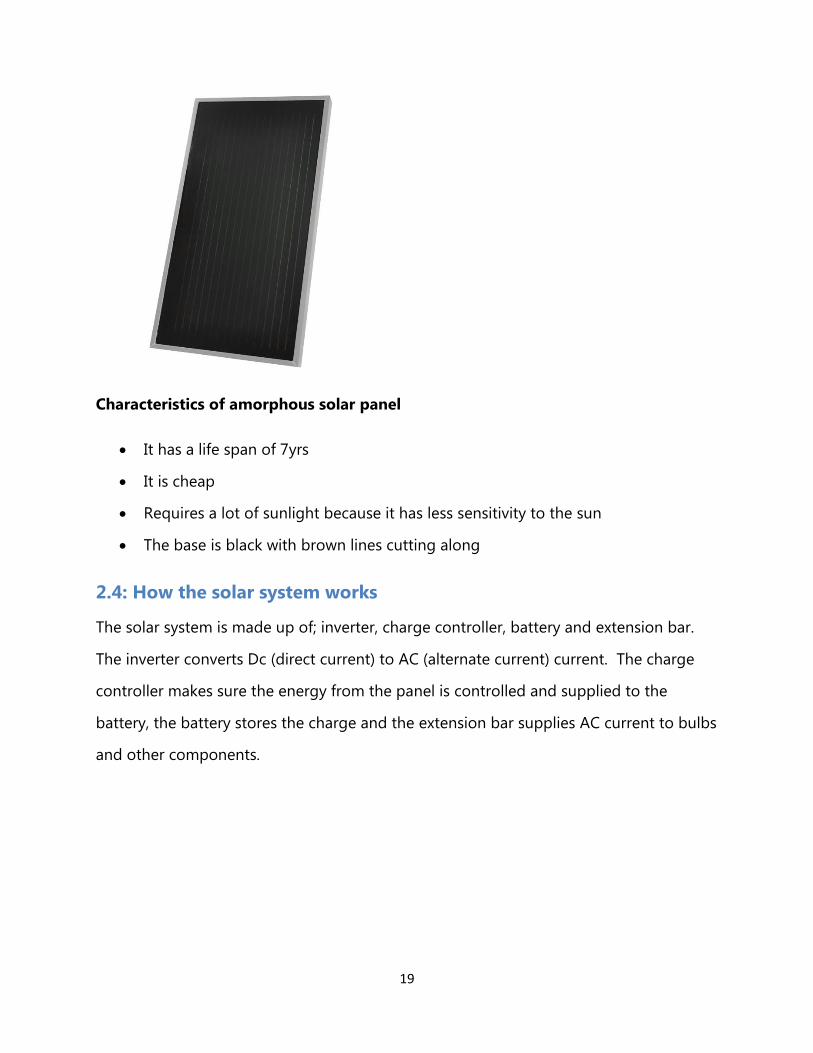
Amorphous panels: An amorphous solar cell is a type of solar cell that is relatively
cheap to produce and widely available. They are named so because of their composition
at the microscopic scale. Amorphous means "without shape". When the term is applied
to solar cells it means that the silicon material that makes up the cell is not highly
structured or crystalized. (http://bit.ly/1f5nZrj )
19
Characteristics of amorphous solar panel
It has a life span of 7yrs
It is cheap
Requires a lot of sunlight because it has less sensitivity to the sun
The base is black with brown lines cutting along
2.4: How the solar system works
The solar system is made up of; inverter, charge controller, battery and extension bar.
The inverter converts Dc (direct current) to AC (alternate current) current. The charge
controller makes sure the energy from the panel is controlled and supplied to the
battery, the battery stores the charge and the extension bar supplies AC current to bulbs
and other components.
20
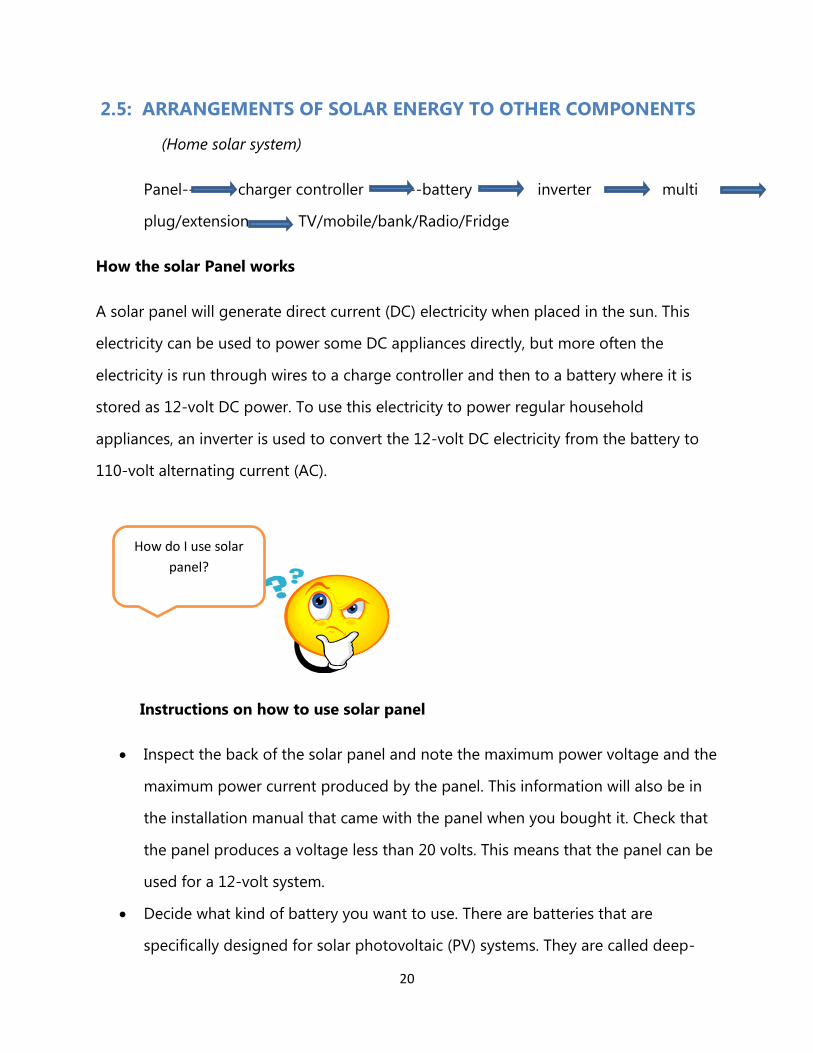
2.5: ARRANGEMENTS OF SOLAR ENERGY TO OTHER COMPONENTS
(Home solar system)
Panel---- charger controller ---battery inverter ------- multi
plug/extension ----- TV/mobile/bank/Radio/Fridge
How the solar Panel works
A solar panel will generate direct current (DC) electricity when placed in the sun. This
electricity can be used to power some DC appliances directly, but more often the
electricity is run through wires to a charge controller and then to a battery where it is
stored as 12-volt DC power. To use this electricity to power regular household
appliances, an inverter is used to convert the 12-volt DC electricity from the battery to
110-volt alternating current (AC).
Instructions on how to use solar panel
Inspect the back of the solar panel and note the maximum power voltage and the
maximum power current produced by the panel. This information will also be in
the installation manual that came with the panel when you bought it. Check that
the panel produces a voltage less than 20 volts. This means that the panel can be
used for a 12-volt system.
Decide what kind of battery you want to use. There are batteries that are
specifically designed for solar photovoltaic (PV) systems. They are called deep-
How do I use solar
panel?
21
cycle batteries. A 12-volt car battery will also work, but it will not last as long as a
deep-cycle battery. Many deep-cycle batteries are 6-volt. If you are going to use
two 6-volt batteries, connect them in series by connecting the positive terminal
of one battery to the negative terminal of the other battery with a battery
interconnect cable.
Decide where you are going to install the solar panel and the battery. The solar
panel should obviously be in a place that gets plenty of sunshine most often on
the roof of a building. The battery, on the other hand, should be inside the
building in a well-ventilated space. But the solar panel and the battery should not
be too far apart. Keep the connecting wires as short as possible. Measure and
write down the distance in feet between the solar panel and the battery.
Buy a charge controller for the 12-volt battery. A charge controller will ensure
that the battery is not overcharged by the solar panel, which could seriously
damage the battery. Go to a store that sells this kind of equipment or check out
one of the many websites on the Internet. Select a charge controller for a 12-volt
system that is designed for the maximum current generated by the solar panel.
Determine the American wire gauge (AWG) of the wires that will connect the
solar panel to the charge controller and the battery. Read carefully the instruction
manual for the charge controller. It will usually tell you what gauge copper wire
you will need to buy. Double the distance you measured between the solar panel
and the battery and buy this length of wire.
Cut the copper into two equal lengths with wire cutters. Take one of the wires
and make a mark in red at each end of the wire on the insulation. This will be the
positive wire. The other wire will be the negative wire. Cover the solar panel so it
is not producing electricity. Connect wire to one of the terminals on the back of
the solar panel. Connect the positive wire to the positive terminal.

22
Install the charge controller on a wall close to the battery. Run the two wires from
the solar panel down to the charge controller, attaching the wires to the wall at
various points if necessary. Cut the wires so that there is just enough wire to
connect to the charge controller. Set aside the remaining length of the two wires.
Open up the charge controller and look at the instruction manual. The controller
will have three sets of two terminals. One pair will be labeled "solar panel" or
"PV," one pair will be labeled "battery," and one pair will be labeled "load." Each
pair of terminals will have a positive and a negative terminal. Connect the positive
wire from the solar panel to the positive terminal of the pair labeled "PV," and the
other wire from the panel to the negative terminal.
Take the length of positive wire that remains and connect one end to the positive
terminal of the pair marked "battery" on the charge controller. Connect the other
end of this wire to the positive terminal of the battery. Repeat this procedure for
the other wire, connecting one end to the negative terminal on the charge
controller and the other end to the negative terminal of the battery. Remove the
cover from the solar panel.
Key questions
(Frequent asked questions)
What makes a good quality solar system?
What company do I select to install my solar system?
What happens with my solar system at Night, in cloudy weather or during rain?
How long will my Installation take?
How will the system be maintained?
How can I tell a water-heating panel from a solar electric module?
How many solar panels do I need to produce enough electricity to run my house?

23
Will a system produce enough energy to cover all my electricity needs?
Case study on home solar panels
Mohammed’s family (not the real name) bought a brand new home in late 2010. After living in the home with their two young children for a year, the family recognized they had a large south-facing roof, the preferred orientation for a solar panel installation, and were curious to hear about cost and tax credits for a solar home upgrade. They were able to research online and then set up an appointment with a Solar Kenyan Energy Consultant who analyzed their power bill data and recommended a system based on individual need.
Challenges
Normally a combination of (energy reduction + energy production) is needed to eliminate a power bill. However, the family’s power bills were lower than national averages, so one main challenge was which home energy solution(s) to recommend. Another challenge was what size solar panel system to recommend in order to maximize available tax credits. One final challenge was suggesting a solar panel and solar array design that would blend seamlessly into the dark asphalt shingle roof.
Solution
After analyzing the family’s power bills and talking about different home energy improvement packages, a 22 panel solar array was determined to be the best solution to both maximize solar tax credits and cover a majority of energy costs. A 5.17kW solar array was designed using 22 235 watt Sharp solar panels with black frames, installed in 2 rows of 11 for a clean and symmetric look. The panels were positioned on the roof so that 1 final row of 11 solar panels could be added at a later date should the home owners desire to expand their home solar panel system.
Result
The photovoltaic home solar panel array was installed in October of 2011. The system was designed to offset approximately 77% of the annual home power bill with an average savings of around 172946 KES per month over the 40 year expected life of the system. In November of 2011 the Family paid for just 106 kWh and in many months since they have received a credit on excess power production including a 691.8 KES credit on their May 2012 power bill.

24
3.0: TOPIC 2: IMPROVED COOK STOVES-ICS
Module 2: Improved Cook Stoves-ICS
Rationale By understanding that improved cook stoves are more efficient
compared to the traditional stove i.e. three stones.
Content Types of improved cook stoves
Types of jiko.
Testing of quality liners
Objective By the end of the topic, participants will be able:
To Define Improved Cook Stoves
To be identify a good quality liner
To mention at least two types of JIKOS
To mention materials used in ICS assembling
Duration 60MINS
Training
Methodology
Group Work
Resources Flip charts
Flipchart stands
Marker pens
Masking tape
25
3.1: Trainer’s Guide
Group work
Small groups may be composed of about three to five members who work together for
a short time to complete packaging and labelling a task or to solve a problem. Through
this group, the trainees can express their opinions freely and get actively involved in the
discussions.
Group Work Instructions
In groups, the trainees are asked to differentiate traditional cook stoves from
improved cook stoves.
In groups, the trainees are asked to mention the disadvantages of using
traditional cook stoves.
In groups, the trainees are asked to mention the advantages of using improved
cook stoves
3.1: Teacher’s notes
Improved Cook Stoves-Definition and benefits
Improved Cooking Stoves (ICS) are designed to be energy-efficient, which translates
into the
Consumption of less fuel wood or charcoal, saving on time and resulting in less
production of harmful
Smoke in comparison to the traditional stoves. The ICS is generally suited both to urban
and rural Population. Specifically, consumers of ICS products are:
Domestic charcoal users mostly in urban/peri-urban areas
Domestic firewood users, mostly in rural areas
26
Institutional users such as schools and hospitals
Business users such as restaurants, hotels and street food vendors
The use of ICS leads to reduction of pressure on forest and energy resources. If the
sector is well developed such as in Kenya, there is tremendous potential for skill
development and job creation.
Improved Cook Stoves (ICS) are a mature energy technology for the efficient conversion
of energy from biomass to heat. Benefits Improved cook-stoves can offer the following
key benefits to consumers, over traditional stoves / 3-stone fire place:
• More fuel efficient: Money and time saved in acquiring fuel
• Reduced amounts of smoke and indoor air pollution
Furthermore, the following wider social benefits mean there is government support:
• Less pressure on forest and energy resources
• Public health: reduction of disease caused by indoor air pollution
• Skill development and job creation in the community.
3.3: Types of Improved Cook Stoves
The key feature of any ICS over a traditional stove is the use of an insulating material
such as clay or mud (liners) to conserve heat and make it more efficient.
Two main parameters can be used to distinguish between
ICS types:
The type of fuel used; e.g. charcoal or firewood and
Whether the stove is portable or fixed.
27
A stove’s efficiency can be determined by the ratio of useful heat produced to the
amount of fuel energy going in. This will tell you how good an ICS is really is. Other
important factor that can be considered is the appearance of the ICS and its ease to
use.
Fixed Firewood Stoves
These types of stoves are mostly common in Uganda and Western Kenya. They are
usually built up in situ and can be made very cheaply using local materials. They
work by directing hot gasses from fuel -wood gasses.
Portable Stoves (charcoal/firewood)
The portable stoves are commonly across East Africa. Their portability makes them
suitable for retail distribution as a take away product and mass manufacture away
from the pint of use
How the stoves are manufactured
Fixed Stove
The main stove body is usually built up from the ground, around a simple
mould (e.g. banana stem) that is removed to create the firebox and air
passage cavities.
They can be made with low-cost local material such as clay saw dust and lime
mortar.
Tolls needed are also relatively inexpensive e.g. shovel, sieve, trowel,
measuring tape
Portable Stove
28
The ceramic liners for portable stoves generally require higher quality
standards and are usually made using mould, left to dry and then fired in a
kiln.
The ceramic liners for portable stoves generally require high quality of clay
which must be careful prepared before putting into the mould. Moulds are
relatively inexpensive.
Likewise the requirement for kiln firing can make this a potentially capital-
intensive venture unless access can be arranged to an existing kiln.
3.4: TYPES OF JIKOS
Kenya Ceramic Jiko
Uhai Jiko
Kuni Mbili multipurpose
Upesi Jiko
Jiko poa
Jiko banifu
Rocket stove
Shigela stove
Kibwangu
Tatedo stove
Maendeleo jiko
29
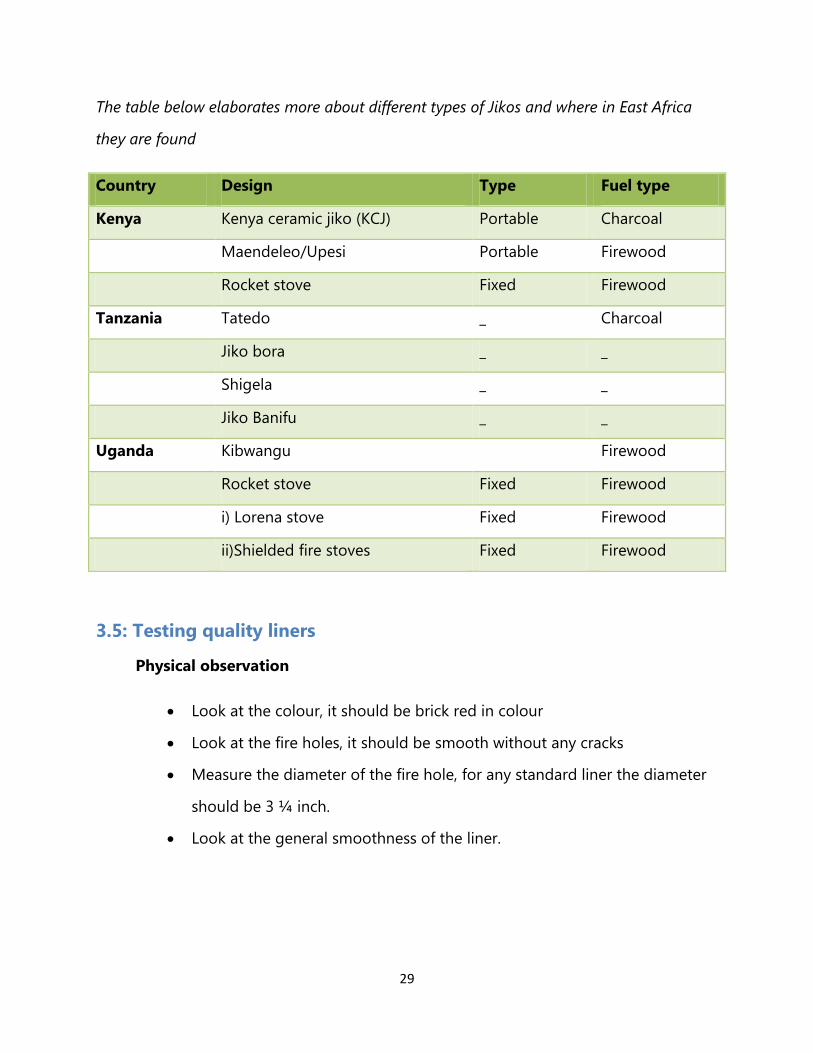
The table below elaborates more about different types of Jikos and where in East Africa
they are found
Country Design Type Fuel type
Kenya Kenya ceramic jiko (KCJ) Portable Charcoal
Maendeleo/Upesi Portable Firewood
Rocket stove Fixed Firewood
Tanzania Tatedo _ Charcoal
Jiko bora _ _
Shigela _ _
Jiko Banifu _ _
Uganda Kibwangu Firewood
Rocket stove Fixed Firewood
i) Lorena stove Fixed Firewood
ii)Shielded fire stoves Fixed Firewood
3.5: Testing quality liners
Physical observation
Look at the colour, it should be brick red in colour
Look at the fire holes, it should be smooth without any cracks
Measure the diameter of the fire hole, for any standard liner the diameter
should be 3 ¼ inch.
Look at the general smoothness of the liner.

30
Sound test
A good liner will sound like a metal or a glass when tested. A bad liner will sound like a
wood.
Water test
3.6: Materials used in ICS assembling
These materials are also called insulators.
Vermiculite +cement
Sand+ Cement +Ash
Rice husk +Ash +Cement
Fired clay
Key Questions
(Frequent asked questions)
Are improved cook stoves really saving on that much?
Do modern stoves do not destroy cultural tradition?
How long do the new stoves last?
Its fuel wood a renewable energy resource?
Isn’t the smoke in the hut needed to drive mosquitoes?
31
4.0: TOPIC 3: Briquette technology
Module 3: Briquettes Technology
Rationale By understanding that, briquettes are renewable source of energy
that is easily accessible and relatively affordable as compared to
other energy fuels; because they are obtained from waste materials.
Content Waste Materials for producing briquettes
Commonly used binding agent
Types of Carbonized briquettes
Ingredient for making briquette
Objective By the end of the topic, participants will be able:
To define what biomass briquetting is?
To mention at least six materials used for producing
briquettes
To list at least the three types of carbonized briquettes
To describe production procedure for making briquettes
using different binders i.e. cassava, molasses, pulped paper
and soil.
Duration 60MINS
Training
Methodology
Practical Exercises
Resources Flip charts
Flipchart stands
Marker pens
32
Masking tape
4.1: Trainers guide
Practical exercises
This technique is used during training session, it permits students to acquire and
practice the knowledge skills, and attitudes necessary to successfully perform more
training objectives.
Practical exercise –Instructions
The trainer divides trainees into three groups’
Group one demonstrates how to make briquettes using cassava
as a binder
Group two demonstrate how to make briquettes using molasses
as a binder
Group three demonstrates how to make briquettes using soil as a
binder
4.2: Teacher’s notes
Fuel briquettes-Definition and Importance
These are charcoal made from waste products (charcoal dust, waste paper, forestry
residue, saw dust and cow dung) that are used in household institutions for energy
purposes. Briquetting technology is the process of adding value to waste products in
order to be used for energy purposes e.g. in cooking and lighting.
33
The benefit of briquettes is found in the light of the following:
Conservation of the environment-mean less rubbish in the streets.
It is a source of income-you can make money from selling briquettes.
Economical-it is cheap since the raw materials are at your disposal.
Saves time-using fuel briquette means less firewood to chop and charcoal to buy
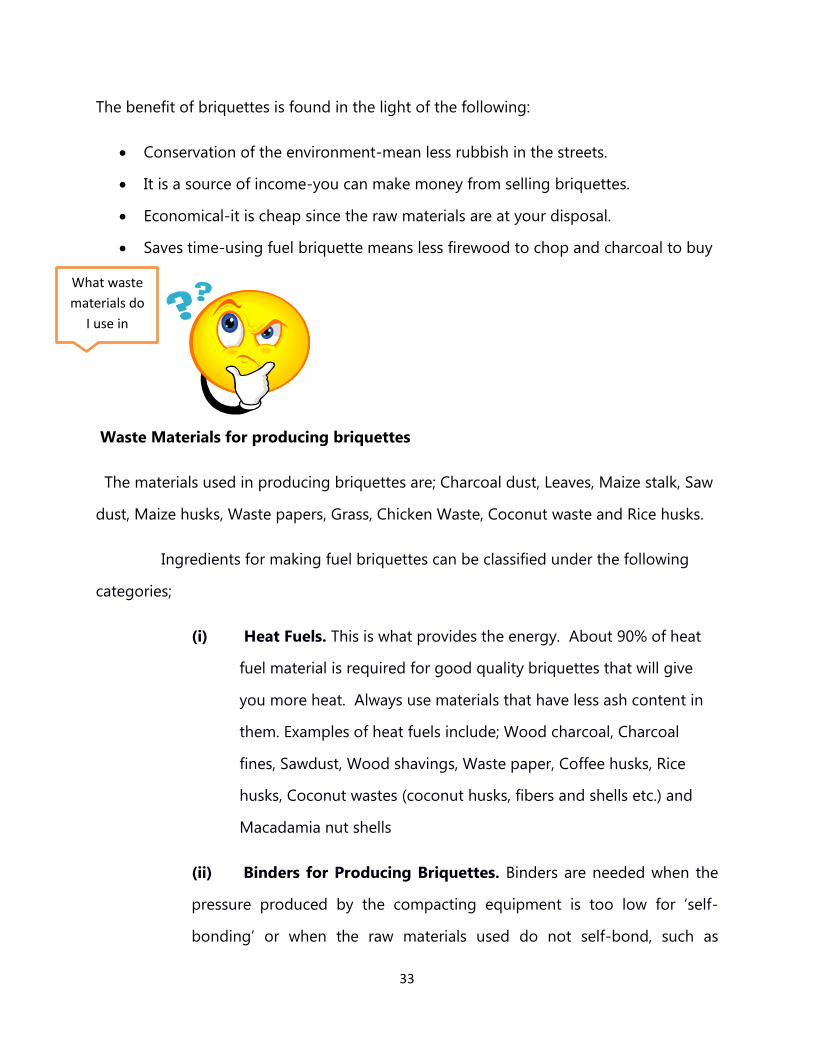
Waste Materials for producing briquettes
The materials used in producing briquettes are; Charcoal dust, Leaves, Maize stalk, Saw
dust, Maize husks, Waste papers, Grass, Chicken Waste, Coconut waste and Rice husks.
Ingredients for making fuel briquettes can be classified under the following
categories;
(i) Heat Fuels. This is what provides the energy. About 90% of heat
fuel material is required for good quality briquettes that will give
you more heat. Always use materials that have less ash content in
them. Examples of heat fuels include; Wood charcoal, Charcoal
fines, Sawdust, Wood shavings, Waste paper, Coffee husks, Rice
husks, Coconut wastes (coconut husks, fibers and shells etc.) and
Macadamia nut shells
(ii) Binders for Producing Briquettes. Binders are needed when the
pressure produced by the compacting equipment is too low for ‘self-
bonding’ or when the raw materials used do not self-bond, such as
What waste
materials do
I use in
production
of
briquettes?
34
charcoal. Charcoal is a material without plasticity and charcoal dust cannot
hold into shape without adding a binding material. The effect of adding a
bonding material is to enhance cohesion and reduce pressure
requirements. Binders hold components by both mechanical and chemical
adhesion, and occur when the binder molecules adhere to specific points
in the molecular structure of the adherent.
4.3: Commonly used binding agents include:
• Starch from maize, cassava (manioc), wheat, sweet potatoes and certain plants
like algae
• Sugarcane molasses
• red soil
• Gum Arabica
• Pulped waste papers
Cassava has unique properties such as high viscosity and resistance to freezing. Binders
such as sugarcane molasses and vegetable starch (from maize, cassava, etc.) add to the
calorific value of the briquette. Clay and/or red soil, and ash when used as binders
inhibit combustion of the briquettes thereby producing more ash.
(i) Accelerants
Briquettes require materials to make them burn faster because unlike lump charcoal,
their structure is more compact due to the compaction process used in making. As a
result, briquettes cannot absorb sufficient oxygen for faster burning. Use about 1 – 2%
of the accelerant. Examples of accelerants include:
• Sawdust

35
• Pulped waste paper
Remember that use of un-carbonized sawdust produces briquettes that produce a lot of
smoke. To reduce the smoke from sawdust, partly ferment your sawdust for about five
days by soaking in water.
Fillers
Fillers are materials that are added to briquettes during production to increase their
weight, density or volume and to regulate the burning rate of the briquettes. That is, it
slows down the burning rate of briquettes, which increases efficiency. Examples of fillers
include red soil and ash.
4.4: Types of carbonized briquettes
Biomass briquettes can be classified into three main categories, these are:
a. Carbonized briquettes: They are produced from densification/compression of
loose carbonized biomass waste materials. Some of the loose carbonized waste
materials that are easily found within our urban areas include charcoal dust. One
can also compress raw biomass materials followed by pyrolysis (heating) to
acquire carbonized briquettes.
b. Non-carbonized briquettes: These are produced through agglomeration of loose
raw biomass waste materials, such as sawdust; waste paper, leaves and wood
shavings to acquire uniformly sized blocks.
c. Semi-carbonized briquettes: Produced from compression of both carbonized and
non-carbonized biomass wastes materials. A good example is making of briquettes from
a mixture of charcoal dust and sawdust
36
4.5: Production Procedures for Briquettes
Making Carbonized briquettes
Tools and Equipment
Wire mesh sieve: for sieving charcoal dust/binders/accelerator to separate dust
from granules/particles. Also make it easy to remove impurities.
Spade: moving/lifting materials required in the briquettes production.
Mixing drum, trough or bucket; this is where mixing of different materials for
making briquettes are done.
Grinder: for grinding the big part particles into powder
Weighing instrument/balance; for measuring the different proportions of
materials used in making briquettes.
Briquettes pressing machine (manual or motorized): for compressing of different
materials to make briquettes
b) Raw materials/ ingredients
The raw materials are classified into heat fuels, binders, accelerators and fillers
i) Heat Fuels: As explained above, these are the key materials in briquettes that
produce energy or heat.
For carbonized briquettes, you can use already carbonized waste materials
found within our environment such as charcoal dust. The alternative will be
for you to carbonize the waste materials either using down draft pit kiln,
drum kiln, controlled open charring, or use of gasifier stoves. This will turn
the raw waste into carbonized materials.
If you are using charcoal dust, sort to remove the unwanted materials such
as leaves, stones, and wood.
37
Sieve to separate the charcoal dust from charcoal granules. Note that at this
stage, the charcoal dust is known to contain some amount of soil in its
composition. This is ideal for making briquettes to be used in poultry farms
where warmth is required and not heat
• Grind the charcoal granules separately into charcoal dust. This particular type of
dust contains less or minimum amount of soil. This is ideal for making
briquettes for use in households, institutions and hotel industry where heat is
required
• If your heat fuel is coconut wastes, saw dust, macadamia nut shells etc. Sort these
materials to remove inorganic stuff like stones, nails, etc. then carbonize before
using them to make briquettes.
ii) Binders. These are the bonding materials used to enhance cohesion and reduce
pressure requirements. They are used when the pressure produced by the
compacting equipment is too low for ‘self-bonding’ or when the raw materials
used do not self-bond, such as charcoal.
These include cassava flour, spoiled maize flour, molasses, waste thick porridge
(Ugali), waste sweet potatoes,
Select the binder of choice that is easily available in your area of operation
Preparing a cassava binder
As mentioned earlier, a number of different binders can be used. Here we
describe using cassava root to make porridge, but any starchy porridge is ideal.
• Peel and grate one large cassava root for each batch of charcoal.
38
• Mix it with hot water, to form a thick, gummy porridge. Approximately 1 cassava
root and 1.5 liters of hot water are required to make enough porridge for one
drum of charcoal.
• Mix the fine charcoal powder, with this warm porridge, in a basin. Mix it well so
that all of the charcoal has some porridge on it.
• You can test if the charcoal mixture is ready for briquetting with your hands. Grab
a handful of charcoal powder, and crush it in your palm to make a rough ball. If
the ball falls apart when you let go, the charcoal needs more binder. If the ball
keeps the shape of your hand, it is ready to make briquettes.
• If you have cassava flour; Mix 1 part of the flour with 10 parts of water and heat
to near boiling i.e. raising the temperature to 90oC while continuously stirring to
make thick porridge (gelatinization)
Preparing molasses as a Binder
Heat the molasses until boiling and leave to cool. This is to increase their binding
characteristic
iii) Accelerators
Two accelerators have been mentioned above; saw dust and waste paper.
Preparation of saw dust
Sort to remove wood chips and twigs
Ferment in water for four to seven days
Preparation of Waste Paper
Sort to remove polythene and plastic materials
39
Shred into small sizes either using hands or paper shredder
Soak in water for two days. Pound using heavy stick into pulp
Drain the water and add clean water and let them soak for another two days, pound
again until it becomes a smooth pulp,
Drain the dirty water, add more clean water and let it ferment for two more days
Preparing soil binder
When red soil/loam is used as binder then,
Sort the soil to remove all impurities such as stones, leaves, humus, nails and
papers.
Carry out size reduction of the soil particles (grind the larger soil particles to finer
particles)
Mix the heat fuel (Charcoal dust) with the finer particles of soil using the
following mixing ratio:
Mix the composition until you get a homogeneous mixture before adding water
How do you determine if the materials you have collected for production will result in
quality briquettes? This can be done by carrying out a simple test as follows:
Step 1: Soak organic material in water
Step 2: Take a handful of the soaked materials and press into a ball. If the paste
retains the ball like structure, it means that it can be pressed into quality
briquettes.
40
Step3: if the material falls apart, i.e. they don’t take the ball like shape, and then
add material
(Binders) that increase the binding capacity and repeat step 2.
4.6: Maxing the materials/ ingredient and Making of the briquettes
a) Using Starch as Binder (Cassava flour or corn flour)
Take 10 parts of the heat fuel + 0.2 parts of fermented saw dust
Mix materials until you get homogeneous mixture
Add the cassava porridge slowly while mixing until the mixture is wet enough
Move the composition to the pressing machine and compress to briquettes (refer
to section on moulding)
Dry in direct sunlight for 3 to 5 days depending on the weather conditions
b) Using Molasses as binder
Take 20 parts of the heat fuel + 0.4 parts of fermented saw dust
Mix the materials until you get homogeneous mixture.
Sprinkle water into the mixture to make it a bit dump
Add 0.5 parts of heated molasses to the mixture
Mix the materials thoroughly to achieve homogeneity
Move the composition to the pressing machine and compress to briquettes (refer
to section on moulding)
Dry in direct sunlight for 3 to 5 days depending on the weather conditions
What ratio do I use in
the production of
briquettes using
different binders?

41
c) Using Soil as Binder
Take 10 parts of the heat fuel + 0.2 parts of fermented saw dust
Mix materials until you get homogeneous mixture
Add 0.8 parts of red soil to the mixture and mix thoroughly
Add water slowly while mixing until the composition is wet enough (refer to the
section below)
Move the composition to the pressing machine and compress to briquettes (refer
to section on moulding)
Dry in direct sunlight for 3 to 5 days depending on the weather conditions
d) Adding water:
Add water to the mixture, little by little while stirring to make a paste. Test
whether you have added enough water by taking a handful of the paste,
squeezing and releasing. If the mixture does not loosen up, it implies that you
have added enough water and you are ready to compress your paste into
briquettes.
Note: Some biomass materials like freshly carbonized charcoal dust require to be
soaked in water for at least 8 hours to ensure that it is easy to work with. Other
materials like sawdust and waste paper are soaked for at least a week to ensure
that they are soft enough to work with.
e) Moulding/compaction into briquettes
Compacting mixed materials into briquettes can be achieved using different
techniques, including:
(I) you can mould the paste into balls or different shapes and sizes with your
hands and leave them to dry in the direct sunlight
42
(II) You can mould the paste into shapes using empty tins or cans (containers of
used products such as oil tins) and dry in direct sunlight.
(III) You can compact the prepared paste using a motorized or manual
machine In this case you need the briquette press, and a hammer, or wooden
mallet.
(Photo above shows the briquette press). With the ejector resting in the
bottom of the cup, scoop up a full cup of charcoal powder.
Place the plunger in the cup.
Hit the piston hard with the hammer 3-5 times, to compress the powder
Hit the bottom of the press on a hard surface (e.g. the surface of the
hammering station). This pushes the ejector pin upwards, and lifts the
briquette upwards.
Repeat until you have made briquettes with all the material. A lot of
charcoal mixture will fall on the ground during this process; if you put a
plastic sheet or tightly woven cloth down where you are working, you can
use it to collect the charcoal mixture to use it to make one final briquette,
so it isn’t wasted.
Drying the briquettes
These briquettes, now formed, will need to dry in the sunshine, to fully harden.
Leave the briquettes to dry in the sun for at least two days. If rain is likely, make sure
they are protected from the water.
Hardening the briquettes (optional step):
After briquettes have dried in the sun, they may still be soft. To harden the briquettes,
you can fire them in an oil drum, while making another batch of charcoal. Put the
briquettes in a wire mesh basket, and gently toss the basket in a burning oil drum, just
43
before you put the lid on and seal it. When you open the drum after two hours, the
briquettes in the mesh basket will have baked, and hardened.
Storage and Packaging
• Store your dried briquettes in a well aerated dry place. Avoid dump areas and
leaking roof as this will make your briquettes return to paste form.
• Package your briquettes in an environmentally-friendly way, label and take to the
market.
4.7: Making your own charcoal for carbonized briquettes
(carbonization of Biomass materials using drum Kiln)
a) What you need
Carbonized materials are easily produced using simple tools and welding equipment;
the total equipment cost is between KES1, 700 KES3, 400. A 250 liter steel oil drum (one
full oil drum needs about 16kg of agricultural waste, and will produce about 4kg of
charcoal) form the kiln
b) Requirements
Drum Kiln
A long, straight object likes a stick – to create a central chimney in the oil drum; it
should be taller than the oil drum, and as wide as a fist in diameter.
Three bricks or flat stones about the same size.
Empty Rice bags or other large bags - to crush the charcoal powder in.
Matches – to set fire to the agricultural waste.
Sand, mud or dirt – to help create an airtight seal around the drum.

44
4.8: Preparing the equipment/ Making Drum Kiln
• Acquire the Oil drum:
• Cut one large hole in the top of the oil drum (this is a loading hole).
• Cut five holes of equal diameter at the bottom (these are air holes) of the oil
drum.
• The drum kiln will be ready for use

45
Figure 1 and 2: holes at the base
Caution
• Do not use an angle grinder or any other tool that will create sparks unless you are
certain that there are no flammable or explosive residues inside the oil drum.
• The drum should not contain any toxic or explosive residues.
• If it has safe residue (oil or food) a small fire should be made inside the drum to
clean it out. Allow the drum to cool before starting to cut holes.
• Both flat ends of the drum must be intact.
• There must be no holes in the curved sides of the drum.
a) The cover
You need a lid, to cover the large loading hole in the top of the oil drum. The
lid should be large enough to cover the loading hole in the oil drum, (figure 2)
but small enough not to extend over the edges of the oil drum. An ideal lid is
made from a piece of sheet metal. It is easier to place the lid on top of the hot
kiln if a handle is welded onto the lid. If you can’t make a curved handle, a
46
handle shaped like a short, flat ‘T’ has worked well. You can also use metal
without handle
b) Making charcoal
Charcoal production requires experience to produce high quality charcoal, and to
get high yields of charcoal from an oil drum. The method must also be adapted
slightly for different materials. Whilst this manual provides general details, the
time required at each stage varies. When conducting a charcoal burn, it is
important that the weather is dry. It is possible to make charcoal when it is
raining, but it is much harder to light a fire. The oil drum also cools down more
quickly, so the yield is lower.
c) Filling the drum
When filling the drum, it is necessary to allow air to flow through the drum so
that the fire can burn hotly and evenly and produce high quality charcoal.
Place a large stick, in the Centre of the drum and pack the bagasse, stalks or
other material around it until the drum is full.
If you are using corn cobs, or other material that is more difficult to light, create
4-5 layers of corn cobs, separated by husks or dried grasses. This allows the
whole drum to get hot, and produce high quality charcoal.
Carefully remove the stick, leaving a hole that goes to the bottom of the drum.
Take a small amount of material and poke it into each of the holes in the bottom
of the drum, leaving about 20 cm sticking out. This creates a wick, allowing you
to easily ignite the material at the bottom of the drum. Refer to figure 4 below
47
Lighting the fire
Before lighting the fire, place the drum on top of three stones or bricks, so that
air can flow in through the holes in the bottom. Place the drum on the stones
carefully, so that it will be easy to remove the stones while the raw material is
burning, to seal the drum.
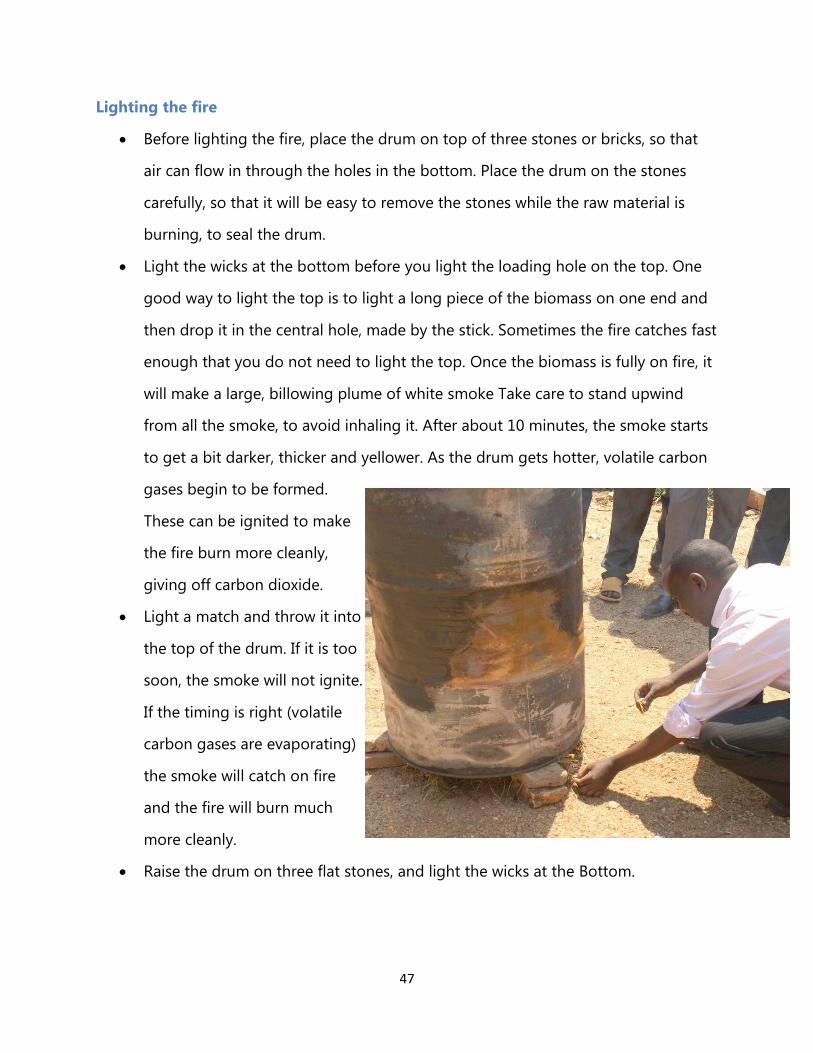
Light the wicks at the bottom before you light the loading hole on the top. One
good way to light the top is to light a long piece of the biomass on one end and
then drop it in the central hole, made by the stick. Sometimes the fire catches fast
enough that you do not need to light the top. Once the biomass is fully on fire, it
will make a large, billowing plume of white smoke Take care to stand upwind
from all the smoke, to avoid inhaling it. After about 10 minutes, the smoke starts
to get a bit darker, thicker and yellower. As the drum gets hotter, volatile carbon
gases begin to be formed.
These can be ignited to make
the fire burn more cleanly,
giving off carbon dioxide.
Light a match and throw it into
the top of the drum. If it is too
soon, the smoke will not ignite.
If the timing is right (volatile
carbon gases are evaporating)
the smoke will catch on fire
and the fire will burn much
more cleanly.
Raise the drum on three flat stones, and light the wicks at the Bottom.
48
Let the fire burn for another 10 minutes before sealing it. These times are
approximate, and may vary depending on the material used, and the conditions
of the burn.
Sealing the drum refer to figure 5 below
In order for the material to carbonize, rather than burning away, it is
necessary to seal the drum, preventing air from getting in. This step
requires at least two and preferably three people.
Place the lid on the drum. It is easiest to do this if the lid has a curved
handle, so you can put the lid on with a stick. If flames shoot out from the
edges of the lid or from under the drum, it is not yet ready to be covered,
the lid should be removed and the material allowed burning for a little
longer.
Once the drum is covered, use the large stick to gently support one side of
the drum, on the side of a stone.
Kick away the stone under that side and gently lower the drum.
When tipping the drum to be able to move the rocks or bricks from
underneath, it may be safer for two people to hold each end of the stick
and tilt the drum with the centre of the stick.
Repeat this with each of the three stones until the drum is resting on the
ground.
Seal the bottom edges of the drum and edges of the lid with sand or soil
until no smoke is visible.
This means that there are no holes through which air can enter the oil
drum.
After sealing, the drum remains hot. Make sure that no one touches the
drum for at least two hours after sealing.
49
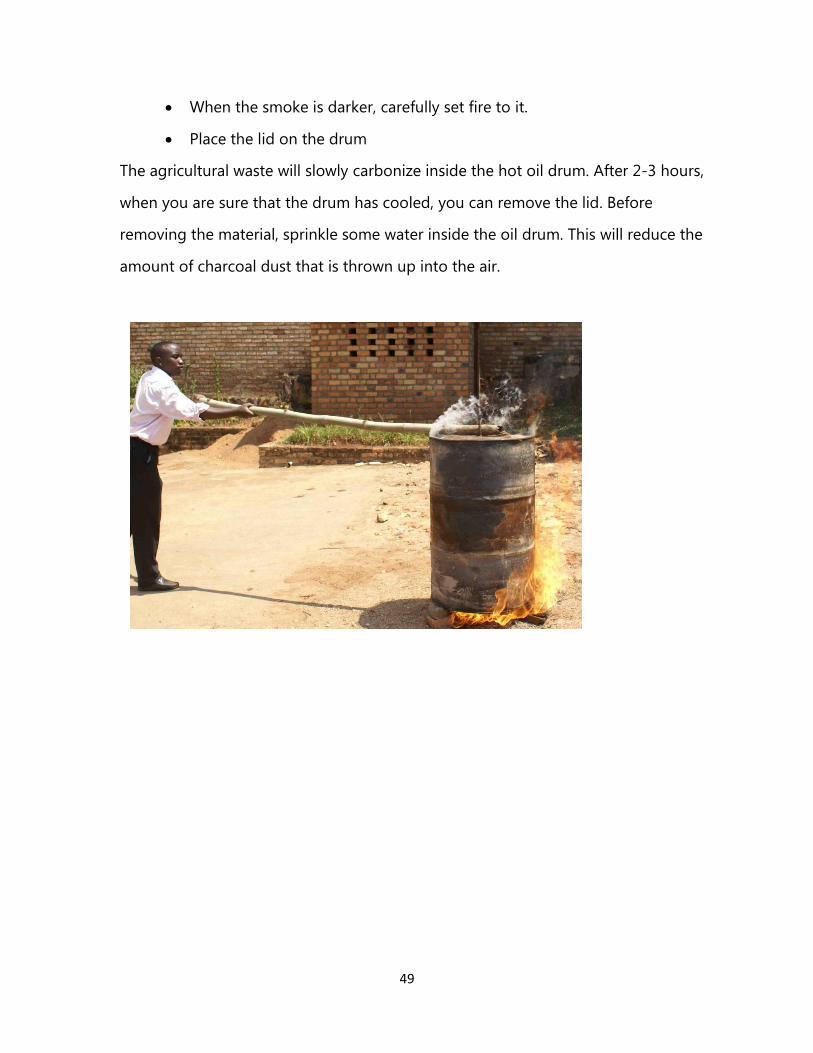
When the smoke is darker, carefully set fire to it.
Place the lid on the drum
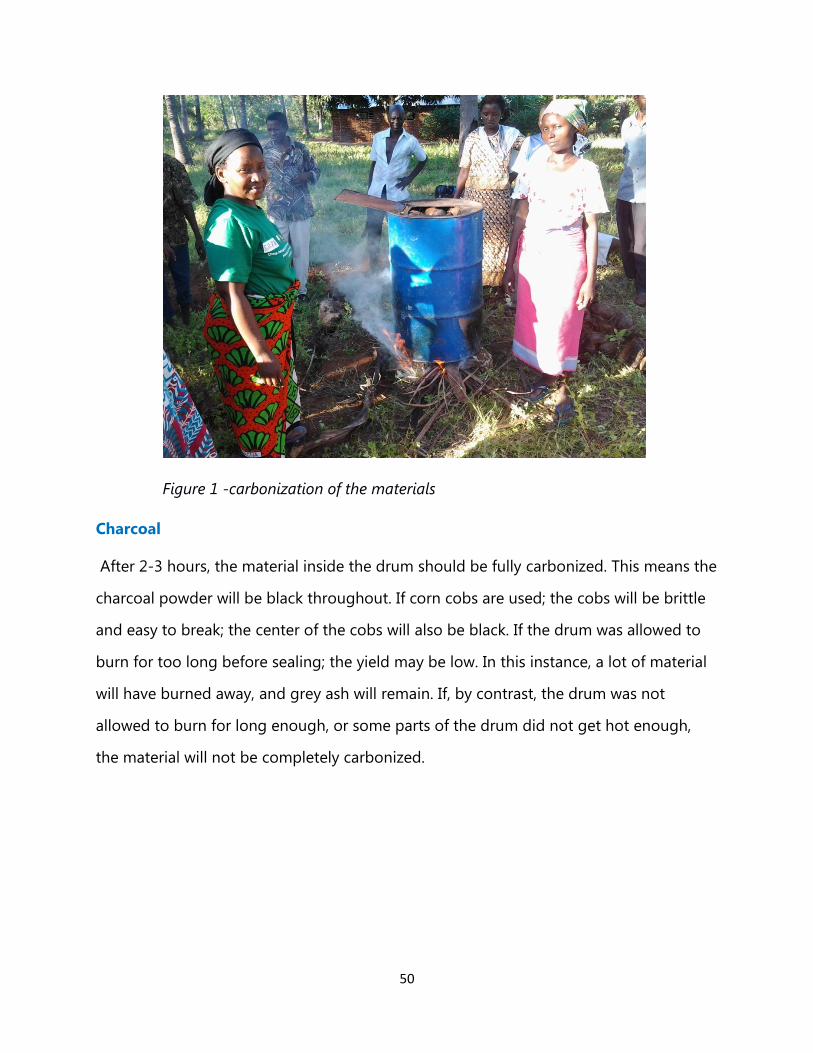
The agricultural waste will slowly carbonize inside the hot oil drum. After 2-3 hours,
when you are sure that the drum has cooled, you can remove the lid. Before
removing the material, sprinkle some water inside the oil drum. This will reduce the
amount of charcoal dust that is thrown up into the air.
50
Figure 1 -carbonization of the materials
Charcoal
After 2-3 hours, the material inside the drum should be fully carbonized. This means the
charcoal powder will be black throughout. If corn cobs are used; the cobs will be brittle
and easy to break; the center of the cobs will also be black. If the drum was allowed to
burn for too long before sealing; the yield may be low. In this instance, a lot of material
will have burned away, and grey ash will remain. If, by contrast, the drum was not
allowed to burn for long enough, or some parts of the drum did not get hot enough,
the material will not be completely carbonized.
51
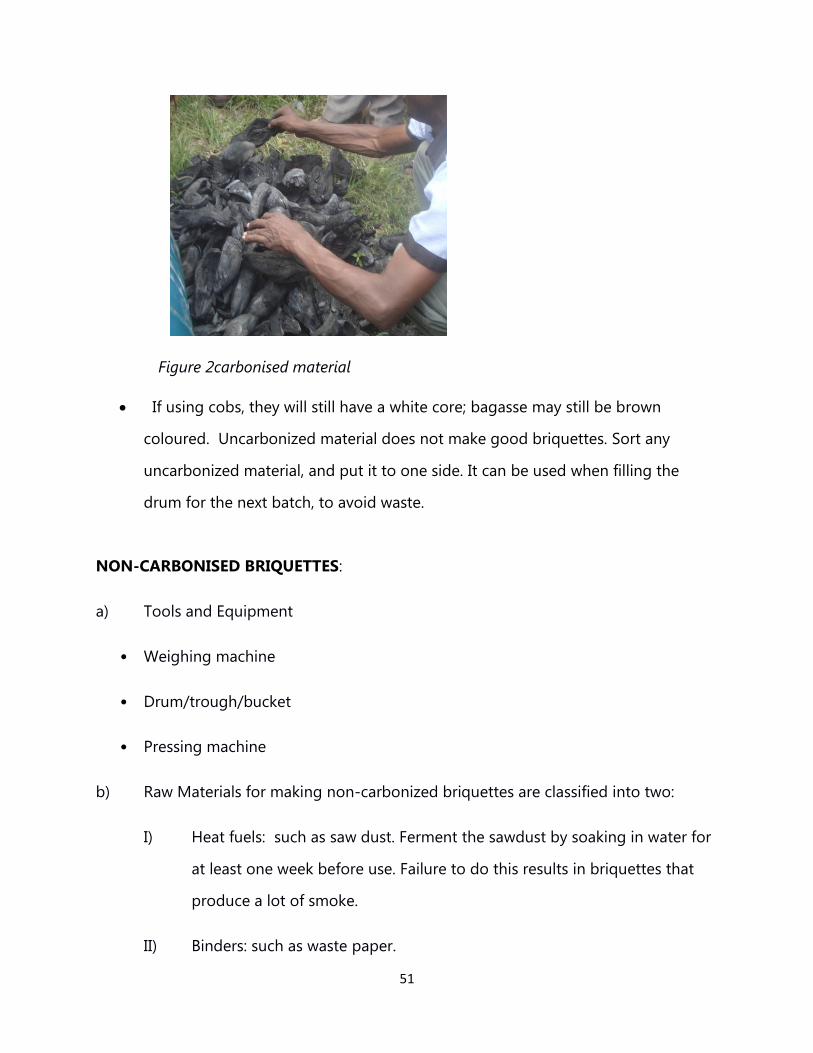
Figure 2carbonised material
If using cobs, they will still have a white core; bagasse may still be brown
coloured. Uncarbonized material does not make good briquettes. Sort any
uncarbonized material, and put it to one side. It can be used when filling the
drum for the next batch, to avoid waste.
NON-CARBONISED BRIQUETTES:
a) Tools and Equipment
• Weighing machine
• Drum/trough/bucket
• Pressing machine
b) Raw Materials for making non-carbonized briquettes are classified into two:
I) Heat fuels: such as saw dust. Ferment the sawdust by soaking in water for
at least one week before use. Failure to do this results in briquettes that
produce a lot of smoke.
II) Binders: such as waste paper.
52
When using waste paper as binder, the following steps are undertaken to prepare:
Sort to remove plastics papers
Shred/tear sorted waste paper into small pieces
Soak them in water for two days; pulp/pound the soaked paper to make paper
marsh
Pour out the water from the pulped paper
Ferment the pulped paper for at least three days by soaking in clean water
Mixing
Mix the heat fuel and binder using the following ratios:
Fermented Saw dust: Fermented Waste paper
Fermented sawdust Fermented waste paper
80 20
Briquette Making
• Press the mixed fermented materials into balls of different sizes and shapes using
hands and dry in the direct sunlight.
• Using press machine compress fuel briquettes into uniform shapes and sizes and
dry them in the direct sunlight
53
4.9: BRIQUETTE PRESSING MACHINES
There are four types of briquetting pressing machines commonly used in Kenya. These
are piston, screw, roller and lever press.
I) reciprocating ram/Piston press
These machines are either manual or motor driven. Motor driven machines are relatively
large and operate in such a way that the piston forces material through a narrow
opening. Very high local pressures are built up as a result of the friction at the point of
entry. This generates sufficient heat for the binding agent to flow, binding the material
together. The area of the die tends to determine the output of a machine. For instance,
a larger die (and correspondingly larger machine components) results in a larger output.
II) Screw press extrusion
Screw extruders use a screw action to extrude a briquette through a die. Material is fed
into the machine from a hopper into the screw chamber. Powered by an electric motor,
the screw forces the material through a die and out of the machine as a (typically)
cylindrical continuous briquette. The heat enables lignin (binding agent) breakdown to
occur, making the machine suited for briquetting non-carbonized feed stocks. Some
machines use a conical screw that tapers from large (input end) to small (output end).
This type of machine can achieve pressures of up to 100MPa, generating sufficient
compaction for briquetting non-carbonized feed stocks.
iii) Roller briquette press
Roller-type briquette presses are commonly used to produce pillow shaped charcoal
briquettes. They involve two adjacent counter-rotating rollers with indentations in the
shape of the desired briquette. Powder is fed from above, falls into the indentations and
is compressed as the rollers turn. The briquette then exits the machine as a single lump.

54
Briquetting of biomass using a roller briquette press usually requires a binder. Very
often this type of machine is used for briquetting carbonized biomass to produce pillow
charcoal briquettes.
iv) Manual press and low pressure briquetting
Manual presses are specifically designed for the purpose or adapted from existing
implements used for other purposes. They are used both for raw biomass feedstock or
charcoal. The use of a binder is imperative. Manual presses are very cheap (compared to
motorized machines), but they have a low production capacity, they demand intensive
labor and require the use of binders. The main advantages of low-pressure briquetting
are the low capital and operating costs needed, and the low levels of skill required to
operate the technology. The following are some of the manual briquetting pressing
machines available in Kenya.