table of contents - federal deposit insurance corporation · pdf fileffiec central data...
TRANSCRIPT

FFIEC Central Data Repository CDR-SOD-Enter Online v1.3
CDR-SOD-Enter Online v1.3 Page 1 of 17
Entering Summary of Deposits in CDR This document provides a basic guide for financial institutions who choose to enter their Summary of Deposits (SOD) online through CDR.
Table of Contents Submitting the SOD Online .......................................................................................... 2
Printing the SOD.......................................................................................................... 10
Accessing Saved or Submitted SODs ....................................................................... 14
Additional Resources ................................................................................................. 17
FFIEC Central Data Repository CDR-SOD-Enter Online v1.3
CDR-SOD-Enter Online v1.3 Page 2 of 17
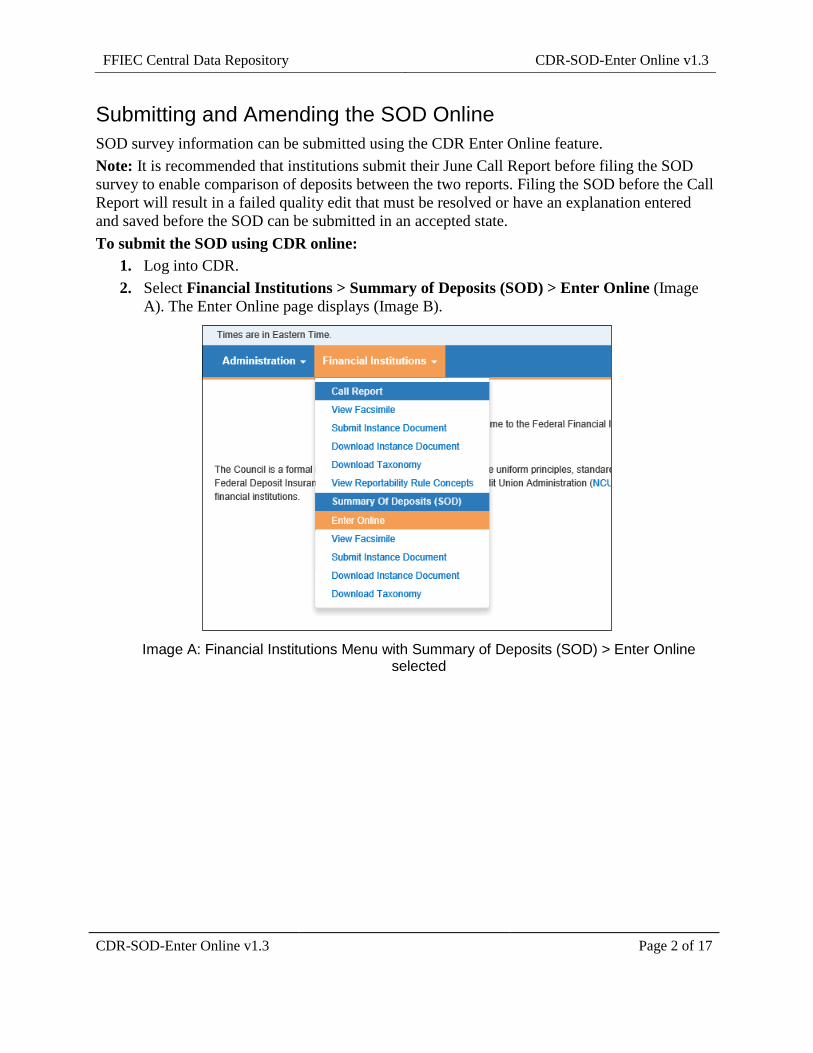
Submitting and Amending the SOD Online SOD survey information can be submitted using the CDR Enter Online feature. Note: It is recommended that institutions submit their June Call Report before filing the SOD survey to enable comparison of deposits between the two reports. Filing the SOD before the Call Report will result in a failed quality edit that must be resolved or have an explanation entered and saved before the SOD can be submitted in an accepted state. To submit the SOD using CDR online:
1. Log into CDR. 2. Select Financial Institutions > Summary of Deposits (SOD) > Enter Online (Image
A). The Enter Online page displays (Image B).
Image A: Financial Institutions Menu with Summary of Deposits (SOD) > Enter Online
selected

FFIEC Central Data Repository CDR-SOD-Enter Online v1.3
CDR-SOD-Enter Online v1.3 Page 3 of 17
Image B: Enter Online page with the Continue button and Reporting Cycle drop-down list
highlighted
3. The Reporting Cycle defaults to the current period. If amending prior period data, select the Reporting Cycle from the drop-down list.
4. Click the Continue button. The Enter Online page displays the default schedule of the SOD (Image C). Note: Starting with SOD reporting period June 2017, the default is the Branches schedule. The Summary schedule is the default for prior periods.

FFIEC Central Data Repository CDR-SOD-Enter Online v1.3
CDR-SOD-Enter Online v1.3 Page 4 of 17
Image C: View Online page displaying Branches schedule with the Back button, Schedule
navigation, and Add Branch, Validate, Save Draft, Submit, and Cancel links highlighted
There is one button at the top of the page: • Back closes the SOD without saving and displays the search fields (image B above).
Links to navigate to the next and previous schedules (Branches, Preparer, Summary) display above the schedule data entry fields.
Note: You can also navigate to the schedules by selecting the name of the schedule from the Schedule drop-down list. However, the drop-down list is not active on the Branches schedule.
The following links also display on the Branches schedule: • Validate checks the SOD for quality and validity errors. • Save Draft saves the SOD. Save the draft to save your work and return at a later
time. It’s recommended that you periodically save the draft in case of session time out, power outages, distractions, etc.
• Submit submits the SOD. • Cancel discards any changes made since the last save.

FFIEC Central Data Repository CDR-SOD-Enter Online v1.3
CDR-SOD-Enter Online v1.3 Page 5 of 17
5. If not displayed, navigate to the Branches schedule by clicking the Branches link or selecting the Branches from the Schedule drop-down list. The Branches schedule displays (Image D).
Image D: Branches schedule with the Office Number link and the Current Period Deposits,
Cen Code and Consolidated Office No. fields highlighted
6. Enter deposit data for each branch, as appropriate: • Current Period Deposits: Report the applicable domestic deposit total (in
thousands) for each branch. Institutions should assign deposits to each office in a manner consistent with their existing internal record-keeping practices.
• CEN Code: Enter “1” for estimated deposits, “2” for deposits consolidated with a different location (applicable for limited service locations only), or “3” for non-deposit accepting location. If reporting actual deposits for a location, the CEN Code should be left blank.
• Consolidated Office No.: If you used CEN Code 2, indicate the FDIC‐assigned office number of the location where the subject branch deposits are consolidated. The consolidated office should be in the same county as the reported office. Limited service offices should be consolidated into another office in the same county unless your bank does not have a full service branch in that county. The Consolidated Office field should be left blank if the CEN Code is blank, 1, or 3.
Use the numbered page buttons above the list of branches to browse to more branches if the bank has more than ten branches.
FFIEC Central Data Repository CDR-SOD-Enter Online v1.3
CDR-SOD-Enter Online v1.3 Page 6 of 17
To update, correct or remove a branch:
• Click the Office Number link. The Branch Details popup window displays. • Select the appropriate change type and code. • Update the applicable branch information. • Validate the address if the location was updated or corrected. • Enter the Effective Date of the change. • Save the changes.
To add a new branch: • Click the Add Branch link. The Branch Details popup window displays. • Select the appropriate add (Change) code. • Enter the required branch information. • Validate the address. • Enter the Effective Date. • Save the branch.
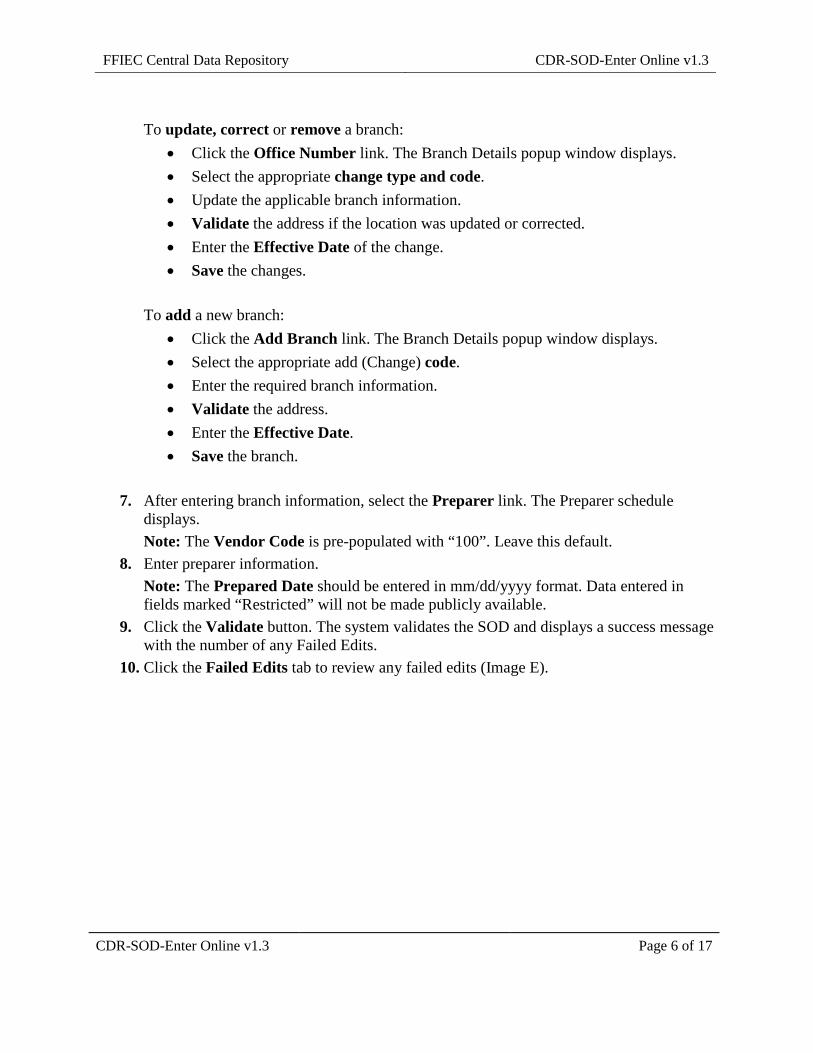
7. After entering branch information, select the Preparer link. The Preparer schedule displays. Note: The Vendor Code is pre-populated with “100”. Leave this default.
8. Enter preparer information. Note: The Prepared Date should be entered in mm/dd/yyyy format. Data entered in fields marked “Restricted” will not be made publicly available.
9. Click the Validate button. The system validates the SOD and displays a success message with the number of any Failed Edits.
10. Click the Failed Edits tab to review any failed edits (Image E).

FFIEC Central Data Repository CDR-SOD-Enter Online v1.3
CDR-SOD-Enter Online v1.3 Page 7 of 17
Image E: Failed Edits page with Failed Edits and SOD tabs, Edit Name link, Edit Explanation Code drop-down, Edit Explanation field and Save button highlighted
11. Enter explanations for each failed quality edit: • Click the link in the Edit Name column for the failed edit to view the edit details. • Select the Edit Explanation Code from the drop-down list. • Enter the explanation in the Edit Explanation field. • Click the Save button to the right. Note: Explanations cannot be entered for failed validity edits. Validity edits must be resolved before submitting or the SOD will be rejected.
12. Click the SOD tab to return to the SOD schedules. 13. Click the Submit button to submit the SOD. The system displays a success message once
the SOD has been submitted. 14. To print a copy of the SOD facsimile, click the Facsimile link (Image F). The facsimile
opens in a new browser tab (Image G). Note: If a "page cannot be displayed" error is encountered, you may need to contact your IT department to open TCP port 8081. As a test for this, access https://cdr.ffiec.gov:8081/. You should receive an error message similar to "HTTP Status 404, Apache Tomcat/7.0.67." If instead of the Tomcat error you receive “page cannot be

FFIEC Central Data Repository CDR-SOD-Enter Online v1.3
CDR-SOD-Enter Online v1.3 Page 8 of 17
displayed,” then internet traffic is not getting through on port 8081. Your local IT should be able to enable this. Contact the CDR Help Desk if further assistance is needed.
Image F: Submitted SOD with Facsimile link highlighted
Image G: SOD Facsimile with Print button highlighted
FFIEC Central Data Repository CDR-SOD-Enter Online v1.3
CDR-SOD-Enter Online v1.3 Page 9 of 17
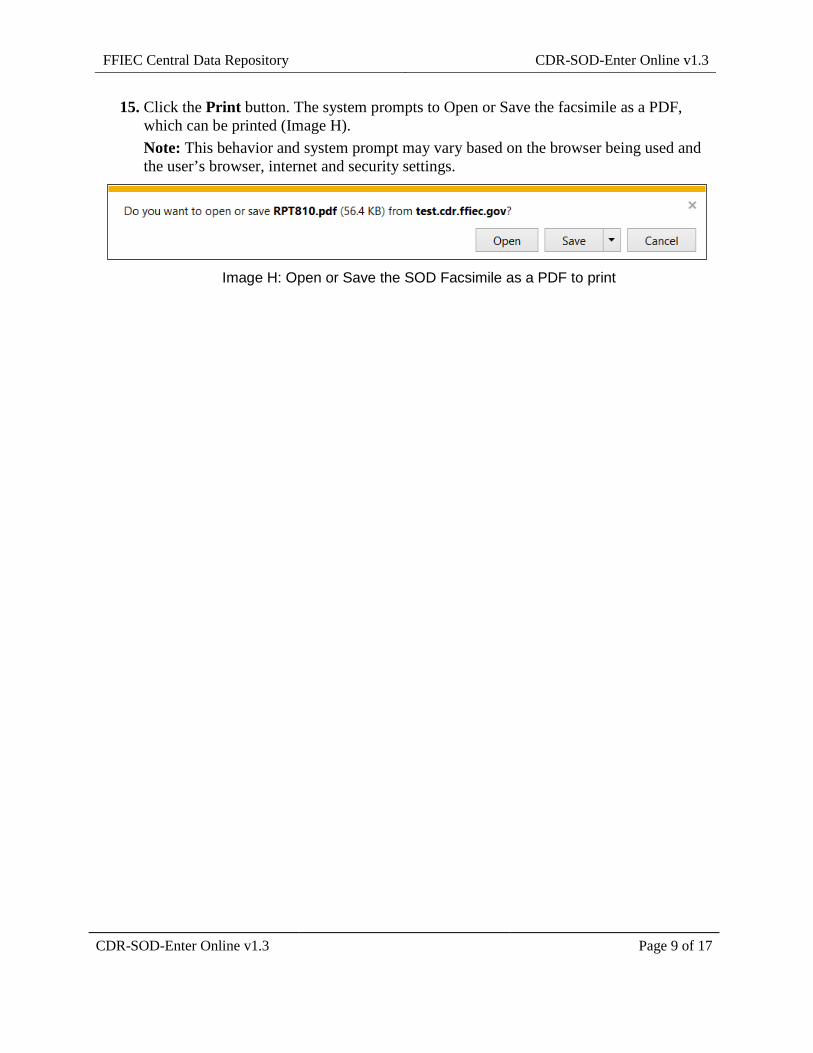
15. Click the Print button. The system prompts to Open or Save the facsimile as a PDF, which can be printed (Image H). Note: This behavior and system prompt may vary based on the browser being used and the user’s browser, internet and security settings.
Image H: Open or Save the SOD Facsimile as a PDF to print

FFIEC Central Data Repository CDR-SOD-Enter Online v1.3
CDR-SOD-Enter Online v1.3 Page 10 of 17
Printing the SOD A printable copy of the SOD is available immediately after submitting the SOD from the Enter Online page by clicking the Facsimile link. (See step 14 of the Submitting the SOD Online topic.)
A printable copy is also available from the View Facsimile feature at any time after submitting the SOD.
Note: The SOD must be in an accepted status. SODs in a rejected state (submitted with unresolved validity errors or quality errors without edit explanations entered) will not be available from the View Facsimile feature.
1. Log into CDR. 2. Select Financial Institutions > Summary of Deposits (SOD) > View Facsimile (Image
I). The View Facsimile page displays (Image J).
Image I: Financial Institutions Menu with View Facsimile selected
FFIEC Central Data Repository CDR-SOD-Enter Online v1.3
CDR-SOD-Enter Online v1.3 Page 11 of 17
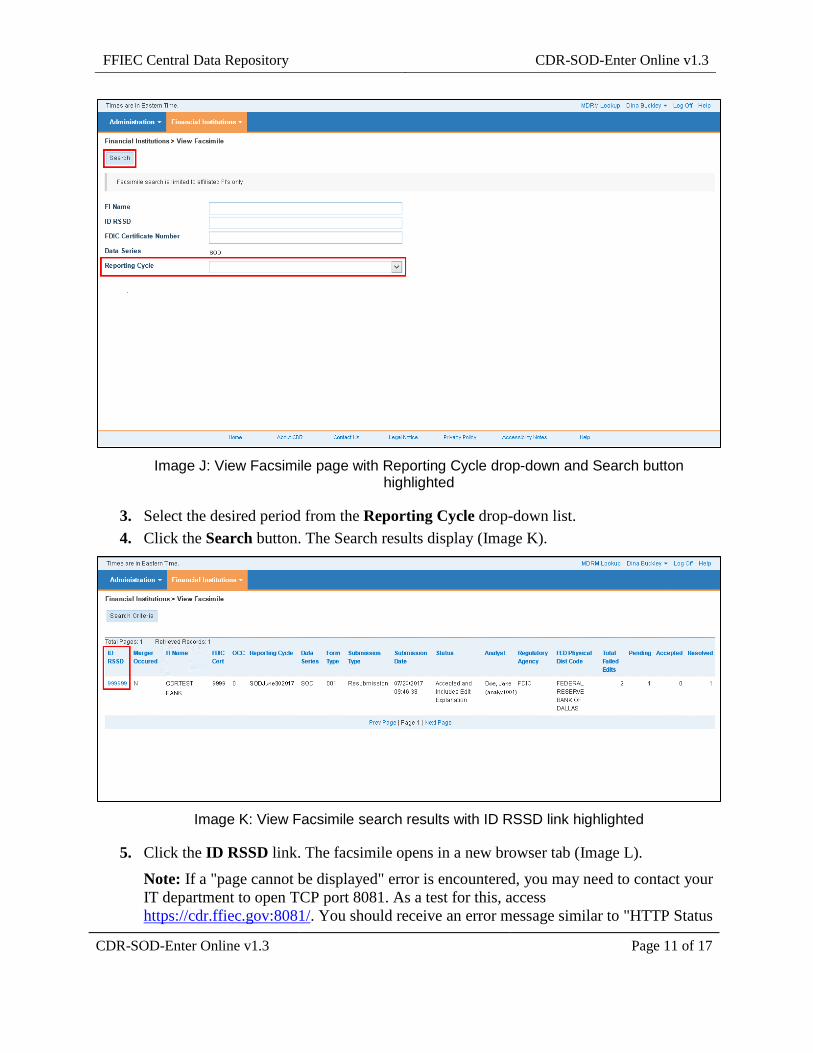
Image J: View Facsimile page with Reporting Cycle drop-down and Search button
highlighted
3. Select the desired period from the Reporting Cycle drop-down list. 4. Click the Search button. The Search results display (Image K).
Image K: View Facsimile search results with ID RSSD link highlighted
5. Click the ID RSSD link. The facsimile opens in a new browser tab (Image L).
Note: If a "page cannot be displayed" error is encountered, you may need to contact your IT department to open TCP port 8081. As a test for this, access https://cdr.ffiec.gov:8081/. You should receive an error message similar to "HTTP Status

FFIEC Central Data Repository CDR-SOD-Enter Online v1.3
CDR-SOD-Enter Online v1.3 Page 12 of 17
404, Apache Tomcat/7.0.67." If instead of the Tomcat error you receive “page cannot be displayed,” then internet traffic is not getting through on port 8081. Your local IT should be able to enable this. Contact the CDR Help Desk if further assistance is needed.
FFIEC Central Data Repository CDR-SOD-Enter Online v1.3
CDR-SOD-Enter Online v1.3 Page 13 of 17
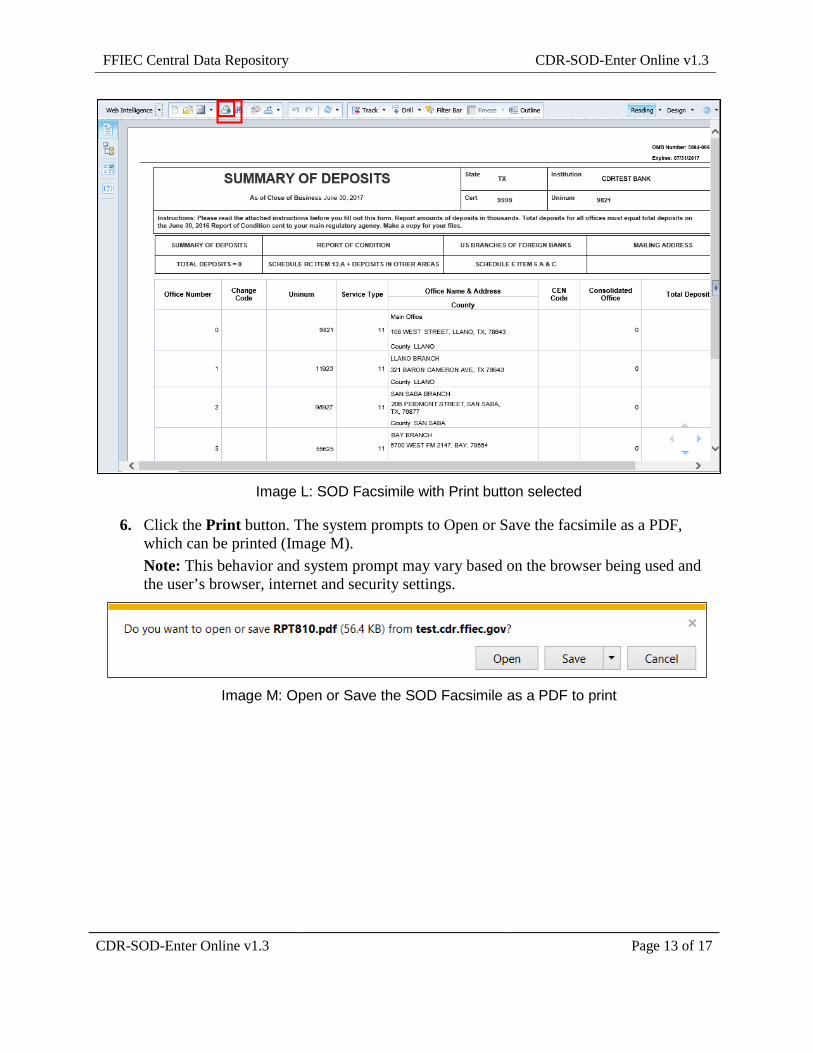
Image L: SOD Facsimile with Print button selected
6. Click the Print button. The system prompts to Open or Save the facsimile as a PDF, which can be printed (Image M). Note: This behavior and system prompt may vary based on the browser being used and the user’s browser, internet and security settings.
Image M: Open or Save the SOD Facsimile as a PDF to print
FFIEC Central Data Repository CDR-SOD-Enter Online v1.3
CDR-SOD-Enter Online v1.3 Page 14 of 17
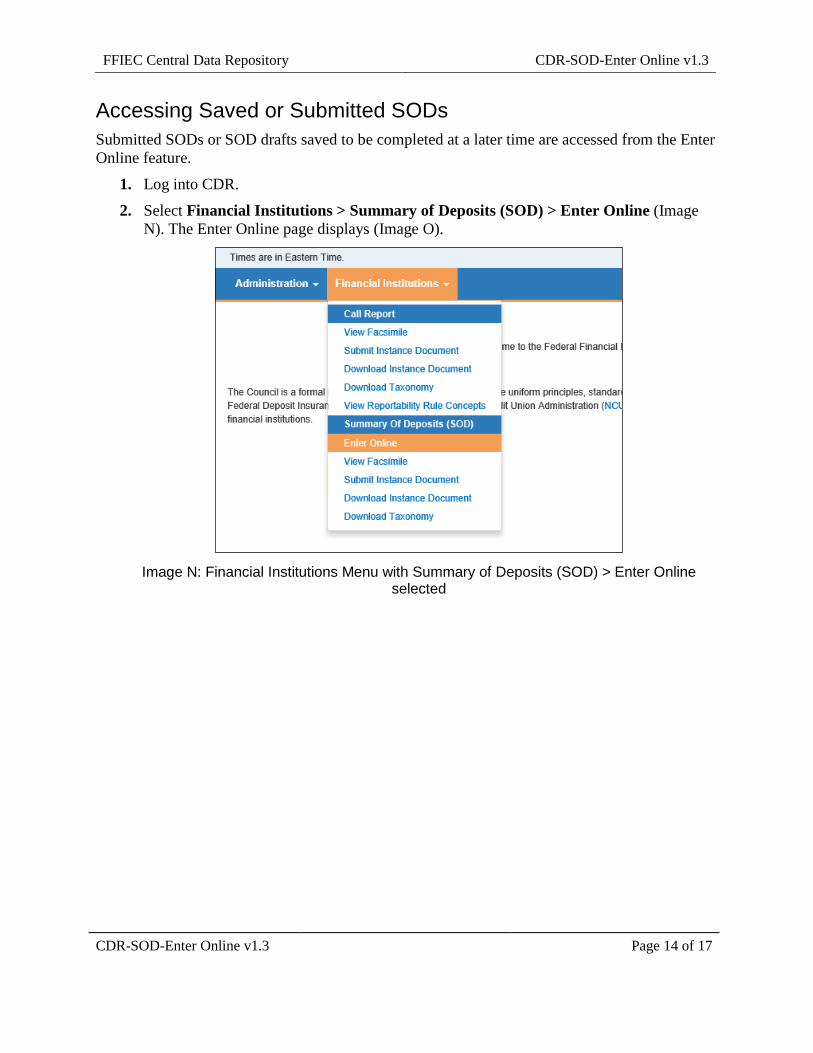
Accessing Saved or Submitted SODs Submitted SODs or SOD drafts saved to be completed at a later time are accessed from the Enter Online feature.
1. Log into CDR.
2. Select Financial Institutions > Summary of Deposits (SOD) > Enter Online (Image N). The Enter Online page displays (Image O).
Image N: Financial Institutions Menu with Summary of Deposits (SOD) > Enter Online
selected

FFIEC Central Data Repository CDR-SOD-Enter Online v1.3
CDR-SOD-Enter Online v1.3 Page 15 of 17
Image O: View Online page with the Continue button and Reporting Cycle drop-down list
highlighted
3. Select the Reporting Cycle from the drop-down list. 4. Click the Continue button. The View Online page displays the default schedule of the
SOD with previously saved data populated for each schedule (Image P).

FFIEC Central Data Repository CDR-SOD-Enter Online v1.3
CDR-SOD-Enter Online v1.3 Page 16 of 17
Image P: View Online page with Blank SOD Report and Facsimile links highlighted
Refer to the Submitting the SOD Online topic for information on entering data and submitting the SOD. Click the Blank SOD Report link to save or print a blank copy (no deposits) of the SOD. Click the Facsimile link to save or print a copy of the SOD facsimile.

FFIEC Central Data Repository CDR-SOD-Enter Online v1.3
CDR-SOD-Enter Online v1.3 Page 17 of 17
Additional Resources The FDIC has provided Reporting Instructions which are available from https://www.fdic.gov: Users should contact their Assigned Analyst for any questions not covered in the Reporting Instructions regarding the data to be entered on the SOD or filing requirements. Users may contact the CDR Help Desk for technical assistance using the CDR system:
• Phone: 1-888-CDR-3111 • Fax: 1-703-774-3946 • E-mail: [email protected] • Submit Online Requests: https://cdr.ffiec.gov/CDR/Public/SubmitHDRequestOnline.aspx