student presentations. overview introduction prepping zipping uploading unzipping viewing
Post on 22-Dec-2015
217 views
TRANSCRIPT

Student Presentations

OverviewOverview
• Introduction• Prepping• Zipping• Uploading• unZipping• Viewing
Intr
od
uct
ion
Intr
od
uct
ion
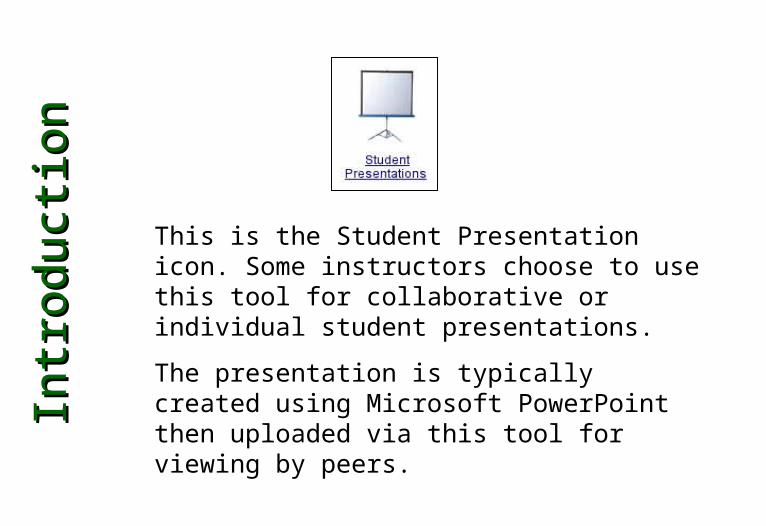
This is the Student Presentation icon. Some instructors choose to use this tool for collaborative or individual student presentations.
The presentation is typically created using Microsoft PowerPoint then uploaded via this tool for viewing by peers.

Loca
ting
Lo
cati
ng
Pre
senta
tions
Pre
senta
tions
Student Presentations may be found directly on the Homepage OR inside a specific course section.
Student Presentations may be found directly on the Homepage OR inside a specific course section.
In this tutorial the Student Presentation tool is inside the section for “Study Tools”, click to enter section.
In this tutorial the Student Presentation tool is inside the section for “Study Tools”, click to enter section.
Stu
dent
Pre
senta
tions
Stu
dent
Pre
senta
tions
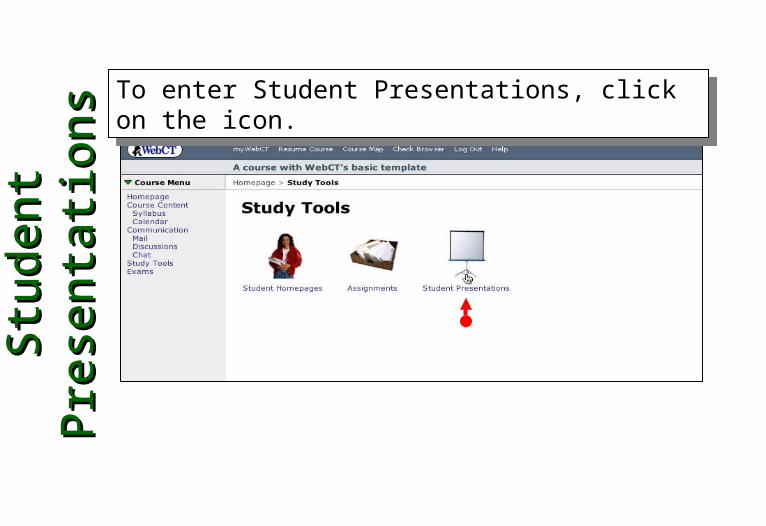
To enter Student Presentations, click on the icon.To enter Student Presentations, click on the icon.

Pre
senta
tions
Pre
senta
tions
Overv
iew
Overv
iew
The Presentations tool will list all presentation groups. Only a group member has access to their presentation area to upload or exchange files.
The Presentations tool will list all presentation groups. Only a group member has access to their presentation area to upload or exchange files.
Click the button for “Edit Files” to enter your presentation area.
Click the button for “Edit Files” to enter your presentation area.
Pre
senta
tions
Pre
senta
tions
Overv
iew
Overv
iew
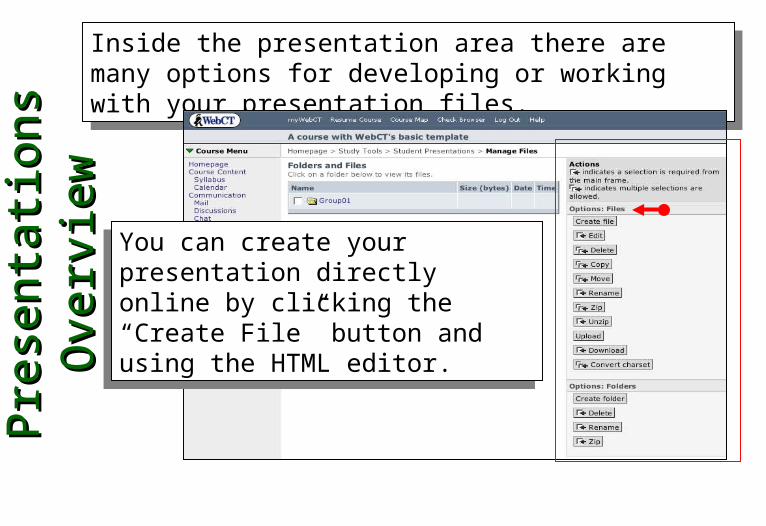
Inside the presentation area there are many options for developing or working with your presentation files.
Inside the presentation area there are many options for developing or working with your presentation files.
You can create your presentation directly online by clicking the “Create File” button and using the HTML editor.
You can create your presentation directly online by clicking the “Create File” button and using the HTML editor.

Pow
erP
oin
tPow
erP
oin
t
More often than not the presentation is created using Microsoft PowerPoint, saved as a Web page and uploaded.
The following section of this tutorial describes saving as a Web Page in Microsoft PowerPoint 2000.
Microsoft PowerPoint 2004 has similar steps.
Savin
g a
s W
eb
Pag
eS
avin
g a
s W
eb
Pag
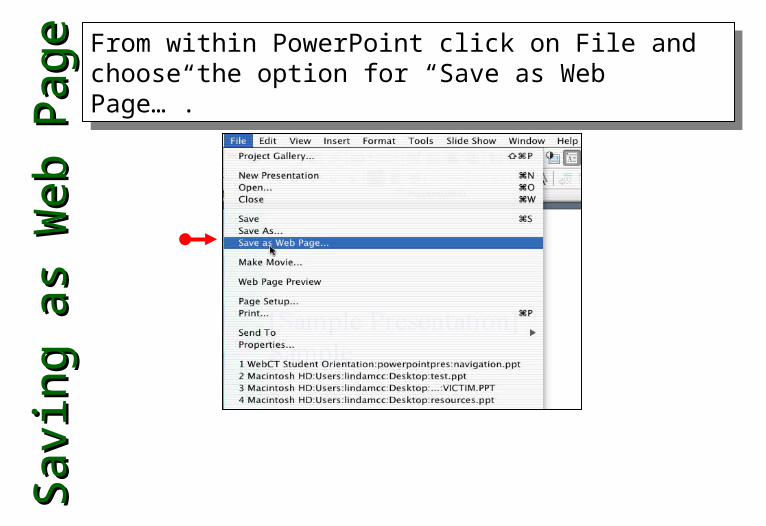
e From within PowerPoint click on File and choose the option for “Save as Web Page…”.
From within PowerPoint click on File and choose the option for “Save as Web Page…”.
Sett
ing
sS
ett
ing
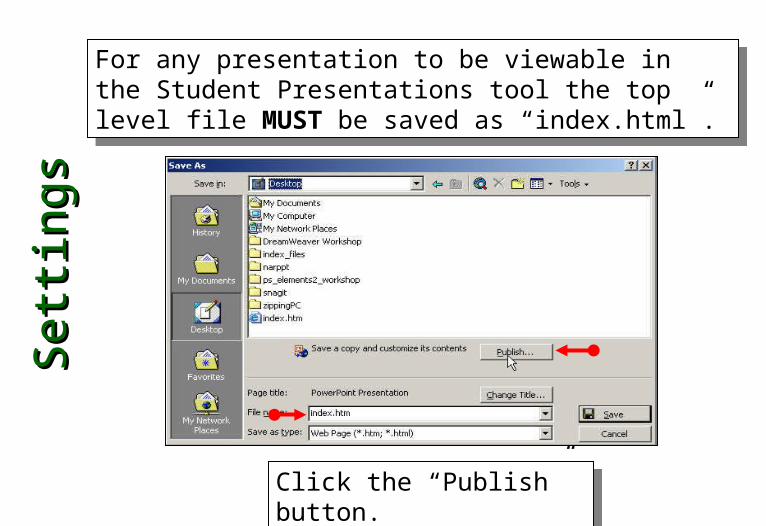
sFor any presentation to be viewable in the Student Presentations tool the top level file MUST be saved as “index.html”.
For any presentation to be viewable in the Student Presentations tool the top level file MUST be saved as “index.html”.
Click the “Publish” button.Click the “Publish” button.
Sett
ing
sS
ett
ing
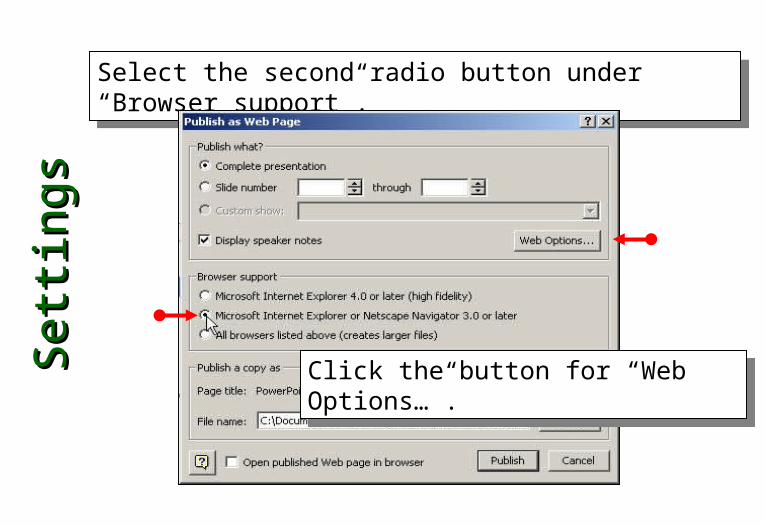
sSelect the second radio button under “Browser support”.Select the second radio button under “Browser support”.
Click the button for “Web Options…”.Click the button for “Web Options…”.
Sett
ing
sS
ett
ing
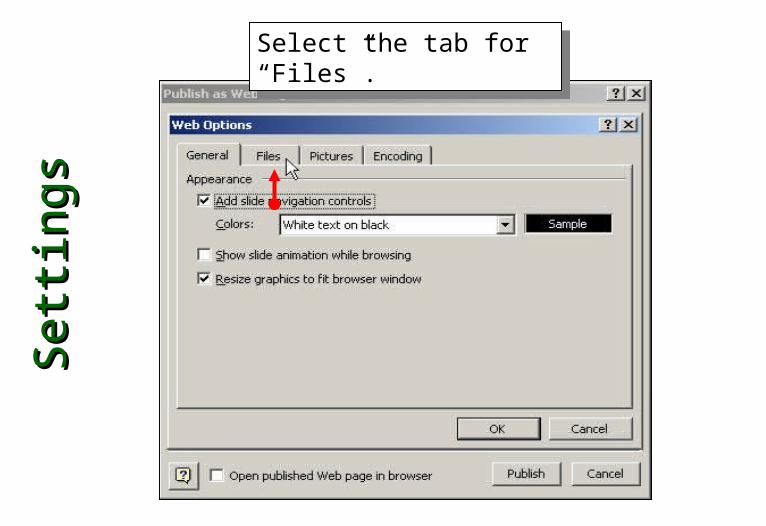
sSelect the tab for “Files”.Select the tab for “Files”.

Sett
ing
sS
ett
ing
sDELESELECT the checkbox for “Organize supporting files in a folder” and click “OK” button when done.
DELESELECT the checkbox for “Organize supporting files in a folder” and click “OK” button when done.
Sett
ing
s S
ett
ing
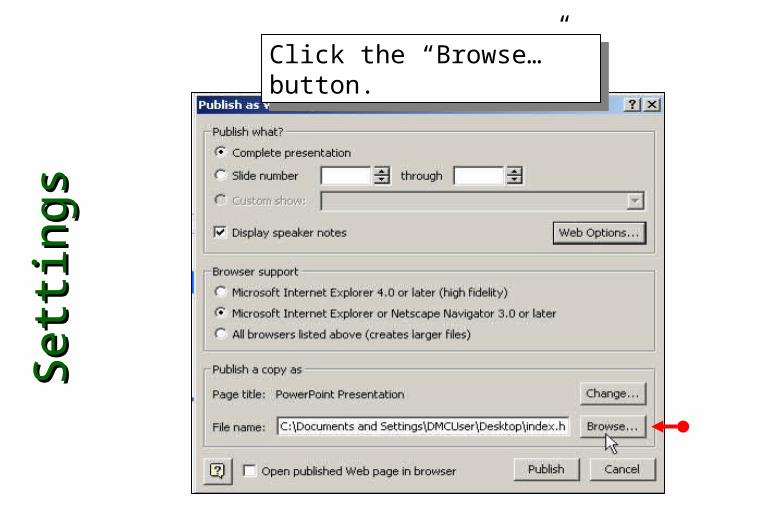
s Click the “Browse…” button. Click the “Browse…” button.
Sett
ing
sS
ett
ing
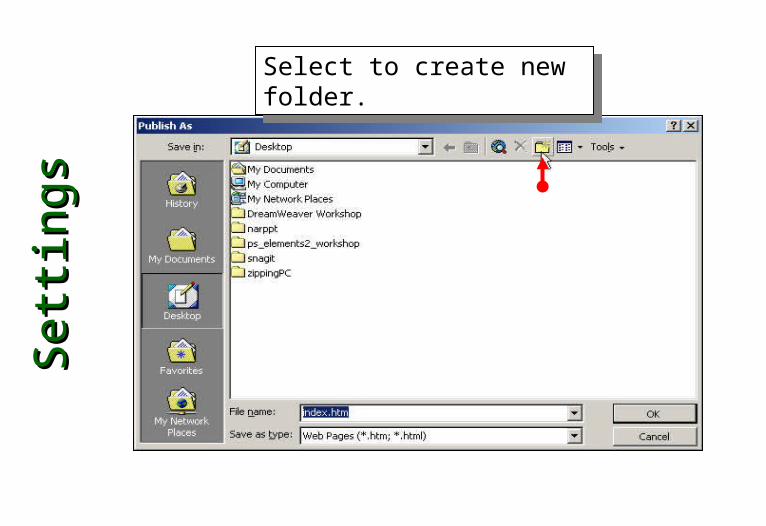
sSelect to create new folder.Select to create new folder.

Sett
ing
sS
ett
ing
sEnter same name as presentation and click the “OK” button.
Enter same name as presentation and click the “OK” button.

Sett
ing
sS
ett
ing
sTo exit, click the “OK” button.To exit, click the “OK” button.

Sett
ing
sS
ett
ing
sTo finalize the save as web page process click the “Publish” button.
To finalize the save as web page process click the “Publish” button.
Zip
pin
gZ
ipp
ing
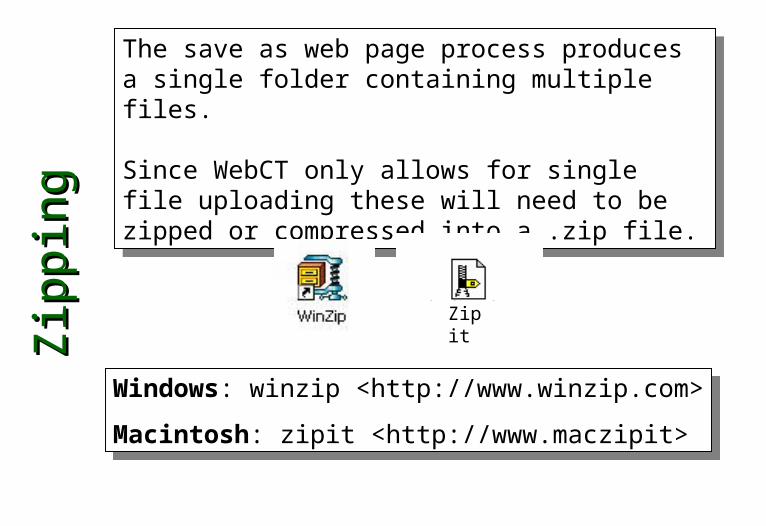
The save as web page process produces a single folder containing multiple files.
Since WebCT only allows for single file uploading these will need to be zipped or compressed into a .zip file.
The save as web page process produces a single folder containing multiple files.
Since WebCT only allows for single file uploading these will need to be zipped or compressed into a .zip file.
Zipit
Windows: winzip <http://www.winzip.com>
Macintosh: zipit <http://www.maczipit>
Windows: winzip <http://www.winzip.com>
Macintosh: zipit <http://www.maczipit>
Zip
pin
gZ
ipp
ing
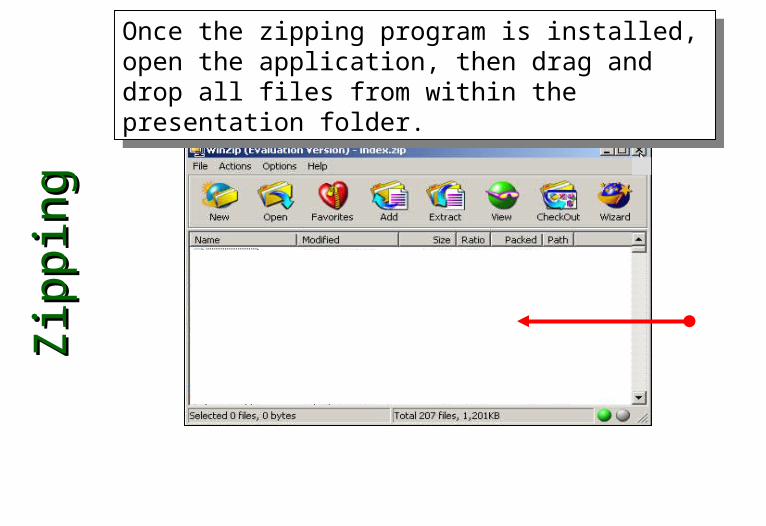
Once the zipping program is installed, open the application, then drag and drop all files from within the presentation folder.
Once the zipping program is installed, open the application, then drag and drop all files from within the presentation folder.

Zip
pin
gZ
ipp
ing
With the mouse click after the word “\Desktop\” and type in the name of the presentation (index).
This will be the name of the zipped file.
Click the “Add” button.
With the mouse click after the word “\Desktop\” and type in the name of the presentation (index).
This will be the name of the zipped file.
Click the “Add” button.

Zip
pin
gZ
ipp
ing
Click the x box to close.Click the x box to close.
Zip
pin
g
Zip
pin
g
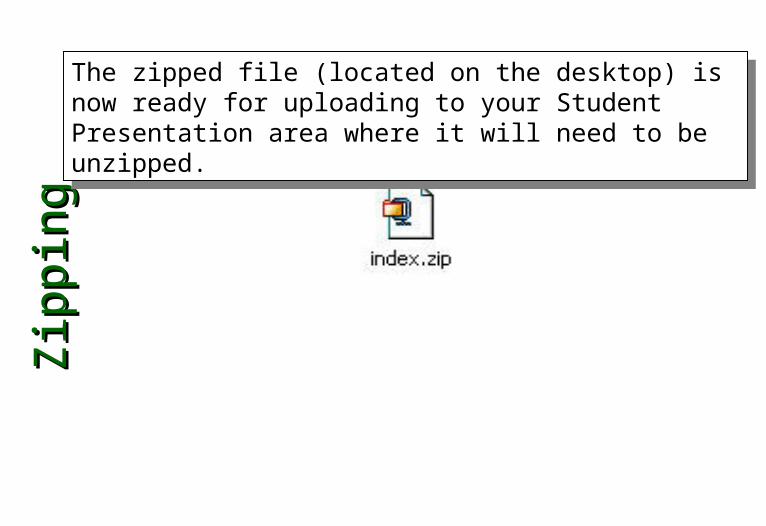
The zipped file (located on the desktop) is now ready for uploading to your Student Presentation area where it will need to be unzipped.
The zipped file (located on the desktop) is now ready for uploading to your Student Presentation area where it will need to be unzipped.

Up
load
ing
Up
load
ing
Inside Student Presentations for your group click on the “Upload” button.
Inside Student Presentations for your group click on the “Upload” button.
Up
load
ing
Up
load
ing
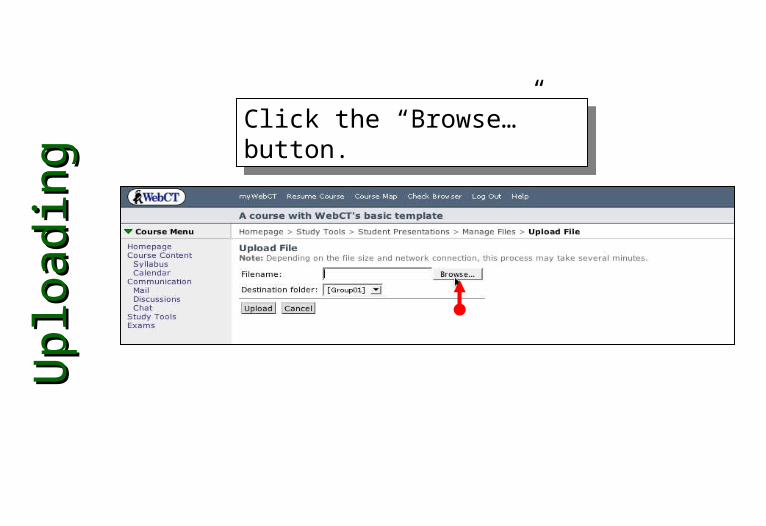
Click the “Browse…” button.Click the “Browse…” button.
Up
load
ing
Up
load
ing
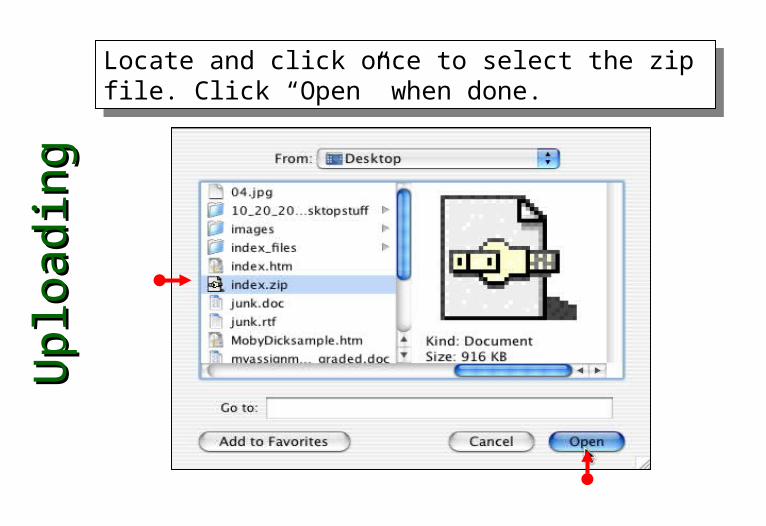
Locate and click once to select the zip file. Click “Open” when done.
Locate and click once to select the zip file. Click “Open” when done.

Up
load
ing
Up
load
ing
Click the “Upload” button.Click the “Upload” button.

Unzi
pp
ing
Unzi
pp
ing
To extract the files select the checkbox next to the zipped file title and click the “Unzip” button.
To extract the files select the checkbox next to the zipped file title and click the “Unzip” button.

Unzi
pp
ing
Unzi
pp
ing
Click the “Unzip” button.Click the “Unzip” button.

Vie
win
gV
iew
ing
To view the presentation click on the WebCT Breadcrumb for “Student Presentations”.
To view the presentation click on the WebCT Breadcrumb for “Student Presentations”.

Vie
win
gV
iew
ing
To open a presentation click on the title in the “Description” column.
To open a presentation click on the title in the “Description” column.
Vie
win
gV
iew
ing
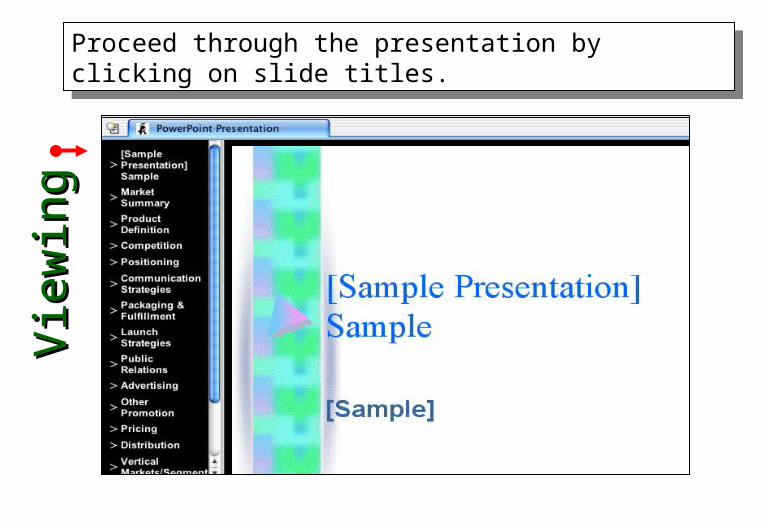
Proceed through the presentation by clicking on slide titles.
Proceed through the presentation by clicking on slide titles.
RefresherRefresher
• Introduction• Prepping• Zipping• Uploading• unZipping• Viewing