start smart sports development program coordinator … · progresses, exercises become increasingly...
TRANSCRIPT
Start Smart Sports Development Program
Coordinator Manual
All material in this program is the property of the National Alliance for Youth Sports. Copyright and other intellectual property laws protect these materials. Reproduction or
retransmission of the materials, in whole or in part, in any manner, without the prior written consent of the copyright holder, is a violation of copyright law.
Dear Start Smart Instructor: Thank you for accepting the position of Start Smart Instructor. This manual will give you detailed instructions on how to run your program.
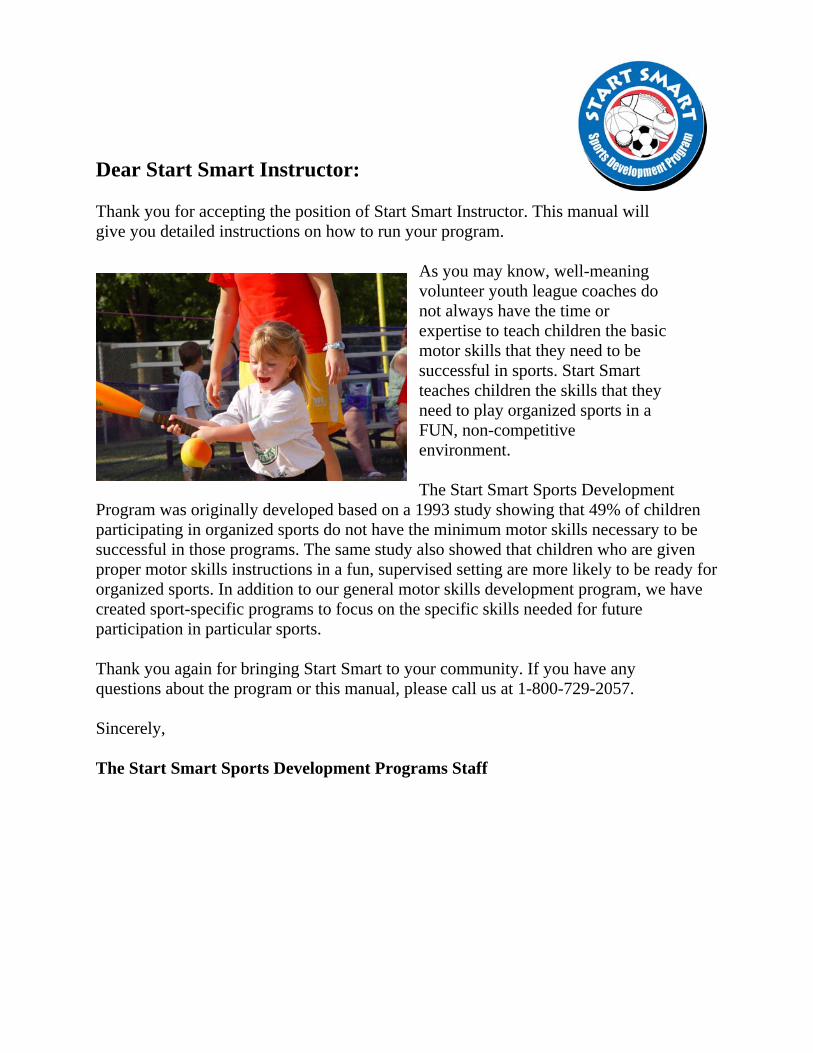
As you may know, well-meaning volunteer youth league coaches do not always have the time or expertise to teach children the basic motor skills that they need to be successful in sports. Start Smart teaches children the skills that they need to play organized sports in a FUN, non-competitive environment. The Start Smart Sports Development
Program was originally developed based on a 1993 study showing that 49% of children participating in organized sports do not have the minimum motor skills necessary to be successful in those programs. The same study also showed that children who are given proper motor skills instructions in a fun, supervised setting are more likely to be ready for organized sports. In addition to our general motor skills development program, we have created sport-specific programs to focus on the specific skills needed for future participation in particular sports. Thank you again for bringing Start Smart to your community. If you have any questions about the program or this manual, please call us at 1-800-729-2057. Sincerely, The Start Smart Sports Development Programs Staff
Table of Contents Introduction What is the Start Smart Sports Development Program? Page 1 The Start Smart Mission Page 1 Who is the National Alliance for Youth Sports Page 1 Why Start Smart? Page 2 What about the Products? Page 2 Program Guidelines Page 3
The Start Smart Instructor What are your Responsibilities Page 4 Program Checklist Page 4 Materials Checklist Page 5 Frequently Asked Questions Page 6 Sample Schedule Page 7
Program Format Week 1 – Skill Assessment Page 10 Week 2 and 3 – Skill Exercises Page 12 Week 4 and 5 – Supplemental Games and Activities Page 13 Week 6 and 7 – Skill Exercises Page 14 Week 8 and 9 – Supplemental Games and Activities Page 15 Week 10 – No Lesson This Week Page 16 Week 11 and 12 – Skill Exercises Page 17 Week 13 and 14 – Supplemental Games and Activities Page 18 Week 15 – Skill Assessment Page 19 Week 16 and 17 – Skill Exercises Page 21 Week 18 and 19 – Supplemental Games and Activities Page 22 Week 20 – No Lesson This Week Page 24 Week 21 and 22 – Skill Exercises Page 25 Week 23 and 24 – Supplemental Games and Activities Page 26 Week 25 and 26 – Skill Exercises Page 27 Week 27 and 28 – Supplemental Games and Activities Page 28 Week 29 – No Lesson This Week Page 29 Week 30 and 31 – Skill Exercises Page 30 Week 32 and 33 – Supplemental Games and Activities Page 31 Week 34 – Skill Assessment Page 32 Week 35 and 36 – Skill Exercises Page 34 Week 37 and 38 – Supplemental Games and Activities Page 35 Week 39 – No Lesson This Week Page 37 Week 40 and 41 – Skill Exercises Page 38 Week 42 and 43 – Supplemental Games and Activities Page 39 Week 44 and 45 – Skill Exercises Page 41 Week 46 and 47 – Supplemental Games and Activities Page 42 Week 48 – Skill Assessment Page 45 Week 49-52 – No Lesson This Week Page 47
Appendix Performance Cues Posters Page A1 Sample Floor Plan Page A2 Skill Assessment Sheet Page A3 andA4 Instructor Survey Page A5 Participant Roster Page A6 Equipment List Page A7
- 1 -
Introduction What is the Start Smart Sports Development Program? The Start Smart Sports Development Program, a program of the National Alliance for Youth Sports, teaches children (ages 3-5) the basic motor skills necessary to play organized sports while they work one-on-one and spend quality time with a member of your staff. The program focuses on teaching children basic sports mechanics without the threat of competition or the fear of getting hurt. Start Smart sessions are held once a week for 45-60 minutes. As the program progresses, exercises become increasingly more difficult as the class progresses and the children show improvement. The Start Smart Mission The Start Smart Sports Development Programs were created to teach children the basic motor skills necessary to participate in organized sports while giving them the opportunity to work one-on-one with an adult. The programs were developed to be informative and fun, so children will have a positive first time sports experience and continue participating in sports beyond this introductory level.
Who is the National Alliance for Youth Sports? Formed in West Palm Beach, Florida in 1981 the “Alliance” was originally developed as a volunteer youth sport coaches certification system (NYSCA) with a simple mission: to make youth sports fun and safe for kids. Since 1981, the nonprofit association has
developed into a diverse organization with a number of national programs and accredited chapters in all fifty states. The programs offered by the Alliance include: the National Youth Sports Coaches and Officials Association, the National Academy for Youth Sports Administrators, Parents Association for Youth Sports, the Start Smart Development Programs, Hook A Kid On Golf and Ready, Set, Run!. These programs are administered by the Alliance’s two divisions; Education and Youth Development. While the Education division concentrates on programs that educate adults, the Youth Development division focuses on programs that deal directly with children. Specifically, the Youth Development division develops programs that build proficiency and confidence that youngsters need to participate and remain active in sports by 1) offering programs that teach the basic motor skills necessary for meaningful sports participation, 2) generating interest in lifetime activities and 3) providing a healthy fitness attitude for life. The Start Smart Sports Development Program, along with the other Start Smart programs, is administered through the Youth Development division of the National Alliance for Youth Sports. Why Start Smart? Before entering organized youth sports programs, children need to master the fundamental motor skills that serve as a basis for more complex sports skills. Children do not effectively learn these skills by playing games, but rather by practicing developmentally appropriate activities.
- 2 -
Developmentally appropriate activities are tasks designed for the child’s current level of performance ability while using equipment that enables the child to be successful. Success is extremely important in early motor skill learning experiences, as it builds self-esteem and the motivation and confidence needed to try and improve. Children who enter youth sports programs with fundamental motor skills and confidence in their ability to perform are much more likely to learn new and more complex sport-specific skills, achieve success in competition, and enjoy a positive sports experience. These children are also more likely to participate in sports and fitness activities as adults. All children should be provided with effective, developmentally appropriate activities and equipment to prepare them for future organized sports and fitness opportunities. Start Smart accomplishes this by offering programs that encourage children to participate in youth sports without the threat of competition or the fear of getting hurt. References The Start Smart Sports Development Program developmental tasks and program guidelines were developed by motor skill development specialists from Northern Kentucky University. The program is based on the research findings (Kirk, 1993), practices of effective motor development teachers and programs (Graham, Holt/Hale & Parker, 1993), and is influenced by the National Association for Sport and Physical Education’s Council on Physical Education for Children’s Position Statement: “Developmentally appropriate physical education practices for children” (1991). And the following publications:
Graham, G.; Holt/Hale S.; & Parker, M. (1993). Children Moving: A Reflective Approach to Teaching Physical Education (3rd Ed.). Mountain View, CA: Mayfield.
Kirk, M.F. (1993). Youth Sports Readiness and Remediation Study; Unpublished research study; Northern Kentucky University.
What about the products? The 1993 study at Northern Kentucky University showed that children ages 5-10 participating in a motor skill development program improved at a greater rate while using specialized equipment as opposed to traditional elementary physical education equipment. The products used in the Start Smart programs are the most innovative available and are developmentally appropriate for teaching youngsters the basic motor skills that are emphasized in the program. The Start Smart Sports Development Program utilizes developmentally appropriate products from the following companies:
Introduction

- 3 -
Program Guidelines The following guidelines should be emphasized during your Start Smart program to ensure that the children obtain high levels of achievement and success during the program. Staff members should be aware of the guidelines at all times while working on basic motor skill development with children.
Positive Learning Environment: Children must be provided with a positive non-threatening learning environment where they receive a great deal of encouragement and success. Children are Unique: All children are unique and learn at different rates. It takes them much effort and many practice trials to improve. Maximum Involvement: Each child needs the opportunity to practice skills learned. START SMART activities are organized to provide children optimal time to practice skills at the same time. To maximize individual practice time, equipment is provided for each instructor-child group. Success is Important: The child should experience high success rates on a task. Modify the task if it is difficult for the child to succeed. Once success is attained, increase the difficulty of the task incrementally. An example of modifying a task is changing the distance that a ball must travel. Appropriate Equipment: The equipment must be developmentally appropriate for the child. Start Smart provides equipment that is the appropriate size and weight for this age group. Keep it simple: Children are not “little adults” and they learn and comprehend differently than adults. In the early learning stages, keep it simple by demonstrating exactly what you want them to do. Positive Feedback: Clear, concise, positive feedback from the staff regarding the child’s performance and effort will enhance learning. Expert Success: All kids need a lot of encouragement and a feeling that your only expectations are that they learn and improve. If you expect success, the children will have the confidence to believe that they are capable of succeeding in the particular task. Complete Tasks Before Continuing: Start Smart activities are organized from simple to more complex. A child should complete one task successfully before moving on to the next exercise. Review Tasks: Children will benefit from reviewing previously completed tasks. This practice is especially helpful if they are having difficulty with the task at hand.
Introduction
- 4 -
The Start Smart Instructor What are your Responsibilities? As a Start Smart Instructor, you are the key to the success of your program! We recommend that you, the Child Development Center (CDC) Training and Curriculum Specialist, CDC Lead or Mentor, or Child and Youth Program Assistant (CYPA), and other instructors assigned to implement the Start Smart program familiarize yourselves with all of the program materials prior to running Start Smart for the first time. You can use the instructor manual as a guide to successfully implement your Start Smart program. This Start Smart Coordinator Manual should be used in conjunction with the Participant Manual that you received with your Start Smart Starter Kit. Program Checklist Below is a checklist of your responsibilities as a Start Smart Instructor. Each item refers to a subject covered later in the manual. We recommend using the checklist as a timeline while working toward your program start date. Materials Checklist
The Instructor
� Review Start Smart Coordinator Manual � Review the Materials Checklist (page 5) to assure that you have received all of your equipment in your Starter Kit. � Establish a location for your program (CDC/SAS multi-purpose room or outdoor area). � Develop Start Smart implementation plan. � Schedule Smart Start into the CDC or SAS Daily Activities Plans. �Recruit parent and teen volunteers to assist with the program. � Order any additional materials from the Start Smart National Office 3 weeks prior to the start of your program. � Gather the additional program materials needed for your program (page5). � Implement Start Smart by following the Program Format (page 7) in this manual.
- 5 -
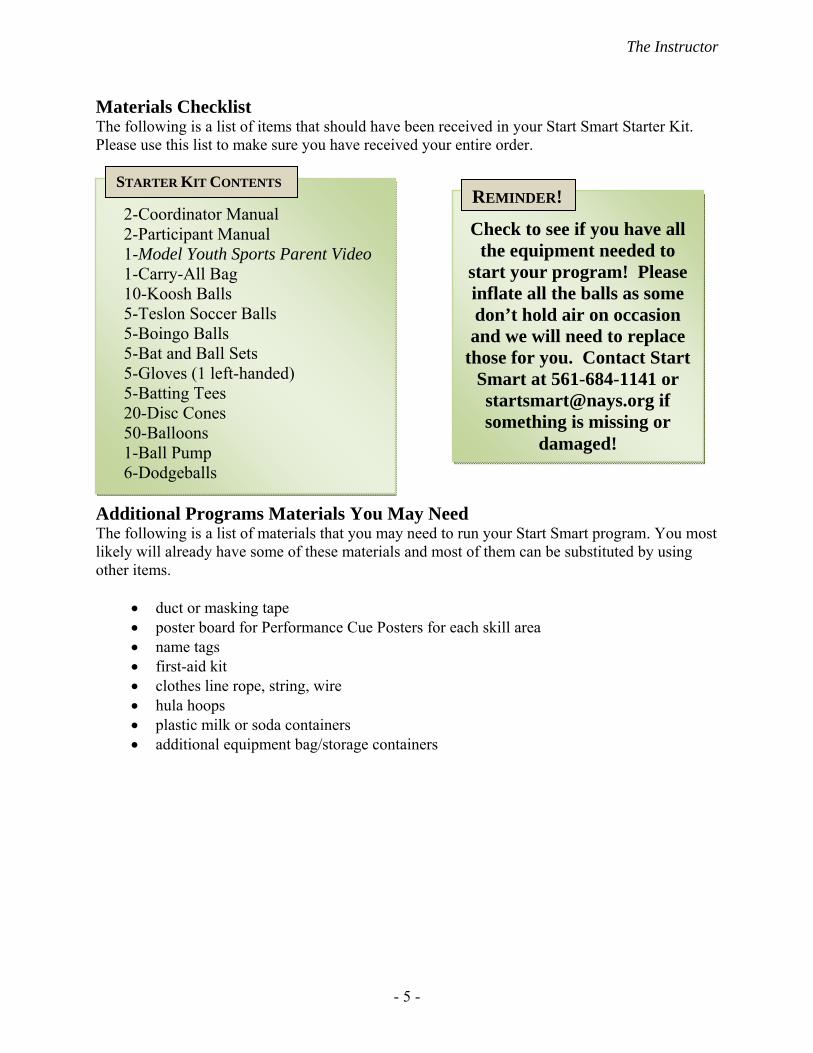
Materials Checklist The following is a list of items that should have been received in your Start Smart Starter Kit. Please use this list to make sure you have received your entire order.
Additional Programs Materials You May Need The following is a list of materials that you may need to run your Start Smart program. You most likely will already have some of these materials and most of them can be substituted by using other items.
duct or masking tape poster board for Performance Cue Posters for each skill area name tags first-aid kit clothes line rope, string, wire hula hoops plastic milk or soda containers additional equipment bag/storage containers
� 2-Coordinator Manual � 2-Participant Manual � 1-Model Youth Sports Parent Video � 1-Carry-All Bag � 10-Koosh Balls � 5-Teslon Soccer Balls � 5-Boingo Balls � 5-Bat and Ball Sets � 5-Gloves (1 left-handed) � 5-Batting Tees � 20-Disc Cones � 50-Balloons � 1-Ball Pump � 6-Dodgeballs
Check to see if you have all
the equipment needed to start your program! Please inflate all the balls as some don’t hold air on occasion and we will need to replace
those for you. Contact Start Smart at 561-684-1141 or [email protected] if something is missing or
damaged!
The Instructor
STARTER KIT CONTENTS REMINDER!

- 6 -
Frequently Asked Questions When is the best time to conduct a Start Smart Program? Smart Start can be run anytime, but you may want to consider running your program as a developmental program prior to the next scheduled youth sports leagues. This would enable those children who would like to participate in the next league to prepare themselves in advance. The Sports Readiness Assessment will enable parents to recognize if their child is ready for organized sports. Smart Start is recommended for children between the ages of 3-7 years old. However, this particular Start Smart program has been modified to be run year-round and will overlap with all of your youth sports’ seasons. Where can I implement my Start Smart Program? Start Smart can be run indoors or outside with the equipment that is included in your Starter Kit. If you are planning to hold your program outdoors, you need to consider variables like the weather, time changes in the spring and fall, and insects. Please remember - some of the Start Smart exercises require the use of a wall as a target. If needed, how would I recruit parent and teen volunteers to assist with Start Smart? Advertise at the front desk, Central Enrollment and Registration (CER), your youth center and ask during sports registration sign-up, bearing in mind that many parents are apprehensive to coach a team but may be interested in teaching a skill development program. What if a child’s attention span prompts him/her to want to move to the next station before the instructor gives the signal? For a program comprised of mostly young children, where attention spans are generally very short, you may want to decrease the time at each station to 7 or 8 minutes (rather than the 10 minutes, as specified in the program format). What if a child refuses to participate in an activity? Some children may not want to participate in a certain activity. Please have books, crayons or something similar available for them to keep them occupied and engaged. Always encourage them to participate in the activities, but sometimes that just won’t be enough. It is helpful to provide them with an activity to keep them busy so they don’t become a distraction and detract from what you are trying to teach the other children. Is the child ready to play in an organized youth sports league once he/she has finished the Start Smart program? Refer to the “Interpreting Assessment” section in the back of the Participant Manual. However, it is important to remember that even if a child proves to be physically ready to participate in organized sports, he or she may not be emotionally ready. This decision should be based on both the physical and emotional development of the child. The National Alliance for Youth Sports recommends that children should not be involved in competitive sports before the age of eight.
The Instructor
- 7 -
Program Format
The following is a standard schedule for the Start Smart Sports Development Program. Each session should be scheduled for 1 day per week and will last approximately one hour. You should have 1 instructor per 5 children. Start Smart Sports Development Program Schedule Week 1: Smart Start Skill Assessment Weeks 2, 3: Skill Development Exercises Week 4, 5: Skill Development Activity, Mock Games Week 10: Off
Sample Schedule - Week 1
Week 1: Skill Assessment The skill assessment can take place over the course of one week. It does not need to be completed within the usual one-hour time frame. Each assessment will consist of 29 components that will need to be accurately observed relating to 5 different skills (overhand throwing, underhand throwing, kicking, catching and batting). You may have to have a child perform a certain task multiple times in order to observe all the necessary components. The appendix of this manual (page A3 and A4) contains a skill assessment form that can be copied and used for each child. You will need approximately 5-10 minutes to complete the assessment of one child.
Sample Schedule - Weeks 2, 3
Week 2: Skill Development Sessions (for a program beginning at 9:00 am) 8:30 am: Set-Up
Have your room already set-up with the four skill stations. Performance Cues posters (if available) should be placed in a visible spot.
9:00-9:10am: Preview The Start Smart Instructor previews the program. Include the following:
Show each exercise for the appropriate week at the skill stations with the suggested equipment.
- 8 -
Intructors should know beforehand with which group of kids they will be working and have an understanding of how to perform/teach each skill for that week.
Remind instructors that tasks may be altered (adjust the distance, etc.) to make the skill easier or more difficult to suit each child’s ability.
9:10-9:20 am: Begin Skill Development Exercises
As the Start Smart Instructor, you should monitor all skill stations. If enough instructors are not available, the head instructor will need to assist by working with a group of children as well.
Each skill should be reviewed with the children before they actually begin the tasks. Instructors should concentrate on proper execution of the Performance Cues by the children, and not necessarily the results.
The Start Smart Instructor needs to continuously remind everyone of the importance of the posted Performance Cues and of giving positive feedback to the children.
9:20-10:00 am: Rotate to all Stations
Rotate through the rest of the stations, switching every 8-10 minutes.
10:00 am: Wrap Up Before the children are dismissed, answer any questions that they may have. Encourage the children to practice at home. Discuss what skills will be learned the following week.
Sample Schedule - Weeks 4, 5 Week 4: Supplemental Games and Activities – Skill Enhancement 8:30 am: Set-Up
Have your room already set-up with the needed equipment inflated/ready for use. Performance Cues posters should be placed in a visible spot. Feel free to create your own variations of the games listed or incorporate games/activities
that you already use with the children. As long as the skills from Start Smart are being utilized in a fun and interactive way, our goals are being met!
9:00-9:10am: Preview The Start Smart Instructor previews the day’s activities. Include the following:
Demonstrate or explain the rules of the game/activity that will be played. Please make sure all instructors know which games/activities are being played and are comfortable leading the children in them.
The purpose of these games/activities is to give the children an opportunity to put into practice the skills they have learned during the Start Smart Program up to this point. This week is designed to develop skills in a “fun” setting for the children.
Program Format
- 9 -
Program Format
9:10-10:00 am: Begin Games/Activities
As the Start Smart Instructor, you should monitor the activities while the other instructors lead the children.
Remember to emphasize the Performance Cues as the children participate. Do your best to make sure all the children stay involved. If a particular game or activity seems popular amongst the children, feel free to use it
again during the duration of the Start Smart program.
10:00 am: Wrap Up Before the children are dismissed, answer any questions that they may have. Encourage the children to practice at home. Discuss what skills were learned/developed from the day’s activities.
Sample Schedule – Week 10
Week 10: Off Even though this week (as well as 3 other weeks throughout the duration of the program) is scheduled as “off”, it may be utilized as a “catch-up” week for you and/or some of your children. Absences are going to happen, so take this week to try to get all of your children up to the same point in the program. You also may encounter holidays or other program cancellations, so the built-in “off” weeks are there to keep your program flowing smoothly and on schedule. You may also take this week to devote extra time to some of the children that may be struggling with a particular skill. Children are going to develop at different rates, so some extra practice for those who aren’t developing as quickly is certainly going to be needed at some point during the program. Finally, if you want to hold a Start Smart session during the “off” week, you are more than welcome to do so. We would recommend offering some of the games/activities that the children have enjoyed up to this point in the program. If the children are physically active, developing their skills, and having fun, then it is certainly worthwhile to utilize the “off” week in this manner.

- 10 -
Program Curriculum Start Smart Skill Assessment – Week 1 During week 1 you will perform a skill assessment on each of your students. This does not need to be completed all on the same day. Please take time over the course of a week to assess each student. All the tasks that the students will be tested on can be found on in this manual’s appendix (pages A3 and A4). You will need to make a copy of those pages as each student will need his or her own assessment sheet. Please keep the assessment sheets as you will perform this test 4 times throughout the year. Results can and should be shared with each child’s parent/guardian to show what skills are being taught, learned and what the child still may need to improve upon.
Please review the Participant Manual’s Performance Cues (pages 3-10) as these are the components that will be assessed during the testing period. The Participant Manual (pages 11-17) also contains the detailed instructions for performing the skill assessments. When performing the skill assessment, you may need to have the child perform each task multiple times as there are several components to each task that you must observe. Please take your time in evaluating each child as it is important to be as accurate as possible. The following information is a brief overview and will help to serve as your “how to” guide when performing the assessments. Read the directions and set-up for each skill area that follows. Understand that the test is NOT used to rank or score any of the children, and the scores are only for you and the child’s parent/guardian to see. **IMPORTANT** Do not give the child any additional instructions other than what is provided to ensure the accuracy of the test results. Throwing Test Throwing Test Set Up and Equipment Requirements On a large wall (at least 10 feet high by 20 feet wide), mark a circle eight feet in diameter with either chalk or marking tape. Use the Koosh Ball for this test. Instructions The child gets one practice throw and then six additional throws to get the ball inside the circle from the designated throwing line. The child may step over the line when throwing. Verbal Instructions to the Child “Stand behind the line when you throw. You may step over it when you throw. You will get one practice throw and then the next six are for scores. Throw the ball as hard as you can and try to hit the center of the circle.”

- 11 -
Catching Test Catching Test Set Up and Equipment Requirements Mark off 2 lines on the floor (10 feet apart). Have the children stand on one line and the parents stand on the other line. Encourage the parents and children to face each other, and give the parents a Koosh Ball. Instructions The parent tosses the Koosh Ball in an arc to the child so that the child does not have to take more than one step to catch the ball. If the child moves more than one step and does not catch the ball, the trial should be taken over. Verbal Instructions to the Child “Stand on the line and when I toss you the ball try to catch it with your hands before it hits the ground. You can step over the line to catch the ball.” Kicking Test Kicking Test Set Up and Equipment Requirements On a large wall (at least 10 feet high by 20 feet wide), mark a rectangle six feet wide by eight feet high with either chalk or marking tape. Mark a line 20 feet away from the wall. Use the soccer ball for this test. Instructions The ball is placed on the 20-foot line and the child stands behind the line, runs up to the ball, and kicks it trying to hit the target area on the wall. Verbal Instructions to the Child “Stand behind the line, move to the ball and kick it as hard as you can to the target. You may cross over the line as you kick the ball.” Batting Test Batting Test Set Up and Equipment Requirements In an open area, mark off 2 lines (15 feet apart). Participants will need a batting tee (or something comparable), a bat and the soft foam ball. Instructions Place the tee on one of the marked lines. The child stands next to the tee with his/her non-dominant side facing the target area. The child will try to hit the foam ball off the tee so that it travels over the other 15-foot line. Verbal Instructions to the Child “Stand facing the batting tee with the bat in your hands ready to swing when I say ‘go’. Try to hit the ball hard so that it goes in the air and lands past the line.”

- 12 -
Skill Development Exercises - Week 2 and 3 Station #1 - Throwing Throwing at a Large Target Equipment Needed: Koosh Balls and Masking Tape With the masking tape, the CYPA will mark a line on the floor 5 feet away from a large target such as a wall. Have the children stand on the marked line and throw a Koosh Ball overhand at the large target. Do not emphasize accuracy but rather distance. The CYPA is to emphasize the performance cues. The CYPA will encourage each child and observe, correct or help them whenever it is needed. Each child should complete 8 out of 10 attempts. Station #2 - Catching Catching a Ball Rolled by a Partner Equipment Needed: Boingo Balls CYPA lines up the children facing each other about 5-10 feet apart. The first child will slowly roll a Boingo Ball on the ground to the other child. The child bends down catches the ball with both hands, the slowly rolls the ball back to the other child. Each child should successfully catch the ball 8 out of 10 times. CYPA will observe the children, correct or help when needed, and encourage the children during activity. CYPA needs to remember to emphasize the Performance Cues. Station #3 - Kicking Kicking the Ball on the Ground for Distance Equipment Needed: Soft, size 4 Soccer Balls, marker cones, and/or Masking Tape Mark 2 lines, 15 feet apart. The CYPA places soccer balls along one of the marked lines and has each child stand behind a ball. The CYPA demonstrates kicking the soccer ball so that the ball travels along the ground past the other marked line, and then the children do the same. After the children kick the soccer ball, have them retrieve the ball and return to the line. The CYPA uses the performance cues to encourage proper technique. When the child can successfully kick 8 out of 10 balls beyond the line, encourage him/her to take a few steps backwards to increase difficulty. Station #4 - Batting Striking a Large, Stationary Ball Off a Batting Tee Equipment Needed: Batting Tees, Masking Tape, Bat, Boingo Balls Set up batting tees and mark a line 10 feet away leaving appropriate space for the children to safely swing. Review batting safely and have the children demonstrate. Have 5 children use a bat to hit the Boingo Ball off the tee so that it travels in the air and lands beyond the marked line. CYPA will use verbal cues for the batters to hit the Boingo Ball at the same time (Ready, step, swing). Have five children stand in their own personal space 10 feet away perpendicular from a child batting from the tee ready to catch the Boingo Ball. Increase the distance after all the children have batted twice.
- 13 -
Supplemental Games and Activities – Week 4 and 5 *Throughout the duration of the program, you are welcome to re-use the supplemental games and activities that the children tend to enjoy. You may also modify them to fit your specific needs and the abilities of your children. Feel free to create your own games or use activities that you have used in the past. As long as the skills being learned through the Start Smart program (throwing, catching, kicking, batting) are being utilized, the activity is perfectly acceptable. Keep Out Playing Area and Formation Divide a room or playing field into four equal squares (sections). Split your children into four teams, assigning each team to a particular section. Teams must stay in their specific square. Steps 1. Randomly distribute 10-15 balls among the teams. Explain that the object of the game is to keep the balls out of your section. 2. Children start by throwing the balls out of their square and into one of the other squares. 3. Stop the game randomly by yelling “freeze” and then count how many balls are in each square. 4. The team with the most balls in their square gets a point. 5. Play the game until a set time limit is up. 6. The team with the fewest points is the winner. Run and Gun Playing Area and Formation Divide participants into several equal groups. Place a ball about 10-15 (you can go further depending on skill level) feet away from each of the groups. Steps 1. The game begins on your command as the first player for each team sprints to pick up the ball and quickly turns and rolls it to the next teammate in line. 2. He/she catches the ball and makes a return roll back to the first player, who places the ball back on the ground where he/she originally picked it up and runs to the end of their team’s line. 3. The player next in line then runs to pick up the ball and turns and rolls the ball to the third player in line, who repeats the above steps. 4. The first team to return all its players to their starting position wins.

- 14 -
Skill Development Exercises - Week 6 and 7 Station #1 - Throwing Throwing Underhand to a Target for Accuracy Equipment Needed: Koosh Balls, Masking Tape, and Hula Hoops (optional) With the masking tape, the CYPA will mark a starting line on the floor and put hula hoops (or taped circles) on the ground five feet away. Have the children stand on the starting line and throw a Koosh Ball underhand so that it lands inside the hula hoops (taped circles). As the child improves he/she should move back in 5 foot increments. The CYPA is to emphasize the Performance Cues. The CYPA will encourage each child and observe, correct or help them whenever it is needed. Each child should complete 8 of 10 attempts. Station #2 - Catching Catching a Rolling Ball Equipment Needed: Boingo Ball CYPA will have the children line up in two lines. Have each child roll the Boingo Ball slowly away from him/herself, run ahead, get in front of the ball, and bend down and catch the ball with both hands. Children will then come back and go to the end of the line. Children will continue this until everyone has gone 10 times. Encourage each child to complete 8 out of 10 catches successfully. CYPA will observe, correct or help when needed, and encourage the children. Station #3 - Kicking Kicking a Stationary Ball on the Ground for Distance Equipment Needed: Soft, Size 4 Soccer Ball, Marker Cones, and or Masking Tape Mark 2 lines, 15 feet apart. The CYPA places the soccer balls along one of the marked lines and has each child stand behind a ball. The CYPA demonstrates taking two or three running steps before kicking the soccer ball so that it rolls over the marked line and then has the children do the same. The CYPA uses the Performance Cues to encourage proper technique. Each child should kick the ball so that it rolls over the other marked line 8 out of 10 times. After the children kick the soccer ball have them retrieve the ball and return to the line. Repeat the activity while increasing the distance in increments of five feet as the children show improvement. Station #4 - Batting Striking a Large, Stationary Ball off a Batting Tee Equipment Needed: Batting Tees, Masking Tape, Bats, Boingo Balls Set up batting tees and mark a line ten feet away, leaving appropriate space for the children to safely swing. Review batting safety and have the children demonstrate. Have 5 children use a bat to hit the Boingo Ball off the tee so that the ball travels in the air and lands beyond the marked line. CYPA will use verbal cues for the batters to hit the Boingo Ball at the same time (Ready, Step, Swing). Have five children stand in their own personal space 10 feet away perpendicular from a child batting from a tee ready to catch the Boingo Ball. Children will rotate after Boingo Ball is hit 8 out of 10 times. Increase the distance after all children have batted twice.
- 15 -
Supplemental Games and Activities – Week 8 and 9 Throws on the Go Play Area and Formation You need a Hula Hoop to conduct this activity. Line the participants up with about three feet in-between each player. Each member begins with a ball. Steps 1. You start about 15 feet away from the group. While holding a Hula Hoop out in front of you begin walking down the line. 2. As you cross in front of each player she attempts to throw her ball through the hoop. If you have a large group of participants have several staff members use Hula Hoops. 3. You can mix the activity up by altering the distance between you and the participants. You can also walk quicker, or even jog, to increase the difficulty of the throws once the participants become pretty accurate with their tosses. Monkey in the Middle Play Area and Formation All players form a circle and choose someone (the "Monkey") to be in its center. Only one soccer ball is needed. Steps 1. The players forming the circle pass one ball among them while the person in the center tries to steal/gain control of the ball. 2. When this happens, the person in the circle who last touched the ball goes to the center. 3. Some level of competitiveness develops but never on an individual basis and the "losers" quickly get a chance to redeem themselves. 4. Vary the size of the circle to increase/decrease difficulty

- 16 -
No Lesson This Week - Week 10 Even though this week (as well as 3 other weeks throughout the duration of the program) is scheduled as “off”, it may be utilized as a “catch-up” week for you and/or some of your children. Absences are going to happen, so take this week to try to get all of your children up to the same point in the program. You also may encounter holidays or other program cancellations, so the built-in “off” weeks are there to keep your program flowing smoothly and on schedule. You may also take this week to devote extra time to some of the children that may be struggling with a particular skill. Children are going to develop at different rates, so some extra practice for those who aren’t developing as quickly is certainly going to be needed at some point during the program. Finally, if you want to hold a Start Smart session during the “off” week, you are more than welcome to do so. We would recommend offering some of the games/activities that the children have enjoyed up to this point in the program. If the children are physically active, developing their skills, and having fun, then it is certainly worthwhile to utilize the “off” week in this manner.
- 17 -
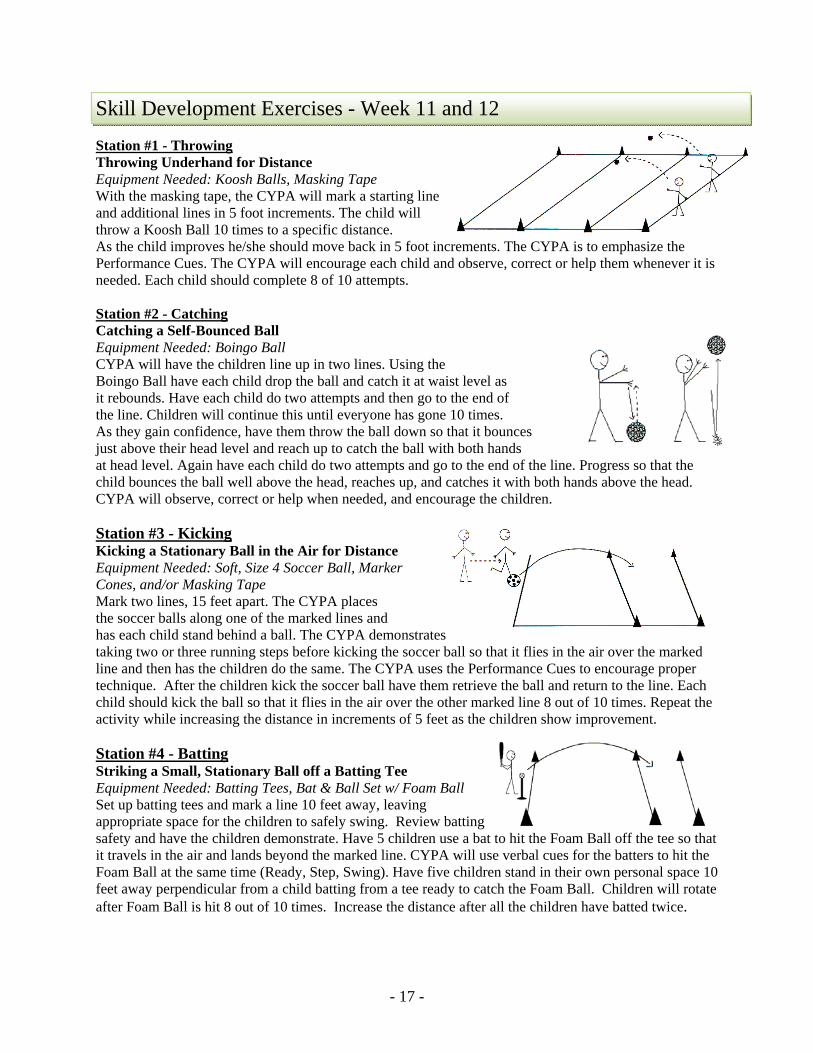
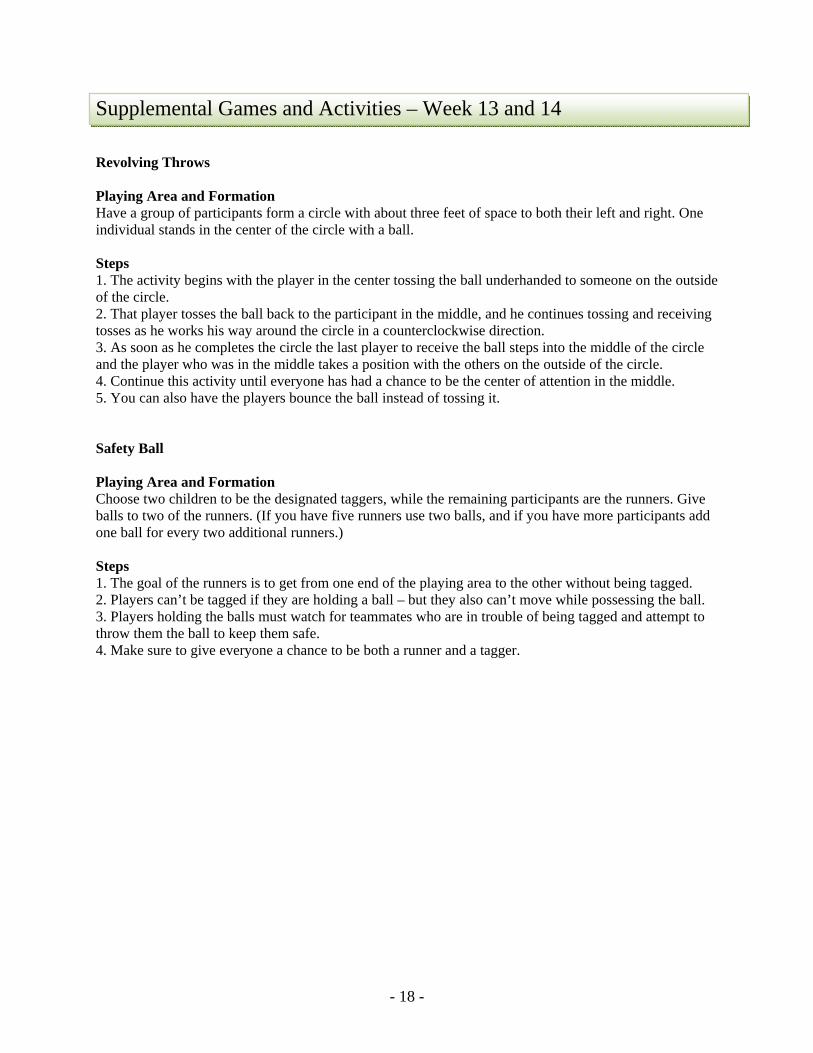
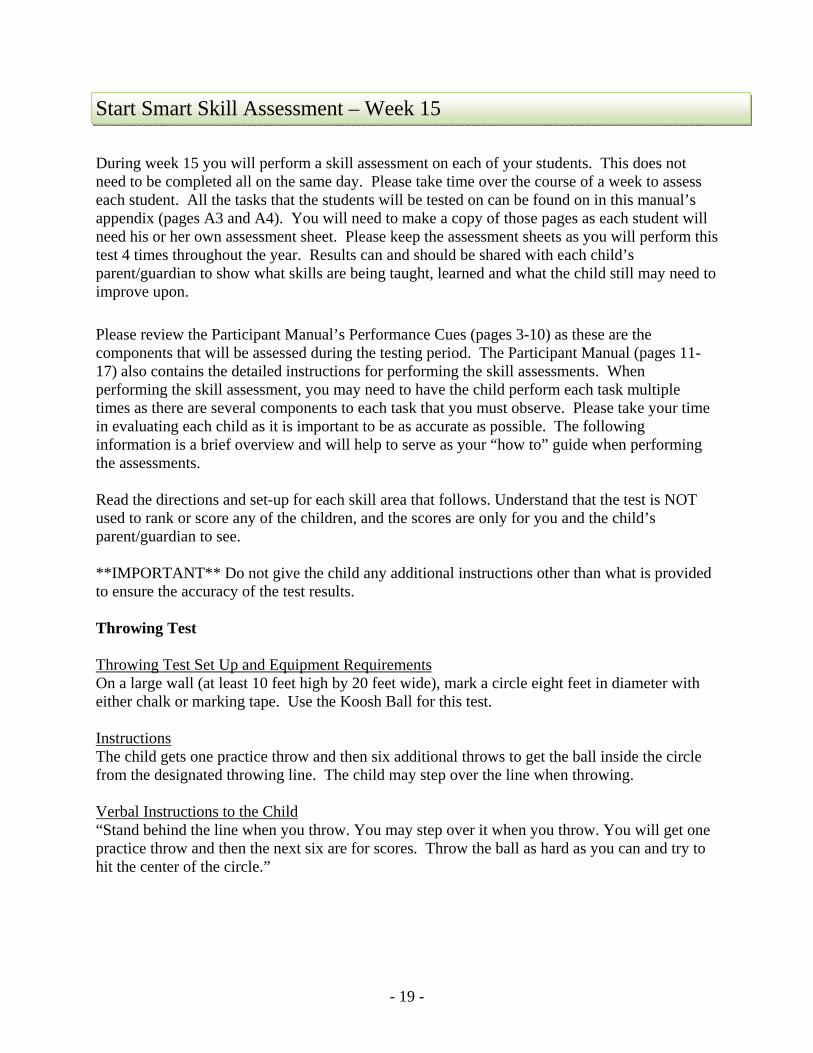
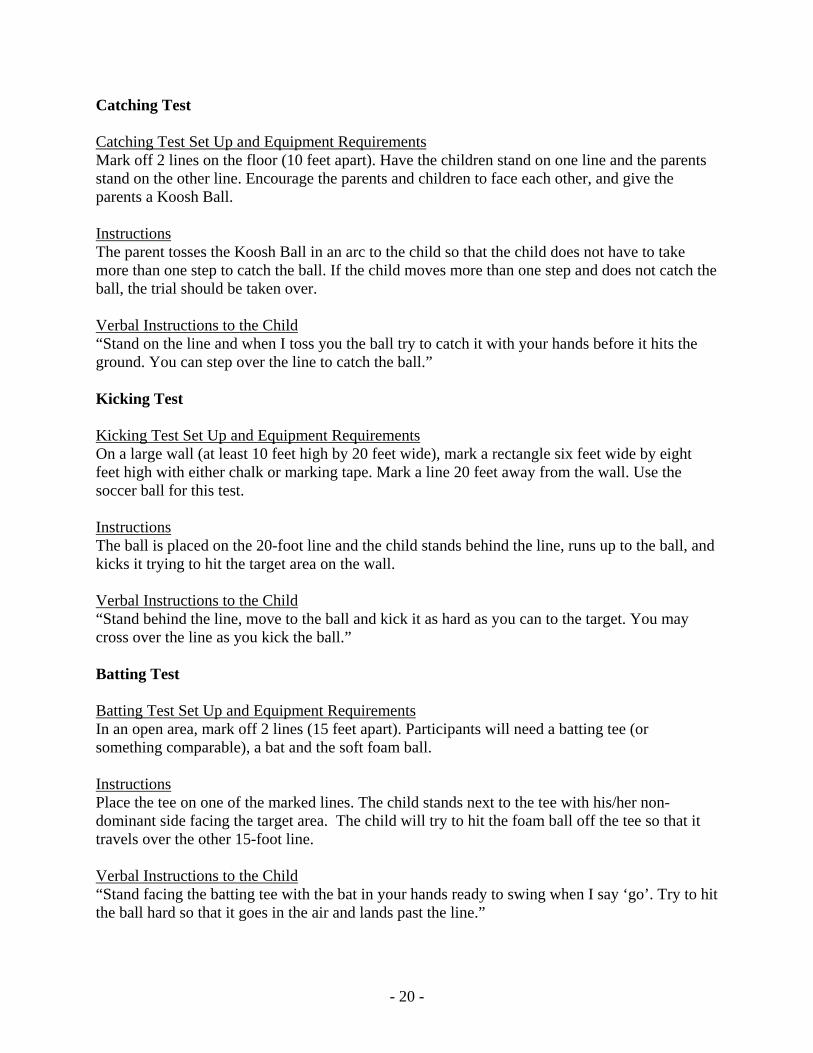
Skill Development Exercises - Week 11 and 12 Station #1 - Throwing Throwing Underhand for Distance Equipment Needed: Koosh Balls, Masking Tape With the masking tape, the CYPA will mark a starting line and additional lines in 5 foot increments. The child will throw a Koosh Ball 10 times to a specific distance. As the child improves he/she should move back in 5 foot increments. The CYPA is to emphasize the Performance Cues. The CYPA will encourage each child and observe, correct or help them whenever it is needed. Each child should complete 8 of 10 attempts. Station #2 - Catching Catching a Self-Bounced Ball Equipment Needed: Boingo Ball CYPA will have the children line up in two lines. Using the Boingo Ball have each child drop the ball and catch it at waist level as it rebounds. Have each child do two attempts and then go to the end of the line. Children will continue this until everyone has gone 10 times. As they gain confidence, have them throw the ball down so that it bounces just above their head level and reach up to catch the ball with both hands at head level. Again have each child do two attempts and go to the end of the line. Progress so that the child bounces the ball well above the head, reaches up, and catches it with both hands above the head. CYPA will observe, correct or help when needed, and encourage the children. Station #3 - Kicking Kicking a Stationary Ball in the Air for Distance Equipment Needed: Soft, Size 4 Soccer Ball, Marker Cones, and/or Masking Tape Mark two lines, 15 feet apart. The CYPA places the soccer balls along one of the marked lines and has each child stand behind a ball. The CYPA demonstrates taking two or three running steps before kicking the soccer ball so that it flies in the air over the marked line and then has the children do the same. The CYPA uses the Performance Cues to encourage proper technique. After the children kick the soccer ball have them retrieve the ball and return to the line. Each child should kick the ball so that it flies in the air over the other marked line 8 out of 10 times. Repeat the activity while increasing the distance in increments of 5 feet as the children show improvement. Station #4 - Batting Striking a Small, Stationary Ball off a Batting Tee Equipment Needed: Batting Tees, Bat & Ball Set w/ Foam Ball Set up batting tees and mark a line 10 feet away, leaving appropriate space for the children to safely swing. Review batting safety and have the children demonstrate. Have 5 children use a bat to hit the Foam Ball off the tee so that it travels in the air and lands beyond the marked line. CYPA will use verbal cues for the batters to hit the Foam Ball at the same time (Ready, Step, Swing). Have five children stand in their own personal space 10 feet away perpendicular from a child batting from a tee ready to catch the Foam Ball. Children will rotate after Foam Ball is hit 8 out of 10 times. Increase the distance after all the children have batted twice.
- 18 -
Supplemental Games and Activities – Week 13 and 14 Revolving Throws Playing Area and Formation Have a group of participants form a circle with about three feet of space to both their left and right. One individual stands in the center of the circle with a ball. Steps 1. The activity begins with the player in the center tossing the ball underhanded to someone on the outside of the circle. 2. That player tosses the ball back to the participant in the middle, and he continues tossing and receiving tosses as he works his way around the circle in a counterclockwise direction. 3. As soon as he completes the circle the last player to receive the ball steps into the middle of the circle and the player who was in the middle takes a position with the others on the outside of the circle. 4. Continue this activity until everyone has had a chance to be the center of attention in the middle. 5. You can also have the players bounce the ball instead of tossing it. Safety Ball Playing Area and Formation Choose two children to be the designated taggers, while the remaining participants are the runners. Give balls to two of the runners. (If you have five runners use two balls, and if you have more participants add one ball for every two additional runners.) Steps 1. The goal of the runners is to get from one end of the playing area to the other without being tagged. 2. Players can’t be tagged if they are holding a ball – but they also can’t move while possessing the ball. 3. Players holding the balls must watch for teammates who are in trouble of being tagged and attempt to throw them the ball to keep them safe. 4. Make sure to give everyone a chance to be both a runner and a tagger.
- 19 -
Start Smart Skill Assessment – Week 15 During week 15 you will perform a skill assessment on each of your students. This does not need to be completed all on the same day. Please take time over the course of a week to assess each student. All the tasks that the students will be tested on can be found on in this manual’s appendix (pages A3 and A4). You will need to make a copy of those pages as each student will need his or her own assessment sheet. Please keep the assessment sheets as you will perform this test 4 times throughout the year. Results can and should be shared with each child’s parent/guardian to show what skills are being taught, learned and what the child still may need to improve upon.
Please review the Participant Manual’s Performance Cues (pages 3-10) as these are the components that will be assessed during the testing period. The Participant Manual (pages 11-17) also contains the detailed instructions for performing the skill assessments. When performing the skill assessment, you may need to have the child perform each task multiple times as there are several components to each task that you must observe. Please take your time in evaluating each child as it is important to be as accurate as possible. The following information is a brief overview and will help to serve as your “how to” guide when performing the assessments. Read the directions and set-up for each skill area that follows. Understand that the test is NOT used to rank or score any of the children, and the scores are only for you and the child’s parent/guardian to see. **IMPORTANT** Do not give the child any additional instructions other than what is provided to ensure the accuracy of the test results. Throwing Test Throwing Test Set Up and Equipment Requirements On a large wall (at least 10 feet high by 20 feet wide), mark a circle eight feet in diameter with either chalk or marking tape. Use the Koosh Ball for this test. Instructions The child gets one practice throw and then six additional throws to get the ball inside the circle from the designated throwing line. The child may step over the line when throwing. Verbal Instructions to the Child “Stand behind the line when you throw. You may step over it when you throw. You will get one practice throw and then the next six are for scores. Throw the ball as hard as you can and try to hit the center of the circle.”
- 20 -
Catching Test Catching Test Set Up and Equipment Requirements Mark off 2 lines on the floor (10 feet apart). Have the children stand on one line and the parents stand on the other line. Encourage the parents and children to face each other, and give the parents a Koosh Ball. Instructions The parent tosses the Koosh Ball in an arc to the child so that the child does not have to take more than one step to catch the ball. If the child moves more than one step and does not catch the ball, the trial should be taken over. Verbal Instructions to the Child “Stand on the line and when I toss you the ball try to catch it with your hands before it hits the ground. You can step over the line to catch the ball.” Kicking Test Kicking Test Set Up and Equipment Requirements On a large wall (at least 10 feet high by 20 feet wide), mark a rectangle six feet wide by eight feet high with either chalk or marking tape. Mark a line 20 feet away from the wall. Use the soccer ball for this test. Instructions The ball is placed on the 20-foot line and the child stands behind the line, runs up to the ball, and kicks it trying to hit the target area on the wall. Verbal Instructions to the Child “Stand behind the line, move to the ball and kick it as hard as you can to the target. You may cross over the line as you kick the ball.” Batting Test Batting Test Set Up and Equipment Requirements In an open area, mark off 2 lines (15 feet apart). Participants will need a batting tee (or something comparable), a bat and the soft foam ball. Instructions Place the tee on one of the marked lines. The child stands next to the tee with his/her non-dominant side facing the target area. The child will try to hit the foam ball off the tee so that it travels over the other 15-foot line. Verbal Instructions to the Child “Stand facing the batting tee with the bat in your hands ready to swing when I say ‘go’. Try to hit the ball hard so that it goes in the air and lands past the line.”
- 21 -
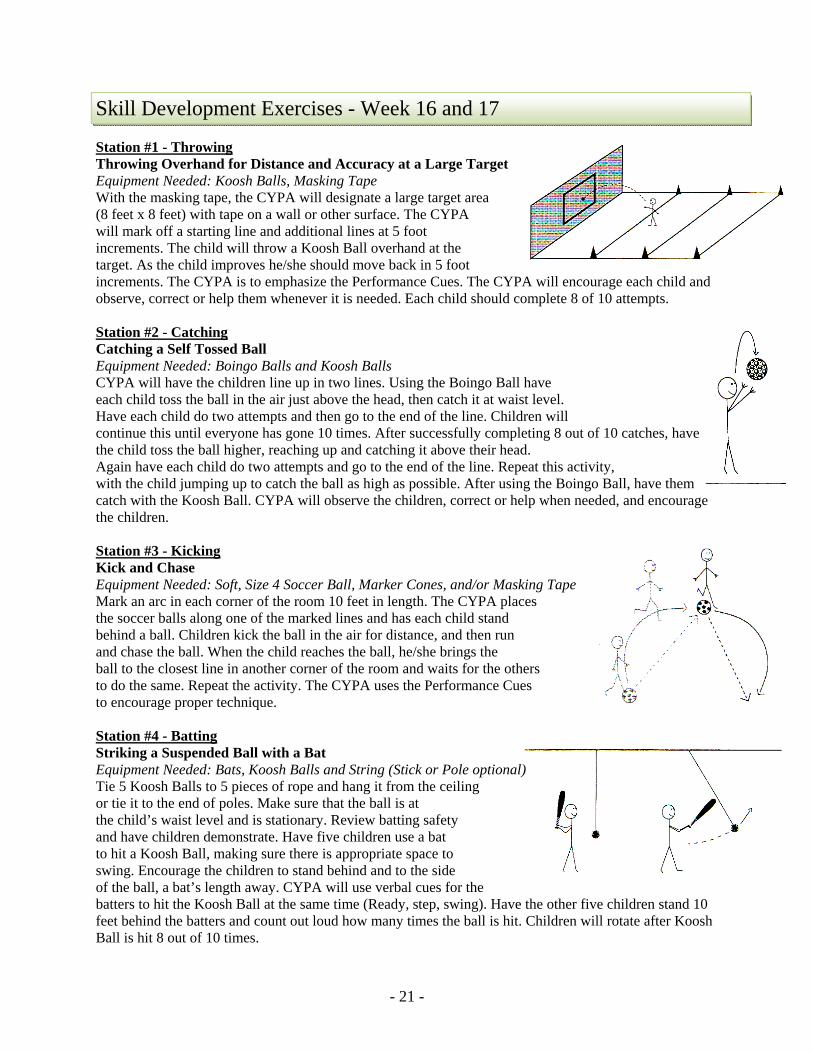
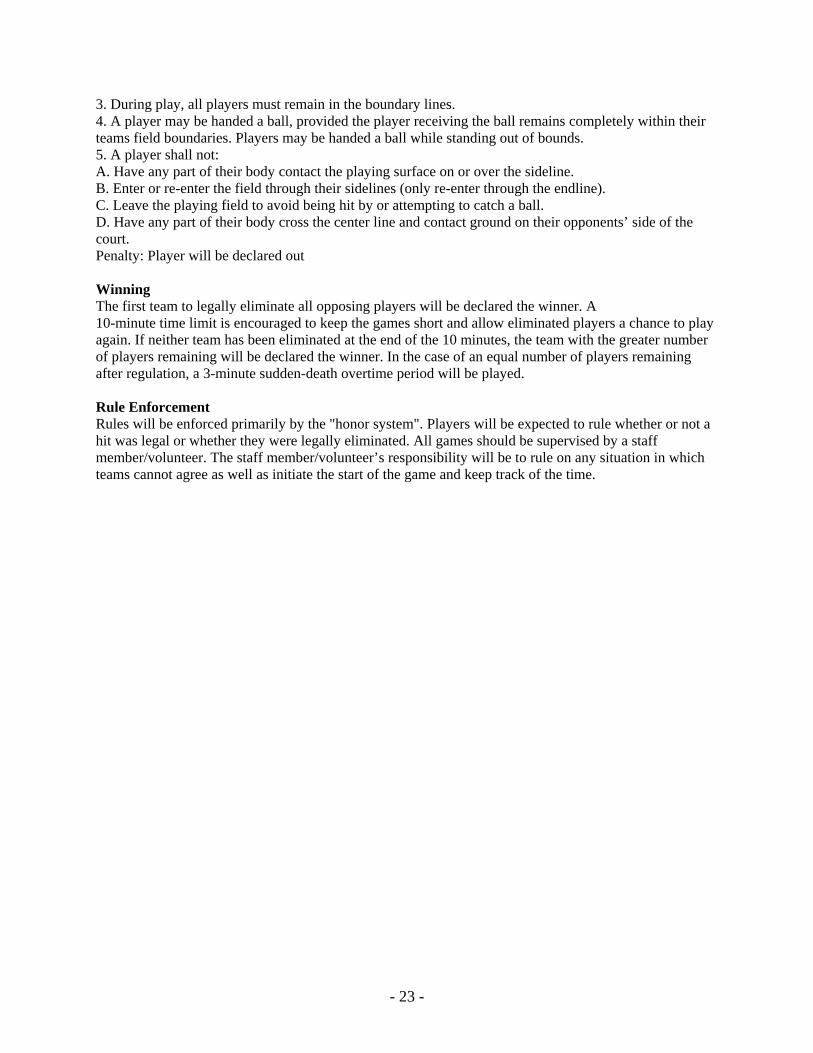
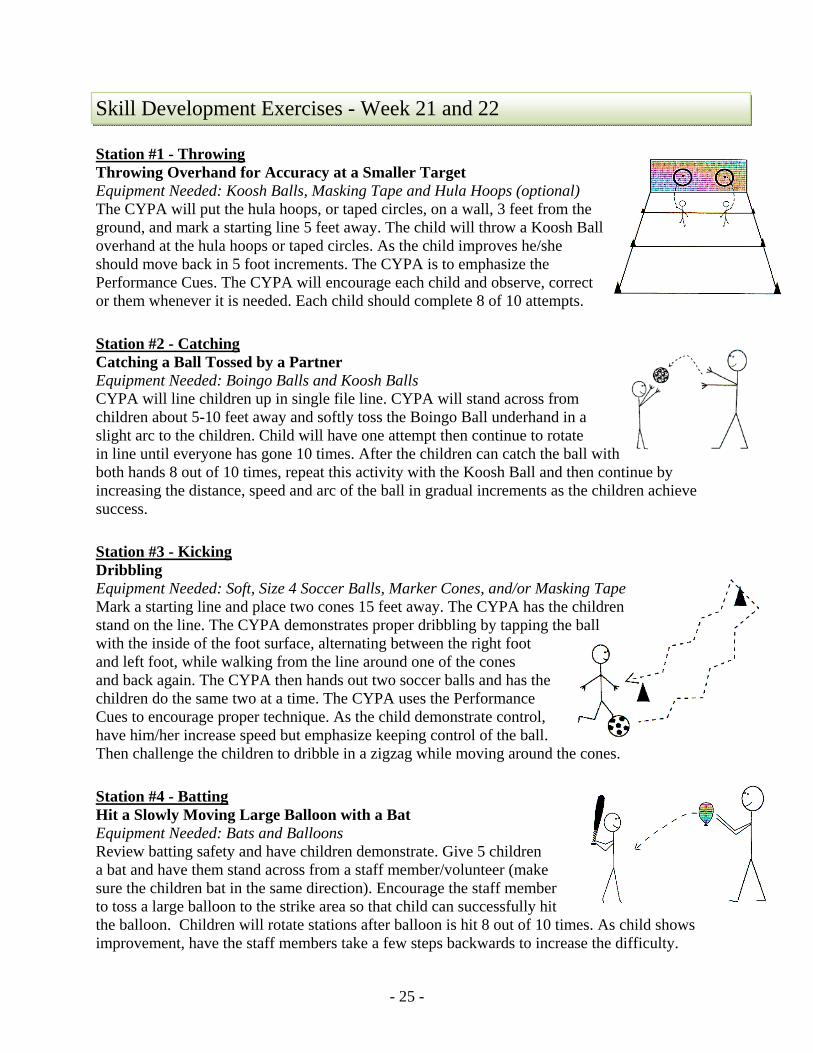
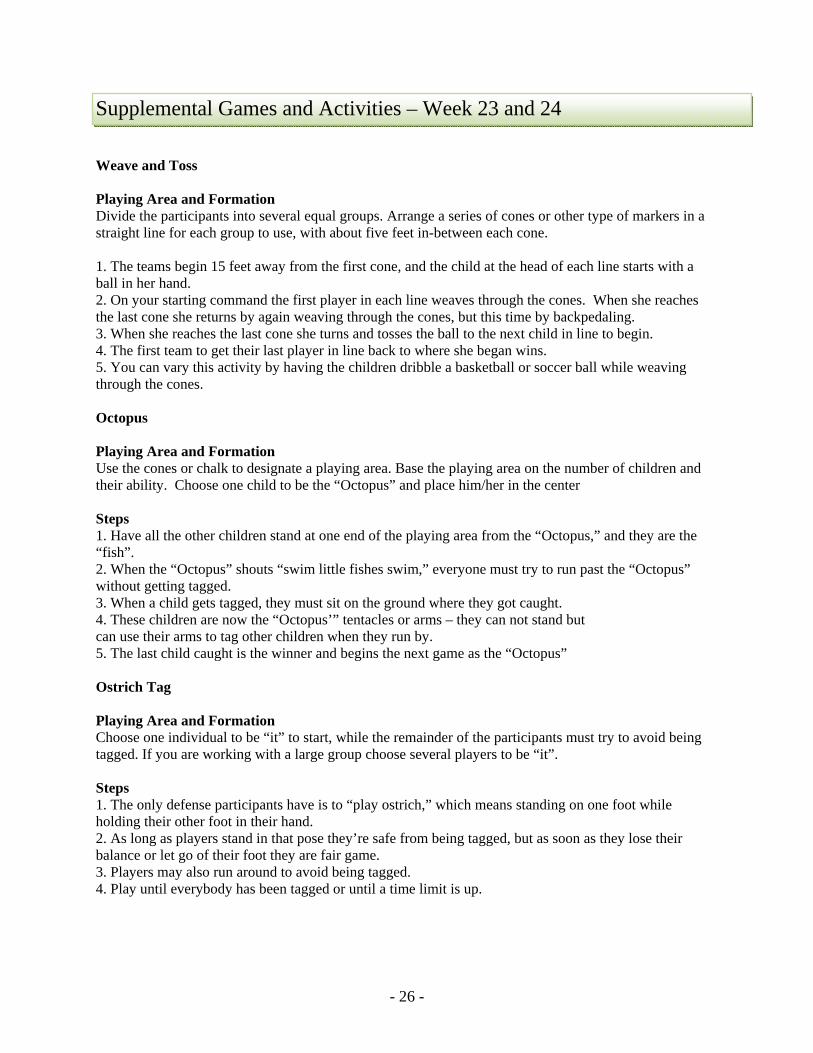
Skill Development Exercises - Week 16 and 17 Station #1 - Throwing Throwing Overhand for Distance and Accuracy at a Large Target Equipment Needed: Koosh Balls, Masking Tape With the masking tape, the CYPA will designate a large target area (8 feet x 8 feet) with tape on a wall or other surface. The CYPA will mark off a starting line and additional lines at 5 foot increments. The child will throw a Koosh Ball overhand at the target. As the child improves he/she should move back in 5 foot increments. The CYPA is to emphasize the Performance Cues. The CYPA will encourage each child and observe, correct or help them whenever it is needed. Each child should complete 8 of 10 attempts. Station #2 - Catching Catching a Self Tossed Ball Equipment Needed: Boingo Balls and Koosh Balls CYPA will have the children line up in two lines. Using the Boingo Ball have each child toss the ball in the air just above the head, then catch it at waist level. Have each child do two attempts and then go to the end of the line. Children will continue this until everyone has gone 10 times. After successfully completing 8 out of 10 catches, have the child toss the ball higher, reaching up and catching it above their head. Again have each child do two attempts and go to the end of the line. Repeat this activity, with the child jumping up to catch the ball as high as possible. After using the Boingo Ball, have them catch with the Koosh Ball. CYPA will observe the children, correct or help when needed, and encourage the children. Station #3 - Kicking Kick and Chase Equipment Needed: Soft, Size 4 Soccer Ball, Marker Cones, and/or Masking Tape Mark an arc in each corner of the room 10 feet in length. The CYPA places the soccer balls along one of the marked lines and has each child stand behind a ball. Children kick the ball in the air for distance, and then run and chase the ball. When the child reaches the ball, he/she brings the ball to the closest line in another corner of the room and waits for the others to do the same. Repeat the activity. The CYPA uses the Performance Cues to encourage proper technique. Station #4 - Batting Striking a Suspended Ball with a Bat Equipment Needed: Bats, Koosh Balls and String (Stick or Pole optional) Tie 5 Koosh Balls to 5 pieces of rope and hang it from the ceiling or tie it to the end of poles. Make sure that the ball is at the child’s waist level and is stationary. Review batting safety and have children demonstrate. Have five children use a bat to hit a Koosh Ball, making sure there is appropriate space to swing. Encourage the children to stand behind and to the side of the ball, a bat’s length away. CYPA will use verbal cues for the batters to hit the Koosh Ball at the same time (Ready, step, swing). Have the other five children stand 10 feet behind the batters and count out loud how many times the ball is hit. Children will rotate after Koosh Ball is hit 8 out of 10 times.

- 22 -
Supplemental Games and Activities – Week 18 and 19 Dodgeball Rules The goal of this program is to utilize the Start Smart skills the participants have learned while participating in a fun and safe game setting. The Team The game shall be played between two teams of 8 players. Ideally, a minimum of 6 players will compete on a side. The Field The game will be played outdoors on a tennis court. The playing field shall be the boundary of the tennis court singles area, divided into two equal zones by a center boundary line. You may also play indoors on a basketball court, with the boundary of the court serving as the boundary lines. You may need to modify the size of the playing area depending on the skill level of the participants. OPTIONAL ATTACK LINE: This line is approximately halfway between the end line and center line in each zone. During the “Rush” (explained later), players must carry the ball behind this line before it can be thrown. The Equipment We recommend using Rhino Skin Dodgeballs with a 6" diameter. Participants must wear shoes, shirts and pants/shorts. The Game The object of the game is to eliminate all opposing players by getting them "OUT". This may be done by: 1. Hitting an opposing player with a thrown ball below the shoulders. Note: If a player ducks, and this is clearly the cause for the player being hit above the shoulders, the player is out and the throw is legal. 2. Catching a ball thrown by your opponent before it touches the ground. If you successfully catch a ball thrown by an opponent, the opponent is eliminated AND one of your teammates that has already been eliminated may rejoin the team by entering through the endline. 3. Causing an opponent to drop a live ball as a result of contact by another thrown live ball (usually occurs when a ball is being used to block a thrown ball). 4. An opposing player stepping out of bounds (to avoid getting hit and not because he or she is retrieving a ball - in which case you have 5 seconds to retrieve a ball, and come immediately back into the playing field). The game begins by placing the dodgeballs along the center line. Players then take a position behind their end line. Following a signal by the official (staff member/volunteer), teams may approach the centerline to retrieve the balls. This signal officially starts the contest. Rush Rule: Each and every ball retrieved at the opening rush must first be taken beyond the attack line and into the team’s backcourt before it may be legally thrown at an opponent. (The Attack line is the service line on the tennis courts.) Boundaries 1. During play, all players must remain within the boundary lines. 2. Players must only leave from the end line to retrieve balls and must return to the court by the end lines.
- 23 -
3. During play, all players must remain in the boundary lines. 4. A player may be handed a ball, provided the player receiving the ball remains completely within their teams field boundaries. Players may be handed a ball while standing out of bounds. 5. A player shall not: A. Have any part of their body contact the playing surface on or over the sideline. B. Enter or re-enter the field through their sidelines (only re-enter through the endline). C. Leave the playing field to avoid being hit by or attempting to catch a ball. D. Have any part of their body cross the center line and contact ground on their opponents’ side of the court. Penalty: Player will be declared out Winning The first team to legally eliminate all opposing players will be declared the winner. A 10-minute time limit is encouraged to keep the games short and allow eliminated players a chance to play again. If neither team has been eliminated at the end of the 10 minutes, the team with the greater number of players remaining will be declared the winner. In the case of an equal number of players remaining after regulation, a 3-minute sudden-death overtime period will be played. Rule Enforcement Rules will be enforced primarily by the "honor system". Players will be expected to rule whether or not a hit was legal or whether they were legally eliminated. All games should be supervised by a staff member/volunteer. The staff member/volunteer’s responsibility will be to rule on any situation in which teams cannot agree as well as initiate the start of the game and keep track of the time.

- 24 -
No Lesson This Week - Week 20 Even though this week (as well as 3 other weeks throughout the duration of the program) is scheduled as “off”, it may be utilized as a “catch-up” week for you and/or some of your children. Absences are going to happen, so take this week to try to get all of your children up to the same point in the program. You also may encounter holidays or other program cancellations, so the built-in “off” weeks are there to keep your program flowing smoothly and on schedule. You may also take this week to devote extra time to some of the children that may be struggling with a particular skill. Children are going to develop at different rates, so some extra practice for those who aren’t developing as quickly is certainly going to be needed at some point during the program. Finally, if you want to hold a Start Smart session during the “off” week, you are more than welcome to do so. We would recommend offering some of the games/activities that the children have enjoyed up to this point in the program. If the children are physically active, developing their skills, and having fun, then it is certainly worthwhile to utilize the “off” week in this manner.
- 25 -
Skill Development Exercises - Week 21 and 22 Station #1 - Throwing Throwing Overhand for Accuracy at a Smaller Target Equipment Needed: Koosh Balls, Masking Tape and Hula Hoops (optional) The CYPA will put the hula hoops, or taped circles, on a wall, 3 feet from the ground, and mark a starting line 5 feet away. The child will throw a Koosh Ball overhand at the hula hoops or taped circles. As the child improves he/she should move back in 5 foot increments. The CYPA is to emphasize the Performance Cues. The CYPA will encourage each child and observe, correct or them whenever it is needed. Each child should complete 8 of 10 attempts.
Station #2 - Catching Catching a Ball Tossed by a Partner Equipment Needed: Boingo Balls and Koosh Balls CYPA will line children up in single file line. CYPA will stand across from children about 5-10 feet away and softly toss the Boingo Ball underhand in a slight arc to the children. Child will have one attempt then continue to rotate in line until everyone has gone 10 times. After the children can catch the ball with both hands 8 out of 10 times, repeat this activity with the Koosh Ball and then continue by increasing the distance, speed and arc of the ball in gradual increments as the children achieve success.
Station #3 - Kicking Dribbling Equipment Needed: Soft, Size 4 Soccer Balls, Marker Cones, and/or Masking Tape Mark a starting line and place two cones 15 feet away. The CYPA has the children stand on the line. The CYPA demonstrates proper dribbling by tapping the ball with the inside of the foot surface, alternating between the right foot and left foot, while walking from the line around one of the cones and back again. The CYPA then hands out two soccer balls and has the children do the same two at a time. The CYPA uses the Performance Cues to encourage proper technique. As the child demonstrate control, have him/her increase speed but emphasize keeping control of the ball. Then challenge the children to dribble in a zigzag while moving around the cones.
Station #4 - Batting Hit a Slowly Moving Large Balloon with a Bat Equipment Needed: Bats and Balloons Review batting safety and have children demonstrate. Give 5 children a bat and have them stand across from a staff member/volunteer (make sure the children bat in the same direction). Encourage the staff member to toss a large balloon to the strike area so that child can successfully hit the balloon. Children will rotate stations after balloon is hit 8 out of 10 times. As child shows improvement, have the staff members take a few steps backwards to increase the difficulty.
- 26 -
Supplemental Games and Activities – Week 23 and 24 Weave and Toss Playing Area and Formation Divide the participants into several equal groups. Arrange a series of cones or other type of markers in a straight line for each group to use, with about five feet in-between each cone. 1. The teams begin 15 feet away from the first cone, and the child at the head of each line starts with a ball in her hand. 2. On your starting command the first player in each line weaves through the cones. When she reaches the last cone she returns by again weaving through the cones, but this time by backpedaling. 3. When she reaches the last cone she turns and tosses the ball to the next child in line to begin. 4. The first team to get their last player in line back to where she began wins. 5. You can vary this activity by having the children dribble a basketball or soccer ball while weaving through the cones. Octopus Playing Area and Formation Use the cones or chalk to designate a playing area. Base the playing area on the number of children and their ability. Choose one child to be the “Octopus” and place him/her in the center Steps 1. Have all the other children stand at one end of the playing area from the “Octopus,” and they are the “fish”. 2. When the “Octopus” shouts “swim little fishes swim,” everyone must try to run past the “Octopus” without getting tagged. 3. When a child gets tagged, they must sit on the ground where they got caught. 4. These children are now the “Octopus’” tentacles or arms – they can not stand but can use their arms to tag other children when they run by. 5. The last child caught is the winner and begins the next game as the “Octopus” Ostrich Tag Playing Area and Formation Choose one individual to be “it” to start, while the remainder of the participants must try to avoid being tagged. If you are working with a large group choose several players to be “it”. Steps 1. The only defense participants have is to “play ostrich,” which means standing on one foot while holding their other foot in their hand. 2. As long as players stand in that pose they’re safe from being tagged, but as soon as they lose their balance or let go of their foot they are fair game. 3. Players may also run around to avoid being tagged. 4. Play until everybody has been tagged or until a time limit is up.
- 27 -
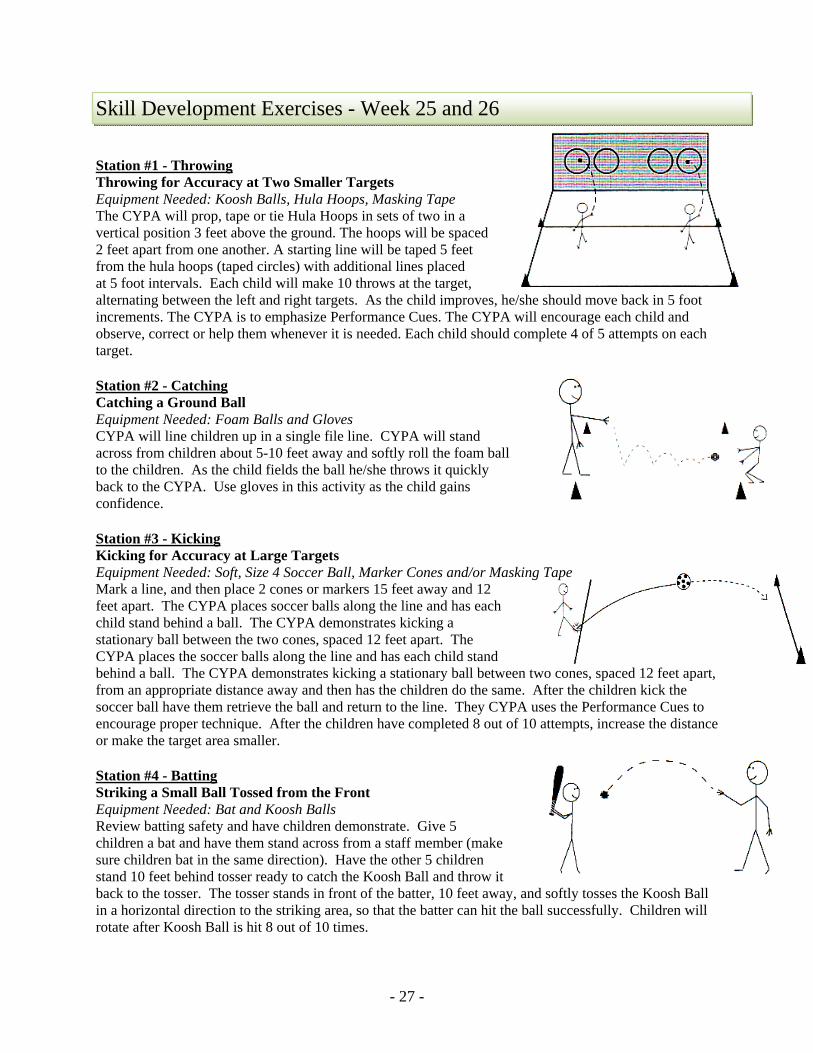
Skill Development Exercises - Week 25 and 26 Station #1 - Throwing Throwing for Accuracy at Two Smaller Targets Equipment Needed: Koosh Balls, Hula Hoops, Masking Tape The CYPA will prop, tape or tie Hula Hoops in sets of two in a vertical position 3 feet above the ground. The hoops will be spaced 2 feet apart from one another. A starting line will be taped 5 feet from the hula hoops (taped circles) with additional lines placed at 5 foot intervals. Each child will make 10 throws at the target, alternating between the left and right targets. As the child improves, he/she should move back in 5 foot increments. The CYPA is to emphasize Performance Cues. The CYPA will encourage each child and observe, correct or help them whenever it is needed. Each child should complete 4 of 5 attempts on each target. Station #2 - Catching Catching a Ground Ball Equipment Needed: Foam Balls and Gloves CYPA will line children up in a single file line. CYPA will stand across from children about 5-10 feet away and softly roll the foam ball to the children. As the child fields the ball he/she throws it quickly back to the CYPA. Use gloves in this activity as the child gains confidence. Station #3 - Kicking Kicking for Accuracy at Large Targets Equipment Needed: Soft, Size 4 Soccer Ball, Marker Cones and/or Masking Tape Mark a line, and then place 2 cones or markers 15 feet away and 12 feet apart. The CYPA places soccer balls along the line and has each child stand behind a ball. The CYPA demonstrates kicking a stationary ball between the two cones, spaced 12 feet apart. The CYPA places the soccer balls along the line and has each child stand behind a ball. The CYPA demonstrates kicking a stationary ball between two cones, spaced 12 feet apart, from an appropriate distance away and then has the children do the same. After the children kick the soccer ball have them retrieve the ball and return to the line. They CYPA uses the Performance Cues to encourage proper technique. After the children have completed 8 out of 10 attempts, increase the distance or make the target area smaller. Station #4 - Batting Striking a Small Ball Tossed from the Front Equipment Needed: Bat and Koosh Balls Review batting safety and have children demonstrate. Give 5 children a bat and have them stand across from a staff member (make sure children bat in the same direction). Have the other 5 children stand 10 feet behind tosser ready to catch the Koosh Ball and throw it back to the tosser. The tosser stands in front of the batter, 10 feet away, and softly tosses the Koosh Ball in a horizontal direction to the striking area, so that the batter can hit the ball successfully. Children will rotate after Koosh Ball is hit 8 out of 10 times.
- 28 -
Supplemental Games and Activities – Week 27 and 28 Hand Clap Catch Playing Area and Formation Spread out your children as much as possible. Steps 1. Give each child a ball. 2. Have your children throw the ball in the air as high as they can. 3. While the ball is in the air, the children must attempt to clap their hands as many times as they can and then catch the ball. 4. If the ball is not caught, the number of claps does not count. They have to honestly count their own claps. 5. Whoever can clap the most times and still catch the ball is the winner. 6. This can be played as long as the children like or until time runs out. Tricky Track Playing Area and Formation Create a straight or curvy “track” or lane across a field using cones. Along the track, situate children 4-5 yards apart as “throwers”. Steps 1. Have the rest of the children take turns attempting to run the length of the track 2. While they are running, the throwers must try to gently hit them with the ball. 3. If they get hit with the ball, they must get back in line to start again. 4. If they catch the ball, they can use that ball to block or deflect other balls being thrown at them. 5. If a child reaches the end of the track, they switch places with a thrower. 6. Play this until everybody has had a chance to be a runner and a thrower.

- 29 -
No Lesson This Week - Week 29 Even though this week (as well as 3 other weeks throughout the duration of the program) is scheduled as “off”, it may be utilized as a “catch-up” week for you and/or some of your children. Absences are going to happen, so take this week to try to get all of your children up to the same point in the program. You also may encounter holidays or other program cancellations, so the built-in “off” weeks are there to keep your program flowing smoothly and on schedule. You may also take this week to devote extra time to some of the children that may be struggling with a particular skill. Children are going to develop at different rates, so some extra practice for those who aren’t developing as quickly is certainly going to be needed at some point during the program. Finally, if you want to hold a Start Smart session during the “off” week, you are more than welcome to do so. We would recommend offering some of the games/activities that the children have enjoyed up to this point in the program. If the children are physically active, developing their skills, and having fun, then it is certainly worthwhile to utilize the “off” week in this manner.
- 30 -
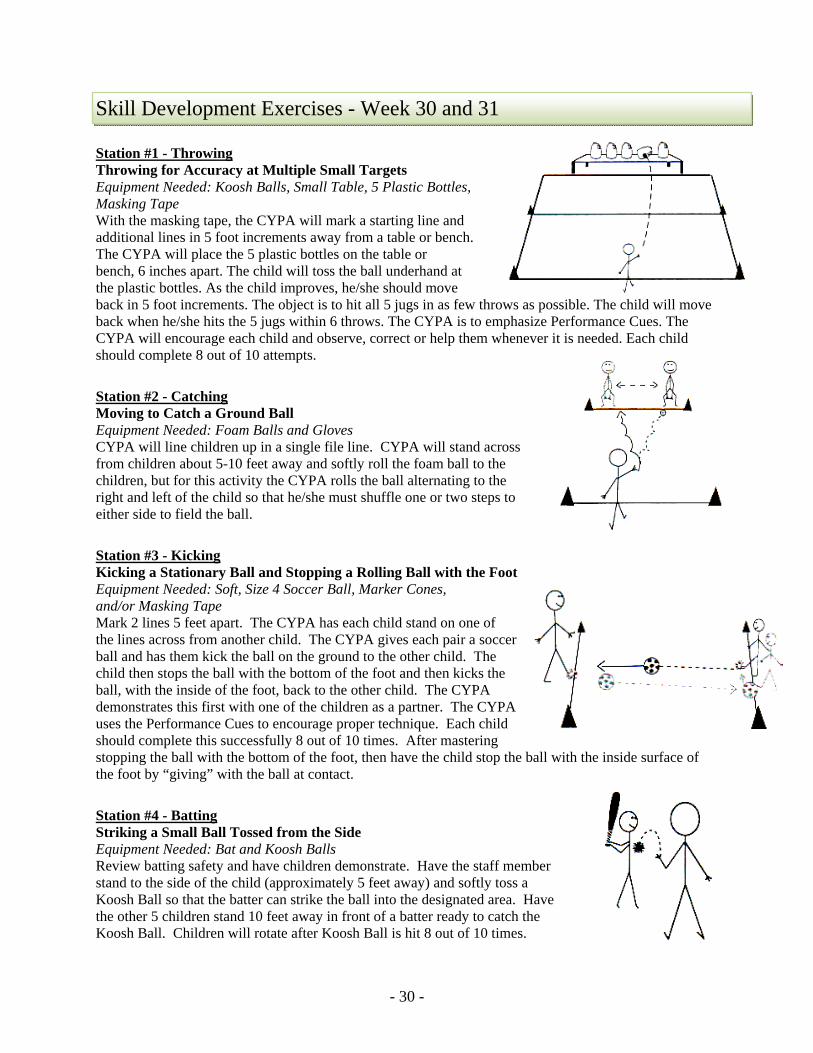
Skill Development Exercises - Week 30 and 31 Station #1 - Throwing Throwing for Accuracy at Multiple Small Targets Equipment Needed: Koosh Balls, Small Table, 5 Plastic Bottles, Masking Tape With the masking tape, the CYPA will mark a starting line and additional lines in 5 foot increments away from a table or bench. The CYPA will place the 5 plastic bottles on the table or bench, 6 inches apart. The child will toss the ball underhand at the plastic bottles. As the child improves, he/she should move back in 5 foot increments. The object is to hit all 5 jugs in as few throws as possible. The child will move back when he/she hits the 5 jugs within 6 throws. The CYPA is to emphasize Performance Cues. The CYPA will encourage each child and observe, correct or help them whenever it is needed. Each child should complete 8 out of 10 attempts.
Station #2 - Catching Moving to Catch a Ground Ball Equipment Needed: Foam Balls and Gloves CYPA will line children up in a single file line. CYPA will stand across from children about 5-10 feet away and softly roll the foam ball to the children, but for this activity the CYPA rolls the ball alternating to the right and left of the child so that he/she must shuffle one or two steps to either side to field the ball.
Station #3 - Kicking Kicking a Stationary Ball and Stopping a Rolling Ball with the Foot Equipment Needed: Soft, Size 4 Soccer Ball, Marker Cones, and/or Masking Tape Mark 2 lines 5 feet apart. The CYPA has each child stand on one of the lines across from another child. The CYPA gives each pair a soccer ball and has them kick the ball on the ground to the other child. The child then stops the ball with the bottom of the foot and then kicks the ball, with the inside of the foot, back to the other child. The CYPA demonstrates this first with one of the children as a partner. The CYPA uses the Performance Cues to encourage proper technique. Each child should complete this successfully 8 out of 10 times. After mastering stopping the ball with the bottom of the foot, then have the child stop the ball with the inside surface of the foot by “giving” with the ball at contact.
Station #4 - Batting Striking a Small Ball Tossed from the Side Equipment Needed: Bat and Koosh Balls Review batting safety and have children demonstrate. Have the staff member stand to the side of the child (approximately 5 feet away) and softly toss a Koosh Ball so that the batter can strike the ball into the designated area. Have the other 5 children stand 10 feet away in front of a batter ready to catch the Koosh Ball. Children will rotate after Koosh Ball is hit 8 out of 10 times.

- 31 -
Supplemental Games and Activities – Week 32 and 33 Ground Ball Grab Playing Area and Formation Arrange two pylons (or cones) about 10 feet apart. The child begins standing between the two, and you face him about 5 feet away. Steps 1. You begin by rolling a tennis ball to the child’s right that he/she shuffles over to, picks up and tosses back to you. 2. As soon as he/she delivers the ball back to you, you roll another ball to his/her left that he/she shuffles over to retrieve and tosses back to you. 3. Deliver 5-10 balls for him/her to scoop up. 4. See how many the child can successfully catch and throw accurately back to you in 60 seconds. Home Run Derby Play Area and Formation During this game the children take turns hitting balls off a batting tee – trying to hit balls above a designated line on your facility’s wall. The younger the children the lower the line should be so that everyone has the chance to enjoy success and hit those homers. Steps 1. Have each player hit until they record three outs. An out is a ball that doesn’t clear the line for a home run. 2. If you are working with a large group of children pair them up and spread them around the facility so that each pair features a pitcher and hitter. This allows participants to get in a lot of swings in a short amount of time. 3. While each player should take pride in making good swings and hitting home runs, this is also a good opportunity to teach the importance of good sportsmanship. 4. Talk to them that during games and other activities at the facility that when they hit home runs that it’s okay to celebrate that hit with teammates, and give highfives with one another, just as long as the celebration doesn’t involve any comments or actions directed at the opposing pitcher or team. 5. To discuss further, have the participants share examples of good and bad sportsmanship they have seen while watching games at the Major League, college or even high school level.
- 32 -
Start Smart Skill Assessment – Week 34 During week 34 you will perform a skill assessment on each of your students. This does not need to be completed all on the same day. Please take time over the course of a week to assess each student. All the tasks that the students will be tested on can be found on in this manual’s appendix (pages A3 and A4). You will need to make a copy of those pages as each student will need his or her own assessment sheet. Please keep the assessment sheets as you will perform this test 4 times throughout the year. Results can and should be shared with each child’s parent/guardian to show what skills are being taught, learned and what the child still may need to improve upon.
Please review the Participant Manual’s Performance Cues (pages 3-10) as these are the components that will be assessed during the testing period. The Participant Manual (pages 11-17) also contains the detailed instructions for performing the skill assessments. When performing the skill assessment, you may need to have the child perform each task multiple times as there are several components to each task that you must observe. Please take your time in evaluating each child as it is important to be as accurate as possible. The following information is a brief overview and will help to serve as your “how to” guide when performing the assessments. Read the directions and set-up for each skill area that follows. Understand that the test is NOT used to rank or score any of the children, and the scores are only for you and the child’s parent/guardian to see. **IMPORTANT** Do not give the child any additional instructions other than what is provided to ensure the accuracy of the test results. Throwing Test Throwing Test Set Up and Equipment Requirements On a large wall (at least 10 feet high by 20 feet wide), mark a circle eight feet in diameter with either chalk or marking tape. Use the Koosh Ball for this test. Instructions The child gets one practice throw and then six additional throws to get the ball inside the circle from the designated throwing line. The child may step over the line when throwing. Verbal Instructions to the Child “Stand behind the line when you throw. You may step over it when you throw. You will get one practice throw and then the next six are for scores. Throw the ball as hard as you can and try to hit the center of the circle.”

- 33 -
Catching Test Catching Test Set Up and Equipment Requirements Mark off 2 lines on the floor (10 feet apart). Have the children stand on one line and the parents stand on the other line. Encourage the parents and children to face each other, and give the parents a Koosh Ball. Instructions The parent tosses the Koosh Ball in an arc to the child so that the child does not have to take more than one step to catch the ball. If the child moves more than one step and does not catch the ball, the trial should be taken over. Verbal Instructions to the Child “Stand on the line and when I toss you the ball try to catch it with your hands before it hits the ground. You can step over the line to catch the ball.” Kicking Test Kicking Test Set Up and Equipment Requirements On a large wall (at least 10 feet high by 20 feet wide), mark a rectangle six feet wide by eight feet high with either chalk or marking tape. Mark a line 20 feet away from the wall. Use the soccer ball for this test. Instructions The ball is placed on the 20-foot line and the child stands behind the line, runs up to the ball, and kicks it trying to hit the target area on the wall. Verbal Instructions to the Child “Stand behind the line, move to the ball and kick it as hard as you can to the target. You may cross over the line as you kick the ball.” Batting Test Batting Test Set Up and Equipment Requirements In an open area, mark off 2 lines (15 feet apart). Participants will need a batting tee (or something comparable), a bat and the soft foam ball. Instructions Place the tee on one of the marked lines. The child stands next to the tee with his/her non-dominant side facing the target area. The child will try to hit the foam ball off the tee so that it travels over the other 15-foot line. Verbal Instructions to the Child “Stand facing the batting tee with the bat in your hands ready to swing when I say ‘go’. Try to hit the ball hard so that it goes in the air and lands past the line.”
- 34 -
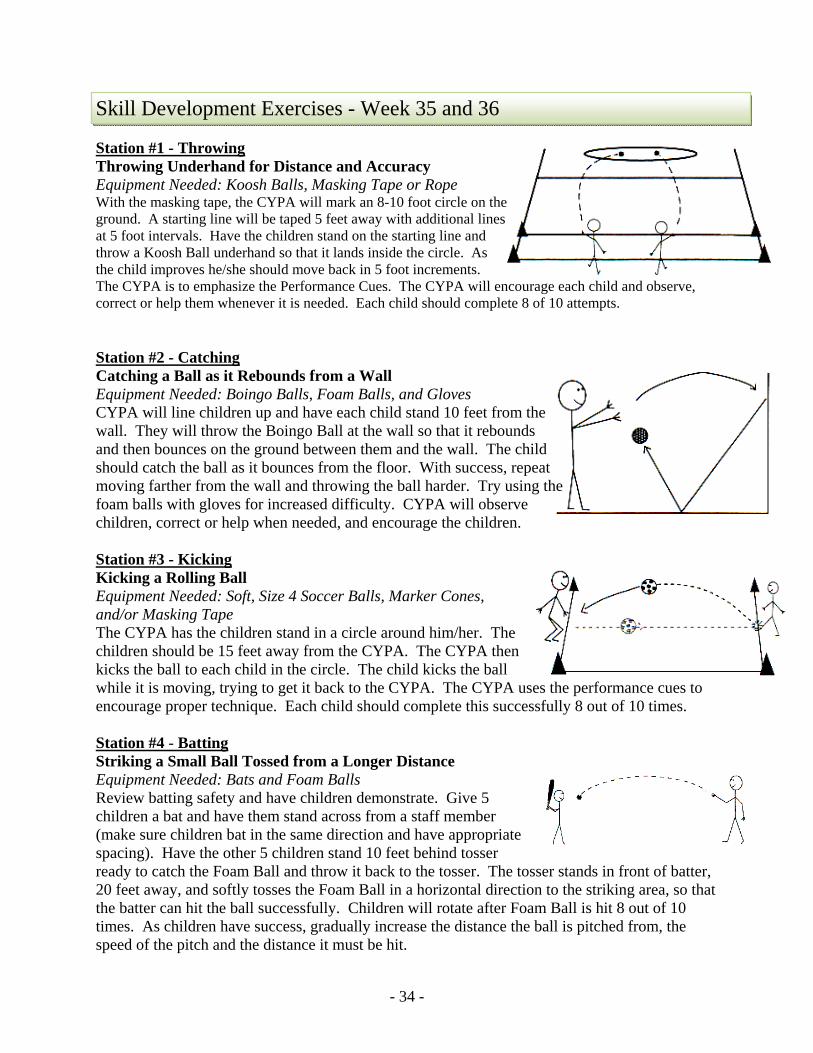
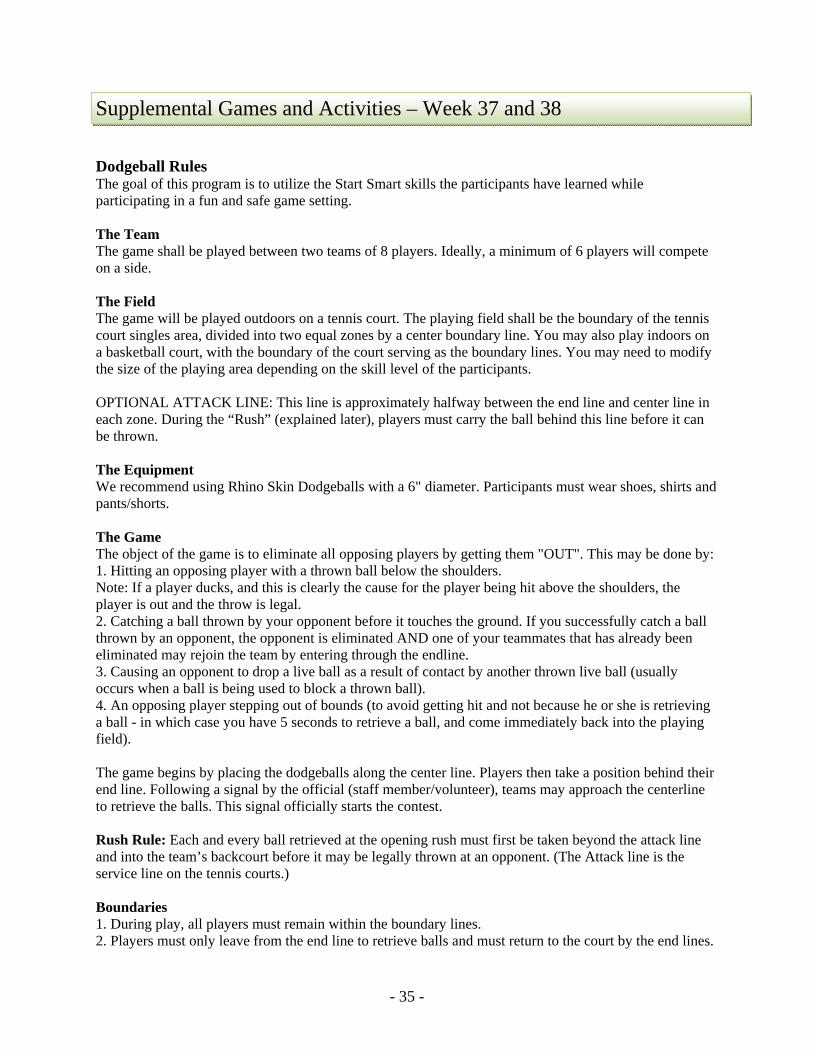
Skill Development Exercises - Week 35 and 36 Station #1 - Throwing Throwing Underhand for Distance and Accuracy Equipment Needed: Koosh Balls, Masking Tape or Rope With the masking tape, the CYPA will mark an 8-10 foot circle on the ground. A starting line will be taped 5 feet away with additional lines at 5 foot intervals. Have the children stand on the starting line and throw a Koosh Ball underhand so that it lands inside the circle. As the child improves he/she should move back in 5 foot increments. The CYPA is to emphasize the Performance Cues. The CYPA will encourage each child and observe, correct or help them whenever it is needed. Each child should complete 8 of 10 attempts. Station #2 - Catching Catching a Ball as it Rebounds from a Wall Equipment Needed: Boingo Balls, Foam Balls, and Gloves CYPA will line children up and have each child stand 10 feet from the wall. They will throw the Boingo Ball at the wall so that it rebounds and then bounces on the ground between them and the wall. The child should catch the ball as it bounces from the floor. With success, repeat moving farther from the wall and throwing the ball harder. Try using the foam balls with gloves for increased difficulty. CYPA will observe children, correct or help when needed, and encourage the children. Station #3 - Kicking Kicking a Rolling Ball Equipment Needed: Soft, Size 4 Soccer Balls, Marker Cones, and/or Masking Tape The CYPA has the children stand in a circle around him/her. The children should be 15 feet away from the CYPA. The CYPA then kicks the ball to each child in the circle. The child kicks the ball while it is moving, trying to get it back to the CYPA. The CYPA uses the performance cues to encourage proper technique. Each child should complete this successfully 8 out of 10 times. Station #4 - Batting Striking a Small Ball Tossed from a Longer Distance Equipment Needed: Bats and Foam Balls Review batting safety and have children demonstrate. Give 5 children a bat and have them stand across from a staff member (make sure children bat in the same direction and have appropriate spacing). Have the other 5 children stand 10 feet behind tosser ready to catch the Foam Ball and throw it back to the tosser. The tosser stands in front of batter, 20 feet away, and softly tosses the Foam Ball in a horizontal direction to the striking area, so that the batter can hit the ball successfully. Children will rotate after Foam Ball is hit 8 out of 10 times. As children have success, gradually increase the distance the ball is pitched from, the speed of the pitch and the distance it must be hit.
- 35 -
Supplemental Games and Activities – Week 37 and 38 Dodgeball Rules The goal of this program is to utilize the Start Smart skills the participants have learned while participating in a fun and safe game setting. The Team The game shall be played between two teams of 8 players. Ideally, a minimum of 6 players will compete on a side. The Field The game will be played outdoors on a tennis court. The playing field shall be the boundary of the tennis court singles area, divided into two equal zones by a center boundary line. You may also play indoors on a basketball court, with the boundary of the court serving as the boundary lines. You may need to modify the size of the playing area depending on the skill level of the participants. OPTIONAL ATTACK LINE: This line is approximately halfway between the end line and center line in each zone. During the “Rush” (explained later), players must carry the ball behind this line before it can be thrown. The Equipment We recommend using Rhino Skin Dodgeballs with a 6" diameter. Participants must wear shoes, shirts and pants/shorts. The Game The object of the game is to eliminate all opposing players by getting them "OUT". This may be done by: 1. Hitting an opposing player with a thrown ball below the shoulders. Note: If a player ducks, and this is clearly the cause for the player being hit above the shoulders, the player is out and the throw is legal. 2. Catching a ball thrown by your opponent before it touches the ground. If you successfully catch a ball thrown by an opponent, the opponent is eliminated AND one of your teammates that has already been eliminated may rejoin the team by entering through the endline. 3. Causing an opponent to drop a live ball as a result of contact by another thrown live ball (usually occurs when a ball is being used to block a thrown ball). 4. An opposing player stepping out of bounds (to avoid getting hit and not because he or she is retrieving a ball - in which case you have 5 seconds to retrieve a ball, and come immediately back into the playing field). The game begins by placing the dodgeballs along the center line. Players then take a position behind their end line. Following a signal by the official (staff member/volunteer), teams may approach the centerline to retrieve the balls. This signal officially starts the contest. Rush Rule: Each and every ball retrieved at the opening rush must first be taken beyond the attack line and into the team’s backcourt before it may be legally thrown at an opponent. (The Attack line is the service line on the tennis courts.) Boundaries 1. During play, all players must remain within the boundary lines. 2. Players must only leave from the end line to retrieve balls and must return to the court by the end lines.

- 36 -
3. During play, all players must remain in the boundary lines. 4. A player may be handed a ball, provided the player receiving the ball remains completely within their teams field boundaries. Players may be handed a ball while standing out of bounds. 5. A player shall not: A. Have any part of their body contact the playing surface on or over the sideline. B. Enter or re-enter the field through their sidelines (only re-enter through the endline). C. Leave the playing field to avoid being hit by or attempting to catch a ball. D. Have any part of their body cross the center line and contact ground on their opponents’ side of the court. Penalty: Player will be declared out Winning The first team to legally eliminate all opposing players will be declared the winner. A 10-minute time limit is encouraged to keep the games short and allow eliminated players a chance to play again. If neither team has been eliminated at the end of the 10 minutes, the team with the greater number of players remaining will be declared the winner. In the case of an equal number of players remaining after regulation, a 3-minute sudden-death overtime period will be played. Rule Enforcement Rules will be enforced primarily by the "honor system". Players will be expected to rule whether or not a hit was legal or whether they were legally eliminated. All games should be supervised by a staff member/volunteer. The staff member/volunteer’s responsibility will be to rule on any situation in which teams cannot agree as well as initiate the start of the game and keep track of the time.

- 37 -
No Lesson This Week - Week 39 Even though this week (as well as 3 other weeks throughout the duration of the program) is scheduled as “off”, it may be utilized as a “catch-up” week for you and/or some of your children. Absences are going to happen, so take this week to try to get all of your children up to the same point in the program. You also may encounter holidays or other program cancellations, so the built-in “off” weeks are there to keep your program flowing smoothly and on schedule. You may also take this week to devote extra time to some of the children that may be struggling with a particular skill. Children are going to develop at different rates, so some extra practice for those who aren’t developing as quickly is certainly going to be needed at some point during the program. Finally, if you want to hold a Start Smart session during the “off” week, you are more than welcome to do so. We would recommend offering some of the games/activities that the children have enjoyed up to this point in the program. If the children are physically active, developing their skills, and having fun, then it is certainly worthwhile to utilize the “off” week in this manner.
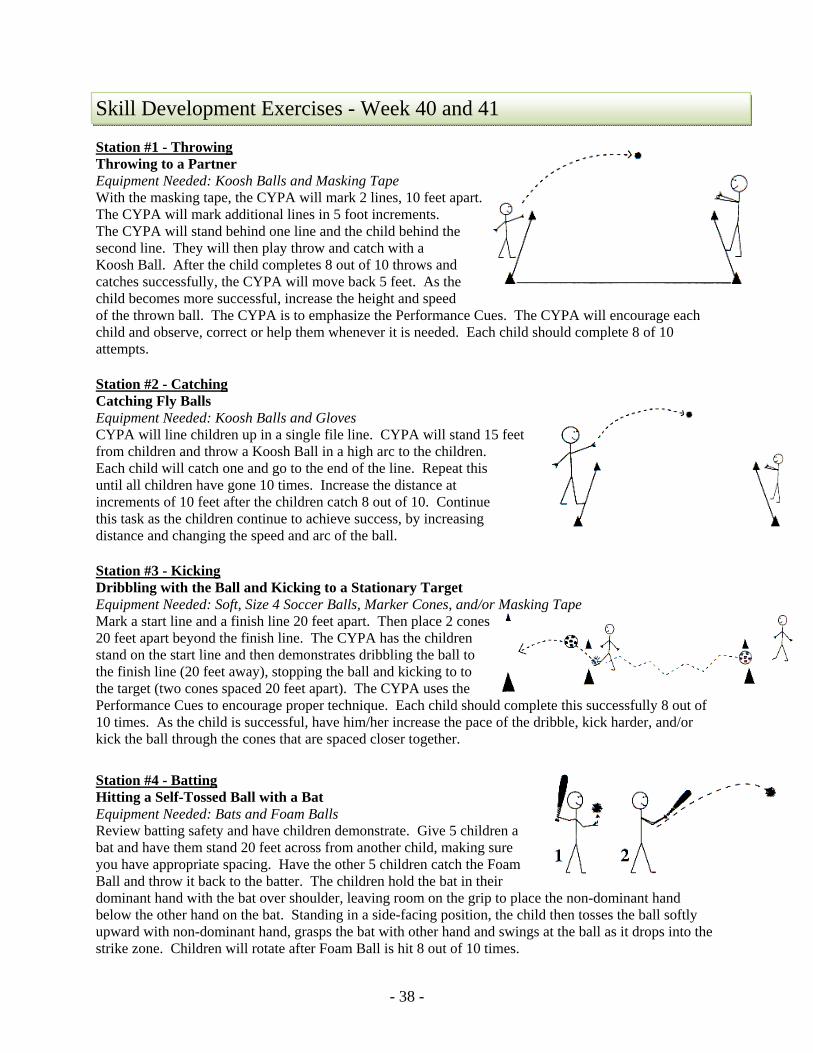
- 38 -
Skill Development Exercises - Week 40 and 41 Station #1 - Throwing Throwing to a Partner Equipment Needed: Koosh Balls and Masking Tape With the masking tape, the CYPA will mark 2 lines, 10 feet apart. The CYPA will mark additional lines in 5 foot increments. The CYPA will stand behind one line and the child behind the second line. They will then play throw and catch with a Koosh Ball. After the child completes 8 out of 10 throws and catches successfully, the CYPA will move back 5 feet. As the child becomes more successful, increase the height and speed of the thrown ball. The CYPA is to emphasize the Performance Cues. The CYPA will encourage each child and observe, correct or help them whenever it is needed. Each child should complete 8 of 10 attempts. Station #2 - Catching Catching Fly Balls Equipment Needed: Koosh Balls and Gloves CYPA will line children up in a single file line. CYPA will stand 15 feet from children and throw a Koosh Ball in a high arc to the children. Each child will catch one and go to the end of the line. Repeat this until all children have gone 10 times. Increase the distance at increments of 10 feet after the children catch 8 out of 10. Continue this task as the children continue to achieve success, by increasing distance and changing the speed and arc of the ball. Station #3 - Kicking Dribbling with the Ball and Kicking to a Stationary Target Equipment Needed: Soft, Size 4 Soccer Balls, Marker Cones, and/or Masking Tape Mark a start line and a finish line 20 feet apart. Then place 2 cones 20 feet apart beyond the finish line. The CYPA has the children stand on the start line and then demonstrates dribbling the ball to the finish line (20 feet away), stopping the ball and kicking to to the target (two cones spaced 20 feet apart). The CYPA uses the Performance Cues to encourage proper technique. Each child should complete this successfully 8 out of 10 times. As the child is successful, have him/her increase the pace of the dribble, kick harder, and/or kick the ball through the cones that are spaced closer together.
Station #4 - Batting Hitting a Self-Tossed Ball with a Bat Equipment Needed: Bats and Foam Balls Review batting safety and have children demonstrate. Give 5 children a bat and have them stand 20 feet across from another child, making sure you have appropriate spacing. Have the other 5 children catch the Foam Ball and throw it back to the batter. The children hold the bat in their dominant hand with the bat over shoulder, leaving room on the grip to place the non-dominant hand below the other hand on the bat. Standing in a side-facing position, the child then tosses the ball softly upward with non-dominant hand, grasps the bat with other hand and swings at the ball as it drops into the strike zone. Children will rotate after Foam Ball is hit 8 out of 10 times.
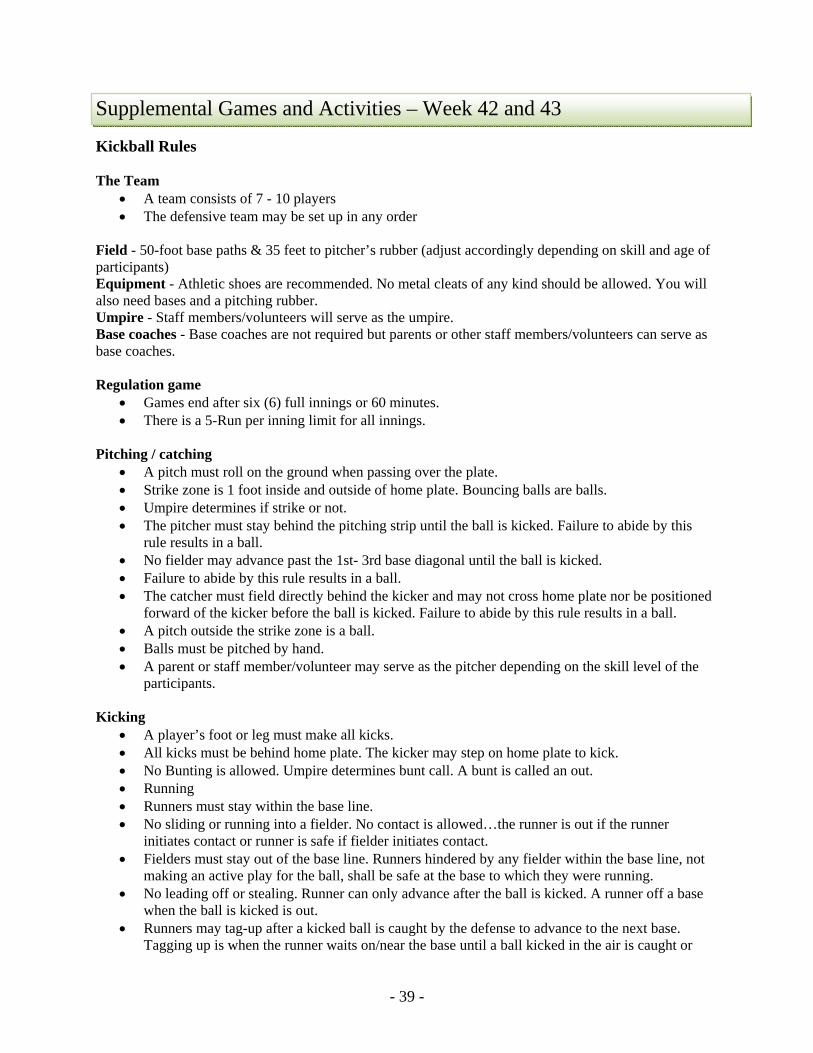
- 39 -
Supplemental Games and Activities – Week 42 and 43 Kickball Rules The Team
A team consists of 7 - 10 players The defensive team may be set up in any order
Field - 50-foot base paths & 35 feet to pitcher’s rubber (adjust accordingly depending on skill and age of participants) Equipment - Athletic shoes are recommended. No metal cleats of any kind should be allowed. You will also need bases and a pitching rubber. Umpire - Staff members/volunteers will serve as the umpire. Base coaches - Base coaches are not required but parents or other staff members/volunteers can serve as base coaches. Regulation game
Games end after six (6) full innings or 60 minutes. There is a 5-Run per inning limit for all innings.
Pitching / catching
A pitch must roll on the ground when passing over the plate. Strike zone is 1 foot inside and outside of home plate. Bouncing balls are balls. Umpire determines if strike or not. The pitcher must stay behind the pitching strip until the ball is kicked. Failure to abide by this
rule results in a ball. No fielder may advance past the 1st- 3rd base diagonal until the ball is kicked. Failure to abide by this rule results in a ball. The catcher must field directly behind the kicker and may not cross home plate nor be positioned
forward of the kicker before the ball is kicked. Failure to abide by this rule results in a ball. A pitch outside the strike zone is a ball. Balls must be pitched by hand. A parent or staff member/volunteer may serve as the pitcher depending on the skill level of the
participants. Kicking
A player’s foot or leg must make all kicks. All kicks must be behind home plate. The kicker may step on home plate to kick. No Bunting is allowed. Umpire determines bunt call. A bunt is called an out. Running Runners must stay within the base line. No sliding or running into a fielder. No contact is allowed…the runner is out if the runner
initiates contact or runner is safe if fielder initiates contact. Fielders must stay out of the base line. Runners hindered by any fielder within the base line, not
making an active play for the ball, shall be safe at the base to which they were running. No leading off or stealing. Runner can only advance after the ball is kicked. A runner off a base
when the ball is kicked is out. Runners may tag-up after a kicked ball is caught by the defense to advance to the next base.
Tagging up is when the runner waits on/near the base until a ball kicked in the air is caught or
- 40 -
drops to the ground. If the ball is caught, the runner must touch the base where he/she started before attempting to advance to the next base. The fielding team may tag the runner or touch the base (with ball in hand), which will result in the runner being out if the runner fails to follow this rule.
Runners may overrun first base. One base on an overthrow into foul territory. This rule is a restriction on the runner – not an
automatic right for the runner to advance. Running past another runner is not allowed. Any runner passed by another runner is out.
Strikes - Three (3) strikes is an out. A strike is:
A pitch within the strike zone that is not kicked; An attempted kick missed by the kicker inside or outside of the strike zone A foul ball is a strike
If a player has 2 strikes and kicks the ball foul, he/she will be granted a “courtesy foul” and will get one more opportunity to kick the ball fair. Balls - Three (3) balls walk the kicker to first base A ball is:
A pitch outside of the strike zone as judged by the Umpire where a kick is not attempted An illegal bouncing pitch Any fielder or pitcher advancing on home plate before the ball is kicked Any catcher crossing home plate before the kicker or failing to field behind the kicker
Foul ball - A foul counts as a strike A foul is:
A kick landing in foul territory A kick that goes foul prior to passing 3rd or 1st base & not touched by a player
Outs - Three (3) outs by a team complete the team’s half of the inning.
Three (3) strikes or fouling twice with 2 strikes Runner touched by the ball while not on base & the ball is in play A fielder can throw a ball at a runner below the shoulders. Runners hit in the neck or head with
the ball will not be out unless they were ducking to dodge the ball. A kicked ball (fair or foul) that is caught in the air A ball thrown to fielder touching base beats the runner who is forced to run A runner is off of his/her base when the ball is kicked
Play ends:
When the pitcher has the ball in control and on the mound. A runner intentionally touches or stops the ball (the runner is out) Interference is when any non-fielder, runner, or non-permanent object touches the ball. Any time
there is interference, play automatically ends and runners proceed to the base to which they were headed.
Let’s have fun rule: In the name of playing the game and making sure that the players/teams have fun and the staff members/volunteers may make minor changes to the rules to accommodate the number of players and skill level of the participants.
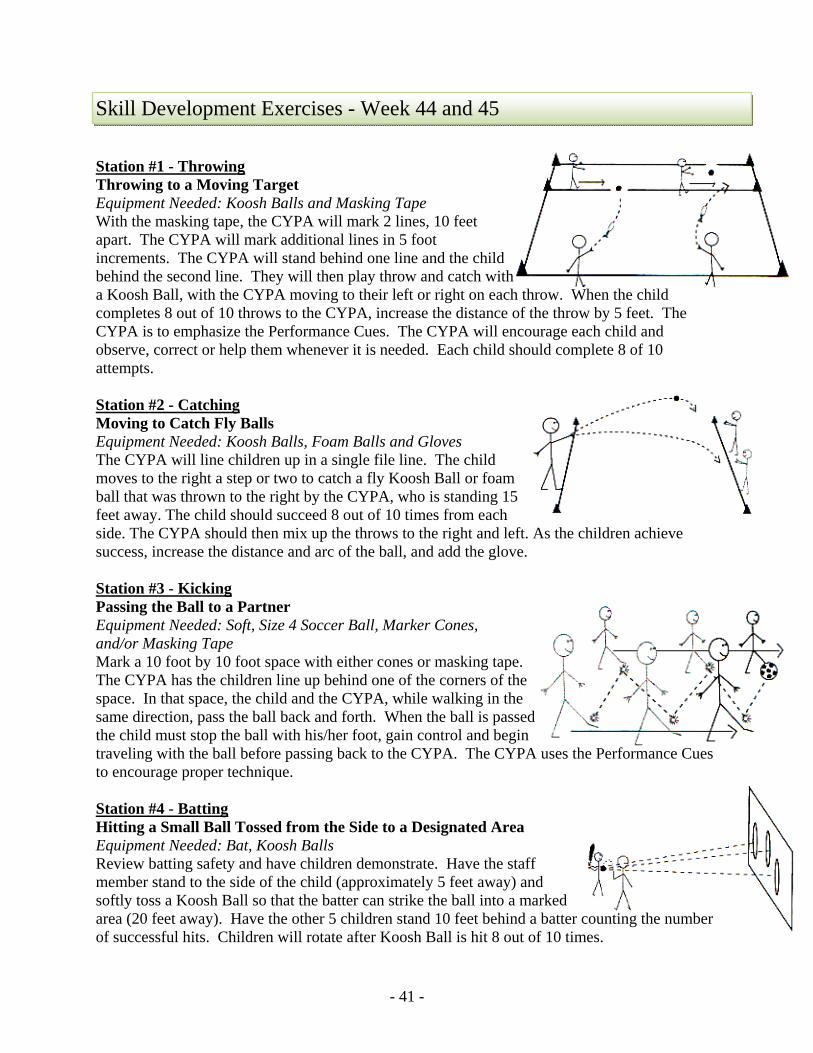
- 41 -
Skill Development Exercises - Week 44 and 45 Station #1 - Throwing Throwing to a Moving Target Equipment Needed: Koosh Balls and Masking Tape With the masking tape, the CYPA will mark 2 lines, 10 feet apart. The CYPA will mark additional lines in 5 foot increments. The CYPA will stand behind one line and the child behind the second line. They will then play throw and catch with a Koosh Ball, with the CYPA moving to their left or right on each throw. When the child completes 8 out of 10 throws to the CYPA, increase the distance of the throw by 5 feet. The CYPA is to emphasize the Performance Cues. The CYPA will encourage each child and observe, correct or help them whenever it is needed. Each child should complete 8 of 10 attempts. Station #2 - Catching Moving to Catch Fly Balls Equipment Needed: Koosh Balls, Foam Balls and Gloves The CYPA will line children up in a single file line. The child moves to the right a step or two to catch a fly Koosh Ball or foam ball that was thrown to the right by the CYPA, who is standing 15 feet away. The child should succeed 8 out of 10 times from each side. The CYPA should then mix up the throws to the right and left. As the children achieve success, increase the distance and arc of the ball, and add the glove. Station #3 - Kicking Passing the Ball to a Partner Equipment Needed: Soft, Size 4 Soccer Ball, Marker Cones, and/or Masking Tape Mark a 10 foot by 10 foot space with either cones or masking tape. The CYPA has the children line up behind one of the corners of the space. In that space, the child and the CYPA, while walking in the same direction, pass the ball back and forth. When the ball is passed the child must stop the ball with his/her foot, gain control and begin traveling with the ball before passing back to the CYPA. The CYPA uses the Performance Cues to encourage proper technique. Station #4 - Batting Hitting a Small Ball Tossed from the Side to a Designated Area Equipment Needed: Bat, Koosh Balls Review batting safety and have children demonstrate. Have the staff member stand to the side of the child (approximately 5 feet away) and softly toss a Koosh Ball so that the batter can strike the ball into a marked area (20 feet away). Have the other 5 children stand 10 feet behind a batter counting the number of successful hits. Children will rotate after Koosh Ball is hit 8 out of 10 times.

- 42 -
Supplemental Games and Activities – Week 46 and 47 Four Square Rules Four square is played all over the world by all sorts of different communities. We've made a great effort to compile and strengthen all of the most common rules from all the playgrounds of our childhoods to create a benchmark for everyone. The Equipment Four square is played with a rubber playground ball on a square court with four players. When the ball is bounced into your square you must then bounce it back out without it hitting twice in your own square, otherwise you are out. The object is to eliminate players in higher squares so that you can make it to the 'four square' and score the most points. The Court Four Square is played on a 16' square court divided into four smaller squares that meet in the center. Squares are numbered 1 through 4. New players enter into square number 1 and the ball is served out of square number 4. Players may stand, walk or run anywhere in the court, though it is best to stay in a position to protect your own square. The Ball We recommend using a textured 8.5" rubber playground ball inflated to 2 lbs. During play the ball may be hit with one or two hands, from the elbow to the fingertips, open or closed fist, in the same manner as official volleyball. Normal Game Play The player in the highest rank, called four square or 'royalty,' serves the ball into the lowest ranking square, called one square. After a single bounce in one square, the player must hit the ball (return) into any other legal square before it bounces again. Each time the ball is bounced in any square, that player must hit it into any other player's square to stay in the game. The game continues until a player makes an error by letting the ball bounce twice, hitting the ball out of bounds, or breaking a 'custom rule' (see below.) During game play, players must hit or touch the ball with enough force to create a change in the ball's path and trajectory. Hits that do not change the path or trajectory of the ball will cause the offending player to be out. Serving the Ball The ball is always served from four square into one square. The serve is always delivered from the back corner of the square, sometimes called the 'mailbox.' Four square must call any custom rules first, drop the ball and serve from the bounce. Serves are meant to place the ball fairly into play and must be returnable by the player in square one, generally taking its first bounce near the center of square one. As they say on playgrounds, "No blood on serves."

- 43 -
Faults Faults are allowed only once for either the server or the receiver. The server can fault if the serve into one square is too high, too low, too fast or otherwise un-returnable by the receiver. The receiver may send the ball back to be served again. The receiver can fault on a return if she hits the ball out of bounds, into her own square or on to an inside court line. The receiver has a second chance for a serve. Both the server and the receiver are allowed only one fault, referred to as "one bad". However, if a player faults a second time then they are out. You can also remember it this way: Two bad = too bad for you! Progression of Squares Each time a player is knocked out, that square becomes vacant and all the players move up to a higher numbered square to make the one square available for an incoming player. Knocked out players must go to the end of the line and await their next turn in play. The Boundaries The lines on the court are like the lines on a tennis or volleyball court and each has a specific rule. 'Outside lines" refer to the outermost square of the court, 'inside lines' refer to the line dividing individual squares of the court which cross in the center. Inside Out: Bouncing the ball on the inside line is a bad play. This means that when a player returns a ball bounced in his/her square, he/she must bounce it cleanly outside of his/her square. If he/she bounces it on an inside line of his/her square, it’s not good enough and he/she is out. Outside In: The lines on the outside of the court are in play, always. If a player bounces the ball into another square and the ball hits the outside line, it is still in play. However, if he/she hit the ball too far and it bounced outside of the outside line, it is out of bounds and he/she is out. Interference If the ball is touched by another object which is not one of the four players or the floor, this is called interference. The round is started again. Players waiting in line may not touch the ball when in play. It should be mentioned here that there are times when one cannot hit the ball. When a ball bounces in a square it is that player's responsibility to hit the ball into another square, and failure to do so would be a fault making him/her out. Other players may not interfere with a player's turn by hitting the ball and preventing him/her from returning it. Specifically, if the ball lands in another player's square then other players are not allowed to touch that ball until it has been hit again. This tactic is called 'poaching' and is not allowed. However, there is nothing stopping one from hitting the ball before it touches a square. The "Showdown!" If there is a dispute that cannot be settled by the officials (staff member/volunteer supervisor) then the only proper way to come to work out the disagreement is through the Showdown. The Showdown is mini-game of two square with no custom rules and the loser is knocked out of the

- 44 -
game. In the event of a Showdown, there are no points or errors logged for the players, the winner of the showdown is simply allowed to stay in the game. Customized Rules Making it into four square comes with the unique privilege of creating special rules which tailor the game play to your own style and help you to stay in four square longer. This is where most of the fun and complexity of game comes from. When in four square, the player may call specific rules which become part of the game at the beginning of each serve and last only for that round. After each round, he/she must call the rules again or it is considered that the rules fall back on the published Standards and no special rules apply. It is enough simply to say, "Same rules" or "Ditto" to let the other players know that the custom rules still apply to this round. Here is a short list of possible customized rules: Double Taps: This means any player may hit the ball two times in the air after it has bounced once in her square. Similar to a one person volleyball team, this is an effective technique for setting yourself up for a spike. Body Language: This rule allows players to use any part of their body to hit the ball. Some players like this because of the added use of feet for emergency recoveries. Black Jack: If a player catches the ball cleanly before it lands in her square, the player who hit the ball is out. It usually forces the game to be played low and fast and creates a different dynamic. If this is played with Double Taps, you must still catch the ball on the first hit. Underhand: The means that all hits are with an open hand, palm(s) up. This brings the game down low to the ground and makes your quads ache the next day. "Underhand" is stereotypically associated with beginners, but in four square even the best players sometimes can't survive a round of underhand.
- 45 -
Start Smart Skill Assessment – Week 48 During week 48 you will perform a skill assessment on each of your students. This does not need to be completed all on the same day. Please take time over the course of a week to assess each student. All the tasks that the students will be tested on can be found on in this manual’s appendix (pages A3 and A4). You will need to make a copy of those pages as each student will need his or her own assessment sheet. Please keep the assessment sheets as you will perform this test 4 times throughout the year. Results can and should be shared with each child’s parent/guardian to show what skills are being taught, learned and what the child still may need to improve upon.
Please review the Participant Manual’s Performance Cues (pages 3-10) as these are the components that will be assessed during the testing period. The Participant Manual (pages 11-17) also contains the detailed instructions for performing the skill assessments. When performing the skill assessment, you may need to have the child perform each task multiple times as there are several components to each task that you must observe. Please take your time in evaluating each child as it is important to be as accurate as possible. The following information is a brief overview and will help to serve as your “how to” guide when performing the assessments. Read the directions and set-up for each skill area that follows. Understand that the test is NOT used to rank or score any of the children, and the scores are only for you and the child’s parent/guardian to see. **IMPORTANT** Do not give the child any additional instructions other than what is provided to ensure the accuracy of the test results. Throwing Test Throwing Test Set Up and Equipment Requirements On a large wall (at least 10 feet high by 20 feet wide), mark a circle eight feet in diameter with either chalk or marking tape. Use the Koosh Ball for this test. Instructions The child gets one practice throw and then six additional throws to get the ball inside the circle from the designated throwing line. The child may step over the line when throwing. Verbal Instructions to the Child “Stand behind the line when you throw. You may step over it when you throw. You will get one practice throw and then the next six are for scores. Throw the ball as hard as you can and try to hit the center of the circle.”

- 46 -
Catching Test Catching Test Set Up and Equipment Requirements Mark off 2 lines on the floor (10 feet apart). Have the children stand on one line and the parents stand on the other line. Encourage the parents and children to face each other, and give the parents a Koosh Ball. Instructions The parent tosses the Koosh Ball in an arc to the child so that the child does not have to take more than one step to catch the ball. If the child moves more than one step and does not catch the ball, the trial should be taken over. Verbal Instructions to the Child “Stand on the line and when I toss you the ball try to catch it with your hands before it hits the ground. You can step over the line to catch the ball.” Kicking Test Kicking Test Set Up and Equipment Requirements On a large wall (at least 10 feet high by 20 feet wide), mark a rectangle six feet wide by eight feet high with either chalk or marking tape. Mark a line 20 feet away from the wall. Use the soccer ball for this test. Instructions The ball is placed on the 20-foot line and the child stands behind the line, runs up to the ball, and kicks it trying to hit the target area on the wall. Verbal Instructions to the Child “Stand behind the line, move to the ball and kick it as hard as you can to the target. You may cross over the line as you kick the ball.” Batting Test Batting Test Set Up and Equipment Requirements In an open area, mark off 2 lines (15 feet apart). Participants will need a batting tee (or something comparable), a bat and the soft foam ball. Instructions Place the tee on one of the marked lines. The child stands next to the tee with his/her non-dominant side facing the target area. The child will try to hit the foam ball off the tee so that it travels over the other 15-foot line. Verbal Instructions to the Child “Stand facing the batting tee with the bat in your hands ready to swing when I say ‘go’. Try to hit the ball hard so that it goes in the air and lands past the line.”
- 47 -
Start Smart Sports Development Program – Week 49-52 Use this period to make up any days that were cancelled or postponed throughout the year. Take this time off to evaluate the quality of your equipment and determine if additional or replacement supplies will be needed before you begin the program again. You might notice that Week 48 (the last week of the program) and Week 1 (the first week of the program) are the same. When rolling the program over into the new year, you will not need to perform the skill assessment on the children that were just tested in Week 48. However, if you have new children in your class(es), you will need to make sure they have a proper skill assessment in Week 1. If you would like to continue the program during the off-weeks, please incorporate the supplemental games and activities into these weeks. This will give the children a fun activity to participate in while continuing to enhance their skills. You may also want to take this time to address individual children who are struggling with a certain skill and spend some one on one time with them in an attempt to help them improve upon the trouble area.
APPENDIX
Performance Cues Posters…………………….. A1 Sample Floor Plan……………………………… A2 Start Smart Skill Test .………………………… A3 Start Smart Skill Test (cont.) ..………………… A4 Instructor Survey……………………………….. A5 Participant Attendance and Observation Sheet. A6 Product Description…………………………….. A7
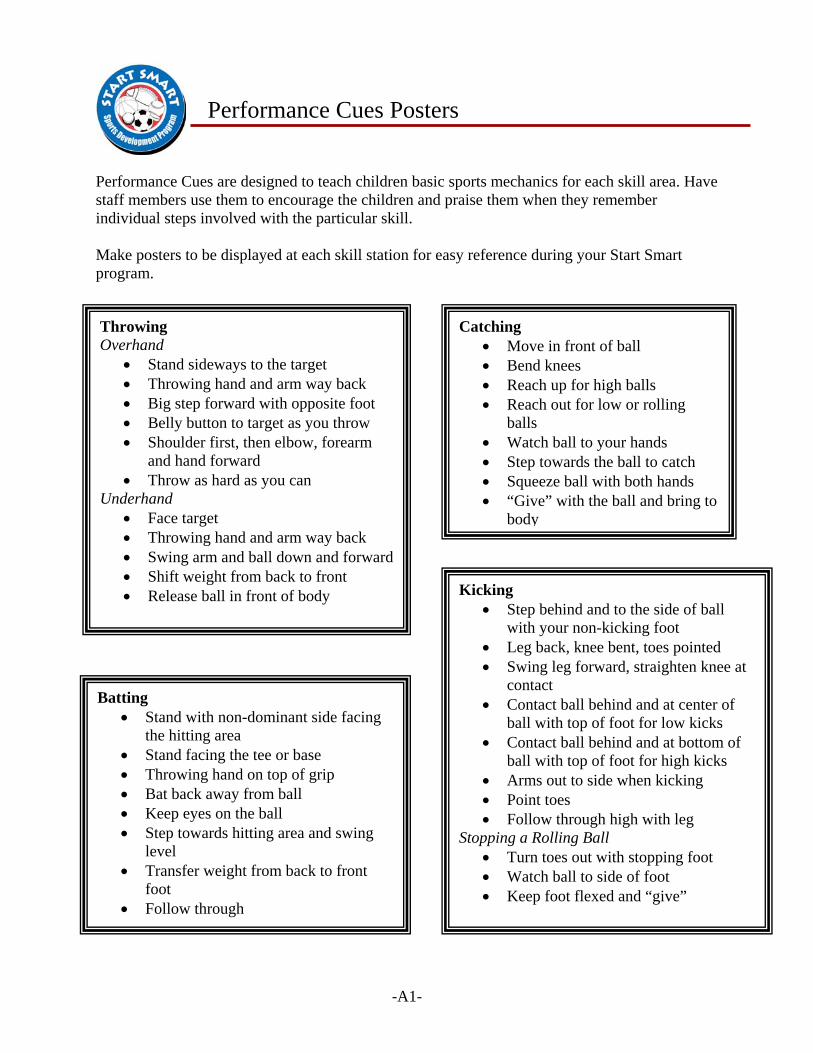
-A1-
Performance Cues Posters Performance Cues are designed to teach children basic sports mechanics for each skill area. Have staff members use them to encourage the children and praise them when they remember individual steps involved with the particular skill. Make posters to be displayed at each skill station for easy reference during your Start Smart program.
Throwing Overhand
Stand sideways to the target Throwing hand and arm way back Big step forward with opposite foot Belly button to target as you throw Shoulder first, then elbow, forearm
and hand forward Throw as hard as you can
Underhand Face target Throwing hand and arm way back Swing arm and ball down and forward Shift weight from back to front Release ball in front of body
Catching Move in front of ball Bend knees Reach up for high balls Reach out for low or rolling
balls Watch ball to your hands Step towards the ball to catch Squeeze ball with both hands “Give” with the ball and bring to
body
Batting Stand with non-dominant side facing
the hitting area Stand facing the tee or base Throwing hand on top of grip Bat back away from ball Keep eyes on the ball Step towards hitting area and swing
level Transfer weight from back to front
foot Follow through
Kicking Step behind and to the side of ball
with your non-kicking foot Leg back, knee bent, toes pointed Swing leg forward, straighten knee at
contact Contact ball behind and at center of
ball with top of foot for low kicks Contact ball behind and at bottom of
ball with top of foot for high kicks Arms out to side when kicking Point toes Follow through high with leg
Stopping a Rolling Ball Turn toes out with stopping foot Watch ball to side of foot Keep foot flexed and “give”
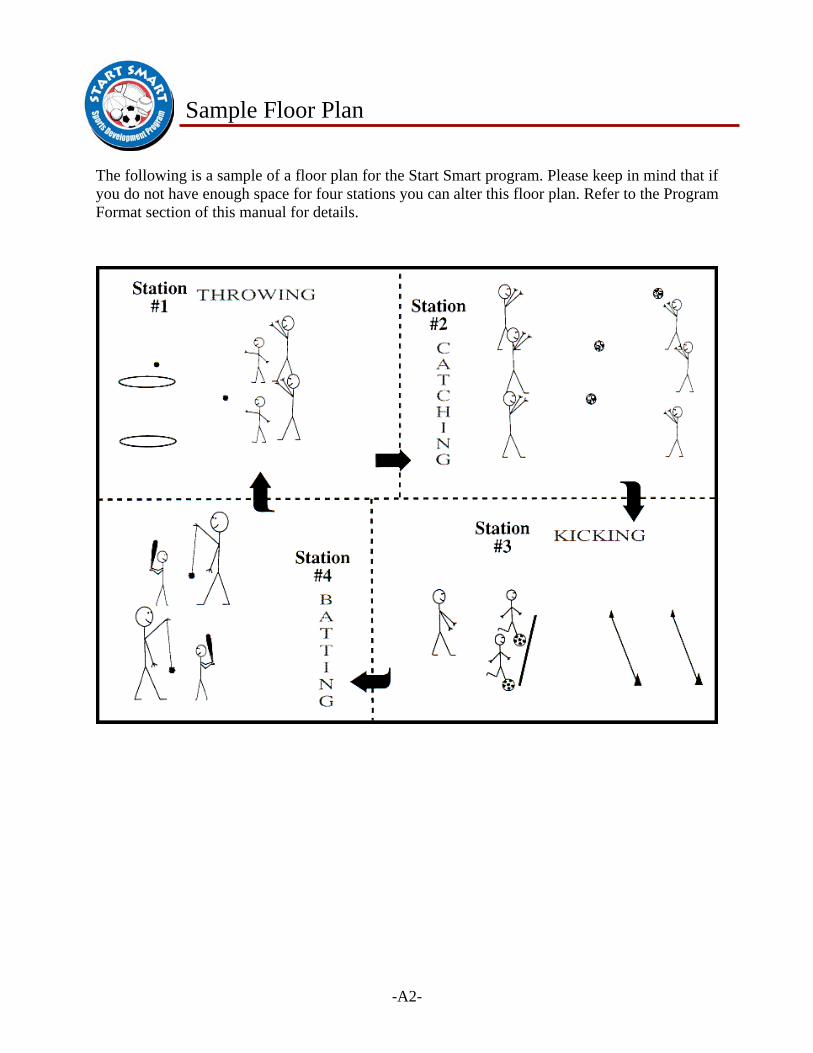
-A2-
Sample Floor Plan The following is a sample of a floor plan for the Start Smart program. Please keep in mind that if you do not have enough space for four stations you can alter this floor plan. Refer to the Program Format section of this manual for details.
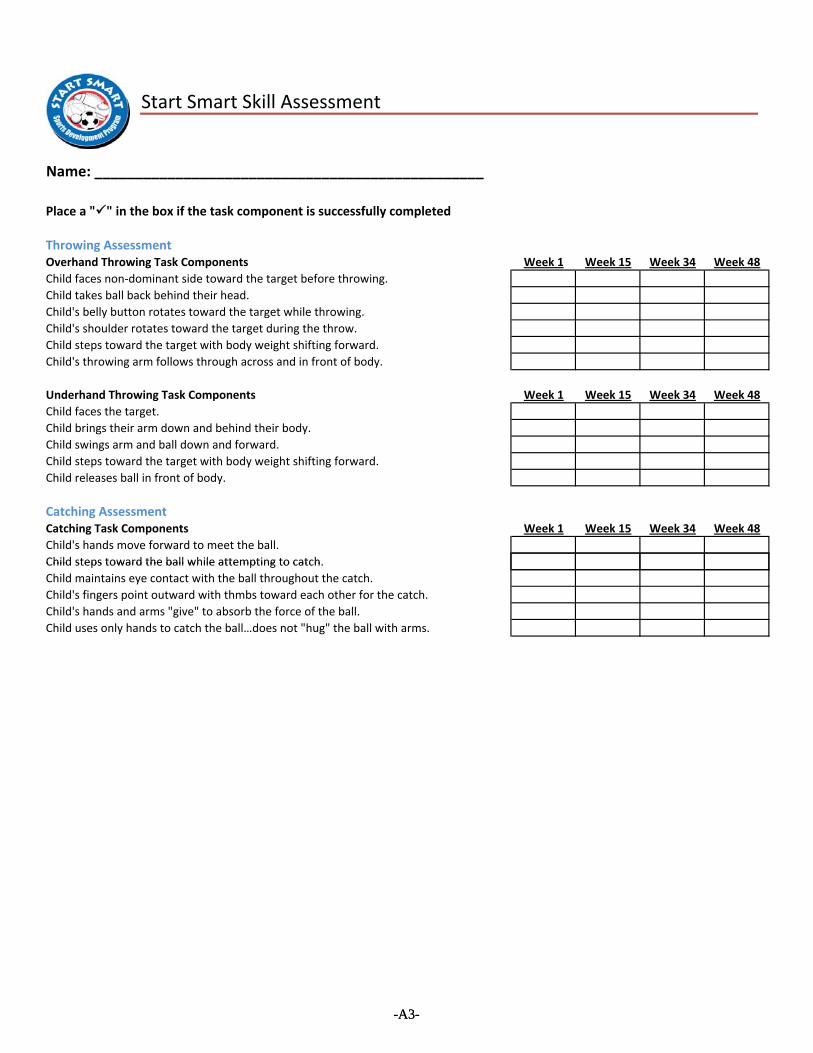
Start Smart Skill Assessment
Name: ________________________________________________
Place a "" in the box if the task component is successfully completed
Throwing AssessmentOverhand Throwing Task Components Week 1 Week 15 Week 34 Week 48Child faces non‐dominant side toward the target before throwing.Child takes ball back behind their head.Child's belly button rotates toward the target while throwing.Child's shoulder rotates toward the target during the throw.Child steps toward the target with body weight shifting forward.Child's throwing arm follows through across and in front of body.
Underhand Throwing Task Components Week 1 Week 15 Week 34 Week 48Child faces the target.Child brings their arm down and behind their body.Child swings arm and ball down and forward.Child steps toward the target with body weight shifting forward.Child releases ball in front of body.
Catching AssessmentCatching Task Components Week 1 Week 15 Week 34 Week 48Child's hands move forward to meet the ball.Child steps toward the ball while attempting to catch.
-A3-
Child steps toward the ball while attempting to catch.Child maintains eye contact with the ball throughout the catch.Child's fingers point outward with thmbs toward each other for the catch.Child's hands and arms "give" to absorb the force of the ball.Child uses only hands to catch the ball…does not "hug" the ball with arms.
-A3-
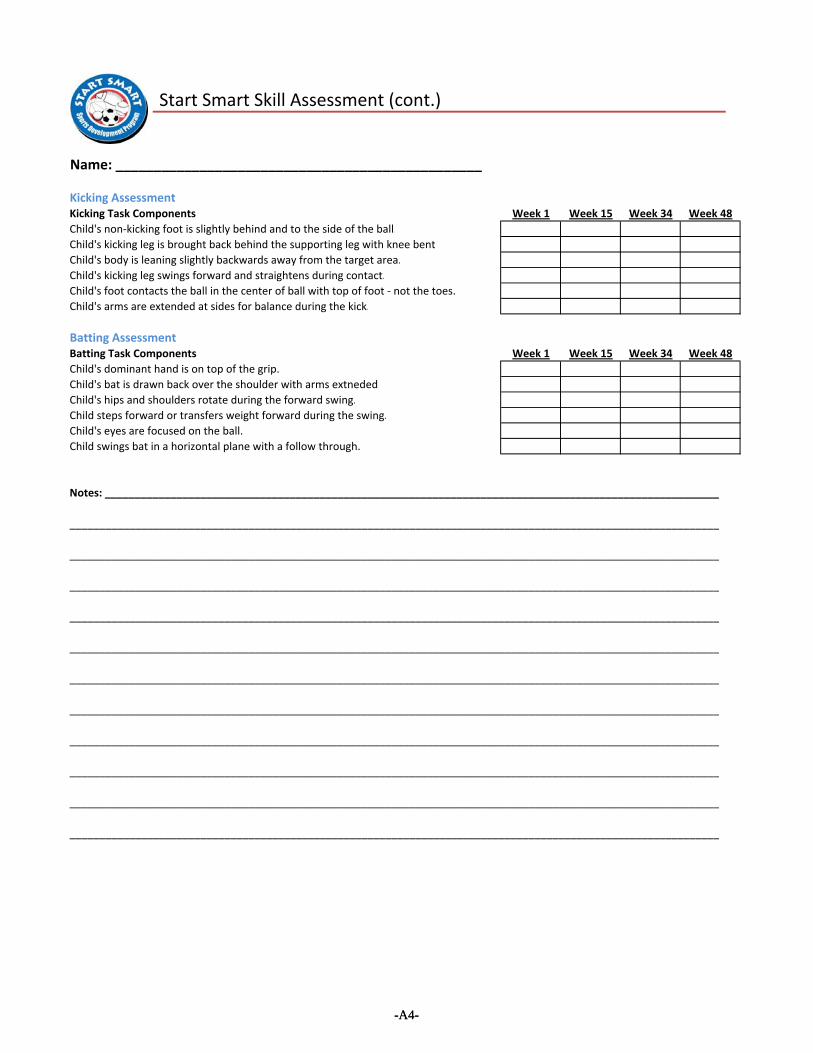
Start Smart Skill Assessment (cont.)
Name: ________________________________________________
Kicking AssessmentKicking Task Components Week 1 Week 15 Week 34 Week 48Child's non‐kicking foot is slightly behind and to the side of the ball.Child's kicking leg is brought back behind the supporting leg with knee bent.Child's body is leaning slightly backwards away from the target area.Child's kicking leg swings forward and straightens during contact.Child's foot contacts the ball in the center of ball with top of foot ‐ not the toes.Child's arms are extended at sides for balance during the kick.
Batting AssessmentBatting Task Components Week 1 Week 15 Week 34 Week 48Child's dominant hand is on top of the grip.Child's bat is drawn back over the shoulder with arms extneded.Child's hips and shoulders rotate during the forward swing.Child steps forward or transfers weight forward during the swing.Child's eyes are focused on the ball.Child swings bat in a horizontal plane with a follow through.
Notes: ________________________________________________________________________________________________________
_____________________________________________________________________________________________________________
_____________________________________________________________________________________________________________
-A4-
_____________________________________________________________________________________________________________
_____________________________________________________________________________________________________________
_____________________________________________________________________________________________________________
_____________________________________________________________________________________________________________
_____________________________________________________________________________________________________________
_____________________________________________________________________________________________________________
_____________________________________________________________________________________________________________
_____________________________________________________________________________________________________________
_____________________________________________________________________________________________________________
-A4-
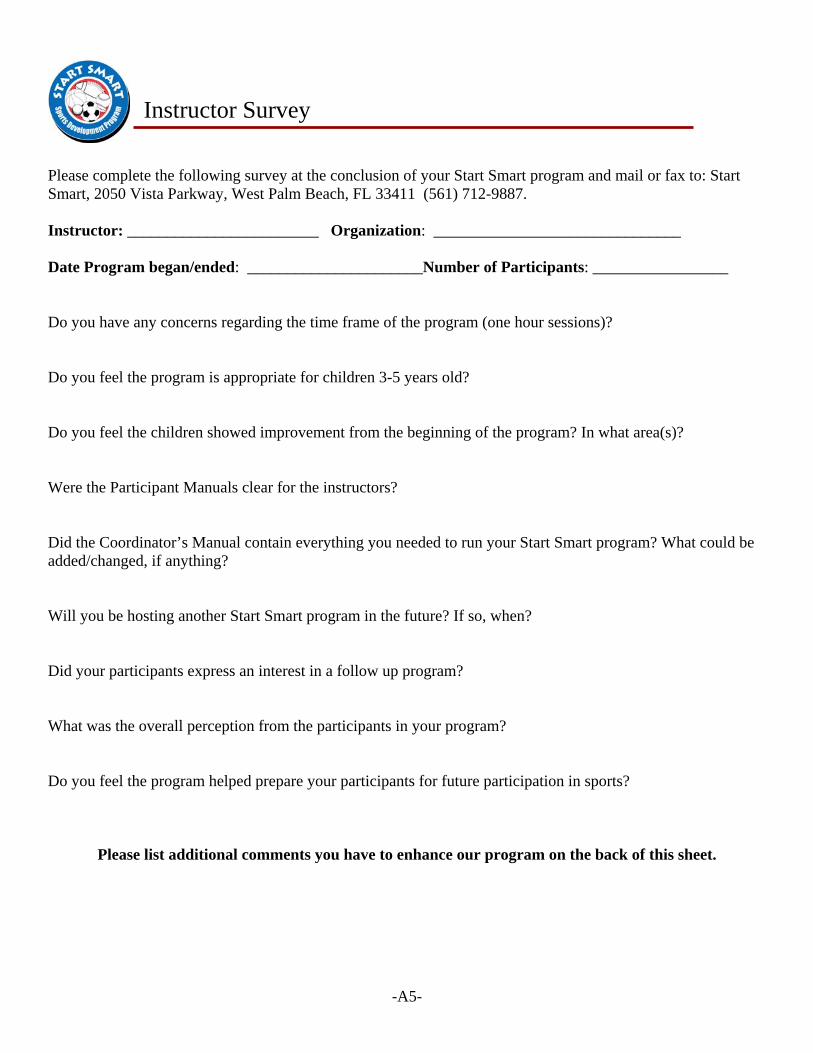
-A5-
Instructor Survey
Please complete the following survey at the conclusion of your Start Smart program and mail or fax to: Start Smart, 2050 Vista Parkway, West Palm Beach, FL 33411 (561) 712-9887. Instructor: ________________________ Organization: _______________________________ Date Program began/ended: ______________________Number of Participants: _________________
Do you have any concerns regarding the time frame of the program (one hour sessions)? Do you feel the program is appropriate for children 3-5 years old? Do you feel the children showed improvement from the beginning of the program? In what area(s)? Were the Participant Manuals clear for the instructors? Did the Coordinator’s Manual contain everything you needed to run your Start Smart program? What could be added/changed, if anything? Will you be hosting another Start Smart program in the future? If so, when? Did your participants express an interest in a follow up program? What was the overall perception from the participants in your program? Do you feel the program helped prepare your participants for future participation in sports?
Please list additional comments you have to enhance our program on the back of this sheet.
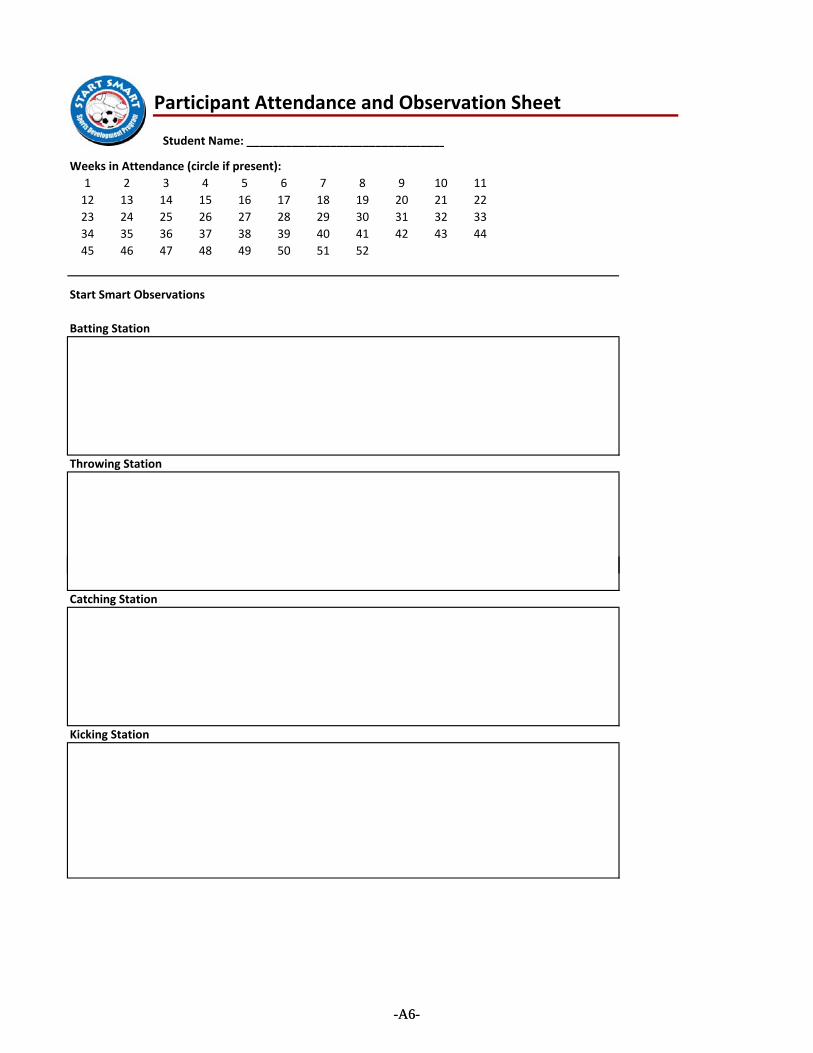
Participant Attendance and Observation Sheet
Student Name: _______________________________
Weeks in Attendance (circle if present):1 2 3 4 5 6 7 8 9 10 1112 13 14 15 16 17 18 19 20 21 2223 24 25 26 27 28 29 30 31 32 3334 35 36 37 38 39 40 41 42 43 4445 46 47 48 49 50 51 52
Start Smart Observations
Batting Station
Throwing Station
-A6-
Catching Station
Kicking Station
-A6-
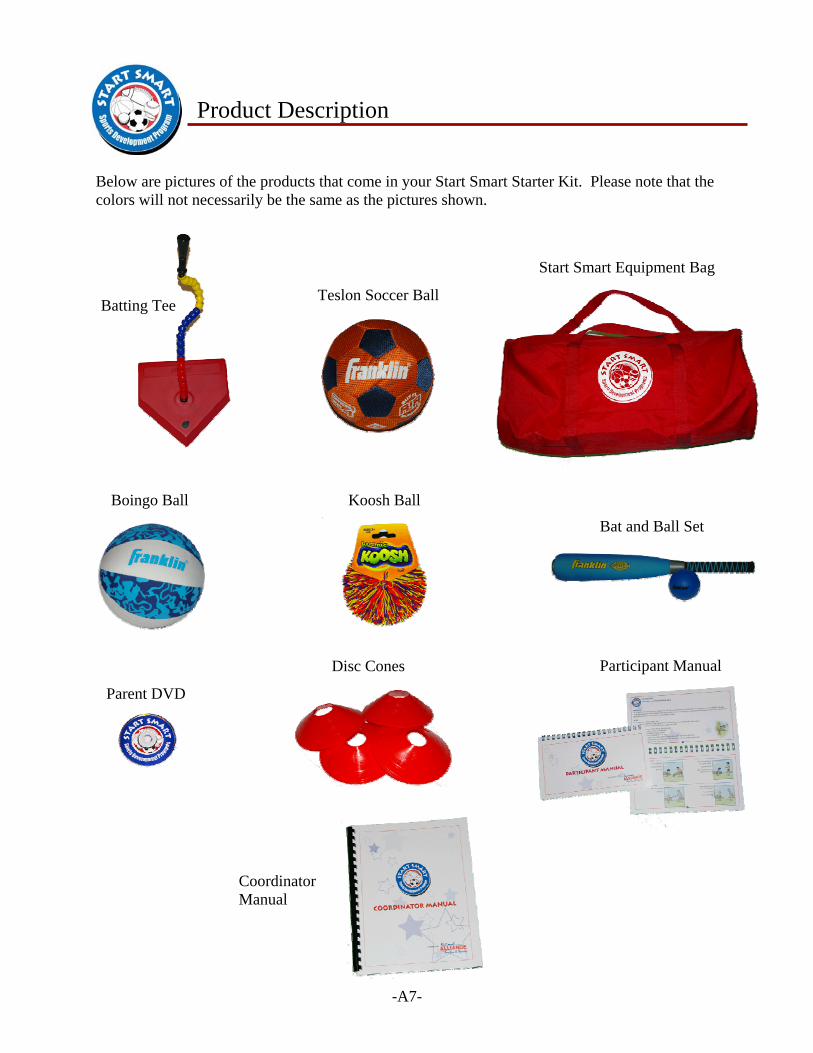
-A7-
Batting Tee
Product Description Below are pictures of the products that come in your Start Smart Starter Kit. Please note that the colors will not necessarily be the same as the pictures shown.
Teslon Soccer Ball
Start Smart Equipment Bag
Boingo Ball Koosh Ball
Bat and Ball Set
Parent DVD
Disc Cones Participant Manual
Coordinator Manual