simple macrame wall hanging - paracordgalaxy.comparacordgalaxy.com/tutorials/pdfs/patterns/wall...
TRANSCRIPT

Website: paracordgalaxy.com Email: [email protected] Phone: 844-727-2267Copyright paracordgalaxy.com. You are welcome to use this material if you credit us and link back to our website.
Simple Macrame Wall HangingMaterials:
100 ft of 550 paracord
1/4” dowel about 1 ft long
Additional paracord for hanging
{Cost for this project starts about $6.49}
Cut twelve 8 ft pieces of paracord. Find the center of one piece and lay it behind
your dowel.
Fold the center down and bring the two ends up through the loop. Pull tight.
Repeat with the other pieces of paracord.
Evenly space your knots. If desired, turn the dowel around so your knots look like this. Use a clipboard or other method to
hold your dowel as you work.
Step 1: Start a square knot with the first four strands by bringing the left cord 1 over
the next two cords and under cord 4.
Website: paracordgalaxy.com Email: [email protected] Phone: 844-727-2267Copyright paracordgalaxy.com. You are welcome to use this material if you credit us and link back to our website.
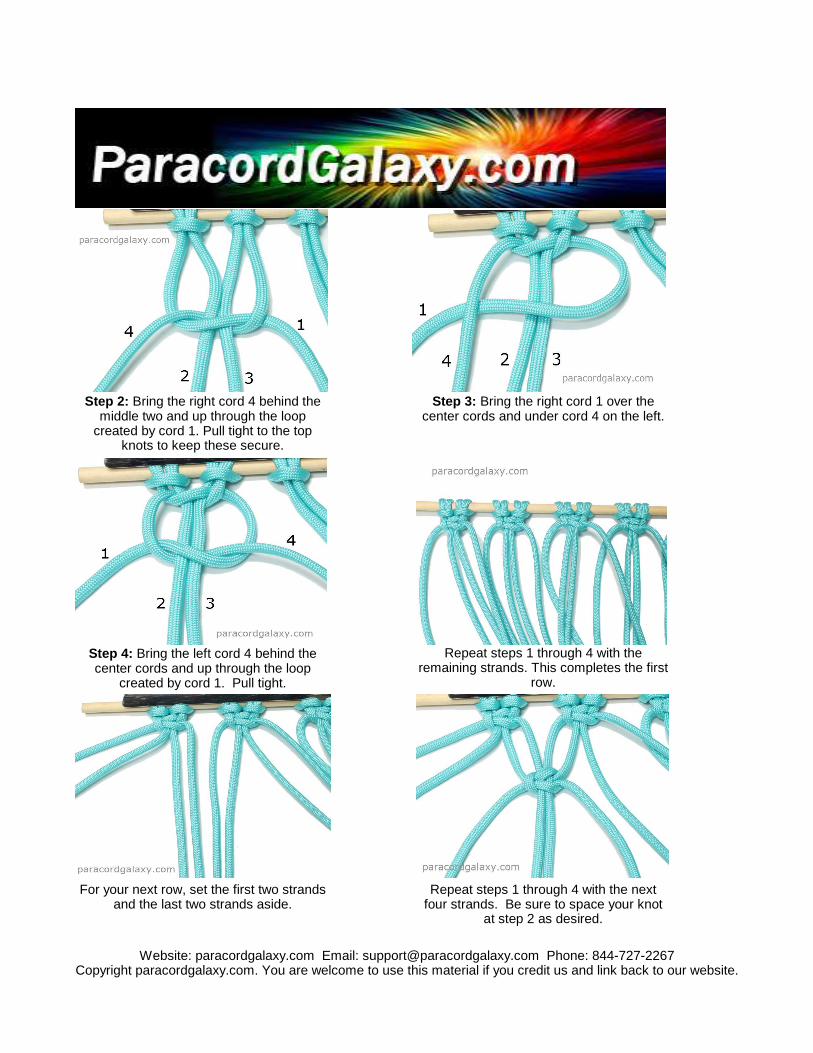
Step 2: Bring the right cord 4 behind the middle two and up through the loop
created by cord 1. Pull tight to the top knots to keep these secure.
Step 3: Bring the right cord 1 over the center cords and under cord 4 on the left.
Step 4: Bring the left cord 4 behind the center cords and up through the loop
created by cord 1. Pull tight.
Repeat steps 1 through 4 with the remaining strands. This completes the first
row.
For your next row, set the first two strands and the last two strands aside.
Repeat steps 1 through 4 with the next four strands. Be sure to space your knot
at step 2 as desired.
Website: paracordgalaxy.com Email: [email protected] Phone: 844-727-2267Copyright paracordgalaxy.com. You are welcome to use this material if you credit us and link back to our website.
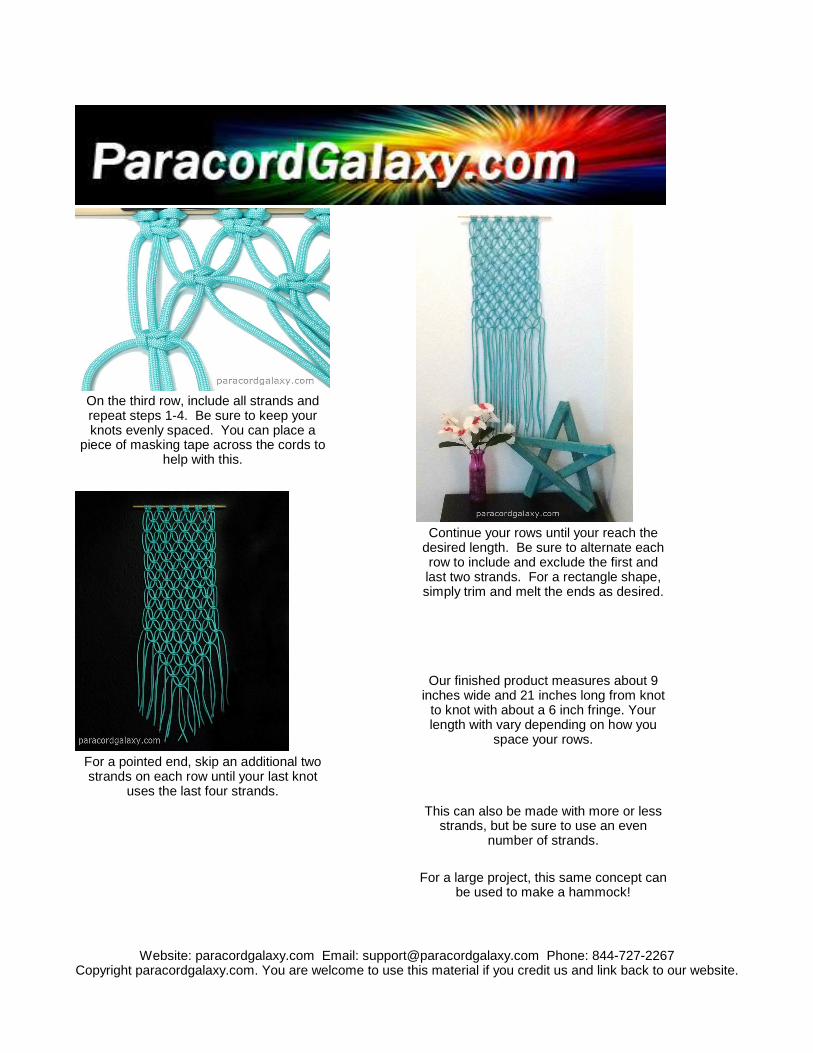
On the third row, include all strands and repeat steps 1-4. Be sure to keep your knots evenly spaced. You can place a
piece of masking tape across the cords to help with this.
Continue your rows until your reach the desired length. Be sure to alternate each row to include and exclude the first and last two strands. For a rectangle shape, simply trim and melt the ends as desired.
Our finished product measures about 9 inches wide and 21 inches long from knot
to knot with about a 6 inch fringe. Your length with vary depending on how you
space your rows.
For a pointed end, skip an additional two strands on each row until your last knot
uses the last four strands.
This can also be made with more or less strands, but be sure to use an even
number of strands.
For a large project, this same concept can be used to make a hammock!