sewing - threads„4 yard decorative fabric for the main side 3 ⁄4 yard decorative fabric for the...
TRANSCRIPT

The Essential Guide to Teaching Yourself to Sew
made
Editors of Threads
simplesewing

sewingsimplemade

Editors of Threads

The Essential Guide to Teaching Yourself to Sewsewing
simplemade
Editors of Threads

Text © 2013 by The Taunton Press, Inc.Illustrations © 2013 by The Taunton Press, Inc.
All rights reserved.
PpThe Taunton Press, Inc., 63 South Main Street, PO Box 5506, Newtown, CT 06470-5506e-mail: [email protected]
Editors: Sarah Rutledge Gorman and Renee Iwaszkiewicz NeigerCopy editor: Candace B. LevyIndexer: Cathy GoddardCover and interior design: Laura PaleseLayout: Susan Lampe WilsonIllustrators: Casey Lukatz and Christine Erikson
Threads® is a trademark of The Taunton Press, Inc., registered in the U.S. Patent and Trademark Office.
The following names/manufacturers appearing in Threads Sewing Made Simple are trademarks: Dacron®, Dupioni®, Ethafoam®, Lycra®, Microtex®, Polarfleece®, Tencel®, Ultrasuede®
Library of Congress Cataloging-in-Publication Data
Threads sewing made simple : the essential guide to teaching yourself to sew / Editors of Threads. pages cm Includes index. E-Book ISBN 978-1-62710-397-81. Sewing--Handbooks, manuals, etc. I. Threads magazine. II. Title: Sewing made simple. TT705.T495 2013 646’.19--dc23 2013013866
Printed in the United States of America10 9 8 7 6 5 4 3 2 1
dedicationFor people who love to sew
acknowledgmentsThanks to Sarah Rutledge Gorman for combing
through the Threads archive and selecting information that is most helpful to those learning to sew.
She skillfully organized it with the help of her editor, Renee Neiger. Thanks to the Taunton Press book staff and everyone who worked so hard to make this book
look as good as it does.
Special thanks to all of our Threads authors, contributors, and editors. Without you, this book would
not have been possible.

IntroductIon 3
chapter 1: getting started 4Setting Up Your Sewing Space 6Tools and Supplies 10Sewing Machines 22Fabrics 27Threads 34Hand Stitches 36Machine Stitches 40Basic Machine Sewing 42Hemming 50Pressing 57
chapter 2: pattern-free projects 64Good to Start With 66 Sundress 66 Placemat Purse 68When You’re Getting Comfortable 70 Reversible Chair Covers 70 Flouncy Tee 74 One-Rectangle Dress 76If You’re Feeling Inspired 78 Convertible Dress 78 Four-Rectangle Tunic 82 Gypsy Skirt 84 Floor Cushion 88
contents

chapter 3: working with patterns 92Understanding Patterns 94Reading a Pattern 100Ease: It’s Easy 104Getting Your Grain 108Pinning 112Working with a Dress Form 114
chapter 4: patterned projects 120Good to Start With 122 Silk Scarf 122 Grecian Tank 124 Wrap Dress 126When You’re Getting Comfortable 130 Recycled-Sweater Mittens 130 Classic Aprons 136 Blanket Coat 140 Pajama Pants 144If You’re Feeling Inspired 148 Stylish Wrap 148 Boxy Tee 150
contents
Glossary of sewInG terms 156
contrIbutors 160
resources 162
metrIc equIvalents 164
PhotoGraPher & Illustrator credIts 165
Index 166

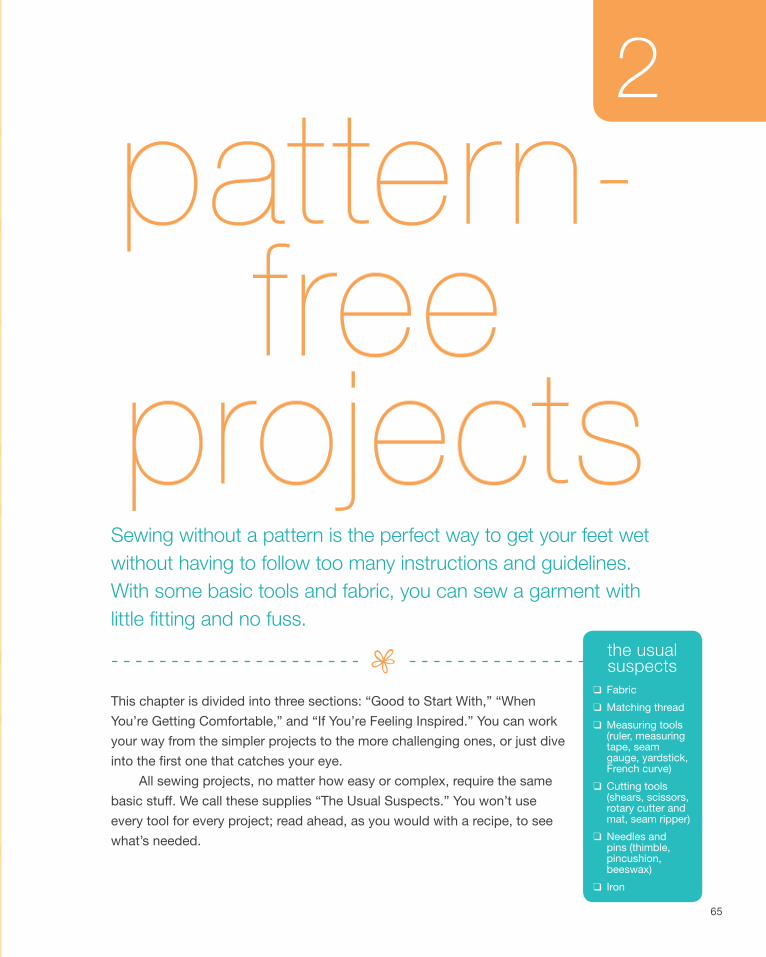
Sewing without a pattern is the perfect way to get your feet wet without having to follow too many instructions and guidelines. With some basic tools and fabric, you can sew a garment with little fitting and no fuss.
This chapter is divided into three sections: “Good to Start With,” “When
You’re Getting Comfortable,” and “If You’re Feeling Inspired.” You can work
your way from the simpler projects to the more challenging ones, or just dive
into the first one that catches your eye.
All sewing projects, no matter how easy or complex, require the same
basic stuff. We call these supplies “The Usual Suspects.” You won’t use
every tool for every project; read ahead, as you would with a recipe, to see
what’s needed.
2
pattern-
projectsfree
the usual suspects
❑ Fabric
❑ Matching thread
❑ Measuring tools (ruler, measuring tape, seam gauge, yardstick, French curve)
❑ Cutting tools (shears, scissors, rotary cutter and mat, seam ripper)
❑ Needles and pins (thimble, pincushion, beeswax)
❑ Iron
65

66 pattern-free projects
1 Measure bust, waist, and hips. With a
measuring tape, measure your bust, waist, and
hips. Note the largest of these measurements, and
cut a rectangle of fabric approximately 20 inches
wider than that measurement. Piece your fabric as
necessary to get this final width.
2 Sew a tube. Measure from right above your
bust to the dress length desired, and trim
to this length, plus a little extra (so you can tweak
the hem later, if needed). Sew the fabric into a
tube, as shown below left.
3 Pleat on a dress form or body. Try the tube
on or place it on a dress form that is your
size. Pleat out the fabric at the front and back of
the tube until it fits snugly against your body or
form. The dress pictured sports a wide box pleat,
but you can pleat any way you like. Mark the
edges of the pleats with pins.
what you’ll needThe Usual Suspects (see p. 65)
11⁄2 yards of fabric
Fitting buddy or dress form
Interfacing
sundressThis versatile sack dress starts with just a tube of fabric, then adds
pleats, tucks, and wide straps. Printed cotton is a great choice, but
the dress also looks great in softer, drapey fabric—just cut a little
wider and use more pleats to create volume.
Hem band
strap
bands
seam
rigHt side
box pleat
start with• good to •
4 Add a top band and straps. Measure along
the top edge of the pleated dress. Cut two
strips of fabric that length, plus seam allowances,
by 6 inches deep. These are the bands. Cut two
5-inch-wide straps, sew into tubes, and turn.
Sandwich the straps between the bands on the
front and back, and sew through all layers. Align
raw edges with the pleated edge and sew, wrong
sides together.
5 Sew on a wide hem band. Cut one 6-inch-
to 8-inch-wide hem band the length of the
hem circumference plus seam allowances. Sew
the short ends of the band, right sides together,
forming a ring. Fold in half lengthwise and press.
Stitch to the dress’s hem edge, then press the
band down.

pattern-free projects 67

68 pattern-free projects
Fashion-forward and adorable, these little purses take just a few
hours—or less—to sew. Starting with a ready-made placemat gives
you fi nished edges and lining, which saves a ton of time (you can fi nd
cool ones at an import store). Choose a placemat that can be folded
easily and doesn’t have stiff or thick edges, as you’ll have to sew
through four edges and a cord. Use a size 16 or 18 denim needle;
sewing through all those layers can break a smaller needle.
1 Fold the placemat in half lengthwise with
wrong sides together, as shown. Press
the fold.
What You’ll NeedThe Usual Suspects (see p. 65)
Placemat
11⁄2-yard-long cord
Size 16 or 18 denim needle
A button or other embellishments
placemat purse
3 Knot the cord ends and bury them inside
the seams; topstitch the sides of the purse
to close them, as shown. Reinforce the stitching
at the cord and the corners.
start with• good to •
2 Fold one short end toward an imaginary line
located about one-quarter of the total length
of the placemat. Press the fold.
4 Fold the top fl ap
down over the
inside pockets and
press the fold.

5 Add buttons, snaps, tassels, or other
embellishments as desired.

70 pattern-free projects

pattern-free projects 71
reversible chair covers
Choose, measure, and cut the fabricReversible chair covers enable you to get two
looks in one. The two sides can be different
materials but should be close in weight. Prewash
the fabrics before cutting if you want them to be
machine washable after construction.
1 Select two middleweight to lightweight
fabrics. The materials should not be too
lightweight (you don’t want show-through) or
too heavy (to avoid bulky covers). The cover is
completely reversible, so the two sides do not
have to coordinate in color.
2 Determine the chair back width. Measure
the chair back’s widest point and add the
chair back’s depth (see right). Add 2 inches for
seam allowances and ease.
3 Measure the chair back height. Starting at
the bottom of the chair back, measure from
the seat to the top of the chair and add half of the
chair back depth, plus a 1-inch seam allowance.
What You’ll NeedThe Usual Suspects (see p. 65)
3⁄4 yard decorative fabric forthe main side
3⁄4 yard decorative fabric forthe reverse side
Want to give your dining area a unique style for any occasion? A
reversible chair cover lets you go from breakfast chic in pretty cotton
to dinner elegant in gold satin. Easy to sew, with just a few seams,
chair covers are a quick and economical way to transform a room.
Choose a unique brocade for an elegant celebration, a whimsical
cotton print for a day of make-believe, or a modern home décor
fabric for everyday style.
4 Cut the covers. Cut two rectangles on grain
from each fabric, using the height and width
determined in steps 2 and 3. If the fabric has a
motif, be sure to center it.
widtH
deptH
HeigHt
comfortable
• when you’re •getting

72 pattern-free projects
sew the corners the length of the chair depth. trim the seam allowance.
Sew the coversA few simple seams make these stylish and
practical covers. The seams are enclosed, so
they are left unfinished. All seam allowances are 1⁄2 inch wide.
5 Sew the seams. With right sides together,
align, pin, and sew the top edge of the first
fabric, then press the seam allowances open.
Repeat this for the second fabric (the cover’s
reverse side). Next, with right sides together, align,
pin, and sew the side seams on the first fabric.
Repeat on the second fabric. Press open the side
seam allowances.
6 Sew and trim the corners. At each corner,
align the top-edge seam with the side seam.
Sew perpendicular to the seams the depth of the
chairs. Press and trim the seam allowance.
7 Sew the covers together. Turn one cover
right side out and place inside the other
cover, so the covers are right sides together. Align
and pin the lower edges. Sew three-quarters
of the way around, leaving a 7-inch to 10-inch
opening for turning (see photo above).
8 Through the opening, turn the chair cover
right side out. Press the seam allowances to
the inside. Hand-sew the opening closed (A)
or topstitch around the lower edge (B). Press all
the seams.
sewn corner sewn and trimmed corner
sew the top and side seams.
sew the lower edge, leaving a 7-inch to 10-inch opening.
opening
Finish the cover by topstitching around the lower edge.
turn the cover right side out, and hand-sew the opening.
b
a

pattern-free projects 73
decorative optionsThese covers are the perfect canvas for showing off your home-decorating style.
Piece it together. give your covers an artistic look by piecing together fabrics before constructing the covers.
Add a ruffle. before sewing the lower edge, insert a ruffle trim made from one of the fabrics or a coordinating fabric.
Tie it up. before sewing the side seams, add self-fabric or ribbon ties. this is especially helpful to give the cover shape if the chair back is much wider at the top than at the bottom. note that if the ties are large, they may be difficult to hide inside, so you may want to use only one side and have the other side serve as a lining.

74 pattern-free projects
flouncy tee
1 Prepare the shirt. Remove the sleeves
and neckline. Be careful not to cut into the
sleeves, as you will be using them for the ruffl e.
Trim off the bottom hem, or remove the stitching
if the shirt is short. To reshape the bottom hem,
fold the shirt in half, with the center front (CF)
to your right and center back (CB) at your left.
Mark the waistline on the shirt’s CB fold with a
What You’ll NeedThe Usual Suspects (see p. 65)
T-shirt
You can take a T-shirt from baggy and unisex to fi tted and fl attering
with just a few snips and seams. This style uses a curved peplum
ruffl e (made from the sleeves) to add interest to the sides and the
back, and a draped collar to soften the tee’s hard edges. You’ll
need a shirt that fi ts or is a little big. You can leave the edges raw
(most jerseys won’t ravel) and let them curl, or you’re free to hem
them if you prefer. This garment works best with T-shirts made
of 100 percent cotton jersey. A stretch straight stitch or a narrow
and short zigzag stitch is your best bet for seaming knits, unless
otherwise indicated. This draped-collar tee is made from only one
shirt, but you can combine two recycled tees to create a contrasting
peplum and collar.
cb
cb
cF
cFwaistline
remove and use for the draped collar.
pin. Draw a line from this point, perpendicular to
the CB, 3 inches to 4 inches long before curving
it gradually, to the bottom edge of the shirt. Be
sure your line crosses the side seams and stops
3 inches to 4 inches from the CF. Compare the
width of your sleeve to the length of the revised
hemline. If the hemline is longer, shorten it to
match the length of the sleeve. Cut on the line you
drew; this piece will become the draped collar.
comfortable
• when you’re •getting

pattern-free projects 75
sHoulder edge
leFt sleeve rigHt sleeve
90 degrees
Join the removed sleeves, and attach them to the hem for a fl ounce.
tee back(rs)
cb
tee Front (ws)
Flounce
original sHoulder edge
attach the collar piece to the neckline to create a draped look.
2 Make the peplum ruffl e. Open the underarm
sleeve seams, and remove the hem with a
seam ripper to maximize the length. Fold each
sleeve in half, and reshape the bottom edge into
a gentle curve. Sew the two sleeve pieces, right
sides together, along one of the underarm seams
to make one continuous ruffl e (see photo above,
top). With right sides together, align the ruffl e
seam to the CB along the shirt’s bottom edge,
and continue to pin the ruffl e to the curved T-shirt
edge. Sew the curved seam.
3 Make the draped collar. Measure the
circumference of the neckline. Then
measure the length of the collar piece cut from
the bottom of the shirt. Cut off the pointed
ends so the collar piece length equals the neck
circumference plus 1 inch. Sew the two ends,
right sides together. Match the collar seam to
the CB and align and pin the collar’s straight
edge to the neckline. Stitch around the neck
circumference.


pattern-free projects 77
1 Double-fold a 3⁄4-inch hem allowance. Sew 3⁄8-inch fi nished hems on two short edges
and one long edge of the skirt.
2 Finish the remaining top edge if it is not the
selvage edge. Sew a 23-inch-long, double-
fold, 3⁄8-inch-wide hem. Backstitch at the inside
end of the hem. Clip to the last stitch so the
remaining fabric is able to lie fl at.
3 Topstitch the remaining upper-edge section
into a 5⁄8-inch casing for the elastic. Feed
the elastic through the casing and stitch it at each
end to secure.
4 Overlap the casing ends to form the
waistband. Stitch them together, allowing
the nonelasticized edge to drape.
one-rectangle dress
This kicky strapless dress, which you can also wear as a skirt, is
made from one rectangle. Use a drapey fabric such as 3-ply or
4-ply silk, rayon crepe, or lightweight wool. The garment shown is
medium size, based on a 36-inch bust measurement. Add or subtract
2 inches from the width measurements for each size change.
Lengthen or shorten as desired.
What You’ll NeedThe Usual Suspects (see p. 65)
1 yard of 60-inch-wide fabric or 12⁄3 yards of 45-inch-wide fabric
Safety pin or bodkin (a tool for threading elastic through a casing)
Point turner1⁄2-inch-wide elastic cut 2 inches
shorter than your waistline
double-foldthe hem.
secure the elastic.
clip
double-fold the 3⁄4-inch allowance to the 3 ⁄8-inch hem.
sew 5⁄8-inch-deep elastic casing from the clip to the corner.
double-fold the 3 ⁄4-inch allowance to the 3 ⁄8-inch hem on three edges.
23 incHes
61 incHes
311⁄2 incHes
comfortable
• when you’re •getting

78 pattern-free projects
In less than an hour, you can make a dress to wrap, roll, and twist
any way you like. This dress has two extra-long, wide straps sewn
into the front waistband. Wrap and twist the straps to form sleeves
or straps, and a sash around your waist. Shift the waistband above
your bust for tunic options, too. You’ve never seen so many styles
for so little sewing. The dress is made from four geometric shapes
with dimensions based on your measurements: a skirt, a waistband,
and two long fabric rectangles that wrap, twist, and tie to become a
bodice, straps, or sleeves. If you leave the edges unfinished, it can be
a two-seam project, with only a waist and a skirt seam to sew.
The version shown here has rolled serged edges.
Plan the dress, cut the piecesSimple geometric shapes are the basis of this
dress. Use the illustration for guidance as you
apply your own measurements to design the
pieces.
1 Plan the skirt. The skirt is two half-rings of
fabric, like two doughnut halves. Divide your
waist circumference by 3.14 to find your waist
diameter. Divide the diameter by 2 to get the
radius. Use the radius to draw the inside (waist)
What You’ll NeedThe Usual Suspects (see p. 65)
About 4 yards fabric with two-way or four-way stretch (look for at least
20 percent stretch; the size 10 dress shown here required about 4 yards
of 53-inch-wide fabric)
Safety pin or bodkin (a tool for threading elastic
through a casing)1⁄2-inch-wide elastic (long enough
to fit around your waist)
Pattern paper
Foamcore
convertible dress
semicircle, then add the desired skirt length for
the outer hem semicircle. To make a “compass,”
lay pattern paper over a sheet of foamcore board,
and stick a tack or pin in the middle. Place the
eyelet end of a tape measure over the pin, and
extend the tape measure out to the required
length. Rotate the tape measure around the
pin, marking the desired circle as you go. Add a 1⁄2-inch seam allowance to the edges.
skirt lengtH
two-way knit grainline
waist radius
cut two skirt Halves.
Skirt1⁄2 waist circumFerence
inspired
• if you’re •feeling


80 pattern-free projects
Sew it together in three seamsTo construct the dress, sew the skirt side seams.
Then overlap the straps at the center front. Sew
on the straps and a waistband in a single seam.
Sewing the waistband and straps to the skirt is
easier if you sew with the skirt wrong side out.
4 Finish the strap edges. Use a rolled serged
edge or a narrow hem on the long edges of
each strap.
2 Determine the strap size. The two straps
are identical rectangles. For the strap width,
measure from the center of your bust to just
under your arm. The strap length is one and a half
times your height (add a few inches to the length if
you’re fuller-figured than average). The straps are
cut so the stretch is parallel to the short ends.
3 Cut a waistband casing. Cut a band about
2 inches wide and a few inches longer than
your waist measurement. Cut the band to stretch
lengthwise.
waist circumFerence plus 3 incHes
Fabric stretcH
cut one waistband.
two-way knit grainline
Waistband (not to scale)
2 incHes
two-way knit grainline
11⁄2 times tHe wearer’s HeigHt
bust center to underarm
Strapcut two straps.
5 Sew the skirt seams. Pin the skirt’s vertical
edges together with right sides together,
and serge or sew the seams. Fold the skirt to align
the seams, then find and mark the center front
and center back.
try a rolled serged edge on the strap edges.

pattern-free projects 81
7 Sew the waistband casing to the skirt. Fold
the waistband in half lengthwise, right side
out. Align the band’s lengthwise raw edges with
the waist and straps’ raw edges (the waistband
should sandwich the straps against the skirt’s
right side). Serge or sew through all layers.
Overlap the casing slightly when you complete
sewing the waist.
center Front
strap (ws)
8 Add waist elastic. Cut an elastic strip to fit
your waist, plus 1 inch. Run it through the
waistband with a safety pin or bodkin. Sew the
strip ends together and overlap the fabric to cover
the elastic.
sew the waistband and straps to the skirt’s wrong side.
skirt (rs)
Folded waistband
strap (ws)
9 Start wrapping and wearing. Both straps
are sewn into the waistband seam. Wrap
them over your shoulders and around your waist
to achieve many possible styles.
center Front (ws)
strap (ws)
overlap the strap at the center front.
strap (rs)
6 Place and pin the straps to the skirt waist.
Align the straps’ raw edges with the skirt
waist, right sides together. Place the straps to
overlap 3 inches to 4 inches, with the middle of
the overlap at the center front. Pin or baste the
straps in place; the waist curvature will cause the
overlap to form a deep V-shape.

If you like this book, you’ll loveeverything about Threads.
Read Threads Magazine: Your subscription includes six issues of Threads plus FREE digital access. Every issue is packed with up-to-the-minute fashions, useful techniques, and expert garment-sewing advice – all designed to help improve your skills and express your creativity.
Subscribe today at:ThreadsMagazine.com/4Sub
Discover our Threads Online Store: It’s your destination for premium resources from the editors of America’s best-loved sewing magazine, designers, and sewing instructors:how-to and design books, videos, and more.
Visit today at: ThreadsMagazine.com/4More
Get our FREE Threads e-Newsletter: Keep up with what’s current – the latest styles, patterns, and fabrics, plus free tips and advice from our Threads editors.
Sign up, it’s free: ThreadsMagazine.com/4Newsletter
Become a Threads Insider: Join now and enjoy exclusive online benefi ts, including: instant videos, favorite articles, digital issues, pattern database, fun giveaways, and more.
Discover more information online:ThreadsMagazine.com/4Join
A Complete RefeRenCe fRom AmeRiCA’s best-loved sewing mAgAzine
Sewing Guide
The besT sewing informaTion available
People who sew—especially those who know Threads
magazine—will have to have this definitive sewing encyclopedia.
an incomparable collection of the best sewing information
available, the threads sewing guide promises to explain,
with trademark thoroughness, the full range of garment
sewing techniques.
from basic stitches to couture techniques • helpful tips and shortcuts to better sewing • Color
photos and easy-to-follow illustrations • special sections on sergers and surface embellishment
crafts & hobbies
Sewin
G G
uid
eTaunton
SOP
Taunton Product #071294
FnL1 00 0000 781600 8514459
53495ISBN 978-1-60085-144-5US $34.95
Threads magazine is one of the leading sewing publications in the country and
provides the most authoritative technical information to its readers. stylish
sewing patterns from Threads’ top designers can be found within its pages as
well as on its website. for more information, visit www.threads.com.
look for other Taunton Press books wherever books are sold or visit our website at www.taunton.com.
The Taunton Press63 south main street, P.o. box 5507newtown, CT 06470-5507www.taunton.comPp
’s best-loved sewing mAgAzine
Sewing Guide
withdigitalaccess
TH3381_SewingMadeSimple_Ad.indd 1 1/22/13 12:41 PM

Pp Taunton Product #077659
Look for other Taunton Press books wherever books are sold or visit our website at www.tauntonstore.com.
America’s best-loved sewing magazine shares everything you need to know to start stitching.
• Detailed instructions explain everything from how to sew a button to working with patterns
• Fun, easy projects help perfect sewing skills
• Sew-like-a-pro tips from Threads editors and contributors
• A fully illustrated reference for every budding sewist’s library
About the author: Threads magazine is one of the leading sewing publications in America and provides the most authoritative technical information along with ideas and inspiration to sewers. Visit www.Threadsmagazine.com to learn more about the magazine, videos, books, and patterns; our digital products; and more.
The Taunton Press63 South Main Street, P.O. Box 5506Newtown, CT 06470-5506www.taunton.com
CRAFTS & HOBBIES
The editors of Threads de-mystify the world of sewing!