sencha docs architecting your app in ext js 4, part 2 · 4/5/13 app architecture part 2 - ext js...
TRANSCRIPT
4/5/13 App Architecture Part 2 - Ext JS 4.0.7 - Sencha Docs
docs.sencha.com/ext-js/4-0/?print=/guide/mvc_pt2 1/14
Ext JS 4.0.7 Sencha Docs
Contents
1. Defining our application2. The Viewport class3. Creating the building blocks4. The models and stores5. Static data6. Models7. Stores8. Adding the stores and models to our application9. Applying the glue
10. Application logic11. Creating our Controllers12. Setting up listeners13. Conclusion
Architecting Your App in Ext JS 4, Part 2
In the previous Ext JS Architecturearticle, we explored how to architect aPandora-style application using ExtJS. We took a look at the Model-View-Controller architecture and howto apply it to a relatively complex UIapplication that had multiple viewsand models. In this article, we’regoing to move beyond architectingthe application visually, and explorehow to design and code thecontrollers and models, starting withExt.application and the Viewportclass.
Let’s just jump in and start writing theapplication.
Defining our application
In Ext JS 3, the Ext.onReady method was the entry point into your application, and the developer had tocome up with an application architecture. In Ext JS 4, we have an introduced an MVC-like pattern. Thispattern helps you to follow best practices when creating your applications.
The entry point into an application written with the new MVC package requires that you use theExt.application method. This method will create an Ext.app.Application instance for you and will fire thelaunch method as soon as the page is ready. This essentially replaces the need to use Ext.onReadywhile adding new functionality such as automatically creating a viewport and setting up yournamespace.
app/Application.js
Ext.application({
name: 'Panda',
autoCreateViewport: true,
launch: function() {
// This is fired as soon as the page is ready
}
});
The name configuration causes a new namespace to be created. All our views, models, stores andcontrollers will live in this namespace. By setting autoCreateViewport to true, the framework will, byconvention, include the app/view/Viewport.js file. In this file, a class should be defined with the name
4/5/13 App Architecture Part 2 - Ext JS 4.0.7 - Sencha Docs
docs.sencha.com/ext-js/4-0/?print=/guide/mvc_pt2 2/14
Panda.view.Viewport, matching the namespace that was specified by the name configuration of yourapplication.
The Viewport class
When we looked at which views we needed for our UI, we were very focused on the individual parts.The Viewport of an application acts as the glue for these individual parts. It loads the required viewsand defines the configuration needed to achieve your app’s overall layout. We have found thatprogressively defining your views and adding them to the viewport is the fastest way to create the basestructure of your UI.
It is important during this process to focus on scaffolding your views and not on the individual viewsthemselves. It’s almost like sculpting. We start by creating the very rough shapes of our views and addmore detail to them later.
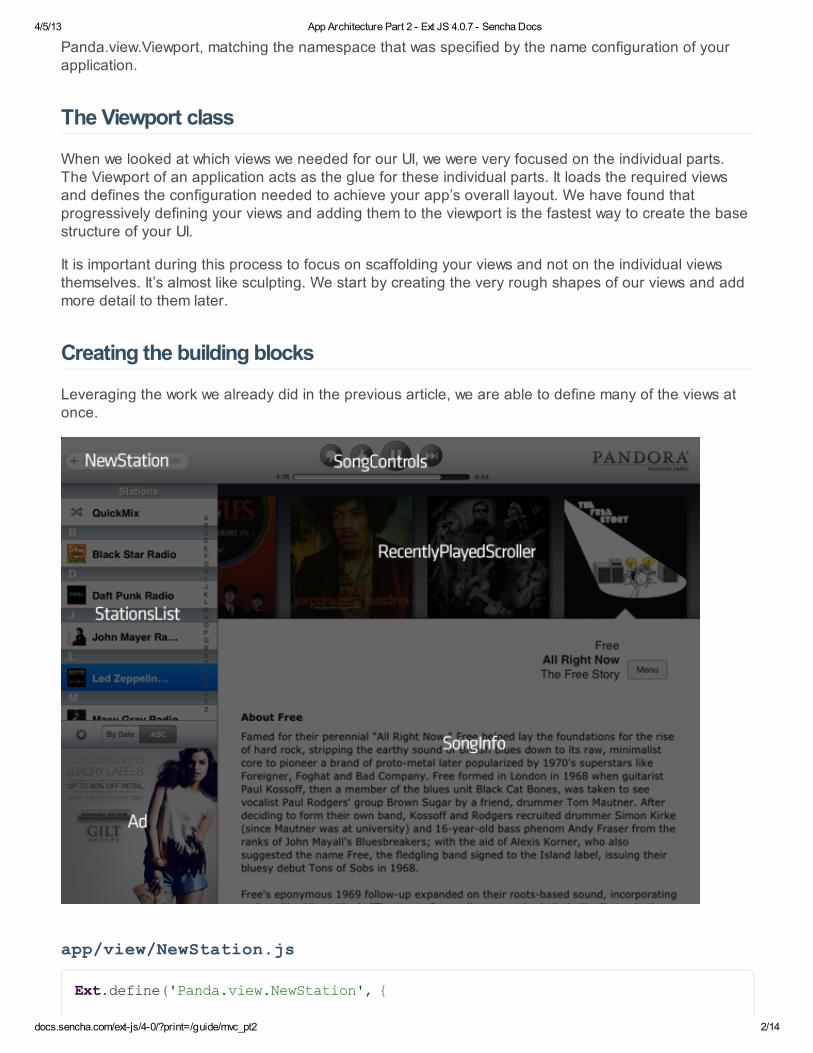
Creating the building blocks
Leveraging the work we already did in the previous article, we are able to define many of the views atonce.
app/view/NewStation.js
Ext.define('Panda.view.NewStation', {

4/5/13 App Architecture Part 2 - Ext JS 4.0.7 - Sencha Docs
docs.sencha.com/ext-js/4-0/?print=/guide/mvc_pt2 3/14
extend: 'Ext.form.field.ComboBox',
alias: 'widget.newstation',
store: 'SearchResults',
... more configuration ...
});
app/view/SongControls.js
Ext.define('Panda.view.SongControls', {
extend: 'Ext.Container',
alias: 'widget.songcontrols',
... more configuration ...
});
app/view/StationsList
Ext.define('Panda.view.StationsList', {
extend: 'Ext.grid.Panel',
alias: 'widget.stationslist',
store: 'Stations',
... more configuration ...
});
app/view/RecentlyPlayedScroller.js
Ext.define('Panda.view.RecentlyPlayedScroller', {
extend: 'Ext.view.View',
alias: 'widget.recentlyplayedscroller',
itemTpl: '<div></div>',
store: 'RecentSongs',
... more configuration ...
});
app/view/SongInfo.js
Ext.define('Panda.view.SongInfo', {
extend: 'Ext.panel.Panel',
alias: 'widget.songinfo',
tpl: '<h1>About </h1><p></p>',
... more configuration ...
});
We have left out some of the configuration here since component configurations are not in the scope ofthis article.
4/5/13 App Architecture Part 2 - Ext JS 4.0.7 - Sencha Docs
docs.sencha.com/ext-js/4-0/?print=/guide/mvc_pt2 4/14
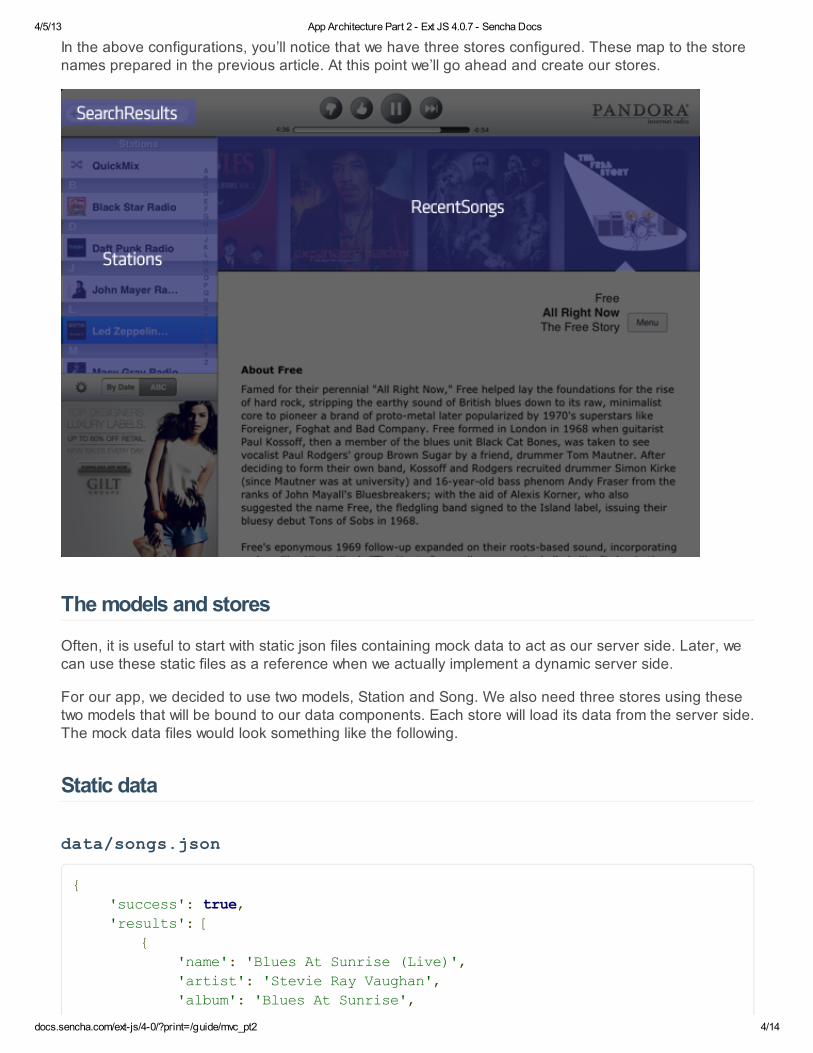
In the above configurations, you’ll notice that we have three stores configured. These map to the storenames prepared in the previous article. At this point we’ll go ahead and create our stores.
The models and stores
Often, it is useful to start with static json files containing mock data to act as our server side. Later, wecan use these static files as a reference when we actually implement a dynamic server side.
For our app, we decided to use two models, Station and Song. We also need three stores using thesetwo models that will be bound to our data components. Each store will load its data from the server side.The mock data files would look something like the following.
Static data
data/songs.json
{
'success': true,
'results': [
{
'name': 'Blues At Sunrise (Live)',
'artist': 'Stevie Ray Vaughan',
'album': 'Blues At Sunrise',

4/5/13 App Architecture Part 2 - Ext JS 4.0.7 - Sencha Docs
docs.sencha.com/ext-js/4-0/?print=/guide/mvc_pt2 5/14
'description': 'Description for Stevie',
'played_date': '1',
'station': 1
},
...
]
}
data/stations.json
{
'success': true,
'results': [
{'id': 1, 'played_date': 4, 'name': 'Led Zeppelin'},
{'id': 2, 'played_date': 3, 'name': 'The Rolling Stones'},
{'id': 3, 'played_date': 2, 'name': 'Daft Punk'}
]
}
data/searchresults.json
{
'success': true,
'results': [
{'id': 1, 'name': 'Led Zeppelin'},
{'id': 2, 'name': 'The Rolling Stones'},
{'id': 3, 'name': 'Daft Punk'},
{'id': 4, 'name': 'John Mayer'},
{'id': 5, 'name': 'Pete Philly & Perquisite'},
{'id': 6, 'name': 'Black Star'},
{'id': 7, 'name': 'Macy Gray'}
]
}
Models
Models in Ext JS 4 are very similar to Records which we had in Ext JS 3. One key difference is that youcan now specify a proxy on your model, as well as validations and associations. The Song model forour application in Ext JS 4 would look like this.
app/model/Song.js
Ext.define('Panda.model.Song', {
extend: 'Ext.data.Model',
fields: ['id', 'name', 'artist', 'album', 'played_date', 'station'],
4/5/13 App Architecture Part 2 - Ext JS 4.0.7 - Sencha Docs
docs.sencha.com/ext-js/4-0/?print=/guide/mvc_pt2 6/14
proxy: {
type: 'ajax',
url: 'data/recentsongs.json',
reader: {
type: 'json',
root: 'results'
}
}
});
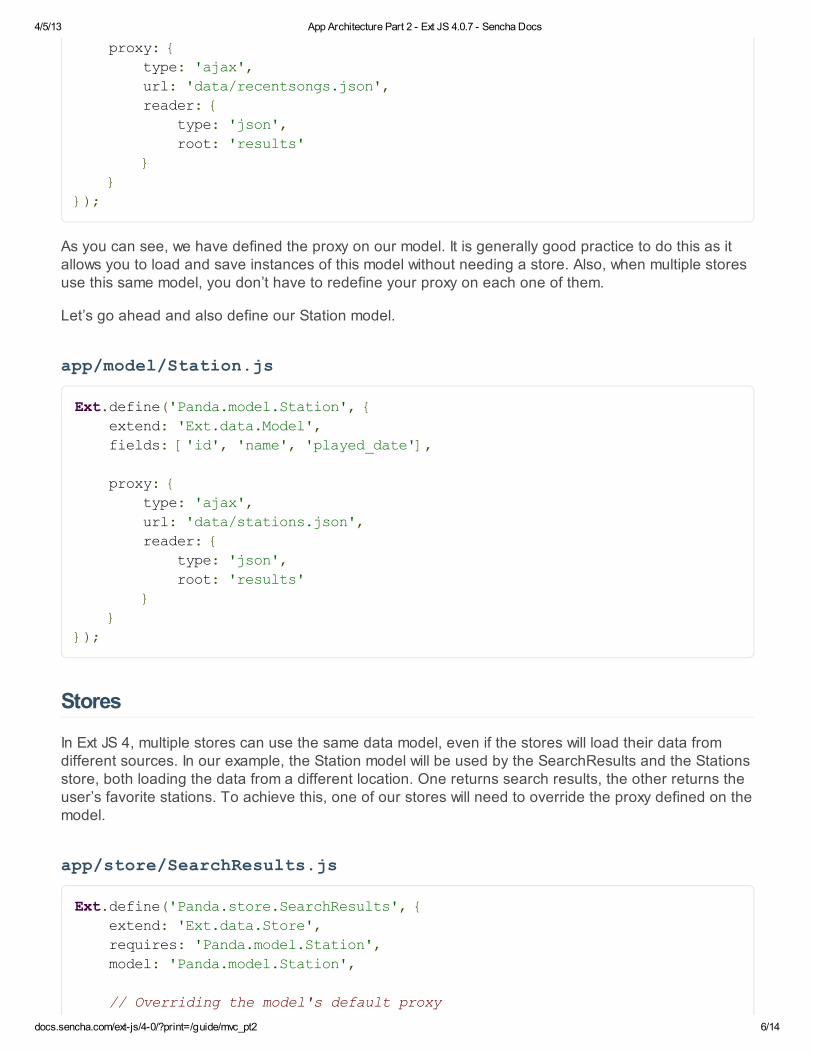
As you can see, we have defined the proxy on our model. It is generally good practice to do this as itallows you to load and save instances of this model without needing a store. Also, when multiple storesuse this same model, you don’t have to redefine your proxy on each one of them.
Let’s go ahead and also define our Station model.
app/model/Station.js
Ext.define('Panda.model.Station', {
extend: 'Ext.data.Model',
fields: ['id', 'name', 'played_date'],
proxy: {
type: 'ajax',
url: 'data/stations.json',
reader: {
type: 'json',
root: 'results'
}
}
});
Stores
In Ext JS 4, multiple stores can use the same data model, even if the stores will load their data fromdifferent sources. In our example, the Station model will be used by the SearchResults and the Stationsstore, both loading the data from a different location. One returns search results, the other returns theuser’s favorite stations. To achieve this, one of our stores will need to override the proxy defined on themodel.
app/store/SearchResults.js
Ext.define('Panda.store.SearchResults', {
extend: 'Ext.data.Store',
requires: 'Panda.model.Station',
model: 'Panda.model.Station',
// Overriding the model's default proxy
4/5/13 App Architecture Part 2 - Ext JS 4.0.7 - Sencha Docs
docs.sencha.com/ext-js/4-0/?print=/guide/mvc_pt2 7/14
proxy: {
type: 'ajax',
url: 'data/searchresults.json',
reader: {
type: 'json',
root: 'results'
}
}
});
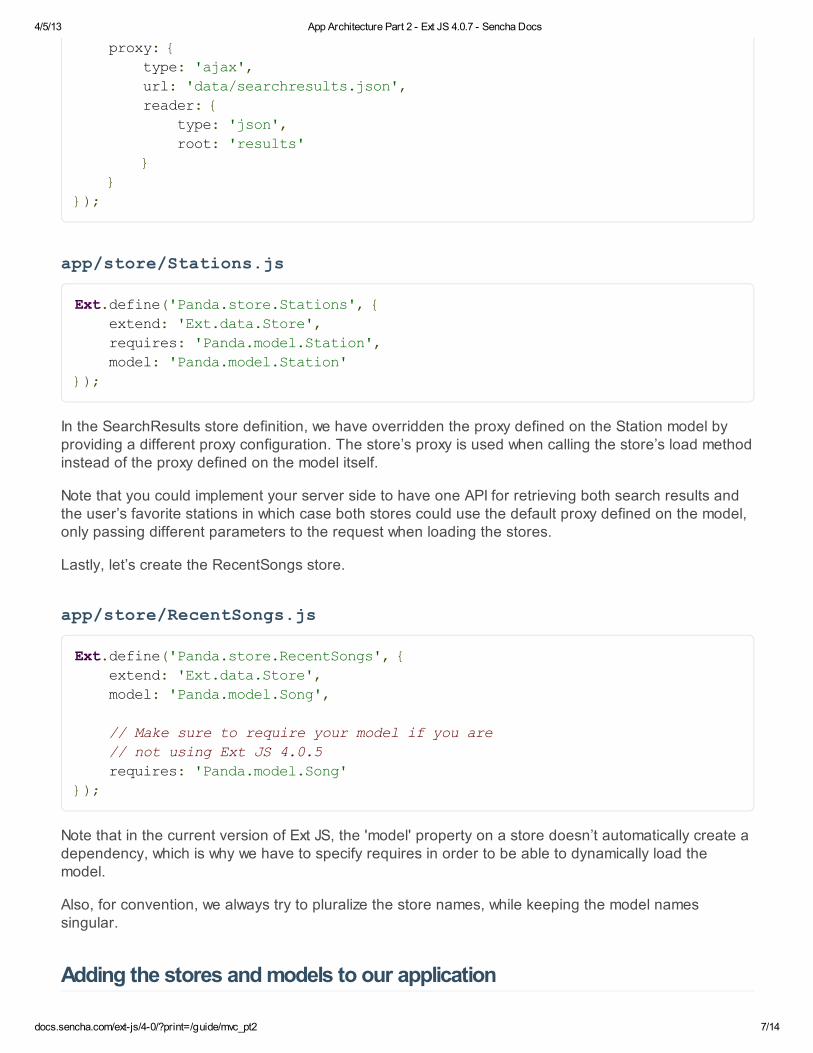
app/store/Stations.js
Ext.define('Panda.store.Stations', {
extend: 'Ext.data.Store',
requires: 'Panda.model.Station',
model: 'Panda.model.Station'
});
In the SearchResults store definition, we have overridden the proxy defined on the Station model byproviding a different proxy configuration. The store’s proxy is used when calling the store’s load methodinstead of the proxy defined on the model itself.
Note that you could implement your server side to have one API for retrieving both search results andthe user’s favorite stations in which case both stores could use the default proxy defined on the model,only passing different parameters to the request when loading the stores.
Lastly, let’s create the RecentSongs store.
app/store/RecentSongs.js
Ext.define('Panda.store.RecentSongs', {
extend: 'Ext.data.Store',
model: 'Panda.model.Song',
// Make sure to require your model if you are
// not using Ext JS 4.0.5
requires: 'Panda.model.Song'
});
Note that in the current version of Ext JS, the 'model' property on a store doesn’t automatically create adependency, which is why we have to specify requires in order to be able to dynamically load themodel.
Also, for convention, we always try to pluralize the store names, while keeping the model namessingular.
Adding the stores and models to our application

4/5/13 App Architecture Part 2 - Ext JS 4.0.7 - Sencha Docs
docs.sencha.com/ext-js/4-0/?print=/guide/mvc_pt2 8/14
Now that we have defined our models and stores, it’s time to add them to our application. Let’s revisitour Application.js file.
app/Application.js
Ext.application({
...
models: ['Station', 'Song'],
stores: ['Stations', 'RecentSongs', 'SearchResults']
...
});
Another advantage of using the new Ext JS 4 MVC package is that the Application will automaticallyload the stores and models defined in the stores and models configurations. Then, it will create aninstance for each store loaded, giving it a storeId equal to its name. This allows us to use the name ofthe store whenever we bind it to a data component like we did in our views, e.g. store: 'SearchResults'.
Applying the glue
Now that we have our views, models and stores, it’s time to glue them together. You start by adding theviews one by one to your viewport. This will make it easier to debug any wrong view configurations.Let’s go through the resulting viewport for the Panda app.
Ext.define('Panda.view.Viewport', {
extend: 'Ext.container.Viewport',
Your Viewport class will usually want to extend Ext.container.Viewport. This will cause your app to takeup all the available space in your browser window.
requires: [
'Panda.view.NewStation',
'Panda.view.SongControls',
'Panda.view.StationsList',
'Panda.view.RecentlyPlayedScroller',
'Panda.view.SongInfo'
],
We set up all the view dependencies in our viewport. This will allow us to use their xtypes, previouslyconfigured in our views using the alias property.
layout: 'fit',
initComponent: function() {
this.items = {
xtype: 'panel',
dockedItems: [{
dock: 'top',

4/5/13 App Architecture Part 2 - Ext JS 4.0.7 - Sencha Docs
docs.sencha.com/ext-js/4-0/?print=/guide/mvc_pt2 9/14
xtype: 'toolbar',
height: 80,
items: [{
xtype: 'newstation',
width: 150
}, {
xtype: 'songcontrols',
height: 70,
flex: 1
}, {
xtype: 'component',
html: 'Panda<br>Internet Radio'
}]
}],
layout: {
type: 'hbox',
align: 'stretch'
},
items: [{
width: 250,
xtype: 'panel',
layout: {
type: 'vbox',
align: 'stretch'
},
items: [{
xtype: 'stationslist',
flex: 1
}, {
html: 'Ad',
height: 250,
xtype: 'panel'
}]
}, {
xtype: 'container',
flex: 1,
layout: {
type: 'vbox',
align: 'stretch'
},
items: [{
xtype: 'recentlyplayedscroller',
height: 250
}, {
xtype: 'songinfo',
flex: 1
}]
}]
};
4/5/13 App Architecture Part 2 - Ext JS 4.0.7 - Sencha Docs
docs.sencha.com/ext-js/4-0/?print=/guide/mvc_pt2 10/14
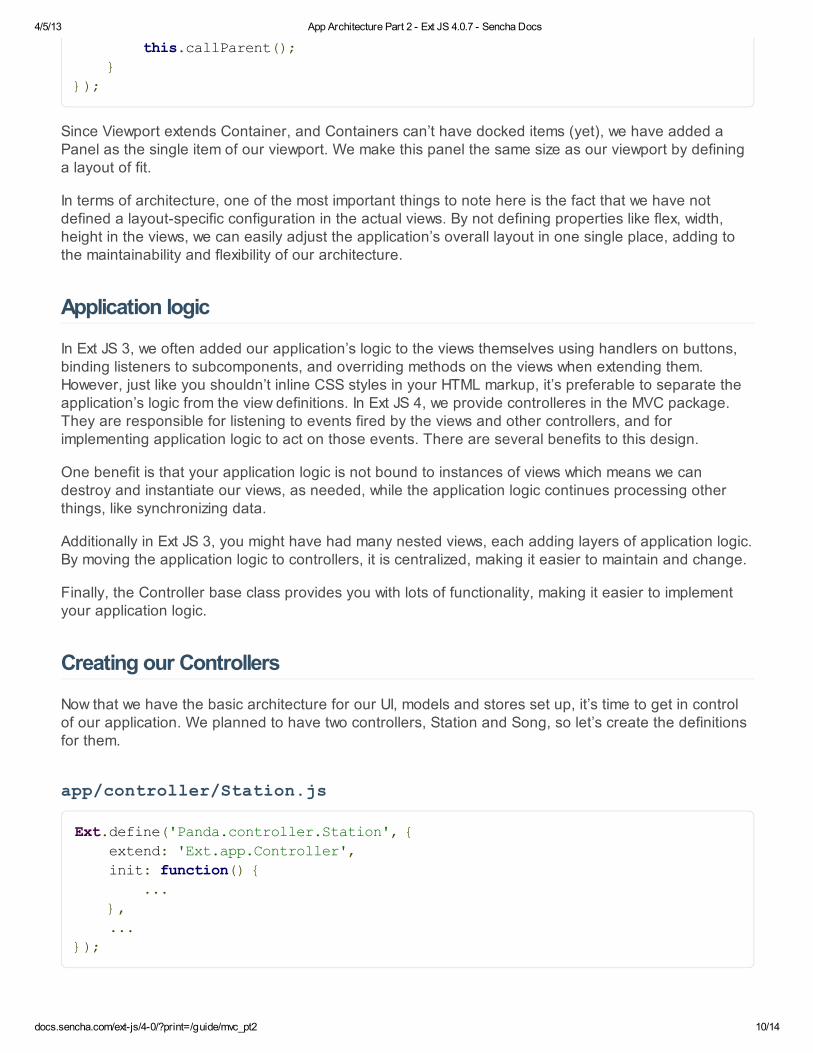
this.callParent();
}
});
Since Viewport extends Container, and Containers can’t have docked items (yet), we have added aPanel as the single item of our viewport. We make this panel the same size as our viewport by defininga layout of fit.
In terms of architecture, one of the most important things to note here is the fact that we have notdefined a layout-specific configuration in the actual views. By not defining properties like flex, width,height in the views, we can easily adjust the application’s overall layout in one single place, adding tothe maintainability and flexibility of our architecture.
Application logic
In Ext JS 3, we often added our application’s logic to the views themselves using handlers on buttons,binding listeners to subcomponents, and overriding methods on the views when extending them.However, just like you shouldn’t inline CSS styles in your HTML markup, it’s preferable to separate theapplication’s logic from the view definitions. In Ext JS 4, we provide controlleres in the MVC package.They are responsible for listening to events fired by the views and other controllers, and forimplementing application logic to act on those events. There are several benefits to this design.
One benefit is that your application logic is not bound to instances of views which means we candestroy and instantiate our views, as needed, while the application logic continues processing otherthings, like synchronizing data.
Additionally in Ext JS 3, you might have had many nested views, each adding layers of application logic.By moving the application logic to controllers, it is centralized, making it easier to maintain and change.
Finally, the Controller base class provides you with lots of functionality, making it easier to implementyour application logic.
Creating our Controllers
Now that we have the basic architecture for our UI, models and stores set up, it’s time to get in controlof our application. We planned to have two controllers, Station and Song, so let’s create the definitionsfor them.
app/controller/Station.js
Ext.define('Panda.controller.Station', {
extend: 'Ext.app.Controller',
init: function() {
...
},
...
});

4/5/13 App Architecture Part 2 - Ext JS 4.0.7 - Sencha Docs
docs.sencha.com/ext-js/4-0/?print=/guide/mvc_pt2 11/14
app/controller/Song.js
Ext.define('Panda.controller.Song', {
extend: 'Ext.app.Controller',
init: function() {
...
},
...
});
When including the controllers in your application, the framework will automatically load the controllerand call the init method on it. Inside the init method, you should set up listeners for your view andapplication events. In larger applications, you might want to load additional controllers at runtime. Youcan do this by using the getController method.
someAction: function() {
var controller = this.getController('AnotherController');
// Remember to call the init method manually
controller.init();
}
When you load additional controllers at runtime, you have to remember to call the init method on theloaded controller manually.
For the purposes of our example application, we’ll let the framework load and initialize our controllers byadding them to the controllers array in our application definition.
app/Application.js
Ext.application({
...
controllers: ['Station', 'Song']
});
Setting up listeners
Let’s start controlling some parts of our UI by using the control method inside of the controller’s initfunction.
app/controller/Station.js
...
init: function() {
this.control({
'stationslist': {

4/5/13 App Architecture Part 2 - Ext JS 4.0.7 - Sencha Docs
docs.sencha.com/ext-js/4-0/?print=/guide/mvc_pt2 12/14
selectionchange: this.onStationSelect
},
'newstation': {
select: this.onNewStationSelect
}
});
}
...
The control method is passed an object where the keys are component queries. In our example, thecomponent queries are just using the xtypes of our views. However, using these component queries,you can target very specific parts of your UI. To learn more about advanced component queries, youcan refer to the API docs.
Each query is bound to a listener configuration. Inside each listener configuration, we want to listen forthe key which is the event name. The events available are the ones provided by the component that istargeted by your query. In this case, we use the selectionchange event provided by Grid (from whichour StationsList view extends) and the select event provided by ComboBox (from which our NewStationview extends). To find out which events are available for a particular component, you can look in theevents section available for each component in the API docs.

4/5/13 App Architecture Part 2 - Ext JS 4.0.7 - Sencha Docs
docs.sencha.com/ext-js/4-0/?print=/guide/mvc_pt2 13/14
The value in the listener configuration is the function that gets executed whenever that event fires. Thescope of this function is always the controller itself.
Let’s also set up some listeners in our Song controller.
app/controller/Song.js
4/5/13 App Architecture Part 2 - Ext JS 4.0.7 - Sencha Docs
docs.sencha.com/ext-js/4-0/?print=/guide/mvc_pt2 14/14
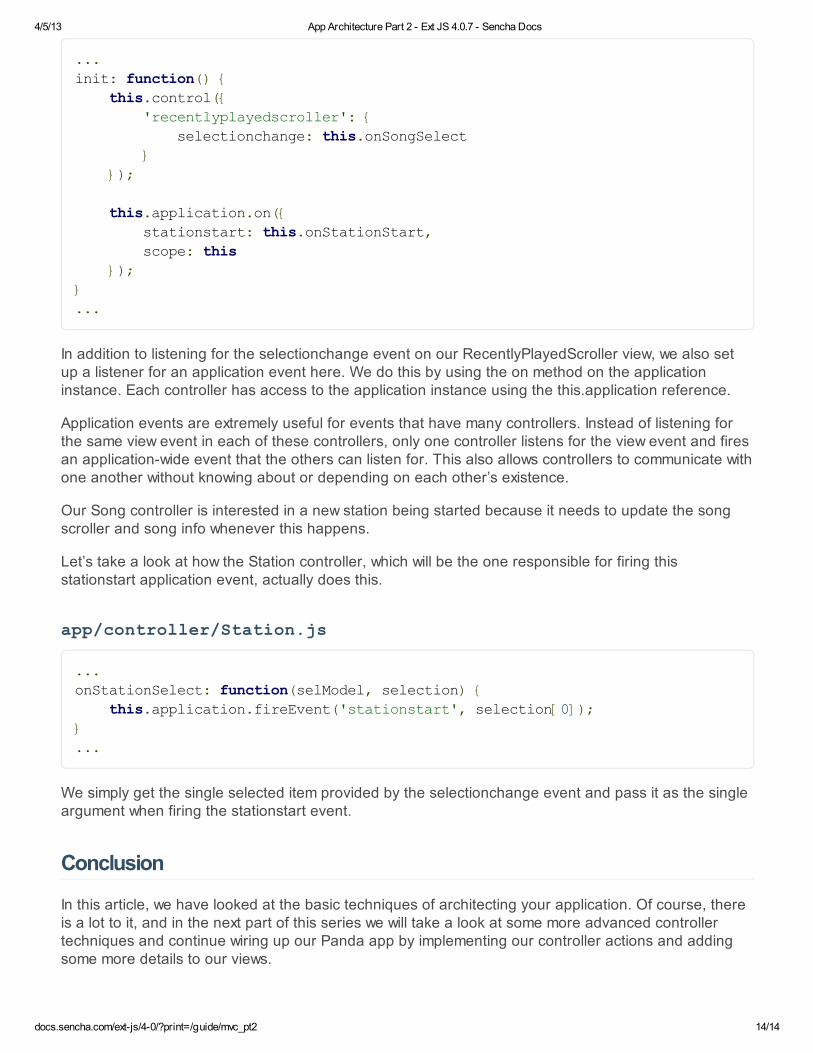
...
init: function() {
this.control({
'recentlyplayedscroller': {
selectionchange: this.onSongSelect
}
});
this.application.on({
stationstart: this.onStationStart,
scope: this
});
}
...
In addition to listening for the selectionchange event on our RecentlyPlayedScroller view, we also setup a listener for an application event here. We do this by using the on method on the applicationinstance. Each controller has access to the application instance using the this.application reference.
Application events are extremely useful for events that have many controllers. Instead of listening forthe same view event in each of these controllers, only one controller listens for the view event and firesan application-wide event that the others can listen for. This also allows controllers to communicate withone another without knowing about or depending on each other’s existence.
Our Song controller is interested in a new station being started because it needs to update the songscroller and song info whenever this happens.
Let’s take a look at how the Station controller, which will be the one responsible for firing thisstationstart application event, actually does this.
app/controller/Station.js
...
onStationSelect: function(selModel, selection) {
this.application.fireEvent('stationstart', selection[0]);
}
...
We simply get the single selected item provided by the selectionchange event and pass it as the singleargument when firing the stationstart event.
Conclusion
In this article, we have looked at the basic techniques of architecting your application. Of course, thereis a lot to it, and in the next part of this series we will take a look at some more advanced controllertechniques and continue wiring up our Panda app by implementing our controller actions and addingsome more details to our views.