salient user guide
DESCRIPTION
User Guide for Wordpress Theme Salient. Explain the instalation, blog setup, custom page layout, custom widget, custom css classes, how to update and import dummy data.TRANSCRIPT
SALIENTUSER GUIDE
This guide provides instructions for installation, help on getting started and extensive documentation of features. It is recommended you read it thoroughly to fully leverage the theme's capabilities. Please also make sure to check
out our Video Tutorials as they explain everything covered in here in greater depth. We hope you enjoy building with
Salient as much as we enjoyed developing it!
Page 11
Page 22
Your First Steps
Installing the Theme
Home & Blog Setup
Features
The Custom Menu
Theme Options
Nectar & Home Sliders
Shortcodes
Columns
Full Width Section
Image With Animation
Testimonial Slider
Centered Heading
Divider
Button
Icon
Toggle Panel
Tabbed Section
Bar Graph
Team Member
Carousel
Clients
Pricing Table
Recent Posts/Work
Portfolio Post Type
Project Categories
Project Attributes
Understanding Portfolio Images
Creating a Gallery
Video Formatting
Masonry Sizing
1.
2.
3.
4.
4.1
4.2
4.3
4.4
4.5
4.6
4.7
4.8
4.9
4.10
4.11
4.12
4.13
4.14
4.15
4.16
5.
5.1
5.2
5.3
5.4
5.5
5.6
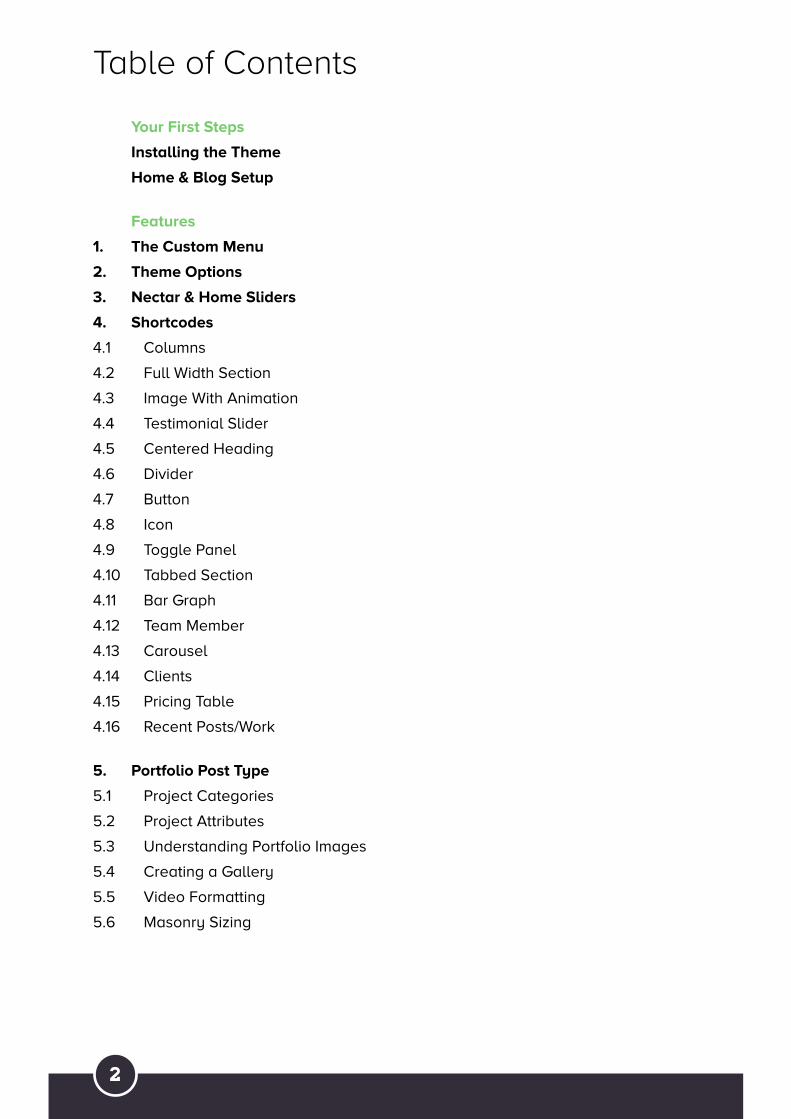
Table of Contents

Page 33
Custom Page Layouts
Home
Portfolio
Contact
Custom Page Options
Page Header
Custom Widgets
Recent Posts Extra
Recent Projects
CSS Classes To Know
Mega Menus
Nectar Slider
Typography
Wrapping Up
Included Styling for Plugins
How To Update
Dummy Data
6.
6.1
6.2
6.3
7.
7.1
8.
8.1
8.2
9.
9.1
9.2
9.3
Table of Contents
Page 44
If you are more of visual learner and would prefer to watch tutorials or if you're stuck
understanding any aspects in theme, please check out our Salient Video Series.
Installing the Theme
Before beginning the installation and configuring of your new theme, you must first
have WordPress already installed on a server.
Once you have setup a copy of WordPress, there are two ways you can go about
installing the theme:
1. FTP Upload. Unzip the download and upload the theme directory /salient/ into
your WordPress themes directory /wp-content/themes/
2. WordPress Upload. This is definitely the easier route for most. Simply navigate to
Appearance › Add New Themes › Upload. Click the “browse” button and locate
the still zipped theme folder. The theme will be uploaded and installed in a matter
of seconds.
After you have installed the theme successfully, you can optionally import the
supplied dummy data in order to get a feel for things. If you would rather skip that
and continue setting up your theme, please continue below. If you're interested in
importing it, learn more about "Dummy Data" on page 14.
Home & Blog Setup
Begin creating a new page by navigating to Pages › Add New. From here, simply give
the page a title i.e. “Home” select the home page template you wish to use under the
“Page Attributes” Widget, and click Publish. Add one more page that will be the blog.
For this page you will only need to enter in a title as there is no page template to
assign.
Now that you have created the necessary pages, you must tell WordPress to use
them appropriately. Head on over to Settings › Reading and toggle the “Front page
displays” to “A static page”. Choose the home page you just created as the "Front
page", and the blog page you created as the "Posts page". Save your changes. Now
your home page will correctly display as the front page of your website and the blog
page will contain all of your posts.
Your First Steps
Page 55
Your theme comes loaded with an array of powerful features that give you the control
to create beautiful and unique layouts all with ease!
1. The Custom Menu
Your theme comes with one custom menu carefully positioned in the header area.
Upon first activating the theme, it is recommended that you set it up to ensure proper
navigation. To set up your custom menu simply navigate to Appearance › Menus.
From here, enter your menu name and click the “Create Menu” button. You can add
items to your menu by using the widgets on the left side. Once you have added all
the links you desire, save your menu and finally attach it to the theme by selecting it
from the “Theme Locations” Widget. Make sure you save again when you're done!
2. Theme Options
The options panel is home to all of the theme's extensive configuration options. To
view the panel, navigate to the ThemeNectar icon followed by your theme name in
the left-hand menu. Here you have the ability to alter many core aspects that make
up how your theme looks and behaves. Any of the options that have some ambiguity
to them conviently have descriptions to explain their purpose.
3. Nectar & Home Sliders
Salient gives you two powerful ways to feature any content your heart desires. But
they aren't just lovely to look at, they're also amazingly easy to manage! We have
built custom interfaces to drastically simplify tasks such as adding, editing, ordering
and deleting. Both of the included sliders work the same way for managing slides
except the Nectar slider is a lot more powerful. As of version 2.0, the home slider is
only sticking around to give you the option of using an alternative style & giving you a
quicker option if you don't need the power.
1. Home slider - Allows for a quick slider to be automatically placed at the top of the
home page (as long as a home template is selected in the page attributes box).
2.Nectar Slider - Offers most options of the home slider plus options for video
backgrounds, Can be instanced an unlimited number of times with various locations,
hardware accelerated, touch-friendly, configuration options for pagination & arrows.
You must be running at least WordPress 3.6 to use this slider!
For detailed guides on using both of these sliders please refer to video tutorial
series here.
Features
Page 66
4. Shortcodes
Welcome to the most powerful feature of the entire theme. ThemeNectar has spent
countless, restless nights developing an extensive, yet simple to use set of shortcodes
that will take your site to the next level. There is no need to remember any syntax
either, because every shortcode is one click away in our intuitive shortcode generator!
4.1 Columns
These are the bread and butter of the theme. Every time you are dealing with
columns it is imperative that you check the “Last Column” check box for the last
column in every row. A row ends every time your columns add up to a whole. If you
fail to do this, your columns will not function correctly. Columns can display anything
you put into them, this includes all other shortcodes except the carousel. The
carousel shortcode must be on its own and not in a column!
4.2 Full Width Section
Salient gives you the option to create full width sections on your pages. This
shortcode will break out of the container and allow your backgrounds to stretch all
the way across the screen. Inside of this shortcode you will find options to use a solid
color of your choosing or upload an image that will be used as the background. When
using an image you also have the option to parallax the background which can come
in handy for creating more interesting sections. This should only be used on pages
without sidebars - Thus it won't work if you use it on blog posts or on the portfolio
more details page. For more information on how to use this feature see this video
tutorial.
4.3 Image With Animation
This shortcode allows you to bind an animation for a given image that will fire when
the user scrolls to the section on the page that your image is located on. There are
three options to choose from which give you greater control over creating unique and
appealing layouts.
4.4 Testimonial Slider
The testimonial slider will take your given testimonials and automatically create a
nicely formatted slider out of them. This shortcode goes great together with the full
width section shortcode and when used together can yield a very appealing area to
show off your testimonials!

Page 77
4.5 Centered Heading
This shortcode will create a centered heading tag with an optional subheader below
it, and a border on the bottom for separation. This is a good shortcode to use at the
top of pages or to introduce a new section in a page.
4.6 Divider
This shortcode creates a divider to better separate your sections. There is only one
option available to choose and it will determine whether or not to show a line in the
dividing space.
4.7 Button
The button shortcode is an easy way to add a styled button quickly to your page. Just
choose the appropriate size, fill out the two fields and off you go!
4.8 Icon
Our icon shortcode makes great use of the Font Awesome web icon font. Upon
selecting this shortcode, you will find a beautiful grid of all the icons available to
select from. Simply choose your icon, select your desired size and add the shortcode
to the editor. The size attribute is very important in determining how the icon will
display, so read the descriptions carefully!
4.9 Toggle Panel
This shortcode creates a toggle panel that expands when the user clicks on the title to
reveal more information.
4.10 Tabbed Section
The tabbed sections shortcode will create a tabbed interface for the user to click
through and change the content accordingly. When creating this shortcode simply
add or remove tabs as needed until you are ready to place the shortcode in the editor.
4.11 Bar Graph
This shortcode will create a horizontal bar that animates to the percent given. Great
for showing a graph of skills or other data that you would like a visual representation
for.
Page 88
4.12 Team Member
The team shortcode takes in all the information for a team member/employee and
formats it nicely. This shortcode works best when used in a 1/3 column. If you have
more than 3 team members/employees, you could create a carousel and add each
team member on a slide.
4.13 Carousel
The carousel shortcode has two configuration options for your convenience. Just
choose your desired settings and add the shortcode into the edior. Unlike the other
shortcodes, the carousel inserts the format of the shortcode but leaves the content
empty for you to fill in. This is because the carousel will most likely contain other
shortcodes or images which are tasks best accomplished from starting in the editor
and not inside the shortcode generator.
4.14 Clients
The clients shortcode allows you to format all of your clients in either a carousel or
column based layout. Simply choose the number of columns you desire, mark whether
or not you would like a carousel, and begin uploading your images!
4.15 Pricing Table
Pricing tables are a great way to display any plans, membership options or
subscription options you wish to format in an intuitive manner. This shortcode only has
one option to choose; columns. After you choose your desired number, the shortcode
will be inserted into your editor where can you edit as needed.
4.16 Recent Posts/Work
These two shortcodes give you a simple way to have more control over where you
want to display your recent content. The only configuration option is whether or not to
show the title labels that you defined in the theme options panel.
5. Portfolio Post Type
One thing that might have caught your attention since activating the theme is the
“Portfolio” tab that appeared. This is where you will manage, edit and create all of the
work related items that you wish to place in your portfolio.
Page 99
5.1 Project Categories
Any categories that you create for your portfolio will automatically be added to the
"Sort Portfolio" list on the portfolio page. You should always remember to assign your
items into a category in order for your user to be able to sort through them.
5.2 Project Attributes
Attributes are anything that you want to highlight about a project in bullet point
fashion. These will automatically appear under the description you create for the
project on the "More Details" page. The attributes that you define will appear in every
work item creation page for you to check off all that apply. This is to save time so you
don't have to redefine attributes that are reoccuring on projects.
5.3 Understanding Portfolio Images
It is important to have a firm grasp on how the portfolio treats the featured images you
set. The most critical point to remember is to always upload your portfolio images at a
minimum width of 800px. This will ensure they will look great on a variety of screen
sizes and devices. Besides that, just be aware that automatic resizing will occur for
all places your portfolio images show up except the "More Details" page. Here your
image will be displayed in its entirety.
5.4 Creating a Gallery
If you have multiple images to show on a given portfolio item, simply attached a
WordPress gallery in your editor and optionally choose weather or not to turn that
gallery into a slider with the checkbox in the "Project Configuration".
5.5 Video Formatting
If you have a video to feature for the project simply fill out the video meta box with the
related information. If the video is self hosted you will need to upload the .ogv and
.m4v files as well as supply an image. Alternatively, If the video is hosted on Vimeo or
Youtube, simply copy and paste the embed code into the box and you're done!
5.6 Masonry Sizing
If you plan on making use of the "Masonry Item Sizing" option you must be aware of
the dimensions your featured images will get cropped at:
• Regular: Min Width 500px Min Height 500px
• Wide: Min Width 1000px Min Height 500px
• Tall: Min Width 500px Min Height 1000px
• Wide & Tall: Min Width 1000px Min Height 1000px
Page 1010
Just make sure to satisfy those sizes when uploading your images or else the
proportions will be off and your grid won't fit snug. It's also worth reiterating that you
don't have to upload the images at those exact sizes - they're just the minimum sizes.
So for example, an image uploaded at 850px by 900px would satisfy the "Regular"
size and the thumbnail would be able to get created correctly at 500px x 500px.
6. Custom Page Layouts
Custom page layouts can be applied to any page by selecting the desired layout
from the “Page Attributes” widget when creating/editing a page. Your theme includes
layouts for Home, Portfolio and Contact pages.
6.1 Home
There are 4 options for your home page layout: Slider Only, Recent Work, Recent
Posts and Both.
Each layout will contain the home slider at the top, the content you define in the editor
in the middle, and the recent relevant information below (unless you have choosen
Slider only). To learn more about adding and managing your sliders content see the
Home Slider section of this guide.
6.2 Portfolio
The portfolio page layout will create a beautiful grid of all your work. The grid is
also easily sortable via the “Sort Portfolio” button located in the right-hand corner of
the header. For more information on setting up your portfolio items please see the
Portfolio Post Type section of this guide.
6.3 Contact
Your theme also includes a contact page layout that features a large map at the top
of the page. The address and info window that appears on the map can be setup in
your Theme Options panel. The contact form that we used in the demo is powered by
a plugin called Contact Form 7.
7. Custom Page Options
Custom page options are extra boxes added in below the content editor that you will
notice on every page you create/edit. Their purpose is to give you more control on
formatting your pages by opening up options that otherwise would not be available.
Page 1111
7.1 Page Header
The “Page Header Settings” box essentially allows you to format your page header in
one of two ways. Either a full width image background with the title & subtitle overlaid,
or a regular clean title & subtitle. You do not have to explicitly tell the theme which
one to use, it will be determined by what data you supply. i.e. if you don't upload an
image, the regular header will be used. Also the subtitle is optional on both.
**Note that the Page Header Settings will be ignored for certain pages including: All of
the home layouts and the blog page.
8. Custom Widgets
Your theme also includes a couple custom widgets as an added bonus!
8.1 Recent Posts ExtraThis widget works the same as the core WordPress recent posts widget, except it also
shows a thumbnail of the featured image and date.
8.2 Recent ProjectsThe recent projects widget will show your desired number of the most current projects
added to the portfolio post type.
9. CSS Classes To Know
In some cases additional functionalty can be achieved from the use of css classes.
Please read the following if you have any interest in these items, also check out our
tutorial video regarding the subject if you need demonstartions of these items.
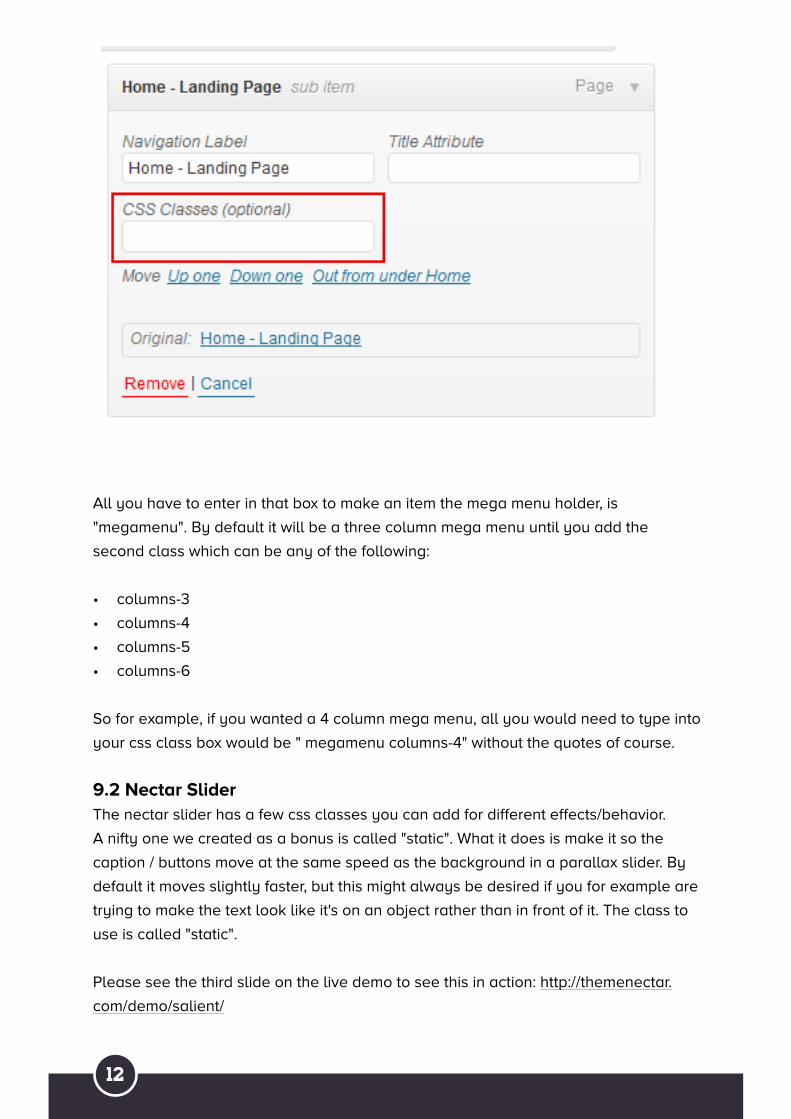
9.1 Mega MenusIf you would like to use a mega menu, please head to the Appearance > Menus tab
in your admin section and make sure that "CSS Classes" are turned on in your screen
options tab in the upper right hand corner of your screen. Once the box for them is
checked, you'll see an input field for "CSS Classes (optional)" in each of your menu
items. See screenshot below :
Page 1212
All you have to enter in that box to make an item the mega menu holder, is
"megamenu". By default it will be a three column mega menu until you add the
second class which can be any of the following:
• columns-3
• columns-4
• columns-5
• columns-6
So for example, if you wanted a 4 column mega menu, all you would need to type into
your css class box would be " megamenu columns-4" without the quotes of course.
9.2 Nectar SliderThe nectar slider has a few css classes you can add for different effects/behavior.
A nifty one we created as a bonus is called "static". What it does is make it so the
caption / buttons move at the same speed as the background in a parallax slider. By
default it moves slightly faster, but this might always be desired if you for example are
trying to make the text look like it's on an object rather than in front of it. The class to
use is called "static".
Please see the third slide on the live demo to see this in action: http://themenectar.
com/demo/salient/
Page 1313
The other possible css classes are "external-button-1" and "external-button-2". Their
names are pretty self explanatory, but adding either of them or both of them will
cause the button(s) for your slide to open in a new window if you want your link to be
external.
9.3 Typography
There's a couple classes that can be used in the text tab on your editor for changing
the font of any text you desire. The two classes are:
• light
• uppercase
Here's an example of how to use them on an html element such as a heading tag.
Again, make sure to enter this into the text tab on your editor!
<h2 class="light">This is an awesome heading</h2>
Wrapping up
Included Styling for Plugins
Your theme also includes styling for a couple plugins we thought you might be likely
to add. So if you are looking to add additional functionality in any of these categories,
we recommend you use the following:
1. Contact Form: Contact Form 7
2. Newsletter: Newsletter
3. Ecommerce: WooCommerce
How To Update
You can update your theme by downloading a fresh copy from ThemeForest,
deleting the current version you have on your server and uploading the new. It's
recommended that you use FTP, but this also can be done with the WP dashboard if
you prefer. The reason FTP is superior for this is because the theme won't have to be
deactivated during the process so you won't have to reassign your widgets. If you're
interested in keeping up to date with the latest changes and fixes, please refer to the
changelog.

Page 1414
Also, remember to clear your browser cache after each update if you notice anything
off. Old theme files can persist in your local cache and make you think something's
wrong.
Dummy Data
Salient includes a dummy data file inside of the main download zip you get from
ThemeForest called "dummy-data.xml". You can import this into your setup by going to
"Tools" > "Import" in your admin panel, choosing "WordPress" and browsing for the file.
There is also a video tutorial showing the process if you're a visual learner.
Included Data
All content seen on the live demo will be imported except for images/videos
ThemeNectar does not have the rights to include. The structures for these items will
still be left intact so you can quickly use your own images in their places if you desire.
If you wish to buy licenses for any of videos seen in the demo you can do so at the
following locations: (continued on next page)
• New York City Skyline Video
• Blue Ink Drop Into Water
• Man Using Smartphone
• **The video of the blurred coding was recorded by ThemeNectar and is yours for
free to use how you please
Therefore it's worth noting:
1. In locations where the videos could not be included your Nectar Slider will simply
show the loading sign until you upload your own videos in their places.
2. In locations where images could not be included there will be black boxes until
you upload your own images in their places.
For more information on the sources of sample images used in the demo, please see
the bottom of the theme description on the main ThemeForest page at the section
"Credits"
Page 1515
Thank You For Purchasing SalientPlease visit themenectar.com to keep up to date on all the themes we create