safety systems en
TRANSCRIPT

EN
Operating Instructions
Safety Systems
MGB-L1…-AR.-… / MGB-L2…-AR.-…MGB-L1…-AP.-… / MGB-L2…-AP.-…
from V3.0.0

Operating Instructions Safety SystemsMGB-L1…-AR.-… / MGB-L2…-AR.-… and MGB-L1…-AP.-… / MGB-L2…-AP.-…
2 (translation of the original operating instructions) 119167-03-01/15
Contents
1. About this document ............................................................................................. 41.1. Scope ............................................................................................................................................4
1.1.1. Notes on older product versions ......................................................................................41.2. Target group ..................................................................................................................................4
1.3. Key to symbols ...............................................................................................................................4
1.4. Supplementary documents ..............................................................................................................5
2. Correct use .......................................................................................................... 62.1. Main differences between MGB-AP and MGB-AR .................................................................................7
3. Description of the safety function .......................................................................... 8
4. Exclusion of liability and warranty ......................................................................... 9
5. General safety instructions.................................................................................... 9
6. Function ............................................................................................................. 106.1. Guard locking for version MGB-L1 ..................................................................................................10
6.2. Guard locking for version MGB-L2 ..................................................................................................11
7. System overview................................................................................................. 127.1. Locking module MGB-L.-… ............................................................................................................12
7.2. Handle module MGB-H-…...............................................................................................................12
7.3. Escape release MGB-E-… (optional) ................................................................................................12
7.4. Dimension drawing .......................................................................................................................13
7.5. Manual release .............................................................................................................................14
7.6. Mechanical release .......................................................................................................................14
7.7. Emergency unlocking (can be retrofitted) ........................................................................................157.7.1. Actuating emergency unlocking ......................................................................................15
7.8. Lockout mechanism ......................................................................................................................15
7.9. Escape release (optional) ..............................................................................................................167.9.1. Preparing escape release .............................................................................................16
8. Mounting ............................................................................................................ 188.1. Mounting color cover ....................................................................................................................19
9. Changing actuating direction (here: from right to left) .......................................... 21
10. Protection against environmental effects ............................................................. 22
11. Electrical connection .......................................................................................... 2311.1. Notes about .........................................................................................................................24
11.2. Safety in case of faults ..................................................................................................................24
11.3. Fuse protection for power supply ...................................................................................................24
11.4. Requirements for connection cables ...............................................................................................25

3119167-03-01/15 (translation of the original operating instructions)
Operating Instructions Safety SystemsMGB-L1…-AR.-… / MGB-L2…-AR.-… and MGB-L1…-AP.-… / MGB-L2…-AP.-…
EN
11.5. Notes on cable laying ....................................................................................................................25
11.6. Changing device configuration (using DIP switches) .........................................................................2611.6.1. Changing system family (AR/AP switching) ......................................................................2611.6.2. Deactivating guard lock monitoring .................................................................................2711.6.3. Activating release monitoring .........................................................................................27
11.7. Notes on operation with control systems ........................................................................................28
11.8. Connection of guard locking control ...............................................................................................29
11.9. Terminal assignment and contact description ..................................................................................30
11.10. Operation as separate device ........................................................................................................31
11.11. Operation in an AR switch chain .....................................................................................................32
11.12. Notes on operation in an AR switch chain .......................................................................................3311.12.1. System times ...............................................................................................................3311.12.2. Wiring an AR switch chain ..............................................................................................3311.12.3. Number of devices in the switch chains ..........................................................................3311.12.4. Resetting in switch chains ..............................................................................................33
12. Setup ................................................................................................................. 3412.1. Teach-in operation (only for MGB unicode) .......................................................................................34
12.2. Mechanical function test ................................................................................................................34
13. Technical data .................................................................................................... 3613.1. Typical system times .....................................................................................................................37
14. System states ..................................................................................................... 3714.1. Key to symbols .............................................................................................................................37
14.2. MGB-AR system status table ..........................................................................................................38
14.3. MGB-AP system status table ..........................................................................................................39
15. Troubleshooting and assistance ........................................................................... 4015.1. Fault reset ....................................................................................................................................40
15.2. Help on troubleshooting in the Internet ...........................................................................................40
15.3. Help on mounting in the Internet .....................................................................................................40
15.4. Application examples ....................................................................................................................40
16. Service .............................................................................................................. 40
17. Inspection and service ........................................................................................ 41
18. Declaration of conformity ................................................................................... 42

Operating Instructions Safety SystemsMGB-L1…-AR.-… / MGB-L2…-AR.-… and MGB-L1…-AP.-… / MGB-L2…-AP.-…
4 (translation of the original operating instructions) 119167-03-01/15
1. About this document1.1. ScopeThese operating instructions are valid for all MGB-L1…-AR.-… / MGB-L2…-AR.-… and MGB-L1…-AP.-… / MGB-L2…-AP.-…. These operating instructions, the document “Safety information and maintenance” and any enclosed data sheet form the complete user information for your device.
Series Guard locking types System families Product versions
MGB
L1 (guard locking by spring force)…-AP…
from V3.0.0…-AR…
L2 (guard locking by solenoid force)…-AP…
…-AR…
1.1.1. Notes on older product versions
Products with lower product versions or without a version number are not described by these operating instructions. Please contact our support team in this case.
1.2. Target groupDesign engineers and installation planners for safety devices on machines, as well as setup and servicing staff possessing special expertise in handling safety components
1.3. Key to symbolsSymbol/depiction Significance
APThis section applies on operation as MGB-AP
ARThis section applies on operation as MGB-AR
DIPOFF
ON
In this section attention must be paid to the DIP switch setting
Printed document
Internet
www Document is available for download at www.euchner.de
Document on CD
DANGER WARNING CAUTION
Safety precautionsDanger of death or severe injuriesWarning about possible injuriesCaution Slight injuries possible
NOTICE Important!
Notice about possible device damageImportant information
Tip Tip/useful information

5119167-03-01/15 (translation of the original operating instructions)
Operating Instructions Safety SystemsMGB-L1…-AR.-… / MGB-L2…-AR.-… and MGB-L1…-AP.-… / MGB-L2…-AP.-…
EN
1.4. Supplementary documentsThe overall documentation for this device consists of the following documents:
Document title(document number) Contents
Safety information and maintenance for safety system MGB-AR/MGB-AP from V3.0.0(123151)
Basic information about safe setup and maintenance
Operating instructions(119167) (this document)
Possibly enclosed data sheet Item-specific information about deviations or additions
Brief instructions for teach-in operation – MGB-AP/MGB-AR (from V2.0.0)(114903)
Brief instructions for teach-in operation Internet
www
Important!
Always read all documents to gain a complete overview of safe installation, setup and use of the device. The documents can be downloaded from www.euchner.de. Enter the document number in the search box for this purpose.

Operating Instructions Safety SystemsMGB-L1…-AR.-… / MGB-L2…-AR.-… and MGB-L1…-AP.-… / MGB-L2…-AP.-…
6 (translation of the original operating instructions) 119167-03-01/15
2. Correct useThe system comprises at least one locking module MGB-L1-…/MGB-L2--… and one handle module MGB-H…
The safety system MGB is an interlocking device with guard locking (type 4). Devices with unicode evaluation possess a high coding level; devices with multicode evaluation feature a low coding level.
The locking module can be configured with the aid of DIP switches. Depending on the setting, the locking module behaves like an AP or AR device (see chapter 2.1. Main differences between MGB-AP and MGB-AR on page 7). In addition the guard lock monitoring can be switched on or off. More detailed information about the possible settings is available in the chapter 11.6. Changing device configuration (using DIP switches) on page 26.
DIPOFF
ON With active guard lock monitoring the following applies:
In combination with a movable safety guard and the machine control, this safety component prevents the safety guard from being opened while a dangerous machine function is being performed.
This means: Ì Starting commands that cause a dangerous machine function must become active only when the safety guard is closed and locked. Ì The guard locking device must not be unlocked until the dangerous machine function has ended. Ì Closing and locking a safety guard must not cause automatic starting of a dangerous machine function. A sepa-rate start command must be issued. For exceptions, refer to EN ISO 12100 or relevant C-standards.
With inactive guard lock monitoring the following applies:
In combination with a movable safety guard and the machine control, this safety component prevents dangerous machine functions from occurring while the safety guard is open. A stop command is triggered if the safety guard is opened during the dangerous machine function. With inactive guard lock monitoring, guard locking must be used only for process protection.
This means: Ì Starting commands that cause a dangerous machine function must become active only when the safety guard is closed. Ì Opening the safety guard triggers a stop command. Ì Closing a safety guard must not cause automatic starting of a dangerous machine function. A separate start command must be issued. For exceptions, refer to EN ISO 12100 or relevant C-standards.
Before the device is used, a risk assessment must be performed on the machine, e.g. in accordance with the following standards: Ì EN ISO 13849-1, Safety of machinery – Safety-related parts of control systems – Part 1: General principles for design Ì EN ISO 12100, Safety of machinery – General principles for design – Risk assessment and risk reduction Ì IEC 62061, Safety of machinery – Functional safety of safety-related electrical, electronic and programmable electronic control systems
Correct use includes observing the relevant requirements for installation and operation, particularly based on the following standards: Ì EN ISO 13849-1, Safety of machinery – Safety-related parts of control systems – Part 1: General principles for design Ì EN ISO 14119 (supersedes EN 1088), Safety of machinery – Interlocking devices associated with guards – Principles for design and selection Ì EN 60204-1, Safety of machinery – Electrical equipment of machines – Part 1: General requirements
The safety system MGB can only be combined with the intended modules in the MGB system family.
On the modification of system components, EUCHNER provides no warranty for function.
ARLocking modules with the configuration MGB-AR can be integrated into an AR switch chain.
Connection of several devices in an AR switch chain is permitted only using devices intended for series connection in an AR switch chain. Check the operating instructions for the related device.

7119167-03-01/15 (translation of the original operating instructions)
Operating Instructions Safety SystemsMGB-L1…-AR.-… / MGB-L2…-AR.-… and MGB-L1…-AP.-… / MGB-L2…-AP.-…
EN
Important!
Ì The user is responsible for the proper integration of the device into a safe overall system. For this purpose, the overall system must be validated, e.g. in accordance with EN ISO 13849-2. Ì Correct use requires observing the permissible operating parameters (see chapter 13. Technical data on page 36). Ì If a product data sheet is included with the product, the information on the data sheet applies.
Table 1: Possible combinations for MGB components
Evaluation unit
Handle module
MGB-H-...from V2.0.0
MGB…AR/APfrom V3.0.0
Key to symbols Combination possible
2.1. Main differences between MGB-AP and MGB-ARSystem family Symbol Use
MGB-APAP
Optimized for operation in safe control systems.If series connection is not necessary, the number of terminals can be reduced using this system family.
MGB-ARAR
Linking of several safety guards on one shutdown path. As a consequence several safety doors can be very simply polled using one evaluation unit or two control system inputs.

Operating Instructions Safety SystemsMGB-L1…-AR.-… / MGB-L2…-AR.-… and MGB-L1…-AP.-… / MGB-L2…-AP.-…
8 (translation of the original operating instructions) 119167-03-01/15
3. Description of the safety functionDevices from this series feature the following safety functions:
With active guard lock monitoring the following applies:
DIPOFF
ON Monitoring of guard locking and the position of the safety guard (interlocking device with guard locking according to EN ISO 14119)
Ì Safety function (see chapter 6. Function on page 10): - The safety outputs are switched off when guard locking is unlocked (monitoring of the locking device). Important: This applies only if guard lock monitoring is active!
- The safety outputs are switched off when the safety guard is open. - Guard locking can be activated only when the bolt tongue is located in the locking module (failsafe locking mechanism).
Ì Safety characteristics: category, Performance Level, PFHd (see chapter 13. Technical data on page 36).
Control of guard locking Ì Safety function. If the device is used as guard locking for personnel protection, control of guard locking must be regarded as a safety function. The safety level of guard locking control is determined by the device PFHd int. and by the external control (e.g. PFHd ext. of the standstill monitor).
PFHdext.PFHdint.
(internal electronic)
Guardlocking Device
(e.g. standstill monitor)
(locking mean)
Ì Safety characteristics: category, Performance Level, PFHd (see chapter 13. Technical data on page 36).
With inactive guard lock monitoring the following applies:
DIPOFF
ON Monitoring of the safety guard position (interlocking device according to EN ISO 14119)
Ì Safety function: The safety outputs are switched off when the safety guard is open (see chapter 6. Function on page 10). Ì Safety characteristics: category, Performance Level, PFHd (see chapter 13. Technical data on page 36).
The following applies to devices with emergency stop:
Emergency stop (emergency stop device according to EN ISO 13850)
Ì Safety function: emergency stop function Ì Safety characteristics: B10d value (see chapter 13. Technical data on page 36)

9119167-03-01/15 (translation of the original operating instructions)
Operating Instructions Safety SystemsMGB-L1…-AR.-… / MGB-L2…-AR.-… and MGB-L1…-AP.-… / MGB-L2…-AP.-…
EN
4. Exclusion of liability and warrantyIn case of failure to comply with the conditions for correct use stated above, or if the safety instructions are not followed, or if any servicing is not performed as required, liability will be excluded and the warranty void.
5. General safety instructionsSafety switches fulfill personal protection functions. Incorrect installation or tampering can lead to fatal injuries to personnel.
Check the safe function of the safety guard particularly Ì after any setup work Ì after the replacement of an MGB component Ì after an extended period without use Ì after every fault Ì after any change to the DIP switch setting
Independent of these checks, the safe function of the safety guard should be checked at suitable intervals as part of the maintenance schedule.
WARNING
Danger to life due to improper installation or due to bypassing (tampering). Safety components perform a personal protection function. Ì Safety components must not be bypassed, turned away, removed or otherwise rendered ineffec-tive. On this topic pay attention in particular to the measures for reducing the possibility of bypass-ing according to EN ISO 14119:2013, section 7. Ì The switching operation is only allowed to be triggered by the intended handle module MGB-H… that is positively fastened to the safety guard. Ì Prevent bypassing by means of replacement actuators (only for multicode evaluation). For this purpose, restrict access to actuators and to keys for releases, for example. Ì Mounting, electrical connection and setup only by authorized personnel possessing the following knowledge: - specialist knowledge in handling safety components - knowledge about the applicable EMC regulations - knowledge about the applicable regulations on occupational safety and accident prevention.
Important!
Prior to use, read the operating instructions and keep these in a safe place. Ensure the operating instructions are always available during mounting, setup and servicing. EUCHNER cannot provide any warranty in relation to the readability of the CD for the storage period required. For this reason you should archive a printed copy of the operating instructions. You can download the operating instruc-tions from www.euchner.de.

Operating Instructions Safety SystemsMGB-L1…-AR.-… / MGB-L2…-AR.-… and MGB-L1…-AP.-… / MGB-L2…-AP.-…
10 (translation of the original operating instructions) 119167-03-01/15
6. FunctionTogether with a handle module, the locking module makes it possible to lock moving safety guards. The combination also serves as a mechanical door stop at the same time.
DIPOFF
ON The following switch-on condition applies to the safety outputs FO1A and FO1B (also see chapters 14.2. MGB-AR system status table on page 38 and 14.3. MGB-AP system status table on page 39):
Configuration System family MGB-AR MGB-AP
Guard lock monitoring active inactive active inactive
Con
ditio
n
No fault in the device TRUE TRUE TRUE TRUE
Safety guard closed TRUE TRUE TRUE TRUE
Bolt tongue inserted in locking module TRUE TRUE TRUE TRUE
Guard locking active TRUE irrelevant TRUE irrelevant
In case of series connection: Signal available from the upstream switch on the safety inputs FI1A and FI1BIn case of separate operation:DC 24 V present at the safety inputs FI1A and FI1B
TRUE TRUE irrelevant irrelevant
FO1A and FO1B are ON
The locking module detects the position of the safety guard and the position of the bolt tongue. The position of the guard locking is also monitored.
Guard lock monitoring can be deactivated using DIP switches (see chapter 11.6. Changing device configuration (using DIP switches) on page 26).
Important!
For use as guard locking in accordance with EN ISO 14119, guard lock monitoring must be active.
The bolt tongue in the handle module is moved into and out of the locking module by actuating the door handle.
When the bolt tongue is fully inserted in the locking module, the locking arm locks the bolt tongue in this position. Depending on the version, this locking is by spring force or solenoid force.
6.1. Guard locking for version MGB-L1(guard locking actuated by spring force and released by energy ON)
Activating guard locking: close safety guard; no voltage at the solenoid.
Releasing guard locking: apply voltage to the solenoid.
The spring-operated guard locking functions in accordance with the closed-circuit current principle. If voltage is interrupted at the solenoid, guard locking remains active and the safety guard cannot be opened directly.
Important!
If the safety guard is open when the power supply is interrupted and the guard is then closed, guard locking is activated. This can lead to persons being locked in unintentionally.
As long as the locking arm is closed, the bolt tongue cannot be pulled out of the locking module and the safety guard is locked.
When voltage is applied to the locking solenoid, the locking arm is opened and bolt tongue is released. The safety guard can be opened.
11119167-03-01/15 (translation of the original operating instructions)
Operating Instructions Safety SystemsMGB-L1…-AR.-… / MGB-L2…-AR.-… and MGB-L1…-AP.-… / MGB-L2…-AP.-…
EN
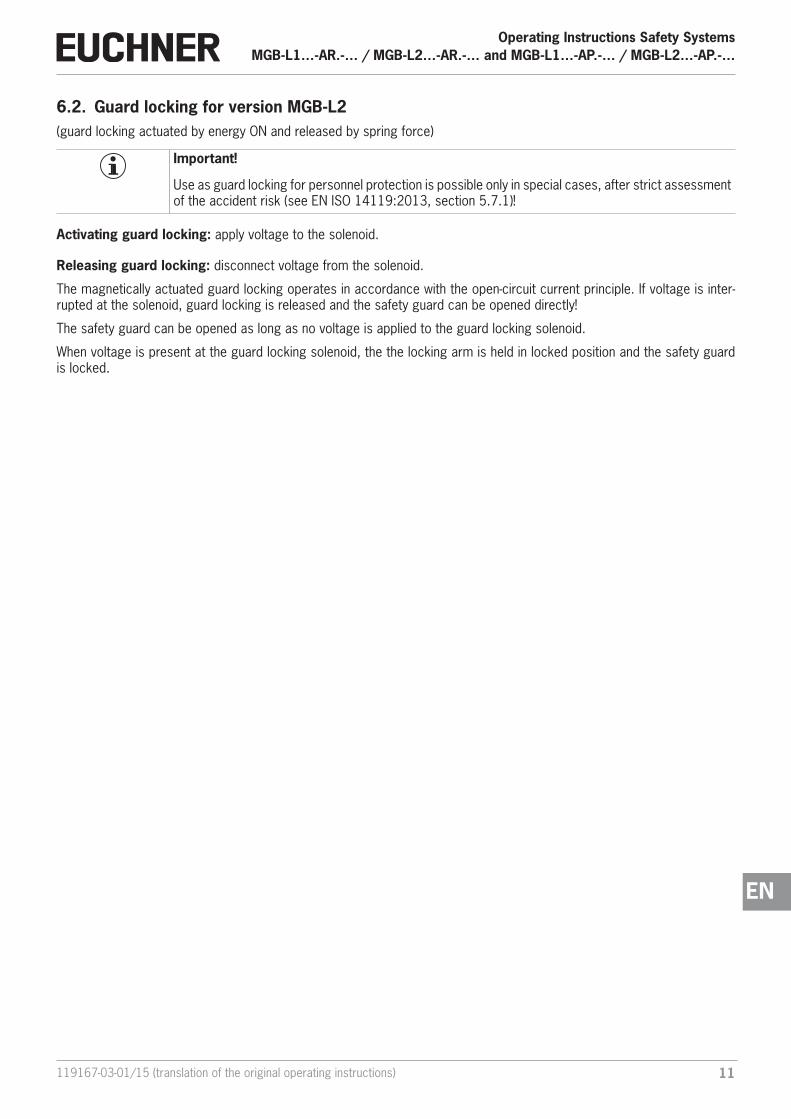
6.2. Guard locking for version MGB-L2(guard locking actuated by energy ON and released by spring force)
Important!
Use as guard locking for personnel protection is possible only in special cases, after strict assessment of the accident risk (see EN ISO 14119:2013, section 5.7.1)!
Activating guard locking: apply voltage to the solenoid.
Releasing guard locking: disconnect voltage from the solenoid.
The magnetically actuated guard locking operates in accordance with the open-circuit current principle. If voltage is inter-rupted at the solenoid, guard locking is released and the safety guard can be opened directly!
The safety guard can be opened as long as no voltage is applied to the guard locking solenoid.
When voltage is present at the guard locking solenoid, the the locking arm is held in locked position and the safety guard is locked.

Operating Instructions Safety SystemsMGB-L1…-AR.-… / MGB-L2…-AR.-… and MGB-L1…-AP.-… / MGB-L2…-AP.-…
12 (translation of the original operating instructions) 119167-03-01/15
7. System overview7.1. Locking module MGB-L.-…
2
4
5
1
9
8
3
7 6
Key:1 Cover for mechanical release2 LED indicator3 Jumper4 DIP switches5 Terminals X2-X56 Depending on version Cable entry M20x1.5 or plug connector7 Internal reset8 Auxiliary marking for maximum permitted mounting distance9 Locking arm
Notice: Depending on the version, additional controls and indicators may be integrated into the cover and a mounting plate can be included. See enclosed data sheet.
Figure 1: Locking module MGB-L.--…
7.2. Handle module MGB-H-…
1
2
5
4
2
3
4
Key:1 Door handle2 Fold-out lockout mechanism
(optional: second, automatically extending lockout mechanism)3 Locking pin for handle adjustment4 Locking screws T10 for housing cover5 Bolt tongue
Notice: Depending on the version, a mounting plate can be included. See enclosed data sheet.
Figure 2: Handle module MGB-H-…
7.3. Escape release MGB-E-… (optional)1 2 3 4 5
Key:1 Door handle2 Setscrew3 Cover4 Actuation axis 8 x 8 mm
(different lengths available)5 Protective sleeve
Notice: Depending on the version, a mounting plate can be included. See enclosed data sheet.
Figure 3: Escape release MGB-E-…

13119167-03-01/15 (translation of the original operating instructions)
Operating Instructions Safety SystemsMGB-L1…-AR.-… / MGB-L2…-AR.-… and MGB-L1…-AP.-… / MGB-L2…-AP.-…
EN
7.4.
Dim
ensi
on d
raw
ing
47,5
60
19
min
.6
37,5
S1S2
4S
3S
A
max
.10
30
21
51 61,5114
40
4083
113,
5
M20
x1,5
(4x)
19,2
289,
3
AUF
OPE
NCLO
SED
ZU
40
130
15
111
40 4
155,
3
104
40 11,558,5110
8 x
8
(min. 10)
7,5
6,6
86,5
15,4
15
73,5
6,3
6,2
89,4
24510
46
10
89,4
77,5
92,5
16,5
14,5
Hole
pat
tern
Lock
ing
mod
ule
Hand
le m
odul
eEs
cape
rele
ase
Deta
il A
Dim
ensi
ons
with
plu
g co
nnec
tor
RC18
and
aut
omat
ical
ly
exte
ndin
g lo
ckou
t mec
hani
sm (o
ptio
nal)
Padl
ock
Lock
out
mec
hani
sm
Figu
re 4
: Di
men
sion
dra
win
g –
MG
B m
ount
ed, w
ithou
t opt
iona
l mou
ntin
g pl
ates

Operating Instructions Safety SystemsMGB-L1…-AR.-… / MGB-L2…-AR.-… and MGB-L1…-AP.-… / MGB-L2…-AP.-…
14 (translation of the original operating instructions) 119167-03-01/15
7.5. Manual releaseSome situations require guard locking to be released manually (e.g. malfunctions or an emergency). A function test should be performed after release.
More information on this topic can be found in the standard EN ISO 14119:2013, section 5.7.5.1. The device can feature the following release functions:
7.6. Mechanical releaseIn the event of service, the guard locking can be released with the mechanical release irrespective of the state of the sole-noid (see Figure 5).
DIPOFF
ON Ì When release monitoring is active, the system enters into a latching fault when the mechanical release is actuat-ed. See System status table, signal sequence incorrect status (DIA red, Lock flashes 1 time). Ì The system might not enter into a latching fault if the mechanical release is actuated very slowly.
Important!
Ì The mechanical release is not a safety function. Ì The machine manufacturer must select and use a suitable release (escape release, emergency unlocking, etc.) for a specific application. A risk assessment is required for this purpose. It may be necessary to take specifications from a product standard into account. Ì The correct function must be checked at regular intervals. Ì Loss of the release function due to mounting errors or damage during mounting. Check the re-lease function every time after mounting. Ì Please observe the notes on any enclosed data sheets.
The locking screw must be screwed back in and sealed (for example with sealing lacquer) after assembly and after every use of the mechanical release. Tightening torque 0.5 Nm.
1. Undo locking screw.
2. Lift locking arm using a screwdriver and actuate door handle.
Figure 5: Mechanical release

15119167-03-01/15 (translation of the original operating instructions)
Operating Instructions Safety SystemsMGB-L1…-AR.-… / MGB-L2…-AR.-… and MGB-L1…-AP.-… / MGB-L2…-AP.-…
EN
7.7. Emergency unlocking (can be retrofitted)Permits opening of a locked safety guard from outside the danger area without tools. For mounting, see the mounting supplement.
Important!
Ì It must be possible to operate emergency unlocking manually from outside the protected area without tools. Ì Emergency unlocking must possess a marking indicating that it may be used only in an emergen-cy. Ì The actuator must not be under tensile stress during manual release. Ì The unlocking function meets all other requirements from EN ISO 14119. Ì Emergency unlocking meets the requirements of Category B according to EN ISO 13849-1:2008. Ì Loss of the unlocking function due to mounting errors or damage during mounting. Ì Check the release function every time after mounting. Ì Please observe the notes on any enclosed data sheets.
7.7.1. Actuating emergency unlocking Ì Press emergency unlocking and turn clockwise by 90° until it clicks into place.
¨ Guard locking is released.
To reset, press the snap-in bolt inward using a small screwdriver or similar tool and turn the emergency unlocking back. The emergency unlocking can be sealed in free position.
The safety outputs are switched off when emergency unlocking is actu-ated. Use the safety outputs to generate a stop command.
7.8. Lockout mechanismIf the lockout mechanism is pivoted out/extended, the bolt tongue cannot be extended. The lockout mechanism can be secured with padlocks (see Figure 6).
¨ To pivot out, press the grooved part (only possible with bolt tongue retracted).
12
Key:1 Padlock ∅ min. 2 mm, ∅ max. 10 mm
Notice: You can fit a maximum of 3 locks Ø 8 mm.
2 Automatically extending, second lockout mechanism Padlock ∅ min. 6 mm, ∅ max. 10 mm
Figure 6: Lockout mechanism secured with padlock
16
37,5
2
25,916,9
14,6
21
Hole for sealing the emer-gency unlocking
Rotary knob
Snap-in bolt
Flange
Flange mounting
Driver

Operating Instructions Safety SystemsMGB-L1…-AR.-… / MGB-L2…-AR.-… and MGB-L1…-AP.-… / MGB-L2…-AP.-…
16 (translation of the original operating instructions) 119167-03-01/15
7.9. Escape release (optional)The escape release is used to open a locked safety guard from the inside without tools.
DIPOFF
ON When release monitoring is active, the system enters into a latching fault when the escape release is actuated.See System status table, signal sequence incorrect status (DIA red, Lock flashes 1 time).The system might not enter into a latching fault if the escape release is actuated very slowly.
Important!
Ì It must be possible to operate the escape release manually from inside the protected area without tools. Ì It must not be possible to reach the escape release from the outside. Ì The actuator must not be under tensile stress during manual release. Ì The escape release meets the requirements of Category B according to EN ISO 13849-1:2008.
Ì Fit escape release such that operation, inspection and service are possible. Ì The actuation axis for the escape release must be inserted min. 10 mm into the handle module. Note the information on the different profile widths in the next chapter. Ì Align escape release axis at right angles to the handle module. See Figure 4 and Figure 8.
7.9.1. Preparing escape release
(also see Figure 7: Preparing escape release on page 17)
Profile width Length required for actuation axis
Which EUCHNER parts are required? Necessary work steps
Without plates With mounting plates (4 mm each)
D D+13 D+21
30 mm 43 mm 51 mm Standard escape release with 110 mm axis(order no. 100465)
Shorten to required length
40 mm 53 mm 61 mm Standard escape release with 110 mm axis(order no. 100465)If necessaryextended actuation axis (order no. 106761)
Without mounting plates: NoneWith mounting plates: Use long actuation axis and protective sleeve and short-en to required length
45 mm 58 mm 66 mm Standard escape release with 110 mm axis(order no. 100465)and extended actuation axis (order no. 106761)
Use long actuation axis and protective sleeve and short-en to required length
50 mm 63 mm 71 mm Standard escape release with 110 mm axis(order no. 100465)and extended actuation axis (order no. 106761)
Use long actuation axis and protective sleeve and short-en to required length

17119167-03-01/15 (translation of the original operating instructions)
Operating Instructions Safety SystemsMGB-L1…-AR.-… / MGB-L2…-AR.-… and MGB-L1…-AP.-… / MGB-L2…-AP.-…
EN
1 Fit door handle. 2 Insert actuation axis. The locking ring A must be in contact with the escape release B.3 Tighten setscrew to 2 Nm.4 Fit protective sleeve.
Protective sleeveActuation axis
Example with mounting plates:
58.5
4.2
D
4.2
(10)
55.5
(+4.
2 m
m p
er p
late
)
250
182
Mounting plates
D +
13
3.5
(+4.
2 m
m p
er p
late
)D
+ 3
.5
1
3 24
A
B
Figure 7: Preparing escape release

Operating Instructions Safety SystemsMGB-L1…-AR.-… / MGB-L2…-AR.-… and MGB-L1…-AP.-… / MGB-L2…-AP.-…
18 (translation of the original operating instructions) 119167-03-01/15
8. MountingWARNING
Mounting must be performed only by authorized personnel.
With two-wing hinged doors, one of the two door wings additionally must be latched mechanically.
Use a rod latch (Item) or a double-door lock (Bosch Rexroth) for this purpose, for example.
Important!
Ì If installed flush, the switching distance changes as a function of the installation depth and the safety guard material.
Locking module
Handle module
Locking module
Handle module
Surface mounting
Flush mounting
Operating distance
Operating distance
Tip!
Ì You will find an animation on the mounting process at www.euchner.de. Ì The color and labeling of pushbuttons and indicators can be modified.
For mounting steps, see Figure 8 and Figure 9 to Figure 14.
Attach system such that operation of the mechanical release as well as inspection and maintenance are possible.
The locking screw of the escape release must be returned to its original position and sealed before putting into operation (for example with sealing lacquer).

19119167-03-01/15 (translation of the original operating instructions)
Operating Instructions Safety SystemsMGB-L1…-AR.-… / MGB-L2…-AR.-… and MGB-L1…-AP.-… / MGB-L2…-AP.-…
EN
8.1. Mounting color cover
1 2
2 3
90°
Click!
1
Mounting
Removing
Color cover

Operating Instructions Safety SystemsMGB-L1…-AR.-… / MGB-L2…-AR.-… and MGB-L1…-AP.-… / MGB-L2…-AP.-…
20 (translation of the original operating instructions) 119167-03-01/15
2x M6
4x M6
1 Nm (6x)
0,5 Nm
Cutout for escape release
Tightening torque 6 Nm
Recommended fixing material:For mounting on the mounting plate: DIN 912-M6X25-8.8 ZN CYLINDER HEAD SCREW
Figure 8: Installation example for door hinged on the right (general view)

21119167-03-01/15 (translation of the original operating instructions)
Operating Instructions Safety SystemsMGB-L1…-AR.-… / MGB-L2…-AR.-… and MGB-L1…-AP.-… / MGB-L2…-AP.-…
EN
9. Changing actuating direction (here: from right to left)Important!
It is only possible to make this change when the bolt tongue is not extended and an escape release is not yet mounted.
As supplied, the handle module is set either for doors hinged on the right or for doors hinged on the left.
Based on the example of a handle module for doors hinged on the right this means: Ì The safety guard opens by pressing down the door handle. Ì The system is mounted the other way around for doors hinged on the left. In other words, the safety door opens by pressing up the door handle (see Figure 9). For this reason the actuating direction of the door handle must be changed (see Figure 9 to Figure 14).
(similarly on handle modules for doors hinged on the left)
CLOSED
OPEN 13
2
1 Press door handle up.2 Unscrew locking screws.3 Push cover aside.
Figure 9: Changing actuating direction, step 1 Figure 10: Changing actuating direction, steps 2 and 3
5
4
4 Lift the locking pin on the door handle using a screwdriver and hold it in this position.
5 Turn door handle to the right.
7
8
6 b
a
3 mm
6 Only if using an escape release: using the hexagon head screw, turn the joint counterclockwise from position (a) to position (b).
7 Close cover.8 Screw in locking screws and tighten to 0.8 Nm.
Figure 11: Changing actuating direction, steps 4 and 5 Figure 12: Changing actuating direction, steps 6 to 8

Operating Instructions Safety SystemsMGB-L1…-AR.-… / MGB-L2…-AR.-… and MGB-L1…-AP.-… / MGB-L2…-AP.-…
22 (translation of the original operating instructions) 119167-03-01/15
3 mm
9
10
11
OPEN
CLOSED
9 Remove cover and undo hexagon socket screw. Reposition the door handle by 90° in clockwise direction and fasten
it again. Tighten hexagon socket head screw to 3 Nm. State after repositioning.
Figure 13: Changing actuating direction, steps 9 and Figure 14: Changing actuating direction, final state
10. Protection against environmental effectsLasting and correct safety function requires that the system must be protected against foreign bodies such as swarf, sand, blasting shot, etc., which can become lodged in the locking and handle modules. For this purpose a suitable installation position should be selected.
Cover device during painting work!

23119167-03-01/15 (translation of the original operating instructions)
Operating Instructions Safety SystemsMGB-L1…-AR.-… / MGB-L2…-AR.-… and MGB-L1…-AP.-… / MGB-L2…-AP.-…
EN
11. Electrical connectionWARNING
In case of an error, loss of the safety function through incorrect connection. Ì To ensure safety, both safety outputs (FO1A and FO1B) must always be evaluated. Ì The monitoring outputs must not be used as safety outputs. Ì Lay the connection cables with protection to prevent the risk of short circuits.
CAUTION
Risk of damage to equipment or malfunctions as a result of incorrect connection. Ì The inputs on an evaluation unit connected must be positive-switching, as the two outputs on the safety switch deliver a level of +24 V in the switched-on state. Ì All the electrical connections must either be isolated from the mains supply by a safety trans-former according EN IEC 61558-2-6 with limited output voltage in the event of a fault, or by other equivalent isolation measures. Ì All electrical outputs must have an adequate protective circuit for inductive loads. The outputs must be protected with a free-wheeling diode for this purpose. RC interference suppression units must not be used. Ì Power devices which are a powerful source of interference must be installed in a separate location away from the input and output circuits for signal processing. The cable routing for safety circuits should be as far away as possible from the cables of the power circuits. Ì To prevent EMC problems, it is imperative you follow the chapter 11.5. Notes on cable laying on page 25. Follow EMC notes on devices in the immediate vicinity of the MGB system and their cables. Ì In order to avoid EMC interference, the physical environmental and operating conditions at the installation site of the device must comply with the requirements according to the standard DIN EN 60204-1:2006, section 4.4.2/EMC.
Important!
Ì If the device does not appear to function when the operating voltage is applied (e.g. green Power LED does not illuminate), the safety switch must be returned to the manufacturer. Ì To ensure the stated degree of protection is achieved, the cover screws must be tightened to a tightening torque of 1 Nm. Ì Tighten screw for the cover for the mechanical release to 0.5 Nm.

Operating Instructions Safety SystemsMGB-L1…-AR.-… / MGB-L2…-AR.-… and MGB-L1…-AP.-… / MGB-L2…-AP.-…
24 (translation of the original operating instructions) 119167-03-01/15
11.1. Notes about
Important!
Ì For use and operation as per the requirements 1), a power supply with the feature “for use in class 2 circuits” must be used. The same requirement applies to the safety outputs.Alternative solutions must comply with the following requirements:a) Electrically isolated power supply unit with a max. open-circuit voltage of 30 V/DC and a limited
current of max. 8 A.b) Electrically isolated power supply unit in combination with fuse as per UL248. This fuse should be
designed for max. 3.3 A and should be integrated into the 30 V DC voltage section. Ì The mounting of conduits directly on the MGB is not allowed. Cables are only allowed to be connected via suitable cable glands. For this purpose use EUCHNER cable gland of type EKP-M20/06U. Equivalent cable glands can be used if they are UL-listed (QCRV) and are suitable for the related cable diameter (22 AWG – 17 AWG).
1) Note on the scope of the UL approval: Only for applications as per NFPA 79 (Industrial Machinery). The devices have been tested as per the requirements of UL508 (protection against electric shock and fire).
11.2. Safety in case of faults Ì The operating voltage UB is reverse polarity protected. Ì The safety outputs FO1A/FO1B are short circuit-proof. Ì A short circuit between FI1A and FI1B or FO1A and FO1B is detected by the device. Ì A short circuit in the cable can be excluded by laying the cable with protection.
11.3. Fuse protection for power supplyThe power supply must be provided with fuse protection depending on the number of devices and current required for the outputs. The following rules apply:
Max. current consumption of an individual device Imax
Imax = IUB + IUA + IFO1A+FO1B
IUB = Device operating current (80 mA)
IUA = Load current of monitoring outputs OD, OT, OL and OI (4 x max. 50 mA) + solenoid + switches
IFO1A+FO1B = Load current of safety outputs FO1A + FO1B (2 x max. 200 mA)
ARMax. current consumption of a switch chain Σ Imax
Σ Imax = IFO1A+FO1B + n x (IUB + IUA)
n = Number of connected devices
Current assignment to the fuses
Current Fuse circuit F1 Fuse circuit F2
IUB 80 mA
IFO1A+FO1B (2 x max. 200 mA)
IUA
Isolenoid = 375 mA
IOD,OT,OL,OI = (4 x max. 50 mA)
Iswitches = max. 100 mA
(per switch)
Iindicators = max. 5 mA
(per indicator)

25119167-03-01/15 (translation of the original operating instructions)
Operating Instructions Safety SystemsMGB-L1…-AR.-… / MGB-L2…-AR.-… and MGB-L1…-AP.-… / MGB-L2…-AP.-…
EN
11.4. Requirements for connection cablesCAUTION
Risk of damage to equipment or malfunctions as a result of incorrect connection cables. Ì On the usage of other connection components, the requirements in the following table apply. EUCHNER provides no warranty for safe function in case of failure to comply with these require-ments.
Observe the following requirements with respect to the connection cables:
Parameter Value UnitConductor cross-section min. 0.13 mm²
R max. 60 Ω/km
C max. 120 nF/km
L max. 0.65 mH/km
11.5. Notes on cable layingLay all MGB connection cables in a common cable harness.
PLC
+ 24 V DC
cabinet
0 V
MGB-L.-...
FI1A/FI1B
FO1A/FO1B
UB 0V UA 0V
Important: lay cables in a common harness
Figure 15: Stipulated cable laying

Operating Instructions Safety SystemsMGB-L1…-AR.-… / MGB-L2…-AR.-… and MGB-L1…-AP.-… / MGB-L2…-AP.-…
26 (translation of the original operating instructions) 119167-03-01/15
11.6. Changing device configuration (using DIP switches)Tip!
You will find an animation on device configuration at www.euchner.de.
DIP switches
The devices can be configured using the DIP switches. The following settings are possible: Ì Changing system family (AR/AP switching) Ì Deactivating guard lock monitoring Ì Activating release monitoring (possible only with active guard lock monitoring)
Position of the switches
Item Description
1 DIP switches
2 Sticker with factory setting
Function of the switches
Detail Switch Function
A 1+2 on: Device is operated as AP system
off: Device is operated as AR system
B 3+4 on: Guard lock monitoring is deactivated
off: Guard lock monitoring is active (usually factory setting)
C 5 on: Configuration possible
off: Configuration inhibited (factory setting)
D 6 on: Release monitoring is activated
off: Release monitoring is deactivated (usually factory setting)
11.6.1. Changing system family (AR/AP switching)
CAUTION
Malfunction due to incorrect configuration or incorrect connection. Ì Note that the terminal assignment also changes on changing the configuration (see chapter 11.9. Terminal assignment and contact description on page 30).
1. Switch off power supply.2. Set DIP switches 1, 2 and 5 as shown.
For changing from AR => AP For changing from AP => AR
1
ON
2 3 4 5 6 1
ON
2 3 4 5 6
3. Switch on power supply for 5 s. ¨ The change is confirmed by the illumination of the Power LED. All other LEDs are off.
4. Switch off power supply and set DIP switch 5 to OFF.
¨ The next time the device is started, it operates in the operating mode set.
1
2
1
ON
2 3 4 5 6
A B C D
27119167-03-01/15 (translation of the original operating instructions)
Operating Instructions Safety SystemsMGB-L1…-AR.-… / MGB-L2…-AR.-… and MGB-L1…-AP.-… / MGB-L2…-AP.-…
EN
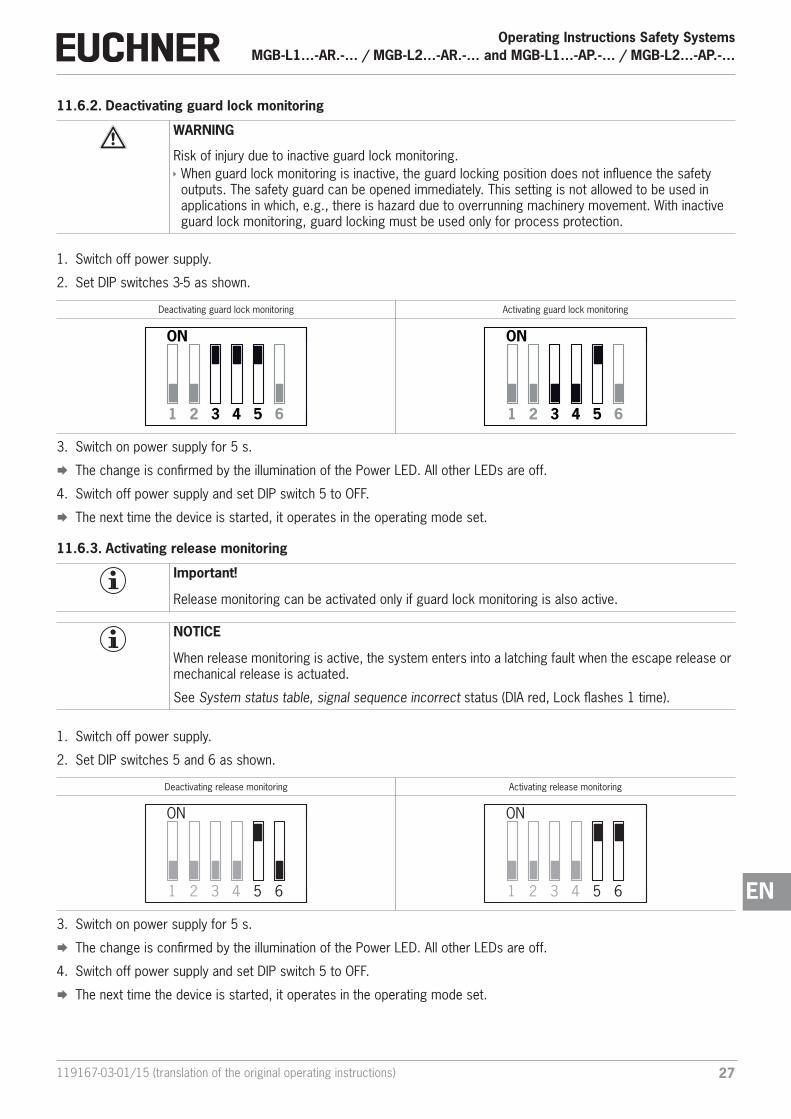
11.6.2. Deactivating guard lock monitoring
WARNING
Risk of injury due to inactive guard lock monitoring. Ì When guard lock monitoring is inactive, the guard locking position does not influence the safety outputs. The safety guard can be opened immediately. This setting is not allowed to be used in applications in which, e.g., there is hazard due to overrunning machinery movement. With inactive guard lock monitoring, guard locking must be used only for process protection.
1. Switch off power supply.
2. Set DIP switches 3-5 as shown.
Deactivating guard lock monitoring Activating guard lock monitoring
1
ON
2 3 4 5 6 1
ON
2 3 4 5 6
3. Switch on power supply for 5 s.
¨ The change is confirmed by the illumination of the Power LED. All other LEDs are off.
4. Switch off power supply and set DIP switch 5 to OFF.
¨ The next time the device is started, it operates in the operating mode set.
11.6.3. Activating release monitoring
Important!
Release monitoring can be activated only if guard lock monitoring is also active.
NOTICE
When release monitoring is active, the system enters into a latching fault when the escape release or mechanical release is actuated.
See System status table, signal sequence incorrect status (DIA red, Lock flashes 1 time).
1. Switch off power supply.
2. Set DIP switches 5 and 6 as shown.
Deactivating release monitoring Activating release monitoring
1
ON
2 3 4 5 6 1
ON
2 3 4 5 6
3. Switch on power supply for 5 s.
¨ The change is confirmed by the illumination of the Power LED. All other LEDs are off.
4. Switch off power supply and set DIP switch 5 to OFF.
¨ The next time the device is started, it operates in the operating mode set.

Operating Instructions Safety SystemsMGB-L1…-AR.-… / MGB-L2…-AR.-… and MGB-L1…-AP.-… / MGB-L2…-AP.-…
28 (translation of the original operating instructions) 119167-03-01/15
11.7. Notes on operation with control systemsPlease observe the following requirements for connection to safe control systems:
General notes Ì Use a common power supply for the control system and the connected safety switches. Ì A pulsed power supply must not be used for UB/UA. Tap the supply voltage directly from the power supply unit. If the supply voltage is connected to a terminal of a safe control system, this output must provide sufficient electrical current. Ì The safety outputs (FO1A and FO1B) can be connected to the safe inputs of a control system. Prerequisite: The input must be suitable for pulsed safety signals (OSSD signals, e.g. from light curtains). The control system must tolerate test pulses on the input signals. This normally can be set up by parameter assignment in the control system. Observe the notes of the control system manufacturer. For the pulse duration of your safety switch, please refer to the chapter 13. Technical data on page 36. Ì The inputs on an evaluation unit connected must be positive-switching, as the two outputs on the safety switch deliver a level of +24 V in the switched-on state.
AR Ì Always connect inputs FI1A and FI1B directly to a power supply unit or to outputs FO1A and FO1B of another EUCHNER AR device (series connection). Pulsed signals must not be present at inputs FI1A and FI1B. The test pulses are also present when the safety outputs are switched off (only on FO1A). Depending on the inertia of the connected device (control system, relay, etc.), this can lead to short switching processes.
Guard locking control Ì Test pulses up to max. 5 ms in duration at intervals of min. 100 ms are tolerated on IMP1, IMP2 and IMM.
The inputs on an evaluation unit connected must be positive-switching, as the two outputs on the safety switch deliver a level of +24 V in the switched-on state.
NOTICE
Due to the fact that short circuit monitoring of the safety outputs FO1A/FO1B is performed by the device itself, the Performance Level in accordance with EN 13849 is not reduced if the control system pulsing is switched off.
Tip!
A detailed example of connecting and setting the parameters of the control system is available for many devices at www.euchner.de in the area Download Applications MGB. The features of the respective device are dealt with there in greater detail.

29119167-03-01/15 (translation of the original operating instructions)
Operating Instructions Safety SystemsMGB-L1…-AR.-… / MGB-L2…-AR.-… and MGB-L1…-AP.-… / MGB-L2…-AP.-…
EN
11.8. Connection of guard locking control
MGB
O1
IMP1 IMP2 IMM
MGB
O1
IMP1 IMP2 IMM
O2
MGB
PLC PLC PLC
O1
IMP1 IMP2 IMM
O2
Jumper (default)
1-channel control1 x p-switching
2-channel control2 x p-switching
2-channel control1 x p-switching1 x n-switching
Figure 16: Connection option for guard locking control
With 2-channel control, the jumper between IMP1 and IMP2 must be removed. Connection as shown above. Further adapta-tions may be required for some device versions with plug connector M23 (RC18) (see data sheet).

Operating Instructions Safety SystemsMGB-L1…-AR.-… / MGB-L2…-AR.-… and MGB-L1…-AP.-… / MGB-L2…-AP.-…
30 (translation of the original operating instructions) 119167-03-01/15
11.9. Terminal assignment and contact description
X5
X3
X4
Power
X2
LEDs
State
DIA
Lock
GNGN
RD
YE
Reset
Jumper
Figure 17: Connections and indicator LED
Terminal Designation DescriptionX3.1 to X3.3 - See the enclosed data sheet
X3.4 UA Power supply for the guard locking solenoid, monitoring outputs and cover assembly, DC 24 V, must be present continuously so that the guard locking solenoid functions.
X3.5 0V Ground, DC 0 V (connected internally to X5.5).
X3.6 IMP2 Control voltage for switching the guard locking on and off, DC 24 V (see chapter 11.8. Connection of guard locking control on page 29). IMP1/IMP2 are usually bridged (jumper) as the default
setting on deliveryX3.7 IMP1 Control voltage for switching the guard locking on and off, DC 24 V (see chapter 11.8. Connection of guard locking control on page 29).
X3.8 IMM Control voltage for switching the guard locking on and off, 0 V (see chapter 11.8. Connection of guard locking control on page 29).
X4.1 FI1A In case of AR configuration: Enable input for channel A, connect to DC 24 V in separate operation. In case of switch chains, con-nect output signal FO1A from previous device. In case of AP configuration: Input is not evaluated.
X4.2 FI1B In case of AR configuration: Enable input for channel B, connect to DC 24 V in separate operation. In case of switch chains, con-nect output signal FO1B from previous device. In case of AP configuration: Input is not evaluated.
X4.3 - See the enclosed data sheet
X4.4 FO1A Safety output channel A (function dependent on DIP switch setting)Guard lock monitoring active: ON when door is closed and locked .Guard lock monitoring inactive: ON when door is closed and bolt tongue is retracted.
X4.5 FO1B Safety output channel B (function dependent on DIP switch setting)Guard lock monitoring active: ON when door is closed and locked .Guard lock monitoring inactive: ON when door is closed and bolt tongue is retracted.
X4.6 RST Reset input, device is reset if DC 24 V is applied to RST for at least 3 s.
X5.1 OD Door monitoring output, ON when the door is closed.
X5.2 OT Bolt tongue monitoring output,ON when the door is closed and the bolt tongue is inserted in the locking module.
X5.3 OL Guard locking monitoring output, ON when the door is closed and locked..
X5.4 OI Diagnostics monitoring output,ON when the device is in the fault state.
X5.5 0V Ground, DC 0 V (connected internally to X3.5).
X5.6 UB Power supply, DC 24 V
X2.1 to X2.8 - See the enclosed data sheet
X1 - Reserved for connection of the cover circuit board (only for populated covers)
Table 2: Terminal assignment and contact description

31119167-03-01/15 (translation of the original operating instructions)
Operating Instructions Safety SystemsMGB-L1…-AR.-… / MGB-L2…-AR.-… and MGB-L1…-AP.-… / MGB-L2…-AP.-…
EN
11.10. Operation as separate device
GND
+24 V DC
Connected load
Guard locking Controller
SafetyOutputs Monitoring Outputs
Safety Inputs
Guard Locking
| |
FI1B
X4:2
IMP1
X3:7
FO1B
X4:5
UA
X3:4
OI
X5:4
IMP2
X3:6
FI1A
X4:1
NC
X3:8
FO1A
X4:4
OD
X5:1
RST
X4:6
OT
X5:2
OL
X5:3
UB
X5:6
0V
X5:5
0V
X3:5
MGB
-F1 -F2
-S1
Figure 18: Connection example for separate operation
The switches can be reset via the RST input. To do this, a voltage of 24 V is applied to the RST input for at least 3 seconds. The supply voltage to the switches is interrupted during this time. The RST input must be connected to 0 V if it is not used.

Operating Instructions Safety SystemsMGB-L1…-AR.-… / MGB-L2…-AR.-… and MGB-L1…-AP.-… / MGB-L2…-AP.-…
32 (translation of the original operating instructions) 119167-03-01/15
11.11. Operation in an AR switch chain
AR
GND
+24 V DC
Connected load
SafetyOutputs Monitoring Outputs
Safety Inputs
Guard Locking
| |
FI1B
X4:2
IMP1
X3:7
FO1B
X4:5
UA
X3:4
OI
X5:4
IMP2
X3:6
FI1A
X4:1
NC
X3:8
FO1A
X4:4
OD
X5:1
RST
X4:6
OT
X5:2
OL
X5:3
UB
X5:6
0V
X5:5
0V
X3:5
MGB
SafetyOutputs Monitoring Outputs
Safety Inputs
Guard Locking
| |
FI1B
X4:2
IMP1
X3:7
FO1B
X4:5
UA
X3:4
OI
X5:4
IMP2
X3:6
FI1A
X4:1
NC
X3:8
FO1A
X4:4
OD
X5:1
RST
X4:6
OT
X5:2
OL
X5:3
UB
X5:6
0V
X5:5
0V
X3:5
MGB
-F1 -F2
-F3 -F4 Guard locking Controller
-S1
Figure 19: Connection examples for operation in a CES-AR switch chain
For detailed information on operation in an AR switch chain, see the related CES-AR operating instructions. The locking module MGB-L1-AR-…/MGB-L2-AR-… behaves in the switch chain in practice like a safety switch CES-AR. The differences to the CES-AR are described in the following.

33119167-03-01/15 (translation of the original operating instructions)
Operating Instructions Safety SystemsMGB-L1…-AR.-… / MGB-L2…-AR.-… and MGB-L1…-AP.-… / MGB-L2…-AP.-…
EN
11.12. Notes on operation in an AR switch chain
AR11.12.1. System times
The locking module has longer reaction times than a CES-AR switch (see chapters 13. Technical data on page 36 and 13.1. Typical system times on page 37).
11.12.2. Wiring an AR switch chain
To prevent earth loops, the wiring should be in a star configuration (see Figure 20).
CES-AR
terminating plug
CES-AR
CES-AR
PLC
MGB-L.-AR...
+ 24 V DC
cabinet
0 V
FI1A/FI1B
FI1A/FI1B
FO1A/FO1B
FI1A/FI1B
FO1A/FO1B
UB 0V UA 0V
#1
#2
#3
#4 MGB-L.-AR...#5
FI1A/FI1B
FO1A/FO1B
FI1A/FI1B
FO1A/FO1B
UB 0V UA 0V
FO1A/FO1B
Important: lay cables in a common harness
Figure 20: Central wiring of an AR switch chain in the control cabinet
11.12.3. Number of devices in the switch chains
In a pure MGB switch chain a maximum of ten devices can be connected in series. In mixed switch chains (e.g. MGB together with CES-AR) the maximum number of devices is also ten.
11.12.4. Resetting in switch chains
Important!
Use the reset input (RST) for resetting in AR switch chains. All devices in the chain must be reset simultaneously. Resetting individual switches will result in faults.

Operating Instructions Safety SystemsMGB-L1…-AR.-… / MGB-L2…-AR.-… and MGB-L1…-AP.-… / MGB-L2…-AP.-…
34 (translation of the original operating instructions) 119167-03-01/15
12. Setup12.1. Teach-in operation (only for MGB unicode)The handle module must be assigned to the locking module using a teach-in function before the system comprising locking module and handle module and forms a functional unit.
During a teach-in operation the safety outputs are switched off.
Important!
Ì The locking module disables the code for the previous handle module if teach-in is carried out for a new handle module. Teach-in is not possible again immediately for this actuator if a new teach-in operation is carried out. The disabled code is deleted in the locking module only after a third code has been taught. Ì The locking module can only be operated with the last handle module taught. Ì If, in the teach-in standby state, the locking module detects the handle module taught-in or a disabled handle module, the teach-in standby state is ended immediately and the locking module changes to the normal state. Ì If the bolt tongue is in the operating distance for less than 60 s, the handle module is not taught.
Tip!
A teach-in adapter (order no. 122369) is available for easier teach-in of already mounted AR devices or for device replacement. It is simply inserted between the connecting cable and the AR device. The device immediately enters teach-in operation on reconnection. After teach-in, the adapter is removed again and the MGB is connected normally. It is not necessary to fit a jumper (e.g. in the control cabinet).
Teaching in handle module
1. Fit handle module.
2. Close safety guard. Check for correct alignment and distance using the marking on the locking module and re-adjust if necessary.
3. Insert bolt tongue in the locking module.
4. Apply operating voltage to the locking module.
¨ The green LED (State) flashes quickly (approx. 5 Hz). A self-test is performed during this time (approx. 10 s in case of AR configuration). Teach-in operation starts, green LED (State) flashes slowly (approx. 1 Hz). During teach-in, the locking module checks whether the handle module is a disabled handle module. Provided this is not the case, the teach-in oper-ation is completed after approx. 60 seconds, and the green LED (State) goes out. The new code has now been stored, and the old code is disabled.
5. To activate the handle module’s code from the teach-in operation in the locking module, the operating voltage must then be switched off at the locking module for min. 3 seconds. As an alternative, 24V can be applied to the input RST for min. 3 seconds.
Teach-in in a series connection works analogously. Here, the complete series connection must be restarted using the input RST.
12.2. Mechanical function testIt must be possible to easily insert the bolt tongue in the locking module. To check, close safety guard several times and actuate door handle.
If available, check function of the escape release. With active guard locking it must be possible to operate the escape release from the inside without excessive effort (approx. 40 N).

35119167-03-01/15 (translation of the original operating instructions)
Operating Instructions Safety SystemsMGB-L1…-AR.-… / MGB-L2…-AR.-… and MGB-L1…-AP.-… / MGB-L2…-AP.-…
EN
Electrical function test
ARWARNING
On usage in a switch chain with different AR devices (e.g. CES-AR, CET-AR), also follow the procedure for the functional check in the related operating instructions.
DIPOFF
ON With active guard lock monitoring
1. Switch on operating voltage.
¨ The locking module carries out a self-test. In case of AR configuration: The green State LED flashes for 10 s with 5 Hz. The green State LED then flashes at regular intervals.
2. Close all safety guards and insert the bolt tongue into the locking module. Guard locking by solenoid force: activate guard locking.
¨ The safety outputs FO1A/FO1B are ON.
¨ The machine must not start automatically.
¨ It must not be possible to open the safety guard.
¨ The green State LED and the yellow Lock LED are illuminated continuously.
3. Enable operation in the control system.
¨ It must not be possible to deactivate guard locking as long as operation is enabled.
4. Disable operation in the control system and deactivate guard locking.
¨ The safety guard must remain locked until there is no longer any risk of injury.
¨ It must not be possible to start the machine as long as the guard locking is deactivated.
¨ It must be possible to open the safety guard.
Repeat steps 2-4 for each safety guard.
With inactive guard lock monitoring
1. Switch on operating voltage.
¨ The locking module carries out a self-test. In case of AR configuration: The green State LED flashes for 10 s with 5 Hz. The green State LED then flashes at regular intervals.
2. Close all safety guards and insert the bolt tongue into the locking module. As soon as the bolt tongue is insert-ed in the locking module, the safety outputs FO1A/FO1B are ON. Independent of whether the guard locking is active or not.
¨ The machine must not start automatically.
¨ The green State LED illuminates continuously. The yellow Lock LED is ON for a long time with a short interruption or is ON continuously (depending on the state of the guard locking).
3. Enable operation in the control system.
4. If necessary deactivate guard locking and open safety guard.
¨ The machine must switch off and it must not be possible to start it as long as the safety guard is open.
Repeat steps 2-4 for each safety guard.

Operating Instructions Safety SystemsMGB-L1…-AR.-… / MGB-L2…-AR.-… and MGB-L1…-AP.-… / MGB-L2…-AP.-…
36 (translation of the original operating instructions) 119167-03-01/15
13. Technical dataNOTICE
If a product data sheet is included with the product, the information on the data sheet applies in case of discrepancies with the operating instructions.
Parameter Value UnitHousing material Glass fiber reinforced plastic;
die-cast zinc, nickel-plated;stainless steel
Dimensions See chapter 7.4. Dimension drawing on page 13WeightLocking moduleHandle moduleEscape release
0.751.000.50
kg
Ambient temperature at UB = DC 24 V -20 … +55 °CDegree of protectionCover not populated/populated with buttons/indi-cators/selector switchesCover populated with key-operated rotary switchCover populated with key-operated rotary switch FS22
IP 65IP 54IP 42
Safety class IIIDegree of contamination 3Installation position AnyLocking force Fzh acc. to EN ISO 14119 2,000 NConnection 4 cable entries M20x1.5 or plug connectorConductor cross-section (rigid/flexible)- With ferrule according to DIN 46228/1- With ferrule with collar according to DIN 46228/1
0.13 … 1.5 (AWG 24 … AWG 16)0.25 … 1.50.25 … 0.75
mm²
Operating voltage UB (reverse polarity protected, regulated, residual ripple < 5%)
24 +10% / -15% (PELV) V DC
Auxiliary voltage UA (reverse polarity protected, regulated, residual ripple < 5%)
24 +10% / -15% (PELV) V DC
Current consumption IUB (no load on any outputs) 80 mACurrent consumption IUA- With energized guard locking solenoid and
unloaded outputs (OI, OL, OT and OD)- Push button S (unloaded, per LED)
3755
mA
External fuse See chapter 11.3. Fuse protection for power supply on page 24Safety outputs FO1A/FO1B Semiconductor outputs, p-switching, short circuit-proofTest pulses AR < 1,000/AP < 300 µsTest pulse interval Min. 100 msOutput voltage UFO1A / UFO1B 1)
HIGH UFO1A / UFO1B UB-2V … UB LOW UFO1A / UFO1B 0 … 1 V DCSwitching current per safety output 1 … 200 mASwitching current per control input IMP1, IMP2 and IMM
20 … 25 mA
Utilization category according to EN IEC 60947-5-2 DC-13 24 V 200 mA Caution: outputs must be protected with a free-wheeling diode in case of inductive loads.
Monitoring outputs- Output voltage 1)
- Max. load
p-switching, short circuit-proofUA - 2V … UA
Max. 50 mARated insulation voltage Ui 30 VRated impulse withstand voltage Uimp 1.5 kVResilience to vibration In acc. with EN IEC 60947-5-3Switching frequency 0.25 HzEMC protection requirements In acc. with EN IEC 60947-5-3Reliability values acc. to EN ISO 13849-1 Guard lock monitoring Control of the guard lockingCategory 4 4Performance Level PL e PL ePFHd 3.7 x 10 -9 / h 2) 2.8 x 10 -9 / h 2)
Mission time 20 20 yearsB10d (emergency stop) 0.065 x 10⁶
Emergency stopOperating voltage 5 … 24 VOperating current 1 … 100 mABreaking capacity max. 250 mWPower supply LED 24 V DCControls and indicatorsOperating voltage UA VOperating current 1 … 10 mABreaking capacity max. 250 mWPower supply LED 24 V DC
1) Values at a switching current of 50 mA without taking into account the cable length.2) Applying the limit value from EN ISO 13849-1:2008, section 4.5.2 (MTTFd = max. 100 years), the employers’ liability insurance association certifies a PFHd of max. 2.47 x 10⁻⁸.

37119167-03-01/15 (translation of the original operating instructions)
Operating Instructions Safety SystemsMGB-L1…-AR.-… / MGB-L2…-AR.-… and MGB-L1…-AP.-… / MGB-L2…-AP.-…
EN
13.1. Typical system timesImportant!
The system times given are maximum values for one device.
Ready delay:
ARIn case of AR configuration the following applies: After switching on, the unit carries out a self-test for 10 s. The system is ready for operation only after this time.
APIn case of AP configuration the following applies: After switching on, the unit carries out a self-test for 0.5 s. The system is ready for operation only after this time.
Switch-on time of safety outputs:
ARIn case of AR configuration the following applies: The max. reaction time from the moment when the safety guard is locked to the moment when the safety outputs switch on Ton is 570 ms.
APIn case of AP configuration the following applies: The max. reaction time from the moment when the bolt tongue is inserted to the moment when the safety outputs switch on Ton is 570 ms.
ARSimultaneity monitoring, safety inputs FI1A/FI1B: If the safety inputs have different switching states for longer than 150 ms, the safety outputs FO1A/FO1B will be switched off. The device switches to fault state.
Risk time according to EN 60947-5-3:
DIPOFF
ON With active guard lock monitoring the following applies: If the guard locking is no longer effective, the safety outputs FO1A and FO1B are deactivated after a maximum of 350 ms.
This value applies to a single switch. For each additional switch in a chain the risk time increases by 5 ms.
DIPOFF
ON With inactive guard lock monitoring the following applies: If the bolt tongue is pulled out of the locking module, the safety outputs FO1A and FO1B are deactivated after a maximum of 350 ms.
This value applies to a single switch. For each additional switch in a chain the risk time increases by 5 ms.
Difference time: The safety outputs FO1A and FO1B switch with a slight delay in relation to each other. They both have the ON state at the latest after a difference time of 10 ms.
Time offset: The max. permissible time offset between switch-on of operating voltage UB and auxiliary voltage UA is 1 s.
14. System states14.1. Key to symbols
LED not illuminated
LED illuminated
10 Hz (8 s) LED flashes for 8 seconds at 10 Hz
3 x LED flashes three times
X Any stateLock ye
LEDPower gnState gnDIA rd

Operating Instructions Safety SystemsMGB-L1…-AR.-… / MGB-L2…-AR.-… and MGB-L1…-AP.-… / MGB-L2…-AP.-…
38 (translation of the original operating instructions) 119167-03-01/15
14.2. MGB-AR system status tableO
pera
ting
mod
e
Safety outputs FI1A and FI1B
Door position
Position of the bolt tongue
Guard locking
Safety outputs FO1A and FO1B
Door monitoring output (OD)
Bolt tongue monitoring output (OT)
Guard locking monitor-ing output (OL)
Diagnostics monitoring output (OI)
LED
indi
cato
r
Stat
e
Power (green)
STATE (green)
DIA (red)
Lock (yellow)
Self-
test
XX
XX
OFF
OFF
OFF
OFF
OFF
5 Hz
Self-
test
afte
r po
wer
up
Nor
mal
ope
r-at
ion
Xop
enno
t ins
erte
dO
FFO
FFO
FFO
FFO
FFO
FFLo
ng O
FF
shor
t ON
Nor
mal
ope
ratio
n, d
oor
open
Xcl
osed
not i
nser
ted
OFF
OFF
ON
OFF
OFF
OFF
Long
ON
, sh
ort O
FFN
orm
al o
pera
tion,
doo
r cl
osed
OFF
clos
edin
sert
edO
FFO
FFO
NO
NO
FFO
FFLo
ng O
N,
shor
t OFF
Long
ON
, sh
ort O
FFN
orm
al o
pera
tion,
doo
r cl
osed
, bol
t ton
gue
inse
rted
saf
ety
inpu
ts F
I1A/
FI1B
OFF
ON
clos
edin
sert
edO
FF
OFF
ON
ON
OFF
OFF
Long
ON
, sh
ort O
FFLo
ng O
N,
shor
t OFF
With
act
ive
guar
d lo
ck m
onito
ring
: Nor
mal
ope
ratio
n, d
oor
clos
ed, b
olt t
ongu
e in
sert
ed. S
afet
y in
puts
FI
1A/F
I1B
are
ON
. Saf
ety
outp
uts
FO1A
and
FO
1B
are
OFF
ON
With
inac
tive
guar
d lo
ck m
onito
ring
: Nor
mal
ope
ratio
n, d
oor
clos
ed, b
olt t
ongu
e in
sert
ed. S
afet
y in
puts
FI
1A/F
I1B
are
ON
. Saf
ety
outp
uts
FO1A
and
FO
1B a
re O
N
OFF
clos
edin
sert
edO
NO
FFO
NO
NO
NO
FFLo
ng O
N,
shor
t OFF
Ope
ratio
n in
an
AR c
hain
: Nor
mal
ope
ratio
n, d
oor
clos
ed a
nd lo
cked
. Saf
ety
outp
uts
on th
e pr
evio
us
devi
ce O
FF
ON
clos
edin
sert
edO
NO
NO
NO
NO
NO
FFO
pera
tion
as s
epar
ate
devi
ce: N
orm
al o
pera
tion,
doo
r cl
osed
and
lock
ed.
Ope
ratio
n in
an
AR c
hain
: Nor
mal
ope
ratio
n, d
oor
clos
ed a
nd lo
cked
. Saf
ety
outp
uts
on th
e pr
evio
us
devi
ce O
N
Teac
h-in
sta
ndby
(onl
y fo
r M
GB
unic
ode)
Xop
enno
t ins
erte
dO
FFO
FFO
FFO
FFO
FFO
FF3
xDo
or o
pen;
dev
ice
is re
ady
for
teac
h-in
of a
noth
er h
andl
e m
odul
e (o
nly
3 m
in. a
fter
Pow
er U
P)
Setu
p(o
nly
for
MG
B un
icod
e)
Xcl
osed
inse
rted
ON
OFF
OFF
OFF
OFF
OFF
1 Hz
Teac
h-in
ope
ratio
n, ti
p: T
o pr
even
t the
inte
rrup
tion
of te
ach-
in o
pera
tions
, clo
se d
oor
and
switc
h on
gua
rd
lock
ing
XX
XX
OFF
OFF
OFF
OFF
OFF
Posi
tive
ackn
owle
dgm
ent a
fter
com
plet
ion
of te
ach-
in o
pera
tion
Dia
gnos
tics
XX
XX
OFF
OFF
OFF
OFF
ON
1 x
Erro
r du
ring
teac
h-in
/con
figur
atio
n or
inva
lid D
IP s
witc
h se
tting
erro
ne-
ous
XX
XO
FFO
FFO
FFO
FFO
N2
xFI
1A/F
I1B
inpu
t err
or (e
.g. m
issi
ng te
st p
ulse
s, il
logi
cal s
witc
hing
sta
te fr
om p
revi
ous
switc
h)
XX
XX
OFF
XX
XO
FF3
xHa
ndle
mod
ule
read
err
or (e
.g. e
rror
in c
ode)
XX
XX
OFF
OFF
OFF
OFF
ON
4 x
Out
put f
ault
(e.g
. sho
rt c
ircui
t, lo
ss o
f sw
itchi
ng c
apab
ility)
or
shor
t circ
uit a
t the
out
puts
XX
XX
XO
FFO
FFO
FFO
NIn
tern
al fa
ult (
e.g.
com
pone
nt fa
ulty
, dat
a er
ror)
XX
XX
OFF
OFF
OFF
OFF
ON
1 x
Sign
al s
eque
nce
erro
neou
s (e
.g. b
roke
n bo
lt to
ngue
)W
ith a
ctiv
e re
leas
e m
onito
ring:
esc
ape
rele
ase
or m
echa
nica
l rel
ease
was
act
uate
d
XX
XX
XO
FFO
FFO
FFO
N2
xCo
ntro
l inp
uts
IMP1
, IM
P2, I
MM
inva
lid; s
witc
h co
ntro
l inp
uts
off f
or m
in. ½
s a
nd s
witc
h on
aga
in to
rese
t
Afte
r re
med
ying
the
caus
e, u
se th
e re
set f
unct
ion
(see
cha
pter
15.
Tro
uble
shoo
ting
and
assi
stan
ce o
n pa
ge 4
0) o
r br
iefly
dis
conn
ect t
he p
ower
sup
ply.
Ple
ase
cont
act t
he m
anuf
actu
rer
if th
e fa
ult c
ould
not
be
rese
t afte
r re
star
ting.
Impo
rtan
t: If
you
do n
ot fi
nd th
e di
spla
yed
devi
ce s
tatu
s in
the
Syst
em s
tatu
s ta
ble,
this
indi
cate
s an
inte
rnal
dev
ice
faul
t. In
this
cas
e, y
ou s
houl
d co
ntac
t the
man
ufac
ture
r.

39119167-03-01/15 (translation of the original operating instructions)
Operating Instructions Safety SystemsMGB-L1…-AR.-… / MGB-L2…-AR.-… and MGB-L1…-AP.-… / MGB-L2…-AP.-…
EN
14.3. MGB-AP system status tableO
pera
ting
mod
e
Door position
Position of the bolt tongue
Guard locking
Safety outputs FO1A and FO1B
Door monitoring output (OD)
Bolt tongue monitoring output (OT)
Guard locking monitor-ing output (OL)
Diagnostics monitoring output (OI)
LED
indi
cato
r
Stat
e
Power (green)
State (green)
DIA (red)
Lock (yellow)
Nor
mal
ope
r-at
ion
open
not i
nser
ted
OFF
OFF
OFF
OFF
OFF
OFF
Long
OFF
sh
ort O
NN
orm
al o
pera
tion,
doo
r op
en
clos
edno
t ins
erte
dO
FFO
FFO
NO
FFO
FFO
FFLo
ng O
N,
shor
t OFF
Nor
mal
ope
ratio
n, d
oor
clos
ed
clos
edin
sert
edO
FF
OFF
ON
ON
OFF
OFF
Long
ON
, sh
ort O
FFLo
ng O
N,
shor
t OFF
With
act
ive
guar
d lo
ck m
onito
ring
: Nor
mal
ope
ratio
n, d
oor
clos
ed, b
olt t
ongu
e in
sert
ed. S
afet
y ou
tput
s FO
1A
and
FO1B
a
re O
FF
ON
With
inac
tive
guar
d lo
ck m
onito
ring
: Nor
mal
ope
ratio
n, d
oor
clos
ed, b
olt t
ongu
e in
sert
ed. S
afet
y ou
tput
s FO
1A
and
FO1B
are
ON
clos
edin
sert
edO
NO
NO
NO
NO
NO
FFN
orm
al o
pera
tion,
doo
r cl
osed
and
lock
ed.
Teac
h-in
sta
ndby
(onl
y fo
r M
GB
unic
ode)
open
not i
nser
ted
OFF
OFF
OFF
OFF
OFF
OFF
3 x
Door
ope
n; d
evic
e is
read
y fo
r te
ach-
in o
f ano
ther
han
dle
mod
ule
(onl
y 3
min
. afte
r Po
wer
UP)
Setu
p(o
nly
for
MG
B un
icod
e)
clos
edin
sert
edO
NO
FFO
FFO
FFO
FFO
FF1
HzTe
ach-
in o
pera
tion,
tip:
To
prev
ent t
he in
terr
uptio
n of
teac
h-in
ope
ratio
ns, c
lose
doo
r an
d sw
itch
on g
uard
lock
ing
XX
XO
FFO
FFO
FFO
FFO
FFPo
sitiv
e ac
know
ledg
men
t afte
r co
mpl
etio
n of
teac
h-in
ope
ratio
n
Dia
gnos
tics
XX
XO
FFO
FFO
FFO
FFO
N1
xEr
ror
durin
g te
ach-
in/c
onfig
urat
ion
or in
valid
DIP
sw
itch
setti
ng
XX
XO
FFX
XX
OFF
3 x
Hand
le m
odul
e re
ad e
rror
(e.g
. err
or in
cod
e)
XX
XO
FFO
FFO
FFO
FFO
N4
xO
utpu
t fau
lt (e
.g. s
hort
circ
uit,
loss
of s
witc
hing
cap
abilit
y) o
r sh
ort c
ircui
t at t
he o
utpu
ts
XX
XX
OFF
OFF
OFF
ON
Inte
rnal
faul
t (e.
g. c
ompo
nent
faul
ty, d
ata
erro
r)
XX
XO
FFO
FFO
FFO
FFO
N1
xSi
gnal
seq
uenc
e er
rone
ous
(e.g
. bro
ken
bolt
tong
ue)
With
act
ive
rele
ase
mon
itorin
g: e
scap
e re
leas
e or
mec
hani
cal r
elea
se w
as a
ctua
ted
XX
XX
OFF
OFF
OFF
ON
2 x
Cont
rol i
nput
s IM
P1, I
MP2
, IM
M in
valid
; sw
itch
cont
rol i
nput
s of
f for
min
. ½ s
and
sw
itch
on a
gain
to re
set
Afte
r re
med
ying
the
caus
e, u
se th
e re
set f
unct
ion
(see
cha
pter
15.
Tro
uble
shoo
ting
and
assi
stan
ce o
n pa
ge 4
0) o
r br
iefly
dis
conn
ect t
he p
ower
sup
ply.
Ple
ase
cont
act t
he m
anuf
actu
rer
if th
e fa
ult c
ould
not
be
rese
t afte
r re
star
ting.
Impo
rtan
t: If
you
do n
ot fi
nd th
e di
spla
yed
devi
ce s
tatu
s in
the
Syst
em s
tatu
s ta
ble,
this
indi
cate
s an
inte
rnal
dev
ice
faul
t. In
this
cas
e, y
ou s
houl
d co
ntac
t the
man
ufac
ture
r.

Operating Instructions Safety SystemsMGB-L1…-AR.-… / MGB-L2…-AR.-… and MGB-L1…-AP.-… / MGB-L2…-AP.-…
40 (translation of the original operating instructions) 119167-03-01/15
15. Troubleshooting and assistance15.1. Fault resetProceed as follows:
1. Open the safety guard.
2. Switch off operating voltage at the locking module for min. 3 seconds or connect 24 V to the input RST for min. 3 seconds. Alternatively, the internal reset (see 7. System overview on page 12) can be pressed for 3 seconds with a pointed object, e.g. ball-point pen.
¨ The green LED (State) flashes quickly (approx. 5 Hz in case of AR configuration). A self-test is performed during this time (approx. 10 s in case of AR configuration). The LED then cyclically flashes three times.
2. Close safety guard and switch guard locking on.
¨ The system is in normal mode again.
15.2. Help on troubleshooting in the InternetYou will find a help file on troubleshooting under “Support” in the service area at www.euchner.de.
15.3. Help on mounting in the InternetYou will find an animation on the mounting process at www.euchner.de.
15.4. Application examplesYou will find application examples on connecting the device to various control systems at www.euchner.de.
16. ServiceIf service support is required, please contact:EUCHNER GmbH + Co. KGKohlhammerstraße 16D-70771 Leinfelden-Echterdingen
Service telephone:
+49 711 7597-500
E-mail:
Internet:
www.euchner.de

41119167-03-01/15 (translation of the original operating instructions)
Operating Instructions Safety SystemsMGB-L1…-AR.-… / MGB-L2…-AR.-… and MGB-L1…-AP.-… / MGB-L2…-AP.-…
EN
17. Inspection and serviceWARNING
Loss of the safety function because of damage to the system.In case of damage, the affected module must be replaced completely. Only accessories or spare parts that can be ordered from EUCHNER may be replaced.
Regular inspection of the following is necessary to ensure trouble-free long-term operation: Ì Check the switching function (see section Electrical function test on page 35) Ì Check the secure fastening of the devices and the connections Ì Check for soiling
No servicing is required; repairs to the device are only allowed to be made by the manufacturer.
NOTICE
The year of manufacture can be seen in the lower right corner of the rating plate.

Operating Instructions Safety SystemsMGB-L1…-AR.-… / MGB-L2…-AR.-… and MGB-L1…-AP.-… / MGB-L2…-AP.-…
42 (translation of the original operating instructions) 119167-03-01/15
18. Declaration of conformity

43119167-03-01/15 (translation of the original operating instructions)
Operating Instructions Safety SystemsMGB-L1…-AR.-… / MGB-L2…-AR.-… and MGB-L1…-AP.-… / MGB-L2…-AP.-…
EN

Euchner GmbH + Co. KGKohlhammerstraße 16D-70771 [email protected]
Edition:119167-03-01/15Title: Operating Instructions Safety Systems MGB-L1…-AR.-… / MGB-L2…-AR.-… and MGB-L1…-AP.-… / MGB-L2…-AP.-… from V3.0.0 (translation of the original operating instructions)Copyright:© EUCHNER GmbH + Co. KG, 01/2015
Subject to technical modifications; no responsibility is accept-ed for the accuracy of this information.