red hat openstack platform 10 openstack integration test ... · red hat openstack platform 10...
TRANSCRIPT
Red Hat OpenStack Platform 10
OpenStack Integration Test Suite Guide
Introduction to the OpenStack Integration Test Suite
Last Updated: 2018-03-22

Red Hat OpenStack Platform 10 OpenStack Integration Test Suite Guide
Introduction to the OpenStack Integration Test Suite
OpenStack [email protected]
Legal Notice
Copyright © 2018 Red Hat, Inc.
The text of and illustrations in this document are licensed by Red Hat under a Creative CommonsAttribution–Share Alike 3.0 Unported license ("CC-BY-SA"). An explanation of CC-BY-SA isavailable athttp://creativecommons.org/licenses/by-sa/3.0/. In accordance with CC-BY-SA, if you distribute this document or an adaptation of it, you mustprovide the URL for the original version.
Red Hat, as the licensor of this document, waives the right to enforce, and agrees not to assert,Section 4d of CC-BY-SA to the fullest extent permitted by applicable law.
Red Hat, Red Hat Enterprise Linux, the Shadowman logo, JBoss, OpenShift, Fedora, the Infinitylogo, and RHCE are trademarks of Red Hat, Inc., registered in the United States and othercountries.
Linux ® is the registered trademark of Linus Torvalds in the United States and other countries.
Java ® is a registered trademark of Oracle and/or its affiliates.
XFS ® is a trademark of Silicon Graphics International Corp. or its subsidiaries in the United Statesand/or other countries.
MySQL ® is a registered trademark of MySQL AB in the United States, the European Union andother countries.
Node.js ® is an official trademark of Joyent. Red Hat Software Collections is not formally related toor endorsed by the official Joyent Node.js open source or commercial project.
The OpenStack ® Word Mark and OpenStack logo are either registered trademarks/service marksor trademarks/service marks of the OpenStack Foundation, in the United States and other countriesand are used with the OpenStack Foundation's permission. We are not affiliated with, endorsed orsponsored by the OpenStack Foundation, or the OpenStack community.
All other trademarks are the property of their respective owners.
Abstract
This guide provides instructions to install, configure and manage the OpenStack Integration TestSuite in a Red Hat OpenStack Platform environment.
. . . . . . . . . . . . . . . . . . . . . . . . . . . . . . . . . . . . . . . . . . . . . . . . . . . . . . . . . . . . . . . . . . . . . . . . . . . . . . . . . . . . . . . . . . . . . . . . . . . . . . . . . . . . . . . . . . . . . . . . . . . . . . . . . . . . . . . . . . . . . . . . . . . . . . . . . . . . . . . . . . . . . . . . . . . . . . . . . . . . . . . . . . . . . . . . . . . . . . . . . . . . . . . . . . . . . . . . . . . . . . . . . . . . . . . . . . . . . . . . . . . . . . . . . . . . . . . . . . . . . . . . . . . . . . . . . . . . . . . .
. . . . . . . . . . . . . . . . . . . . . . . . . . . . . . . . . . . . . . . . . . . . . . . . . . . . . . . . . . . . . . . . . . . . . . . . . . . . . . . . . . . . . . . . . . . . . . . . . . . . . . . . . . . . . . . . . . . . . . . . . . . . . . . . . . . . . . . . . . . . . . . . . . . . . . . . . . . . . . . . . . . . . . . . . . . . . . . . . . . . . . . . . . . . . . . . . . . . . . . . . . . . . . . . . . . . . . . . . . . . . . . . . . . . . . . . . . . . . . . . . . . . . . . . . . . . . . . . . . . . . . . . . . . . . . . . . . . . . . . .
. . . . . . . . . . . . . . . . . . . . . . . . . . . . . . . . . . . . . . . . . . . . . . . . . . . . . . . . . . . . . . . . . . . . . . . . . . . . . . . . . . . . . . . . . . . . . . . . . . . . . . . . . . . . . . . . . . . . . . . . . . . . . . . . . . . . . . . . . . . . . . . . . . . . . . . . . . . . . . . . . . . . . . . . . . . . . . . . . . . . . . . . . . . . . . . . . . . . . . . . . . . . . . . . . . . . . . . . . . . . . . . . . . . . . . . . . . . . . . . . . . . . . . . . . . . . . . . . . . . . . . . . . . . . . . . . . . . . . . . .
. . . . . . . . . . . . . . . . . . . . . . . . . . . . . . . . . . . . . . . . . . . . . . . . . . . . . . . . . . . . . . . . . . . . . . . . . . . . . . . . . . . . . . . . . . . . . . . . . . . . . . . . . . . . . . . . . . . . . . . . . . . . . . . . . . . . . . . . . . . . . . . . . . . . . . . . . . . . . . . . . . . . . . . . . . . . . . . . . . . . . . . . . . . . . . . . . . . . . . . . . . . . . . . . . . . . . . . . . . . . . . . . . . . . . . . . . . . . . . . . . . . . . . . . . . . . . . . . . . . . . . . . . . . . . . . . . . . . . . . .
. . . . . . . . . . . . . . . . . . . . . . . . . . . . . . . . . . . . . . . . . . . . . . . . . . . . . . . . . . . . . . . . . . . . . . . . . . . . . . . . . . . . . . . . . . . . . . . . . . . . . . . . . . . . . . . . . . . . . . . . . . . . . . . . . . . . . . . . . . . . . . . . . . . . . . . . . . . . . . . . . . . . . . . . . . . . . . . . . . . . . . . . . . . . . . . . . . . . . . . . . . . . . . . . . . . . . . . . . . . . . . . . . . . . . . . . . . . . . . . . . . . . . . . . . . . . . . . . . . . . . . . . . . . . . . . . . . . . . . . .
. . . . . . . . . . . . . . . . . . . . . . . . . . . . . . . . . . . . . . . . . . . . . . . . . . . . . . . . . . . . . . . . . . . . . . . . . . . . . . . . . . . . . . . . . . . . . . . . . . . . . . . . . . . . . . . . . . . . . . . . . . . . . . . . . . . . . . . . . . . . . . . . . . . . . . . . . . . . . . . . . . . . . . . . . . . . . . . . . . . . . . . . . . . . . . . . . . . . . . . . . . . . . . . . . . . . . . . . . . . . . . . . . . . . . . . . . . . . . . . . . . . . . . . . . . . . . . . . . . . . . . . . . . . . . . . . . . . . . . . .
. . . . . . . . . . . . . . . . . . . . . . . . . . . . . . . . . . . . . . . . . . . . . . . . . . . . . . . . . . . . . . . . . . . . . . . . . . . . . . . . . . . . . . . . . . . . . . . . . . . . . . . . . . . . . . . . . . . . . . . . . . . . . . . . . . . . . . . . . . . . . . . . . . . . . . . . . . . . . . . . . . . . . . . . . . . . . . . . . . . . . . . . . . . . . . . . . . . . . . . . . . . . . . . . . . . . . . . . . . . . . . . . . . . . . . . . . . . . . . . . . . . . . . . . . . . . . . . . . . . . . . . . . . . . . . . . . . . . . . . .
Table of Contents
PREFACE
CHAPTER 1. INTRODUCTION
CHAPTER 2. OPENSTACK INTEGRATION TEST SUITE TESTS2.1. SCENARIO TESTS2.2. API TESTS
CHAPTER 3. INSTALLING THE OPENSTACK INTEGRATION TEST SUITE3.1. USING THE DIRECTOR3.2. PREPARING A MANUAL INSTALLATION3.3. INSTALLING THE OPENSTACK INTEGRATION TEST SUITE PACKAGES
3.3.1. List of Tempest Plug-in Packages
CHAPTER 4. CONFIGURING THE OPENSTACK INTEGRATION TEST SUITE4.1. CREATING A WORKSPACE4.2. VERIFYING YOUR TEMPEST CONFIGURATION4.3. CHANGING THE LOGGING CONFIGURATION4.4. CONFIGURING MICROVERSION TESTS
CHAPTER 5. USING OSTESTR TO RUN TEMPEST5.1. RUNNING SMOKE TESTS5.2. RUNNING SPECIFIC TESTS USING WHITELIST FILES5.3. SKIPPING TESTS USING BLACKLIST FILES5.4. RUNNING TESTS IN PARALLEL CONCURRENTLY, OR SERIALLY
CHAPTER 6. CLEANING TEMPEST RESOURCES6.1. PERFORMING A CLEAN UP6.2. PERFORMING A DRY RUN6.3. DELETING TEMPEST OBJECTS
3
4
555
66677
999
1010
1111111212
13131313
Table of Contents
1
Red Hat OpenStack Platform 10 OpenStack Integration Test Suite Guide
2
PREFACEThis guide provides instructions to install, configure and manage the OpenStack Integration Test Suite ina Red Hat OpenStack Platform environment.
PREFACE
3
CHAPTER 1. INTRODUCTIONAs OpenStack consists of many different projects, it is important to test their interoperability within yourOpenStack cluster. The OpenStack Integration Test Suite (tempest) automates the integration testing ofyour Red Hat OpenStack Platform deployment. Running tests ensures your cluster is working asexpected, and can also provide early warning of potential problems, especially after an upgrade. TheIntegration Test Suite contains tests for OpenStack API validation and scenario testing, as well as unittesting for self-validation. It performs black box testing using the OpenStack public APIs, with ostestras the test runner.
Red Hat OpenStack Platform 10 OpenStack Integration Test Suite Guide
4
CHAPTER 2. OPENSTACK INTEGRATION TEST SUITE TESTSThe OpenStack Integration Test Suite has many applications. It acts as a gate for commits to theOpenStack core projects, it can stress test to generate load on a cloud deployment, and it can performCLI tests to check the response formatting of the command line. However, the functionality that we areconcerned with are the scenario tests and API tests. These tests are run against your OpenStack clouddeployment. The following sections briefly describe each of these tests and how you can implementthem.
2.1. SCENARIO TESTS
Scenario tests simulate a typical end user action workflow to test the integration points between services.The testing framework conducts the set up, tests the integration between services, and then it is torndown. You should tag the tests with which services they relate to, to make it clear which client librariesthe test uses. A scenario is based on a use case, for example:
Upload an image to the Image Service
Deploy an instance from the image
Attach a volume to the instance
Create a snapshot of the instance
Detach the volume from the instance
2.2. API TESTS
API tests validate the OpenStack API. Tests use the OpenStack Integration Test Suite implementation ofthe Openstack API. Both valid and invalid JSON can be used to make sure error responses are valid.Tests can be run independently, and do not rely on the state left by the previous test.
CHAPTER 2. OPENSTACK INTEGRATION TEST SUITE TESTS
5
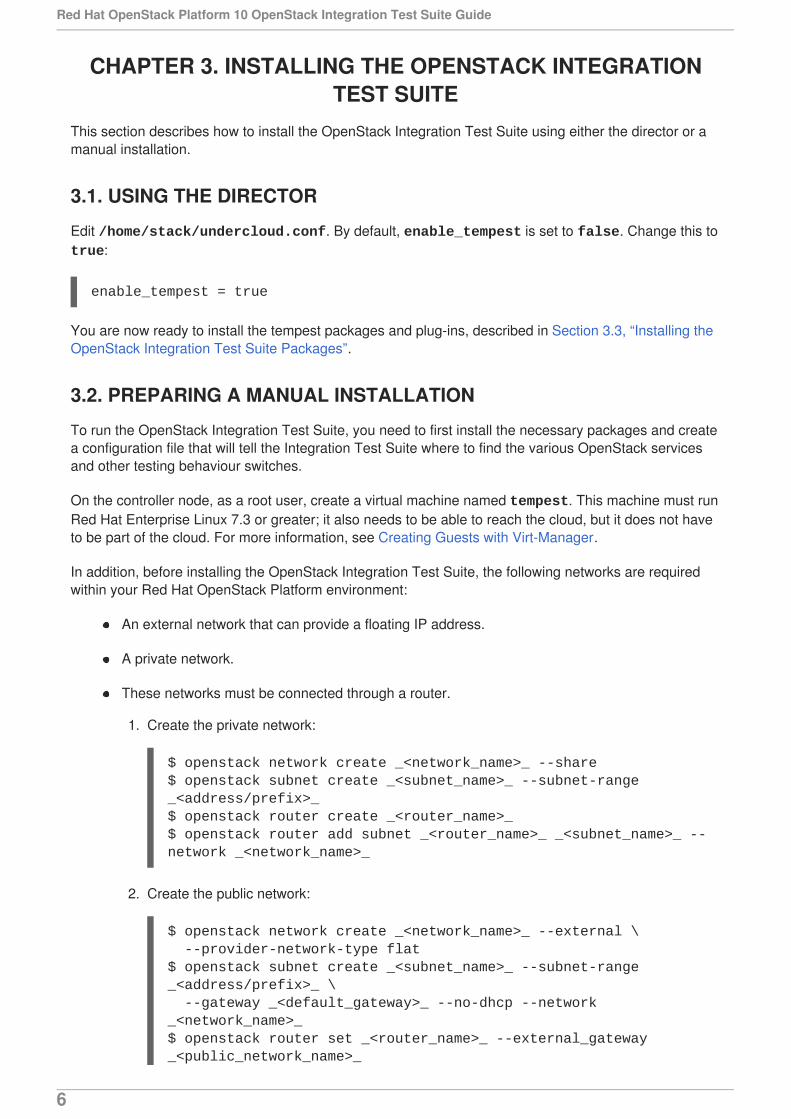
CHAPTER 3. INSTALLING THE OPENSTACK INTEGRATIONTEST SUITE
This section describes how to install the OpenStack Integration Test Suite using either the director or amanual installation.
3.1. USING THE DIRECTOR
Edit /home/stack/undercloud.conf. By default, enable_tempest is set to false. Change this totrue:
enable_tempest = true
You are now ready to install the tempest packages and plug-ins, described in Section 3.3, “Installing theOpenStack Integration Test Suite Packages”.
3.2. PREPARING A MANUAL INSTALLATION
To run the OpenStack Integration Test Suite, you need to first install the necessary packages and createa configuration file that will tell the Integration Test Suite where to find the various OpenStack servicesand other testing behaviour switches.
On the controller node, as a root user, create a virtual machine named tempest. This machine must runRed Hat Enterprise Linux 7.3 or greater; it also needs to be able to reach the cloud, but it does not haveto be part of the cloud. For more information, see Creating Guests with Virt-Manager.
In addition, before installing the OpenStack Integration Test Suite, the following networks are requiredwithin your Red Hat OpenStack Platform environment:
An external network that can provide a floating IP address.
A private network.
These networks must be connected through a router.
1. Create the private network:
$ openstack network create _<network_name>_ --share$ openstack subnet create _<subnet_name>_ --subnet-range _<address/prefix>_$ openstack router create _<router_name>_$ openstack router add subnet _<router_name>_ _<subnet_name>_ --network _<network_name>_
2. Create the public network:
$ openstack network create _<network_name>_ --external \ --provider-network-type flat$ openstack subnet create _<subnet_name>_ --subnet-range _<address/prefix>_ \ --gateway _<default_gateway>_ --no-dhcp --network _<network_name>_$ openstack router set _<router_name>_ --external_gateway _<public_network_name>_
Red Hat OpenStack Platform 10 OpenStack Integration Test Suite Guide
6

$ neutron router-gateway-set _<router_name>_ _<network_name>_
Create the required keystone roles:
$ openstack role create swiftoperator$ openstack role create heat_stack_owner
You are now ready to install and configure the OpenStack Integration Test Suite within the tempestvirtual machine. For more information, see Section 3.3, “Installing the OpenStack Integration Test SuitePackages”.
3.3. INSTALLING THE OPENSTACK INTEGRATION TEST SUITEPACKAGES
1. Install the packages related to the OpenStack Integration Test Suite:
$ sudo yum install openstack-tempest
However, this command will not install any tempest plug-ins. These are installed manually in thefollowing steps, depending on your OpenStack installation:
2. Install the appropriate tempest plug-in for each component you have, separated by spaces, inthe following format:
$ sudo yum install <component1> <component2> <component3>
You can list multiple components in the same command.
Or:
$ sudo python /usr/share/openstack-tempest-13.0.0/tools/install_test_packages.py
3. Review the list of installed plugins:
$ tempest list-plugins
See Section 3.3.1, “List of Tempest Plug-in Packages” for a list of available tempest plug-ins foreach OpenStack component.
3.3.1. List of Tempest Plug-in Packages
Component Package Name
aodh python-aodh-tests
ceilometer python-ceilometer-tests
cinder python-cinder-tests
CHAPTER 3. INSTALLING THE OPENSTACK INTEGRATION TEST SUITE
7
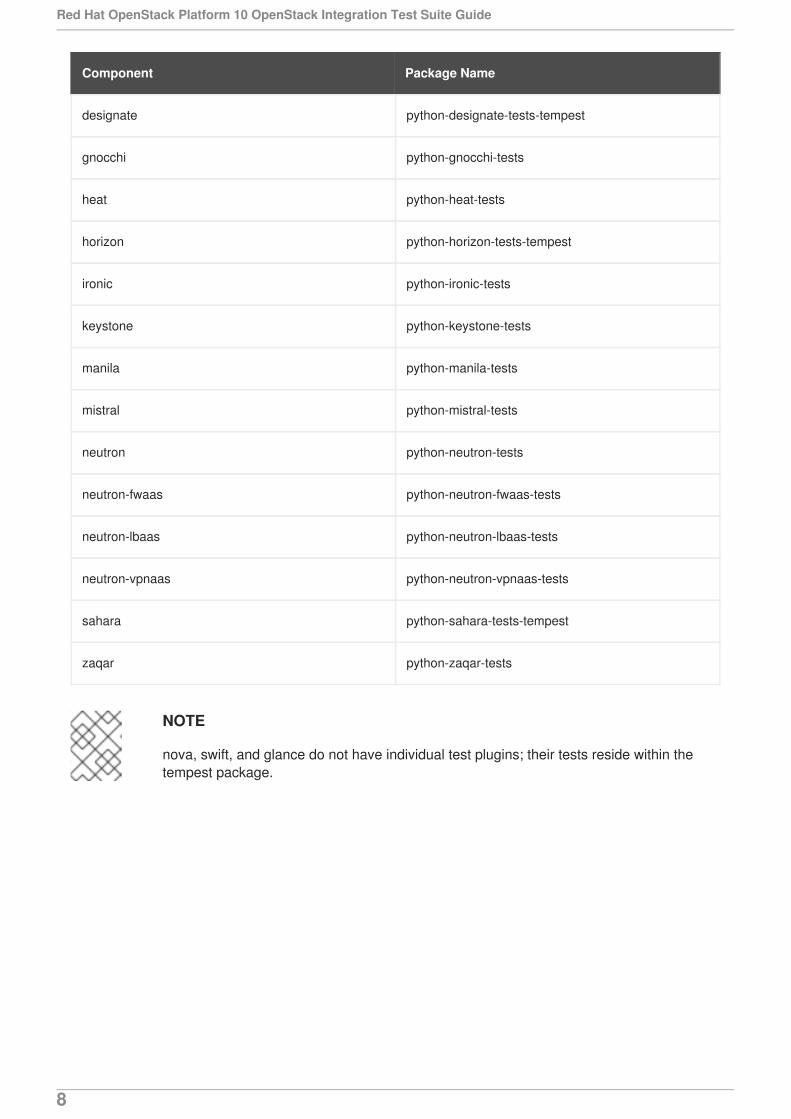
designate python-designate-tests-tempest
gnocchi python-gnocchi-tests
heat python-heat-tests
horizon python-horizon-tests-tempest
ironic python-ironic-tests
keystone python-keystone-tests
manila python-manila-tests
mistral python-mistral-tests
neutron python-neutron-tests
neutron-fwaas python-neutron-fwaas-tests
neutron-lbaas python-neutron-lbaas-tests
neutron-vpnaas python-neutron-vpnaas-tests
sahara python-sahara-tests-tempest
zaqar python-zaqar-tests
Component Package Name
NOTE
nova, swift, and glance do not have individual test plugins; their tests reside within thetempest package.
Red Hat OpenStack Platform 10 OpenStack Integration Test Suite Guide
8

CHAPTER 4. CONFIGURING THE OPENSTACK INTEGRATIONTEST SUITE
4.1. CREATING A WORKSPACE
1. Source the admin credentials:
In the undercloud:
$ source stackrc
Or in the overcloud:
$ source overcloudrc
2. Initialize tempest:
$ cd ~$ mkdir mytempest$ cd mytempest$ /usr/share/openstack-tempest-13.0.0/tools/configure-tempest-directory
This creates a tempest workspace named mytempest for your user account.
3. Generate the etc/tempest.conf file:
$ python tools/config_tempest.py --deployer-input ~/tempest-deployer-input.conf --debug --create identity.uri $OS_AUTH_URL identity.admin_password $OS_PASSWORD --network-id _<uuid>_
uuid is the UUID of the external network.
NOTE
For offline systems, you can specify an existing glance image by adding the --image parameter. For example: --image cirros-0.3.4-x86_64-disk.img
4. You can view a list of existing workspaces:
$ tempest workspace list
4.2. VERIFYING YOUR TEMPEST CONFIGURATION
1. Generate the .testr.conf in your tempest workspace:
$ testr init
2. Verify your current tempest configuration, specifying the tempest.conf file that was justgenerated:
CHAPTER 4. CONFIGURING THE OPENSTACK INTEGRATION TEST SUITE
9
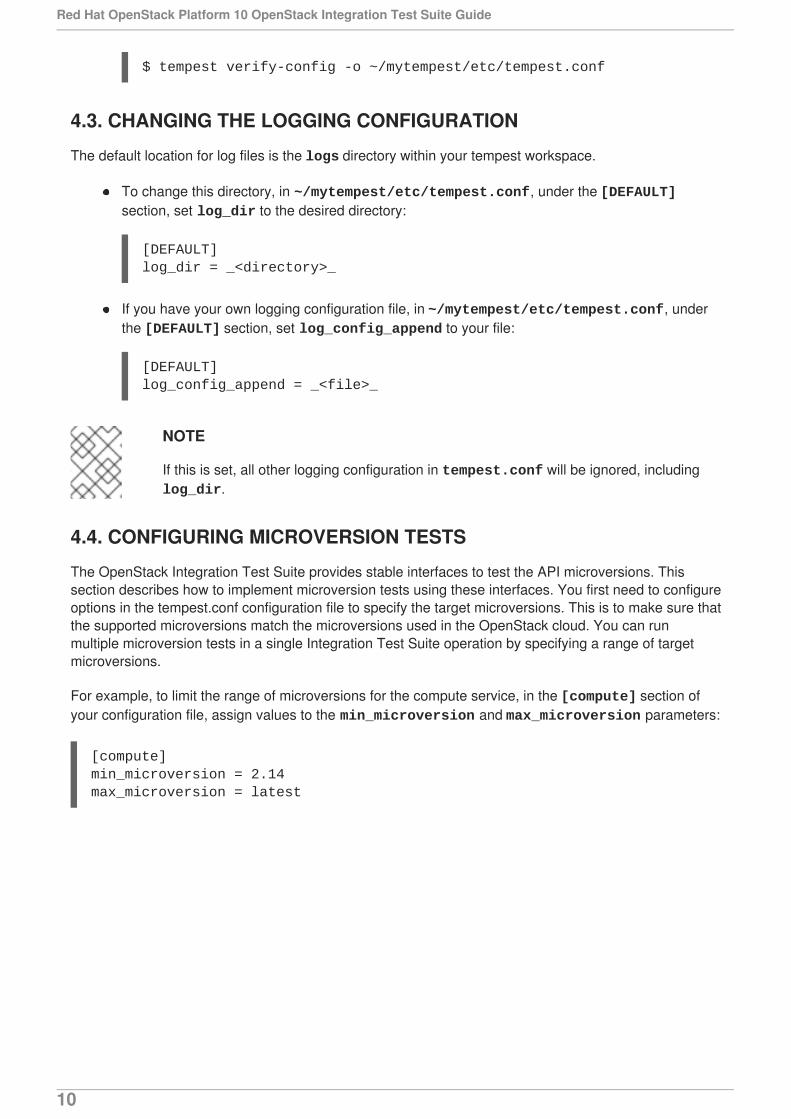
$ tempest verify-config -o ~/mytempest/etc/tempest.conf
4.3. CHANGING THE LOGGING CONFIGURATION
The default location for log files is the logs directory within your tempest workspace.
To change this directory, in ~/mytempest/etc/tempest.conf, under the [DEFAULT]section, set log_dir to the desired directory:
[DEFAULT]log_dir = _<directory>_
If you have your own logging configuration file, in ~/mytempest/etc/tempest.conf, underthe [DEFAULT] section, set log_config_append to your file:
[DEFAULT]log_config_append = _<file>_
NOTE
If this is set, all other logging configuration in tempest.conf will be ignored, including log_dir.
4.4. CONFIGURING MICROVERSION TESTS
The OpenStack Integration Test Suite provides stable interfaces to test the API microversions. Thissection describes how to implement microversion tests using these interfaces. You first need to configureoptions in the tempest.conf configuration file to specify the target microversions. This is to make sure thatthe supported microversions match the microversions used in the OpenStack cloud. You can runmultiple microversion tests in a single Integration Test Suite operation by specifying a range of targetmicroversions.
For example, to limit the range of microversions for the compute service, in the [compute] section ofyour configuration file, assign values to the min_microversion and max_microversion parameters:
[compute]min_microversion = 2.14max_microversion = latest
Red Hat OpenStack Platform 10 OpenStack Integration Test Suite Guide
10
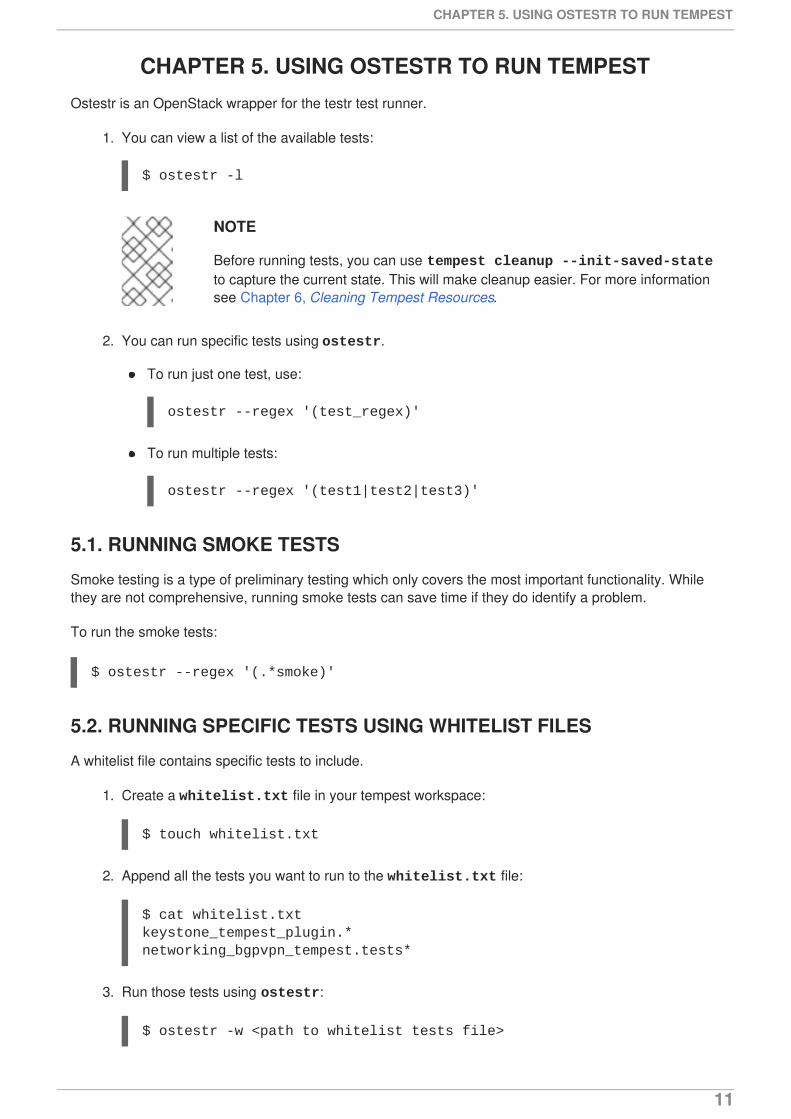
CHAPTER 5. USING OSTESTR TO RUN TEMPESTOstestr is an OpenStack wrapper for the testr test runner.
1. You can view a list of the available tests:
$ ostestr -l
NOTE
Before running tests, you can use tempest cleanup --init-saved-stateto capture the current state. This will make cleanup easier. For more informationsee Chapter 6, Cleaning Tempest Resources.
2. You can run specific tests using ostestr.
To run just one test, use:
ostestr --regex '(test_regex)'
To run multiple tests:
ostestr --regex '(test1|test2|test3)'
5.1. RUNNING SMOKE TESTS
Smoke testing is a type of preliminary testing which only covers the most important functionality. Whilethey are not comprehensive, running smoke tests can save time if they do identify a problem.
To run the smoke tests:
$ ostestr --regex '(.*smoke)'
5.2. RUNNING SPECIFIC TESTS USING WHITELIST FILES
A whitelist file contains specific tests to include.
1. Create a whitelist.txt file in your tempest workspace:
$ touch whitelist.txt
2. Append all the tests you want to run to the whitelist.txt file:
$ cat whitelist.txtkeystone_tempest_plugin.*networking_bgpvpn_tempest.tests*
3. Run those tests using ostestr:
$ ostestr -w <path to whitelist tests file>
CHAPTER 5. USING OSTESTR TO RUN TEMPEST
11
5.3. SKIPPING TESTS USING BLACKLIST FILES
A blacklist file contains a list of tests to exclude.
1. Create a skip_test.txt file in your tempest workspace:
$ touch skip_test.txt
2. Append all the tests to skip to the skip_test.txt file.
$ cat skip_test.txtkeystone_tempest_plugin.*networking_bgpvpn_tempest.tests*
3. Run tests using ostestr:
$ ostestr -b <path to skip test file>
4. You can run specific tests by skipping the listed tests:
ostestr --regex '(tempest.api.object_storage) -b <path to skip test file>
5.4. RUNNING TESTS IN PARALLEL CONCURRENTLY, OR SERIALLY
Run the tests in series:
$ ostestr --serial
Run the tests in parallel (this is the default):
$ ostestr --parallel
Specify the number of workers to use when running tests in parallel:
$ ostestr --concurrency _<workers>_
Alternatively:
$ ostestr -c _<workers>_
By default, this is set to the number of CPUs.
Red Hat OpenStack Platform 10 OpenStack Integration Test Suite Guide
12
CHAPTER 6. CLEANING TEMPEST RESOURCESAfter running tempest, there will be files, users and tenants created in the testing process that need to bedeleted. The ability to self-clean is one of the design principles of tempest.
6.1. PERFORMING A CLEAN UP
First you must initialize the saved state. This creates the file saved_state.json, which prevents thecleanup from deleting objects that need to be kept. Typically you would run cleanup with --init-saved-state prior to a tempest run. If this is not the case, saved_state.json must be edited toremove objects you want cleanup to delete.
$ tempest cleanup --init-saved-state
Run the cleanup:
$ tempest cleanup
6.2. PERFORMING A DRY RUN
A dry run lists the files that would be deleted by a cleanup, but does not delete any files. The files arelisted in the dry_run.json file.
$ tempest cleanup --dry-run
6.3. DELETING TEMPEST OBJECTS
Delete users and tenants created by tempest:
$ tempest cleanup --delete-tempest-conf-objects
CHAPTER 6. CLEANING TEMPEST RESOURCES
13