quilting with decorative stitches - bernina of america ... · pdf filequilting with decorative...
TRANSCRIPT
©2014 BERNINA of America, Inc. Page 1 of 4
Created by Kay Hickman
Quilting with Decorative Stitches
Machine & Accessories
BERNINA Sewing & Embroidery Machine Large Oval Hoop Teardrop Embroidery Foot #26 Zipper Foot #4 Edgestitch Foot #10/10C/10D Open Embroidery Foot #20/20C/20D Patchwork Foot #37/37D or 97/97D
Embroidery Design Collection OESD Quilting Feather Daisies #12521 - Quilt
Design #4 available at embdesignstudio.com. Reduce the size of the design to 3” for this project.
Threads Isacord Thread Embroidery Bobbin thread Construction Thread
Fabric & Notions Fabric
Two 4 ½” light squares Two 4 ½” dark squares
Lining Fabric—9” square Batting—9” square Two 9” lengths of 1 ½” wide grosgrain ribbon
Two 3” lengths of ½” wide ribbon
14” or longer zipper OESD AquaFilm Backing—Water Soluble Stabilizer Organ Embroidery Needles—Size 80 for embroidery Microtex Needles - Sizes 80 for construction Temporary Adhesive Spray Marking pen or pencil Pinking shears (optional)
Supplies
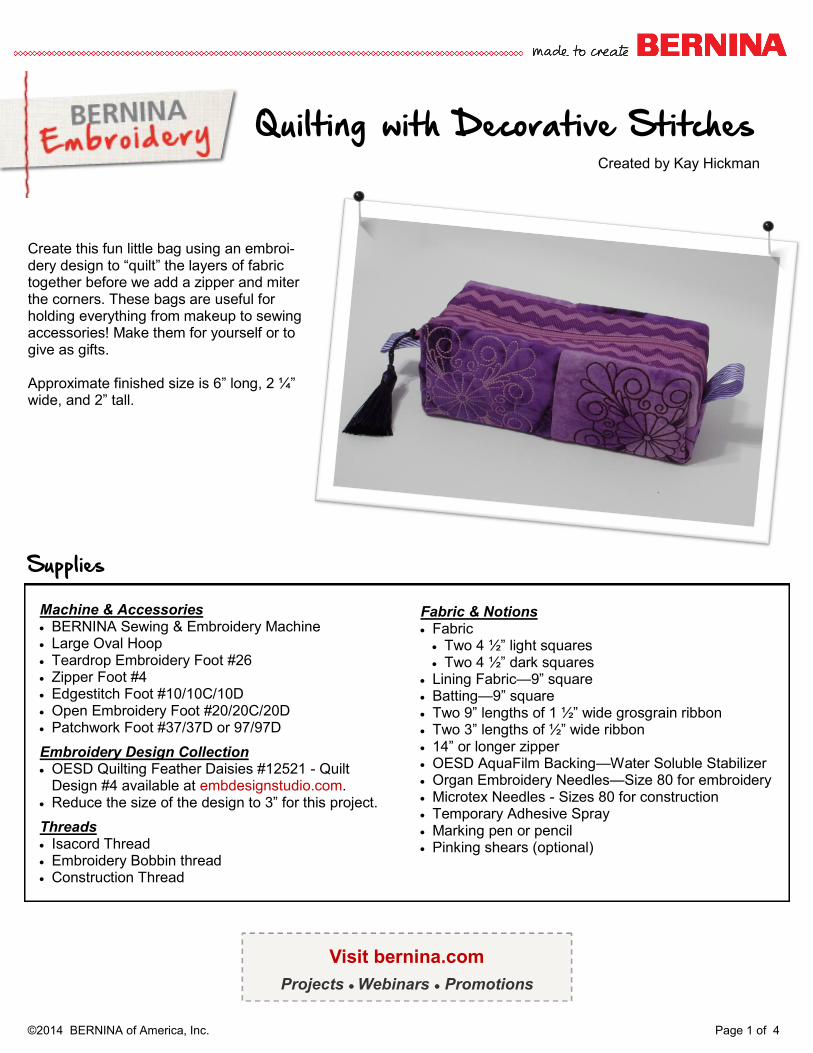
Create this fun little bag using an embroi-dery design to “quilt” the layers of fabric together before we add a zipper and miter the corners. These bags are useful for holding everything from makeup to sewing accessories! Make them for yourself or to give as gifts. Approximate finished size is 6” long, 2 ¼” wide, and 2” tall.
Visit bernina.com
Projects ● Webinars ● Promotions
©2014 BERNINA of America, Inc. Page 2 of 4
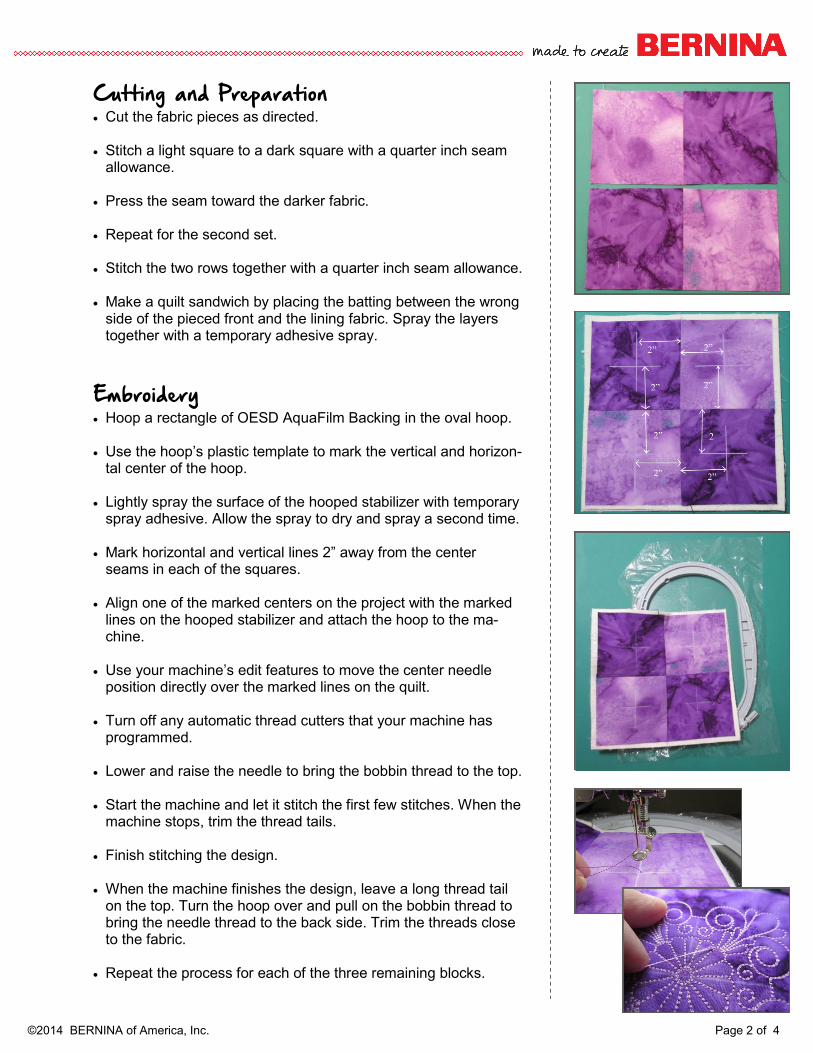
Cutting and Preparation Cut the fabric pieces as directed. Stitch a light square to a dark square with a quarter inch seam
allowance. Press the seam toward the darker fabric. Repeat for the second set. Stitch the two rows together with a quarter inch seam allowance. Make a quilt sandwich by placing the batting between the wrong
side of the pieced front and the lining fabric. Spray the layers together with a temporary adhesive spray.
Embroidery Hoop a rectangle of OESD AquaFilm Backing in the oval hoop. Use the hoop’s plastic template to mark the vertical and horizon-
tal center of the hoop. Lightly spray the surface of the hooped stabilizer with temporary
spray adhesive. Allow the spray to dry and spray a second time. Mark horizontal and vertical lines 2” away from the center
seams in each of the squares. Align one of the marked centers on the project with the marked
lines on the hooped stabilizer and attach the hoop to the ma-chine.
Use your machine’s edit features to move the center needle
position directly over the marked lines on the quilt. Turn off any automatic thread cutters that your machine has
programmed. Lower and raise the needle to bring the bobbin thread to the top. Start the machine and let it stitch the first few stitches. When the
machine stops, trim the thread tails. Finish stitching the design. When the machine finishes the design, leave a long thread tail
on the top. Turn the hoop over and pull on the bobbin thread to bring the needle thread to the back side. Trim the threads close to the fabric.
Repeat the process for each of the three remaining blocks.
©2014 BERNINA of America, Inc. Page 3 of 4
Remove the AquaFilm from the back of the project by tearing as much away as possible. TIP: To remove the remainder, wet a paper towel and wring out the excess. Place the wet paper towel over the stabilizer and place a hot iron on top. Most of the stabi-lizer will adhere to the paper towel. Move to a clean spot on the paper towel and repeat the process until all the stabilizer has been removed. (Excess stabilizer can also be removed with warm running water.)
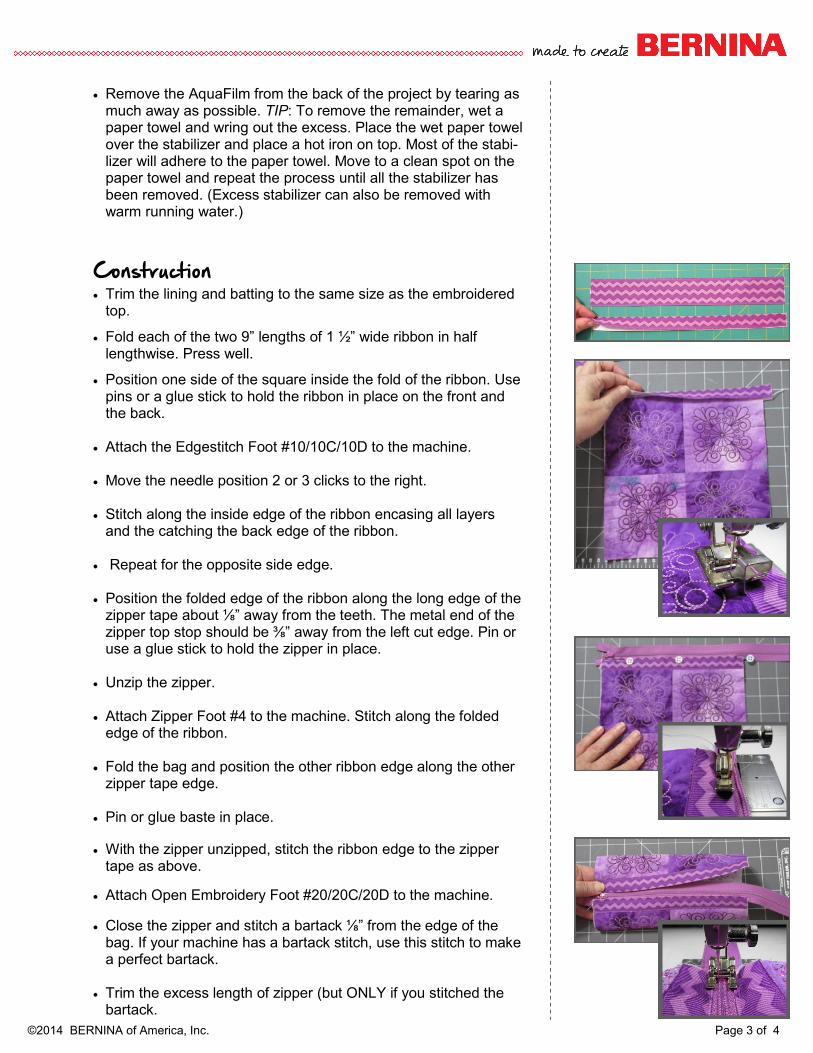
Construction Trim the lining and batting to the same size as the embroidered
top.
Fold each of the two 9” lengths of 1 ½” wide ribbon in half lengthwise. Press well.
Position one side of the square inside the fold of the ribbon. Use pins or a glue stick to hold the ribbon in place on the front and the back.
Attach the Edgestitch Foot #10/10C/10D to the machine. Move the needle position 2 or 3 clicks to the right. Stitch along the inside edge of the ribbon encasing all layers
and the catching the back edge of the ribbon. Repeat for the opposite side edge. Position the folded edge of the ribbon along the long edge of the
zipper tape about ⅛” away from the teeth. The metal end of the zipper top stop should be ⅜” away from the left cut edge. Pin or use a glue stick to hold the zipper in place.
Unzip the zipper. Attach Zipper Foot #4 to the machine. Stitch along the folded
edge of the ribbon. Fold the bag and position the other ribbon edge along the other
zipper tape edge. Pin or glue baste in place.
With the zipper unzipped, stitch the ribbon edge to the zipper tape as above.
Attach Open Embroidery Foot #20/20C/20D to the machine.
Close the zipper and stitch a bartack ⅛” from the edge of the bag. If your machine has a bartack stitch, use this stitch to make a perfect bartack.
Trim the excess length of zipper (but ONLY if you stitched the
bartack.
©2014 BERNINA of America, Inc. Page 4 of 4
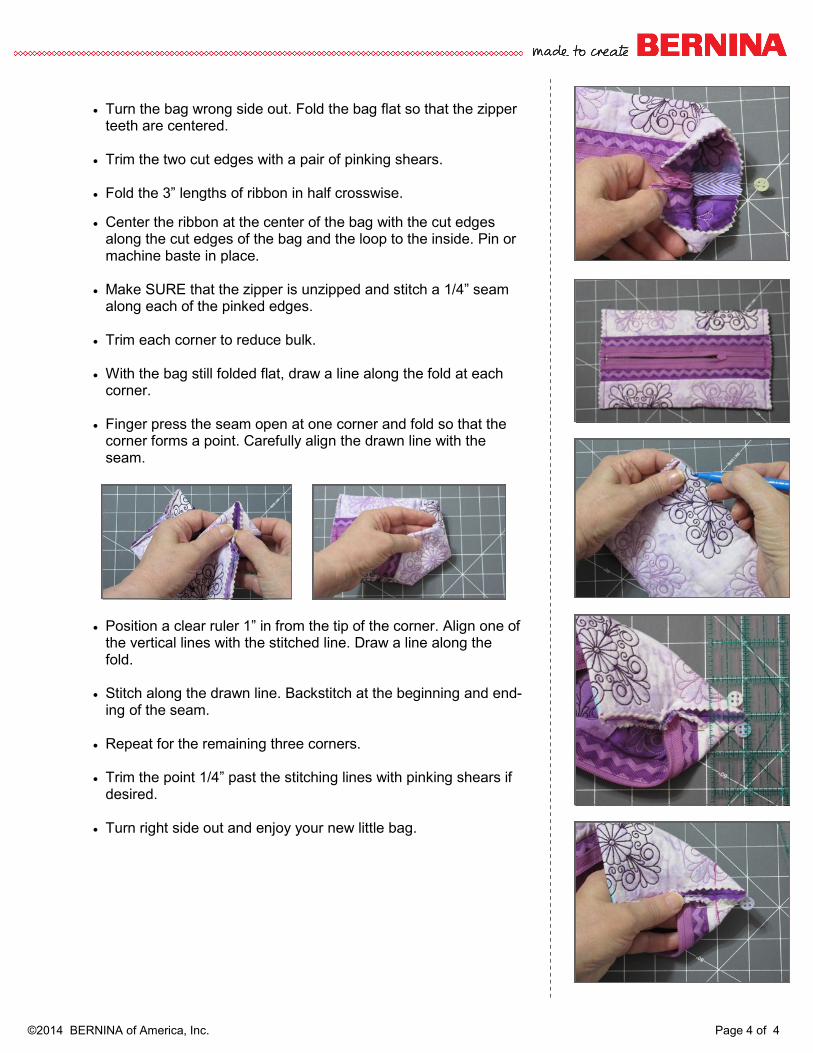
Turn the bag wrong side out. Fold the bag flat so that the zipper
teeth are centered. Trim the two cut edges with a pair of pinking shears. Fold the 3” lengths of ribbon in half crosswise.
Center the ribbon at the center of the bag with the cut edges along the cut edges of the bag and the loop to the inside. Pin or machine baste in place.
Make SURE that the zipper is unzipped and stitch a 1/4” seam
along each of the pinked edges. Trim each corner to reduce bulk. With the bag still folded flat, draw a line along the fold at each
corner. Finger press the seam open at one corner and fold so that the
corner forms a point. Carefully align the drawn line with the seam.
Position a clear ruler 1” in from the tip of the corner. Align one of the vertical lines with the stitched line. Draw a line along the fold.
Stitch along the drawn line. Backstitch at the beginning and end-
ing of the seam. Repeat for the remaining three corners. Trim the point 1/4” past the stitching lines with pinking shears if
desired. Turn right side out and enjoy your new little bag.