promaster chassis cab and cut away loose ship … · promaster chassis cab and cut away loose ship...
TRANSCRIPT
Promaster Chassis Cab and Cut Away Loose Ship Back Up Camera System
Starting in model year 2016, the RAM Promaster Chassis Cab and Cut Away are offered with a rear camera option. The package sales code is XA3. Included in this option package are an 11 meter video cable (Part Number 68266970AB) and a user mountable camera. (Part Number 68284643AA) In order to get this option, you must also order the RA2, U Connect 5.0 radio.
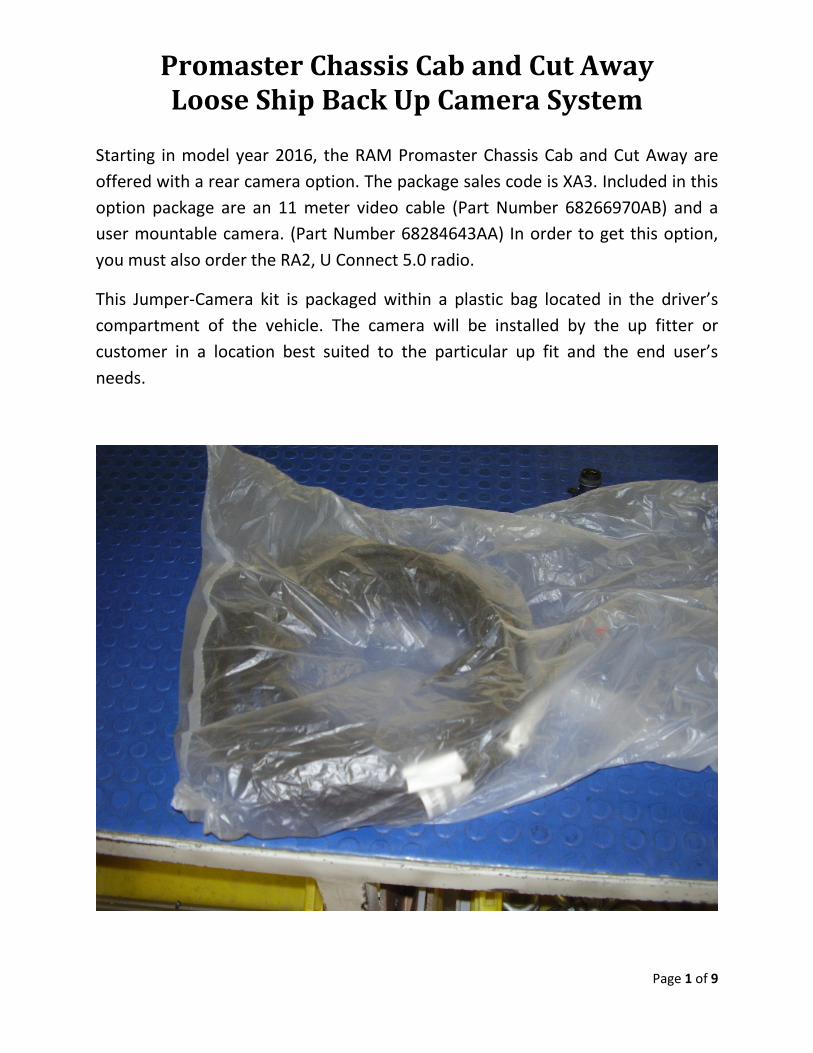
This Jumper-Camera kit is packaged within a plastic bag located in the driver’s compartment of the vehicle. The camera will be installed by the up fitter or customer in a location best suited to the particular up fit and the end user’s needs.
Page 1 of 9

Promaster Chassis Cab and Cut Away Loose Ship Back Up Camera System
Camera Location
The first step is to determine the best location for the camera. The camera location is dependent on end user needs and the availability of suitable locations on the up fit. Sometimes, this can be a tradeoff. This system was designed to be a backup camera. The picture is only available when the vehicle is in reverse. So, using the system as a cargo view may not be practical. Typically, the camera will be mounted at the rearward most edge of the vehicle, as close to the lateral center line as possible and as high up as you can get it. The down angle will be in the area of 30 degrees. The mounting location and down angle can be adjusted to achieve the desired view. Unlike the van, the chassis cab and cut away camera does not have guide lines. No need to worry about guide line accuracy.
Cable Routing
One end of the video cable has a black plug and a ground eyelet. These connections are made behind the trim panel in the driver’s side foot well. The other end of the cable has a grey connector on it. That will connect to the pig tail on the camera. Routing the cable from the camera through the up fit is left to the discretion of the camera installer and the desires of the owner.
In the case of the cut away, there is plenty of opportunity to route the cable into the cab. On the chassis cab, the opportunity is limited. Unless the camera installer wishes to cut a small hole in the cab back, the only way in is through a rubber body plug located below the passenger side B pillar in the rear of the body. See pictures on the next page.
Page 2 of 9

Promaster Chassis Cab and Cut Away Loose Ship Back Up Camera System
Page 3 of 9

Promaster Chassis Cab and Cut Away Loose Ship Back Up Camera System
This hole can be accessed on the inside of the body by removing the trim panel at the base of the passenger side B pillar then removing the plastic electrical block housing. See pictures below.
Remove the body plug and pierce a hole through the center of the plug. Using a pair of needle nose plies, stretch the hole. Be careful not to rip the plug. Once the rubber is sufficiently worked, the grey connector can be passed through the plug. Once the installation is complete and the camera cable is secured into place, fill the recessed area of the outside of the body plug with RTV.
Inside of Body Plug Electrical Block Housing
Fill this Area with RTV
Page 4 of 9
Promaster Chassis Cab and Cut Away Loose Ship Back Up Camera System
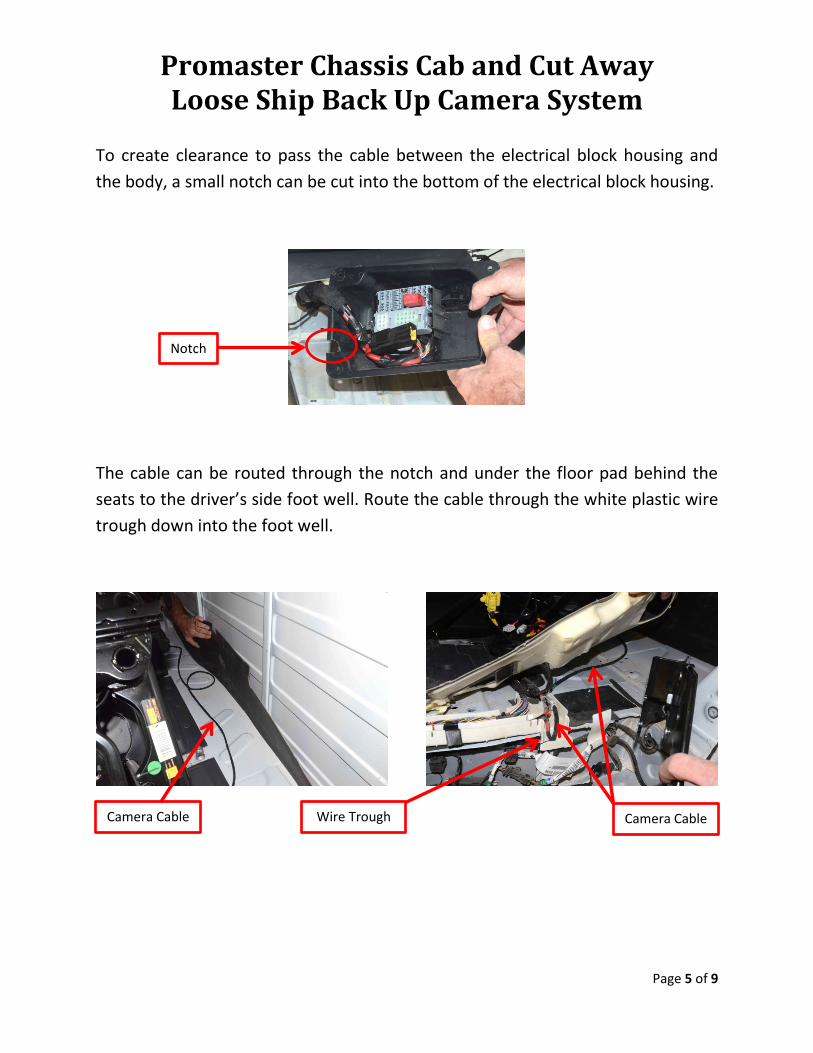
To create clearance to pass the cable between the electrical block housing and the body, a small notch can be cut into the bottom of the electrical block housing.
The cable can be routed through the notch and under the floor pad behind the seats to the driver’s side foot well. Route the cable through the white plastic wire trough down into the foot well.
Notch
Wire Trough Camera Cable Camera Cable
Page 5 of 9
Promaster Chassis Cab and Cut Away Loose Ship Back Up Camera System
In Cab Electrical Connections
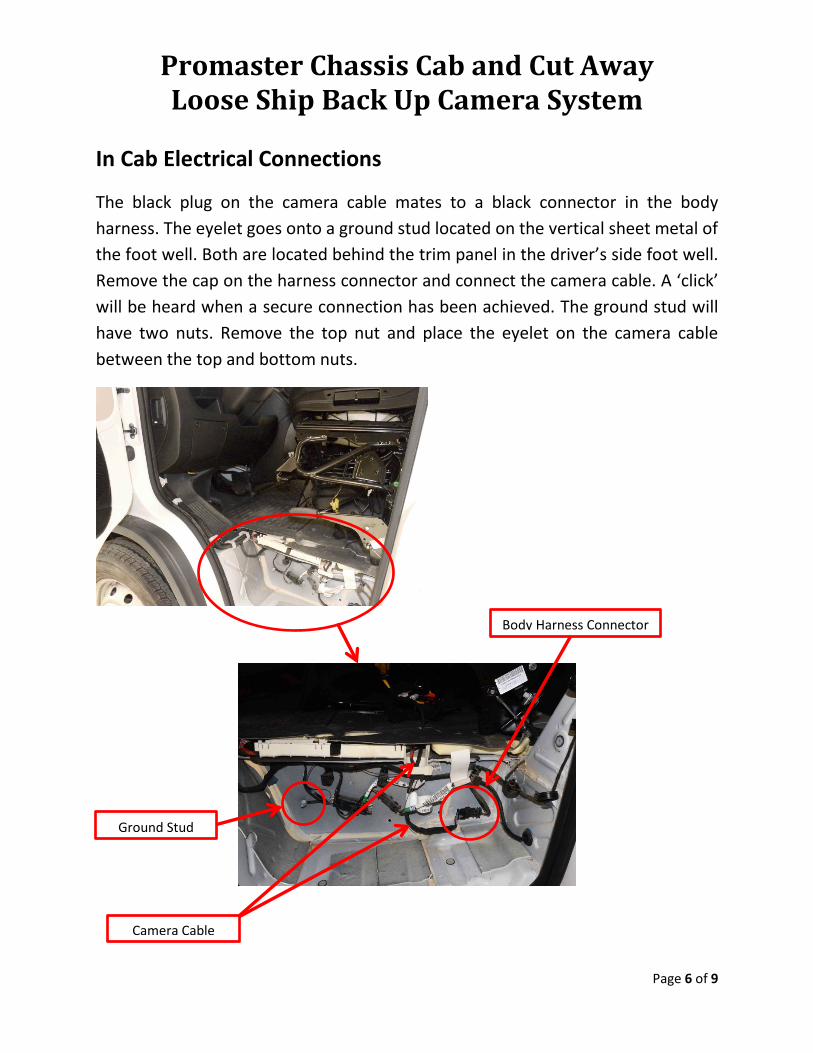
The black plug on the camera cable mates to a black connector in the body harness. The eyelet goes onto a ground stud located on the vertical sheet metal of the foot well. Both are located behind the trim panel in the driver’s side foot well. Remove the cap on the harness connector and connect the camera cable. A ‘click’ will be heard when a secure connection has been achieved. The ground stud will have two nuts. Remove the top nut and place the eyelet on the camera cable between the top and bottom nuts.
Body Harness Connector
Ground Stud
Camera Cable
Page 6 of 9

Promaster Chassis Cab and Cut Away Loose Ship Back Up Camera System
Camera Mounting
Unless the camera can be mounted directly to the up fit, a bracket will need to be fabricated. If practical, it is desirable to mount the camera in a location where the connector on the end of the pig tail can be inside the up fit and shielded from the outside environment. In this particular case, the vehicle was up fit with a flat bed. The camera was mounted to the rear of the flat bed. A bracket was fabricated to securely hold the camera and offer as much protection as possible. The bracket was designed to provide a down angle that will allow the ground to come into view at a point directly below the reward most edge of the vehicle.
In this case, it was not possible to get the pig tail in a dry environment. If this is the case with your up fit, you may want to consider covering the connection with a sealing heat shrink tube.
Page 7 of 9
Promaster Chassis Cab and Cut Away Loose Ship Back Up Camera System
The bracket show above is just an example of what can be done. Bracket designs can vary depending upon the up fit they are mounted to and the creativity of the camera installer.
Camera Electrical Connections
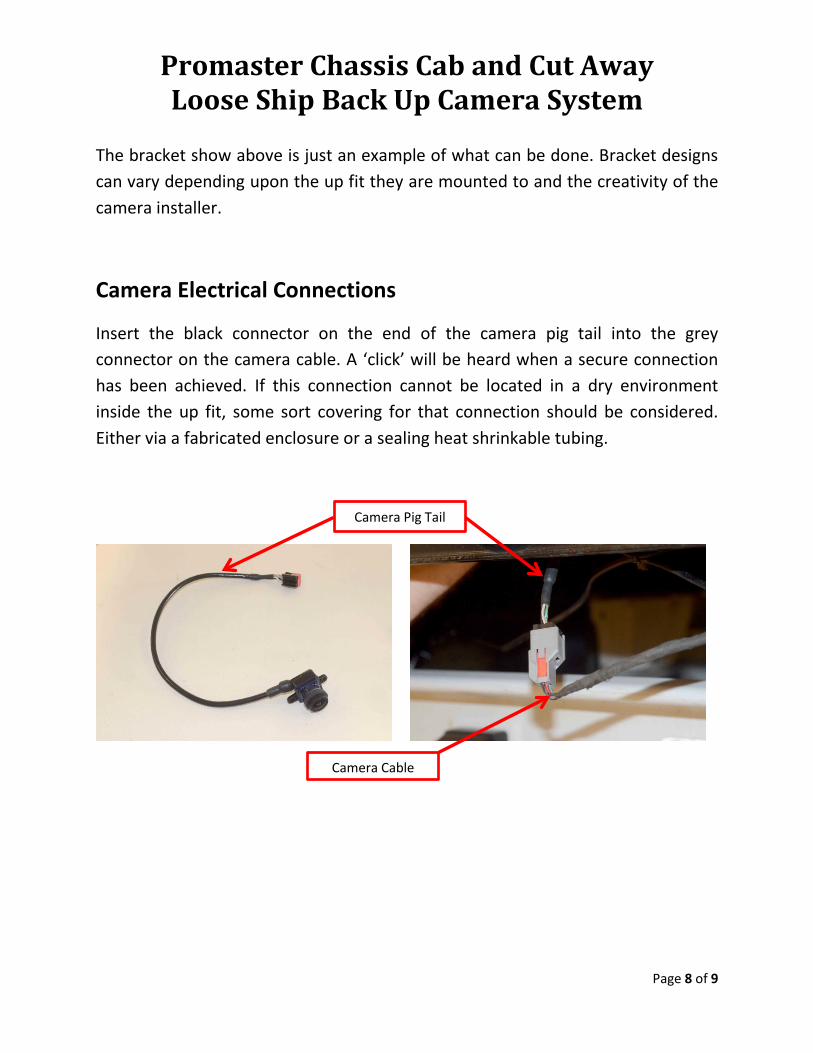
Insert the black connector on the end of the camera pig tail into the grey connector on the camera cable. A ‘click’ will be heard when a secure connection has been achieved. If this connection cannot be located in a dry environment inside the up fit, some sort covering for that connection should be considered. Either via a fabricated enclosure or a sealing heat shrinkable tubing.
Camera Pig Tail
Camera Cable
Page 8 of 9
Promaster Chassis Cab and Cut Away Loose Ship Back Up Camera System
Finishing Up
Take care to prevent in-use impact and abrasion damage. Add a protective covering (such as convolute) if prudent. Clean up and/or cover sharp or abrasive edges in the sheet metal. Secure the cable (using clips/straps) often in its routing path. Don’t forget to fill the outside of the body plug below the B pillar with RTV.
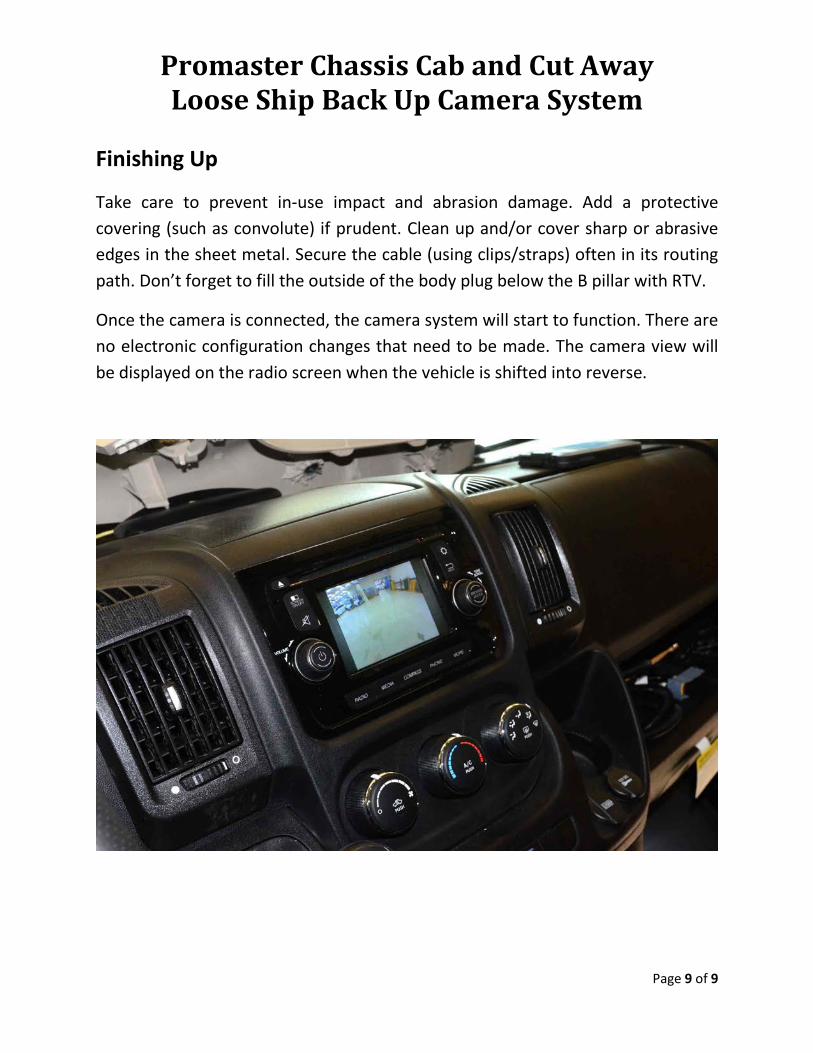
Once the camera is connected, the camera system will start to function. There are no electronic configuration changes that need to be made. The camera view will be displayed on the radio screen when the vehicle is shifted into reverse.
Page 9 of 9