preface - farmers helping farmers · 5.3 manure compost and fertilizer ... (sweet pepper and chili...
TRANSCRIPT

1
PREFACE
This Crops Handbook was prepared by Farmers Helping Farmers Inc. as part of a project (2011-2014) to improve food security with two Kenyan farm women groups: the Muchui Women Group Community Based Organization and the Ruuju Women Self-Help Group and their communities of Kiirua and Marega. We gratefully acknowledge funding from the Canadian International Development Agency and Foreign Affairs, Trade and Development Canada.
Farmers Helping Farmers Inc. worked with the Muchui Women Group for more than ten years and the Ruuju Women Group for seven years to improve their crop production in a landscape which is very dry and has erratic rainfall. Most of the information developed is the result of lessons learned with the women. The two communities of Marega and Kiirua have moved from being areas where only maize and beans were produced to an area with highly diversified field and vegetable crops which are a source of cash income for the farmers.
Each year two or three Canadian horticulturists organized and delivered training on various aspects of crop production. Also, each year, with funds from the Association of Universities and Colleges of Canada, several senior nutrition students from the University of Prince Edward Island along with their human nutrition Professor helped the women improve the nutrition of their families. Our capable and dedicated Kenyan staff contributed immensely to the success of the project.
Farmers Helping Farmers Inc. has worked in Kenya for 35 years with groups of farm families to help them improve their lives. With support from Prince Edward Island residents and the Government of Canada we have worked successfully with our Kenyan partners.
This handbook was prepared primarily as a source of information for the members of the Muchui Women Group and the Ruuju Women Group as well as their neighbors and the schools in the communities of Marega and Kiirua. However, we hope this information will help you in whatever capacity you are using it: as an educator, a horticulturist, or a farmer. And we thank all our supporters for your assistance in making this all possible.
Any or all parts of this handbook may be reproduced with acknowledgement.
Authors
Farmers Helping Farmers wishes to thank the following for their contribution to the handbook:
Ms. Patricia Bishop Mr. Eddy Dykerman Mr.Roger Henry Dr. Winston Johnston Ms. Kristen Pyke Mr. John Lohr Ms. Margie Loo Ms. Susan MacKinnon Mr. Ken Mellish Dr. Teresa Mellish Mr. Douglas Gikundi M’Muguna Mr. Stephen Mwenda Ms. Salome Ntinyari Mr. Shaad Olingo Ms. Ilse Peters-Ching Mr. Charlie van Kampen Dr. Colleen Walton Ms. Janice Whalen
2
TABLE OF CONTENTS CHAPTER 1.00 NUTRITION 4 1.1 Food servings for all people 5 1.2 Milk servings per day 5 1.3 Different cooking methods to help your family 5 1.4 Secrets to great health 6 CHAPTER 2.00 - LAND PREPARATION 8 2.1. Land preparation 8 2.2. Deep soil preparation (double digging). 9 CHAPTER 3.00 – NURSERY ESTABLISHMENT AND MANAGEMENT 13 3.1. Planning and timing of crops 13 3.2 Site selection 13 3.3. Nursery bed preparation 13 3.4 Sowing seeds in a nursery bed 14 3.5 Nursery maintenance 14 3.6 Starting seedlings in a growing structure 15 3.7 Sanitation 15 CHAPTER 4.00 - SCREEN HOUSE FARMING 16 CHAPTER 5.00 – TRANSPLANTING AND FIELD ESTABLISHMENT 18 5.1. Field establishment 18 5.2 Water use in vegetable production 18 5.3 Manure compost and fertilizer 19 5.4 Composting in Kenya 20 5.5 Crop rotation and crop diversity 23 5.6 Weed control 25 5.7 Mulching and pruning/desuckering 25 5.8 Integrated pest management (IPM) 26 5.9 Pesticide Safety 28 CHAPTER 6.00 – VEGETABLE CROPS. 30 6.1. Cabbages 31 6.2. Kales 32 6.3 Spinach 32 6.4 Tomatoes 33
Propagating tomato plants from cuttings 34 6.5 Bulb onions 39 6.6 Sweet potatoes 40 6.7 Carrots 42 6.8 Capiscum (Sweet pepper and chili pepper) 43 6.9 Snap beans, French or string beans 44 6.10 Snow peas 45

3
CHAPTER 7.00 – FIELD CROPS 47 7.1 Field beans 47 7.2 Cow peas 48 7.3 Pigeon peas 49 7.4 Maize 50 7.5 Sorghum 52 7.6 Millet 53 CHAPTER 8:00 FRUIT CROPS 55 8.1 Bananas 55 8.2 Mango 56 8.3 Papaya 58 8.4 Passion fruit 59 8.5 Watermelon 60
CHAPTER 9.00 AFRICAN LEAFY VEGETABLES ( ALVS) 61 9.1 Amaranthus (Terere) 61 9.2 African night shade (managu) (mnavusolanum spp) 62 9.3 Ethiopian kale 63 9.4 Crotolaria (mitoo) 64 9.5 Spider plant (Sargeti) 65 APPENDIX Pest Control Products Registered for use in Kenya 67
4
CHAPTER 1.00 NUTRITION
________________________________________________________________________
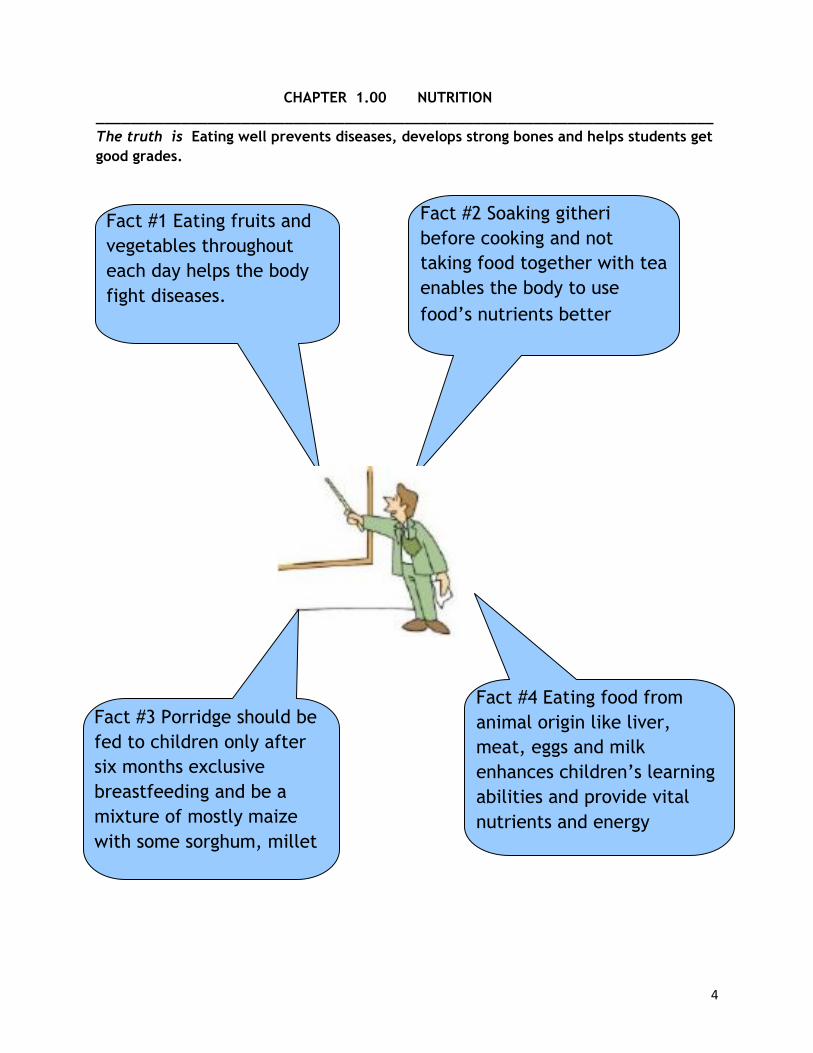
The truth is Eating well prevents diseases, develops strong bones and helps students get
good grades.
Fact #1 Eating fruits and
vegetables throughout
each day helps the body
fight diseases.
Fact #2 Soaking githeri
before cooking and not
taking food together with tea
enables the body to use
food’s nutrients better
Fact #3 Porridge should be
fed to children only after
six months exclusive
breastfeeding and be a
mixture of mostly maize
with some sorghum, millet
Fact #4 Eating food from
animal origin like liver,
meat, eggs and milk
enhances children’s learning
abilities and provide vital
nutrients and energy
5
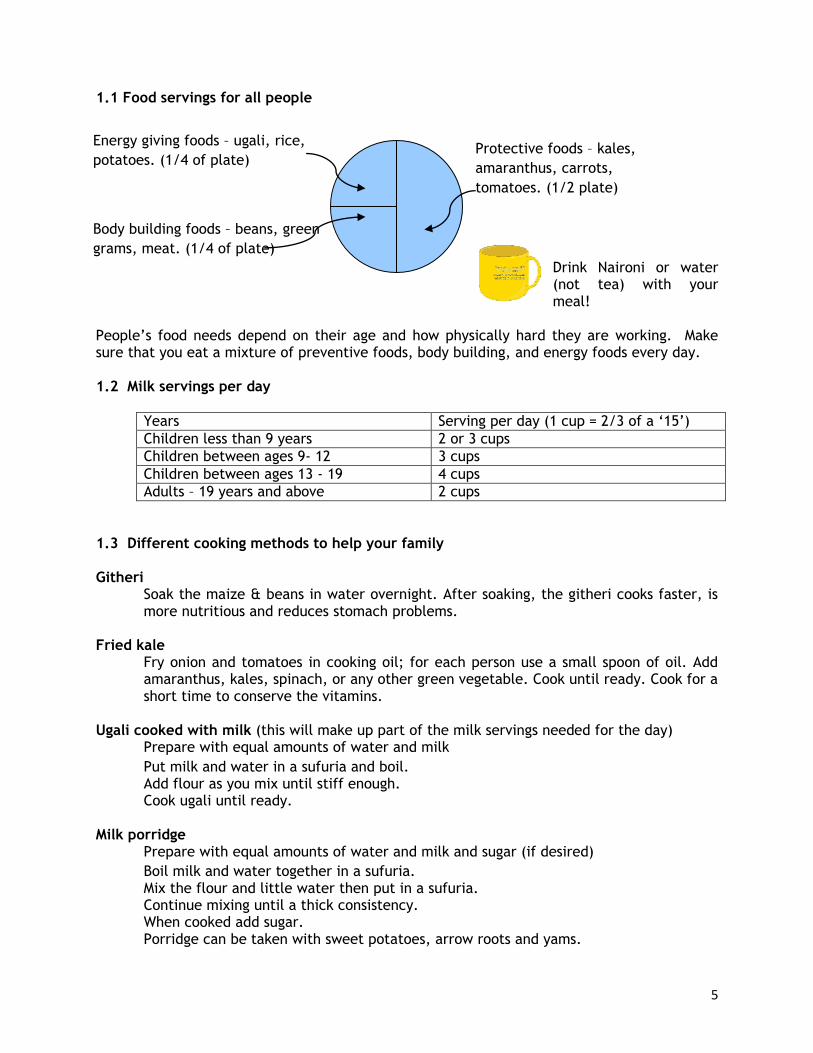
1.1 Food servings for all people
Drink Naironi or water (not tea) with your meal!
People’s food needs depend on their age and how physically hard they are working. Make sure that you eat a mixture of preventive foods, body building, and energy foods every day. 1.2 Milk servings per day
Years Serving per day (1 cup = 2/3 of a ‘15’)
Children less than 9 years 2 or 3 cups
Children between ages 9- 12 3 cups
Children between ages 13 - 19 4 cups
Adults – 19 years and above 2 cups
1.3 Different cooking methods to help your family Githeri
Soak the maize & beans in water overnight. After soaking, the githeri cooks faster, is more nutritious and reduces stomach problems.
Fried kale Fry onion and tomatoes in cooking oil; for each person use a small spoon of oil. Add amaranthus, kales, spinach, or any other green vegetable. Cook until ready. Cook for a short time to conserve the vitamins.
Ugali cooked with milk (this will make up part of the milk servings needed for the day)
Prepare with equal amounts of water and milk
Put milk and water in a sufuria and boil. Add flour as you mix until stiff enough. Cook ugali until ready.
Milk porridge Prepare with equal amounts of water and milk and sugar (if desired)
Boil milk and water together in a sufuria. Mix the flour and little water then put in a sufuria. Continue mixing until a thick consistency. When cooked add sugar. Porridge can be taken with sweet potatoes, arrow roots and yams.
Protective foods – kales,
amaranthus, carrots,
tomatoes. (1/2 plate)
Energy giving foods – ugali, rice,
potatoes. (1/4 of plate)
Body building foods – beans, green
grams, meat. (1/4 of plate)

6
1.4 Secrets to great health Vitamin A Green leafy vegetables (kales, amaranthus, pumpkin leaves, nettle leaves) and yellow fruits (pawpaw, mangoes, pumpkins and carrots) are good sources of Vitamin A. Cabbage is less good. Vitamin A protect the body from diseases and aids in keeping good eye sight. Factors interfering with nutrients entering your body. Tea, coffee and unsoaked beans contain substances that interfere with food digestion and utilization of vitamins and minerals. Soaking beans for 12 hours before cooking helps remove these substances. This improves your body’s ability to use essential minerals like iron, zinc, and calcium in the food. It’s recommended to take tea two hours before or after meal to avoid combining the anti-nutrients and your meal. This way the food will have been digested and the nutrients absorbed before you take your tea. Diets for infants and children six months and above. An infant should be fed exclusively on breast milk for 6 months, with no other food or even water. Breast milk is not enough after six months; therefore supplementary food is acceptable as the child continues to breast feed. These foods include porridge with milk and sieved fruits. The porridge flour should be made from a mixture of 2 kilograms of maize and 2 kilograms mixture of (sorghum, millet and others). Preparing the porridge with milk will further help the baby grow well and develop good learning capabilities. Feeding sieved fruit (eg. ripe pawpaw) provides important vitamins and minerals. Food from animal sources Liver, meat, eggs and milk help build the body as they contain minerals iron, zinc, and other essential vitamins and nutrients that improves understanding and prevent the child from diseases. Fruits Fruits like mangoes, pawpaw, passion fruits, guavas and lunguads contain Vitamin C. When eaten with a meal will help the body to better use minerals (iron and zinc) in the food. Fruits have many other vitamins and important nutrients and therefore eating everyday is important. Calcium and bone development Milk without tea leaves provides essential calcium to help people, especially women and children grow and remain strong and healthy. Children ages 18 and below need calcium for height and bone development. Two servings of milk is essential. Women should take two

7
servings of milk, without tea leaves, per day to help in breast feeding and maintaining strong bones. Breakfast Everyone should eat breakfast before going to school or to the garden or other work. Eating ugali, arrow roots, sweet potatoes, chapatti or any other foods including fruits and vegetables, and with milk, is good morning eating. Sugar Limit sugar in tea to one small spoon. Too much sugar contributes to diseases like increased pulse rate and diabetes). Oil Use liquid oil rather than solid fat in cooking to keep your heart and blood healthy
8
CHAPTER 2.0 LAND PREPARATION
2.1 Land Preparation
Most vegetables have small to medium size seeds. Consequently, proper seed bed preparation
is important. Prepare your land before the rains preferably when the soil is still moist. This
allows time for large furrow slices and lumps of soil to break up and the up-rooted weeds to
dry. Compost or animal manure should be added earlier during the first cultivation to allow
for any weed seeds to also germinate before the final tilling session before planting. Any
plant and animal material added to the soil is decomposed and partially transformed into soil
organic matter (also called humus). The organic matter content of soils increases very slowly
even with the continuous addition of organic materials to the soil so it is important to
minimize loss through wind or water erosion. As well excessive tillage will speed up the
breakdown of organic matter.
If the area was previously covered with weeds like Amaranthus spp, which produce a lot of
seeds, then the land needs to be tilled early in the season. This will encourage most of the
weed seeds to germinate as soon as the soil gets any moisture. The soil will then only need to
be lightly tilled before planting seeds to remove the remaining weeds.
The optimum soil pH for vegetables is 6.8; soils with a pH below 5.5 should be limed. Lime is
added to make the soil less acid and increases the availability of many nutrients to plants.
Liming will also help to encourage the activity of earthworms and nitrogen-fixing bacteria as
well as the rotting of organic material that releases nitrogen, phosphorus, sulphur and micro-
elements.
Location
An optimum location for a vegetable garden is a field that is nearly flat to slightly sloping,
well drained and free of low spots, rocks or trees. Ideally, the garden should receive as much
sunlight as possible because most vegetables require at least 5 or 6 hours of sunlight per day.
Consider shading from buildings, fences, trees, and shrubs when selecting your garden site.
Excessive shading will cause spindly growth and reduced yields especially in crops that love
sun such as tomatoes, peppers and cucumbers. Some insect and disease problems will be
more serious in shady areas as well. Tree roots will compete for moisture and nutrient. If
shaded areas must be used crops such as carrots, kale, spinach can be grown because they
tolerate shade.
While the crops require an abundant supply of water, good drainage is very necessary. The
soil should also contain a reasonable amount of organic matter. The best soils for growing
vegetables are well-drained, fairly deep, and relatively high in organic matter. These soils
should have good structure and have been adequately limed and fertilized for the past few
years. For vegetable production the soil should be well prepared to a fine consistency.
9
Microclimates
Microclimates are small areas in the landscape with slight variations on the weather. You can
take advantage of these areas to maximize production in the vegetable garden, but they can
also undermine your efforts if not taken into account.
Microclimates can come and go as the sun shifts from overhead in the summer towards the
southern sky in the winter. In general, the southeast side of your home is the warmest spot.
Lower and north-facing areas tend to be a little colder and more humid. A fence can create a
microclimate by blocking cold or drying winds.
Irrigation
Growing a crop without irrigation is possible, but irrigating will enhance your success. Several
different irrigation methods can be used, although drip irrigation is the most water-use
efficient because water is delivered directly to plant roots via a low-volume soaker hose, drip
tape or emitters. There are some disadvantages to drip irrigation, including installation and
maintenance costs. This type of irrigation needs to be monitored closely, especially with
newly transplanted plants, because they may not wet the soil sufficiently or evenly for new
plants. Drip irrigation tape or soaker hose placement may have to be adjusted, particularly
during plant establishment. Overhead sprinkler systems are easy to use and require less
maintenance and monitoring; however, they can result in uneven water application and use
water inefficiently.
2.2 Deep soil preparation (Double digging)
In areas with high population density, where the average farm size is shrinking. Food
production must become more intensive and efficient. Double digging allows farmers with
very small farms to produce more food on less land.
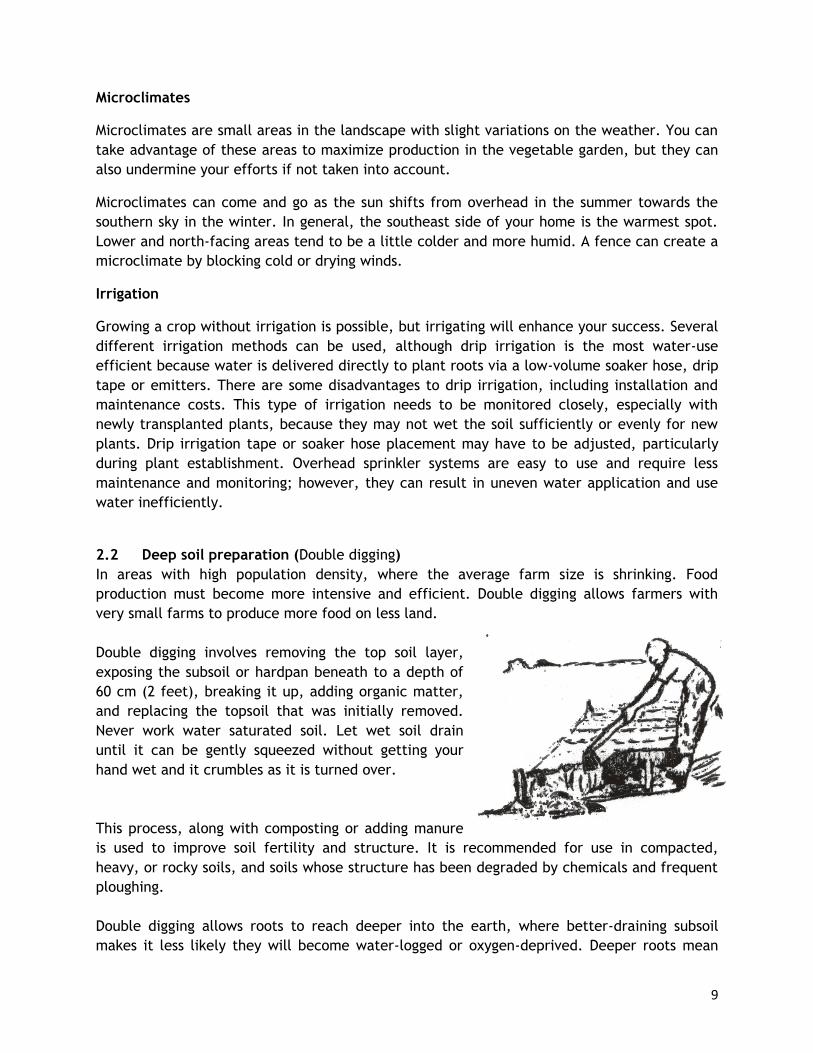
Double digging involves removing the top soil layer,
exposing the subsoil or hardpan beneath to a depth of
60 cm (2 feet), breaking it up, adding organic matter,
and replacing the topsoil that was initially removed.
Never work water saturated soil. Let wet soil drain
until it can be gently squeezed without getting your
hand wet and it crumbles as it is turned over.
This process, along with composting or adding manure
is used to improve soil fertility and structure. It is recommended for use in compacted,
heavy, or rocky soils, and soils whose structure has been degraded by chemicals and frequent
ploughing.
Double digging allows roots to reach deeper into the earth, where better-draining subsoil
makes it less likely they will become water-logged or oxygen-deprived. Deeper roots mean
10
plants do not have to be watered as often. It also permits more plants to grow in the same
area because they don’t have to rely on the topsoil alone for moisture and nutrients.
Advantages
Increases the amount of space in the soil for air and water which in turn improves
crops growth.
Improves the soil structure, especially when compost or manure is added.
Promotes earthworms and the activities of soil microbes.
Breaks up soil crusts and hard pans, and increases the speed that water can seep into
the soil.
Used with enough organic fertilizer, it helps the soil retain water, allowing crops to
survive longer in dry situations.
Allows crops to be planted close together, which can result in yields up four times the
conventional average.
If the crops are planted close together in a diagonal pattern, their canopy suppresses
weeds and acts as a living mulch, further decreasing the amount of moisture lost through
evaporation.
Disadvantages
Labour intensive, but usually needs to be done only once every three to four years.
May damage the soil structure if not done properly or if the beds are not adequately
fertilized with compost or manure.
Requirements
Hoe or digging fork, rake, digging spade.
Wheelbarrow or big buckets.
Digging board (a plank of wood to stand on while you are digging, so you do not
compress the soil).
An area of at least 1.5 mx6 m (5 feet x20 feet) for each bed.
Procedure
1. Measure the area you want to double-dig, mark the corners with pegs. The beds should be
1.5 m wide, and can be as long as you want. Lay out beds across (perpendicular to) the
slope if the ground is not level.
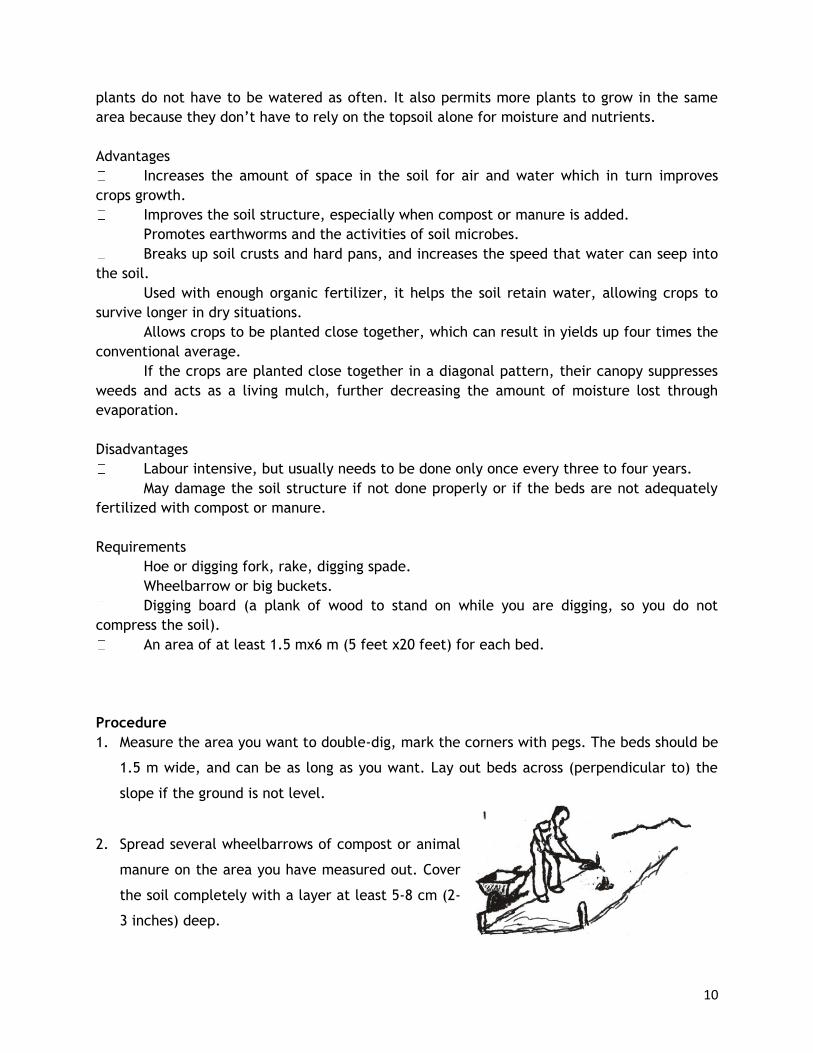
2. Spread several wheelbarrows of compost or animal
manure on the area you have measured out. Cover
the soil completely with a layer at least 5-8 cm (2-
3 inches) deep.
11
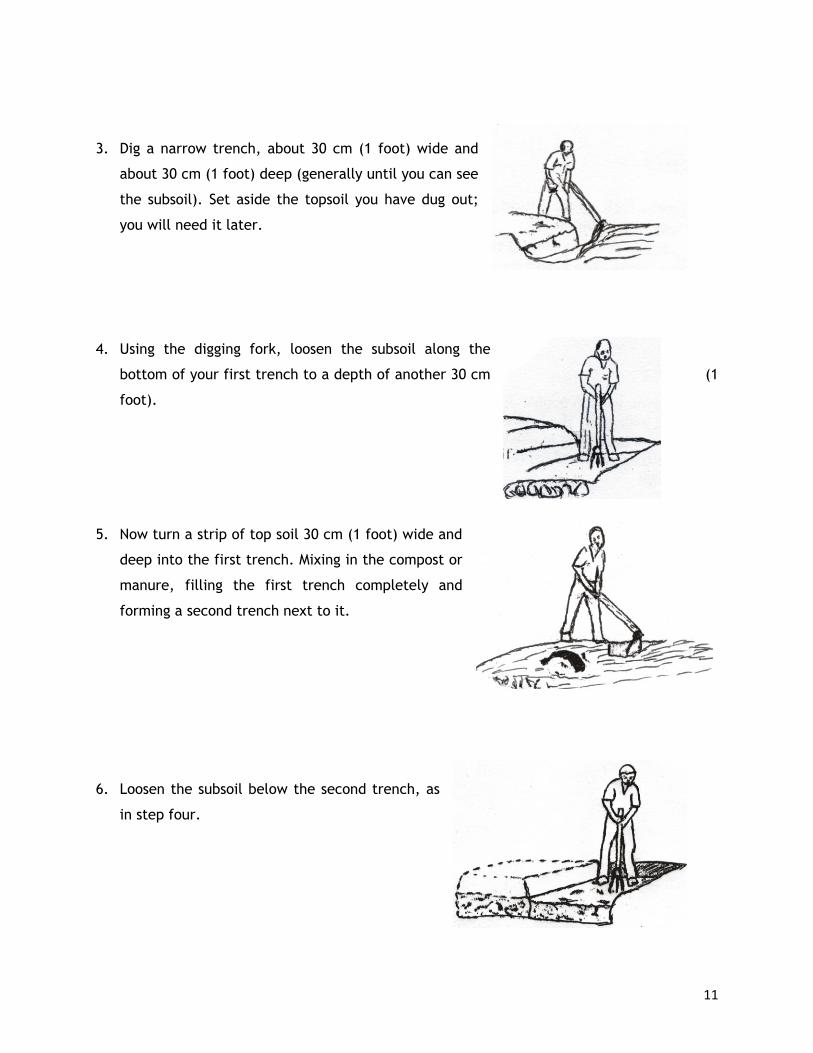
3. Dig a narrow trench, about 30 cm (1 foot) wide and
about 30 cm (1 foot) deep (generally until you can see
the subsoil). Set aside the topsoil you have dug out;
you will need it later.
4. Using the digging fork, loosen the subsoil along the
bottom of your first trench to a depth of another 30 cm (1
foot).
5. Now turn a strip of top soil 30 cm (1 foot) wide and
deep into the first trench. Mixing in the compost or
manure, filling the first trench completely and
forming a second trench next to it.
6. Loosen the subsoil below the second trench, as
in step four.
12
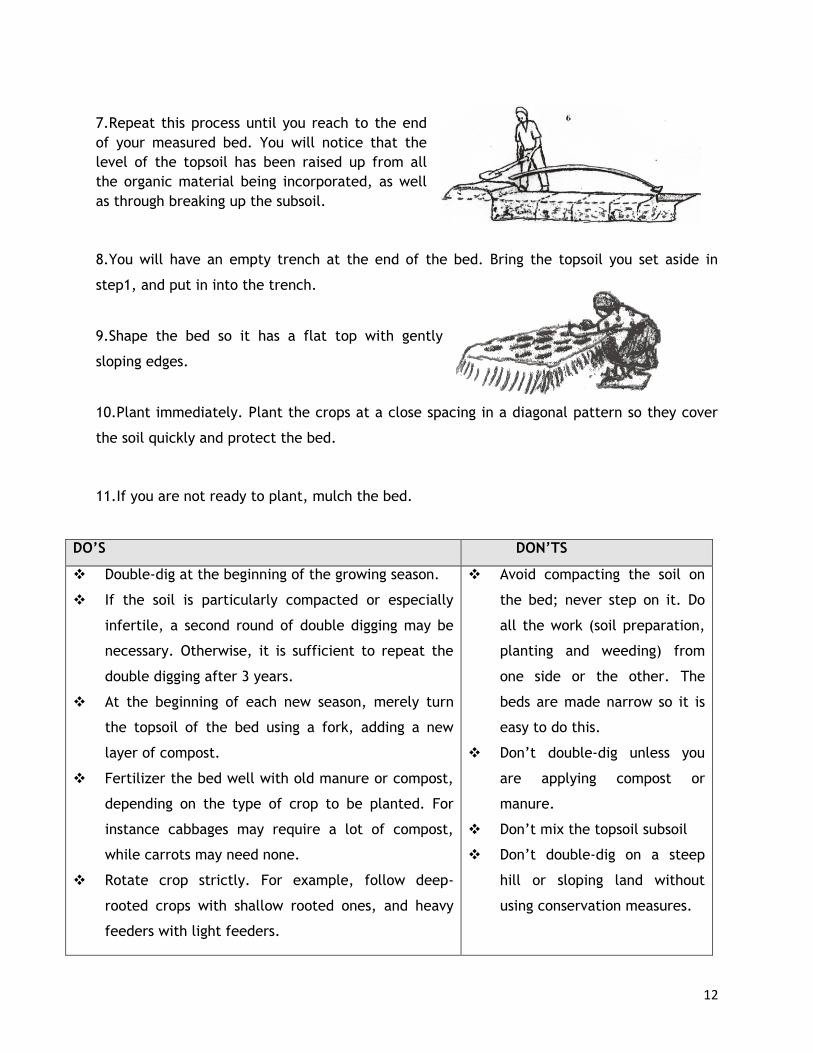
7.Repeat this process until you reach to the end
of your measured bed. You will notice that the
level of the topsoil has been raised up from all
the organic material being incorporated, as well
as through breaking up the subsoil.
8.You will have an empty trench at the end of the bed. Bring the topsoil you set aside in
step1, and put in into the trench.
9.Shape the bed so it has a flat top with gently
sloping edges.
10.Plant immediately. Plant the crops at a close spacing in a diagonal pattern so they cover
the soil quickly and protect the bed.
11.If you are not ready to plant, mulch the bed.
DO’S DON’TS
Double-dig at the beginning of the growing season.
If the soil is particularly compacted or especially
infertile, a second round of double digging may be
necessary. Otherwise, it is sufficient to repeat the
double digging after 3 years.
At the beginning of each new season, merely turn
the topsoil of the bed using a fork, adding a new
layer of compost.
Fertilizer the bed well with old manure or compost,
depending on the type of crop to be planted. For
instance cabbages may require a lot of compost,
while carrots may need none.
Rotate crop strictly. For example, follow deep-
rooted crops with shallow rooted ones, and heavy
feeders with light feeders.
Avoid compacting the soil on
the bed; never step on it. Do
all the work (soil preparation,
planting and weeding) from
one side or the other. The
beds are made narrow so it is
easy to do this.
Don’t double-dig unless you
are applying compost or
manure.
Don’t mix the topsoil subsoil
Don’t double-dig on a steep
hill or sloping land without
using conservation measures.
13
CHAPTER 3.00 NURSERY ESTABLISHMENT AND MANAGEMENT.
The first step in successful vegetable production is to raise healthy vigorous seedlings. Young
plants whether propagated from seed or transplant require a lot of care particularly during
the early stages of growth. They have to be protected from adverse temperatures, heavy
rains, drought, wind and a variety of pests and diseases. If small seeded vegetables are sown
directly in the field, germination is often poor and the young plants grow very slowly and
require a long time to mature.
3.1. Planning and timing of crops.
One of the biggest frustrations growers encounter is raising a beautiful crop only to see it rot
in the field because there is no market for it. Much of this can be eliminated by planning
production in accordance with: the market needs, the vegetable type, when prices are likely
to be high, and quantities required. The growing of crops should be planned in such a manner
that there is continuous supply of produce throughout the year. The production plan should
incorporate a rotation plan for crops.
A farmer should work out a production plan to supply the desired quantities of each
vegetable. In order to do this, information is needed on: a) How long does it take for the
crops to reach maturity? This will tell when to plant and to harvest (b) How long can you
continue harvesting once a crop is mature? This will indicate how often to plant to ensure
continuous production. (c) Expected yield: how much will you harvest from a given area? This
will tell how much to plant to satisfy customers.
3.2. Site selection.
A number of important aspects must be considered in choosing a site for the establishment of
a nursery if the outlay for seed, fertilizer, and labour is to show profitable returns. The
nursery site should be near a water source, have good drainage and be protected from winds.
It should not be on a steep slope as this causes soil erosion. Select an area with sandy loam
soil with good supply of humus. It is best if the nursery is not in the garden area or field
because it can lead to a build-up of insects and disease.
The transplants will only need a moderate amount of fertility because they are only in the
nursery for three to five weeks, depending on the crop. It is important that you rotate crops
within in the nursery to prevent disease and insect pressure from becoming a problem.
Incorporating cover crops and periodically resting the land used for the nursery is essential in
preventing deterioration of the soil structure and build up of disease and pests.
3.3. Nursery bed preparation.
Beds are normally raised to prevent water logging. However, during the dry season sunken
beds are ideal for the maximizing water retention. Preparation for the nursery should start
the preceding season, allowing time to cultivate the bed or plant cover crops to reduce weeds
14
competition. The nursery size will depend on the volume of transplants you wish to produce.
A typical nursery bed is 1.0 metre wide with 30cm paths between beds.
To prepare the bed prior to seeding, remove all weeds, break down all the clods or lumps of
soil and mix in organic manures such as farm yard manure or compost. Level the bed with a
rake to create a firm, fine seed bed to sow your seeds.
3.4. Sowing seeds in a nursery bed.
Always start with seed that has a good germination. Older seed that has not been properly
stored may have a low germination and poor plant vigour.
Make a shallow furrow or drill with a stick. Water the drill, then sow seeds evenly and thinly.
Always consider the size of the seed while covering it with soil. Fine or small seeds require
comparatively thin or shallow soil covers. The general rule is to cover seed twice as deep as
their diameter. It is best to dampen the soil thoroughly before sowing seeds. This will ensure
good distribution of water throughout the soil and minimize the chance of washing or
splashing small seeds away. Little added water is needed before seedlings emerge. Too much
water will promote damping-off organisms. Once seedlings emerge, check them for dryness at
least two or three times per day and water as needed. Never allow seedlings to wilt.
Apply pesticides and fertilizer against pests and diseases in the drills and on the soil after
covering the drills. Mix thoroughly in the soil before sowing your seeds. Any contact with the
seeds may scorch or kill the germinating root.
Seeds which should be started in nurseries include kales, tomatoes, capsicums, brinjals. Crops
such as carrots and onions can be sown directly in the soil.
3.5 Nursery maintenance.
After sowing seeds, protect your nursery from hot sun or heavy rains. A light cover of rough
grass will help to retain moisture and protect the seedlings from rain splash and excessive
heat from the sun. The cover should only provide partial shade because the seed will need
some light to stimulate germination and prevent the transplants from becoming long and
skinny.
Vegetable seeds and transplants need an adequate amount of moisture for germination and
growth. Avoid over-watering, however, since root development will be poor and diseases are
more likely to develop if the plants are grown in soils that are kept saturated. Water only
when needed, but don’t let the plants wilt if you can avoid it.
The nursery should be weeded regularly and insect pests and diseases monitored. If required
a fungicides or insecticide application can be made. Fertilizers should only be applied if
needed.
Thickly sown seedlings will need to be thinned after germination to avoid overcrowding.
Thinned seedling can be planted into another seedbed.
15
After 4-6 weeks, depending on the crop, the seedlings should be hardened off before
transplanting to prevent shock. This is done by exposing the seedlings to more sunlight and
higher temperatures by removing the shade and reducing the water slightly. The transplants
can be hurt if they wilt excessively.
3.6 Starting seedlings in a growing structure
If you have access to a covered structure to grow your transplants, the best option is a
greenhouse. The greenhouse should be located in full sun in an area with good drainage. It
should be oriented in a north-south direction to minimize the effects of shading from the
greenhouse frame. Growing in a covered structure, although more expensive than outdoor
seedbeds, will provide transplants with more uniformity and vigour. The transplants will
generally start to grow quicker and experience less transplant shock than seedlings pulled
from a nursery. As well, seedlings can be monitored more easily in a greenhouse for pests and
disease.
There are a wide variety of containers used to start seeds in a greenhouse. The most common
are flats of cell packs/trays. For container production, the best growing mix should have a
combination of good moisture holding capacity, good drainage, and high nutrient retention. A
good germination media can be purchased or made from a mixture of soil and peat or well
rotten manure. It can be risky to use outside soil for raising transplants because if soil is
contaminated with disease organisms, seedlings may become infected.
3.7 Sanitation
Many disease and insect problems can be prevented or controlled without the use of
pesticides. Always remove and destroy any plant debris or infected plant parts after the
growing season. Plant pathogens are less likely to survive if organic matter is quickly
decomposed. Turn the soil after harvest to help break down small roots that may harbor
nematodes, fungi or bacteria. Remove any infected plants when you first notice them will
reduce the spread to other plants. It is a good practice to clean and sterilize any tools or
containers between uses. A 10 percent solution of household bleach diluted with water (1
part bleach to 9 parts water or 10% and soak for 30 minutes) works well. After soaking in the
solution, rinse of the tools or containers with clean water and store in a clean area for the
next use.
16
CHAPTER 4.00 SCREEN HOUSE FARMING
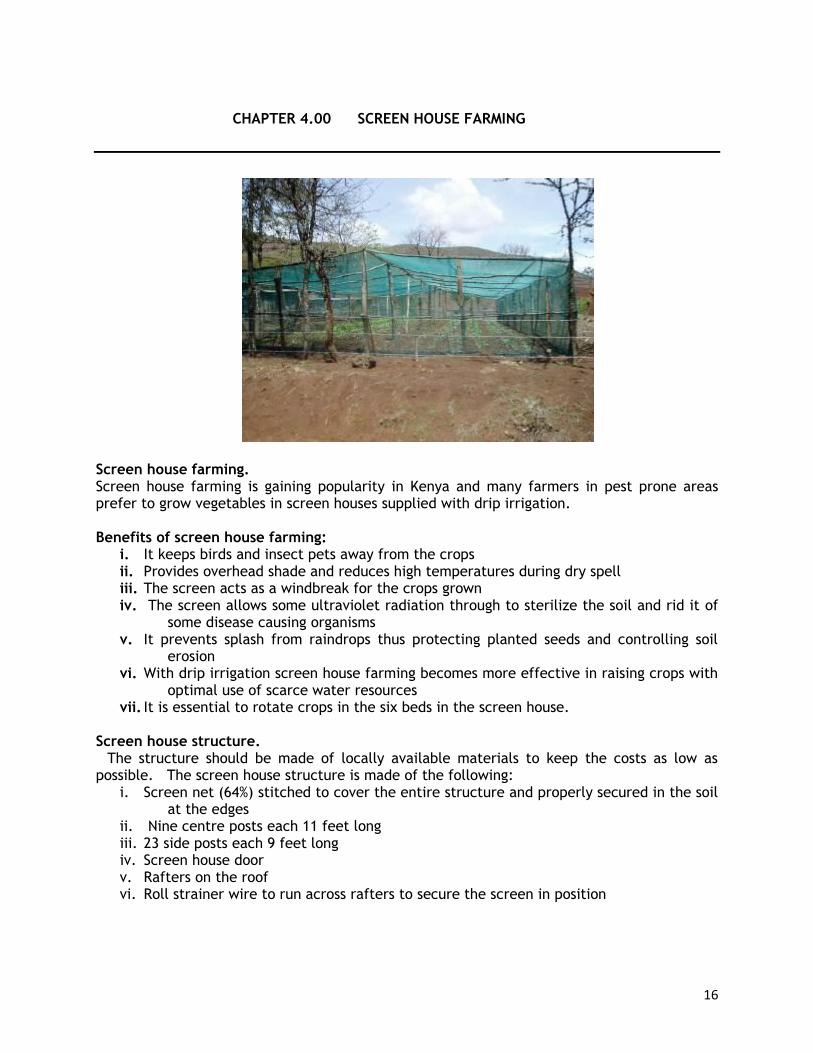
Screen house farming. Screen house farming is gaining popularity in Kenya and many farmers in pest prone areas prefer to grow vegetables in screen houses supplied with drip irrigation. Benefits of screen house farming:
i. It keeps birds and insect pets away from the crops ii. Provides overhead shade and reduces high temperatures during dry spell iii. The screen acts as a windbreak for the crops grown iv. The screen allows some ultraviolet radiation through to sterilize the soil and rid it of
some disease causing organisms v. It prevents splash from raindrops thus protecting planted seeds and controlling soil
erosion vi. With drip irrigation screen house farming becomes more effective in raising crops with
optimal use of scarce water resources vii. It is essential to rotate crops in the six beds in the screen house.
Screen house structure. The structure should be made of locally available materials to keep the costs as low as possible. The screen house structure is made of the following:
i. Screen net (64%) stitched to cover the entire structure and properly secured in the soil at the edges
ii. Nine centre posts each 11 feet long iii. 23 side posts each 9 feet long iv. Screen house door v. Rafters on the roof vi. Roll strainer wire to run across rafters to secure the screen in position

17
Steps in construction - Select a good site, 80 ft long and 30 ft wide. The center posts should be dug at the center of the screen house along the length at a spacing of 10 ft apart. Then dig the side posts 10 ft a part a round the screen house. - Nail two lines of rafters at every side of the screen house. Also nail roof rafters on the poles across the screen house. Then fix lines of wire across the rafters along the screen house. Fix the door at the front. - You can now cover the structure with a 60% screen net and secure it into the soil all round the structure. - Those who prefer a flat roof should have all measuring 9 ft long. Seedbed. - The screen house will accommodate six (6) beds measuring 90 cms wide with a foot path 50cms wide between beds and all round the edge of the screen house. - Double dig the beds, apply manure generously and mix with the soil. There after you should raise the beds 15 cms above ground to control water logging and increase aeration. - Next install drip lines on the bench 60 cms a part leaving 15 cms on either side of the bed. Add a third drip line at the centre for onions. You will need more drip lines for carrots due to closer inter row spacing. Transplanting seedlings in screen house. The process is similar to that for specific crops already detailed in this handbook. The seedlings are started in a nursery either on an open soil or seedlings chamber in the case of tomato seedlings. The seedlings chamber is the most common since it keeps insects and pests away. You may direct sow carrots and cow peas on to the beds. Crops rotation in a screen house. There are six beds in a screen house each measuring 90 cms wide and running a full length of the screen house 25 m (80 ft). You may select the types of crops to grow in a screen house based on market demands, diseases and pests and family nutritional needs. Whatever the case you should always consider a rotational programme already discussed in this handbook. Number the beds and plant them following a designed crops rotation. Some crops have a shorter lifespan than others. This should be taken into consideration when raising seedlings Water management. There should be adequate supply of water. Be careful not to waterlog the beds. Check the drips daily and clean the tank filters periodically. Crops management. All crops grown in the screen house have been covered under specific topics in this hand book. You should strictly adhere to the crops husbandly practices as explained in the hand book.

18
CHAPTER 5.00 TRANSPLANTING AND FIELD MAINTENANCE.
5.1. Field establishment
Seedlings for transplanting should be selected depending on growth, vigor and absence of
pests and diseases. Seedlings should be transplanted after they attain a certain height and
thickness. Before transplanting you should water the nursery beds the previous night to
enable the seedlings to be uprooted without injury to the roots. See to it that the uprooted
seedlings do not get direct sun or hot air. Transplanting of seedlings should be done on a dull,
cloudy day or in the evenings if that is not possible then put some shade over the transplants
for one or two days.
Space the plants appropriately taking into consideration the future root development and the
ultimate size of the plant.
5.2. Water use in vegetable production
During farm visits in Meru in 2013, it was noticed that many farmers were applying too much
water with the drip irrigation systems. When using drip tube irrigation it is very easy to use
too much water. Excess watering will result in very poor crop results.
1. Excess water causes water logging of the soil which eliminates the air in the soil. The
plant roots need air or they will die.
2. Excess water will favor the growth of many fungal diseases especially the damping-off
disease.
3. It also wastes the valuable water resources.
Therefore we recommend:
1. Allow the soil to dry out between watering. Do not water the crop until you see a few
plants showing signs of water stress such as plant wilting.
2. Every day, one should put their hand into the planting bed soil and squeeze the soil. If
it sticks together in a ball the soil does not need water. If the soil falls apart following
the squeeze test then one needs to irrigate the crop. This is called the squeeze test.
3. We have been promoting the growing of several crops in the same screen house. This
will mean that some rows will require more water than others. Rows that do not
require water (squeeze test) must be plugged off. If one continues to water a wet soil
you will create conditions for fungus diseases to grow.
4. When watering the crop it is important to water until the soil is wet down 15 cm then
do not apply any more water until the soil is dry and you see a few plants beginning to
wilt. Fewer more significant waterings are much better at preventing fungal diseases
than many small waterings.
19
5. If you see damping off disease in the crop you should drench the soil with fungicides
like Ridimol etc.
5.3 Manure Compost and Fertilizer.
Manure is a different type of soil fertilizer than purchased fertilizer. Only a portion of the
nutrients in raw manure and compost will be available to plants within a year of its
application. May people say half of the total amount is available the first year. The use of
commercial/straight fertilizer may be necessary to supplement the nutrient requirements in
many cases. The manure and compost will continue to add value to the soil in the years
following application where the fertilizer generally does not.
The application of organic manures such as farm yard manures and compost are a good
fertility option and great value to the soil. Besides improving soil fertility; manures contribute
to the physical condition of soils. They increase the moisture holding capacity of light (sandy)
soils and add porosity to the heavy (clay) soils.
There are numerous commercial fertilizers in the market. A commercial fertilizer contains
different mixes of the 3 of the main nutrients a plant needs to grow. They are Nitrogen (N),
Phosphorous (P), and Potassium (K). In the central part of Kenya the soils have adequate
potassium so most of the fertilizers used are mixed fertilizers of nitrogen and phosphorus.
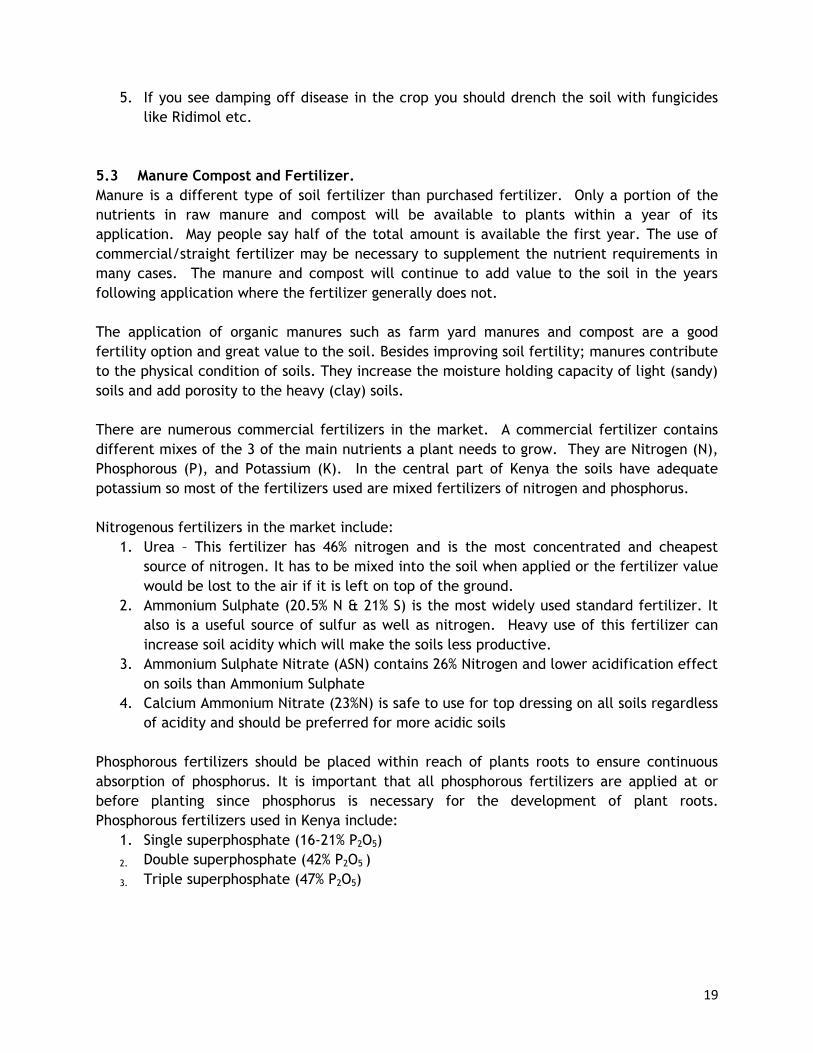
Nitrogenous fertilizers in the market include:
1. Urea – This fertilizer has 46% nitrogen and is the most concentrated and cheapest
source of nitrogen. It has to be mixed into the soil when applied or the fertilizer value
would be lost to the air if it is left on top of the ground.
2. Ammonium Sulphate (20.5% N & 21% S) is the most widely used standard fertilizer. It
also is a useful source of sulfur as well as nitrogen. Heavy use of this fertilizer can
increase soil acidity which will make the soils less productive.
3. Ammonium Sulphate Nitrate (ASN) contains 26% Nitrogen and lower acidification effect
on soils than Ammonium Sulphate
4. Calcium Ammonium Nitrate (23%N) is safe to use for top dressing on all soils regardless
of acidity and should be preferred for more acidic soils
Phosphorous fertilizers should be placed within reach of plants roots to ensure continuous
absorption of phosphorus. It is important that all phosphorous fertilizers are applied at or
before planting since phosphorus is necessary for the development of plant roots.
Phosphorous fertilizers used in Kenya include:
1. Single superphosphate (16-21% P2O5)
2. Double superphosphate (42% P2O5 )
3. Triple superphosphate (47% P2O5)
20
Potassium fertilizers are not commonly used in small holder agriculture since it was believed
in the past that Kenyan soils had sufficient potassium (K). However recent soil analysis has
revealed deficiencies of potassium in soils across the county.
Potassium fertilizers include;
1. Muriate of potash (60%KO)
2. Sulphate of potash (48%K2O)
Most fertilizers are compound/mixed fertilizers contain nitrogen, phosphate and at times
potassium in different combinations or ratios. One can purchase a mixed fertilizer to meet
the needs of the crop to be grown. Some crops require more of one nutrient than others.
Foliar application of plant nutrients is gaining popularity with intensive cultivation of crops
including vegetables however it has limitations:
a) Only specific quantities of nutrients can be applied to the foliage (leaves) at any one
time. Excessive application may burn/damage the leaves
b) There must be sufficient foliage/leaves for it to be taken up by plants.
c) It is uneconomical to apply all plant nutrients through the leaves.
d) You should understand that foliar fertilizers can only be used to supplement fertilizers
applications through the soil since major plant nutrient requirements can be met
simply and economically with fertilizers applications through the soil.
e) Foliar applications for the micronutrients are the most successful because they are
only needed in very small amounts.
5.4 Composting in Kenya
Why compost? Compost will break down the various types of organic matter around the
shamba and provide the odour free, earthy type material that will enrich the soil and increase
the soils ability to hold water. Composting is a natural process where the bacteria and fungus
(good soil bugs) change the raw material in to compost.
Composting requires four things:
1. Brown material - this is maize stalks, straw and vines from wheat or beans or peas,
dead leaves from any plant and sawdust but not sticks or twigs.
2. Green material - this is any green living plant material especially Tethonia and all
types of animal manure.
3. Water - the composting bugs require water to live and grow and convert the material
to compost if the pile is too dry the bugs stop working.
4. Air - the compost bugs require air to live and grow and convert the material to
compost, if a pile is waterlogged the good bugs will die off and the material will not
compost and will start to stick.
If any of these four is missing in the pile then the material will not rot and become compost.
21

22
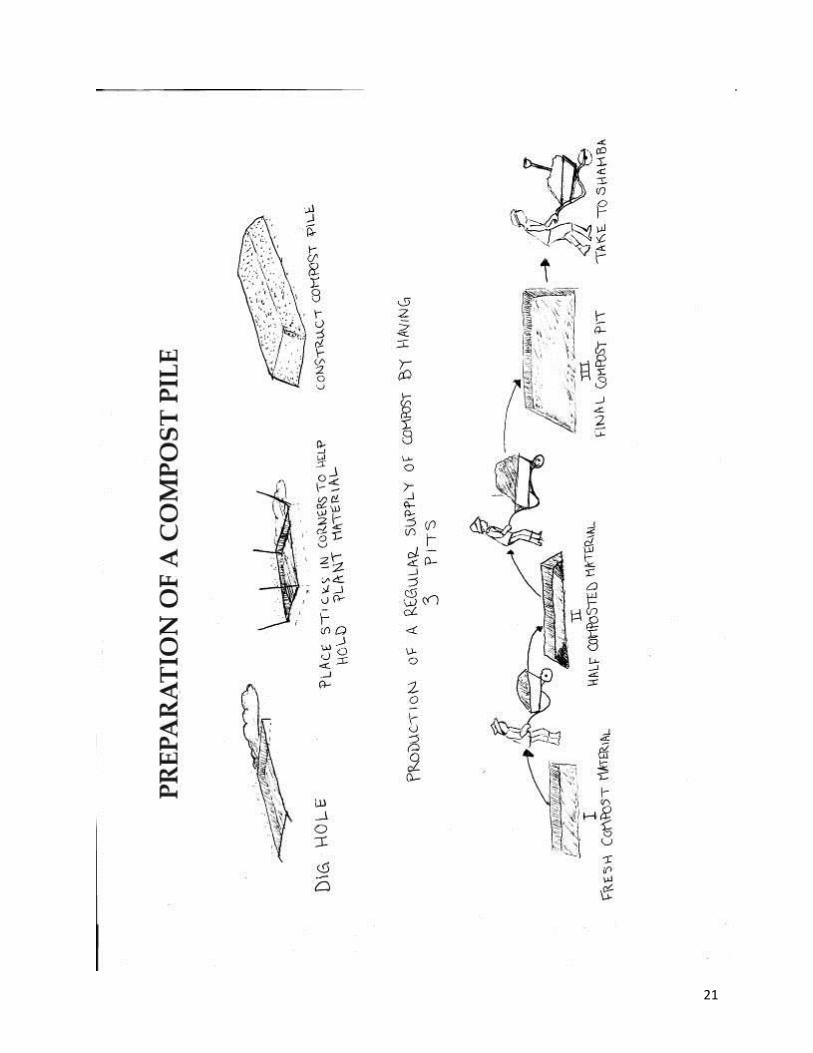
To make a compost pile: Make a layer of brown material about 15 cm thick then add a layer
of green material about the same thickness on top of the brown layer. If you are using pure
wet manure the layer need only be 10 cm thick. Do this until you get a pile 1 meter high or
better. Add water till the entire pile is wet all thorough.
Covering the pile: One should cover the pile with a small tarp or dry material as it will
prevent the loss of water and decrease the amount of water needed. During the rainy season
the pile does not need to be covered. If the pile is placed in the shade of trees it will also
reduce the water loss and may not need to be covered.
Using a pit A pit 1.5 m by 3 m about 25 cm deep can be used during the dry season to make
the compost. The advantage of the pit is it will hold the water better and decrease the need
to water the pile. It is important not to dig the pit too deep as it will be hard to get the air to
the bottom of the pit if it is more than 25-30 cm deep. Also the pit will catch any running
water so it is important not to place the pit where it will fill with water running through the
shamba during the rainy season or from leaky irrigation pipes. An excellent place to put the
pit is under a banana tree as it will shade the pile and the fertile juice from the pile will
make the banana tree grow better. An improperly located pit will be full of water and
become a pile of mud. The wet material will not compost as it is too wet and there is no air
therefore the good bugs that make the compost will die.
Amount of water in a compost pile: A pile of decomposing material should be about 50%
water. The simplest way to tell this is to grab a handful of the mixed material and squeeze it
(squeeze test). If a very small drip of water forms between your finger or the ball of material
stays together when squeezed the pile is ok. If water can be squeezed out of the mixture then
the pile is too wet.
Turning the pile: Turning or mixing the compost pile will speed up the composting, as it adds
air each time it is turned. Using the layers of material will reduce the need for turning as the
brown coarse layer generally allows air to move into the working pile. If a pile becomes
waterlogged the best way to get it going again is to turn the pile.
Adding ashes to the pile: Ashes contain many nutrients and can be added to the compost
pile. It is probably best to add the ashes to the pile towards the end of the process or when
the compost is finished.
When is a pile finished composting: Compost is finished when the entire pile is a uniform
dark brown colour, has an earthy type feel and odour to it and when there is no heat left in
the pile. If there are still maize stalks in the pile add some more green material and mix and
they will decompose. If there is heat in the pile it is a sign the composting bugs are still
working and it should be left a little longer. If you are adding weeds with seeds to the pile the
weeds seeds will be killed if the pile heats up to 40 degrees C. If you want weed free compost
for a green house then only put plant material free of seeds or make sure the pile gets up to
400C.
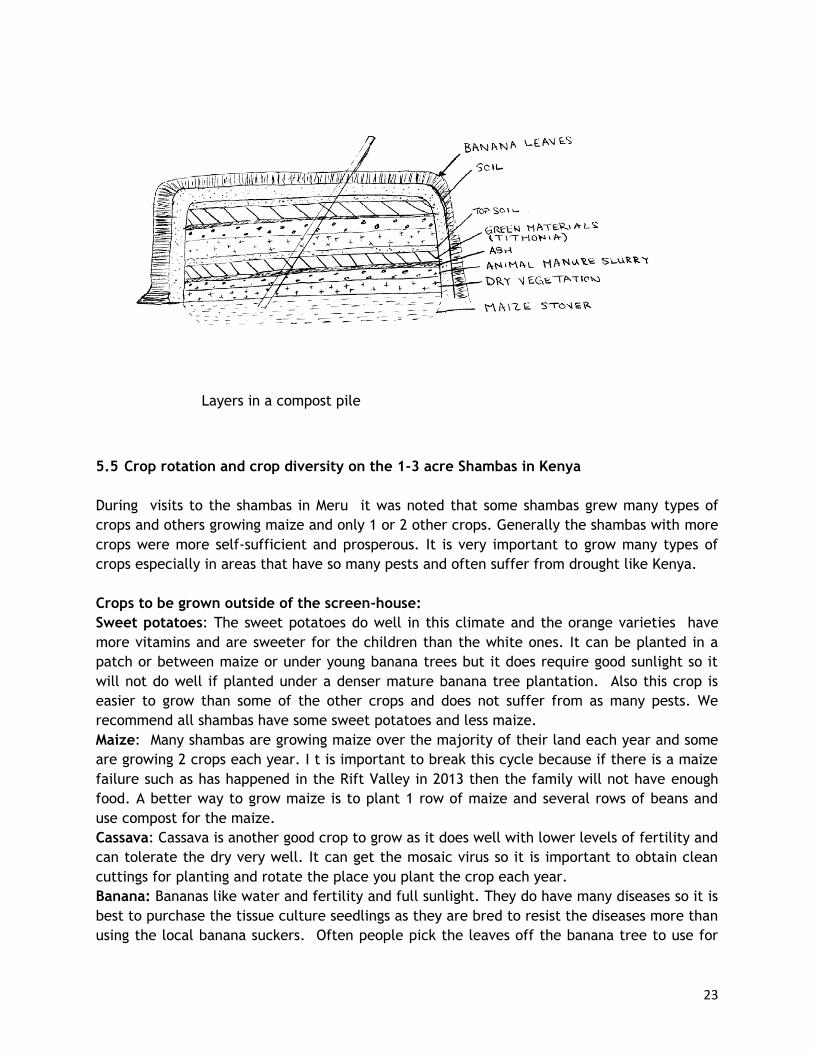
23
Layers in a compost pile
5.5 Crop rotation and crop diversity on the 1-3 acre Shambas in Kenya
During visits to the shambas in Meru it was noted that some shambas grew many types of
crops and others growing maize and only 1 or 2 other crops. Generally the shambas with more
crops were more self-sufficient and prosperous. It is very important to grow many types of
crops especially in areas that have so many pests and often suffer from drought like Kenya.
Crops to be grown outside of the screen-house:
Sweet potatoes: The sweet potatoes do well in this climate and the orange varieties have
more vitamins and are sweeter for the children than the white ones. It can be planted in a
patch or between maize or under young banana trees but it does require good sunlight so it
will not do well if planted under a denser mature banana tree plantation. Also this crop is
easier to grow than some of the other crops and does not suffer from as many pests. We
recommend all shambas have some sweet potatoes and less maize.
Maize: Many shambas are growing maize over the majority of their land each year and some
are growing 2 crops each year. I t is important to break this cycle because if there is a maize
failure such as has happened in the Rift Valley in 2013 then the family will not have enough
food. A better way to grow maize is to plant 1 row of maize and several rows of beans and
use compost for the maize.
Cassava: Cassava is another good crop to grow as it does well with lower levels of fertility and
can tolerate the dry very well. It can get the mosaic virus so it is important to obtain clean
cuttings for planting and rotate the place you plant the crop each year.
Banana: Bananas like water and fertility and full sunlight. They do have many diseases so it is
best to purchase the tissue culture seedlings as they are bred to resist the diseases more than
using the local banana suckers. Often people pick the leaves off the banana tree to use for
24
various purposes around the shamba. This is fine, but remember you need to leave 8 leaves
on the tree or you will reduce the banana yield.
Mango and pawpaws: Both of these grow well here and are a perennial crop so they produce
fruit each year. They do not take up much space and can be planted around the perimeter of
the property. We would strongly recommend you grow some of these crops as well.
Black beans, green or black grams and field beans: These are field legume crops that will
make their own nitrogen. The field beans, grams and hybrid varieties of black beans will ripen
in 4 months. The traditional black bean will require 6 months to reach maturity. The grams
ripen unevenly and shatter when ripe for that reason they are picked daily for a month. The
black beans are a higher value crop but are susceptible to blight. All these crops can be
interplanted with maize or grown as a pure stand.
Sesbania: Is a fast growing bush that last from 5-10 years. It is excellent fodder for cows,
sheep and goats. We recommend this be planted around the perimeter of the property and
used for livestock feed.
A crop rotation plan for the screen-house and kitchen gardens:
A crop rotation will diversify the food produced in the gardens, reduce the pest pressure and
improve the soil. The following is a crop rotation with 5 different crop groups in it. We
suggest the farmer choose one crop from each group (1 through 5). Start at crop 1 and plant a
crop from each of the 5 groups. Another option is to put a third of the row into each of the
crops in the group. Rather than planting the screen houses all at one time it would provide a
more steady supply of food and income if every month there were 2-3 rows planted to several
crops. This would mean that there would be food ready for eating each month and any surplus
could be sold. If you have a greenhouse and are able to grow a high value crop like tomatoes
go ahead but if you cannot do such you should consider planting several crops in 2-3 rows
each month.
Group 1: Brinjal (eggplant) – Peppers - Tomatoes (provided the soil does not have bacterial
wilt). These crops require good level of soil fertility; are all members of the same plant
family so they will be attacked by the same type of pests and in this case all are susceptible
the blight.
Group 2: Cabbage – Kake - Swiss chard - Spinach
This group of crops also require good levels of soil fertility. The cabbage and kale will have
more insect pests than the other 2 crops. We are told the cabbage sell for good prices in
January and June the remainder of the year the price is low. What we suggest is to plant
cabbage during the months of October and March and the remainder of the year it would be
better to plant a mixture of cowpeas and amaranthus in the space the cabbage would be
grown. The cowpeas can be picked for greens and when the amaranthus is 70 cm high or
before it goes to seed the mixture should be worked into the soil as a green manure crop.

25
Group 3: Courgette – Melons – Cucumbers – Butternut - Watermelon
This group requires moderate fertility, will get blight and has several insect pests including
white fly. They require insects to pollinate the flowers as well so a greenhouse or screen
house with a very tight material may prevent the insect pollinators from getting at the plants.
They can be hand pollinated with a small (makeup) brush. Watermelon and butternut become
a large vine when full grown and may take up too much space for that reason we recommend
these be put outside the screen-house provided the birds do not eat them. The birds may eat
any of these plants when young but do not seem to bother with the larger leaves and vines.
The bed in the screen house that has these vine plants could also grow pole/busk/stake beans
if several stakes were put in the ground for the beans to climb over the melons.
Group 4: Carrots – Onions – Corriander - Garlic
These are moderate feeding crops and do not require a lot of space. Rather than only plant 2
rows of these crops in the bed, one can either plant 2 rows of onions with a row of coriander
or carrots down the middle or 2 rows of carrots with a row of onions down the middle. This
will increase the production per bed.
Group 5: Peas – Cowpeas - Broad beans
This is a legume group. This group will produce its own nitrogen fertilizer. It does not require
the high amounts of fertilizer. These crops do not have as many pests as other crops but the
birds love to eat the young shoots so it is important to keep the birds out. Cowpeas are grown
outside the greenhouse generally. One can plant a mixture of cowpeas and amaranthus in a
bed in the green/screenhouse as a green manure and crop rotation crop. One can use the
leaves for 6 weeks from each crop or so and then chop the crop into the soil before the
amaranthus go to seed.
5.6 Weed control.
Weeds compete with plants for moisture, soil nutrients and space. They harbor insect pests
and diseases which are harmful to your crops. They must therefore be controlled timely and
effectively. They should not be allowed to flower and form seeds since this will grow more
weeds the next season.
Several methods can be used to control weeds. They include hand weeding using hand tools
such as hoes and forks. The use of tractor drawn implements such as harrows are applicable
in medium and large scale farms while herbicides are increasingly being used by many
farmers.
5.7 Mulching and Pruning/desuckering.
A good way to conserve soil water and prevent weed growth at the same time is to apply a
layer of cut grass to the bare soil around the plants you intent to grow, this is known as
mulching. A mulch can be made of grass, straw, dead leaves or even old plastic. Grass
mulching is recommended to conserve soil moisture and suppress weeds. Make a mulch out of
the most easily obtainable material. Remember not to take too many leaves off the good
banana trees.
26
Pruning is the removal of branches and shoots from plants and fruit trees. Pruning is required
to ensure the fruit on the tree become large and salable. In Kenya the trees grow fast so it is
important to remove side shoots regularly in order to encourage good ventilation and fruit
setting. If pruning is postponed for too long, large wounds are made and in wet weather,
diseases such as wilt and blight can infect the plants through the wounds. It is not advisable
to remove the leaves above the tomato fruit formation or cluster as foliage is necessary for
growth of the plant.
Desucker the tomato plants continuously and defoliate the drying leaves at the bottom and
remove the trash from the garden to control pests and diseases.
5.8 Integrated pest management (IPM).
Integrated pest management is a holistic approach to the prevention and control of pests and
diseases using all existing crops protection techniques and strategies. The IPM strategy uses
all available ways of controlling disease and pests not just chemicals. Is has become very
important due to the growing consumer awareness to the harmful effects of pesticides. It is
also important as continual use of the same chemical pesticide over time the bugs get
immuned to the chemical and it does not work any more. The following crop protection
measures are used in IPM strategy.
1. Cultural practices
These are basic things that many farmers can/do use to prevent problems. They
include using disease resistant varieties (tissue culture bananas), using correct spacing
so there is good air movement in the screenhouse which helps to prevent the blight
diseases, growing susceptible varieties when level of infestation is low use of correct
spacing, use of disease free planting materials, preventing over bearing
(flowers/fruits) and crop rotation practices.
2. Hygienic measures
These are all things one does to keep the place clean and disease free. These are
procedures for the prevention or eradication of sources and vectors of pests and
diseases. They reduce the amount of disease causing organisms thereby reducing the
need for chemical control. It also increases the chances of successful biological
control. This is achieved through the use of clean planting materials, removal of old
foliage carefully to avoid injury, removal of infected plant debris, regular inspection
of crop to assess level of pests and disease infestations, weed control, working from
clean irrigation water and destruction of hiding places for harmful organisms such as
snails and slugs shell.
3. Mechanical control
Mechanical control involves the use of mechanical measures to control pests and
diseases. These includes keeping of insects from plants using insect nettings, covering
27
soil with polythene, cloth, capturing insects using sticky traps, trap plants pheromone
traps, temperature treatments to kill harmful organisms such as hot water for seeds,
buibs, tubers and cuttings; hot air, solarisation through soil covered by tansparent
polythene; and steaming and removal of infested plant/plant parts.
4. Biological control
This is the control of pest and diseases through the introduction of their natural
enemies. These could be predators (mites, bugs, beetles, gall midges)
parasites(parasitic wasps and flies) or micro-organisms (nematodes, fungi, bacteria
and viruses.)
5. Chemical control
Within the concept of IPM, chemical control is mainly used as a corrective measure.
Hence, the following guidelines should be adhered to:
Use of selective pesticides
Use of selective application techniques
Use of pesticides with short persistence
Addition of wetters or spreaders should be carefully handled as they may kill
beneficial insects especially predators.
Safe use of pesticides
This is a very important aspect for horticultural growers since pesticides are harmful to
workers who are regularly exposed to them and other crops in the field. The workers actually
involved with the spraying should be adequately protected. The aspects of safety should be
considered and pesticides kept away from food stuffs and passengers during transportation in
case of accidental spillage. The use of the right pesticides, frequency of application and
dosage rates applied is critical for effective pest and diseases control and the growers and/or
their workers should be appropriately trained and fully conversant with these aspects.
i. Chemical control – mainly used as a corrective measure in IPM. Please observe the
following guidelines when using chemicals.
- Use of selective pesticides.
- Use selective application techniques.
- Use pesticides with short persistence.
-Addition of spreaders and waters should be carefully handed as they may kill beneficial
insects like predators.

28
5.9 Pesticide safety
What are pesticides?
A pestIcide refers to many different kinds of chemicals that are intended to control or destroy
a pest. Pests can be animals, such as insects or mice, unwanted plants known as weeds or
microorganisms.
Pesticide Labels
Different coloured labels mean different warnings according to toxicity.
Red Group ia Extremely Hazardous Red Group ib Highly Hazardous Yellow Group ii Moderately Hazardous Blue Group iii Slightly Hazardous Green Group iv Unlikely to present acute Hazard
Pesticide use:
Choose the appropriate type and amount of pesticide needed. This will reduce storage
problems and help keep costs down. Always know that the pesticide labels says. Labels
provide proper information on application rates clothing and emergency instructions.
Wear proper protective equipment ( PPE).
Our skin can be protected from absorbing pesticides by wearing proper clothing. Use a wide
brimmed, waterproof hat, a long sleeved shirt, long pants, rubber boots and chemical –
resistant gloves. Depending on the product being used, eye goggles or a face shield and a
respirator may also be required. This prevents the chemicals from splashing in our eyes or

29
being inhaled when we breathe. Make sure the eye protection and the respirator fit securely
and both are in good working condition.
Never eat, drink or smoke when applying pesticides. Always wash your hands with soap and
water after applying pesticides. Wash protective clothing separately from other clothing.
Preparing the area for pesticide application.
Before spraying pesticides, clear the area of animals, food and other people. Teach children
that “pesticides are poison”. Make sure that the weather is not too windy so that the spray
does not drift where it is not meant to go. Pesticides should not be sprayed in the rain.
Mixing and Loading Chemicals.
Stay away water sources when mixing and loading chemicals. An accidental spill may
contaminate the water source. Never exceed the amount of pesticide used for the target pest
in the target area. It is important that your sprayer is delivering the right amount of product
per hectare or square metre. The proper calibration (amount of spray released) of your
sprayer makes economic sense and environmental sense.
Prevent leftover pesticide by mixing only as much as needed. When the chemical containers
are empty of the pesticide, rinse the chemical out of the container three times before
disposing the container. Do not use the empty container for storing any food or water for
people or livestock. To ensure that pesticides containers are not re-used for other purposes,
empty containers should have holes driven in them once empty.
General first aid guidelines.
Swallowed pesticide: Induce vomiting only if the chemical is not a petroleum based product
or a caustic poison. This would be explained on the label.
Pesticide in eye: Eye damage can occur within minutes with some types of pesticide. If
poison slashes into an eye, hold the eyelid open and wash quickly and gently with clean,
running water for 15 minutes.
Pesticide on skin: If pesticide splashes on the skin, soak the area with water and remove
contaminated clothing. Wash skin and hair thoroughly with soap and water .
Inhaled pesticide: If a person becomes ill because of inhaling fumes from the pesticide, help
them get fresh air immediately. Loosen the person’s clothing. If the victim is blue or has
stopped breathing, give artificial respiration and seek medical help immediately.