powerline router engeurope.corinex.com/web/docx.nsf/0/d8e794f776042b15… · ·...
TRANSCRIPT


This Quick Start Guide, as well as the software described in it, is furnished under license and may be used or copied only in accordance with the terms of the license. The content of this manual is furnished for informational use only, it is subject to change without notice, and it does not represent a commitment on the part of Corinex Communications Corp.
Corinex Communications Corp. assumes no responsibility or liability for any errors or inaccuracies that may appear in this book.
It is our policy to enhance our products as new technologies, hardware components, software and firmware become available; therefore, the information contained in this document is subject to change without notice.
Some features, functions, and operations described in this manual may not be included and sold in certain countries due to government regulations or marketing policies.
The use of the product or its features described in this document may be restricted or regulated by law in some countries. If you are unsure which restrictions or regulations apply, you should consult your regional Corinex office or the authorized reseller.
Published by:Corinex Communications Corp.World Trade Center404-999 Canada PlaceVancouver, B.C.Canada V6C 3E2Tel:+1-604-692 0520Fax: +1 - 604 - 694 0061
Corinex is a registered trademark of Corinex Communications Corp.
Apple, MAC OS X are either registered trademarks or trademarks of Apple Computer, Inc. in the U.S.A. and/or other countries.
Microsoft, MS-DOS, MS, Windows NT are either registered trademarks or trademarks of Microsoft Corporation in the U.S.A. and/or other countries.
All products or company names mentioned herein may be the trademarks of their respective owners.
Copyright (c) 2001-2003 by Corinex Communications Corp.
1
Copyright
Corinex Powerline Router Quick Setup Guide
2003-08-06 ver.1
Content
Package Content ................................................................................ 3 Requirements ..................................................................................... 3 Installation Overview .......................................................................... 4 Step 1: Connecting the Router ........................................................... 5 Step 2: Configuring Computers .......................................................... 6 Step 3: Configuring the Router ........................................................... 9
Content
2
Corinex Powerline Router Quick Setup Guide

3
Package Content / Requirements
Corinex Powerline Router Quick Setup Guide
Congratulations! Thank you for choosing the Corinex Powerline Router. The Router allows you to set up a home or small business network to share your high-speed Internet connection using either Ethernet cabling or Powerline connection.
Package Content
Package Includes:
• Corinex Powerline Router• Installation CD-ROM (including Corinex Powerline Router User
Guide)• AC Power Adapter• Ethernet cable (RJ-45)• Quick Start Guide
Requirements
• IBM Compatible PC or Macintosh computer (needed for initial configuration of the Router)
• AC 220/110 V power outlet• Broadband Connection (DSL, Cable) or Internet device with 10/100
Ethernet connection• Powerline and/or Ethernet connection for each computer• Windows 98/ME/2000/NT/XP, Mac OS X or Linux operating system
for Computers sharing the Internet connection• Web browser supporting JavaScript for the router management

Installation Overview
Installation Overview
This Guide will assist you with your successful installation and configuration of your Corinex Powerline Router for the first time. It will help you with basic settings, which are covering most of the settings you may need to configure for your Internet connection to be shared through the Ethernet or Powerline medium. If you require more sophisticated setup, we advise you to read the Corinex Powerline Router User Guide, which is enclosed on the Installation CD.
The next three chapters will explain you how to connect your Corinex Powerline Router in three easy steps.
Step 1: Connecting the Router – First you need to connect cables and connect the router both to the power and to the Internet connection; and, optionally to your Ethernet connected computers.
Step 2: Configuring the Computers – Then you will need to connect the computers to the router, in order to be able to configure the settings on the Router. These steps differ between Ethernet and Powerline connection and also it differs between different sorts of Operating Systems and Computers.
Step 3: Configuring the Router – Last step required is to configure your Corinex Powerline Router settings according to your Internet connection.
Corinex Powerline Router Quick Setup Guide
4
5
Step 1: Connecting the Router
Corinex Powerline Router Quick Setup Guide
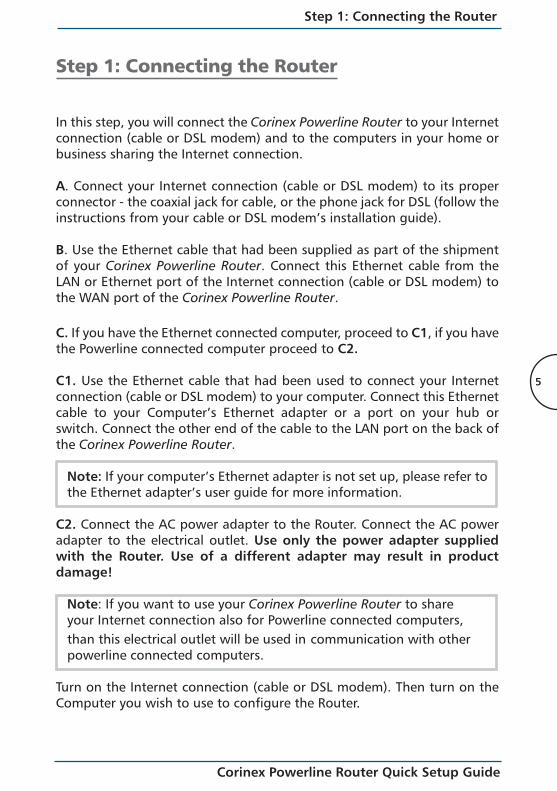
Step 1: Connecting the Router
In this step, you will connect the Corinex Powerline Router to your Internet connection (cable or DSL modem) and to the computers in your home or business sharing the Internet connection.
A. Connect your Internet connection (cable or DSL modem) to its proper connector - the coaxial jack for cable, or the phone jack for DSL (follow the instructions from your cable or DSL modem’s installation guide).
B. Use the Ethernet cable that had been supplied as part of the shipment of your Corinex Powerline Router. Connect this Ethernet cable from the LAN or Ethernet port of the Internet connection (cable or DSL modem) to the WAN port of the Corinex Powerline Router.
C. If you have the Ethernet connected computer, proceed to C1, if you have the Powerline connected computer proceed to C2.
C1. Use the Ethernet cable that had been used to connect your Internet connection (cable or DSL modem) to your computer. Connect this Ethernet cable to your Computer’s Ethernet adapter or a port on your hub or switch. Connect the other end of the cable to the LAN port on the back of the Corinex Powerline Router.
Note: If your computer’s Ethernet adapter is not set up, please refer to the Ethernet adapter’s user guide for more information.
C2. Connect the AC power adapter to the Router. Connect the AC power adapter to the electrical outlet. Use only the power adapter supplied with the Router. Use of a different adapter may result in product damage!
Note: If you want to use your Corinex Powerline Router to share your Internet connection also for Powerline connected computers, than this electrical outlet will be used in communication with other powerline connected computers.
Turn on the Internet connection (cable or DSL modem). Then turn on the Computer you wish to use to configure the Router.

6
Step 2: Configuring Computers
Step 2: Configuring Computers
The instructions in this chapter will help you to configure each of your computers to be able to communicate with the Corinex Powerline Router.
This process differs between Ethernet connected computers and Powerline connected computers, and also differs between different Operating Systems.
If you have an Ethernet connected computer, proceed to B, if you have a Powerline connected computer proceed to A.
A. We advise you to read and use the Installation Guide of your Powerline Adapter to establish a Powerline connection between Corinex Powerline Router and Powerline Adapter. Use the Default (NEK) password "HomePlug", as this is the factory default password setting for the Corinex Powerline Router. When you are using the Corinex Setup Tool to configure your powerline adapter, you can check, whether your Adapter has a powerline connection to a Corinex Powerline Router by searching in the last window of the Corinex Setup Tool for the MAC addresses of the Router. You will find the MAC address of your Corinex Powerline Router on the label on the bottom of the Router´s plastic cover (MAC PLC/SN). Proceed to B.
Corinex Powerline Router Quick Setup Guide

Step 2: Configuring Computers
7
B. Next you will need to configure your TCP/IP Settings so that your computer will obtain an IP (or TCP/IP) address automatically (called DHCP). Computers use IP addresses to communicate with each other across a network or the Internet.
Find out which Operating System your computer is running, such as Windows 95, 98, Millennium, 2000, XP, Linux or Macintosh OS. We are giving detailed configuration guide to the Windows XP Operating System. Other operating systems have slight differences and we advise you to the Corinex Powerline Router User Guide for detailed description how to change TCP/IP settings on your Operating System.
Windows XP TCP/IP Settings
A. Click the Start button, open the Control Panel. From there, click the Network and Internet Connections icon and then the Network Connections window appears.
B. Select the Local Area Connection icon for the applicable adapter (Ethernet adapter, if you are Ethernet connected or Powerline Adapter if you are powerline connected. It is usually the first adapter listed). Double-click the Local Area Connection.
C. The Local Area Connection Status screen will appear. Click the Properties button.
Corinex Powerline Router Quick Setup Guide
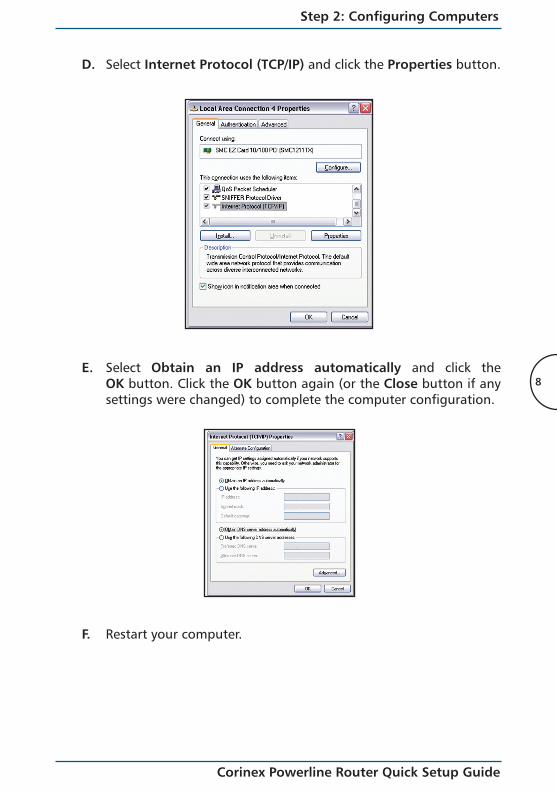
D. Select Internet Protocol (TCP/IP) and click the Properties button.
E. Select Obtain an IP address automatically and click the OK button. Click the OK button again (or the Close button if any settings were changed) to complete the computer configuration.
F. Restart your computer.
8
Step 2: Configuring Computers
Corinex Powerline Router Quick Setup Guide

Step 3: Configuring the Router
9
Step 3: Configuring the Router
In this step, you will configure the Corinex Powerline Router to communicate with the Internet through your Internet Service Provider (ISP). For this you will need the setup information provided by your ISP. If you do not have this information, you have to contact your ISP before proceeding.
This information from your ISP was used to configure your computer for Internet access. Because you are now sharing Internet access between several computers, you will use this setup information from your ISP to configure the Corinex Powerline Router instead of your computer.
Note: You only need to configure the Corinex Powerline Router once using the first computer you set up.
A. Open your web browser. (You can get an error message at this point. Ignore it.) Enter http://192.168.1.1 in the web browser’s Address field. Press the Enter key.
B. Window requiring entering your password will appear. Enter password in lowercase letters in the Password field (password is the default password). Then, click the Submit button.
Corinex Powerline Router Quick Setup Guide
Address http://192.168.1.1

C. The Router configuration screen will appear. Based on the setup instructions from your ISP, you may need to provide this information into the router, as explained in following instructions.
D. In the WAN tab, select Connection Type. The following screen will appear:
The Corinex Powerline Router supports four connection types: Dynamic (Obtain IP address dynamically), Static, PPPoE, and PPTP. The setup will differ according to the type of your Internet connection, instructions are included here.
10
Step 3: Configuring the Router
Corinex Powerline Router Quick Setup Guide

Step 3: Configuring the Router
11
Corinex Powerline Router Quick Setup Guide
Follow the instructions:
- E1 for Dynamic - E2 for Static - E3 for PPPoE - E4 for PPTP conection type. E1. Dynamic
- Select Dynamic from the Connection Type screen.- If your ISP gave you the Host Name information, enter it into the
Host Name field.- Some ISPs require you to change your Routers MAC address into
your previously connected Ethernet card. Click on Change WAN MAC Address in order to change it.
- Click on Apply button.- Continue to F.
E2. Static
- Select Static from the Connection Type screen.- Enter the IP address, Subnet Mask and Gateway Address
according to the information provided to you through your ISP.- If your ISP provided you with specific DNS settings you need to
change them by clicking Click here to enter your DNS Settings.- Click on Submit button.- Continue to F.

12
Step 3: Configuring the Router
E3. PPPoE
- Select PPPoE from the Connection Type screen.- Enter the User Name, Password, and Service Name (Optional)
according to the information provided to you through your ISP.- You will need to enter the password twice, enter it into the field
Retype Password.- Change the MTU only if your ISP specifically requires a different
setting than 1492. Then enter the required size in the MTU field.- Optionally you can decide to be disconnected after period of
inactivity. Check the Disconnect checkbox and enter the number of minutes after which you want to be disconnected from the Internet in the minutes field.
- Click on Submit button.- Continue to F.
Corinex Powerline Router Quick Setup Guide

13
Corinex Powerline Router Quick Setup Guide
E4. PPPTP
- Select PPPTP from the Connection Type screen.- Enter the PPTP Account, PPTP Password, Service IP Address,
My IP Address, My Subnet Mask, and optionally Connection ID according to the information provided to you through your ISP.
- You will need to enter the password twice, enter it into the field Retype PPTP Password.
- Optionally you can decide to be disconnected after period of inactivity. Check the Disconnect checkbox and enter the number of minutes after which you want to be disconnected from the Internet in the minutes field.
- If your ISP provided you with specific DNS settings you need to change them by clicking Click here to enter your DNS Settings.
- Click on Submit button.
Step 3: Configuring the Router

14
Step 3: Configuring the Router
F. Reset the power on your Internet connection (cable or DSL modem).
G. Restart your computers so that they can obtain the Router’s new settings.
Corinex Powerline Router Quick Setup Guide