please follow the next simple steps to install the … follow the next simple steps to install the...
TRANSCRIPT

Please follow the next simple steps to install the AXEFWC Cart Mounted Food Warmer.
Only a standard Philips screw driver is required:
STEP 1:
Remove the existing left side table
by lifting and slinding out from the
support brackets.
STEP 2:
Remove the existing brackets by
loosening and removing the four
10-32 flat head screws.
STEP 3:
Install the new support bracket
with four 10-32 pan head screws
provided.
Tighten screws securely with a
standard Philips screw driver.
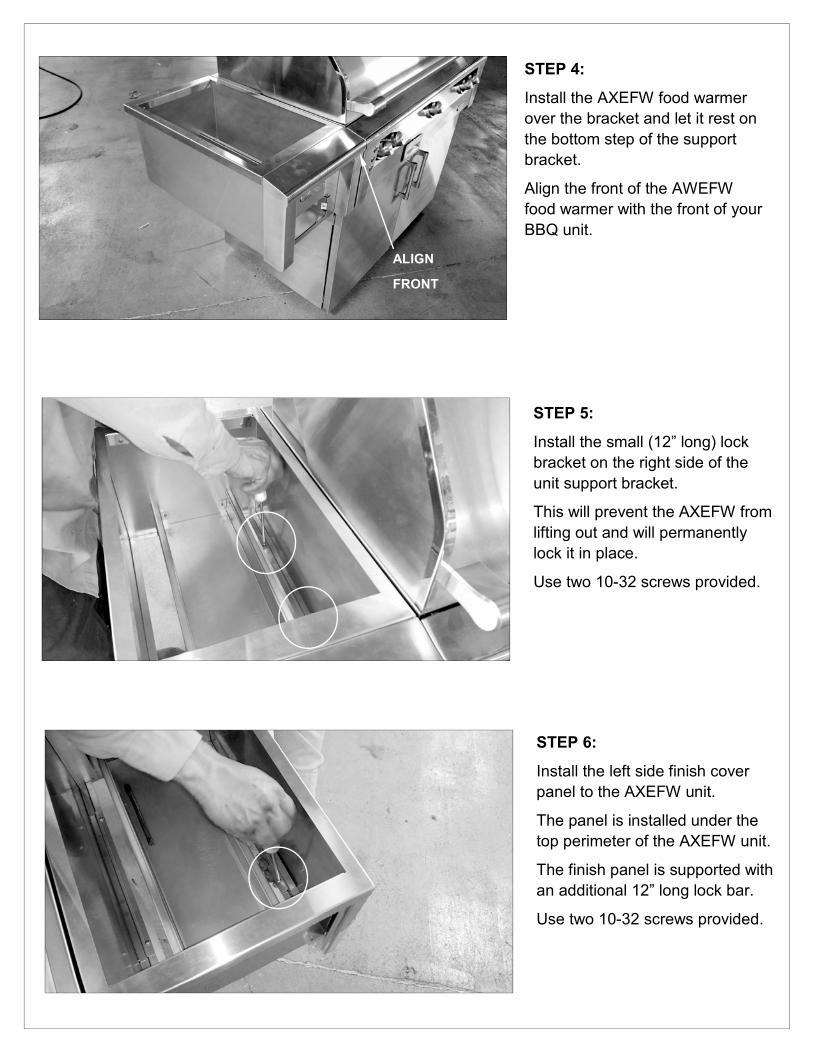
STEP 4:
Install the AXEFW food warmer
over the bracket and let it rest on
the bottom step of the support
bracket.
Align the front of the AWEFW
food warmer with the front of your
BBQ unit.
ALIGN
FRONT
STEP 5:
Install the small (12” long) lock
bracket on the right side of the
unit support bracket.
This will prevent the AXEFW from
lifting out and will permanently
lock it in place.
Use two 10-32 screws provided.
STEP 6:
Install the left side finish cover
panel to the AXEFW unit.
The panel is installed under the
top perimeter of the AXEFW unit.
The finish panel is supported with
an additional 12” long lock bar.
Use two 10-32 screws provided.
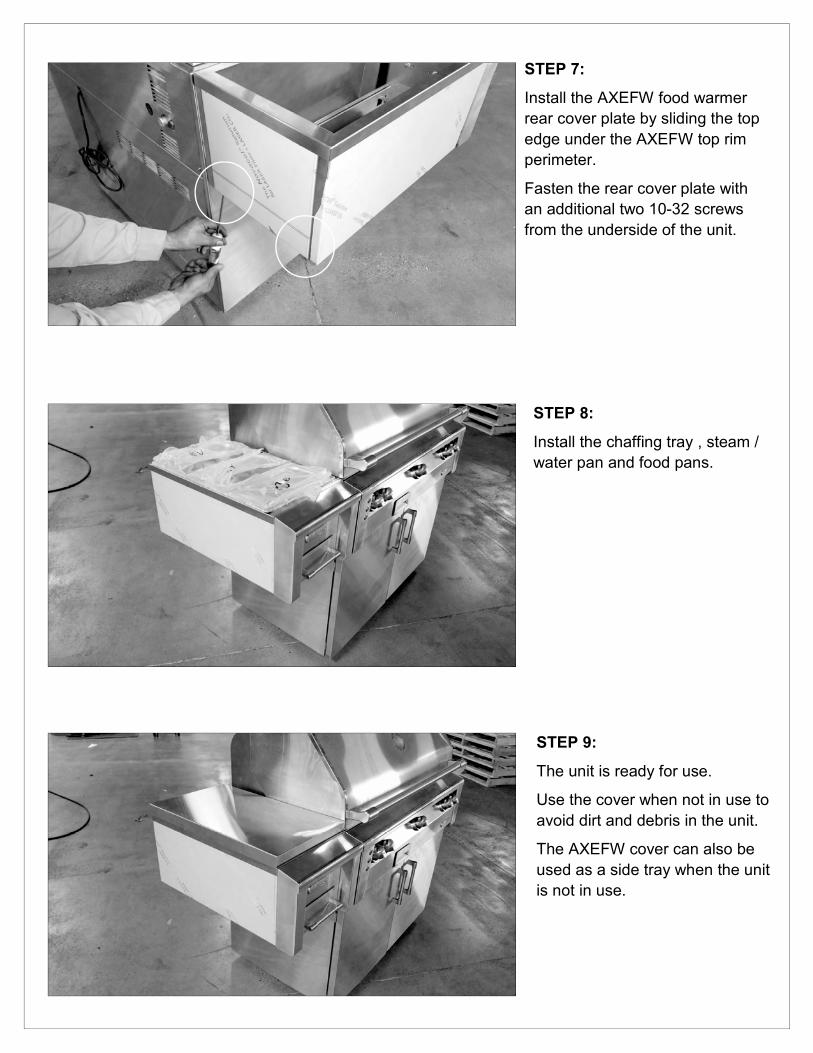
STEP 7:
Install the AXEFW food warmer
rear cover plate by sliding the top
edge under the AXEFW top rim
perimeter.
Fasten the rear cover plate with
an additional two 10-32 screws
from the underside of the unit.
STEP 8:
Install the chaffing tray , steam /
water pan and food pans.
STEP 9:
The unit is ready for use.
Use the cover when not in use to
avoid dirt and debris in the unit.
The AXEFW cover can also be
used as a side tray when the unit
is not in use.