photoshop painting outline - cdaltonkhs.pbworks.com · photoshop painting...
TRANSCRIPT

Photoshop Painting Photoshop is a very diverse raster program that is used for a variety of reasons. This lesson will be exploring a more traditional method of creating art and that is painting. Photoshop has created with each tool a set of various options and with those options it is possible to make the brush tool act more like an actual paint brush. You will explore the potential properties of making those changes to the brush tool using the brush options.
Essential Questions • How can a digital media be used to replicate a traditional form of
painting?
Learning Targets • Understand how to change the properties of the brush tool by making
changes through the brush palette.
• Apply traditional painting techniques to an image using Photoshop.
• Use layers to build up a rendering of the original photograph.
• Utilize the Eyedropper tool for selecting colors from the original image.
• Create a painting of a chosen image that shows high contrast (range of lights and darks).
Assessment
Project Requirements
• US Paper Size or Custom, 150 ppi, RGB Color • Light and shadow (value) is built up to develop form in the image
Craftsmanship/Technique • Skillful use of the brush tool in combination of the retouching tools • Brush Palette • Smudge tool/Finger Painting • Eyedropper tool (Holding ALT while using Brush Tool)
Productivity/Self Direction • Develops ideas using time well • Accessed available resources when needed ( teacher, program help, internet)
Critical Thinking/Problem Solving • Accurately interpreted the process and content of the lesson • Analyzed and solved problems through many view points
Higher Order Thinking Questions
1. How did you incorporate changes in the Brush Tool for completing your portrait? Describe the custom changes you made through the Brush Palette?
2. You were instructed to separate your portrait by layers, evaluate your use of layers in your portrait painting. 3. Compare and contrast painting in Photoshop to traditional painting? 4. Assess your ability to create contrast in your portrait. In what ways can the portrait be improved to incorporate contrast? 5. How did you combine prior Photoshop knowledge incorporated into completing the project?
Procedure
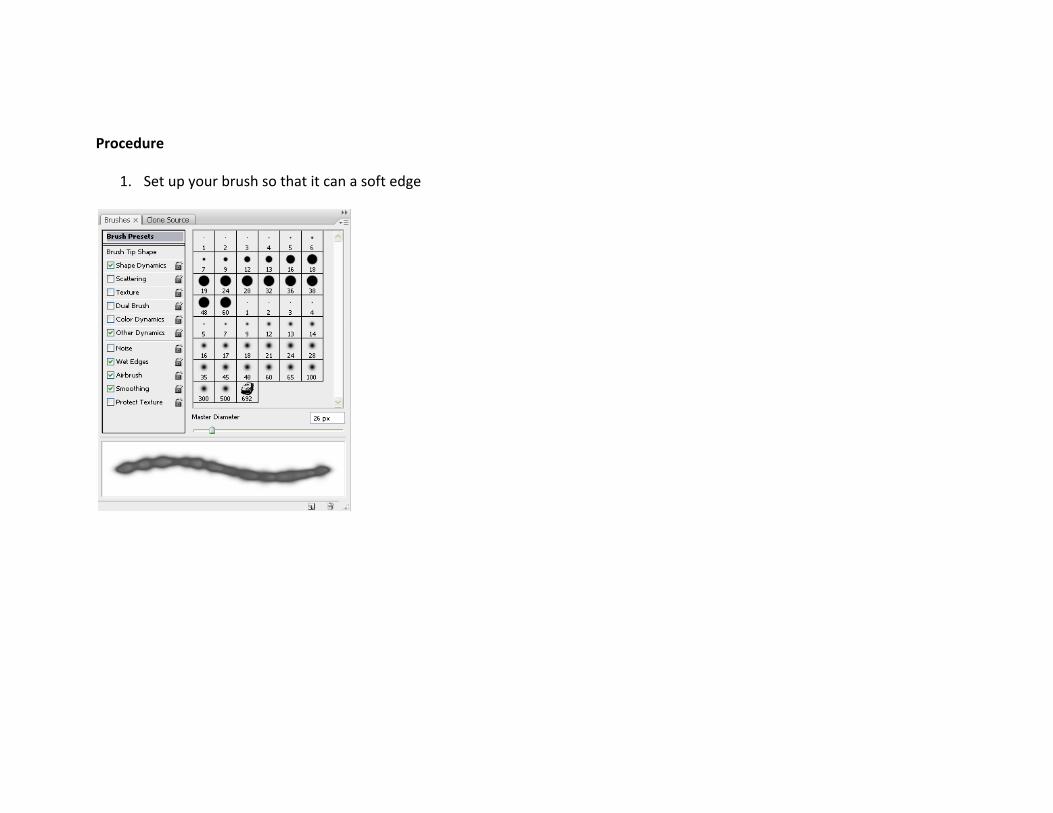
1. Set up your brush so that it can a soft edge
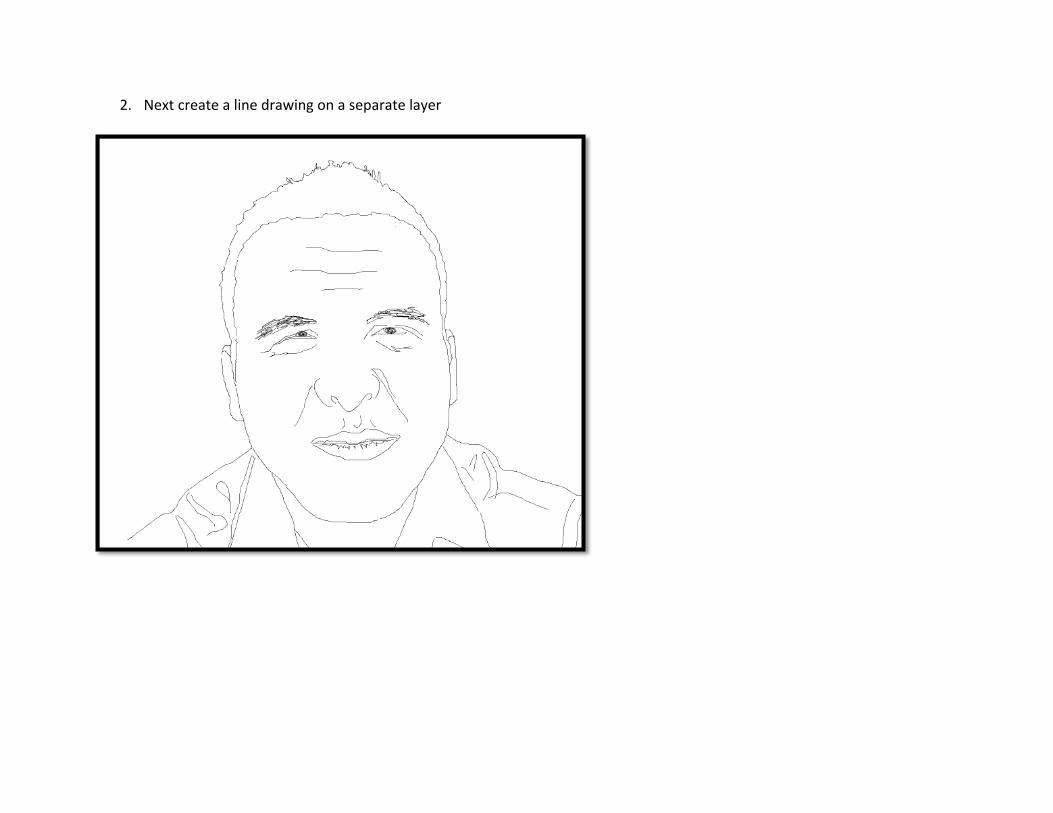
2. Next create a line drawing on a separate layer
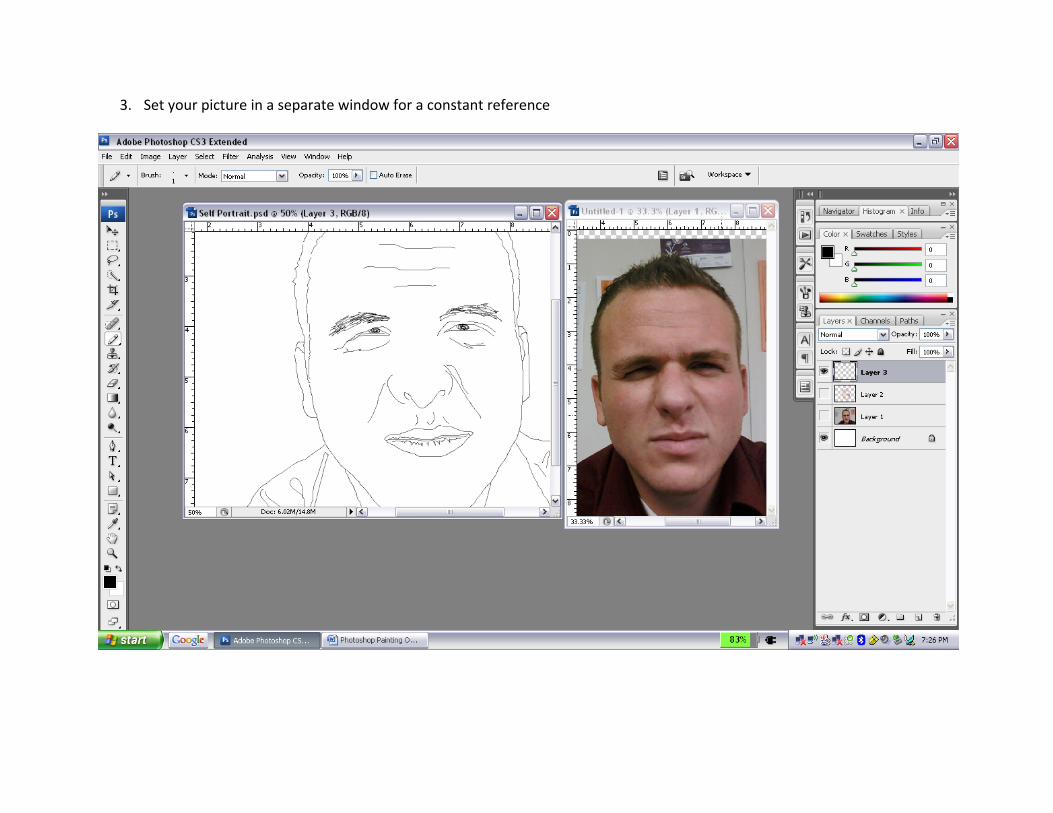
3. Set your picture in a separate window for a constant reference
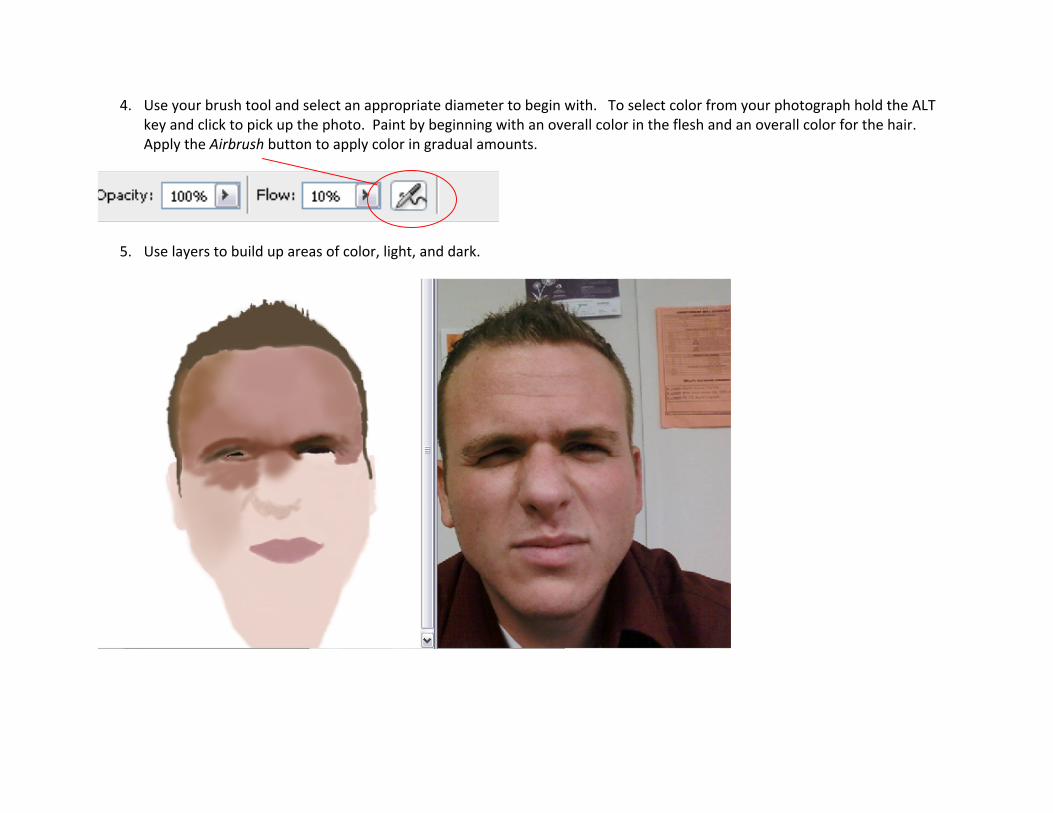
4. Use your brush tool and select an appropriate diameter to begin with. To select color from your photograph hold the ALT key and click to pick up the photo. Paint by beginning with an overall color in the flesh and an overall color for the hair. Apply the Airbrush button to apply color in gradual amounts.
5. Use layers to build up areas of color, light, and dark.
Installing Photoshop Brushes
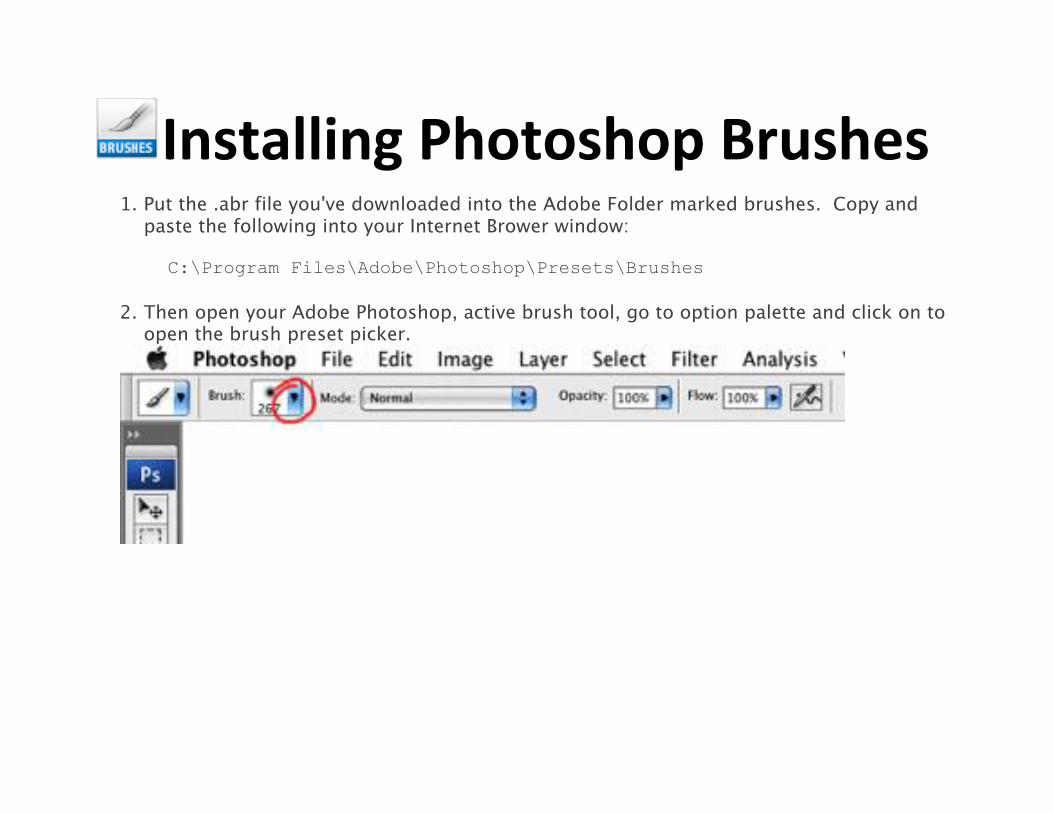
1. Put the .abr file you've downloaded into the Adobe Folder marked brushes. Copy and paste the following into your Internet Brower window:
C:\Program Files\Adobe\Photoshop\Presets\Brushes
2. Then open your Adobe Photoshop, active brush tool, go to option palette and click on to open the brush preset picker.

3. Then click on little triangel in the right upper corner.
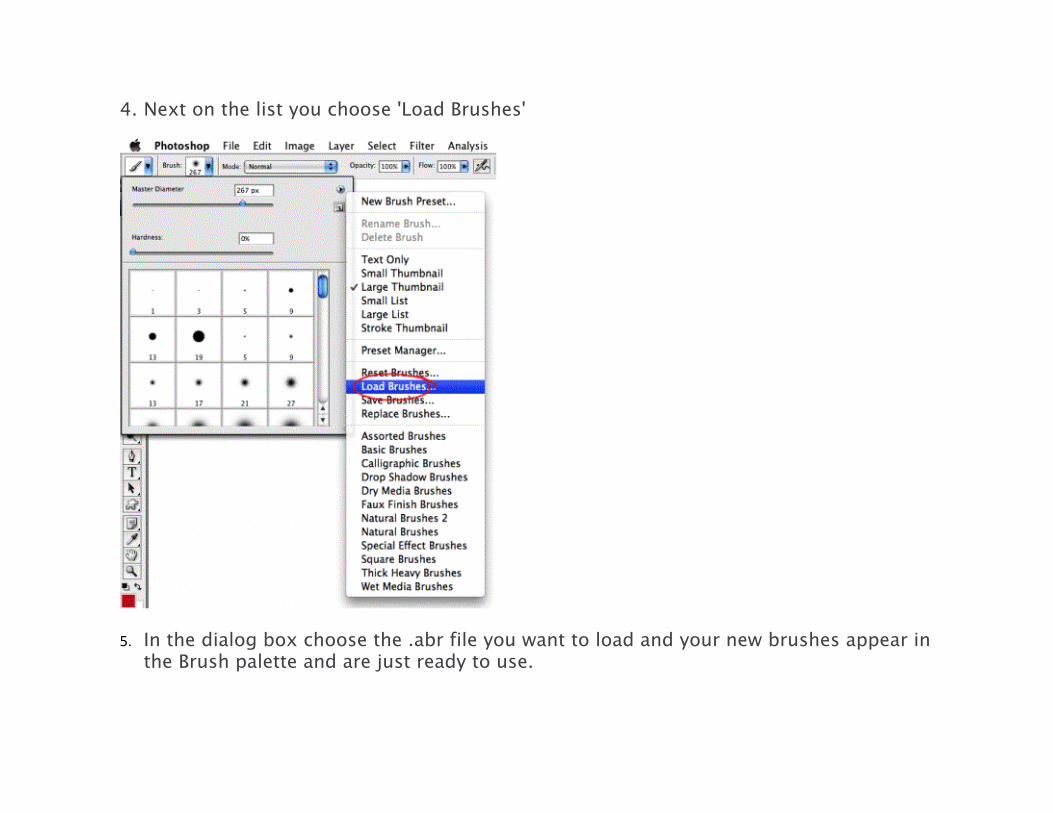
4. Next on the list you choose 'Load Brushes'
5. In the dialog box choose the .abr file you want to load and your new brushes appear in the Brush palette and are just ready to use.