peoplesoft enterprise staffing front office 8.8 to ...• oracle’s peoplesoft enterprise staffing...
TRANSCRIPT
PeopleSoft Enterprise Staffing FrontOffice 8.8 to Financials SupplyChain Management 9.1Upgrade
March 2010

PeopleSoft Enterprise Staffing Front Office 8.8 to Financials Supply Chain Management 9.1UpgradeSKU ufrontoffice_032610_ufo88xtofscm91Copyright © 2010, Oracle and/or its affiliates. All rights reserved.
Trademark NoticeOracle is a registered trademark of Oracle Corporation and/or its affiliates. Other namesmay be trademarks of theirrespective owners.
License Restrictions Warranty/Consequential Damages DisclaimerThis software and related documentation are provided under a license agreement containing restrictions on use anddisclosure and are protected by intellectual property laws. Except as expressly permitted in your license agreementor allowed by law, youmay not use, copy, reproduce, translate, broadcast, modify, license, transmit, distribute,exhibit, perform, publish or display any part, in any form, or by anymeans. Reverse engineering, disassembly, ordecompilation of this software, unless required by law for interoperability, is prohibited.
Warranty DisclaimerThe information contained herein is subject to change without notice and is not warranted to be error-free. If you findany errors, please report them to us in writing.
Restricted Rights NoticeIf this software or related documentation is delivered to the U.S. Government or anyone licensing it on behalf of theU.S. Government, the following notice is applicable:
U.S. GOVERNMENT RIGHTS
Programs, software, databases, and related documentation and technical data delivered to U.S. Government customersare “commercial computer software” or “commercial technical data” pursuant to the applicable Federal AcquisitionRegulation and agency-specific supplemental regulations. As such, the use, duplication, disclosure, modification, andadaptation shall be subject to the restrictions and license terms set forth in the applicable Government contract, and,to the extent applicable by the terms of the Government contract, the additional rights set forth in FAR 52.227-19,Commercial Computer Software License (December 2007). Oracle USA, Inc., 500 Oracle Parkway, Redwood City,CA 94065.
Hazardous Applications NoticeThis software is developed for general use in a variety of informationmanagement applications. It is not developedor intended for use in any inherently dangerous applications, including applications whichmay create a riskof personal injury. If you use this software in dangerous applications, then you shall be responsible to take allappropriate fail-safe, backup, redundancy and other measures to ensure the safe use of this software. OracleCorporation and its affiliates disclaim any liability for any damages caused by use of this software in dangerousapplications.
Third Party Content, Products, and Services DisclaimerThis software and documentationmay provide access to or information on content, products and services from thirdparties. Oracle Corporation and its affiliates are not responsible for and expressly disclaim all warranties of any kindwith respect to third party content, products and services. Oracle Corporation and its affiliates will not be responsiblefor any loss, costs, or damages incurred due to your access to or use of third party content, products or services.
Contents
PrefaceAbout This Documentation... . . . . . . . . . . .. . . . . . . . . . . . . . . . . . . . . . . . . . . . . . . . . .. . . . . . . . . . . . . . . . . . . . . . . . . . . . . . . . . .ixUnderstanding This Documentation.. . . . . . . . . . . . . . . . . . . . . . . . . . . . . . . . . . . . . . . . . . . . . . . . . . . . . . . . . . . . . . . . . . . . . . . . . . . . . . . . .ixPrerequisites.. . . . . . . . . . . . . . . . . . . . . . . . . . . . . . . . . . . . . . . . . . . . . . . . . . . . . . . . . . . . . . . . . . . . . . . . . . . . . . . . . . . . . . . . . . . . . . . . . . . . . . . . . . . .ixAudience.. . . . . . . . . . . . . . . . . . . . . . . . . . . . . . . . . . . . . . . . . . . . . . . . . . . . . . . . . . . . . . . . . . . . . . . . . . . . . . . . . . . . . . . . . . . . . . . . . . . . . . . . . . . . . . . . .ixOrganization.. . . . . . . . . . . . . . . . . . . . . . . . . . . . . . . . . . . . . . . . . . . . . . . . . . . . . . . . . . . . . . . . . . . . . . . . . . . . . . . . . . . . . . . . . . . . . . . . . . . . . . . . . . . . . .xTypographical Conventions and Visual Cues.. . . . . . . . . . . . . . . . . . . . . . . . . . . . . . . . . . . . . . . . . . . . . . . . . . . . . . . . . . . . . . . . . . . . . . . .xProducts.. . . . . . . . . . . . . . . . . . . . . . . . . . . . . . . . . . . . . . . . . . . . . . . . . . . . . . . . . . . . . . . . . . . . . . . . . . . . . . . . . . . . . . . . . . . . . . . . . . . . . . . . . . . . . . . . .xiRelated Information.. . . . . . . . . . . . . . . . . . . . . . . . . . . . . . . . . . . . . . . . . . . . . . . . . . . . . . . . . . . . . . . . . . . . . . . . . . . . . . . . . . . . . . . . . . . . . . . . . . . .xiiComments and Suggestions.. . . . . . . . . . . . . . . . . . . . . . . . . . . . . . . . . . . . . . . . . . . . . . . . . . . . . . . . . . . . . . . . . . . . . . . . . . . . . . . . . . . . . . . . . .xii
Chapter 1Installing the Software.... . . . . .. . . . . . . . . . . . . . . . . . .. . . . . . . . . . . . . . . . . . .. . . . . . . . . . . . . . . .. . . . . . . . . . . . . . . . . . . . . . . . . .1Understanding Software Installation. . . . . . . . . . . . . . . . . . . . . . . . . . . . . . . . . . . . . . . . . . . . . . . . . . . . . . . . . . . . . . . . . . . . . . . . . . . . . . . . . . .1Installing the New Release.. . . . . . . . . . . . . . . . . . . . . . . . . . . . . . . . . . . . . . . . . . . . . . . . . . . . . . . . . . . . . . . . . . . . . . . . . . . . . . . . . . . . . . . . . . . . .1Applying PeopleTools Patches.. . . . . . . . . . . . . . . . . . . . . . . . . . . . . . . . . . . . . . . . . . . . . . . . . . . . . . . . . . . . . . . . . . . . . . . . . . . . . . . . . . . . . . . .2Installing Change Assistant. . . . . . . . . . . . . . . . . . . . . . . . . . . . . . . . . . . . . . . . . . . . . . . . . . . . . . . . . . . . . . . . . . . . . . . . . . . . . . . . . . . . . . . . . . . . .3Retrieving and Applying Upgrade Files.. . . . . . . . . . . . . . . . . . . . . . . . . . . . . . . . . . . . . . . . . . . . . . . . . . . . . . . . . . . . . . . . . . . . . . . . . . . . . . .3
Understanding Upgrade Files... . . . . . . . . . . . . . . . . . . . . . . . . . . . . . . . . . . . . . . . . . . . . . . . . . . . . . . . . . . . . . . . . . . . . . . . . . .. . . . . . . . . .4Applying Baseline Upgrade Files.. . . . . . . . . . . . . . . . . . . . . . . . . . . . . . . . . . . . . . . . . . . . . . . . . . . . . . . . . . . . . . . . . . . . . . . .. . . . . . . . . .4Applying Required for Upgrade Fixes.. . . . . . . . . . . . . . . . . . . . . . . . . . . . . . . . . . . . . . . . . . . . . . . . . . . . . . . . . . . . . . . . . . .. . . . . . . . . .4
Creating and Configuring an Upgrade Job.. . . . . . . . . . . . . . . . . . . . . . . . . . . . . . . . . . . . . . . . . . . . . . . . . . . . . . . . . . . . . . . . . . . . . . . . . . .6Reviewing Upgrade Step Properties.. . . . . . . . . . . . . . . . . . . . . . . . . . . . . . . . . . . . . . . . . . . . . . . . . . . . . . . . . . . . . . . . . . . . . . . . . . . . . . . . . .7
Chapter 2Planning Your Application Upgrade... . . . . . . . . . . . . . . . . . . . . . . . . . . . . . . . . . . . . . . . . . . . . . . . . . . . . . . . . . . . . . . . . . . . . .9Understanding Application Upgrade Planning.. . . . . . . . . . . . . . . . . . . . . . . . . . . . . . . . . . . . . . . . . . . . . . . . . . . . . . . . . . . . . . . . . . . . . . .9Understanding Your Upgrade.. . . . . . . . . . . . . . . . . . . . . . . . . . . . . . . . . . . . . . . . . . . . . . . . . . . . . . . . . . . . . . . . . . . . . . . . . . . . . . . . . . . . . . . . . .9
Understanding PeopleSoft Upgrades.. . . . . . . . . . . . . . . . . . . . . . . . . . . . . . . . . . . . . . . . . . . . . . . . . . . . . . . . . . . . . . . . . . .. . . . . . . . . .9Verifying the Software Installation.. . . . . . . . . . . . . . . . . . . . . . . . . . . . . . . . . . . . . . . . . . . . . . . . . . . . . . . . . . . . . . . . . . . . . . .. . . . . . . .10Defining Upgrade Databases.. . . . . . . . . . . . . . . . . . . . . . . . . . . . . . . . . . . . . . . . . . . . . . . . . . . . . . . . . . . . . . . . . . . . . . . . . . . .. . . . . . . .10Reviewing Upgrade Notes and Tips... . . . . . . . . . . . . . . . . . . . . . . . . . . . . . . . . . . . . . . . . . . . . . . . . . . . . . . . . . . . . . . . . . . .. . . . . . . .10
Copying Your Production Database.. . . . . . . . . . . . . . . . . . . . . . . . . . . . . . . . . . . . . . . . . . . . . . . . . . . . . . . . . . . . . . . . . . . . . . . . . . . . . . . . .11
Copyright © 2010, Oracle and/or its affiliates. All rights reserved. iii
Contents
Making a Copy of Production Database.. . . . . . . . . . . . . . . . . . . . . . . . . . . . . . . . . . . . . . . . . . . . . . . . . . . . . . . . . . . . . . . .. . . . . . . .12
Chapter 3Preparing Your Database for Upgrade... . . . . . . . . . . . . . . . . . . . . . . . . . . . . . . . . . . . . . . . . . . . . . . . . . . . . . . . . . . . . . . . .13Understanding Database Preparation.. . . . . . . . . . . . . . . . . . . . . . . . . . . . . . . . . . . . . . . . . . . . . . . . . . . . . . . . . . . . . . . . . . . . . . . . . . . . . .13Applying Upgrade Planning Files .. . . . . . . . . . . . . . . . . . . . . . . . . . . . . . . . . . . . . . . . . . . . . . . . . . . . . . . . . . . . . . . . . . . . . . . . . . . . . . . . . . .13
Understanding Applying Upgrade Planning Files.. . . . . . . . . . . . . . . . . . . . . . . . . . . . . . . . . . . . . . . . . . . . . . . . . . . . .. . . . . . . .14Applying the UPGOPTFO Project . . . . . . . . . . . . . . . . . . . . . . . . . . . . . . . . . . . . . . . . . . . . . . . . . . . . . . . . . . . . . . . . . . . . . . .. . . . . . . .14Building the UPGOPTFO Project . . . . . . . . . . . . . . . . . . . . . . . . . . . . . . . . . . . . . . . . . . . . . . . . . . . . . . . . . . . . . . . . . . . . . . . .. . . . . . . .14Setting Up Security for Upgrade Planning.. . . . . . . . . . . . . . . . . . . . . . . . . . . . . . . . . . . . . . . . . . . . . . . . . . . . . . . . . . . . . .. . . . . . . .15
Setting Up Front Office.. . . . . . . . . . . . . . . . . . . . . . . . . . . . . . . . . . . . . . . . . . . . . . . . . . . . . . . . . . . . . . . . . . . . . . . . . . . . . . . . . . . . . . . . . . . . . . .15Understanding the Front Office Setup.. . . . . . . . . . . . . . . . . . . . . . . . . . . . . . . . . . . . . . . . . . . . . . . . . . . . . . . . . . . . . . . . . .. . . . . . . .16Verifying Installation Options.. . . . . . . . . . . . . . . . . . . . . . . . . . . . . . . . . . . . . . . . . . . . . . . . . . . . . . . . . . . . . . . . . . . . . . . . . . . . .. . . . . . . .16Configuring PC Business Unit. . . . . . . . . . . . . . . . . . . . . . . . . . . . . . . . . . . . . . . . . . . . . . . . . . . . . . . . . . . . . . . . . . . . . . . . . . . .. . . . . . . .16Mapping Skill Type to Competency Type.. . . . . . . . . . . . . . . . . . . . . . . . . . . . . . . . . . . . . . . . . . . . . . . . . . . . . . . . . . . . . . .. . . . . . . .17Mapping Skill Code to Competency.. . . . . . . . . . . . . . . . . . . . . . . . . . . . . . . . . . . . . . . . . . . . . . . . . . . . . . . . . . . . . . . . . . . . .. . . . . . . .19Mapping Resource and Order Priority Values.. . . . . . . . . . . . . . . . . . . . . . . . . . . . . . . . . . . . . . . . . . . . . . . . . . . . . . . . .. . . . . . . .20Mapping Business Unit to Location Code... . . . . . . . . . . . . . . . . . . . . . . . . . . . . . . . . . . . . . . . . . . . . . . . . . . . . . . . . . . . .. . . . . . . .22Mapping Test to Accomplishment.. . . . . . . . . . . . . . . . . . . . . . . . . . . . . . . . . . . . . . . . . . . . . . . . . . . . . . . . . . . . . . . . . . . . . . .. . . . . . . .24Mapping Degree to Accomplishment.. . . . . . . . . . . . . . . . . . . . . . . . . . . . . . . . . . . . . . . . . . . . . . . . . . . . . . . . . . . . . . . . . . .. . . . . . . .25Mapping Major Code ... . . . . . . . . . . . . . . . . . . . . . . . . . . . . . . . . . . . . . . . . . . . . . . . . . . . . . . . . . . . . . . . . . . . . . . . . . . . . . . . . . . .. . . . . . . .26Mapping School Code ... . . . . . . . . . . . . . . . . . . . . . . . . . . . . . . . . . . . . . . . . . . . . . . . . . . . . . . . . . . . . . . . . . . . . . . . . . . . . . . . . . .. . . . . . . .28Printing Translate Values for NAME PREFIX.. . . . . . . . . . . . . . . . . . . . . . . . . . . . . . . . . . . . . . . . . . . . . . . . . . . . . . . . . .. . . . . . . .30Printing Translate Values for SCHOOL TYPE... . . . . . . . . . . . . . . . . . . . . . . . . . . . . . . . . . . . . . . . . . . . . . . . . . . . . . . .. . . . . . . .31
Exporting Front Office Data.. . . . . . . . . . . . . . . . . . . . . . . . . . . . . . . . . . . . . . . . . . . . . . . . . . . . . . . . . . . . . . . . . . . . . . . . . . . . . . . . . . . . . . . . . .31Understanding Front Office Data Export.. . . . . . . . . . . . . . . . . . . . . . . . . . . . . . . . . . . . . . . . . . . . . . . . . . . . . . . . . . . . . . . .. . . . . . . .31Updating Configuration Manager Profile.. . . . . . . . . . . . . . . . . . . . . . . . . . . . . . . . . . . . . . . . . . . . . . . . . . . . . . . . . . . . . . . .. . . . . . . .32Exporting Front Office NonStable Tables.. . . . . . . . . . . . . . . . . . . . . . . . . . . . . . . . . . . . . . . . . . . . . . . . . . . . . . . . . . . . . . .. . . . . . . .33Exporting Front Office Stable Tables.. . . . . . . . . . . . . . . . . . . . . . . . . . . . . . . . . . . . . . . . . . . . . . . . . . . . . . . . . . . . . . . . . . . .. . . . . . . .33
Performing General Options Setup .. .. . . . . . . . . . . . . . . . . . . . . . . . . . . . . . . . . . . . . . . . . . . . . . . . . . . . . . . . . . . . . . . . . . . . . . . . . . . . . . .33Populating UPG_CONV_TBL Table .. . . . . . . . . . . . . . . . . . . . . . . . . . . . . . . . . . . . . . . . . . . . . . . . . . . . . . . . . . . . . . . . . . . .. . . . . . . .34
Verifying the Upgrade User. . . . . . . . . . . . . . . . . . . . . . . . . . . . . . . . . . . . . . . . . . . . . . . . . . . . . . . . . . . . . . . . . . . . . . . . . . . . . . . . . . . . . . . . . . .34
Chapter 4Applying Application Changes... . . . . . . . . . . . . . . . . . . . . . . . . . . . . . . . . . . . . . . . . . . . . . . . . . . . . . . . . . . . . . . . . . . . . . . . . .35Understanding Application Changes.. . . . . . . . . . . . . . . . . . . . . . . . . . . . . . . . . . . . . . . . . . . . . . . . . . . . . . . . . . . . . . . . . . . . . . . . . . . . . . . .35Importing Front Office Data.. . . . . . . . . . . . . . . . . . . . . . . . . . . . . . . . . . . . . . . . . . . . . . . . . . . . . . . . . . . . . . . . . . . . . . . . . . . . . . . . . . . . . . . . . .35
Understanding Front Office Data Import.. . . . . . . . . . . . . . . . . . . . . . . . . . . . . . . . . . . . . . . . . . . . . . . . . . . . . . . . . . . . . . . .. . . . . . . .36
iv Copyright © 2010, Oracle and/or its affiliates. All rights reserved.
Contents
Importing Front Office NonStable Tables.. . . . . . . . . . . . . . . . . . . . . . . . . . . . . . . . . . . . . . . . . . . . . . . . . . . . . . . . . . . . . . .. . . . . . . .36Importing Front Office Stable Tables.. . . . . . . . . . . . . . . . . . . . . . . . . . . . . . . . . . . . . . . . . . . . . . . . . . . . . . . . . . . . . . . . . . . .. . . . . . . .36Building Front Office Create Indexes Script. . . . . . . . . . . . . . . . . . . . . . . . . . . . . . . . . . . . . . . . . . . . . . . . . . . . . . . . . . . . .. . . . . . . .36Running Front Office Create Indexes Script. . . . . . . . . . . . . . . . . . . . . . . . . . . . . . . . . . . . . . . . . . . . . . . . . . . . . . . . . . . .. . . . . . . .37
Preparing for Data Conversion Analysis.. . . . . . . . . . . . . . . . . . . . . . . . . . . . . . . . . . . . . . . . . . . . . . . . . . . . . . . . . . . . . . . . . . . . . . . . . . . .37Populating Alter Analyzer Repository.. . . . . . . . . . . . . . . . . . . . . . . . . . . . . . . . . . . . . . . . . . . . . . . . . . . . . . . . . . . . . . . . . . .. . . . . . . .37Building the EOUF_UPGRADE_FRAMEWORK Project. . . . . . . . . . . . . . . . . . . . . . . . . . . . . . . . . . . . . . . . . . . . . .. . . . . . . .37Running the EOUF_UPGRADE_FRAMEWORK Script. . . . . . . . . . . . . . . . . . . . . . . . . . . . . . . . . . . . . . . . . . . . . . .. . . . . . . .38
Modifying the Database Structure .. . . . . . . . . . . . . . . . . . . . . . . . . . . . . . . . . . . . . . . . . . . . . . . . . . . . . . . . . . . . . . . . . . . . . . . . . . . . . . . . . .38Building the Upgrade Tables Script.. . . . . . . . . . . . . . . . . . . . . . . . . . . . . . . . . . . . . . . . . . . . . . . . . . . . . . . . . . . . . . . . . . . . . .. . . . . . . .38Re-Creating Upgrade Tables .. . . . . . . . . . . . . . . . . . . . . . . . . . . . . . . . . . . . . . . . . . . . . . . . . . . . . . . . . . . . . . . . . . . . . . . . . . . .. . . . . . . .39Creating Upgrade Views .. . . . . . . . . . . . . . . . . . . . . . . . . . . . . . . . . . . . . . . . . . . . . . . . . . . . . . . . . . . . . . . . . . . . . . . . . . . . . . . . .. . . . . . . .39
Loading Data for Data Conversion .. . . . . . . . . . . . . . . . . . . . . . . . . . . . . . . . . . . . . . . . . . . . . . . . . . . . . . . . . . . . . . . . . . . . . . . . . . . . . . . . .39Running Required for Upgrade Data.. . . . . . . . . . . . . . . . . . . . . . . . . . . . . . . . . . . . . . . . . . . . . . . . . . . . . . . . . . . . . . . . . . . .. . . . . . . .39Updating the Installation Option ... . . . . . . . . . . . . . . . . . . . . . . . . . . . . . . . . . . . . . . . . . . . . . . . . . . . . . . . . . . . . . . . . . . . . . . .. . . . . . . .40
Applying Updates Before Data Conversion. . . . . . . . . . . . . . . . . . . . . . . . . . . . . . . . . . . . . . . . . . . . . . . . . . . . . . . . . . . . . . . . . . . . . . . . .40Configuring Scheduler and Server .. . . . . . . . . . . . . . . . . . . . . . . . . . . . . . . . . . . . . . . . . . . . . . . . . . . . . . . . . . . . . . . . . . . . . . . . . . . . . . . . .41Backing Up Before Data Conversion.. . . . . . . . . . . . . . . . . . . . . . . . . . . . . . . . . . . . . . . . . . . . . . . . . . . . . . . . . . . . . . . . . . . . . . . . . . . . . . .41Running Data Conversion for Front Office.. . . . . . . . . . . . . . . . . . . . . . . . . . . . . . . . . . . . . . . . . . . . . . . . . . . . . . . . . . . . . . . . . . . . . . . . .41Backing Up After Data Conversion... . . . . . . . . . . . . . . . . . . . . . . . . . . . . . . . . . . . . . . . . . . . . . . . . . . . . . . . . . . . . . . . . . . . . . . . . . . . . . . . .42Updating Object Version Numbers .. . . . . . . . . . . . . . . . . . . . . . . . . . . . . . . . . . . . . . . . . . . . . . . . . . . . . . . . . . . . . . . . . . . . . . . . . . . . . . . . .42Running the Final Audit Reports.. . . . . . . . . . . . . . . . . . . . . . . . . . . . . . . . . . . . . . . . . . . . . . . . . . . . . . . . . . . . . . . . . . . . . . . . . . . . . . . . . . . . .42
Running the Final DDDAUDIT Report. . . . . . . . . . . . . . . . . . . . . . . . . . . . . . . . . . . . . . . . . . . . . . . . . . . . . . . . . . . . . . . . . . .. . . . . . . .43Running the Final SYSAUDIT Report. . . . . . . . . . . . . . . . . . . . . . . . . . . . . . . . . . . . . . . . . . . . . . . . . . . . . . . . . . . . . . . . . . . .. . . . . . . .43Creating the FNLALTAUD Project. . . . . . . . . . . . . . . . . . . . . . . . . . . . . . . . . . . . . . . . . . . . . . . . . . . . . . . . . . . . . . . . . . . . . . . .. . . . . . . .43Running the Final Alter Audit. . . . . . . . . . . . . . . . . . . . . . . . . . . . . . . . . . . . . . . . . . . . . . . . . . . . . . . . . . . . . . . . . . . . . . . . . . . . . .. . . . . . . .43Reviewing the Final Audits. . . . . . . . . . . . . . . . . . . . . . . . . . . . . . . . . . . . . . . . . . . . . . . . . . . . . . . . . . . . . . . . . . . . . . . . . . . . . . . .. . . . . . . .44Running the Final SETINDEX Report. . . . . . . . . . . . . . . . . . . . . . . . . . . . . . . . . . . . . . . . . . . . . . . . . . . . . . . . . . . . . . . . . . . .. . . . . . . .45Running the Final SETTABLE Report. . . . . . . . . . . . . . . . . . . . . . . . . . . . . . . . . . . . . . . . . . . . . . . . . . . . . . . . . . . . . . . . . . . .. . . . . . . .45
Configuring the Upgrade Environment. . . . . . . . . . . . . . . . . . . . . . . . . . . . . . . . . . . . . . . . . . . . . . . . . . . . . . . . . . . . . . . . . . . . . . . . . . . . . .45Configuring the Web Server.. . . . . . . . . . . . . . . . . . . . . . . . . . . . . . . . . . . . . . . . . . . . . . . . . . . . . . . . . . . . . . . . . . . . . . . . . . . . . .. . . . . . . .45Configuring Portal. . . . . . . . . . . . . . . . . . . . . . . . . . . . . . . . . . . . . . . . . . . . . . . . . . . . . . . . . . . . . . . . . . . . . . . . . . . . . . . . . . . . . . . . . .. . . . . . . .46
Configuring Front Office and PayBill. . . . . . . . . . . . . . . . . . . . . . . . . . . . . . . . . . . . . . . . . . . . . . . . . . . . . . . . . . . . . . . . . . . . . . . . . . . . . . . . .46Understanding Front Office Configuration.. . . . . . . . . . . . . . . . . . . . . . . . . . . . . . . . . . . . . . . . . . . . . . . . . . . . . . . . . . . . . .. . . . . . . .47Configuring School Type Values... . . . . . . . . . . . . . . . . . . . . . . . . . . . . . . . . . . . . . . . . . . . . . . . . . . . . . . . . . . . . . . . . . . . . . . .. . . . . . . .47Configuring Salutation Table Values.. . . . . . . . . . . . . . . . . . . . . . . . . . . . . . . . . . . . . . . . . . . . . . . . . . . . . . . . . . . . . . . . . . . .. . . . . . . .47Running Cache Administration... . . . . . . . . . . . . . . . . . . . . . . . . . . . . . . . . . . . . . . . . . . . . . . . . . . . . . . . . . . . . . . . . . . . . . . . . .. . . . . . . .48
Reconfiguring Security. . . . . . . . . . . . . . . . . . . . . . . . . . . . . . . . . . . . . . . . . . . . . . . . . . . . . . . . . . . . . . . . . . . . . . . . . . . . . . . . . . . . . . . . . . . . . . . . .49Backing Up Before Testing.. . . . . . . . . . . . . . . . . . . . . . . . . . . . . . . . . . . . . . . . . . . . . . . . . . . . . . . . . . . . . . . . . . . . . . . . . . . . . . . . . . . . . . . . . . .49Testing Your Upgraded System Database .. . . . . . . . . . . . . . . . . . . . . . . . . . . . . . . . . . . . . . . . . . . . . . . . . . . . . . . . . . . . . . . . . . . . . . . . .49
Copyright © 2010, Oracle and/or its affiliates. All rights reserved. v

Contents
Chapter 5Appendices... . .. . . . . . . . . . . . . . . . . . . . . . . . . . . . . . . . . . . . . . . . . . . . . . . . . . . . . . . . . . . . . . . . . . . . . . . . . . . . . . . . . . . . . . . . . . . . . . . .51Understanding Appendices.. . . . . . . . . . . . . . . . . . . . . . . . . . . . . . . . . . . . . . . . . . . . . . . . . . . . . . . . . . . . . . . . . . . . . . . . . . . . . . . . . . . . . . . . . .51
Appendix AApplying Fixes Required for Upgrade..... . . . . . . . . . . . . . . . . . . . . . . . . . . . . . . . . . . . . . . . . . . . . . . . . . . . . . . . . . . . . . . .53Preparing to Apply Fixes.. . . . . . . . . . . . . . . . . . . . . . . . . . . . . . . . . . . . . . . . . . . . . . . . . . . . . . . . . . . . . . . . . . . . . . . . . . . . . . . . . . . . . . . . . . . . .53Applying Fixes During Installation.. . . . . . . . . . . . . . . . . . . . . . . . . . . . . . . . . . . . . . . . . . . . . . . . . . . . . . . . . . . . . . . . . . . . . . . . . . . . . . . . . . .54Applying Fixes After Copying Project. . . . . . . . . . . . . . . . . . . . . . . . . . . . . . . . . . . . . . . . . . . . . . . . . . . . . . . . . . . . . . . . . . . . . . . . . . . . . . . .54Applying Fixes After Data Conversion.. . . . . . . . . . . . . . . . . . . . . . . . . . . . . . . . . . . . . . . . . . . . . . . . . . . . . . . . . . . . . . . . . . . . . . . . . . . . . .55Applying Fixes Between Upgrade Passes.. . . . . . . . . . . . . . . . . . . . . . . . . . . . . . . . . . . . . . . . . . . . . . . . . . . . . . . . . . . . . . . . . . . . . . . . .55Applying Fixes in Move to Production.. . . . . . . . . . . . . . . . . . . . . . . . . . . . . . . . . . . . . . . . . . . . . . . . . . . . . . . . . . . . . . . . . . . . . . . . . . . . . .56
Appendix BUpgrading Front Office and PayBill. .. . . . . . . . . . . . . . . . . . . . . . . . . . . . . . . . . . . . . . . . . . . . . . . . . . . . . . . . . . . . . . . . . . . . .57Reviewing the Front Office Standalone Upgrade.. . . . . . . . . . . . . . . . . . . . . . . . . . . . . . . . . . . . . . . . . . . . . . . . . . . . . . . . . . . . . . . . .57
Appendix CUsing Data Conversion Utilities... . . . . . . . . . . . . . . . . . . . . . . . . . . . . . . . . . . . . . . . . . . . . . . . . . . . . . . . . . . . . . . . . . . . . . . . .59Understanding Data Conversion Utilities.. . . . . . . . . . . . . . . . . . . . . . . . . . . . . . . . . . . . . . . . . . . . . . . . . . . . . . . . . . . . . . . . . . . . . . . . . . .59Using the UPGDATACONV Process.. . . . . . . . . . . . . . . . . . . . . . . . . . . . . . . . . . . . . . . . . . . . . . . . . . . . . . . . . . . . . . . . . . . . . . . . . . . . . . . .59
Understanding the UPGDATACONV Process.. . . . . . . . . . . . . . . . . . . . . . . . . . . . . . . . . . . . . . . . . . . . . . . . . . . . . . . . .. . . . . . . .59Reviewing the Data Conversion Report. . . . . . . . . . . . . . . . . . . . . . . . . . . . . . . . . . . . . . . . . . . . . . . . . . . . . . . . . . . . . . . . .. . . . . . . .60
Using the EO Upgrade Framework Process.. . . . . . . . . . . . . . . . . . . . . . . . . . . . . . . . . . . . . . . . . . . . . . . . . . . . . . . . . . . . . . . . . . . . . . .60Understanding the EO Upgrade Framework Process.. . . . . . . . . . . . . . . . . . . . . . . . . . . . . . . . . . . . . . . . . . . . . . . .. . . . . . . .60Reviewing EO Upgrade Framework Initial Analysis.. . . . . . . . . . . . . . . . . . . . . . . . . . . . . . . . . . . . . . . . . . . . . . . . . . .. . . . . . . .60Reviewing Dependency Analysis.. . . . . . . . . . . . . . . . . . . . . . . . . . . . . . . . . . . . . . . . . . . . . . . . . . . . . . . . . . . . . . . . . . . . . . . .. . . . . . . .64Reviewing Runtime for EOUFDATACONV... . . . . . . . . . . . . . . . . . . . . . . . . . . . . . . . . . . . . . . . . . . . . . . . . . . . . . . . . . . .. . . . . . . .64Reviewing EO Upgrade Framework Reporting.. . . . . . . . . . . . . . . . . . . . . . . . . . . . . . . . . . . . . . . . . . . . . . . . . . . . . . . .. . . . . . . .65
Using the Upgrade Driver Program... . . . . . . . . . . . . . . . . . . . . . . . . . . . . . . . . . . . . . . . . . . . . . . . . . . . . . . . . . . . . . . . . . . . . . . . . . . . . . . .67Using the Upgrade Drivers Page... . . . . . . . . . . . . . . . . . . . . . . . . . . . . . . . . . . . . . . . . . . . . . . . . . . . . . . . . . . . . . . . . . . . . . . . . . . . . . . . . . .67
Understanding the Upgrade Drivers Page.. . . . . . . . . . . . . . . . . . . . . . . . . . . . . . . . . . . . . . . . . . . . . . . . . . . . . . . . . . . . .. . . . . . . .68Accessing the Upgrade Drivers Page... . . . . . . . . . . . . . . . . . . . . . . . . . . . . . . . . . . . . . . . . . . . . . . . . . . . . . . . . . . . . . . . . .. . . . . . . .68Adding the New Upgrade Drivers Section Page.... . . . . . . . . . . . . . . . . . . . . . . . . . . . . . . . . . . . . . . . . . . . . . . . . . . . .. . . . . . . .69Inactivating the Upgrade Drivers Section... . . . . . . . . . . . . . . . . . . . . . . . . . . . . . . . . . . . . . . . . . . . . . . . . . . . . . . . . . . . . .. . . . . . . .69
vi Copyright © 2010, Oracle and/or its affiliates. All rights reserved.

Contents
Index ... . . . . . . . . . . . . . . . . . . . . . . . . . . . . . . . . . . . . . . . . . . . . . . .. . . . . . . . . . . . . . . . . . . . . . . . . . . . . . . . . . . . . . . . . . . . . . . . . . . . . . . . . . .71
Copyright © 2010, Oracle and/or its affiliates. All rights reserved. vii

Contents
viii Copyright © 2010, Oracle and/or its affiliates. All rights reserved.
About This Documentation
This preface discusses:
• Understanding This Documentation
• Prerequisites
• Audience
• Organization
• Typographical Conventions and Visual Cues
• Products
• Related Information
• Comments and Suggestions
Understanding This DocumentationThis documentation is designed to direct you through the process of upgrading to your new PeopleSoft release.
This section describes information that you should know before you begin working with PeopleSoft productsand documentation, including PeopleSoft documentation conventions.
PrerequisitesYou must complete the tasks in the document Getting Started on Your PeopleSoft Upgrade before beginningthis upgrade. If you have not yet completed these tasks, do so now. Go to My Oracle Support and searchfor Getting Started on Your PeopleSoft Upgrade.
AudienceThis documentation is written for the individuals responsible for upgrading to your new PeopleSoft release.This documentation assumes that you have a basic understanding of the PeopleSoft system. One of the mostimportant components of a successful upgrade of your PeopleSoft installation is your on-site expertise.
You should be familiar with your operating hardware environment and have the necessary skills to support thatenvironment. You should also have a working knowledge of:
• SQL and SQL command syntax.• PeopleSoft system navigation.• PeopleSoft windows, menus, and pages, and how to modify them.
Copyright © 2010, Oracle and/or its affiliates. All rights reserved. ix
Preface
• Microsoft Windows.
Oracle recommends that you complete training before performing an upgrade.
See Oracle University http://education.oracle.com
OrganizationThis documentation is divided into chapters that represent major milestones in the upgrade process.
This documentation may also contain appendixes. When additional information is required to complete anupgrade task, you will be directed to the appropriate appendix.
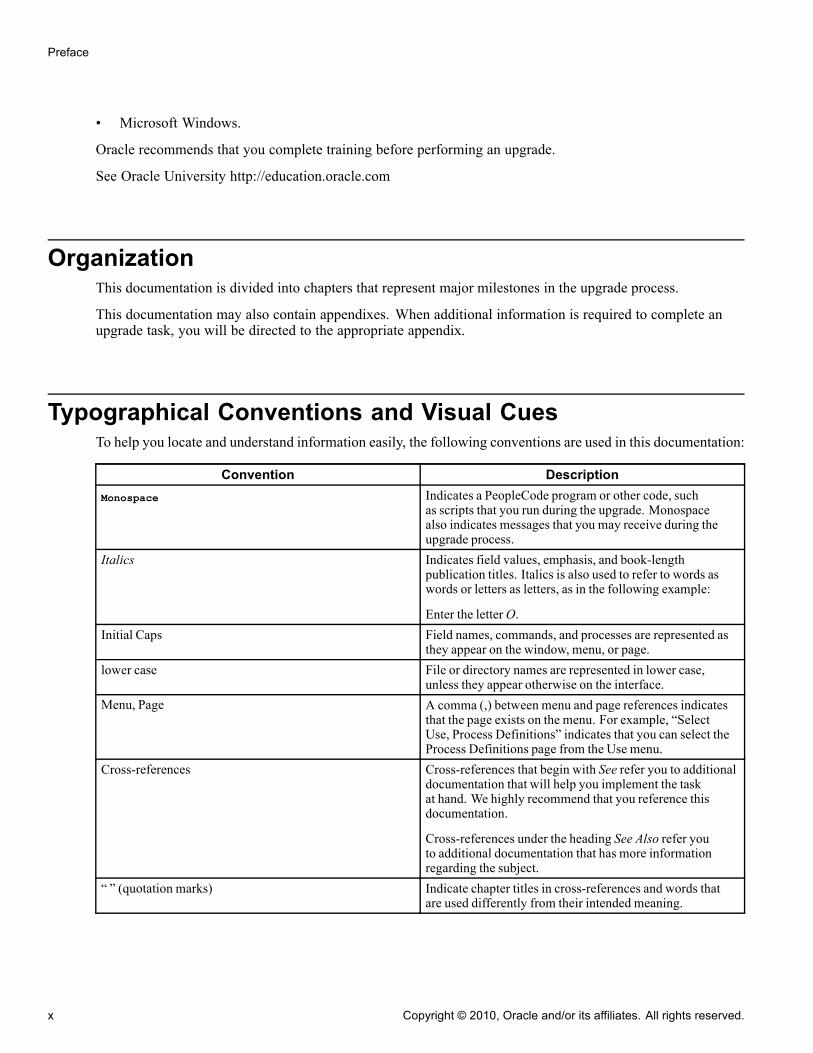
Typographical Conventions and Visual CuesTo help you locate and understand information easily, the following conventions are used in this documentation:
Convention DescriptionMonospace Indicates a PeopleCode program or other code, such
as scripts that you run during the upgrade. Monospacealso indicates messages that you may receive during theupgrade process.
Italics Indicates field values, emphasis, and book-lengthpublication titles. Italics is also used to refer to words aswords or letters as letters, as in the following example:
Enter the letterO.Initial Caps Field names, commands, and processes are represented as
they appear on the window, menu, or page.lower case File or directory names are represented in lower case,
unless they appear otherwise on the interface.Menu, Page A comma (,) between menu and page references indicates
that the page exists on the menu. For example, “SelectUse, Process Definitions” indicates that you can select theProcess Definitions page from the Use menu.
Cross-references Cross-references that begin with See refer you to additionaldocumentation that will help you implement the taskat hand. We highly recommend that you reference thisdocumentation.
Cross-references under the heading See Also refer youto additional documentation that has more informationregarding the subject.
“ ” (quotation marks) Indicate chapter titles in cross-references and words thatare used differently from their intended meaning.
x Copyright © 2010, Oracle and/or its affiliates. All rights reserved.

Preface
Convention DescriptionNote. Note text. Text that begins with Note indicates information that you
should pay particular attention to as you work with yourPeopleSoft system.
Important! Important note text. A note that begins with Important! is crucial and includesinformation about what you need to do for the system tofunction properly.
Warning! Warning text. A note that begins withWarning! contains crucialconfiguration information or implementationconsiderations; for example, if there is a chance of losing orcorrupting data. Pay close attention to warning messages.
ProductsThis documentation may refer to these products and product families:
• Oracle’s PeopleSoft Application Designer• Oracle’s PeopleSoft Change Assistant• Oracle’s PeopleSoft Data Mover• Oracle’s PeopleSoft Process Scheduler• Oracle’s PeopleSoft Pure Internet Architecture• Oracle’s PeopleSoft Enterprise Customer Relationship Management• Oracle’s PeopleSoft Enterprise Financial Management• Oracle’s PeopleSoft Enterprise Human Resources Management Systems• Oracle’s PeopleSoft Enterprise Learning Management• Oracle’s PeopleSoft Enterprise Pay/Bill Management• Oracle’s PeopleSoft Enterprise PeopleTools• Oracle’s PeopleSoft Enterprise Performance Management• Oracle’s PeopleSoft Enterprise Portal Solutions• Oracle’s PeopleSoft Enterprise Staffing Front Office• Oracle’s PeopleSoft Enterprise Supply Chain Management
Note. This documentation refers to both Oracle’s PeopleSoft Enterprise Portal Solutions and to PeopleSoftPeopleTools portal or portal technologies. PeopleSoft Portal Solutions is a separate application product.The PeopleSoft PeopleTools portal technologies consist of PeopleSoft Pure Internet Architecture and thePeopleTools portal technology used for creating and managing portals.
See http://www.oracle.com/applications/peoplesoft-enterprise.html for a list of PeopleSoft Enterprise products.
Copyright © 2010, Oracle and/or its affiliates. All rights reserved. xi
Preface
Related InformationOracle provides additional information that may help with your upgrade. The following information isavailable on My Oracle Support:
• Release Notes. Before you begin your upgrade, read the release notes to determine what has changedin the system and to familiarize yourself with the new features. The release notes also indicate whetheryou need to upgrade other portions of your system, such as your relational database management system(RDBMS) software or batch files.Go to My Oracle Support and search for the Release Notes for your product and release level.
• Upgrade Documentation. The upgrade documentation on My Oracle Support contains information postedafter shipment of this release that may not be included in these upgrade instructions. Always check MyOracle Support for the most current documentation and information.
Important! Before upgrading, it is imperative that you check My Oracle Support for updates to theupgrade instructions. We continually post updates as we refine the upgrade process.
To find updates to the upgrade documentation, go to My Oracle Support and search for the upgradedocumentation for your product and release level.
• Getting Started on Your PeopleSoft Upgrade. Before beginning a PeopleSoft upgrade, you must completethe tasks in the document Getting Started on Your PeopleSoft Upgrade. This document guides you throughplanning your upgrade as well as installing the software necessary to upgrade to the new PeopleSoftproduct release. If you did not complete the tasks in this documentation, do so now.Go to My Oracle Support and search for Getting Started on Your PeopleSoft Upgrade.
Comments and SuggestionsYour comments are important to us. We encourage you to tell us what you like, or what you would likechanged about our documentation, PeopleSoft PeopleBooks, and other Oracle reference and training materials.Please send your suggestions to:
While we cannot guarantee to answer every email message, we will pay careful attention to your commentsand suggestions. We are always improving our product communications for you.
xii Copyright © 2010, Oracle and/or its affiliates. All rights reserved.
CHAPTER 1
Installing the Software
This chapter discusses:
• Understanding Software Installation
• Installing the New Release
• Applying PeopleTools Patches
• Installing Change Assistant
• Retrieving and Applying Upgrade Files
• Creating and Configuring an Upgrade Job
• Reviewing Upgrade Step Properties
Understanding Software InstallationThis chapter discusses how you install all of the software that is required for your upgrade. It is very importantthat you complete all of the instructions discussed in this chapter before you begin the upgrade.
Task 1-1: Installing the New ReleaseTo upgrade your system:
1. Install Oracle’s PeopleSoft Enterprise Financial Management Solutions (FMS) 9.1 codeline and Systemdatabase.
2. Download the PeopleSoft Enterprise PeopleTools installation guide for your platform.
See My Oracle Support, select the Knowledge tab, then PeopleSoft Enterprise. Select Tools andTechnology, then select the Enterprise PeopleTools Installation guide for your new release.
3. Download the application-specific addenda for the product line you are installing.
See My Oracle Support, select the Knowledge tab, then PeopleSoft Enterprise. Select your product, thenselect the Enterprise PeopleTools Installation guide for your new release.
4. Install your new PeopleSoft software and System database following the instructions in the PeopleSoftEnterprise PeopleTools installation guide for your platform along with the application installation guidefor your product line.
Copyright © 2010, Oracle and/or its affiliates. All rights reserved. 1

Installing the Software Chapter 1
Note. Oracle’s PeopleSoft Enterprise Financials/Supply Chain Management (FSCM) family of applications issometimes referred to in this documentation as Financials. Also, Oracle’s PeopleSoft Enterprise Staffing FrontOffice is sometimes referred to as Front Office, and Oracle’s PeopleSoft Enterprise Pay/Bill Management issometimes referred to as Pay/Bill or PayBill.
Properties
DatabaseOrientation
Initial orMTP
Products Platforms Languages
Target Initial Staffing Front Office All All
Task 1-2: Applying PeopleTools PatchesIn this task, you will download and apply PeopleSoft PeopleTols “required for upgrade” patches from Patchesand Updates on My Oracle Support.
Important! Because the release of an upgrade is often intimately tied to a PeopleSoft PeopleTools patchrelease, complete this step only after the complete upgrade for your product is released on My Oracle Support.The certified upgrade path for your product will indicate the minimum PeopleSoft PeopleTools release andpatch level that is required for your upgrade. Make note of this minimum PeopleSoft PeopleTools releaseand patch level.
However, it is recommended that you take the most updated version of PeopleSoft PeopleTools as long as yourminimum release is included to ensure that your have the most updated PeopleSoft PeopleTools.
Applying PeopleSoft PeopleTools patches will bring you completely up to date with any changes made toPeopleSoft PeopleTools that affect the upgrade process. These PeopleSoft PeopleTools patches should onlybe applied to your source database at the beginning or end of an upgrade pass. If you apply a PeopleSoftPeopleTools patch at the beginning of the upgrade pass to your source database, the changes will automaticallybe migrated to the target database. You can apply PeopleSoft PeopleTools patches to the target database at theend of an upgrade pass if the patches were not applied to the source database in the beginning of the upgrade.
To apply all PeopleSoft PeopleTools “required for upgrade” patches:
1. Go to the patch fix search page on My Oracle Support.
See My Oracle Support, Patches and Updates.2. Select the following search criteria:
• Select the PeopleSoft tab.• Select the Required for Install or Upgrade hyperlink.• SelectPeopleTools from the Product Line drop down menu.• Select PeopleTools from the Product drop down menu.• Select your new PeopleTools release from the Release drop down menu.• The Required for Upgrade option
3. Click the right pointing arrow to execute the search.
2 Copyright © 2010, Oracle and/or its affiliates. All rights reserved.
Chapter 1 Installing the Software
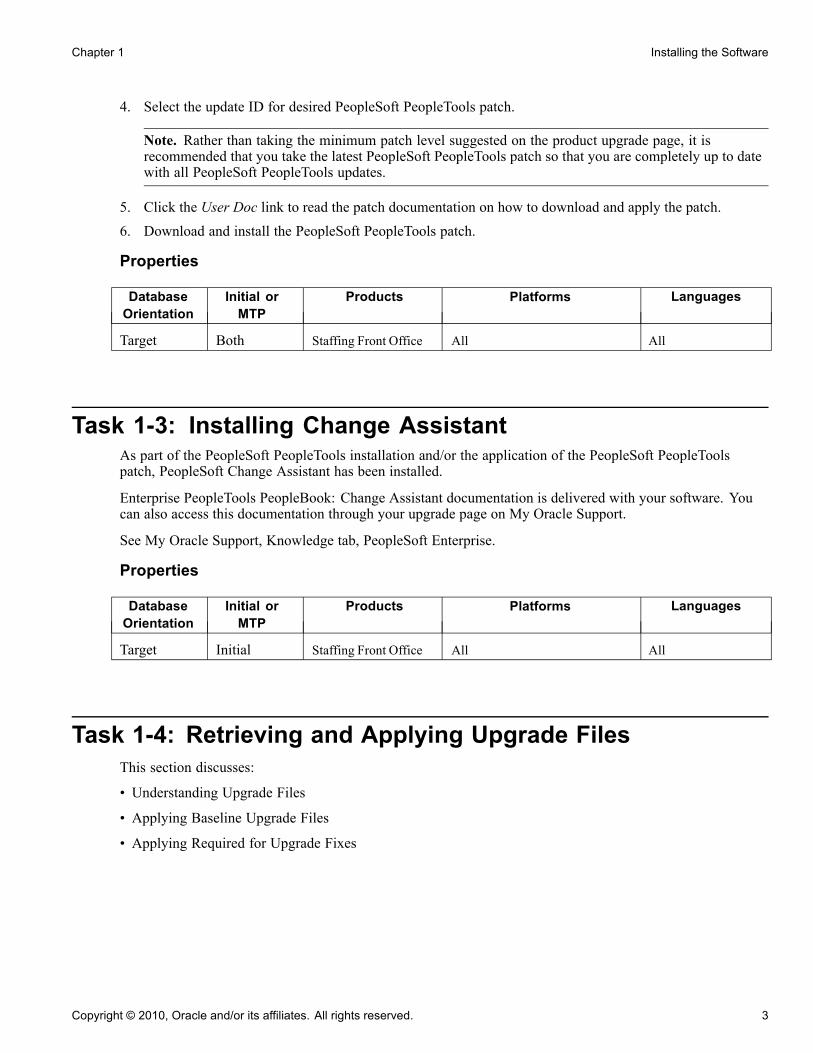
4. Select the update ID for desired PeopleSoft PeopleTools patch.
Note. Rather than taking the minimum patch level suggested on the product upgrade page, it isrecommended that you take the latest PeopleSoft PeopleTools patch so that you are completely up to datewith all PeopleSoft PeopleTools updates.
5. Click the User Doc link to read the patch documentation on how to download and apply the patch.6. Download and install the PeopleSoft PeopleTools patch.
Properties
DatabaseOrientation
Initial orMTP
Products Platforms Languages
Target Both Staffing Front Office All All
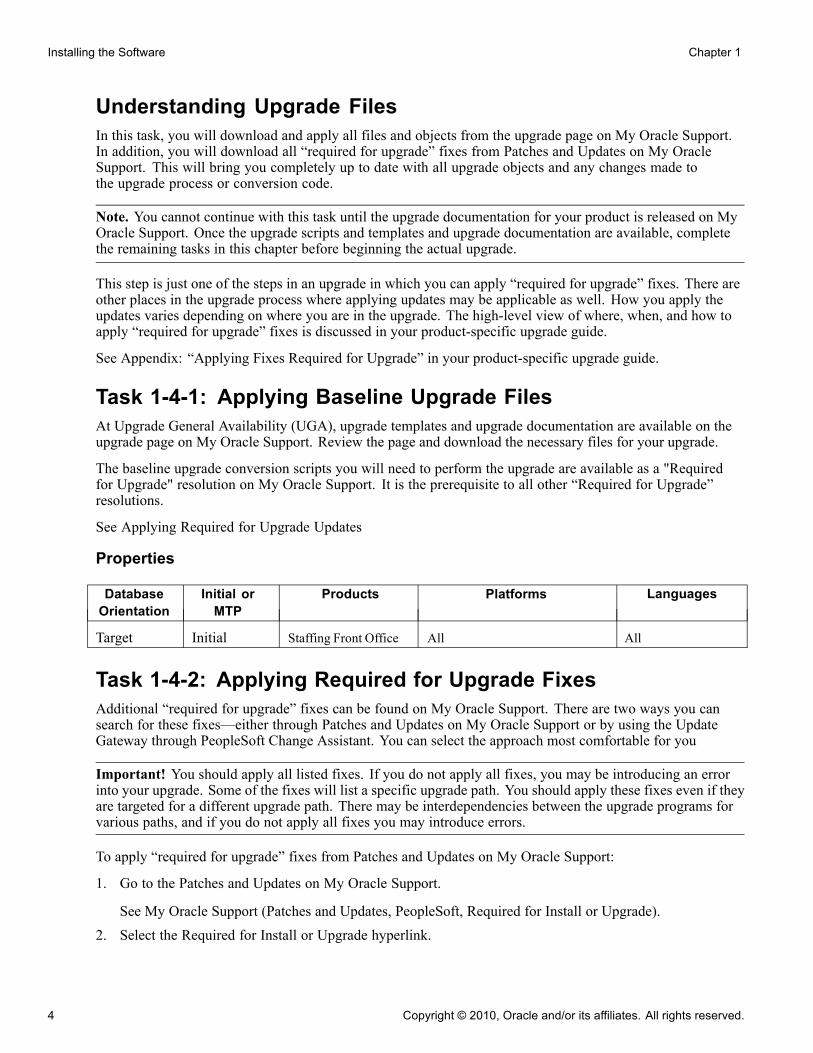
Task 1-3: Installing Change AssistantAs part of the PeopleSoft PeopleTools installation and/or the application of the PeopleSoft PeopleToolspatch, PeopleSoft Change Assistant has been installed.
Enterprise PeopleTools PeopleBook: Change Assistant documentation is delivered with your software. Youcan also access this documentation through your upgrade page on My Oracle Support.
See My Oracle Support, Knowledge tab, PeopleSoft Enterprise.
Properties
DatabaseOrientation
Initial orMTP
Products Platforms Languages
Target Initial Staffing Front Office All All
Task 1-4: Retrieving and Applying Upgrade FilesThis section discusses:
• Understanding Upgrade Files
• Applying Baseline Upgrade Files
• Applying Required for Upgrade Fixes
Copyright © 2010, Oracle and/or its affiliates. All rights reserved. 3
Installing the Software Chapter 1
Understanding Upgrade FilesIn this task, you will download and apply all files and objects from the upgrade page on My Oracle Support.In addition, you will download all “required for upgrade” fixes from Patches and Updates on My OracleSupport. This will bring you completely up to date with all upgrade objects and any changes made tothe upgrade process or conversion code.
Note. You cannot continue with this task until the upgrade documentation for your product is released on MyOracle Support. Once the upgrade scripts and templates and upgrade documentation are available, completethe remaining tasks in this chapter before beginning the actual upgrade.
This step is just one of the steps in an upgrade in which you can apply “required for upgrade” fixes. There areother places in the upgrade process where applying updates may be applicable as well. How you apply theupdates varies depending on where you are in the upgrade. The high-level view of where, when, and how toapply “required for upgrade” fixes is discussed in your product-specific upgrade guide.
See Appendix: “Applying Fixes Required for Upgrade” in your product-specific upgrade guide.
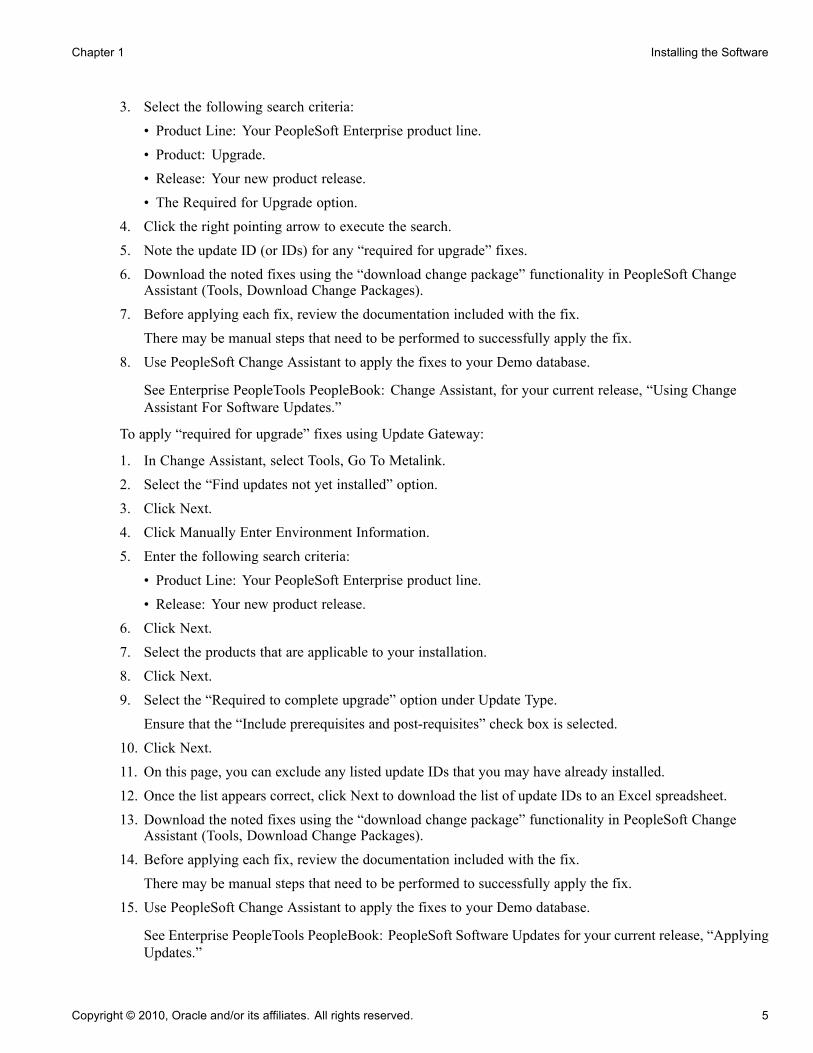
Task 1-4-1: Applying Baseline Upgrade FilesAt Upgrade General Availability (UGA), upgrade templates and upgrade documentation are available on theupgrade page on My Oracle Support. Review the page and download the necessary files for your upgrade.
The baseline upgrade conversion scripts you will need to perform the upgrade are available as a "Requiredfor Upgrade" resolution on My Oracle Support. It is the prerequisite to all other “Required for Upgrade”resolutions.
See Applying Required for Upgrade Updates
Properties
DatabaseOrientation
Initial orMTP
Products Platforms Languages
Target Initial Staffing Front Office All All
Task 1-4-2: Applying Required for Upgrade FixesAdditional “required for upgrade” fixes can be found on My Oracle Support. There are two ways you cansearch for these fixes—either through Patches and Updates on My Oracle Support or by using the UpdateGateway through PeopleSoft Change Assistant. You can select the approach most comfortable for you
Important! You should apply all listed fixes. If you do not apply all fixes, you may be introducing an errorinto your upgrade. Some of the fixes will list a specific upgrade path. You should apply these fixes even if theyare targeted for a different upgrade path. There may be interdependencies between the upgrade programs forvarious paths, and if you do not apply all fixes you may introduce errors.
To apply “required for upgrade” fixes from Patches and Updates on My Oracle Support:
1. Go to the Patches and Updates on My Oracle Support.
See My Oracle Support (Patches and Updates, PeopleSoft, Required for Install or Upgrade).2. Select the Required for Install or Upgrade hyperlink.
4 Copyright © 2010, Oracle and/or its affiliates. All rights reserved.
Chapter 1 Installing the Software
3. Select the following search criteria:• Product Line: Your PeopleSoft Enterprise product line.• Product: Upgrade.• Release: Your new product release.• The Required for Upgrade option.
4. Click the right pointing arrow to execute the search.5. Note the update ID (or IDs) for any “required for upgrade” fixes.6. Download the noted fixes using the “download change package” functionality in PeopleSoft Change
Assistant (Tools, Download Change Packages).7. Before applying each fix, review the documentation included with the fix.
There may be manual steps that need to be performed to successfully apply the fix.8. Use PeopleSoft Change Assistant to apply the fixes to your Demo database.
See Enterprise PeopleTools PeopleBook: Change Assistant, for your current release, “Using ChangeAssistant For Software Updates.”
To apply “required for upgrade” fixes using Update Gateway:
1. In Change Assistant, select Tools, Go To Metalink.
2. Select the “Find updates not yet installed” option.
3. Click Next.4. Click Manually Enter Environment Information.
5. Enter the following search criteria:
• Product Line: Your PeopleSoft Enterprise product line.
• Release: Your new product release.
6. Click Next.7. Select the products that are applicable to your installation.
8. Click Next.9. Select the “Required to complete upgrade” option under Update Type.
Ensure that the “Include prerequisites and post-requisites” check box is selected.
10. Click Next.11. On this page, you can exclude any listed update IDs that you may have already installed.
12. Once the list appears correct, click Next to download the list of update IDs to an Excel spreadsheet.
13. Download the noted fixes using the “download change package” functionality in PeopleSoft ChangeAssistant (Tools, Download Change Packages).
14. Before applying each fix, review the documentation included with the fix.
There may be manual steps that need to be performed to successfully apply the fix.
15. Use PeopleSoft Change Assistant to apply the fixes to your Demo database.
See Enterprise PeopleTools PeopleBook: PeopleSoft Software Updates for your current release, “ApplyingUpdates.”
Copyright © 2010, Oracle and/or its affiliates. All rights reserved. 5
Installing the Software Chapter 1
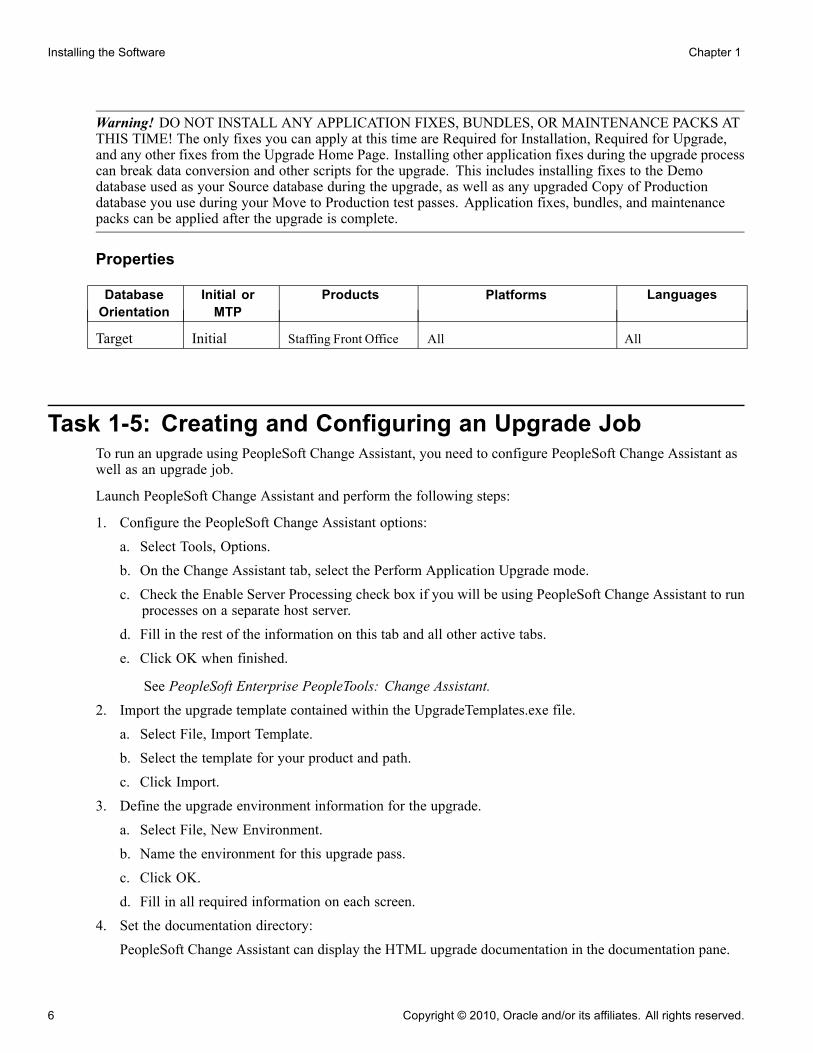
Warning! DO NOT INSTALL ANY APPLICATION FIXES, BUNDLES, OR MAINTENANCE PACKS ATTHIS TIME! The only fixes you can apply at this time are Required for Installation, Required for Upgrade,and any other fixes from the Upgrade Home Page. Installing other application fixes during the upgrade processcan break data conversion and other scripts for the upgrade. This includes installing fixes to the Demodatabase used as your Source database during the upgrade, as well as any upgraded Copy of Productiondatabase you use during your Move to Production test passes. Application fixes, bundles, and maintenancepacks can be applied after the upgrade is complete.
Properties
DatabaseOrientation
Initial orMTP
Products Platforms Languages
Target Initial Staffing Front Office All All
Task 1-5: Creating and Configuring an Upgrade JobTo run an upgrade using PeopleSoft Change Assistant, you need to configure PeopleSoft Change Assistant aswell as an upgrade job.
Launch PeopleSoft Change Assistant and perform the following steps:
1. Configure the PeopleSoft Change Assistant options:
a. Select Tools, Options.
b. On the Change Assistant tab, select the Perform Application Upgrade mode.
c. Check the Enable Server Processing check box if you will be using PeopleSoft Change Assistant to runprocesses on a separate host server.
d. Fill in the rest of the information on this tab and all other active tabs.
e. Click OK when finished.
See PeopleSoft Enterprise PeopleTools: Change Assistant.
2. Import the upgrade template contained within the UpgradeTemplates.exe file.
a. Select File, Import Template.
b. Select the template for your product and path.
c. Click Import.
3. Define the upgrade environment information for the upgrade.
a. Select File, New Environment.
b. Name the environment for this upgrade pass.
c. Click OK.d. Fill in all required information on each screen.
4. Set the documentation directory:
PeopleSoft Change Assistant can display the HTML upgrade documentation in the documentation pane.
6 Copyright © 2010, Oracle and/or its affiliates. All rights reserved.
Chapter 1 Installing the Software
a. Select Edit, Set Documentation Directory.b. Enter or browse to the directory containing the HTML documentation and click OK.
See PeopleSoft Enterprise PeopleTools Change Assistant "Configuring Change Assistant forUpgrades."
5. Create the upgrade job for the Initial upgrade pass.The upgrade job contains all steps specific to your upgrade environment.
See PeopleSoft Enterprise PeopleTools Change Assistant "Configuring Change Assistant for Upgrades."
Properties
DatabaseOrientation
Initial orMTP
Products Platforms Languages
Target Initial Staffing Front Office All All
Task 1-6: Reviewing Upgrade Step PropertiesWhen you open the upgrade template using PeopleSoft Change Assistant, you will see various propertiesfor each step. Several of those properties are included in this upgrade documentation. At the end of eachupgrade step, you see a description of the properties used during that step. The following example shows theinformation that you see in the upgrade documentation:
Properties box example
The Database Orientation has two possible description: Source and Target.
Note. This upgrade differs from many other PeopleSoft upgrades. Please pay special attention to thedescriptions for each database.
• Source indicates that the step runs on the Source database. During your initial pass and for test move toproduction passes, the Source database is a Copy of your old release Front Office Production database.
• Target indicates that the step runs on the Target database, which is your new FSCM 9.1 system database.
The Initial or MTP properties have three possible descriptions: Initial Upgrade, Move To Production, and Both.
• Initial Upgrade indicates that this step runs only in the Initial pass of the upgrade.• Move To Production indicates that this step runs only in Move to Production upgrade passes. This step is
not applicable to the Initial pass.• Both indicates that this step runs in both the Initial and Move to Production upgrade passes.
The Products property has two descriptions: All, and a specific product name or names:
Copyright © 2010, Oracle and/or its affiliates. All rights reserved. 7

Installing the Software Chapter 1
• All indicates that you run the step regardless of which products you are upgrading.• A specific product name or names indicates that you run the step only if you’re upgrading the product or
products specified. You specified the product or products that you would upgrade when you set up yourPeopleSoft Change Assistant job configuration.
The Platforms property has two possible descriptions: All, and a specific platform name or names.
• All indicates that you run the step regardless of which platform your database uses.• A specific platform name or names indicates that you run the step only if your database uses the specified
platform or platforms. You specified the platform that you would use when you set up your PeopleSoftChange Assistant job configuration. The following are platform names that will appear:• DB2 z/OS• DB2 UNIX/NT• Informix• MS SQL Server• Oracle• Sybase
Note. DB2 UDB for OS/390 and z/OS is the official IBM name for the database management system. Thecurrent PeopleSoft PeopleTools release no longer supports the OS/390 operating system; it supports only z/OS,the replacement for OS/390. For the sake of brevity, this documentation sometimes refers to DB2 UDB forOS/390 and z/OS as DB2 z/OS, and it sometimes refers to DB2 UDB for Linux, Unix, and Windows asDB2 UNIX/NT.
The Languages property has two possible descriptions: All, and a specific language name or names.
• All indicates that you will run this step regardless of which language your database uses.• A specific language name or names indicates that you will run this step only if your database uses the
language or languages specified. You specified the languages installed on your database when you set upyour PeopleSoft Change Assistant job configuration.
Properties
DatabaseOrientation
Initial orMTP
Products Platforms Languages
Target Initial Staffing Front Office All All
8 Copyright © 2010, Oracle and/or its affiliates. All rights reserved.

CHAPTER 2
Planning Your Application Upgrade
This chapter discusses:
• Understanding Application Upgrade Planning
• Understanding Your Upgrade
• Copying Your Production Database
Understanding Application Upgrade PlanningYou must make a copy of your production database before you start preparations for the technical portionof the upgrade. Unless otherwise noted, run these tasks on your Copy of Production database (not the NewRelease Demo database).
Important! You must read the documentation Getting Started on Your PeopleSoft Upgrade before youcontinue with your upgrade. This getting started guide explains the upgrade process, terminology, and setuptasks that must be performed prior to starting your upgrade.
Task 2-1: Understanding Your UpgradeThis section discusses:
• Understanding PeopleSoft Upgrades
• Verifying the Software Installation
• Defining Upgrade Databases
• Reviewing Upgrade Notes and Tips
Understanding PeopleSoft UpgradesThis task reviews information that you need to know before you begin your upgrade. It explains the differenttypes of databases that you will use and provides useful upgrade tips and information that you may need toapply before beginning your upgrade.
Copyright © 2010, Oracle and/or its affiliates. All rights reserved. 9
Planning Your Application Upgrade Chapter 2
Task 2-1-1: Verifying the Software InstallationBefore continuing with the upgrade, you must complete all of the tasks in Getting Started on Your PeopleSoftUpgrade, “Starting Your Upgrade.” Verify that the following tasks are complete:
• Installing the new release.• Applying PeopleSoft PeopleTools patches.• Installing PeopleSoft Change Assistant.• Retrieving and applying upgrade files.• Creating and configuring an upgrade job.• Setting Configuration Manager profile.• Reviewing upgrade step properties.
Properties
DatabaseOrientation
Initial orMTP
Products Platforms Languages
Source Initial All All All
Task 2-1-2: Defining Upgrade DatabasesThe following databases will be used during your upgrade:
• The New Release Demo database always refers to the database delivered with your new PeopleSoft release.It contains the new and changed database objects that you want to add. The New Release Demo databaseis also referred to as the Demo database later in the upgrade.
• The Copy of Production database refers to the copy of your production database, into which you will addthe new and changed objects for this release from the New Release Demo database.
Note. You will create more than one Copy of Production database. Your second and subsequent copiesare referred to as the New Copy of Production.
• The Copy of Current Demo refers to the copy of the demo database for the release that you are currentlyusing.
Properties
DatabaseOrientation
Initial orMTP
Products Platforms Languages
Target Initial All All All
Task 2-1-3: Reviewing Upgrade Notes and TipsThis section contains information that may apply to your upgrade product. Review the information in thissection before beginning your upgrade.
• Budget Cycle
10 Copyright © 2010, Oracle and/or its affiliates. All rights reserved.
Chapter 2 Planning Your Application Upgrade
Upgrading in the middle of a budget cycle is not recommended, but it can be accomplished. If you want toupgrade in the middle of a budget cycle, you must take the following steps:Re-create any run control records created prior to the upgrade for the Budgets Cube Import. This is due tothe introduction of new ChartFields for ledger tables.If the Position Budgeting feature is used, the position data will not be upgraded due to the extent of thearchitectural changes to the position tables. When the upgrade is complete, you will need to subscribe tothe new position data (from HRMS or EPM/WFA) or if you do not have integration points, you will needto key in new position data via the Budgets product.
• Oracle’s PeopleSoft Enterprise Time and Labor to Projects Interface ConsiderationsThis information applies if you are currently using the PeopleSoft Time and Labor to Projects interface,and you intend to continue using this interface with the new PeopleSoft release. Because this interfacetakes records from PeopleSoft Time and Labor in the HRMS database and loads them in Oracle’sPeopleSoft Enterprise Projects tables in the PeopleSoft Financials and Supply Chain Managementdatabase, you cannot use this interface until both databases are upgraded.You can upgrade the two databases independently and in no particular order, but you will not be able to runthis interface until both upgrades are complete.
• Performance RecommendationsBefore beginning your upgrade, you should plan for performance issues as outlined in the Getting Startedon Your PeopleSoft Upgrade documentation.
• ExpensesOracle’s PeopleSoft Enterprise Expenses uses a new Approval and Workflow engine to manage expensetransaction approvals. To prepare for upgrade, customers must ensure that all expense transactions areeither in Pending status (unsubmitted) or in final approved status prior to the upgrade. Transactions thatare in the approval process may not be recoverable for routing to approver queues after the upgrade. Oncethe upgrade is completed and the system is in production, transactions that are in Pending status may besubmitted normally and transactions that are already approved may be staged for further processing asrequired.
• Microsoft SQL Server Column StatisticsAs of Microsoft SQL Server 2000, user-defined statistics can be created on columns within a table. Thisfeature is not supported by PeopleSoft PeopleTools. If you added user-defined statistics to any columnsin your PeopleSoft application, it may cause errors to occur during the upgrade steps that alter tables.Oracle recommends that you drop all user-defined statistics on columns of PeopleSoft tables beforeproceeding with your upgrade.
Properties
DatabaseOrientation
Initial orMTP
Products Platforms Languages
Target Both All All All
Task 2-2: Copying Your Production DatabaseThis section discusses:
Copyright © 2010, Oracle and/or its affiliates. All rights reserved. 11

Planning Your Application Upgrade Chapter 2
• Making a Copy of Production Database
Task 2-2-1: Making a Copy of Production DatabaseMake a copy of your production database. You will perform the upgrade on this Copy of Productiondatabase, not on your production database. Make sure that all current processes are completed and thatno existing non-upgrade processes are queued or scheduled to run during the upgrade on the Copy ofProduction. Performing the upgrade on a copy of your production database enables you to test your upgradein a controlled environment. Refer to the administration guide for your database platform for informationon copying databases.
Note. Move to Production: This is a second Copy of Production, sometimes referred to as the New Copyof Production. The first Copy of Production, or “old” Copy of Production, will now be the Source database(it was the Target database in the initial test pass). The second, or “new” Copy of Production, is now theTarget database.
Properties
DatabaseOrientation
Initial orMTP
Products Platforms Languages
Target Both All All All
12 Copyright © 2010, Oracle and/or its affiliates. All rights reserved.

CHAPTER 3
Preparing Your Database for Upgrade
This chapter discusses:
• Understanding Database Preparation
• Applying Upgrade Planning Files
• Setting Up Front Office
• Exporting Front Office Data
• Performing General Options Setup
• Verifying the Upgrade User
Understanding Database PreparationIn this chapter, you begin preparations for the upgrade. Unless otherwise noted, run these tasks on your Copyof Production database (not the New Release Demo database). These tasks do not use the new PeopleSoftrelease. You should use your current codeline and current PeopleSoft PeopleTools release to perform thesetasks unless instructed otherwise.
Important! You must read the documentation Getting Started on Your PeopleSoft Upgrade before youcontinue with your upgrade. This getting started guide explains the upgrade process, terminology, and setuptasks that must be performed prior to starting your upgrade.
Task 3-1: Applying Upgrade Planning FilesThis section discusses:
• Understanding Applying Upgrade Planning Files
• Applying the UPGOPTFO Project
• Building the UPGOPTFO Project
• Setting Up Security for Upgrade Planning
Copyright © 2010, Oracle and/or its affiliates. All rights reserved. 13

Preparing Your Database for Upgrade Chapter 3
Understanding Applying Upgrade Planning FilesIn this task, you apply the upgrade planning files that you downloaded from the upgrade page on My OracleSupport to your current codeline. These files may include Structured Query Report (SQR) programs andscripts that you will execute in later tasks, and a project that you will apply to your Copy of Productiondatabase. This project may include records, fields, pages, menus, queries, and process definitions that allowfunctional users to define conversion information needed for later upgrade tasks.
Task 3-1-1: Applying the UPGOPTFO ProjectIn this step, apply the Staffing Front Office (FO) UPGOPTFO project to your Copy of Production databaseusing the Copy Project from File process.
Apply the UPGOPTFO to your Staffing Front Office database by following the instructions below.
To apply the UPGOPTFO project:
1. Using your current codeline, launch Application Designer and sign on to your Copy of Production database.2. Select Tools, Copy Project, From File.3. From the dialog box, select the import directory PS_HOME\PROJECTS\ (current codeline).4. Click UPGOPTFO in the Projects box, and then click Select.5. Click Copy.
This copies the UPGOPTFO project onto your Copy of Production database.
Properties
DatabaseOrientation
Initial orMTP
Products Platforms Languages
Source Both Staffing Front Office All All
Task 3-1-2: Building the UPGOPTFO ProjectIn this step, you create and alter tables, and create views.
To build the UPGOPTFO project:
1. Using your current codeline, launch Application Designer and sign on to your Copy of Production database.2. Select File, Open…3. In the Definition drop-down list box, select Project and click Open to display the list of projects.4. Select UPGOPTFO and click Open again.5. Select Build, Project…6. Under Build Options, select Create Tables, Create Views.7. Click Settings...8. On the Create tab, select Recreate View if it already exists and Recreate Table if it already exists.9. On the Logging tab, select Fatal errors, warnings, and informational messages.10. On the Scripts tab, select Output to separate files.
14 Copyright © 2010, Oracle and/or its affiliates. All rights reserved.
Chapter 3 Preparing Your Database for Upgrade
11. In the Script File Names box, give your scripts a unique name that reflects this task number and theobject being created.
12. Click OK.13. Under Build Execute Options, select Build script file.14. Click Build.15. Using the appropriate SQL query tool for your platform, run the scripts created in the step above.
Run the scripts in the following order: Create Tables, Create Views, Create Indexes.
Properties
DatabaseOrientation
Initial orMTP
Products Platforms Languages
Source Both Staffing Front Office All All
Task 3-1-3: Setting Up Security for Upgrade PlanningIn this step you set up security on your Copy of Production database.
To set up security:
1. Select PeopleTools, Security, Permissions and Roles, Permission Lists.2. Enter the permission list for the users who will be reviewing and setting up functional requirements for the
upgrade then click Search.3. Select the permission list for the users that will be reviewing and setting up functional requirements
for the upgrade.4. Grant access to this permission list for the following navigations:
PeopleTools, Utilities, Administration, Translate Values.
Properties
DatabaseOrientation
Initial orMTP
Products Platforms Languages
Source Both Staffing Front Office All All
Task 3-2: Setting Up Front OfficeThis section discusses:
• Understanding the Front Office Setup
• Verifying Installation Options
• Configuring PC Business Unit
• Mapping Skill Type to Competency Type
Copyright © 2010, Oracle and/or its affiliates. All rights reserved. 15

Preparing Your Database for Upgrade Chapter 3
• Mapping Skill Code to Competency
• Mapping Resource and Order Priority Values
• Mapping Business Unit to Location Code
• Mapping Test to Accomplishment
• Mapping Degree to Accomplishment
• Mapping Major Code
• Mapping School Code
• Printing Translate Values for NAME PREFIX
• Printing Translate Values for SCHOOL TYPE
Understanding the Front Office SetupIn this task you will set up your data on your Staffing Front Office database to prepare it for conversion.
Task 3-2-1: Verifying Installation OptionsIn this step, verify that you selected the correct products when you installed your FSCM 9.1 database.
Note. Run this step against your FSCM database.
To verify installation options:
1. Select Set Up Financials/Supply Chain, Install, Installation Options.
2. Verify that the Pay/Bill Management check box is not selected.
3. Verify that the Staffing Front Office check box is selected.
Properties
DatabaseOrientation
Initial orMTP
Products Platforms Languages
Target Both Staffing Front Office All All
Task 3-2-2: Configuring PC Business UnitAs part of the upgrade to FSCM 9.1, all Staffing Front Office 8.8 Business Units are mapped with LocationCodes and Project Costing (PC) Business Units to upgrade the Business Units to Staffing Branches.
PC Business Units did not exist in Staffing Front Office 8.8. Therefore, before you map your Staffing FrontOffice 8.8 Business Units, you must create those corresponding PC Business Units in FSCM 9.1.
Be sure to keep a record of the PC Business Unit values you enter for FSCM 9.1. You will enter those values tothe Staffing Front Office 8.8 Business Units later in the upgrade.
To enter the PC Business Unit values:
1. Select Set Up Financials/Supply Chain, Business Unit Related, Project Costing, Project Costing Definition.
16 Copyright © 2010, Oracle and/or its affiliates. All rights reserved.
Chapter 3 Preparing Your Database for Upgrade
2. Create one or more PC Business Units in FSCM 9.1 based on how you want to map your Staffing FrontOffice 8.8 Business Units later in the upgrade.
See PeopleSoft Enterprise 9.1 PeopleBook, PeopleSoft Staffing Front Office for your current release.
Properties
DatabaseOrientation
Initial orMTP
Products Platforms Languages
Target Both Staffing Front Office All All
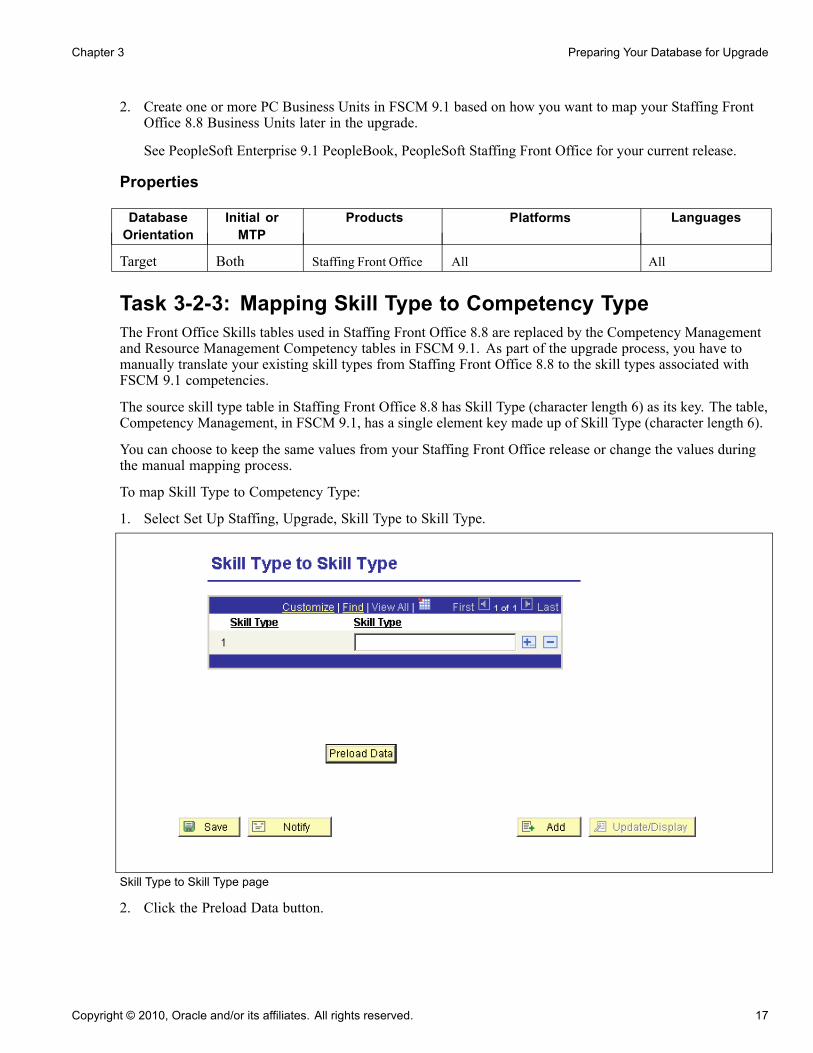
Task 3-2-3: Mapping Skill Type to Competency TypeThe Front Office Skills tables used in Staffing Front Office 8.8 are replaced by the Competency Managementand Resource Management Competency tables in FSCM 9.1. As part of the upgrade process, you have tomanually translate your existing skill types from Staffing Front Office 8.8 to the skill types associated withFSCM 9.1 competencies.
The source skill type table in Staffing Front Office 8.8 has Skill Type (character length 6) as its key. The table,Competency Management, in FSCM 9.1, has a single element key made up of Skill Type (character length 6).
You can choose to keep the same values from your Staffing Front Office release or change the values duringthe manual mapping process.
To map Skill Type to Competency Type:
1. Select Set Up Staffing, Upgrade, Skill Type to Skill Type.
Skill Type to Skill Type page
2. Click the Preload Data button.
Copyright © 2010, Oracle and/or its affiliates. All rights reserved. 17
Preparing Your Database for Upgrade Chapter 3
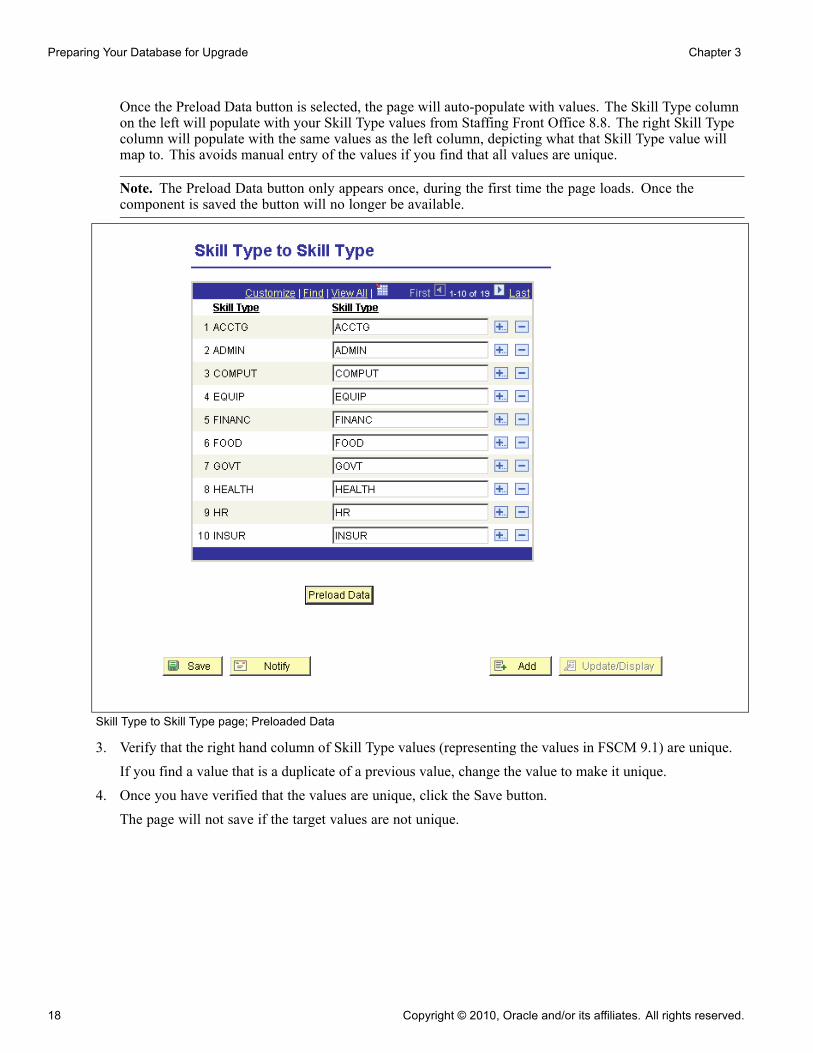
Once the Preload Data button is selected, the page will auto-populate with values. The Skill Type columnon the left will populate with your Skill Type values from Staffing Front Office 8.8. The right Skill Typecolumn will populate with the same values as the left column, depicting what that Skill Type value willmap to. This avoids manual entry of the values if you find that all values are unique.
Note. The Preload Data button only appears once, during the first time the page loads. Once thecomponent is saved the button will no longer be available.
Skill Type to Skill Type page; Preloaded Data
3. Verify that the right hand column of Skill Type values (representing the values in FSCM 9.1) are unique.If you find a value that is a duplicate of a previous value, change the value to make it unique.
4. Once you have verified that the values are unique, click the Save button.The page will not save if the target values are not unique.
18 Copyright © 2010, Oracle and/or its affiliates. All rights reserved.

Chapter 3 Preparing Your Database for Upgrade
Properties
DatabaseOrientation
Initial orMTP
Products Platforms Languages
Source Both Staffing Front Office All All
Task 3-2-4: Mapping Skill Code to CompetencyThe Skills tables used in PeopleSoft Staffing Front Office 8.8 have been replaced by Competency Managementand Resource Management Competency Tables in PeopleSoft FSCM 9.1. As part of the upgrade, you mustmanually translate your skill codes from Staffing Front Office 8.8 to competencies in FSCM 9.1.
The Skill Code table in PeopleSoft Staffing Front Office 8.8 has a two-element key, made up of Skill Type(character length 6) and Skill Code (character length 10). The Competency table in PeopleSoft FSCM 9.1has a single element key made up of Competency (character length 8).
Competency cannot be generated directly from Skill Code, as the same Skill Code value may appear undervarious Skill Types in Staffing Front Office 8.8. Even if the values of Skill Code are distinct in Staffing FrontOffice 8.8, the first eight characters of the Skill Code will not ensure uniqueness.
Despite the scenario mentioned above, Competency values will be auto-generated to avoid duplicates andmanual entry. If you choose to change the auto-generated values, you must ensure that all values are uniquebefore you save the page.
To map Skill Code and Skill Type to Competency:
1. Select Set Up Staffing, Upgrade, Skill Code to Competency.
Skill Code to Competency page
2. Click the Preload Data button.
Copyright © 2010, Oracle and/or its affiliates. All rights reserved. 19
Preparing Your Database for Upgrade Chapter 3
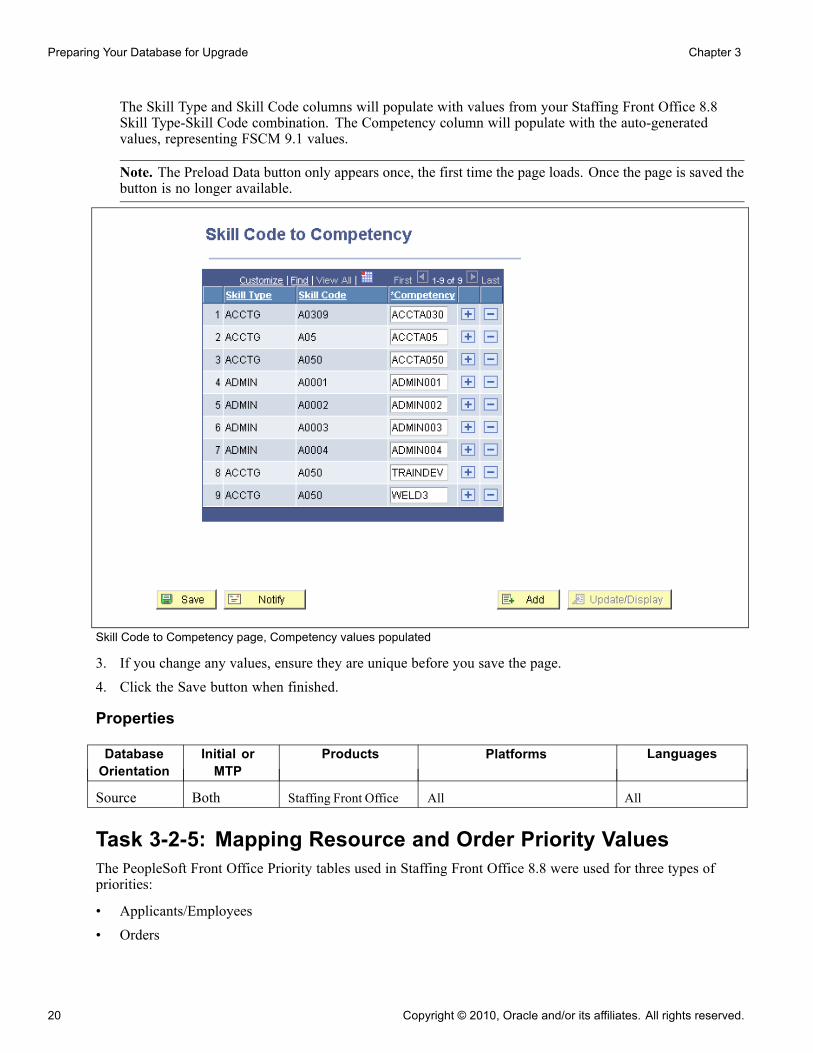
The Skill Type and Skill Code columns will populate with values from your Staffing Front Office 8.8Skill Type-Skill Code combination. The Competency column will populate with the auto-generatedvalues, representing FSCM 9.1 values.
Note. The Preload Data button only appears once, the first time the page loads. Once the page is saved thebutton is no longer available.
Skill Code to Competency page, Competency values populated
3. If you change any values, ensure they are unique before you save the page.4. Click the Save button when finished.
Properties
DatabaseOrientation
Initial orMTP
Products Platforms Languages
Source Both Staffing Front Office All All
Task 3-2-5: Mapping Resource and Order Priority ValuesThe PeopleSoft Front Office Priority tables used in Staffing Front Office 8.8 were used for three types ofpriorities:
• Applicants/Employees• Orders
20 Copyright © 2010, Oracle and/or its affiliates. All rights reserved.

Chapter 3 Preparing Your Database for Upgrade
• Customers
The priority table in PeopleSoft Staffing Front Office 8.8 has a two-element key made up of User Status(character length 5) and Status Type (character length 4). The Priority table in PeopleSoft FSCM 9.1 has asingle element key made up of Priority Code (character length 3).
For each of the Status Types, the first three characters of the User Status values will be extracted to generatenew Priority code values. In some cases, the generated Priority code values will not be unique if the first threecharacters of two or more User Status fields are the same. In such cases, you must manually resolve thevalues of the priority codes.
The upgrade process will do the following:
• User Status “Customer” will not be upgraded as it was not used in any component of Staffing FrontOffice 8.8.
• User Status “Employees” will be upgraded to Resource Priority table in FSCM 9.1.
• User Status “Orders” will be upgraded to the Order Priority table in FSCM 9.1.
The following procedure will instruct you to map the Status Type, User Status to its corresponding Prioritycodes.
To map the Status Type, User Status to Priority codes:
1. Select Set Up Staffing, Upgrade, User Status to Priority Code.
User Status to Priority Code page
2. Click the Preload Data button.This button populates the page with the existing Status Type and User Status and the corresponding PriorityCode. The Priority Code is generated by extracting the first three characters of the User Status field.
Note. The Preload Data button only appears once, the first time the page loads. Once the page is saved thebutton is no longer available.
3. Review the Priority Codes to ensure each value is unique.
Copyright © 2010, Oracle and/or its affiliates. All rights reserved. 21
Preparing Your Database for Upgrade Chapter 3
All Priority Codes should be created as unique values. If a Priority Code is not unique, manually change itto make it so. The page will not save if the codes are not unique.
4. Once you have reviewed all Priority Codes, click the Save button.
Properties
DatabaseOrientation
Initial orMTP
Products Platforms Languages
Source Both Staffing Front Office All All
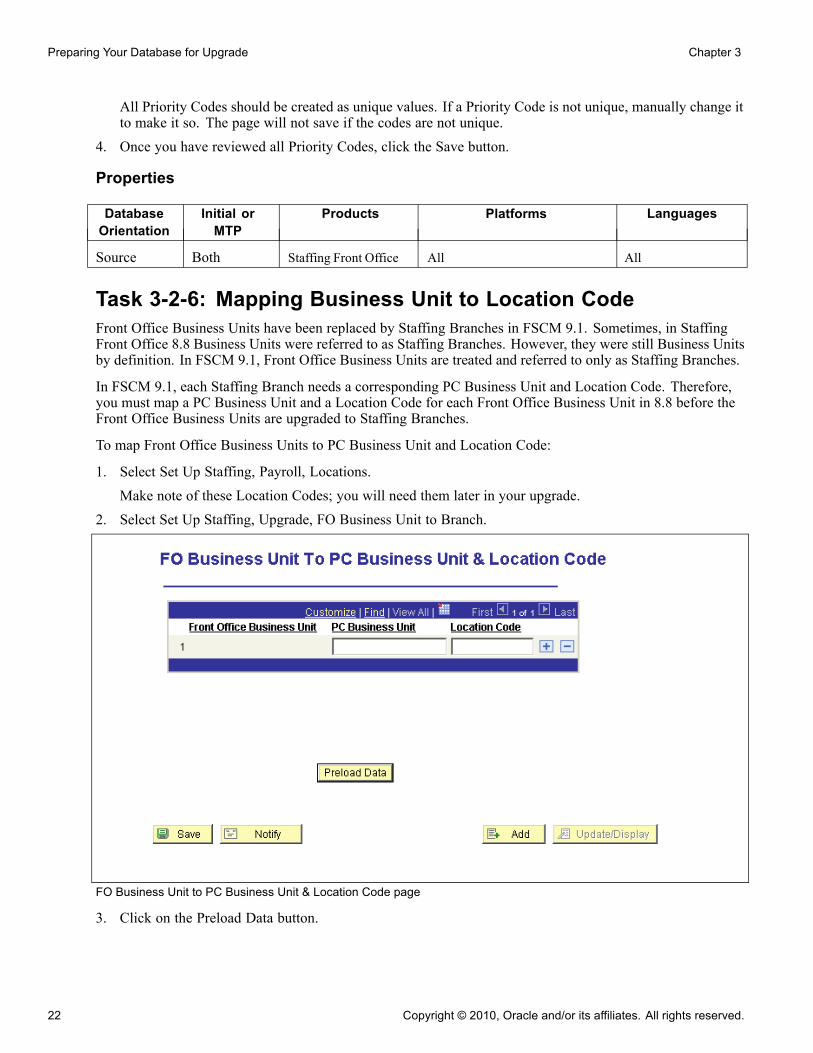
Task 3-2-6: Mapping Business Unit to Location CodeFront Office Business Units have been replaced by Staffing Branches in FSCM 9.1. Sometimes, in StaffingFront Office 8.8 Business Units were referred to as Staffing Branches. However, they were still Business Unitsby definition. In FSCM 9.1, Front Office Business Units are treated and referred to only as Staffing Branches.
In FSCM 9.1, each Staffing Branch needs a corresponding PC Business Unit and Location Code. Therefore,you must map a PC Business Unit and a Location Code for each Front Office Business Unit in 8.8 before theFront Office Business Units are upgraded to Staffing Branches.
To map Front Office Business Units to PC Business Unit and Location Code:
1. Select Set Up Staffing, Payroll, Locations.
Make note of these Location Codes; you will need them later in your upgrade.
2. Select Set Up Staffing, Upgrade, FO Business Unit to Branch.
FO Business Unit to PC Business Unit & Location Code page
3. Click on the Preload Data button.
22 Copyright © 2010, Oracle and/or its affiliates. All rights reserved.

Chapter 3 Preparing Your Database for Upgrade
Note. The Preload Data button only appears once, the first time the page loads. Once the page is saved thebutton is no longer available.
FO Business Unit to PC Business Unit & Location Code page, data loaded
4. For each Front Office Business Unit, key in a PC Business Unit from the list of PC Business Unit valuesyou previously noted in the task, Configuring PC Business Unit earlier in the upgrade.
5. For each Front Office Business Unit key in the corresponding Location Code from the list you noted atthe start of this step.All Front Office Business Units will be upgraded to Staffing Branches in FSCM 9.1, regardless of if theyhave a Location Code mapped. Later in the upgrade you can add or change the Location Codes.
See “Applying Application Changes,” Configuring Front Office and PayBill, Configure Location forStaffing Branches.
6. Once you have entered all PC Business Units and Location Codes, click Save.
Copyright © 2010, Oracle and/or its affiliates. All rights reserved. 23
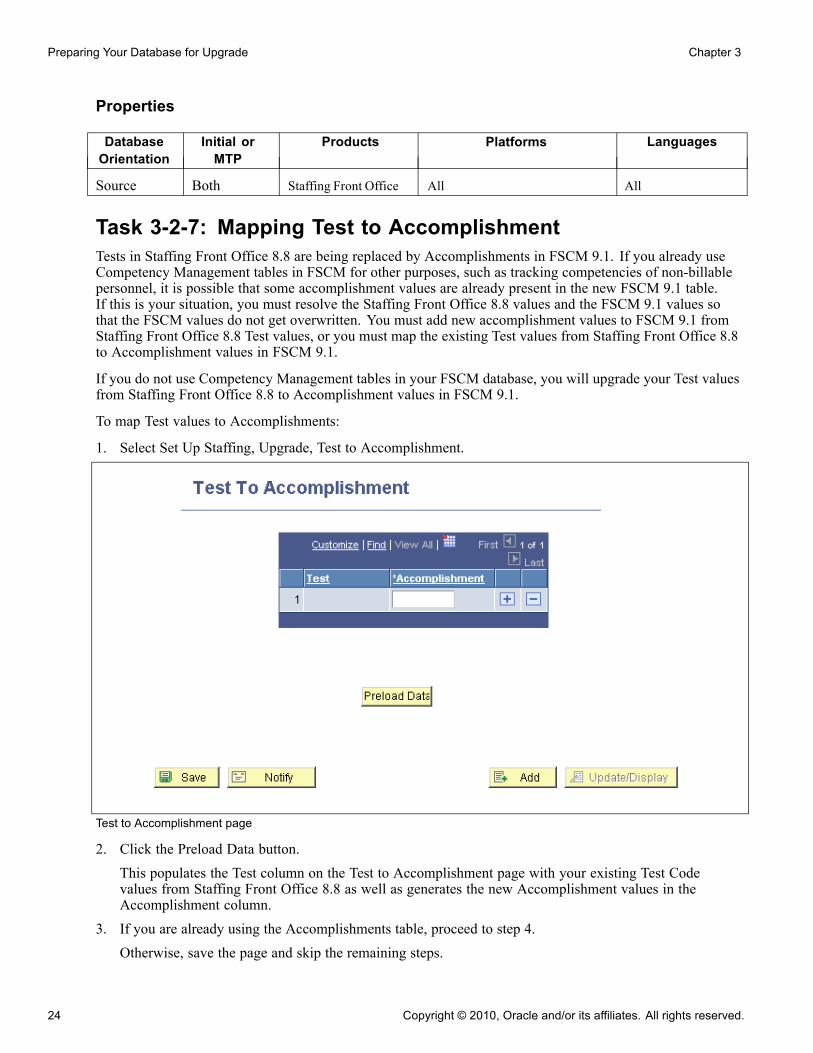
Preparing Your Database for Upgrade Chapter 3
Properties
DatabaseOrientation
Initial orMTP
Products Platforms Languages
Source Both Staffing Front Office All All
Task 3-2-7: Mapping Test to AccomplishmentTests in Staffing Front Office 8.8 are being replaced by Accomplishments in FSCM 9.1. If you already useCompetency Management tables in FSCM for other purposes, such as tracking competencies of non-billablepersonnel, it is possible that some accomplishment values are already present in the new FSCM 9.1 table.If this is your situation, you must resolve the Staffing Front Office 8.8 values and the FSCM 9.1 values sothat the FSCM values do not get overwritten. You must add new accomplishment values to FSCM 9.1 fromStaffing Front Office 8.8 Test values, or you must map the existing Test values from Staffing Front Office 8.8to Accomplishment values in FSCM 9.1.
If you do not use Competency Management tables in your FSCM database, you will upgrade your Test valuesfrom Staffing Front Office 8.8 to Accomplishment values in FSCM 9.1.
To map Test values to Accomplishments:
1. Select Set Up Staffing, Upgrade, Test to Accomplishment.
Test to Accomplishment page
2. Click the Preload Data button.This populates the Test column on the Test to Accomplishment page with your existing Test Codevalues from Staffing Front Office 8.8 as well as generates the new Accomplishment values in theAccomplishment column.
3. If you are already using the Accomplishments table, proceed to step 4.Otherwise, save the page and skip the remaining steps.
24 Copyright © 2010, Oracle and/or its affiliates. All rights reserved.

Chapter 3 Preparing Your Database for Upgrade
Note. Ensure that all values are unique. The page will not save until all values are unique.
4. Bring up the Accomplishments of Category Test report you ran earlier in the upgrade (UPG_FOQ03).Using the Accomplishment values from the report that represent the values you currently have in yourFSCM database, verify if any of the Test values from Staffing Front Office 8.8 already exist in the report.There are three possible scenarios you may encounter:• The Staffing Front Office 8.8 Test code value is already present in your report and both the values refer tothe same context (for example 1004 is General Aptitude Test in both Staffing Front Office and FSCM).This requires no action. You can leave the auto-generated values as they are.
• If the Test code value is present in your report and in the Accomplishment column, but the values refer todifferent contexts (for example, 1004 represents General Aptitude Test in Staffing Front Office but 1004represents Programmer’s Aptitude Test in FSCM), then you need to change the corresponding valuein the Accomplishment column to a unique value that is not already used in FSCM (so there isn’t aduplicate of the value in the Accomplishment column).
• If the Test code value is not present in your report but there is another Accomplishment in the reportreferring to the same context that you do have in Staffing Front Office 8.8 you must change the value inthe Accomplishment column to the FSCM Accomplishment value that represents the same value.For example, 1009 represents Business English in Staffing Front Office 8.8 but 1009 is not present onyour report because 1009 does not exist or represent Business English in FSCM. However, on the report1006 represents Business English. Therefore, you must change the value in the Accomplishment columnthat corresponds to 1009 (Business English in Staffing Front Office 8.8) to 1006 (Business English inFSCM). This maps the Accomplishment value for Business English, in FSCM, to the value for BusinessEnglish in Staffing Front Office 8.8.
5. Save the page.
Note. The page will not save until all values are unique.
Properties
DatabaseOrientation
Initial orMTP
Products Platforms Languages
Source Both Staffing Front Office All All
Task 3-2-8: Mapping Degree to AccomplishmentDegrees in Staffing Front Office 8.8 are replaced by Accomplishments in FSCM 9.1.
If you already use Competency Management tables in FSCM for other purposes, such as tracking competenciesof non-billable personnel, it is possible that some accomplishment values are already present in the new FSCM9.1 table. If this is your situation, you must resolve the Staffing Front Office 8.8 and FSCM 9.1 values so thatthe FSCM values do not get overwritten during the upgrade. You must add new accomplishment values toFSCM from Staffing Front Office 8.8 Degree values or you must map the existing Degree values from StaffingFront Office 8.8 to Accomplishment values in FSCM 9.1.
If you do not use Competency Management tables in FSCM, you will upgrade your Staffing Front Office 8.8Degree values to Accomplishment values in FSCM 9.1.
To map Degree values to Accomplishment values:
Copyright © 2010, Oracle and/or its affiliates. All rights reserved. 25
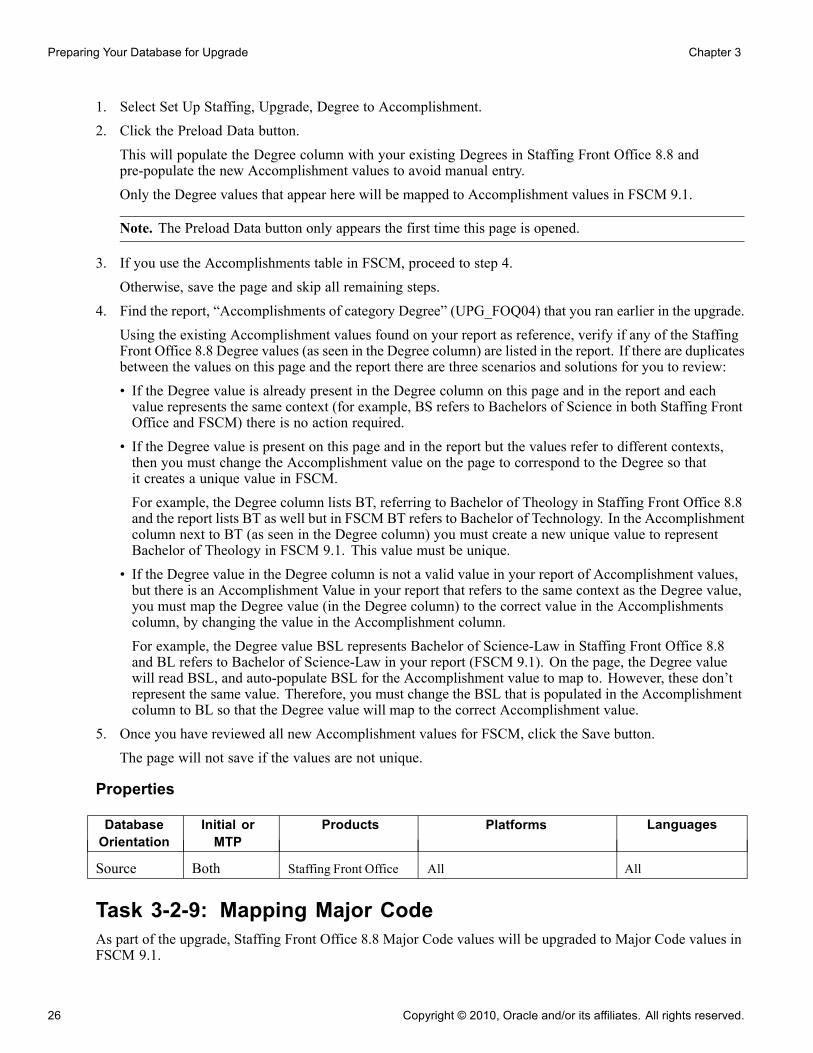
Preparing Your Database for Upgrade Chapter 3
1. Select Set Up Staffing, Upgrade, Degree to Accomplishment.2. Click the Preload Data button.
This will populate the Degree column with your existing Degrees in Staffing Front Office 8.8 andpre-populate the new Accomplishment values to avoid manual entry.Only the Degree values that appear here will be mapped to Accomplishment values in FSCM 9.1.
Note. The Preload Data button only appears the first time this page is opened.
3. If you use the Accomplishments table in FSCM, proceed to step 4.Otherwise, save the page and skip all remaining steps.
4. Find the report, “Accomplishments of category Degree” (UPG_FOQ04) that you ran earlier in the upgrade.Using the existing Accomplishment values found on your report as reference, verify if any of the StaffingFront Office 8.8 Degree values (as seen in the Degree column) are listed in the report. If there are duplicatesbetween the values on this page and the report there are three scenarios and solutions for you to review:• If the Degree value is already present in the Degree column on this page and in the report and eachvalue represents the same context (for example, BS refers to Bachelors of Science in both Staffing FrontOffice and FSCM) there is no action required.
• If the Degree value is present on this page and in the report but the values refer to different contexts,then you must change the Accomplishment value on the page to correspond to the Degree so thatit creates a unique value in FSCM.For example, the Degree column lists BT, referring to Bachelor of Theology in Staffing Front Office 8.8and the report lists BT as well but in FSCM BT refers to Bachelor of Technology. In the Accomplishmentcolumn next to BT (as seen in the Degree column) you must create a new unique value to representBachelor of Theology in FSCM 9.1. This value must be unique.
• If the Degree value in the Degree column is not a valid value in your report of Accomplishment values,but there is an Accomplishment Value in your report that refers to the same context as the Degree value,you must map the Degree value (in the Degree column) to the correct value in the Accomplishmentscolumn, by changing the value in the Accomplishment column.For example, the Degree value BSL represents Bachelor of Science-Law in Staffing Front Office 8.8and BL refers to Bachelor of Science-Law in your report (FSCM 9.1). On the page, the Degree valuewill read BSL, and auto-populate BSL for the Accomplishment value to map to. However, these don’trepresent the same value. Therefore, you must change the BSL that is populated in the Accomplishmentcolumn to BL so that the Degree value will map to the correct Accomplishment value.
5. Once you have reviewed all new Accomplishment values for FSCM, click the Save button.The page will not save if the values are not unique.
Properties
DatabaseOrientation
Initial orMTP
Products Platforms Languages
Source Both Staffing Front Office All All
Task 3-2-9: Mapping Major CodeAs part of the upgrade, Staffing Front Office 8.8 Major Code values will be upgraded to Major Code values inFSCM 9.1.
26 Copyright © 2010, Oracle and/or its affiliates. All rights reserved.

Chapter 3 Preparing Your Database for Upgrade
If you already use Competency Management tables in FSCM for other purposes, such as tracking competenciesof non-billable personnel, it is possible that some major code values that you use for Staffing Front Office8.8 are already present in the new FSCM table. If this is the case, you must resolve the Staffing Front Office8.8 and FSCM values so that the FSCM 9.1 values do not get overwritten. You will either add Major Codevalues to FSCM 9.1 from Staffing Front Office 8.8 values or map the existing Major Code values in StaffingFront Office 8.8 to Major Code values in FSCM.
If you do not use Competency Management tables in FSCM, you simply upgrade your Major Code valuesfrom Staffing Front Office 8.8 to Major Code values in FSCM 9.1.
To map Staffing Front Office Major Codes to FSCM Major Codes:
1. Select Set Up Staffing, Upgrade, Major Code to Major Code.
Major Code to Major Code page
2. Click the Preload Data button.This will populate the Major Code column (left column) with your Staffing Front Office 8.8 values. Theright hand Major Code column is populated with auto-generated values that map to FSCM 9.1.
Note. The Preload Data button will only appear the first time this page is loaded.
3. If you are already using the Accomplishments table, proceed to step 4.Otherwise, save the page and skip the rest of these steps.
4. Retrieve the Major Codes (UPG_FOQ06) report you ran earlier in the upgrade.This report gives you the existing Major Code values in FSCM. Using this report as a reference, verify ifany of the Staffing Front Office 8.8 Major Code values (from the left hand column on this page) alreadyexist in your report. If so there are three possible scenarios and solutions:• If the Front Office 8.8 Major Code (from this page) is already present in your report and the valuesrepresent the same context (for example, K000003 refers to Electrical Engineering in both Staffing FrontOffice 8.8 and in FSCM 9.1) no action is required.
Copyright © 2010, Oracle and/or its affiliates. All rights reserved. 27

Preparing Your Database for Upgrade Chapter 3
• If the Major Code value on this page is already present in your report, but the values represent differentcontexts then you must change the value of the Major Code on the right hand column of this page so thatthe Staffing Front Office 8.8 Major Code value maps to a new unique Major Code value in FSCM 9.1.For example, K000010 refers to Anthropology in Staffing Front Office 8.8 and K000010 refers toBusiness Administration in FSCM 9.1. In this example, the page would display K000010 in the lefthand Major Code column (Staffing Front Office 8.8 value) and K000010 in the right hand Major Codecolumn. From your report you know that in FSCM K000010 represents Business Administration.Therefore, you would change the K000010 value in the right-hand column to a unique value, creating anew Anthropology Major Code value in FSCM 9.1.
• If the Staffing Front Office 8.8 Major Code value is not present in the report but there is a Major Codevalue in Staffing Front Office 8.8 that represents the same value as a Major Code value listed in yourreport, you must change the value in FSCM (right-hand Major Code column on this page) so that theStaffing Front Office 8.8 value maps to the correct FSCM Major Code value.For example, K000008 refers to French in Staffing Front Office 8.8 and appears in the left-hand MajorCode column. However, K000001 refers to French in FSCM. Your page will populate with K000008 inthe left-hand column mapping to K000008 in the right-hand column. You must change the K000008 toK000001 in the right-hand Major Code column, mapping the K000008 French value in Staffing FrontOffice to the K000001 French value in FSCM.
5. Save the page.The page will not save until all Major Code values are unique.
Properties
DatabaseOrientation
Initial orMTP
Products Platforms Languages
Source Both Staffing Front Office All All
Task 3-2-10: Mapping School CodeAs part of the upgrade, Schools in Staffing Front Office 8.8 are upgraded to Schools in FSCM 9.1. The Schooltable in Staffing Front Office 8.8 has a two-element key made up of School Code and Country. The Schooltable in FSCM 9.1 also has a two-element key made up of School Code and Country.
If you already use Competency Management tables in FSCM for other purposes, such as tracking competenciesof non-billable personnel, it is possible that some school values are already present in the new FSCM 9.1 table.If this is the case, you must resolve the Staffing Front Office 8.8 and FSCM values so that the FSCM values donot get overwritten. You either add new School values in FSCM from the School values in Staffing FrontOffice 8.8 or you map the existing Staffing Front Office 8.8 School values to School values in FSCM.
If you do not use Competency Management tables in FSCM, you simply upgrade the school values fromStaffing Front Office 8.8 to School values in FSCM 9.1.
To map Staffing Front Office School values to FSCM School values:
1. Select Set Up Staffing, Upgrade, School Code to School Code.
28 Copyright © 2010, Oracle and/or its affiliates. All rights reserved.
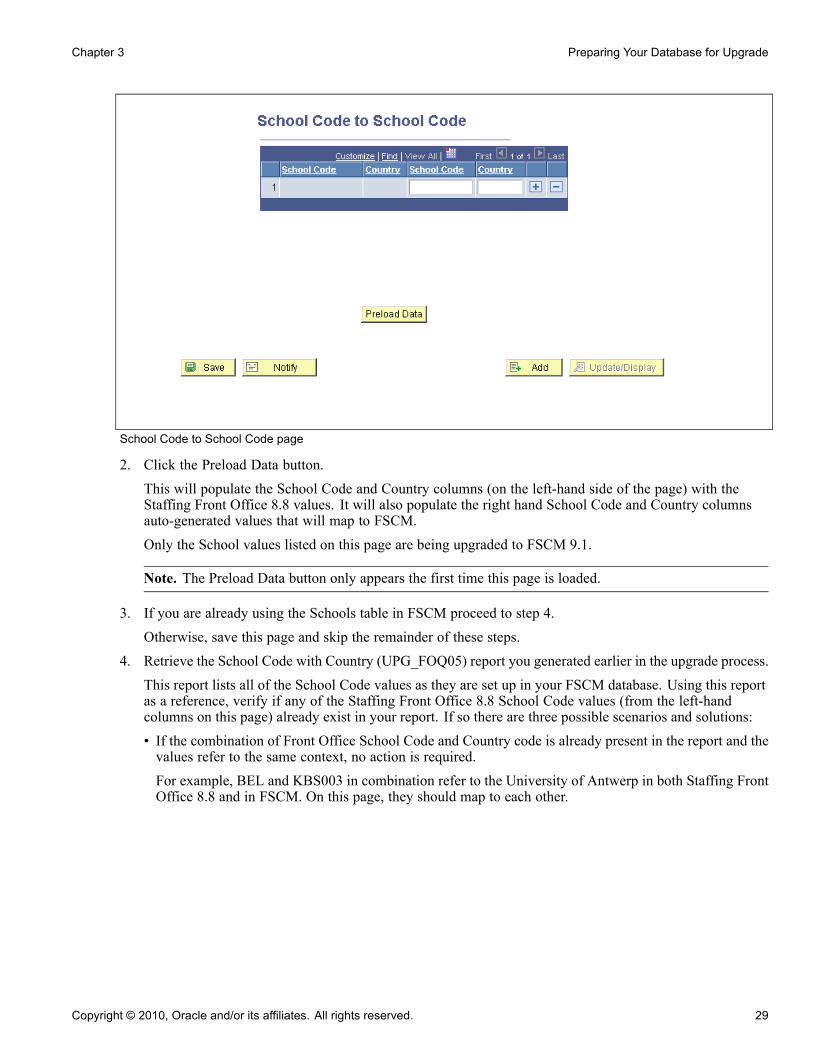
Chapter 3 Preparing Your Database for Upgrade
School Code to School Code page
2. Click the Preload Data button.This will populate the School Code and Country columns (on the left-hand side of the page) with theStaffing Front Office 8.8 values. It will also populate the right hand School Code and Country columnsauto-generated values that will map to FSCM.Only the School values listed on this page are being upgraded to FSCM 9.1.
Note. The Preload Data button only appears the first time this page is loaded.
3. If you are already using the Schools table in FSCM proceed to step 4.Otherwise, save this page and skip the remainder of these steps.
4. Retrieve the School Code with Country (UPG_FOQ05) report you generated earlier in the upgrade process.This report lists all of the School Code values as they are set up in your FSCM database. Using this reportas a reference, verify if any of the Staffing Front Office 8.8 School Code values (from the left-handcolumns on this page) already exist in your report. If so there are three possible scenarios and solutions:• If the combination of Front Office School Code and Country code is already present in the report and thevalues refer to the same context, no action is required.For example, BEL and KBS003 in combination refer to the University of Antwerp in both Staffing FrontOffice 8.8 and in FSCM. On this page, they should map to each other.
Copyright © 2010, Oracle and/or its affiliates. All rights reserved. 29
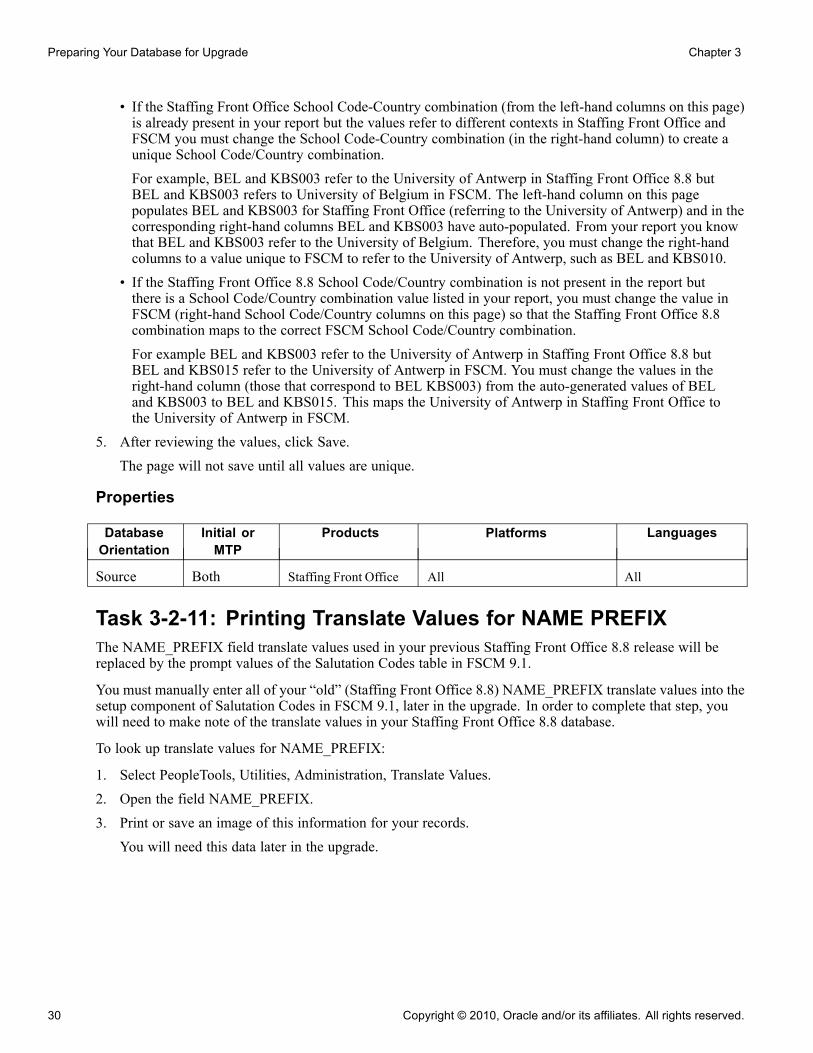
Preparing Your Database for Upgrade Chapter 3
• If the Staffing Front Office School Code-Country combination (from the left-hand columns on this page)is already present in your report but the values refer to different contexts in Staffing Front Office andFSCM you must change the School Code-Country combination (in the right-hand column) to create aunique School Code/Country combination.For example, BEL and KBS003 refer to the University of Antwerp in Staffing Front Office 8.8 butBEL and KBS003 refers to University of Belgium in FSCM. The left-hand column on this pagepopulates BEL and KBS003 for Staffing Front Office (referring to the University of Antwerp) and in thecorresponding right-hand columns BEL and KBS003 have auto-populated. From your report you knowthat BEL and KBS003 refer to the University of Belgium. Therefore, you must change the right-handcolumns to a value unique to FSCM to refer to the University of Antwerp, such as BEL and KBS010.
• If the Staffing Front Office 8.8 School Code/Country combination is not present in the report butthere is a School Code/Country combination value listed in your report, you must change the value inFSCM (right-hand School Code/Country columns on this page) so that the Staffing Front Office 8.8combination maps to the correct FSCM School Code/Country combination.For example BEL and KBS003 refer to the University of Antwerp in Staffing Front Office 8.8 butBEL and KBS015 refer to the University of Antwerp in FSCM. You must change the values in theright-hand column (those that correspond to BEL KBS003) from the auto-generated values of BELand KBS003 to BEL and KBS015. This maps the University of Antwerp in Staffing Front Office tothe University of Antwerp in FSCM.
5. After reviewing the values, click Save.The page will not save until all values are unique.
Properties
DatabaseOrientation
Initial orMTP
Products Platforms Languages
Source Both Staffing Front Office All All
Task 3-2-11: Printing Translate Values for NAME PREFIXThe NAME_PREFIX field translate values used in your previous Staffing Front Office 8.8 release will bereplaced by the prompt values of the Salutation Codes table in FSCM 9.1.
You must manually enter all of your “old” (Staffing Front Office 8.8) NAME_PREFIX translate values into thesetup component of Salutation Codes in FSCM 9.1, later in the upgrade. In order to complete that step, youwill need to make note of the translate values in your Staffing Front Office 8.8 database.
To look up translate values for NAME_PREFIX:
1. Select PeopleTools, Utilities, Administration, Translate Values.
2. Open the field NAME_PREFIX.
3. Print or save an image of this information for your records.
You will need this data later in the upgrade.
30 Copyright © 2010, Oracle and/or its affiliates. All rights reserved.

Chapter 3 Preparing Your Database for Upgrade
Properties
DatabaseOrientation
Initial orMTP
Products Platforms Languages
Source Both Staffing Front Office All All
Task 3-2-12: Printing Translate Values for SCHOOL TYPEThe SCHOOL_TYPE field translate values used in Staffing Front Office 8.8 are replaced by the prompt valuesof the School Type table in FSCM 9.1.
You must manually enter all of your “old” (Staffing Front Office 8.8) translate values from the fieldSCHOOL_TYPE into the set up component of School Type in FSCM 9.1 later in the upgrade process.Therefore, you need to make note of all translate values of the SCHOOL_TYPE field in your Front Officedatabase to use for reference.
To look up SCHOOL_TYPE translate values:
1. Select PeopleTools, Utilities, Administration, Translate Values.
2. Open the SCHOOL_TYPE field.
3. Print or save an image of this information for your records.
You will need this information later in the upgrade.
Properties
DatabaseOrientation
Initial orMTP
Products Platforms Languages
Source Both Staffing Front Office All All
Task 3-3: Exporting Front Office DataThis section discusses:
• Understanding Front Office Data Export
• Updating Configuration Manager Profile
• Exporting Front Office NonStable Tables
• Exporting Front Office Stable Tables
Understanding Front Office Data ExportIn this task you export your data from your PeopleSoft Staffing Front Office 8.8 database. Later in the upgradeyou will import this data into your FSCM 9.1 database.
Copyright © 2010, Oracle and/or its affiliates. All rights reserved. 31

Preparing Your Database for Upgrade Chapter 3
Task 3-3-1: Updating Configuration Manager ProfileThe Configuration Manager default profile needs to be updated to use values for your new release PS_HOME.PeopleSoft Change Assistant uses this information to run automated steps for the rest of the upgrade. These aresettings on the workstation and you need to do this for each workstation you may use during the upgrade.
To update the profile:
1. Open Configuration Manager.2. On the Profile tab, select the Default profile.3. Click Edit and select the Common tab.
Edit Profile - Default dialog box
Note. The Input Directory value must be <PS_HOME>\data, where you replace <PS_HOME> withyour new codeline installation directory. The Output Directory value must be the same as the InputDirectory value.
4. Enter a value to point to the directory where you want your Data Mover logs to be saved.
5. Select the Process Scheduler tab and verify your SQR settings.
PeopleSoft Change Assistant will use these to launch SQR.
32 Copyright © 2010, Oracle and/or its affiliates. All rights reserved.
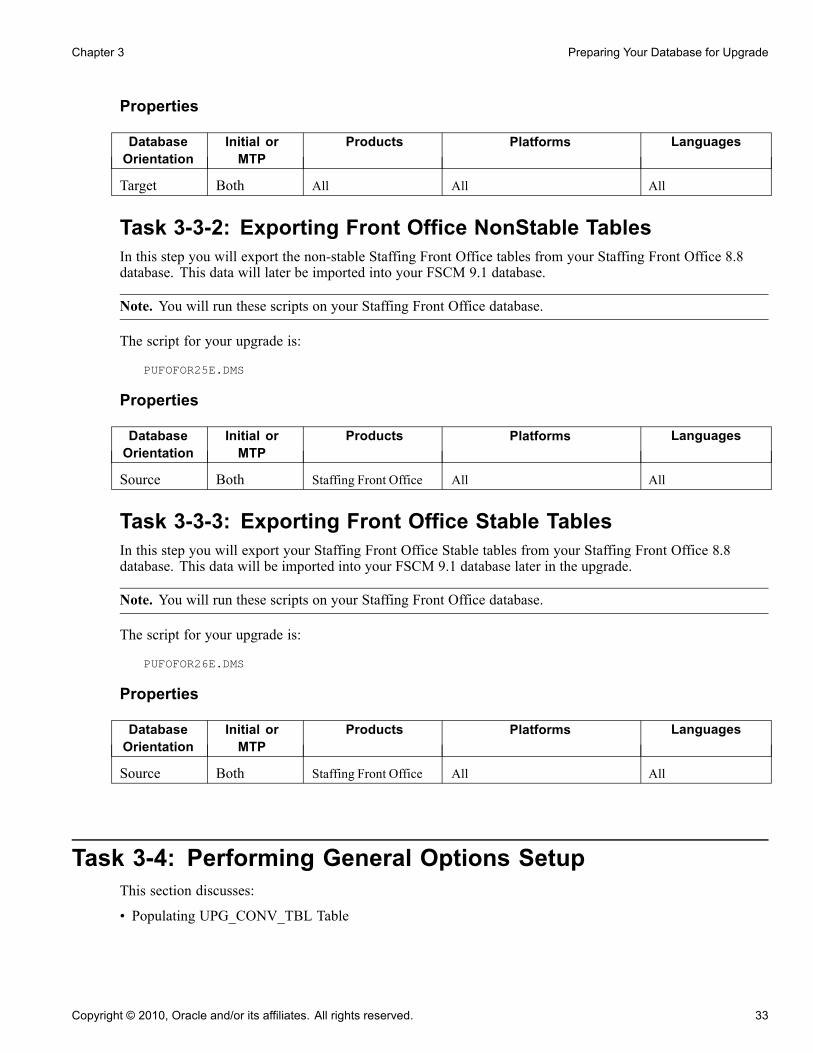
Chapter 3 Preparing Your Database for Upgrade
Properties
DatabaseOrientation
Initial orMTP
Products Platforms Languages
Target Both All All All
Task 3-3-2: Exporting Front Office NonStable TablesIn this step you will export the non-stable Staffing Front Office tables from your Staffing Front Office 8.8database. This data will later be imported into your FSCM 9.1 database.
Note. You will run these scripts on your Staffing Front Office database.
The script for your upgrade is:
PUFOFOR25E.DMS
Properties
DatabaseOrientation
Initial orMTP
Products Platforms Languages
Source Both Staffing Front Office All All
Task 3-3-3: Exporting Front Office Stable TablesIn this step you will export your Staffing Front Office Stable tables from your Staffing Front Office 8.8database. This data will be imported into your FSCM 9.1 database later in the upgrade.
Note. You will run these scripts on your Staffing Front Office database.
The script for your upgrade is:
PUFOFOR26E.DMS
Properties
DatabaseOrientation
Initial orMTP
Products Platforms Languages
Source Both Staffing Front Office All All
Task 3-4: Performing General Options SetupThis section discusses:
• Populating UPG_CONV_TBL Table
Copyright © 2010, Oracle and/or its affiliates. All rights reserved. 33
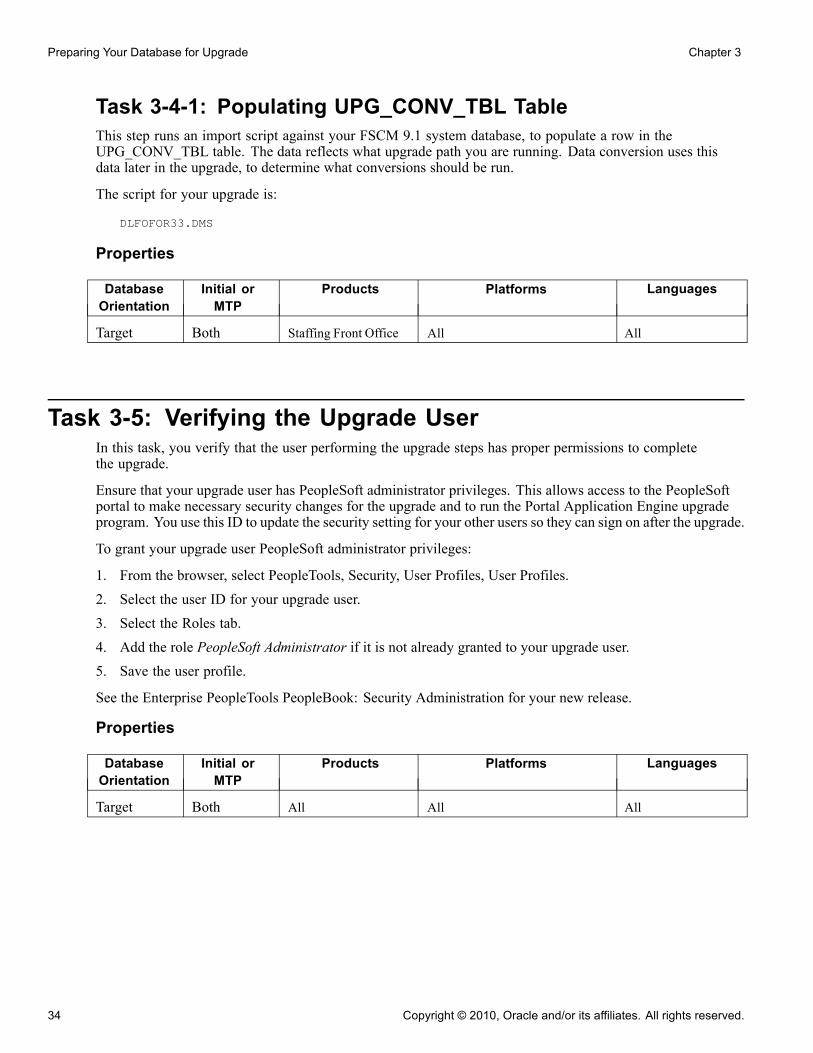
Preparing Your Database for Upgrade Chapter 3
Task 3-4-1: Populating UPG_CONV_TBL TableThis step runs an import script against your FSCM 9.1 system database, to populate a row in theUPG_CONV_TBL table. The data reflects what upgrade path you are running. Data conversion uses thisdata later in the upgrade, to determine what conversions should be run.
The script for your upgrade is:
DLFOFOR33.DMS
Properties
DatabaseOrientation
Initial orMTP
Products Platforms Languages
Target Both Staffing Front Office All All
Task 3-5: Verifying the Upgrade UserIn this task, you verify that the user performing the upgrade steps has proper permissions to completethe upgrade.
Ensure that your upgrade user has PeopleSoft administrator privileges. This allows access to the PeopleSoftportal to make necessary security changes for the upgrade and to run the Portal Application Engine upgradeprogram. You use this ID to update the security setting for your other users so they can sign on after the upgrade.
To grant your upgrade user PeopleSoft administrator privileges:
1. From the browser, select PeopleTools, Security, User Profiles, User Profiles.2. Select the user ID for your upgrade user.3. Select the Roles tab.4. Add the role PeopleSoft Administrator if it is not already granted to your upgrade user.5. Save the user profile.
See the Enterprise PeopleTools PeopleBook: Security Administration for your new release.
Properties
DatabaseOrientation
Initial orMTP
Products Platforms Languages
Target Both All All All
34 Copyright © 2010, Oracle and/or its affiliates. All rights reserved.

CHAPTER 4
Applying Application Changes
This chapter discusses:
• Understanding Application Changes
• Importing Front Office Data
• Preparing for Data Conversion Analysis
• Modifying the Database Structure
• Loading Data for Data Conversion
• Applying Updates Before Data Conversion
• Configuring Scheduler and Server
• Backing Up Before Data Conversion
• Running Data Conversion for Front Office
• Backing Up After Data Conversion
• Updating Object Version Numbers
• Running the Final Audit Reports
• Configuring the Upgrade Environment
• Configuring Front Office and PayBill
• Reconfiguring Security
• Backing Up Before Testing
• Testing Your Upgraded System Database
Understanding Application ChangesEarlier in the upgrade, you made various application changes. Now it is time to apply these applicationchanges to your Target database.
Task 4-1: Importing Front Office DataThis section discusses:
Copyright © 2010, Oracle and/or its affiliates. All rights reserved. 35

Applying Application Changes Chapter 4
• Understanding Front Office Data Import
• Importing Front Office NonStable Tables
• Importing Front Office Stable Tables
• Building Front Office Create Indexes Script
• Running Front Office Create Indexes Script
Understanding Front Office Data ImportIn this task you import data from your old Staffing Front Office database into your installed FSCM 9.1 database.
Task 4-1-1: Importing Front Office NonStable TablesIn this step you import the Staffing Front Office 8.8 non-stable tables you exported earlier in the upgrade,into your FSCM 9.1 database.
If you are upgrading from Staffing Front Office 8.8 the script for your path is:
PUEPFOR28I.DMS
Properties
DatabaseOrientation
Initial orMTP
Products Platforms Languages
Target Both Staffing Front Office All All
Task 4-1-2: Importing Front Office Stable TablesIn this step you import the Staffing Front Office 8.8 stable tables you exported earlier in the upgrade, intoyour FSCM 9.1 database.
If you are upgrading from Staffing Front Office 8.8 the script for your path is:
PUEPFOR27I.DMS
Properties
DatabaseOrientation
Initial orMTP
Products Platforms Languages
Target Both Staffing Front Office All All
Task 4-1-3: Building Front Office Create Indexes ScriptIn this step, you generate the SQL script to recreate the indexes for all records in the Staffing Front Officeproject.
If you are upgrading from Staffing Front Office 8.8 indexes will be created for the tables in the followingproject:
UPGFO2FINTBLS_88
36 Copyright © 2010, Oracle and/or its affiliates. All rights reserved.
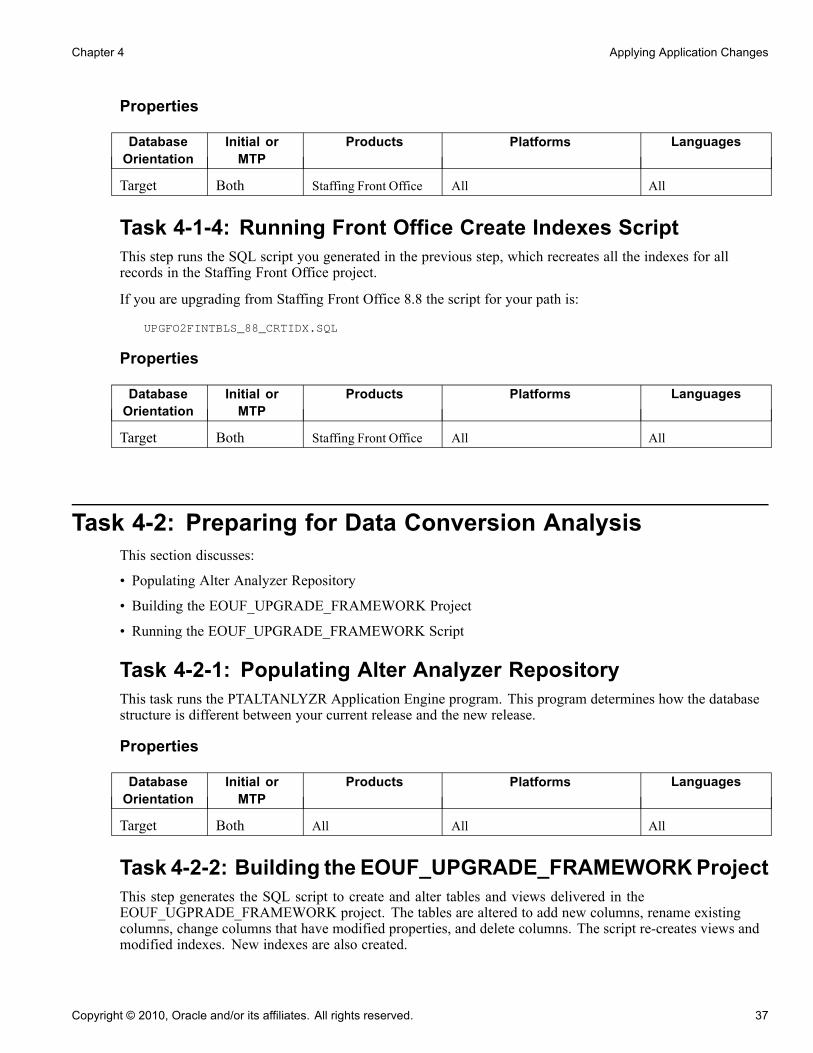
Chapter 4 Applying Application Changes
Properties
DatabaseOrientation
Initial orMTP
Products Platforms Languages
Target Both Staffing Front Office All All
Task 4-1-4: Running Front Office Create Indexes ScriptThis step runs the SQL script you generated in the previous step, which recreates all the indexes for allrecords in the Staffing Front Office project.
If you are upgrading from Staffing Front Office 8.8 the script for your path is:
UPGFO2FINTBLS_88_CRTIDX.SQL
Properties
DatabaseOrientation
Initial orMTP
Products Platforms Languages
Target Both Staffing Front Office All All
Task 4-2: Preparing for Data Conversion AnalysisThis section discusses:
• Populating Alter Analyzer Repository
• Building the EOUF_UPGRADE_FRAMEWORK Project
• Running the EOUF_UPGRADE_FRAMEWORK Script
Task 4-2-1: Populating Alter Analyzer RepositoryThis task runs the PTALTANLYZR Application Engine program. This program determines how the databasestructure is different between your current release and the new release.
Properties
DatabaseOrientation
Initial orMTP
Products Platforms Languages
Target Both All All All
Task 4-2-2: Building the EOUF_UPGRADE_FRAMEWORKProjectThis step generates the SQL script to create and alter tables and views delivered in theEOUF_UGPRADE_FRAMEWORK project. The tables are altered to add new columns, rename existingcolumns, change columns that have modified properties, and delete columns. The script re-creates views andmodified indexes. New indexes are also created.
Copyright © 2010, Oracle and/or its affiliates. All rights reserved. 37

Applying Application Changes Chapter 4
The script for your upgrade path is:
EOUF_UPGRADE_FRAMEWORK.SQL
Properties
DatabaseOrientation
Initial orMTP
Products Platforms Languages
Target Both All All All
Task 4-2-3: Running the EOUF_UPGRADE_FRAMEWORK ScriptThis step runs the script generated in the previous step.
Properties
DatabaseOrientation
Initial orMTP
Products Platforms Languages
Target Both All All All
Task 4-3: Modifying the Database StructureThis section discusses:
• Building the Upgrade Tables Script
• Re-Creating Upgrade Tables
• Creating Upgrade Views
Task 4-3-1: Building the Upgrade Tables ScriptThis step generates the SQL script to drop and re-create all the tables in the project named UPGCONVERT.These tables will be used during data conversion by Application Engine programs. They can be safely droppedat this time because they do not contain application data required by your PeopleSoft system. The scriptname for your upgrade path is:
UPGCONVERT_CRTTBL.SQL
Properties
DatabaseOrientation
Initial orMTP
Products Platforms Languages
Target Both All All All
38 Copyright © 2010, Oracle and/or its affiliates. All rights reserved.
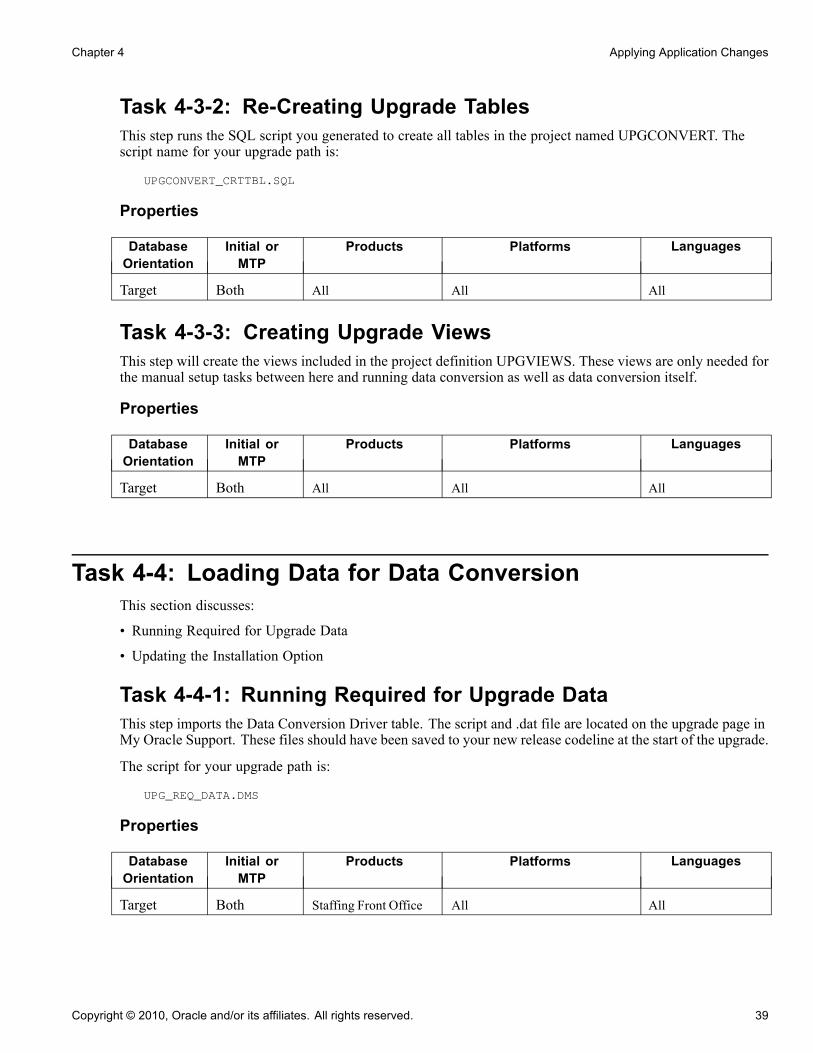
Chapter 4 Applying Application Changes
Task 4-3-2: Re-Creating Upgrade TablesThis step runs the SQL script you generated to create all tables in the project named UPGCONVERT. Thescript name for your upgrade path is:
UPGCONVERT_CRTTBL.SQL
Properties
DatabaseOrientation
Initial orMTP
Products Platforms Languages
Target Both All All All
Task 4-3-3: Creating Upgrade ViewsThis step will create the views included in the project definition UPGVIEWS. These views are only needed forthe manual setup tasks between here and running data conversion as well as data conversion itself.
Properties
DatabaseOrientation
Initial orMTP
Products Platforms Languages
Target Both All All All
Task 4-4: Loading Data for Data ConversionThis section discusses:
• Running Required for Upgrade Data
• Updating the Installation Option
Task 4-4-1: Running Required for Upgrade DataThis step imports the Data Conversion Driver table. The script and .dat file are located on the upgrade page inMy Oracle Support. These files should have been saved to your new release codeline at the start of the upgrade.
The script for your upgrade path is:
UPG_REQ_DATA.DMS
Properties
DatabaseOrientation
Initial orMTP
Products Platforms Languages
Target Both Staffing Front Office All All
Copyright © 2010, Oracle and/or its affiliates. All rights reserved. 39
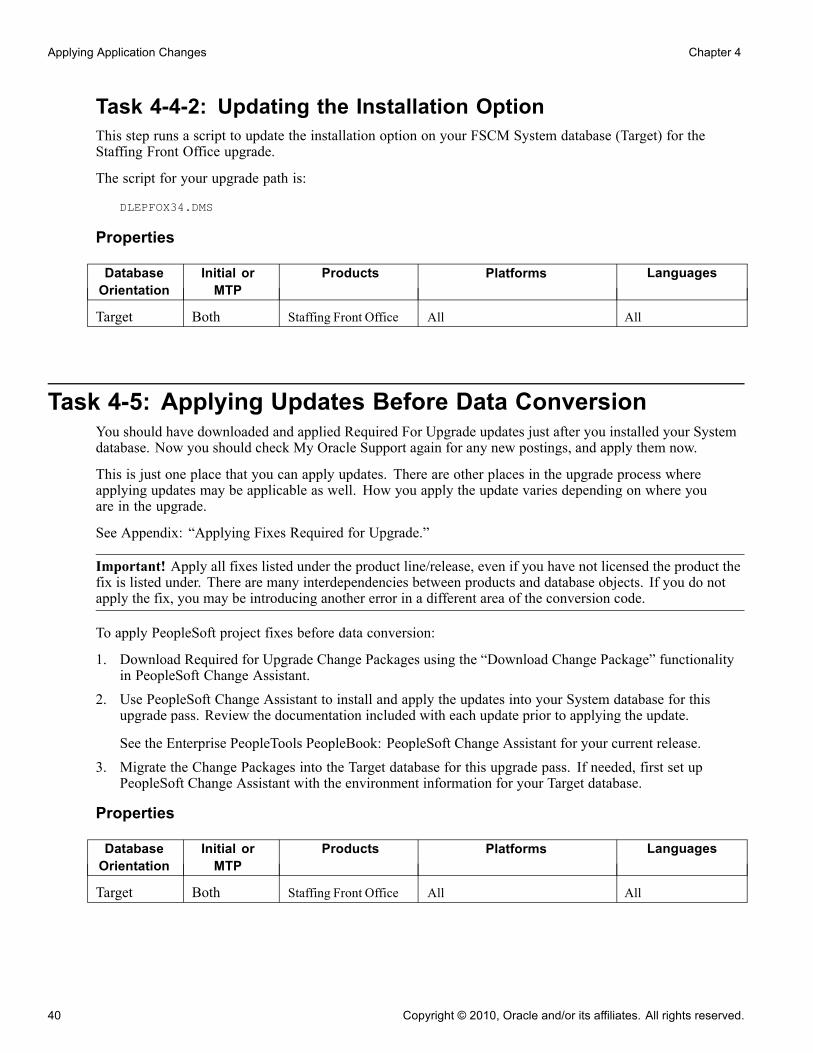
Applying Application Changes Chapter 4
Task 4-4-2: Updating the Installation OptionThis step runs a script to update the installation option on your FSCM System database (Target) for theStaffing Front Office upgrade.
The script for your upgrade path is:
DLEPFOX34.DMS
Properties
DatabaseOrientation
Initial orMTP
Products Platforms Languages
Target Both Staffing Front Office All All
Task 4-5: Applying Updates Before Data ConversionYou should have downloaded and applied Required For Upgrade updates just after you installed your Systemdatabase. Now you should check My Oracle Support again for any new postings, and apply them now.
This is just one place that you can apply updates. There are other places in the upgrade process whereapplying updates may be applicable as well. How you apply the update varies depending on where youare in the upgrade.
See Appendix: “Applying Fixes Required for Upgrade.”
Important! Apply all fixes listed under the product line/release, even if you have not licensed the product thefix is listed under. There are many interdependencies between products and database objects. If you do notapply the fix, you may be introducing another error in a different area of the conversion code.
To apply PeopleSoft project fixes before data conversion:
1. Download Required for Upgrade Change Packages using the “Download Change Package” functionalityin PeopleSoft Change Assistant.
2. Use PeopleSoft Change Assistant to install and apply the updates into your System database for thisupgrade pass. Review the documentation included with each update prior to applying the update.
See the Enterprise PeopleTools PeopleBook: PeopleSoft Change Assistant for your current release.3. Migrate the Change Packages into the Target database for this upgrade pass. If needed, first set up
PeopleSoft Change Assistant with the environment information for your Target database.
Properties
DatabaseOrientation
Initial orMTP
Products Platforms Languages
Target Both Staffing Front Office All All
40 Copyright © 2010, Oracle and/or its affiliates. All rights reserved.
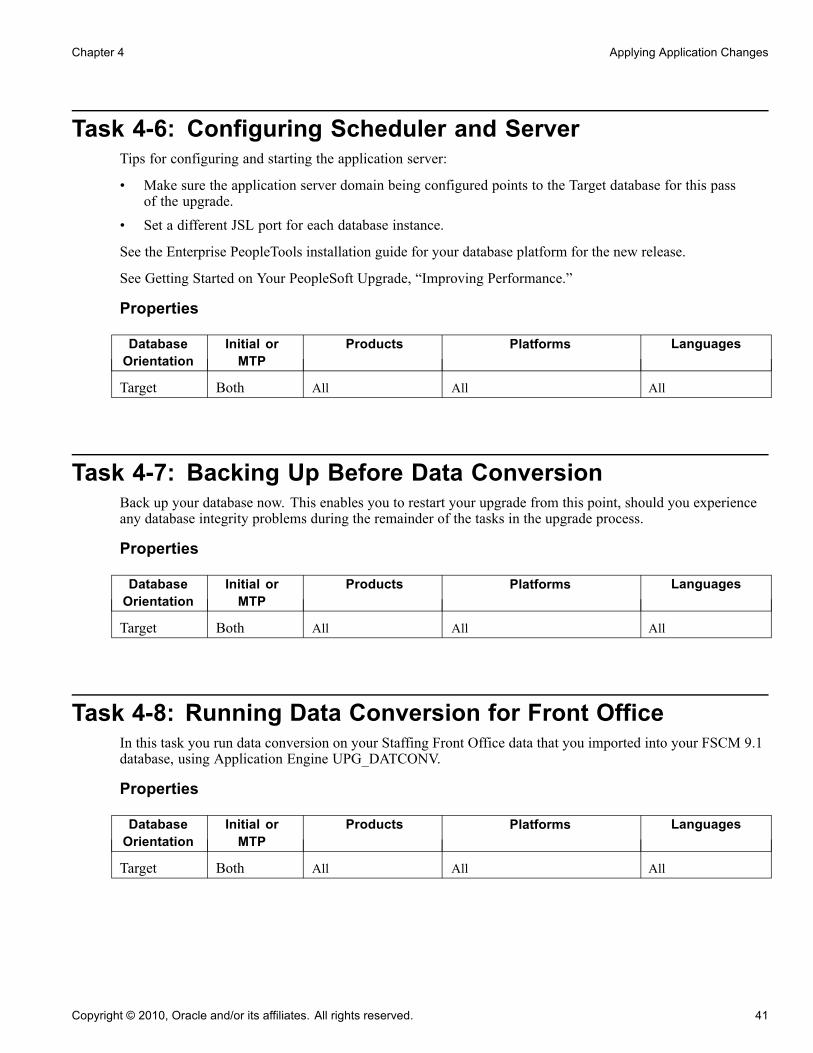
Chapter 4 Applying Application Changes
Task 4-6: Configuring Scheduler and ServerTips for configuring and starting the application server:
• Make sure the application server domain being configured points to the Target database for this passof the upgrade.
• Set a different JSL port for each database instance.
See the Enterprise PeopleTools installation guide for your database platform for the new release.
See Getting Started on Your PeopleSoft Upgrade, “Improving Performance.”
Properties
DatabaseOrientation
Initial orMTP
Products Platforms Languages
Target Both All All All
Task 4-7: Backing Up Before Data ConversionBack up your database now. This enables you to restart your upgrade from this point, should you experienceany database integrity problems during the remainder of the tasks in the upgrade process.
Properties
DatabaseOrientation
Initial orMTP
Products Platforms Languages
Target Both All All All
Task 4-8: Running Data Conversion for Front OfficeIn this task you run data conversion on your Staffing Front Office data that you imported into your FSCM 9.1database, using Application Engine UPG_DATCONV.
Properties
DatabaseOrientation
Initial orMTP
Products Platforms Languages
Target Both All All All
Copyright © 2010, Oracle and/or its affiliates. All rights reserved. 41
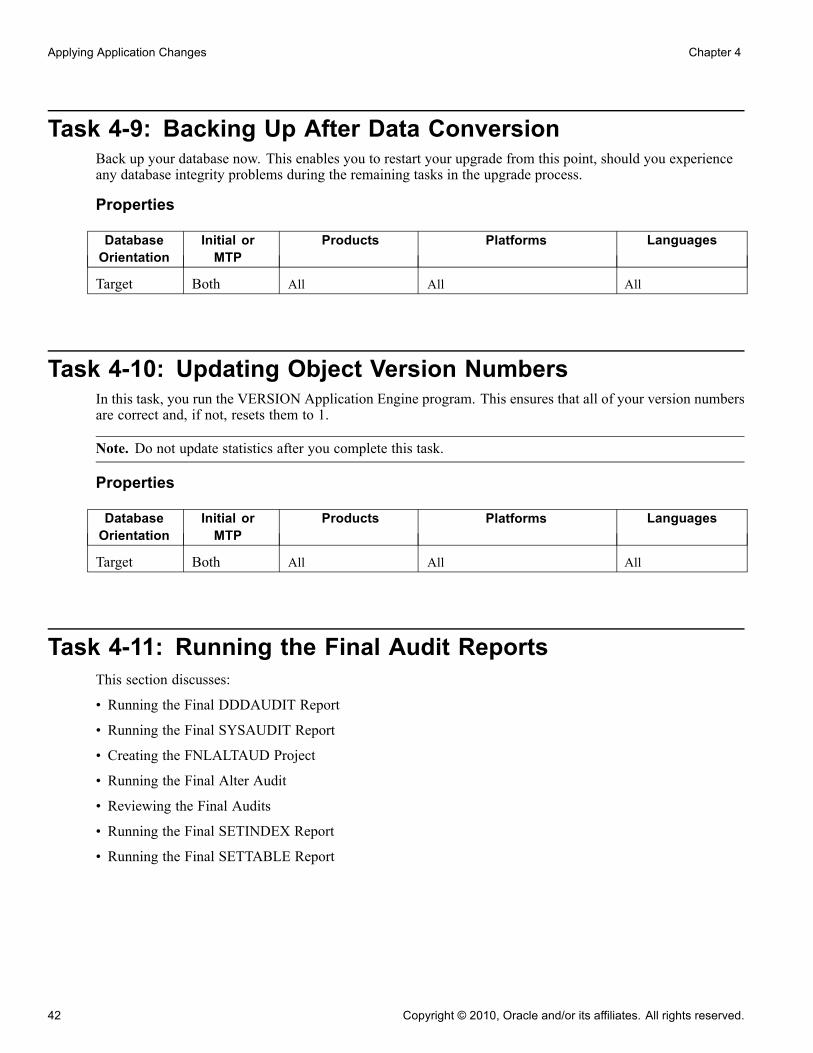
Applying Application Changes Chapter 4
Task 4-9: Backing Up After Data ConversionBack up your database now. This enables you to restart your upgrade from this point, should you experienceany database integrity problems during the remaining tasks in the upgrade process.
Properties
DatabaseOrientation
Initial orMTP
Products Platforms Languages
Target Both All All All
Task 4-10: Updating Object Version NumbersIn this task, you run the VERSION Application Engine program. This ensures that all of your version numbersare correct and, if not, resets them to 1.
Note. Do not update statistics after you complete this task.
Properties
DatabaseOrientation
Initial orMTP
Products Platforms Languages
Target Both All All All
Task 4-11: Running the Final Audit ReportsThis section discusses:
• Running the Final DDDAUDIT Report
• Running the Final SYSAUDIT Report
• Creating the FNLALTAUD Project
• Running the Final Alter Audit
• Reviewing the Final Audits
• Running the Final SETINDEX Report
• Running the Final SETTABLE Report
42 Copyright © 2010, Oracle and/or its affiliates. All rights reserved.
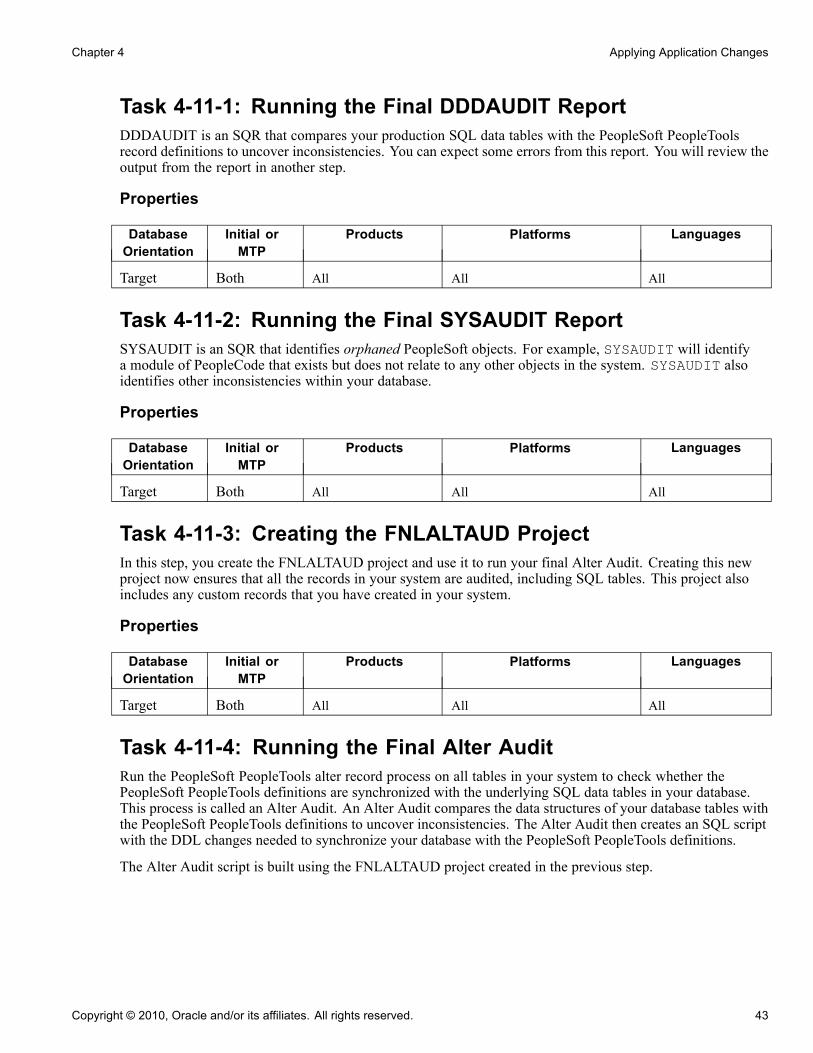
Chapter 4 Applying Application Changes
Task 4-11-1: Running the Final DDDAUDIT ReportDDDAUDIT is an SQR that compares your production SQL data tables with the PeopleSoft PeopleToolsrecord definitions to uncover inconsistencies. You can expect some errors from this report. You will review theoutput from the report in another step.
Properties
DatabaseOrientation
Initial orMTP
Products Platforms Languages
Target Both All All All
Task 4-11-2: Running the Final SYSAUDIT ReportSYSAUDIT is an SQR that identifies orphaned PeopleSoft objects. For example, SYSAUDIT will identifya module of PeopleCode that exists but does not relate to any other objects in the system. SYSAUDIT alsoidentifies other inconsistencies within your database.
Properties
DatabaseOrientation
Initial orMTP
Products Platforms Languages
Target Both All All All
Task 4-11-3: Creating the FNLALTAUD ProjectIn this step, you create the FNLALTAUD project and use it to run your final Alter Audit. Creating this newproject now ensures that all the records in your system are audited, including SQL tables. This project alsoincludes any custom records that you have created in your system.
Properties
DatabaseOrientation
Initial orMTP
Products Platforms Languages
Target Both All All All
Task 4-11-4: Running the Final Alter AuditRun the PeopleSoft PeopleTools alter record process on all tables in your system to check whether thePeopleSoft PeopleTools definitions are synchronized with the underlying SQL data tables in your database.This process is called an Alter Audit. An Alter Audit compares the data structures of your database tables withthe PeopleSoft PeopleTools definitions to uncover inconsistencies. The Alter Audit then creates an SQL scriptwith the DDL changes needed to synchronize your database with the PeopleSoft PeopleTools definitions.
The Alter Audit script is built using the FNLALTAUD project created in the previous step.
Copyright © 2010, Oracle and/or its affiliates. All rights reserved. 43

Applying Application Changes Chapter 4
Properties
DatabaseOrientation
Initial orMTP
Products Platforms Languages
Target Both All All All
Task 4-11-5: Reviewing the Final AuditsThe Alter Audit process creates SQL scripts that correct any discrepancies between your PeopleSoftPeopleTools record definitions and the database system catalog table definitions. Review the Alter Auditoutput and correct any discrepancies noted by running the generated scripts with your platform-specificSQL tool. The script names are:
FNLALTAUD_ALTTBL.SQL
FNLALTAUD_CRTIDX.SQL
Note. The Alter Audit process also creates the script FNLALTAUD_CRTTRG.SQL, which re-creates alldatabase triggers. You do not need to run this script, since all database triggers were created in a previous task.
See Finalizing the Database Structure.
Note. For Informix sites, if your database has Application Functions, you use SQL to drop and re-create thesefunctions and their associated indexes, even though the underlying tables and indexes have not changed.
Note. For Microsoft SQL Server and DB2 UNIX/NT platforms, if your database has tables containing theMSSCONCATCOL or DBXCONCATCOL column, you will see SQL alter the tables and re-create theirassociated indexes, even though the underlying tables and indexes may not have changed.
Review the output from the SYSAUDIT and DDDAUDIT reports and correct any discrepancies.
Your DDDAUDIT listing shows some expected discrepancies. Tables and views deleted from PeopleSoftApplication Designer are not automatically deleted from the system tables. Oracle takes this precaution incase you have customized information that you want to preserve. Therefore, the report lists any tables andviews that the new release does not have. Review these tables to verify that you do not wish to preserve anycustom data, and then drop the tables and views.
Similarly, your SYSAUDIT report may have some errors due to references to obsolete PeopleSoft-ownedobjects. Invalid references are not automatically cleaned up during the upgrade in case you have customizationsthat you want to modify. For instance, if a PeopleSoft Permission List is deleted, and you have a Role that stillrefers to that Permission List, then it will appear on the SYSAUDIT report.
See the Enterprise PeopleTools PeopleBook: Data Management for your new release.
Properties
DatabaseOrientation
Initial orMTP
Products Platforms Languages
Target Both All All All
44 Copyright © 2010, Oracle and/or its affiliates. All rights reserved.
Chapter 4 Applying Application Changes
Task 4-11-6: Running the Final SETINDEX ReportThe SETINDEX SQR updates index overrides stored in the PSIDXDDLPARM table. The SQR updates thevalues stored in the PARMVALUE field with current values found in the system catalog. Running SETINDEXcleans up fragmentation issues that may have occurred during data conversion.
Properties
DatabaseOrientation
Initial orMTP
Products Platforms Languages
Target Both All DB2 z/OS
Oracle
All
Task 4-11-7: Running the Final SETTABLE ReportThe SETTABLE SQR updates table overrides stored in the PSRECDDLPARM table. The SQR updatesthe values stored in the PARMVALUE field with the current values found in the system catalog. RunningSETTABLE will clean up fragmentation issues that may have occurred during data conversion.
Properties
DatabaseOrientation
Initial orMTP
Products Platforms Languages
Target Both All Oracle All
Task 4-12: Configuring the Upgrade EnvironmentThis section discusses:
• Configuring the Web Server
• Configuring Portal
Task 4-12-1: Configuring the Web ServerRunning Portal requires a fully functional web server. In this step, configure your web server. Make sure thatyou also configure your web server for PeopleSoft Enterprise PeopleBooks so that you can easily refer to thedocumentation while reviewing the new release.
See the Enterprise PeopleTools installation guide for your database platform on your new release.
Copyright © 2010, Oracle and/or its affiliates. All rights reserved. 45
Applying Application Changes Chapter 4
Properties
DatabaseOrientation
Initial orMTP
Products Platforms Languages
Target Both All All All
Task 4-12-2: Configuring PortalRunning Portal requires a fully functional application server domain. The application server was configuredearlier in the upgrade. PeopleSoft applications are accessed through the Portal. You need to grant users accessto complete the upgrade process. You must install and configure the PeopleSoft Portal to complete the upgrade.
Note. If you configured your Portal earlier in the upgrade, you can skip this step.
You also must define a password on the Node Definitions page for Single Signon to work properly. If you donot define a password, the sign-on page appears when trying to access a report directly, instead of the reportitself. To avoid this issue, follow the procedure below to assign a password.
To assign a password:
1. Select PeopleTools, Integration Broker, Integration Setup, Nodes.
2. Click Search.
3. Select the database’s default local node.
The default local node shows a Y in the Default Local Node column.
4. On the Node Definitions page, select Password in the Authentication Option field.
5. Enter a password in the Password field.
6. Enter the password again in the Confirm Password field.
7. Enter the default user in the Default User ID field.
8. Save the node definition.
9. Reboot the application server and web server.
See the Enterprise PeopleTools installation guide for your database platform.
Properties
DatabaseOrientation
Initial orMTP
Products Platforms Languages
Target Both All All All
Task 4-13: Configuring Front Office and PayBillThis section discusses:
• Understanding Front Office Configuration
46 Copyright © 2010, Oracle and/or its affiliates. All rights reserved.

Chapter 4 Applying Application Changes
• Configuring School Type Values
• Configuring Salutation Table Values
• Running Cache Administration
Understanding Front Office ConfigurationThis task will guide you through the final set up for your Staffing Front Office data as it now resides inthe FSCM 9.1 database.
In the new release for Front Office standalone customers, a new Staffing installation option, Allow ReactivateClosed Assign will be automatically selected during the upgrade. This option enables users with the appropriatepermissions to reactivate previously closed assignments. You do not need to perform any action to accessthis functionality.
Task 4-13-1: Configuring School Type ValuesThe School Type field is validated based on the contents of a set up table rather than translate values inFSCM 9.1.
The SCHOOL_TYPE field translate values used in your previous Staffing Front Office release are replacedby the prompt values of the School Types table in FSCM 9.1. You must manually configure the SchoolType component so that the prompt table contains all of the SCHOOL_TYPE translate values from yourprevious release.
To configure School Type Values:
1. Retrieve the SCHOOL_TYPE field information you found in the step, “Printing Translate Values forSCHOOL_TYPE” in chapter 1 of the upgrade.
2. Select Set Up Financials/Supply Chain, Common Definitions, Resources Data, School Types.3. Enter a Set ID.4. In the School Type Code field, enter a translate value of the field SCHOOL_TYPE.5. In the Description field, enter the “old” (Staffing Front Office 8.8) Long Name of the translate value.6. In the Short Description field, enter the “old” Short Name of the translate value.7. Save the component.8. Repeat these steps until all Staffing Front Office 8.8 School Type translate values have been entered
into the set up component.
Properties
DatabaseOrientation
Initial orMTP
Products Platforms Languages
Target Both Staffing Front Office All All
Task 4-13-2: Configuring Salutation Table ValuesThis section discusses:
• Understanding Salutation Table Values
• Configuring Salutation Table Values for Staffing Front Office
Copyright © 2010, Oracle and/or its affiliates. All rights reserved. 47
Applying Application Changes Chapter 4
Understanding Salutation Table ValuesThe NAME_PREFIX field translate values used in Staffing Front Office 8.8 are replaced by the promptvalues of the Salutation Codes table in Staffing Front Office in FSCM 9.1. You must manually configure theSalutation Codes component so that the prompt tables contain all the translate values from your previousNAME_PREFX field in Staffing Front Office 8.8.
Configuring Salutation Table Values for Staffing Front OfficeIn this step configure your Salutation Table values.
To configure Salutation Table values:
1. Retrieve the NAME_PREFIX translate values you printed earlier in the task titled Print Translate Valuesof NAME_PREFIX.
2. Select Set Up Financials/Supply Chain, Common Definitions, Customers, Salutation Table.3. In the Salutation Code field, enter a translate value from your list of NAME_PREFIX values you
printed out.4. In the Description field, enter the long name of the translate value as it is in Staffing Front Office 8.8.5. In the Short Description field, enter the short name of the translate value as it is in Staffing Front Office 8.8.6. Save the page.7. Repeat these steps for all translate values on your list.
Properties
DatabaseOrientation
Initial orMTP
Products Platforms Languages
Target Both Staffing Front Office All All
Task 4-13-3: Running Cache AdministrationIn this step, a process is run so that you can see your upgraded Applicants and Employees.
To run the Cache Administration process:
1. Select Set Up Financials/Supply Chain, Common Definitions, Resource Search, Cache Administration.
2. Select the Maintain Search Index tab.
3. Select the search type of Staffing.
This enables the Miscellaneous tab.
4. On the Miscellaneous tab, select Maintain Employee Data Cache.
5. Select Create New to run the process.
48 Copyright © 2010, Oracle and/or its affiliates. All rights reserved.

Chapter 4 Applying Application Changes
Properties
DatabaseOrientation
Initial orMTP
Products Platforms Languages
Target Both Staffing Front Office All All
Task 4-14: Reconfiguring SecurityThe security model used in your previous Staffing Front Office database, has changed considerably for FSCM9.1 due to the merge of Staffing Front Office 8.8 into FSCM 9.1. Therefore, after data conversion, you arerequired to set up operators, roles, permission lists, and department security tables among other componentsin the FSCM 9.1 database to reconfigure security.
At this time please refer to your release’s PeopleBooks for information on how to set up the security forFSCM 9.1.
See PeopleSoft Enterprise Portal Solutions PeopleBook: Enterprise Portal Application Technology.
Properties
DatabaseOrientation
Initial orMTP
Products Platforms Languages
Target Both Staffing Front Office All All
Task 4-15: Backing Up Before TestingBack up your upgraded System database now. This enables you to restart your upgrade from this point, shouldyou experience any database integrity problems during the remaining tasks in the upgrade process.
Properties
DatabaseOrientation
Initial orMTP
Products Platforms Languages
Target Both All All All
Task 4-16: Testing Your Upgraded System DatabaseIn this task, you test your upgraded System database. Testing your upgraded System database will ensurethat you can still operate your day-to-day processes on your new release. After you have reviewed yourDDDAUDIT and SYSAUDIT, verify that the system is working properly by reviewing the system online.After you are comfortable that the system is working properly, you can perform the Test Move to Productionupgrade pass.
Copyright © 2010, Oracle and/or its affiliates. All rights reserved. 49
Applying Application Changes Chapter 4
See Appendix: “Planning for Upgrade Testing.”
Properties
DatabaseOrientation
Initial orMTP
Products Platforms Languages
Target Both All All All
50 Copyright © 2010, Oracle and/or its affiliates. All rights reserved.
CHAPTER 5
Appendices
Understanding AppendicesThe appendices portion of this documentation contains information you may need for your upgrade. Theappendices have been referenced throughout the upgrade documentation for further understanding of theupgrade you are performing. Oracle recommends that you read each appendix as it is referenced in thedocumentation.
Copyright © 2010, Oracle and/or its affiliates. All rights reserved. 51

Appendices Chapter 5
52 Copyright © 2010, Oracle and/or its affiliates. All rights reserved.
APPENDIX A
Applying Fixes Required for Upgrade
This appendix discusses:
• Preparing to Apply Fixes
• Applying Fixes During Installation
• Applying Fixes After Copying Project
• Applying Fixes After Data Conversion
• Applying Fixes Between Upgrade Passes
• Applying Fixes in Move to Production
Task A-1: Preparing to Apply FixesThis appendix gives general instructions for applying a Required for Upgrade fix for your upgrade. If thedirections given in a particular fix are different from those given here, then follow the instructions in the fix.
It is important that you run your upgrade using the latest versions of all upgrade software. On My OracleSupport, check the upgrade page and the patches and updates page to ensure that you have all of the latest code.
Ideally, you should follow the steps below to apply the various files and fixes.
To apply files and fixes:
1. Install the new release from the CD.2. Apply any additional scripts and projects from the My Oracle Support upgrade page to your new release
codeline (and to the New Release Demo database, if applicable).3. Apply any other Required for Upgrade fixes from My Oracle Support’s patches and updates page to your
new release codeline (and to the New Release Demo database, if applicable).4. Run your initial pass of the upgrade.5. Before you begin each subsequent upgrade pass, check the upgrade page for new versions of any files
that you previously applied.Then check patches and updates for any new Required for Upgrade fixes.
Your initial upgrade pass will differ from your subsequent Test Move to Production passes. Some of theupgrade tasks and steps are common to both the initial upgrade pass and the Move to Production pass. For thisreason, you may find Required for Upgrade fixes that do not apply to the upgrade pass that you are currentlyperforming. The details provided with each fix will help you determine whether to apply the fix and when toapply it. The fix will also tell you what to do if you have already passed the step for which the fix is needed.
Copyright © 2010, Oracle and/or its affiliates. All rights reserved. 53

Applying Fixes Required for Upgrade Appendix A
How you apply a fix depends on where you are in the upgrade process. This appendix explains how to apply atypical fix, and is organized by the various points within the upgrade where you will apply fixes.
Task A-2: Applying Fixes During InstallationIn the chapter, “Starting Your Upgrade,” in Getting Started on Your PeopleSoft Upgrade, you should firstdownload and apply all files and objects from the upgrade page on My Oracle Support. Then you mustdownload all Required for Upgrade fixes from the patches and updates page on My Oracle Support. You canuse the instructions in this section to apply any additional fixes that are posted, until you reach the task,“Running New Release Compare Reports.”
If a fix contains a project that needs to be copied from a file, apply it to your New Release Demo databaseduring installation. If the project contains changes for records or fields, those objects will be updated duringthe normal compare and copy steps in the upgrade. You will not have to build objects in the project separatelyor consider whether it will have an impact on customizations. You will do that with the rest of the objectsduring the upgrade. Apply as many of the fixes as you can at this time.
To apply script fixes during installation:
1. Download Required for Upgrade change packages using the “Download Change Package” functionality inPeopleSoft Change Assistant.
2. Use PeopleSoft Change Assistant to apply the updates into your New Release Demo database.Review the documentation included with each update prior to applying each update. You may need toperform manual steps to successfully apply the update.
See the Enterprise PeopleTools PeopleBook: PeopleSoft Change Assistant for your current release, “ApplyingUpdates.”
Task A-3: Applying Fixes After Copying ProjectIt is best not to apply fixes during the compare and copy tasks in the “Running and Reviewing CompareReports” and “Applying Application Changes” chapters of the initial upgrade pass. It can also be cumbersometo apply record and field changes during the creating and altering of tables in the “Completing DatabaseChanges” chapter. It is, therefore, best to wait until just before the “Running Data Conversion” task in the“Applying Application Changes” chapter to apply additional fixes. Most of the fixed objects will be dataconversion code, delivered in projects.
To apply PeopleSoft project fixes before data conversion:
1. Download Required for Upgrade change packages using the “Download Change Package” functionality inPeopleSoft Change Assistant.
2. Use PeopleSoft Change Assistant to apply the updates into your New Release Demo database for thisupgrade pass.Review the documentation included with each update prior to applying each update.
See the Enterprise PeopleTools PeopleBook: PeopleSoft Change Assistant for your current release,“Applying Updates.”
54 Copyright © 2010, Oracle and/or its affiliates. All rights reserved.
Appendix A Applying Fixes Required for Upgrade
3. The project is now loaded on your New Release Demo database. You should run a project compare tomake sure that the objects in the fix will not overwrite any of your customizations.If you find customizations, you must decide how to deal with them before you copy the fix to yourCopy of Production.
4. If you are performing a Move to Production upgrade pass, first migrate the change packages into theSource database for this upgrade pass.If needed, first set up PeopleSoft Change Assistant with the environment information for your Sourcedatabase. If you customized any of the objects delivered in the change package, you should repackagethe fix to include your customizations. If you did not customize any objects delivered in the fix youmay directly apply them to your Source database.
See the Enterprise PeopleTools PeopleBook: PeopleSoft Change Assistant for your current release,“Applying Updates.”
5. Migrate the change packages into the Target database for this upgrade pass.If needed, first set up PeopleSoft Change Assistant with the environment information for your Targetdatabase.
Task A-4: Applying Fixes After Data ConversionAt this point, you have already converted all of your data for the upgrade pass, and you cannot applyApplication Engine program fixes and use them in this upgrade pass. You should refer to the fix instructions todetermine what to do in each case. Often, the instructions say that you need to restore your database from apre-conversion backup and rerun data conversion to get the benefits of the fix. Because this is the only wayyou can get the fix onto your current Copy of Production, you may decide to allow the error and not apply thefix until you do a Test Move to Production. Then after you have completed that test pass, you can test theaffected function. However, you should not do this if your next pass is your final Move to Production, andyou are going into production with the resulting database. You should always test your upgraded databasebetween test passes if changes have been made to procedures, scripts, or programs. You do not want anysurprises during the final Move to Production.
Task A-5: Applying Fixes Between Upgrade PassesYou can apply fixes just before you start a Test Move to Production pass in the same way you would in the stepabove, Applying Fixes After Copying Project. In those instructions, you apply the fix to your New ReleaseDemo database and compare it to the Copy of Production. Make sure that you do the database comparison toverify that the fix does not wipe out any customizations you made to Application Engine programs during yourinitial upgrade pass. If you have made customizations, merge your customizations into the new ApplicationEngine code on the New Release Demo database. Then apply the fix to your Copy of Production, which youwill use as the Source database in the Test Move to Production. The fix will then get moved to your NewCopy of Production when you run the MVPRDEXP.DMS and MVPRDIMP.DMS scripts in the “ApplyingPeopleTools Changes” chapter.
Copyright © 2010, Oracle and/or its affiliates. All rights reserved. 55

Applying Fixes Required for Upgrade Appendix A
Task A-6: Applying Fixes in Move to ProductionOnce you have started a Test Move to Production, do not apply any fixes until just before data conversion.Apply any fixes using the previous step, “Applying Fixes After Copying Project.” In those instructions youapply the fix to your New Release Demo database and compare it to your Copy of Production. Instead ofusing the original Copy of Production as the Target, you must now use your New Copy of Production, the onedefined as the Target in your Move to Production PeopleSoft Change Assistant job. Be sure to do the databasecomparison to verify that the fix does not wipe out any customizations that you made to Application Engineprograms during your initial upgrade pass. If you have made customizations, merge your customizations intothe new Application Engine code on the New Release Demo database, then copy the project to your NewCopy of Production.
56 Copyright © 2010, Oracle and/or its affiliates. All rights reserved.

APPENDIX B
Upgrading Front Office and PayBill
Task B-1: Reviewing the Front Office Standalone UpgradeIf you currently only have a Staffing Front Office database you will complete what is known as the StaffingFront Office standalone upgrade. This upgrade will import and upgrade your Staffing Front Office data out ofyour old Staffing Front Office database and incorporate it into your new Financials/Supply Chain Management9.1 database. Your Staffing Front Office objects will be part of the product, Staffing Front Office in FSCM 9.1,with this upgrade. After you complete this upgrade, and when you are ready to upgrade in the future, you willonly need to upgrade your Financials/Supply Chain Management database.
This is a unique style of upgrade and does not follow the traditional PeopleSoft upgrade process. Thisfollows a model in which you will copy your data out of your old database and into a brand new databasebefore running data conversion.
Copyright © 2010, Oracle and/or its affiliates. All rights reserved. 57

Upgrading Front Office and PayBill Appendix B
58 Copyright © 2010, Oracle and/or its affiliates. All rights reserved.
APPENDIX C
Using Data Conversion Utilities
This appendix discusses:
• Understanding Data Conversion Utilities
• Using the UPGDATACONV Process
• Using the EO Upgrade Framework Process
• Using the Upgrade Driver Program
• Using the Upgrade Drivers Page
Understanding Data Conversion UtilitiesThe Upgrade Data Conversion Application Engine Programs are organized into a series of Drivers or Groupswhich guide the flow and order of execution at runtime for a particular upgrade path. This appendix containsinformation regarding the Application Engine program UPG_DATACONV and the PS_UPG_DATACONVtable.
This appendix also contains information regarding the EO Upgrade Framework, which consists of twoApplication Engine programs and is intended to optimize the data conversion process by analyzing Sourceand Target tables, column usage, state records, and bind variables in order to determine actual dependenciesbetween application engine sections. This allows you to run your data conversion process during yourPeopleSoft application upgrade with optimal performance.
Task C-1: Using the UPGDATACONV ProcessThis section discusses:
• Understanding the UPGDATACONV Process
• Reviewing the Data Conversion Report
Understanding the UPGDATACONV ProcessTo run all PRE and POST data conversions, Oracle has provided the Application Engine programUPG_DATACONV. This program runs the Application Engine sections defined in the tablePS_UPG_DATACONV.
Copyright © 2010, Oracle and/or its affiliates. All rights reserved. 59
Using Data Conversion Utilities Appendix C
Task C-1-1: Reviewing the Data Conversion ReportEach of the upgrade data conversion sections contains comments that describe the processing performed bythe section. Oracle delivered an SQR to list all of these comments by the group and sequence numbers thatdetermine how they run. The name of this report is UDATACNV.
To run UDATACNV:
1. Using SQRW, run SQR UDATACNV on your Copy of Production database.2. When prompted for upgrade path, enter:
FO8X
F881
3. When prompted for group number, enter the two-digit group number to report on, or enter 0 to seethe comments for all groups.
Task C-2: Using the EO Upgrade Framework ProcessThis section discusses:
• Understanding the EO Upgrade Framework Process
• Reviewing EO Upgrade Framework Initial Analysis
• Reviewing Dependency Analysis
• Reviewing Runtime for EOUFDATACONV
• Reviewing EO Upgrade Framework Reporting
Task C-2-1: Understanding the EO Upgrade Framework ProcessThe EO Upgrade Framework process includes analyzing the insert, update, and delete SQL steps in your dataconversion to determine the Source and Target tables, column usage, stat records, and bind variables that areused. This includes analyzing dynamic SQL, App Classes, SQLExec’s, and platform-specific code.
The AE program gathers a list of AE sections required for data conversion from a given upgrade path. Thesesections are analyzed and SQL statements are extracted and stored in the AE Analyzer repository. EachSQL statement is analyzed to derive a list of tables that are manipulated or queried during the execution ofthat SQL. Once all the SQL is analyzed, the information is used to derive section dependency informationwhich is then saved in the AE Analyzer repository.
There are two types of analysis for EO Upgrade Framework: initial and dependency. This section will describeboth analysis types in detail.
Task C-2-2: Reviewing EO Upgrade Framework Initial AnalysisThis section discusses:
• Understanding Initial Analysis
• Reviewing Custom Data Conversion Code
• Reviewing Table Usage Information
60 Copyright © 2010, Oracle and/or its affiliates. All rights reserved.
Appendix C Using Data Conversion Utilities
• Reviewing Invalid SQL
• Reviewing the Data Conversion Repositories
Understanding Initial AnalysisThe EOUFANALYSIS Application Engine reads the data conversion code for your defined upgrade path(where the path is defined in the UPGDATACONV table with UPG_CONV_TYPE= “MAIN”).
The AE Analyzer program leverages two PeopleCode functions included with PeopleSoft PeopleTools 8.50 orhigher. The two PeopleCode functions are:
• GetProgText: A function that retrieves a PeopleCode program as text.• ResolveMetaSQL: A function that returns a string of SQL text that has had its metasql resolved.
Reviewing Custom Data Conversion CodeCustom data conversion code can be included in the Initial Analysis and subsequent steps in the EO UpgradeFramework by adding a row (or rows) to the PS_UPG_DATACONV table for each custom AE section that isto be executed, where a row is defined as UPG_PATH, UPG_GROUP_SEQ_NUM, SEQ_NUM, AE_APPLID,AE_SECTION, ACTIVE_FLAG, UPG_CONV_TYPE.
Reviewing Table Usage InformationThe data conversion analysis process attempts not only to identify the tables that are used in a givenApplication Engine step, but also how the tables are being used in the context of each step.
This information is stored in the analysis tables and documented in the Table Usage and Action columns ofdelivered EOUF reports, such as EOUF0001.SQR.
Valid values for the Table Usage column are:
• “S” for Data Source
• “T” for Data Target
• “X” for Unknown
Note. An “X” Usage for the PSEOUF_DUAL, PS_EOUF_COMMON_AET, PS_EOUF_DUMMY and/orPS_EOUF_NORECNAME tables is expected and does not impact the subsequent Dependency AnalysisProcess.
See Reviewing Dependency Analysis
Valid Values for the Action column are:
• CREATE• DELETE• DROP• INSERT• SELECT• TRUNCATE• UPDATE• UPDSTATS
Copyright © 2010, Oracle and/or its affiliates. All rights reserved. 61
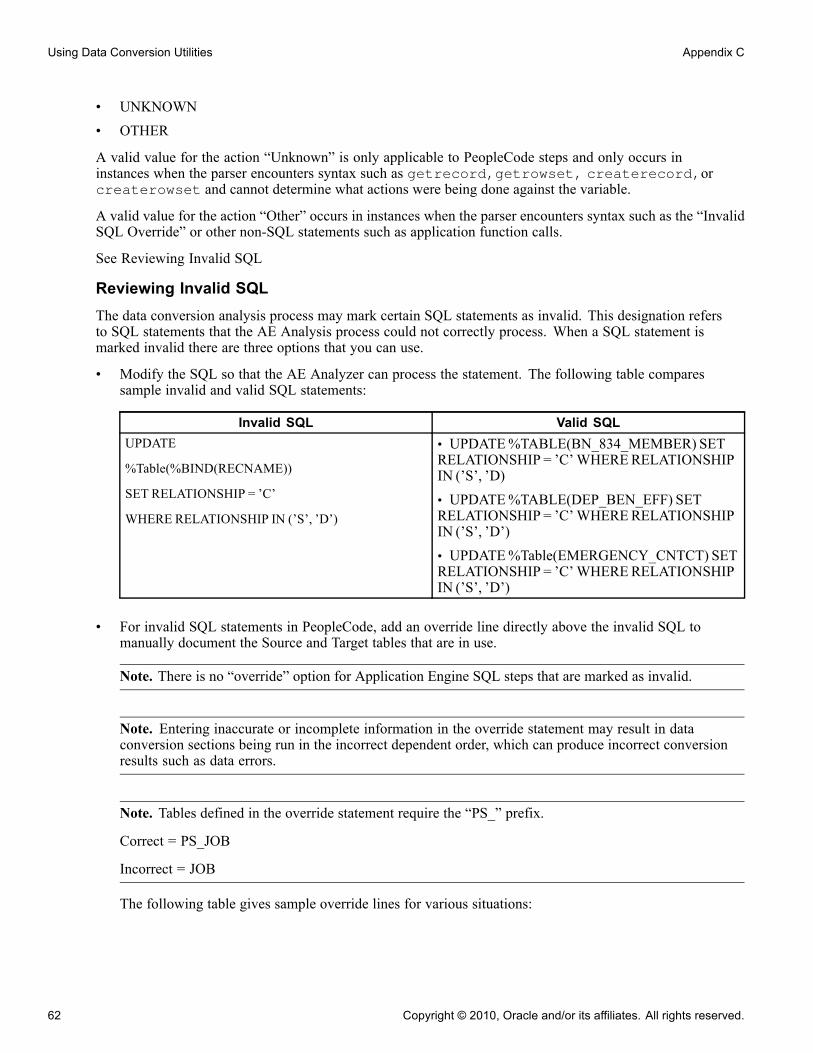
Using Data Conversion Utilities Appendix C
• UNKNOWN• OTHER
A valid value for the action “Unknown” is only applicable to PeopleCode steps and only occurs ininstances when the parser encounters syntax such as getrecord,getrowset, createrecord,orcreaterowset and cannot determine what actions were being done against the variable.
A valid value for the action “Other” occurs in instances when the parser encounters syntax such as the “InvalidSQL Override” or other non-SQL statements such as application function calls.
See Reviewing Invalid SQL
Reviewing Invalid SQLThe data conversion analysis process may mark certain SQL statements as invalid. This designation refersto SQL statements that the AE Analysis process could not correctly process. When a SQL statement ismarked invalid there are three options that you can use.
• Modify the SQL so that the AE Analyzer can process the statement. The following table comparessample invalid and valid SQL statements:
Invalid SQL Valid SQLUPDATE
%Table(%BIND(RECNAME))
SET RELATIONSHIP = ’C’
WHERE RELATIONSHIP IN (’S’, ’D’)
• UPDATE%TABLE(BN_834_MEMBER) SETRELATIONSHIP = ’C’WHERERELATIONSHIPIN (’S’, ’D)• UPDATE%TABLE(DEP_BEN_EFF) SETRELATIONSHIP = ’C’WHERERELATIONSHIPIN (’S’, ’D’)• UPDATE%Table(EMERGENCY_CNTCT) SETRELATIONSHIP = ’C’WHERERELATIONSHIPIN (’S’, ’D’)
• For invalid SQL statements in PeopleCode, add an override line directly above the invalid SQL tomanually document the Source and Target tables that are in use.
Note. There is no “override” option for Application Engine SQL steps that are marked as invalid.
Note. Entering inaccurate or incomplete information in the override statement may result in dataconversion sections being run in the incorrect dependent order, which can produce incorrect conversionresults such as data errors.
Note. Tables defined in the override statement require the “PS_” prefix.
Correct = PS_JOB
Incorrect = JOB
The following table gives sample override lines for various situations:
62 Copyright © 2010, Oracle and/or its affiliates. All rights reserved.
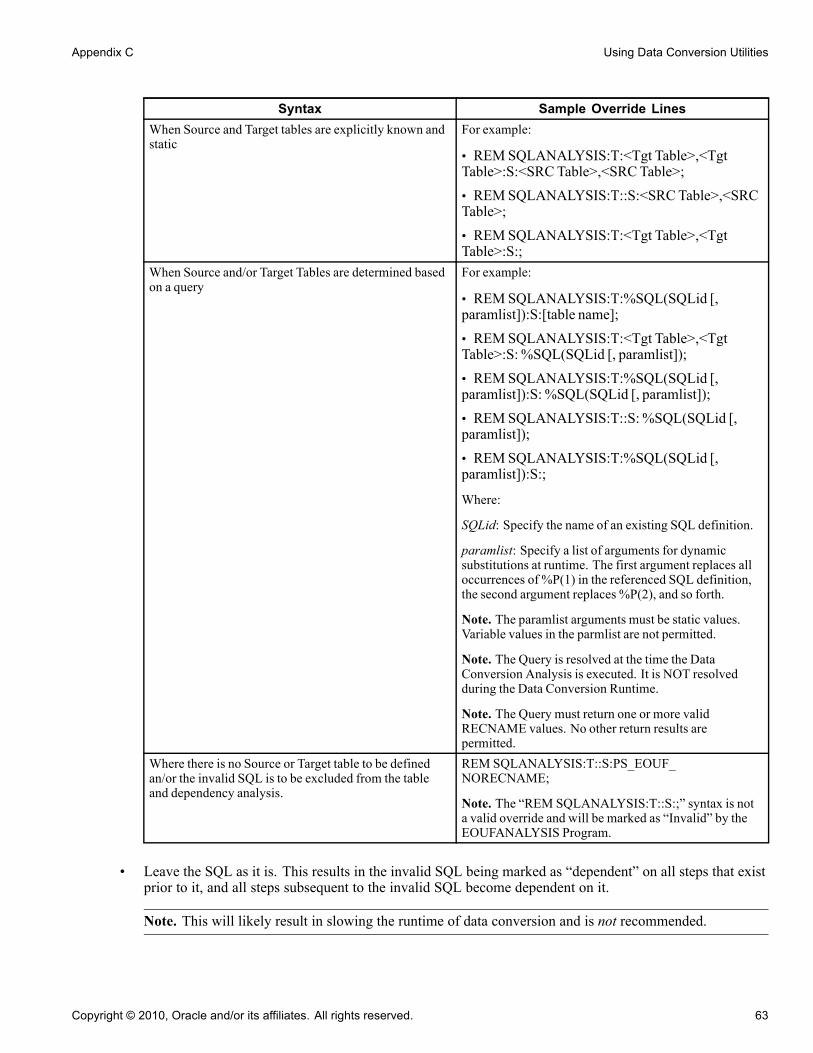
Appendix C Using Data Conversion Utilities
Syntax Sample Override LinesWhen Source and Target tables are explicitly known andstatic
For example:
• REMSQLANALYSIS:T:<Tgt Table>,<TgtTable>:S:<SRCTable>,<SRCTable>;• REMSQLANALYSIS:T::S:<SRCTable>,<SRCTable>;• REMSQLANALYSIS:T:<Tgt Table>,<TgtTable>:S:;
When Source and/or Target Tables are determined basedon a query
For example:
• REMSQLANALYSIS:T:%SQL(SQLid [,paramlist]):S:[table name];• REMSQLANALYSIS:T:<Tgt Table>,<TgtTable>:S: %SQL(SQLid [, paramlist]);• REMSQLANALYSIS:T:%SQL(SQLid [,paramlist]):S: %SQL(SQLid [, paramlist]);• REMSQLANALYSIS:T::S: %SQL(SQLid [,paramlist]);• REMSQLANALYSIS:T:%SQL(SQLid [,paramlist]):S:;
Where:
SQLid: Specify the name of an existing SQL definition.
paramlist: Specify a list of arguments for dynamicsubstitutions at runtime. The first argument replaces alloccurrences of %P(1) in the referenced SQL definition,the second argument replaces %P(2), and so forth.
Note. The paramlist arguments must be static values.Variable values in the parmlist are not permitted.
Note. The Query is resolved at the time the DataConversion Analysis is executed. It is NOT resolvedduring the Data Conversion Runtime.
Note. The Query must return one or more validRECNAME values. No other return results arepermitted.
Where there is no Source or Target table to be definedan/or the invalid SQL is to be excluded from the tableand dependency analysis.
REM SQLANALYSIS:T::S:PS_EOUF_NORECNAME;
Note. The “REM SQLANALYSIS:T::S:;” syntax is nota valid override and will be marked as “Invalid” by theEOUFANALYSIS Program.
• Leave the SQL as it is. This results in the invalid SQL being marked as “dependent” on all steps that existprior to it, and all steps subsequent to the invalid SQL become dependent on it.
Note. This will likely result in slowing the runtime of data conversion and is not recommended.
Copyright © 2010, Oracle and/or its affiliates. All rights reserved. 63

Using Data Conversion Utilities Appendix C
Reviewing the Data Conversion RepositoriesThe tables in the Data Conversion Analysis repository hold the following data:
• Step actions stored in execution order.• SQL clauses extracted from step actions.• Tables featured in SQL clause.• Bind variables used in SQL.
Analysis information is stored in the following tables:
• PS_UPG_DATACONV
• PS_EOUF_DATACONV
• PS_EOUF_SECLISTTMP
• PS_EOUF_ANALYSIS
• PS_EOUF_DTLIDSQLS
• PS_EOUF_DTLIDSQLSR
Task C-2-3: Reviewing Dependency AnalysisThe table usage information identified in the Initial Analysis is subsequently used to determine the dependenciesbetween AE Steps. The Step Dependency Information is then aggregated to the “Root Section” level where aRoot Section is defined as a row in the PS_UPG_DATACONV table (UPG_PATH, UPG_GROUP_SEQ_NUM,SEQ_NUM, AE_APPLID, AE_SECTION, ACTIVE_FLAG, UPG_CONV_TYPE).
The following outlines how dependency analysis is structured:
• All groups identified for a particular path in the UPG_DATACONV table can only be dependent onthemselves and Group 1. For example, a step in Group 2 can only be dependent on a step (or steps)that precedes it in Group 2 or exists in Group 1.
• A step in Group 2 can not be dependent on a step in Group 3.• Usage of the PS_EOUF_DUAL, PS_EOUF_COMMON_AET, PS_EOUF_DUMMY or
PS_EOUF_NORECNAME tables never results in a dependency.• A “Invalid SQL” (as defined by the analysis), is dependent on all steps that precede it in its group and in
Group 1 (if the invalid step itself is not in Group 1).• A Select is not dependent on a Select.
Task C-2-4: Reviewing Runtime for EOUFDATACONVAll runtime information for EOUFDATACONV is stored in the following tables:
• PS_EOUF_DATACONV
• PS_EOUF_RUNSTATUS
• PS_EOUF_RUNDETAIL
• PS_EOUF_RUNCOUNT
64 Copyright © 2010, Oracle and/or its affiliates. All rights reserved.
Appendix C Using Data Conversion Utilities
The EOUFDATACONV Application Engine leverages the Dependency Analysis to optimize the runtime ofthe data conversion. The runtime of the data conversion is improved in the new PeopleSoft release by runningmultiple instances of EOUFDATACONV in parallel, executing against a single set of dependency information.The optimal number of instances to be initiated will vary.
EOUFDATACONV determines which “Root Sections” are able to run and executes them. A Root Section isable to run when all Root Sections that are dependent on it have completed successfully.
In the event that multiple root sections are able to run at the same time, steps that have the largest numberof dependent Root Sections and/or Root Sections that have the longest run time (in a previous run), aregiven priority.
In the event of failure, the instance of EOUFDATCONV that encountered the error will mark the step as“Failed” and stop. All other instances of EOUFDATACONV will continue to run. Steps that are dependenton a “Failed” step will be marked as “Blocked” and will not be executed as part of the current run. Uponrestarting the process, the “Failed” section and any “Blocked” sections will be executed.
Task C-2-5: Reviewing EO Upgrade Framework ReportingThis section discusses:
• Understanding EO Upgrade Framework Reporting
• Reviewing the Tables Referenced Report
• Reviewing the Customization Impacts Report
• Reviewing Execution Report by Section – Duration
• Reviewing Execution Report by Section – Start Time
• Reviewing the Execution Report by Step
• Reviewing the Execution by Thread Report
• Reviewing the Thread Duration Report
• Reviewing the Execution Comparison Report
• Reviewing the Table Analysis Report
Understanding EO Upgrade Framework ReportingYou can query all tables populated and leveraged by the EO Upgrade Framework (as identified previously)through the various platform specific query tools or psquery. You can gather information in the EOUF tables toidentify the following:
• Tables referenced in the data conversion code.• Steps impacted by customizations (prior to the initial data conversion run).• Performance issues (after the initial data conversion run).• Impact of changes (run to run timing comparisons).
Oracle has delivered a series of standard reports to address the most commonly accessed information inthe EOUF repository.
Copyright © 2010, Oracle and/or its affiliates. All rights reserved. 65
Using Data Conversion Utilities Appendix C
Reviewing the Tables Referenced ReportEOUF0001.SQR lists all tables referenced within the Application Engine data conversion programs. For eachtable listed, the report displays the section and step in which it is used, whether it is a data source or data targettable, and the type of SQL statement in which it is referenced. This report is sorted by table name. Data forthis report comes from the PS_EOUF_ANALYSIS, PS_EOUF_DTLIDSQLS, and PS_EOUF_DTLIDTBLStables. This report can be run anytime after the EOUFANALYSIS Application Engine program has runand populated the EOUF tables used by this SQR.
Reviewing the Customization Impacts ReportEOUF0002.SQR shows the section/steps within the Application Engine data conversion programs thatreferenced tables with custom added fields. This report is sourced from the PS_EOUF_ANALYSIS table andthe PSPROJECTITEM table. This report must be run after the customizations project has been comparedagainst the New Release Demo database.
Reviewing Execution Report by Section – DurationEOUF003.SQR shows the duration or execution time for each Application Engine section. Since this report isat a section level, the information is sourced from the PS_EOUF_RUNDETAIL table. The report is orderedby execution time with the poorest performing steps at the top. This report can be run anytime after thePS_EOUF_RUNDETAIL table has been populated for the data conversion run on which you want to report.
Reviewing Execution Report by Section – Start TimeEOUF0004.SQR shows the duration or execution time for each section. Since this report is at a section level,the information will be sourced from the PS_EOUF_RUNDETAIL table. The report would be ordered by starttime so that you can see the order in which the sections were executed. This report can be run anytime after thePS_EOUF_RUNDETAIL table has been populated for the data conversion run on which you want to report.
Reviewing the Execution Report by StepEOUF0005.SQR shows the execution time for each section and the associated steps that were run.
This report requires a trace of 16,384 or higher.
Since this report is at a step level, it assumes that a trace of 16,384 or higher has been run so that the stepinformation could be obtained from the PS_EOUF_TIMINGS_DT table. If the appropriate trace has not beenrun, then a report is not created and output files will be produced. The report will be ordered by executiontime with the poorest performing steps at the top.
Reviewing the Execution by Thread ReportEOUF006.SQR shows the execution timing of each Application Engine section run as part of the dataconversion process. This report is sorted so that you can see which sections were executed by each thread.This report is sourced from the PS_EOUF_RUNDETAIL table.
Reviewing the Thread Duration ReportEOUF007.SQR shows the total duration time for each thread used during the data conversion process.This report is sourced from the PS_EOUF_RUNDETAIL table. It can be run anytime after thePS_EOUF_RUNDETAIL table has been populated from the data conversion run on which you want to report.
66 Copyright © 2010, Oracle and/or its affiliates. All rights reserved.
Appendix C Using Data Conversion Utilities
Reviewing the Execution Comparison ReportEOUF0008.SQR shows the execution duration from the current run of data conversion as comparedto the execution duration from the previous run of data conversion. This report is sourced from thePS_EOUF_RUNDETAIl table. This report can be run anytime after the PS_EOUF_RUNDETAIL table hasbeen populated for the data conversion runs on which you want to report.
Reviewing the Table Analysis ReportEOUF0009.SQR indicates how a particular application table is impacted by the create/alter scripts aswell as the data conversion process during the PeopleSoft upgrade. This report is sourced from thePS_PTUALTRECDATA, PS_PTUALTRECFLDDAT, PS_EOUF_ALTRECDATA, PS_EOUF_ANALYSIS,and PS_EOUF_DTLIDTBLS tables. This report can be run after the Alter Analyzer and the AE Analyzerprocesses have successfully completed. This report is designed to be run against the initial pass database asthe data stored in the tables during the Move to Production will differ.
Task C-3: Using the Upgrade Driver ProgramThe sequence of Application Engine sections that are run by an upgrade driver is maintained in thePS_UPG_DATACONV Table. The Application Engine Sections defined in the UPG_DATACONV Table arereferred to as “Root Sections.”
There are three categories of Upgrade Groups:
• PRE – Data Conversion Sections which must be executed in advance of all other sections.• MAIN – Core Data Conversion• POST – Data Conversion Sections which must be executed after all other sections.
Note. Your specific upgrade may or may not contain pre-delivered PRE or POST groups.
Upgrade groups contain one or more Application Engine Sections which are ordered within the group bysequence number. The Application Engine program UPG_DATACONV is used to execute PRE and POSTdata conversion groups. The Application Engine program EOUF_DATCONV is used to execute the MAINdata conversion group.
When data conversion is executed using the UPG_DATACONV program, the sequence number is used todetermine the “Absolute Run Order” of the upgrade group. When data conversion is executed using theEOUFDATACONV Application Program, the sequence number is used to determine the “Relative RunOrder” of Application Engine Sections which reference the same table or tables, but not the “Absolute RunOrder” of the upgrade group(s).
Task C-4: Using the Upgrade Drivers PageThis section discusses:
• Understanding the Upgrade Drivers Page
• Accessing the Upgrade Drivers Page
Copyright © 2010, Oracle and/or its affiliates. All rights reserved. 67

Using Data Conversion Utilities Appendix C
• Adding the New Upgrade Drivers Section Page
• Inactivating the Upgrade Drivers Section
Understanding the Upgrade Drivers PageBefore you run data conversion, you may need to change what the Upgrade Driver program runs. You can add,remove, or deactivate Application Engine sections through the Upgrade Drivers page.
You do not have an active portal on your Copy of Production during data conversion, so you need to viewand update the Data Conversion Definitions on your Demo database and then copy the updated data to yourCopy of Production database.
Task C-4-1: Accessing the Upgrade Drivers PageTo access the Upgrade Drivers page:
1. From your browser, sign in to the Demo database.
2. Select Set Up Financials/Supply Chain, Upgrade, Define Upgrade Drivers.
3. Select Set Up Staffing, Upgrade, Upgrade AE Documentation.
4. Enter your upgrade path:
FO8X
F881
5. Click Search.You are now on the Upgrade Drivers page. Following the example of the page are descriptions for eachsection of the Upgrade Drivers page.
Upgrade Drivers page
• Upgrade Path. This field contains the upgrade path on which the section will be run.• Program Name. This is the Application Engine program that contains the section.• Group #. This is the group number. All sections with the same group number will be run during the same
run of the UPG_DATACONV Application Engine program.• Section. This is the section that will be called from the UPG_DATACONV Application Engine program.• Sequence. This is the order in which the sections will be called during the run of UPG_DATACONV
for the group number.• Active Flag. This field determines whether the section will be run. If the value of this field is Active, the
section will be run. If the value is Inactive, it will not be run. If you need to remove a section, change thevalue in this field to Inactive.
• Description.
68 Copyright © 2010, Oracle and/or its affiliates. All rights reserved.
Appendix C Using Data Conversion Utilities
• Comments.
Task C-4-2: Adding the New Upgrade Drivers Section PageFollow the instructions below to add a new section to the Upgrade Drivers page.
Note. To add a new section, the Application Engine program and section must exist on the Demo database.
To add a new section to the Upgrade Drivers page:
1. From your browser, sign in to the Demo database.2. Select Set Up Financials/Supply Chain, Upgrade, Define Upgrade Drivers.3. Select Add a New Value.4. Click Add.5. Enter values for Upgrade Path and Program Name.6. Enter a value for Group #.
Note. Each group number corresponds to a data conversion step in the PeopleSoft Change Assistanttemplate. If you select a group number that already exists in the PS_UPG_DATACONV table, your sectionwill be executed when PeopleSoft Change Assistant runs the data conversion step that corresponds to thegroup number you selected. Alternatively, if you assign a group number to your new section that does notalready exist in PS_UPG_DATACONV, you must add a new step to your PeopleSoft Change Assistanttemplate. The new template step will have the same properties as the other data conversion steps, exceptfor the group number specified in the step properties Parameters box.
7. Enter values for Section and Sequence.The Description and Comments fields are optional.
8. Click Save.9. When you have completed all changes, sign in to your Demo database using PeopleSoft Data Mover and
run the following script to export the updated data conversion data:
DLUPX03E.DMS
10. Sign in to your Copy of Production database using PeopleSoft Data Mover and run the following script toload the updated data conversion data:
DLUPX03I.DMS
See the Enterprise PeopleTools PeopleBook: PeopleSoft Change Assistant for your new release,Appendix: “Using a Change Assistant Template.”
Task C-4-3: Inactivating the Upgrade Drivers SectionFollow the instructions below to deactivate a section on the Upgrade Drivers page. Once deactivated, thesection will not run as part of data conversion.
To inactivate a section on the Upgrade Drivers page:
1. From your browser, sign in to the Demo database.
2. Select Set Up Financials/Supply Chain, Upgrade, Define Upgrade Drivers.
Copyright © 2010, Oracle and/or its affiliates. All rights reserved. 69
Using Data Conversion Utilities Appendix C
3. Enter your upgrade path:
FO8X
F881
4. Click Search.5. Find the row with the Program Name and Section you want to remove and change the value of the
Active Flag field to Inactive.6. Click Save.7. When you have completed all changes, sign in to your Demo database using PeopleSoft Data Mover and
run the following script to export the updated data conversion data:
DLUPX03E.DMS
8. Sign in to your Copy of Production database using PeopleSoft Data Mover and run the following script toload the updated data conversion data:
DLUPX03I.DMS
70 Copyright © 2010, Oracle and/or its affiliates. All rights reserved.
Index
AAlter Auditfinal, reviewing 44final, running 43
application enginePTALTANLYZR 37
application serversconfiguring 41
applyingfixes after copying project 54fixes after data conversion 55fixes between upgrade passes 55fixes during installation 54fixes during Move to Production 56fixes, required for upgrade 4PeopleTools patches 2updates before data conversion 40UPGOPTFO project 14upgrade planning files 13
auditsDDDAUDIT, final 43final 42SYSAUDIT, final 43
Bbacking upafter data conversion 42before conversion 41before testing 49
billingmanagement 11
buildingcreate upgrade tables script 38EOUF_UPGRADE_FRAMEWORK 37Staffing Front Office create indexesscript 36UPGOPT project 14
Business Units to Location Codesmapping 22
CCache Administration processrunning 48
Change Assistantconfiguring 6creating a job 6upgrade step properties 7
Change Assistant, installing 3configuringapplication servers 41Change Assistant 6Pay/Bill Management 46Portal 46Process Scheduler 41Project Costing Business Units 16Salutation Table values 47School Type values 47Staffing Front Office 46upgrade environment 45web server 45
Copy of Productioncreating 12
copyingproduction database 12
create indexesbuilding Staffing Front Office script 36running Staffing Front Office script 37
creatingFNLALTAUD project 43
Ddata conversionanalysis 37applying updates before 40backing up after 42loading data 39
data conversion analysispreparing 37
data conversion report, reviewing 60database structure, modifying 38DDDAUDIT scriptfinal, running 43
Degrees to Accomplishmentsmapping 25
DLEPFOX34.DMS script 40downloadinginstallation guides 1
Copyright © 2010, Oracle and/or its affiliates. All rights reserved. 71
Index
EEOUF_UPGRADE_FRAMEWORKbuilding 37running 38
exportingStaffing Front Office data 31Staffing Front Office non-stabletables 33Staffing Front Office stable tables 33
Ffinal audit reports, running 42fixesapplying after copying project 54applying after data conversion 55applying between upgrade passes 55applying during installation 54applying during Move to Production 56
fixes, required for upgrade 4See Also patchesapplying 4downloading with Change Assistant 4
FNLALTAUD project, creating 43FO, See Staffing Front OfficeFO Business Unit to PC Business Unit &Location Code pagemapping Business Units to LocationCodes 22
Front Office, See Staffing Front Office
Ggeneral options, performing setup 33getting started 13
Iinstallation flag for Pay/Bill Managementverifying 16
installation flag for Staffing Front Officeverifying 16
installation optionupdating for Staffing Front Officeupgrade 40
installation options, verifying 16installation, applying fixes during 54installingChange Assistant 3new release 1PeopleTools 1product 1
Lloadingdata for data conversion 39
MMajor Code to Major Code pagemapping Major Codes 27
Major Codesmapping 26
management, billing and order 11mappingBusiness Units to Location Codes 22Degrees to Accomplishments 25Major Codes 26Resource and Order Priority values 20School Codes 28Skill Codes to Competency values 19Skill Types to Competency Types 17Tests to Accomplishments 24
mapping Business Units to Location CodesFO Business Unit to PC Business Unit &Location Code page 22
mapping Degrees to AccomplishmentsDegree to Accomplishment page 25
mapping Major CodesMajor Code to Major Code page 27
mapping Resource and Order PriorityvaluesUser Status to Priority Code page 21
mapping School CodesSchool Code to School Code page 28
mapping Skill Codes to Competency valuesSkill Code to Competency page 19
mapping Skill Types to Competency TypesSkill Type to Skill Type page 17
mapping Tests to AccomplishmentsTest to Accomplishment page 24
modifyingdatabase structure 38
NNAME_PREFIX, translate values 30non-stable tables, exporting Staffing FrontOffice 33notes and tips, for your upgrade 10
Oobject version numbers, updating 42order, management 11
72 Copyright © 2010, Oracle and/or its affiliates. All rights reserved.

Index
Ppatches 2See Also fixes, required for upgrade
Pay/Bill Managementconfiguring 46Salutation Table values, configuring 47
PeopleToolsapplying patches 2installing 1
performinggeneral options setup 33
populating, UPG_CONV_TBL 34Portalconfiguring 46
printingtranslate values for NAME PREFIX 30translate values for SCHOOL TYPE 31
Process Schedulerconfiguring 41
production database, copying 12Project Costing Business Unitsconfiguring 16
properties table 7PTALTANLYZER 37
Rrelease, newinstalling 1
Resource and Order Priority valuesmapping 20
reviewingAlter Audit, final 44
runningAlter Audit, final 43audits 42Cache Administration process 48create upgrade tables script 39data conversion for Front Office 41DDDAUDIT script, final 43EOUF_UPGRADE_FRAMEWORK 38SETINDEX script 45SETTABLE script 45Staffing Front Office create indexesscript 37SYSAUDIT script, final 43
SSalutation Table values
configuring 47configuring for Staffing Front Office 48
School Code to School Code pagemapping School Codes 28
School Codes, mapping 28School Type values, configuring 47SCHOOL_TYPE, translate values 31scriptrunning create upgrade tables 39
scriptsbuilding create upgrade tables 38
security, reconfiguring 49serversapplication servers 41
SETINDEX script 45SETTABLE script 45setting upStaffing Front Office 15
Skill Code to Competency pagemapping Skill Codes to Competencyvalues 19
Skill Codes to Competency valuesmapping 19
Skill Type to Skill Type pagemapping Skill Types to CompetencyTypes 17
Skill Types to Competency Typesmapping 17
software installationverifying 10
stable tables, exporting Staffing FrontOffice 33Staffing Front Officeconfiguring 46configuring Salutation Table values 48Salutation Table values, configuring 47setting up 15Staffing queries 15
Staffing Front Office dataexporting 31
Staffing queries and reportsUPG_FOQ03, Accomplishments withcategory Test 25UPG_FOQ04, Accomplishments withcategory Degree 26UPG_FOQ05, School Code withCountry 29UPG_FOQ06, Major Codes 27
SYSAUDIT scriptrunning final 43
Copyright © 2010, Oracle and/or its affiliates. All rights reserved. 73
Index
TTest to Accomplishment pagemapping Tests to Accomplishments 24
testingbacking up before 49upgraded System database 49
Tests to Accomplishmentsmapping 24
translate valueslooking up 30–31NAME PREFIX 30printing 30–31SCHOOL TYPE 31
translate values for NAME PREFIXprinting 30
translate values for SCHOOL TYPEprinting 31
Uupdatesapplying before data conversion 40
updatingobject version numbers 42
UPGDATACONV process, using 59UPGOPT projectapplying Staffing Front Office 14
UPGOPTFO projectbuilding 14
upgradeconfiguring environment 45database preparation 13databases, defined 10getting started 13notes and tips 10step properties 7
Upgrade Drivers pageaccessing 68adding new section 69inactivating section 69using 67
upgrade files, retrieving and applying 3upgrade planning files, applying 13upgrade viewscreating 39
upgraded System databasetesting 49
User Status to Priority Code pagemapping Resource and Order Priorityvalues 21
Vverifyinginstallation flags 16software installation 10upgrade user 34
Wweb serverconfiguring 45
74 Copyright © 2010, Oracle and/or its affiliates. All rights reserved.