patches of blue quilt along-block 4 blue spruce · this entry was posted in quilting on april 16,...
TRANSCRIPT
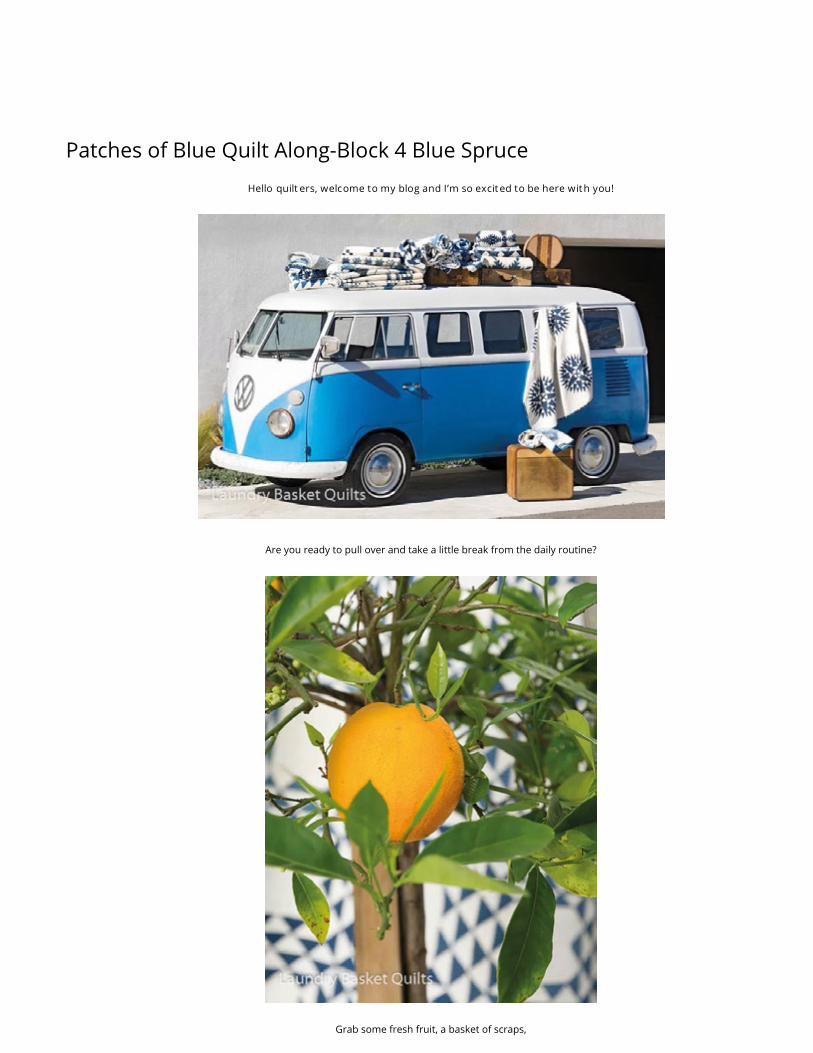
Patches of Blue Quilt Along-Block 4 Blue SpruceHello quilt ers, welcome to my blog and I’m so excit ed to be here wit h you!
Are you ready to pull over and take a little break from the daily routine?
Grab some fresh fruit, a basket of scraps,
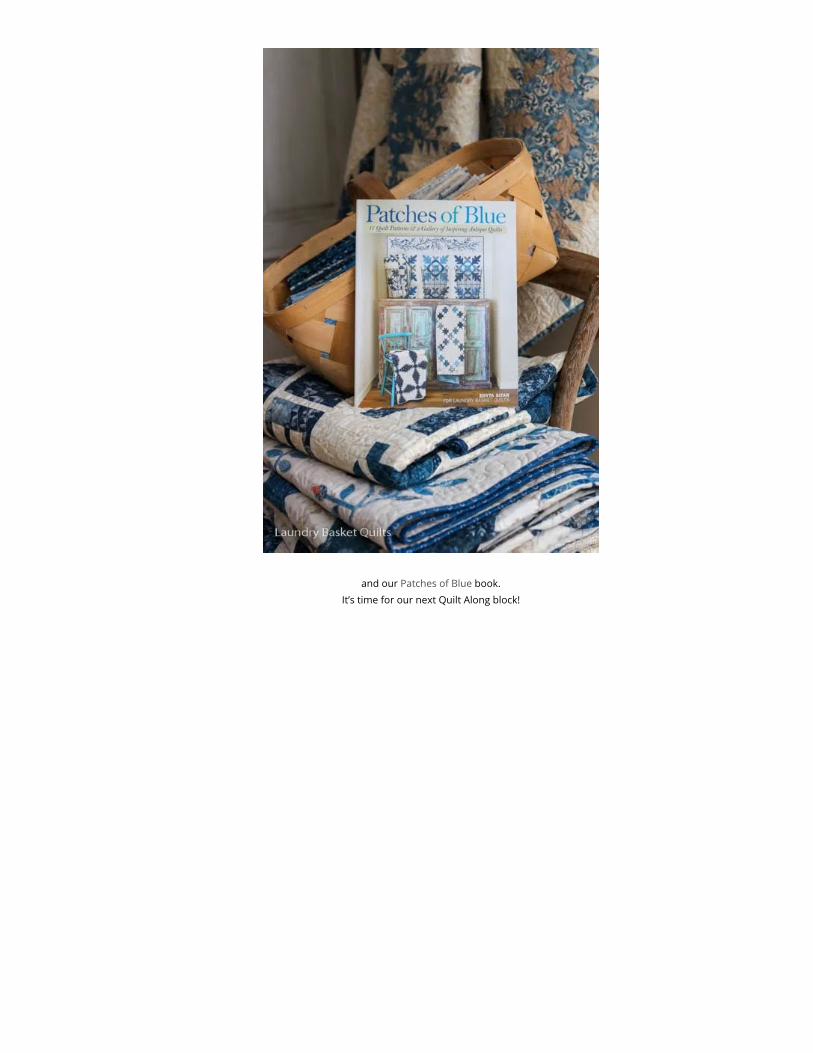
and our Patches of Blue book.
It’s time for our next Quilt Along block!
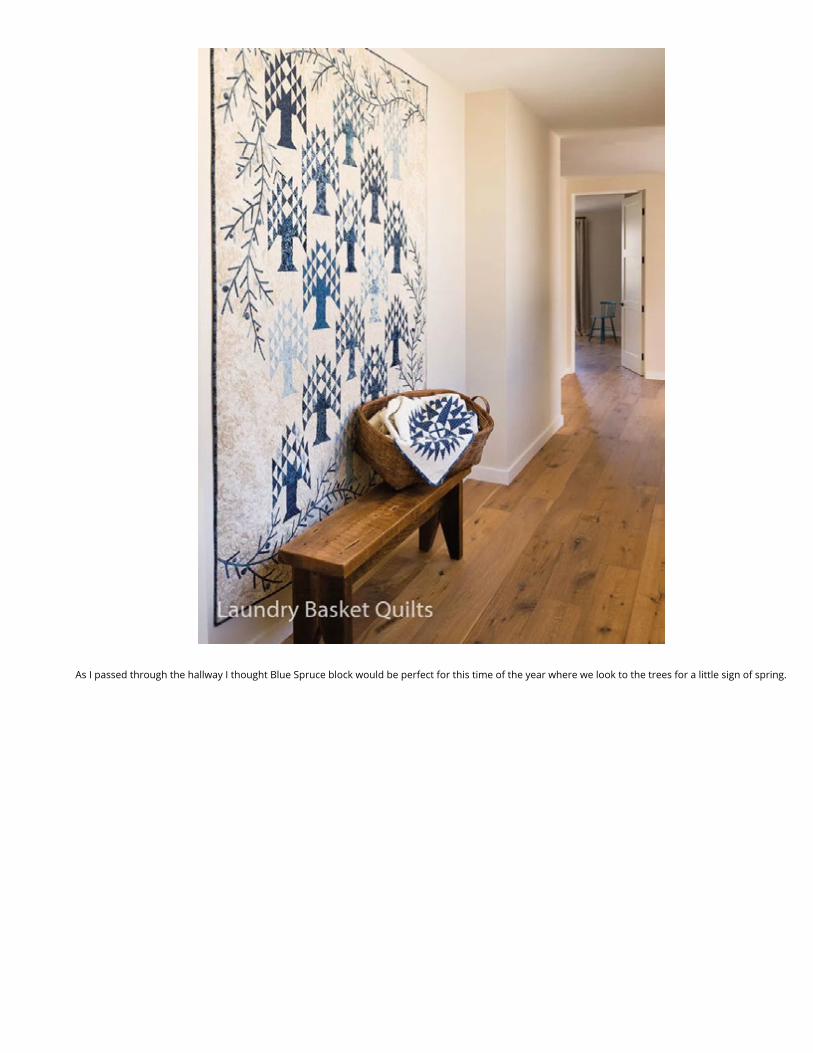
As I passed through the hallway I thought Blue Spruce block would be perfect for this time of the year where we look to the trees for a little sign of spring.
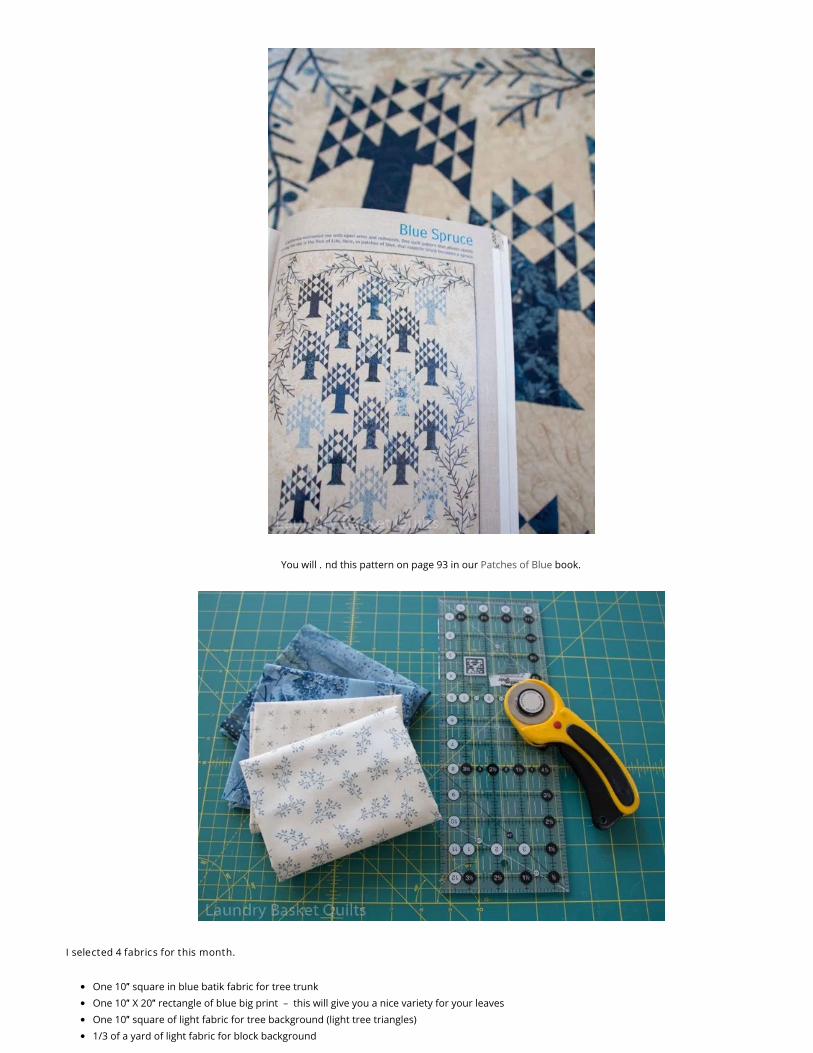
You will . nd this pattern on page 93 in our Patches of Blue book.
I selected 4 fabrics for this month.
One 10″ square in blue batik fabric for tree trunk
One 10″ X 20″ rectangle of blue big print – this will give you a nice variety for your leaves
One 10″ square of light fabric for tree background (light tree triangles)
1/3 of a yard of light fabric for block background
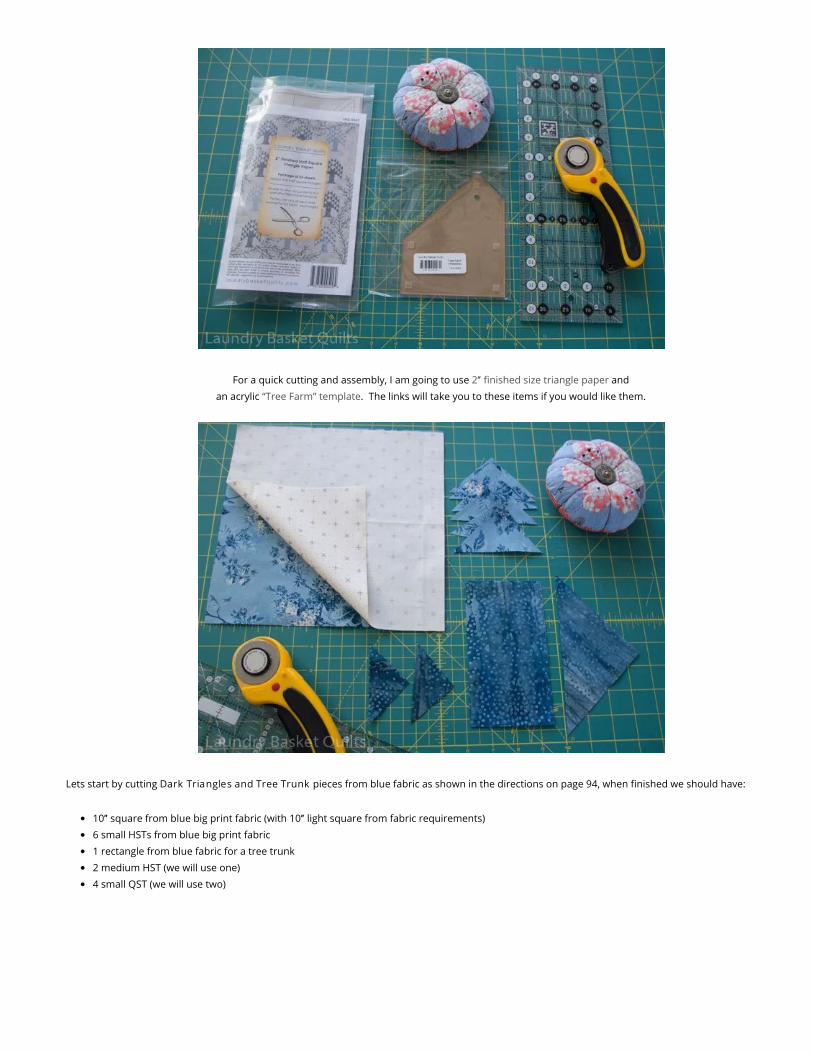
For a quick cutting and assembly, I am going to use 2″ �nished size triangle paper and
an acrylic “Tree Farm” template. The links will take you to these items if you would like them.
Lets start by cutting Dark Triangles and Tree Trunk pieces from blue fabric as shown in the directions on page 94, when �nished we should have:
10″ square from blue big print fabric (with 10″ light square from fabric requirements)
6 small HSTs from blue big print fabric
1 rectangle from blue fabric for a tree trunk
2 medium HST (we will use one)
4 small QST (we will use two)
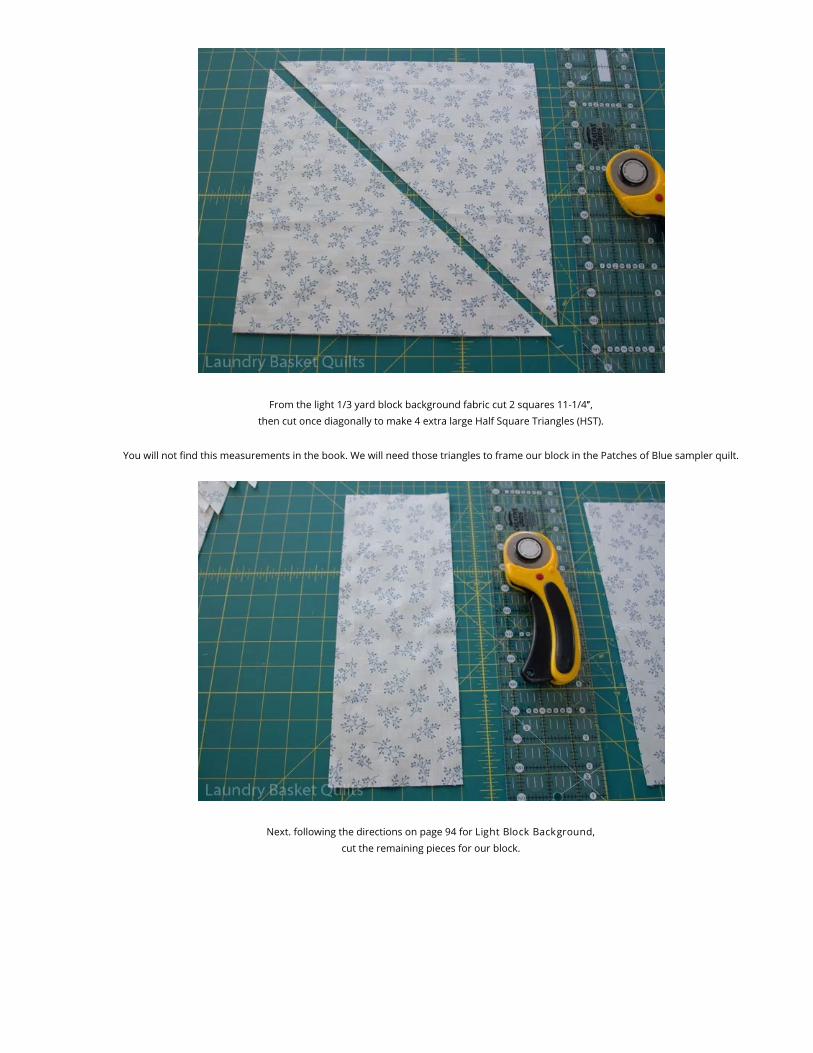
From the light 1/3 yard block background fabric cut 2 squares 11-1/4″, then cut once diagonally to make 4 extra large Half Square Triangles (HST).
You will not �nd this measurements in the book. We will need those triangles to frame our block in the Patches of Blue sampler quilt.
Next. following the directions on page 94 for Light Block Background,
cut the remaining pieces for our block.
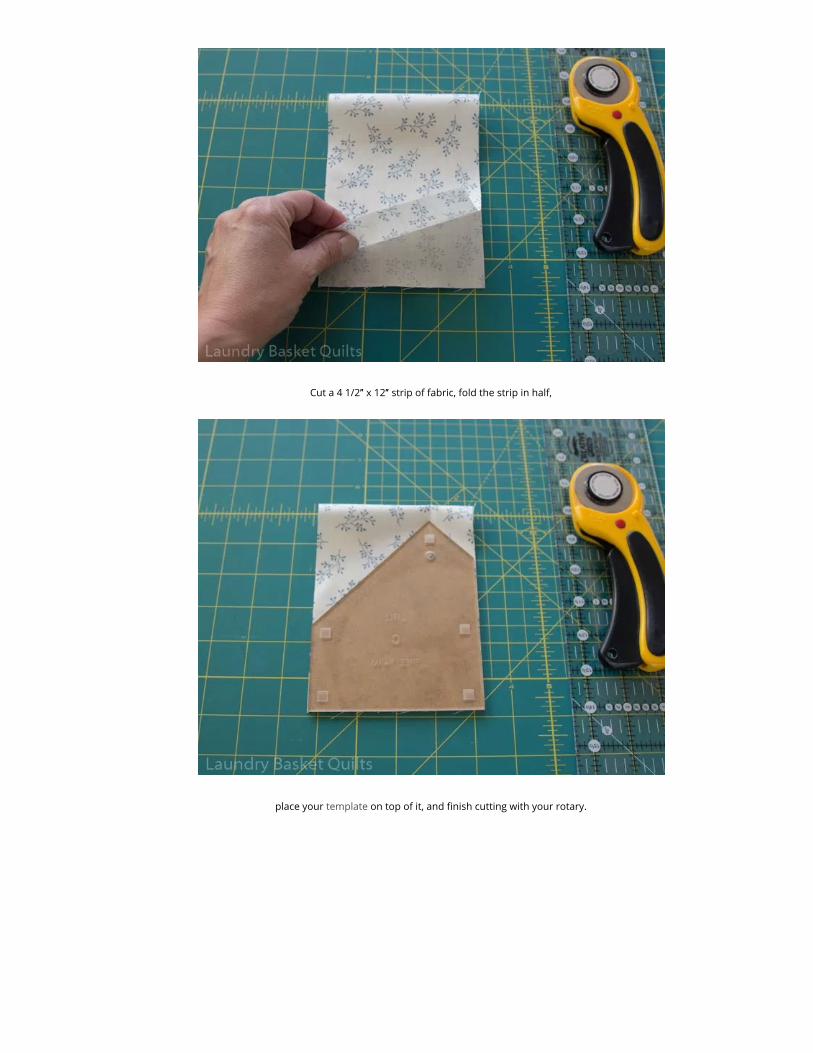
Cut a 4 1/2″ x 12″ strip of fabric, fold the strip in half,
place your template on top of it, and �nish cutting with your rotary.
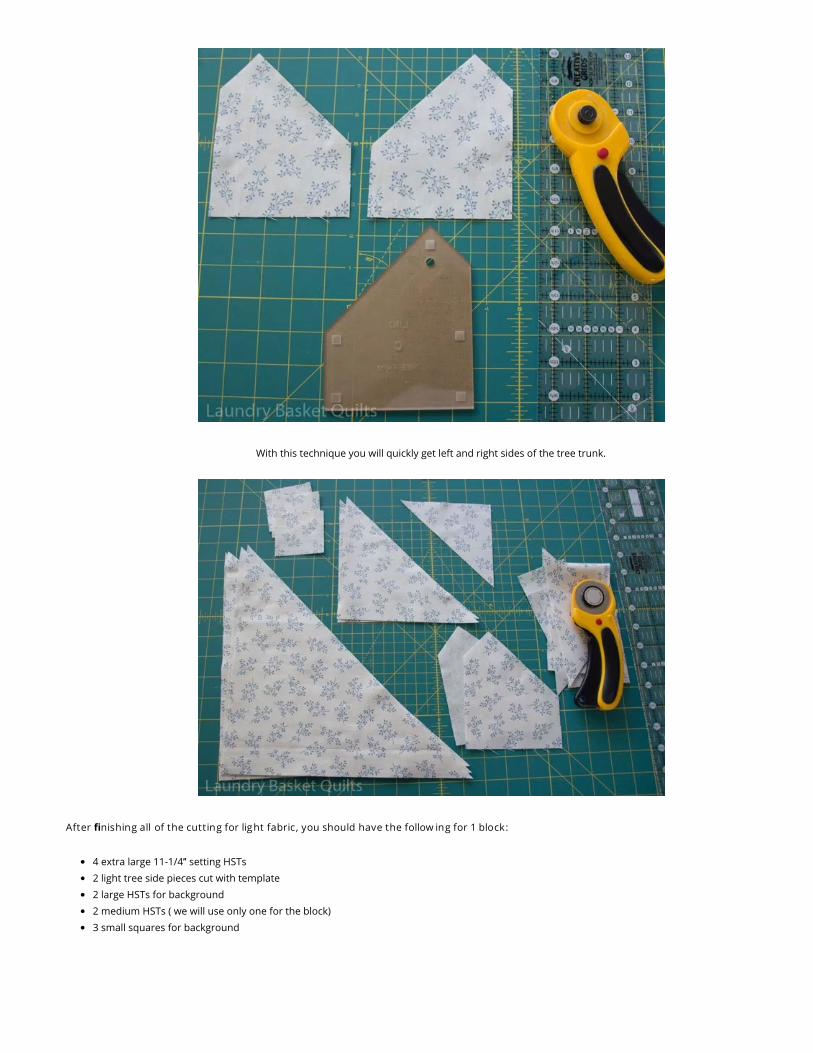
With this technique you will quickly get left and right sides of the tree trunk.
After �nishing all of the cutting for light fabric, you should have the follow ing for 1 block:
4 extra large 11-1/4″ setting HSTs
2 light tree side pieces cut with template
2 large HSTs for background
2 medium HSTs ( we will use only one for the block)
3 small squares for background
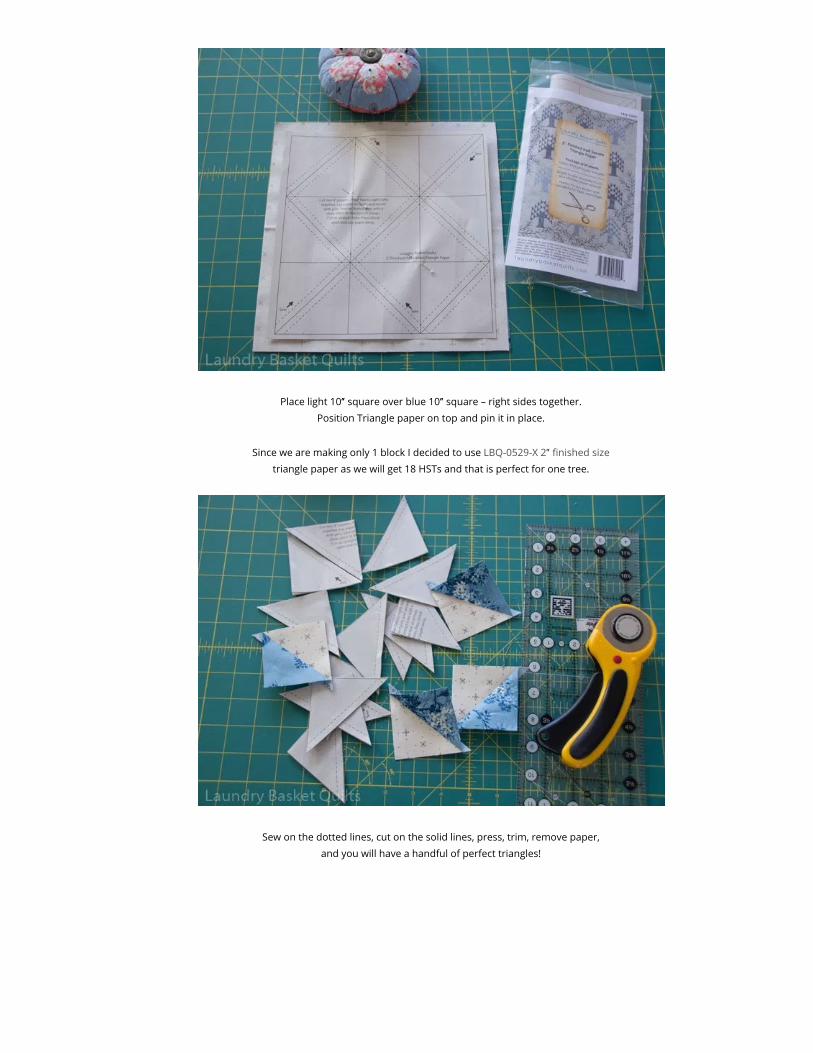
Place light 10″ square over blue 10″ square – right sides together.
Position Triangle paper on top and pin it in place.
Since we are making only 1 block I decided to use LBQ-0529-X 2″ �nished size
triangle paper as we will get 18 HSTs and that is perfect for one tree.
Sew on the dotted lines, cut on the solid lines, press, trim, remove paper,
and you will have a handful of perfect triangles!
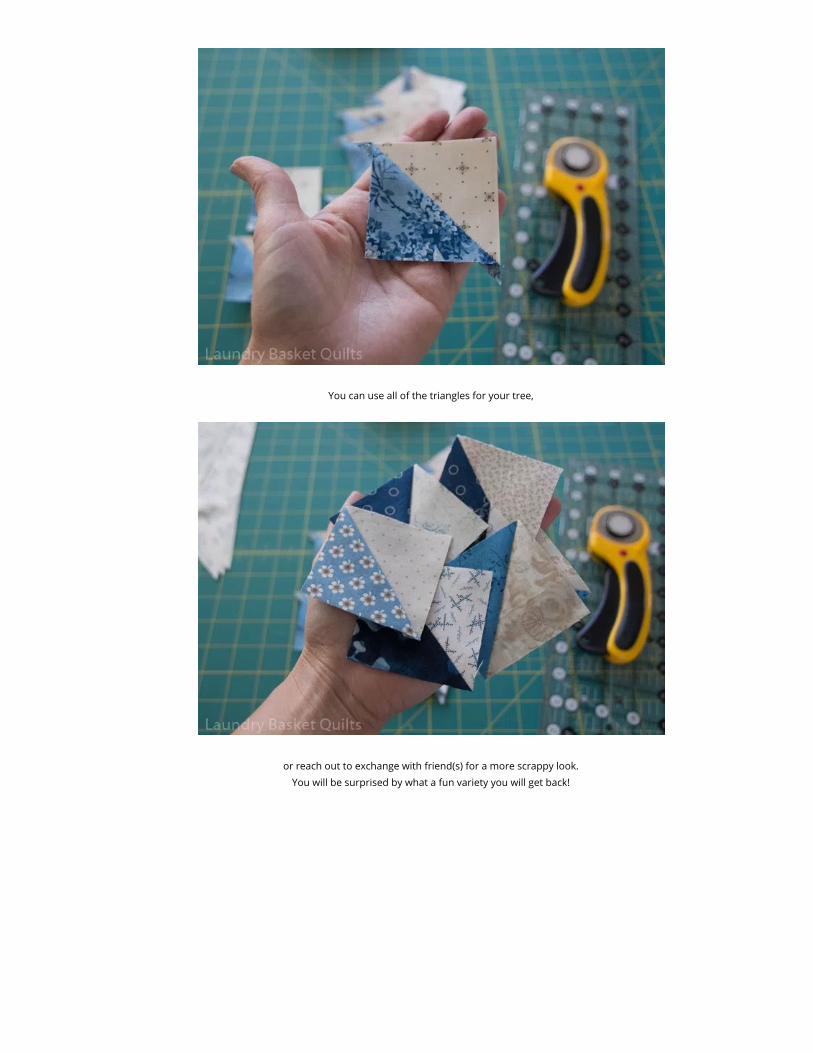
You can use all of the triangles for your tree,
or reach out to exchange with friend(s) for a more scrappy look.
You will be surprised by what a fun variety you will get back!
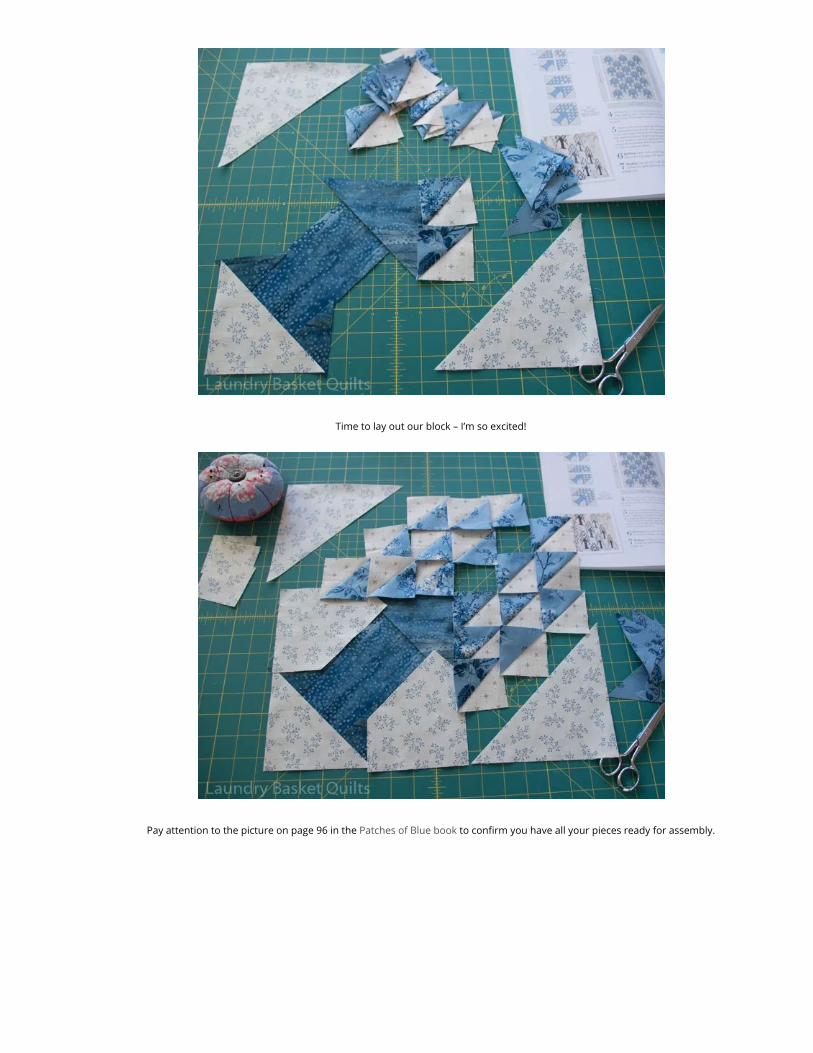
Time to lay out our block – I’m so excited!
Pay attention to the picture on page 96 in the Patches of Blue book to con�rm you have all your pieces ready for assembly.
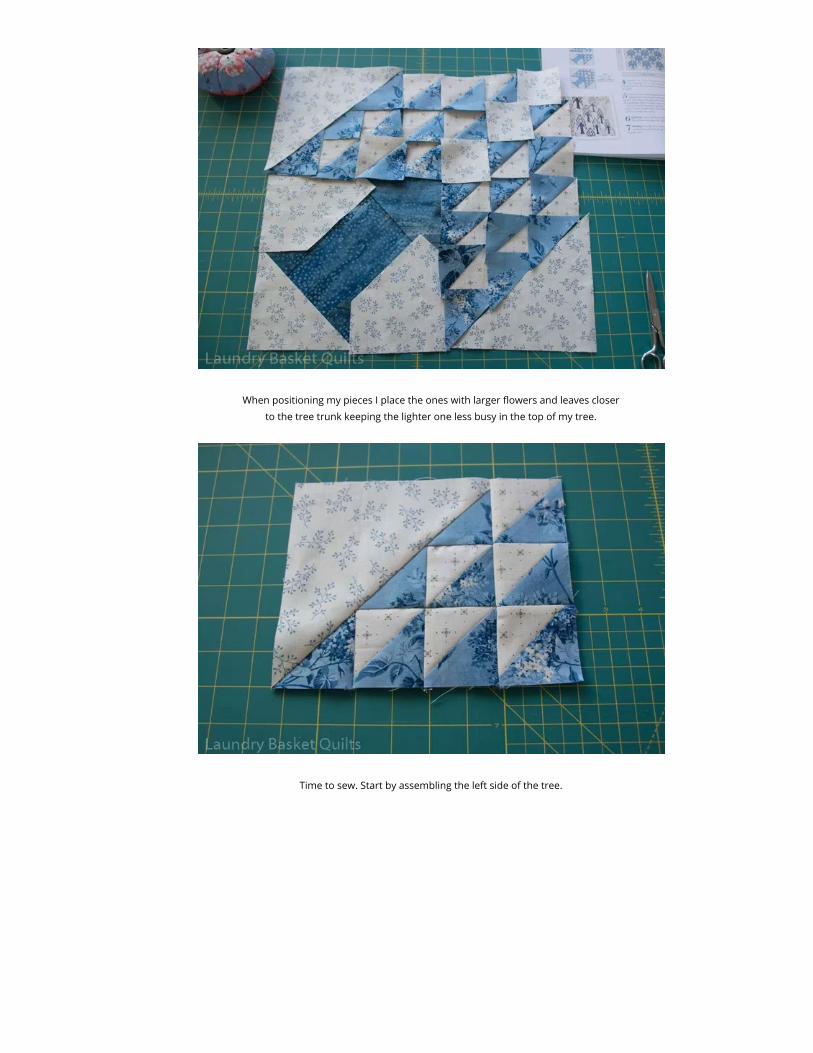
When positioning my pieces I place the ones with larger �owers and leaves closer
to the tree trunk keeping the lighter one less busy in the top of my tree.
Time to sew. Start by assembling the left side of the tree.
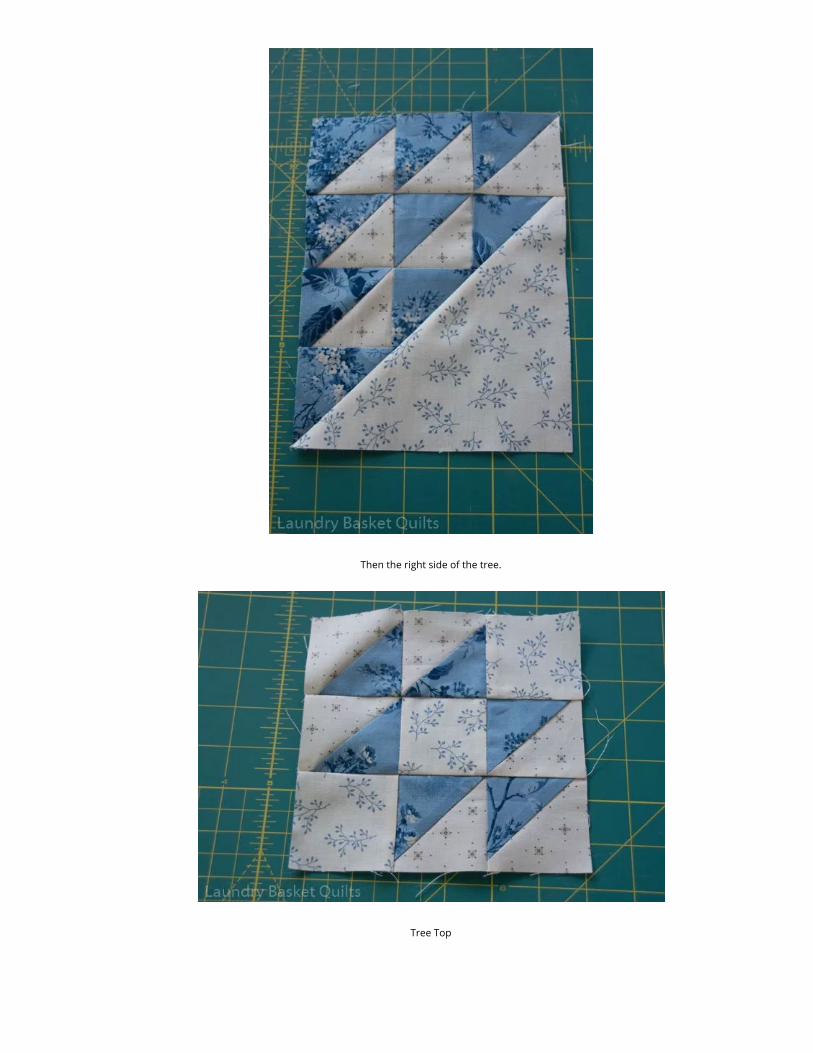
Then the right side of the tree.
Tree Top
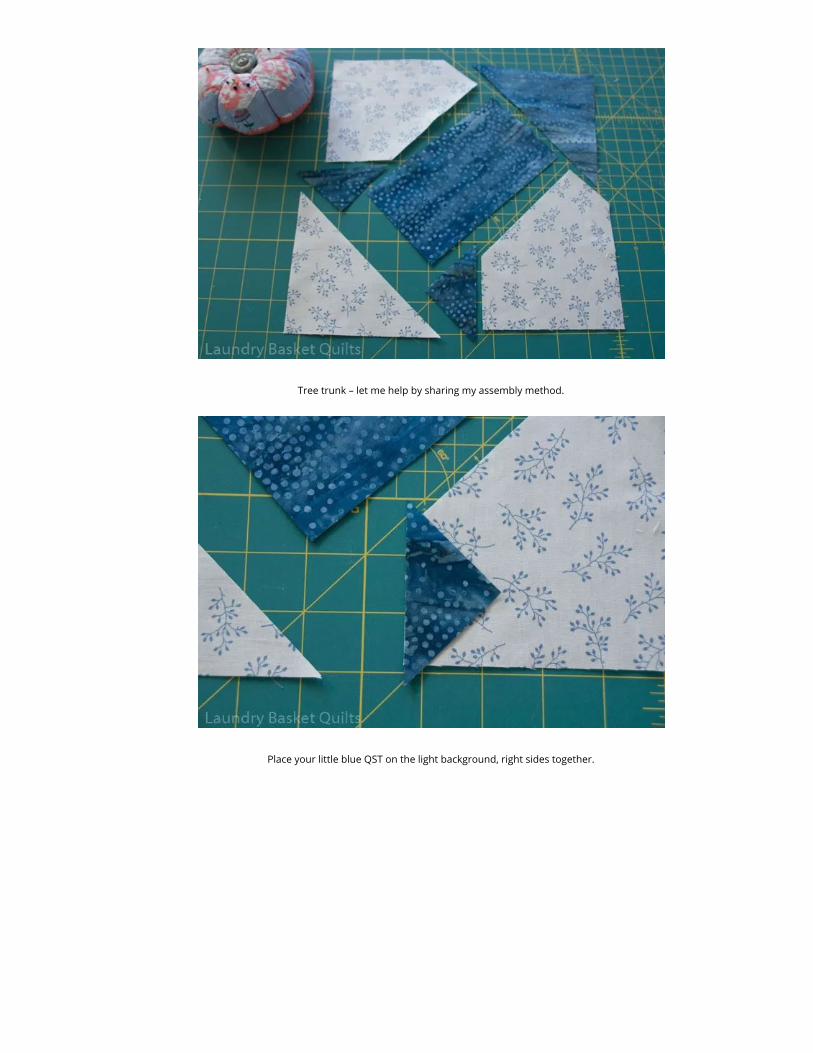
Tree trunk – let me help by sharing my assembly method.
Place your little blue QST on the light background, right sides together.
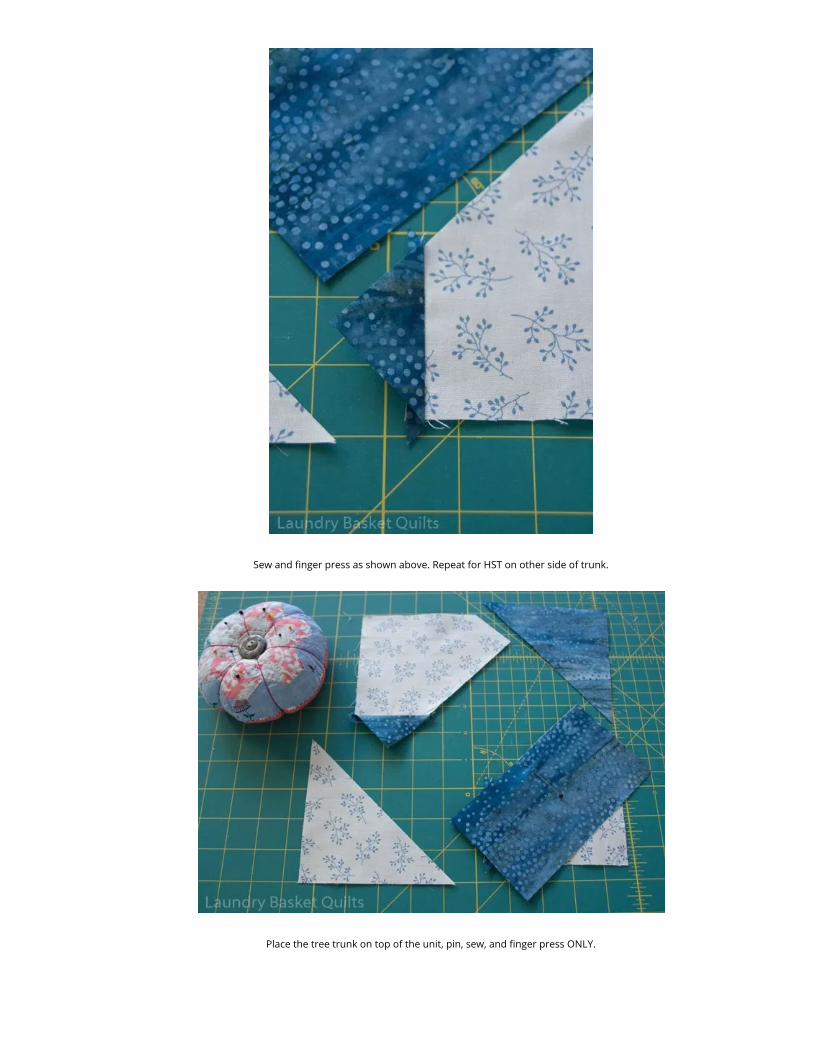
Sew and �nger press as shown above. Repeat for HST on other side of trunk.
Place the tree trunk on top of the unit, pin, sew, and �nger press ONLY.
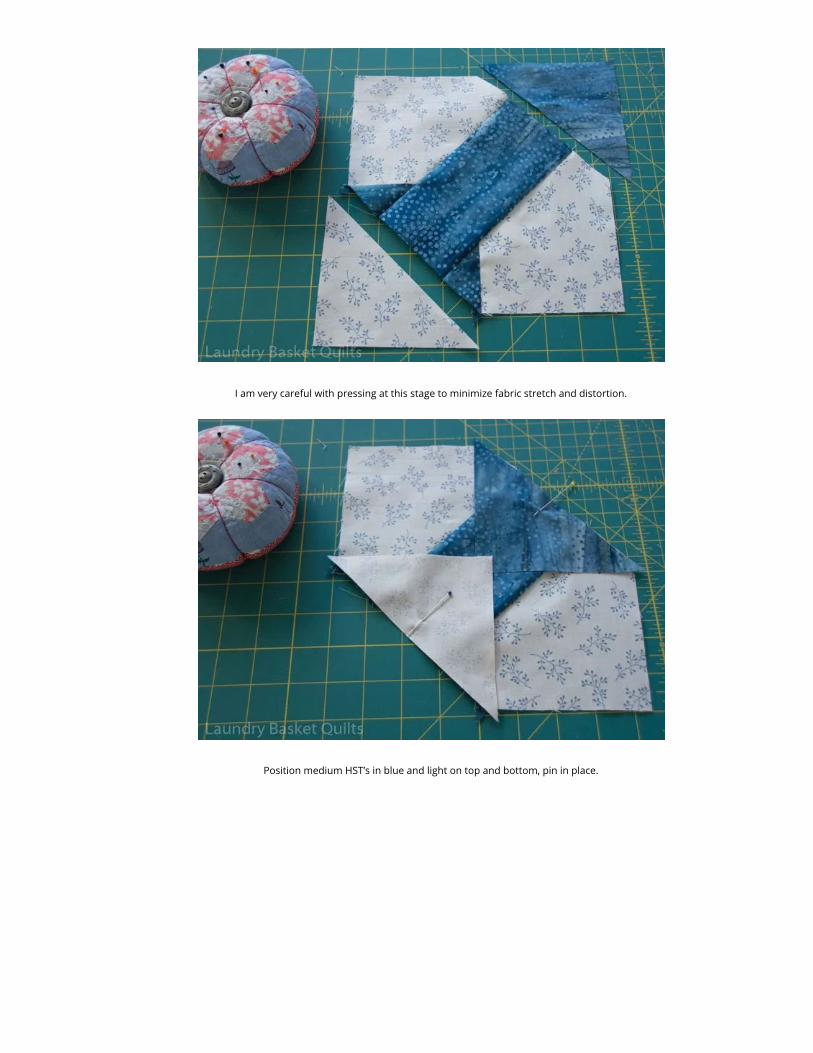
I am very careful with pressing at this stage to minimize fabric stretch and distortion.
Position medium HST’s in blue and light on top and bottom, pin in place.
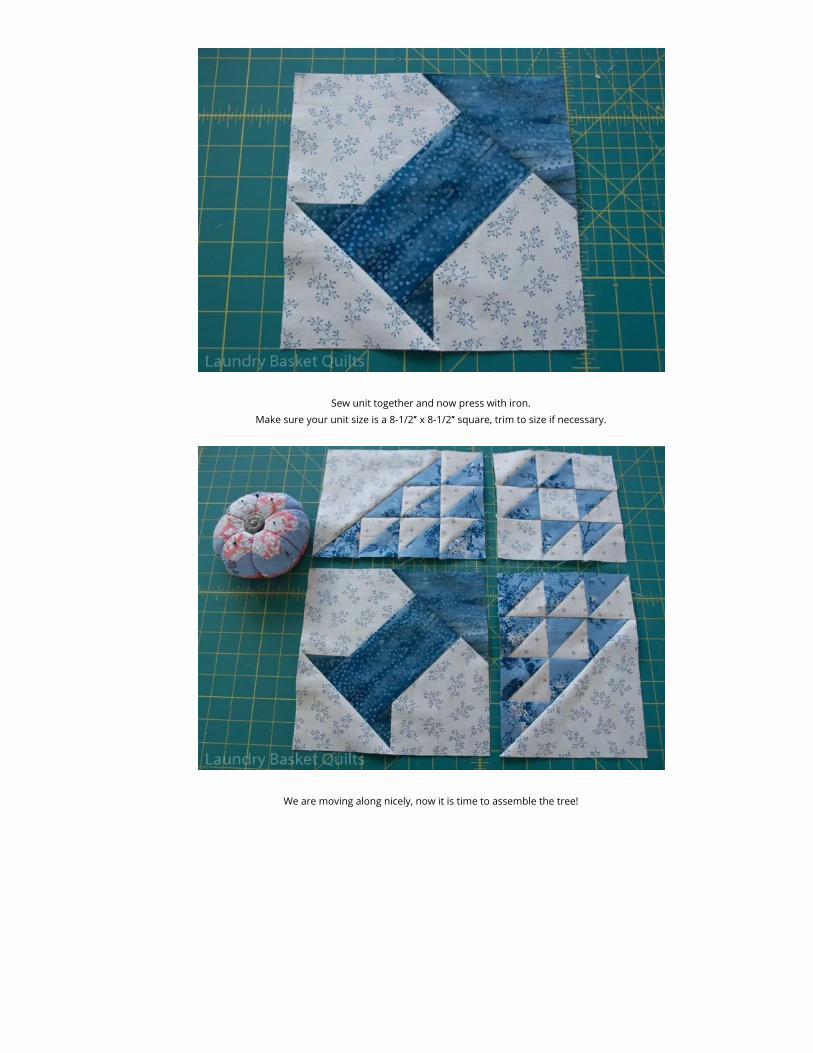
Sew unit together and now press with iron.
Make sure your unit size is a 8-1/2″ x 8-1/2″ square, trim to size if necessary.
We are moving along nicely, now it is time to assemble the tree!
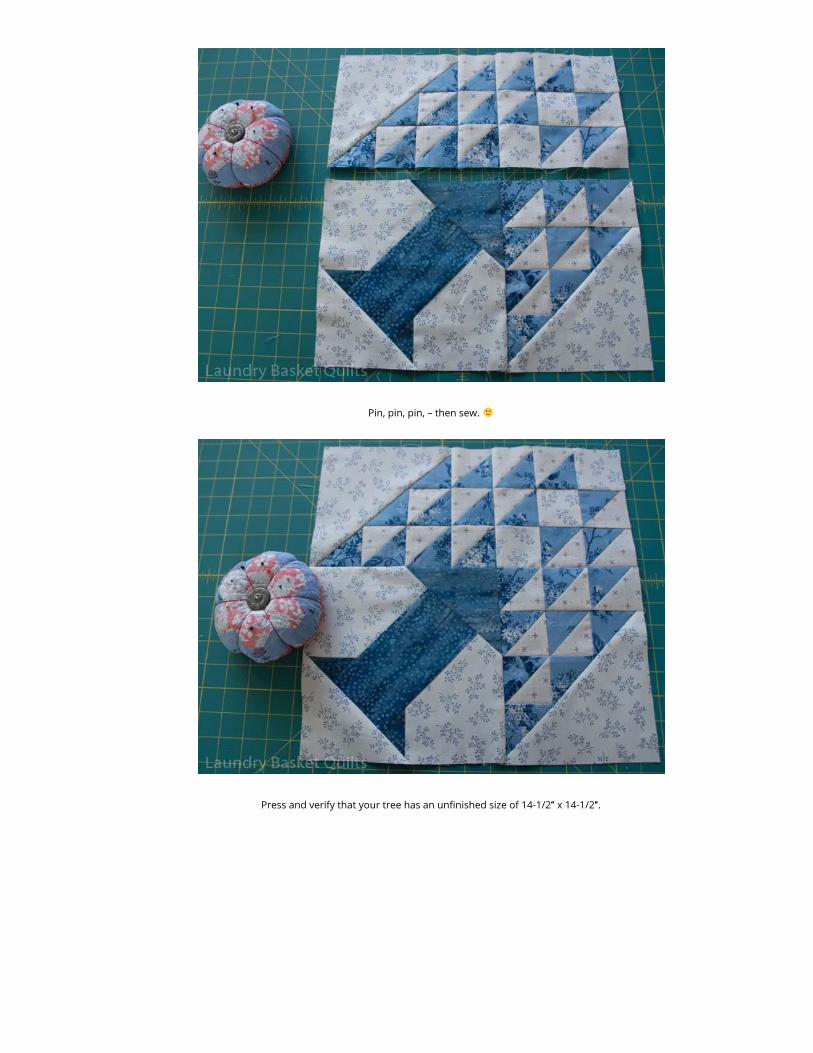
Pin, pin, pin, – then sew.
Press and verify that your tree has an un�nished size of 14-1/2″ x 14-1/2″.
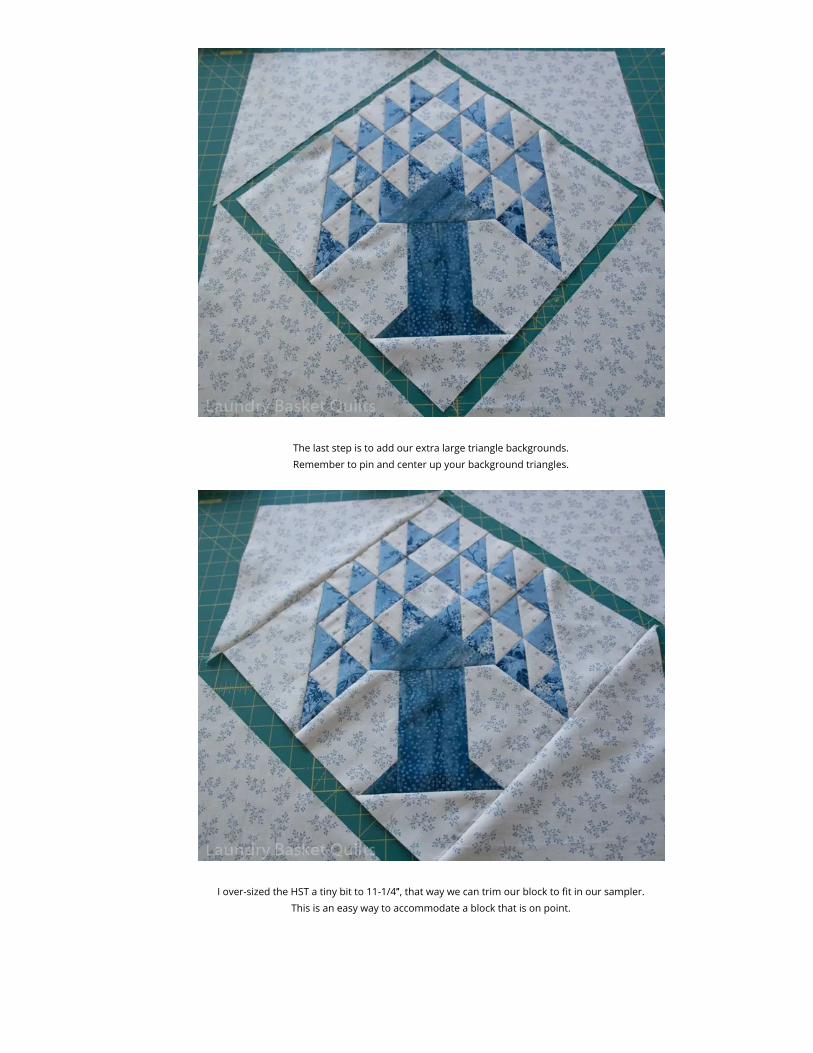
The last step is to add our extra large triangle backgrounds.
Remember to pin and center up your background triangles.
I over-sized the HST a tiny bit to 11-1/4″, that way we can trim our block to �t in our sampler.
This is an easy way to accommodate a block that is on point.
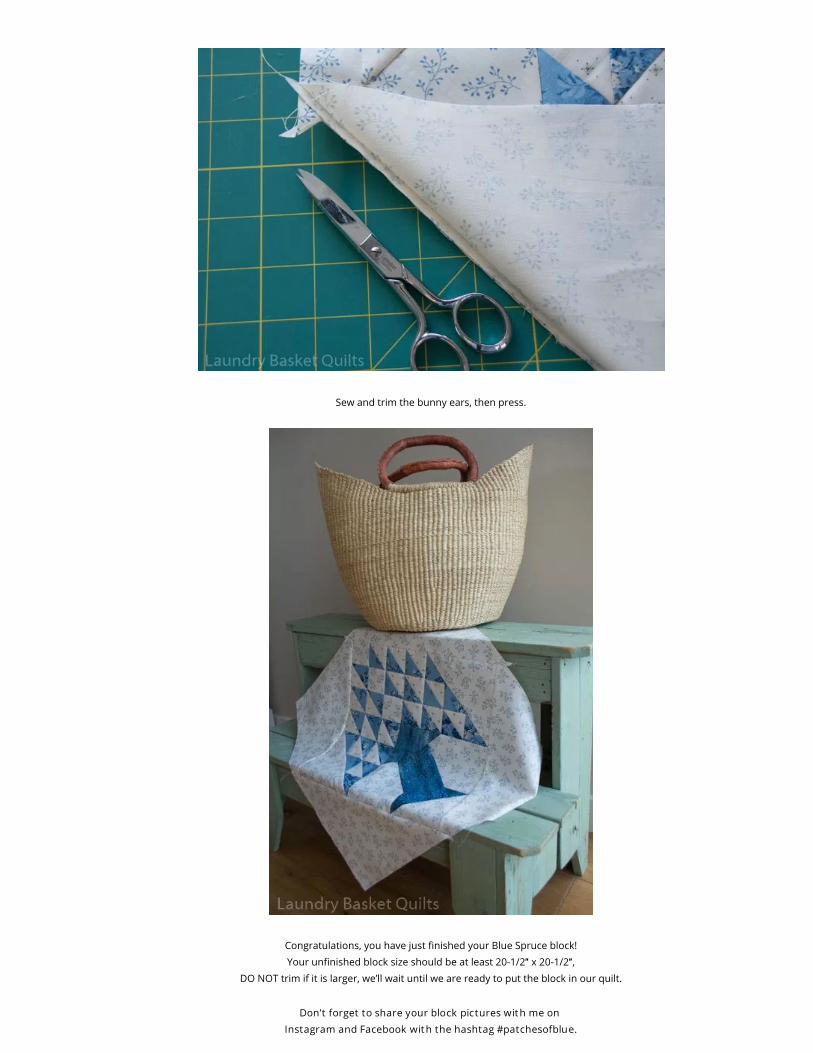
Sew and trim the bunny ears, then press.
Congratulations, you have just �nished your Blue Spruce block!
Your un�nished block size should be at least 20-1/2″ x 20-1/2″, DO NOT trim if it is larger, we’ll wait until we are ready to put the block in our quilt.
Don’t forget to share your block pictures wit h me on
Instagram and Facebook wit h the hashtag #patchesofblue.
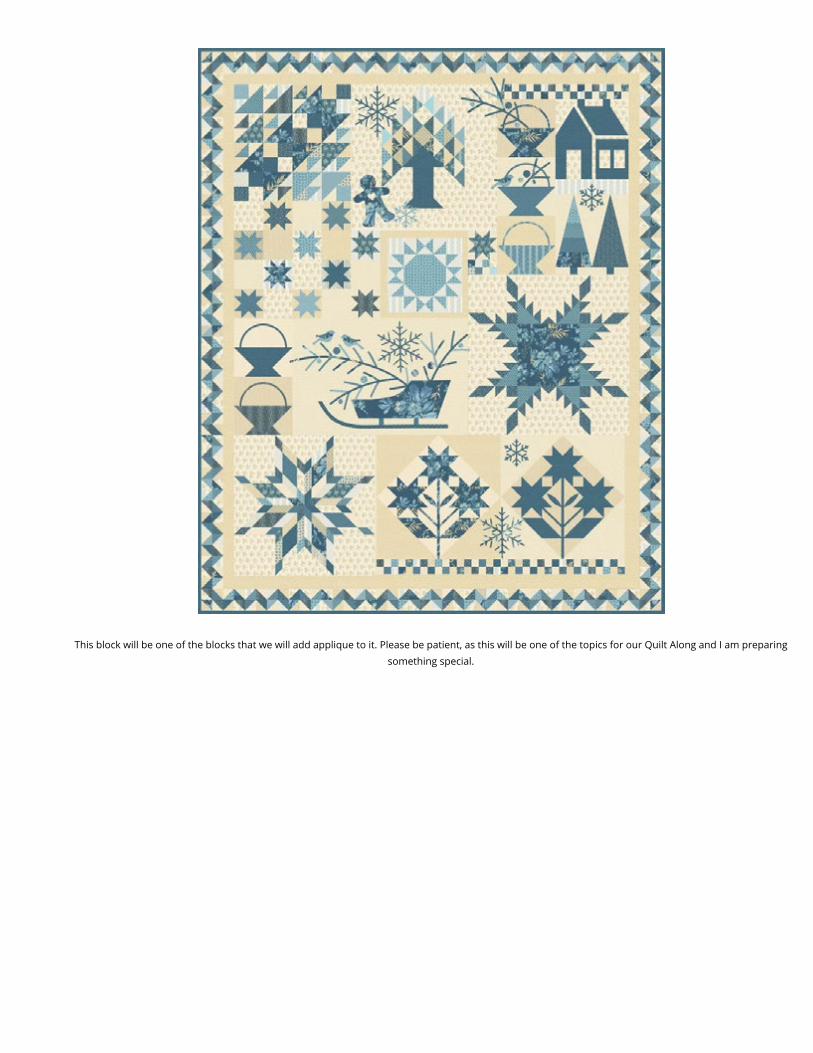
This block will be one of the blocks that we will add applique to it. Please be patient, as this will be one of the topics for our Quilt Along and I am preparing
something special.
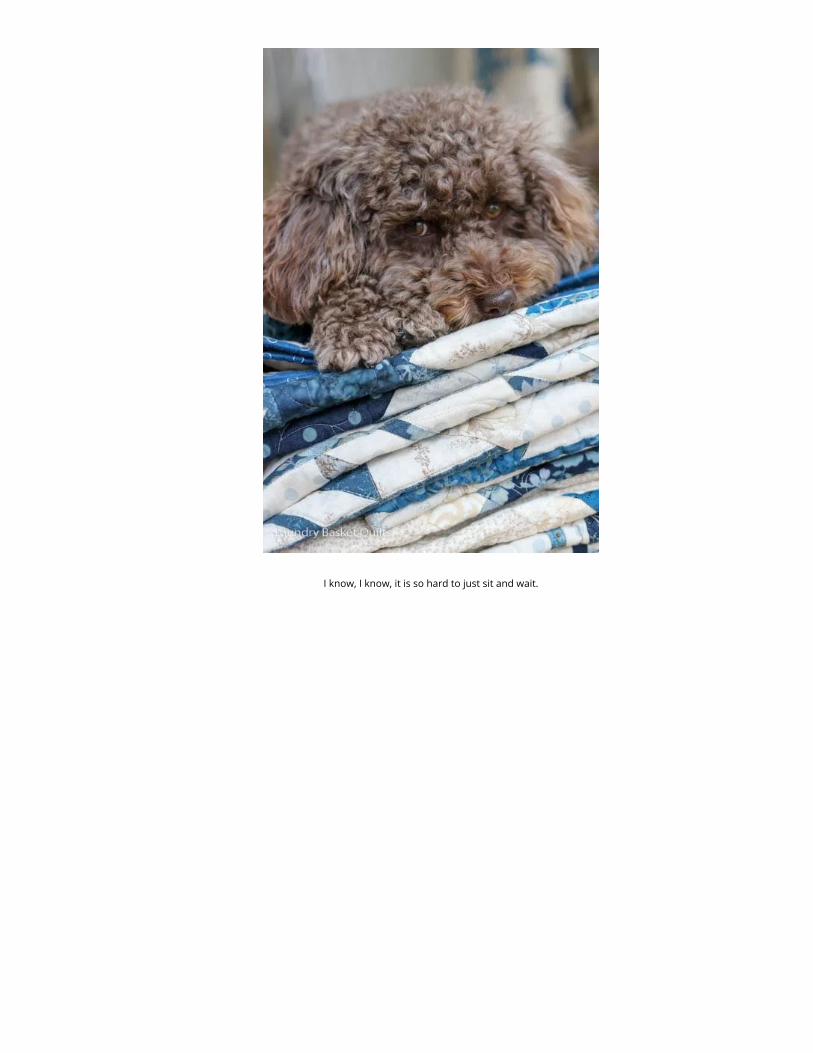
I know, I know, it is so hard to just sit and wait.
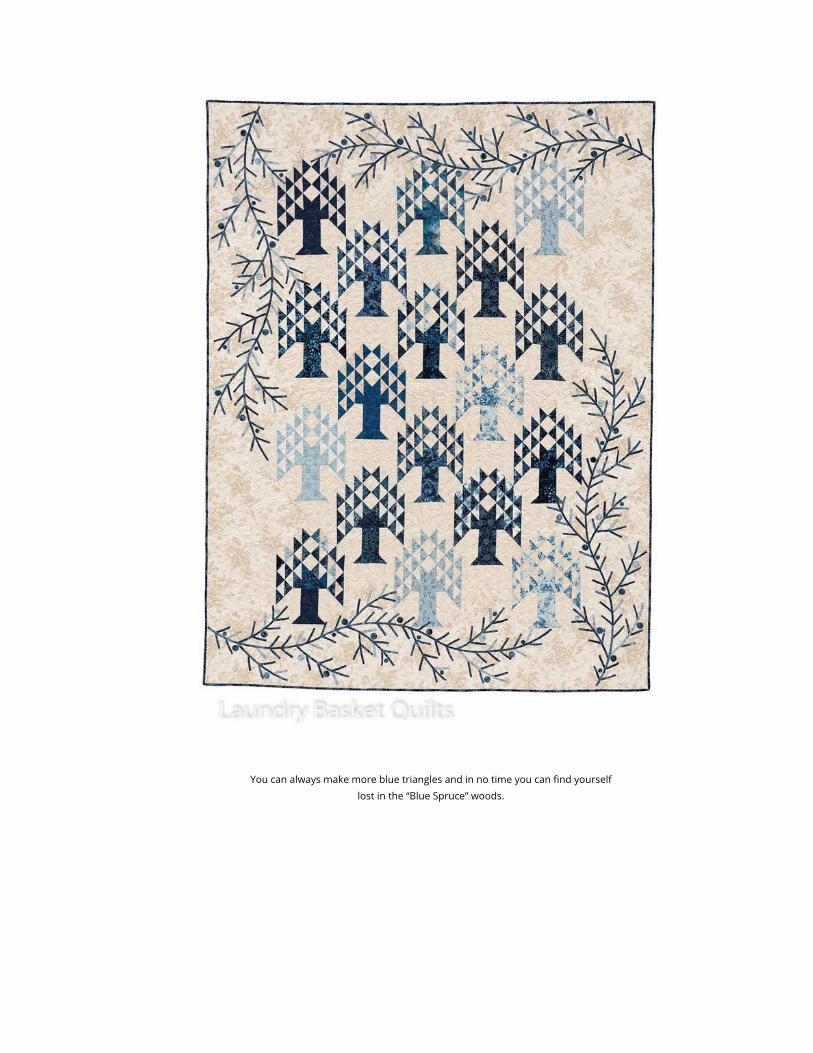
You can always make more blue triangles and in no time you can �nd yourself
lost in the “Blue Spruce” woods.
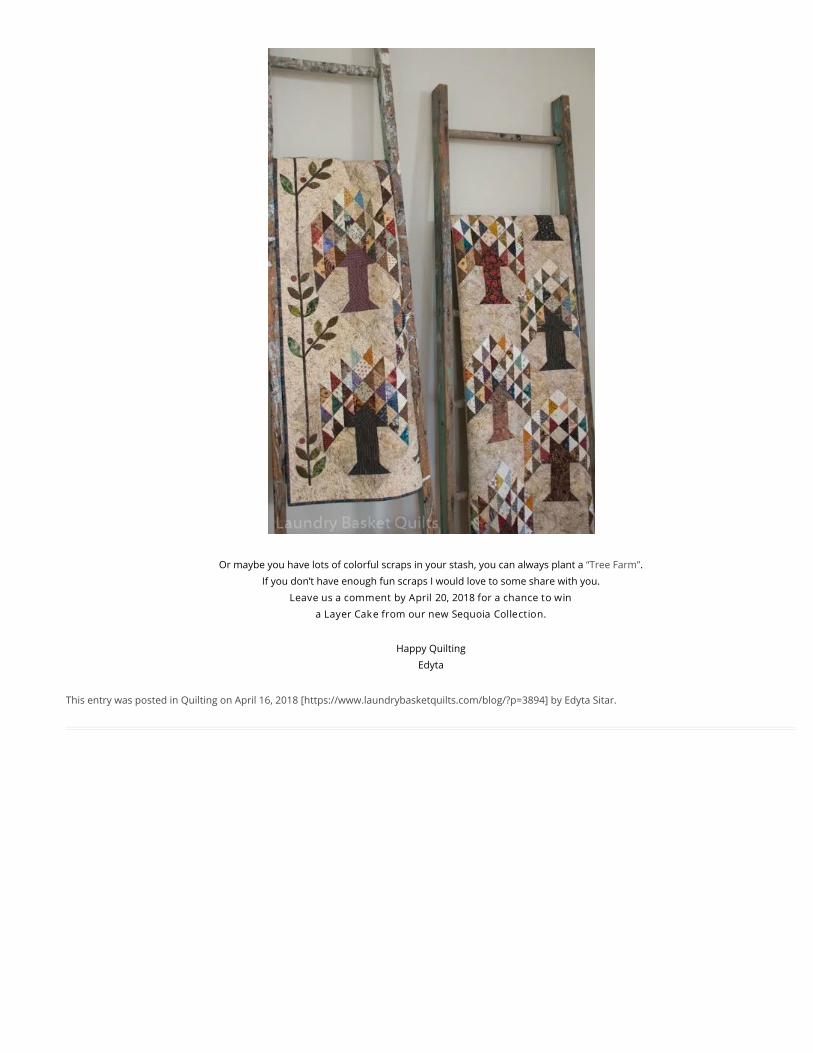
Or maybe you have lots of colorful scraps in your stash, you can always plant a “Tree Farm”.
If you don’t have enough fun scraps I would love to some share with you.
Leave us a comment by April 20, 2018 for a chance to win
a Layer Cake from our new Sequoia Collection.
Happy Quilting
Edyta
This entry was posted in Quilting on April 16, 2018 [https://www.laundrybasketquilts.com/blog/?p=3894] by Edyta Sitar.