part 1 – adding the db1 as a new device - bowers & … · b&w db1 harmony tutorial 1 the...
TRANSCRIPT

B&W DB1 Harmony Tutorial 1
The IR control codes for the DB1 Subwoofer have been added to the public database for Logitech Harmony IR remote control devices. This tutorial gives an example of how to integrate the DB1 into an activity controlled by a Logitech Harmony One remote handset. The tutorial starts with the following devices already present in the account:
1. A television 2. A surround processor 3. A 5-channel power amplifier 4. A DVD player
Part 1 – Adding the DB1 as a new device 1.1
Select the ‘Devices’ tab and press ‘Add Device’. 1.2
As there is no powered speaker category, the DB1 is classed as an amplifier, so choose Amplifier from both the first and second drop-down menus.

B&W DB1 Harmony Tutorial 2
1.3
Next, select ‘B&W’ from the Manufacturer drop-down list. 1.4
Type DB1 into the Model box and press ‘Next’. 1.5
This page confirms the selection, so press ‘Next’ again.

B&W DB1 Harmony Tutorial 3
1.6
The DB1 has been added as a new device, but has automatically been given a default generic name. As there is already an amplifier set up, it is called Amplifier 2. To change the name, first press ‘Settings’ for the device. 1.7
Select ‘Rename this device’ and press ‘Next’. 1.8
Type the new name into the box (for example, ‘DB1 Subwoofer’) and press ‘Save’.
B&W DB1 Harmony Tutorial 4
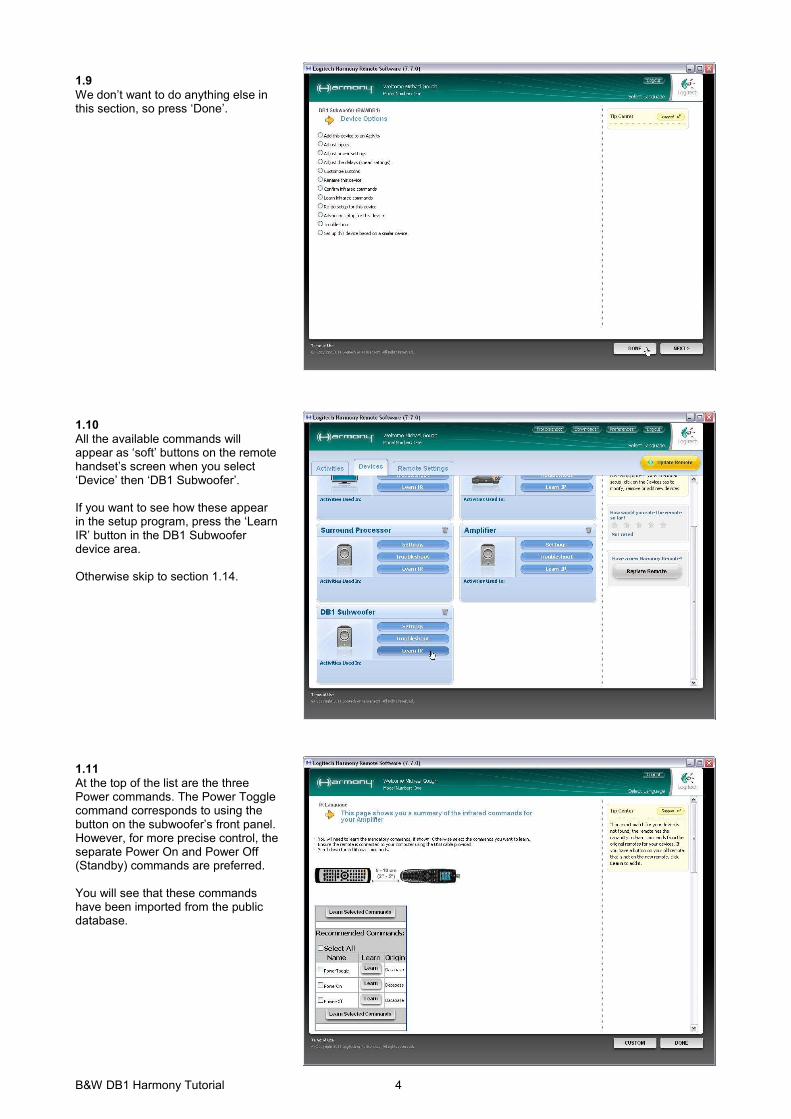
1.9
We don’t want to do anything else in this section, so press ‘Done’. 1.10
All the available commands will appear as ‘soft’ buttons on the remote handset’s screen when you select ‘Device’ then ‘DB1 Subwoofer’. If you want to see how these appear in the setup program, press the ‘Learn IR’ button in the DB1 Subwoofer device area. Otherwise skip to section 1.14. 1.11
At the top of the list are the three Power commands. The Power Toggle command corresponds to using the button on the subwoofer’s front panel. However, for more precise control, the separate Power On and Power Off (Standby) commands are preferred. You will see that these commands have been imported from the public database.

B&W DB1 Harmony Tutorial 5
1.12
Scroll halfway down the page. You will see that no general Volume Up and Volume Down commands have been imported. The only volume commands on the DB1 that should be used on a day-to-day basis (and that are available for IR control) are the so-called Volume Trim commands, used to fine-tune the subwoofer’s output relative to the main speakers for individual programme items. 1.13
Now scroll to the bottom of the page, where you will find the remaining available IR commands imported from the database. There are commands to select any one of the 5 presets, at least one of which must previously have been set up in the subwoofer for a desired application or activity. The SubVolumeUp and SubVolumeDown commands correspond to the DB1 Volume Trim commands, which have a range of +/-6dB. In Device mode, these volume commands will not scroll when you press and hold. However, they will scroll when imported into an Activity. Press ‘Done’ to return to the main Devices page. 1.14
Before adding the DB1 to an activity, connect the remote to the computer and update it. When done, disconnect the remote, press ‘Devices’ and select the DB1. You should have the following 10 buttons available on-screen:
1. Power Toggle 2. Power On 3. Power Off 4. Preset1 5. Preset2 6. Preset3 7. Preset4 8. Preset5 9. SubVolumeUp 10. SubVolumeDown
On the Harmony One, these will be spread over two pages. Check that they all function correctly and give the expected response on the front panel display of the DB1. When testing the Power functions, give the subwoofer sufficient time to fully power on or off before trying another command. In this mode, the SubVolumeUp and SubVolumeDown commands will not scroll with press & hold.

B&W DB1 Harmony Tutorial 6
Part 2 – Creating a new activity with DB1. 2.1
We are going to add a new activity from scratch, so press the ‘Activities’ tab, followed by the ‘Add Activity’ button. 2.2
At this point we could choose either option. A manual setup allows you to set up all the required devices in a single pass and that might be the preferred choice for the experienced user. However, we will choose the automatic option. On the first pass, this will only add the minimum number of devices the program thinks are necessary and this will not include the DB1 or the power amplifier. We will add these later. Press ‘Next’ when you have made your choice. 2.3
The program will suggest possible activities, based on the available devices. Your own device list may suggest different options, but for this tutorial, we have checked the ‘Watch a DVD’ activity. Press ‘Next’ to continue.

B&W DB1 Harmony Tutorial 7
2.4
The surround processor is at the heart of the system and will be used to control the overall volume level for all activities. Select this option and press ‘Next’. 2.5
We shall assume that the connection between the processor and the television is HDMI and that the first such input is used. Select the appropriate input for your system and press ‘Next’. 2.6
We shall also assume for the purposes of this tutorial that the DVD Player is connected to Input 1 of the processor. Select the appropriate input for your system and press ‘Next’.
B&W DB1 Harmony Tutorial 8
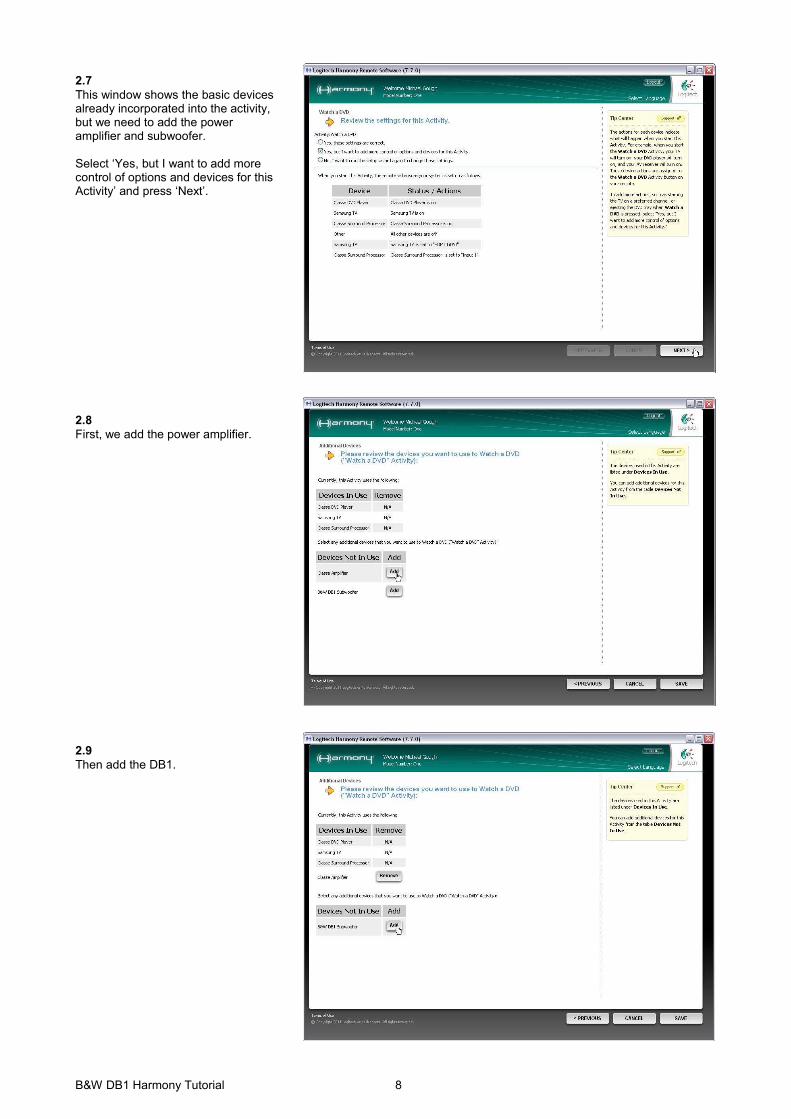
2.7
This window shows the basic devices already incorporated into the activity, but we need to add the power amplifier and subwoofer. Select ‘Yes, but I want to add more control of options and devices for this Activity’ and press ‘Next’.
2.8
First, we add the power amplifier. 2.9
Then add the DB1.

B&W DB1 Harmony Tutorial 9
2.10
Press ‘Save’ to keep the added devices. 2.11
At this point, the program will once again ask you to specify the inputs used. This will include reconfirmation of those already specified, starting with the television. Note that previously specified selections will appear in bold and pre-selected. Just press ‘Next’ here. 2.12
Then comes a repeat of the processor input, so again, just press ‘Next’.

B&W DB1 Harmony Tutorial 10
2.13
The power amplifier is a new device to our activity. Here we have assumed a balanced connection between processor and amplifier and selected BAL 1. After selecting, press ‘Next’. 2.14
The input to the subwoofer is selected automatically through configuration of the preset used for a particular activity, so there is no need to select an input here. In fact you cannot, so select ‘I don’t need to set the input on my B&W DB1 Subwoofer’ and press ‘Next’. 2.15
We need to make sure that the correct DB1 preset for this activity is selected, so select ‘B&W DB1 Subwoofer’ from the drop-down list to add an action for when the Activity starts.

B&W DB1 Harmony Tutorial 11
2.16
Then press ‘Add’. 2.17
Select the DB1 Preset that you have configured for your activity. Here we will assume that the parameters of Preset 1 on the DB1 have been set up for watching a movie on DVD, so check the ‘Send this infrared Command’ radio button and select Preset1 from the drop-down list of commands. 2.18
Check that the correct Preset is going to be selected. Then press ‘Next’.

B&W DB1 Harmony Tutorial 12
2.19
Check that all settings are correct on the review page, then press ‘Save’. 2.20
Everything should now be set up correctly for this activity, so select ‘Yes, these settings are correct’ and press ‘Next’. 2.21
This screen confirms that the new Activity has been set up, so press ‘Done’ to return to the main Activities screen.

B&W DB1 Harmony Tutorial 13
2.22
We are now going to add on-screen ‘soft’ buttons to this activity so we can change the subwoofer volume level relative to the main speakers – the equivalent of changing Volume Trim on the front panel of the DB1. Press ‘Customize Buttons’. 2.23
The first screen shows those activity commands mapped to the ‘hard’ buttons on the remote. To access the on-screen ‘soft’ buttons, press the ‘Additional Buttons’ tab. 2.24
In this example, all six buttons on Page 1 are already filled. Scroll down to find the first available slot. Here, it is position 3 – the left button on row 2. Type the name you want to appear on the button in the left hand label box. We have used ‘SubVol -’. This short form name will fit on the button and differentiate the command from the main system volume. Next select ‘DB1 Subwoofer’ from the central drop-down list.

B&W DB1 Harmony Tutorial 14
2.25
Now select the relevant database command name ‘SubVolumeDown’ from the right hand drop-down list. 2.26
Similarly, type ‘SubVol +’ in the label box of position 4. and select DB1 Subwoofer from the device list. 2.27
This time, select the command ‘SubVolumeUp’.

B&W DB1 Harmony Tutorial 15
2.28
Then press ‘Done’. Remember, in Activity mode these SubVol commands will now scroll when you press and hold the button on the remote. 2.29
You will be returned to the main Activity screen and the ‘Watch a DVD’ activity setup is now complete. You can now go on to set up further activities in the same manner, such as ‘Listen to CDs’. You will most likely want to set up a different Preset in the DB1 for listening to music and select it for that activity, but the general procedure remains the same.

B&W DB1 Harmony Tutorial 16
Part 3 – Adding the DB1 to an existing activity 3.1
We are going to assume that you already have an existing activity ‘Watch a DVD’ as described in Part 2, but without the DB1. We are now going to add the DB1 to this activity. First, add the DB1 as a new device as described in Part 1. Now select the Activity tab. Note that there are only 2 amplifier icons, corresponding to the Surround processor and Power Amplifier Press ‘Settings’ in the activity. 3.2
Select the option ‘Review the settings fro this Activity’ and press ‘Next’. 3.3
This window shows the basic devices already incorporated into the activity in Part 2, but we need to add the subwoofer. Select ‘Yes, but I want to add more control of options and devices for this Activity’ and press ‘Next’.
B&W DB1 Harmony Tutorial 17
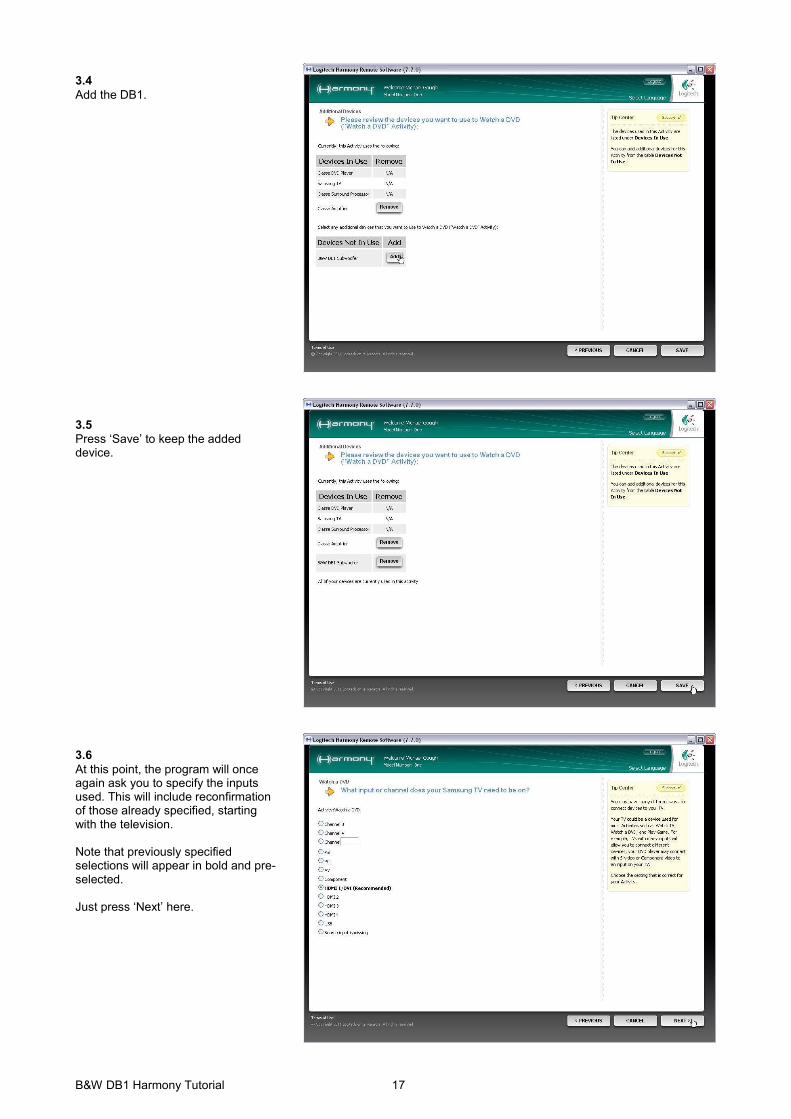
3.4
Add the DB1. 3.5
Press ‘Save’ to keep the added device. 3.6
At this point, the program will once again ask you to specify the inputs used. This will include reconfirmation of those already specified, starting with the television. Note that previously specified selections will appear in bold and pre-selected. Just press ‘Next’ here.

B&W DB1 Harmony Tutorial 18
3.7
Then comes a repeat of the processor input, so again, just press ‘Next’. 3.8
Followed by a repeat of the power amplifier input, so again, just press ‘Next’. 3.9
The input to the subwoofer is selected automatically through configuration of the preset used for a particular activity, so there is no need to select an input here. In fact you cannot, so select ‘I don’t need to set the input on my B&W DB1 Subwoofer’ and press ‘Next’.

B&W DB1 Harmony Tutorial 19
3.10
We need to make sure that the correct DB1 preset for this activity is selected, so select ‘B&W DB1 Subwoofer’ from the drop-down list to add an action for when the Activity starts. 3.11
Then press ‘Add’. 3.12
Select the DB1 Preset that you have configured for your activity. Here we will assume that the parameters of Preset 1 on the DB1 have been set up for watching a movie on DVD, so we select Preset1 from the drop-down list of commands.

B&W DB1 Harmony Tutorial 20
3.13
Check that the correct Preset is going to be selected. Then press ‘Next’. 3.14
Check that all settings are correct on the review page, then press ‘Save’. 3.15
Everything should now be set up correctly for this activity, so select ‘Yes, these settings are correct’ and press ‘Next’.
B&W DB1 Harmony Tutorial 21
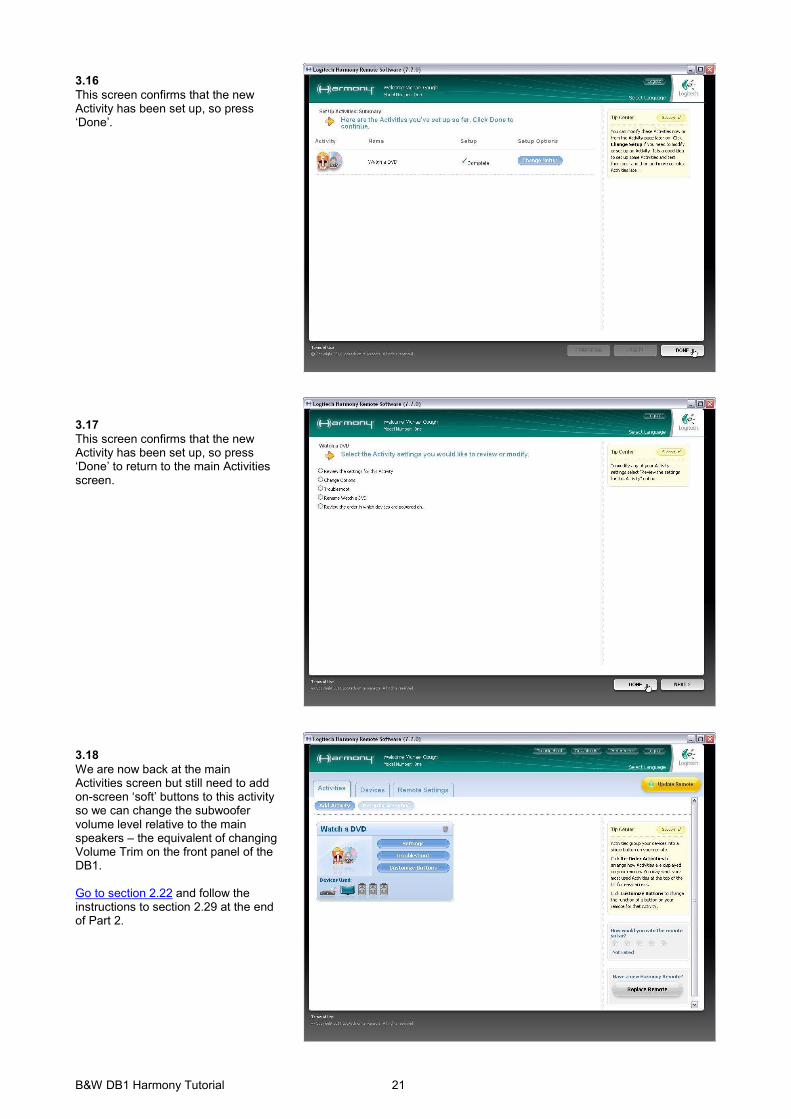
3.16
This screen confirms that the new Activity has been set up, so press ‘Done’. 3.17
This screen confirms that the new Activity has been set up, so press ‘Done’ to return to the main Activities screen. 3.18
We are now back at the main Activities screen but still need to add on-screen ‘soft’ buttons to this activity so we can change the subwoofer volume level relative to the main speakers – the equivalent of changing Volume Trim on the front panel of the DB1. Go to section 2.22 and follow the instructions to section 2.29 at the end of Part 2.

B&W DB1 Harmony Tutorial 22
Part 4 - Troubleshooting
4.1 General good practice when using universal remote controls 4.2 The Sub Volume (Volume Trim) commands move in 2dB instead of 1dB steps 4.3 The DB1 does not switch to the correct preset
4.1 General good practice when using universal remote controls
Remember that activities often involve a multitude of commands to several devices and there is a built-in delay between each of them, so keep the remote pointing at the devices until the remote stops sending out commands. On the Harmony One used in this tutorial, command activity is shown in the top right hand corner of the screen. If the devices are spread out or built into custom furniture, you may get better results by using a supplementary IR receiver and distribution amplifier feeding IR repeaters attached close to the receivers on each device. The DB1 has no IR receiver on its front panel, so IR commands must be input using an IR amplifier that outputs signals suitable for the mini-jack input on the back panel. These are different from signals that drive an IR repeater. Make sure that the equipment you use to transmit IR commands to the DB1 is suitable for its 56kHz carrier frequency. 4.2 The Sub Volume (Volume Trim) commands move in 2dB instead of 1dB steps
4.2.1
This is most likely to be due to having too great a delay time between commands. If it is too high, the device may respond to a command twice instead of just once. Select the ‘Devices’ tab and press ‘Troubleshoot’ for the DB1 Subwoofer. 4.2.2
Select ‘Show me more problems’ and press ‘Next’.
B&W DB1 Harmony Tutorial 23
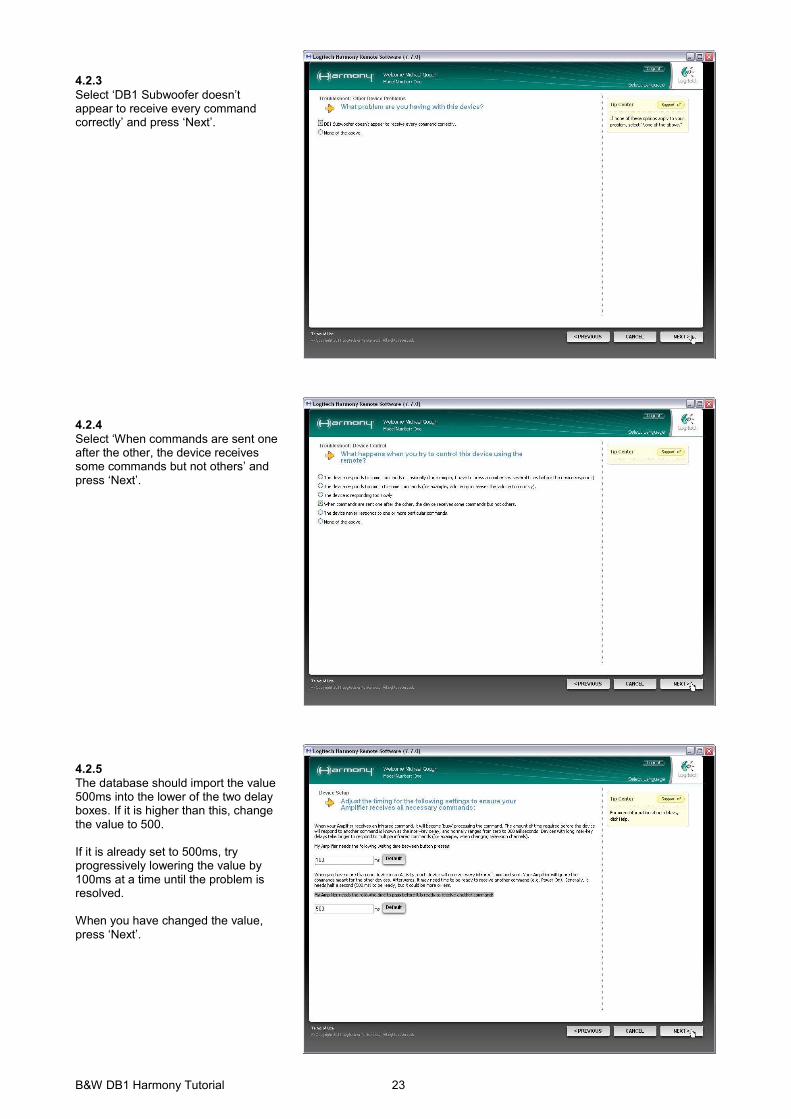
4.2.3
Select ‘DB1 Subwoofer doesn’t appear to receive every command correctly’ and press ‘Next’. 4.2.4
Select ‘When commands are sent one after the other, the device receives some commands but not others’ and press ‘Next’. 4.2.5
The database should import the value 500ms into the lower of the two delay boxes. If it is higher than this, change the value to 500. If it is already set to 500ms, try progressively lowering the value by 100ms at a time until the problem is resolved. When you have changed the value, press ‘Next’.
B&W DB1 Harmony Tutorial 24
4.2.6
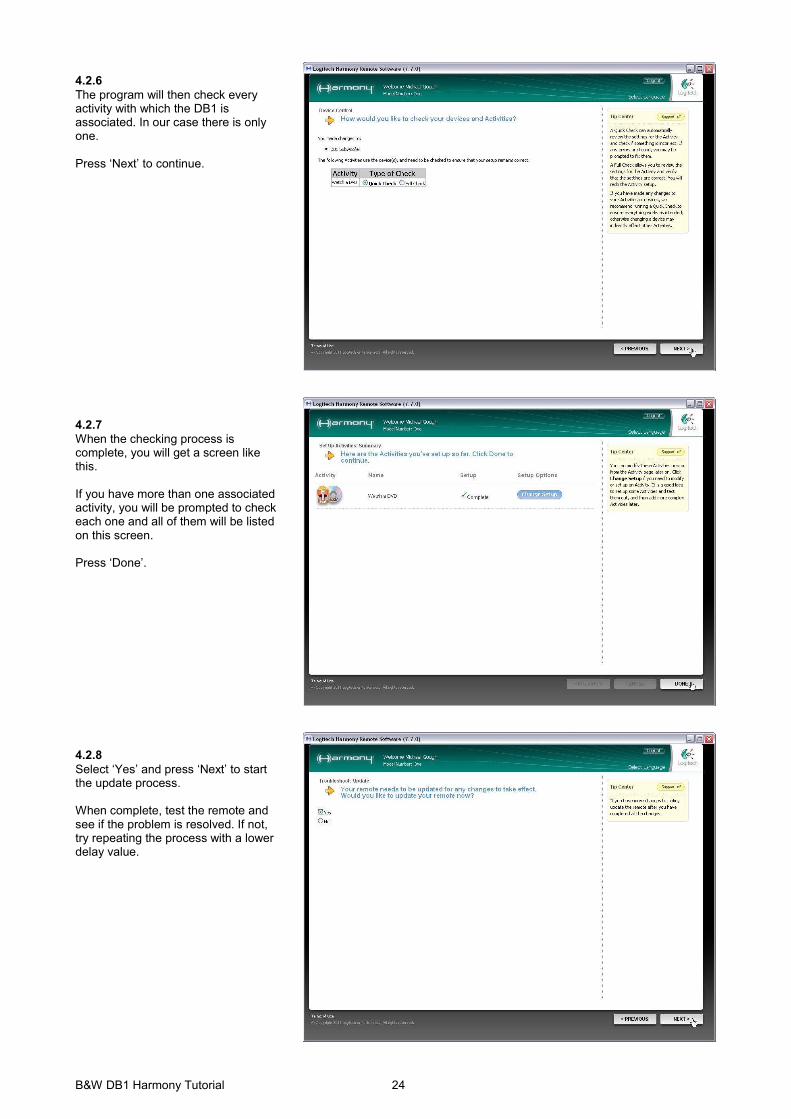
The program will then check every activity with which the DB1 is associated. In our case there is only one. Press ‘Next’ to continue. 4.2.7
When the checking process is complete, you will get a screen like this. If you have more than one associated activity, you will be prompted to check each one and all of them will be listed on this screen. Press ‘Done’. 4.2.8
Select ‘Yes’ and press ‘Next’ to start the update process. When complete, test the remote and see if the problem is resolved. If not, try repeating the process with a lower delay value.
B&W DB1 Harmony Tutorial 25
4.3 The DB1 does not switch to the correct preset
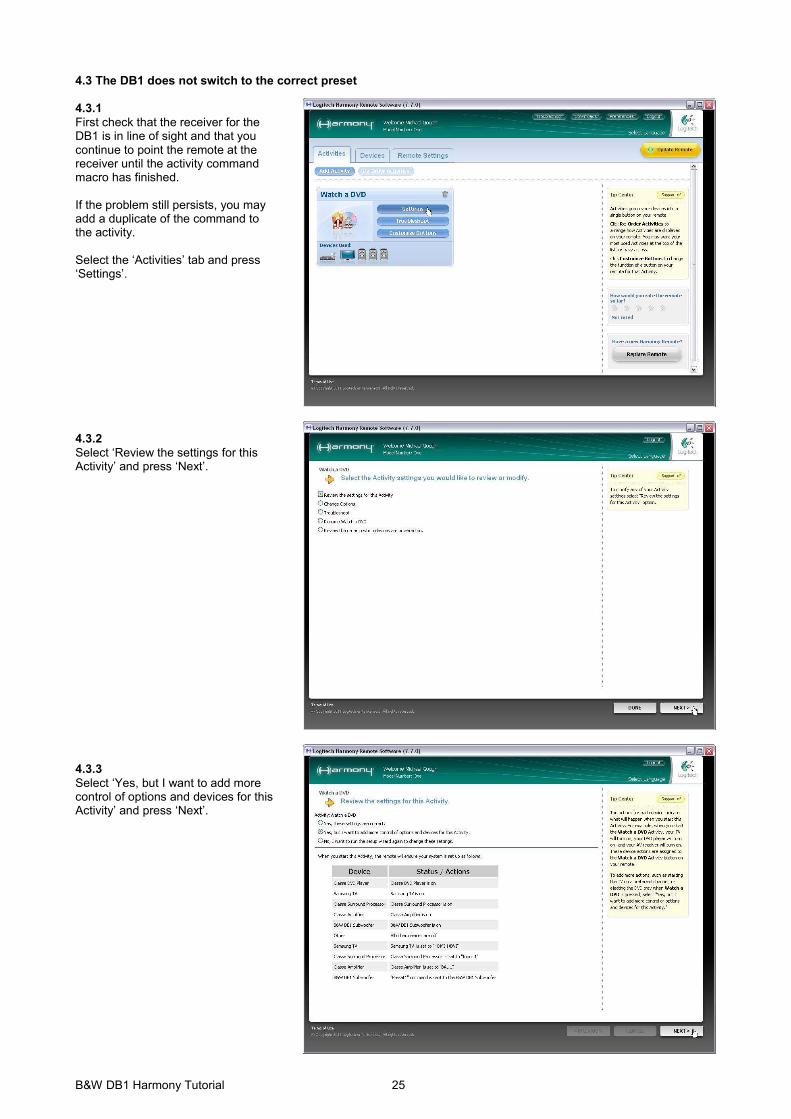
4.3.1
First check that the receiver for the DB1 is in line of sight and that you continue to point the remote at the receiver until the activity command macro has finished. If the problem still persists, you may add a duplicate of the command to the activity. Select the ‘Activities’ tab and press ‘Settings’. 4.3.2
Select ‘Review the settings for this Activity’ and press ‘Next’. 4.3.3
Select ‘Yes, but I want to add more control of options and devices for this Activity’ and press ‘Next’.

B&W DB1 Harmony Tutorial 26
4.3.4
The program will go through existing settings, which you do not need to
screen and then keep pressing ‘Next’ until you reach this screen. 4.3.5
There is an existing command for the DB1 to select Preset1, but if it does not always get executed, it does no harm to duplicate it. Select ‘B&W DB1 Subwoofer’ from the drop down list of devices. 4.3.6
Press ‘Add’
change, so press ‘Save’ on the first
B&W DB1 Harmony Tutorial 27
4.3.7
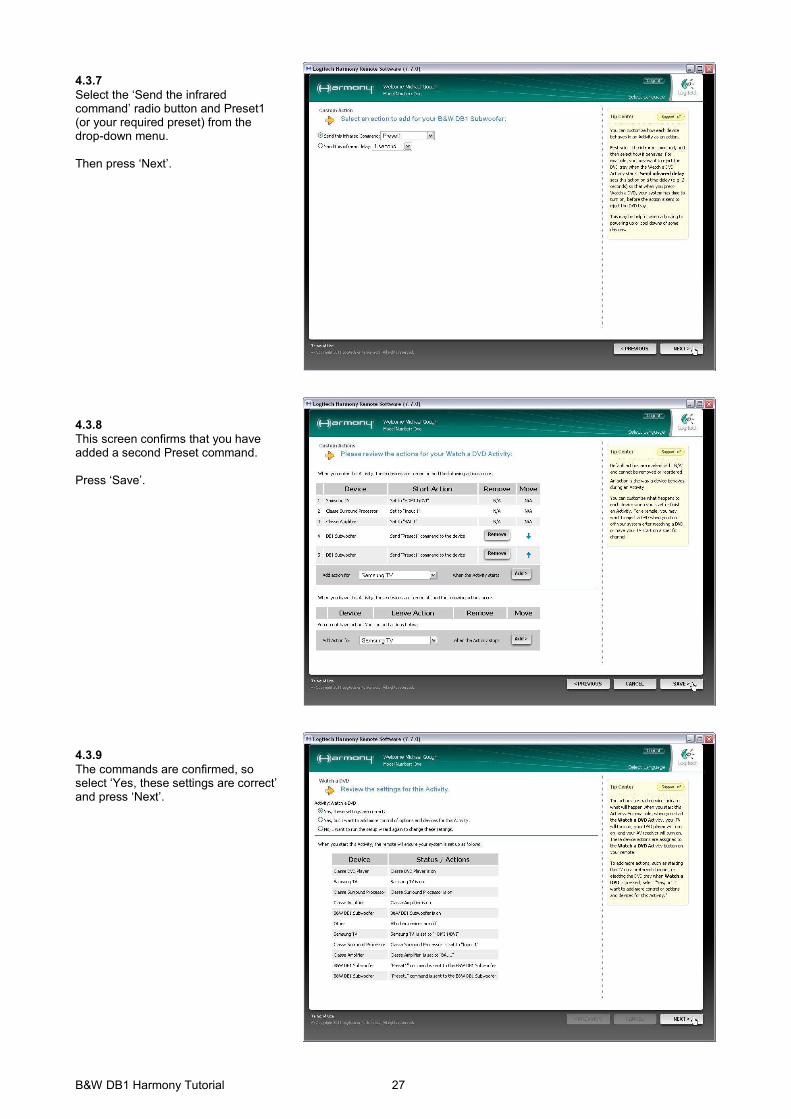
Select the ‘Send the infrared command’ radio button and Preset1 (or your required preset) from the drop-down menu. Then press ‘Next’. 4.3.8
This screen confirms that you have added a second Preset command. Press ‘Save’. 4.3.9
The commands are confirmed, so select ‘Yes, these settings are correct’ and press ‘Next’.
B&W DB1 Harmony Tutorial 28
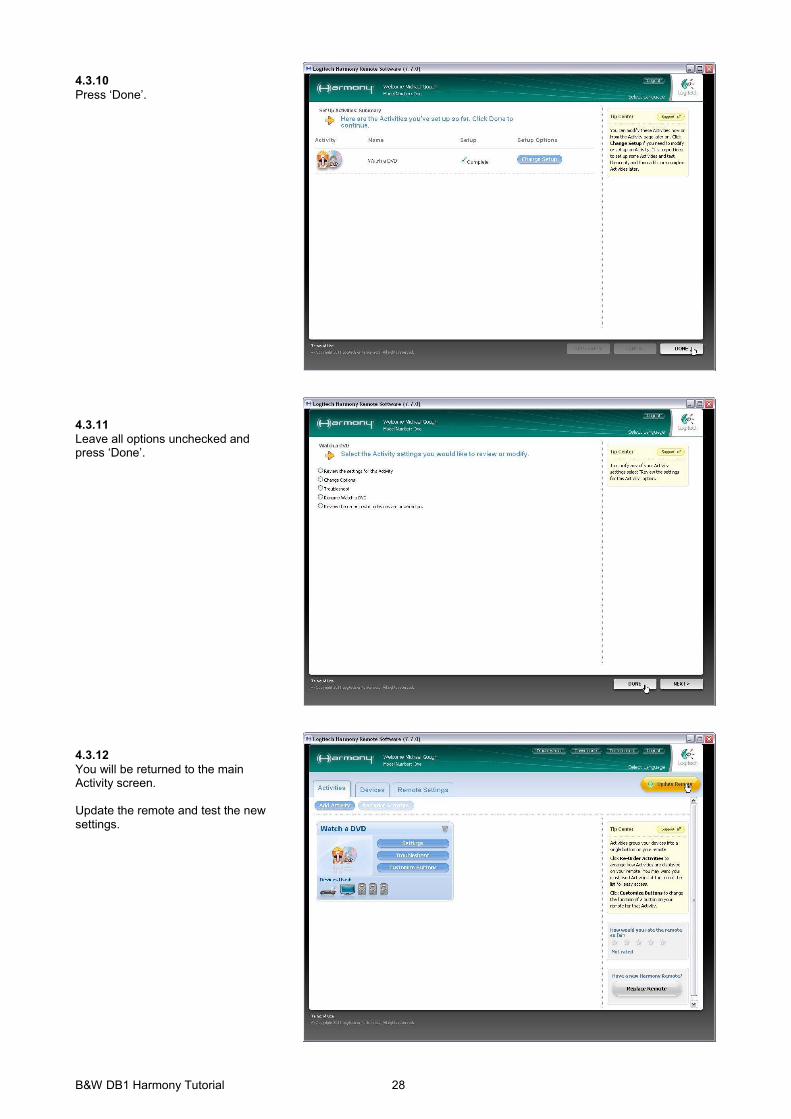
4.3.10
Press ‘Done’. 4.3.11
Leave all options unchecked and press ‘Done’. 4.3.12
You will be returned to the main Activity screen. Update the remote and test the new settings.