paper piecing tutorial by soma acharya - whims and fancies · paper piecing tutorial by soma ... at...
TRANSCRIPT
Paper Piecing Tutorial by Soma Acharya
http://www.whimsandfancies.com/ I learned to quilt by paper piecing. I have tried traditionally pieced quilts, but paper piecing has remained my preferred method of quilting. Paper piecing opens up so many possibilities. The biggest reason is being able to sew pictures with fabric. You also don’t have to measure anything because you trim as you go. With the paper piecing method, you can also get wonderful points with a little bit of practice. I have picked a traditional block for this tutorial – the schoolhouse block. I picked this block because it has angles as well as straight lines. I find pictures to be very helpful, so I added lots of pictures to this tutorial to show you the procedure step by step, plus fabric and time-saving tips. I will also show you how to align two sections so your blocks look perfect at the end. If you are unclear on any section, please let me know. I will be happy to clarify and I am sure I have extra pictures that I can email you to make the learning process easier.
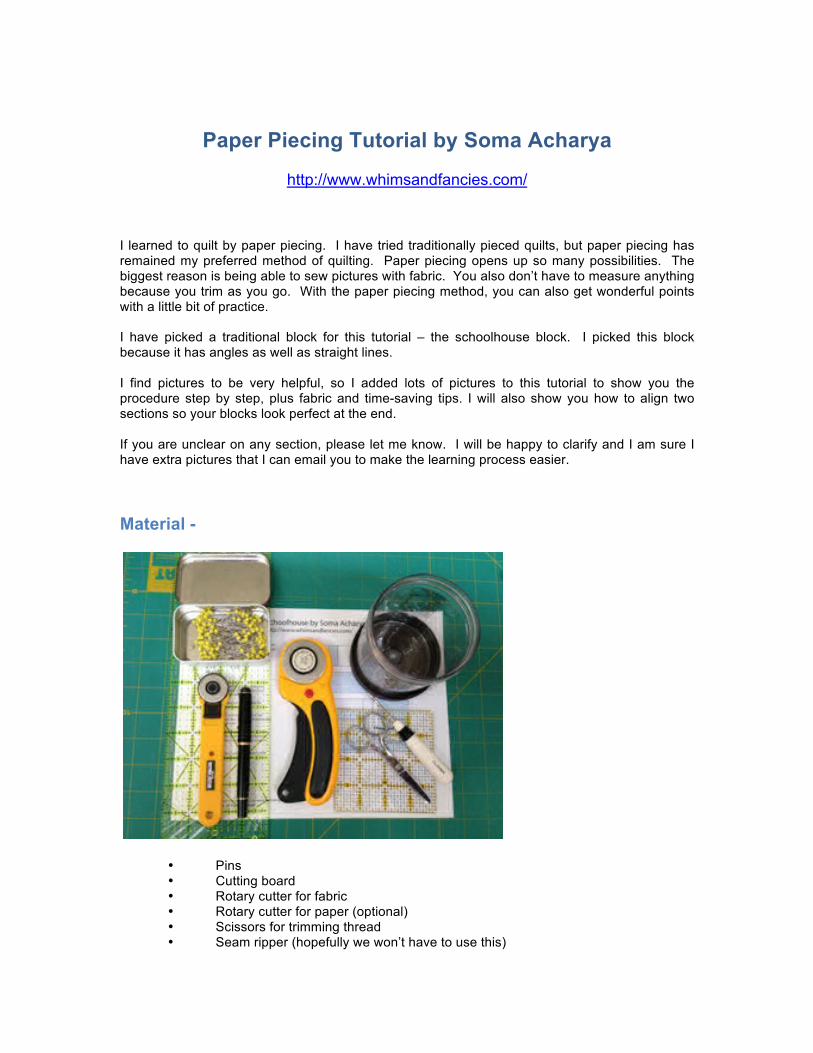
Material -
• Pins • Cutting board • Rotary cutter for fabric • Rotary cutter for paper (optional) • Scissors for trimming thread • Seam ripper (hopefully we won’t have to use this)
• A container for discarded trimmed fabric and thread • Straight ruler • A square ruler to trim your block with – larger than your block size • Paper Piecing Pattern
Not shown in the picture above –
• Sewing machine • Ironing surface • Iron
About the optional rotary cutter for paper – I started sewing with that small rotary cutter you see up there. As I continued to sew more, I got the larger one. I realized my blades were getting dull from cutting all the paper I use for paper piecing. So now I have a designated rotary cutter for cutting out patterns.
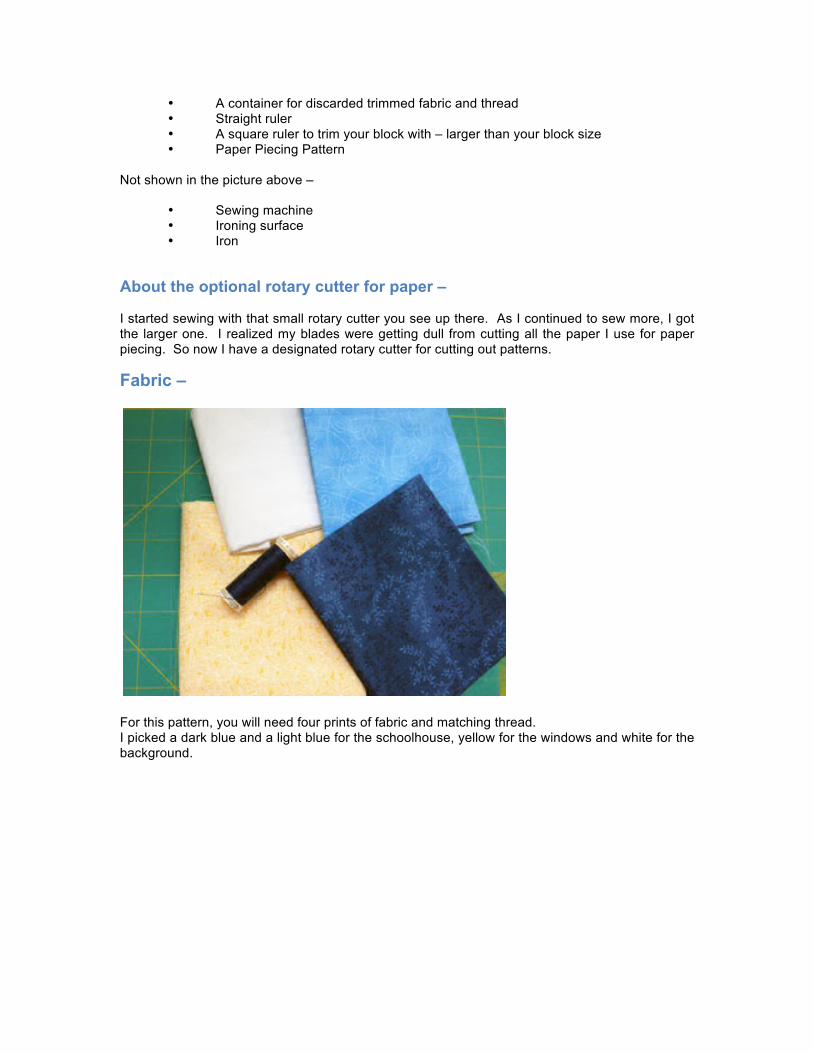
Fabric –
For this pattern, you will need four prints of fabric and matching thread. I picked a dark blue and a light blue for the schoolhouse, yellow for the windows and white for the background.
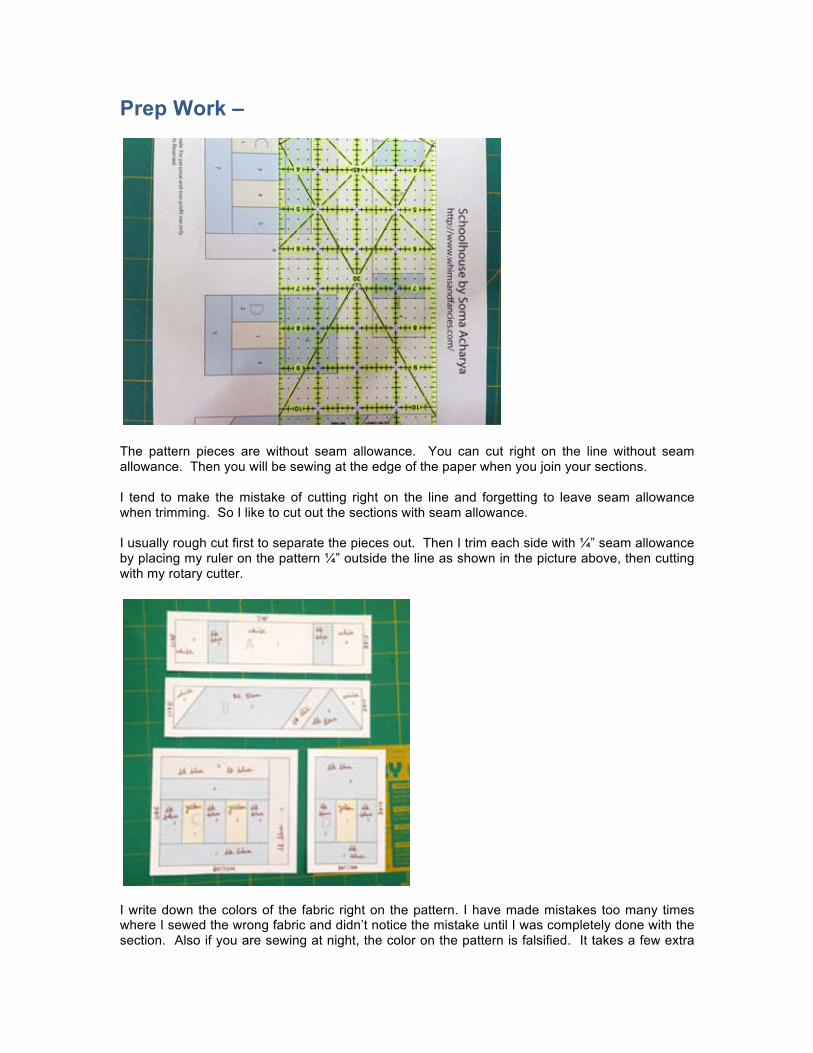
Prep Work –
The pattern pieces are without seam allowance. You can cut right on the line without seam allowance. Then you will be sewing at the edge of the paper when you join your sections. I tend to make the mistake of cutting right on the line and forgetting to leave seam allowance when trimming. So I like to cut out the sections with seam allowance. I usually rough cut first to separate the pieces out. Then I trim each side with ¼” seam allowance by placing my ruler on the pattern ¼” outside the line as shown in the picture above, then cutting with my rotary cutter.
I write down the colors of the fabric right on the pattern. I have made mistakes too many times where I sewed the wrong fabric and didn’t notice the mistake until I was completely done with the section. Also if you are sewing at night, the color on the pattern is falsified. It takes a few extra
minutes at the beginning to write all the numbers, but you will spend a lot less time with your seam ripper. You can do this before of after cutting the sections out. I also write down top, bottom, sides of the block on every section, so that I know not to trim those sides until the very end. This is what my sections look like before I start sewing:
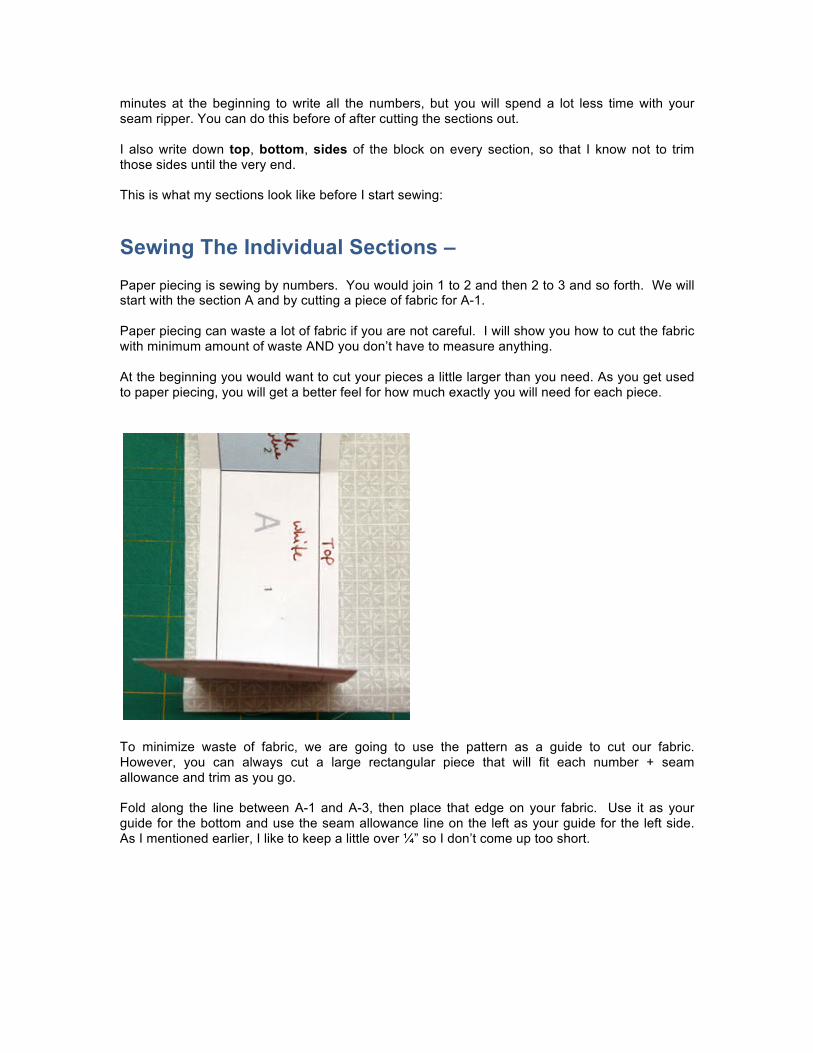
Sewing The Individual Sections – Paper piecing is sewing by numbers. You would join 1 to 2 and then 2 to 3 and so forth. We will start with the section A and by cutting a piece of fabric for A-1. Paper piecing can waste a lot of fabric if you are not careful. I will show you how to cut the fabric with minimum amount of waste AND you don’t have to measure anything. At the beginning you would want to cut your pieces a little larger than you need. As you get used to paper piecing, you will get a better feel for how much exactly you will need for each piece.
To minimize waste of fabric, we are going to use the pattern as a guide to cut our fabric. However, you can always cut a large rectangular piece that will fit each number + seam allowance and trim as you go. Fold along the line between A-1 and A-3, then place that edge on your fabric. Use it as your guide for the bottom and use the seam allowance line on the left as your guide for the left side. As I mentioned earlier, I like to keep a little over ¼” so I don’t come up too short.
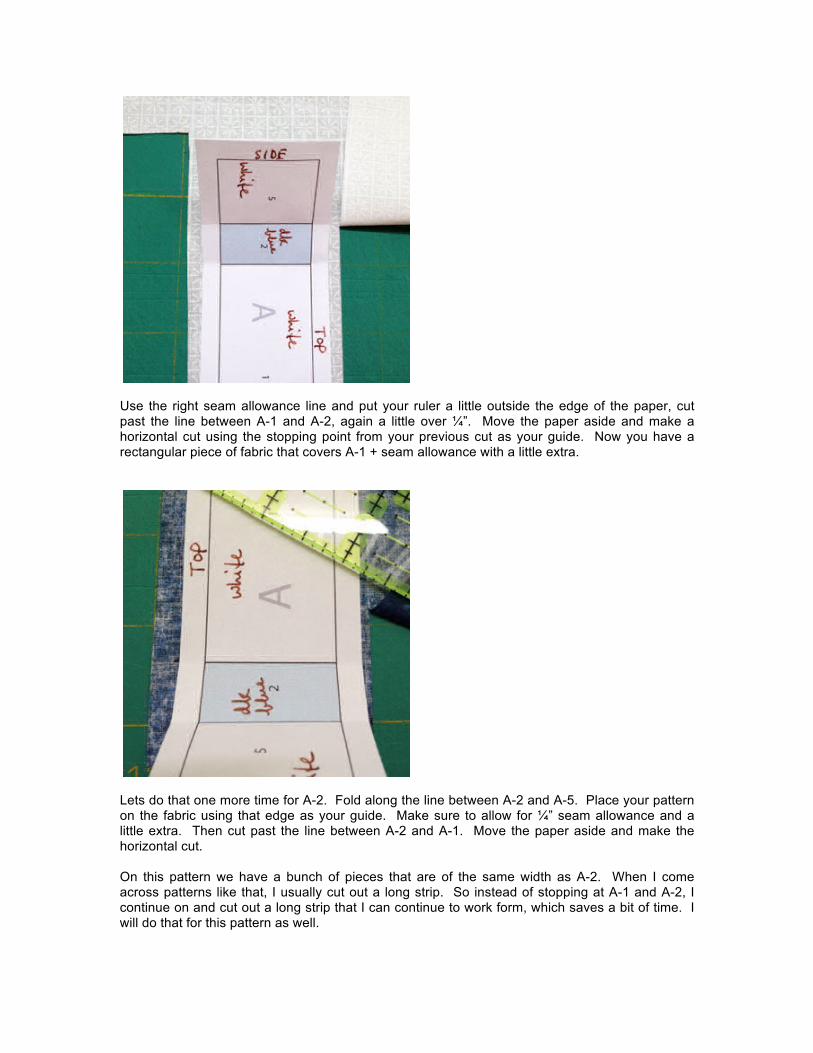
Use the right seam allowance line and put your ruler a little outside the edge of the paper, cut past the line between A-1 and A-2, again a little over ¼”. Move the paper aside and make a horizontal cut using the stopping point from your previous cut as your guide. Now you have a rectangular piece of fabric that covers A-1 + seam allowance with a little extra.
Lets do that one more time for A-2. Fold along the line between A-2 and A-5. Place your pattern on the fabric using that edge as your guide. Make sure to allow for ¼” seam allowance and a little extra. Then cut past the line between A-2 and A-1. Move the paper aside and make the horizontal cut. On this pattern we have a bunch of pieces that are of the same width as A-2. When I come across patterns like that, I usually cut out a long strip. So instead of stopping at A-1 and A-2, I continue on and cut out a long strip that I can continue to work form, which saves a bit of time. I will do that for this pattern as well.
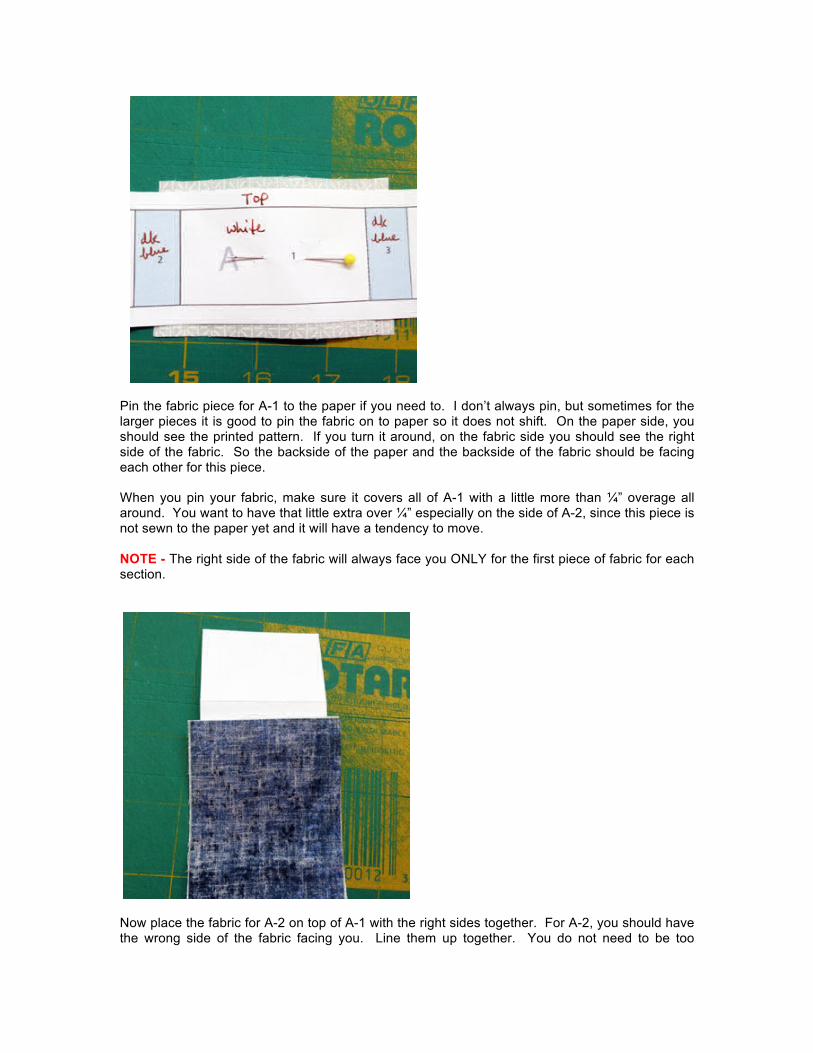
Pin the fabric piece for A-1 to the paper if you need to. I don’t always pin, but sometimes for the larger pieces it is good to pin the fabric on to paper so it does not shift. On the paper side, you should see the printed pattern. If you turn it around, on the fabric side you should see the right side of the fabric. So the backside of the paper and the backside of the fabric should be facing each other for this piece. When you pin your fabric, make sure it covers all of A-1 with a little more than ¼” overage all around. You want to have that little extra over ¼” especially on the side of A-2, since this piece is not sewn to the paper yet and it will have a tendency to move. NOTE - The right side of the fabric will always face you ONLY for the first piece of fabric for each section.
Now place the fabric for A-2 on top of A-1 with the right sides together. For A-2, you should have the wrong side of the fabric facing you. Line them up together. You do not need to be too
accurate with the lining up. We will trim the seam after sewing. That’s why we always cut a tiny bit extra over ¼” seam allowance. Accuracy will come with practice
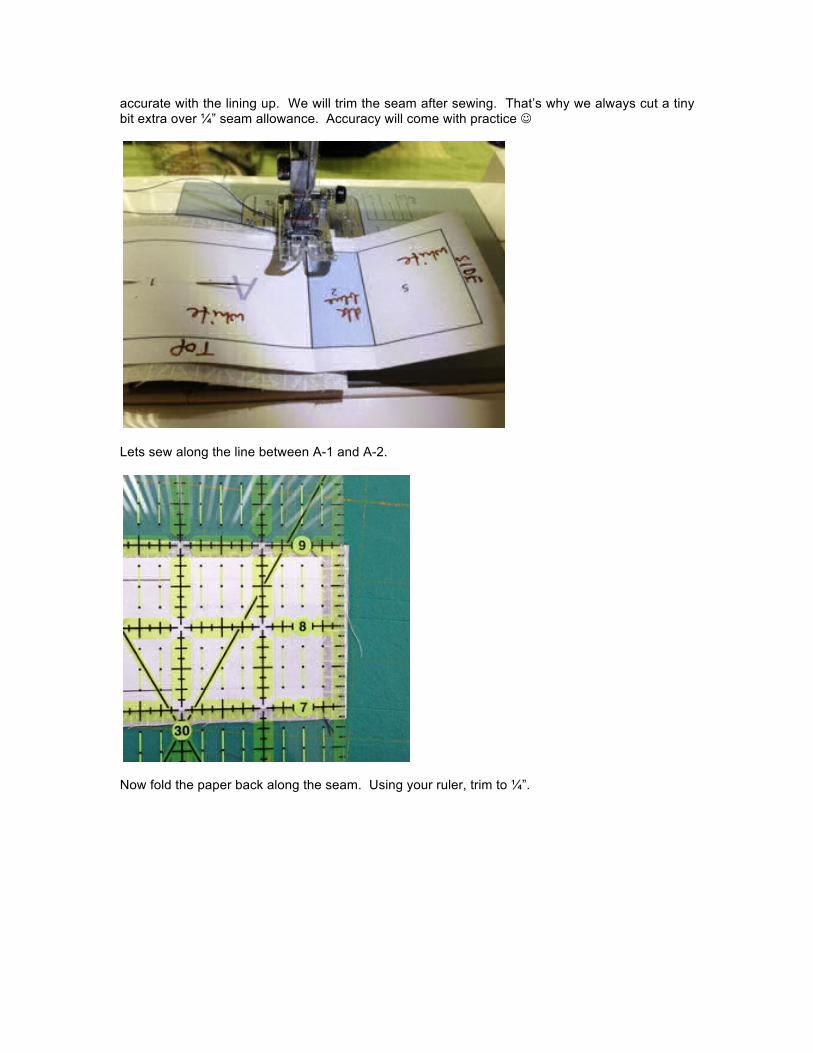
Lets sew along the line between A-1 and A-2.
Now fold the paper back along the seam. Using your ruler, trim to ¼”.
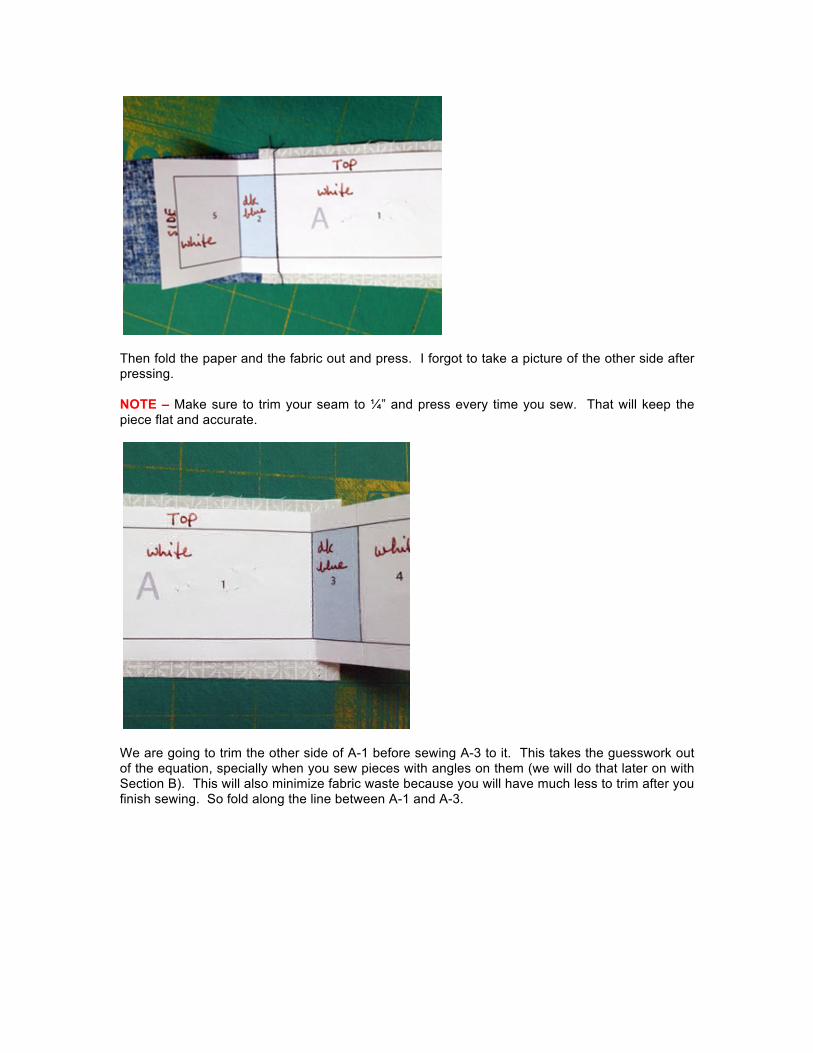
Then fold the paper and the fabric out and press. I forgot to take a picture of the other side after pressing. NOTE – Make sure to trim your seam to ¼” and press every time you sew. That will keep the piece flat and accurate.
We are going to trim the other side of A-1 before sewing A-3 to it. This takes the guesswork out of the equation, specially when you sew pieces with angles on them (we will do that later on with Section B). This will also minimize fabric waste because you will have much less to trim after you finish sewing. So fold along the line between A-1 and A-3.
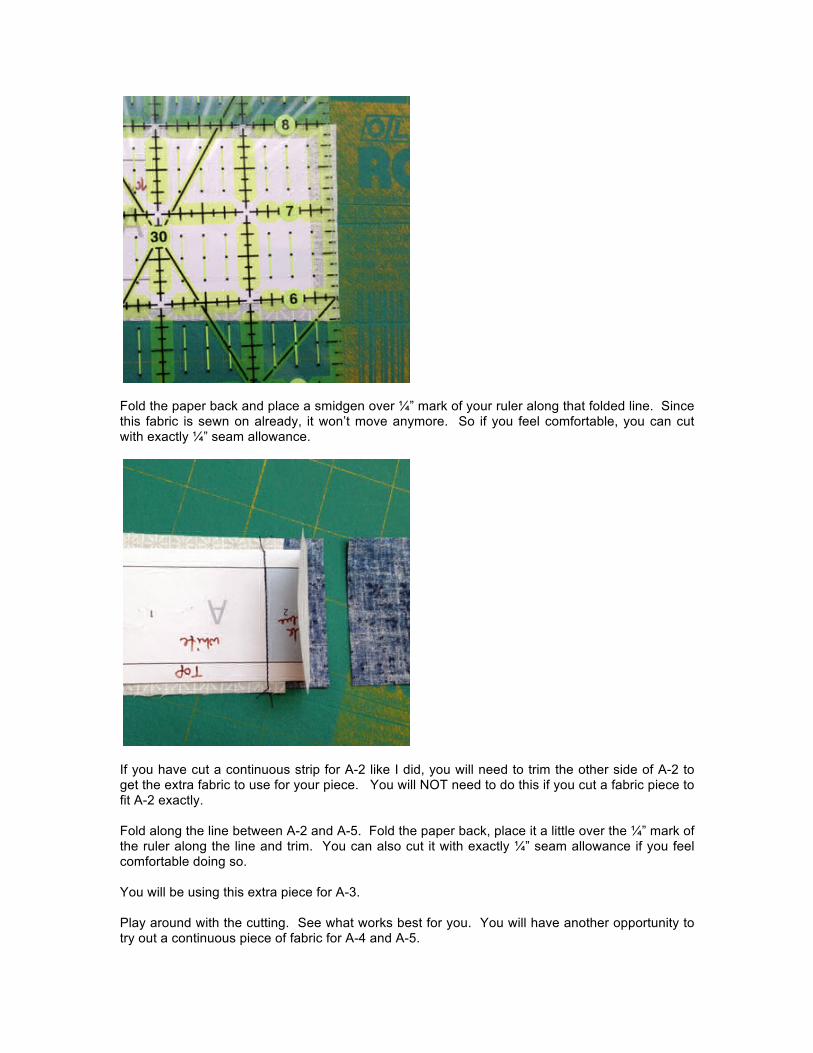
Fold the paper back and place a smidgen over ¼” mark of your ruler along that folded line. Since this fabric is sewn on already, it won’t move anymore. So if you feel comfortable, you can cut with exactly ¼” seam allowance.
If you have cut a continuous strip for A-2 like I did, you will need to trim the other side of A-2 to get the extra fabric to use for your piece. You will NOT need to do this if you cut a fabric piece to fit A-2 exactly. Fold along the line between A-2 and A-5. Fold the paper back, place it a little over the ¼” mark of the ruler along the line and trim. You can also cut it with exactly ¼” seam allowance if you feel comfortable doing so. You will be using this extra piece for A-3. Play around with the cutting. See what works best for you. You will have another opportunity to try out a continuous piece of fabric for A-4 and A-5.

Now follow the previous instructions to finish A completely. Make sure to use your extra piece from A-2 for A-3 if you had cut out a continuous piece of fabric. NOTE - Make sure to always trim the seam allowance to ¼” after sewing (e.g. A-1 and A-2) and press. Also, remember to trim the next side that you will be sewing to a little over ¼” (e.g. A-1 and A-3).
This is what the paper side of your finished Section A should look like. Take a moment to look at the fabric side and make sure you have all the right side of the fabric facing you. You should not see any wrong side of the fabric at all. We will do B last since it has angular cuts. Lets continue on with the sections that have only straight cuts for more practice.
Lets move on to Section D. Fold along the line between D-1/D-2/D-3 and D-5. Also make a fold along the line between D-1 and D-2. Using these two folds as a guide, place your pattern on the
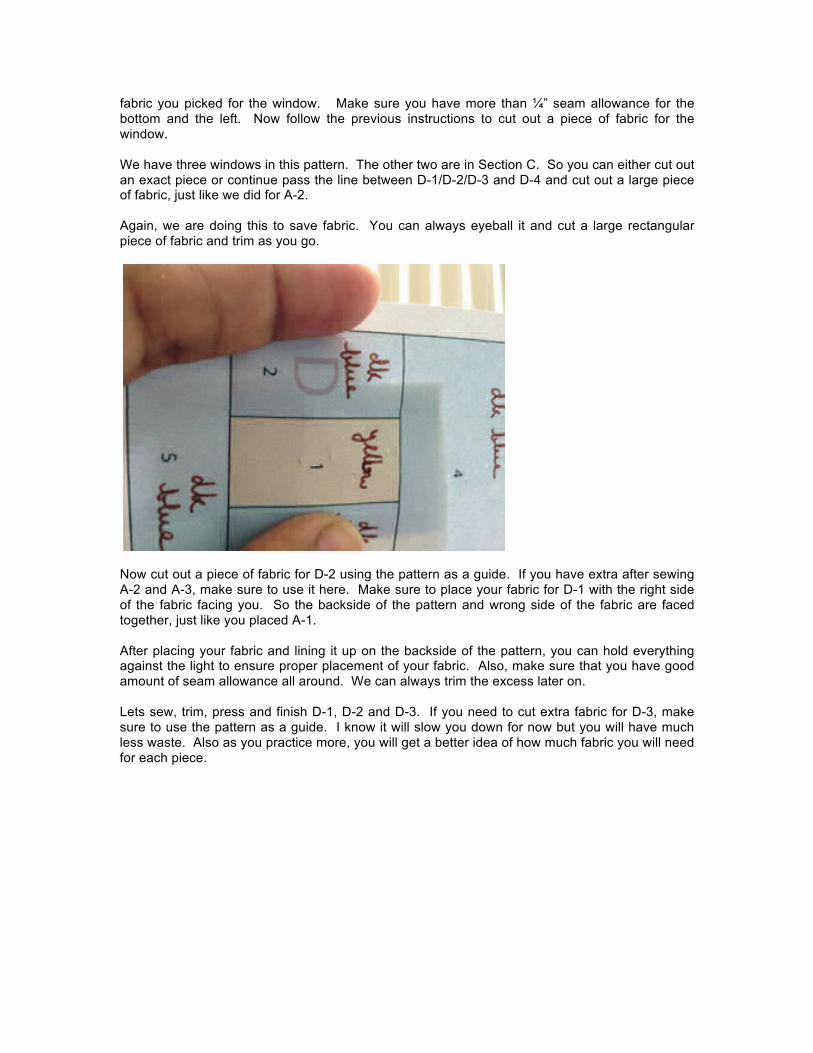
fabric you picked for the window. Make sure you have more than ¼” seam allowance for the bottom and the left. Now follow the previous instructions to cut out a piece of fabric for the window. We have three windows in this pattern. The other two are in Section C. So you can either cut out an exact piece or continue pass the line between D-1/D-2/D-3 and D-4 and cut out a large piece of fabric, just like we did for A-2. Again, we are doing this to save fabric. You can always eyeball it and cut a large rectangular piece of fabric and trim as you go.
Now cut out a piece of fabric for D-2 using the pattern as a guide. If you have extra after sewing A-2 and A-3, make sure to use it here. Make sure to place your fabric for D-1 with the right side of the fabric facing you. So the backside of the pattern and wrong side of the fabric are faced together, just like you placed A-1. After placing your fabric and lining it up on the backside of the pattern, you can hold everything against the light to ensure proper placement of your fabric. Also, make sure that you have good amount of seam allowance all around. We can always trim the excess later on. Lets sew, trim, press and finish D-1, D-2 and D-3. If you need to cut extra fabric for D-3, make sure to use the pattern as a guide. I know it will slow you down for now but you will have much less waste. Also as you practice more, you will get a better idea of how much fabric you will need for each piece.
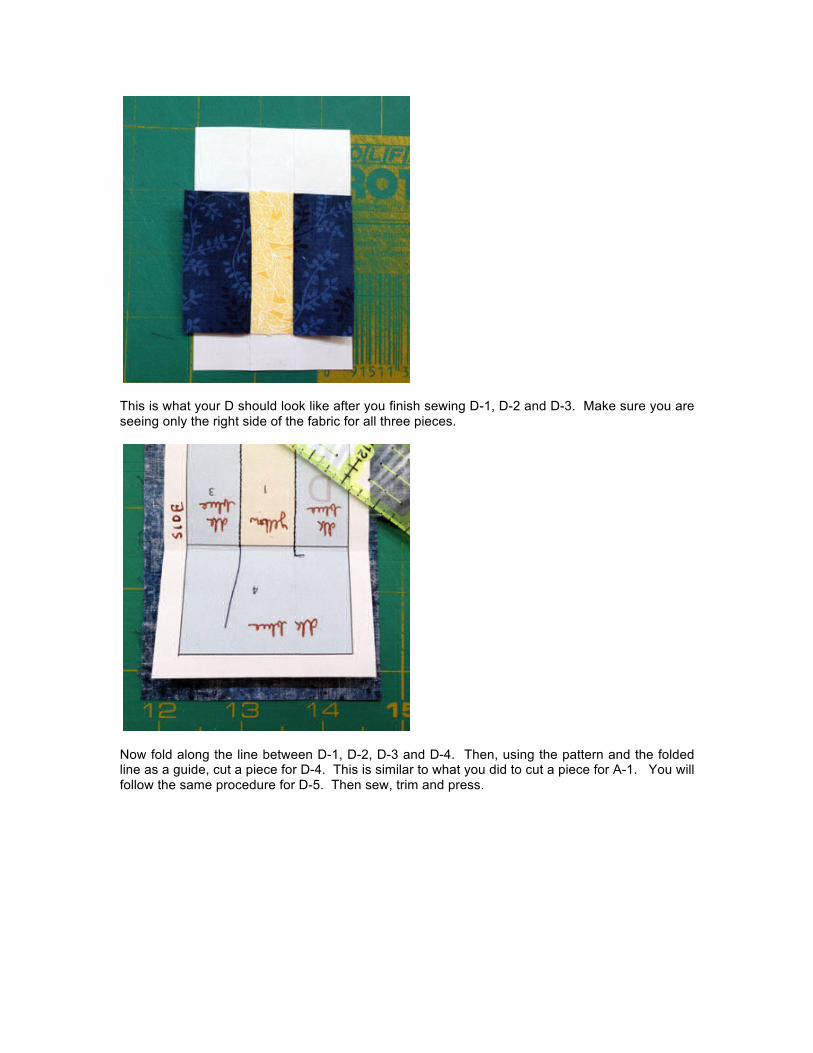
This is what your D should look like after you finish sewing D-1, D-2 and D-3. Make sure you are seeing only the right side of the fabric for all three pieces.
Now fold along the line between D-1, D-2, D-3 and D-4. Then, using the pattern and the folded line as a guide, cut a piece for D-4. This is similar to what you did to cut a piece for A-1. You will follow the same procedure for D-5. Then sew, trim and press.
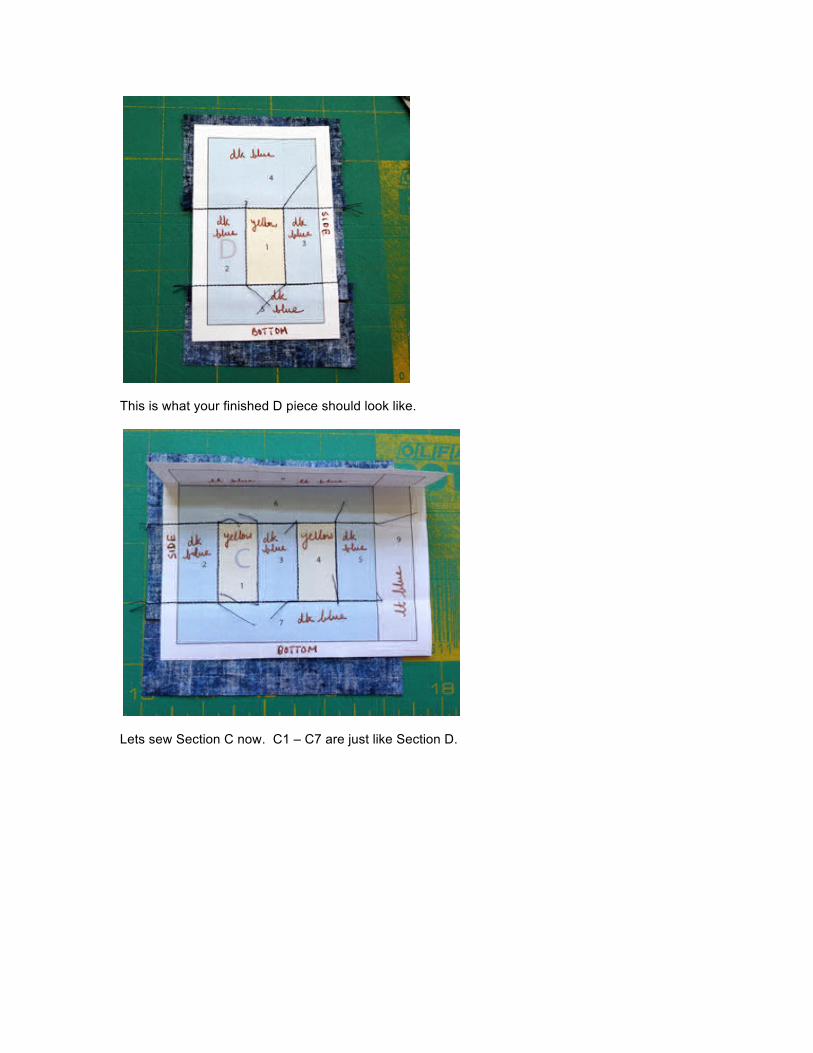
This is what your finished D piece should look like.
Lets sew Section C now. C1 – C7 are just like Section D.
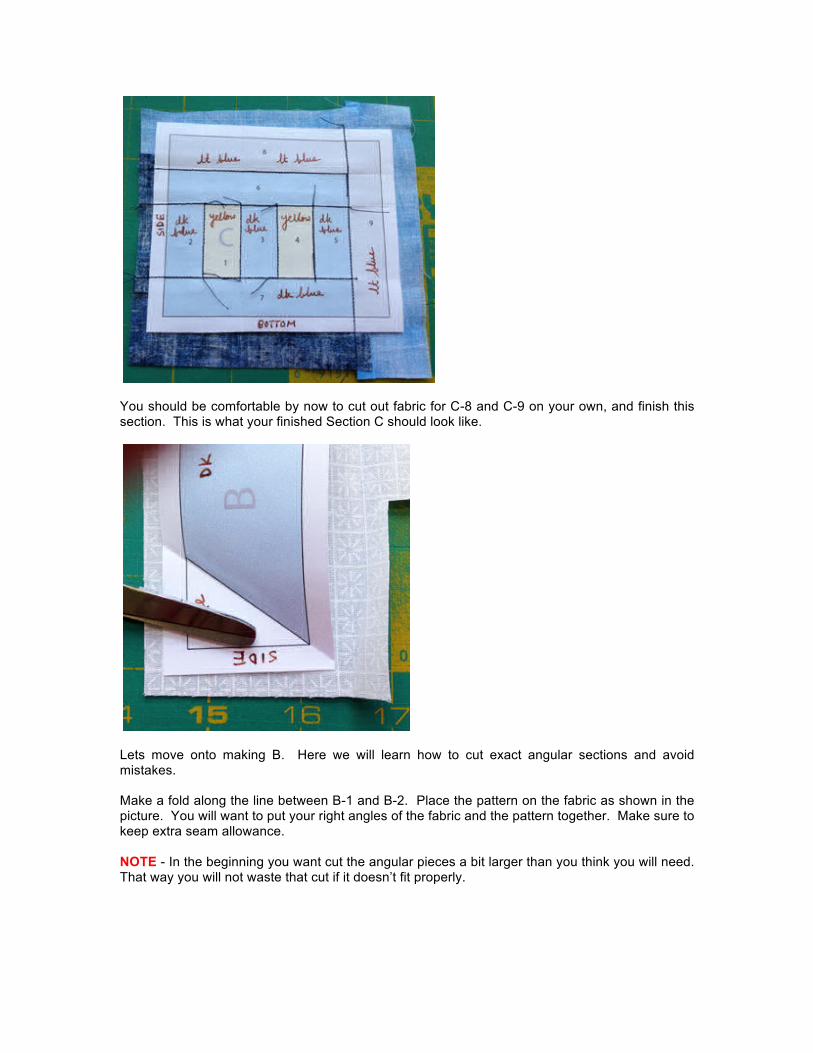
You should be comfortable by now to cut out fabric for C-8 and C-9 on your own, and finish this section. This is what your finished Section C should look like.
Lets move onto making B. Here we will learn how to cut exact angular sections and avoid mistakes. Make a fold along the line between B-1 and B-2. Place the pattern on the fabric as shown in the picture. You will want to put your right angles of the fabric and the pattern together. Make sure to keep extra seam allowance. NOTE - In the beginning you want cut the angular pieces a bit larger than you think you will need. That way you will not waste that cut if it doesn’t fit properly.
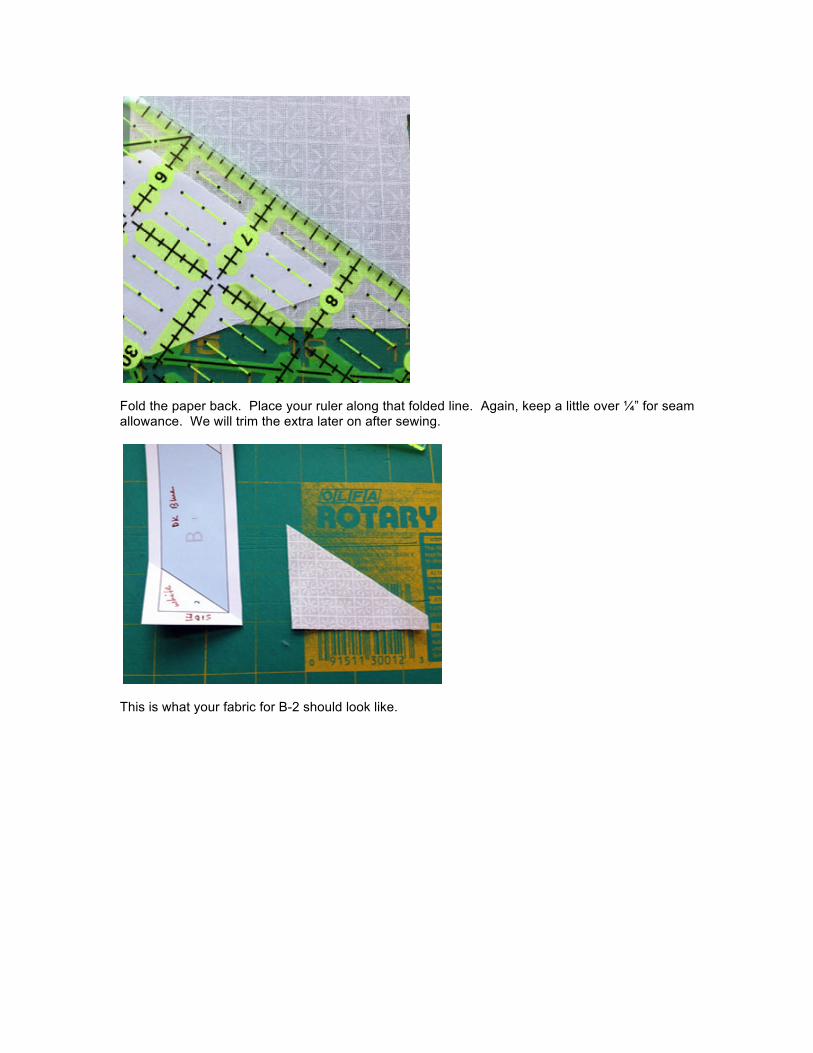
Fold the paper back. Place your ruler along that folded line. Again, keep a little over ¼” for seam allowance. We will trim the extra later on after sewing.
This is what your fabric for B-2 should look like.
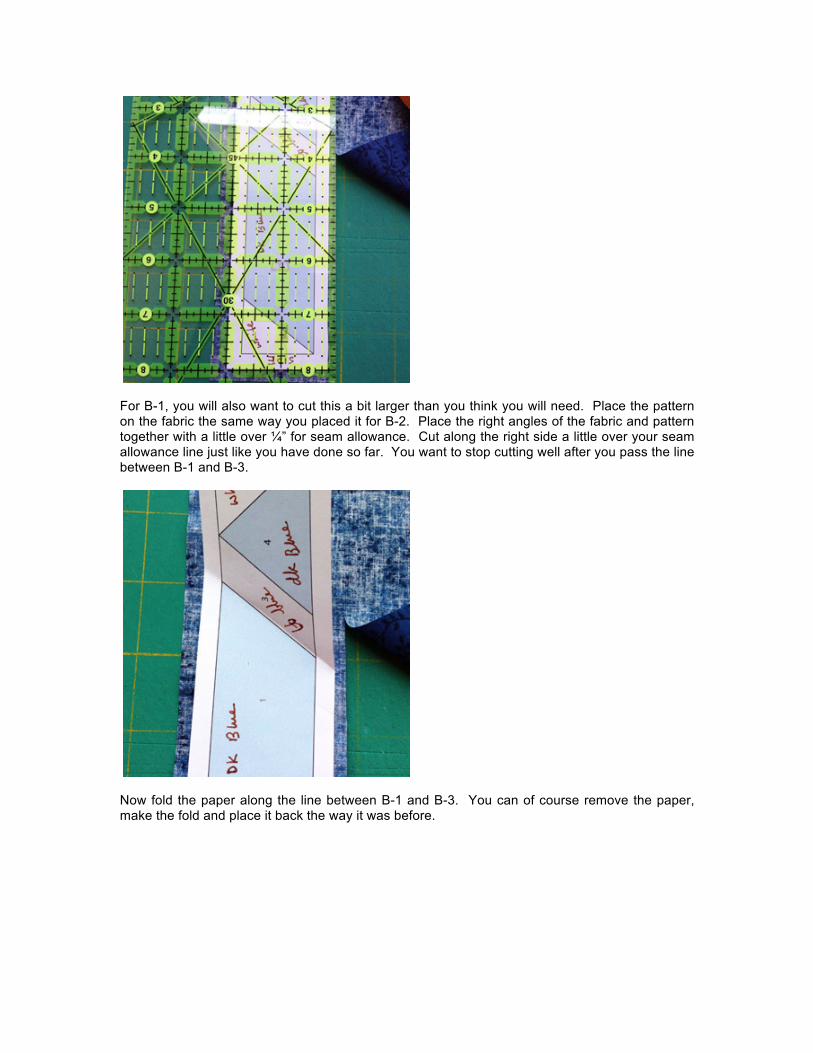
For B-1, you will also want to cut this a bit larger than you think you will need. Place the pattern on the fabric the same way you placed it for B-2. Place the right angles of the fabric and pattern together with a little over ¼” for seam allowance. Cut along the right side a little over your seam allowance line just like you have done so far. You want to stop cutting well after you pass the line between B-1 and B-3.
Now fold the paper along the line between B-1 and B-3. You can of course remove the paper, make the fold and place it back the way it was before.

Then fold the paper back. Place your ruler along the line with a little over ¼” seam allowance as we did for the previous pieces and make the cut.
This is what it should look like after the cut. NOTE - Always cut the straight side first before cutting the angular side.
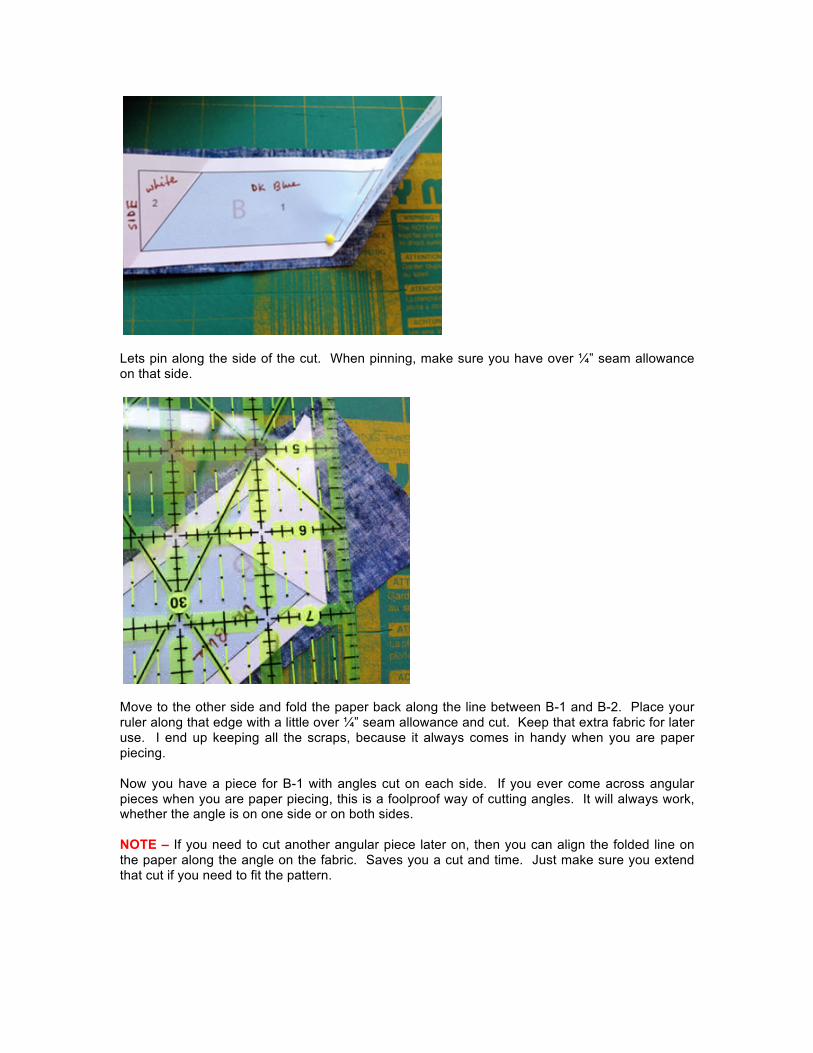
Lets pin along the side of the cut. When pinning, make sure you have over ¼” seam allowance on that side.
Move to the other side and fold the paper back along the line between B-1 and B-2. Place your ruler along that edge with a little over ¼” seam allowance and cut. Keep that extra fabric for later use. I end up keeping all the scraps, because it always comes in handy when you are paper piecing. Now you have a piece for B-1 with angles cut on each side. If you ever come across angular pieces when you are paper piecing, this is a foolproof way of cutting angles. It will always work, whether the angle is on one side or on both sides. NOTE – If you need to cut another angular piece later on, then you can align the folded line on the paper along the angle on the fabric. Saves you a cut and time. Just make sure you extend that cut if you need to fit the pattern.
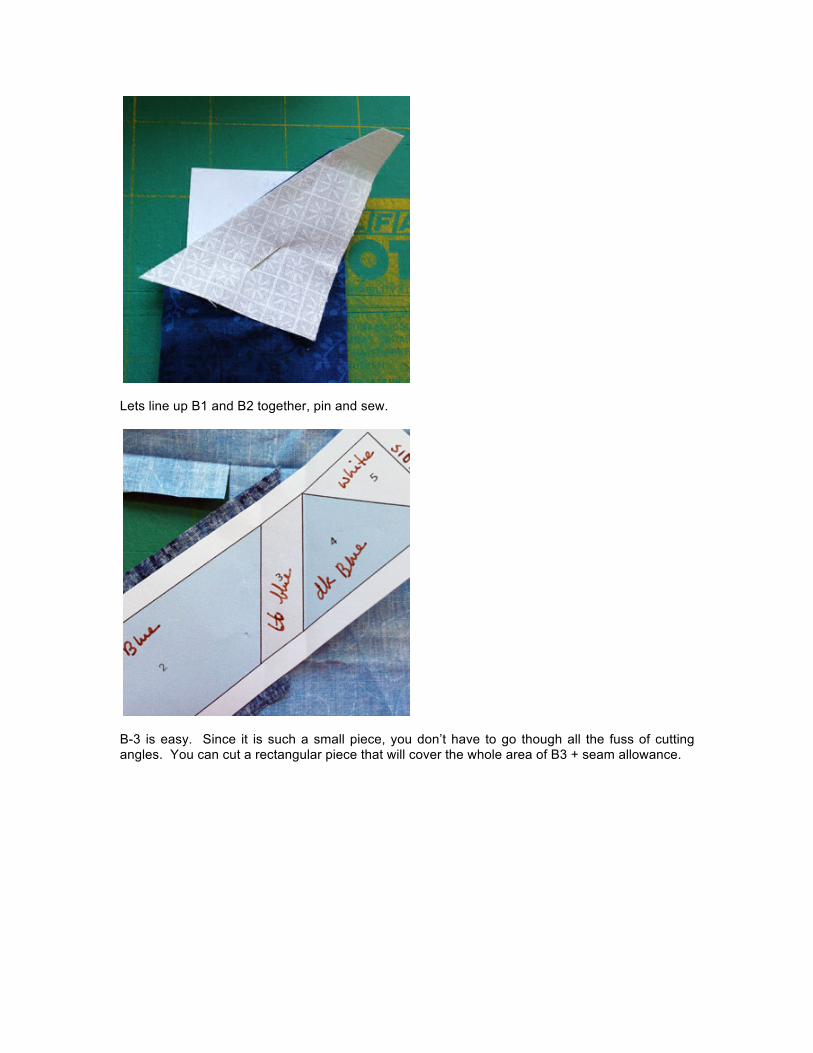
Lets line up B1 and B2 together, pin and sew.
B-3 is easy. Since it is such a small piece, you don’t have to go though all the fuss of cutting angles. You can cut a rectangular piece that will cover the whole area of B3 + seam allowance.
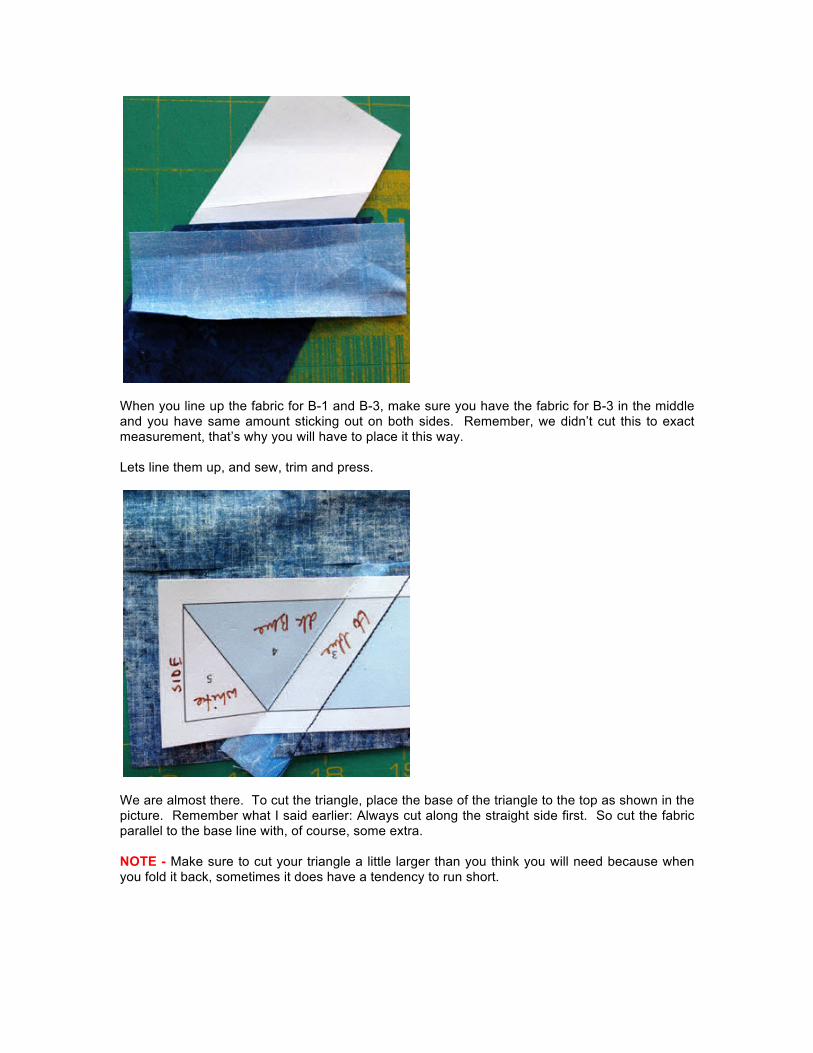
When you line up the fabric for B-1 and B-3, make sure you have the fabric for B-3 in the middle and you have same amount sticking out on both sides. Remember, we didn’t cut this to exact measurement, that’s why you will have to place it this way. Lets line them up, and sew, trim and press.
We are almost there. To cut the triangle, place the base of the triangle to the top as shown in the picture. Remember what I said earlier: Always cut along the straight side first. So cut the fabric parallel to the base line with, of course, some extra. NOTE - Make sure to cut your triangle a little larger than you think you will need because when you fold it back, sometimes it does have a tendency to run short.
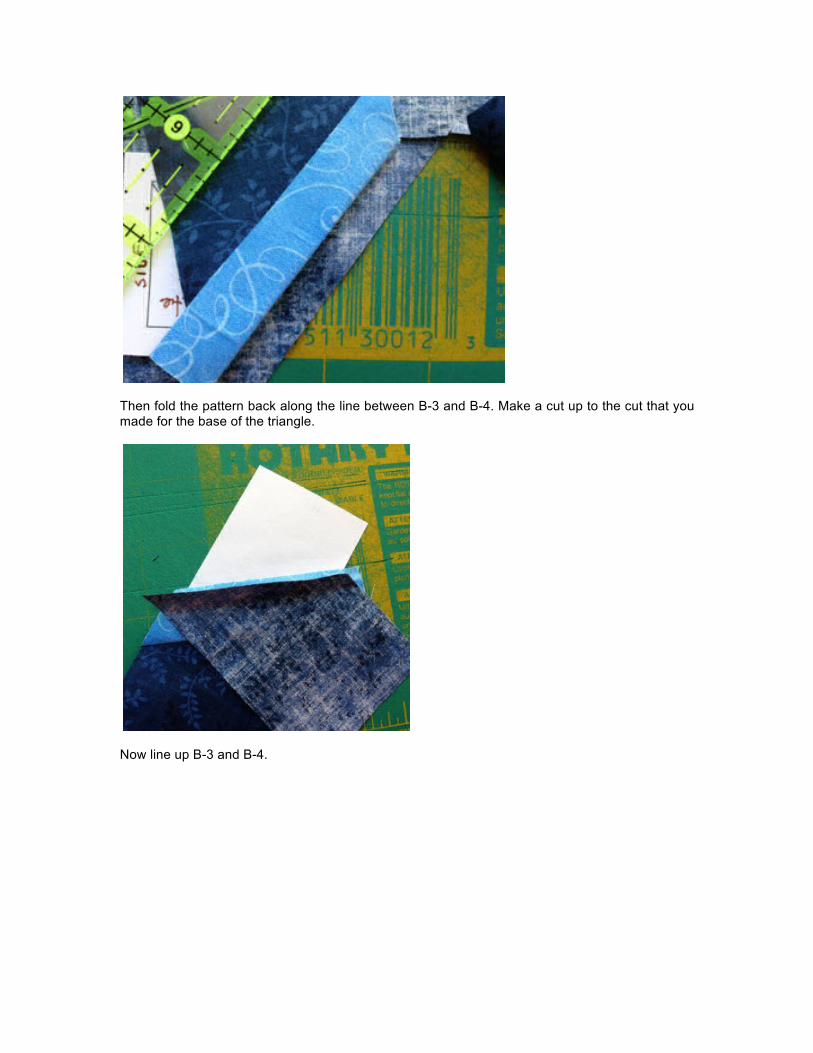
Then fold the pattern back along the line between B-3 and B-4. Make a cut up to the cut that you made for the base of the triangle.
Now line up B-3 and B-4.
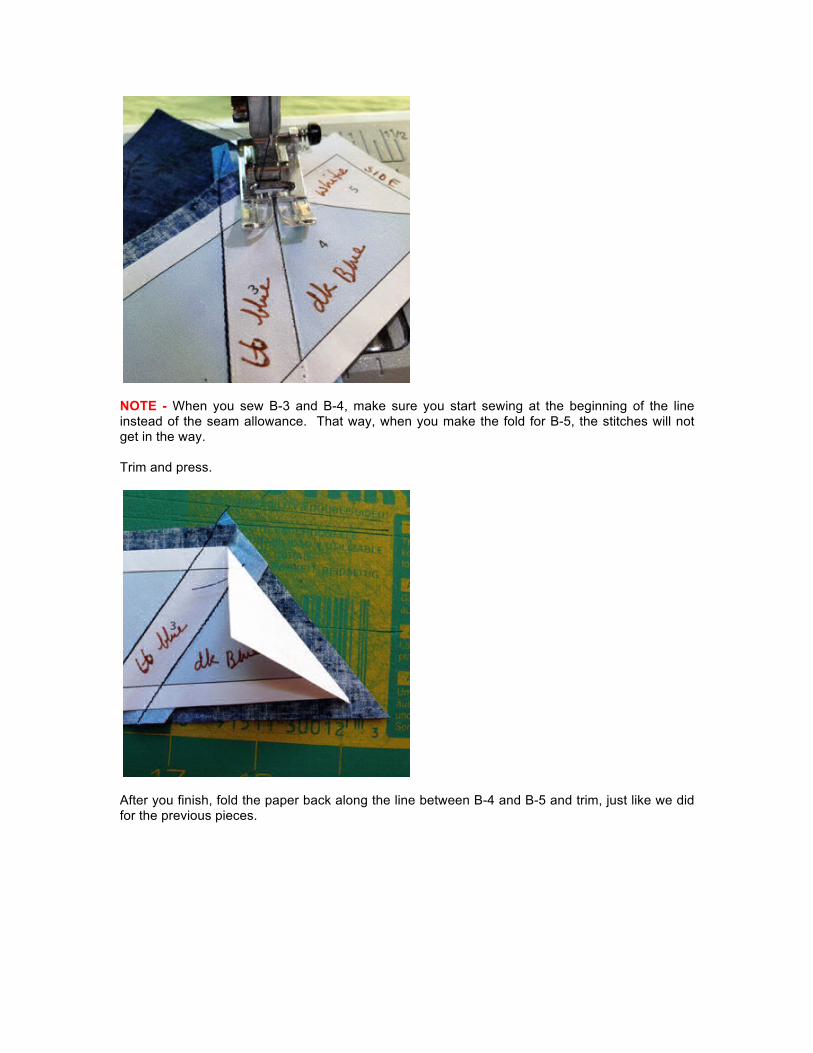
NOTE - When you sew B-3 and B-4, make sure you start sewing at the beginning of the line instead of the seam allowance. That way, when you make the fold for B-5, the stitches will not get in the way. Trim and press.
After you finish, fold the paper back along the line between B-4 and B-5 and trim, just like we did for the previous pieces.
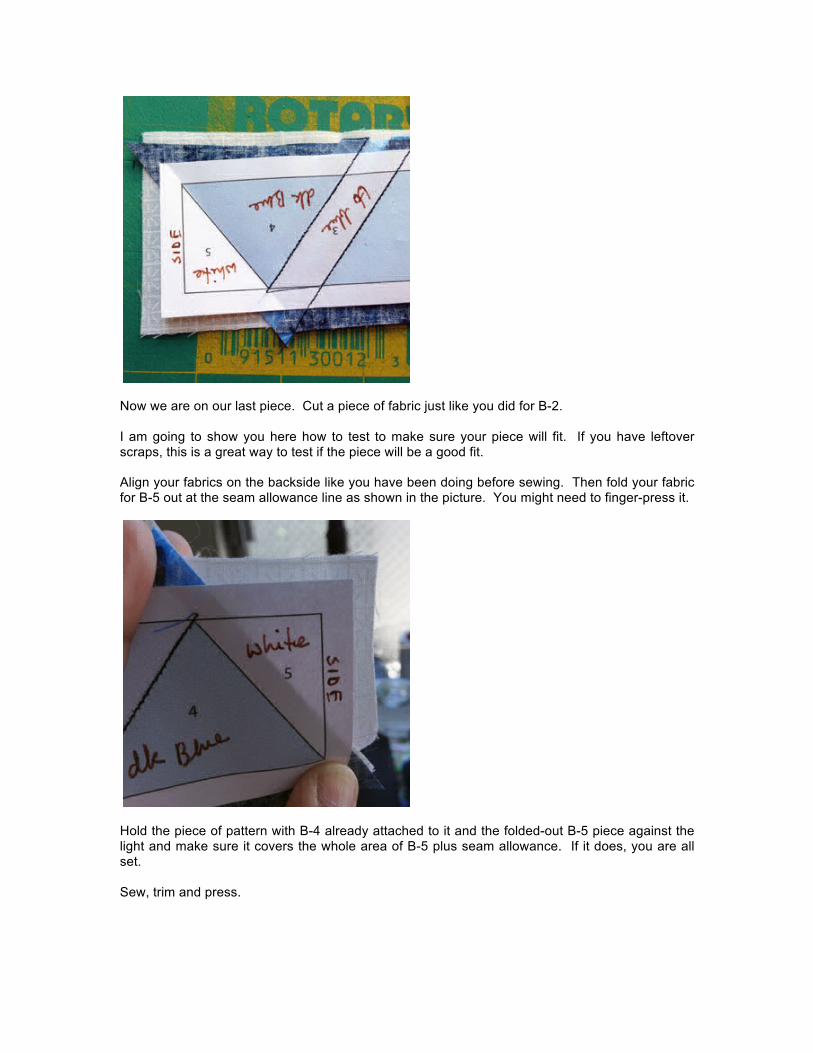
Now we are on our last piece. Cut a piece of fabric just like you did for B-2. I am going to show you here how to test to make sure your piece will fit. If you have leftover scraps, this is a great way to test if the piece will be a good fit. Align your fabrics on the backside like you have been doing before sewing. Then fold your fabric for B-5 out at the seam allowance line as shown in the picture. You might need to finger-press it.
Hold the piece of pattern with B-4 already attached to it and the folded-out B-5 piece against the light and make sure it covers the whole area of B-5 plus seam allowance. If it does, you are all set. Sew, trim and press.
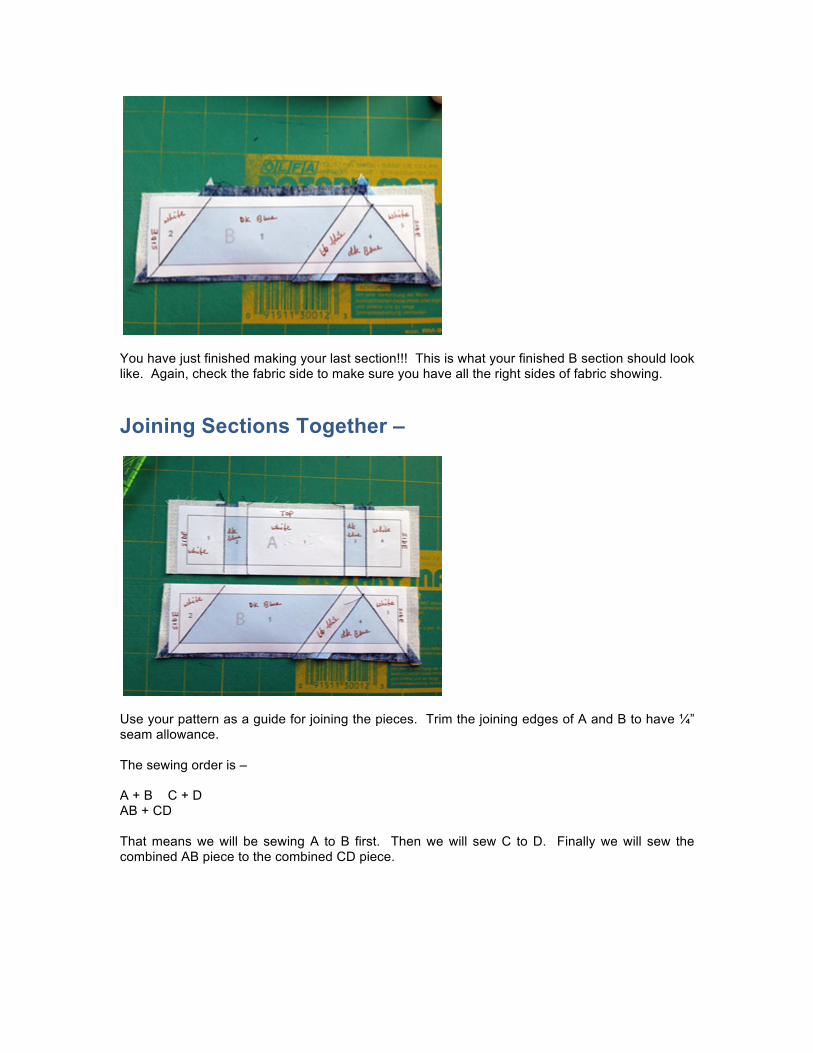
You have just finished making your last section!!! This is what your finished B section should look like. Again, check the fabric side to make sure you have all the right sides of fabric showing.
Joining Sections Together –
Use your pattern as a guide for joining the pieces. Trim the joining edges of A and B to have ¼” seam allowance. The sewing order is – A + B C + D AB + CD That means we will be sewing A to B first. Then we will sew C to D. Finally we will sew the combined AB piece to the combined CD piece.
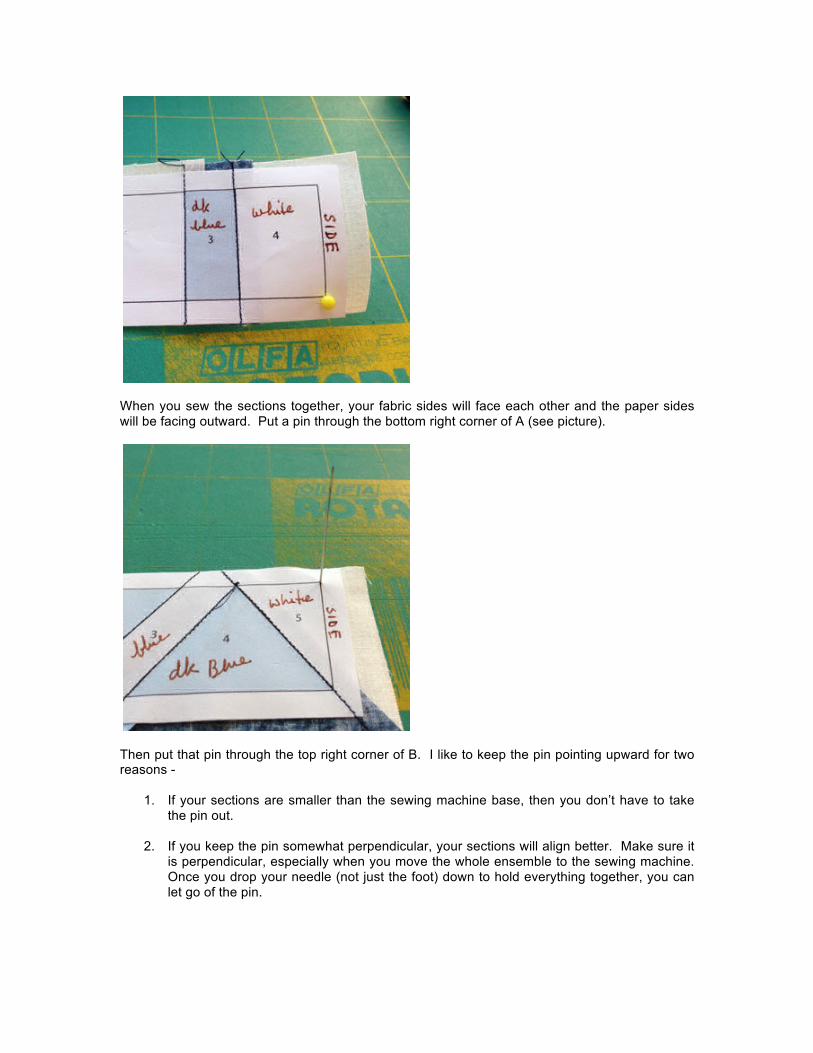
When you sew the sections together, your fabric sides will face each other and the paper sides will be facing outward. Put a pin through the bottom right corner of A (see picture).
Then put that pin through the top right corner of B. I like to keep the pin pointing upward for two reasons -
1. If your sections are smaller than the sewing machine base, then you don’t have to take the pin out.
2. If you keep the pin somewhat perpendicular, your sections will align better. Make sure it
is perpendicular, especially when you move the whole ensemble to the sewing machine. Once you drop your needle (not just the foot) down to hold everything together, you can let go of the pin.
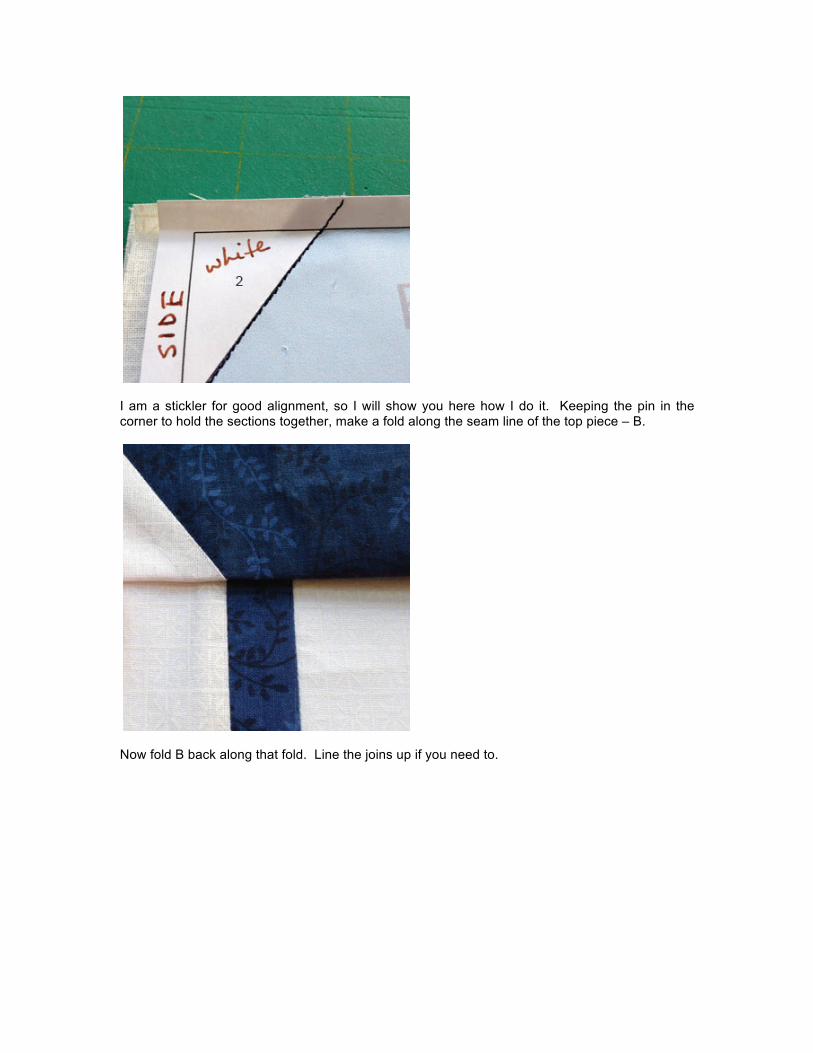
I am a stickler for good alignment, so I will show you here how I do it. Keeping the pin in the corner to hold the sections together, make a fold along the seam line of the top piece – B.
Now fold B back along that fold. Line the joins up if you need to.
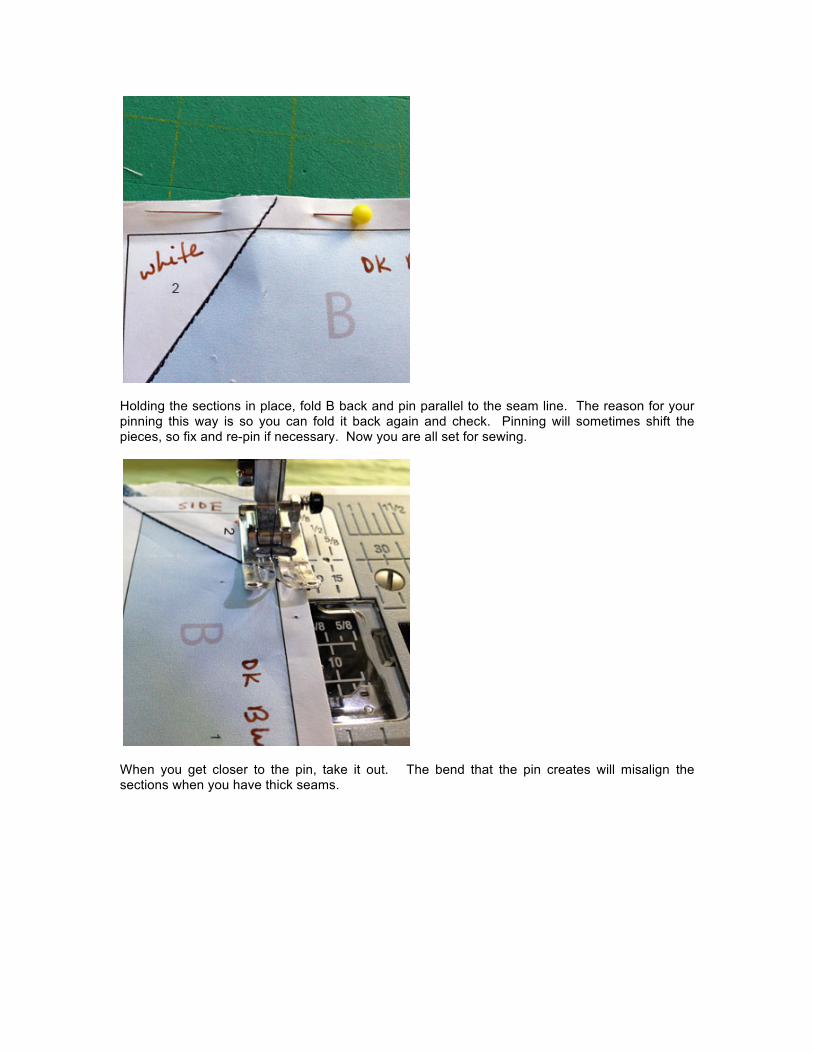
Holding the sections in place, fold B back and pin parallel to the seam line. The reason for your pinning this way is so you can fold it back again and check. Pinning will sometimes shift the pieces, so fix and re-pin if necessary. Now you are all set for sewing.
When you get closer to the pin, take it out. The bend that the pin creates will misalign the sections when you have thick seams.
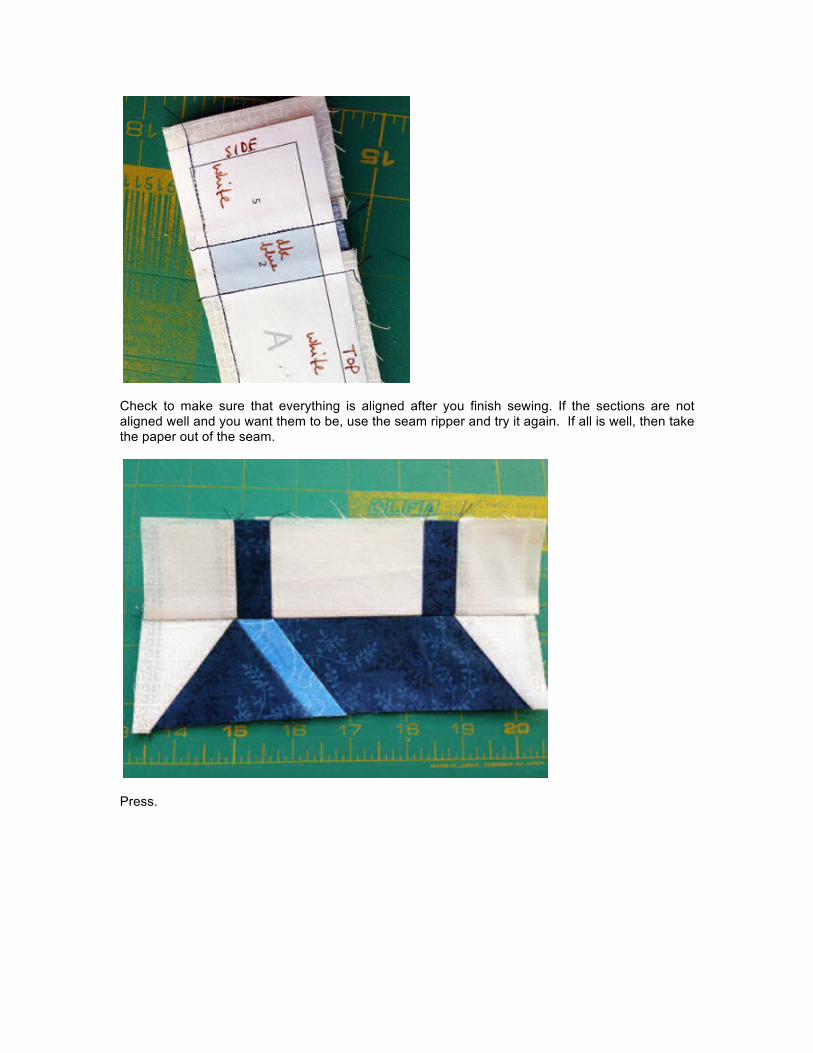
Check to make sure that everything is aligned after you finish sewing. If the sections are not aligned well and you want them to be, use the seam ripper and try it again. If all is well, then take the paper out of the seam.
Press.
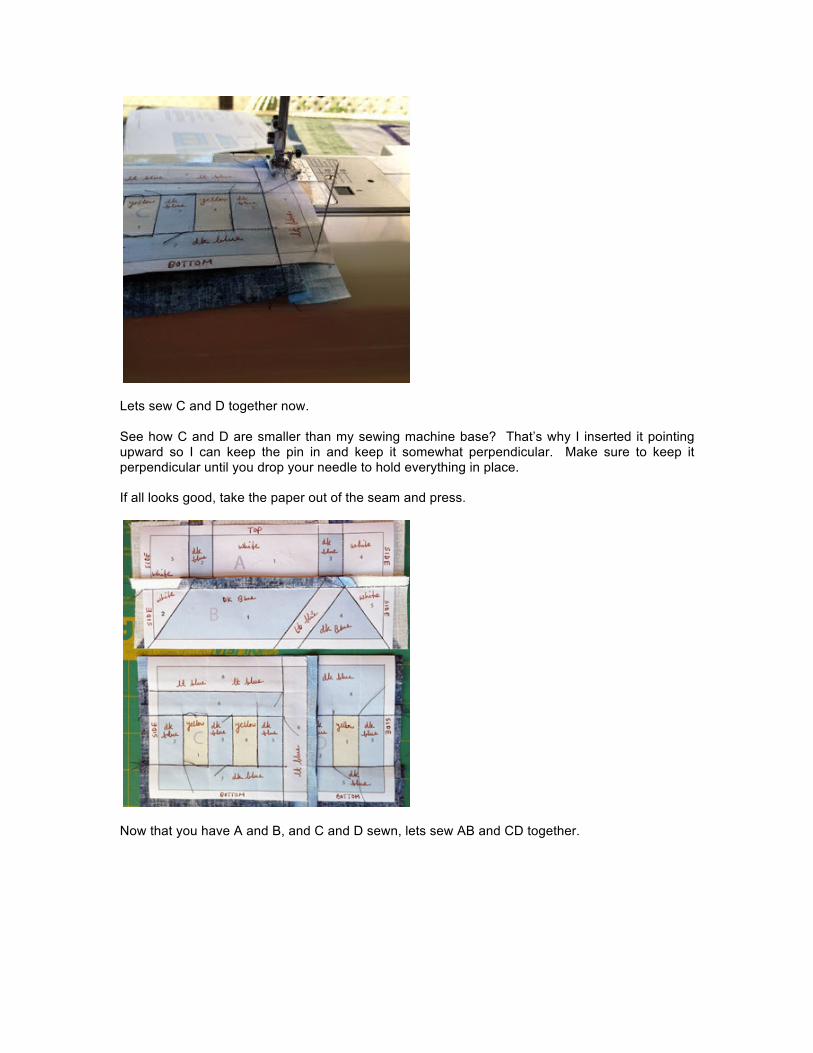
Lets sew C and D together now. See how C and D are smaller than my sewing machine base? That’s why I inserted it pointing upward so I can keep the pin in and keep it somewhat perpendicular. Make sure to keep it perpendicular until you drop your needle to hold everything in place. If all looks good, take the paper out of the seam and press.
Now that you have A and B, and C and D sewn, lets sew AB and CD together.
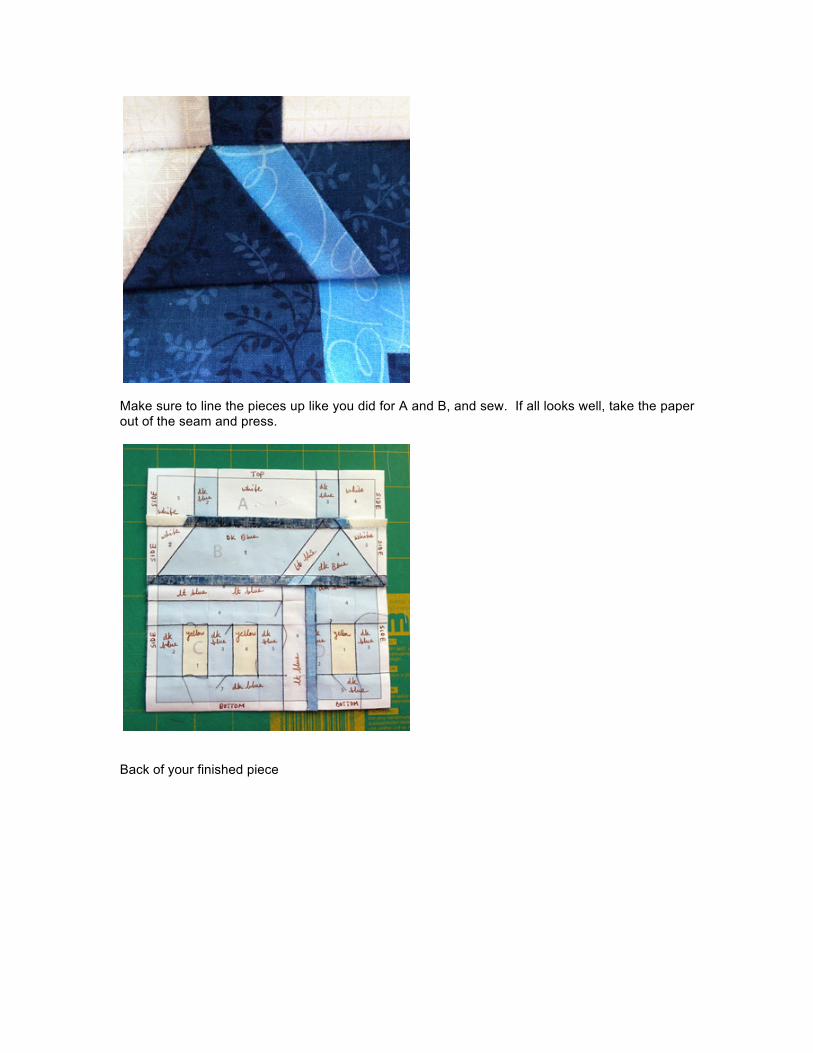
Make sure to line the pieces up like you did for A and B, and sew. If all looks well, take the paper out of the seam and press.
Back of your finished piece
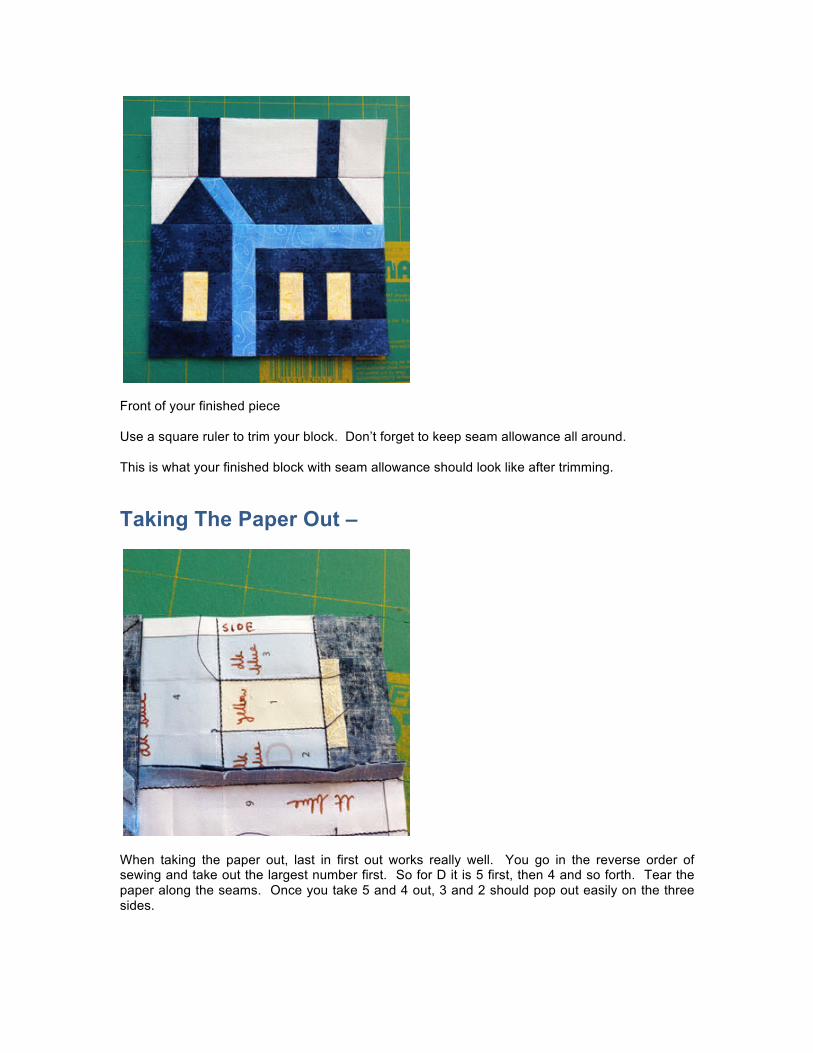
Front of your finished piece Use a square ruler to trim your block. Don’t forget to keep seam allowance all around. This is what your finished block with seam allowance should look like after trimming.
Taking The Paper Out –
When taking the paper out, last in first out works really well. You go in the reverse order of sewing and take out the largest number first. So for D it is 5 first, then 4 and so forth. Tear the paper along the seams. Once you take 5 and 4 out, 3 and 2 should pop out easily on the three sides.
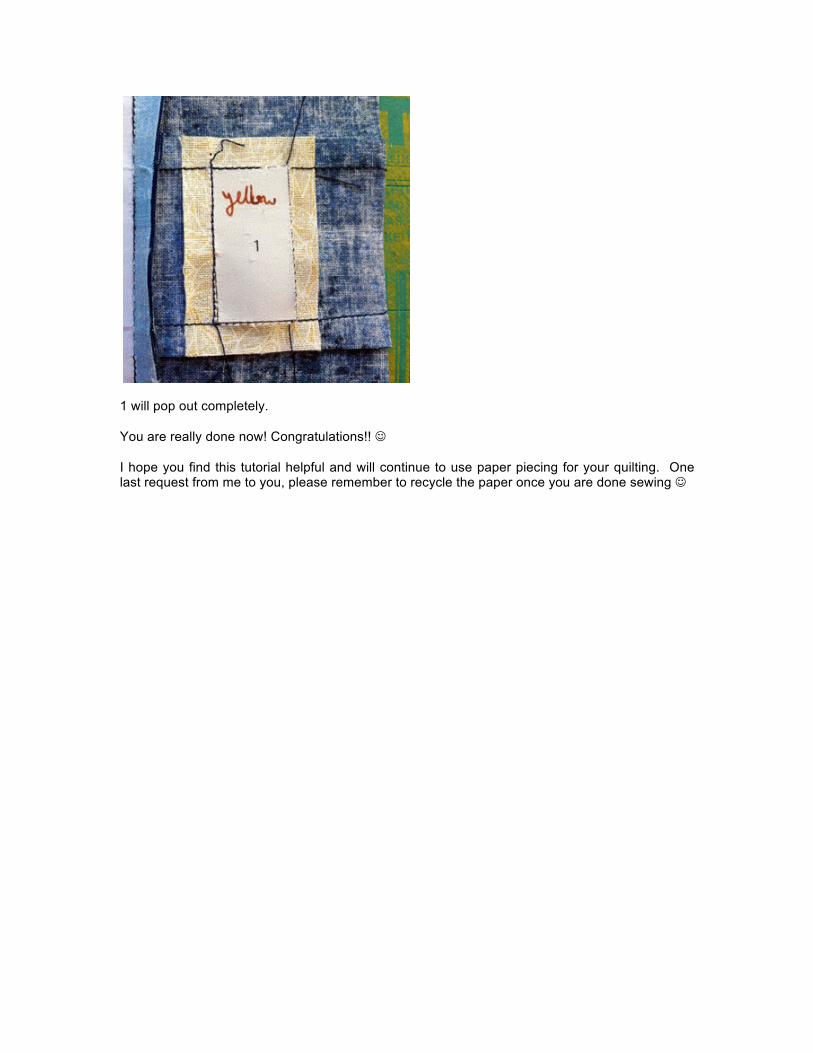
1 will pop out completely. You are really done now! Congratulations!! I hope you find this tutorial helpful and will continue to use paper piecing for your quilting. One last request from me to you, please remember to recycle the paper once you are done sewing