neonatal mortality and neonatal resuscitation - session 2 - neonatal resuscitat… · neonatal...
TRANSCRIPT
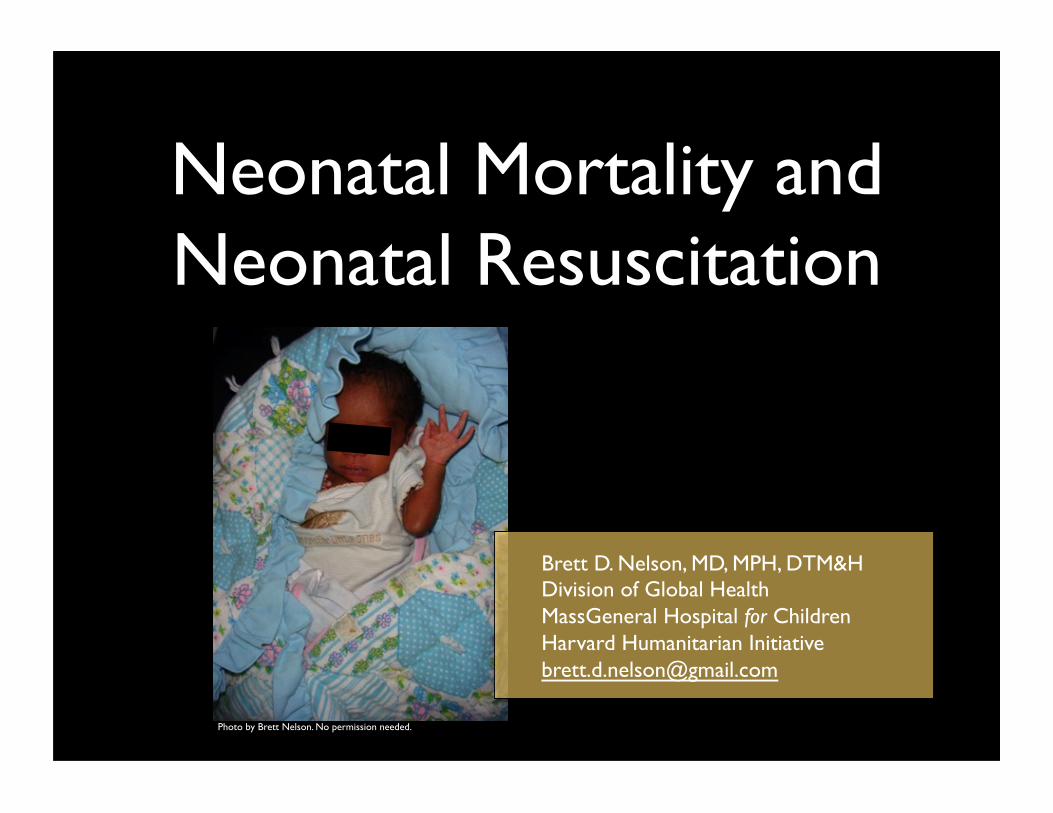
Neonatal Mortality and Neonatal Resuscitation
Brett D. Nelson, MD, MPH, DTM&H Division of Global Health MassGeneral Hospital for Children Harvard Humanitarian Initiative [email protected]
Photo by Brett Nelson. No permission needed.

Discussion outline
• Neonatal mortality
• Importance of newborn resuscitation
• Simple effective steps for newborn
resuscitation
• Practicum
Causes of child mortality
WHO. The global burden of disease: 2004 update.
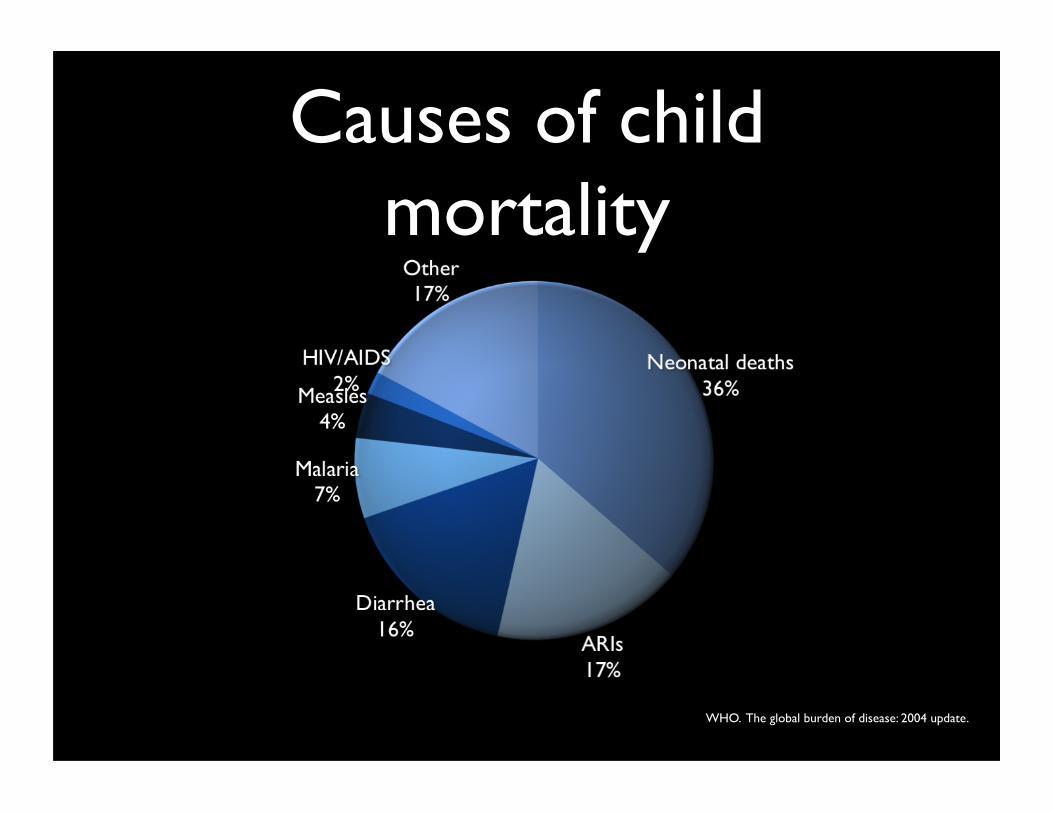
Causes of child mortality
WHO. The global burden of disease: 2004 update.
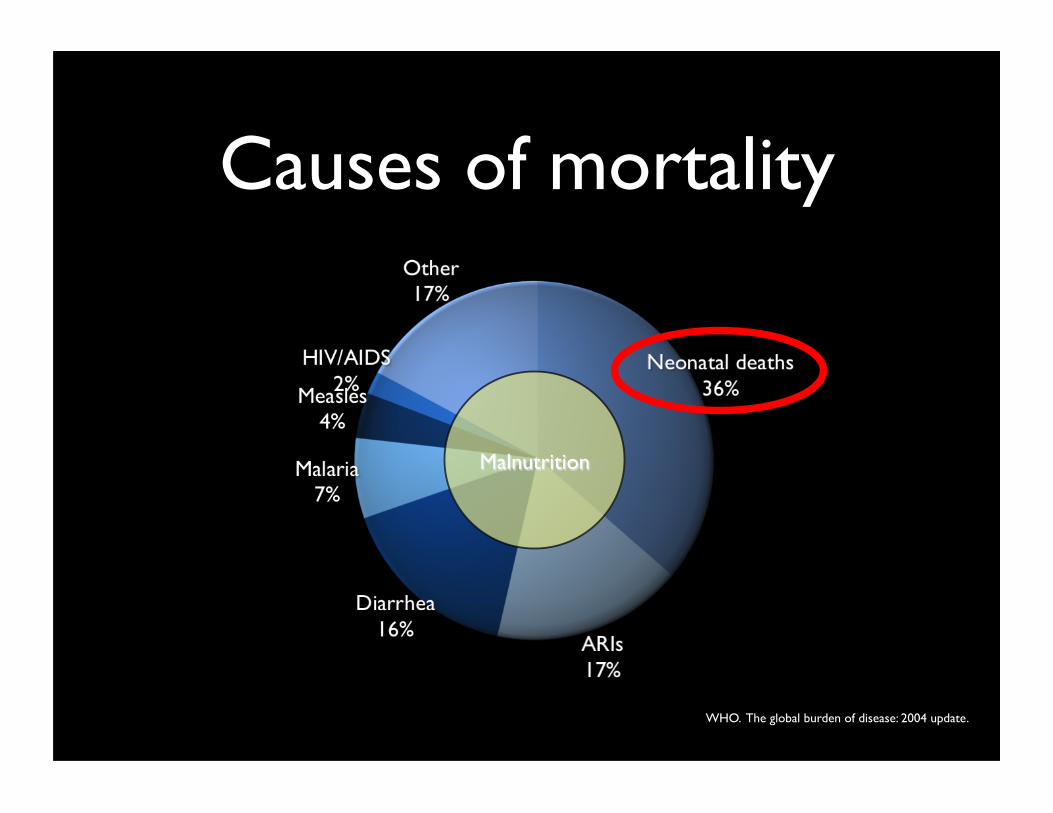
Causes of mortality
WHO. The global burden of disease: 2004 update.
Malnutrition
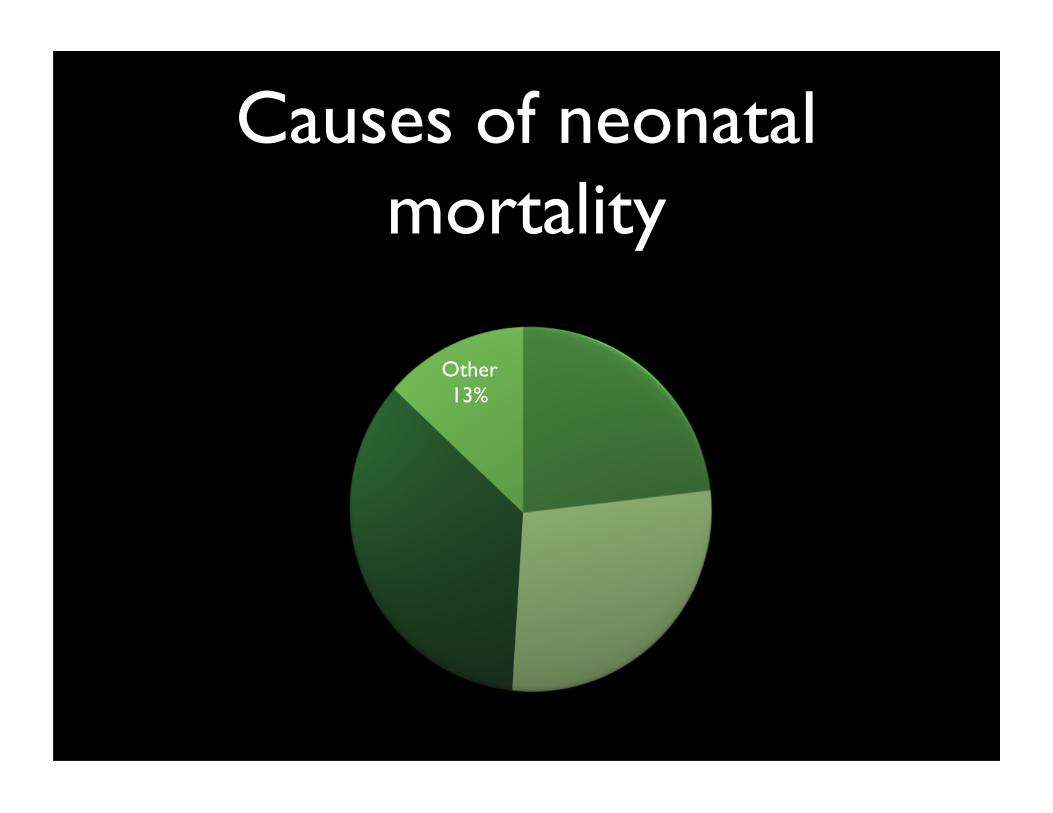
Causes of neonatal mortality
Other 13%
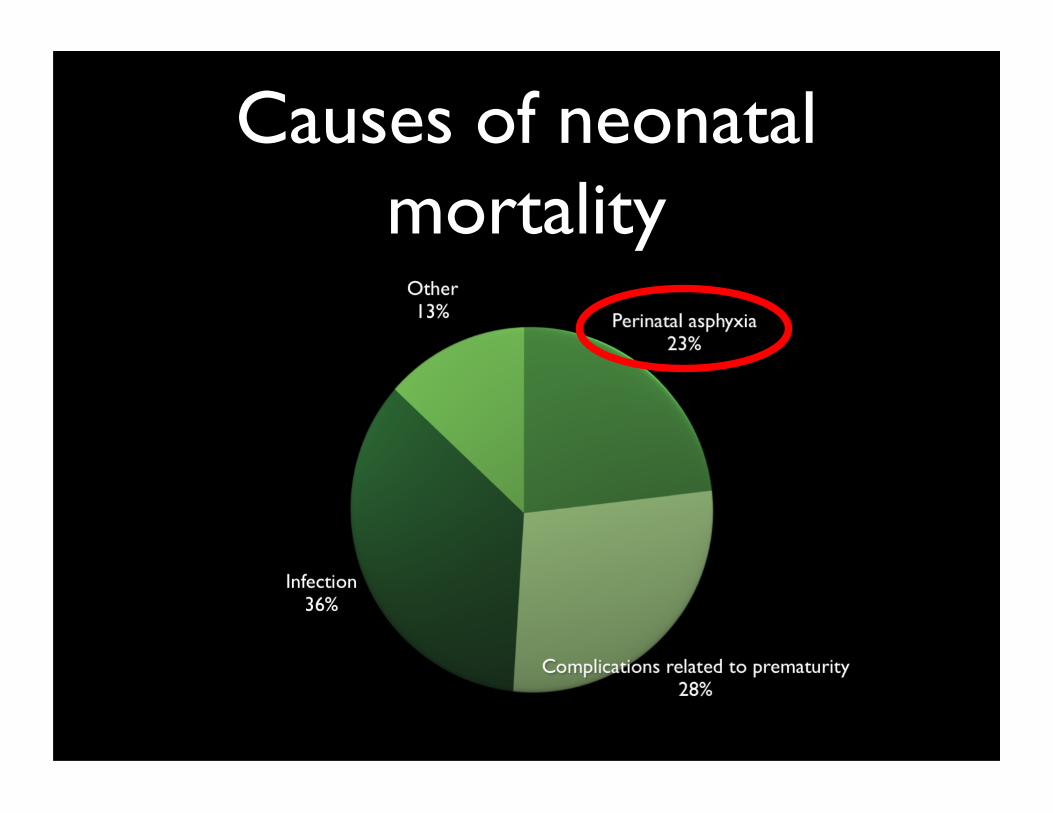
Causes of neonatal mortality
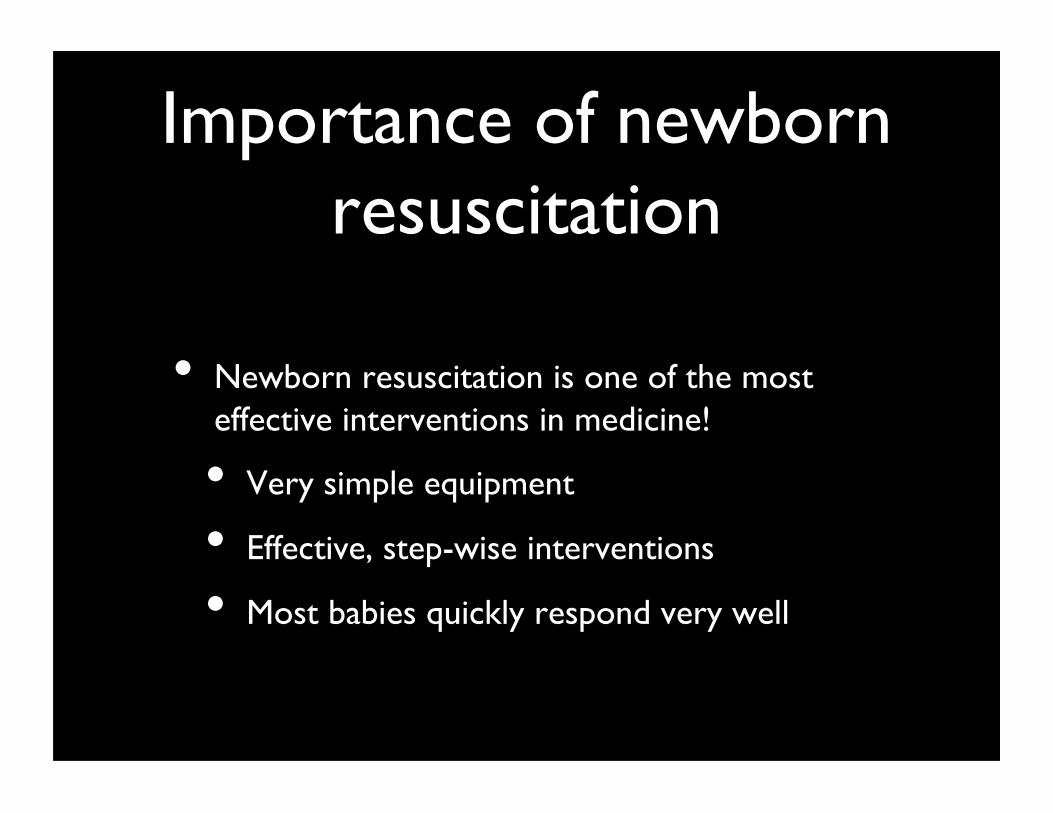
Importance of newborn resuscitation
• Newborn resuscitation is one of the most effective interventions in medicine!
• Very simple equipment
• Effective, step-wise interventions
• Most babies quickly respond very well
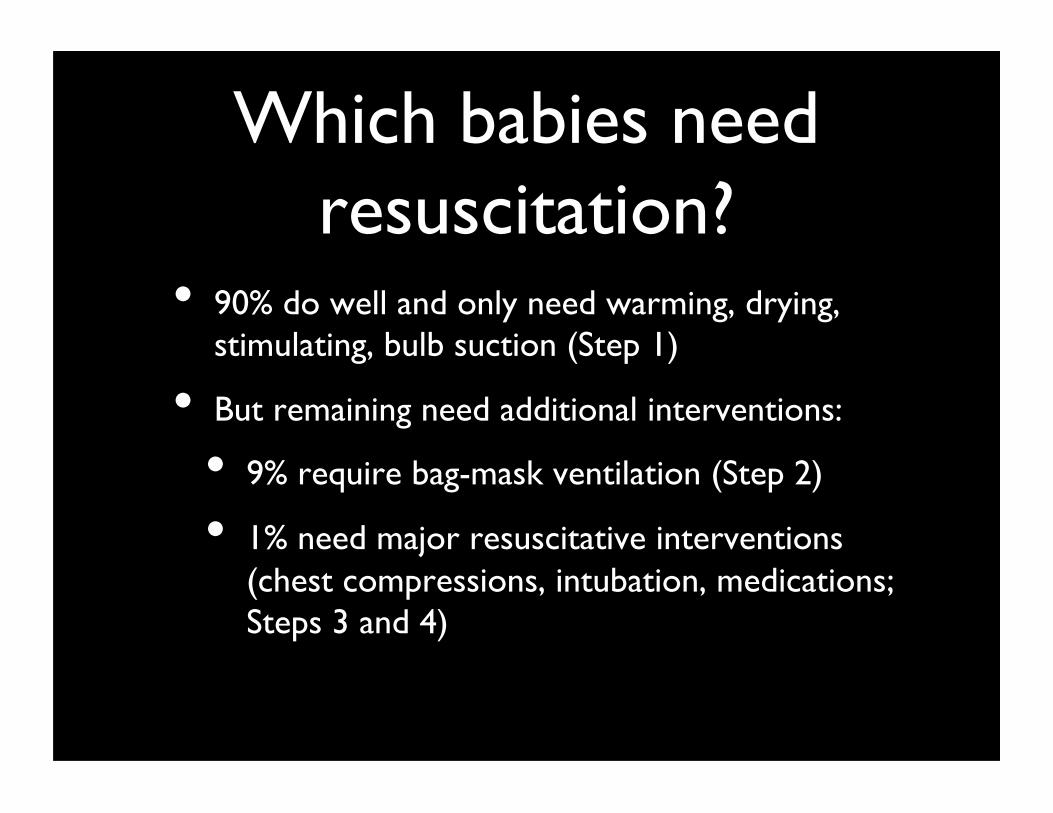
Which babies need resuscitation?
• 90% do well and only need warming, drying, stimulating, bulb suction (Step 1)
• But remaining need additional interventions:
• 9% require bag-mask ventilation (Step 2)
• 1% need major resuscitative interventions (chest compressions, intubation, medications; Steps 3 and 4)

90% only need Step 1
9% also need Step 2
1% also need Steps 3-4
Which babies need resuscitation?
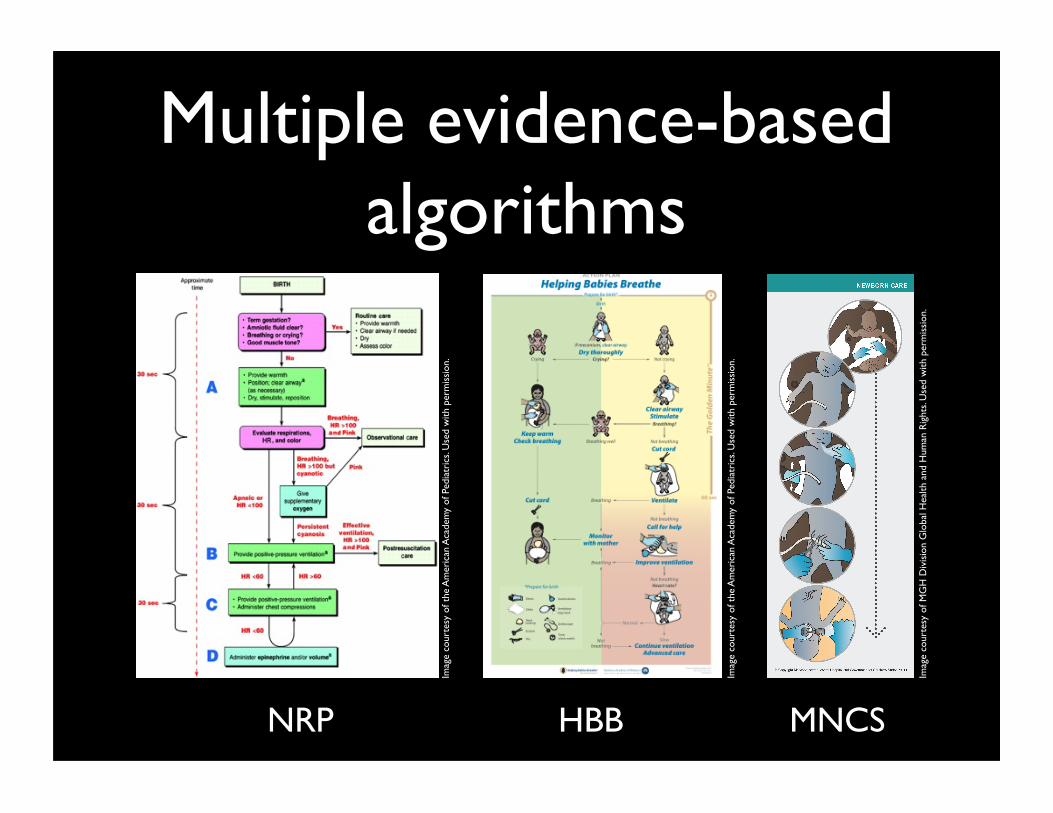
Multiple evidence-based algorithms
NRP HBB MNCS
Imag
e co
urte
sy o
f the
Am
eric
an A
cade
my
of P
edia
tric
s. U
sed
with
per
mis
sion
.
Imag
e co
urte
sy o
f the
Am
eric
an A
cade
my
of P
edia
tric
s. U
sed
with
per
mis
sion
.
Imag
e co
urte
sy o
f MG
H D
ivis
ion
Glo
bal H
ealth
and
Hum
an R
ight
s. U
sed
with
per
mis
sion
.

Helping Babies Breathe • NRP for resource-limited settings
• Released by AAP and partners in June 2010
• Pictorial algorithms and affordable resuscitative devices and training equipment
Image courtesy of Laerdal Medical. Used with permission. Imag
e co
urte
sy o
f the
Am
eric
an A
cade
my
of P
edia
tric
s. U
sed
with
per
mis
sion
.
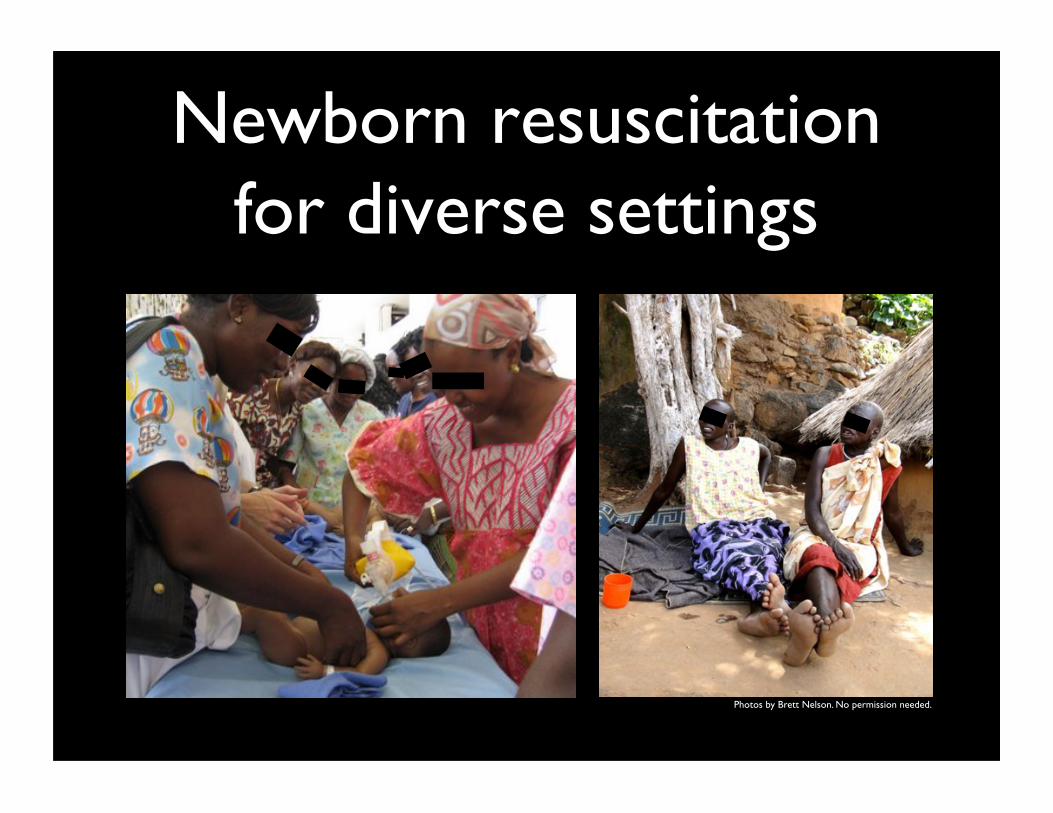
Newborn resuscitation for diverse settings
American Heart Association, American Academy of Pediatrics. Pediatrics. 2006;117:e1029-e1038
Photos by Brett Nelson. No permission needed.
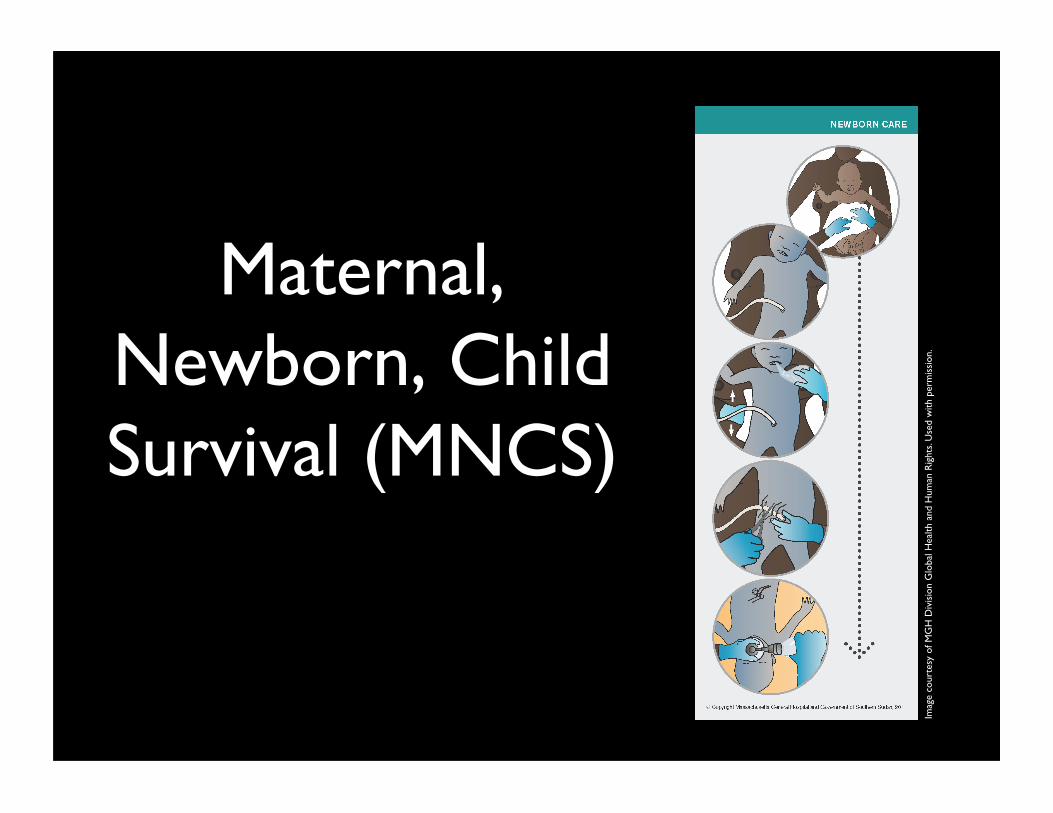
Maternal, Newborn, Child Survival (MNCS)
Imag
e co
urte
sy o
f MG
H D
ivis
ion
Glo
bal H
ealth
and
Hum
an R
ight
s. U
sed
with
per
mis
sion
.
Prepare for resuscitation
• Always have resuscitation equipment ready
• Every delivery should have 1 person….
• whose only responsibility is the baby
• who is capable of initiating resuscitation
• When significant resuscitation is anticipated, have additional personnel present
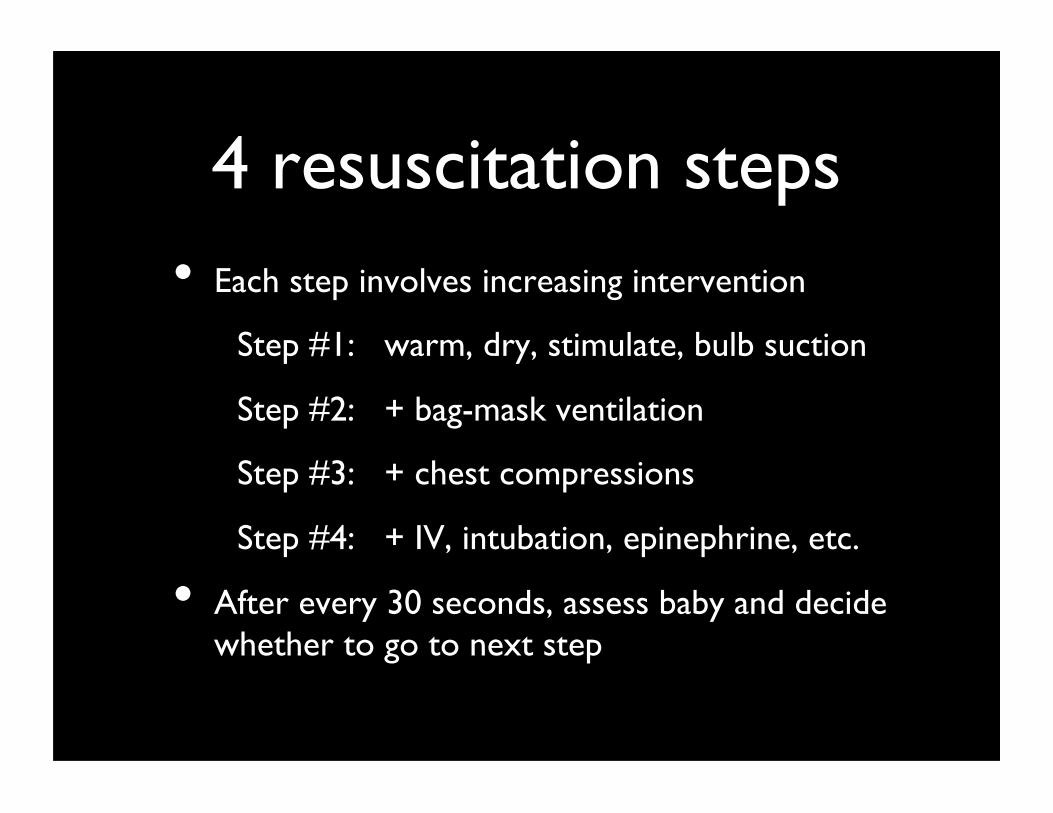
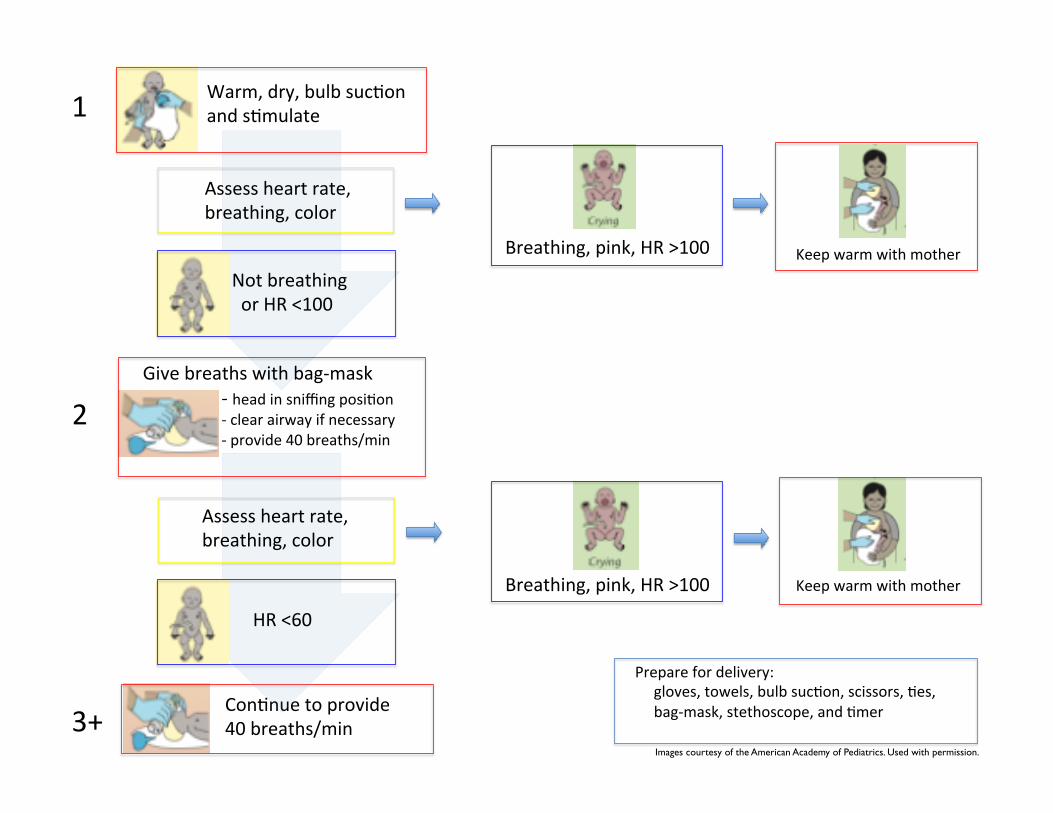
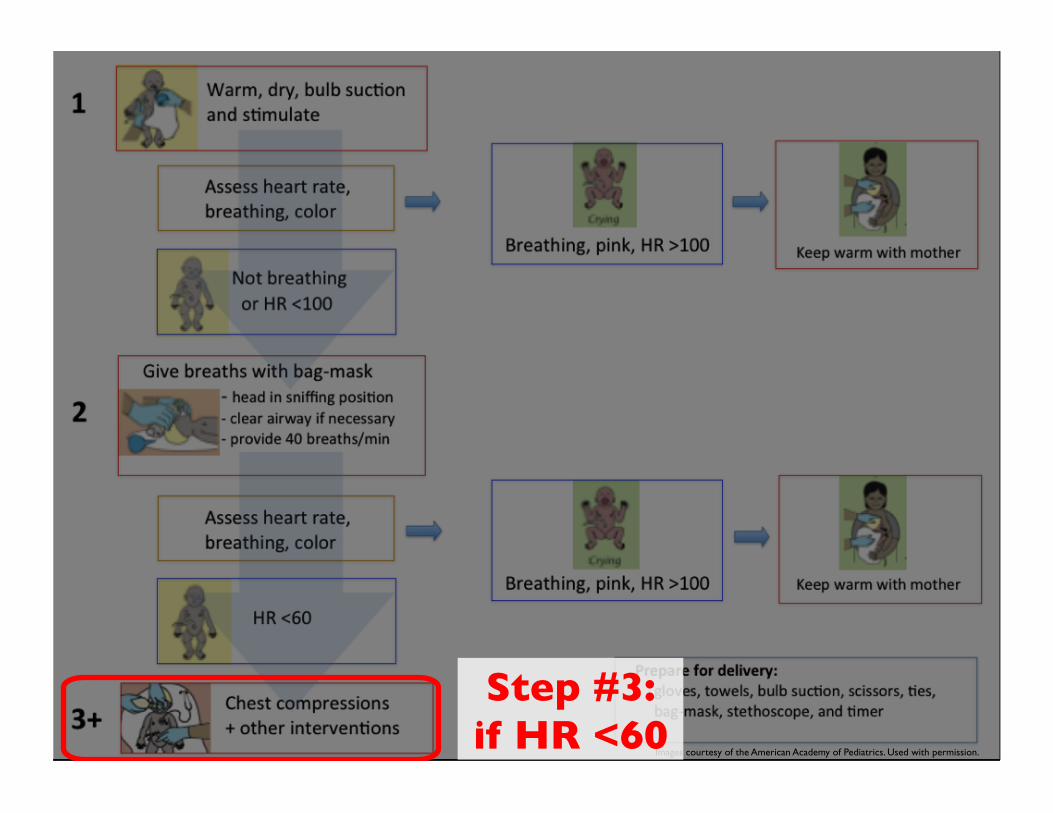
4 resuscitation steps • Each step involves increasing intervention
Step #1: warm, dry, stimulate, bulb suction
Step #2: + bag-mask ventilation
Step #3: + chest compressions
Step #4: + IV, intubation, epinephrine, etc.
• After every 30 seconds, assess baby and decide whether to go to next step
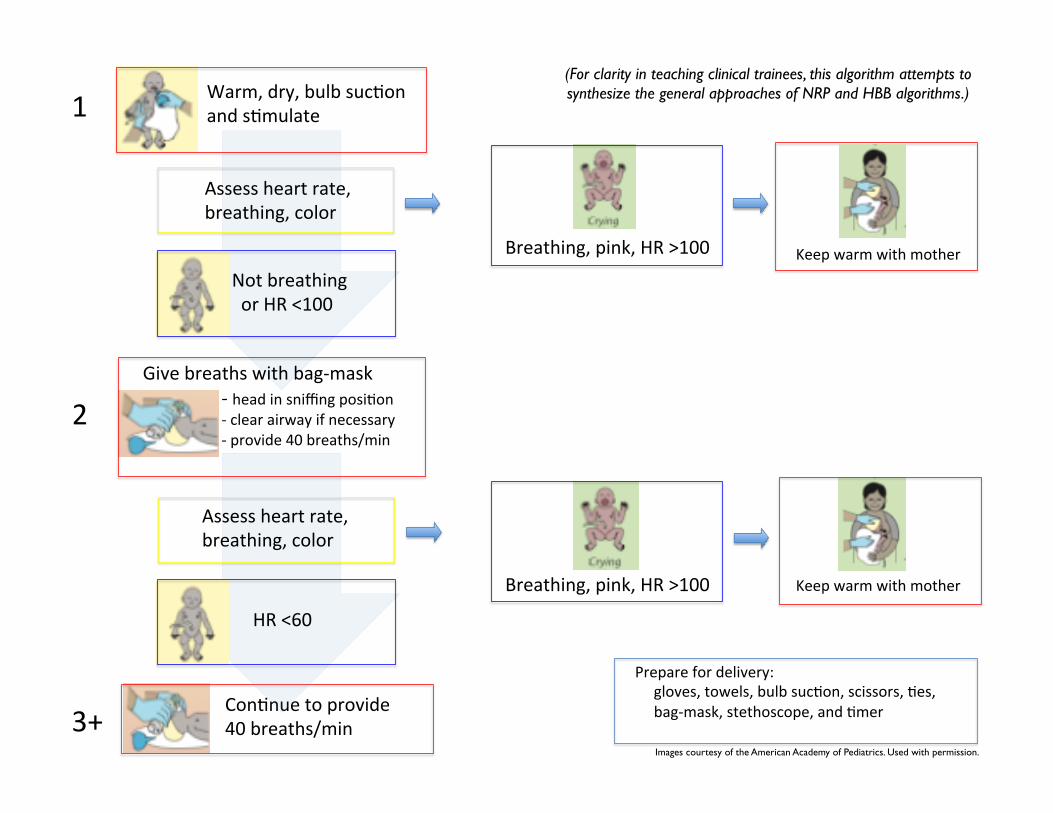
Con$nue to provide 40 breaths/min
-‐ head in sniffing posi$on -‐ clear airway if necessary -‐ provide 40 breaths/min
Give breaths with bag-‐mask
Warm, dry, bulb suc$on and s$mulate
Not breathing or HR <100
Breathing, pink, HR >100
Breathing, pink, HR >100
Keep warm with mother
Assess heart rate, breathing, color
Keep warm with mother
Prepare for delivery: gloves, towels, bulb suc$on, scissors, $es, bag-‐mask, stethoscope, and $mer
1
2
3+
HR <60
Assess heart rate, breathing, color
Images courtesy of the American Academy of Pediatrics. Used with permission.
(For clarity in teaching clinical trainees, this algorithm attempts to synthesize the general approaches of NRP and HBB algorithms.)
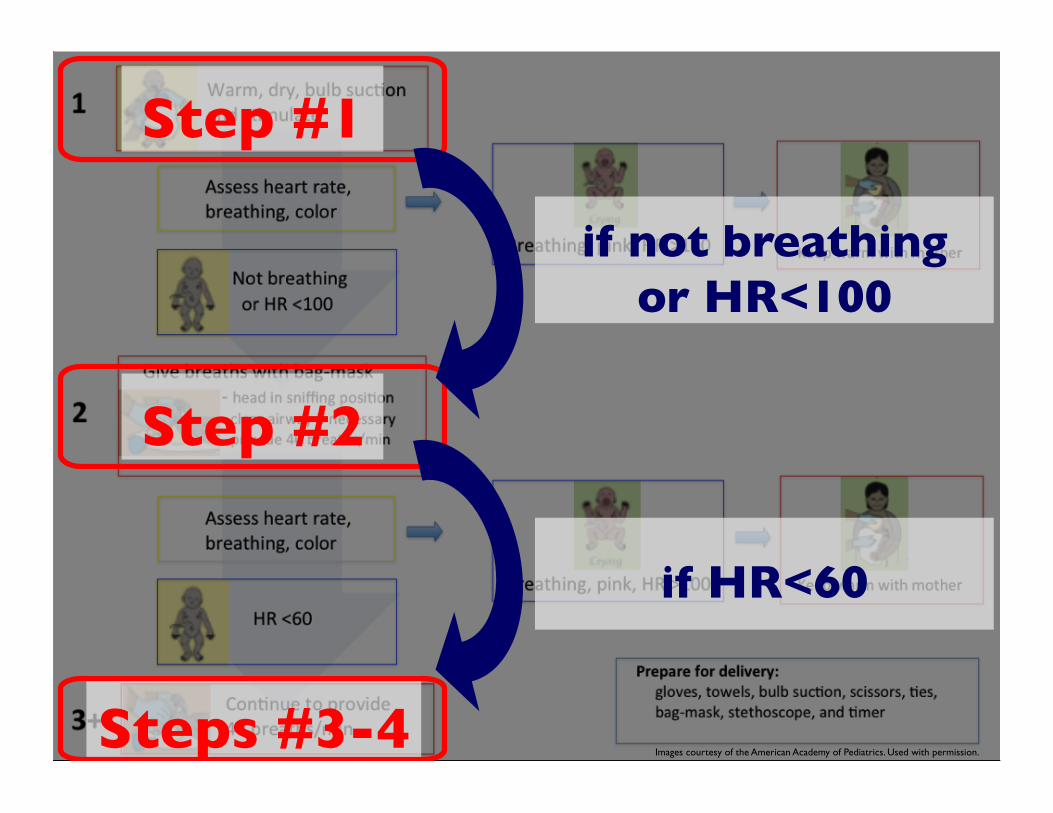
Step #1
if not breathing or HR<100
Step #2
if HR<60
Steps #3-4 Images courtesy of the American Academy of Pediatrics. Used with permission.
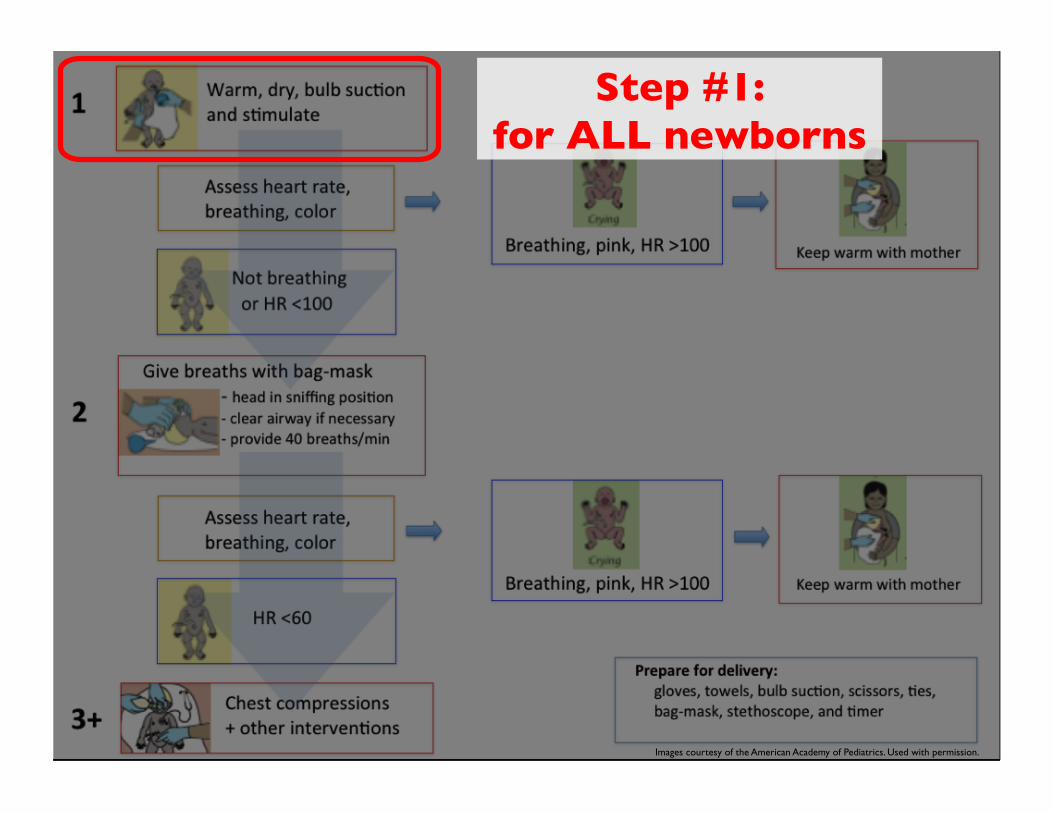
Step #1: for ALL newborns
Images courtesy of the American Academy of Pediatrics. Used with permission.
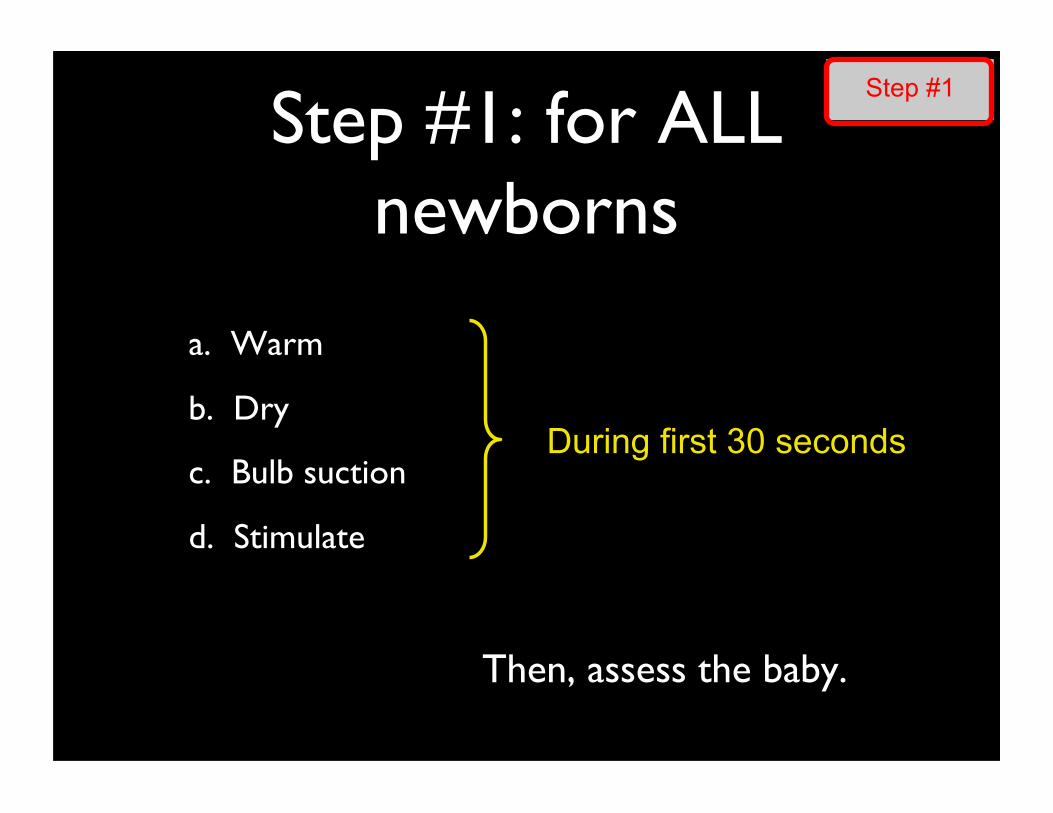
Step #1: for ALL newborns
a. Warm
b. Dry
c. Bulb suction
d. Stimulate
Then, assess the baby.
During first 30 seconds
Step #1
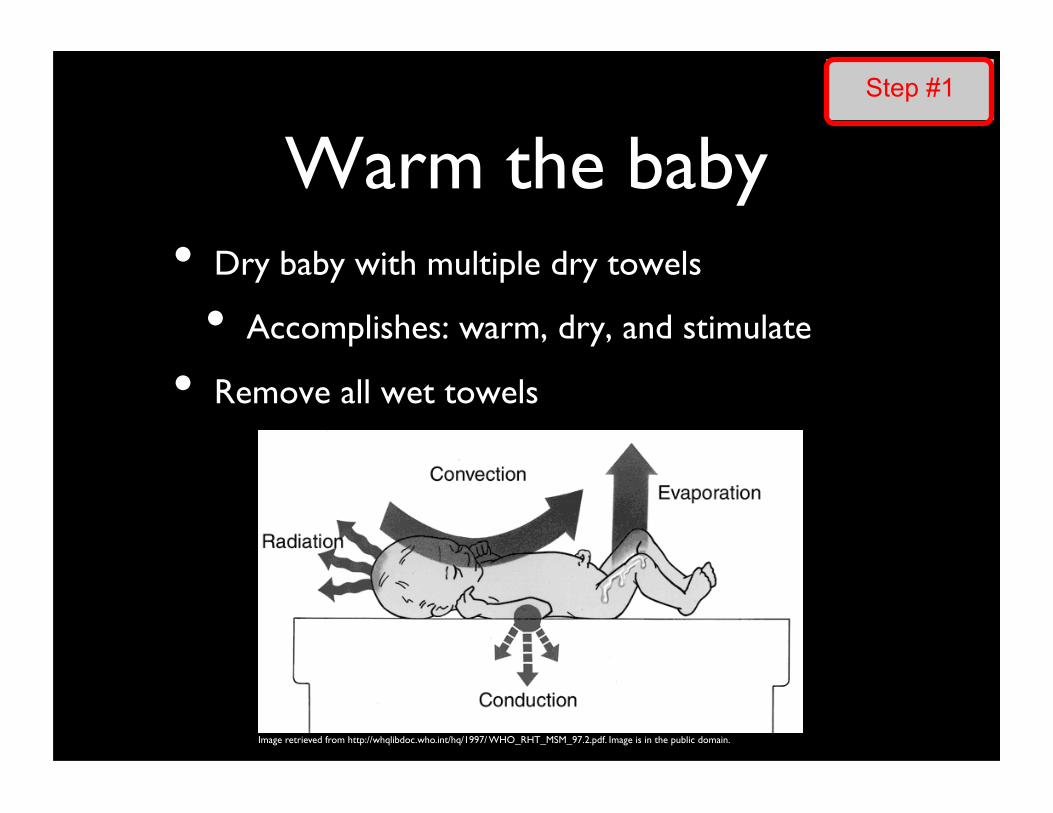
Warm the baby • Dry baby with multiple dry towels
• Accomplishes: warm, dry, and stimulate
• Remove all wet towels
Step #1
Image retrieved from http://whqlibdoc.who.int/hq/1997/ WHO_RHT_MSM_97.2.pdf. Image is in the public domain.
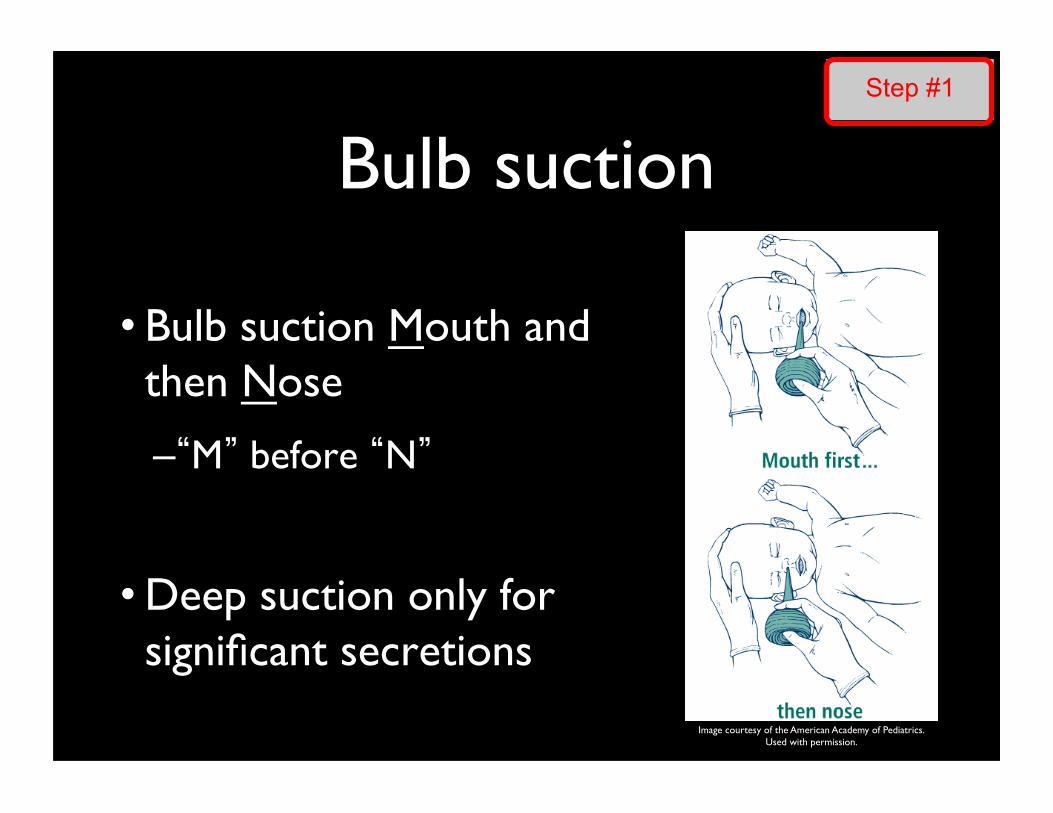
Bulb suction
• Bulb suction Mouth and then Nose
– “M” before “N”
• Deep suction only for significant secretions
Step #1
Image courtesy of the American Academy of Pediatrics. Used with permission.
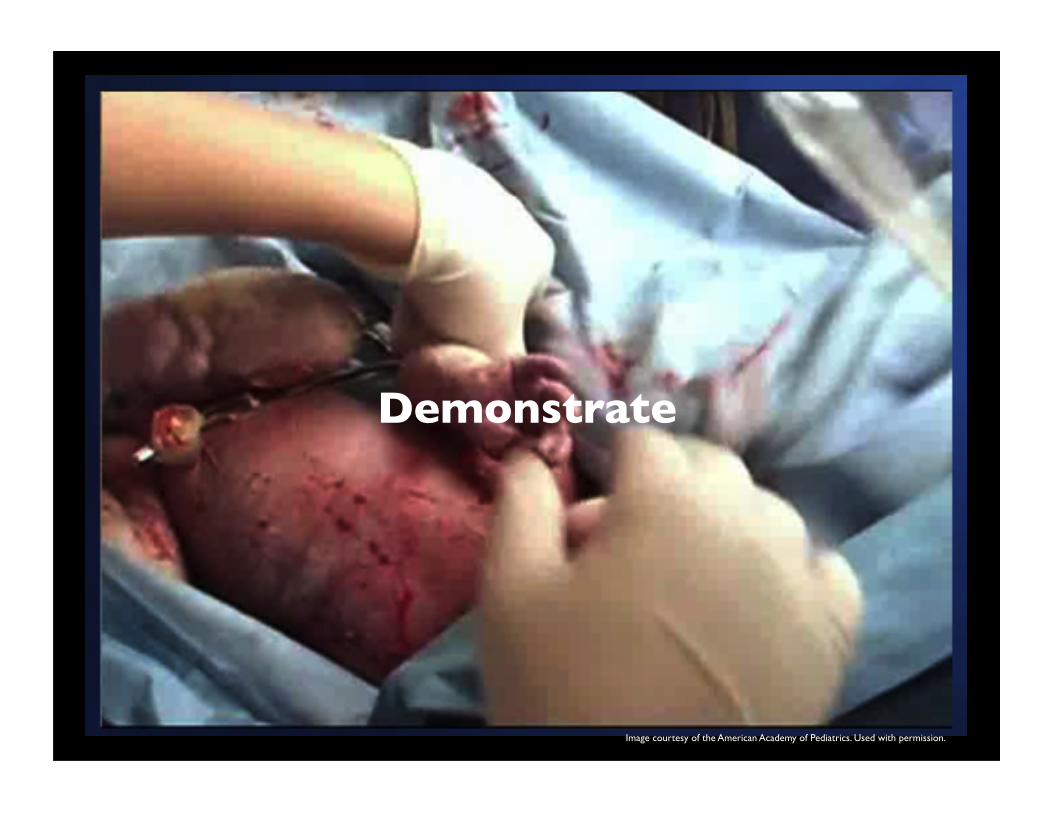
Demonstrate
Image courtesy of the American Academy of Pediatrics. Used with permission.
Now, after 30 seconds of Step #1, assess the baby…���
���And decide whether need Step #2
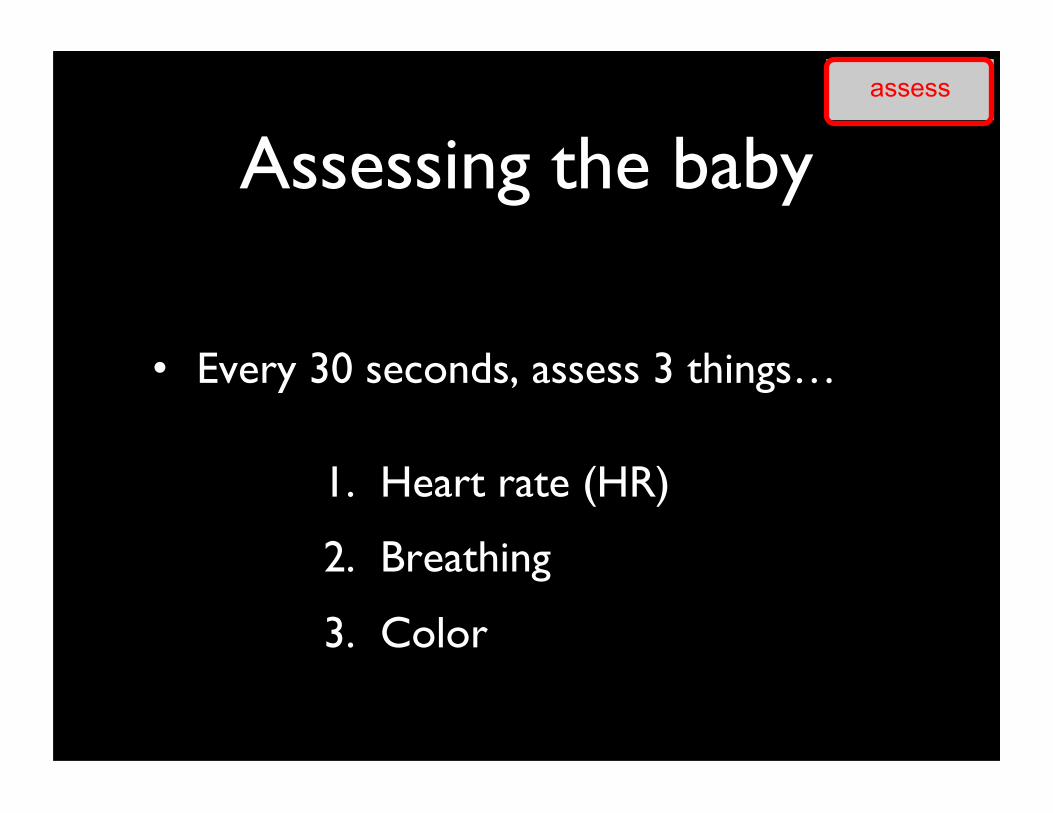
Assessing the baby
• Every 30 seconds, assess 3 things…
1. Heart rate (HR)
2. Breathing
3. Color
assess
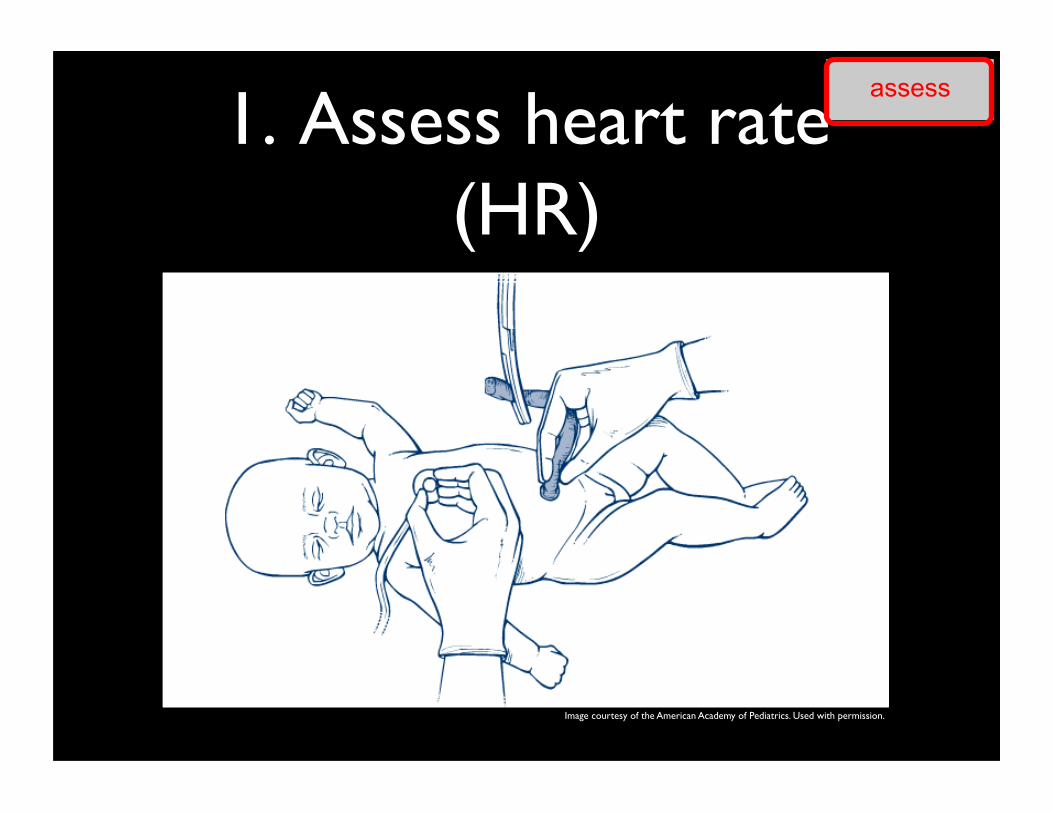
1. Assess heart rate (HR)
assess
Image courtesy of the American Academy of Pediatrics. Used with permission.
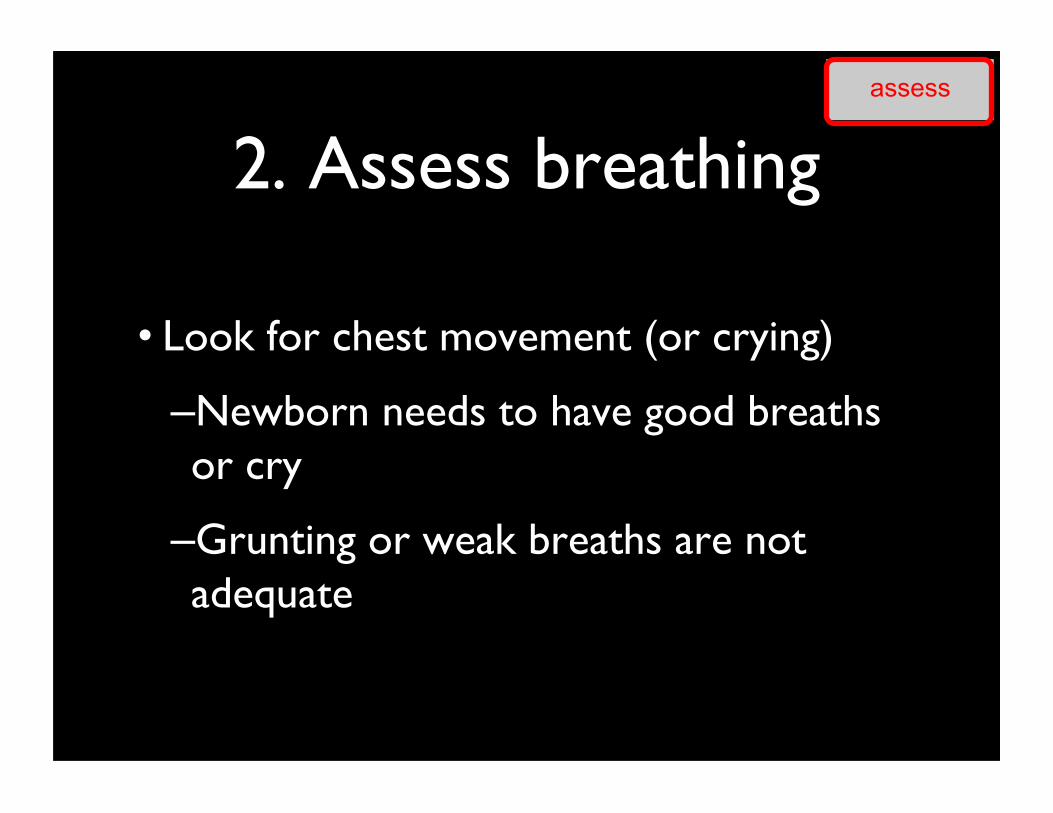
2. Assess breathing
• Look for chest movement (or crying)
– Newborn needs to have good breaths or cry
– Grunting or weak breaths are not adequate
assess
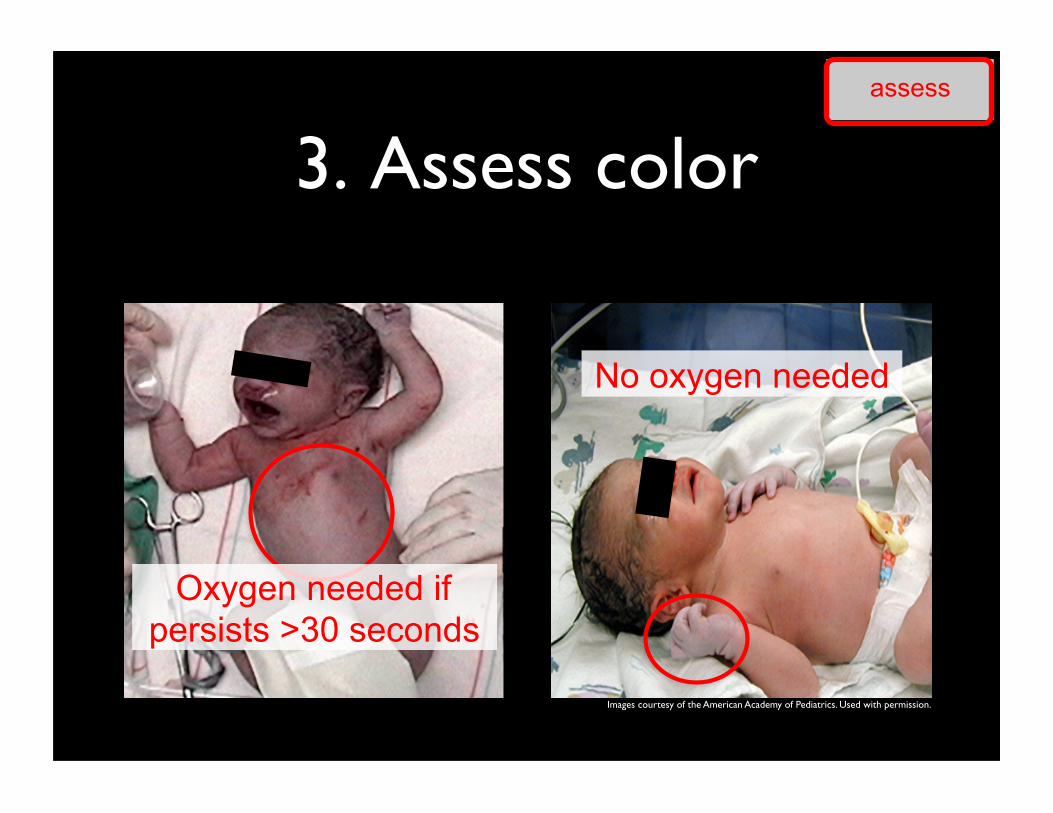
3. Assess color
No oxygen needed
assess
Oxygen needed if persists >30 seconds
Images courtesy of the American Academy of Pediatrics. Used with permission.
Con$nue to provide 40 breaths/min
-‐ head in sniffing posi$on -‐ clear airway if necessary -‐ provide 40 breaths/min
Give breaths with bag-‐mask
Warm, dry, bulb suc$on and s$mulate
Not breathing or HR <100
Breathing, pink, HR >100
Breathing, pink, HR >100
Keep warm with mother
Assess heart rate, breathing, color
Keep warm with mother
Prepare for delivery: gloves, towels, bulb suc$on, scissors, $es, bag-‐mask, stethoscope, and $mer
1
2
3+
HR <60
Assess heart rate, breathing, color
Images courtesy of the American Academy of Pediatrics. Used with permission.
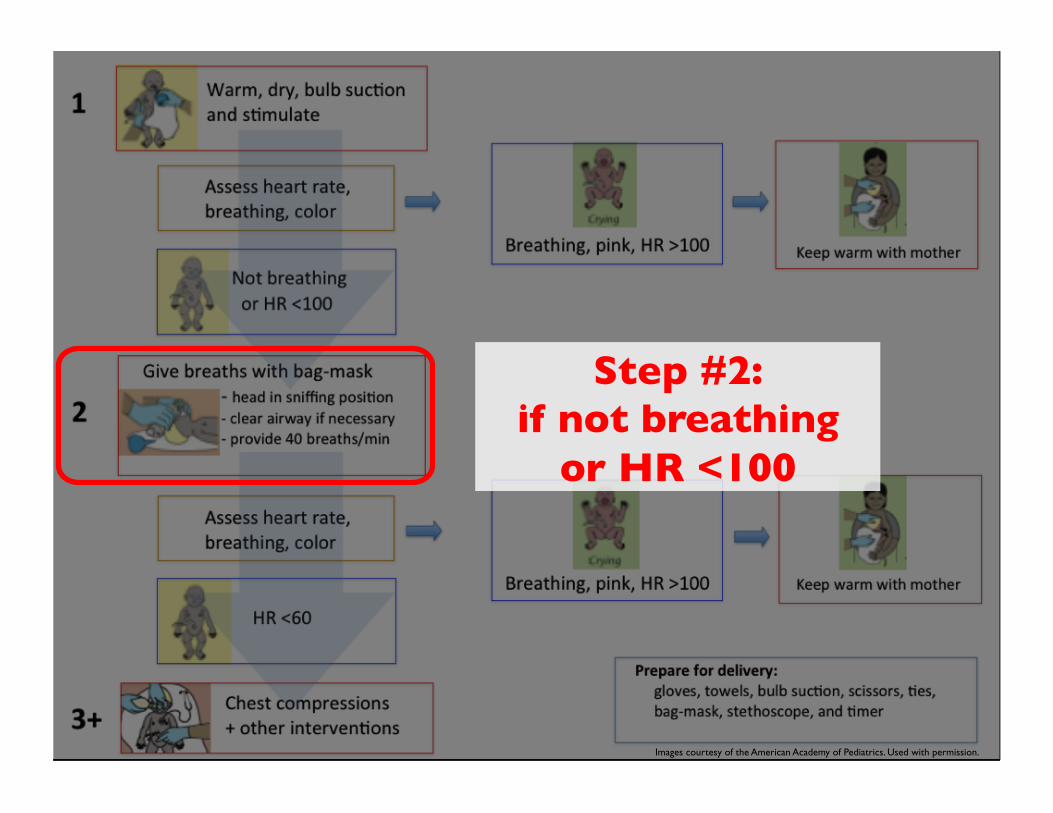
Step #2: if not breathing
or HR <100
Images courtesy of the American Academy of Pediatrics. Used with permission.
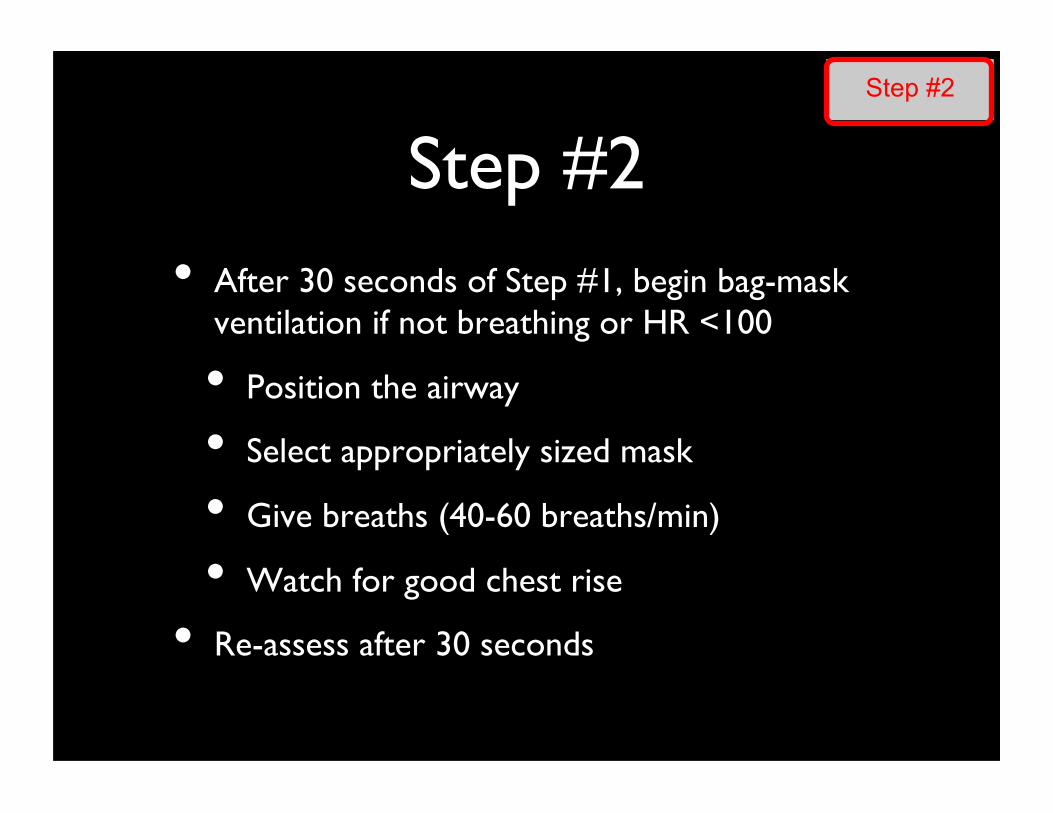
Step #2
Step #2 • After 30 seconds of Step #1, begin bag-mask
ventilation if not breathing or HR <100
• Position the airway
• Select appropriately sized mask
• Give breaths (40-60 breaths/min)
• Watch for good chest rise
• Re-assess after 30 seconds
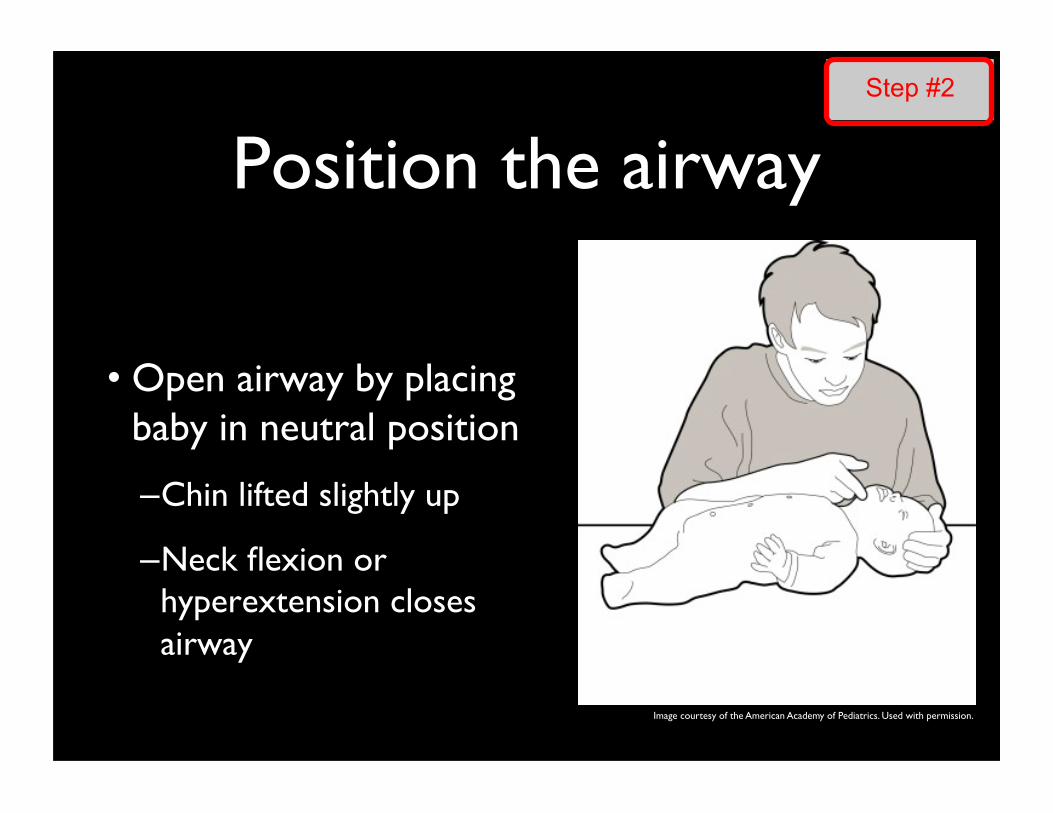
Position the airway
• Open airway by placing baby in neutral position
– Chin lifted slightly up
– Neck flexion or hyperextension closes airway
Step #2
Image courtesy of the American Academy of Pediatrics. Used with permission.
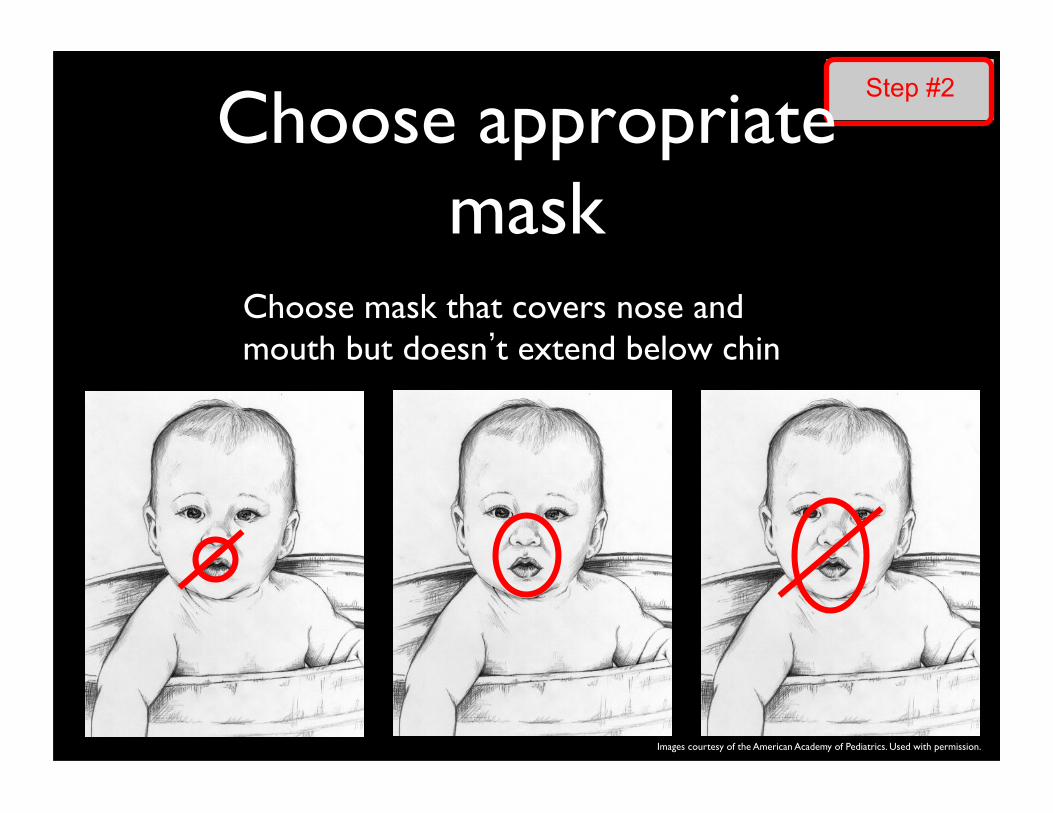
Step #2 Choose appropriate
mask Choose mask that covers nose and mouth but doesn’t extend below chin
Images courtesy of the American Academy of Pediatrics. Used with permission.
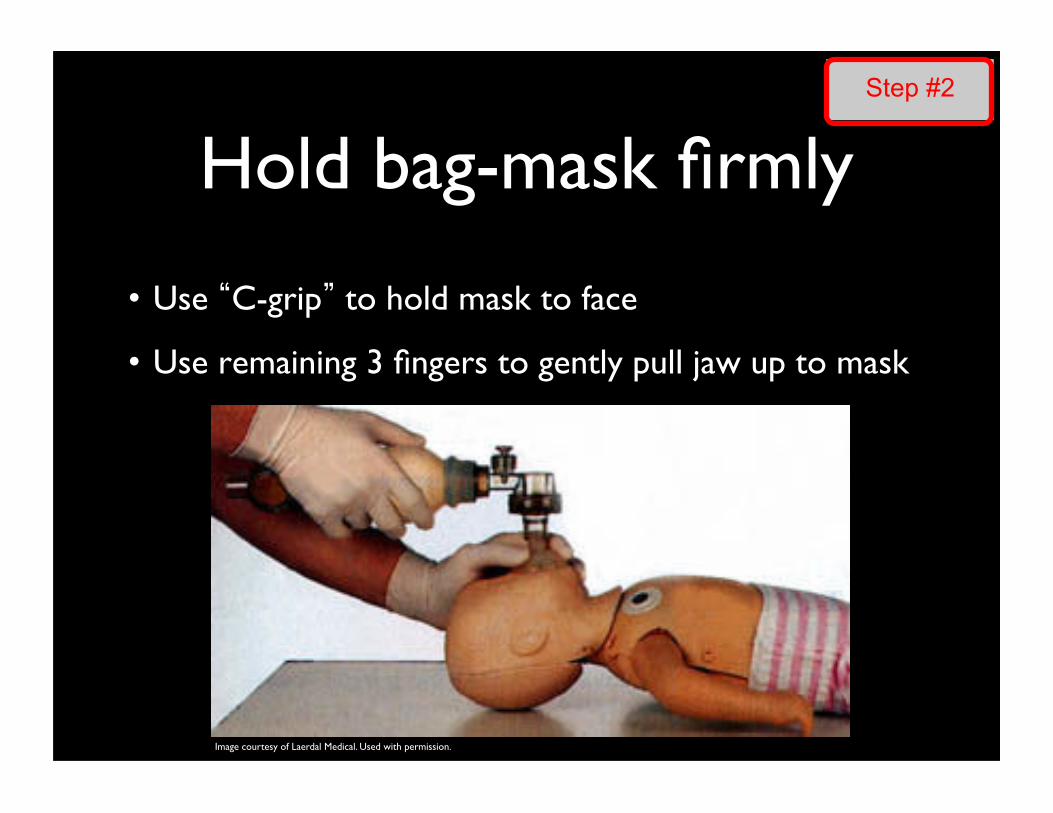
Hold bag-mask firmly
• Use “C-grip” to hold mask to face
• Use remaining 3 fingers to gently pull jaw up to mask
Step #2
Image courtesy of Laerdal Medical. Used with permission.

Check good mask seal • Give breaths at 40-60 breaths/min
• If you hear air escaping from mask, reposition or hold mask more firmly
Step #2
Image retrieved from http://whqlibdoc.who.int/publications/2005/9241546700.pdf. Image in public domain.
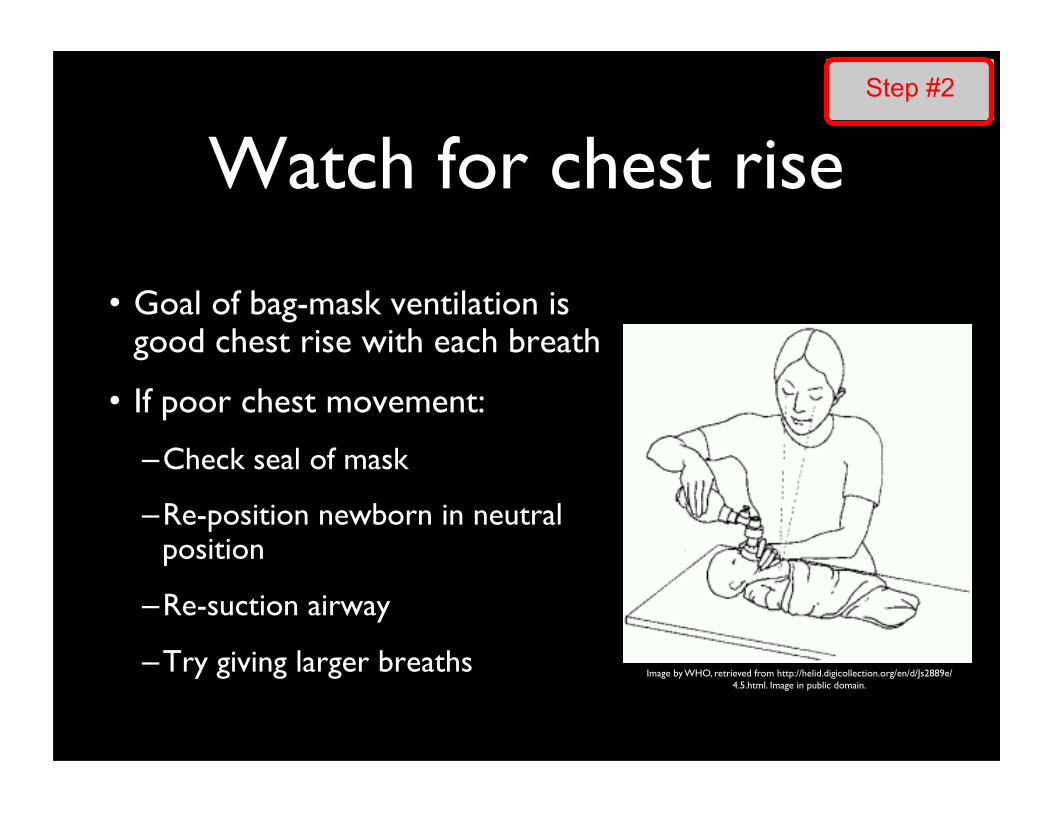
Watch for chest rise
• Goal of bag-mask ventilation is good chest rise with each breath
• If poor chest movement:
– Check seal of mask
– Re-position newborn in neutral position
– Re-suction airway
– Try giving larger breaths
Step #2
Image by WHO, retrieved from http://helid.digicollection.org/en/d/Js2889e/4.5.html. Image in public domain.
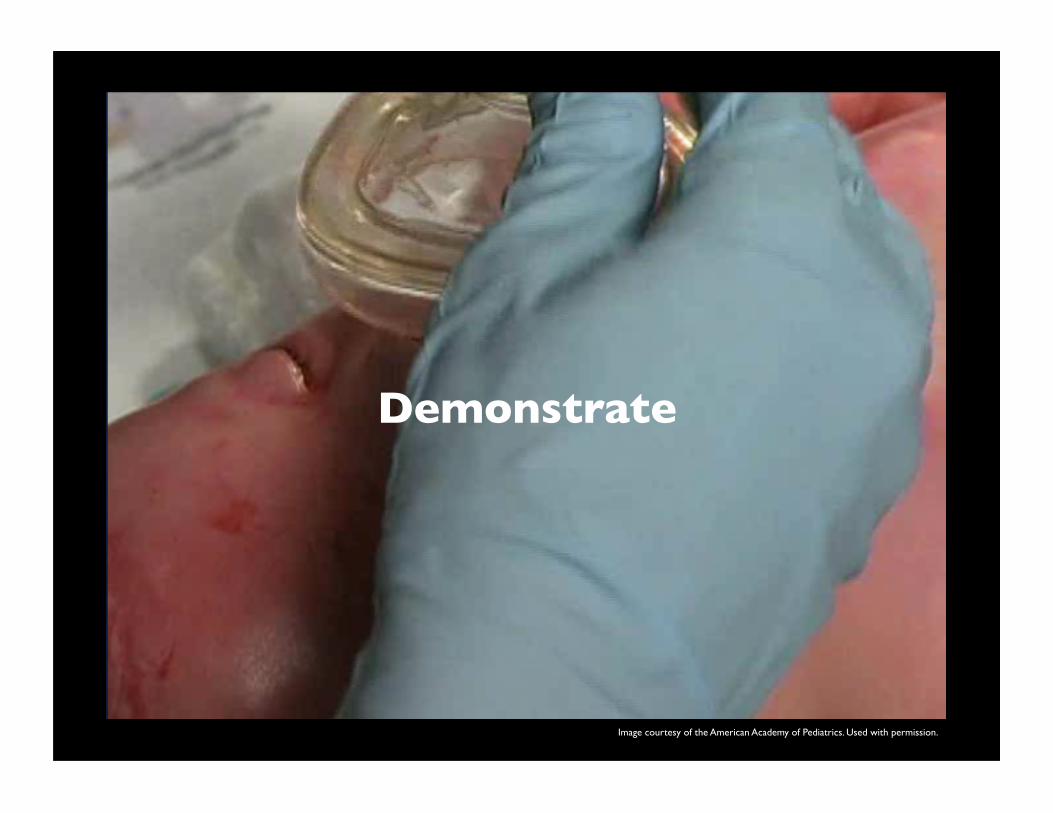
Demonstrate
Image courtesy of the American Academy of Pediatrics. Used with permission.
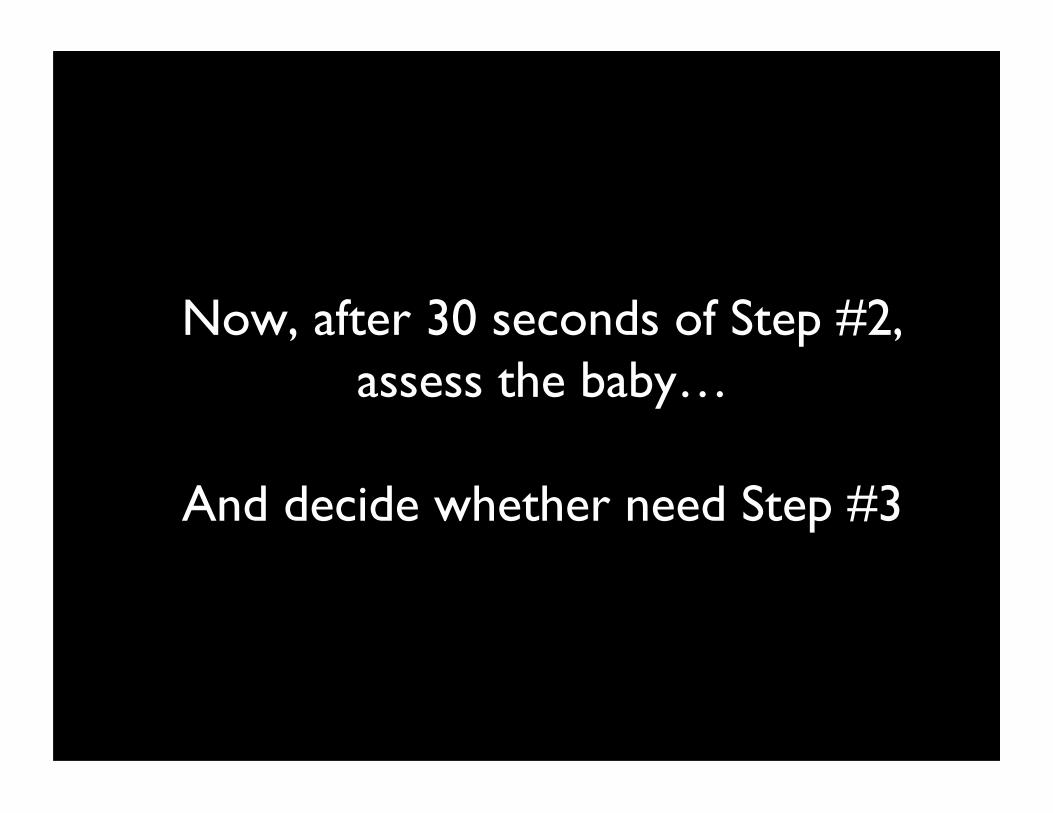
Now, after 30 seconds of Step #2, assess the baby…���
���And decide whether need Step #3

Con$nue to provide 40 breaths/min
-‐ head in sniffing posi$on -‐ clear airway if necessary -‐ provide 40 breaths/min
Give breaths with bag-‐mask
Warm, dry, bulb suc$on and s$mulate
Not breathing or HR <100
Breathing, pink, HR >100
Breathing, pink, HR >100
Keep warm with mother
Assess heart rate, breathing, color
Keep warm with mother
Prepare for delivery: gloves, towels, bulb suc$on, scissors, $es, bag-‐mask, stethoscope, and $mer
1
2
3+
HR <60
Assess heart rate, breathing, color
Images courtesy of the American Academy of Pediatrics. Used with permission.
Images courtesy of the American Academy of Pediatrics. Used with permission.
Step #3: if HR <60
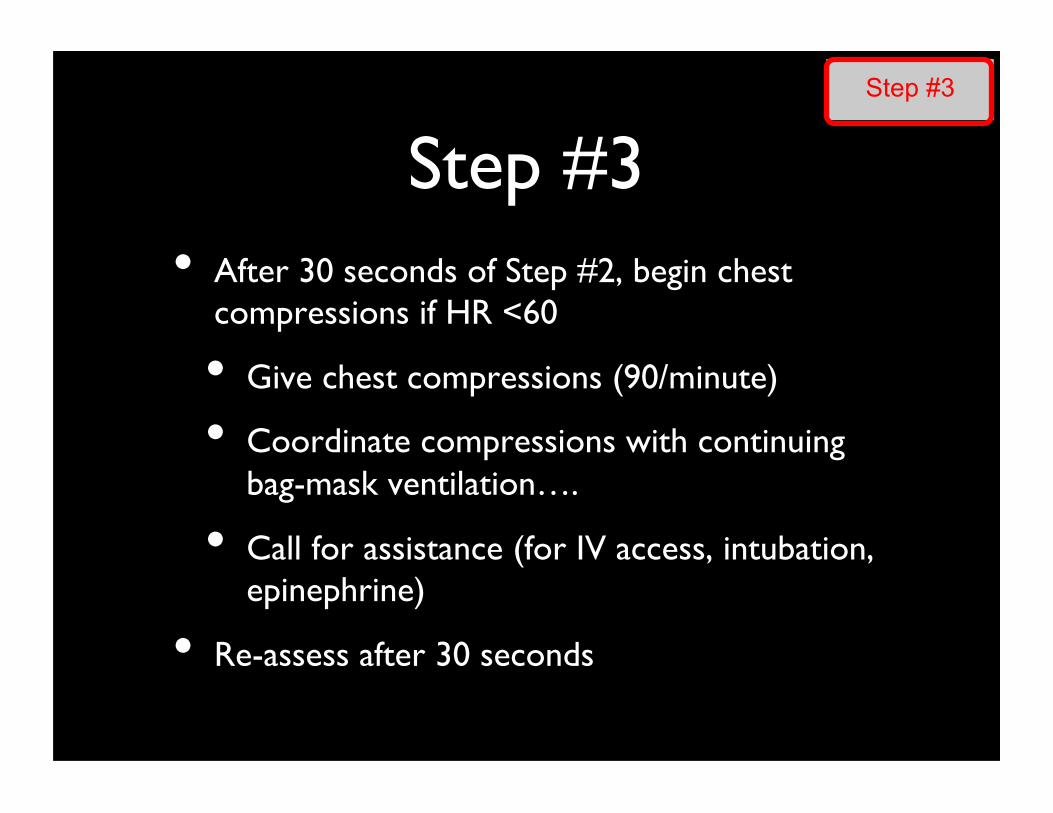
Step #3
Step #3 • After 30 seconds of Step #2, begin chest
compressions if HR <60
• Give chest compressions (90/minute)
• Coordinate compressions with continuing bag-mask ventilation….
• Call for assistance (for IV access, intubation, epinephrine)
• Re-assess after 30 seconds
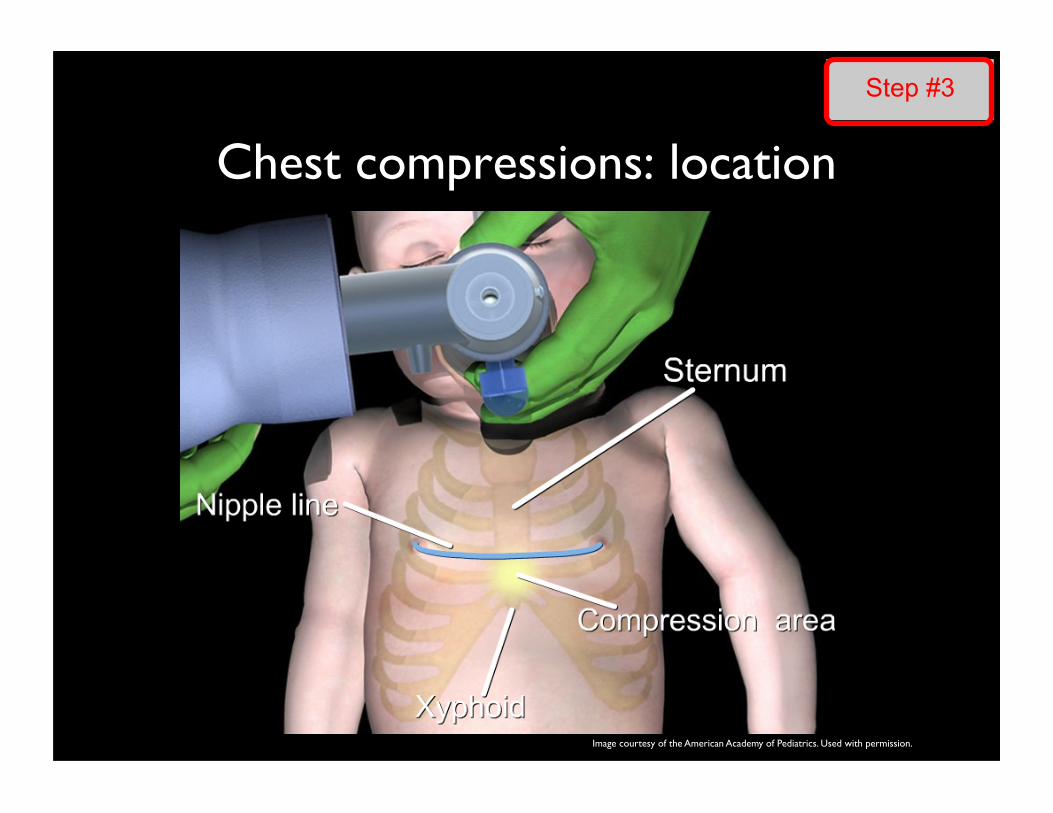
Step #3
Chest compressions: location
Image courtesy of the American Academy of Pediatrics. Used with permission.

Chest compressions: 2 techniques
2-finger compressions
Step #3
Preferred:
Less tiring Better control of
depth
Hands around chest
Images courtesy of the American Academy of Pediatrics. Used with permission.

Chest compressions
• Place thumbs on lower sternum
• Just below nipple line
• Compress about 1/3 of chest depth
• Give 3 compressions for every breath
• “1 and 2 and 3 and BREATHE” • 90 compressions and 30 breaths per minute
Step #3
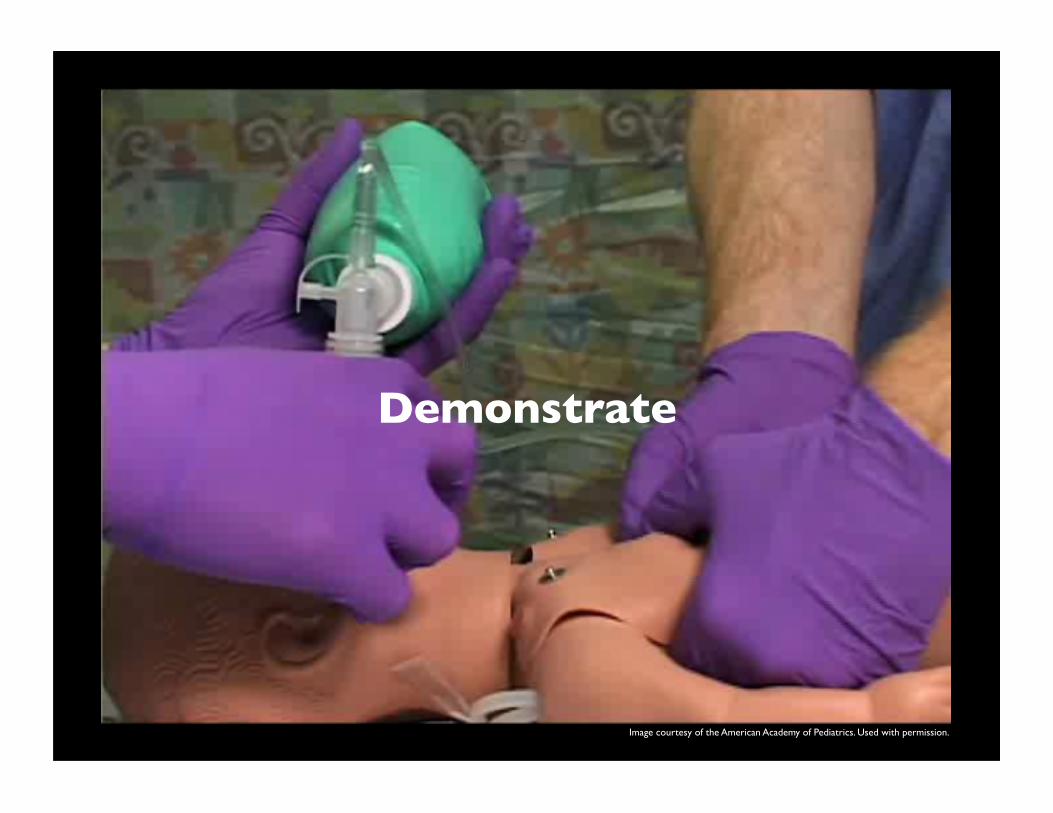
Demonstrate
Image courtesy of the American Academy of Pediatrics. Used with permission.

Demonstrate
Image courtesy of the American Academy of Pediatrics. Used with permission.
Now, after 30 seconds of Step #3, assess the baby…���
���And decide whether need Step #4
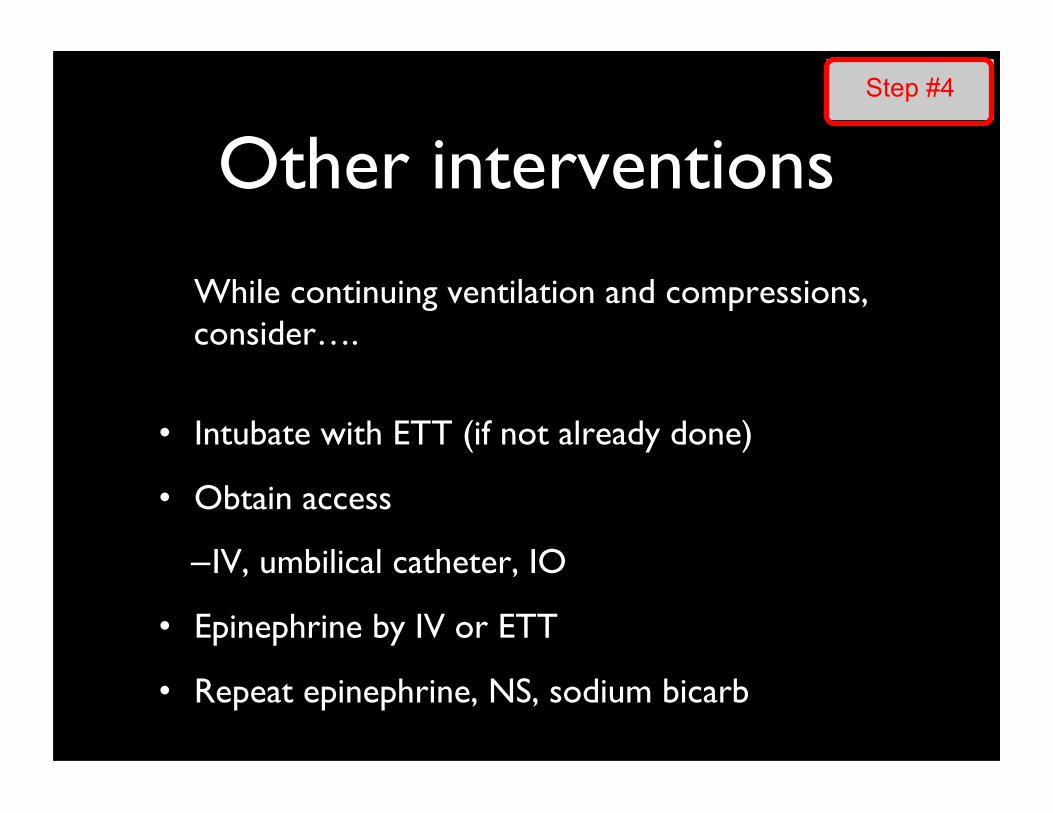
Other interventions
While continuing ventilation and compressions, consider….
• Intubate with ETT (if not already done)
• Obtain access
– IV, umbilical catheter, IO
• Epinephrine by IV or ETT
• Repeat epinephrine, NS, sodium bicarb
Step #4
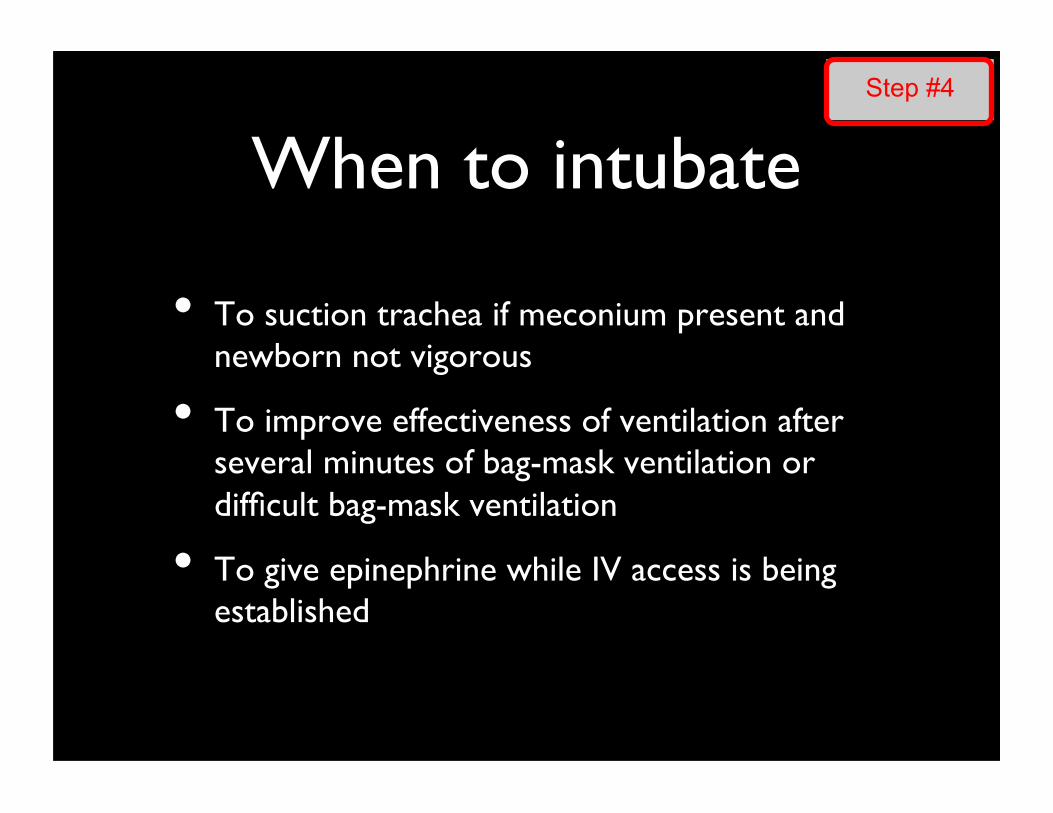
When to intubate
• To suction trachea if meconium present and newborn not vigorous
• To improve effectiveness of ventilation after several minutes of bag-mask ventilation or difficult bag-mask ventilation
• To give epinephrine while IV access is being established
Step #4
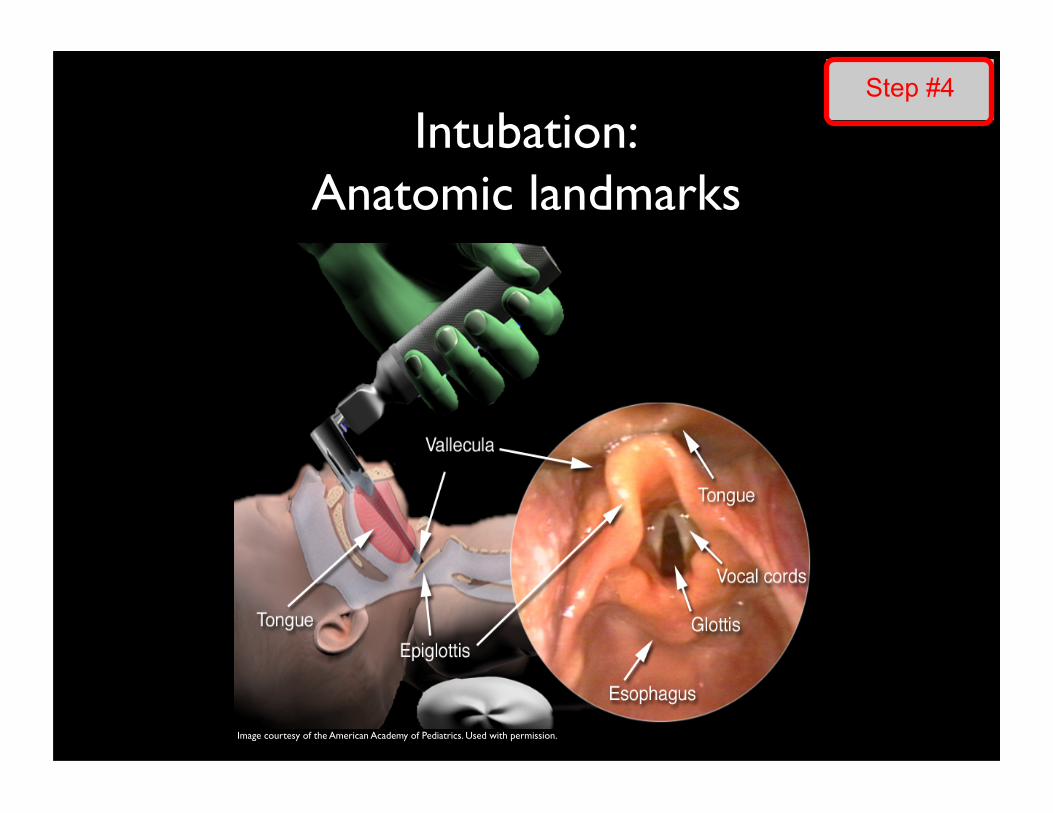
Intubation: ���Anatomic landmarks
Step #4
Image courtesy of the American Academy of Pediatrics. Used with permission.
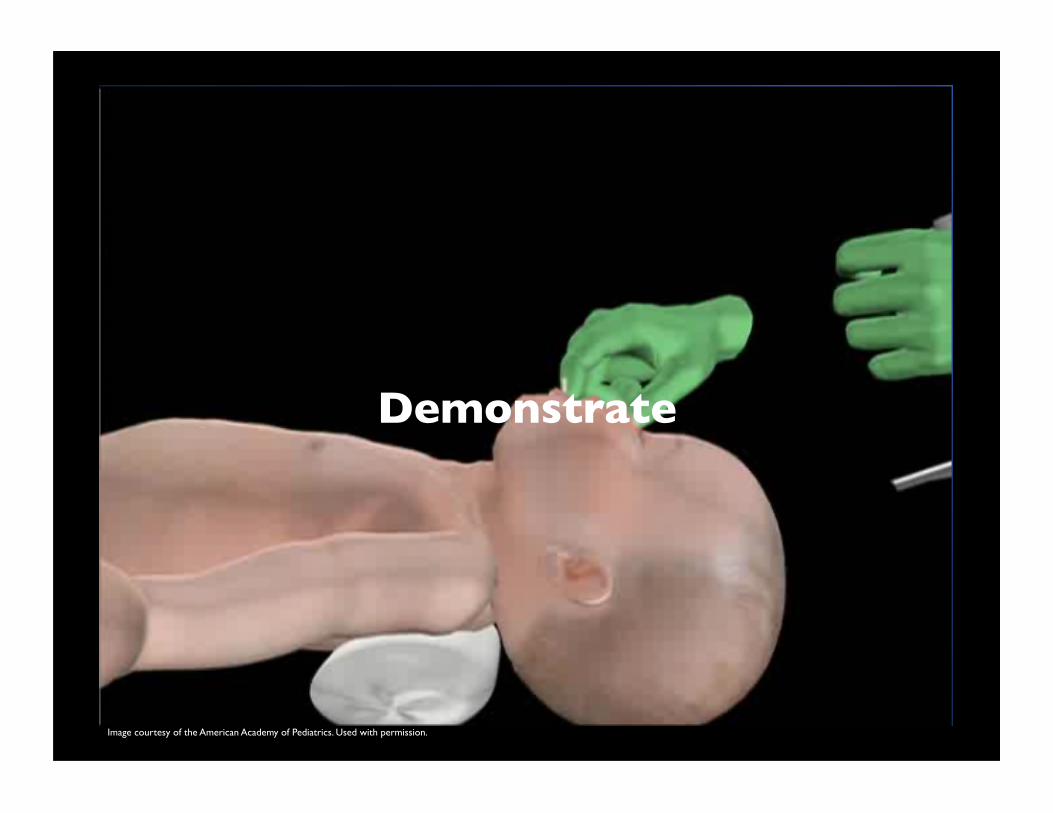
Demonstrate
Image courtesy of the American Academy of Pediatrics. Used with permission.
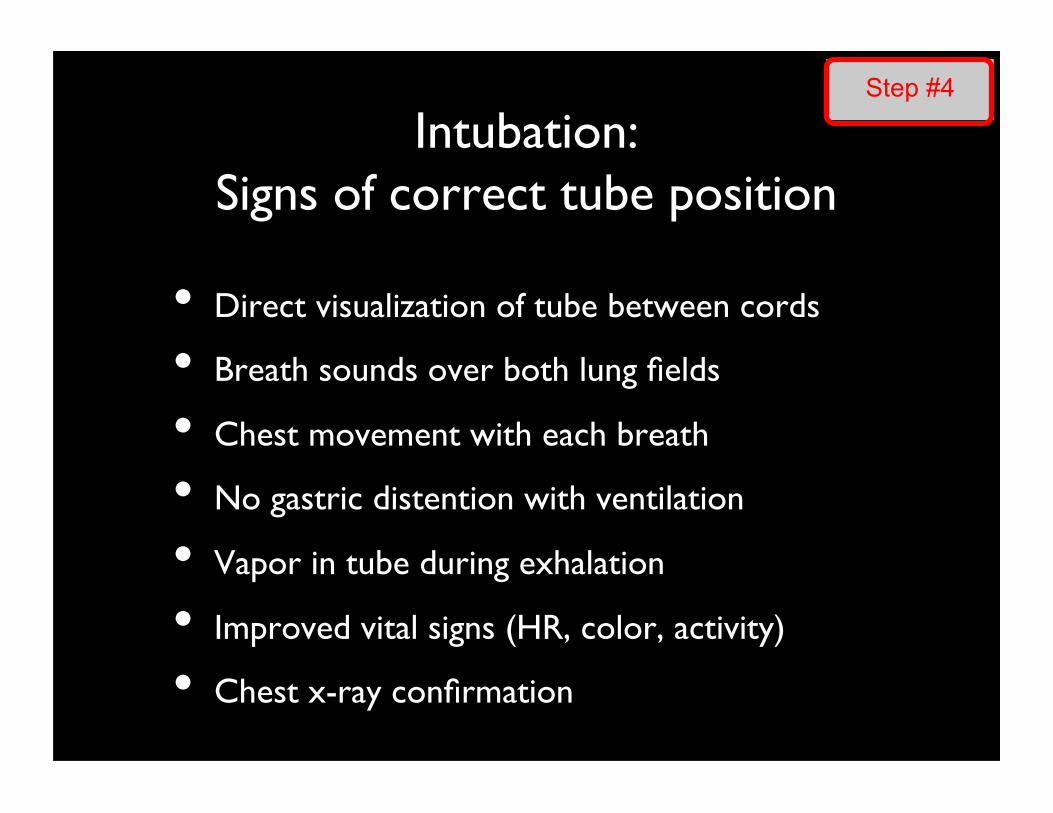
Intubation: ���Signs of correct tube position
• Direct visualization of tube between cords
• Breath sounds over both lung fields
• Chest movement with each breath
• No gastric distention with ventilation
• Vapor in tube during exhalation
• Improved vital signs (HR, color, activity)
• Chest x-ray confirmation
Step #4
Stopping resuscitation
If after 20 minutes of effective resuscitation….
• No breathing
• No pulse
…. the recommendation is to stop resuscitation
Summary (1)
• Neonatal resuscitation is one of the most effective medical interventions
• Ideally, every delivery attended by at least 1 trained person whose only responsibility is the baby
• When resuscitation is anticipated, additional personnel should be present
Summary (2)
• When a baby needs assistance, most important and effective action is to ventilate baby’s lungs
• Ventilation can fix breathing, heart rate, and color

Summary (3)
Initially, assess the baby every 30 seconds and decide whether to go to next step
Step 1: All newborns → warm, dry, bulb suction, stimulate
Step 2: If HR<100 or apnea → bag-mask
Step 3: If HR<60 → chest compressions
Step 4: If still HR<60 → ETT, IV, epinephrine

Neonatal resuscitation practice