migrating oracle database exadata express cloud …...exadata express cloud service to oracle...
TRANSCRIPT

Oracle® CloudMigrating Oracle Database Exadata ExpressCloud Service Apps to Oracle CloudInfrastructure
19.2F21313-02
Oracle Cloud Migrating Oracle Database Exadata Express Cloud Service Apps to Oracle CloudInfrastructure, 19.2
F21313-02
Copyright © Oracle and/or its affiliates. All rights reserved.
This software and related documentation are provided under a license agreement containing restrictions onuse and disclosure and are protected by intellectual property laws. Except as expressly permitted in yourlicense agreement or allowed by law, you may not use, copy, reproduce, translate, broadcast, modify,license, transmit, distribute, exhibit, perform, publish, or display any part, in any form, or by any means.Reverse engineering, disassembly, or decompilation of this software, unless required by law forinteroperability, is prohibited.
The information contained herein is subject to change without notice and is not warranted to be error-free. Ifyou find any errors, please report them to us in writing.
If this is software or related documentation that is delivered to the U.S. Government or anyone licensing it onbehalf of the U.S. Government, then the following notice is applicable:
U.S. GOVERNMENT END USERS: Oracle programs, including any operating system, integrated software,any programs installed on the hardware, and/or documentation, delivered to U.S. Government end users are"commercial computer software" pursuant to the applicable Federal Acquisition Regulation and agency-specific supplemental regulations. As such, use, duplication, disclosure, modification, and adaptation of theprograms, including any operating system, integrated software, any programs installed on the hardware,and/or documentation, shall be subject to license terms and license restrictions applicable to the programs.No other rights are granted to the U.S. Government.
This software or hardware is developed for general use in a variety of information management applications.It is not developed or intended for use in any inherently dangerous applications, including applications thatmay create a risk of personal injury. If you use this software or hardware in dangerous applications, then youshall be responsible to take all appropriate fail-safe, backup, redundancy, and other measures to ensure itssafe use. Oracle Corporation and its affiliates disclaim any liability for any damages caused by use of thissoftware or hardware in dangerous applications.
Oracle and Java are registered trademarks of Oracle and/or its affiliates. Other names may be trademarks oftheir respective owners.
Intel and Intel Xeon are trademarks or registered trademarks of Intel Corporation. All SPARC trademarks areused under license and are trademarks or registered trademarks of SPARC International, Inc. AMD, Opteron,the AMD logo, and the AMD Opteron logo are trademarks or registered trademarks of Advanced MicroDevices. UNIX is a registered trademark of The Open Group.
This software or hardware and documentation may provide access to or information about content, products,and services from third parties. Oracle Corporation and its affiliates are not responsible for and expresslydisclaim all warranties of any kind with respect to third-party content, products, and services unless otherwiseset forth in an applicable agreement between you and Oracle. Oracle Corporation and its affiliates will not beresponsible for any loss, costs, or damages incurred due to your access to or use of third-party content,products, or services, except as set forth in an applicable agreement between you and Oracle.

Contents
iii
About Migrating
Learn how to migrate Oracle Application Express applications from Oracle DatabaseExadata Express Cloud Service to Oracle Autonomous Data Warehouse and OracleAutonomous Transaction Processing.
Topics:
• Why Migrate to Oracle Cloud Infrastructure
• About Oracle Cloud Infrastructure
• About Migrating to Oracle Autonomous Database
• About Migration Task Flow
Why Migrate to Oracle Cloud InfrastructureOracle encourages you to migrate your existing cloud resources to Oracle CloudInfrastructure regions. You can gain several advantages by doing so.
In Oracle Cloud, you provision resources in specific regions, which are localized togeographic locations. Certain regions support the Oracle Cloud Infrastructure platform.
Oracle Cloud Infrastructure is Oracle's modern cloud platform that's based on thelatest cloud technologies and standards. It provides more consistent performance andbetter features at lower costs. Oracle continues to invest in Oracle CloudInfrastructure, including the addition of new regions, services, and features. See DataRegions for Platform and Infrastructure Services.
You can benefit from these additional administrative features when you migrate yourcloud resources to Oracle Cloud Infrastructure:
• Organize cloud resources into a hierarchy of logical compartments.
• Create fine-grained access policies for each compartment.
To learn more, see Upgrade Your Classic Services to Oracle Cloud Infrastructure.
About Oracle Cloud InfrastructureGet familiar with basic Oracle Cloud Infrastructure security, network, and storageconcepts.
Cloud resources in Oracle Cloud Infrastructure are created in logical compartments.You also create fine-grained policies to control access to the resources within acompartment.
You create instances within an Oracle Cloud Infrastructure region. You also specify anavailability domain (AD), if supported in the selected region.
A virtual cloud network (VCN) is comprised of one or more subnets, and an instance isassigned to a specific subnet. Oracle Cloud Infrastructure does not allow you toreserve specific IP addresses for platform services.
A subnet's security lists permit and block traffic to and from specific IP addresses andports.
Why Migrate to Oracle Cloud Infrastructure
4

Instances can communicate with resources outside of Oracle Cloud by using OracleCloud Infrastructure FastConnect, which provides a fast, dedicated connection to youron-premises network. Alternatively, use an IPSec VPN.
A bucket in Oracle Cloud Infrastructure Object Storage can be used to store files andshare them with multiple instances. A user's generated authentication token (authtoken) is required to access the bucket.
To learn more, see Key Concepts and Terminology in the Oracle Cloud Infrastructuredocumentation.
About Migrating to Oracle Autonomous DatabaseOracle Autonomous Database delivers self-driving, self-securing, self-repairingdatabase services that scale instantly to meet the demands of mission criticalapplications.
Oracle Application Express (APEX) on Oracle Autonomous Transaction Processingand Oracle Autonomous Data Warehouse provides a preconfigured, fully managedand secured environment to both develop and deploy world-class applications andRESTful services. Oracle APEX applications, data, and RESTful services can bemigrated from Oracle Database Exadata Express Cloud Service to OracleAutonomous Database.
To learn more, see:
• Autonomous Database + APEX
• Getting Started with Autonomous Transaction Processing in Using OracleAutonomous Transaction Processing
• Getting Started with Autonomous Data Warehouse in Using Oracle AutonomousData Warehouse
• Oracle Exadata Express Cloud Service in Oracle Help Center
About Migration Task FlowThe following workflow guides you through the steps to migrate from Oracle DatabaseExadata Express Cloud Service to Oracle Autonomous Transaction Processing orOracle Autonomous Data Warehouse.
1. Export your apps with APEX Application Archive app and RESTful services withSQL Workshop.
2. Export your databasse schema to an Oracle Cloud Infrastructure Object StorageClassic container.
3. Move the Data Pump export file from Oracle Cloud Infrastructure Object StorageClassic to Oracle Cloud Infrastructure Object Storage.
4. Connect to Autonomous Database using client credentials and import the schemausing the Oracle Data Pump impdp utility.
5. Create an APEX workspace in Autonomous Database. This workspace will beused to restore your apps and RESTful services.
6. Restore your APEX apps and workspace files using the APEX Application Archiveproductivity app.
About Migrating to Oracle Autonomous Database
5

7. Import your RESTful services using SQL Workshop.
8. Complete Post-Migration tasks in Autonomous Database, if applicable.
Once you have completed these steps, you are able to run your APEX apps. Pleasenote that Oracle Autonomous Database runs Oracle APEX 19.1. Therefore, your appsare upgraded when they are restored. Your apps should run without issue, but shouldbe thoroughly tested. Developers should also go into each app and review theUpgrade Application report within Utilities for any additional upgrades they may wantto implement that were not automatically performed.
About Migration Task Flow
6

Prepare to Migrate
Prepare for migration by exporting APEX apps and RESTful services, creating a DataPump export file that includes database objects and APEX application definitions, andstaging the export file in Oracle Cloud Infrastructure Object Storage.
Topics:
• Export APEX Apps and RESTful Services in Exadata Express
• Create the Data Pump Export in Exadata Express
• Stage the Data Pump Export in Object Storage
Export APEX Apps and RESTful Services in ExadataExpress
The APEX Application Archive productivity app ships with Oracle Application Express(APEX) and allows you to quickly create archives of your apps and workspaceresources. These archives are stored in tables which are created if they don't yet exist.
You can archive your apps so they can be moved by doing a schema export from yourExadata Express instance and import into your Autonomous Database instance. Inyour Autonomous Database instance, you simply install the same APEX ApplicationArchive app, which works against the imported tables, and allows you to easily restorethese applications in your new workspace.
To export APEX apps:
1. Log in to your Exadata Express workspace.
2. From the App Builder home page, click Create and choose Productivity App.
3. Find the APEX Application Archive app in the App Gallery list and click InstallApp.
4. Click Next and Install App.
5. Click Run App icon.
6. Accept the defaults and click Complete Setup.
7. Click Archive Applications.
8. Ensure all applications are in the right side of the shuttle. Click Next and thenCreate Archive.
7

9. Repeat this process for all workspaces you wish to import into your AutonomousDatabase.
To export RESTful services:
1. Sign in to your Exadata Express workspace and click SQL Workshop, then clickAPEX RESTful Services.
2. Click the Export button.
3. Choose All Services from the RESTful Service select list, then click Export andsave the SQL file.
Create the Data Pump Export in Exadata ExpressIn your Oracle Database Exadata Express Cloud Service create a Data Pump exportfile with the data you want to migrate.
Follow the steps in Export Database Schemas to Oracle Cloud Infrastructure ObjectStorage Classic in the Using Oracle Database Exadata Express Cloud Service toexport data structures and data to Object Storage Classic. APEX app definitionsarchived using the APEX Application Archive productivity app are automaticallyincluded in this export.
Once the export file is available (for example, export.zip), download it and extractexport.dmp and param.helper files. Examine the param.helper text file to identify theAPEX tablespace name that was used in your Exadata Express database. You willprovide this tablespace name to impdp utility later.
For additional information, see:
• Downloading Objects in Using Oracle Cloud Infrastructure Object Storage Classic
Create the Data Pump Export in Exadata Express
8

Stage the Data Pump Export in Object StorageFollow the steps below to import the Data Pump file, export.dmp, to Oracle CloudInfrastructure Object Storage where Oracle Autonomus Database will be able toaccess it. This additional step is required as Oracle Database Exadata Express CloudService does not support data export directly to Object Storage.
Note:
Oracle recommends that you upload large Data Pump export files usingOracle Cloud Infrastructure CLI rather than the Object Storage console. Tolearn more, see Using Multipart Uploads in Oracle Cloud InfrastructureDocumentation.
1. Sign in to Oracle Cloud Infrastructure.
2. Expand the top left menu and, in the Core Infrastructure section, expand theObject Storage sub-menu and click Object Storage.
3. Pick an existing compartment and the existing bucket or create a new bucket.
4. Click on the bucket name and then click Upload Objects.
5. Choose the Data Pump export file, export.dmp, and click Upload Objects.
6. After the upload completes, open the context menu for the uploaded export.dmp.Click View Object Details, and copy the URL Path (URI) value. You will providethis value to the impdp utility later.
For additional information, see:
• Using the Console to upload and download objects in Managing Objects in OracleCloud Infrastructure Documentation
Stage the Data Pump Export in Object Storage
9

Migrate Your Apps
Migration involves importing data into your Autonomous Database using Data Pump,creating a new APEX workspace, installing the APEX Application Archive productivityapp, restoring APEX apps and workspace files into this workspace, and importingRESTful services.
Topics:
• Import Schema into Oracle Autonomous Database
• Create an APEX Workspace in Autonomous Database
• Install APEX Application Archive Productivity App
• Restore APEX Apps and Workspace Files
• Import RESTful Services
Import Schema into Oracle Autonomous DatabaseFollow the steps below to import the Data Pump file (export.dmp) into your OracleAutonomous Database.
See To create an auth token in Managing User Credentials in Oracle CloudInfrastructure Documentation. Copy the auth token as it will not be displayed again.
Note:
Oracle recommends to use the Oracle Instant Client downloaded fromAutonomous Database service console (Development page, DownloadOracle Instant Client link).
1. Sign in to your Oracle Autonomous Transaction Processing or Oracle AutonomousData Warehouse service console and click Development.
2. Click Download Oracle Instant Client and save the zip file.
3. Unzip the file and set the $ORACLE_HOME environment variable to point to thisdirectory.
4. On the Administration page, click Download Client Credentials (Wallet) andsave the zip file.
5. Extract the file into $ORACLE_HOME/network/admin directory.
6. Inspect the tnsnames.ora file included in the zip to see the list of service names toconnect to. Identify the "high" service name of the database into which you aremigrating.
7. Use SQL*Plus to connect to your Autonomous Database as the ADMIN user usingthe service name you identified in the previous step.
8. Run the following to create a credential using the DBMS_CLOUD package. ReplaceOCI_USERNAME with your Oracle Cloud Infrastructure username and
Import Schema into Oracle Autonomous Database
10

OCI_AUTH_TOKEN with your Oracle Cloud Infrastructure auth token you created in aprevious step.
BEGIN DBMS_CLOUD.CREATE_CREDENTIAL( credential_name => 'def_cred_name', username => 'OCI_USERNAME', password => 'OCI_AUTH_TOKEN' );END;/
9. Use impdp Data Pump utility to import your Exadata Express export file fromOracle Cloud Infrastructure Object Storage to your Autonomous Database.Replace SERVICE_NAME with the "high" service name of your AutonomousDatabase. Replace APEX_TABLESPACE with the Oracle Application Express (APEX)tablespace name used in your Exadata Express database. ReplaceEXPORT_FILE_URL with the URL to the export.dmp file uploaded in Object Storage.Enter the password for the ADMIN database user when prompted. Make note ofthe database user that is created by the import operation.
impdp admin@SERVICE_NAME credential=def_cred_name directory=data_pump_dir remap_tablespace=APEX_TABLESPACE1:data,APEX_TABLESPACE2:data,... \dumpfile='EXPORT_FILE_URL' \parallel=2 transform=segment_attributes:n transform=dwcs_cvt_iots:y transform=constraint_use_default_index:y \exclude=cluster,db_link
For example:
impdp admin@demo_high credential=def_cred_name directory=data_pump_dir remap_tablespace=APEX_1234567890:data,APEX_12223333444:data \dumpfile='https://objectstorage.us-phoenix-1.oraclecloud.com/n/.../b/.../o/export.dmp' \parallel=2 transform=segment_attributes:n transform=dwcs_cvt_iots:y transform=constraint_use_default_index:y \exclude=cluster,db_link
Note:
If you encountered the following role grant error, please ignore it:
Processing object type SCHEMA_EXPORT/ROLE_GRANTORA-39083: Object type ROLE_GRANT failed to create with error:ORA-01924: role 'C##DBPOD_BUILTIN_USERS_ROLE' not granted or does not existFailing sql is:GRANT "C##DBPOD_BUILTIN_USERS_ROLE" TO "DEMO"
Import Schema into Oracle Autonomous Database
11
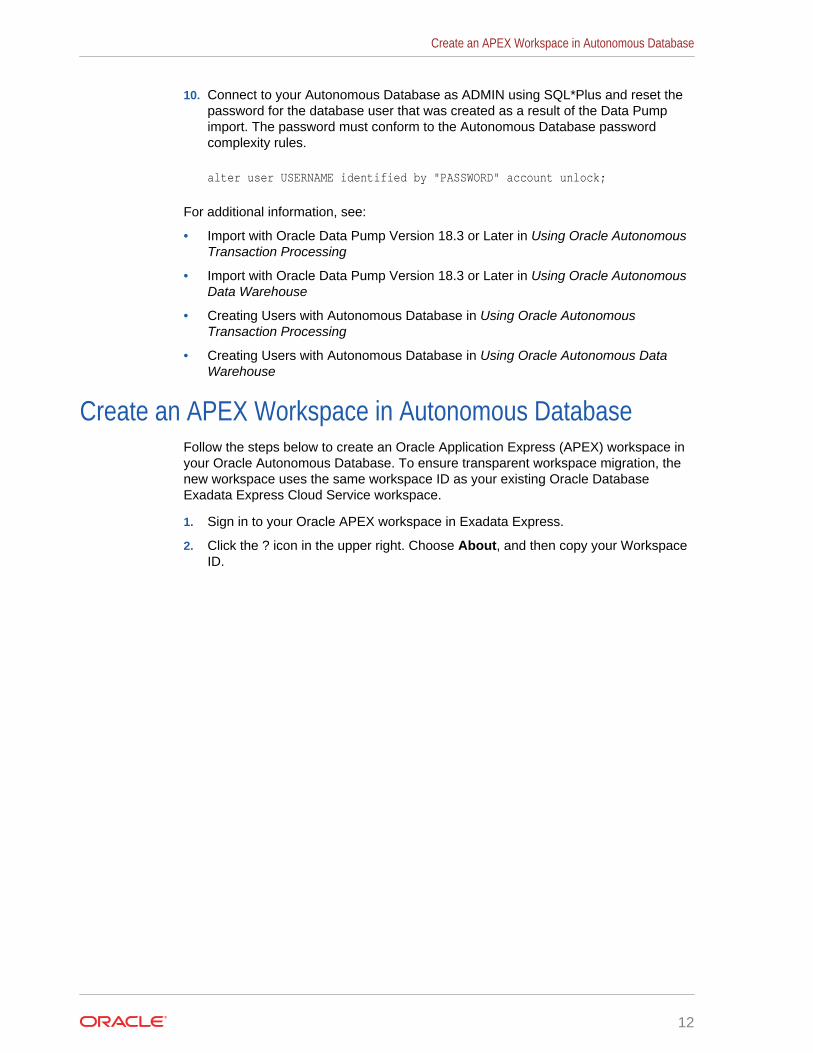
10. Connect to your Autonomous Database as ADMIN using SQL*Plus and reset thepassword for the database user that was created as a result of the Data Pumpimport. The password must conform to the Autonomous Database passwordcomplexity rules.
alter user USERNAME identified by "PASSWORD" account unlock;
For additional information, see:
• Import with Oracle Data Pump Version 18.3 or Later in Using Oracle AutonomousTransaction Processing
• Import with Oracle Data Pump Version 18.3 or Later in Using Oracle AutonomousData Warehouse
• Creating Users with Autonomous Database in Using Oracle AutonomousTransaction Processing
• Creating Users with Autonomous Database in Using Oracle Autonomous DataWarehouse
Create an APEX Workspace in Autonomous DatabaseFollow the steps below to create an Oracle Application Express (APEX) workspace inyour Oracle Autonomous Database. To ensure transparent workspace migration, thenew workspace uses the same workspace ID as your existing Oracle DatabaseExadata Express Cloud Service workspace.
1. Sign in to your Oracle APEX workspace in Exadata Express.
2. Click the ? icon in the upper right. Choose About, and then copy your WorkspaceID.
Create an APEX Workspace in Autonomous Database
12
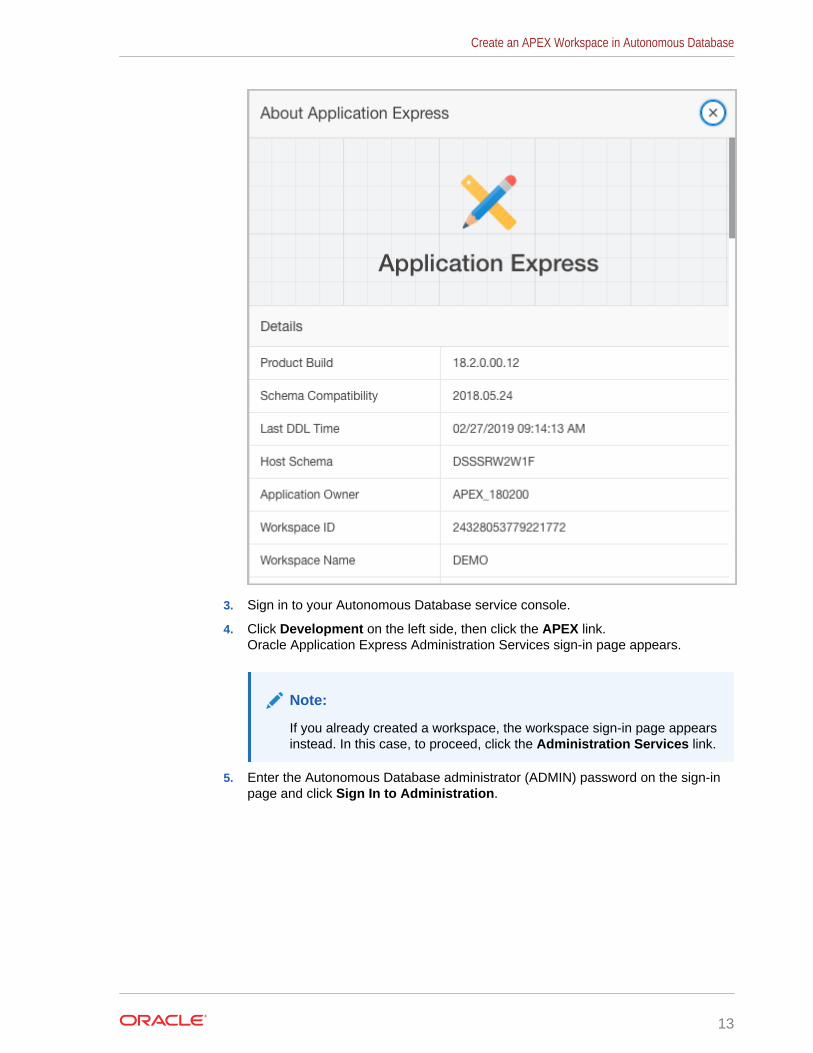
3. Sign in to your Autonomous Database service console.
4. Click Development on the left side, then click the APEX link.Oracle Application Express Administration Services sign-in page appears.
Note:
If you already created a workspace, the workspace sign-in page appearsinstead. In this case, to proceed, click the Administration Services link.
5. Enter the Autonomous Database administrator (ADMIN) password on the sign-inpage and click Sign In to Administration.
Create an APEX Workspace in Autonomous Database
13

6. In Administration Services, click Create Workspace and select the Database Userthat you imported. Ensure the Workspace Name matches your Exadata Expressworkspace. Expand the Advanced section and enter the same Workspace ID asyou copied in an earlier step. Click Create Workspace.
Create an APEX Workspace in Autonomous Database
14

7. Click the link of the workspace name in the success message. The workspacesign-in page appears with Workspace and Username fields populated. Enter thepassword for the database user and click Sign In.
8. Click Set APEX Account Password and enter the same password you just usedto sign in to Oracle APEX.
For additional information, see:
• Creating Oracle Application Express Workspaces Autonomous TransactionProcessing in Using Oracle Autonomous Transaction Processing
• Creating Oracle Application Express Workspaces in Autonomous DatabaseWarehouse in Using Oracle Autonomous Data Warehouse
Install APEX Application Archive Productivity AppYou will use APEX Application Archive productivity app to import APEX applicationsand static workspace files into your Autonomous Database.
Follow the steps below to install APEX Application Archive productivity app in theworkspace in your Autonomous Database. Before this app can be installed, you needto remove runtime database objects used by this app in Oracle Database ExadataExpress Cloud Service. These objects were automatically imported in a previous stepand prevent the latest version of the app from being installed.
1. Sign in to your Oracle Autonomous Transaction Processing or Oracle AutonomousData Warehouse service console.
2. Click Development on the left side, then click the APEX link.
3. On the APEX workspace sign in page, enter your Workspace name, Username,and Password, and click Sign In.
4. Click SQL Workshop and click SQL scripts.
5. Click Upload and follow the steps to upload this sql script.
drop package eba_archive;drop package eba_archive_fw;
drop sequence eba_archive_seq; drop table eba_archive_users cascade constraints;drop table eba_archive_errors cascade constraints;drop table eba_archive_access_levels cascade constraints;drop table eba_archive_notifications cascade constraints; drop table eba_archive_error_lookup; drop table eba_archive_preferences;
Install APEX Application Archive Productivity App
15

6. Click Run. The script should execute successfully.
7. Click App Builder, then click Install a Productivity or Sample App.
8. Find the APEX Application Archive app in the App Gallery list and click InstallApp, click Next, then click Install App.
9. Repeat this process for all workspaces you want to import into your AutonomousDatabase.
Restore APEX Apps and Workspace FilesYou will use APEX Application Archive productivity app to import APEX applicationsand static workspace files into your Autonomous Database.
Import Oracle APEX Apps
To import Oracle APEX apps into your Autonomous Database:
1. Run the APEX Application Archive productivity app, sign in using the databaseuser that you imported, and complete the first time setup if prompted.
2. Click Archived Content and then click Restore for the application you want torestore.
The archive is exported to the Export Repository within the APEX App Builder.
3. Go back to App Builder. Click Workspace Utilities and then click Export.
4. In the Tasks section, click Export Repository.
5. Now you should see the application SQL file that you restored. Click Install andthen select the Reuse Application ID From Export File option. Click InstallApplication.
Restore APEX Apps and Workspace Files
16
6. Repeat this process for all APEX apps you want to import into your AutonomousDatabase.
Import Static Workspace Files
To import Oracle Application Express (APEX) static workspace files into yourAutonomous Database:
1. In the APEX Application Archive productivity app, click Archived Content.
2. Search for "FILES" content type to find the latest archive that contains workspacefiles. Click Download.
3. In APEX SQL Workshop, click SQL Scripts. Click Upload and then upload thearchive file.
4. Once the file is uploaded, click the Run icon associated with this file. Click RunNow.
5. In APEX App Builder, open the app that uses workspace files.
6. Click Shared Components, then click Static Workspace Files in the Filessection. Confirm that the expected workspace files are listed.
See Complete the Post-Migration Tasks for additional tasks that may be requiredbefore you can run your APEX apps in Autonomous Database.
Import RESTful ServicesYou use APEX SQL Workshop to import RESTful services. Autonomous Databaseonly supports ORDS RESTful services, so you must migrate your RESTful servicesonce imported.
To import RESTful Services into your Autonomous Database:
1. Sign in to your Oracle APEX workspace in Autonomous Database.
2. In APEX SQL Workshop, click SQL Scripts. Click Upload, then upload the exportSQL file you downloaded from Exadata Express.
3. Once the file is uploaded, click the Run icon associated with this file, then clickRun Now.
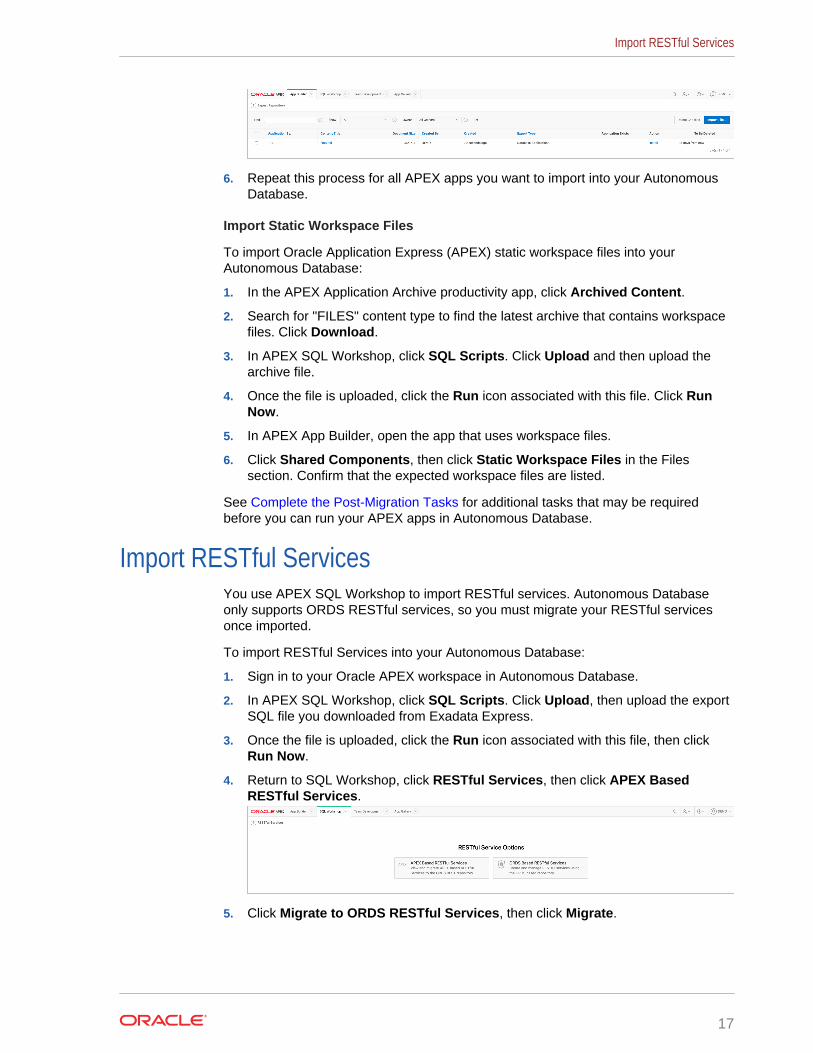
4. Return to SQL Workshop, click RESTful Services, then click APEX BasedRESTful Services.
5. Click Migrate to ORDS RESTful Services, then click Migrate.
Import RESTful Services
17

6. Return to the RESTful Services page, then click ORDS Based RESTful Servicesto review the migrated modules and privileges.
7. (Optional) On the APEX Based RESTful Services page, delete the modules thathave been successfully migrated. Once all legacy modules have been deleted,accessing RESTful Services page will immediately display ORDS RESTfulServices.
8. Repeat this process for RESTful Services in all workspaces you want to import toyour Autonomous Database.
For additional information, see:
• Developing RESTful Services in Autonomous Database in Using OracleAutonomous Transaction Processing
• Developing RESTful Services in Autonomous Database in Using OracleAutonomous Data Warehouse
Import RESTful Services
18

Complete the Post-Migration Tasks
You may need to complete additional tasks after migration to Autonomous Databasebefore you can fully utilize your Oracle Application Express (APEX) apps and RESTfulservices.
Further, review restrictions and limitations for Oracle APEX in Autonomous Databasefor additional items that may impact your apps.
Topics:
• Unsupported APEX Authentication Schemes
• Applications that Send Email
To learn more, see:
• Restrictions and Limitations for Oracle Application Express with AutonomousTransaction Processing in Using Oracle Autonomous Transaction Processing
• APEX Restrictions and Limitations Autonomous Database in Using OracleAutonomous Data Warehouse
Unsupported APEX Authentication SchemesOracle APEX in Autonomous Database does not support certain applicationauthentication schemes. If your application in Exadata Express uses "Oracle CloudIdentity Management" authentication scheme, you must switch to a differentauthentication scheme after importing this application into Autonomous Database.
To change authentication scheme for your APEX application in AutonomousDatabase:
1. Open your application in APEX App Builder.
2. Click Shared Components, then click Authentication Schemes in the Securitysection.
3. Click Create, click Next.
4. Enter the Name for your new authentication scheme and select a supportedScheme Type (for example, "Application Express Accounts").
5. Click Create Authentication Scheme.
6. Run the application.
Applications that Send EmailIf your applications in Exadata Express send outbound email using APEX_MAIL or built-in Application Express dialogs, further configuration is required in AutonomousDatabase.
To learn more, see:
• APEX Sending Email from APEX Autonomous Database in Using OracleAutonomous Transaction Processing
19