manual sansung e250
TRANSCRIPT

8/4/2019 Manual Sansung e250
http://slidepdf.com/reader/full/manual-sansung-e250 1/140
SGH-E250
User’s Guide

8/4/2019 Manual Sansung e250
http://slidepdf.com/reader/full/manual-sansung-e250 2/140
Important
safetyprecautionsFailure to comply with the following
precautions may be dangerous or illegal.
Drive safely at all times
Do not use a hand-held phone whivehicle first.
Sw itch off the phone when refu
Do not use the phone at a refuellin
station) or near fuels or chemicals
Sw itch off in an aircraft
Wireless phones can cause interferan aircraft is both illegal and dange
Sw itch off the phone near all m
Hospitals or health care facilities mequipment that could be sensitive
frequency energy. Follow any reguforce.
Interference
All wireless phones may be subject
which could affect their performan
8/4/2019 Manual Sansung e250
http://slidepdf.com/reader/full/manual-sansung-e250 3/140
Be aware of special regulations
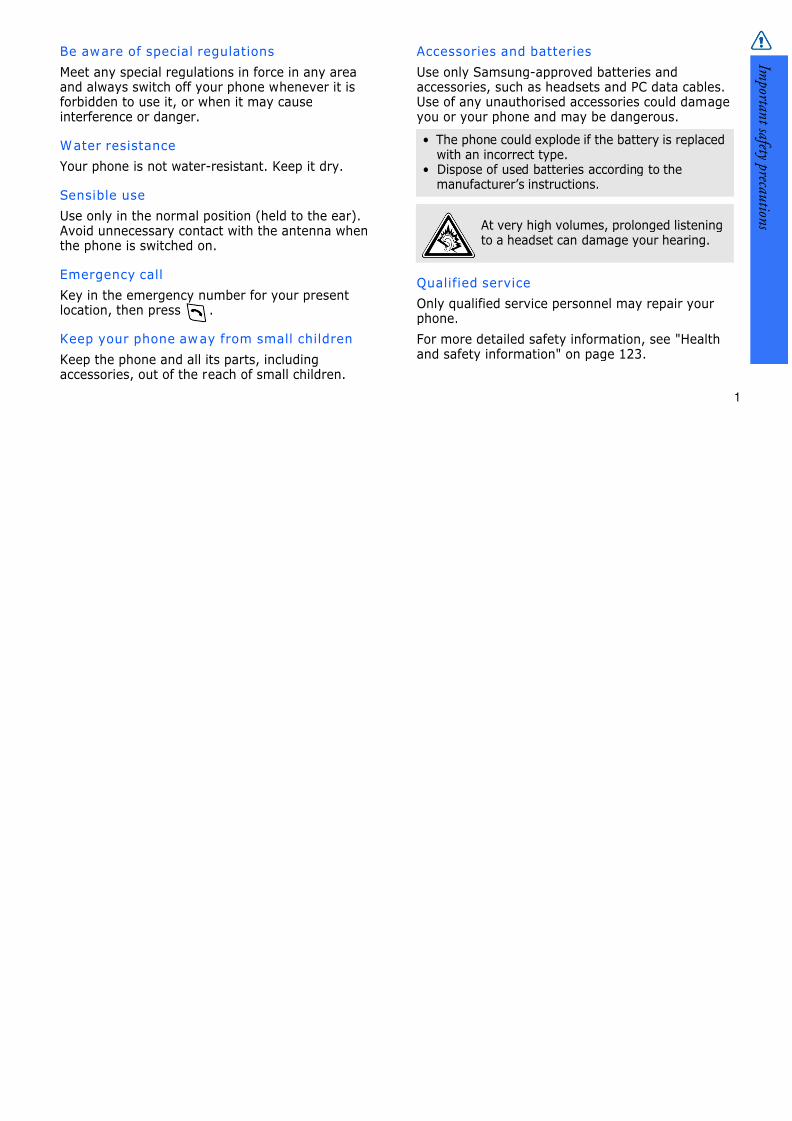
Meet any special regulations in force in any areaand always switch off your phone whenever it isforbidden to use it, or when it may causeinterference or danger.
Water resistanceYour phone is not water-resistant. Keep it dry.
Sensible use
Use only in the normal position (held to the ear).Avoid unnecessary contact with the antenna whenthe phone is switched on.
Emergency call
Key in the emergency number for your presentlocation, then press .
Keep your phone away from small children
Keep the phone and all its parts, including
accessories, out of the reach of small children.
Accessories and batteries
Use only Samsung-approved baaccessories, such as headsets aUse of any unauthorised accessyou or your phone and may be
Qualified service
Only qualified service personnephone.
For more detailed safety informand safety information" on page
• The phone could explode if thewith an incorrect type.
• Dispose of used batteries accomanufacturer’s instructions.
At very high volumes,to a headset can dama

8/4/2019 Manual Sansung e250
http://slidepdf.com/reader/full/manual-sansung-e250 4/140
2
About this GuideThis User’s Guide provides you with condensedinformation about how to use your phone. Toquickly learn the basics for your phone, please referto “Get started” and “Step outside the phone.”
In this guide, the following instruction iconsappear:
Indicates that you need to pay carefulattention to the subsequent information
regarding safety or phone features.
Indicates that you can get more informationon the referenced page.
→ Indicates that you need to press theNavigation keys to scroll to the specifiedoption and then select it.
[ ] Indicates a key on the phone. For example,[ ]
< > Indicates a soft key, whose function is
displayed on the phone screen. For example,<Menu>
• Camera and
Use the camephone to take
a video.
Special features of
• Music playerPlay music fileas a music pla
• FM radioListen to yourstations anyti

8/4/2019 Manual Sansung e250
http://slidepdf.com/reader/full/manual-sansung-e250 5/140
• Digital data printing
Print images, messages, andother personal data directly fromyour phone.
• Bluetooth
Transfer media files and personaldata and connect to otherdevices using free, wirelessBluetooth technology.
• Offline modeSwitch your phone to use itsnone-wireless functions in anairplane.
• Name cardCreate name cards with yournumber and profile. Wheneverintroducing yourself to others,use this convenient electronic
name card.
• Multimedia M
(MMS)Send and recewith a combinimage, video,
• E-mailSend and receimage, video,attachments.
• JavaEnjoy Java™-games and dogames.
• Voice recordRecord memo

8/4/2019 Manual Sansung e250
http://slidepdf.com/reader/full/manual-sansung-e250 6/140
4
Contents Unpack 6
Make sure you have each item
Your phone 6
Keys, features, and locations
Get started 7
First steps to operating your phone
Install and charge the phone ........................... 7
Power on or off.............................................. 9Keys and display........................................... 10Access menu functions .................................. 13Customise your phone................................... 14Make/Answer calls ........................................ 16
Step outside the phone 17Begin with your camera, the music player, the webbrowser, and other special features
Use the camera ............................................ 17
Play music ................................................... 18Listen to the FM radio.................................... 20
Browse the web ....................Use Phonebook .....................
Send messages.....................View messages .....................Send an SOS message ...........Use Bluetooth .......................Use a memory card ...............
Enter text
ABC, T9, Number, and Symbol m
Call functions
Advanced calling features
Menu functions
All menu options listed
Solve problems
Help and personal needs
Health and safety informa
Index

8/4/2019 Manual Sansung e250
http://slidepdf.com/reader/full/manual-sansung-e250 7/140
1 Call log p.38
1 Recent contacts2 Missed calls
3 Dialled calls4 Received calls5 Delete all6 Call time7 Call costs1
p.38p.39
p.39p.39p.39p.39p.40
2 Phonebook p.40
1 Contact list2 FDN contacts1
3 Create contact4 Group5 Speed dial6 My namecard7 Own number8 Management9 Service number1
p.41p.42p.42p.43p.44p.45p.46p.46p.46
3 Applications p.47
1 Music player
2 Voice recorder3 Image editor
p.47
p.50p.51
3 Applications (continued)
4 FM radio5 Bluetooth
6 Java world7 SIM-AT1
p.52p.54
p.57p.58
4 Browser p.59
1 Home2 Bookmarks3 Enter URL4 Clear cache5 Profile settings6 Current profile
p.59p.60p.61p.61p.61p.62
5 Messages p.63
1 Create new message2 My messages3 Templates4 Delete all5 Settings6 SOS messages7 Broadcast messages
8 Memory status
p.63p.67p.73p.74p.75p.82p.82
p.83
6 My files p.83
1 Images2 Videos
3 Music4 Sounds5 Other files6 Memory card2
7 Memory status
p.84p.85
p.87p.87p.88p.89p.89
7 Planner p.89
1 Alarm2 Calendar3 Memo4 World clock5 Calculator6 Converter
7 Timer8 Stopwatch
p.89p.90p.95p.95p.96p.97p.98p.98
8 Camera p.98
1 Take photo2 Record video
3 Go to My photos4 Go to My video clips
p.99p.102
p.105p.105
9 Se
1 Tim2 Pho
3 Dis4 Sou5 Lig6 Net7 Sec8 Me9 Res10 Ke11 VO
1. Showyour
2. Showis in
3. Showyour
Overview of menu functions To access Menu mode, press <Menu> in Idle mode.

8/4/2019 Manual Sansung e250
http://slidepdf.com/reader/full/manual-sansung-e250 8/140
6
Unpack Make sure you have each item
• Phone
• Travel Adapter
• Battery• User’s Guide
You can obtain variousaccessories from your localSamsung dealer.
The items supplied withyour phone and theaccessories available atyour Samsung dealer may
vary, depending on yourcountry or serviceprovider.
Your phone Keys, features, and locations
Camera
Hea
Ad
Delete key
Microphone
Power on/off/Menu exit key
Right soft key
Navigation(Up/Down/Left/Rigkeys
Earpiece
Display
Volume keys
Left soft key
Dial key
Memory card slot
Alphanumerickeys
Special functionkeys
Web access/Confirm key

8/4/2019 Manual Sansung e250
http://slidepdf.com/reader/full/manual-sansung-e250 9/140
Get started First steps to operating your phone
SIM card information
When you subscribe to a cellular network, you
receive a plug-in SIM (Subscriber IdentityModule) card loaded with your subscriptiondetails, such as your PIN, and available optionalservices.
Install and charge the phone
Remove thebattery cover.
If the phone isalready on, first turnit off by pressing andholding [ ].
Insert the SIM
card.
Make sure that thegold-colouredcontacts on the card
are face down.
Install the battery.
Reattach the cover.

8/4/2019 Manual Sansung e250
http://slidepdf.com/reader/full/manual-sansung-e250 10/140
Get started
8
Low battery indicator
When the battery is low:• a warning tone sounds,
• the battery low message d
• the empty battery icon
If the battery level becomes tautomatically turns off. Recha
Plug the travel
adapter into thephone.
Plug the adapter into a standard AC walloutlet.
When the phone is completely charged(the battery icon becomes still), unplug theadapter from the wall outlet.
Remove the
adapter from thephone.

8/4/2019 Manual Sansung e250
http://slidepdf.com/reader/full/manual-sansung-e250 11/140
Power on or off
Keypad lock
When you close the phone, it locks the exposedkeys to prevent any unwanted phoneoperations, from accidentally pressing any of the keys.
To unlock the keypad, press <then <OK>.
Offline mode
You can switch the phone to which the phone functions re
connections are deactivated. helpful when you want to useplace where you are not allowdevices, such as in an airplanhospital.
To switch to Offline mode, prselect Settings → Phone semode → On.
In Offline mode, you can use
functions, such as games, caland music player.
Switch on
Do not turn onthe phone when
mobile phoneuse is prohibited.
1. Open the phone.
2. Press and hold [ ].
3. If necessary, enter thePIN and press <OK>.
Switch off 1. Open the phone.
2. Press and hold [ ].

8/4/2019 Manual Sansung e250
http://slidepdf.com/reader/full/manual-sansung-e250 12/140
Get started
10
Keys and display
Keys
Perform the function indicated on thebottom line of the display.
In Idle mode, access the followingmenus directly:• Up: My Menu mode
• Down: Camera
• Left/Right: Your favourite menusp. 107
In Menu mode, scroll through menuoptions.
In Idle mode, launch the webbrowser.
In Menu mode, select the highlightedmenu option or confirm input.
Make or answer a
In Idle mode, retrirecently dialled, m
Delete characters fitems in an applica
Press and hold to son or off.
End a call.
In Menu mode, canreturn the phone t
Enter numbers, letspecial characters.
In Idle mode, presaccess your voicemhold [0] to enter anprefix.

8/4/2019 Manual Sansung e250
http://slidepdf.com/reader/full/manual-sansung-e250 13/140
DisplayEnter special characters.
In Idle mode, press and hold [ ] toactivate or deactivate Silent mode.Press and hold [ ] to enter a pausebetween numbers.
Adjust the phone volume.In Idle mode, with the phone open,adjust the key tone volume.
Layout
Icons1 Received sig
Call in progre
Out of your scannot make
Alarm set
SOS messag
p. 82
Menu Contacts
Tediin
in
Soinsh
futh
Icdi

8/4/2019 Manual Sansung e250
http://slidepdf.com/reader/full/manual-sansung-e250 14/140
Get started
12
New text message
New voicemailNew multimedia message
New e-mail
Call diverting feature active
p. 114Bluetooth activep. 54
Bluetooth headset or hands-free car kit connectedp. 55
GPRS network status• Blue: GPRS network
• Red: Transferring data inGPRS network
EDGE network status• Blue: EDGE network
• Red: Transferring data inEDGE network
Home Zone,
the appropriaOffice Zone, the appropria
Browsing Int
Memory cardSilent mode
Silent mode
Ringer type
• None: Melo• : Vibrati
• : Melody
• : Melody
• : Vibrati
Battery powe
1. Depending on your country or icons shown on the display m

8/4/2019 Manual Sansung e250
http://slidepdf.com/reader/full/manual-sansung-e250 15/140
Access menu functions
Use the
soft keys
The roles of the soft keys varydepending on the function youare using. The bottom line of thedisplay indicates their current
role.
Press the left
soft key toselect thehighlightedoption.
Press the right
soft key toreturn to theprevious menulevel.
Select Back
Select an
option
1. Press a desi
2. Press the Namove to the option.
3. Press <Seleconfirm the for option hig
4. To exit, choo
following me• Press <B
one level
• Press [mode.
Use
shortcuts
Press the numbcorresponding twant.

8/4/2019 Manual Sansung e250
http://slidepdf.com/reader/full/manual-sansung-e250 16/140
Get started
14
Customise your phone
1. In Idle mode, press<Menu> and selectSettings → Phonesettings → Language.
2. Select a language.
1. In Idle mode, press<Menu> and selectSettings → Soundsettings → Incoming call → Ring tone.
2. Press [Left] or [Right] to
access a ringtone category.3. Press [Up] or [Down] to
select a ringtone.
4. Press <Save>.
Display
language
Call ringer
melody
You can set idle screen o
1. In Idle moand selecDisplay s
Wallpape
2. Select an
3. Select an
4. Press <Sa
You can chathe display cas title bars
1. In Idle moand selecDisplay s
2. Select a c
Idle modewallpaper
Menu mode
skin colour

8/4/2019 Manual Sansung e250
http://slidepdf.com/reader/full/manual-sansung-e250 17/140
You can set [Left] or [Right] tofunction as shortcuts to accessyour favourite menus.
1. In Idle mode, press<Menu> and select
Settings → Phonesettings → Shortcuts.
2. Select a key.
3. Select a menu to be
assigned to the key.
You can set up a menu for yourown favourite menu items.
To set a My menu item:
1. In Idle mode, press<Menu> and selectSettings → Phone
settings → My menu.
Menushortcuts
My Menu
mode
2. Select anchanged.
3. Select thewant.
To access a
1. In Idle m
2. Scroll to a
3. Press [
You can switSilent mode other people
Press and homode.
Silent mode
G d

8/4/2019 Manual Sansung e250
http://slidepdf.com/reader/full/manual-sansung-e250 18/140
Get started
16
Make/ Answer calls
You can protect the phoneagainst unauthorised use witha phone password. The phonewill require the password onpower-up.
1. In Idle mode, press<Menu> and selectSettings → Security → Change password.
2. Enter the default password,00000000, and press<OK>.
3. Enter a new 4- to 8-digitpassword and press <OK>.
4. Enter the new passwordagain and press <OK>.
Phone lock5. Select Ph
6. Select En
7. Enter thepress <O
1. Enter an
phone nu2. Press [
3. To end th
Make a call

8/4/2019 Manual Sansung e250
http://slidepdf.com/reader/full/manual-sansung-e250 19/140
Step outside the phBegin with your camera, the mubrowser, and other special feat
Use the camera
1. When the phone rings,press [ ].
2. To end the call, press [ ].
Press [ / ].
Answer acall
Adjust thevolume
during a call1. In Idle m
and selecturn on th
2. Aim the leand makeadjustme
3. Press [
photo. Thautomatic
4. Press <Banother p
Take a
photo
S id h h

8/4/2019 Manual Sansung e250
http://slidepdf.com/reader/full/manual-sansung-e250 20/140
Step outside the phone
18
P lay music
1. In Idle mode, press<Menu> and select Myfiles → Images → My photos.
2. Select the photo you want.
1. In Idle mode, press [Down]and select Record video.
2. Press [ ] to start
recording.
3. Press [ ] or < > tostop recording. The video issaved automatically.
4. Press < > to recordanother video.
View aphoto
Record a
video
1. In Idle m<Menu>files → Vclips.
2. Select the
want.
Use these m• Download
webp.
• Download
using the PC StudioStudio Us
Play a video
Copy music
files to the
phone

8/4/2019 Manual Sansung e250
http://slidepdf.com/reader/full/manual-sansung-e250 21/140
• Receive via Bluetoothp. 57
• Copy to a memory card andinsert it into the phonep. 28
1. In Idle mode, press<Menu> and selectApplications → Music
player.2. Press <Options> and
select Add music from → amemory location.
3. Press [ ] to select thefiles you want and press<Add>.
Create a
play list
1. From the screen, p
2. During plfollowing
• :
playba• Up: op
play lis
• Left: r
previobackwheld do
• Right: file. Sk
file wh• / : a
3. Press [Doplayback.
Play musicfiles
Step outside the phone

8/4/2019 Manual Sansung e250
http://slidepdf.com/reader/full/manual-sansung-e250 22/140
Step outside the phone
20
Listen to the FM radio
Browse the webUsing a built-in web browser,access the wireless web to geup-to-date services and infor
download web content.
1. Plug the connecter of thesupplied headset into the jack on the right side of thephone.
2. In Idle mode, press<Menu> and selectApplications → FM radio.
3. Press [ ] to turn on the
radio.
4. Press [Left] or [Right] tofind available radio stations.
5. To turn off the radio, press
[ ] or disconnect theheadset from the phone.
Listen to the
radio
1. From the <Options
2. Enter theand the frstation an
3. Select a lyou want station.
In Idle modepress <Men
Browser →
Store radiostations
Launch the
web browser

8/4/2019 Manual Sansung e250
http://slidepdf.com/reader/full/manual-sansung-e250 23/140
Use Phonebook• To scroll through browser
items, press [Up] or[Down].
• To select an item, press< > or [ ].
• To return to the previouspage, press <Back> or [C].
• To return to the homepage,press and hold [C].
• To access browser options,select or press [ ].
• To access other phonemenus, press [ ].
Navigate theweb To the phone
1. In Idle monumber a
2. Select Phnumber t
3. Specify coFirst namMobile, H
Other, EmRingtone,Notes.
4. Press <Sa
contact.
Add a
contact
Step outside the phone

8/4/2019 Manual Sansung e250
http://slidepdf.com/reader/full/manual-sansung-e250 24/140
Step outside the phone
22
To the SIM card:
1. In Idle mode, enter a phonenumber and press [ ].
2. Select SIM → New .
3. Enter a name.
4. Press <Save> to save thecontact.
1. In Idle mode, press<Contacts>.
2. Enter the first few letters of the name you want.
3. Select a contact.
4. Scroll to a number and press[ ] to dial, or press [ ]to edit contact information.
Add acontact(continued)
Find acontact
1. In Idle m<Menu>Phonebonamecar
2. Specify yo
informatio3. Press [
name car
4. To send t
press <Oselect Sesending m
Create andsend a name
card

8/4/2019 Manual Sansung e250
http://slidepdf.com/reader/full/manual-sansung-e250 25/140
Send messages
1. In Idle mode, press<Menu> and selectMessages → Create newmessage → Text message.
2. Enter the message text andpress [ ].
3. Enter destination numbers.
4. Press [ ] to send themessage.
1. In Idle mode, press <Menu>and select Messages →
Create new message → Multimedia message.
2. Select Subject.
3. Enter the message subject
and press [ ].
Send a text
message
(SMS)
Send a
multimediamessage
(MMS)
4. Select Im
Music or
5. Select Advideo ana video cl
Alternativmusic oradd a muclip.
6. Select Te7. Enter the
press [
8. Press <O
select Se9. Enter des
or addres
10.Press [
message
Step outside the phone
8/4/2019 Manual Sansung e250
http://slidepdf.com/reader/full/manual-sansung-e250 26/140
Step outside the phone
24
View messages
1. In Idle mode, press<Menu> and selectMessages → Create newmessage → Email.
2. Select Subject.
3. Enter the e-mail subject andpress [ ].
4. Select Message.
5. Enter the e-mail text andpress [ ].
6. Select File attach.
7. Add image, video, sound,music files, or documentfiles.
8. Press <Options> andselect Send.
Send ane-mail
9. Enter e-m
10.Press [e-mail.
When a notif
1. Press <V
2. Select thethe Inbox
From the Inb
1. In Idle m
<Menu>Messagemessage
2. Select an
( ).
View a text
message

8/4/2019 Manual Sansung e250
http://slidepdf.com/reader/full/manual-sansung-e250 27/140
Send an SOS messagYou can send an SOS messag
friends for help in an emerge
When a notification appears:
1. Press <View>.
2. Select the message fromthe Inbox.
From the Inbox:1. In Idle mode, press
<Menu> and selectMessages → Mymessages → Inbox.
2. Select an MMS message( ).
1. In Idle mode, press<Menu> and selectMessages → Mymessages → Email inbox.
2. Select Check new mail.
View amultimedia
message
View ane-mail
3. Select anheader.
4. If you selpress <Oselect Re
body of th
1. In Idle m<Menu>
Messagemessageoptions.
2. Select OnSOS line.
Set up SOS
message
options
Step outside the phone

8/4/2019 Manual Sansung e250
http://slidepdf.com/reader/full/manual-sansung-e250 28/140
Step outside the phone
26
Use Bluetooth
Your phone is equipped with technology, enabling you to cwirelessly to other Bluetooth exchange data with them, talcontrol the phone remotely.
3. Select Recipients.
4. Enter the phone numbers towhich you want to send theSOS message and press[ ].
5. Press <Options> andselect Save.
6. Press <Yes> to send anotification to the registered
numbers.
In Idle mode, with the phoneclosed, press [ / ] 4 times.
The phone sends the SOSmessage.
Set up SOSmessage
options(continued)
Send the
SOS
message
1. In Idle m<Menu>Applicat→
Activa
2. Select Myvisibilityother devphone.
Turn on
Bluetooth

8/4/2019 Manual Sansung e250
http://slidepdf.com/reader/full/manual-sansung-e250 29/140
1. In Idle mode, press
<Menu> and selectApplications → Bluetooth → My devices → Searchnew device.
2. Select a device.3. Enter a Bluetooth PIN or the
other device’s BluetoothPIN, if it has one, and press
<OK>.4. When the owner of the
other device enters thesame code, the pairing iscomplete.
Search forand pair with
a Bluetooth
device
1. Access anPhoneboCalendar
2. Select thesend.
3. Press <Oselect SeBluetoot
4. For Phone
data you 5. Select a d
6. If necessaBluetooth
<OK>.
Send data
Step outside the phone

8/4/2019 Manual Sansung e250
http://slidepdf.com/reader/full/manual-sansung-e250 30/140
p p
28
Use a memory cardYou can use an optional microSD memory card
to increase your phone’s memory capacity.
To receive data via Bluetooth,
your phone’s Bluetooth featuremust be active.
1. When a device attempts toaccess your phone, press
<Yes> to permit theconnection.
2. If necessary, press <Yes>to confirm that you are
willing to receive.
Receive data
• Frequent writing wlifespan.
• Do not rethe phone
phone whaccessed This coulddata and/card or ph
• Do not sustrong sh
• Do not towith your
objects. Icard with
Importantmemory
card
information

8/4/2019 Manual Sansung e250
http://slidepdf.com/reader/full/manual-sansung-e250 31/140
• Keep cards away from smallchildren or pets.
• Do not expose cards in aplace subject toelectro-static discharge
and/or electrical noise.
1. Slide the card into the cardslot, with the label side faceup.
2. Press the card until it locks
into place.
Insert a
memory
card
1. Press thedisengage
2. Slide the slot.
Using a cardUSB card reacan read the
1. Insert a m
card adapadapter inwriter.
2. Plug the U
the card rthe USB p
3. Access thmemory dand from
Remove thememory
card
Use a card
adapter

8/4/2019 Manual Sansung e250
http://slidepdf.com/reader/full/manual-sansung-e250 32/140
30
Enter text
ABC, T9, Number, and Symbol modes
You can enter text in some features such asMessages, Phonebook, or Calendar, using ABCmode, T9 mode, Number mode, and Symbol
mode.
Changing the text input mode
The text input mode indicator displays when the
cursor is in a text field.• Press and hold [ ] to switch between T9
( ) and ABC ( ) modes.
• Press [ ] to change case or to switch to
Number mode ( ).• Press and hold [ ] to switch to Symbol
mode ( ).
Using ABC mode
Press the appropriate key untyou want appears on the scre
(Creating an SMS message with Gencoding)
Characters in orde
Upper caseKey

8/4/2019 Manual Sansung e250
http://slidepdf.com/reader/full/manual-sansung-e250 33/140
Other ABC mode operations
• To enter the same letter twice or to enter adifferent letter on the same key, wait for thecursor to move to the right automatically orpress [Right]. Then, enter the next letter.
• Press [ ] to insert a space.
• Press the Navigation keys to move thecursor.
• Press [C] to delete characters one by one.Press and hold [C] to clear the entire display.
Using T9 mode
T9 is a predictive text input mode that allowsyou to key in any character using single
keystrokes.
Entering a word in T9 mode
1. Press [2] to [9] to start entering a word.Press each key once for each letter.
For example, press [4], [3[6] to enter Hello in T9 mo
T9 predicts the word that and it may change with eapress.
2. Enter the whole word befo
deleting characters.3. When the word displays co
4. Otherwise, press [0] to word choices for the keys pressed.
For example, Of and Me u
4. Press [ ] to insert a spacnext word.
Other T9 mode operation• Press [1] to enter periods
automatically.
• Press the Navigation keys cursor.
Enter text

8/4/2019 Manual Sansung e250
http://slidepdf.com/reader/full/manual-sansung-e250 34/140
32
• Press [C] to delete characters one by one.Press and hold [C] to clear the entire display.
Adding a new word to the T9 dictionary
This feature may not be available for somelanguages.
1. Enter the word that you want to add.2. Press [0] to display alternative words for
your key presses. When there are no morealternative words, Spell displays on thebottom line.
3. Press <Spell>.
4. Enter the word you want using ABC modeand press <Add>.
Using Number mode
Number mode enables you to enter numbers.
Press the keys corresponding to the digits you
want.
Using Symbol mode
Symbol mode enables you toTo Pres
scroll to a symbol set the
select a symbol the cnum
clear the symbols [C].
insert the symbols <OK

8/4/2019 Manual Sansung e250
http://slidepdf.com/reader/full/manual-sansung-e250 35/140
Call functions
Advanced calling features
Making a call
1. In Idle mode, enter the area code and phonenumber.
2. Press [ ].
3. When you want to end the call, press [ ].
Making an international call1. In Idle mode, press and hold [0]. The +
character appears.
2. Enter the country code, arphone number, then press
Redialling recent numbe
1. In Idle mode, press [ ] torecent numbers.
2. Scroll to the number you w[ ].
Making a call from Phone
Once you have stored a num
you can dial the number by sPhonebook.p. 40
You can also use the speed dassign your most frequently d
specific number keys.p. 44You can quickly dial a numbecard using the location numbstored.
• Press [C] to clear the last digit or press andhold [C] to clear the whole display.
• Press and hold [ ] to enter a pause
between numbers.
Call functions

8/4/2019 Manual Sansung e250
http://slidepdf.com/reader/full/manual-sansung-e250 36/140
34
1. In Idle mode, enter the location number forthe phone number you want and press [ ].
2. Scroll through other numbers, if necessary.
3. Press <Dial> or [ ] to dial the number youwant.
Answering a callWhen you receive a call, the phone rings anddisplays the incoming call image.
Press <Accept> or [ ] to answer the call.
Tips for answering a call
• When Anykey answer is active, you canpress any key to answer a call, except for
<Reject> and [ ].
p. 110• When Up in Slide Settings is set to Acceptcall, you can simply open the phone.p. 107
• Press <Reject> or [ ] to reject a call.
• Press and hold [ / ] to rethe ringer, depending on t
setting.p. 109
View ing missed calls
If you have missed calls, the
how many calls you have mis
1. Press <View>.
2. If necessary, scroll throug
3. Press [ ] to dial the num
Using the headset
Use the headset to make or awithout holding the phone.
Connect the headset to the jaof the phone. The button on tas follows:

8/4/2019 Manual Sansung e250
http://slidepdf.com/reader/full/manual-sansung-e250 37/140
Options during a call
You can access a number of functions during acall.
Adjusting the volume during a call
Use [ / ] to adjust the earpiece volume duringa call.
Press [ ] to increase the volume level and [ ]to decrease the volume level.
Placing a call on hold/ R
Press <Hold> to place the ca<Retrieve> to retrieve the c
Making a second call
You can make another call if
supports this function.
1. Press <Hold> to put the c
2. Make the second call in th
3. Press <Swap> to switch b
4. Press <Options> and seleto end the call on hold.
5. To end the current call, pr
Answering a second caYou can answer an incoming on the phone, if your networkfunction and you have activat
feature.p. 115
To Press
redial the last call the button and thenpress and hold itagain.
answer a call the button and hold.
end a call the button and hold.
Call functions

8/4/2019 Manual Sansung e250
http://slidepdf.com/reader/full/manual-sansung-e250 38/140
36
1. Press [ ] to answer the call. The first call isautomatically put on hold.
2. Press <Swap> to switch between the calls.
Using the speakerphone feature
Use the speakerphone feature to talk and listen
with the phone a short distance away.Press [ ] and then <Yes> to activate thespeakerphone feature. Press [ ] again toswitch back to the earpiece.
Using In-call options
Press <Options> to access the followingoptions during a call:
• Switch to headset /Sw itch to phone:switch the call to a Bluetooth headset orhands-free car kit or back to the phone. Touse this feature, you first need to connectyour headset or car kit to the phone.p. 55
• Voice clarity on /Voice clextraneous noise and incre
that the person with whomcan hear you clearly even noisy place.
• Whisper mode on /Whisturn on or off Whisper mo
automatically increases thsensitivity to allow the othyour voice even though yowhispering.
• Mute /Unmute: switch off
microphone so that the otphone cannot hear you, or
If you are using the spea
you must first deactivatevoice clarity feature.

8/4/2019 Manual Sansung e250
http://slidepdf.com/reader/full/manual-sansung-e250 39/140
• Mute keys /Send keys: switch the keytones on or off.
• Phonebook: access the contact list.
• Send DTMF: send the DTMF (Dual tonemulti-frequency) tones as a group. TheDTMF tones are the tones used in phones fortone dialling, sounding when you press the
number keys. This option is helpful forentering a password or an account numberwhen you call an automated system, like abanking service.
• Message: read an incoming message and
send a new message.p. 63• Join: set up a multi-party call by adding a
caller on hold to a currently active call.You can include up to five people on a
multi-party call.
• Split: have a private convselected participant. The o
can converse with each otprivate conversation, selecboth private participants tcall.
• Transfer: transfer the curto a caller on hold. The twto each other, but you are the call.
• Remove: disconnect the s
participant.• End held call: disconnect
on hold.
• SIM service: access spec
as news, weather forecastand location services, provcard. This option is availabSIM card supporting SIM A
To communicate with answering machines orcomputerised telephone systems, Send keys must be selected.

8/4/2019 Manual Sansung e250
http://slidepdf.com/reader/full/manual-sansung-e250 40/140
38
Menu functions
All menu options listed
Call log (Menu 1)
Use this menu to view the calls you havedialled, received, or missed, and the length of the calls. You can also check the cost of yourcalls, if the SIM card supports this function.
To access this menu, press <Menu> in Idle
mode and select Call log.
Recent contacts (Menu 1.1)
This menu displays the most recent calls
dialled, received, or missed.
Accessing a call log
1. Press [Left] or [Right] to mcall type.
2. Press [Up] or [Down] to sccall list.
3. Press [ ] to dial a numbe
to view the details of a cal
Using call log options
From the call list, press <Opt
the following options:• Details: access the call de
• Call: make a call to the nu
• Add to Phonebook: savePhonebook.
• Send message: send an message.
• Delete: delete the selectelogs.

8/4/2019 Manual Sansung e250
http://slidepdf.com/reader/full/manual-sansung-e250 41/140
• Reject list: specify numbers from which youdo not want to accept calls.
• Add to reject list: add the number to theReject list.
• View contact details: access contactinformation, if the caller is saved in
Phonebook.
Missed calls (Menu 1.2)
This menu displays the most recent received
calls that you did not answer.
Dialled calls (Menu 1.3)
This menu displays the most recent calls you
have dialled.
Received calls (Menu 1.4)
This menu displays the most recent calls you
have received.
Delete all (Menu 1.5)
Use this menu to delete all ofcall type.
1. Press [ ] to select thecleared.
2. Press <Delete>.3. Press <Yes> to confirm th
Call time (Menu 1.6)
This menu displays the time and received. The actual timeservice provider will vary.
• Last call time: check the call.
• Total sent: check the totacalls you have dialled.
• Total received: check thethe calls you have receive
Menu functions

8/4/2019 Manual Sansung e250
http://slidepdf.com/reader/full/manual-sansung-e250 42/140
40
• Reset timers: reset the call timers. Youneed to enter the phone password.
Call costs (Menu 1.7)
This network feature displays the cost of calls.This menu is available only if your SIM cardsupports this feature. Note that this is notintended to be used for billing purposes.
• Last call cost: check the cost of your lastcall.
• Total cost: check the total cost of all yourcalls. If the total cost exceeds the maximum
cost set in Set max cost, you must resetthe counter before you can make anothercall.
• Max cost: check the maximum cost limit setin Set max cost.
• Reset counters: reset th
• Set max cost: set the ma
authorised for your calls.• Price/ Unit: set the price
applied when the cost of ycalculated.
Phonebook (Menu 2)
You can store phone numbersand in your phone’s memory.
phone’s memory are physicathey are used as a single entPhonebook.
To access this menu, press <
mode and select Phonebook
The password is preset to 00000000. Youcan change this password.p. 117
C t t li t S d d

8/4/2019 Manual Sansung e250
http://slidepdf.com/reader/full/manual-sansung-e250 43/140
Contact list (Menu 2.1)
Use this menu to search for contacts inPhonebook.
Finding a contact
1. Enter the first few letters of the name thatyou want to find.
2. Select the contact you want from the list.
3. Scroll to a number and press [ ] to dial, orpress [ ] to edit contact information.
Using Phonebook options
While viewing contact details, press<Options> to access the following options:
• Edit: edit contact information.
• Send message: send an message to the selected n
MMS message or e-mail toe-mail address.
• Copy: copy the number tomemory, to the SIM card,
• Copy to phone: copy thewith the name to a new co
• Send via: send the contae-mail, or Bluetooth.
• Delete: delete the selecte
• Mark as default numbernumber as the default for
• Print via Bluetooth: princonnecting the phone to a
Bluetooth.
You can quickly access this menu by pressing<Contacts> in Idle mode.
Some printers may not bthe phone.
Menu functions
FDN t t U i t t ti

8/4/2019 Manual Sansung e250
http://slidepdf.com/reader/full/manual-sansung-e250 44/140
42
FDN contacts (Menu 2.2)
Use this menu to create a list of contacts to beused in FDN (Fixed Dialling Number) mode, inwhich the phone allows outgoing calls only tothe specified phone numbers, if your SIM cardsupports this feature.
Adding a contact
1. Press <Options> and select Add.2. Enter your PIN2 and press <OK>.
3. Enter information about the contact:
• Name: assign a name.
• Number: add a number.• Location: assign a location number.
4. Press <Save> to save the contact.
Using contact options
From the FDN list, you can accontact options as in Phonebo<Options>.
Create contact (Menu 2.3)
Use this menu to add a new cPhonebook.
Storing a contact to the
memory1. Select Phone.
2. Change the settings or enabout the contact:
• First name /Last nam• Mobile /Home /Office /number in any category
You can change the numpressing <Options> an
Change type.
You can activate FDN mode in the FDN mode menu.p. 118
Email: assign an e mail address Sto ing a contact on the

8/4/2019 Manual Sansung e250
http://slidepdf.com/reader/full/manual-sansung-e250 45/140
• Email: assign an e-mail address.
• Graphic ID: assign a caller ID image toalert you to a call from the person.
• Ringtone: assign a ringtone to alert youto a call from the person.
• Group: assign the number to a callergroup.
• Notes: add a memo about the person.
3. Press <Save> to save the contact.
Storing a contact on the
1. Select SIM.
2. Enter information about th
• Name: assign a name
• Number: add a numbe
• Location: assign a loca
3. Press <Save> to save the
Group (Menu 2.4)
Use this menu to organise yo
caller groups.
Adding members to a ca
1. Select a group.
You can set domain name extensions andretrieve one by pressing <Options> andselecting Common address.
The settings specified in Graphic ID andRingtone are given priority over group
settings.
To assign a caller ID imagroup, the contact must phone’s memory.
Menu functions
2 Press <Add> Speed dial (M 2 5)

8/4/2019 Manual Sansung e250
http://slidepdf.com/reader/full/manual-sansung-e250 46/140
44
2. Press <Add>.
3. Press [ ] to select the contacts you
want.4. Press <Options> and select Add.
Managing caller groups
From the group list, press <Options> to accessthe following options:
• View : display the members of the selectedgroup.
• Add: add a new group.
• Edit: change the properties of the selectedgroup.
• Send message: send an SMS, MMS, ore-mail to the members you want.
• Delete: delete the selected group. Groupmembers, however, will not be deleted fromPhonebook.
Speed dial (Menu 2.5)
Use this menu to assign speeto 9) for 8 of your most frequnumbers.
Assigning speed dial num
1. Scroll to a key location froreserved for your voicema
2. Press <Options> and seleor FDN contact.
3. Select a contact from the 4. Select a number, if the con
than one number.
Managing speed dial ent
From the Speed dial screen, to access the following option
• Add: assign a number to aYou can select a contact fr
the FDN list.
• View : check the name and number assigned Using name card options
8/4/2019 Manual Sansung e250
http://slidepdf.com/reader/full/manual-sansung-e250 47/140
• View : check the name and number assignedto the key.
• Change: assign a different number to a key.• Remove: clear the speed dial setting for a
key.
Dialling speed dial numbers
In Idle mode, press and hold the appropriatekey.
My namecard (Menu 2.6)
Use this menu to create a name card and sendit to other people.
Saving your name card
The procedure for creating your name card isthe same as the one for saving a number in thephone’s memory.p. 42
Using name card options
After saving your name card,
to access the following option• Edit: edit the name card.
• Send via: send the name MMS, e-mail, or Bluetooth
• Exchange namecard: excard with another person v
• Remove: delete the name
• Print via Bluetooth: prin
by connecting the phone tBluetooth.
Some printers may not bthe phone.
Menu functions
Own number (Menu 2 7) • Delete all: delete all of th

8/4/2019 Manual Sansung e250
http://slidepdf.com/reader/full/manual-sansung-e250 48/140
46
Own number (Menu 2.7)
Use this feature to check your phone numbers,or to assign a name to each of the numbers.Changes made here do not affect the actualsubscriber numbers on your SIM card.
Management (Menu 2.8)
Use this menu to manage Phonebook.
• Save new contacts to: select a defaultmemory location for saving contacts. If you
select Always ask, the phone will ask you toselect a memory location each time you savea number.
• Copy all: copy all of the contacts stored on
the SIM card to the phone’s memory, or viceversa.
• List by: sort your contacts by the first nameor last name.
• Delete all: delete all of thyour phone’s memory, you
FDN list, or all of them.• Memory status: display t
contacts you have stored i
Service number (Menu 2.9
Use this menu to view the listNumbers (SDN) assigned by provider, including emergencnumbers for directory enquiravailable if your SIM card sup
1. Scroll to the number you w
2. Press <Dial> or [ ].
Applications (Menu 3) Use the following methods to

8/4/2019 Manual Sansung e250
http://slidepdf.com/reader/full/manual-sansung-e250 49/140
Applications (Menu 3)
Use this menu to play Java applications, playmusic files, or edit photos. You can also use theBluetooth feature.
To access this menu, press <Menu> in Idlemode and select Applications.
Music player (Menu 3.1)
Use this menu to enjoy music. First, you needto save music files in your phone’s memory. To
enjoy high quality music, you can use anoptional Bluetooth stereo headset.
Downloading or receiving music files
You can play *.mp3, *.aac, *.aac+, and *.m4afiles.
Use the following methods to your phone:
• Download from the wireles• Download from a compute
optional Samsung PC StudSamsung PC Studio Us
• Receive via an active Bluep. 57
• Copy to a memory card anphonep. 28
Creating a play listAdd the music files to the plaplay them.
1. From the music player scr
<Options> and select Admemory location.
2. Press [ ] to select the press <Add>.
Normal headsets and Bluetooth mono headsetsare not compatible with the music player.
Menu functions
Playing music files

8/4/2019 Manual Sansung e250
http://slidepdf.com/reader/full/manual-sansung-e250 50/140
48
Playing music files
1. From the music player screen, press
<Options> and select Play via.
2. Select Phone to use the phone speaker.
Select Bluetooth stereo headset to use aBluetooth stereo headset, and then search
for and connect the phone to the headset.During playback, use the following keys:
Using music player optioFrom the music player screen<Options> to access the fol
• Play via: play the selected
speaker or a Bluetooth ste• Play /Pause: begin or pau
Key Function
Pauses or resumes playback.Left Returns to the previous file.
Moves backward in a file whenheld down.
Right Skips to the next file. Skipsforward in a file when held down.
Up Opens the current play list.
Down Stops playback.
/ Adjusts the volum
1 Changes the rep
2 Changes the pla
3 Sets the music ptracks in random
Key Function
• Transfer to Bluetooth stereo headset/ Visualisation: change the
8/4/2019 Manual Sansung e250
http://slidepdf.com/reader/full/manual-sansung-e250 51/140
Transfer to Bluetooth stereo headset /Transfer to phone: switch the sound
output to a Bluetooth headset or the phonespeaker.
• Open playlist: access the current play listor all play lists.
• Remove from playlist: remove theselected file from the play list.
• Send via: send the file via MMS, e-mail, orBluetooth.
• Set as: set the file as your ringtone, as a
ringtone for a Phonebook entry, or as aringtone for alarms.
• Settings: change the default settings forplaying music files.
Repeat mode: select a repeat mode.Shuffle: set the music player to play tracksin random order.
Visualisation: change theanimation.
Volume: select a volume • Details: access the file pr
• Activate key: get a new the key for the selected D
• Reactivate key: get anoteven when the key for thehas not expired.
• Key management: manakeys you have acquired.
• Shortcuts: view the functyou can use during playba
Accessing the play list
From the music player screenPress <Options> to access toptions:
• Play via: play the selectedspeaker or a Bluetooth ste
Menu functions
• Add music from: add files to the play list. 2. Speak into the microphone
8/4/2019 Manual Sansung e250
http://slidepdf.com/reader/full/manual-sansung-e250 52/140
50
dd us c o : add files to the play list.
• Move track in playlist: move the selected
file to the position you want within the playlist.
• Go to all playlists: access all play lists.
• Move to: move the selected file to another
play list.• Copy to: copy the selected file to anotherplay list.
• Remove: remove the selected file or all filesfrom the play list.
Voice recorder (Menu 3.2)
Use this menu to record voice memos. A voicememo can be up to one hour long.
Recording a voice memo
1. Press [ ] to start recording.
2. Speak into the microphone
Press [ ] to pause or r
recording.3. When you have finished, p
[Down]. The voice memo saved.
4. Press [ ] to review thepress [Up] to record addit
Playing a voice memo
1. From the Voice recorder sc
<Options> and select Goclips.
2. Select a voice memo. The
During playback, use the follo
Key Function
Pauses or resu
Left Moves backwa
Visualisation: change theKey Function

8/4/2019 Manual Sansung e250
http://slidepdf.com/reader/full/manual-sansung-e250 53/140
Using voice recorder options
From the Voice recorder screen, press<Options> to access the following options:
• Record: record a new voice memo.
• Go to My voice clips: access the voicememo list.
• Settings: customise the default settings forthe voice recorder:
Recording time: select a recording time.Volume: select a volume level.
Default name: change the default prefix of file names.
ganimation.
Image editor (Menu 3.3)
Use this menu to edit your phassortment of editing tools.
Applying an effect
1. Press <Options> and seleOpen or Take photo.
2. Select a photo or take a n3. Press <Load>, or press <
select Load.
4. Press <Options> and seleeffect option.
5. Press <Done>.
6. Press <Options> and sele
7. Press <Yes>.
8. Enter a new file name and
Right Skips forward in a memo. / Adjusts the volume.
Down Stops playback.
Key Function

8/4/2019 Manual Sansung e250
http://slidepdf.com/reader/full/manual-sansung-e250 54/140
Turning off the radio Using radio options

8/4/2019 Manual Sansung e250
http://slidepdf.com/reader/full/manual-sansung-e250 55/140
g
From the radio screen, press [ ], or
disconnect the headset from the phone.
Setting up a radio station list
You can store your favourite radio stations to
quickly access them.1. Connect the headset to the phone and turn
on the radio.
2. Press <Options> and select Add.
3. Enter a title for the station you want and thefrequency of the station, and press <Save>.
4. Select a location in which you want to storethe station.
5. Repeat from step 2 to store other stations.To listen to your stored stations, press [Up] or[Down] from the radio screen.
g p
From the radio screen, press
access the following options:• FM radio off /FM radio o
off or on.
• Add: store a radio station
• Edit: edit the title or frequradio station.
• Self-tuning: let the phonscan through and save avastations.
• Remove: remove the selestations.
• Pop-up alert: set the pholisten to the FM radio at a
When the pop-up notificatscreen, press <Listen> tospecified radio station.
Menu functions
• Speaker on /Earphone on: change sound • If there are obstacles betw

8/4/2019 Manual Sansung e250
http://slidepdf.com/reader/full/manual-sansung-e250 56/140
54
output to the phone speaker or headset.
• Settings: select the radio volume.
Bluetooth (Menu 3.5)
Using Bluetooth wireless, you can connect the
phone wirelessly to other Bluetooth devices andexchange data with them, talk hands-free, orcontrol the phone remotely.
Bluetooth technology allows free wireless
connections between all Bluetooth-compliantdevices within a range of 10 metres. Since thedevices communicate using radio waves, theydo not need to be in line of sight to each other.
Setting up the Bluetooth
The Bluetooth menu provideoptions:
• Activation: activate or deBluetooth feature.
• My devices: search for coBluetooth devices.
• My phone’s visibility: alBluetooth devices to conne
If there are obstacles betwmaximum operating dista
• It is recommended that yBluetooth feature while usfeatures, such as voice remusic player, or vice versperformance.
• Some devices, especially tested or approved by Bluincompatible with your ph

8/4/2019 Manual Sansung e250
http://slidepdf.com/reader/full/manual-sansung-e250 57/140

8/4/2019 Manual Sansung e250
http://slidepdf.com/reader/full/manual-sansung-e250 58/140
7. If necessary, enter the Bluetooth PIN neededf i i d <OK>
Using Java application o

8/4/2019 Manual Sansung e250
http://slidepdf.com/reader/full/manual-sansung-e250 59/140
for pairing and press <OK>.
Receiving data via Bluetooth
To receive data via Bluetooth, your phone’sBluetooth feature must be active and itsvisibility must be enabled.
If an unauthorised Bluetooth device sends datato your phone, the phone displays aconfirmation message. To receive data, press<Yes>.
Java world (Menu 3.6)
Use this menu to access the embedded Javagames and downloaded Java applications.
Playing a game
Select a game from the game list and follow theonscreen instructions. The procedure may differfrom game to game.
From the application list, pres
access the following options:• Start: launch the selected
• Delete: delete the selecte
• Details: access the applic
• Permission: set permissiservices charging you addas network access and SM
• Lock /Unlock: lock the app
it from being deleted, or uapplication.
• Upgrade: upgrade the aplatest version, except for e
• Send information via tex
the URL address containinvia SMS, except for embed
• Memory status: access minformation for application
Menu functions
• Network settings: customise a connectionprofile to be used for applications requiring
SIM-AT (Menu 3.7)

8/4/2019 Manual Sansung e250
http://slidepdf.com/reader/full/manual-sansung-e250 60/140
58
profile to be used for applications requiring
network access. The following options areavailable:
APN: enter the access point name of thenetwork gateway.
Login ID: enter the user ID.
Password: enter the password.
Proxy: select whether or not the phone usesa proxy server to launch the web browser.
Proxy settings: customise the following
proxy settings:When the proxy is set to E n a b l e :
- IP address: enter the gateway address.
- Port: enter the port number.
When the proxy is set to D i s a b l e :- DNS1: enter the primary address.
- DNS2: enter the secondary address.
This menu is available if you that supports SIM Applicationand provides additional servicweather, sports, entertainmeservices. Available services m
depending on your service prdetails, see your SIM card inscontact your service provider
Browser (Menu 4) Navigating the web brow
8/4/2019 Manual Sansung e250
http://slidepdf.com/reader/full/manual-sansung-e250 61/140
The Wireless Application Protocol (WAP) onyour phone allows you to access the wirelessweb. Using the web browser, you can accessup-to-date information and a wide variety of media content, such as wallpapers, ringtones,
and music files.To access this menu, press <Menu> in Idlemode and select Browser.
Home (Menu 4.1)
Use this menu to connect your phone to thenetwork and load the homepage of the wirelessweb service provider. You can also press [ ]in Idle mode.
Using browser options
1. Select or press [ ].
2. Select one of the following
• Back: go back to the p
• Home: go back to the
• Exit: exit the web brow
To Pres
scroll throughbrowser items
[Up]
select a browser item <
return to the previouspage
<Ba
return to thehomepage
and
Menu functions
• Reload: reload the current page.
• Show URL: display the URL address ofBookmarks (Menu 4.2)

8/4/2019 Manual Sansung e250
http://slidepdf.com/reader/full/manual-sansung-e250 62/140
60
• Show URL: display the URL address of
the current web page.• About ...: access version and copyright
information about the browser.
Accessing other phone menus
From any web page, press [ ] to access thefollowing options:
• Enter URL: enter a URL address manually.
• Bookmarks: switch to the Bookmarks
menu.• Messages: check the messages stored in
the My messages folder. You can alsocreate and send a new SMS message.
• My files: switch to the My files menu.Exiting the browser
Press [ ] to end the network connection andexit the browser.
Use this menu to save URL adto quickly access web pages, preset bookmarks.
Adding a bookmark
1. Select an empty location.2. Enter a title for the bookm
[Down].
3. Enter a URL address and p
Accessing a bookmarked
Selecting a bookmark item labrowser and accesses the ass
Using bookmark optionsFrom the bookmark list, presaccess the following options:
• Open: access the website
• Edit: edit the address and name of thebookmark
For each server, the followingavailable:

8/4/2019 Manual Sansung e250
http://slidepdf.com/reader/full/manual-sansung-e250 63/140
bookmark.
• Delete: delete the currently selectedbookmark or all bookmarks.
Enter URL (Menu 4.3)
Use this menu to manually enter the URLaddress of a website and access the website.
Clear cache (Menu 4.4)
Use this menu to clear the cache, which is atemporary memory site that stores recentlyaccessed web pages.
Profile settings(Menu 4.5)
Use this menu to set up servers for the webbrowser. Contact your service provider fordetails about your setting options.
available:
• Profile name: assign a nprofile.
• Home URL: enter the addhomepage.
• Bearer: select a bearer fonetwork address accessed
• Proxy: select whether or na proxy server to launch th
• GPRS settings: customis
network settings:When the proxy is set to E
Proxy IP : enter the web g
Proxy port: enter the por
APN: enter the access poiGPRS network gateway.
Login ID: enter the user
Password: enter the pass

8/4/2019 Manual Sansung e250
http://slidepdf.com/reader/full/manual-sansung-e250 64/140
8/4/2019 Manual Sansung e250
http://slidepdf.com/reader/full/manual-sansung-e250 65/140
Menu functions
• Save and send: save the message in Sentbox and then send it.
Creating and sending an M
1 Select the Subject line

8/4/2019 Manual Sansung e250
http://slidepdf.com/reader/full/manual-sansung-e250 66/140
64
Sentbox and then send it.
• Insert: add a text template, Phonebookentry, or bookmark.
• Add picture /Add animation /Add melody:attach a simple image, an animated image,or a melody.
• Attach: add a name card or calendar dataas a data format attachment.
• Save in: save the message in anothermessage folder.
• Input language: change the language tobe used in T9 input mode.
• Text style: change the text attributes.
Multimedia message (Menu 5.1.2)
Multimedia Message Service (MMS) deliversmessages containing a combination of text,image, video, and audio, from phone to phoneor from phone to e-mail.
1. Select the Subject line.
2. Enter the message subject
3. Select the Image or vide4. Select Add image or Add
image or a video clip.
5. Select the Music or soun
6. Select Add music or Addmusic file or a sound clip.
7. Select the Text line.
You can use various opti<Options> in each field
• The maximum size allo
can differ, depending oprovider.• Depending on the file
Rights Management) smay not be able to be
8. Enter the message text and press [ ].
9 When you have finished press <Options>
• Preview : view the messashown on the recipient’s p

8/4/2019 Manual Sansung e250
http://slidepdf.com/reader/full/manual-sansung-e250 67/140
9. When you have finished, press <Options>
and select Send.10.Enter a phone number or an e-mail address.
To send the message to more than onerecipient, fill in additional destination fields.
11.Press [ ] to send the message.Using options while composing an MMSmessage
While composing a message, press <Options>
to access the following options:• Add: add the message subject or message
text.
• Add image /Add video /Add music /Addsound
: add media files stored in the phone’smemory.
• Change image /Change video /Changemusic /Change sound: replace an item.
• Edit: edit the subject or text.
o o p p
• View : open the selected a
• Send: send the message.
• Save in: save the messagmessage folder.
• Add page: add pages. Moby pressing [Left] or [Righ
• Delete page: delete a pa• Edit page: change the du
display or move the page backward among the othe
• Attach: attach a Phoneboname card or calender datattachment, or a documenOther files folder.
Attached files from the Ocannot be open in your p
Menu functions
• Remove subject /Remove text /Removemedia /Remove: remove an added item.
5. Select the File attach line
6 Add media files document

8/4/2019 Manual Sansung e250
http://slidepdf.com/reader/full/manual-sansung-e250 68/140
66
/
Email (Menu 5.1.3)
You can create and send e-mails that includetext, audio, and images. To use this feature,you need to subscribe to an e-mail service and
set up your e-mail account and profile.p. 79, p. 81
Creating and sending an e-mail
You can create and send e-mails.
1. Select the Subject line.
2. Enter the subject of your e-mail and press[ ].
3. Select the Message line.
4. Enter the e-mail text and press [ ].
6. Add media files, document
Other files folder, or Phoname cards or calender daattachments.
7. When you have finished, pand select Send.
8. Enter an e-mail address.To send the e-mail to morrecipient, fill in additional
9. Press [ ] to send the e
Using options while compoWhile composing an e-mail, pto access the following option
• Add: add the subject of yo
e-mail text.
You can use various options by pressing<Options> in each field.next section
Depending on the file typRights Management) sysnot be able to be forward
• Edit: edit the subject or text.
• Add image/Add videos/Add sounds/Add
• Remove all attachmentsattachments.

8/4/2019 Manual Sansung e250
http://slidepdf.com/reader/full/manual-sansung-e250 69/140
Add image /Add videos /Add sounds /Add
music: add media files stored in the phone’smemory.
• Add other file: add document files stored inthe Other files folder.
• Add from memory card: add files storedon a memory card.
• View /Play: open the selected attachment.
• Send: send the e-mail.
• Save in: save the e-mail in anothermessage folder.
• Attach: attach Phonebook entries as namecards or calender data as data formatattachments.
• Remove subject /Remove message: clearthe subject or text.
• Remove: delete the selecall attachments.
My messages (Menu 5.2)
Use this menu to access mesreceived, sent, or which have
Inbox (Menu 5.2.1)
This folder stores all of the mreceived, except for e-mails.
Viewing a message
The following icons may appe
list to show the message type• SMS or delivery report
messages
• MMS
Attached files from the Other files foldercannot be open in your phone.
Menu functions
• MMS notification ( : Being retrieved,: Failed to be retrieved)
• Delete: delete the messa
• Move to phone /Move to

8/4/2019 Manual Sansung e250
http://slidepdf.com/reader/full/manual-sansung-e250 70/140
68
• Voicemail• Push message from web servers
• Configuration message, containingnetwork parameters from your serviceprovider
Using message optionsWhile viewing a message, press <Options> toaccess the following options:
SMS messages
• Reply via: send a reply to the sender viaSMS or MMS.
• Forward: forward the message to otherpeople.
p /
message between the SIMphone’s memory.
• Add to block list: add theto the Block list to reject tthe sender.
• Cut address: extract URLaddresses, or phone numbmessage.
• Attached items: save me
the message to your phon• Print via Bluetooth: prin
connecting the phone to aBluetooth.
• Lock /Unlock: lock the mefrom being deleted, or unl
A ! icon next to a message means that themessage is of high priority. A grey-colouredmessage icon indicates low priority.
Some printers may not bthe phone.
MMS messages
• Retrieve: retrieve the MMS message from
• Lock /Unlock: lock the mefrom being deleted, or unl

8/4/2019 Manual Sansung e250
http://slidepdf.com/reader/full/manual-sansung-e250 71/140
g
the server.• Reply via text message: send a reply to
the sender via SMS.
• Reply via multimedia message to: send areply via MMS to the sender or all recipients.
• Forward: forward the message to otherpeople.
• Delete: delete the message or all messages.
• Add to block list: add the sender’s numberto the Block list to reject the messages fromthe sender.
• Cut address: extract URL addresses, e-mailaddresses, or phone numbers from the
message.• Attached items: save media contents from
the message to your phone’s memory.
• Details: access the messaPush messages
• Open URL: connect to thespecified in the message.
• Delete: delete the messa• Cut address: extract URL
addresses, or phone numbmessage.
Configuration messages
• Install: apply the configumessage to the phone.
• Cut address: extract URL
addresses, or phone numbmessage.
• Delete: delete the messa
Menu functions
• Lock /Unlock: lock the message to protect itfrom being deleted, or unlock the message.
• Register: save the attachand calendar items to the

8/4/2019 Manual Sansung e250
http://slidepdf.com/reader/full/manual-sansung-e250 72/140
70
Draft (Menu 5.2.2)
This folder stores messages you have saved tosend at a later time.
When you select an SMS or e-mail message, it
opens in Edit mode so that you can edit and/orsend the message.
When you select an MMS message, it opens inPreview mode as would a message from the
Inbox. To edit the MMS message, press<Options> and select Edit.
Outbox (Menu 5.2.3)
This folder stores messages that the phone is
attempting to send or has failed to send.
While viewing a message, press <Options> toaccess the following options:
• View /Play: open the selected attachment.
• Save to My files: save thattachment.
• Send again: retry sendin
• Edit: edit the message an
• Delete: delete the messa• Move to phone /Move tomessage between the SIMphone’s memory.
• Print via Bluetooth: prin
connecting the phone to aBluetooth.
• Lock /Unlock: lock the mefrom being deleted, or unl
• Details: access the messa
Some printers may not bthe phone.
Sentbox (Menu 5.2.4)
This folder stores messages that you have sent
Some printers may not bthe phone.

8/4/2019 Manual Sansung e250
http://slidepdf.com/reader/full/manual-sansung-e250 73/140
This folder stores messages that you have sent
successfully.While viewing a message, press <Options> toaccess the following options:
• View /Play: open the selected attachment.
• Register: save the attached name cardsand calendar items to the phone.
• Save to My files: save the selectedattachment.
• Forward: forward the message to otherpeople.
• Delete: delete the selected message.
• Move to phone /Move to SIM: move themessage between the SIM card and the
phone’s memory.• Print via Bluetooth: print the message by
connecting the phone to a printer viaBluetooth.
• Lock /Unlock: lock the mefrom being deleted, or unl
• Details: access the messa
Email inbox (Menu 5.2.5)This folder stores e-mails thareceived.
View ing an e-mail
1. Press <Select> when Chedisplays. The phone checkand downloads new e-mai
The following icons may ap
show the e-mail status:• Retrieved from the
• Being retrieved
• Failed to be retrieve
p
Menu functions
• Save to My files: save thattachment.
A ! icon next to a message means that thee-mail is of high priority. A grey-coloured

8/4/2019 Manual Sansung e250
http://slidepdf.com/reader/full/manual-sansung-e250 74/140
72
2. Select an e-mail or a header.
3. Press [ / ] to view other pages in thee-mail.
Press and hold [ / ] to move to the first orlast page in the e-mail.
4. Press [ ] or [ ] to view the next orprevious e-mail.
Using e-mail optionsWhile viewing the e-mail or header, press<Options> to access the following options:
• Retrieve: retrieve the body of the e-mail
from the e-mail server.• View /Play: open the selected attachment.
• Register: save the attached name cardsand calendar items to the phone.
• Reply: send a reply to theor e-mail.
• Reply to all: send a replyall of the other recipients.
• Forward: forward the e-mpeople.
• Delete: delete the e-mail memory or from both the and the e-mail server.
• Add to block list: add thaddress or subject to the Be-mails from that address subject.
• Cut address: extract URLaddresses, and phone num
• Attached items: save theattachment or all attachme-mail to your phone’s me
e-mail icon indicates low priority.
• Print via Bluetooth: print the e-mail byconnecting the phone to a printer via
Templates (Menu 5.3)
Use this menu to make and u
8/4/2019 Manual Sansung e250
http://slidepdf.com/reader/full/manual-sansung-e250 75/140
Bluetooth.
• Lock /Unlock: lock the message to protect it
from being deleted, or unlock the message.• Details: access the e-mail properties.
My folder (Menu 5.2.6)
Use this menu to view the messages you havemoved to this folder using the Move to myfolder option while viewing a message list.
Use this menu to make and ufrequently used messages or
Text template (Menu 5.3.1)
You can create SMS template
sentences you use frequentlyretrieve and insert them wheSMS message or passages.
Creating a template
1. Select an empty location.2. Enter a message and pres
Using template options
From the template list, press access the following options:
• Edit: edit the template.
Some printers may not be compatible withthe phone.
Menu functions
• Send: create and send a new message viaSMS, MMS, or e-mail using the selectedtemplate
Using template options
From the template list, press

8/4/2019 Manual Sansung e250
http://slidepdf.com/reader/full/manual-sansung-e250 76/140
74
template.
• Delete: delete the selected template.
Multimedia message templates(Menu 5.3.2)
You can access embedded MMS templates orones you have saved so that you can use themin composing an MMS message.
Creating a template
1. Press <Options> and select Add new .
2. Create a template as you would whencreating an MMS message.
3. Press <Options> and select Save in → Templates.
access the following options:• View : open the selected t
• Send: send the selected t
• Edit: edit the selected tem
• Add new : add a new tem• Delete: delete the selecte
templates. You cannot deltemplates.
Delete all (Menu 5.4)
Use this menu to delete all mmessage type at once.
1. Press [ ] to select theto be cleared.
2. Press <Delete>.
3. Press <Yes> to confirm th
Settings (Menu 5.5)
Use this menu to set up for using the
If this menu is not shown,provides the automatic chby default
8/4/2019 Manual Sansung e250
http://slidepdf.com/reader/full/manual-sansung-e250 77/140
Use this menu to set up for using themessaging service.
Text messages (Menu 5.5.1)
You can configure default SMS settings.
• Sending options: set up the options forsending SMS messages:
Reply path: allow recipients to reply to youthrough your SMS server.
Request delivery receipt: set the networkto inform you when messages have beendelivered.
Character support: select a characterencoding type. When you select Auto, the
phone switches the encoding type fromGSM-alphabet to Unicode if you enter anUnicode character. Use of Unicode encodingwill reduce the maximum number of characters in a message to about half.
by default.
Validity period: set the lemessages are stored in the
Message type: set the detype. The network can con
into the selected format.Service centre: store or number of SMS server.
• Block number: store the
from which you want to remessages.
Multimedia messages (Me
You can configure default MM
• Sending options: set up sending MMS messages:
Request delivery receipto inform you when your m
been delivered.

8/4/2019 Manual Sansung e250
http://slidepdf.com/reader/full/manual-sansung-e250 78/140

8/4/2019 Manual Sansung e250
http://slidepdf.com/reader/full/manual-sansung-e250 79/140
Menu functions
Small video: you can add any type of itemsof up to 100 KB.
Emails (Menu 5.5.3)
You can configure default e-m

8/4/2019 Manual Sansung e250
http://slidepdf.com/reader/full/manual-sansung-e250 80/140
78
Moderate video: you can add any type of items of up to 300 KB.
• Creation mode: select an MMS creationmode.
Warning: you can create a message with
any type of content and of any size, but thephone will inform you when the content andsize have exceeded the maximum.
Free: you can create a message with any
type of contents and of any size.Restricted: you can create a message withthe type of content and size specified inMessage class.
• Sending options: set up
sending e-mails:Send copy to self : send e-mail to your e-mail acco
Request delivery receip
to inform you when e-maidelivered.
Request read receipt: serequest along with your e-
Priority: select the priorite-mails.Add signature: attach yonumber, or a simple memo
You cannot change e-mail psettings while an e-mail is bretrieved.
Edit name: enter the name in yoursignature.
Delete option: determineare deleted immediately oyou connect to the server.

8/4/2019 Manual Sansung e250
http://slidepdf.com/reader/full/manual-sansung-e250 81/140
Edit telephone number: enter the phonenumber in your signature.
Edit note: enter the tag line in yoursignature.
• Receiving options: set up the options for
receiving e-mails:Check interval: set how often the phonechecks the e-mail server for downloadingnew e-mails. If you select Not used, use the
Check new email option to receive new e-mails manually.
Send read receipt: determine whether ornot the phone sends a read-reply forincoming e-mails. If you select Announce,
the phone asks you to send a read-reply.Retrieve option: set whether the phonedownloads e-mail headers only or e-mailheaders and bodies both.
you connect to the server.
Keep in server: leave thein the server after retrievi
• Email accounts: set up aand select an account to b
Current account: select Account settings: configaccounts using different e-Press <Create>, or press
select Create, if one has asaved.
- In use: select this optioaccount and to display thEmail inbox.
- Account name: enter acurrently selected accou
Menu functions
To access the following options, press<Options> and select Next, or press[ ].
- Retrieve server type: sfor the incoming e-mail sremaining options depen

8/4/2019 Manual Sansung e250
http://slidepdf.com/reader/full/manual-sansung-e250 82/140
80
[ ]
- User name: enter a user name.
- Email address: enter your e-mailaddress.
- Reply address: enter your e-mil address
to be used when the recipient sends areply.
To access the following options, press<Options> and select Next, or press[ ].
- SMTP server: enter the IP address or hostname of the outgoing e-mail server.
- SMTP port: enter the SMTP port number.
- SMTP user ID: enter the SMTP user
name.- SMTP password: enter the SMTP
password.
g p ptype setting.
When the protocol type is
- POP3 server: enter the name of the server that
e-mail.- POP3 port: enter the PO
- Same ID and passworwant to have the same upassword with the outgo
- POP3 user ID: enter th
- POP3 password: enter password.
- APOP login: connect to
using the APOP login schoption is selected.
When the protocol type is I M A P 4 :
- IMAP4 server: enter the IP address or
Profile settings: configurusing different e-mail servoptions for each profile:

8/4/2019 Manual Sansung e250
http://slidepdf.com/reader/full/manual-sansung-e250 83/140
host name of the server that receives youre-mail.
- IMAP4 port: enter the IMAP4 portnumber.
- Same ID and password: select if you
want to have the same user ID andpassword with the outgoing e-mail server.
- IMAP4 user ID: enter the IMAP4 username.
- IMAP4 password: enter the IMAP4password.
- Include attachments: select this optionto receive attachments with e-mails.
- Email retrieval limit: set the number of
headers you will retrieve from the server.• Email profiles: set up an e-mail profile and
select a profile to be used.
Current profile: select a profile.
p p
- Profile name: enter a nprofile.
- APN: enter the access pothe GPRS network addre
- Login ID: enter the use- Password: enter the pa
- DNS1: enter the primary
- DNS2: enter the second
• Block list: specify e-mail subjects you want to rejec
Push message (Menu 5.5.4)
You can change the settings fmessages from the wireless w• Receive: set how your ph
messages.
Menu functions
• Service centre: enter the address of theserver from which you want to receive pushmessages.
Repeat: set the number oresends the SOS message
8/4/2019 Manual Sansung e250
http://slidepdf.com/reader/full/manual-sansung-e250 84/140
82
g
SOS messages (Menu 5.6)
In an emergency, you can send an SOS
message to your family or friends for help. Youcan also receive an SOS message from otherpeople who are in an emergency. Use this menuto specify options for sending and receiving anSOS message.
• Sending options: set up the options forsending an SOS message:
Sending SOS: activate or deactivate theSOS message feature. To send an SOSmessage, press [ / ] 4 times in Idle mode,with the phone closed.
Recipients: specify the phone numbers towhich you want to send SOS messages.
Message: check the presetext.
• Receiving options: set aincoming SOS messages.
Broadcast messages (M
The cell broadcast service demessages on various topics suor traffic.
Use this menu to change the service and to access broadca
• Read: open received broa
The Temporary box save
messages until the phone Press <Options> and seletext notification appears toArchive box.
The Archive box saves broadcast messagesindefinitely.
My files (Menu 6)
The My files menu allows yo

8/4/2019 Manual Sansung e250
http://slidepdf.com/reader/full/manual-sansung-e250 85/140
• Activation: select to receive broadcastmessages, or not.
• Receiving channels: indicate the channelsfrom which you wish to receive broadcastmessages. Please contact your service
provider for further details.• Language: select the preferred languages
in which broadcast messages display.
Memory status (Menu 5.8)
Use this menu to view the amount of memorycurrently in use in each message folder.
You can also access a message box by selecting
it from this menu.
images, videos, music files, astored in the phone’s memorycard.
To access this menu, press <
mode and select My files.
Tips for Digital Rights Man
As a result of the Digital Righ(DRM) system, some of the m
download from the Internet omay require a licence key to can acquire the key from the owns the rights to the contenkey option.
Note the following icons on th
• : Forwardable item wi
• : Forwardable item wi
Menu functions
• : Unforwardable item with a valid key.
• : Unforwardable item without a valid
1. Select an image folder.
2. Press <Options> and sele

8/4/2019 Manual Sansung e250
http://slidepdf.com/reader/full/manual-sansung-e250 86/140
84
key.Your service provider supports onlycount-based or unlimited-access DRM files.
Images (Menu 6.1)
This menu displays photos you have taken andimages you have downloaded, received inmessages, or imported from a computer.
Viewing an image1. Select an image folder.
2. Select an image.
View ing a slide showYou can view your images as a slide show, asequential presentation of each image in thecurrent folder.
3. Select a time interval. The4. Press <Back> to stop the
Using image options
While viewing an image, presaccess the following options:
• List: return to the image
• Full screen view : open tscreen.
• Send via: send the file viaBluetooth.
• Set as: set the image as ythe display or as a caller I
Phonebook entry.• Edit: edit the image using
if it is a photo taken by thphone.p. 51
• Move to: move the file to another folder.
• Copy to card: copy the files to a memory
d
• Activate key: get a new the key for the selected D
R i k

8/4/2019 Manual Sansung e250
http://slidepdf.com/reader/full/manual-sansung-e250 87/140
card.• Delete: delete the selected file.
• Rename: change the file name.
• Slide show : view all images as a slideshow.
• Bluetooth visibility: share the file withother Bluetooth devices.
• Print via Bluetooth: print the image byconnecting the phone to a printer via
Bluetooth.
• Lock /Unlock: lock the file to protect it frombeing deleted, or unlock the file.
• Details: access the file properties.
• Reactivate key: get anotthe key for the selected Dexpired.
• Key management: manakeys you have acquired.
Videos (Menu 6.2)
This menu displays video cliprecorded, downloaded, receiv
or imported from a computer
Playing a video clip1. Select a video folder.
2. Select a video clip.
Some printers may not be compatible withthe phone.
Video clips recorded on othecamcorders, may not play co
Menu functions
During playback, use the following keys: • Send via: send the selecte-mail, or Bluetooth.
M t th fil t
Key Function

8/4/2019 Manual Sansung e250
http://slidepdf.com/reader/full/manual-sansung-e250 88/140
86
After playback, press < > to access thefollowing options:
• Play: play the selected file.
• Move to: move the file to• Copy to card: copy the ficard.
• Delete: delete the selecte
• Rename: change the file
• Bluetooth visibility: shawith other Bluetooth devic
• Lock /Unlock: lock the filebeing deleted, or unlock th
• Details: access the file pr• Activate key: get a new
the key for the selected D
• Reactivate key: get anot
the key for the selected Dexpired.
• Key management: manakeys you have acquired.
Pauses or resumes playback.
Left Returns to the previous file.Moves backward in a file whenheld down.
Right Skips to the next file. Skipsforward in a file when helddown.
Up Opens the file list.
Down Stops playback.
/ Adjusts the volume.
Music (Menu 6.3)
This menu displays music files you have
d l d d i t d f t
Using sound options
While playing a sound clip, pr
th f ll i ti

8/4/2019 Manual Sansung e250
http://slidepdf.com/reader/full/manual-sansung-e250 89/140
downloaded, or imported from a computer.
1. Select Music.
2. Select a file. The music player opens.p. 48
Sounds (Menu 6.4)
This menu displays the voice memos you haverecorded, and sound clips you have
downloaded, received in messages, or importedfrom a computer.
Playing a sound clip
1. Select a sound folder.2. Select a sound clip. For a voice memo, see
Voice recorder.p. 50
access the following options:• List: return to the sound l
• Send via: send the selecte-mail, or Bluetooth.
• Set as: set the file as youringtone for a Phonebook eringtone for alarms.
• Move to: move the file to
• Copy to card: copy the fi
card.• Delete: delete the file.
• Rename: change the file
• Bluetooth visibility: sha
selected file or the files yoBluetooth devices.
• Lock /Unlock: lock the filebeing deleted, or unlock th
8/4/2019 Manual Sansung e250
http://slidepdf.com/reader/full/manual-sansung-e250 90/140
• Activate key: get a new licence key whenthe key for the selected DRM file expires.
• Reactivate key: get another key even whenth k f th l t d DRM fil h t
Planner (Menu 7)
Use this menu to keep track
You can also use convenient

8/4/2019 Manual Sansung e250
http://slidepdf.com/reader/full/manual-sansung-e250 91/140
the key for the selected DRM file has notexpired.
• Key management: manage the licencekeys you have acquired.
Memory card (Menu 6.6)
Use this menu to access the files stored on amemory card. This menu is only available when
you insert a memory card into the phone.
Memory status (Menu 6.7)
You can check the total amount of memory and
the amount of memory currently in use in eachmedia box.
You can access a media box by selecting it fromthis menu.
You can also use convenient an alarm clock, calculator, constopwatch.
To access this menu, press <mode and select Planner.
Alarm (Menu 7.1)
Use this menu to set alarms.
a normal alarm corresponds ttype settings. A wake-up alarby your sound settings.
Setting an alarm
1. Select the type of alarm.2. Set each alarm option.
• Alarm: activate the ala
Menu functions
• Alarm time: enter the time for the alarmto ring.
• AM/PM: select AM or PM in 12-hourtime format
Deactivating an alarm
1. Select the alarm you want
2 Select Off on the Alarm l

8/4/2019 Manual Sansung e250
http://slidepdf.com/reader/full/manual-sansung-e250 92/140
90
time format.
• Alarm day: select days of the week tosound the alarm.
• Alarm tone: select an alarm tone.
• Snooze: (for Wake-up alarm) select aninterval for the alarm to repeat.
• Repeat: (for Wake-up alarm) set howmany times the alarm will repeat.
3. Press <Save>.
Stopping an alarm
• For a non-wake-up alarm, press any key.
• For a wake-up alarm, press <OK> or[ ].
If the snooze option is set for the wake-upalarm, press any key, except for <OK> and[ ], to cause it to sound again after a
specific time.
2. Select Off on the Alarm l<Save>.
Setting alarms to sound phone is off
From the Alarm screen, selec→ On.
If the phone is off when it is to sound, the phone switches
the alarm.
Calendar (Menu 7.2)
Use this menu to keep track
Selecting a day on the ca
When you access the Calendcalendar in Month view appea
date indicated by a grey box.
• Press [Left] or [Right] to move by day.
• Press [Up] or [Down] to move by week.
• Press [ / ] to move by month
• AM/PM: select AM ortime format.
• End date and End timending date and time fo

8/4/2019 Manual Sansung e250
http://slidepdf.com/reader/full/manual-sansung-e250 93/140
• Press [ / ] to move by month.Creating an item
You can store appointments, anniversaries,miscellaneous items, and tasks on the calendar.
More than one item per day can be stored.
Entering an appointment or amiscellaneous item
1. Select a date on the calendar.
2. Press <Options> and select Create → Appointment or Miscellany.
3. Enter information or change the settings:
• Subject: enter a title for the item.
• Details: enter item details.
• Start date and Start time: enter thestarting date and time for the item.
ending date and time fo
• AM/PM: select AM ortime format.
• Location: (for Appoint
information about the a• Alarm: set an alarm fo
• before: set how long balarm is to alert you.
• Alarm tone: select an • Repeat: (for Appointmthe item to recur and s
• until: (for Appointmendate, if the item will rec
4. Press <Save> to save the
Menu functions
Entering an anniversary
1. Select a date on the calendar.
2 Press <Options> and select Create →
Entering a task
1. Select a date on the calen
2 Press <Options> and sele

8/4/2019 Manual Sansung e250
http://slidepdf.com/reader/full/manual-sansung-e250 94/140
92
2. Press <Options> and select Create Anniversary.
3. Enter information or change the settings:
• Occasion: enter information about the
anniversary.• Date: enter the date.
• Alarm: set an alarm for the anniversary.
• before: set how long before theanniversary the alarm is to alert you.
• Alarm time: enter the time for the alarmto ring.
• AM/PM: select AM or PM in 12-hourtime format.
• Alarm tone: select an alarm tone.• Repeat every year: set the phone to
remind you of the anniversary every year.
4. Press <Save> to save the anniversary.
2. Press <Options> and seleTask.
3. Enter information or chang
• Task: enter informatio
• Start date: enter the s• Due date: enter the en
• Priority: select a prior
• Alarm: set an alarm fo
• before: set how long balarm is to alert you.
• Alarm time: enter the to ring.
• AM/PM: select AM or
time format.• Alarm tone: select an
4. Press <Save> to save the
Consulting the calendar
Once you have created items, the item icons
and the number of items for a specific dayt th b tt f th l d
• Send via: send the item ve-mail, or Bluetooth.
• View by: change the viewcalendar

8/4/2019 Manual Sansung e250
http://slidepdf.com/reader/full/manual-sansung-e250 95/140
and the number of items for a specific dayappears at the bottom of the calendar.
• Appointment
• Anniversary
• Task
• Miscellaneous item
Viewing an item
1. Select a date on the calendar to display the
items for that day.2. Select an item to view its details.
3. Press [Left] or [Right] to access the otheritems scheduled for the selected day.
While viewing an item, press <Options> toaccess the following options:
• Edit: edit the item.
• Create: add a new item.
calendar.
• Done /Not done: change task item.
• Delete: delete the item.
• Print via Bluetooth: prinby connecting the phone tBluetooth.
Using calendar options
On the calendar, press <Optithe following options:
• View by: change the viewcalendar.
• Create: add a new item.
Some printers may not b
the phone.
Menu functions
• Go to: select today’s date or enter a specificdate.
• Event list: sort items by type of item.
• Delete: delete items stored on the calendar
View ing items in a differ
You can change the calendar
view or Week view Press <Oselect View by → a view mod

8/4/2019 Manual Sansung e250
http://slidepdf.com/reader/full/manual-sansung-e250 96/140
94
• Delete: delete items stored on the calendarby using various deleting options.
• Settings: change the default settings forthe calendar.
Starting day: select which day of the weekthe calendar starts with.
Default view by: select the defaultcalendar view mode.
• Missed alarm events: access items whosealarms you have missed.
• Memory status: access memoryinformation for the items stored on thecalendar.
view or Week view. Press <Oselect View by → a view mod
Day view
You can view items for the se
following icons may display tostatus:
• Alarm set
• Recurring item
• Completed task• Task priority ( : high,
: low)
Select an item to view its det
Week viewYou can view items for the seon the timetable indicates theinformation. Select a cell in t
Memo (Menu 7.3)
Use this menu to make memos for things that
are important and manage them.
• Print via Bluetooth: prinby connecting the phone tBluetooth.
Some printers may not b
8/4/2019 Manual Sansung e250
http://slidepdf.com/reader/full/manual-sansung-e250 97/140
are important and manage them.
Creating a memo
1. Press <Options> and select Create.
2. Enter the memo’s text and press [ ].
Viewing memos
1. Select the memo you want to view.
2. Press [Left] or [Right] to view other memos.Using memo options
While viewing memo details, press <Options>to access the following options:
• Edit: change the memo’s text.• Send via: send the selected memo via SMS,
MMS, e-mail, or Bluetooth.
• Delete: delete the memo.
• Memory status: check ho
you have created.
World clock (Menu 7.4)
Use this menu to find out the
another part of the world.
Setting the local time zo
1. From the world map, presthe upper line ( ) and se
2. Select Time zone.
3. Press [Left] or [Right] to syou want. As the time lineand date of the given zone
Some printers may not bthe phone.
Menu functions
4. Press [ ] to save the city as your localtime zone.
5. Press <Save>.
• Mark as second clock: stime zone to be displayed type.
• Display settings: select

8/4/2019 Manual Sansung e250
http://slidepdf.com/reader/full/manual-sansung-e250 98/140
96
Viewing world time
1. From the world map, press [Left] or [Right]to scroll to the city you want on a foreign
time zone line ( or ). As the time linemoves, the time and date of the given zonedisplay.
2. Press [ ] to save the time zone.
Using world clock options
From the world map, press <Options> toaccess the following options:
• Edit: change the local time zone.
• Save: save the selected foreign time zone.• Apply daylight saving time: apply
daylight saving time to the time zone youwant.
Display settings: select displayed on the idle screeclock is only available whemarked a time zone for a
Calculator (Menu 7.5)
Use this menu to perform basfunctions, such as addition, smultiplication, and division.
1. Enter the first number.• Press [ ] to insert a de
• Press [ ] to insert a br
• Press [ / ] to move th
You cannot display the ducalendar in Idle mode at Whichever you select las
• Press <Options> to use additionalarithmetic functions or to switch to theConverter screen.
2. Press one of the Navigation keys to access
3. Enter the value to be conv[Down].
• Press [ ] to insert a de
• Press [ ] to change th

8/4/2019 Manual Sansung e250
http://slidepdf.com/reader/full/manual-sansung-e250 99/140
2. Press one of the Navigation keys to accessthe math function you want.
3. Enter the second number.
4. Press [ ] to view the result.
5. If necessary, repeat from step 2 to continuethe calculation.
Converter (Menu 7.6)
Use this menu for common conversions, suchas currency and temperature.
Performing a conversion
1. Select a converter.2. Press [Left] or [Right] to select the original
unit and press [Down].
Press [ ] to change thabove zero (+) or below
4. Press [Left] or [Right] to swhich you want to convert
The equivalent value for thentered displays.
Using converter options
Press <Options> to access toptions:
• Clear: clear the current va
• Reverse: reverse the con
• Exchange rate: edit the
Menu functions
Timer (Menu 7.7)
Use this menu to set a period of time for the
phone to count down. The phone sounds anl h th ifi d i d f ti i
Stopwatch (Menu 7.8)
Use this menu to measure ela
maximum time is 10 hours.

8/4/2019 Manual Sansung e250
http://slidepdf.com/reader/full/manual-sansung-e250 100/140
98
p palarm when the specified period of time expires.
Starting the timer
1. Press <Set>.2. Enter the length of time you want to countdown and press <OK>.
3. Press [ ] to start counting down.
Stopping the timer• Press any key when the timer sounds.
• Press [ ] on the Timer screen to stop thetimer before it sounds.
1. Press [ ] to start the s
2. Press [ ] to check an irepeat this step for a total
Camera (Menu 8)
You can use the camera mod
your phone to take photos anTo access this menu, press <mode and select Camera, or
• Do not take photos of peopermission.
• Do not take photos in a pare not allowed.
• Do not take photos in a pinterfere with another per
Take photo (Menu 8.1)
The camera produces JPEG photos.
When you take a photo in direct sunlight or in
4. To Pre
access photo options <Op

8/4/2019 Manual Sansung e250
http://slidepdf.com/reader/full/manual-sansung-e250 101/140
Taking a photo1. Access the Take photo menu to turn on the
camera.
2. Make any desired adjustments.
• Press < > to access camera options.next section
• Use the keypad to change the camerasettings or switch to other modes.p. 101
3. Press [ ] to take a photo. The photo issaved in the My photos folder.
Using camera options in
In Capture mode, press <following options:
• Record video: switch to R
• Shooting mode: take a pfollowing modes:
Single shot: take a photo
You can select whether or automatically saves a phot
e you ta e a p oto d ect su g t obright conditions, shadows may appear on thephoto.
p
delete the photo [C]
return to Capture
mode
<Ba
Menu functions
Multi shot: take a series of action stills. Youcan select the number of photos the camerawill take.
Mosaic shot: take several stills and save
- Viewfinder mode: selescreen.
- Scene program: set whNight shot mode.

8/4/2019 Manual Sansung e250
http://slidepdf.com/reader/full/manual-sansung-e250 102/140
100
them in one frame. You can select thelayout.
• Effects: change the colour tone or apply a
special effect.• Frames: apply a decorative frame.
• Timer: set a time delay before the cameratakes a photo.
• Go to My photos: access the My photos folder.
• Camera settings: change the defaultsettings for taking a photo.
Photo settings: change the following image
settings:- Size: select an image size.
- Quality: select an image quality setting.
- Exposure metering: sedetermine the exposure based on a specific area
- White balance: adjust tof the photo. You can maappear warmer or cooler
Preferences: change the settings:
- Shutter sound: select thear when you press the
- Zoom sound: turn the szooming on or off.
- Brightness sound: turnfor brightness adjustmen
- Default name: change of file names.
• Camera shortcuts: view the functions of the keys you can use in Capture mode.
Using the keypad in Capture mode
4 Changes the sh
5 Changes the co
Key Function

8/4/2019 Manual Sansung e250
http://slidepdf.com/reader/full/manual-sansung-e250 103/140
You can use the keypad to customise yourcamera settings in Capture mode.
Using photo options
After saving a photo, press <access the following options:
• View : access one of the m
Key Function
Left/Right Adjusts the brightness.
Up/Down Zooms in or out.
Flips the image vertically.
Shows the mirror image.
1 Switches to Record mode.p. 102
2 Changes the image size.
3 Changes the image quality.
5 Changes the coapplies a specia
6 Changes the w
setting.7 Selects a decor
8 Sets the timer.
0 Goes to the My
Changes the pr
Menu functions
• Send via: send the file via MMS, e-mail, orBluetooth.
• Viewfinder: return to Capture mode.
• Set as: set the photo as your wallpaper for
• Print via Bluetooth: princonnecting the phone to aBluetooth.
Some printers may not b

8/4/2019 Manual Sansung e250
http://slidepdf.com/reader/full/manual-sansung-e250 104/140
102
p y p pthe display or as a caller ID image for aPhonebook entry.
• Edit: edit the image using the Image editor.
p. 51• Delete: delete the file.
• Multi shot delete all: delete the multi-shotphotos you want.
• Rename: change the file name.• Go to My photos: access the My photos
folder.p. 84
• Bluetooth visibility: share the selected fileor the files you want with other Bluetoothdevices.
• Lock /Unlock: lock the file
being deleted, or unlock th• Details: access the file pr
Record video (Menu 8.2)
You can record a video of whthe camera screen and save
Recording a video
1. Access the Record video
2. Make any desired adjustm
• Press < > to access cnext section
p ythe phone.
• Use the keypad to change the camerasettings or switch to other modes.p. 104
3. Press [ ] to start recording.
Using camera options in
In Record mode, press < >
following options:• Take photo: switch to Ca

8/4/2019 Manual Sansung e250
http://slidepdf.com/reader/full/manual-sansung-e250 105/140
4. Press [ ] or < > to stop recording. Thevideo is automatically saved in the My videoclips folder.
p
• Effects: change the colouspecial effect.
• Timer: set a time delay bstarts recording a video.
• Go to My video clips: accclips folder.
• Camcorder settings: cha
settings for recording a vidRecording mode: select mode.
Select Limit for multime
Limit for emails to recorfor an MMS message or e-clip is saved in 3GP format
5. To Press
play back the videoclip
[ ].
access video options < >.p. 105
delete the video [C] and then <Yes>.
return to Record
mode
< >.
Menu functions
Select Normal to record a video within thelimit of the currently available memory. Thevideo clip is saved in MP4 format.
Size: select a frame size.Q lit l t i lit tti
Using the keypad in Reco
You can use the keypad to cu
camera settings in Record moKey Function

8/4/2019 Manual Sansung e250
http://slidepdf.com/reader/full/manual-sansung-e250 106/140
104
Quality: select an image quality setting.
Record audio: record a video clip withaudio.
White balance: adjust the colour balance of the video. You can make your video appearwarmer or cooler.
Zoom sound: turn the sound effect forzooming on or off.
Brightness sound: turn the sound effectfor brightness adjustment on or off.
Default name: change the default prefix of file names.
• Camcorder shortcuts: view the functionsof the keys you can use in Record mode.
Key Function
Left/Right Adjusts the brig
Up/Down Zooms in or ouFlips the image
Shows the mirr
1 Switches to Cap. 99
2 Changes the fr
3 Changes the im
4 Changes the vimode.
• Rename: change the file
• Go to My video clips: accclips folder.p. 85
• Bluetooth visibility: shah Bl h d i
5 Changes the colour tone or
applies a special effect.
Key Function

8/4/2019 Manual Sansung e250
http://slidepdf.com/reader/full/manual-sansung-e250 107/140
Using video options
After saving a video clip, press < > to accessthe following options:
• Viewfinder: return Record mode.• Send via: send the file via MMS, e-mail, or
Bluetooth.
• Delete: delete the file.
other Bluetooth devices.
• Lock /Unlock: lock the filebeing deleted, or unlock th
• Details: access the file pr
Go to My photos (Menu 8.
Use this menu to access a lishave taken.p. 84
Go to My video clips (Me
Use this menu to access a lishave recorded.p. 85
6 Changes the white balancesetting.
7 Mutes or unmutes the audio.8 Sets the timer.
0 Goes to the My video clips folder.
Menu functions
Settings (Menu 9)
The Settings menu provides you with various
setting options to customise the phone to yourpreferences and needs. You can also reset the Automatic: your phone w
Time information may noyou move to one time zoa country.
8/4/2019 Manual Sansung e250
http://slidepdf.com/reader/full/manual-sansung-e250 108/140
106
psettings to their default values.
To access this menu, press <Menu> in Idlemode and select Settings.
Time and date (Menu 9.1)
Use this menu to set the current time and dateon your phone.
• Time zone updating: select a mode forupdating the current time and date.
Prompt first: the phone will read the MCC(Mobile Country Code) from the network and
automatically update the current time for thecountry that you are in when you travelabroad. Before updating, the phone will askif you want to update time information.
Automatic: your phone winformation from the netw
Manual only: you can setmanually.
• Time zone: set the homethe city that corresponds tTo set the daylight saving daylight saving time.
• Time: enter the current ti• AM/PM: select AM or PM
format.
• Time format: select a tim
• Date: enter the current da• Date format: select a dat
Phone settings (Menu 9.2)
Many different features of your phone’s system
can be customised to suit your preferences.
• Down: set whether or notmaintains the menu you aclose the phone.
When you set Down toti th k l k

8/4/2019 Manual Sansung e250
http://slidepdf.com/reader/full/manual-sansung-e250 109/140
Language (Menu 9.2.1)
Use this menu to select a language for thedisplay text.
Greeting message (Menu 9.2.2)
Use this menu to enter the greeting that isdisplayed briefly when the phone is switched
on.
Slide settings (Menu 9.2.3)
Use this menu to set how the phone reactswhen you open it for an incoming call, andwhen you close it while using a function.
• Up: set whether a call is automaticallyanswered when you open your phone.
Shortcuts (Menu 9.2.4)You can use the Navigation keaccess specific menus directlyUse this menu to change the assignments for [Left] and [Ras a shortcut to My menu, aCamera.
Assigning a shortcut menu
1. Select a key to be used as2. Select a menu to be assig
operation, the key lockmode or after the display
Menu functions
Using shortcut options
Press <Options> to access the followingoptions:
• Assign: assign a shortcut menu.
Ch h h t t
Using item options
Press <Options> to access toptions:
• Assign: assign an item.
Ch h th l

8/4/2019 Manual Sansung e250
http://slidepdf.com/reader/full/manual-sansung-e250 110/140
108
• Change: change a shortcut menuassignment.
• Remove: deactivate the shortcut
assignment to the selected key.• Remove all: deactivate all shortcut
assignments.
My menu (Menu 9.2.5)
You can set up a menu of your own using yourfavourite menu items, which can be easilyaccessed by pressing [Up] in Idle mode.
Setting up My menu items1. Select an item to be changed.
2. Select the menu item you want.
• Change: change the selec
• Remove: remove the sele
• Remove all: remove all it
Advanced shortcuts (Menu
Use this menu to activate theshortcut feature, which allows
text message, alarm, calendaconverter applications from t
Launching menus by numb
1. From the Advanced short
On and press <Save>.
2. In Idle mode, enter the number for theaction you want.
For example, enter time as 4-digit to set an
alarm or date as 4-digits to enter yourschedule.
Using Advanced shortcut o
Press <Options> to access toptions:
• Assign: assign a shortcut
Ch h h t
8/4/2019 Manual Sansung e250
http://slidepdf.com/reader/full/manual-sansung-e250 111/140
schedule.
3. Press one of the Navigation keys.
You can access the following applications by
default:• Up: Alarmp. 89
• Down: Converterp. 97
• Left: SMSp. 63
• Right: Calendarp. 90Changing an Advanced shortcut key
1. From the Advanced shortcuts menu, press[Down] and select a key to be used as a
shortcut key.2. Select a menu to be assigned to the key.
• Change: change a shortc
• Remove: deactivate the sassignment to the selected
• Remove all: deactivate aassignments.
Volume key (Menu 9.2.7)
Use this menu to change the settings.
• Volume key function: sephone mutes the call ringeif you press and hold [ /
comes in. You can also setphone sends an SMS messwhen a call is rejected.
Menu functions
• Text message: enter a message to be sentto the caller when a call is rejected.
USB settings (Menu 9.2.8)
Use this menu to select a USB mode to be used
• Anykey answer: answer by pressing any key, exceand [ ].
• Voice clarity: remove extincrease call quality so tha

8/4/2019 Manual Sansung e250
http://slidepdf.com/reader/full/manual-sansung-e250 112/140
110
Use this menu to select a USB mode to be usedwhen you connect your phone to a PC via USB.
• Modem: you can use your phone as a
modem for PC network connections.• Mass storage: you can access a memory
card from your PC. This option is onlyavailable when you insert a memory cardinto the phone.
Extra settings (Menu 9.2.9)
You can turn the automatic redialling oranswering features on or off.
• Auto redial: set the phone to make up toten attempts to redial a phone number afteran unsuccessful call.
increase call quality so thawhom you are speaking caeven if you are in a noisy
Offline mode (Menu 9.2.10)
Use this menu to switch the pmode or back to Online mode
Display settings (Menu 9.
Use this menu to change settdisplay.
Wallpaper (Menu 9.3.1)
You can change the backgroudisplayed on the display.
• Wallpaper: select a background image inIdle mode.
• Menu background: set whether or not to
display the same background image in Menumode.
Skin (Menu 9.3.4)
You can select a skin colour pmode.
Brightness (Menu 9.3.5)

8/4/2019 Manual Sansung e250
http://slidepdf.com/reader/full/manual-sansung-e250 113/140
mode.
• Transparency: adjust the transparency of the menu background image.
Main menu style (Menu 9.3.2)
You can select a display style for the main menuscreen.
Text display (Menu 9.3.3)
You can change the display settings for the textdisplayed on the idle screen.
• Text position: select a position. If you do
not want text to display in Idle mode, selectOff .
• Text style: select a font style.
• Text colour: select a font colour.
Brightness (Menu 9.3.5)
You can adjust the brightnessvarying lighting conditions.
Dialling display (Menu 9.3.6
Use this menu to select a fonfor the numbers entered and colour of the display while dia
Calendar (Menu 9.3.7)
Use this menu to display the current month on the idle scr
Menu functions
Show caller ID (Menu 9.3.8)
Use this menu to set the phone to displaymissed call notifications with the most recentlymissed caller’s information.
Keypad tone (Menu 9.4.2)
Use this menu to select the tosounds when you press a key
You can adjust the key tone
8/4/2019 Manual Sansung e250
http://slidepdf.com/reader/full/manual-sansung-e250 114/140
112
Sound settings (Menu 9.4)
Use this menu to customise various soundsettings.
Incoming call (Menu 9.4.1)
Use this menu to select a volume level and alert
type for incoming calls.• Alert type: specify how you are to be
informed of incoming calls.
• Ring tone: select a ringtone for the call
ringer.• Volume: select a ringtone volume.
Message tone (Menu 9.4.3)
Use this menu to set up the rincoming messages and e-ma
• Tone: select one of the setones.
• Alert type: specify how ywhen a message comes in
• Repetition: specify how oinforms you of a new mes
Power-on/ off tone (Menu
Use this menu to select the mphone sounds when it is swit
in Idle mode.

8/4/2019 Manual Sansung e250
http://slidepdf.com/reader/full/manual-sansung-e250 115/140
Menu functions • Any time: the keypad light is always used.
• Night time: the keypad light is used onlybetween 5:00 PM and 9:00 AM.
• Custom time: you can specify the timeperiod that the keypad light is used.
• No reply: divert calls wanswer the phone.
• Unreachable: divert c
not in your service areaphone is switched off.

8/4/2019 Manual Sansung e250
http://slidepdf.com/reader/full/manual-sansung-e250 116/140
114
period that the keypad light is used.
Network services (Menu 9.6)
Use this menu to access network services.Please contact your service provider to checktheir availability and subscribe to them, if youwish.
Call diverting (Menu 9.6.1)
This network service reroutes incoming calls toa phone number that you specify.
1. Select a call diverting option:• Divert always: divert calls.
• Busy: divert calls when you are onanother call.
• Cancel all: cancel all coptions.
2. Select the type of calls to 3. Select Activate. To deacti
select Deactivate.
4. Move to the Divert to line
5. Enter the number to whichdiverted and press <Selec
6. If you selected No reply, line and select the length network delays before dive

8/4/2019 Manual Sansung e250
http://slidepdf.com/reader/full/manual-sansung-e250 117/140
Menu functions
Network selection (Menu 9.6.4)
This network service allows you to manuallyselect the network to be used while roamingoutside of your home area, or to let the networkbe chosen automatically.
• Connect to voice servervoicemail server to allow y
You must store the voicemabefore accessing the server. provider can give you the nu

8/4/2019 Manual Sansung e250
http://slidepdf.com/reader/full/manual-sansung-e250 118/140
116
y
You can select a network other than your homenetwork only if there is a valid roaming
agreement between the two.
Caller ID (Menu 9.6.5)
This network service allows you to hide yourphone number from the person you are calling.However, some networks do not allow the userto change this setting. If you select Default,the phone will use the default setting providedby the network.
Voice mail server (Menu 9.6.6)
Use this menu to store the number of thevoicemail server and access your voicemails.
voicemail server to allow yyour messages.
• Voice server number: e
server number.
Band selection (Menu 9.6.7
For the phone to make and re
it must register with an availaYour phone can handle any otypes of networks: CombinedGSM 1900, and GSM 900/180
The country where you purchdetermines the default band you travel abroad, you must change to an appropriate ban
Security (Menu 9.7)
Use this menu to protect the phone against
unauthorised use by managing the severalaccess codes of your phone and SIM card.
Change PIN (Menu 9.7.2)
Use this menu to change youcheck feature must be enablefeature.
Ph l k

8/4/2019 Manual Sansung e250
http://slidepdf.com/reader/full/manual-sansung-e250 119/140
PIN check (Menu 9.7.1)
The 4- to 8-digit PIN (Personal IdentificationNumber) protects your SIM card againstunauthorised use. When this feature is enabled,the phone requires your PIN each time it isswitched on.
Phone lock (Menu 9.7.3)
The Phone lock feature locks
unauthorised use.When this feature is enabled,4- to 8-digit phone passwordphone is switched on.
The password is preset to 00change the password, use thepassword menu.
Change password (Menu 9
Use this menu to change you
If you enter an incorrect PIN/PIN2 three times,the SIM card is blocked. To unblock it, you needto enter your PUK/PUK2 (Personal UnblockingKey). The codes are supplied by your networkoperator.
Menu functions Privacy (Menu 9.7.5)
Use this menu to lock access to call logs,messages, or files. When a privacy optionsenabled, you must enter the phone password toaccess the locked items or functions.
Change PIN2 (Menu 9.7.8)
If supported by your SIM cardfeature changes your current
Mobile tracker (Menu 9.7.9)

8/4/2019 Manual Sansung e250
http://slidepdf.com/reader/full/manual-sansung-e250 120/140
118
SIM lock (Menu 9.7.6)
The SIM lock feature allows your phone to workonly with the current SIM by assigning a SIMlock code. You must enter the SIM lock code touse a different SIM card.
FDN mode (Menu 9.7.7)
If supported by your SIM card, Fixed DiallingNumber (FDN) mode restricts your outgoingcalls to a limited set of phone numbers. When
this feature is enabled, you can make calls onlyto phone numbers stored on the SIM card.
When someone tries to use yanother SIM card, the phone
send the preset tracking mesfamily or friends. You can chenumber from which the messthen track your phone. This fwhen the phone is stolen or l
1. Enter the phone password
Sending of the tracking mes
the user of the unauthorised
your phone with any other
first deactivate the Mobile t
2. Specify the following options:
• Mobile tracker: activate or deactivatethe Mobile tracker feature.
• Recipients: specify phone numbers towhich you want to send the tracking
Reset settings (Menu 9.9)
Use this menu to reset the ph
have changed.1. Press [ ] to select the
t b t

8/4/2019 Manual Sansung e250
http://slidepdf.com/reader/full/manual-sansung-e250 121/140
messages.
• Sender: enter the sender’s name.
• Message: check the preset trackingmessage text.
3. When you have finished, press <Save>.
4. Press <Accept> if you agree to the terms
and conditions of service listed on thescreen.
Memory status (Menu 9.8)
Use this menu to check the amount of memorybeing used for storing data in Messages, Myfiles, Calendar, Phonebook, and JAVA world. Youcan also view the amount of shared memory.
to be reset.
2. Press <Reset>.
3. Press <Yes> to confirm th4. Enter the phone password
The password is preset tocan change this passwor
Menu functions
Key management (Menu 9.10)
Use this menu to manage the licence keys you
have acquired to activate media files locked byDRM systems.
Press <Options> to access the following
VOD settings (Menu 9.11)
Use this menu to select a con
be used for accessing a videoThis menu may not be shownyour service provider.

8/4/2019 Manual Sansung e250
http://slidepdf.com/reader/full/manual-sansung-e250 122/140
120
Press <Options> to access the followingoptions:
• Details: access the properties of the licencekey.
• Display /Preview /Play /Execute: open thecorresponding media content.
• Delete: delete the selected licence key.
• Go to My messages /Go to My files / Go toJava world: access the message containingthe media content, the corresponding filefolder, or the corresponding game.
your service provider.
• Current profile: select a
• Profile settings: customieach profile.
Profile name: assign a n
APN: enter the access poiGPRS network gateway.
Login ID: enter the user Password: enter the pass
Solve problems Help and personal needs
To save the time and expense of anunnecessary service call, perform the simple
“Enter PIN”
• You are using your phone You must enter the PIN su
SIM card.• The PIN check feature is en
the phone is switched on

8/4/2019 Manual Sansung e250
http://slidepdf.com/reader/full/manual-sansung-e250 123/140
y , p pchecks in this section before contacting aservice professional.
When you sw itch on your phone, thefollow ing messages may appear:
“Insert SIM”
• Be sure that the SIM card is correctly
installed. “Phone lock”
• The automatic locking function has beenenabled. You must enter the phone’s
password before you can use the phone.
the phone is switched on, entered. To disable this fea
check menu. “Enter PUK”
• The PIN code has been enthree times, and the SIM cblocked. Enter the PUK su
service provider.
“No network,” “Network u “No service” displays
• The network connection hamay be in a weak signal aagain.

8/4/2019 Manual Sansung e250
http://slidepdf.com/reader/full/manual-sansung-e250 124/140
No number is dialled w hen you re-call aPhonebook entry
• Use the Contact list menu to ensure the
number has been stored correctly.• Re-store the number, if necessary.
Health and safety
SAR certification informThis phone meets European Urequirements concerning exp

8/4/2019 Manual Sansung e250
http://slidepdf.com/reader/full/manual-sansung-e250 125/140
The battery does not charge properly orthe phone sometimes turns itself off
• Wipe the charging contacts both on thephone and on the battery with a clean softcloth.
I f the above guidelines do not help you tosolve the problem, take note of:
• The model and serial numbers of your phone
• Your warranty details
• A clear description of the problem
Then contact your local dealer or Samsungafter-sales service.
requirements concerning expwaves.
Your mobile phone is a radio receiver. It is designed and mexceed the limits for exposurfrequency (RF) energy, as recEU Council. These limits are p
comprehensive guidelines anpermitted levels of RF energypopulation. The guidelines weindependent scientific organisthe periodic and thorough evscientific studies. The limits isubstantial safety margin desthe safety of all persons, regahealth.

8/4/2019 Manual Sansung e250
http://slidepdf.com/reader/full/manual-sansung-e250 126/140
standby time are greatly affected by thesignal strength on the cellular network andthe parameters set by the network operator.
• Battery charging time depends on theremaining battery charge, the type of battery, and the charger used. The battery
• Extreme temperatures wilcharging capacity of your require cooling or warming
• Do not leave the battery inbecause the capacity and battery will be reduced. Tr

8/4/2019 Manual Sansung e250
http://slidepdf.com/reader/full/manual-sansung-e250 127/140
battery, and the charger used. The batterycan be charged and discharged hundreds of times, but it will gradually wear out. Whenthe operation time is noticeably shorter thannormal, it is time to buy a new battery.
• If left unused, a fully charged battery willdischarge itself over time.
• Use only Samsung-approved batteries, andrecharge your battery only with Samsung-approved chargers. Disconnect the chargerfrom the power source when it is not in use.Do not leave the battery connected to acharger for more than a week, sinceovercharging may shorten its life.
battery will be reduced. Trbattery at room temperatuhot or cold battery may notemporarily, even when thcharged. Li-ion batteries aaffected by temperatures
• Do not short-circuit the ba
short-circuiting can occur object like a coin, clip or pconnection between the + the battery (metal strips oexample, do not carry a sp
pocket or bag where the bametal objects. Short-circumay damage the battery ocausing the short-circuitin
Health and safety information• Dispose of used batteries in accordance with
local regulations. Always recycle. Do notdispose of batteries in a fire.
Road safety
Operating environment
Remember to follow any spec
force in the area you are in, aoff your phone whenever it isit, or when it may cause inter
8/4/2019 Manual Sansung e250
http://slidepdf.com/reader/full/manual-sansung-e250 128/140
126
Your wireless phone gives you the powerfulability to communicate by voice, almost
anywhere, anytime. But an importantresponsibility accompanies the benefits of wireless phones, one that every user mustuphold.
When driving a car, driving is your firstresponsibility. When using your wireless phonewhile driving, follow local regulations in thecountry or region you are in.
When connecting the phone oanother device, read its user’
detailed safety instructions. Dincompatible products.
As with other mobile radio traequipment, users are advised
satisfactory operation of the ethe safety of personnel, it is rthe equipment should only benormal operating position (hethe antenna pointing over yo
Electronic devices
Most modern electronic equipment is shielded
from radio frequency (RF) signals. However,certain electronic equipment may not beshielded against the RF signals from your
i l h C lt th f t t
Hearing aids
Some digital wireless phones some hearing aids. In the eveinterference, you may wish tohearing aid manufacturer to dalternatives

8/4/2019 Manual Sansung e250
http://slidepdf.com/reader/full/manual-sansung-e250 129/140
wireless phone. Consult the manufacturer todiscuss alternatives.
Pacemakers
Pacemaker manufacturers recommend that aminimum distance of 15 cm (6 inches) bemaintained between a wireless phone and apacemaker to avoid potential interference withthe pacemaker. These recommendations areconsistent with the independent research andrecommendations of Wireless Technology
Research. If you have any reason to suspectthat interference is taking place, switch off yourphone immediately.
alternatives.
Other medical devices
If you use any other personaconsult the manufacturer of ydetermine if it is adequately sexternal RF energy.
Your physician may be able toobtaining this information.
Switch off your phone in heawhen regulations posted in th
you to do so.
Health and safety informationVehicles
RF signals may affect improperly installed orinadequately shielded electronic systems inmotor vehicles. Check with the manufacturer orits representative regarding your vehicle.
You should also consult the manufacturer of any
Users are advised to switch oat a refuelling point (service sreminded of the need to obse
the use of radio equipment instorage and distribution areaplants, or where blasting ope

8/4/2019 Manual Sansung e250
http://slidepdf.com/reader/full/manual-sansung-e250 130/140
128
You should also consult the manufacturer of anyequipment that has been added to your vehicle.
Posted facilities
Switch off your phone in any facility whereposted notices require you to do so.
Potentially explosive environments
Switch off your phone when in any area with apotentially explosive atmosphere, and obey allsigns and instructions. Sparks in such areascould cause an explosion or fire resulting inbodily injury or even death.
progress.
Areas with a potentially exploare often but not always cleainclude the areas below deckchemical transfer or storage fusing liquefied petroleum gas
or butane, areas where the achemicals or particles, such ametal powders, and any othewould normally be advised tovehicle engine.
Emergency calls
This phone, like any wireless phone, operates
using radio signals, wireless, and landlinenetworks as well as user-programmedfunctions, which cannot guarantee connectionin all conditions The efo e o sho ld ne e
3. Press [ ].
Certain features like Call Barrbe deactivated before you ca
emergency call. Consult this your local cellular service pro

8/4/2019 Manual Sansung e250
http://slidepdf.com/reader/full/manual-sansung-e250 131/140
in all conditions. Therefore, you should neverrely solely on any wireless phone for essential
communications like medical emergencies.To make or receive calls, the phone must beswitched on and in a service area with adequatesignal strength. Emergency calls may not be
possible on all wireless phone networks or whencertain network services and/or phone featuresare in use. Check with local service providers.
To make an emergency call:
1. Switch on the phone.
2. Key in the emergency number for yourpresent location. Emergency numbers varyby location.
Other important safety
• Only qualified personnel sphone or install the phoneFaulty installation or servicdangerous and may invalid
applicable to the device.• Check regularly that all wiequipment in your vehicle operating properly.
• Do not store or carry flam
gases, or explosive matericompartment as the phoneaccessories.
Health and safety information• For vehicles equipped with an air bag,
remember that an air bag inflates with greatforce. Do not place objects, including
installed or portable wireless equipment, inthe area over the air bag or in the air bagdeployment area. Improperly installed
i l i t ld lt i i
Care and maintenance
Your phone is a product of su
craftsmanship and should be The suggestions below will hewarranty obligations and allowproduct for many years

8/4/2019 Manual Sansung e250
http://slidepdf.com/reader/full/manual-sansung-e250 132/140
130
wireless equipment could result in seriousinjury if the air bag inflates.
• Switch off your phone before boarding anaircraft. It is dangerous and illegal to usewireless phones in an aircraft because theycan interfere with the operation of the
aircraft.• Failure to observe these instructions maylead to the suspension or denial of telephoneservices to the offender, or legal action, orboth.
product for many years.
• Keep your phone and all it
accessories out of the reacand pets. They may accidethese things or choke on s
• Keep the phone dry. Precip
and liquids contain mineraelectronic circuits.
• Do not use the phone withso may cause an electric sdamage to the phone.
• Do not use or store the phareas, as its moving parts
• Do not store the phone in temperatures can shorten
electronic devices, damage batteries, andwarp or melt certain plastics.
• Do not store the phone in cold areas. When
the phone warms up to its normal operatingtemperature, moisture can form inside thephone, which may damage the phone’sl b d
• When the phone or batterylabel indicating water damphone changes colour. In t
repairs are no longer guarmanufacturer's warranty, ewarranty for your phone h
f h h fl h

8/4/2019 Manual Sansung e250
http://slidepdf.com/reader/full/manual-sansung-e250 133/140
electronic circuit boards.
• Do not drop, knock, or shake the phone.Rough handling can break internal circuitboards.
• Do not use harsh chemicals, cleaningsolvents, or strong detergents to clean the
phone. Wipe it with a soft cloth.• Do not paint the phone. Paint can clog the
device’s moving parts and prevent properoperation.
• Do not put the phone in or on heatingdevices, such as a microwave oven, stove, orradiator. The phone may explode whenoverheated.
• If your phone has a flash oit too close to the eyes of pThis may cause damage to
• Use only the supplied or areplacement antenna. Unaantennas or modified acce
damage the phone and viogoverning radio devices.
• If the phone, battery, characcessory is not working pyour nearest qualified serv
personnel there will assistnecessary, arrange for ser
Index
A
ABC mode, text input • 30Alarm • 89Answering
ll 34
Bluetooth
receiving, data • 57sending, data • 56settings • 54
Broadcast messages 82
barring
divertinholdingmakingrediallin

8/4/2019 Manual Sansung e250
http://slidepdf.com/reader/full/manual-sansung-e250 134/140
132
call • 34second call • 35
Anykey answer • 110Auto redial • 110
BBackground image • 110
Backlight, setdisplay • 113keypad • 113
Band selection • 116Barring, calls • 115
Batterycharging • 7low indicator • 8precautions • 124
Broadcast messages • 82Browser, web • 59
CCalculator • 96Calendar • 90Call costs • 40
Call logdialled • 39missed • 39received • 39
Call time • 39
Caller groups • 43Caller ID • 116Calls
answering • 34
rediallinrejectin
waiting Camera
photos videos •
CB (Cell Broa
82Characters, eConfigurationConnection toConverter • 9
Creating mese-mail •MMS • SMS • 6
DDate, set • 106Deleting
calendar items • 93, 94call log • 38, 39e-mail • 72, 74memos • 95
EE-mails
creating/sending • 66
deleting • 72, 74setting • 78viewing • 71
Emergency calls • 129
IIcons, descriImage editor
Images, dowInbox, messae-mail MMS/S

8/4/2019 Manual Sansung e250
http://slidepdf.com/reader/full/manual-sansung-e250 135/140
e os 95MMS • 69, 70, 74
phonebook • 46SMS • 68, 70, 74Dialled calls • 39Dialling display, set • 111Display
brightness • 111icons • 11language • 107layout • 11settings • 110
Diverting, calls • 114Document files • 88DRM (Digital RightsManagement) • 83DTMF tones, send • 37
e ge cy ca s 9
FFDN (Fixed Dialling Number)mode • 118FDN contacts • 42File manager • 83FM radio • 52
GGames • 57Greeting message • 107
HHealth and safety • 123Holding, call • 35
S/SInternationa
Internet • 59JJava applicat
KKey manageKey tones
selectinsendingvolume
LLanguage, seLast number
Index Light settings • 113Locking
menu functions • 118
phone • 117SIM card • 118Low battery indicator • 8
greeting • 107MMS • 64push • 69
SMS • 63Minute minder • 113Missed calls • 39MMS messages
Network bandNetwork selecNetwork serv
Numberssearchistoring

8/4/2019 Manual Sansung e250
http://slidepdf.com/reader/full/manual-sansung-e250 136/140
134
MMemo • 95Memory card
accessing files • 89inserting • 29
Memory statusfile manager • 89messages • 83phone • 119phonebook • 46
Menu style • 111Message tone • 112Messages
broadcast • 82configuration • 69e-mail • 66
gcreating/sending • 64deleting • 69, 74setting • 75viewing • 67
Mobile tracker • 118Multiparty-call • 37Music player • 47Music, downloaded • 87My files • 83My menu • 108
NName card • 45Names
entering • 30searching • 41
OOffline mode Outbox, mess
PPassword
call bar
phone •Phone
care andisplay icons •
locking passworesettinswitchin
unpacking • 6Phonebook
adding • 42
deleting • 41, 46editing • 41finding • 41managing • 46
e-mail • 71MMS/SMS • 67
Recording
videos • 102voice memos • 50Redialling
automatically • 110
setting switchin
SIM card
insertinlocking Skin colour • Slide settings

8/4/2019 Manual Sansung e250
http://slidepdf.com/reader/full/manual-sansung-e250 137/140
options • 41speed dialling • 44
Photosediting • 51taking • 99viewing • 84
PIN, change • 117PIN2, change • 118Planner • 89Power on/off tone • 112Privacy • 118Push messages • 69, 81
RReceived calls • 39Received messages
manually • 33Resetting phone • 119Ringer
incoming calls • 112messages • 112
Road safety • 126Roaming • 116
SSafety
information • 123precautions • 1
Security, calls • 117Sent messages • 71Shortcut • 107Silent mode
Slide tone • 1SMS message
creatingdeletingsetting viewing
Sound settingSounds, downSpeakerphonSpeed dial • 4Stopwatch • 9Switching on/
microphphone •
Index TT9 mode, text input • 31Templates, message • 73
Text, enter • 30Time, set • 106Timer • 98
U
Web browseraccess • 59bookmarks • 60
World clock • 95

8/4/2019 Manual Sansung e250
http://slidepdf.com/reader/full/manual-sansung-e250 138/140
136
UUSB settings • 110
VVideos
playing • 85recording • 102
Voice clarity • 36, 110Voice recorder
playing • 50recording • 50
Voicemail server • 116
WWaiting call • 115Wallpaper • 110

8/4/2019 Manual Sansung e250
http://slidepdf.com/reader/full/manual-sansung-e250 139/140
* Depending on the software installed or your service provider or country, some of ththis guide may not match your phone exactly.
* Depending on your country, your phone and accessories may appear different from this guide.

8/4/2019 Manual Sansung e250
http://slidepdf.com/reader/full/manual-sansung-e250 140/140
World Wide Web
http://www.samsungmobile.com
C
English