ls9 fader replacement guide
TRANSCRIPT
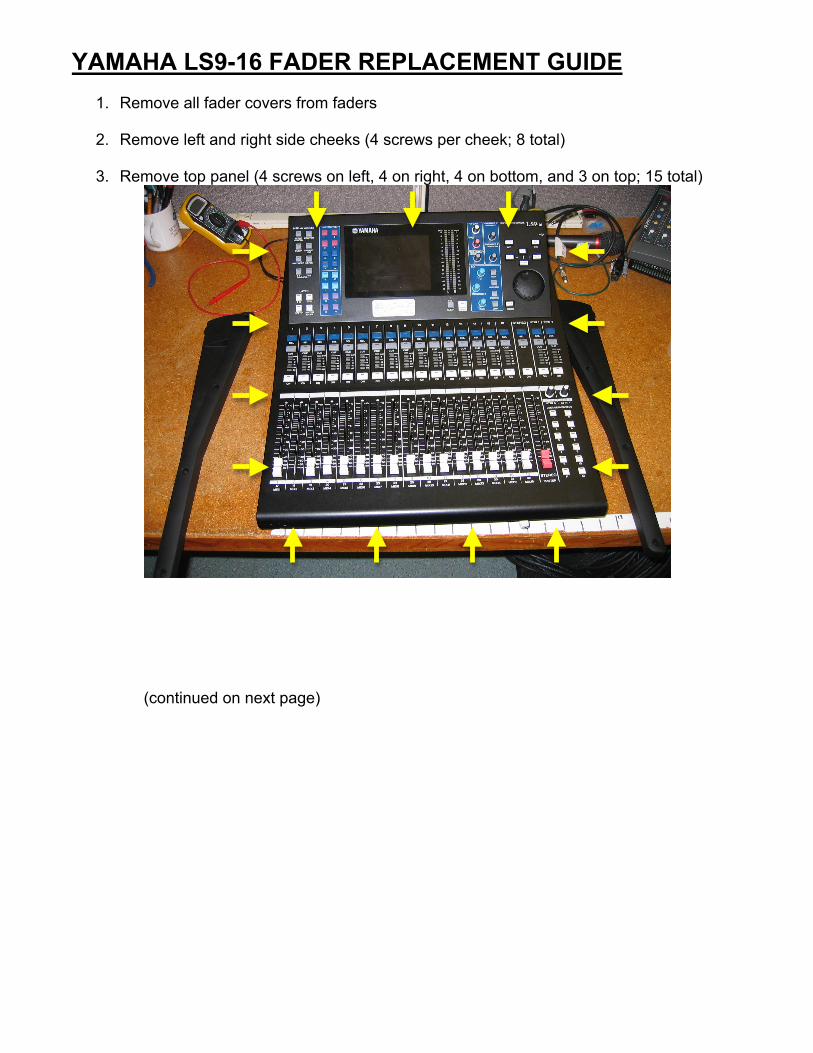
YAMAHA LS9-16 FADER REPLACEMENT GUIDE
1. Remove all fader covers from faders 2. Remove left and right side cheeks (4 screws per cheek; 8 total) 3. Remove top panel (4 screws on left, 4 on right, 4 on bottom, and 3 on top; 15 total)
(continued on next page)
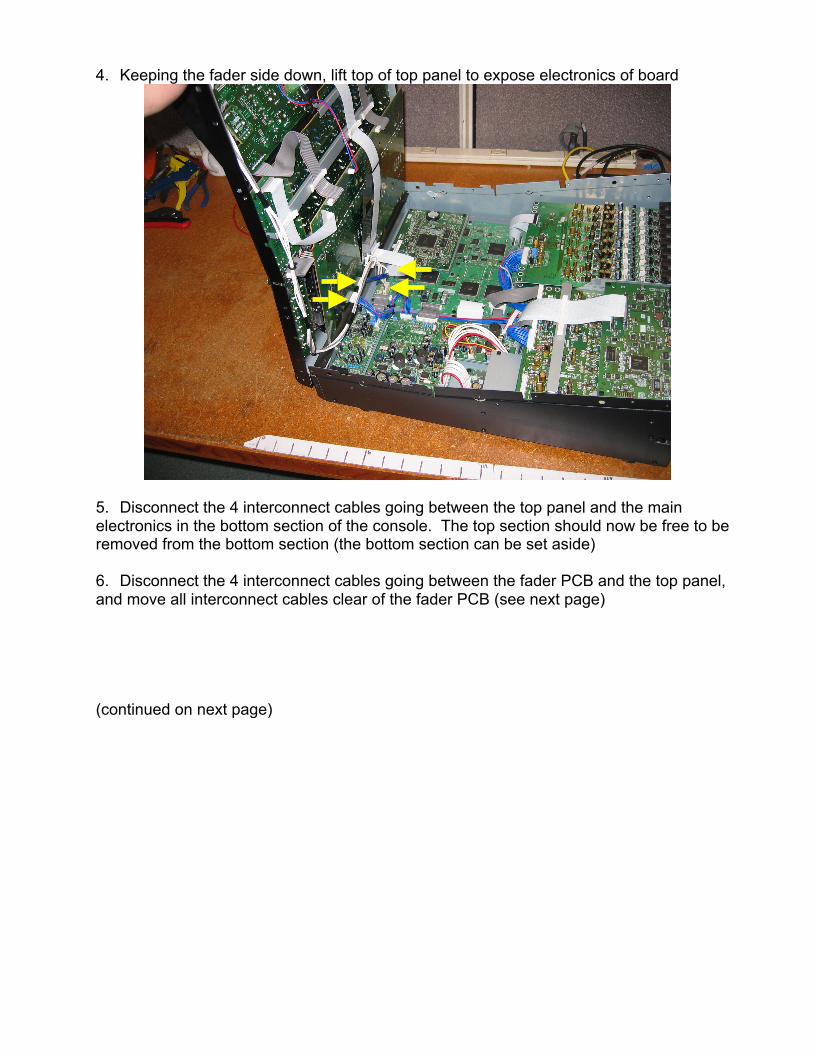
4. Keeping the fader side down, lift top of top panel to expose electronics of board
5. Disconnect the 4 interconnect cables going between the top panel and the main electronics in the bottom section of the console. The top section should now be free to be removed from the bottom section (the bottom section can be set aside)
6. Disconnect the 4 interconnect cables going between the fader PCB and the top panel, and move all interconnect cables clear of the fader PCB (see next page) (continued on next page)
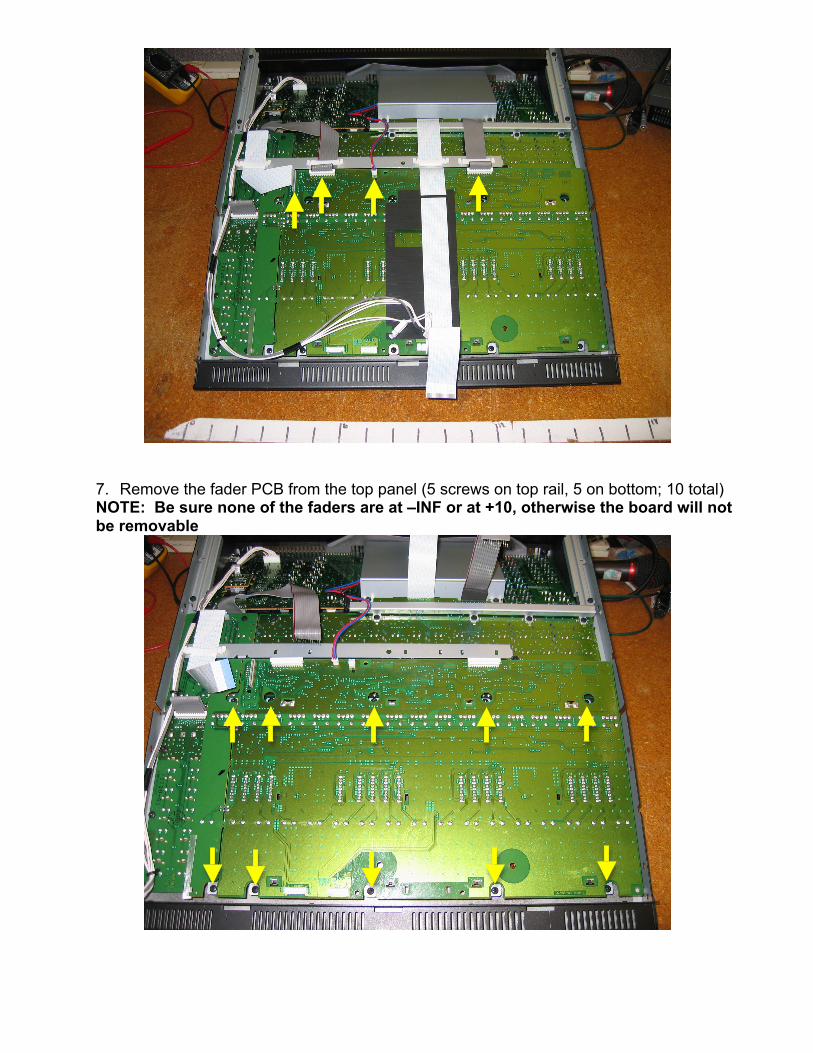
7. Remove the fader PCB from the top panel (5 screws on top rail, 5 on bottom; 10 total) NOTE: Be sure none of the faders are at –INF or at +10, otherwise the board will not be removable
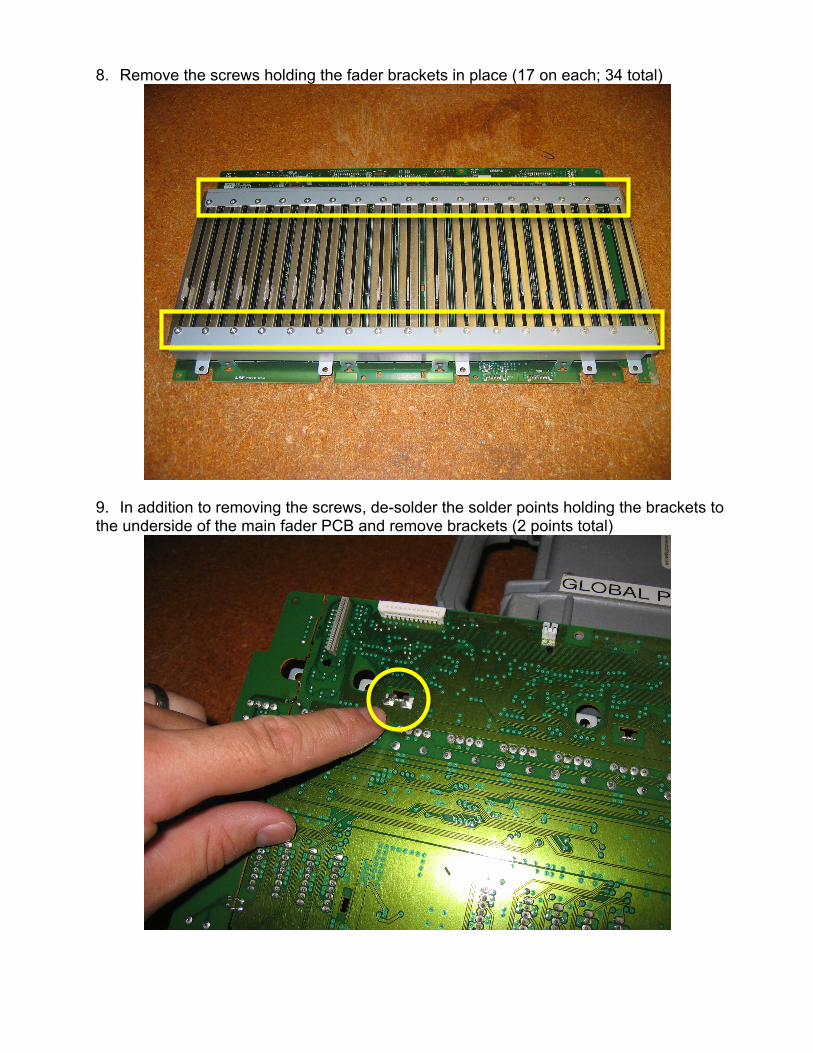
8. Remove the screws holding the fader brackets in place (17 on each; 34 total)
9. In addition to removing the screws, de-solder the solder points holding the brackets to the underside of the main fader PCB and remove brackets (2 points total)
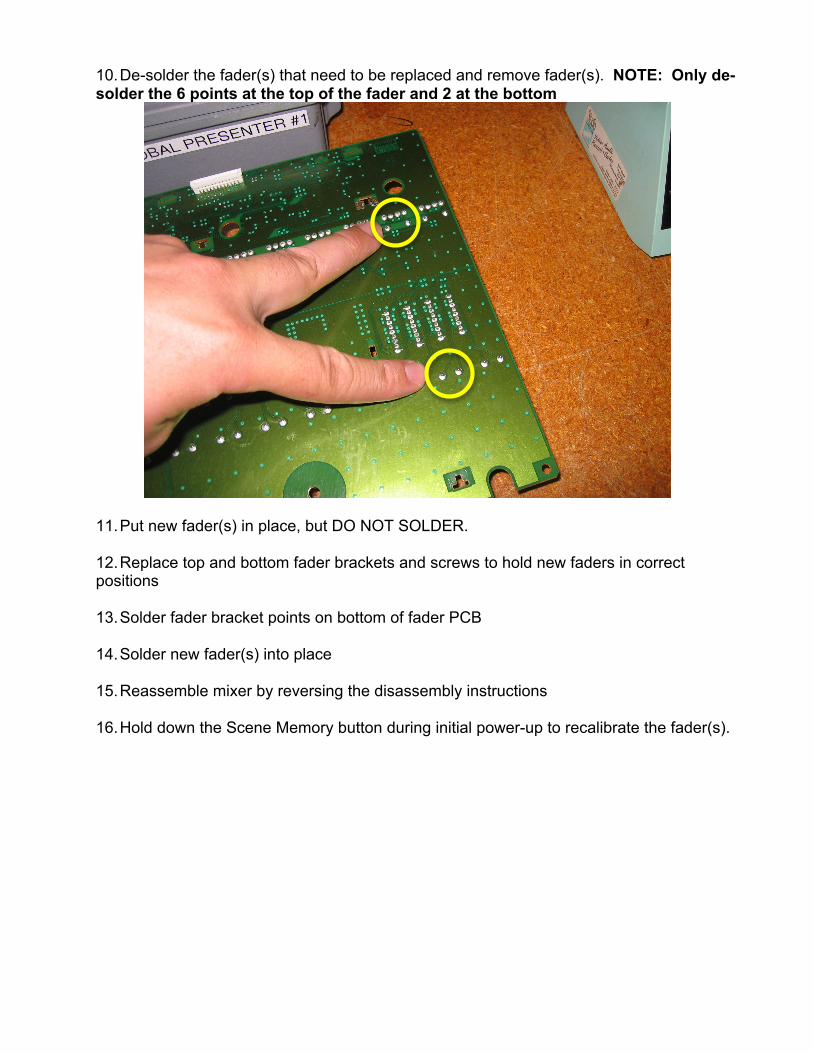
10. De-solder the fader(s) that need to be replaced and remove fader(s). NOTE: Only de-solder the 6 points at the top of the fader and 2 at the bottom
11. Put new fader(s) in place, but DO NOT SOLDER. 12. Replace top and bottom fader brackets and screws to hold new faders in correct positions 13. Solder fader bracket points on bottom of fader PCB 14. Solder new fader(s) into place 15. Reassemble mixer by reversing the disassembly instructions 16. Hold down the Scene Memory button during initial power-up to recalibrate the fader(s).