lightning - claro software · web viewabout lightning with speech. 3. 2. system ... download. to...
TRANSCRIPT

A SCREEN MAGNIFICATION AND SCREEN READER SOFTWARE PACKAGE
USER MANUAL
© Sensory Software 2008

Contents
Contents......................................................................11. About Lightning with Speech....................................32. System Requirements...............................................33. Installing Lightning with Speech...............................44. Running Lightning with Speech.................................45. The Lightning with Speech Toolbar...........................56. For seeing users and Teachers..................................67. Changing the Level of Magnification..........................88. Changing the Colour Scheme....................................89. Changing the Magnification Lens..............................910. Configuring the Cursor Colour...............................1011. Altering the Font..................................................1012. Altering the Spacing.............................................1013. Lightning with Speech: Magnification Settings.......11
13.1 Magnification Settings – Settings tab....................12Magnification Settings.....................................................12Smoothing and Invert......................................................13Magnification Style..........................................................13Tracking...........................................................................14
13.2 Magnification Settings – Colour tab.......................15Invert and Colours...........................................................15Brightness.......................................................................16Contrast...........................................................................16
13.3 Magnification Settings – Locators tab...................17Mouse Pointer Locators...................................................18Caret Locators.................................................................19Border for Scrolling..........................................................20
14. Lightning with Speech: Speech Settings................2014.1 Voice Settings.......................................................2114.2 Punctuation...........................................................2114.3 Input and speaking...............................................2114.4 HotKeys.................................................................22
1

14.5 Novice Mode.........................................................2214.6 Use Music..............................................................2214.7 Save and OK Buttons............................................23
15. Keyboard shortcut references...............................2415.1 Different methods of reading................................2415.2 Speech punctuation..............................................2515.3 Repeating Speech.................................................2515.4 Stop speech..........................................................2515.5 Outlook express keys............................................2615.6 “WHERE AM I” keys...............................................2615.7 Controlling the Mouse Pointer with Keystrokes.....2715.7 The screenreader marker system.........................27
16. Exiting Lightning with Speech...............................2817. Microsoft Program Accessibility............................2818. Support & Contact..............................................................28
2

1. About Lightning with SpeechLightning with Speech is a magnification software package that also makes the computer to talk to you. Whatever appears on the computer screen can be magnified up to 36 times and it works well with most Windows applications and video clips. It is easy to install and just as easy to use. Without needing to see the screen you will be able to write letters and documents, hear what you have typed letter by letter or word by word, change the speed and voice, and repeat what you have just heard and more. It will speak menus and toolbars. You will have full speech feedback for most text-based word processing tasks including editing documents in Microsoft Word, WordPad or Notepad.
2. System Requirements Windows XP or Vista 1GB RAM 10MB free disk space (extra for voices) WebbIE, our Internet text browser. Download it from our website
or install it from an installation disk. You can’t use Internet Explorer on its own.
3

3. Installing Lightning with Speech
Lightning with Speech does not appear to clash with other disability access software.
Installing from Download
To download Lightning with Speech: Activate the download linkClick OK at the security screenSave the installation file to your hard diskOnce downloaded, run the file and follow the on screen instructions.
Installing from CD
Lightning with Speech can also be loaded from a CD. To install:Place the Lightning with Speech CD in the CD driveThe installation should begin automatically, follow the on screen instructions
4. Running Lightning with SpeechLightning with Speech will run automatically when you start your PC. If you do not want this to happen select Start All Programs Startup, right click on “Sensory Lightning with Speech” and select Delete.
To run Lightning with Speech, either double click on the icon on the desktop or click on Start and select All Programs Sensory Lightning with Speech. A toolbar will appear in the top left corner of the screen offering various options.
4

5. The Lightning with Speech Toolbar
The Lightning with Speech toolbar has the following buttons:
Change the Level of Magnification (Section 7) Change the colour scheme (Section 8) Change magnification lens (Section 9) Change cursor colour (Section 10) Change Font Size (Microsoft Word only) (Section 11) Change Spacing (Microsoft Word only) (Section 12) Change Magnification and Speech Settings (Sections 13 and 14) Exit (Section 16)
The toolbar initially appears in the left-hand top corner of the screen. When you open an application such as Microsoft Word or Internet Explorer, Lightning with Speech will still be running even though the toolbar is hidden. If you want to get back to the toolbar to make changes, place the mouse cursor at the top of the screen or hold down the ALT key and keep pressing the TAB key until the Lightning with Speech toolbar appears again.
5

6. For seeing users and TeachersTeaching visually-impaired people to enjoy the computer is fundamentally different from the way most of us work within Windows or Apple Mac. Those who can’t see where the mouse pointer is must use keyboard shortcut keys to do the equivalent of point and click. This will in time often become quicker and more visually relaxing for those who have a little sight and struggle with the mouse. Here is an introduction to some shortcut keys:
Bring up the Start Menu by pressing the Windows key (Second key in from the left-hand side nearest to you).
Get to menu choices with ALT, CURSOR keys and ENTER.
Move around toolbares with the TAB key, CURSOR keys and ENTER.
Leave menus or toolbares with the ESCAPE key (left-hand key furthest away from you).
Toggle checkboxes ticked or unchecked with the SPACEBAR.
Move between radio button choices with the CURSOR keys.
Read and listen line by line with the CURSOR keys.
When learning Windows shortcut keys, be aware of the underlined letter in menus and toolbares, e.g. F is underlined in the File Menu.
Windows standard Shortcut keys can be used instead of the mouse for such tasks as opening a file or printing a document, e.g.
CTRL + N opens a new document.
CTRL + O opens an existing document.
CTRL + P will print the document you are working on.
There are short video clips on the installation disk or as a download which explain this.
Keystrokes are also built into the screenreader for tasks such as reading a line or repeating the last speech you might have missed. Here are some screenreader keystrokes which you can use in Microsoft Word, Notepad or Outlook Express:
CAPSLOCK + L reads the current line you are on.
6

CAPSLOCK + ; (Semicolon) repeats the last speech you might have missed.
CAPSLOCK + Shift + ; (Semicolon) spells the last speech you might have missed.
In the Hotkeys Reference card, you will find full details of all such keystrokes.
7

7. Changing the Level of MagnificationOn the toolbar there is a button to change the level of magnification:
To change the level of magnification until you find the size that suits you best, click on the plus (+) or minus (-) button. On the settings screen, if the X=Y box is checked, the two numbers will always be the same. This box can be found by clicking on the magnification settings icon on the Lightning with Speech toolbar. The X=Y box is ticked by default.
Please see the magnification settings section (section 13) on how to make the numbers differ if this is required.
Lightning with Speech will remember your choice whenever you turn your computer on and you can change size at any time to meet the needs of your current task.
It is possible to increase or decrease your current level of magnification using the keyboard by pressing CTRL and + (plus) or - (minus) on the number keypad.
8. Changing the Colour Scheme
Clicking on this button allowing you to alter the colour of your computer screen. You will then be shown a selection of colour schemes you can use to alter the appearance of your computer screen.
8

9. Changing the Magnification Lens
From this button you can choose the lens which is used to magnify the screen. Below are the magnifying modes:
Full Screen Magnification - This is the default and most widely used option. This magnifies the entire screen.
The Magnifying Lens - This option uses a square magnifying lens. As you drive the mouse pointer round the screen, you see in detail a small area surrounding the pointer. The rest of the screen is not magnified.
The Strip Magnifier with normal sized pointer - When you click on this strip magnifier option, you create a horizontal magnifying strip which moves about the screen as you drive the mouse pointer. Some users have found that in strip magnifier mode it is useful to increase the height of letters slightly but not the width. To do this, un-tick the X=Y choice on the Lightning with Speechsettings screen. Then set the Y size to be one size higher than the X size.
The Strip Magnifier without normal sized pointer - As above but it does not show the normal sized pointer. The mouse pointer appears only within the strip and is magnified, ideal for reading text line by line.
Vertical and horizontal split screens - There are occasions when it is useful to see half the screen at normal size and the other half at your chosen magnified size for detailed work. Clicking on one of the two options enables such split screen choices. Once selected, three more options appear underneath. These allow you to magnify in either half of the screen (top/bottom or left/right) and auto-move the magnification.
9

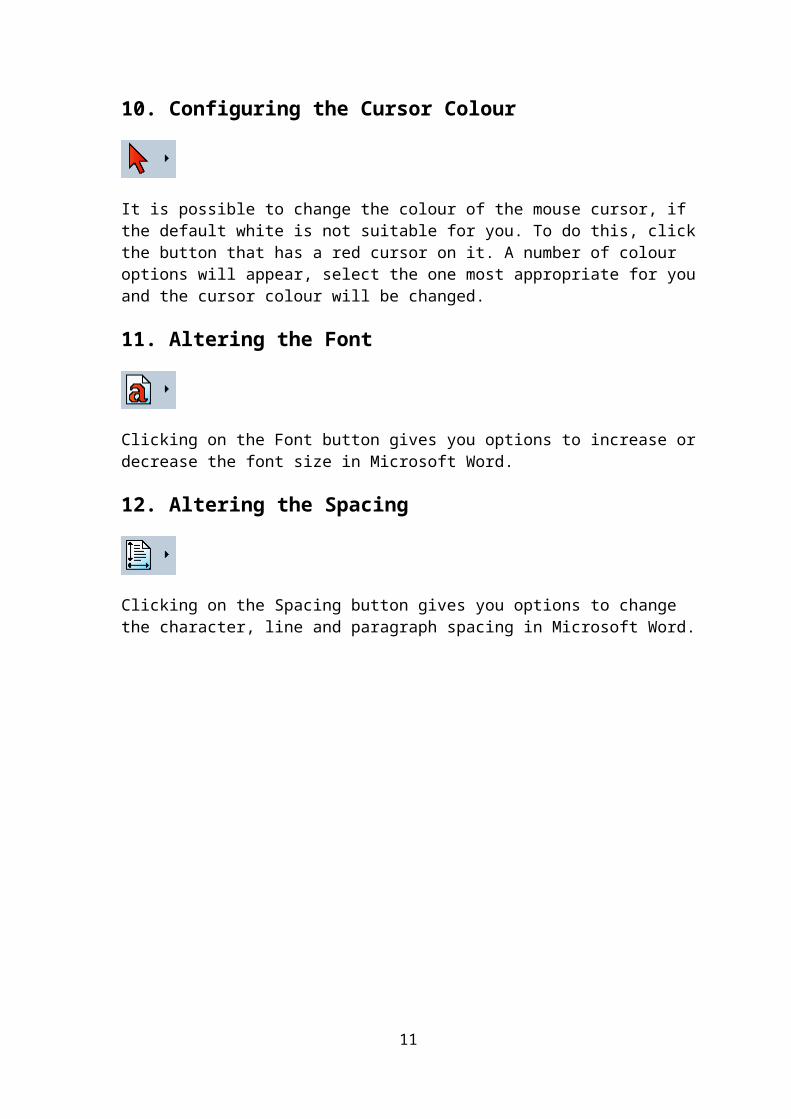
10. Configuring the Cursor Colour
It is possible to change the colour of the mouse cursor, if the default white is not suitable for you. To do this, click the button that has a red cursor on it. A number of colour options will appear, select the one most appropriate for you and the cursor colour will be changed.
11. Altering the Font
Clicking on the Font button gives you options to increase or decrease the font size in Microsoft Word.
12. Altering the Spacing
Clicking on the Spacing button gives you options to change the character, line and paragraph spacing in Microsoft Word.
10
13. Lightning with Speech: Magnification Settings
Lightning with Speech settings can be accessed through the Settings button on the toolbar:
The Setting screen has three tabs:
1. Settings2. Colours
3. Locators
11

13.1 Magnification Settings – Settings tab
From this screen you can alter the following:
Magnification Settings
From this section you can alter the way the screen is magnified. By default X=Y is checked which keeps the magnification equal vertically and horizontally. If you uncheck the X=Y box it will allow you to change the level of X and Y independently. If you only increase X, letters and pictures will grow in size horizontally but not vertically. If you only increase Y, letters and pictures will grow in size vertically but remain the same horizontally. Clicking on the X = Y button again and then the value will reset the size when you want the letters or pictures. to return to their normal symmetrical shape.
12

Smoothing and Invert
Everything on the screen is made up of square pixels, so when you have large letters or magnified pictures, it may be inconvenient to view rough shapes and edges. The smoothing tool can improve this by smoothing black text.
You can choose to have smoothing on or off at any time by checking the box to get the best results.
Some people prefer to look at white bright letters against a black background rather than dark letters against a white background. Checking the Invert box will invert the colours on your computer screen.
Magnification Style
From this secion you can alter the way the screen is magnified. You can also adjust the lens: on the bottom line of icons it allows you to increase and decrease the vertical and horzontal height/width and swap which area is magnified.
13

Tracking
This section allows to you set whether the magnification focus follows the:
Mouse - used when moving the mouse Caret - used when typing Focus - used when the focus is changed, e.g. a popup window or save dialog appears Window - used when you change window or alt-tab to another window
14

13.2 Magnification Settings – Colour tab
From this screen you can alter the following:
Invert and Colours
15

You can change the colour scheme and choose to invert the colours on the screen from this setting.
Brightness
You can alter the brightness of your computer screen using this slider.
Contrast
You can alter the contast of your computer screen using this slider.
16

13.3 Magnification Settings – Locators tab
From this screen you can alter the following:
17
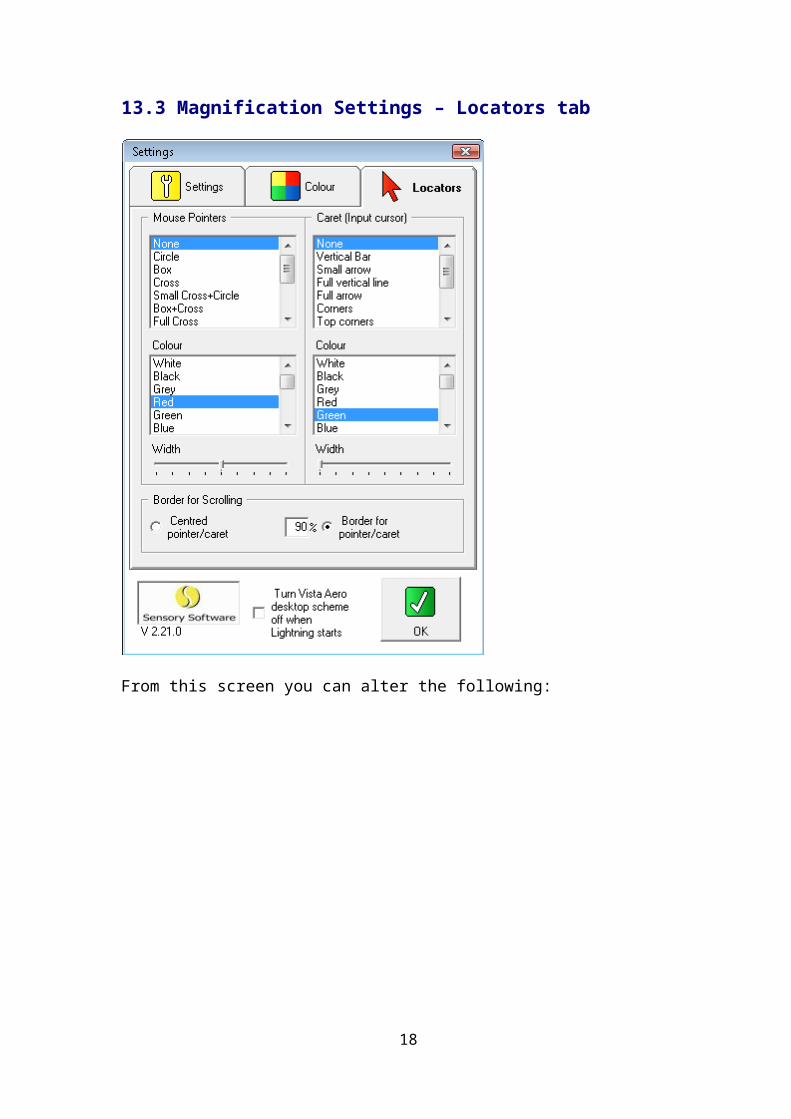
Mouse Pointer Locators
From this section you can choose the way the mouse pointer can be located. This includes the style, width and colour of locator. Below is an example of the "Small cross+circle" locator in red:
18

Caret Locators
From this section you can choose the way the caret can be located when you're typing. This includes the style, width and colour of locator. Below is an example of the "Full Arrow" locator in blue:
19

Border for Scrolling
From this section you can choose to centre the cursor in the magnification lens. The border percentage setting sets how far the cursor is allowed to get to the edge of the lens before the lens moves.
14. Lightning with Speech: Speech SettingsSpeech Settings is where you can change how the screenreader speaks, its volume and speed, whether it speaks letter by letter, word by word or both, whether punctuation is spoken and more. Experiment until you find what you like and you can always have it work that way, but you can change at any time, perhaps having a slower speed when reading unfamiliar web pages.
To explore the list of settings you can change, keep pressing TAB, or hold down SHIFT and dab at TAB to go back through the list.
20

Some settings such as Novice Mode have just two choices, on or off, the Screenreader will say “checked” and “unchecked” as you press the SPACEBAR. Leave it “checked” if you want the feature or “unchecked” if you don’t. This is a toggle key. You can instead use the hotkeys listed below to switch between “checked” or “unchecked”.
If there are more than two choices you will need to press the cursor keys to make the change. For example, to decrease the speed, TAB to “Speed” and Cursor up and Cursor Down to increase or decrease speed.
To save changes so that your PC always speaks as you want, press ALT and CURSOR DOWN until you hear “Save configuration”, press ENTER once to get back to Settings, and again to get out of Settings. You will be back to Lightning with Speech. If you were in a document or your emails, hold down ALT and dab at TAB till you hear what you were in.
14.1 Voice SettingsIn the Speech Settings window you can set the voice Lightning with Speech should use along with the Speed and volume of the voice. There is a test button to test your settings.
14.2 PunctuationIn the punctuation section you can select whether the voice should not pause for punctuation (No Punctuation), pause for punctuation (Some Punctuation) or speak the name of the punctuation mark, e.g. “full stop” (All Punctuation)
14.3 Input and speakingThe Input and Speaking section allows you to set what gets spoken when you are reading and writing.
ECHO CHARACTERS: ALT + C ECHO WORDS: ALT + W You can choose whether Screenreader speaks letter by letter as you type or word by word or both.
SPEED CHANGE: ALT + S Cursor UP and DOWN to the speed of speech you like.
VOICE CHANGE: press Tab until you hear “Sam” or one of the other voices and then Cursor UP and DOWN to the one you like. If you need a better voice, please check out the website or get a computer buddy to do it for you.
VOLUME CHANGE: ALT + V Cursor UP and DOWN until you find the volume you want. You will probably also have a volume knob on your speakers which may be quicker and easier to use.
21

HOME AND END KEYSYou can choose to have them spoken “checked” or not “unchecked” when you press them.
SPEAK MODIFIERSThe Modifier keys are Alt, Control and Shift. Beginners may like to hear them spoken. Alt and control keys have useful functions within Windows. Shift, when held down as a letter is pressed, turns a lower case letter into a capital.
PUNCTUATION LEVEL: ALT + PYou can choose how much punctuation is spoken, some, all or none. When listening to a book, you will not want to hear punctuation. But if you are checking a letter you have typed, you may well want to hear that your punctuation is as you intended it to be. The up or down cursor moves you between some, all or none.
USE MUSIC ON/OFF: ALT + M Turning “Music” off will stop the tones you hear as you move the cursor or mouse pointer about the screen.
BEEP FOR CAPITALSWhen this is “checked”, you will hear a beep when you type a capital letter. This can be very helpful.
SPELL NUMBERS DIGITSWhen this is “checked”, you will hear numbers spoken as single digits. E.G., the number 111 will be spoken one one one, not one hundred and eleven. This helps when reading long numbers such as telephone numbers.
SPEAK SHORTCUT KEYS: ALT + KShortcut keys are used instead of the mouse for making something particular happen. It can help to have the shortcut underlined letter spoken if you are a beginner or are exploring a new program, E.G., In Microsoft Word when they are “checked” if you press ALT + F for the file menu you will hear “file shortcut ALT F” as confirmation.
14.4 HotKeysThere are a number of keyboard hotkeys, the hotkey section allows you to customize these shortcut keys.
14.5 Novice ModeWhen Novice Mode is “checked” you hear lots of speech prompts to remind you of what you can do which may be useful to a beginner, but it may become distracting. Turn it off in “Settings” by pressing TAB until you reach “Novice Mode” and press SPACEBAR to “uncheck” it.
22

14.6 Use MusicUse Music on/off: ALT + M in Settings
You will hear musical tones as you move about the screen. They are intended to help you build up a mental picture of where you are and where things are on the screen.
The metallic tones go higher as you move up the screen with the CURSOR Keys or Numeric Keypad NKP8. The tones go lower as you move down the screen with the CURSOR key or NKP2. The more wooden tones go higher as you move to the right with the cursor or NKP6 and lower as you move to the left or NKP4. You can either dab at these keys or hold them down to move more quickly.
You will hear characters spoken as you move across the screen using the Right and Left CURSOR keys. You will also hear four levels of tone: the highest indicating a capital letter, the next down indicating a lower case letter, then punctuation, and the lowest indicating a space.
If you move word by word by holding down the CTRL and pressing RIGHT or LEFT CURSOR you will hear the pitch rise as you go to the right and fall as you go to the left to indicate where you are on the line.
You will find these tones particularly useful when proof-reading documents, but if they are too distracting, you can turn them off.
14.7 Save and OK ButtonsThe Save button will save your settings changes. The OK button will close the Speech Settings window.
23

15. Keyboard shortcut references
15.1 Different methods of reading
The following keys enable you to read:
A character at a time: Right or Left Cursor A word at a time: CTRL Right or Left Cursor Next line: Down CursorPrevious line: Up CursorCurrent line: CAPSLOCK + LCurrent line to cursor: CAPSLOCK + KCurrent word to cursor: CAPSLOCK + JCharacter at cursor: CAPSLOCK + IDocument: CTRL + Alt + Down CursorHighlighted text: CAPSLOCK + H Object: CAPSLOCK + O
You can read letter by letter with RIGHT or LEFT CURSOR keys, and word by word by holding down the CTRL key and dabbing at the RIGHT or LEFT CURSOR keys. You can read the next line with The DOWN CURSOR key, and CURSOR UP to read the previous line.
There are some special Screenreader reading keys which let you keep your fingers on the home keys as typists are taught to do, and the cursor will not move.
CAPSLOCK + L reads the line you are on in most situations but you can still cursor up or down and back again to read the line.
CAPSLOCK + K reads the line to where the cursor is including the letter at the cursor point so you know exactly where the cursor is.
CAPSLOCK + I reads where the cursor is and CAPSLOCK + J reads the word just to where the cursor is. These are for precision editing so you don’t need to take your fingers from the home position to check what is there letter by letter with the left or right cursor keys.
CAPSLOCK + O speaks the Object that is in focus or under the mouse pointer. This could be the clock in the bottom right-hand corner of the screen.
CAPSLOCK + H reads what is highlighted at the time. Highlighting is used when copying and pasting, deleting and changing the font size of text amongst other things.
Highlight characters by holding down the LEFT SHIFT and moving the Left or Right Cursor keys. Highlight words by holding down the LEFT
24

SHIFT and CTRL keys with the left hand and moving the Left or Right Cursor keys.
Document Read: CTRL+ ALT + DOWN CURSORPause reading: DOWN or UP Cursor Keys With “Document Read” you can read a long document without having to touch the keyboard. To start and
stop reading at any point, press the Cursor keys, and the cursor will remain at the point where you stopped reading. This function will work well within Microsoft Word.
15.2 Speech punctuation
Pressing ALT + 4 switches spoken punctuation between all, some and none. Alternatively, press Numeric Keypad 1 (NKP1). Sometimes, when listening to a book you have found on the Internet or a disk, you will choose not to hear punctuation. Sometimes, when you are writing an important letter, you will want to hear all the punctuation.
15.3 Repeating Speech
Repeat last speech: CAPSLOCK + SEMICOLON Repeat and spell last speech: CAPSLOCK + SHIFT + SEMICOLONRepeat last speech phonetically: ALT + SEMICOLON
Even the most experienced speech users sometimes miss what has been spoken first time. The above keys will work for you in any situation at any time. If you frequently miss speech, try a slower speed or different voice. See Section 14: Speech Settings.
15.4 Stop speech
Stop speech until next keystroke: CTRL Stop speech until next Screenreader command: SHIFT + CAPSLOCK + ALT + M (mute)Close down Screenreader: ALT + F4Stop speech if you are a seeing user: go to the Lightning with Speech toolbar and click on the X button.
However useful speech is, there are times when you need to silence it. Press the CTRL key to stop it instantly at any time in every situation.
To silence speech for a while as you listen to an audio file or radio station, hold down SHIFT + CAPSLOCK + ALT and press M (mute). To
25

hear speech again, press a Screenreader keystroke such as Caps Lock + L.
To stop speech, you can turn down the volume to Zero on your speakers if they have a volume knob or hold down ALT and dab at TAB until you reach the screenreader Message Box where the screenreader announces itself. Press ALT + F4. You will be asked to confirm that you really do want to close the screenreader down and lose speech.
To revive the speech, press CAPSLOCK + Shift + S.
15.5 Outlook express keys
Outlook Express must be set up on your PC so that it goes straight to the Inbox when you launch it, and you must have some messages waiting to be read in your Inbox.
Cursor UP and DOWN the inbox and press TAB (not ENTER) on the message you wish to read.Read the message line by line with the cursor keys.
Reply to the message: CTRL + R then type your reply.
Send a message or your reply: ALT + S with the message or reply on-screen.
Write new message: CTRL + N then type the recipient’s email address. Press TAB twice and type in a subject heading. Press TAB, you will hear the word “Pane”, and type your message, then send it by pressing Alt + S.
15.6 “WHERE AM I” keys
X-Y co-ordinates (where the cursor is on the screen in row and column numbers): CAPSLOCK + / (forward slash) Read the name of the program or document you are in: SHIFT + CAPSLOCK + N
Windows applications are very visual and often have cluttered screens. Your screenreader’s “WHERE AM I” keys can tell you precisely where you are and what you are doing; particularly helpful when exploring and building up a mental picture of what is on the screen.
Some people like to know where the mouse pointer is. You will hear two numbers when you Press CAPSLOCK + / (forward slash) – the key to the left of the right shift key. These numbers represent the horizontal distance from the left side and the vertical distance from the top of the
26
screen. If for instance your screen resolution is set to 800 x 600, and your mouse pointer is down towards the bottom and the right-hand side, you will hear something like “column 790, row 580”.
To hear the name of the program or document you are in when you have several open, presses SHIFT + CAPSLOCK + N. To move between programs that may be open, hold down the ALT and keep dabbing at TAB.
Within a word-processor, the musical tones and CAPSLOCK + / (forward slash) will prove your best location guides. ALT + 3 when in Microsoft Word will give your table row and column position.
You can press the “WHERE AM I” Keys whenever you need a reminder and use Screenreader’s repeat functions if you don’t hear some speech first time, SHIFT + CAPSLOCK + SEMICOLON.
15.7 Controlling the Mouse Pointer with Keystrokes
Move mouse pointer generally with the NUMERIC KEYPAD (NKP) KEYS to:
Top left-hand corner of the screen: NKP7Bottom right-hand corner: NKP3Top edge: CAPSLOCK + NKP7 Bottom edge: CAPSLOCK + NKP3Left edge: CAPSLOCK + NKP1Right edge: CAPSLOCK + NKP9
Up the screen: NKP8Down the screen: NKP2To the left: NKP4To the right: NKP6
MOUSE CLICKSLeft click: NKP5 Double click: NKP5 twiceRight click: NKP MINUSMove about the screen by Pixel: NKP* (STAR)
Seeing people use the mouse for most tasks, but someone with little or no sight can’t point and click a handheld mouse. Instead, the screenreader drives the mouse pointer round the screen when you press the NKP keys as above. You will have to use the mouse pointer when you need to set and go to markers and to access some CD-ROMS or some anti-virus programs.
15.7 The screenreader marker system
27
Marker go to: CAPSLOCK + G followed by a letter Marker set: CAPSLOCK + S followed by a letter Tidy window: CAPSLOCK + T
Markers take you straight to a specific point on the screen that you will want to go to regularly, such as the clock at the bottom of the Desktop or the favourite link on a website.
To set a marker at your chosen spot, with the NKP keys, put the mouse pointer where you will want to start reading. Then press CAPSLOCK + S (set) followed by a letter to remind you of that spot, such as C for clock, S for status bar. That marker will be saved so you can come back to it.
To go to your marked spot again, press CAPSLOCK + G (go to) followed by the letter you chose.
There is a refinement that you may just need if there are unforeseen problems. CAPSLOCK + T tidies the window which you might need to do before you set markers and again before you go back to them. Generally, you will not need this tidy window function.
16. Exiting Lightning with SpeechTo exit Lightning with Speech, click on the Close symbol in the top right corner of the Lightning with Speech toolbar. Magnification will now cease.
17. Microsoft Program AccessibilityMicrosoft provide accessibility information and tips on all of their products, so to get the most out of your PC, visits their website: www.microsoft.com/enable.
Good luck with Lightning with Speech, your new magnifier and speech software.
18. Support & ContactTo view more product please visit www.itzooms.com
If you have any queries, please contact us at [email protected]
28