lexmark multifunction printer (mfp) with scan to guardian...
TRANSCRIPT
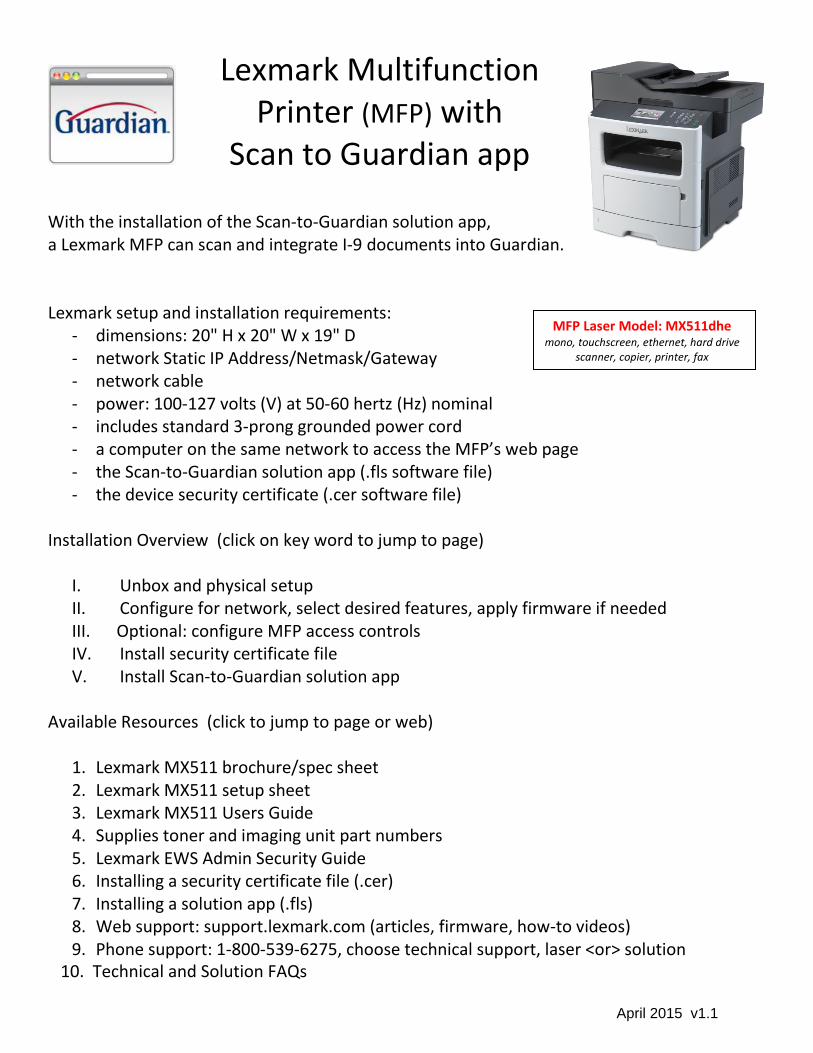
Lexmark Multifunction Printer (MFP) with
Scan to Guardian app With the installation of the Scan-to-Guardian solution app, a Lexmark MFP can scan and integrate I-9 documents into Guardian. Lexmark setup and installation requirements:
- dimensions: 20" H x 20" W x 19" D - network Static IP Address/Netmask/Gateway - network cable - power: 100-127 volts (V) at 50-60 hertz (Hz) nominal - includes standard 3-prong grounded power cord - a computer on the same network to access the MFP’s web page - the Scan-to-Guardian solution app (.fls software file) - the device security certificate (.cer software file)
Installation Overview (click on key word to jump to page)
I. Unbox and physical setup II. Configure for network, select desired features, apply firmware if needed III. Optional: configure MFP access controls IV. Install security certificate file V. Install Scan-to-Guardian solution app
Available Resources (click to jump to page or web)
1. Lexmark MX511 brochure/spec sheet 2. Lexmark MX511 setup sheet 3. Lexmark MX511 Users Guide 4. Supplies toner and imaging unit part numbers 5. Lexmark EWS Admin Security Guide 6. Installing a security certificate file (.cer) 7. Installing a solution app (.fls) 8. Web support: support.lexmark.com (articles, firmware, how-to videos) 9. Phone support: 1-800-539-6275, choose technical support, laser <or> solution
10. Technical and Solution FAQs
MFP Laser Model: MX511dhe mono, touchscreen, ethernet, hard drive
scanner, copier, printer, fax
April 2015 v1.1
13W
WM
2560
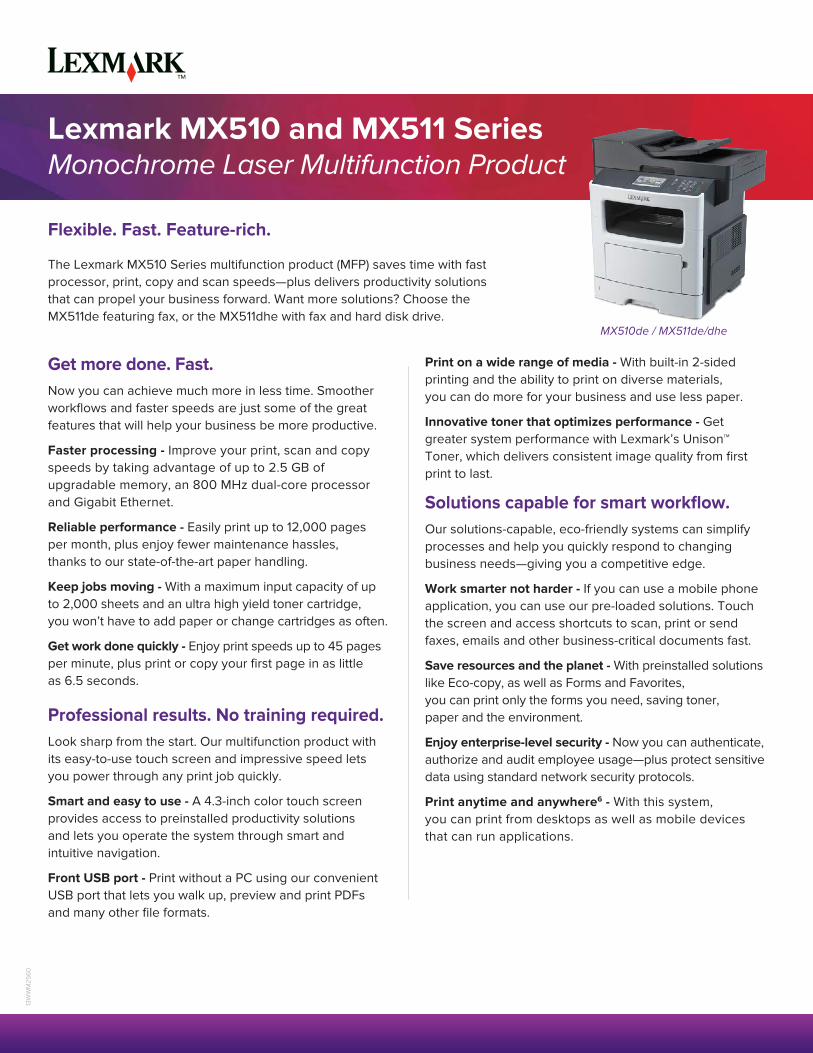
The Lexmark MX510 Series multifunction product (MFP) saves time with fast processor, print, copy and scan speeds—plus delivers productivity solutions that can propel your business forward. Want more solutions? Choose the MX511de featuring fax, or the MX511dhe with fax and hard disk drive.
Get more done. Fast.Now you can achieve much more in less time. Smoother workflows and faster speeds are just some of the great features that will help your business be more productive.
Faster processing - Improve your print, scan and copy speeds by taking advantage of up to 2.5 GB of upgradable memory, an 800 MHz dual-core processor and Gigabit Ethernet.
Reliable performance - Easily print up to 12,000 pages per month, plus enjoy fewer maintenance hassles, thanks to our state-of-the-art paper handling.
Keep jobs moving - With a maximum input capacity of up to 2,000 sheets and an ultra high yield toner cartridge, you won’t have to add paper or change cartridges as often.
Get work done quickly - Enjoy print speeds up to 45 pages per minute, plus print or copy your first page in as little as 6.5 seconds.
Professional results. No training required.Look sharp from the start. Our multifunction product with its easy-to-use touch screen and impressive speed lets you power through any print job quickly.
Smart and easy to use - A 4.3-inch color touch screen provides access to preinstalled productivity solutions and lets you operate the system through smart and intuitive navigation.
Front USB port - Print without a PC using our convenient USB port that lets you walk up, preview and print PDFs and many other file formats.
Flexible. Fast. Feature-rich.
Lexmark MX510 and MX511 SeriesMonochrome Laser Multifunction Product
Print on a wide range of media - With built-in 2-sided printing and the ability to print on diverse materials, you can do more for your business and use less paper.
Innovative toner that optimizes performance - Get greater system performance with Lexmark’s Unison™ Toner, which delivers consistent image quality from first print to last.
Solutions capable for smart workflow.Our solutions-capable, eco-friendly systems can simplify processes and help you quickly respond to changing business needs—giving you a competitive edge.
Work smarter not harder - If you can use a mobile phone application, you can use our pre-loaded solutions. Touch the screen and access shortcuts to scan, print or send faxes, emails and other business-critical documents fast.
Save resources and the planet - With preinstalled solutions like Eco-copy, as well as Forms and Favorites, you can print only the forms you need, saving toner, paper and the environment.
Enjoy enterprise-level security - Now you can authenticate, authorize and audit employee usage—plus protect sensitive data using standard network security protocols.
Print anytime and anywhere6 - With this system, you can print from desktops as well as mobile devices that can run applications.
MX510de / MX511de/dhe

13W
WM
2560
— 2 —
1 Average standard page yield value declared in accordance with ISO/IEC 19752. 2 “Maximum Monthly Duty Cycle” is defined as the maximum number of pages a device could deliver in a month using a multishift operation. This metric provides a comparison of robustness in relation to other Lexmark printers and MFPs. 3 “Recommended Monthly Page Volume” is a range of pages that helps customers evaluate Lexmark’s product offerings based on the average number of pages customers plan to print on the device each month. Lexmark recommends that the number of pages per month be within the stated range for optimum device performance, based on factors including: supplies replacement intervals, paper loading intervals, speed, and typical customer usage. 4 Print and copy speeds measured in accordance with ISO/IEC 24734, excludes first set of test documents. For more information see: www.lexmark.com/ISOspeeds. 5 Product functions only with replacement cartridges designed for use in a specific geographical region. See www.lexmark.com/regions for more details. 6 For more information on Lexmark Mobile Solutions see: http://www1.lexmark.com/en_US/solutions/business-solutions/mobile-print/index.shtml
Unison is a trademark of Lexmark International, Inc. Information in this document is subject to change without notice. ENERGY STAR® is a U.S. registered mark. All other trademarks are the property of their respective owners. Lexmark and Lexmark with the diamond design are trademarks of Lexmark International, Inc., registered in the United States and/or other countries. AirPrint and the AirPrint logo are trademarks of Apple Inc.
Product specifications
PrintingFunction Printing, Network Scanning, Copying,
Color ScanningPrinting, Network Scanning, Faxing, Copying,
Color ScanningPrinting, Network Scanning, Faxing, Copying,
Color ScanningDisplay Lexmark e-Task 4.3-inch (10.9 cm) color touch screenPrint Speed: Up to4 Black: 45 ppmTime to First Page: As fast as Black: 6.5 secondsPrint Resolution Black: 600 x 600 dpi, 1200 Image Quality,
1200 x 1200 dpi, 2400 Image QualityBlack: 600 x 600 dpi, 1200 Image Quality,
2400 Image Quality, 1200 x 1200 dpiBlack: 600 x 600 dpi, 1200 Image Quality,
2400 Image Quality, 1200 x 1200 dpiMemory / Processor Standard: 512 MB / Maximum: 2560 MB / Processor: Dual Core, 800 MHzHard Disk Option available Option available Included in configurationRecommended Monthly Page Volume2 2000 - 12000 pagesMaximum Monthly Duty Cycle: Up to3 100000 pages per month
CopyingCopy Speed: Up to4 Black: 45 cpmTime to First Copy: As fast as Black: 6.5 seconds
Color ScanningScanner Type / ADF Scan Flatbed scanner with ADF / RADF (Reversing Duplex) / 50 pages 20 lb or 75 gsm bondDuplex Scan Speed: Up to A4/Ltr, Black: 18 / 19 sides per minute - A4/Ltr, Color: 8 / 9 sides per minuteSimplex Scan Speed: Up to A4/Ltr, Black: 41 / 43 sides per minute - A4/Ltr, Color: 19 / 20 sides per minuteOptical Scanning Resolution 1200 X 600 ppi (black), 600 X 600 ppi (color)
FaxingModem Speed ITU T.30, V.34 Half-Duplex, 33.6 Kbps ITU T.30, V.34 Half-Duplex, 33.6 Kbps
Supplies5
Laser Cartridge Yields 20,000¹-page Extra High Yield Cartridge, 10,000¹-page High Yield Cartridge, 2,500¹-page CartridgeCartridge(s) Shipping with Product 5,000¹-page Starter Return Program Toner Cartridge
Paper HandlingIncluded Paper Handling Integrated Duplex, 150-Sheet Output Bin, 250-Sheet Input, 100-Sheet Multipurpose FeederOptional Paper Handling 550-Sheet Tray, 250-Sheet TrayPaper Input Capacity: Up to Standard: 350 pages 20 lb or 75 gsm bond / Maximum: 2000 pages 20 lb or 75 gsm bondPaper Output Capacity: Up to Standard: 150 pages 20 lb or 75 gsm bond / Maximum: 150 pages 20 lb or 75 gsm bondMedia Types Supported Refer to the Card Stock & Label Guide, Plain Paper, Envelopes, Card Stock, Paper Labels, TransparenciesMedia Sizes Supported A6, Oficio, Universal, Statement, Folio, DL Envelope, A4, 7 3/4 Envelope, 10 Envelope, 9 Envelope, A5, Executive, JIS-B5, Legal, Letter
GeneralStandard Ports Rear USB 2.0 Specification Hi-Speed Certified Port (Type A), One Internal Card Slot, Front USB 2.0 Specification Hi-Speed Certified Port (Type A),
USB 2.0 Specification Hi-Speed Certified (Type B), Gigabit Ethernet (10/100/1000)Optional Network Ports / Optional Local Ports Internal MarkNet N8350 802.11b/g/n Wireless / Internal 1284-B Bidirectional Parallel, Internal RS-232C serialNoise Level, Operating Printing: 56 dBA / Copy: 56 dBA / Scan: 55 dBAProduct Warranty 1-Year Onsite Service, Next Business DaySize (in. - H x W x D) / Weight (lb.) 19.8 x 19.3 x 17.8 in. / 48 lb.
Lexmark MX510de Lexmark MX511de Lexmark MX511dhe
Solutions SecurityUp to 45 ppm
4.3-in. Touch Screen
MX510 Series Product Features
Standard
Optional
Adjustable Printer StandSwivel CabinetColor 2.4" LCD Standard
PagesUp to 35ppm Network Eco-mode USBSecurityColor 2.4" LCD Standard
PagesUp to 35ppm Network Eco-mode USBSecurity
Color 2.4" LCD StandardPages
Up to 35ppm Network Eco-mode USBSecurity
Lexmark MX510 and MX511 Series Monochrome Laser Multifunction Printer
4.3-Inch Touch Screen
100-Sheet Multipurpose Feeder
250-Sheet Input
250-Sheet Tray / 550-Sheet Tray
250-Sheet Tray / 550-Sheet Tray
250-Sheet Tray / 550-Sheet Tray
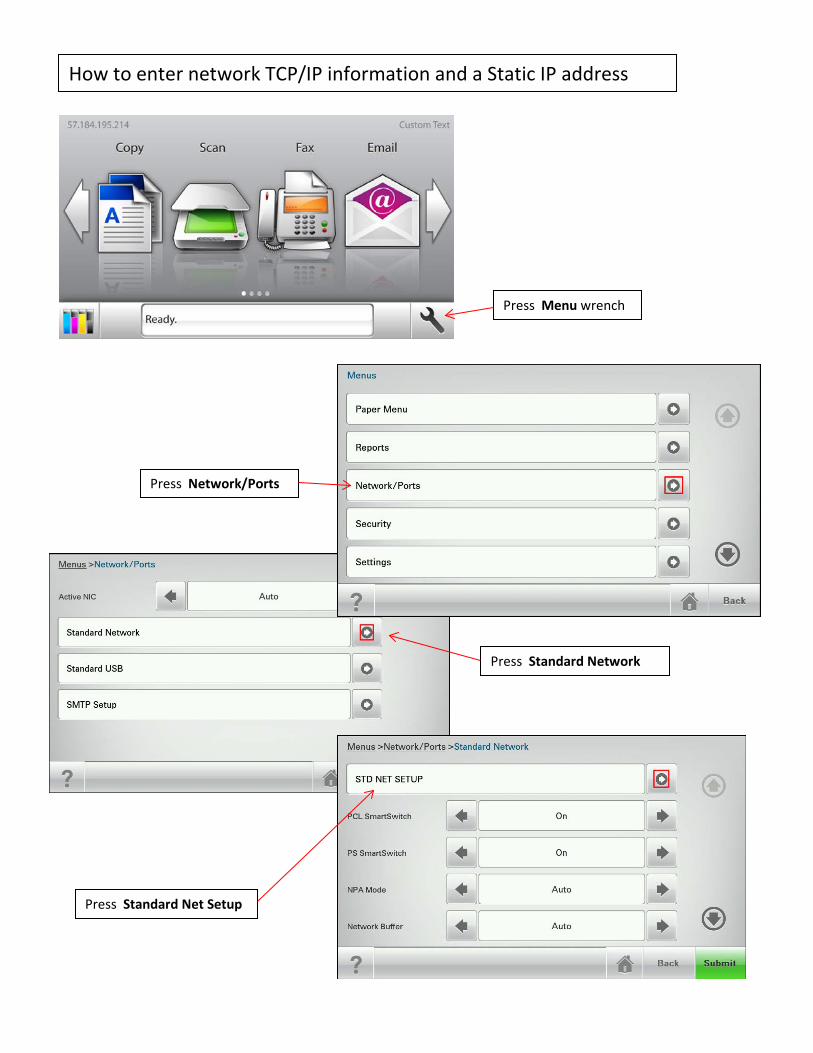
How to enter network TCP/IP information and a Static IP address
Press Menu wrench
Press Network/Ports
Press Standard Network
Press Standard Net Setup
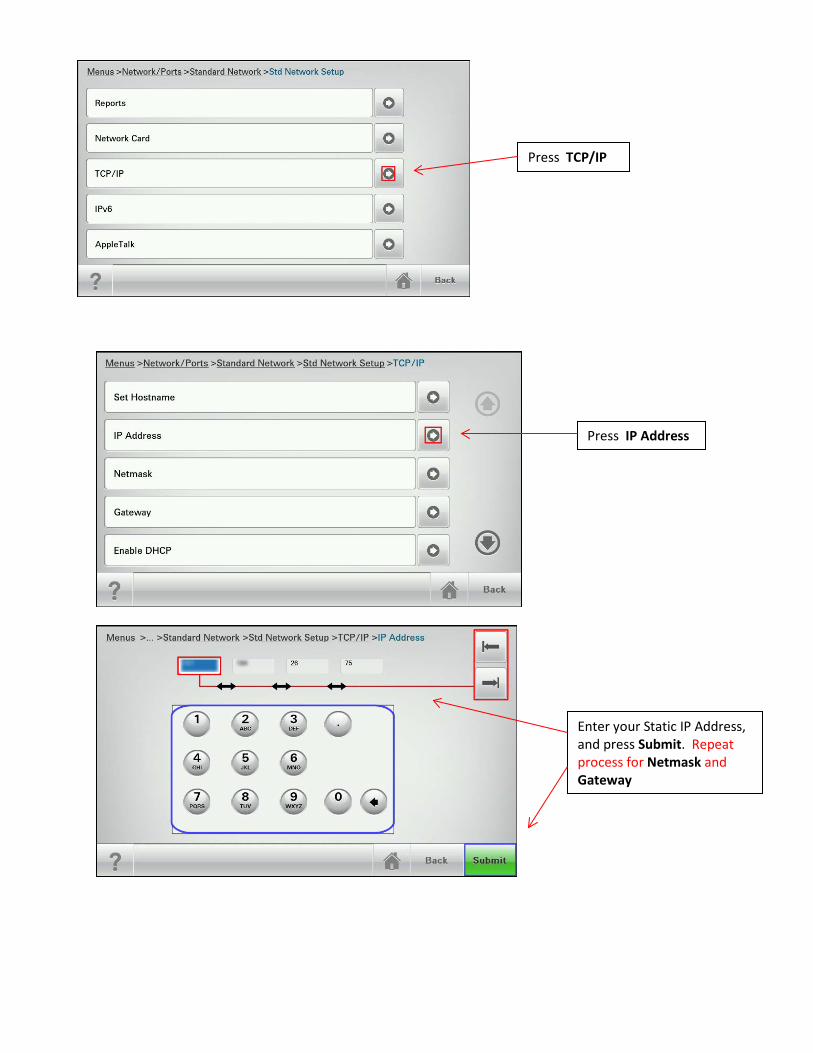
Press TCP/IP
Press IP Address
Enter your Static IP Address, and press Submit. Repeat process for Netmask and Gateway
Embedded Web Server — Security
Administrator's Guide
September 2014 www.lexmark.com
Model(s):
MS911de, MX910de, MX911, MX912, XM9145, XM9155, XM9165, CS310, CS410, CS510, CX310, CX410, CX510, M1140, M1145, M3150, M3150dn, M5155, M5163,M5170, XM1140, XM1145, XM3150, XM5163, XM5170, XM7155, XM7163, XM7170, XC2132, MS310, MS410, MS510, MS61x, MS81x, MX310, MX410, MX51x, MX61x,MX71x, MX81x
Contents
Devices covered in this guide.......................................................................4Simple‑security devices.............................................................................................................................4
Advanced‑security devices........................................................................................................................4
Managing authentication and authorization methods..................................5Understanding the basics..........................................................................................................................5
Simple-security device access controls.....................................................................................................8
Limiting access using basic security setup.................................................................................................9
Advanced-security building blocks..........................................................................................................10
Using a security template to control function access.............................................................................20
Managing certificates and other settings....................................................23Installing a Certificate Authority certificate on the device......................................................................23
Configuring the device for certificate information..................................................................................24
Setting up a Certificate Authority certificate monitor.............................................................................26
Managing devices remotely........................................................................28Using HTTPS for device management.....................................................................................................28
Setting a backup password......................................................................................................................28
Setting up SNMP......................................................................................................................................29
Configuring security audit log settings....................................................................................................30
Updating firmware..................................................................................................................................31
Managing other access functions...............................................................33Configuring confidential printing............................................................................................................33
Setting login restrictions..........................................................................................................................34
Enabling and disabling USB host ports....................................................................................................34
Enabling the security reset jumper.........................................................................................................35
Enabling holding faxes.............................................................................................................................36
Enabling Operator Panel Lock.................................................................................................................36
Securing network connections....................................................................38Configuring 802.1X authentication.........................................................................................................38
Configuring IP security settings...............................................................................................................39
Connecting to a wireless network...........................................................................................................40
Contents 2
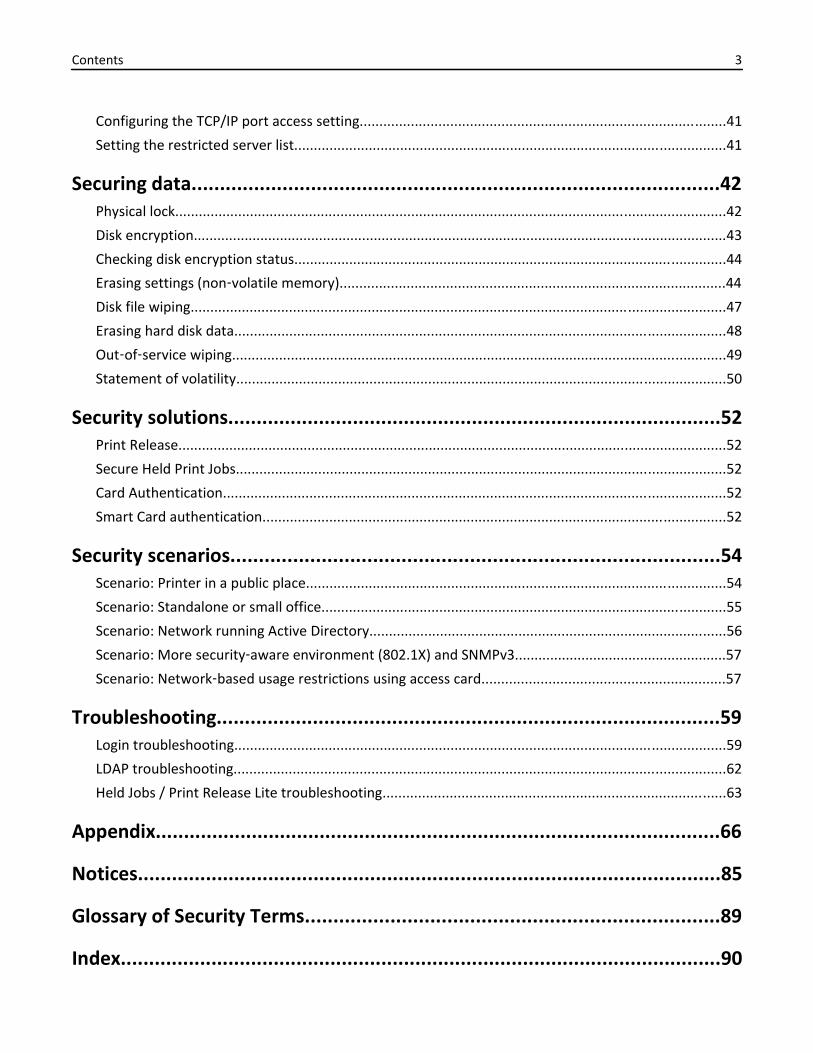
Configuring the TCP/IP port access setting.............................................................................................41
Setting the restricted server list..............................................................................................................41
Securing data.............................................................................................42Physical lock............................................................................................................................................42
Disk encryption........................................................................................................................................43
Checking disk encryption status..............................................................................................................44
Erasing settings (non‑volatile memory)..................................................................................................44
Disk file wiping........................................................................................................................................47
Erasing hard disk data.............................................................................................................................48
Out‑of‑service wiping..............................................................................................................................49
Statement of volatility.............................................................................................................................50
Security solutions.......................................................................................52Print Release............................................................................................................................................52
Secure Held Print Jobs.............................................................................................................................52
Card Authentication................................................................................................................................52
Smart Card authentication......................................................................................................................52
Security scenarios......................................................................................54Scenario: Printer in a public place...........................................................................................................54
Scenario: Standalone or small office.......................................................................................................55
Scenario: Network running Active Directory...........................................................................................56
Scenario: More security‑aware environment (802.1X) and SNMPv3......................................................57
Scenario: Network‑based usage restrictions using access card..............................................................57
Troubleshooting.........................................................................................59Login troubleshooting.............................................................................................................................59
LDAP troubleshooting.............................................................................................................................62
Held Jobs / Print Release Lite troubleshooting.......................................................................................63
Appendix....................................................................................................66
Notices.......................................................................................................85
Glossary of Security Terms.........................................................................89
Index..........................................................................................................90
Contents 3
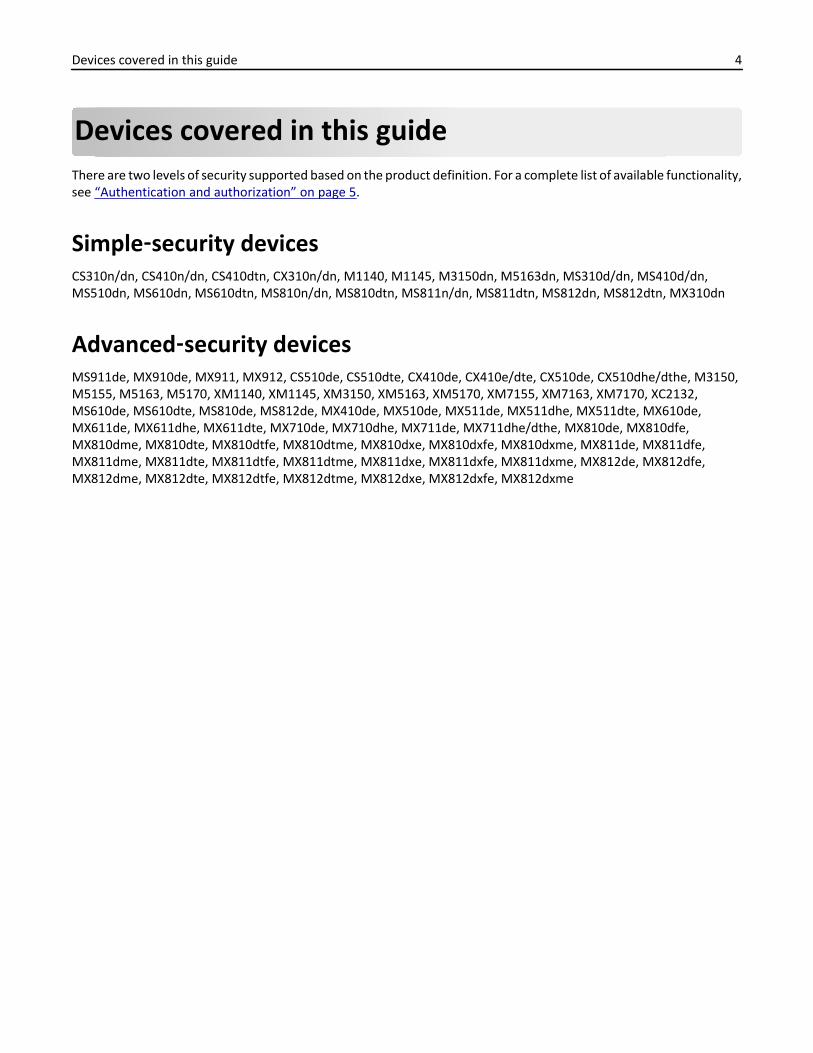
Devices covered in this guideThere are two levels of security supported based on the product definition. For a complete list of available functionality,see “Authentication and authorization” on page 5.
Simple‑security devicesCS310n/dn, CS410n/dn, CS410dtn, CX310n/dn, M1140, M1145, M3150dn, M5163dn, MS310d/dn, MS410d/dn,MS510dn, MS610dn, MS610dtn, MS810n/dn, MS810dtn, MS811n/dn, MS811dtn, MS812dn, MS812dtn, MX310dn
Advanced‑security devicesMS911de, MX910de, MX911, MX912, CS510de, CS510dte, CX410de, CX410e/dte, CX510de, CX510dhe/dthe, M3150,M5155, M5163, M5170, XM1140, XM1145, XM3150, XM5163, XM5170, XM7155, XM7163, XM7170, XC2132,MS610de, MS610dte, MS810de, MS812de, MX410de, MX510de, MX511de, MX511dhe, MX511dte, MX610de,MX611de, MX611dhe, MX611dte, MX710de, MX710dhe, MX711de, MX711dhe/dthe, MX810de, MX810dfe,MX810dme, MX810dte, MX810dtfe, MX810dtme, MX810dxe, MX810dxfe, MX810dxme, MX811de, MX811dfe,MX811dme, MX811dte, MX811dtfe, MX811dtme, MX811dxe, MX811dxfe, MX811dxme, MX812de, MX812dfe,MX812dme, MX812dte, MX812dtfe, MX812dtme, MX812dxe, MX812dxfe, MX812dxme
Devices covered in this guide 4
Managing authentication and authorizationmethods
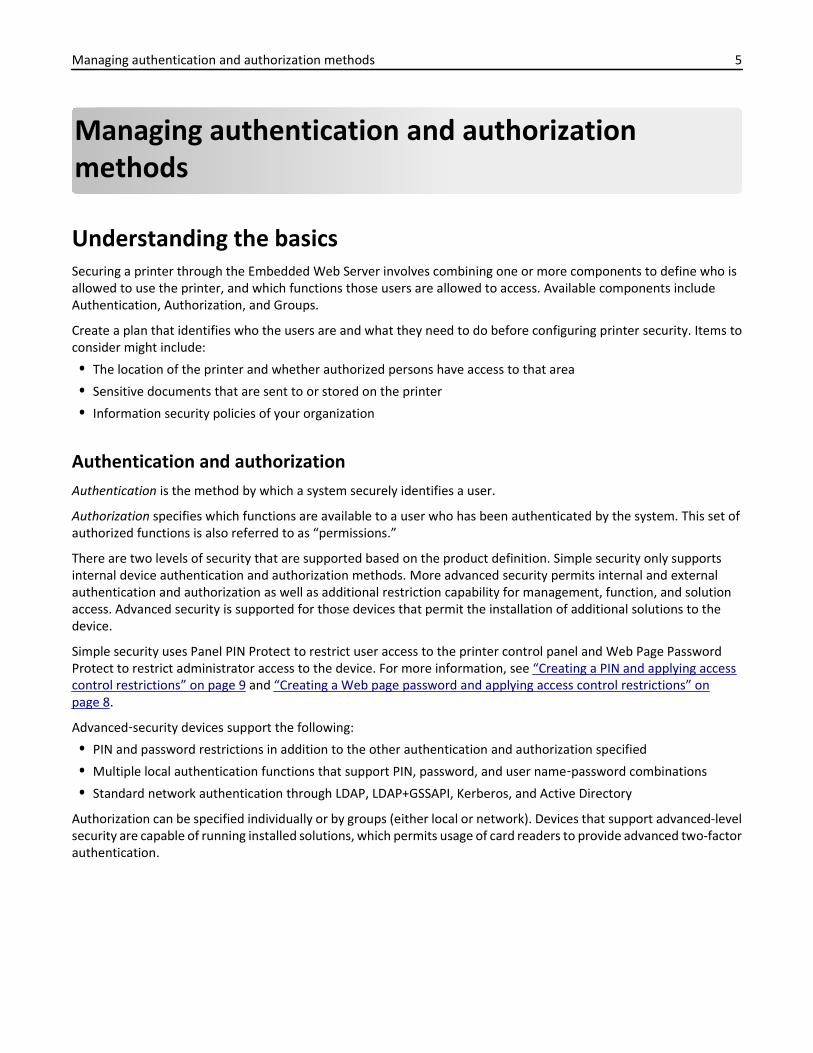
Understanding the basicsSecuring a printer through the Embedded Web Server involves combining one or more components to define who isallowed to use the printer, and which functions those users are allowed to access. Available components includeAuthentication, Authorization, and Groups.
Create a plan that identifies who the users are and what they need to do before configuring printer security. Items toconsider might include:
• The location of the printer and whether authorized persons have access to that area
• Sensitive documents that are sent to or stored on the printer
• Information security policies of your organization
Authentication and authorizationAuthentication is the method by which a system securely identifies a user.
Authorization specifies which functions are available to a user who has been authenticated by the system. This set ofauthorized functions is also referred to as “permissions.”
There are two levels of security that are supported based on the product definition. Simple security only supportsinternal device authentication and authorization methods. More advanced security permits internal and externalauthentication and authorization as well as additional restriction capability for management, function, and solutionaccess. Advanced security is supported for those devices that permit the installation of additional solutions to thedevice.
Simple security uses Panel PIN Protect to restrict user access to the printer control panel and Web Page PasswordProtect to restrict administrator access to the device. For more information, see “Creating a PIN and applying accesscontrol restrictions” on page 9 and “Creating a Web page password and applying access control restrictions” onpage 8.
Advanced‑security devices support the following:
• PIN and password restrictions in addition to the other authentication and authorization specified
• Multiple local authentication functions that support PIN, password, and user name‑password combinations
• Standard network authentication through LDAP, LDAP+GSSAPI, Kerberos, and Active Directory
Authorization can be specified individually or by groups (either local or network). Devices that support advanced-levelsecurity are capable of running installed solutions, which permits usage of card readers to provide advanced two-factorauthentication.
Managing authentication and authorization methods 5
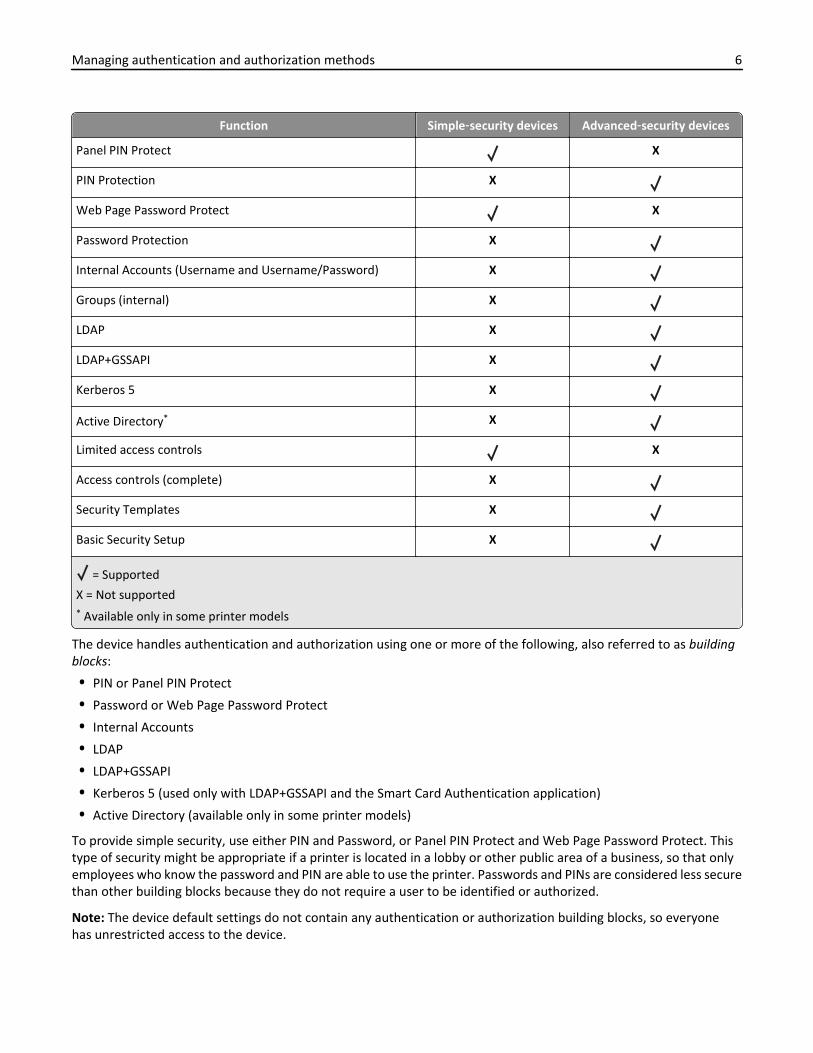
Function Simple‑security devices Advanced‑security devices
Panel PIN Protect X
PIN Protection X
Web Page Password Protect X
Password Protection X
Internal Accounts (Username and Username/Password) X
Groups (internal) X
LDAP X
LDAP+GSSAPI X
Kerberos 5 X
Active Directory* X
Limited access controls X
Access controls (complete) X
Security Templates X
Basic Security Setup X
= Supported
X = Not supported* Available only in some printer models
The device handles authentication and authorization using one or more of the following, also referred to as buildingblocks:
• PIN or Panel PIN Protect
• Password or Web Page Password Protect
• Internal Accounts
• LDAP
• LDAP+GSSAPI
• Kerberos 5 (used only with LDAP+GSSAPI and the Smart Card Authentication application)
• Active Directory (available only in some printer models)
To provide simple security, use either PIN and Password, or Panel PIN Protect and Web Page Password Protect. Thistype of security might be appropriate if a printer is located in a lobby or other public area of a business, so that onlyemployees who know the password and PIN are able to use the printer. Passwords and PINs are considered less securethan other building blocks because they do not require a user to be identified or authorized.
Note: The device default settings do not contain any authentication or authorization building blocks, so everyonehas unrestricted access to the device.
Managing authentication and authorization methods 6
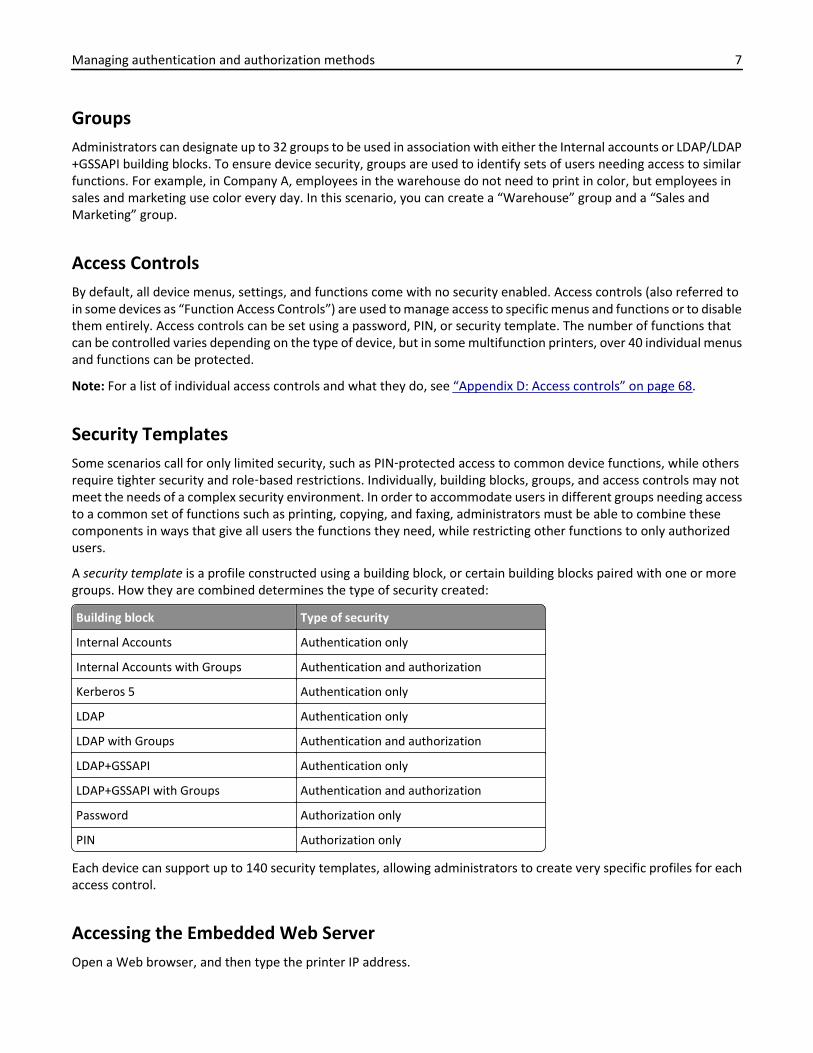
GroupsAdministrators can designate up to 32 groups to be used in association with either the Internal accounts or LDAP/LDAP+GSSAPI building blocks. To ensure device security, groups are used to identify sets of users needing access to similarfunctions. For example, in Company A, employees in the warehouse do not need to print in color, but employees insales and marketing use color every day. In this scenario, you can create a “Warehouse” group and a “Sales andMarketing” group.
Access ControlsBy default, all device menus, settings, and functions come with no security enabled. Access controls (also referred toin some devices as “Function Access Controls”) are used to manage access to specific menus and functions or to disablethem entirely. Access controls can be set using a password, PIN, or security template. The number of functions thatcan be controlled varies depending on the type of device, but in some multifunction printers, over 40 individual menusand functions can be protected.
Note: For a list of individual access controls and what they do, see “Appendix D: Access controls” on page 68.
Security TemplatesSome scenarios call for only limited security, such as PIN‑protected access to common device functions, while othersrequire tighter security and role‑based restrictions. Individually, building blocks, groups, and access controls may notmeet the needs of a complex security environment. In order to accommodate users in different groups needing accessto a common set of functions such as printing, copying, and faxing, administrators must be able to combine thesecomponents in ways that give all users the functions they need, while restricting other functions to only authorizedusers.
A security template is a profile constructed using a building block, or certain building blocks paired with one or moregroups. How they are combined determines the type of security created:
Building block Type of security
Internal Accounts Authentication only
Internal Accounts with Groups Authentication and authorization
Kerberos 5 Authentication only
LDAP Authentication only
LDAP with Groups Authentication and authorization
LDAP+GSSAPI Authentication only
LDAP+GSSAPI with Groups Authentication and authorization
Password Authorization only
PIN Authorization only
Each device can support up to 140 security templates, allowing administrators to create very specific profiles for eachaccess control.
Accessing the Embedded Web ServerOpen a Web browser, and then type the printer IP address.
Managing authentication and authorization methods 7
To obtain the printer IP address, print a network setup page, and then locate the TCP/IP section. For more informationon printing a network setup page, see the printer User’s Guide.
We recommend using HTTPS when connecting to the Embedded Web Server to prevent network viewing of the databeing entered. For example, type HTTPS://ip_address.
Note: When you access the Embedded Web Server, a warning message may appear. Proceed by continuing toconnect to the device IP address.
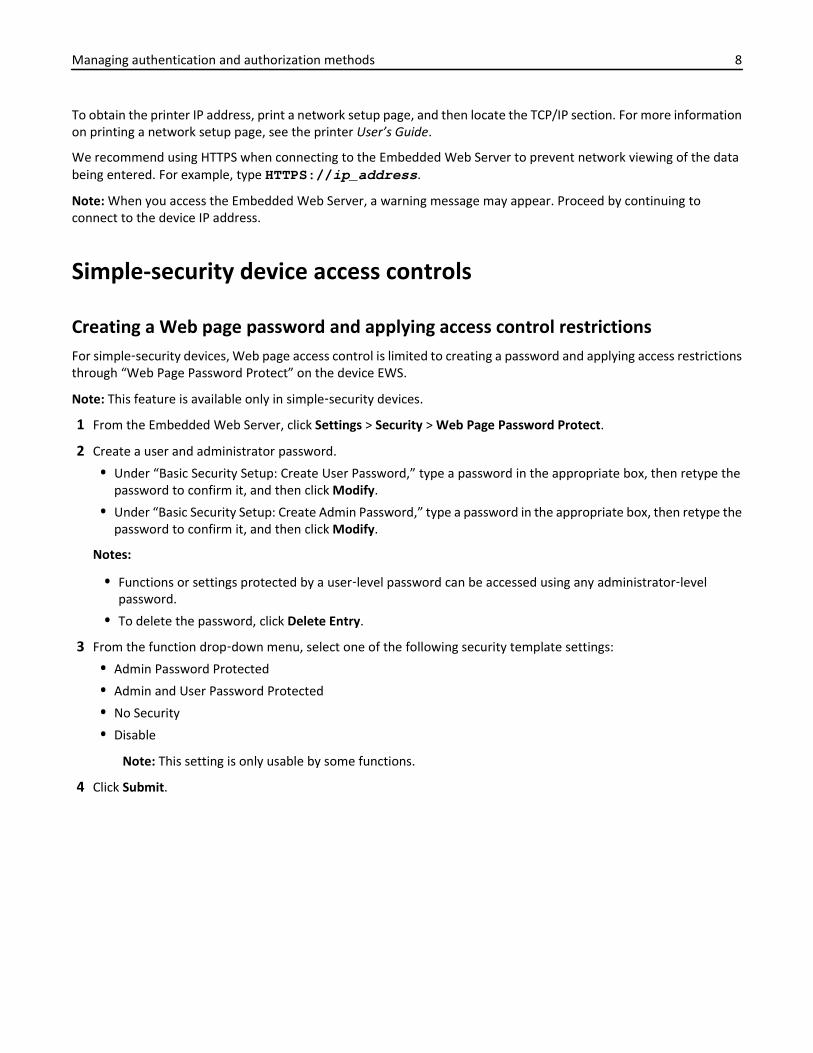
Simple-security device access controls
Creating a Web page password and applying access control restrictionsFor simple‑security devices, Web page access control is limited to creating a password and applying access restrictionsthrough “Web Page Password Protect” on the device EWS.
Note: This feature is available only in simple‑security devices.
1 From the Embedded Web Server, click Settings > Security > Web Page Password Protect.
2 Create a user and administrator password.
• Under “Basic Security Setup: Create User Password,” type a password in the appropriate box, then retype thepassword to confirm it, and then click Modify.
• Under “Basic Security Setup: Create Admin Password,” type a password in the appropriate box, then retype thepassword to confirm it, and then click Modify.
Notes:
• Functions or settings protected by a user‑level password can be accessed using any administrator‑levelpassword.
• To delete the password, click Delete Entry.
3 From the function drop‑down menu, select one of the following security template settings:
• Admin Password Protected
• Admin and User Password Protected
• No Security
• Disable
Note: This setting is only usable by some functions.
4 Click Submit.
Managing authentication and authorization methods 8
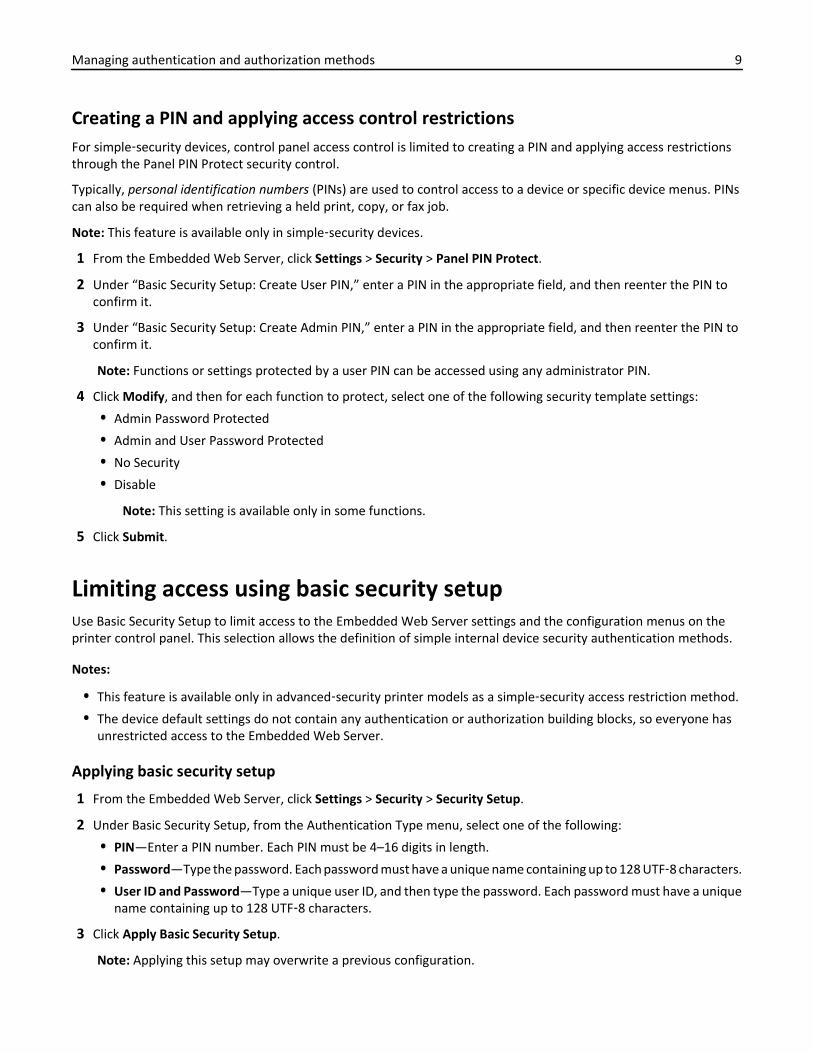
Creating a PIN and applying access control restrictionsFor simple‑security devices, control panel access control is limited to creating a PIN and applying access restrictionsthrough the Panel PIN Protect security control.
Typically, personal identification numbers (PINs) are used to control access to a device or specific device menus. PINscan also be required when retrieving a held print, copy, or fax job.
Note: This feature is available only in simple‑security devices.
1 From the Embedded Web Server, click Settings > Security > Panel PIN Protect.
2 Under “Basic Security Setup: Create User PIN,” enter a PIN in the appropriate field, and then reenter the PIN toconfirm it.
3 Under “Basic Security Setup: Create Admin PIN,” enter a PIN in the appropriate field, and then reenter the PIN toconfirm it.
Note: Functions or settings protected by a user PIN can be accessed using any administrator PIN.
4 Click Modify, and then for each function to protect, select one of the following security template settings:
• Admin Password Protected
• Admin and User Password Protected
• No Security
• Disable
Note: This setting is available only in some functions.
5 Click Submit.
Limiting access using basic security setupUse Basic Security Setup to limit access to the Embedded Web Server settings and the configuration menus on theprinter control panel. This selection allows the definition of simple internal device security authentication methods.
Notes:
• This feature is available only in advanced‑security printer models as a simple‑security access restriction method.
• The device default settings do not contain any authentication or authorization building blocks, so everyone hasunrestricted access to the Embedded Web Server.
Applying basic security setup
1 From the Embedded Web Server, click Settings > Security > Security Setup.
2 Under Basic Security Setup, from the Authentication Type menu, select one of the following:
• PIN—Enter a PIN number. Each PIN must be 4–16 digits in length.
• Password—Type the password. Each password must have a unique name containing up to 128 UTF‑8 characters.
• User ID and Password—Type a unique user ID, and then type the password. Each password must have a uniquename containing up to 128 UTF‑8 characters.
3 Click Apply Basic Security Setup.
Note: Applying this setup may overwrite a previous configuration.
Managing authentication and authorization methods 9
The new settings are submitted. The next time you access Security Setup, you will be required to enter yourauthentication credentials.
Modifying or removing basic security setup
1 From the Embedded Web Server, click Settings > Security > Security Setup.
2 Enter your authentication credentials to access Security Setup.
3 Under Modify or Remove Basic Security Setup, enter your new authentication credentials.
4 Click Modify Basic Security Setup to enter your new authentication credentials to access Security Setup, or clickRemove Basic Security Setup to remove all authentication requirements.
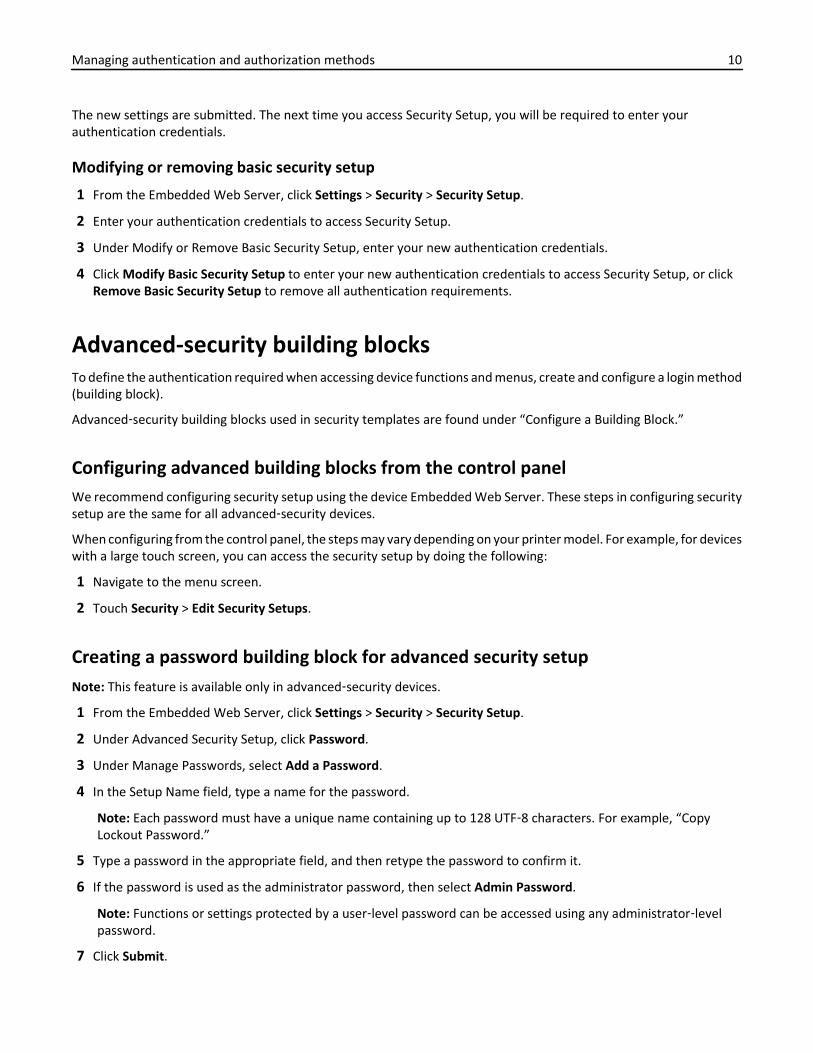
Advanced-security building blocksTo define the authentication required when accessing device functions and menus, create and configure a login method(building block).
Advanced‑security building blocks used in security templates are found under “Configure a Building Block.”
Configuring advanced building blocks from the control panelWe recommend configuring security setup using the device Embedded Web Server. These steps in configuring securitysetup are the same for all advanced‑security devices.
When configuring from the control panel, the steps may vary depending on your printer model. For example, for deviceswith a large touch screen, you can access the security setup by doing the following:
1 Navigate to the menu screen.
2 Touch Security > Edit Security Setups.
Creating a password building block for advanced security setupNote: This feature is available only in advanced‑security devices.
1 From the Embedded Web Server, click Settings > Security > Security Setup.
2 Under Advanced Security Setup, click Password.
3 Under Manage Passwords, select Add a Password.
4 In the Setup Name field, type a name for the password.
Note: Each password must have a unique name containing up to 128 UTF‑8 characters. For example, “CopyLockout Password.”
5 Type a password in the appropriate field, and then retype the password to confirm it.
6 If the password is used as the administrator password, then select Admin Password.
Note: Functions or settings protected by a user‑level password can be accessed using any administrator‑levelpassword.
7 Click Submit.
Managing authentication and authorization methods 10
Notes:
• To edit a password, select a password from the list, and then modify the settings.
• To delete a password, select a password from the list, and then click Delete Entry.
• To delete all passwords in the list, click Delete List.
Creating a PIN building block for advanced security setupNote: This feature is available only in advanced‑security devices.
Personal identification numbers (PINs) are used to control access to specific device menus or to a device itself. PINs canalso be required when retrieving a held print, copy, or fax job.
1 From the Embedded Web Server, click Settings > Security > Security Setup.
2 Under Advanced Security Setup, click PIN > Add a PIN.
3 In the Setup Name field, type the name of the PIN configuration.
Note: Each PIN must have a unique name containing up to 128 UTF‑8 characters. For example, “Copy LockoutPIN.”
4 Type a PIN in the appropriate field, and then retype the PIN to confirm it.
5 If the PIN is used as the Administrator PIN, then click Admin PIN.
6 Click Submit.
Changing the PIN length
1 Click Settings > Security > Miscellaneous Security Settings.
2 Enter a number in the Minimum PIN Length field.
3 Click Submit.
Setting up internal accountsNote: This feature is available only in advanced‑security devices.
Administrators can configure one internal account building block per supported device. Each internal account buildingblock can include a maximum of 750 user accounts and 32 user groups.
You can use this building block by itself in a security template to provide authentication‑level security, or with othergroups to provide both authentication and authorization.
Defining user groups
Before you begin, do the following:
• Create a list of all the users in the group.
• Identify the device functions needed for all users and for specific users.
Note: When a security template is assigned to a group, a role is created. Users can be assigned to more than onegroup or role.
Managing authentication and authorization methods 11
Using the Embedded Web Server
1 From the Embedded Web Server, click Settings > Security > Security Setup.
2 Under Advanced Security Setup, click Internal Accounts > Setup groups for use with internal accounts.
3 Type the group name.
Note: Group names can contain up to 128 UTF‑8 characters.
4 Click Add.
Using the control panel
Note: These instructions apply only in printer models with a touch‑screen display.
1 Navigate to the menu screen.
2 Touch Security > Edit Security Setups > Edit Building Blocks > Internal Accounts > General Settings > Groups forInternal Accounts > Add Entry.
3 In the Name field, type a group name.
4 Touch Done.
Creating user accounts
Note: We recommend creating groups before creating a user account.
Using the Embedded Web Server
1 Click Settings > Security > Security Setup.
2 Under Advanced Security Setup, click Internal Accounts > Add an Internal Account.
3 Provide the information needed for each account:
• Account Name—Type the account name of the user. For example, “Jack Smith.” You can use up to 164 UTF‑8characters.
• User ID—Type an ID for the account. For example, “jsmith.” You can use up to 128 UTF‑8 characters.
• Password—Type a password of between 8 and 128 characters.
• Re‑enter Password—Type the password entered in the preceding field.
• E‑mail—Type the e-mail address of the user. For eample, “[email protected].”
• Groups—Select the groups to which the account belongs. Hold down the Ctrl key to select multiple groups forthe account.
4 Click Submit.
Using the control panel
Note: These instructions apply only in printer models with a touch‑screen display.
1 Navigate to the menu screen.
2 Touch Security > Edit Security Setups > Edit Building Blocks > Internal Accounts > General Settings.
3 Set Required User Credentials to User ID and password, and then touch Submit.
4 Select Manage Internal Accounts > Add Entry.
5 Type the user account name, and then touch Done.
Managing authentication and authorization methods 12
6 Type a user ID for the account, and then touch Done.
7 Type a password for the account, and then touch Done.
8 Retype the password, and then touch Done.
9 Type the user e-mail address, and then touch Done.
10 From the Set Groups screen, select the groups to which the account belongs.
11 Touch Done.
Specifying settings for internal accounts
Internal account settings determine the information an administrator submits when creating a new internal accountand the information a user submits when authenticating.
• Custom Building Block Name—Type a unique name for this building block.
• Require E‑mail Address—Select this box to make the e-mail address a required field when creating new internalaccounts.
• Required User Credentials—Select either User ID or User ID and password to specify the information a user mustsubmit when authenticating.
Connecting your printer to an Active Directory domainUsing Active Directory simplifies network authentication and authorization setup, automatically creating andconfiguring LDAP+GSSAPI and Kerberos authentication building blocks. It also simplifies certificate chain download.
Notes:
• This feature is available only in advanced‑security devices.
• Use HTTPS to protect the credentials that are used to join the printer to the domain.
1 From the Embedded Web Server, click Settings > Security > Security Setup > Active Directory > Join an ActiveDirectory Domain.
2 Provide the information needed for each account:
• Domain Name—Type the name of the domain that you want to join in uppercase.
• User ID—Type the user name of the network administrator or any individual who has rights to add computersto a network.
• Password—Type the password of the network administrator or the individual who has rights to join the domain.
Note: Passwords are case‑sensitive and are not cached by the device.
• Organizational Unit—Type the name of your organizational unit, if necessary.
3 Select one or more of the following domain services:
• LDAP Address Book—Configure LDAP server address book information using Active Directory data.
• Standard Admin Groups and Security Templates—Create a group named “admin,” and a security templatenamed “Active Directory.”
• CA Certificate Monitoring—Enable the CA certificate monitor feature with the following default settings:
– “Enable CA Monitor” is selected.
– “Schedule run time” is set to 0:00 (midnight).
– Monitoring is repeated every day.
Managing authentication and authorization methods 13
4 Click Submit.
Notes:
• The screen flashes, and you may hear a clicking noise.
• If the configuration is unsuccessful, then a big red X mark appears. A message appears if the configuration isnot successful.
5 Click Manage Security Templates to use the Active Directory information to complete your security setup.
If you want to review or make some small modifications to the LDAP+GSSAPI building block, then click Return toSecurity Setup and do the following:
a Under Advanced Security Setup, click Kerberos 5.
b Click View File to open the Kerberos Config file that was created using the Active Directory setup.
c Review the file, and then click the back button of the browser.
Note: Do not edit or copy the Kerberos Config file to use with older devices, to avoid issues with KDC ServerAffinity Service. Older devices do not recognize the special mappings associated with the KDC Server AffinityService.
d Click Return to Security Setup, and then click LDAP+GSSAPI.
e Under LDAP+GSSAPI Setups, click the building block that was created by the Active Directory Setup process.
Note: By default, the building block name is the realm name, and the server address field is the domaincontroller name.
f If necessary, change some of the building block settings depending on your environment, including the following:
• Server Port—The standard port for LDAP is 389. Another common port is 3268, but this port is used onlyfor Global Catalog servers in Active Directory. If applicable, change the port to 3268 to speed up the queryingprocess.
• Search Base—This setting indicates the location in the directory tree where the device starts searching. Atthe most basic, we recommend specifying the root of the directory (such as “dc=company,dc=com”).
• Use Kerberos Service Ticket—This advanced setup, otherwise known as SPNEGO, is the session ticket thata user uses to log in to a computer. We recommend leaving this setting unchanged.
• Use Active Directory Device Credentials—This option lets you use the service account that is created inActive Directory. If you want to use an existing service account or user credential (advanced setup), thenclear this check box.
g If necessary, adjust the following settings:
• Group Search Base—This setting indicates the location in the directory tree where the device starts searchingfor a particular group. If the environment does not require user‑ or group‑based authorization, then leavethis field blank.
• Short name for group—This setting is a name that a user can use to associate to a group identifier.
• Group Identifier—This setting is a container or organizational unit that a device searches to validate whetheran authenticated user is a member of an authorized group.
h Click Modify.
Using LDAPNote: This feature is available only in advanced‑security devices.
Managing authentication and authorization methods 14
Lightweight Directory Access Protocol (LDAP) is a standards‑based, cross‑platform, extensible protocol that runs directlyon top of the TCP/IP layer. It is used to access information stored in a specially organized information directory. It caninteract with many different kinds of databases without special integration, making it more flexible than otherauthentication methods.
Notes:
• Supported devices can store a maximum of five unique LDAP configurations. Each configuration must have aunique name.
• Administrators can create up to 32 user‑defined groups that apply to each unique LDAP configuration.
• LDAP relies on an external server for authentication. If an outage prevents the printer from communicating withthe server, users will not be able to access protected device functions.
• To help prevent unauthorized access, log out from the printer after each session.
Adding an LDAP setup
1 From the Embedded Web Server, click Settings > Security > Security Setup.
2 Under Advanced Security Setup, click LDAP.
3 Click Add an LDAP Setup.
The LDAP Server Setup dialog is divided into four parts:
General Information
• Setup Name—This name is used to identify each particular LDAP Server Setup when creating security templates.
• Server Address—Type the IP address or the host name of the LDAP server where the authentication isperformed.
• Server Port—The Embedded Web Server communicates with the LDAP server using this port. The default LDAPport is 389.
• Use SSL/TLS—From the drop‑down menu, select None, SSL/TLS (Secure Sockets Layer/Transport LayerSecurity), or TLS.
• Userid Attribute—Type either cn (common name), uid, userid, or user‑defined.
• Mail Attribute—Type a maximum of 48 characters to identify e‑mail addresses. The default value is “mail.”
• Full Name Attribute—Type a maximum of 48 characters. The default value is “cn.”
• Search Base—The node in the LDAP server where user accounts reside. You can enter multiple search bases,separated by commas.
Note: A search base consists of multiple attributes separated by commas, such as cn (common name), ou(organizational unit), o (organization), c (country), and dc (domain).
• Search Timeout—Enter a value from 5 to 30 seconds or 5 to 300 seconds, depending on your printer model.
• Required User Input—Select either User ID and password or User ID to specify which credentials a user mustprovide when attempting to access a function protected by the LDAP building block. User ID and password isthe default setting.
Device Credentials
• Use Active Directory Device Credentials—Allow user credentials and group designations to be pulled from theexisting network comparable to other network services.
• Anonymous LDAP Bind—Bind the Embedded Web Server with the LDAP server anonymously, and make theDistinguished Name and MFP Password fields unavailable.
Managing authentication and authorization methods 15
• Distinguished Name—Type the distinguished name of the print server or servers.
• MFP’s Password—Type the password for the print servers.
Search specific object classes
• Person—Allow the “person” object class to be searched.
• Custom Object Class—Allow the custom search object class to be searched. You can define up to three customsearch object classes.
LDAP Group Names
• Administrators can associate as many as 32 named groups stored on the LDAP server by entering identifiers forthose groups under the Group Search Base list. Both the Short name for group and Group Identifier must beprovided.
• When creating security templates, you can pick groups from this setup for controlling access to device functions.
4 Click Submit to save the changes, or Cancel to return to previous values.
Editing an LDAP setup
1 From the Embedded Web Server, click Settings > Security > Security Setup.
2 Under Advanced Security Setup, click LDAP.
3 Click a setup from the list.
4 Make any needed changes in the LDAP Configuration dialog.
5 Click Modify to save the changes, or click Cancel to return to previous values.
Deleting an LDAP setup
1 From the Embedded Web Server, click Settings > Security > Security Setup.
2 Under Advanced Security Setup, click LDAP.
3 Select a setup from the list.
4 Click Delete Entry to remove the profile, or Cancel to return to previous values.
Notes:
• Click Delete List to delete all LDAP setups in the list.
• An LDAP building block cannot be deleted if it is being used as part of a security template.
Validating an LDAP setup
1 From the Embedded Web Server, click Settings > Security > Security Setup.
2 Under Advanced Security Setup, click LDAP.
3 Click Test LDAP Authentication Setup next to the setup you want to test.
Using LDAP+GSSAPINote: This feature is available only in advanced‑security devices.
Managing authentication and authorization methods 16
Some administrators prefer authenticating to an LDAP server using the more secure Generic Security ServicesApplication Programming Interface (GSSAPI) instead of simple LDAP authentication. Instead of authenticating directlywith the LDAP server, the user first authenticates with a Kerberos server to obtain a Kerberos “ticket.” This ticket isthen presented to the LDAP server using the GSSAPI protocol for access. LDAP+GSSAPI is typically used for networksrunning Active Directory.
Notes:
• LDAP+GSSAPI requires Kerberos 5 to be configured.
• Supported devices can store a maximum of five unique LDAP+GSSAPI configurations. Each configuration musthave a unique name.
• LDAP relies on an external server for authentication. If an outage prevents the printer from communicating withthe server, users will not be able to access protected device functions.
• To help prevent unauthorized access, log out from the printer after each session.
Adding an LDAP+GSSAPI setup
1 From the Embedded Web Server, click Settings > Security > Security Setup.
2 Under Advanced Security Setup, click LDAP+GSSAPI.
3 Click Add an LDAP+GSSAPI Setup. The setup dialog is divided into four parts:
General Information
• Setup Name—This name is used to identify each particular LDAP+GSSAPI Server Setup when creating securitytemplates.
• Server Address—Type the IP address or the host name of the LDAP server where the authentication isperformed.
• Server Port—The port used by the Embedded Web Server to communicate with the LDAP server. The defaultLDAP port is 389.
• Use SSL/TLS—From the drop‑down menu, select None, SSL/TLS (Secure Sockets Layer/Transport LayerSecurity), or TLS.
• Userid Attribute—Type either cn (common name), uid, userid, or user‑defined.
• Mail Attribute—Type a maximum of 48 characters to uniquely identify e‑mail addresses. The default value is“mail.”
• Full Name Attribute—Type a maximum of 48 characters.
• Search Base—The node in the LDAP server where user accounts reside. You can enter multiple search bases,separated by commas.
Note: A search base consists of multiple attributes separated by commas, such as cn (common name), ou(organizational unit), o (organization), c (country), and dc (domain).
• Search Timeout—Enter a value from 5 to 30 seconds or 5 to 300 seconds depending on your printer model.
• Use Kerberos Service Ticket—If selected, then a Kerberos ticket is presented to the LDAP server using the GSSAPIprotocol to obtain access.
Device Credentials
• Use Active Directory Device Credentials—Allow user credentials and group designations to be pulled from theexisting network comparable to other network services.
• MFP Kerberos Username—Type the distinguished name of the print server or servers.
• MFP’s Password—Type the Kerberos password for the print server or servers.
Managing authentication and authorization methods 17
Search specific object classes
• Person—Allow the “person” object class to be searched.
• Custom Object Class—Allow the custom search object class to be searched. You can define up to three customsearch object classes.
LDAP Group Names
• You can associate up to 32 named groups stored on the LDAP server by entering identifiers for those groupsunder the Group Search Base list. Both the Short name for group and Group Identifier must be provided.
• When creating security templates, you can pick groups from this setup for controlling access to device functions.
4 Click Submit to save the changes, or Cancel to return to previous values.
Editing an LDAP+GSSAPI setup
1 From the Embedded Web Server, click Settings > Security > Security Setup.
2 Under Advanced Security Setup, click LDAP+GSSAPI.
3 Select a setup from the list.
4 Make any needed changes in the LDAP Configuration dialog.
5 Click Modify to save the changes, or Cancel to return to previous values.
Deleting an LDAP+GSSAPI setup
1 From the Embedded Web Server, click Settings > Security > Security Setup.
2 Under Advanced Security Setup, click LDAP+GSSAPI.
3 Select a setup from the list.
4 Click Delete Entry to remove the profile, or Cancel to return to previous values.
Notes:
• Click Delete List to delete all LDAP+GSSAPI setups in the list.
• An LDAP+GSSAPI building block cannot be deleted if it is being used as part of a security template.
Configuring Kerberos 5 for use with LDAP+GSSAPINote: This feature is available only in advanced‑security devices.
Kerberos 5 can be used by itself for user authentication, but it is most often used with the LDAP+GSSAPI building block.While only one Kerberos configuration file (krb5.conf) can be stored on a supported device, that file can apply to multiplerealms and Kerberos Domain Controllers (KDCs). An administrator must anticipate the different types of authenticationrequests that the Kerberos server might receive, and configure the krb5.conf file to handle these requests.
Notes:
• Because only one krb5.conf file is used, uploading or resubmitting a simple Kerberos file will overwrite theconfiguration file.
• The krb5.conf file can specify a default realm. But if a realm is not specified in the configuration file, then thefirst realm specified is used as the default realm for authentication.
Managing authentication and authorization methods 18
• Some types of authentication relies on an external server. If an outage prevents the printer from communicatingwith the server, users will not be able to access protected device functions.
• To help prevent unauthorized access, log out from the printer after each session.
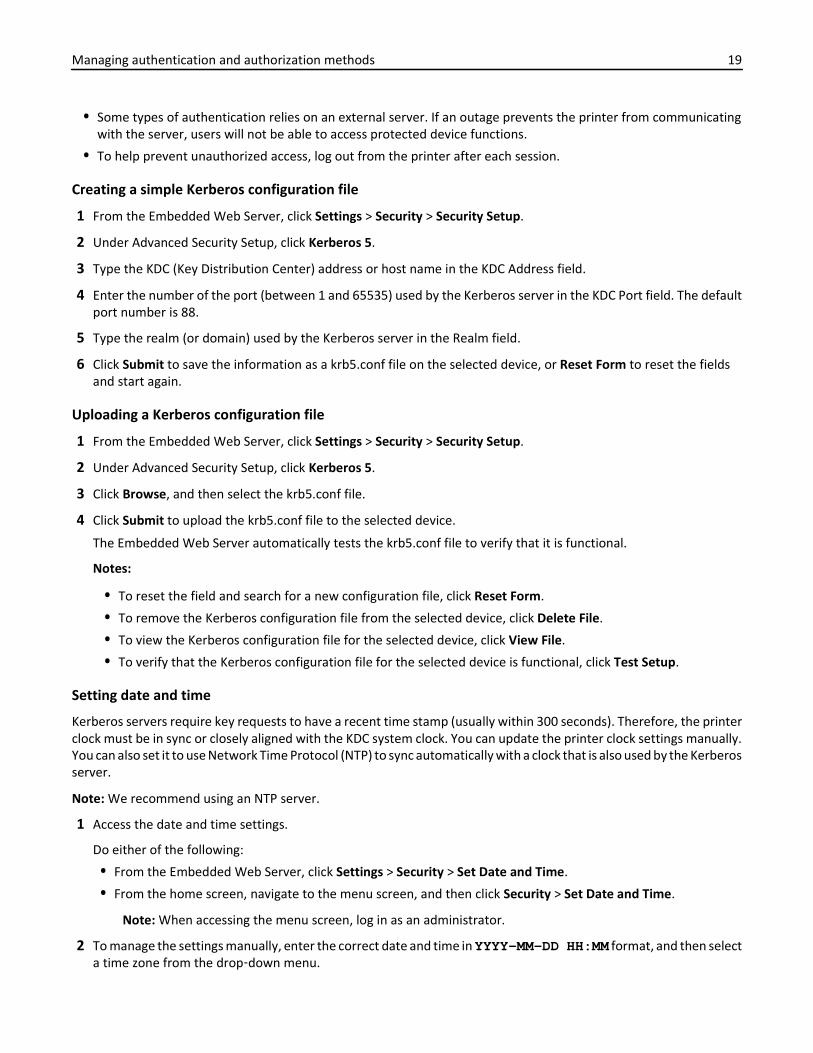
Creating a simple Kerberos configuration file
1 From the Embedded Web Server, click Settings > Security > Security Setup.
2 Under Advanced Security Setup, click Kerberos 5.
3 Type the KDC (Key Distribution Center) address or host name in the KDC Address field.
4 Enter the number of the port (between 1 and 65535) used by the Kerberos server in the KDC Port field. The defaultport number is 88.
5 Type the realm (or domain) used by the Kerberos server in the Realm field.
6 Click Submit to save the information as a krb5.conf file on the selected device, or Reset Form to reset the fieldsand start again.
Uploading a Kerberos configuration file
1 From the Embedded Web Server, click Settings > Security > Security Setup.
2 Under Advanced Security Setup, click Kerberos 5.
3 Click Browse, and then select the krb5.conf file.
4 Click Submit to upload the krb5.conf file to the selected device.
The Embedded Web Server automatically tests the krb5.conf file to verify that it is functional.
Notes:
• To reset the field and search for a new configuration file, click Reset Form.
• To remove the Kerberos configuration file from the selected device, click Delete File.
• To view the Kerberos configuration file for the selected device, click View File.
• To verify that the Kerberos configuration file for the selected device is functional, click Test Setup.
Setting date and time
Kerberos servers require key requests to have a recent time stamp (usually within 300 seconds). Therefore, the printerclock must be in sync or closely aligned with the KDC system clock. You can update the printer clock settings manually.You can also set it to use Network Time Protocol (NTP) to sync automatically with a clock that is also used by the Kerberosserver.
Note: We recommend using an NTP server.
1 Access the date and time settings.
Do either of the following:
• From the Embedded Web Server, click Settings > Security > Set Date and Time.
• From the home screen, navigate to the menu screen, and then click Security > Set Date and Time.
Note: When accessing the menu screen, log in as an administrator.
2 To manage the settings manually, enter the correct date and time in YYYY-MM-DD HH:MM format, and then selecta time zone from the drop‑down menu.
Managing authentication and authorization methods 19
Notes:
• Entering manual settings automatically disables the use of NTP.
• If you select (UTC+user) Custom from the Time Zone list, then you need to configure more settings underCustom Time Zone Setup.
3 If daylight saving time (DST) is observed in your area, then select Automatically Observe DST.
4 If you are located in a nonstandard time zone or an area that observes an alternate DST calendar, then adjust theCustom Time Zone Setup settings.
5 If you want to sync to an NTP server rather than update the clock settings manually, then select Enable NTP. Thentype the IP address or host name of the NTP server.
6 If the NTP server requires authentication, then select the preferred method from the Authentication menu. Thenclick Install MD5 key or Install Autokey IFF params to browse to the file containing the matching NTP authentication.
7 Click Submit to save the changes, or click Reset Form to restore the default settings.
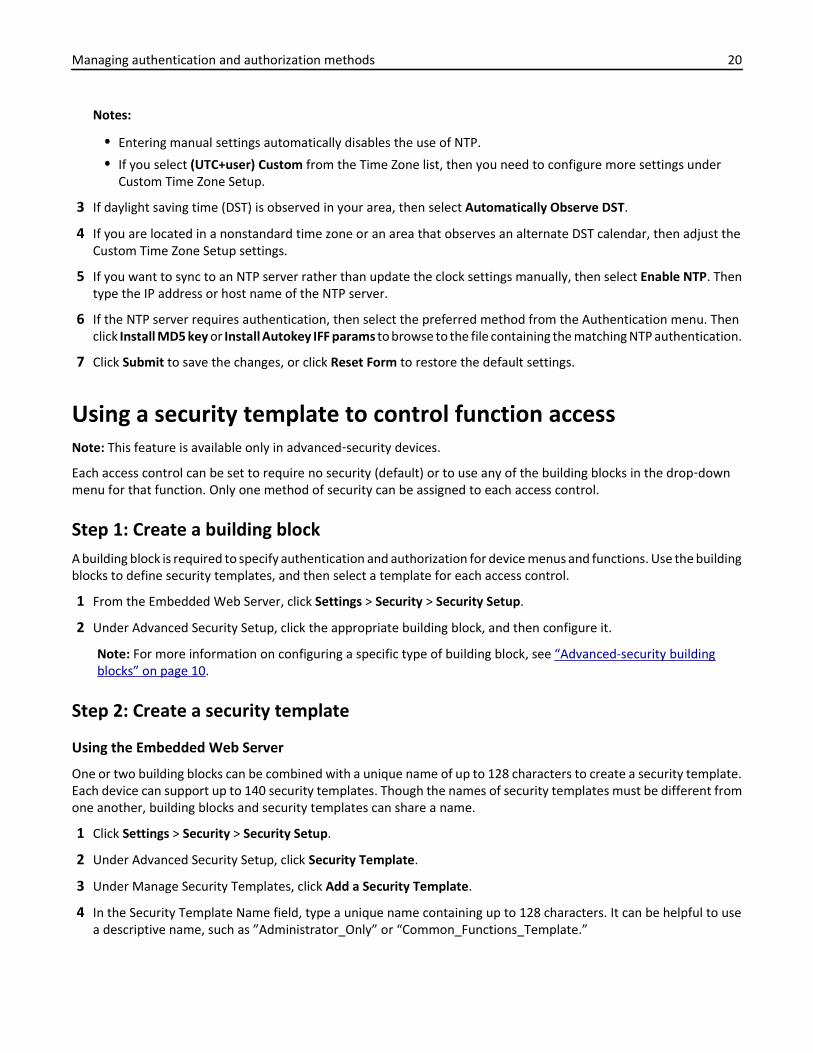
Using a security template to control function accessNote: This feature is available only in advanced‑security devices.
Each access control can be set to require no security (default) or to use any of the building blocks in the drop‑downmenu for that function. Only one method of security can be assigned to each access control.
Step 1: Create a building blockA building block is required to specify authentication and authorization for device menus and functions. Use the buildingblocks to define security templates, and then select a template for each access control.
1 From the Embedded Web Server, click Settings > Security > Security Setup.
2 Under Advanced Security Setup, click the appropriate building block, and then configure it.
Note: For more information on configuring a specific type of building block, see “Advanced-security buildingblocks” on page 10.
Step 2: Create a security template
Using the Embedded Web Server
One or two building blocks can be combined with a unique name of up to 128 characters to create a security template.Each device can support up to 140 security templates. Though the names of security templates must be different fromone another, building blocks and security templates can share a name.
1 Click Settings > Security > Security Setup.
2 Under Advanced Security Setup, click Security Template.
3 Under Manage Security Templates, click Add a Security Template.
4 In the Security Template Name field, type a unique name containing up to 128 characters. It can be helpful to usea descriptive name, such as ”Administrator_Only” or “Common_Functions_Template.”
Managing authentication and authorization methods 20
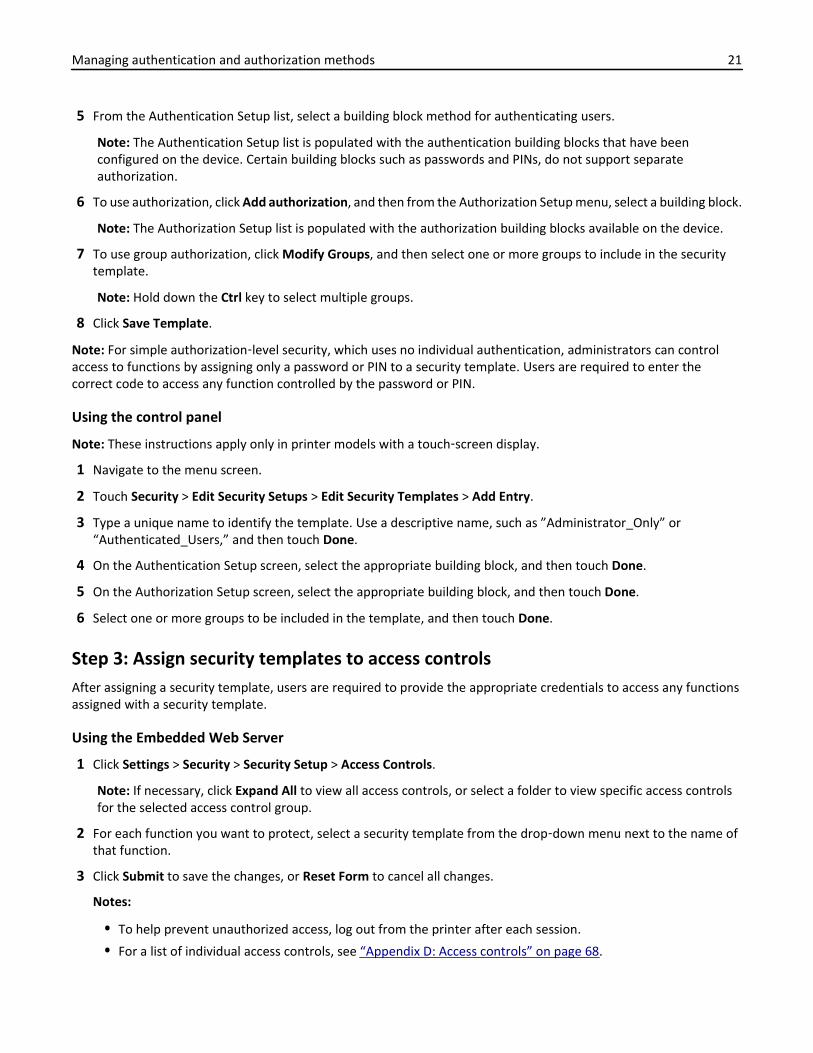
5 From the Authentication Setup list, select a building block method for authenticating users.
Note: The Authentication Setup list is populated with the authentication building blocks that have beenconfigured on the device. Certain building blocks such as passwords and PINs, do not support separateauthorization.
6 To use authorization, click Add authorization, and then from the Authorization Setup menu, select a building block.
Note: The Authorization Setup list is populated with the authorization building blocks available on the device.
7 To use group authorization, click Modify Groups, and then select one or more groups to include in the securitytemplate.
Note: Hold down the Ctrl key to select multiple groups.
8 Click Save Template.
Note: For simple authorization‑level security, which uses no individual authentication, administrators can controlaccess to functions by assigning only a password or PIN to a security template. Users are required to enter thecorrect code to access any function controlled by the password or PIN.
Using the control panel
Note: These instructions apply only in printer models with a touch‑screen display.
1 Navigate to the menu screen.
2 Touch Security > Edit Security Setups > Edit Security Templates > Add Entry.
3 Type a unique name to identify the template. Use a descriptive name, such as ”Administrator_Only” or“Authenticated_Users,” and then touch Done.
4 On the Authentication Setup screen, select the appropriate building block, and then touch Done.
5 On the Authorization Setup screen, select the appropriate building block, and then touch Done.
6 Select one or more groups to be included in the template, and then touch Done.
Step 3: Assign security templates to access controlsAfter assigning a security template, users are required to provide the appropriate credentials to access any functionsassigned with a security template.
Using the Embedded Web Server
1 Click Settings > Security > Security Setup > Access Controls.
Note: If necessary, click Expand All to view all access controls, or select a folder to view specific access controlsfor the selected access control group.
2 For each function you want to protect, select a security template from the drop‑down menu next to the name ofthat function.
3 Click Submit to save the changes, or Reset Form to cancel all changes.
Notes:
• To help prevent unauthorized access, log out from the printer after each session.
• For a list of individual access controls, see “Appendix D: Access controls” on page 68.
Managing authentication and authorization methods 21
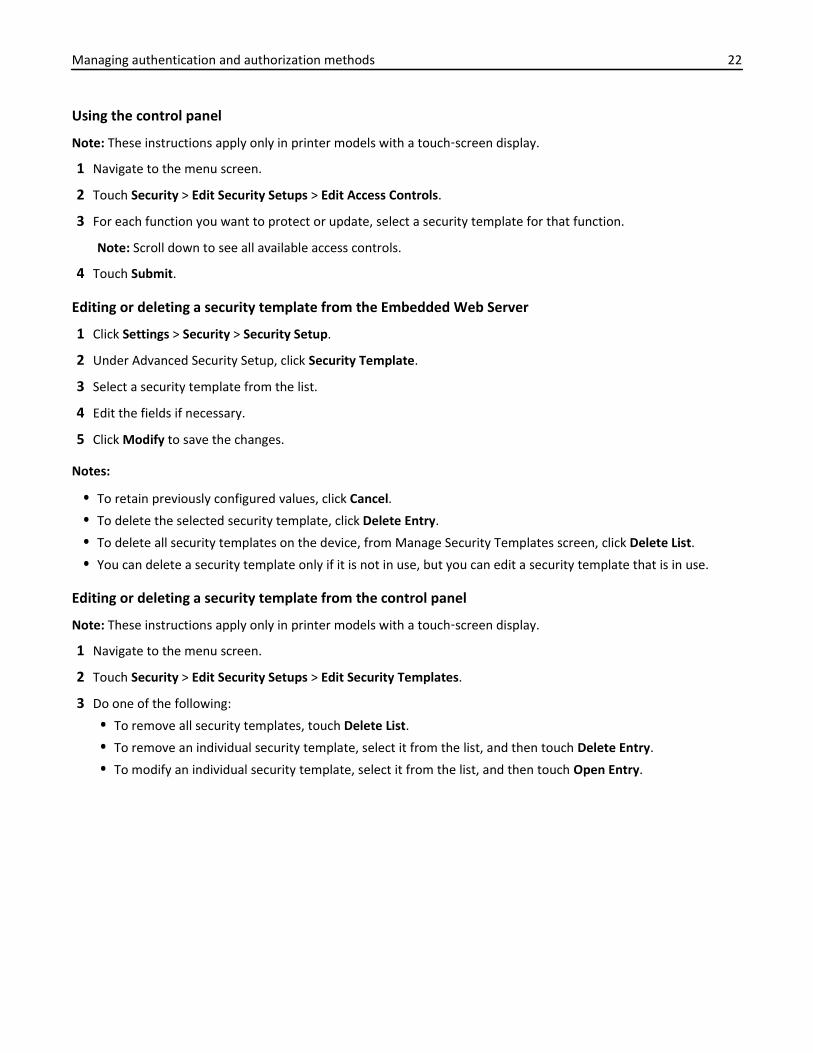
Using the control panel
Note: These instructions apply only in printer models with a touch‑screen display.
1 Navigate to the menu screen.
2 Touch Security > Edit Security Setups > Edit Access Controls.
3 For each function you want to protect or update, select a security template for that function.
Note: Scroll down to see all available access controls.
4 Touch Submit.
Editing or deleting a security template from the Embedded Web Server
1 Click Settings > Security > Security Setup.
2 Under Advanced Security Setup, click Security Template.
3 Select a security template from the list.
4 Edit the fields if necessary.
5 Click Modify to save the changes.
Notes:
• To retain previously configured values, click Cancel.
• To delete the selected security template, click Delete Entry.
• To delete all security templates on the device, from Manage Security Templates screen, click Delete List.
• You can delete a security template only if it is not in use, but you can edit a security template that is in use.
Editing or deleting a security template from the control panel
Note: These instructions apply only in printer models with a touch‑screen display.
1 Navigate to the menu screen.
2 Touch Security > Edit Security Setups > Edit Security Templates.
3 Do one of the following:
• To remove all security templates, touch Delete List.
• To remove an individual security template, select it from the list, and then touch Delete Entry.
• To modify an individual security template, select it from the list, and then touch Open Entry.
Managing authentication and authorization methods 22
Managing certificates and other settingsThe Certificate Management menu is used for configuring printers to utilize certificates for establishing SSL, IPSec, and802.1x connections. Additionally, devices utilize certificates for LDAP over SSL authentication and address book look-ups.
Certificates are used by network devices to securely identify other devices. Certificate Authorities (CA) are trustedlocations established on the network that are required in secure environments. Otherwise, the default device certificateis used to identify devices on the network.
The process for creating a CA-signed certificate on a device consists of the following activities:
1 Loading of the CA certificate for a certificate authority into the device
2 Creating a Certificate Signing Request (CSR) to obtain a CA-signed device certificate
3 Generating a CA-signed certificate using the CSR by the CA administrator
4 Loading of the CA-signed certificate into the device
Note: You can simplify the process by using the Automatic Certificate Enrollment Application, which is availablewhen an Active Directory environment is used. For more information, see “Appendix C: Automatic CertificateEnrollment Application” on page 66.
Installing a Certificate Authority certificate on the deviceNote: This feature is available only in network printers or in printers connected to print servers.
The Certificate Authority (CA) certificate is needed so that the printer can trust and validate the credentials of anothersystem on the network. Without a CA certificate, the printer cannot determine whether to trust the certificate that ispresented by the system trying to create the secure connection.
Start with the certificate file (.pem format) for the CA that you want to utilize. An example of how to create this file isprovided in “Appendix A: CA file creation” on page 66.
1 Open a Web browser, and then type the IP address or host name of the printer.
2 From the Embedded Web Server, click Settings > Security > Certificate Management > Certificate AuthorityManagement.
Notes:
• This window lets the device administrator load a new CA certificate, delete all CA certificates, and viewpreviously installed CA certificates. To view more details of an installed CA certificate or delete a certificate,click common name link under Certificate Authority Common Name.
• There are no installed CA certificates to view on this page in new devices.
3 Click New to display the Certificate Authority Installation screen.
4 Click Browse to select the .pem format certificate authority file.
5 Click Submit.
Managing certificates and other settings 23
Configuring the device for certificate informationThe printer has a self‑generated certificate. For some operations (such as 802.1X and IPsec), the printer certificateneeds to be upgraded to a certificate that has been signed by a certificate authority.
The printer includes a process of generating a certificate signing request that can be viewed or downloaded, whichfacilitates the process of obtaining the signed certificate for the printer.
1 From the Embedded Web Server, click Settings > Security > Certificate Management > Set Certificate Defaults.
2 Update the information on the device to fit your organization, and then click Submit. For more information, see“Setting certificate defaults” on page 26.
3 From the Certificate Management page, click Device Certificate Management.
Notes:
• This window lets the device administrator load a new device certificate, delete all device certificates, andview previously installed device certificates. To view more details of an installed device certificate or delete adevice certificate, click on the certificate common name link under Friendly Name.
• If you are configuring a new device, then a default self‑signed certificate can be viewed on this page.
4 Select the link for the preferred device certificate to obtain the certificate signing request information.
Notes:
• You may use the link to the default certificate created in step 2 or another named certificate. The certificateinformation is displayed.
• To create other certificates, select New to open a Certificate Generation Parameters page. For moreinformation, see “Creating a new device certificate” on page 25.
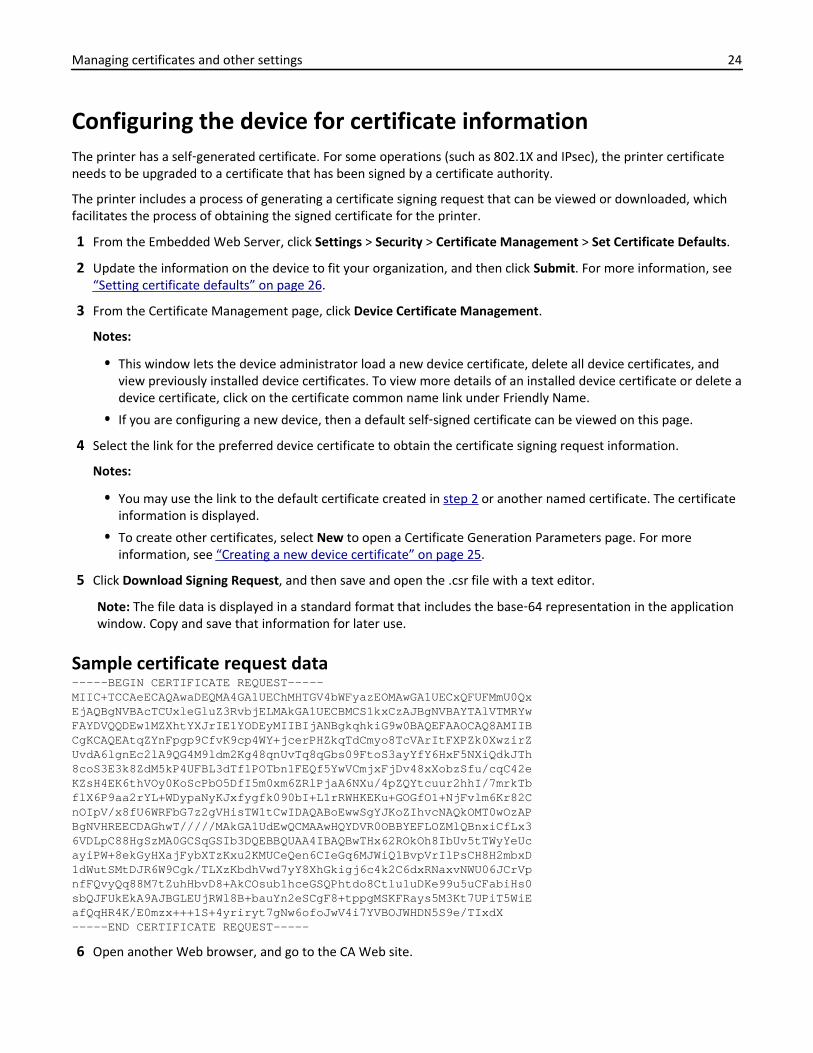
5 Click Download Signing Request, and then save and open the .csr file with a text editor.
Note: The file data is displayed in a standard format that includes the base‑64 representation in the applicationwindow. Copy and save that information for later use.
Sample certificate request data-----BEGIN CERTIFICATE REQUEST-----MIIC+TCCAeECAQAwaDEQMA4GA1UEChMHTGV4bWFyazEOMAwGA1UECxQFUFMmU0QxEjAQBgNVBAcTCUxleGluZ3RvbjELMAkGA1UECBMCS1kxCzAJBgNVBAYTAlVTMRYwFAYDVQQDEw1MZXhtYXJrIE1YODEyMIIBIjANBgkqhkiG9w0BAQEFAAOCAQ8AMIIBCgKCAQEAtqZYnFpgp9CfvK9cp4WY+jcerPHZkqTdCmyo8TcVArItFXPZk0XwzirZUvdA6lgnEc2lA9QG4M9ldm2Kg48qnUvTq8qGbs09FtoS3ayYfY6HxF5NXiQdkJTh8coS3E3k8ZdM5kP4UFBL3dTf1POTbn1FEQf5YwVCmjxFjDv48xXobzSfu/cqC42eKZsH4EK6thVOy0KoScPbO5DfI5m0xm6ZRlPjaA6NXu/4pZQYtcuur2hhI/7mrkTbflX6P9aa2rYL+WDypaNyKJxfygfk090bI+L1rRWHKEKu+GOGfO1+NjFvlm6Kr82CnOIpV/x8fU6WRFbG7z2gVHisTW1tCwIDAQABoEwwSgYJKoZIhvcNAQkOMT0wOzAPBgNVHREECDAGhwT/////MAkGA1UdEwQCMAAwHQYDVR0OBBYEFLOZMlQBnxiCfLx36VDLpC88HgSzMA0GCSqGSIb3DQEBBQUAA4IBAQBwTHx62ROkOh8IbUv5tTWyYeUcayiPW+8ekGyHXajFybXTzKxu2KMUCeQen6CIeGq6MJWiQ1BvpVrIlPsCH8H2mbxD1dWutSMtDJR6W9Cgk/TLXzKbdhVwd7yY8XhGkigj6c4k2C6dxRNaxvNWU06JCrVpnfFQvyQq88M7tZuhHbvD8+AkCOsub1hceGSQPhtdo8Ctlu1uDKe99u5uCFabiHs0sbQJFUkEkA9AJBGLEUjRWl8B+bauYn2eSCgF8+tppgMSKFRays5M3Kt7UPiT5WiEafQqHR4K/E0mzx+++1S+4yriryt7gNw6ofoJwV4i7YVBOJWHDN5S9e/TIxdX-----END CERTIFICATE REQUEST-----
6 Open another Web browser, and go to the CA Web site.
Managing certificates and other settings 24
7 Follow the CA certificate request process as defined for the CA. A sample request is shown in “Appendix B: CA‑SignedDevice Certificate creation” on page 66.
Note: The result is a CA‑signed device certificate file (in .pem format). Save this file on your computer for use inthe next steps.
8 From the Embedded Web Server, return to the “default” Device Certificate Management page, and then click InstallSigned Certificate.
9 Click Browse, and then select the CA‑signed device certificate file that was created in step 8.
10 Click Submit.
Note: This completes the process of creating and installing a signed printer certificate. The printer can nowpresent a valid CA‑signed certificate to systems to which it attempts to negotiate an SSL or IPsec connection.
Creating a new device certificate1 From the Embedded Web Server, click Settings > Security > Certificate Management.
2 Click Device Certificate Management > New.
3 Enter values in the appropriate fields:
• Friendly Name—Type a name for the certificate (64‑character maximum).
• Common Name—Type a name for the device (128‑character maximum).
Note: Leave this field blank if you want to use the host name for the device.
• Organization Name—Type the name of the company or organization issuing the certificate (128‑charactermaximum).
• Unit Name—Type the name of the unit within the company or organization issuing the certificate (128‑charactermaximum).
• Country/Region—Type the country or region where the company or organization issuing the certificate islocated (2‑character maximum).
• Province Name—Type the name of the province or state where the company or organization issuing thecertificate is located (128‑character maximum).
• City Name—Type the name of the city where the company or organization issuing the certificate is located(128‑character maximum).
• Subject Alternate Name—Type the alternate name and prefix that conforms to RFC 2459. For example, typean IP address using the format IP:1.2.3.4, or a DNS address using the formatDNS:ldap.company.com. Leave this field blank if you want to use the IPv4 address (128‑charactermaximum).
4 Click Generate New Certificate.
Viewing, downloading, and deleting a certificate1 From the Embedded Web Server, click Settings > Security > Certificate Management > Device Certificate
Management.
2 Select a certificate from the list.
The details of the certificate appear in the Device Certificate Management window.
Managing certificates and other settings 25
3 Click any of the following:
• Delete—Remove a previously stored certificate.
• Download To File—Download or save the certificate as a .pem file.
• Download Signing Request—Download or save the signing request as a .csr file.
• Install Signed Certificate—Upload a previously signed certificate.
Setting certificate defaultsAdministrators can set default values for certificates generated for a supported device. The values entered here willbe present in all new certificates generated in the Certificate Management task, even though those fields will remainblank on the screen.
1 From the Embedded Web Server, click Settings > Security > Certificate Management > Set Certificate Defaults.
2 Enter values in the appropriate fields:
• Common Name—Type a name for the device (128‑character maximum).
Note: Leave this field blank to use the domain name for the device.
• Organization Name—Type the name of the company or organization issuing the certificate.
• Unit Name—Type the name of the unit within the company or organization issuing the certificate.
• Country/Region—Type the country or region where the company or organization issuing the certificate islocated (2‑character maximum).
• Province Name—Type the name of the province or state where the company or organization issuing thecertificate is located.
• City Name—Type the name of the city where the company or organization issuing the certificate is located.
• Subject Alternate Name—Type the alternate name and prefix that conforms to RFC 2459. For example, typean IP address using the format IP:1.2.3.4, or a DNS address using the formatDNS:ldap.company.com. Leave this field blank to use the IPv4 address.
Note: All fields accept a maximum of 128 characters, except where noted.
3 Click Submit.
Setting up a Certificate Authority certificate monitorNote: This setting is available only in printer models that support Active Directory.
When the device is joined to an Active Directory environment, automatic updates of CA (Certificate Authority)certificates are necessary. The certificate monitor performs this function.
1 From the Embedded Web Server, click Settings > Security > Certificate Management > CA Cert Monitor Setup.
2 Enable the CA monitor.
3 Select when and how often the device checks for new CA certificates.
4 Click Submit.
Managing certificates and other settings 26
Downloading the Certificate Authority certificatesNote: This setting is available only in some printer models.
We recommend retrieving the certificate immediately. The default setting for the automatic download of the CAcertificates is 12:00 AM in the device‑designated time zone.
1 From the Embedded Web Server, click Settings > Security > Certificate Management > CA Cert Monitor Setup.
2 Select Enable CA Monitor and Fetch immediately.
3 Click Submit.
4 Click Certificate Authority Management, then review the downloaded CA certificate chain by selecting on the namefrom the CA Common Name section.
Managing certificates and other settings 27
Managing devices remotely
Using HTTPS for device managementTurn off the HTTP port, leaving the HTTPS port (443) active, to restrict the access of the device Embedded Web Serverto HTTPS only. This action ensures that all communication with the device using Embedded Web Server is encrypted.
1 From the Embedded Web Server, click Settings > Security > TCP/IP Port Access.
2 Clear TCP 8000 (HTTP) and TCP 80 (HTTP).
3 Click Submit.
Setting a backup passwordNote: This setting is available only in advanced‑security devices.
A backup password lets the Embedded Web Server administrator access security menus regardless of the type ofsecurity assigned. It can also be helpful if other security measures become unavailable, such as when there is a networkcommunication problem or an authentication server fails.
Notes:
• In some organizations, security policies prohibit the use of a backup password. Consult your organization'spolicies before deploying any security method that might compromise those policies.
• The backup password is not associated with any accounts in the corporate directory. It is a password stored onlyon the device. Share only with users who are authorized to modify the device security settings.
• Make sure that the backup password contains a minimum of eight alphanumeric characters and that it is not adictionary word or a variation of the user ID.
Using the Embedded Web Server
1 Click Settings > Security > Security Setup.
2 Under Additional Security Setup, click Backup Password.
3 Select Use Backup Password, and then type and retype the password to confirm it.
4 Click Submit.
Using the control panel
1 Navigate to the menu screen.
2 Touch Security > Edit Security Setups > Edit Backup Password > Password.
3 Type and then retype the password to confirm it.
4 From the Edit Backup Password screen, set User Backup Password to On.
5 Apply the changes.
Managing devices remotely 28
Setting up SNMPSimple Network Management Protocol (SNMP) is used in network management systems to monitor network-connecteddevices for conditions that warrant administrative attention. The Embedded Web Server allows administrators toconfigure settings for SNMP versions 1 through 3.
Note: We recommend selecting only SNMPv3, setting Minimum Authentication Level to Authentication, Privacy,and setting the strongest privacy algorithm.
SNMP Version 1,2c
1 From the Embedded Web Server, click Settings > Security > SNMP.
2 Under SNMP Version 1,2c, select Enabled.
3 To allow administrators to set SNMP variables, select Allow SNMP Set.
4 Type a name to be used for the SNMP Community identifier. The default community name is “public.”
5 To facilitate the automatic installation of device drivers and other printing applications, select Enable PPM Mib(Printer Port Monitor MIB).
6 Click Submit to save the changes, or click Reset Form to restore the default values.
SNMP Version 3
1 From the Embedded Web Server, click Settings > Security > SNMP.
2 Under SNMP Version 3, select Enabled.
Note: Under SNMP Version 1,2c, clear Enabled.
3 To allow remote installation and configuration changes, and device monitoring, type login information in theSNMPv3 Read/Write User and SNMPv3 Read/Write Password fields.
4 To allow device monitoring only, type login information in the SNMPv3 Read Only User and SNMPv3 Read OnlyPassword fields.
5 From the SNMPv3 Minimum Authentication Level list, select Authentication, Privacy.
6 From the SNMPv3 Authentication Hash list, select MD5 or SHA1.
7 From the SNMPv3 Privacy Algorithm list, select the strongest setting supported by your network environment.
8 Click Submit to save the changes, or click Reset Form to restore the default values.
Setting SNMP Traps
After configuring SNMP Version 1,2c or SNMP Version 3, you can further customize which alerts are sent to the networkmanagement system by designating SNMP “traps,” or events that trigger an alert message.
1 From the Embedded Web Server, click Settings > Security > SNMP.
2 Click Set SNMP Traps.
3 From the IP Address list, click one of the blank IP address entries (shown as 0.0.0.0).
4 Under Trap Destination, enter the IP address of the network management server or monitoring station, and thenselect the conditions for which you want to generate an alert.
5 Click Submit to save the changes, or click Reset Form to clear all fields.
Managing devices remotely 29
Configuring security audit log settingsNote: This setting is available only in advanced‑security devices and in simple‑security devices with color LCD controlpanels.
The security audit log lets administrators monitor security‑related events on a device, including failed userauthorization, successful administrator authentication, and Kerberos file uploads to a device. By default, security logsare stored on the device, but may also be transmitted to a network syslog server for further processing or storage.
We recommend enabling audit in secure environments.
1 From the Embedded Web Server, click Settings > Security > Security Audit Log.
2 Select Enable Audit to activate security audit logging.
3 To use both remote syslog server and internal logging, type the IP address or host name of the Remote Syslog Server.Then select Enable Remote Syslog to transmit log events to a network syslog server.
Note: Enable Remote Syslog is available only after an IP address or host name is entered.
4 Enter the Remote Syslog Port number used on the destination server. The default value is 514.
5 From the Remote Syslog Method menu, select one of the following:
• Normal UDP—Send log messages and events using a lower‑priority transmission protocol.
• Stunnel—If implemented on the destination server.
6 From the Remote Syslog Facility menu, select a facility code for events to be logged to on the destination server.All events sent from the device are tagged with the same facility code to aid in sorting and filtering by networkmonitoring or intrusion detection software.
Note: step 3 on page 30 through step 6 and step 8 are valid only if Remote Syslog is enabled.
7 From the “Severity of events to log” menu, select the priority level cutoff (0–7) for logging messages and events.
Note: The highest severity is 0, and the lowest is 7. The selected severity level and anything higher is logged. Forexample, if you select 4 ‑ Warning, then severity levels 0–4 are logged.
8 Select Remote Syslog non‑logged events to send all events regardless of severity to the remote server.
9 In the “Admin's e‑mail address” field, type one or more e-mail addresses (separated by commas) to automaticallynotify administrators of certain log events. Then select from the following options:
• E‑mail log cleared alert—Indicates when the Delete Log button is clicked.
• E‑mail log wrapped alert—Indicates when the log becomes full and begins to overwrite the oldest entries.
• Log full behavior—Provides a drop‑down list with two options:
– Wrap over oldest entries
– E‑mail log then delete all entries
• E‑mail % full alert—Indicates when log storage space reaches a certain percentage of capacity.
• % full alert level (1–99%)—Sets how full the log must be before an alert is triggered.
• E‑mail log exported alert—Indicates when the log file is exported.
• E‑mail log settings changed alert—Indicates when the log settings are changed.
• Log line endings—Sets how the log file terminates the end of each line. Select a line ending option from thedrop‑down menu.
• Digitally sign exports—Adds a digital signature to each exported log file.
Managing devices remotely 30
Note: To use e-mail alerts, click Submit to save the changes, and then click Setup E-mail Server to configureSMTP settings.
10 Click Submit to save the changes, or Reset Form to restore the default settings.
E-mail server setup
To use the e‑mail notification of logged events, set up the e‑mail server.
1 From the Security Audit Log main screen, click Setup E-mail Server.
2 Under SMTP Setup, type the IP address or host name of the Primary SMTP Gateway the device will use for sendinge-mail.
3 Enter the Primary SMTP Gateway Port number of the destination server. The default value is 25.
4 If you are using a secondary or backup SMTP server, then type the IP address/host name and SMTP port for thatserver.
5 For SMTP Timeout, enter the number of seconds (5–30) the device will wait for a response from the SMTP serverbefore timing out. The default value is 30 seconds.
6 To receive responses to messages sent from the printer (in case of failed or bounced messages), type the replyaddress.
7 From the Use SSL/TLS list, select Disabled, Negotiate, or Required to specify whether e-mail will be sent using anencrypted link.
8 If your SMTP server requires user credentials, then select an authentication method from the SMTP ServerAuthentication list. The default setting is “No authentication required.”
9 From the Device‑Initiated E‑mail list, select None for no authentication, or Use Device SMTP Credentials ifauthentication is required.
10 From the User‑Initiated E‑mail list, select None for no authentication, or Use Device SMTP Credentials ifauthentication is required.
11 If the device must provide credentials in order to send e-mail, then enter the information appropriate for yournetwork under Device Credentials.
12 Click Submit to save the changes, or Reset Form to restore the default settings.
Managing the security audit log• To view or save a text file of the current syslog, click Export Log.
• To delete the current syslog, click Delete Log.
Updating firmwareAutomated firmware updates can be done simultaneously over a network of devices. For security, the ability to performthis update can be restricted to authorized administrators by using access control.
Managing devices remotely 31

Devices inspect all downloaded firmware packages for a number of required attributes before adopting and executingthe packages. The firmware must be packaged in a proprietary format and encrypted with a symmetric encryptionalgorithm through an embedded key that is known only to Lexmark. However, the strongest security measure comesfrom requiring all firmware packages to include multiple digital 2048-bit RSA signatures from Lexmark. If thesesignatures are not valid, or if the message logs indicate a change in firmware after the signatures were applied, thenthe firmware is discarded.
1 From the Embedded Web Server, click Settings > Update Firmware.
2 Browse to the flash file.
3 Click Submit.
Managing devices remotely 32
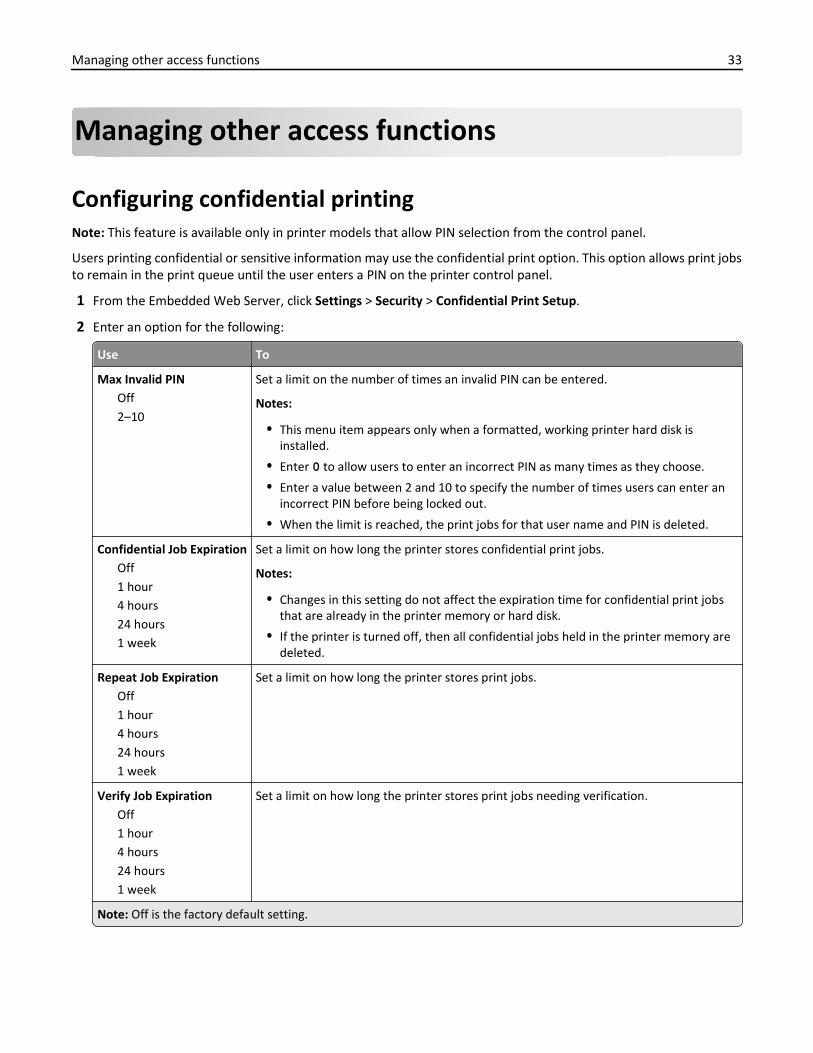
Managing other access functions
Configuring confidential printingNote: This feature is available only in printer models that allow PIN selection from the control panel.
Users printing confidential or sensitive information may use the confidential print option. This option allows print jobsto remain in the print queue until the user enters a PIN on the printer control panel.
1 From the Embedded Web Server, click Settings > Security > Confidential Print Setup.
2 Enter an option for the following:
Use To
Max Invalid PINOff2–10
Set a limit on the number of times an invalid PIN can be entered.
Notes:
• This menu item appears only when a formatted, working printer hard disk isinstalled.
• Enter 0 to allow users to enter an incorrect PIN as many times as they choose.
• Enter a value between 2 and 10 to specify the number of times users can enter anincorrect PIN before being locked out.
• When the limit is reached, the print jobs for that user name and PIN is deleted.
Confidential Job ExpirationOff1 hour4 hours24 hours1 week
Set a limit on how long the printer stores confidential print jobs.
Notes:
• Changes in this setting do not affect the expiration time for confidential print jobsthat are already in the printer memory or hard disk.
• If the printer is turned off, then all confidential jobs held in the printer memory aredeleted.
Repeat Job ExpirationOff1 hour4 hours24 hours1 week
Set a limit on how long the printer stores print jobs.
Verify Job ExpirationOff1 hour4 hours24 hours1 week
Set a limit on how long the printer stores print jobs needing verification.
Note: Off is the factory default setting.
Managing other access functions 33
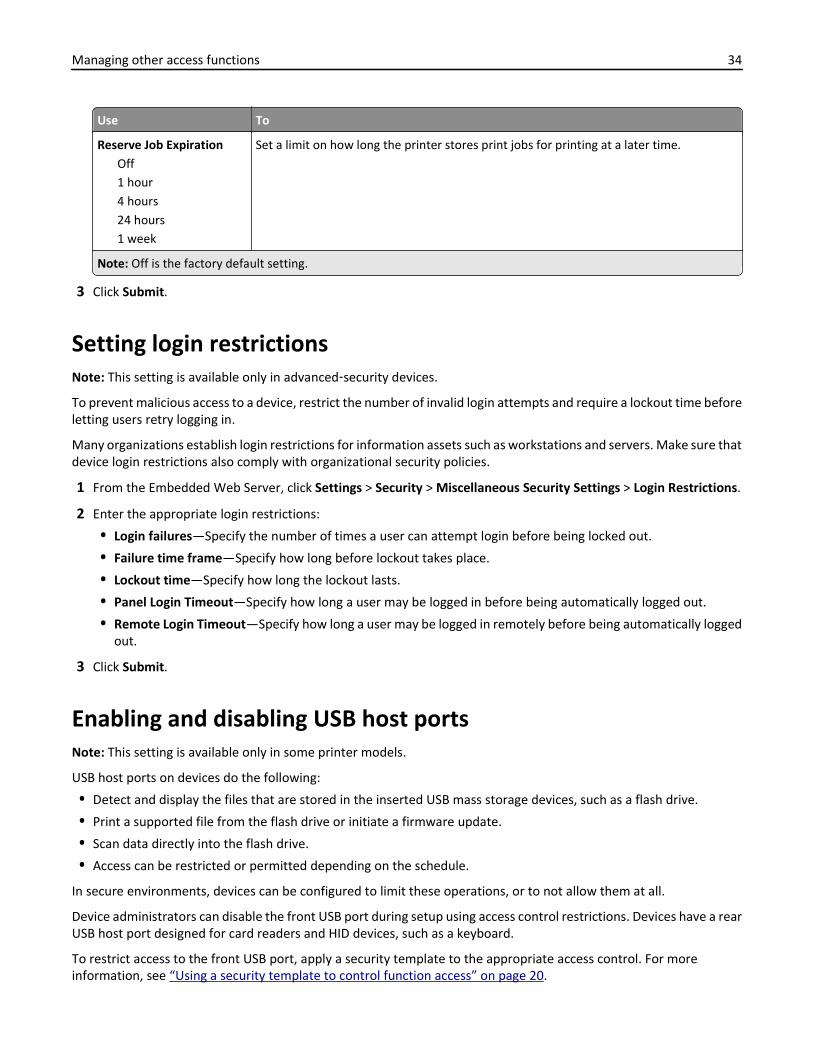
Use To
Reserve Job ExpirationOff1 hour4 hours24 hours1 week
Set a limit on how long the printer stores print jobs for printing at a later time.
Note: Off is the factory default setting.
3 Click Submit.
Setting login restrictionsNote: This setting is available only in advanced‑security devices.
To prevent malicious access to a device, restrict the number of invalid login attempts and require a lockout time beforeletting users retry logging in.
Many organizations establish login restrictions for information assets such as workstations and servers. Make sure thatdevice login restrictions also comply with organizational security policies.
1 From the Embedded Web Server, click Settings > Security > Miscellaneous Security Settings > Login Restrictions.
2 Enter the appropriate login restrictions:
• Login failures—Specify the number of times a user can attempt login before being locked out.
• Failure time frame—Specify how long before lockout takes place.
• Lockout time—Specify how long the lockout lasts.
• Panel Login Timeout—Specify how long a user may be logged in before being automatically logged out.
• Remote Login Timeout—Specify how long a user may be logged in remotely before being automatically loggedout.
3 Click Submit.
Enabling and disabling USB host portsNote: This setting is available only in some printer models.
USB host ports on devices do the following:
• Detect and display the files that are stored in the inserted USB mass storage devices, such as a flash drive.
• Print a supported file from the flash drive or initiate a firmware update.
• Scan data directly into the flash drive.
• Access can be restricted or permitted depending on the schedule.
In secure environments, devices can be configured to limit these operations, or to not allow them at all.
Device administrators can disable the front USB port during setup using access control restrictions. Devices have a rearUSB host port designed for card readers and HID devices, such as a keyboard.
To restrict access to the front USB port, apply a security template to the appropriate access control. For moreinformation, see “Using a security template to control function access” on page 20.
Managing other access functions 34

To set the schedule that restricts access at a specified time, do the following:
1 From the Embedded Web Server, click Settings > Security > Schedule USB Devices.
2 From the Disable Devices menu, select to disable printing from any USB device or from flash drives only.
Note: All scheduled Disable actions are affected by this setting.
3 Click Submit.
4 Enable or disable the use of USB devices on certain days or during certain hours. To create a schedule:
a Select a device action, and then set the time and day for the device to perform the action.
b Add the entry.
Notes:
• Use of USB devices is enabled by default.
• For each Disable schedule entry, create an Enable schedule entry to reactivate use of the USB devices.
Enabling the security reset jumperNote: This feature is available only in some printer models.
If the device is locked down due to a forgotten administrator password or lost network connectivity, then you canrecover the device by resetting it. Access the controller board and move the reset jumper to cover the middle andunexposed prongs.
Using a cable lock to secure access to the controller board ensures that the device is not maliciously reset.
Warning—Potential Damage: Resetting the device deletes all customer data.
Managing other access functions 35
The secure reset feature requires specifying in the Embedded Web Server the effect of using the security resetjumper, which is located on the controller board.
1 From the Embedded Web Server, click Settings > Security > Miscellaneous Security Settings.
2 From the Security Reset Jumper list, select one of the following:
• No Effect—Remove access to all security menus. This option should be used with caution.
• Access controls = “No security”—Remove security only from the function access controls.
• Reset factory security defaults—Restore all security settings to the default values.
3 Click Submit to save the changes, or Reset Form to restore the default settings.
Warning—Potential Damage: If you selected No Effect and the device is locked down, then you cannot access thesecurity menus. To replace the device controller board and regain access to the security menus, a service call isrequired.
Enabling holding faxesUse the Incoming Fax Holding feature to configure MFPs to receive faxes and temporarily store them in the printerhard disk. The held faxes are secured in the hard disk until the designated release time or when valid user credentialsare provided.
1 From the Embedded Web Server, click Settings > Fax Settings > Analog Fax Setup > Holding Faxes.
2 Select the appropriate help fax mode.
• Always On—Always holds the fax jobs.
• Manual—Lets users select if they want to continue storing the fax jobs or not.
• Scheduled—Prints faxes depending on the set fax holding schedule.
3 Click Submit.
Setting the fax holding schedule
1 From the Embedded Web Server, click Settings > Fax Settings > Analog Fax Setup > Holding Faxes > Fax HoldingSchedule.
2 Select a device action, and then set the time and day for the device to perform the action.
3 Add the entry.
Notes:
• Fax printing is enabled by default.
• For each Disable schedule entry, create an Enable schedule entry to reactive fax printing.
Enabling Operator Panel LockUse the Operator Panel Lock feature to lock a device so that the control panel cannot be used for any user operationsor configurations. If the device has a hard disk, incoming print and fax jobs are temporarily stored instead of beingprinted. The device can be unlocked by entering a valid user credential.
Configure this feature by creating an authentication building block, then applying it against the control panel lockfunction access control using the Embedded Web Server. To access the device control panel, provide your credentials.
Managing other access functions 36
Notes:
• This feature requires a hard disk.
• When the device is locked, incoming print and fax jobs are stored in the printer hard disk. If the hard disk isencrypted, then the jobs stored are encrypted.
• When the device is unlocked, jobs received during the locked period are printed. Confidential print jobs receivedduring the lock state are not printed, but are available through the confidential print job menu on the controlpanel.
1 From the Embedded Web Server, click Settings > Security > Security Setup.
2 Under Advanced Security Setup, click Access Controls.
3 Select a template for control panel lock .
4 Click Submit.
Managing other access functions 37

Securing network connections
Configuring 802.1X authenticationThough normally associated with wireless devices and connectivity, 802.1X authentication supports both wired andwireless environments. 802.1X is located within the wireless menu when wireless is enabled on the device.
The following network authentication mechanisms can be included in the 802.1X protocol negotiation:
• EAP‑MD5
• EAP‑TLS
• EAP‑TTLS with the following methods:
– CHAP
– MSCHAP
– MSCHAPv2
– PAP
• EAP_MSCHAPV2
• PEAP
• LEAP
Use To
EAP‑MD5 Require a device login name and password.
EAP‑TLS Require a device login name and password, CA certificate, and signed devicecertificate.
EAP‑TTLS Require a device login name and password, and CA certificate.
PEAP (TLS) Require a device login name and password, CA certificate, and signed devicecertificate.
LEAP Require a device login name and password.
Note: Make sure that all of the devices participating in the 802.1X process support the same EAP authenticationtype.
1 From the Embedded Web Server, click Settings > Security > 802.1x.
2 Under 802.1x Authentication, do the following:
a Select Active to enable 802.1X authentication.
b Type the login name and password the printer uses to log in to the authentication server.
c Select the Validate Server Certificate check box to require verification of the security certificate on theauthenticating server.
Notes:
• If using digital certificates to establish a secure connection to the authentication server, configure thecertificates on the printer before changing 802.1X authentication settings. For more information, see“Managing certificates and other settings” on page 23.
• Server certificate validation is integral to TLS (Transport Layer Security), PEAP (Protected ExtensibleAuthentication Protocol), and TTLS (Tunneled Transport Security Layer).
Securing network connections 38
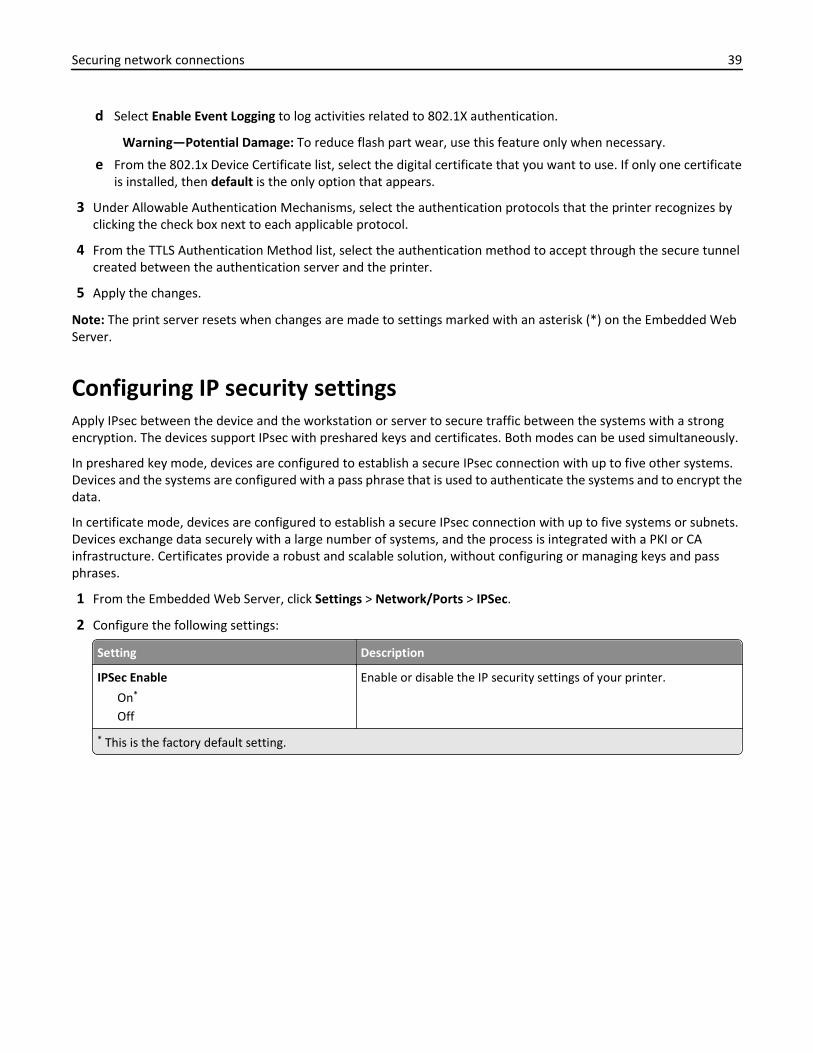
d Select Enable Event Logging to log activities related to 802.1X authentication.
Warning—Potential Damage: To reduce flash part wear, use this feature only when necessary.
e From the 802.1x Device Certificate list, select the digital certificate that you want to use. If only one certificateis installed, then default is the only option that appears.
3 Under Allowable Authentication Mechanisms, select the authentication protocols that the printer recognizes byclicking the check box next to each applicable protocol.
4 From the TTLS Authentication Method list, select the authentication method to accept through the secure tunnelcreated between the authentication server and the printer.
5 Apply the changes.
Note: The print server resets when changes are made to settings marked with an asterisk (*) on the Embedded WebServer.
Configuring IP security settingsApply IPsec between the device and the workstation or server to secure traffic between the systems with a strongencryption. The devices support IPsec with preshared keys and certificates. Both modes can be used simultaneously.
In preshared key mode, devices are configured to establish a secure IPsec connection with up to five other systems.Devices and the systems are configured with a pass phrase that is used to authenticate the systems and to encrypt thedata.
In certificate mode, devices are configured to establish a secure IPsec connection with up to five systems or subnets.Devices exchange data securely with a large number of systems, and the process is integrated with a PKI or CAinfrastructure. Certificates provide a robust and scalable solution, without configuring or managing keys and passphrases.
1 From the Embedded Web Server, click Settings > Network/Ports > IPSec.
2 Configure the following settings:
Setting Description
IPSec Enable
On*
Off
Enable or disable the IP security settings of your printer.
* This is the factory default setting.
Securing network connections 39
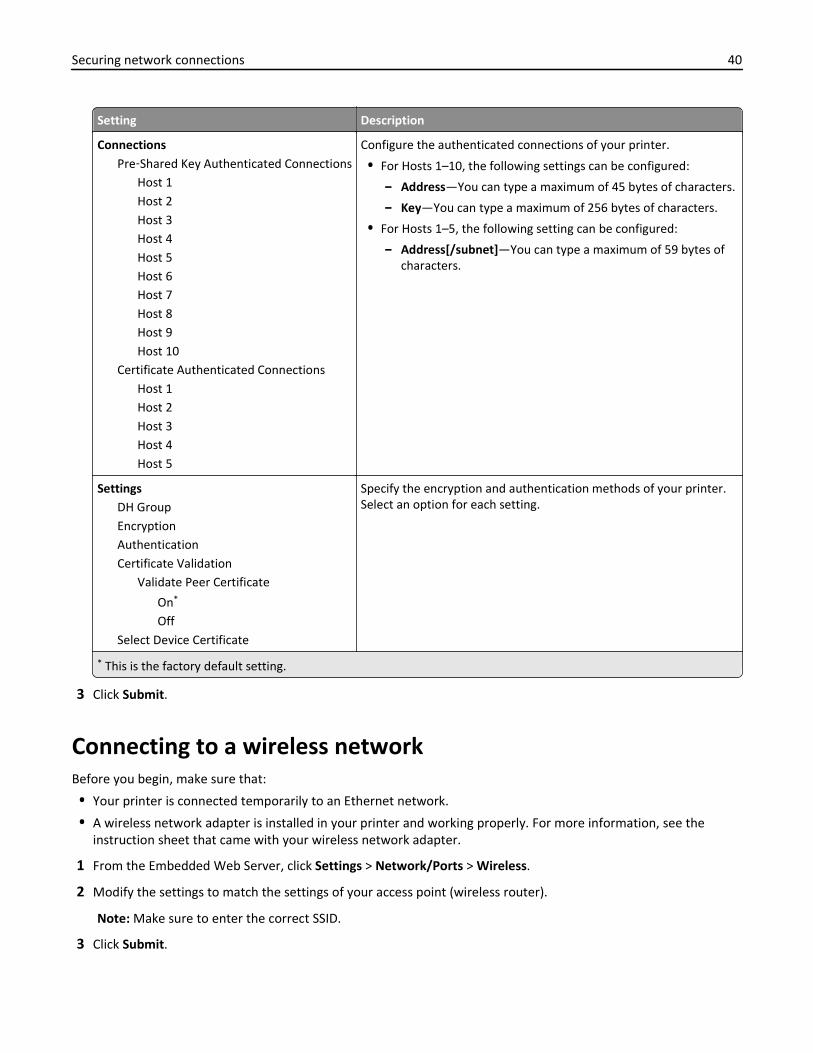
Setting Description
ConnectionsPre‑Shared Key Authenticated Connections
Host 1Host 2Host 3Host 4Host 5Host 6Host 7Host 8Host 9Host 10
Certificate Authenticated ConnectionsHost 1Host 2Host 3Host 4Host 5
Configure the authenticated connections of your printer.
• For Hosts 1–10, the following settings can be configured:
– Address—You can type a maximum of 45 bytes of characters.
– Key—You can type a maximum of 256 bytes of characters.
• For Hosts 1–5, the following setting can be configured:
– Address[/subnet]—You can type a maximum of 59 bytes ofcharacters.
SettingsDH GroupEncryptionAuthenticationCertificate Validation
Validate Peer Certificate
On*
OffSelect Device Certificate
Specify the encryption and authentication methods of your printer.Select an option for each setting.
* This is the factory default setting.
3 Click Submit.
Connecting to a wireless networkBefore you begin, make sure that:
• Your printer is connected temporarily to an Ethernet network.
• A wireless network adapter is installed in your printer and working properly. For more information, see theinstruction sheet that came with your wireless network adapter.
1 From the Embedded Web Server, click Settings > Network/Ports > Wireless.
2 Modify the settings to match the settings of your access point (wireless router).
Note: Make sure to enter the correct SSID.
3 Click Submit.
Securing network connections 40
4 Turn off the printer, and then disconnect the Ethernet cable. Wait for at least five seconds, and then turn the printerback on.
5 Check if your printer is connected to the network. Print a network setup page, and then in the Network Card [x]section, see if the status is “Connected.”
For more information, see the “Verifying printer setup” section of the printer User’s Guide.
Configuring the TCP/IP port access settingYou can control your network device activities by configuring your device to filter out traffic on specific network ports.Protocols (such as FTP, HTTP, and Telnet) can be disabled.
Port filtering on devices disables network ports individually. When a port is closed, a device does not respond to trafficon the specified port whether or not the corresponding network application is enabled. We recommend closing anyports that you do not plan to use under standard operation by clearing them.
This feature lets you set access settings on the different TCP/IP ports of the device.
1 From the Embedded Web Server, click Settings > Security > TCP/IP Port Access.
2 Click the check box of the TCP/IP port to change its access setting.
3 Click Submit.
Setting the restricted server listDevices can be configured to allow connection only from a list of specified TCP/IP addresses. This action blocks all TCPconnections from other addresses, protecting the device against unauthorized printing and configuring.
1 From the Embedded Web Server, click Settings > Network/Ports > TCP/IP.
2 In the Restricted Server List field, type up to 50 IP addresses, separated by commas, that are allowed to make TCPconnections.
3 From the Restricted Server List Options menu, set the blocking option.
4 Click Submit.
Securing network connections 41
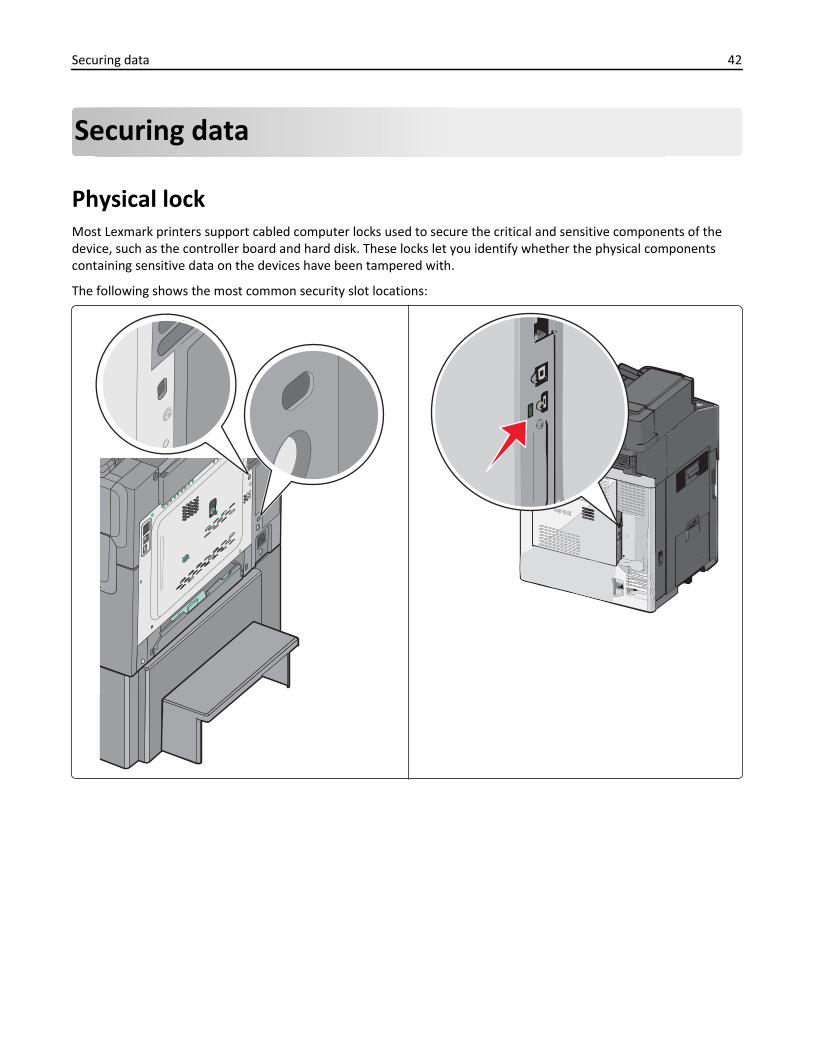
Securing data
Physical lockMost Lexmark printers support cabled computer locks used to secure the critical and sensitive components of thedevice, such as the controller board and hard disk. These locks let you identify whether the physical componentscontaining sensitive data on the devices have been tampered with.
The following shows the most common security slot locations:
Securing data 42
Disk encryptionEnable hard disk encryption to prevent loss of sensitive data if the printer or its hard disk is stolen. When hard diskencryption is activated, the encryption key to be used (256-bit AES symmetric encryption) is pseudo-randomlygenerated. This encryption key is stored in a proprietary way in the NV memory of the device. The hard disk is thenreformatted with the encryption key. Any data on the disk is lost. The key, which is unique to the device, is not storedon the hard disk itself. So if the hard disk is removed from the device, then the contents of the hard disk areindecipherable.
When an encrypted hard disk is moved to another supported device, the hard disk attempts to verify its encryptionkey with the device encryption key. Because the encryption key on the hard disk is different than the device encryptionkey, the verification fails. The device prompts to reformat the hard disk with a new encryption key, replacing the existingencrypted data on the hard disk.
Note: Some printer models may not have a printer hard disk installed.
Using the Embedded Web Server
1 Click Settings > Security > Disk Encryption.
Note: Disk Encryption appears in the Security menu only when a formatted, working hard disk is installed.
2 From the Disk Encryption menu, select either of the following:
• Disable—Disable disk encryption.
• Enable—Enable disk encryption.
Notes:
– Disable is the factory default setting.
– Changing this setting causes the printer to undergo a power‑on reset.
Warning—Potential Damage: Changing the setting for disk encryption will erase the contents of the harddisk.
3 Click Submit to proceed with disk encryption.
Note: Encryption takes approximately two minutes. A status bar appears on the control panel indicating theprogress of the disk encryption task.
Warning—Potential Damage: Do not turn off the printer during the encryption process.
4 From the Web browser, refresh the page to return to the Embedded Web Server.
Using the control panel
1 Turn off the printer.
2 While turning the printer on, press and hold down 2 and 6 simultaneously on the keypad until a progress bar appears.
Note: Some printer models require you to press and hold down the check mark and the right arrow buttons.
The printer performs a power-on reset, and then the Configuration menu appears. When the printer is fully turnedon, a list of functions appears on the printer display.
3 Touch Disk Encryption > Enable > Yes.
Securing data 43
Notes:
• Encryption takes approximately two minutes. A status bar appears on the control panel indicating theprogress of the disk encryption task.
• After the disk has been encrypted, the printer returns to the Enable/Disable screen.
Warning—Potential Damage: Do not turn off the printer during the encryption process. Doing so may result inloss of data.
4 Touch Exit Config Menu or Exit Config.
The printer performs a power‑on reset, and then returns to normal operating mode.
Checking disk encryption status1 From the Embedded Web Server, click Select Reports > Select Device Settings.
2 In the Other Settings section, check the value for Disk Encryption.
Note: You can also check the disk encryption status using Markvision Enterprise. Markvision provides an advancedsearch feature to view the disk encryption status on a fleet of devices.
Erasing settings (non‑volatile memory)Most devices use two forms of non-volatile memory—EEPROM and NAND. These components store the device settings,network information, embedded solution applications, various scanner settings, and bookmark settings. No user-related print, copy, or scan data is stored in non‑volatile memory.
The user may erase selected groups of data or all data. There is one “restore defaults” setting defined in the standardadministrator menu to restore the basic operator settings. This setting is easily accessible but only restores basicsettings. From the configuration menu or the device Embedded Web Server, you can add more options for erasinggroups of settings (printer, settings, or application settings).
The Erase Printer Memory option (also called Wipe All Settings on some devices) erases all contents stored onnon‑volatile memory. Using Wipe All Settings completely clears all device settings, including network and securitysettings. Installed applications and their settings are also removed.
Restoring default settings from the control panel1 Navigate to the menu screen, and then touch Settings > General Settings > Factory Defaults.
2 Select Restore Now >Submit.
Note: This feature does not remove the following settings:
• Network settings or connections
• Paper source settings
• Country selections
• Display language
• Applications settings
• CA certificate data
• Security settings
Securing data 44
Clearing selected settings
Using the Embedded Web Server
Note: This menu is available only in some printer models.
1 Click Settings > Security > Restore Factory Defaults > Restore Settings.
2 Select one of the following settings:
• Printer Settings—Restore all non‑critical base device settings to the factory default. It does not affect networksettings or connections, and display language.
• Network Settings—Reset all network and port settings.
• Apps—Restore the factory default configuration of applications. All non‑factory installed applications areremoved, all application settings are reset, and SE logs are cleared.
3 Click Restore.
Using the control panel
1 Turn off the printer.
2 While the printer is turning on, press and hold 2 and 6 on the keypad simultaneously until a progress bar appears.
Note: Some printer models require you to press and hold the check mark and the right arrow buttons.
The printer performs a power‑on sequence, and then the Configuration menu appears.
3 From the list, select Restore Factory Settings > Restore Settings.
4 Select one of the following settings:
• Restore Printer Settings—Restore all non‑critical base device settings to the factory default. It does not affectnetwork settings or connections, and display language.
• Restore Network Settings—Reset all network and port settings.
• Restore Solutions—Restore the factory default configuration of applications. All non‑factory installedapplications are removed, all application settings are reset, and SE logs are cleared.
Clearing all settingsNote: After all settings are cleared or reset, network connectivity cannot be retained because the device is in theout-of-box shipping state. You are prompted to restart the device for transport. There is no network connectivityuntil the device is restarted to ensure that the original ship configuration is maintained.
Using the Embedded Web Server
Note: This menu is available only in some printer models.
1 Click Settings > Security > Restore Factory Defaults > Erase Printer Memory.
2 Select the check box to confirm, and then click Erase.
Securing data 45

Using the control panel
1 Turn off the printer.
2 While the printer is turning on, press and hold 2 and 6 on the keypad simultaneously until a progress bar appears.
Note: Some printer models require you to press and hold the check mark and the right arrow buttons.
The printer performs a power‑on sequence, and then the Configuration menu appears.
3 From the list, select Restore Factory Defaults > Erase Printer Memory.
While clearing the settings, the "Restoring Factory Defaults" message appears on the display, and then the devicereboots to the initial setup wizard screen. Turn off the device to restore factory settings completely.
This feature erases all device settings stored in NVRAM, including network, security, and application settings, and allpending jobs. Installed applications and settings are also removed. If there is no hard disk installed, then pending faxdata are also removed.
Securing data 46
Disk file wipingThe file-based disk wipe sanitizes the portion of the hard disk where data was stored after a job has been processedto remove any residual data.
Some devices uses hard disks to temporarily buffer scan, fax, print, and copy data that exceed the amount of RAMinstalled on the device. Buffered data can be deleted from the hard disk immediately after an original scan, fax, printor copy job is complete. Additionally, devices can temporarily hold print jobs on a hard disk if you use the ConfidentialPrint and Print and Hold features or when held fax jobs are received and sent. This data remains on the hard disk untilyou print or delete the job, or until the document expires through the job expiration feature.
When a data file is deleted from a hard disk, the data that is associated with that file is not actually deleted. This dataremains on the hard disk and can be recovered with substantial effort. All printer models with a hard disk support anadditional mechanism for protecting residual data, which is hard disk file wiping.
Hard disk file wiping actively overwrites any job data files that are deleted. You have a choice of single or multiple passesto overwrite data, which removes all data residue from the deleted file.
All permanent data on the hard disk is preserved, such as downloaded fonts, macros and held jobs. The multiple passwiping process adheres to NIST and DOD (DOD 5220.22-M) guidelines for overwriting confidential data.
Erasing temporary data files from the hard diskOn devices that contain a hard disk, use the Erase Temporary Data Files option to remove residual confidential materialand free up memory space. This setting securely uses random data patterns to overwrite files stored on the hard drivethat have been marked for deletion. Overwriting can be accomplished with a single pass for a quick wipe, or withmultiple passes for greater security.
Note: If there is no hard disk installed on your device, then Erase Temporary Data Files is not available in the mainSecurity menu.
Using the Embedded Web Server
1 Click Settings > Security > Erase Temporary Data Files.
Note: Wiping Mode can only be set to Auto. This setting automatically wipes the files that are no longerrequired for printing.
2 Modify the following settings:
• Single Pass—Overwrite the printer hard disk in a single pass with a repeating bit pattern. This setting is thefactory default.
• Multi‑pass—Overwrite the printer hard disk with random bit patterns several times, followed by a verificationpass. A secure overwrite is compliant with the DoD 5220.22M standard for securely erasing data from a harddisk. Use this method to wipe highly confidential information.
3 Click Submit.
Using the control panel
1 Navigate to the menu screen, and then touch Security > Disk Wiping.
2 Select Single Pass or Multi‑pass.
3 Apply the changes.
Securing data 47
Erasing hard disk dataCompletely erase the hard disk data to wipe it clean when doing any of the following:
• Decommissioning the device
• Replacing the hard disk
• Moving the device to a different department or location
• Preparing the device to be serviced by someone outside the organization
• Removing the device from the premises of service
Warning—Potential Damage: This action deletes all the contents of a hard disk, including font data, forms data,macros, and any buffered fax, Confidential Print, or Print and Hold data.
Access the Erase Hard Disk option from the Configuration menu or from the Embedded Web Server.
Using the Embedded Web Server
1 Click Settings > Security > Restore Factory Defaults > Erase Hard Disk.
2 Select the check box to confirm.
3 Select either of the following:
• Single Pass Erase—Overwrite the hard disk in a single pass.
• Multiple Pass Erase—Overwrite the hard disk with random bit patterns several times, followed by a verificationpass. A secure overwrite is compliant with the DoD 5220.22‑M standard for securely erasing data from a harddisk. Use this method when wiping highly confidential information.
4 Click Submit.
Using the control panel
1 Turn off the printer.
2 While turning on the printer, press and hold the 2 and 6 on the keypad simultaneously until a progress bar appears.It takes approximately a minute before the Configuration menu appears.
Note: Some printer models require you to press and hold the check mark and the right arrow buttons.
3 From the list, select Reset Factory Defaults > Erase Hard Disk or Erase All Information on Disk depending on yourprinter model.
4 Select Single Pass Erase or Multiple Pass Erase.
Note: Do not turn off the printer while erasing hard disk data. This process may take several hours to complete.
Securing data 48

Out‑of‑service wipingThis menu lets you clear all settings, applications, and pending job or fax data stored in the device, erase all contentson the hard disk, or both. Doing both restores the device to the original factory default settings, which includes networksettings.
Out‑of‑service wiping allows users to erase the printer memory and completely wipe the hard disk in one process.When removing a device from a secure environment, we recommend performing this to make sure that no customerdata remains.
Using the Embedded Web Server
1 Click Settings > Security.
Note: Depending on your printer model, click Restore Factory Defaults.
2 Depending on your printer firmware version, click Out of Service Erase or Out of Service Wiping, and then selectone or more of the following:
• Erase Printer Memory—Erase all settings, applications, and job data.
• Erase Hard Disk—Erase all the contents of the hard disk.
• Perform Disk Wipe—Clear all job data.
• Clear Settings and Solutions—Clear all settings and applications.
Note: In some printer models, the Out of Service Wiping setting is visible only if security is enabled. Make surethat the access control for the security menus are set to use any security template other than No Security.
3 If you selected either Erase Hard Disk or Perform Disk Wipe, select either of the following:
• Single Pass Erase—Erase the content on the printer hard disk in a single pass with a repeating bit pattern.
• Multiple Pass Erase—Erase the content on the printer hard disk with random bit patterns several times, followedby a verification pass. A secure erase is compliant with the DoD 5220.22‑M standard for securely erasing datafrom a hard disk. Highly confidential information should be erased using this method.
4 Confirm your selection.
5 Apply the changes.
Warning—Potential Damage: Do not turn off the printer while erasing data. This process may take several hours tocomplete.
Using the control panel
This menu is available only in some firmware versions.
1 Turn off the printer.
2 While turning on the printer, press and hold 2 and 6 on the keypad simultaneously until a progress bar appears.
Note: Some printer models require you to press and hold the check mark and the right arrow buttons.
The printer performs a power-on reset, and then the Configuration menu appears.
3 From the list, select Reset Factory Defaults > Out of Service Erase.
Securing data 49

4 Select one of the following:
• Erase Memory—Erase all settings, applications, and job data.
• Erase Memory and Hard Disk (Single Pass)—Erase all settings, applications, and job data (including all thecontents of the hard disk) in a single pass with a repeating bit pattern.
• Erase Memory and Hard Disk (Multiple Pass)—Erase all settings, applications, and job data (including allcontents of the hard disk) with random bit patterns several times, followed by a verification pass. A secure eraseis compliant with the DoD 5220.22‑M standard for securely erasing data from a hard disk. Highly confidentialinformation should be erased using this method.
5 Follow the instructions on the printer display.
Warning—Potential Damage: Do not turn off the printer while erasing data. This process may take several hours tocomplete.
Statement of volatilityYour printer contains various types of memory that are capable of storing device and network settings, informationfrom embedded solutions, and user data. The types of memory—along with the types of data stored by each—aredescribed as follows:
• Volatile memory—Your device utilizes standard random access memory (RAM) to temporarily buffer user dataduring simple print and copy jobs.
• Non‑volatile memory—Your device may utilize two forms of non-volatile memory: EEPROM and NAND (flashmemory). Both types are used to store the operating system, device settings, network information, scanner andbookmark settings, and embedded solutions.
• Hard disk memory—Some devices have a hard disk drive installed. The printer hard disk is designed fordevice‑specific functionality and cannot be used for long term storage for data that is not print‑related. The harddisk does not provide the capability for users to extract information, create folders, create disk or network fileshares, or FTP information directly from a client device. The hard disk can retain buffered user data from complexscan, print, copy, and fax jobs, as well as form data, and font data.
You may want to erase the contents of the memory devices installed in your printer when:
• The printer is being decommissioned.
• The printer hard drive is being replaced.
• The printer is being moved to a different department or location.
• The printer is being serviced by someone from outside your organization.
• The printer is being removed from your premises for service.
Disposing of a hard diskNote: Some printer models may not have a hard disk installed.
High‑security environments may require additional steps to ensure that confidential data on the printer or hard diskcannot be accessed when either is removed from premises.
• Degaussing—Flushes the hard drive with a magnetic field that erases stored data
• Crushing—Physically compresses the hard disk to break component parts and render them unreadable
• Milling—Physically shreds the hard disk into small metal bits
Securing data 50
Note: Most data can be erased electronically, but to guarantee that all data is completely erased, physically destroyeach hard disk where data is stored.
Erasing volatile memoryThe volatile memory (RAM) installed on your printer requires a power source to retain information. To erase thebuffered data, simply turn off the device.
Erasing non‑volatile memoryThere are several methods for erasing data stored in non‑volatile memory, depending on the type of memory deviceinstalled and the type of data stored.
• Individual settings—Erase individual printer settings using the control panel or the Embedded Web Server. Formore information, see the printer User’s Guide.
• Device and network settings—Erase device and network settings, and restore factory defaults by resetting theNVRAM from the configuration menu. You can also use the Restore Factory Defaults setting from the EmbeddedWeb Server.
• Security settings—Restore factory defaults or erase security settings by selecting an action for the Security ResetJumper setting in the Embedded Web Server. Then move the hardware jumper on the controller board.
• Fax data—If no hard disk is installed, or fax storage uses NAND, then erase fax settings and data by resetting theNVRAM from the configuration menu. You can also use the Restore Factory Defaults setting from the EmbeddedWeb Server.
Note: If your printer has a hard disk that has been partitioned for fax storage, then reformat that partition toerase fax data and settings.
• Embedded solutions—Erase information and settings associated with embedded solutions by uninstalling thesolution, or by restoring factory defaults from the configuration menu. You can also use the Restore Factory Defaultssetting from the Embedded Web Server.
Securing data 51
Security solutionsLexmark products support installable solutions that are developed to utilize the embedded Solutions Framework (eSF)and cloud Solutions Framework (cSF) platforms in the device. These solutions extend the basic capabilities of the device,often enhancing the security of the device or the customer environment. Some device models come with selectedsolutions pre-installed such as Common Criteria configured models.
Print ReleaseThis solution consists of an externally hosted document management application and a device‑resident applicationproviding the local user interface for selecting and releasing print jobs. All documents are held in a print queue untiltheir owners release them. The queue can be hosted on-premise or in the cloud, which offers more features andbenefits. To release your documents, enter your credentials at the device, and then select the documents you want toprint.
For more information on how to configure and use the application, see the documentation that came with the LexmarkPrint Management application.
Secure Held Print JobsThis application prevents accidental exposure of sensitive or confidential business information by holding jobs at theprinter until an authorized user releases the job for printing. On devices containing a hard disk, you can send and storejobs on the printer and release them using a badge or a four-digit PIN.
To clear all DRAM memory used to store job data after a job is completed, enable Clear Print Data under AdvancedSettings.
For more information on how to configure and use the application, see Secure Held Print Jobs Administrator’s Guide.
Card AuthenticationLexmark devices support a number of different contactless card solutions (applications) for basic badge authenticationwhere your identity is linked to your ID badge. The application verifies the badge ID and retrieves your user informationso that it can be used for accessing held print jobs. It can also be used for identifying the source of scanned documentsor identifying you for other identification purposes.
The application is designed to work with a card reader driver application. The card reader driver provides card ID datato other solutions that manage workflows, or access to device functions. The background and idle screen controlapplication is also included to restrict control of the operator panel primary menus.
For more information on how to configure and use the application, see Card Authentication Administrator’s Guide.
Smart Card authenticationThe Common Access Card (CAC) and Personal Identity Verification (PIV) authentication solution extends the cardauthentication applications to provide safe workflow processes throughout federal government operations. Thesolution provides more control over the security of networked Lexmark MFPs. The same solution also supports SIPRtoken cards (using a different card interface application) to provide access over the Secret Internet Protocol RouterNetwork.
Security solutions 52

For more information on how to configure and use this application, see Smart Card Authentication Administrator’sGuide.
Security solutions 53
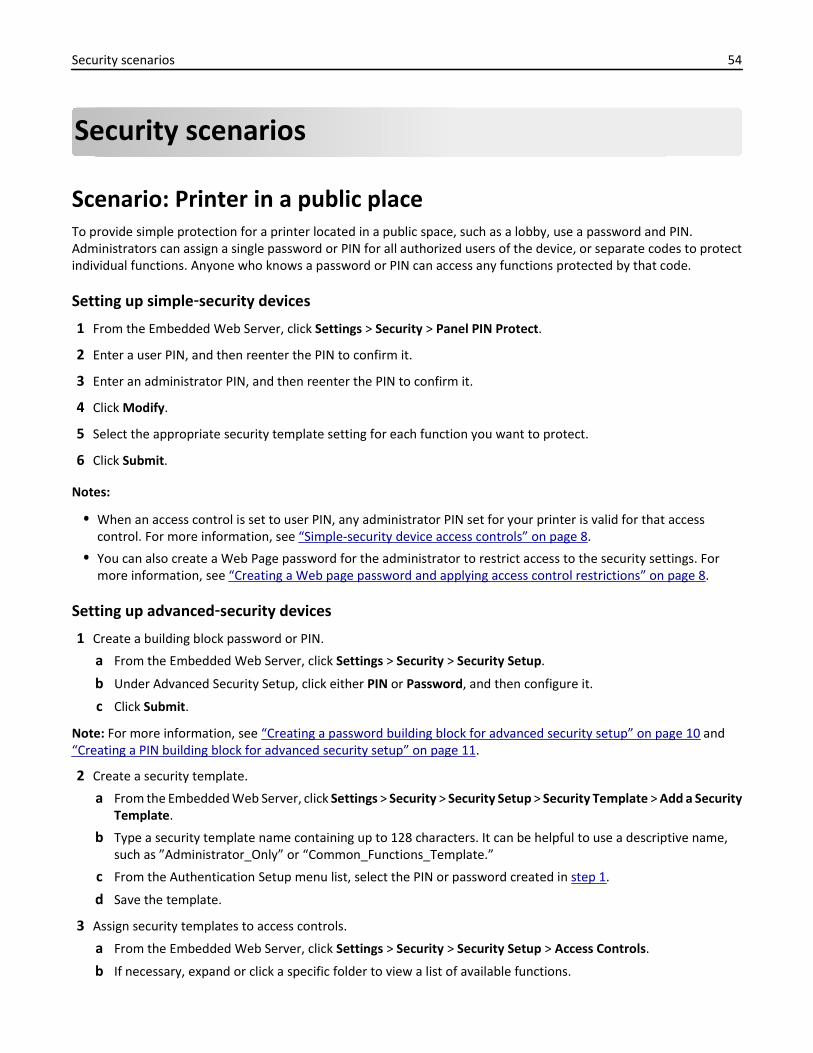
Security scenarios
Scenario: Printer in a public placeTo provide simple protection for a printer located in a public space, such as a lobby, use a password and PIN.Administrators can assign a single password or PIN for all authorized users of the device, or separate codes to protectindividual functions. Anyone who knows a password or PIN can access any functions protected by that code.
Setting up simple‑security devices
1 From the Embedded Web Server, click Settings > Security > Panel PIN Protect.
2 Enter a user PIN, and then reenter the PIN to confirm it.
3 Enter an administrator PIN, and then reenter the PIN to confirm it.
4 Click Modify.
5 Select the appropriate security template setting for each function you want to protect.
6 Click Submit.
Notes:
• When an access control is set to user PIN, any administrator PIN set for your printer is valid for that accesscontrol. For more information, see “Simple-security device access controls” on page 8.
• You can also create a Web Page password for the administrator to restrict access to the security settings. Formore information, see “Creating a Web page password and applying access control restrictions” on page 8.
Setting up advanced‑security devices
1 Create a building block password or PIN.
a From the Embedded Web Server, click Settings > Security > Security Setup.
b Under Advanced Security Setup, click either PIN or Password, and then configure it.
c Click Submit.
Note: For more information, see “Creating a password building block for advanced security setup” on page 10 and“Creating a PIN building block for advanced security setup” on page 11.
2 Create a security template.
a From the Embedded Web Server, click Settings > Security > Security Setup > Security Template > Add a SecurityTemplate.
b Type a security template name containing up to 128 characters. It can be helpful to use a descriptive name,such as ”Administrator_Only” or “Common_Functions_Template.”
c From the Authentication Setup menu list, select the PIN or password created in step 1.
d Save the template.
3 Assign security templates to access controls.
a From the Embedded Web Server, click Settings > Security > Security Setup > Access Controls.
b If necessary, expand or click a specific folder to view a list of available functions.
Security scenarios 54
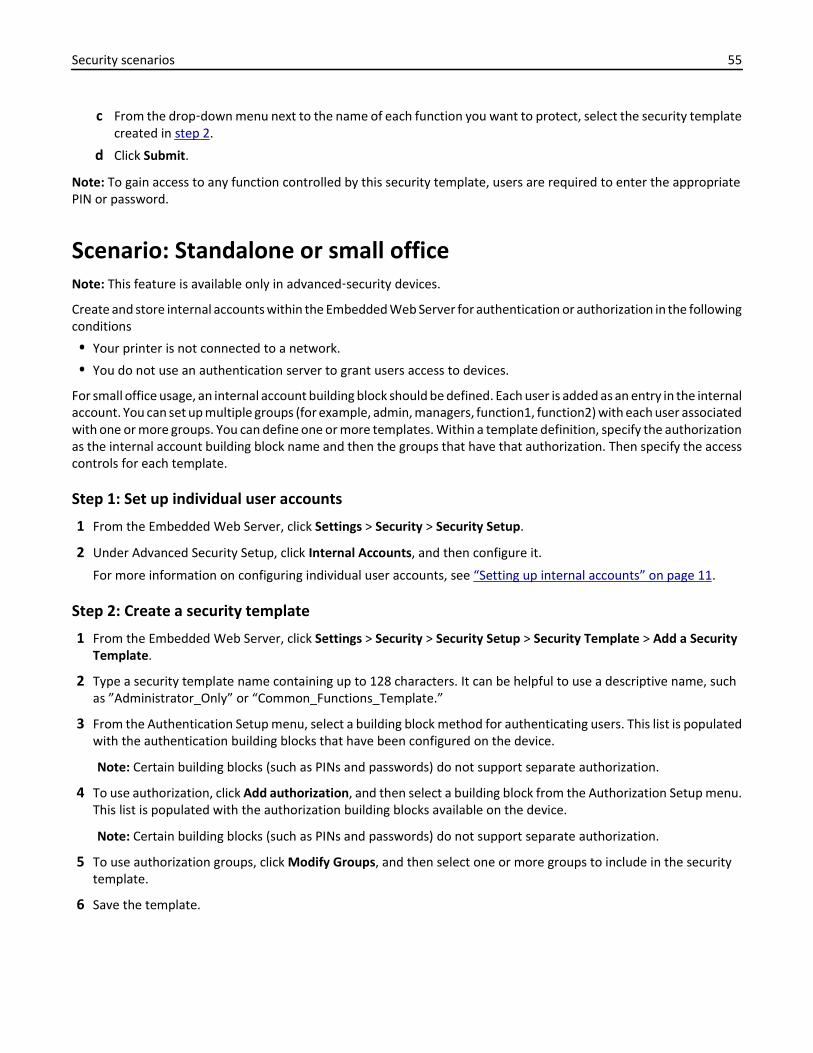
c From the drop‑down menu next to the name of each function you want to protect, select the security templatecreated in step 2.
d Click Submit.
Note: To gain access to any function controlled by this security template, users are required to enter the appropriatePIN or password.
Scenario: Standalone or small officeNote: This feature is available only in advanced‑security devices.
Create and store internal accounts within the Embedded Web Server for authentication or authorization in the followingconditions
• Your printer is not connected to a network.
• You do not use an authentication server to grant users access to devices.
For small office usage, an internal account building block should be defined. Each user is added as an entry in the internalaccount. You can set up multiple groups (for example, admin, managers, function1, function2) with each user associatedwith one or more groups. You can define one or more templates. Within a template definition, specify the authorizationas the internal account building block name and then the groups that have that authorization. Then specify the accesscontrols for each template.
Step 1: Set up individual user accounts
1 From the Embedded Web Server, click Settings > Security > Security Setup.
2 Under Advanced Security Setup, click Internal Accounts, and then configure it.
For more information on configuring individual user accounts, see “Setting up internal accounts” on page 11.
Step 2: Create a security template
1 From the Embedded Web Server, click Settings > Security > Security Setup > Security Template > Add a SecurityTemplate.
2 Type a security template name containing up to 128 characters. It can be helpful to use a descriptive name, suchas ”Administrator_Only” or “Common_Functions_Template.”
3 From the Authentication Setup menu, select a building block method for authenticating users. This list is populatedwith the authentication building blocks that have been configured on the device.
Note: Certain building blocks (such as PINs and passwords) do not support separate authorization.
4 To use authorization, click Add authorization, and then select a building block from the Authorization Setup menu.This list is populated with the authorization building blocks available on the device.
Note: Certain building blocks (such as PINs and passwords) do not support separate authorization.
5 To use authorization groups, click Modify Groups, and then select one or more groups to include in the securitytemplate.
6 Save the template.
Security scenarios 55
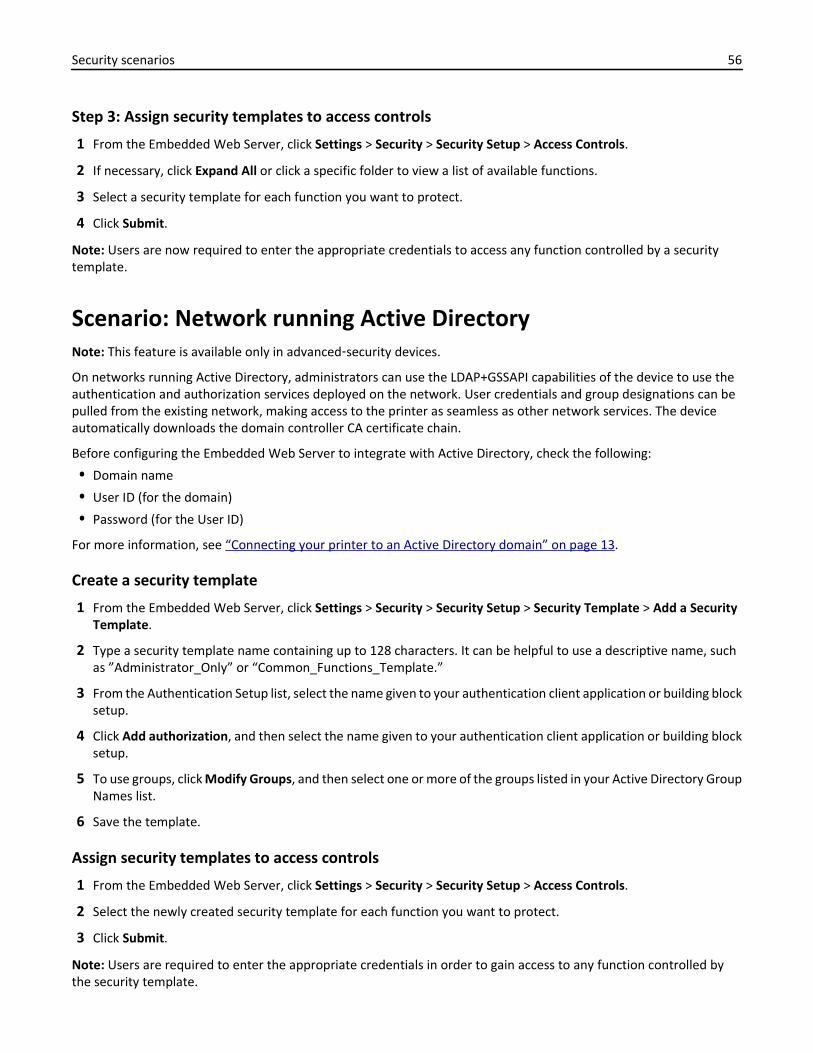
Step 3: Assign security templates to access controls
1 From the Embedded Web Server, click Settings > Security > Security Setup > Access Controls.
2 If necessary, click Expand All or click a specific folder to view a list of available functions.
3 Select a security template for each function you want to protect.
4 Click Submit.
Note: Users are now required to enter the appropriate credentials to access any function controlled by a securitytemplate.
Scenario: Network running Active DirectoryNote: This feature is available only in advanced‑security devices.
On networks running Active Directory, administrators can use the LDAP+GSSAPI capabilities of the device to use theauthentication and authorization services deployed on the network. User credentials and group designations can bepulled from the existing network, making access to the printer as seamless as other network services. The deviceautomatically downloads the domain controller CA certificate chain.
Before configuring the Embedded Web Server to integrate with Active Directory, check the following:
• Domain name
• User ID (for the domain)
• Password (for the User ID)
For more information, see “Connecting your printer to an Active Directory domain” on page 13.
Create a security template
1 From the Embedded Web Server, click Settings > Security > Security Setup > Security Template > Add a SecurityTemplate.
2 Type a security template name containing up to 128 characters. It can be helpful to use a descriptive name, suchas ”Administrator_Only” or “Common_Functions_Template.”
3 From the Authentication Setup list, select the name given to your authentication client application or building blocksetup.
4 Click Add authorization, and then select the name given to your authentication client application or building blocksetup.
5 To use groups, click Modify Groups, and then select one or more of the groups listed in your Active Directory GroupNames list.
6 Save the template.
Assign security templates to access controls
1 From the Embedded Web Server, click Settings > Security > Security Setup > Access Controls.
2 Select the newly created security template for each function you want to protect.
3 Click Submit.
Note: Users are required to enter the appropriate credentials in order to gain access to any function controlled bythe security template.
Security scenarios 56
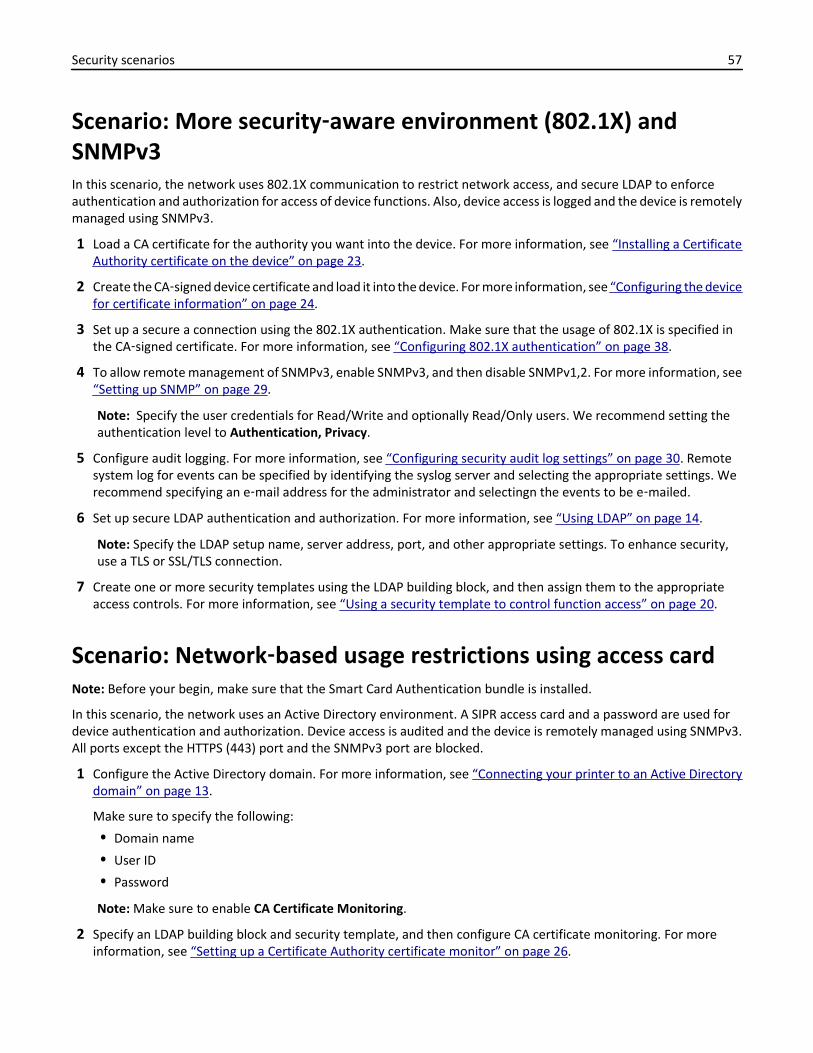
Scenario: More security‑aware environment (802.1X) andSNMPv3In this scenario, the network uses 802.1X communication to restrict network access, and secure LDAP to enforceauthentication and authorization for access of device functions. Also, device access is logged and the device is remotelymanaged using SNMPv3.
1 Load a CA certificate for the authority you want into the device. For more information, see “Installing a CertificateAuthority certificate on the device” on page 23.
2 Create the CA‑signed device certificate and load it into the device. For more information, see “Configuring the devicefor certificate information” on page 24.
3 Set up a secure a connection using the 802.1X authentication. Make sure that the usage of 802.1X is specified inthe CA‑signed certificate. For more information, see “Configuring 802.1X authentication” on page 38.
4 To allow remote management of SNMPv3, enable SNMPv3, and then disable SNMPv1,2. For more information, see“Setting up SNMP” on page 29.
Note: Specify the user credentials for Read/Write and optionally Read/Only users. We recommend setting theauthentication level to Authentication, Privacy.
5 Configure audit logging. For more information, see “Configuring security audit log settings” on page 30. Remotesystem log for events can be specified by identifying the syslog server and selecting the appropriate settings. Werecommend specifying an e‑mail address for the administrator and selectingn the events to be e‑mailed.
6 Set up secure LDAP authentication and authorization. For more information, see “Using LDAP” on page 14.
Note: Specify the LDAP setup name, server address, port, and other appropriate settings. To enhance security,use a TLS or SSL/TLS connection.
7 Create one or more security templates using the LDAP building block, and then assign them to the appropriateaccess controls. For more information, see “Using a security template to control function access” on page 20.
Scenario: Network‑based usage restrictions using access cardNote: Before your begin, make sure that the Smart Card Authentication bundle is installed.
In this scenario, the network uses an Active Directory environment. A SIPR access card and a password are used fordevice authentication and authorization. Device access is audited and the device is remotely managed using SNMPv3.All ports except the HTTPS (443) port and the SNMPv3 port are blocked.
1 Configure the Active Directory domain. For more information, see “Connecting your printer to an Active Directorydomain” on page 13.
Make sure to specify the following:
• Domain name
• User ID
• Password
Note: Make sure to enable CA Certificate Monitoring.
2 Specify an LDAP building block and security template, and then configure CA certificate monitoring. For moreinformation, see “Setting up a Certificate Authority certificate monitor” on page 26.
Security scenarios 57
3 Configure the Smart Card Authentication bundle. For more information, see Smart Card AuthenticationAdministrator’s Guide.
Note: To secure access to all applications and printer functions on the home screen, configure Background andIdle Screen. For more information, see Background and Idle Screen Administrator’s Guide.
4 To secure a network, restrict all network connections that are not used. For more information, see “Configuringthe TCP/IP port access setting” on page 41.
5 To allow remote management of SNMPv3, enable SNMPv3, and then disable SNMPv1,2. For more information, see“Setting up SNMP” on page 29.
Note: Specify the user credentials for Read/Write and optionally Read/Only users. It is recommended thatauthentication level is set to Authentication, Privacy.
6 Configure the audit logging. For more information, see “Configuring security audit log settings” on page 30. Youcan specify a remote system log for events by identifying the syslog server and selecting the appropriate settings.We recommend specifying an e‑mail address for the administrator and selecting the events to be e‑mailed.
7 Create one or more security templates using the LDAP building block, and then assign them to the appropriateaccess controls. For more information, see “Using a security template to control function access” on page 20.
Security scenarios 58

Troubleshooting
Login troubleshooting
USB device is not supported
MAKE SURE THAT A SUPPORTED SMART CARD READER IS ATTACHED
Remove the unsupported reader and attach a valid reader. For information on the supported readers, contact yourLexmark representative.
Printer home screen fails to return to a locked state when not in useTry one or more of the following:
MAKE SURE THAT THE AUTHENTICATION TOKEN IS INSTALLED AND RUNNING
1 From the Embedded Web Server, click Settings > Apps > Apps Management.
2 Make sure that the authentication token appears in the list of installed solutions and that it is in a “Running”state.
• If the authentication token is installed but is not running, then select the check box next to the applicationname, and then click Start.
• If the authentication token does not appear in the list of installed solutions, then contact the Solutions HelpDesk for assistance.
MAKE SURE THAT SMART CARD AUTHENTICATION IS INSTALLED AND RUNNING
1 From the Embedded Web Server, click Settings > Apps > Apps Management.
2 Make sure that the Smart Card Authentication solution appears in the list of installed solutions and that it is in a
"Running" state
• If Smart Card Authentication is installed but is not running, then select the application name, and then clickStart.
• If the authentication token does not appear in the list of installed solutions, then contact the Solutions HelpDesk for assistance.
Login screen does not appear when a smart card is inserted
MAKE SURE THAT THE SMART CARD IS RECOGNIZED BY THE READER
Contact the Solutions Help Desk for assistance.
Troubleshooting 59

KDC and MFP clocks are out of syncThis error indicates that the printer clock is more than five minutes out of sync with the domain controller clock.
MAKE SURE THAT THE DATE AND TIME SETTINGS ON THE PRINTER ARE CORRECT
1 From the Embedded Web Server, click Settings > Security > Set Date and Time.
2 If you have manually configured date and time settings, then adjust the settings if necessary. Make sure that thetime zone and daylight saving time settings are correct.
Note: If your network uses DHCP, then make sure that NTP settings are not automatically provided by the DHCPserver before manually configuring NTP settings.
3 If the printer uses an NTP server, then make sure that those settings are correct and that the NTP server isfunctioning correctly.
4 Apply the changes.
Kerberos configuration file is not uploadedThis error occurs when Smart Card Authentication is configured to use the Device Kerberos Setup, but no Kerberos filehas been uploaded.
MAKE SURE THAT THE KERBEROS FILE HAS BEEN UPLOADED
1 From the Embedded Web Server, click Settings > Apps > Apps Management > Smart Card Authentication >Configure.
2 If you are using Simple Kerberos Setup, then clear the Use Device Kerberos Setup check box, and then apply thechanges.
3 If you are using a Kerberos configuration file, then do the following:
a From the Embedded Web Server, click Settings > Security > Security Setup > Kerberos 5.
b Under Import Kerberos File, browse to the krb5.conf file, and then click Submit.
Unable to authenticate users
MAKE SURE THAT THE REALM SPECIFIED IN THE KERBEROS SETTINGS IS IN UPPERCASE
1 From the Embedded Web Server, click Settings > Apps > Apps Management > Smart Card Authentication >Configure.
2 For Simple Kerberos Setup, make sure that the Realm is correct and typed in uppercase.
3 If you are using krb5.conf file, then make sure that the Realm entries in the configuration file are in uppercase.
Troubleshooting 60
Domain controller certificate is not installed
MAKE SURE THAT THE CORRECT CERTIFICATE IS INSTALLED ON THE PRINTER
For information on installing, viewing, or modifying certificates, see “Installing a Certificate Authority certificate onthe device” on page 23.
KDC did not respond within the required timeTry one or more of the following:
MAKE SURE THAT THE IP ADDRESS OR HOST NAME OF THE KDC IS CORRECT
1 From the Embedded Web Server, click Settings > Apps > Apps Management > Smart Card Authentication >Configure.
2 For Simple Kerberos Setup, make sure that the IP address or host name specified for the Domain Controller iscorrect, and then apply the changes.
3 If you are using a krb5.conf file, then make sure that the IP address or host name specified for the DomainController is correct.
MAKE SURE THAT THE KDC IS AVAILABLE
You can specify multiple KDCs in the Smart Card Authentication settings or in the krb5.conf file.
MAKE SURE THAT PORT 88 IS NOT BLOCKED BY A FIREWALL
Port 88 must be opened between the printer and the KDC for authentication to work.
User realm not found in the Kerberos configuration file
MAKE SURE THAT THE WINDOWS DOMAIN IS SPECIFIED IN THE KERBEROS SETTINGS
1 From the Embedded Web Server, click Settings > Apps > Apps Management > Smart Card Authentication >Configure.
2 Under Simple Kerberos Setup, add the Windows Domain in lowercase to the Domain setting.
For example, if the Domain setting is mil,.mil and the Windows Domain is x.y.z, then change the Domainsetting to mil,.mil,x.y.z.
3 If you are using a krb5.conf file, then add an entry to the domain_realm section. Map the lowercase WindowsDomain to the uppercase realm (similar to the existing mapping for the “mil” domain).
Troubleshooting 61
Cannot find realm on card in the Kerberos configuration fileThis error occurs during smart card login.
UPLOAD A KERBEROS CONFIGURATION FILE AND MAKE SURE THAT THE REALM HAS BEEN ADDED TO THE FILE
The Smart Card Authentication settings do not support multiple Kerberos Realm entries. If multiple realms areneeded, then create and upload a krbf5.conf file containing the needed realms. If you are already using a Kerberosconfiguration file, then make sure that the missing realm is added to the file correctly.
Client is unknownThis error indicates that the KDC being used to authenticate the user does not recognize the User Principal Namespecified in the error message.
MAKE SURE THAT THE DOMAIN CONTROLLER INFORMATION IS CORRECT
1 From the Embedded Web Server, click Settings > Apps > Apps Management > Smart Card Authentication >Configure.
2 For Simple Kerberos Setup, make sure that the IP address or host name of the Domain Controller is correct.
3 If you are using a Kerberos configuration file, then make sure that the Domain Controller entry is correct.
Login does not respond at “Getting User Info”For information on LDAP‑related issues, see“LDAP troubleshooting” on page 62.
User is logged out automatically
INCREASE THE PANEL LOGIN TIMEOUT INTERVAL
1 From the Embedded Web Server, click Settings > Security > Miscellaneous Security Settings > Login Restrictions.
2 Increase the time (in seconds) of the Panel Login Timeout setting.
3 Apply the changes.
LDAP troubleshooting
LDAP lookups take a long time and then failThis issue can occur during login (at “Getting User Info”) or during address book searches. Try one or more of thefollowing:
MAKE SURE THAT PORT 389 (NON‑SSL) AND PORT 636 (SSL) ARE NOT BLOCKED BY A FIREWALL
The printer uses these ports to communicate with the LDAP server. The ports must be open for LDAP lookups towork.
Troubleshooting 62
MAKE SURE THAT THE LDAP SEARCH BASE IS NOT TOO BROAD IN SCOPE
Narrow the LDAP search base to the lowest possible scope that will include all necessary users.
LDAP lookups fail almost immediatelyTry one or more of the following:
MAKE SURE THAT THE ADDRESS BOOK SETUP CONTAINS THE HOST NAME FOR THE LDAP SERVER
1 From the Embedded Web Server, click Settings > Network/Ports > Address Book Setup.
2 Make sure that the host name (not the IP address) of the LDAP server specified in the Server Address field iscorrect.
3 Apply the changes.
MAKE SURE THAT THE ADDRESS BOOK SETUP SETTINGS ARE CORRECT
1 From the Embedded Web Server, click Settings > Network/Ports > Address Book Setup.
2 If necessary, modify the following settings:
• Server Port—Set this port to 636.
• Use SSL/TLS—Select SSL/TLS.
• LDAP Certificate Verification—Select Never.
3 Apply the changes.
NARROW THE LDAP SEARCH BASE TO THE LOWEST POSSIBLE SCOPE THAT INCLUDES ALL NECESSARY USERS
MAKE SURE THAT THE LDAP ATTRIBUTES FOR THE USER E‑MAIL ADDRESS AND HOME DIRECTORY ARE
CORRECT
Held Jobs / Print Release Lite troubleshooting
Cannot use the Held Jobs feature
ADD THE USER TO THE APPROPRIATE ACTIVE DIRECTORY GROUP
If user authorization is enabled for Held Jobs, then add the user to an Active Directory group that is included in theauthorization list for the Secure Held Print Jobs function.
Troubleshooting 63
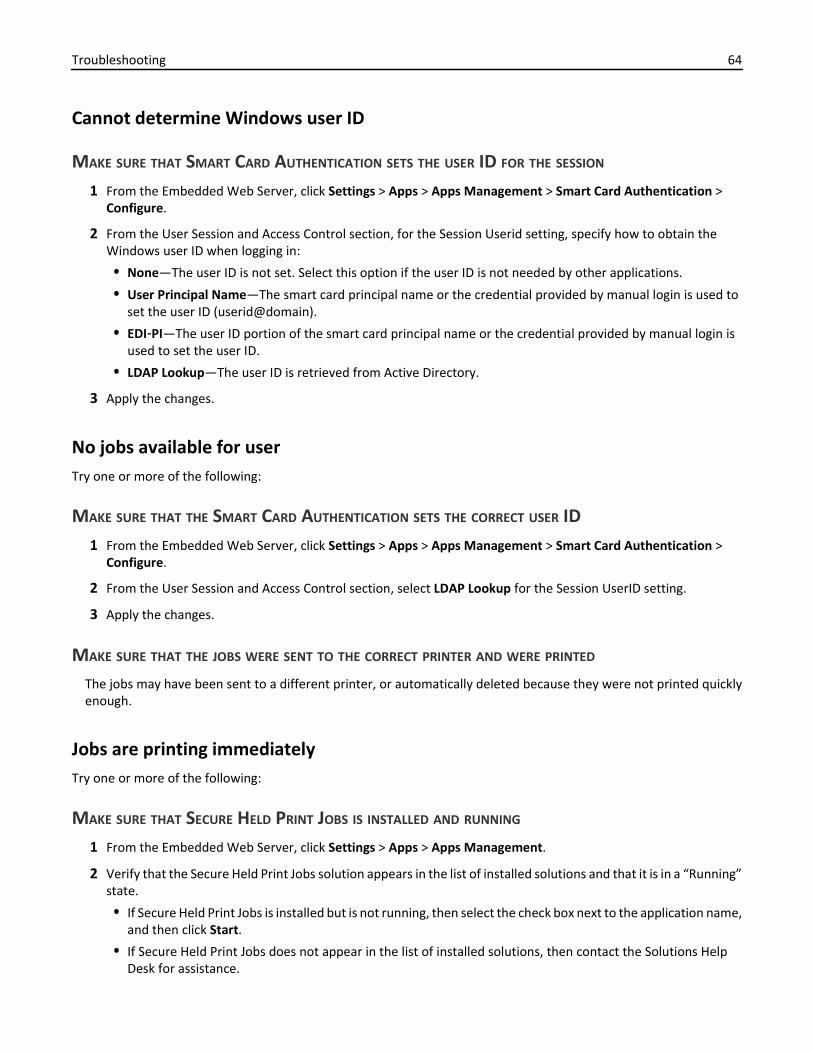
Cannot determine Windows user ID
MAKE SURE THAT SMART CARD AUTHENTICATION SETS THE USER ID FOR THE SESSION
1 From the Embedded Web Server, click Settings > Apps > Apps Management > Smart Card Authentication >Configure.
2 From the User Session and Access Control section, for the Session Userid setting, specify how to obtain theWindows user ID when logging in:
• None—The user ID is not set. Select this option if the user ID is not needed by other applications.
• User Principal Name—The smart card principal name or the credential provided by manual login is used toset the user ID (userid@domain).
• EDI‑PI—The user ID portion of the smart card principal name or the credential provided by manual login isused to set the user ID.
• LDAP Lookup—The user ID is retrieved from Active Directory.
3 Apply the changes.
No jobs available for userTry one or more of the following:
MAKE SURE THAT THE SMART CARD AUTHENTICATION SETS THE CORRECT USER ID1 From the Embedded Web Server, click Settings > Apps > Apps Management > Smart Card Authentication >
Configure.
2 From the User Session and Access Control section, select LDAP Lookup for the Session UserID setting.
3 Apply the changes.
MAKE SURE THAT THE JOBS WERE SENT TO THE CORRECT PRINTER AND WERE PRINTED
The jobs may have been sent to a different printer, or automatically deleted because they were not printed quicklyenough.
Jobs are printing immediatelyTry one or more of the following:
MAKE SURE THAT SECURE HELD PRINT JOBS IS INSTALLED AND RUNNING
1 From the Embedded Web Server, click Settings > Apps > Apps Management.
2 Verify that the Secure Held Print Jobs solution appears in the list of installed solutions and that it is in a “Running”state.
• If Secure Held Print Jobs is installed but is not running, then select the check box next to the application name,and then click Start.
• If Secure Held Print Jobs does not appear in the list of installed solutions, then contact the Solutions HelpDesk for assistance.
Troubleshooting 64

MAKE SURE THAT ALL JOBS ARE REQUIRED TO BE HELD
1 From the Embedded Web Server, click Settings > Apps > Apps Management > Secure Held Print Jobs >Configure.
2 From the Advanced Settings section, enable Require All Jobs to be Held and Clear Print Data .
3 Apply the changes.
Troubleshooting 65
Appendix
Appendix A: CA file creationNote: This example of generation of a CA file for the Certificate Authority assumes usage of a Windows CertificateAuthority server.
1 Point the browser window to the CA. Make sure to use the URL, http//<CA’s address>/CertSrv, where CA’saddress is the IP address or host name of the CA server.
Note: Before the CA Web page opens, a Windows login window may pop up and request user credentials toverify that you have access to the CA Web page.
2 Click Download a CA certificate, certificate chain, or CRL.
3 Click Base 64 encoded, and then click Download CA Certificate.
Note: DER encoding is not supported.
4 Save the certificate that is offered in a file. The file name is arbitrary, but the extension should be “.pem”.
Appendix B: CA‑Signed Device Certificate creationNote: This example of generation of a CA file for the Certificate Authority assumes usage of a Windows CertificateAuthority server.
1 Point the browser window to the CA. Make sure to use the URL, http//<CA’s address>/CertSrv, where CA’saddress is the IP address or host name of the CA server.
2 Click Request a certificate.
3 Click advanced certificate request.
4 Click Submit a certificate request by using a base‑64‑encoded.
5 Paste the (.csr prompted) information copied from the device into the Saved Request field, and then select a WebServer‑type certificate template.
6 Click Submit.
Note: The server takes a moment or two to process the request, and then presents a dialog window.
7 Select Base 64 encoded, and then click Download Certificate.
Note: DER encoding is not supported.
8 Save the certificate that is offered in a file. The file name is arbitrary, but the extension should be “.pem”.
Appendix C: Automatic Certificate Enrollment ApplicationThis application, after installation, will automatically create a device certificate signing request and pass the signingrequest on to the Certificate authority (CA) for approval. It will then retrieve the CA signed device certificate, and theninstall the certificate. The previous manual process is replaced by a simple process with only limited initial setuprequired.
Appendix 66
For this application to function, the device must be joined to an Active Directory environment and a CertificateEnrollment Web Services (Server Role) application needs to be installed on the customer’s network.
Note: The example usage instructions given below assume the Certificate Enrollment Web Services is installed on aWindows 2008 R2 server.
1 Open a Web browser, and then type the IP address or host name of the printer in the address field.
2 From the Embedded Web Server, click Settings > Security > Certificate Management > Device CertificateManagement.
3 Click Advanced Management to use the Automatic Certificate Enrollment application, and then click Request newCertificate.
Note: The screen may refresh for 10 to 15 seconds. At this time, the device is contacting the CertificateEnrollment Web Service on the server and capturing the certificate templates that are available to the device.
4 From the “Device Certificate Management > Advanced > Templates” page, select any of the following displayedtemplate options to use when requesting a certificate:
• IPSec—If you want to install a device certificate that is used for IPSec negotiations.
• Web Server—If you want to secure any SSL/TLS connections such as the EWS or LDAP over SSL.
• RAS and IAS Server—If you want to install a device certificate that is used for 802.1X negotiations.
5 Click Request Certificate. From this screen, you will customize the certificate for this device.
Note: If you want to view the template details first, then click View instead of Request Certificate.
6 Modify the settings from the Request Certificate Web page, but only when necessary.
Notes:
• The fields that are filled in with the data and the selected check boxes are the template defaults that werepulled from the CA. You can change them if you choose, but remember that the default templates aregenerally configured with the appropriate settings by the CA administrator and changing some settings maycause the request to be denied.
• The “Collapse/Expand Subject Name” fields link is used to change any of the device information that is usedto create or generate a certificate. This includes the same information as the Set Certificate Defaults linkunder Certificate Management.
7 Click Submit to send the Certificate Signing Request (CSR) to the CA.
Note: The screen may refresh for 10 to 15 seconds. At this time, the device is contacting the CertificateEnrollment Web Service requesting the CA signed certificate be generated.
8 If successful, you will return to the “Device Certificate Management > Advanced” Web page and the new CA‑signeddevice certificate with the specified name will be included in the list of certificates. If not, an error message isdisplayed.
Note: If a template is specified at the server to require CA administrator approval, then a separate table ofpending certificates is displayed and a message indicating that a request is pending admin approval will bedisplayed on the Device Certificate Management screen where the certificate is listed. The certificate is not validuntil approved. Once approval is granted, the message will disappear and the certificate(s) will be displayed inthe installed certificates table.
The link with the certificate name can be selected if you would like to see the information associated with the newcertificate. The “Renew” link is used to renew the certificate when the current CA certificate is about to expire (defaultof 2 years).
Appendix 67
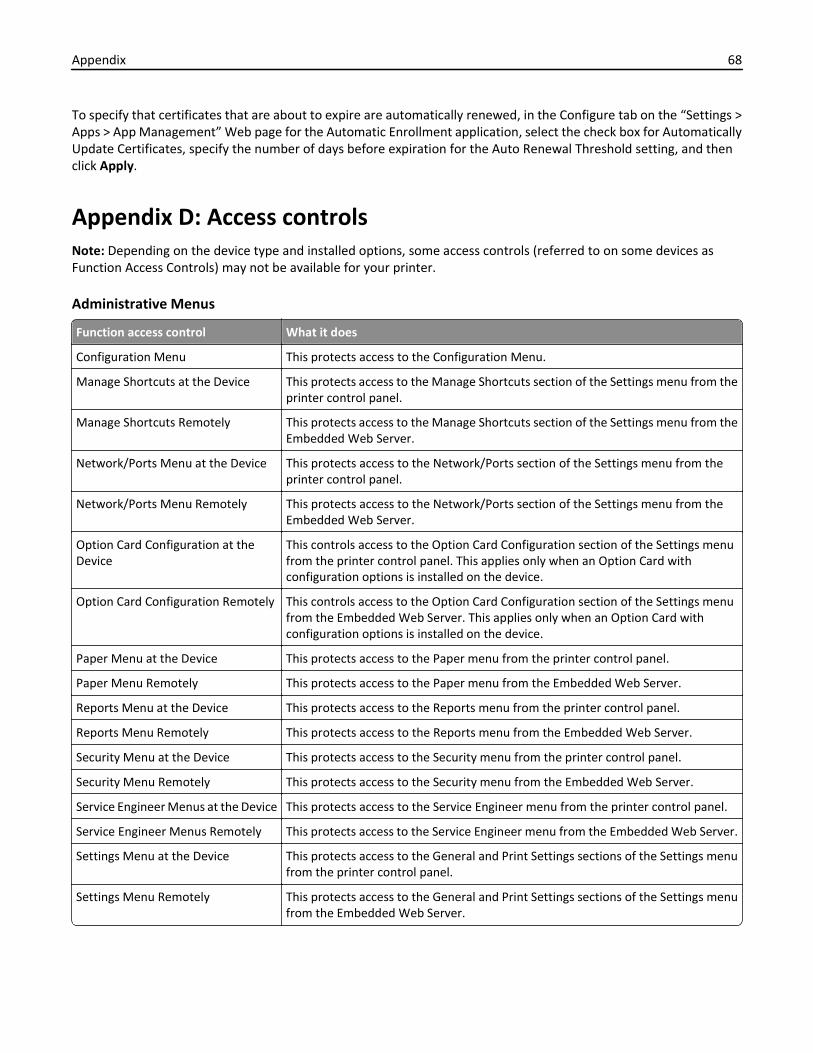
To specify that certificates that are about to expire are automatically renewed, in the Configure tab on the “Settings >Apps > App Management” Web page for the Automatic Enrollment application, select the check box for AutomaticallyUpdate Certificates, specify the number of days before expiration for the Auto Renewal Threshold setting, and thenclick Apply.
Appendix D: Access controlsNote: Depending on the device type and installed options, some access controls (referred to on some devices asFunction Access Controls) may not be available for your printer.
Administrative Menus
Function access control What it does
Configuration Menu This protects access to the Configuration Menu.
Manage Shortcuts at the Device This protects access to the Manage Shortcuts section of the Settings menu from theprinter control panel.
Manage Shortcuts Remotely This protects access to the Manage Shortcuts section of the Settings menu from theEmbedded Web Server.
Network/Ports Menu at the Device This protects access to the Network/Ports section of the Settings menu from theprinter control panel.
Network/Ports Menu Remotely This protects access to the Network/Ports section of the Settings menu from theEmbedded Web Server.
Option Card Configuration at theDevice
This controls access to the Option Card Configuration section of the Settings menufrom the printer control panel. This applies only when an Option Card withconfiguration options is installed on the device.
Option Card Configuration Remotely This controls access to the Option Card Configuration section of the Settings menufrom the Embedded Web Server. This applies only when an Option Card withconfiguration options is installed on the device.
Paper Menu at the Device This protects access to the Paper menu from the printer control panel.
Paper Menu Remotely This protects access to the Paper menu from the Embedded Web Server.
Reports Menu at the Device This protects access to the Reports menu from the printer control panel.
Reports Menu Remotely This protects access to the Reports menu from the Embedded Web Server.
Security Menu at the Device This protects access to the Security menu from the printer control panel.
Security Menu Remotely This protects access to the Security menu from the Embedded Web Server.
Service Engineer Menus at the Device This protects access to the Service Engineer menu from the printer control panel.
Service Engineer Menus Remotely This protects access to the Service Engineer menu from the Embedded Web Server.
Settings Menu at the Device This protects access to the General and Print Settings sections of the Settings menufrom the printer control panel.
Settings Menu Remotely This protects access to the General and Print Settings sections of the Settings menufrom the Embedded Web Server.
Appendix 68
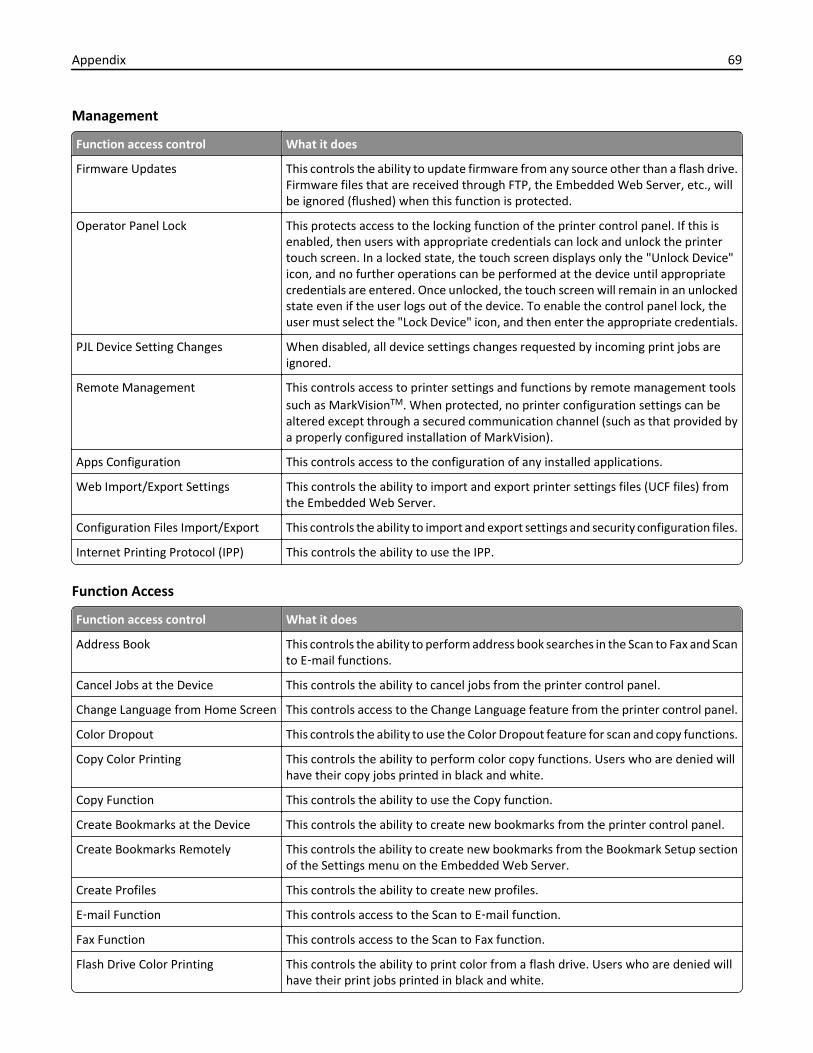
Management
Function access control What it does
Firmware Updates This controls the ability to update firmware from any source other than a flash drive.Firmware files that are received through FTP, the Embedded Web Server, etc., willbe ignored (flushed) when this function is protected.
Operator Panel Lock This protects access to the locking function of the printer control panel. If this isenabled, then users with appropriate credentials can lock and unlock the printertouch screen. In a locked state, the touch screen displays only the "Unlock Device"icon, and no further operations can be performed at the device until appropriatecredentials are entered. Once unlocked, the touch screen will remain in an unlockedstate even if the user logs out of the device. To enable the control panel lock, theuser must select the "Lock Device" icon, and then enter the appropriate credentials.
PJL Device Setting Changes When disabled, all device settings changes requested by incoming print jobs areignored.
Remote Management This controls access to printer settings and functions by remote management toolssuch as MarkVisionTM. When protected, no printer configuration settings can bealtered except through a secured communication channel (such as that provided bya properly configured installation of MarkVision).
Apps Configuration This controls access to the configuration of any installed applications.
Web Import/Export Settings This controls the ability to import and export printer settings files (UCF files) fromthe Embedded Web Server.
Configuration Files Import/Export This controls the ability to import and export settings and security configuration files.
Internet Printing Protocol (IPP) This controls the ability to use the IPP.
Function Access
Function access control What it does
Address Book This controls the ability to perform address book searches in the Scan to Fax and Scanto E‑mail functions.
Cancel Jobs at the Device This controls the ability to cancel jobs from the printer control panel.
Change Language from Home Screen This controls access to the Change Language feature from the printer control panel.
Color Dropout This controls the ability to use the Color Dropout feature for scan and copy functions.
Copy Color Printing This controls the ability to perform color copy functions. Users who are denied willhave their copy jobs printed in black and white.
Copy Function This controls the ability to use the Copy function.
Create Bookmarks at the Device This controls the ability to create new bookmarks from the printer control panel.
Create Bookmarks Remotely This controls the ability to create new bookmarks from the Bookmark Setup sectionof the Settings menu on the Embedded Web Server.
Create Profiles This controls the ability to create new profiles.
E‑mail Function This controls access to the Scan to E‑mail function.
Fax Function This controls access to the Scan to Fax function.
Flash Drive Color Printing This controls the ability to print color from a flash drive. Users who are denied willhave their print jobs printed in black and white.
Appendix 69
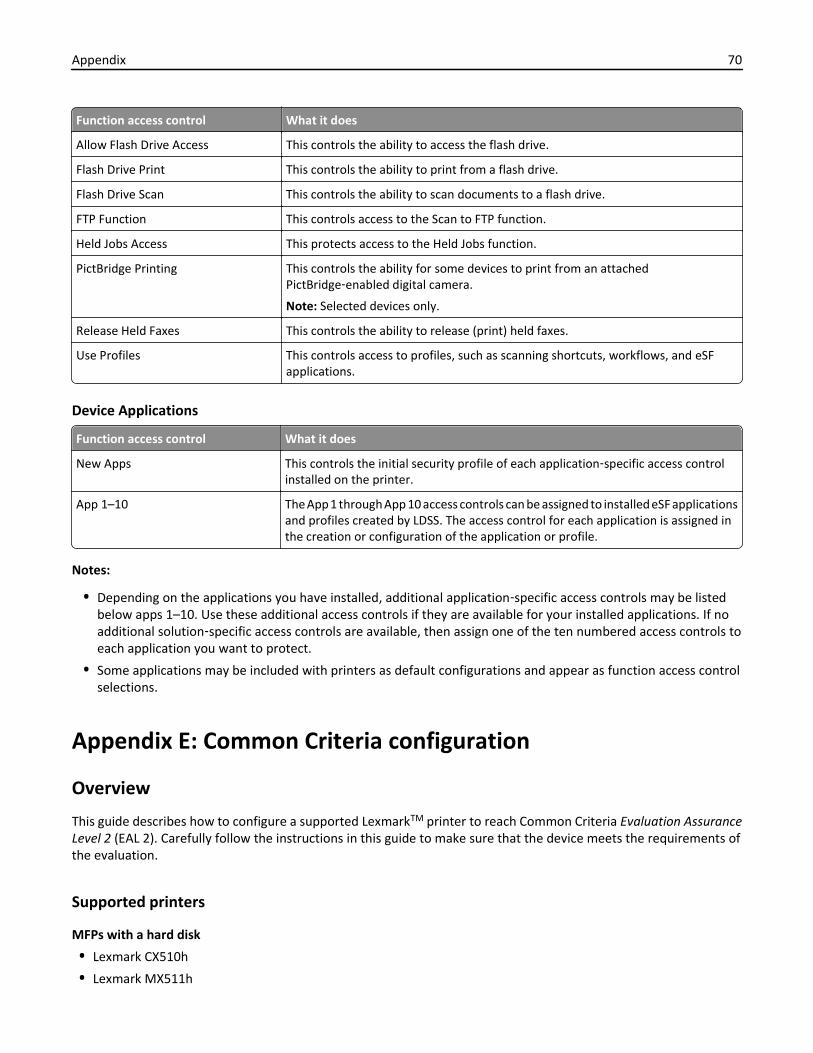
Function access control What it does
Allow Flash Drive Access This controls the ability to access the flash drive.
Flash Drive Print This controls the ability to print from a flash drive.
Flash Drive Scan This controls the ability to scan documents to a flash drive.
FTP Function This controls access to the Scan to FTP function.
Held Jobs Access This protects access to the Held Jobs function.
PictBridge Printing This controls the ability for some devices to print from an attachedPictBridge‑enabled digital camera.
Note: Selected devices only.
Release Held Faxes This controls the ability to release (print) held faxes.
Use Profiles This controls access to profiles, such as scanning shortcuts, workflows, and eSFapplications.
Device Applications
Function access control What it does
New Apps This controls the initial security profile of each application‑specific access controlinstalled on the printer.
App 1–10 The App 1 through App 10 access controls can be assigned to installed eSF applicationsand profiles created by LDSS. The access control for each application is assigned inthe creation or configuration of the application or profile.
Notes:
• Depending on the applications you have installed, additional application‑specific access controls may be listedbelow apps 1–10. Use these additional access controls if they are available for your installed applications. If noadditional solution‑specific access controls are available, then assign one of the ten numbered access controls toeach application you want to protect.
• Some applications may be included with printers as default configurations and appear as function access controlselections.
Appendix E: Common Criteria configuration
Overview
This guide describes how to configure a supported LexmarkTM printer to reach Common Criteria Evaluation AssuranceLevel 2 (EAL 2). Carefully follow the instructions in this guide to make sure that the device meets the requirements ofthe evaluation.
Supported printers
MFPs with a hard disk
• Lexmark CX510h
• Lexmark MX511h
Appendix 70

• Lexmark MX611h
• Lexmark MX710h
• Lexmark MX711h
• Lexmark MX810
• Lexmark MX811
• Lexmark MX812
• Lexmark XM7155
• Lexmark XM7163
• Lexmark XM7170
• Lexmark XC2132
MFPs without a hard disk
• Lexmark CX410
• Lexmark CX510
• Lexmark MX410
• Lexmark MX510
• Lexmark MX511
• Lexmark MX610
• Lexmark MX611
• Lexmark MX710
• Lexmark MX711
• Lexmark XM1145
• Lexmark XM3150
• Lexmark XM5163
• Lexmark XM5170
SFPs
• Lexmark CS510
• Lexmark M3150
• Lexmark M5155
• Lexmark M5163
• Lexmark M5170
• Lexmark MS610E
• Lexmark MS810E
• Lexmark MS812E
Note: MFPs support copy, e‑mail, fax and printing features. SFPs support only printing features. Hard disk featuresare supported only by printers containing a hard disk. This guide describes the configuration of features that are notavailable on all printers.
Appendix 71
Before configuring the printer (required)
Checking physical interfaces and installed firmware
1 Inspect the printer to make sure that only one network interface is installed. There should be no optional network,parallel, or serial interfaces.
Note: USB ports that perform document processing functions are disabled at the factory.
2 Turn on the printer.
3 Navigate to the menu screen, and then touch Reports > Menu Settings Page.
Note: A device information page is printed.
4 In the Installed Features section, make sure that there are no Download Emulator (DLE) option cards installed.
5 If you find more interfaces, or if a DLE card is installed, then contact your Lexmark representative before proceeding.
6 To check the firmware version, from the Device Information section, locate Base = and Network =.
7 To check if the Base and Network values are correct and up‑to‑date, contact your Lexmark representative.
Attaching a lock
Once a lock is attached, the metal plate and controller board cannot be removed, and the security jumper cannot beaccessed without causing visible damage to the device.
1 Make sure that the printer case is closed.
2 Locate the security slot, and then attach a lock. It is the same type of security slot found on most laptop computersand can normally be found on the back of the printer near an outside edge.
The following illustrations show the most common security slot locations:
Appendix 72
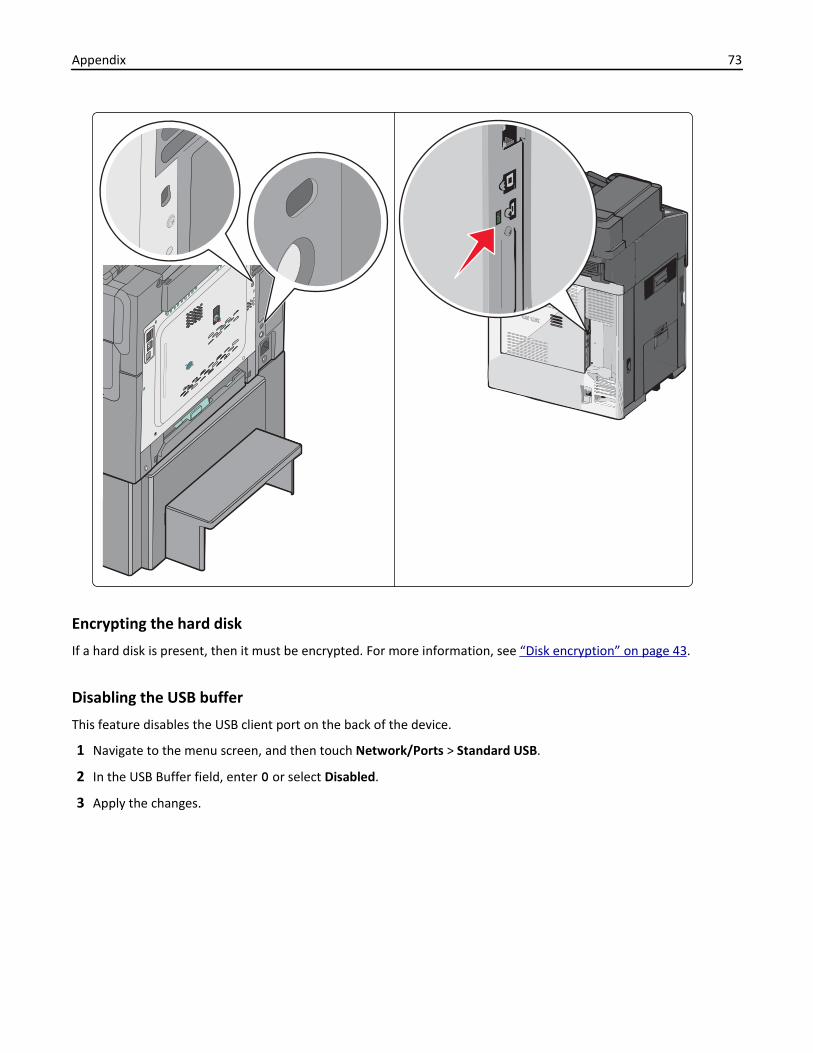
Encrypting the hard disk
If a hard disk is present, then it must be encrypted. For more information, see “Disk encryption” on page 43.
Disabling the USB buffer
This feature disables the USB client port on the back of the device.
1 Navigate to the menu screen, and then touch Network/Ports > Standard USB.
2 In the USB Buffer field, enter 0 or select Disabled.
3 Apply the changes.
Appendix 73
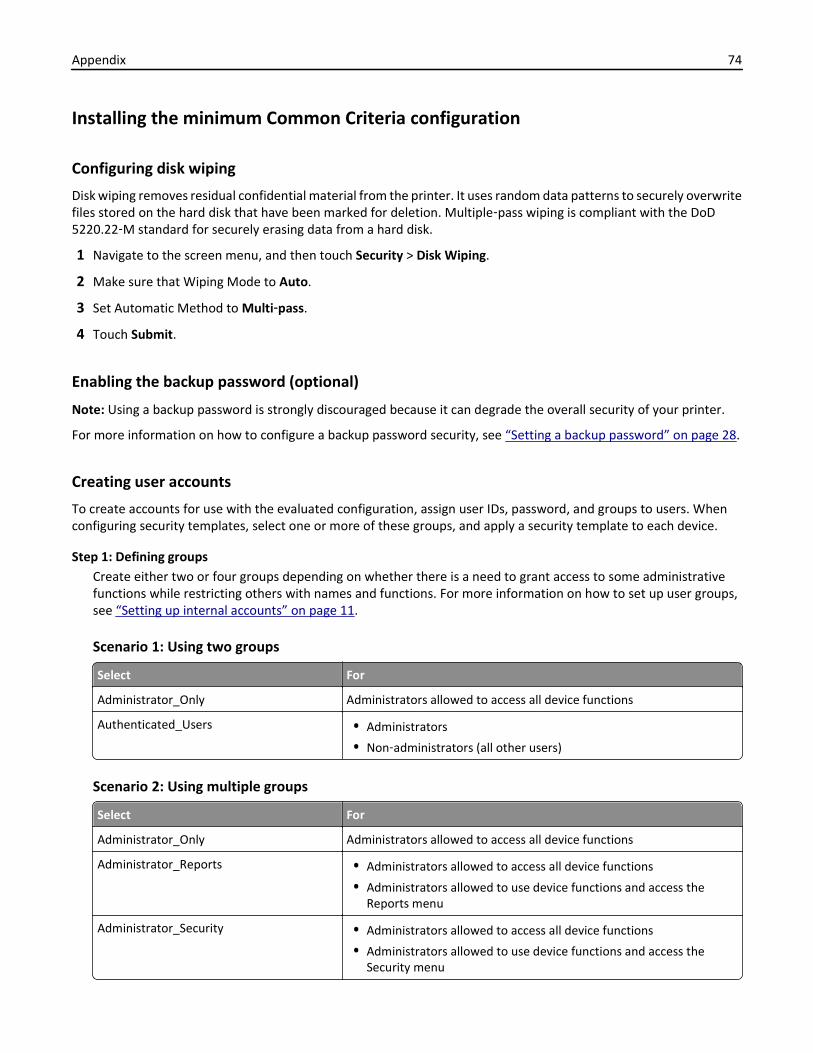
Installing the minimum Common Criteria configuration
Configuring disk wiping
Disk wiping removes residual confidential material from the printer. It uses random data patterns to securely overwritefiles stored on the hard disk that have been marked for deletion. Multiple‑pass wiping is compliant with the DoD5220.22‑M standard for securely erasing data from a hard disk.
1 Navigate to the screen menu, and then touch Security > Disk Wiping.
2 Make sure that Wiping Mode to Auto.
3 Set Automatic Method to Multi‑pass.
4 Touch Submit.
Enabling the backup password (optional)
Note: Using a backup password is strongly discouraged because it can degrade the overall security of your printer.
For more information on how to configure a backup password security, see “Setting a backup password” on page 28.
Creating user accounts
To create accounts for use with the evaluated configuration, assign user IDs, password, and groups to users. Whenconfiguring security templates, select one or more of these groups, and apply a security template to each device.
Step 1: Defining groupsCreate either two or four groups depending on whether there is a need to grant access to some administrativefunctions while restricting others with names and functions. For more information on how to set up user groups,see “Setting up internal accounts” on page 11.
Scenario 1: Using two groups
Select For
Administrator_Only Administrators allowed to access all device functions
Authenticated_Users • Administrators
• Non‑administrators (all other users)
Scenario 2: Using multiple groups
Select For
Administrator_Only Administrators allowed to access all device functions
Administrator_Reports • Administrators allowed to access all device functions
• Administrators allowed to use device functions and access theReports menu
Administrator_Security • Administrators allowed to access all device functions
• Administrators allowed to use device functions and access theSecurity menu
Appendix 74
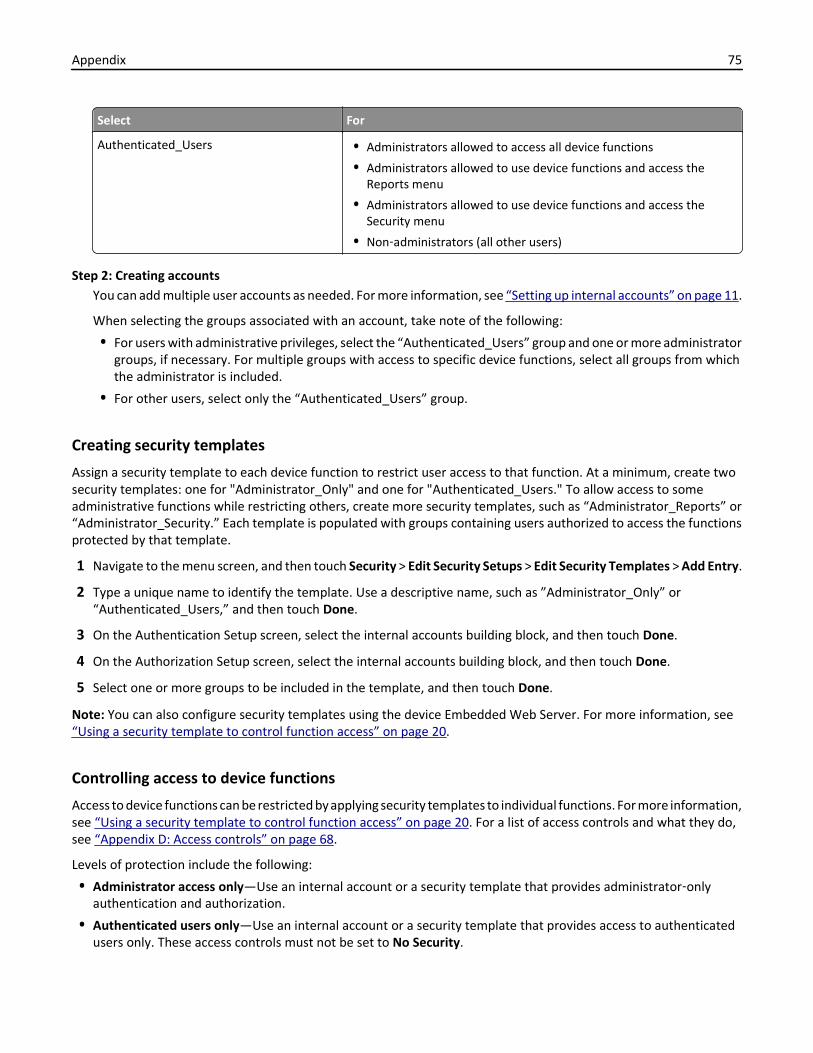
Select For
Authenticated_Users • Administrators allowed to access all device functions
• Administrators allowed to use device functions and access theReports menu
• Administrators allowed to use device functions and access theSecurity menu
• Non‑administrators (all other users)
Step 2: Creating accountsYou can add multiple user accounts as needed. For more information, see “Setting up internal accounts” on page 11.
When selecting the groups associated with an account, take note of the following:
• For users with administrative privileges, select the “Authenticated_Users” group and one or more administratorgroups, if necessary. For multiple groups with access to specific device functions, select all groups from whichthe administrator is included.
• For other users, select only the “Authenticated_Users” group.
Creating security templates
Assign a security template to each device function to restrict user access to that function. At a minimum, create twosecurity templates: one for "Administrator_Only" and one for "Authenticated_Users." To allow access to someadministrative functions while restricting others, create more security templates, such as “Administrator_Reports” or“Administrator_Security.” Each template is populated with groups containing users authorized to access the functionsprotected by that template.
1 Navigate to the menu screen, and then touch Security > Edit Security Setups > Edit Security Templates > Add Entry.
2 Type a unique name to identify the template. Use a descriptive name, such as ”Administrator_Only” or“Authenticated_Users,” and then touch Done.
3 On the Authentication Setup screen, select the internal accounts building block, and then touch Done.
4 On the Authorization Setup screen, select the internal accounts building block, and then touch Done.
5 Select one or more groups to be included in the template, and then touch Done.
Note: You can also configure security templates using the device Embedded Web Server. For more information, see“Using a security template to control function access” on page 20.
Controlling access to device functions
Access to device functions can be restricted by applying security templates to individual functions. For more information,see “Using a security template to control function access” on page 20. For a list of access controls and what they do,see “Appendix D: Access controls” on page 68.
Levels of protection include the following:
• Administrator access only—Use an internal account or a security template that provides administrator‑onlyauthentication and authorization.
• Authenticated users only—Use an internal account or a security template that provides access to authenticatedusers only. These access controls must not be set to No Security.
Appendix 75
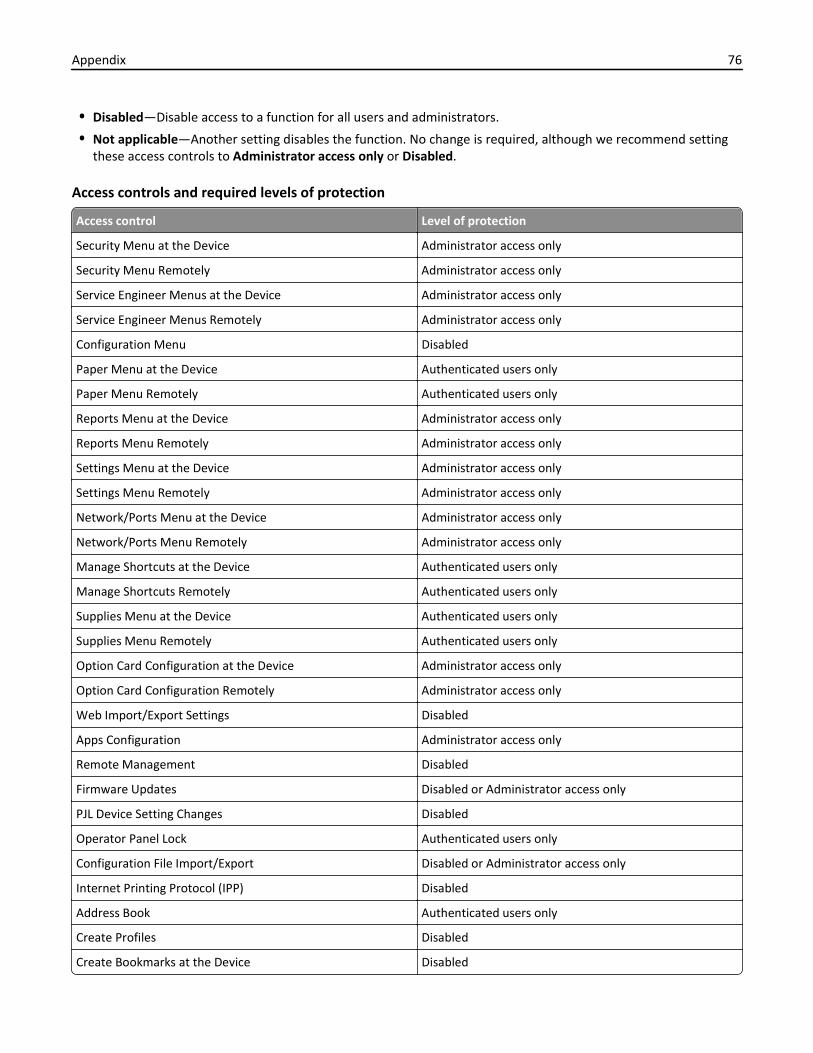
• Disabled—Disable access to a function for all users and administrators.
• Not applicable—Another setting disables the function. No change is required, although we recommend settingthese access controls to Administrator access only or Disabled.
Access controls and required levels of protection
Access control Level of protection
Security Menu at the Device Administrator access only
Security Menu Remotely Administrator access only
Service Engineer Menus at the Device Administrator access only
Service Engineer Menus Remotely Administrator access only
Configuration Menu Disabled
Paper Menu at the Device Authenticated users only
Paper Menu Remotely Authenticated users only
Reports Menu at the Device Administrator access only
Reports Menu Remotely Administrator access only
Settings Menu at the Device Administrator access only
Settings Menu Remotely Administrator access only
Network/Ports Menu at the Device Administrator access only
Network/Ports Menu Remotely Administrator access only
Manage Shortcuts at the Device Authenticated users only
Manage Shortcuts Remotely Authenticated users only
Supplies Menu at the Device Authenticated users only
Supplies Menu Remotely Authenticated users only
Option Card Configuration at the Device Administrator access only
Option Card Configuration Remotely Administrator access only
Web Import/Export Settings Disabled
Apps Configuration Administrator access only
Remote Management Disabled
Firmware Updates Disabled or Administrator access only
PJL Device Setting Changes Disabled
Operator Panel Lock Authenticated users only
Configuration File Import/Export Disabled or Administrator access only
Internet Printing Protocol (IPP) Disabled
Address Book Authenticated users only
Create Profiles Disabled
Create Bookmarks at the Device Disabled
Appendix 76
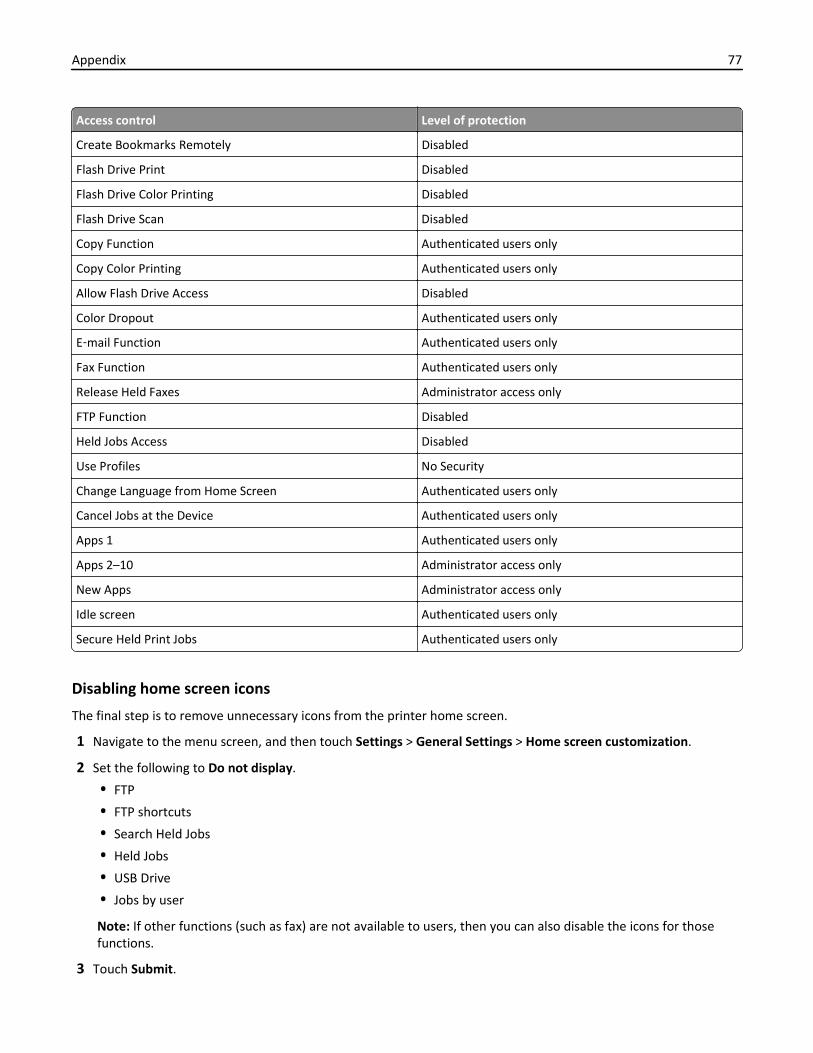
Access control Level of protection
Create Bookmarks Remotely Disabled
Flash Drive Print Disabled
Flash Drive Color Printing Disabled
Flash Drive Scan Disabled
Copy Function Authenticated users only
Copy Color Printing Authenticated users only
Allow Flash Drive Access Disabled
Color Dropout Authenticated users only
E‑mail Function Authenticated users only
Fax Function Authenticated users only
Release Held Faxes Administrator access only
FTP Function Disabled
Held Jobs Access Disabled
Use Profiles No Security
Change Language from Home Screen Authenticated users only
Cancel Jobs at the Device Authenticated users only
Apps 1 Authenticated users only
Apps 2–10 Administrator access only
New Apps Administrator access only
Idle screen Authenticated users only
Secure Held Print Jobs Authenticated users only
Disabling home screen icons
The final step is to remove unnecessary icons from the printer home screen.
1 Navigate to the menu screen, and then touch Settings > General Settings > Home screen customization.
2 Set the following to Do not display.
• FTP
• FTP shortcuts
• Search Held Jobs
• Held Jobs
• USB Drive
• Jobs by user
Note: If other functions (such as fax) are not available to users, then you can also disable the icons for thosefunctions.
3 Touch Submit.
Appendix 77
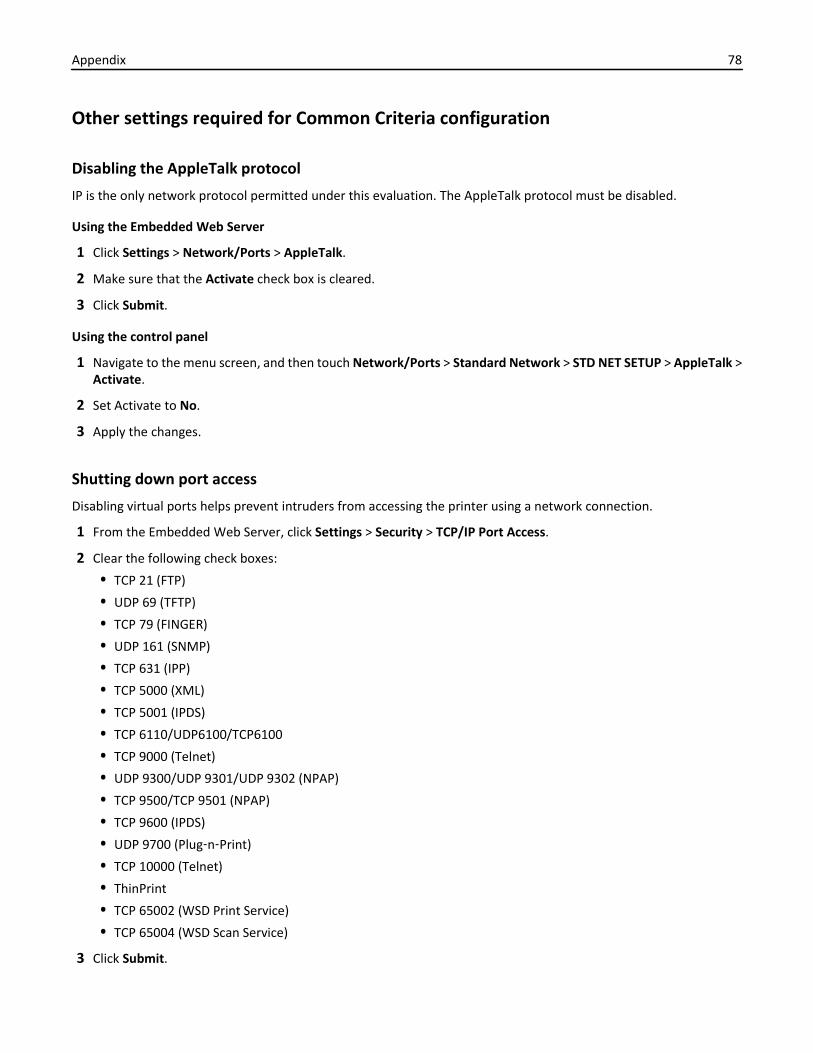
Other settings required for Common Criteria configuration
Disabling the AppleTalk protocol
IP is the only network protocol permitted under this evaluation. The AppleTalk protocol must be disabled.
Using the Embedded Web Server
1 Click Settings > Network/Ports > AppleTalk.
2 Make sure that the Activate check box is cleared.
3 Click Submit.
Using the control panel
1 Navigate to the menu screen, and then touch Network/Ports > Standard Network > STD NET SETUP > AppleTalk >Activate.
2 Set Activate to No.
3 Apply the changes.
Shutting down port access
Disabling virtual ports helps prevent intruders from accessing the printer using a network connection.
1 From the Embedded Web Server, click Settings > Security > TCP/IP Port Access.
2 Clear the following check boxes:
• TCP 21 (FTP)
• UDP 69 (TFTP)
• TCP 79 (FINGER)
• UDP 161 (SNMP)
• TCP 631 (IPP)
• TCP 5000 (XML)
• TCP 5001 (IPDS)
• TCP 6110/UDP6100/TCP6100
• TCP 9000 (Telnet)
• UDP 9300/UDP 9301/UDP 9302 (NPAP)
• TCP 9500/TCP 9501 (NPAP)
• TCP 9600 (IPDS)
• UDP 9700 (Plug‑n‑Print)
• TCP 10000 (Telnet)
• ThinPrint
• TCP 65002 (WSD Print Service)
• TCP 65004 (WSD Scan Service)
3 Click Submit.
Appendix 78

Network Time Protocol
Use Network Time Protocol (NTP) to automatically sync printer time settings with a trusted clock so that Kerberosrequests and log events are accurately time‑stamped.
Note: If your network uses DHCP, then make sure that NTP settings are not automatically provided by the DHCPserver before manually configuring NTP settings.
Using the Embedded Web Server
1 From the Embedded Web Server, click Settings > Security > Set Date and Time.
2 In the Network Time Protocol section, select Enable NTP, and then type the IP address or host name of the NTPServer.
3 If the NTP server requires authentication, then select MD5 key or Autokey IFF from the Authentication menu.
a Click Install MD5 key or Install Autokey IFF params, and then browse to the file containing the NTPauthentication credentials.
b Click Submit.
4 Click Submit.
Using the control panel
1 Navigate to the menu screen, and then touch Security > Set Date and Time.
2 Set Enable NTP to On.
3 Touch the NTP Server field, type the IP address or host name of the NTP server, and then touch Submit.
4 If the NTP server requires authentication, then set Enable Authentication to On.
5 Apply the changes.
Fax
If your printer includes fax capabilities and is attached to a phone line, then disable fax forwarding and the driver tofax function, and enable held faxes.
Using the Embedded Web Server
1 Click Settings > Fax Settings > Analog Fax Setup.
2 Under Fax Receive Settings, click Holding Faxes.
3 Set Held Fax Mode to Always On, and then click Submit.
4 Under Fax Send Settings, clear Driver to fax.
5 Under Fax Receive Settings, select Print from the Fax Forwarding list.
6 Click Submit.
Using the control panel
1 Navigate to the menu screen, and then touch Settings > Fax Settings > Analog Fax Setup > Fax Receive Settings >Holding Faxes.
2 Set Held Fax Mode to Always On, and then save your changes.
Appendix 79
3 Set Fax Forwarding to Print, and then touch Submit.
4 Touch Fax Send Settings, and then set “Driver to fax” to No.
5 Apply the changes.
Setting up a fax storage location (optional)
1 Turn off the printer.
2 While turning on back the printer, press and hold 2 and 6 on the keypad simultaneously until a list of printer functionsappears.
3 From the list, touch Fax Storage Location, and then select Disk.
4 Touch Submit.
5 Touch Exit Config Menu or Exit Config.
Note: The printer undergoes a power‑on reset and returns to the home screen.
Configuring and securing the application
1 From the Embedded Web Server, access the configuration page for the Secure Held Print Jobs application.
2 Specify the text and image that you want to appear on your home screen.
Note: Some applications require changing the settings from the profile page.
3 From the Release Options section, configure the following settings to specify how users are allowed to release printjobs:
• Release Method—Select either of the following:
– User selects job(s) to print—Let users choose the jobs they want to print.
– All jobs print automatically—Print all pending jobs automatically when the user touches the applicationicon and authenticates.
• Display Print Jobs Sorted By—Specify the order of jobs listed on the control panel.
4 From the Job Expiration section, set the expiration for Verify jobs and Repeat jobs.
There are four types of held jobs:
• Confidential—Store jobs on the printer until you log in and release or delete them.
• Verify—Print one copy of a job to make sure that it is satisfactory before printing the remaining copies. The jobis automatically deleted from the printer after all copies are printed.
• Reserve—Store print on the printer and automatically delete them after printing.
• Repeat—Print all copies of a job and store the job on the printer for later printing. You can print copies as longas the job is stored on the printer.
To set the expiration of Confidential and Reserve jobs, use the printer Confidential Print Setup on the EmbeddedWeb Server. (Click Settings or Configuration, and then click Security > Confidential Print Setup.) By default, onlyConfidential jobs can be set to expire. The Job Expiration settings let you set Verify and Repeat jobs to expire eitherat the same time as Confidential jobs or at another time.
Appendix 80
5 From the Advanced Settings section, configure the following settings:
• Require All Jobs to be Held—Let all jobs remain on the printer until released by an authorized user or until theyexpire.
• Clear Print Data—Clear the memory associated with each job when the job is released.
6 Apply the changes.
Securing access to the home screen
Use this method to require users to authenticate to view and use the printer home screen.
Note: The Background and Idle Screen application must be installed and running on the printer before you cansecure access to the home screen.
1 From the Embedded Web Server, access the configuration page for Background and Idle Screen.
2 Under the Idle Screen Settings heading, make sure Enable is selected.
3 In the Start Time field, enter 0. This prompts the printer to start the secure idle screen immediately (0 seconds)after a user’s login session ends.
4 Under the Home Screen Background heading, clear Enable.
5 If you want to add custom idle screen images, then click Add under the Idle Screen Images heading.
6 Type an image name, and then upload the file you want to use.
Note: For information about compatible image file types and recommended file sizes, see the mouse‑over helpnext to the field.
7 Apply the changes.
8 Repeat step 5 through step 7 to add more idle screen images. You can add up to ten images.
9 If you want to add a custom home screen background image, then under the Home Screen Background heading,select one of the default images, or upload a custom image in the Custom Image field.
Note: For information about compatible image file types and recommended file sizes, see the mouse‑over help.
10 If necessary, configure the other application settings. For more information about configuring the application, seethe Background and Idle Screen Administrator’s Guide.
11 Apply the changes.
12 Secure access to the idle screen using Smart Card Authentication Client.
a Create a security template for Smart Card Authentication Client to obtain user credentials. For more information,see “Creating security templates” on page 75.
b From the Embedded Web Server, click Settings > Security > Security Setup > Access Controls.
c If necessary, expand the Device Solutions folder.
d From the Idle Screen drop‑down menu, select your security template.
e Click Submit.
Appendix 81
Configuring user access for Common CriteriaAdministrators and users are required to log in to the printer using a method that provides both authentication andauthorization. Under the evaluated configuration, access to network‑connected devices can be granted through internalaccounts, LDAP+GSSAPI (which is used in Active Directory), or Smart Card Authentication.
Creating internal accounts for use with the evaluated configuration involves assigning a user ID and password to eachuser and then segmenting users into groups. When configuring security templates, select one or more of these groups,and then apply a security template to each device function to control access to that function.
Internal accounts
1 Create groups, and then add users to the internal accounts. For more information, see “Setting up internal accounts”on page 11.
2 Create security templates, and then assign each function access controls to the appropriate security templates. Formore information, see “Using a security template to control function access” on page 20.
LDAP+GSSAPIOn networks running Active Directory, you can use LDAP+GSSAPI to take advantage of authentication andauthorization services already deployed on the network. User credentials and group designations can be pulledfrom your existing system, making access to the printer as seamless as other network services. Supported devicescan store a maximum of five LDAP+GSSAPI configurations. Each configuration must have a unique name. For moreinformation, see “Using LDAP+GSSAPI” on page 16.
Note: Make sure to configure Kerberos before setting up LDAP+GSSAPI. For more information, see “ConfiguringKerberos 5 for use with LDAP+GSSAPI” on page 18.
Smart Card Authentication
You can use the login screen settings to choose how users can log in to the printer. Users may be prompted for a PINor a password after inserting a smart card.
1 From the Embedded Web Server, access the configuration page for the Smart Card Authentication Client application.
2 Under Login Screen, in the Login Type menu, select Smart Card Only.
3 Set User Validation Mode to Active Directory.
4 Click Apply.
Note: For more information, see Smart Card Authentication Administrator’s Guide.
Appendix 82
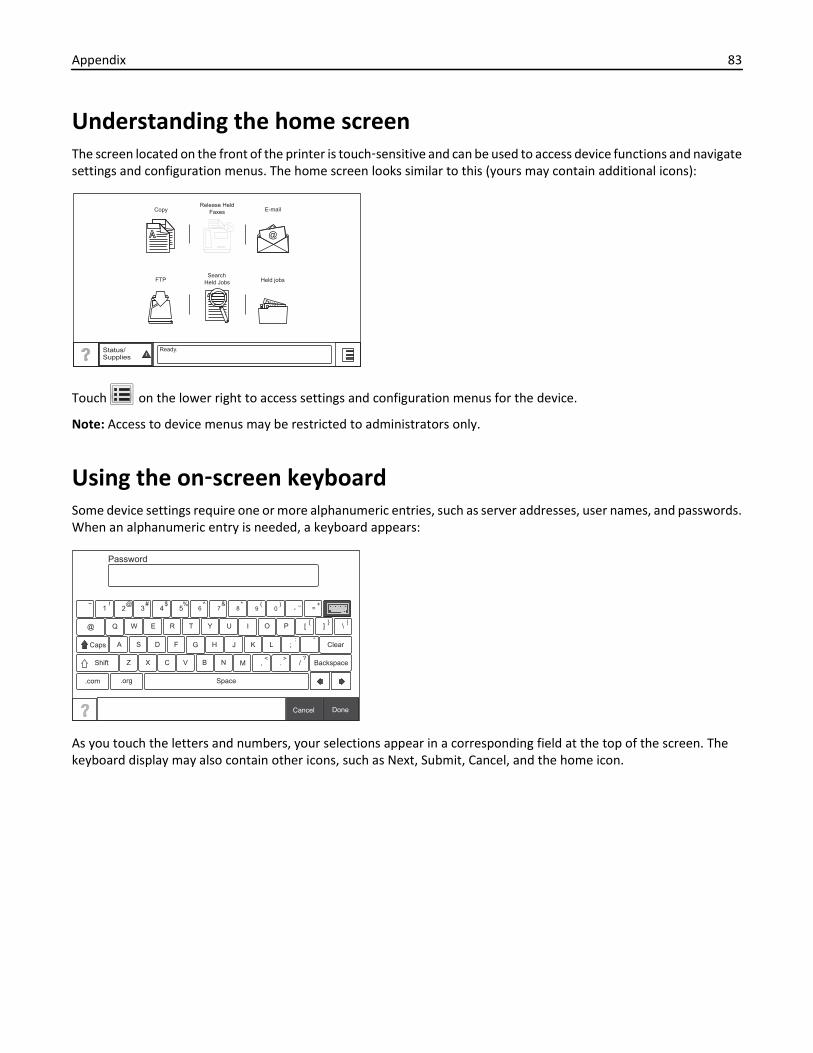
Understanding the home screenThe screen located on the front of the printer is touch‑sensitive and can be used to access device functions and navigatesettings and configuration menus. The home screen looks similar to this (yours may contain additional icons):
@
Status/Supplies
Ready.
CopyRelease Held
Faxes E-mail
FTPSearch
Held Jobs Held jobs
Touch on the lower right to access settings and configuration menus for the device.
Note: Access to device menus may be restricted to administrators only.
Using the on‑screen keyboardSome device settings require one or more alphanumeric entries, such as server addresses, user names, and passwords.When an alphanumeric entry is needed, a keyboard appears:
Password
~1 2 3 4 5 6 7 8 9 0 - =
Q W E R T Y U I O P [ ] \
A S D F G H J K L ; Clear
BackspaceZ X C V B N M , . /
.com .org Space
@
Caps
Shift
Cancel Done
! @ # $ % ^ & * ( ) _ +
{ } |
: “
< > ?
As you touch the letters and numbers, your selections appear in a corresponding field at the top of the screen. Thekeyboard display may also contain other icons, such as Next, Submit, Cancel, and the home icon.
Appendix 83

To type a single uppercase or shift character, touch Shift, and then touch the letter or number you need to uppercase.To turn on Caps Lock, touch Caps, and then continue typing. Caps Lock will remain engaged until you touch Caps again.
Password
~1 2 3 4 5 6 7 8 9 0 - =
Q W E R T Y U I O P [ ] \
A S D F G H J K L ; Clear
BackspaceZ X C V B N M , . /
.com .org Space
@
Caps
Shift
Cancel Done
! @ # $ % ^ & * ( ) _ +
{ } |
: “
< > ?
Touch Backspace to delete a single character or Clear to delete everything you have typed.
Appendix 84
Notices
Edition notice
September 2014
The following paragraph does not apply to any country where such provisions are inconsistent with local law:LEXMARK INTERNATIONAL, INC., PROVIDES THIS PUBLICATION “AS IS” WITHOUT WARRANTY OF ANY KIND, EITHEREXPRESS OR IMPLIED, INCLUDING, BUT NOT LIMITED TO, THE IMPLIED WARRANTIES OF MERCHANTABILITY OR FITNESSFOR A PARTICULAR PURPOSE. Some states do not allow disclaimer of express or implied warranties in certaintransactions; therefore, this statement may not apply to you.
This publication could include technical inaccuracies or typographical errors. Changes are periodically made to theinformation herein; these changes will be incorporated in later editions. Improvements or changes in the products orthe programs described may be made at any time.
References in this publication to products, programs, or services do not imply that the manufacturer intends to makethese available in all countries in which it operates. Any reference to a product, program, or service is not intended tostate or imply that only that product, program, or service may be used. Any functionally equivalent product, program,or service that does not infringe any existing intellectual property right may be used instead. Evaluation and verificationof operation in conjunction with other products, programs, or services, except those expressly designated by themanufacturer, are the user’s responsibility.
For Lexmark technical support, visit http://support.lexmark.com.
For information on supplies and downloads, visit www.lexmark.com.
© 2014 Lexmark International, Inc.
All rights reserved.
Trademarks
Lexmark and Lexmark with diamond design are trademarks of Lexmark International, Inc., registered in the UnitedStates and/or other countries.
All other trademarks are the property of their respective owners.
GOVERNMENT END USERS
The Software Program and any related documentation are "Commercial Items," as that term is defined in 48 C.F.R.2.101, "Computer Software" and "Commercial Computer Software Documentation," as such terms are used in 48 C.F.R.12.212 or 48 C.F.R. 227.7202, as applicable. Consistent with 48 C.F.R. 12.212 or 48 C.F.R. 227.7202-1 through 227.7207-4,as applicable, the Commercial Computer Software and Commercial Software Documentation are licensed to the U.S.Government end users (a) only as Commercial Items and (b) with only those rights as are granted to all other end userspursuant to the terms and conditions herein.
Notices 85
GifEncoder
GifEncoder - writes out an image as a GIF. Transparency handling and variable bit size courtesy of Jack Palevich. Copyright(C) 1996 by Jef Poskanzer * <[email protected]>. All rights reserved. Redistribution and use in source and binary forms,with or without modification, are permitted provided that the following conditions are met: 1. Redistributions of sourcecode must retain the above copyright notice, this list of conditions and the following disclaimer. 2. Redistributions inbinary form must reproduce the above copyright notice, this list of conditions and the following disclaimer in thedocumentation and/or other materials provided with the distribution. THIS SOFTWARE IS PROVIDED BY THE AUTHORAND CONTRIBUTORS ``AS IS'' AND ANY EXPRESS OR IMPLIED WARRANTIES, INCLUDING, BUT NOT LIMITED TO, THEIMPLIED WARRANTIES OF MERCHANTABILITY AND FITNESS FOR A PARTICULAR PURPOSE ARE DISCLAIMED. IN NOEVENT SHALL THE AUTHOR OR CONTRIBUTORS BE LIABLE FOR ANY DIRECT, INDIRECT, INCIDENTAL, SPECIAL,EXEMPLARY, OR CONSEQUENTIAL DAMAGES (INCLUDING, BUT NOT LIMITED TO, PROCUREMENT OF SUBSTITUTEGOODS OR SERVICES; LOSS OF USE, DATA, OR PROFITS; OR BUSINESS INTERRUPTION) HOWEVER CAUSED AND ON ANYTHEORY OF LIABILITY, WHETHER IN CONTRACT, STRICT LIABILITY, OR TORT (INCLUDING NEGLIGENCE OR OTHERWISE)ARISING IN ANY WAY OUT OF THE USE OF THIS SOFTWARE, EVEN IF ADVISED OF THE POSSIBILITY OF SUCH DAMAGE.Visit the ACME Labs Java page for up-to-date versions of this and other fine Java utilities:http://www.acme.com/java/
ZXing 1.7
This project consists of contributions from several people, recognized here for convenience, in alphabetical order.
Agustín Delgado (Servinform S.A.), Aitor Almeida (University of Deusto), Alasdair Mackintosh (Google), AlexanderMartin (Haase & Martin GmbH), Andreas Pillath, Andrew Walbran (Google), Andrey Sitnik, Androida.hu /http://www.androida.hu/, Antonio Manuel Benjumea (Servinform S.A.), Brian Brown (Google), Chang Hyun Park,Christian Brunschen (Google), crowdin.net, Daniel Switkin (Google), Dave MacLachlan (Google), David Phillip Oster(Google), David Albert (Bug Labs), David Olivier, Diego Pierotto, drejc83, Eduardo Castillejo (University of Deusto),Emanuele Aina, Eric Kobrin (Velocitude), Erik Barbara, Fred Lin (Anobiit), gcstang, Hannes Erven, hypest (Barcoramaproject), Isaac Potoczny-Jones, Jeff Breidenbach (Google), John Connolly (Bug Labs), Jonas Petersson (Prisjakt), JosephWain (Google), Juho Mikkonen, jwicks, Kevin O'Sullivan (SITA), Kevin Xue (NetDragon Websoft Inc., China), LachezarDobrev, Luiz Silva, Luka Finžgar, Marcelo, Mateusz Jędrasik, Matrix44, Matthew Schulkind (Google), Matt York(LifeMarks), Mohamad Fairol, Morgan Courbet, Nikolaos Ftylitakis, Pablo Orduña (University of Deusto), PaulHackenberger, Ralf Kistner, Randy Shen (Acer), Rasmus Schrøder Sørensen, Richard Hřivňák, Romain Pechayre, RomanNurik (Google), Ryan Alford, Sanford Squires, Sean Owen (Google), Shiyuan Guo / 郭世元, Simon Flannery (Ericsson),Steven Parkes, Suraj Supekar, Sven Klinkhamer, Thomas Gerbet, Vince Francis (LifeMarks), Wolfgang Jung, YakovOkshtein (Google)
Apache License Version 2.0, January 2004
http://www.apache.org/licenses/
TERMS AND CONDITIONS FOR USE, REPRODUCTION, AND DISTRIBUTION
1 Definitions.
"License" shall mean the terms and conditions for use, reproduction, and distribution as defined by Sections 1through 9 of this document.
"Licensor" shall mean the copyright owner or entity authorized by the copyright owner that is granting the License.
"Legal Entity" shall mean the union of the acting entity and all other entities that control, are controlled by, or areunder common control with that entity. For the purposes of this definition, "control" means (i) the power, director indirect, to cause the direction or management of such entity, whether by contract or otherwise, or (ii) ownershipof fifty percent (50%) or more of the outstanding shares, or (iii) beneficial ownership of such entity.
Notices 86
"You" (or "Your") shall mean an individual or Legal Entity exercising permissions granted by this License.
"Source" form shall mean the preferred form for making modifications, including but not limited to software sourcecode, documentation source, and configuration files.
"Object" form shall mean any form resulting from mechanical transformation or translation of a Source form,including but not limited to compiled object code, generated documentation, and conversions to other media types.
"Work" shall mean the work of authorship, whether in Source or Object form, made available under the License,as indicated by a copyright notice that is included in or attached to the work (an example is provided in the Appendixbelow).
"Derivative Works" shall mean any work, whether in Source or Object form, that is based on (or derived from) theWork and for which the editorial revisions, annotations, elaborations, or other modifications represent, as a whole,an original work of authorship. For the purposes of this License, Derivative Works shall not include works that remainseparable from, or merely link (or bind by name) to the interfaces of, the Work and Derivative Works thereof.
"Contribution" shall mean any work of authorship, including the original version of the Work and any modificationsor additions to that Work or Derivative Works thereof, that is intentionally submitted to Licensor for inclusion inthe Work by the copyright owner or by an individual or Legal Entity authorized to submit on behalf of the copyrightowner. For the purposes of this definition, "submitted" means any form of electronic, verbal, or writtencommunication sent to the Licensor or its representatives, including but not limited to communication on electronicmailing lists, source code control systems, and issue tracking systems that are managed by, or on behalf of, theLicensor for the purpose of discussing and improving the Work, but excluding communication that is conspicuouslymarked or otherwise designated in writing by the copyright owner as "Not a Contribution."
"Contributor" shall mean Licensor and any individual or Legal Entity on behalf of whom a Contribution has beenreceived by Licensor and subsequently incorporated within the Work.
2 Grant of Copyright License. Subject to the terms and conditions of this License, each Contributor hereby grants toYou a perpetual, worldwide, non-exclusive, no-charge, royalty-free, irrevocable copyright license to reproduce,prepare Derivative Works of, publicly display, publicly perform, sublicense, and distribute the Work and suchDerivative Works in Source or Object form.
3 Grant of Patent License. Subject to the terms and conditions of this License, each Contributor hereby grants to Youa perpetual, worldwide, non-exclusive, no-charge, royalty-free, irrevocable (except as stated in this section) patentlicense to make, have made, use, offer to sell, sell, import, and otherwise transfer the Work, where such licenseapplies only to those patent claims licensable by such Contributor that are necessarily infringed by theirContribution(s) alone or by combination of their Contribution(s) with the Work to which such Contribution(s) wassubmitted. If You institute patent litigation against any entity (including a cross-claim or counterclaim in a lawsuit)alleging that the Work or a Contribution incorporated within the Work constitutes direct or contributory patentinfringement, then any patent licenses granted to You under this License for that Work shall terminate as of thedate such litigation is filed.
4 Redistribution. You may reproduce and distribute copies of the Work or Derivative Works thereof in any medium,with or without modifications, and in Source or Object form, provided that You meet the following conditions:
a (a) You must give any other recipients of the Work or Derivative Works a copy of this License; and
b (b) You must cause any modified files to carry prominent notices stating that You changed the files; and
c (c) You must retain, in the Source form of any Derivative Works that You distribute, all copyright, patent,trademark, and attribution notices from the Source form of the Work, excluding those notices that do not pertainto any part of the Derivative Works; and
d (d) If the Work includes a "NOTICE" text file as part of its distribution, then any Derivative Works that Youdistribute must include a readable copy of the attribution notices contained within such NOTICE file, excludingthose notices that do not pertain to any part of the Derivative Works, in at least one of the following places:within a NOTICE text file distributed as part of the Derivative Works; within the Source form or documentation,if provided along with the Derivative Works; or, within a display generated by the Derivative Works, if andwherever such third-party notices normally appear. The contents of the NOTICE file are for informational
Notices 87
purposes only and do not modify the License. You may add Your own attribution notices within Derivative Worksthat You distribute, alongside or as an addendum to the NOTICE text from the Work, provided that suchadditional attribution notices cannot be construed as modifying the License.
You may add Your own copyright statement to Your modifications and may provide additional or different licenseterms and conditions for use, reproduction, or distribution of Your modifications, or for any such Derivative Worksas a whole, provided Your use, reproduction, and distribution of the Work otherwise complies with the conditionsstated in this License.
5 Submission of Contributions. Unless You explicitly state otherwise, any Contribution intentionally submitted forinclusion in the Work by You to the Licensor shall be under the terms and conditions of this License, without anyadditional terms or conditions. Notwithstanding the above, nothing herein shall supersede or modify the terms ofany separate license agreement you may have executed with Licensor regarding such Contributions.
6 Trademarks. This License does not grant permission to use the trade names, trademarks, service marks, or productnames of the Licensor, except as required for reasonable and customary use in describing the origin of the Workand reproducing the content of the NOTICE file.
7 Disclaimer of Warranty. Unless required by applicable law or agreed to in writing, Licensor provides the Work (andeach Contributor provides its Contributions) on an "AS IS" BASIS, WITHOUT WARRANTIES OR CONDITIONS OF ANYKIND, either express or implied, including, without limitation, any warranties or conditions of TITLE, NON-INFRINGEMENT, MERCHANTABILITY, or FITNESS FOR A PARTICULAR PURPOSE. You are solely responsible fordetermining the appropriateness of using or redistributing the Work and assume any risks associated with Yourexercise of permissions under this License.
8 Limitation of Liability. In no event and under no legal theory, whether in tort (including negligence), contract, orotherwise, unless required by applicable law (such as deliberate and grossly negligent acts) or agreed to in writing,shall any Contributor be liable to You for damages, including any direct, indirect, special, incidental, or consequentialdamages of any character arising as a result of this License or out of the use or inability to use the Work (includingbut not limited to damages for loss of goodwill, work stoppage, computer failure or malfunction, or any and allother commercial damages or losses), even if such Contributor has been advised of the possibility of such damages.
9 Accepting Warranty or Additional Liability. While redistributing the Work or Derivative Works thereof, You maychoose to offer, and charge a fee for, acceptance of support, warranty, indemnity, or other liability obligationsand/or rights consistent with this License. However, in accepting such obligations, You may act only on Your ownbehalf and on Your sole responsibility, not on behalf of any other Contributor, and only if You agree to indemnify,defend, and hold each Contributor harmless for any liability incurred by, or claims asserted against, such Contributorby reason of your accepting any such warranty or additional liability.
END OF TERMS AND CONDITIONS
APPENDIX: How to apply the Apache License to your work.
To apply the Apache License to your work, attach the following boilerplate notice, with the fields enclosed by brackets"[]" replaced with your own identifying information. (Don't include the brackets!) The text should be enclosed in theappropriate comment syntax for the file format. We also recommend that a file or class name and description of purposebe included on the same "printed page" as the copyright notice for easier identification within third-party archives.
Copyright [yyyy] [name of copyright owner]
Licensed under the Apache License, Version 2.0 (the "License"); you may not use this file except in compliance with theLicense. You may obtain a copy of the License at
http://www.apache.org/licenses/LICENSE-2.0
Unless required by applicable law or agreed to in writing, software distributed under the License is distributed on an"AS IS" BASIS, WITHOUT WARRANTIES OR CONDITIONS OF ANY KIND, either express or implied. See the License for thespecific language governing permissions and limitations under the License.
Notices 88
Glossary of Security TermsAccess Controls Settings that control whether individual device menus, functions, and settings
are available, and to whom. Also referred to as Function Access Controls on somedevices.
Authentication A method for securely identifying a user.
Authorization A method for specifying which functions are available to a user.
Building Block Authentication and Authorization tools used in the Embedded Web Server. Theyinclude: password, PIN, Internal accounts, LDAP, LDAP+GSSAPI, Kerberos 5.
Group A collection of users sharing common characteristics.
Security Template A profile created and stored in the Embedded Web Server, used with AccessControls to manage device functions.
Glossary of Security Terms 89
IndexNumerics802.1X authentication 38, 57
Aaccess card
restricting 57access controls
list of 68managing with PIN or
password 20managing with security
templates 20setting 75understanding 7
accessing the Embedded WebServer 7Active Directory
connecting a printer to 13adding idle screen images 81advanced building blocks
configuring 10advanced security setup
password 10advanced‑security devices 4Appendix A
CA file creation 66Appendix A: CA file creation 66Appendix B
CA‑Signed Device Certificatecreation 66
Appendix B: CA‑Signed DeviceCertificate creation 66Appendix C
Automatic CertificationEnrollment Application 66
Appendix C: Automatic CertificationEnrollment Application 66AppleTalk
disabling 78applying access control restriction
Panel PIN Protect 9Web Page Password Protect 8
authenticating using Kerberos 18using LDAP 14using LDAP+GSSAPI 16
authentication understanding 5
authorization understanding 5
Automatic Certification EnrollmentApplication
Appendix C 66
BBackground and Idle Screen
configuring 81background image
adding 81backup password
creating 28enabling 74using 28
basic security applying basic security setup 9authentication type 9limiting access 9modifying or removing access 9
before configuring the device checking firmware 72checking physical interfaces 72
building blocks adding to security templates 20internal accounts 11Kerberos 5 18LDAP 14LDAP+GSSAPI 16
CCA certificate monitor
setting up 26CA file creation
Appendix A 66Card Authentication 52card authentication 52CA‑Signed Device Certificatecreation
Appendix B 66certificate
creating 25deleting 25downloading 25viewing 25
Certificate Authority certificate downloading 27installing 23
certificate defaults setting 26
certificate error 61certificate information
configuring in devices 26device, configuring 24
certificates setting defaults 26
checking disk encryption status 44Common Access Card 52Common Criteria
overview 70complete hard disk erasure 48confidential print jobs 80confidential printing
configuring 33configuring
Background and Idle Screen 81IP security settings 39Network Time Protocol 79Smart Card Authentication
Client 81TCP/IP port access setting 41user access for Common
Criteria 82configuring advanced buildingblocks
control panel 10configuring device
certificate information 24configuring disk wiping 74Configuring Out of Service Erase 49configuring out‑of‑servicewiping 49connecting to a wirelessnetwork 40control panel
locking 36control panel lock
enabling 36controlling access to devicefunctions 75creating
certificate 25creating internal accounts 11, 74creating password
security 8Web Page Password Protect 8
Index 90
creating security templates 75creating user accounts 74
Ddate and time
setting 79deleting
certificate 25device certificate
creating 25device management
using HTTPS 28device, configuring
certificate information 24devices
advanced security 4simple security 4
disabling Apple Talk 78disabling home screen icons 77disabling USB buffering 73disk encryption status
checking 44disk wiping
configuring 74out of service 49
disposing of printer hard disk 50domain certificate error 61domain controller certificate notinstalled 61downloading
certificate 25Certificate Authority certificate 27
EEmbedded Web Server
accessing 7enabling backup password 74encrypting the hard disk 73encrypting the printer hard disk 43erasing hard disk 48erasing non‑volatile memory 44, 51erasing temporary data files 47erasing volatile memory 51eSF Security Manager 81
Ffax forwarding 79fax settings
Driver to fax 79fax forwarding 79held faxes 79
fax storage location setting up 79
firmware checking 72updating 31
function access restricting 75
Function Access Controls 7function access controls
list of 68
Ggroups
understanding 7
Hhard disk
disposing of 50erasing temporary data files
from 47hard disk encryption 73hard disk erasure 48held faxes 79held jobs
types 80holding faxes
enabling 36home screen 83
securing 81home screen icons
disabling 77HTTPS
device management 28
Iidle screen
securing 81idle screen images
adding 81installing
Certificate Authority certificate 23Installing a Certificate Authoritycertificate on the device 23interfaces
checking 72internal accounts
creating 11, 74using 11
IP security settings configuring 39
IPsec IP security settings 39
Jjob expiration settings
configuring 80
KKDC and MFP clocks out of sync 60Kerberos
configuring 18LDAP+GSSAPI and 18setting date and time for 18
keyboard using the 83
LLDAP
using 14LDAP lookup failure 63LDAP+GSSAPI
Kerberos and 18using 16
limiting access 9location of a lock 42lock
location 42locking the home screen 81lockout 34login
failure 34restrictions 34
MMFP clock out of sync 60multifunction printers with a harddisk 70multifunction printers without ahard disk 70
NNetwork Time Protocol
configuring 79non‑volatile memory
erasing 51notices 85
OOperator Panel Lock
enabling 36
Index 91
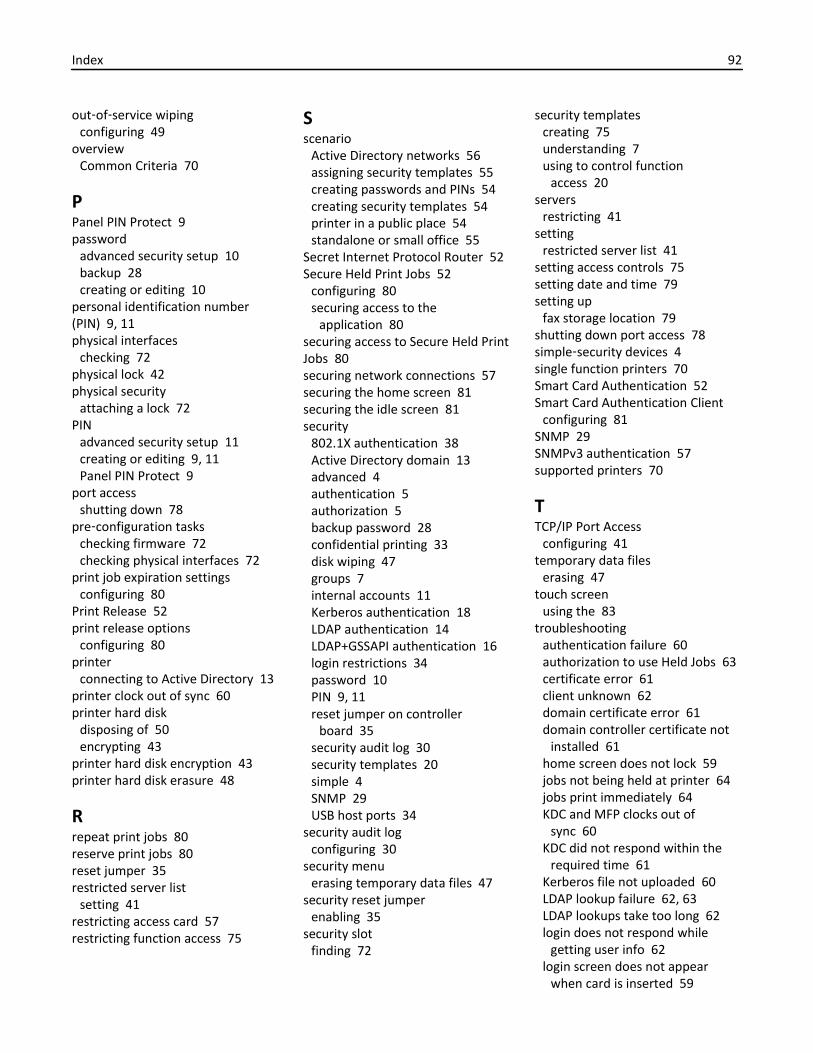
out‑of‑service wiping configuring 49
overview Common Criteria 70
PPanel PIN Protect 9password
advanced security setup 10backup 28creating or editing 10
personal identification number(PIN) 9, 11physical interfaces
checking 72physical lock 42physical security
attaching a lock 72PIN
advanced security setup 11creating or editing 9, 11Panel PIN Protect 9
port access shutting down 78
pre‑configuration tasks checking firmware 72checking physical interfaces 72
print job expiration settings configuring 80
Print Release 52print release options
configuring 80printer
connecting to Active Directory 13printer clock out of sync 60printer hard disk
disposing of 50encrypting 43
printer hard disk encryption 43printer hard disk erasure 48
Rrepeat print jobs 80reserve print jobs 80reset jumper 35restricted server list
setting 41restricting access card 57restricting function access 75
Sscenario
Active Directory networks 56assigning security templates 55creating passwords and PINs 54creating security templates 54printer in a public place 54standalone or small office 55
Secret Internet Protocol Router 52Secure Held Print Jobs 52
configuring 80securing access to the
application 80securing access to Secure Held PrintJobs 80securing network connections 57securing the home screen 81securing the idle screen 81security
802.1X authentication 38Active Directory domain 13advanced 4authentication 5authorization 5backup password 28confidential printing 33disk wiping 47groups 7internal accounts 11Kerberos authentication 18LDAP authentication 14LDAP+GSSAPI authentication 16login restrictions 34password 10PIN 9, 11reset jumper on controller
board 35security audit log 30security templates 20simple 4SNMP 29USB host ports 34
security audit log configuring 30
security menu erasing temporary data files 47
security reset jumper enabling 35
security slot finding 72
security templates creating 75understanding 7using to control function
access 20servers
restricting 41setting
restricted server list 41setting access controls 75setting date and time 79setting up
fax storage location 79shutting down port access 78simple‑security devices 4single function printers 70Smart Card Authentication 52Smart Card Authentication Client
configuring 81SNMP 29SNMPv3 authentication 57supported printers 70
TTCP/IP Port Access
configuring 41temporary data files
erasing 47touch screen
using the 83troubleshooting
authentication failure 60authorization to use Held Jobs 63certificate error 61client unknown 62domain certificate error 61domain controller certificate not
installed 61home screen does not lock 59jobs not being held at printer 64jobs print immediately 64KDC and MFP clocks out of
sync 60KDC did not respond within the
required time 61Kerberos file not uploaded 60LDAP lookup failure 62, 63LDAP lookups take too long 62login does not respond while
getting user info 62login screen does not appear
when card is inserted 59
Index 92
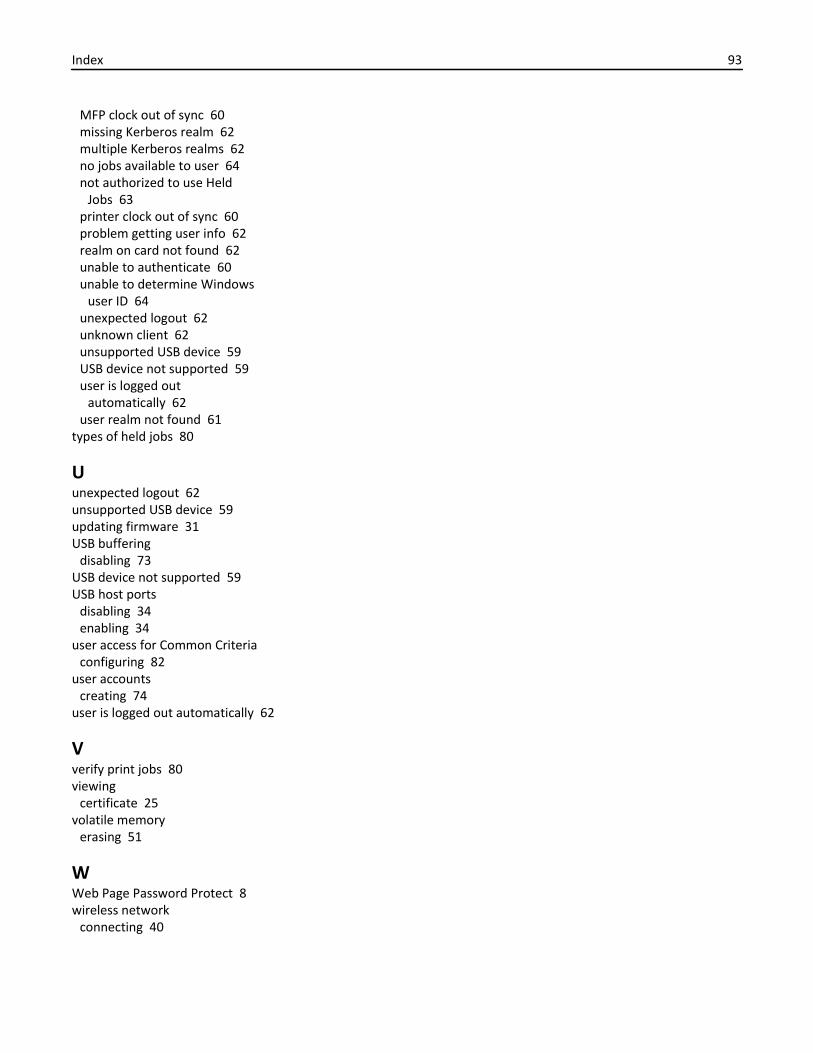
MFP clock out of sync 60missing Kerberos realm 62multiple Kerberos realms 62no jobs available to user 64not authorized to use Held
Jobs 63printer clock out of sync 60problem getting user info 62realm on card not found 62unable to authenticate 60unable to determine Windows
user ID 64unexpected logout 62unknown client 62unsupported USB device 59USB device not supported 59user is logged out
automatically 62user realm not found 61
types of held jobs 80
Uunexpected logout 62unsupported USB device 59updating firmware 31USB buffering
disabling 73USB device not supported 59USB host ports
disabling 34enabling 34
user access for Common Criteria configuring 82
user accounts creating 74
user is logged out automatically 62
Vverify print jobs 80viewing
certificate 25volatile memory
erasing 51
WWeb Page Password Protect 8wireless network
connecting 40
Index 93
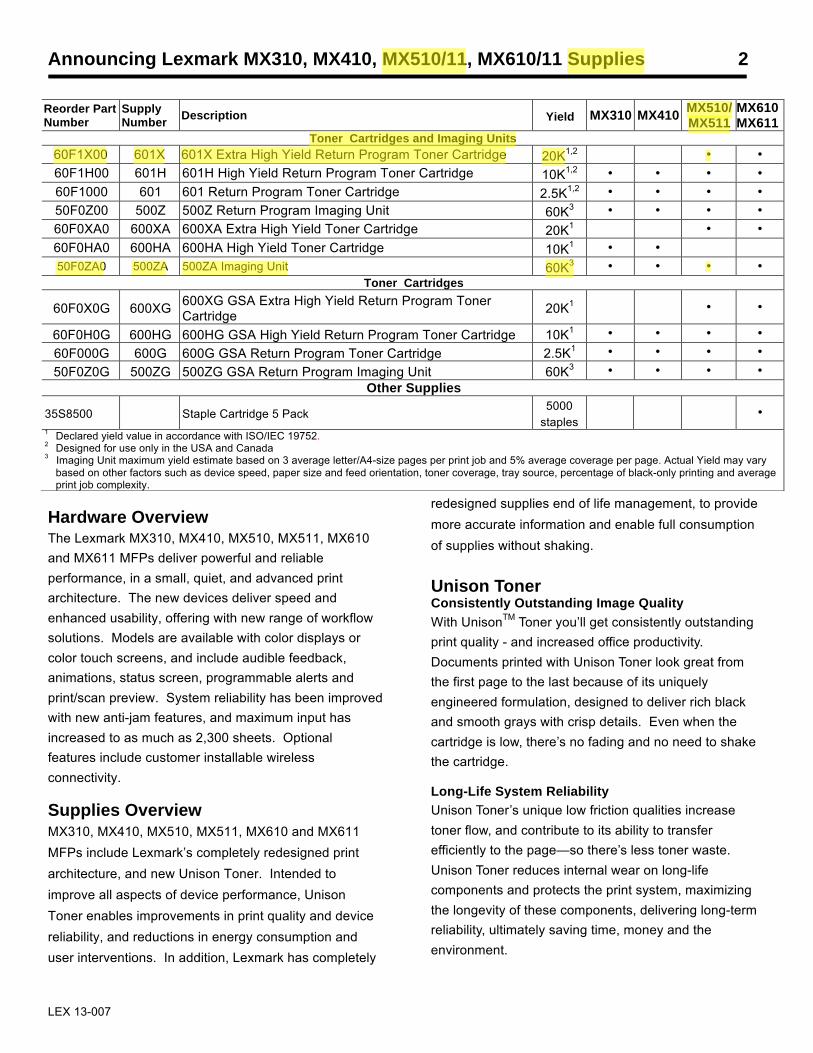
Announcing Lexmark MX310, MX410, MX510/11, MX610/11 Supplies 2
LEX 13-007
Hardware Overview The Lexmark MX310, MX410, MX510, MX511, MX610 and MX611 MFPs deliver powerful and reliable performance, in a small, quiet, and advanced print architecture. The new devices deliver speed and enhanced usability, offering with new range of workflow solutions. Models are available with color displays or color touch screens, and include audible feedback, animations, status screen, programmable alerts and print/scan preview. System reliability has been improved with new anti-jam features, and maximum input has increased to as much as 2,300 sheets. Optional features include customer installable wireless connectivity. Supplies Overview MX310, MX410, MX510, MX511, MX610 and MX611 MFPs include Lexmark’s completely redesigned print architecture, and new Unison Toner. Intended to improve all aspects of device performance, Unison Toner enables improvements in print quality and device reliability, and reductions in energy consumption and user interventions. In addition, Lexmark has completely
redesigned supplies end of life management, to provide more accurate information and enable full consumption of supplies without shaking. Unison Toner Consistently Outstanding Image Quality With UnisonTM Toner you’ll get consistently outstanding print quality - and increased office productivity. Documents printed with Unison Toner look great from the first page to the last because of its uniquely engineered formulation, designed to deliver rich black and smooth grays with crisp details. Even when the cartridge is low, there’s no fading and no need to shake the cartridge. Long-Life System Reliability Unison Toner’s unique low friction qualities increase toner flow, and contribute to its ability to transfer efficiently to the page—so there’s less toner waste. Unison Toner reduces internal wear on long-life components and protects the print system, maximizing the longevity of these components, delivering long-term reliability, ultimately saving time, money and the environment.
Reorder Part Number
Supply Number Description Yield MX310 MX410 MX510/
MX511 MX610 MX611
Toner Cartridges and Imaging Units 60F1X00 601X 601X Extra High Yield Return Program Toner Cartridge 20K1,2 � � 60F1H00 601H 601H High Yield Return Program Toner Cartridge 10K1,2 � � � � 60F1000 601 601 Return Program Toner Cartridge 2.5K1,2 � � � � 50F0Z00 500Z 500Z Return Program Imaging Unit 60K3 � � � � 60F0XA0 600XA 600XA Extra High Yield Toner Cartridge 20K1 � �
60F0HA0 600HA 600HA High Yield Toner Cartridge 10K1 � � 50F0ZA0 500ZA 500ZA Imaging Unit 60K3 � � � �
Toner Cartridges
60F0X0G 600XG 600XG GSA Extra High Yield Return Program Toner Cartridge 20K1 � �
60F0H0G 600HG 600HG GSA High Yield Return Program Toner Cartridge 10K1 � � � �
60F000G 600G 600G GSA Return Program Toner Cartridge 2.5K1 � � � �
50F0Z0G 500ZG 500ZG GSA Return Program Imaging Unit 60K3 � � � � Other Supplies
35S8500 Staple Cartridge 5 Pack 5000
staples
�
1 Declared yield value in accordance with ISO/IEC 19752.
2 Designed for use only in the USA and Canada 3 Imaging Unit maximum yield estimate based on 3 average letter/A4-size pages per print job and 5% average coverage per page. Actual Yield may vary
based on other factors such as device speed, paper size and feed orientation, toner coverage, tray source, percentage of black-only printing and average print job complexity.
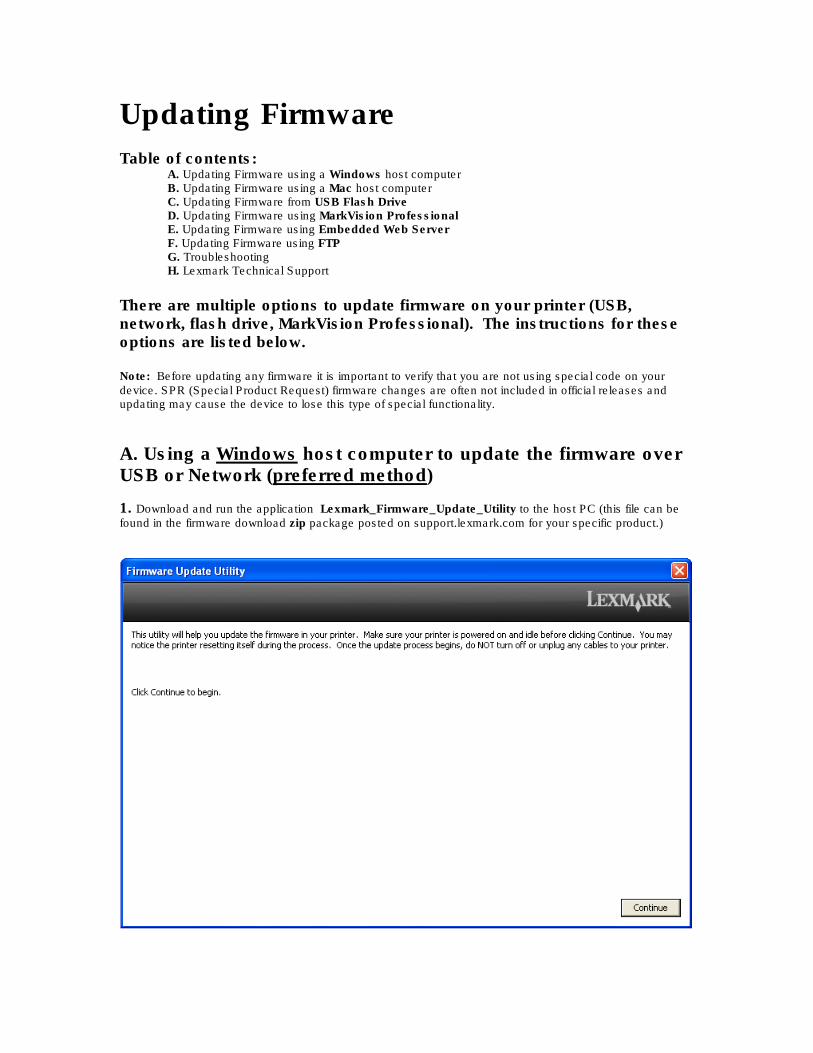
Updating Firmware Table of contents:
A. Updating Firmware using a Windows host computer B. Updating Firmware using a Mac host computer C. Updating Firmware from USB Flash Drive D. Updating Firmware using MarkVision Professional E. Updating Firmware using Embedded Web Server F. Updating Firmware using FTP G. Troubleshooting H. Lexmark Technical Support
There are multiple options to update firmware on your printer (USB, network, flash drive, MarkVision Professional). The instructions for these options are listed below.
Note: Before updating any firmware it is important to verify that you are not using special code on your device. SPR (Special Product Request) firmware changes are often not included in official releases and updating may cause the device to lose this type of special functionality.
A. Using a Windows host computer to update the firmware over USB or Network (preferred method)
1. Download and run the application Lexmark_Firmware_Update_Utility to the host PC (this file can be found in the firmware download zip package posted on support.lexmark.com for your specific product.)
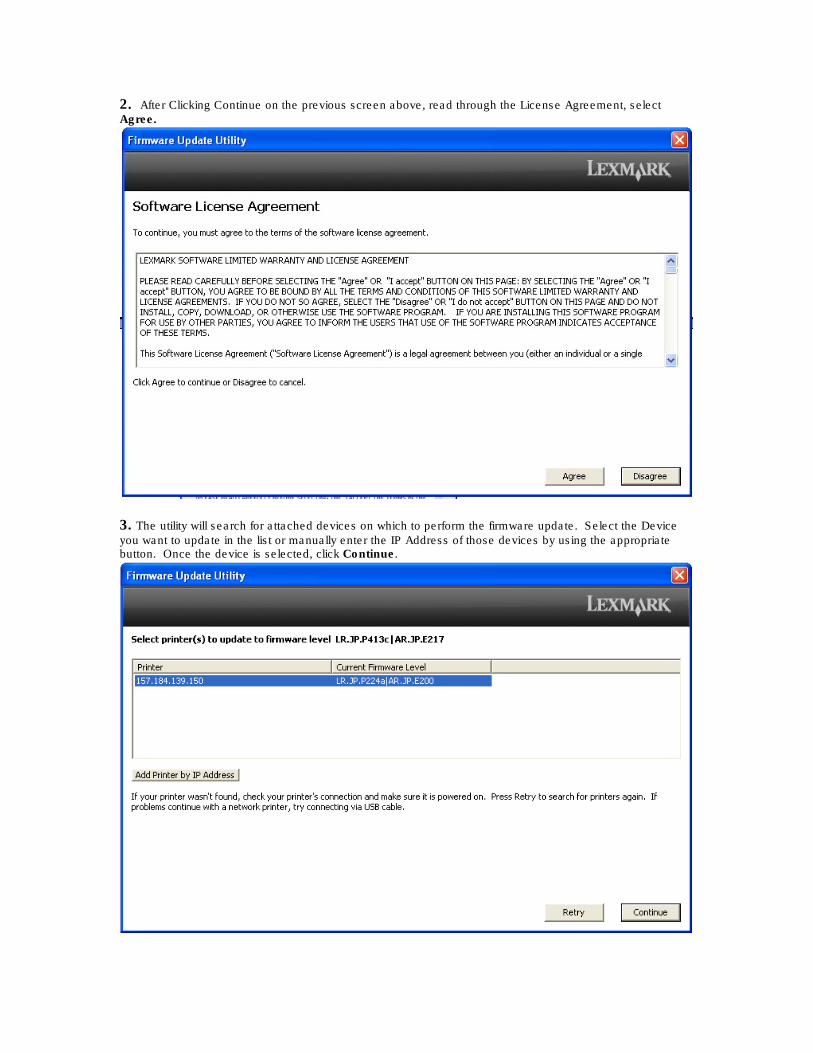
2. After Clicking Continue on the previous screen above, read through the License Agreement, select Agree.
3. The utility will search for attached devices on which to perform the firmware update. Select the Device
you want to update in the list or manually enter the IP Address of those devices by using the appropriate button. Once the device is selected, click Continue.
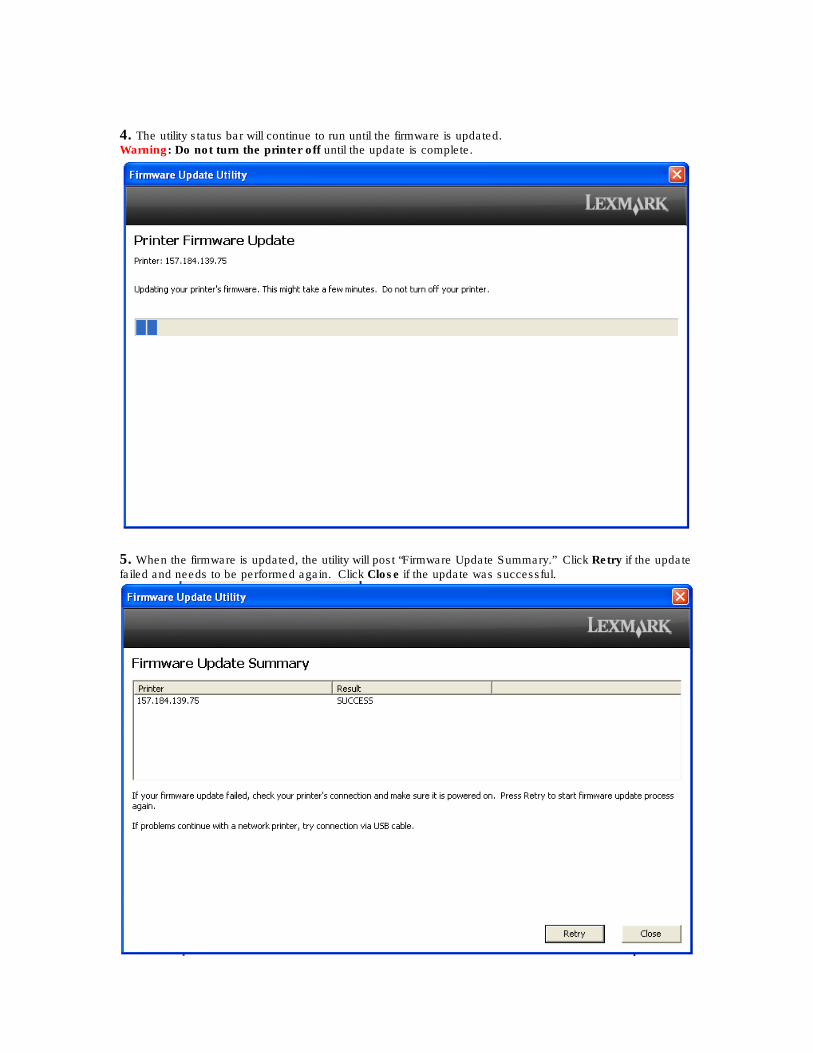
4. The utility status bar will continue to run until the firmware is updated. Warning: Do not turn the printer off until the update is complete.
5. When the firmware is updated, the utility will post “Firmware Update Summary.” Click Retry if the update
failed and needs to be performed again. Click Close if the update was successful.

B. Using a Mac host computer to update the firmware over USB Note: This procedure uses the program PrinterFileLoader.dmg. Printer File Loader is a utility that can also be used to update firmware from a Mac host computer via USB. To use the Printer File Loader utility, the printer must be installed on the host computer so a USB virtual printer port can be established on the host computer. The virtual printer port is needed so the host computer can communicate with the printer. Note: The driver must be installed before Printer File Loader will recognize the printer.
1. Download and unzip the firmware zip package from support.lexmark.com for your specific product.
2. Make sure the printer is attached over USB and Ready or Invalid Engine Code displays on the operator
panel.
3. Verify your USB connection to the printer, and make sure the printer is recognized by the USB host
controller.
4. Open the PrinterFileLoader.dmg file.
5. Follow the Printer File Loader Installer wizard.
6. Open the Printer File Loader. See images below for an illustration of this firmware update process.
7. Next to Printer, confirm that the correct printer is listed. If not, click on ( ) to select your printer from the
list.
8. Click on the parent firmware file directory.
9. Browse for the firmware flash file (*.fls) for your specific product.
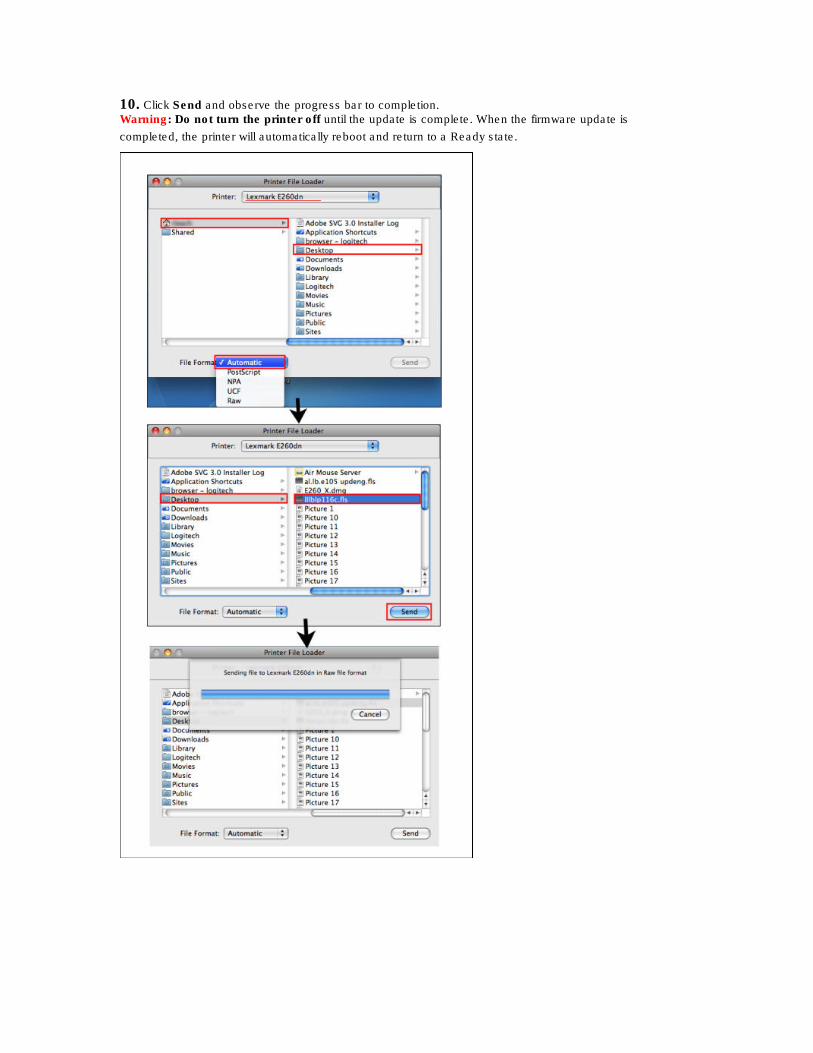
10. Click Send and observe the progress bar to completion. Warning: Do not turn the printer off until the update is complete. When the firmware update is
completed, the printer will automatically reboot and return to a Ready state.
C. Updating the firmware using a USB flash drive If a USB thumb drive/flash drive is available, it can be used to update the printer firmware. To do so, unzip the zip package for your specific product and the firmware files to the flash drive. The USBFlash.exe and PrinterFileLoader.dmg files do not need to be copied to the flash drive. Note: A printer that is in Invalid Code mode cannot be updated from a USB flash drive. Note: Verify the Enable Drive and Update Code settings are enabled. These settings are in the Flash Drive menu under the Settings Menu in the Administrative menus. To update the printer firmware, perform the following steps:
1. Insert the flash drive into the USB port located on the operator panel. USB Menu: Print from USB
displays. Note: If Print from USB doesn’t display by default, use the ⊳ or � buttons to navigate to the Print from USB command.
2. Press the a button to access the flash drive’s directory structure displays.
3. Use the ⊳ or � buttons to navigate to the *.fls firmware file.
4. Press the a button. Program Device: Yes displays.
5. Press the a button. The printer will start the update process. Various status and progress messages
will display on the operator panel. Warning: DO NOT TURN THE PRINTER OFF or unplug the flash drive until the update is complete. When the update is complete, the printer will automatically reboot and return to USB Menu: Print from USB.
6. Once USB Menu: Print from USB displays, remove the flash drive. Printer will return to Ready.
D. Updating the firmware using MarkVision Professional (MVP) To update firmware using MVP, download the firmware files to the host PC (these files can be found in the zip package).
1. On the main MVP screen you will see a list of IP addresses associated to the printers MVP is monitoring.
Select the address (or addresses) of print servers that you would like to update
2. From the "Actions" drop down menu select "Firmware Download (Print Server)" task OR from the MVP
Home screen, select the Firmware Download (Print Server) task from the All Tasks list.
3. Click New File to add the *.fls firmware file to the MVP list of downloadable firmware files.
4. Click Start to begin the upgrade process.
Warning: The print server may be damaged if it is turned off or reset during a firmware flash. Use the Scheduling task to perform flash operations at night, on holidays, or at other times when printer traffic is very light.
E. Updating the firmware using a networked computer and using the printer’s internal Web server To update firmware over the printer’s webpage, download the firmware files to the host PC (these files can be found in the zip package downloaded from support.lexmark.com). Note: You will need the IP address of the printer on the network. This can be obtained from the Network Settings page found under Network Setup menu under Reports, in the Administrative menu. You can also navigate to Menu > Network/Ports > Network Menu > Network Setup > TCP/IP > IP Address. To update the printer’s firmware, perform the follow steps:
1. Confirm the printer displays Ready.
2. On a computer attached to a network, open a Web browser.
3. Enter the printers IP address in the Web browsers address bar.
4. Press Enter. The printer’s homepage opens.
5. Click Settings. The settings page opens.
6. Click the Update Firmware link. The update firmware page opens.
7. Click the Browse button. A file browser will open.
8. Browse to appropriate *.fls file.
9. Click Open.
10. Click Submit. Various status and progress messages will appear on the operator panel. The printer will
reboot. The webpage will post File Transfer Complete. The HTTP session will terminate. Warning: Do not turn the printer off until the update is complete. When the firmware update is completed, the printer will automatically reboot and return to a Ready state.
F. Updating the firmware using a networked computer and FTP To update firmware over FTP, download the firmware files to the host PC (these files can be found in the zip package downloaded from support.lexmark.com). Note: To update the printer using FTP, you should have an understanding of how to use an FTP client. Note: You will need the IP address of the printer on the network. This can be obtained from the Network Settings page found under Network Setup menu under Reports, in the Administrative menu. You can also navigate to Menu > Network/Ports > Network Menu > Network Setup > TCP/IP > IP Address. To update the printer’s firmware, perform the follow steps:
1. Confirm the printer displays Ready.
2. On a computer attached to a network, open an FTP client.
3. Using the FTP client, navigate to the directory containing the firmware files.
4. Open an FTP session with printer’s IP address.
5. Use a Put command to send the appropriate *.fls file to the printer.
The printer will start the update process. Various status and progress messages will display on the operator panel. The FTP session will terminate. Warning: DO NOT TURN THE PRINTER OFF until the update is complete. When the update is completed, the printer will automatically reboot and return to Ready.
G. Troubleshooting If the device does not appear to be updated correctly please try the following before contacting the Lexmark Technical Support Center for assistance:
1. Verify that the firmware revisions are not updated by printing out the menu settings pages and comparing
them to the revisions in this document.
2. Verify that the firmware package you are trying to use is correct for the device you are trying to update.
(i.e. One would use the T654 package to update a T654 printer, etc.)
3. Power off the device and back on and then try to update the device again.
H. LEXMARK TECHNICAL SUPPORT AND ELECTRONIC SERVICES For technical assistance contact the Lexmark Customer Support Center at 1-800-LEXMARK weekdays from 9 a.m. to 9 p.m. EST or on Saturday from 12 p.m. to 6 p.m. EST. Lexmark's public webpage is located at http://www.lexmark.com/ and provides access to product information, print drivers, firmware updates, and utility program updates.
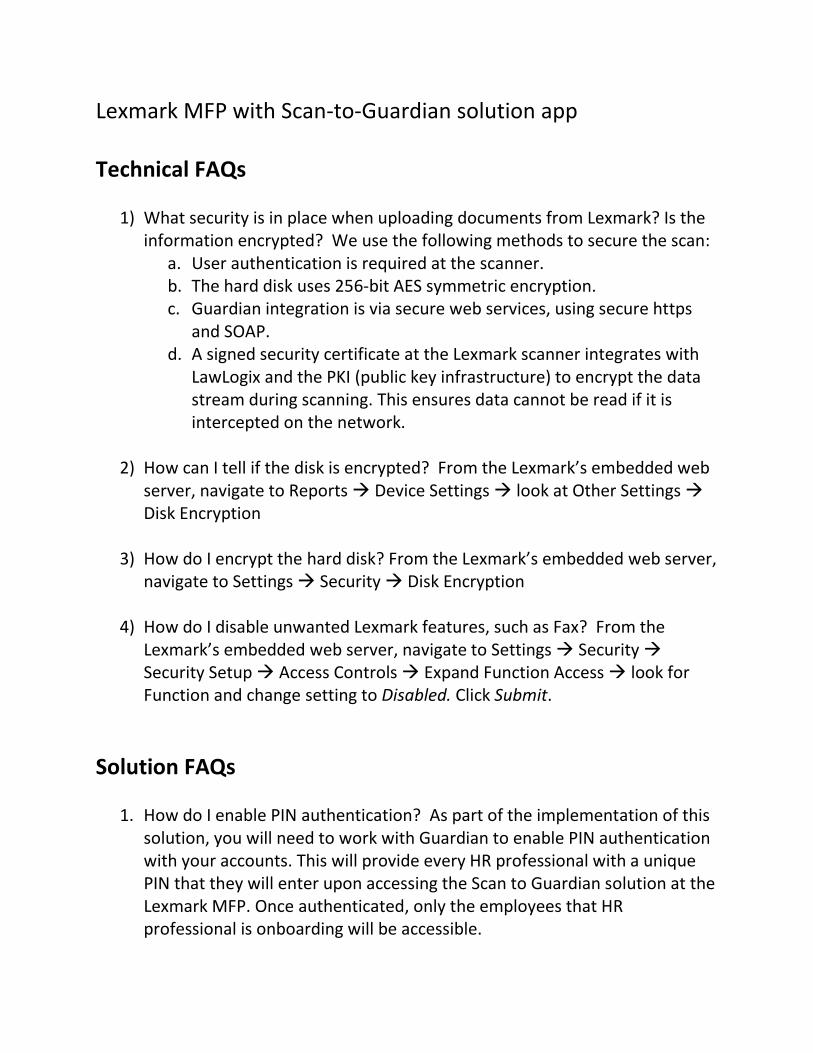
Lexmark MFP with Scan-to-Guardian solution app Technical FAQs
1) What security is in place when uploading documents from Lexmark? Is the information encrypted? We use the following methods to secure the scan:
a. User authentication is required at the scanner. b. The hard disk uses 256-bit AES symmetric encryption. c. Guardian integration is via secure web services, using secure https
and SOAP. d. A signed security certificate at the Lexmark scanner integrates with
LawLogix and the PKI (public key infrastructure) to encrypt the data stream during scanning. This ensures data cannot be read if it is intercepted on the network.
2) How can I tell if the disk is encrypted? From the Lexmark’s embedded web
server, navigate to Reports Device Settings look at Other Settings Disk Encryption
3) How do I encrypt the hard disk? From the Lexmark’s embedded web server, navigate to Settings Security Disk Encryption
4) How do I disable unwanted Lexmark features, such as Fax? From the Lexmark’s embedded web server, navigate to Settings Security Security Setup Access Controls Expand Function Access look for Function and change setting to Disabled. Click Submit.
Solution FAQs
1. How do I enable PIN authentication? As part of the implementation of this solution, you will need to work with Guardian to enable PIN authentication with your accounts. This will provide every HR professional with a unique PIN that they will enter upon accessing the Scan to Guardian solution at the Lexmark MFP. Once authenticated, only the employees that HR professional is onboarding will be accessible.
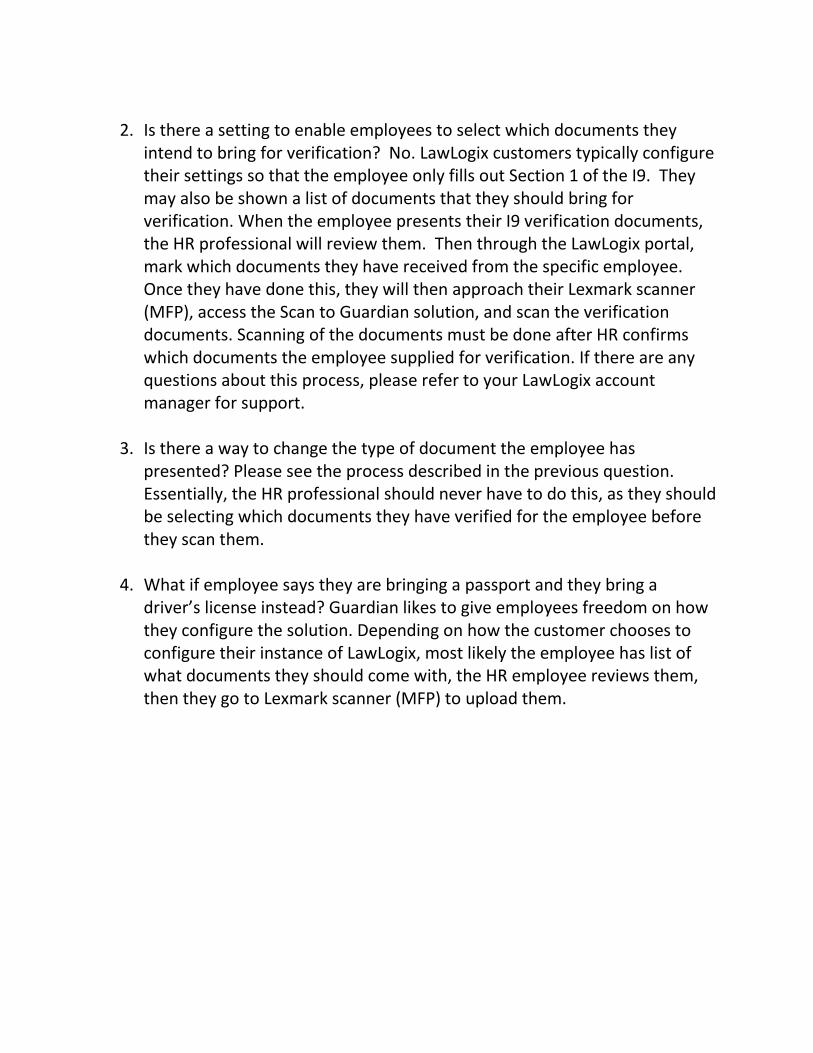
2. Is there a setting to enable employees to select which documents they
intend to bring for verification? No. LawLogix customers typically configure their settings so that the employee only fills out Section 1 of the I9. They may also be shown a list of documents that they should bring for verification. When the employee presents their I9 verification documents, the HR professional will review them. Then through the LawLogix portal, mark which documents they have received from the specific employee. Once they have done this, they will then approach their Lexmark scanner (MFP), access the Scan to Guardian solution, and scan the verification documents. Scanning of the documents must be done after HR confirms which documents the employee supplied for verification. If there are any questions about this process, please refer to your LawLogix account manager for support.
3. Is there a way to change the type of document the employee has
presented? Please see the process described in the previous question. Essentially, the HR professional should never have to do this, as they should be selecting which documents they have verified for the employee before they scan them.
4. What if employee says they are bringing a passport and they bring a
driver’s license instead? Guardian likes to give employees freedom on how they configure the solution. Depending on how the customer chooses to configure their instance of LawLogix, most likely the employee has list of what documents they should come with, the HR employee reviews them, then they go to Lexmark scanner (MFP) to upload them.

Lexmark International, Inc. Lexmark Solution Technical Support
740 New Circle Road NW
Lexington, KY 40550
1
Lexmark Solution Technical Support
HOW TO CONTACT LEXMARK TECHNICAL SUPPORT
Phone support is available to all customers under an active Annual Maintenance and Support (AM&S) agreement.
Please call the same number provided to you for Hardware support:
Lexmark Support is 1-800-LEXMARK Monday-Friday 9:00am to 9:00pm ET and Saturday 12:00pm to 6pm ET
Solutions Customers will use the following prompts: 1 – for English 1 – for Tech Support 3 – for Drivers Applications Solutions or Business Software 3 – for Lexmark Business Solutions
W HEN CONTACTING LEXMARK TECHNICAL SUPPORT
Being able to articulate the problem and symptoms is critical for a quick and accurate resolution to your issues. In
order to ensure this type of resolution it is strongly suggested to have the following information prior to calling the
Lexmark Technical Support Center:
− Contact Name − Telephone number or email where you can be
reached
− Company Name − Background information of the issue:
o Symptoms
o Error messages
o Timeframes for the issue
HOW LEXMARK TECHNICAL SUPPORT HANDLES YOUR REQUEST
A unique incident number will be created once the issue has been submitted. Please make note of this number,
as it will be used for future reference.
Your Lexmark Support Engineer will research and escalate your issue as needed to resolve your problem as
quickly as possible. Due to the level of specialization required to maintain superior technical expertise, it is
sometimes necessary to involve more than one support team in resolving a particular software problem. This is
easily handled, as our support teams are all well connected and work as one to resolve your unique issues.
MEETING OUR CUSTOMER’S EXPECTATIONS
If at any point in our service delivery process your expectations are not met by Lexmark, you may call our
attention to this problem by asking to speak with the Support Services Manager or by calling your Lexmark
Account Manager. An escalation will receive prompt attention and management focus. Lexmark Support
Services are committed to ensuring your expectations are met and that your request is being handled
appropriately.