kvm virtualization in rhel 7 made easy
DESCRIPTION
KVM Virtualization in RHEL 7 Made EasyTRANSCRIPT
KVM Virtualization in RHEL 7 Made Easy
A Dell Technical White Paper
Jose De la Rosa
Dell Linux Engineering
Dell Inc. KVM Virtualization in RHEL 7 Made Easy
2
THIS WHITE PAPER IS FOR INFORMATIONAL PURPOSES ONLY, AND MAY CONTAIN TYPOGRAPHICAL
ERRORS AND TECHNICAL INACCURACIES. THE CONTENT IS PROVIDED AS IS, WITHOUT EXPRESS OR
IMPLIED WARRANTIES OF ANY KIND.
© 2014 Dell Inc. All rights reserved. Reproduction of this material in any manner whatsoever without
the express written permission of Dell Inc. is strictly forbidden. For more information, contact Dell.
September 2014
Dell Inc. KVM Virtualization in RHEL 7 Made Easy
3
Contents
1. Introduction ........................................................................................................................................ 4
1.1 Purpose of this document ....................................................................................................... 4
1.2 A very brief overview of KVM .................................................................................................. 4
1.3 Terms & Conventions ............................................................................................................... 4
2. Preparing your environment ........................................................................................................... 5
2.1 Hardware..................................................................................................................................... 5
2.2 Virtualization Technology ....................................................................................................... 5
2.3 Required packages .................................................................................................................... 5
2.4 OS Installation Source .............................................................................................................. 6
2.5 Disk Space ................................................................................................................................... 6
2.6 Networking ................................................................................................................................. 6
2.7 Firewalld ...................................................................................................................................... 7
2.8 SELinux ........................................................................................................................................ 7
3 Creating VMs ...................................................................................................................................... 8
4 Cloning VMs ..................................................................................................................................... 10
5 Managing VMs .................................................................................................................................. 10
5.1 Common tasks ......................................................................................................................... 10
5.2 Getting access to a VM’s console ......................................................................................... 11
5.3 Attaching storage device to a VM ........................................................................................ 11
5.4 GUI Tools .................................................................................................................................. 12
6 Changing VM parameters .............................................................................................................. 12
6.1 Memory ..................................................................................................................................... 12
6.2 VCPUs ........................................................................................................................................ 14
6.3 Disk capacity ............................................................................................................................. 14
7 Deleting VMs .................................................................................................................................... 15
8 Conclusion ........................................................................................................................................ 15
Appendix - Additional Documentation ............................................................................................... 15
Dell Inc. KVM Virtualization in RHEL 7 Made Easy
4
1. Introduction
1.1 Purpose of this document
This document describes how to quickly setup and manage a virtualized environment with KVM
(Kernel-based Virtual Machine) in Red Hat Enterprise Linux 7 on Dell PowerEdge servers. This is not an
in-depth discussion of virtualization or KVM, but rather an easy-to-follow step-by-step description of
how to install and manage Virtual Machines (VMs) on a physical server.
Perhaps the biggest advantage of virtualization is cost savings. Even with the simplest deployment
you will save hardware ($$) and management (time) costs. For example in my lab I used to have 3
separate physical servers that ran all my services and apps, now I have only one physical server with 4
VMs and plenty or resources (CPUs, memory & disk space) to spare. In this article I share the exact
same steps I followed to install and manage the virtual environment in my lab.
I don’t use Windows in the lab, so I only cover Linux VMs. The steps for installing Windows VMs are
the same as Linux, with one additional (optional) step: installing virtio drivers in your Windows VM,
which enable direct access to devices and peripherals in your physical host and thus improves
performance. For more details on virtio drivers for Windows, read here.
1.2 A very brief overview of KVM
A line or two about KVM and then we’ll move on to the fun stuff. KVM is a Linux kernel module that
allows a user space program access to the hardware virtualization features of Intel and AMD
processors. With the KVM kernel module, VMs run as ordinary user-space processes.
KVM uses QEMU for I/O hardware emulation. QEMU is a user-space emulator that can emulate a
variety of guest processors on host processors with decent performance. Using the KVM kernel
module allows it to approach native speeds.
KVM is managed via the libvirt API and tools. Some libvirt tools used in this article include virsh, virt-
install and virt-clone.
1.3 Terms & Conventions
Let’s agree to some terms & conventions I use here:
Host - The hypervisor or physical server where all VMs are installed.
VMs (Virtual Machines) - Virtual servers that are installed on top of a physical server. Some online
documents refer to virtual machines as ‘domains’ or ‘guests’.
Text in Courier New font preceded by # are commands you type on a shell terminal.
Text in Courier New font is command output or file contents.
Dell Inc. KVM Virtualization in RHEL 7 Made Easy
5
2. Preparing your environment
2.1 Hardware
You don’t need a top-of-the-line PowerEdge server, a 2-socket server (with 4-6 cores each), 8-16 GB
of memory and 100 GB disk space is sufficient for 4 to 8 VMs, but of course it will depend on your
needs. In my lab I have a PowerEdge T610 with 2 Intel Xeon 4-core 5520 processors, 16 GB of
memory and about 160GB disk space and I can easily run 8-10 RHEL VMs without a sweat. Most of my
VMs use 1 GB of memory, 1 virtual CPU (VCPU) and around 15 GB of disk space.
One awesome feature in KVM is the concept of overcommitting, which allows you to allocate more
virtualized CPUs and memory than available resources on the host. The VMs then only use what they
need, allowing other VMs to use unused resources. So when you are planning your VM resources,
remember that you can allocate more resources than you actually have, but of course be mindful that
the total amount of resources actually being used by all VMs can’t exceed the total amount of
resources available on your host.
2.2 Virtualization Technology
Verify that Virtualization Technology (VT) is enabled in your server’s BIOS. Reboot your server and
press F2 during POST to go into the BIOS, then select “Processors Settings”, and verify “Virtualization
Technology” is set to “Enabled”. Save and Exit and let the server boot up.
Another item to check once your server boots up is whether your processors support VT. This is not a
requirement but it will help a lot with performance, so you will be better off with processors that
support VT. Check for these CPU extensions:
# grep -E 'svm|vmx' /proc/cpuinfo
- vmx is for Intel processors
- svm is for AMD processors
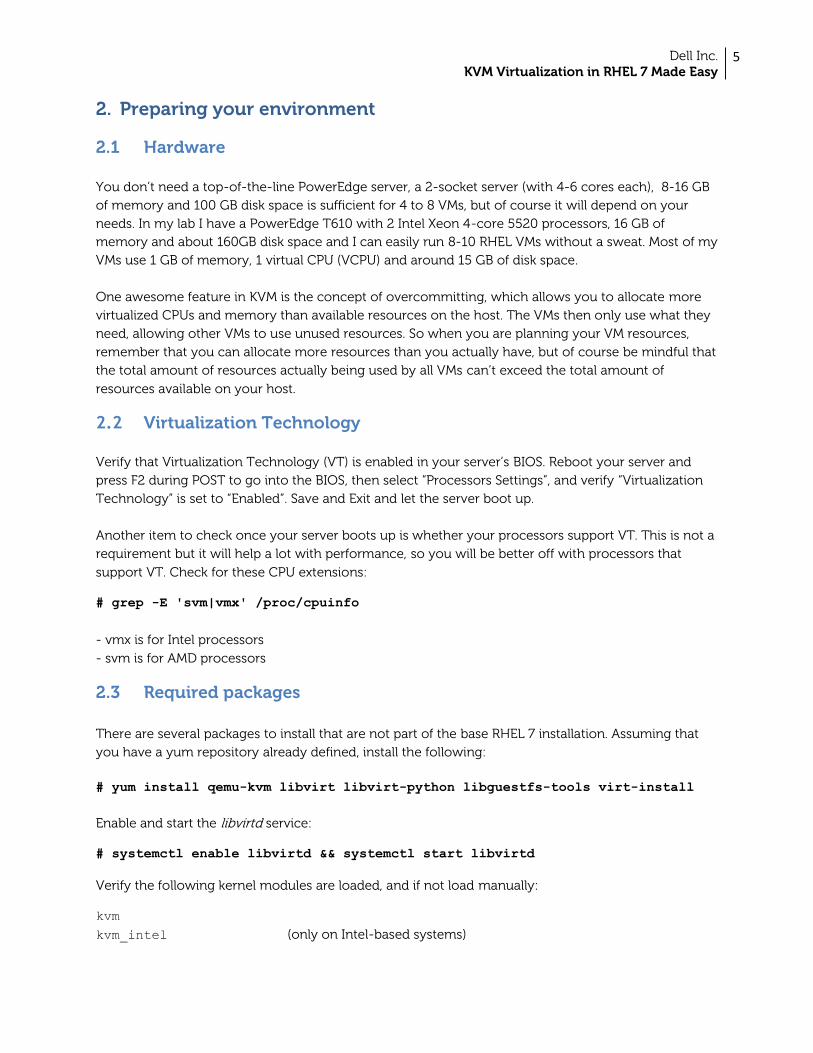
2.3 Required packages
There are several packages to install that are not part of the base RHEL 7 installation. Assuming that
you have a yum repository already defined, install the following:
# yum install qemu-kvm libvirt libvirt-python libguestfs-tools virt-install
Enable and start the libvirtd service:
# systemctl enable libvirtd && systemctl start libvirtd
Verify the following kernel modules are loaded, and if not load manually:
kvm
kvm_intel (only on Intel-based systems)
Dell Inc. KVM Virtualization in RHEL 7 Made Easy
6
2.4 OS Installation Source
You need to have an OS installation source ready for your VMs. You can either use an iso or a network
installation source that can be accessed via http, ftp or nfs.
2.5 Disk Space
When a VM is created, image files are created in the default directory /var/lib/libvirt/images, but you
can choose any directory you’d like. Regardless of what directory you choose, you will have to verify
there is enough disk space available in that partition. In the examples presented in this whitepaper, I
use directory /vm-images.
KVM supports several types of VM image formats, which determine the amount of actual disk space
each VM uses on the host. In this article, we will only create VMs with raw file formats, which use the
exact amount of disk space you specify. So for example if you specify that a VM will have 10 GB of disk
space, the VM install tool will create a file image of exactly 10 GB on the host, regardless whether the
VM uses all 10 GB or not.
Best practice here is to allocate more than enough disk space on the host to safely fit all your VMs. For
example, if you want to create 4 VMs with 20 GB storage each, be sure you have at least 85-90 GB
space available on your host. Disk space is cheap nowadays, so hopefully this will not be an issue.
2.6 Networking
By default, VMs will only have network access to other VMs on the same server (and to the host itself)
via private network 192.168.122.0. If you want the VMs to have access to your LAN, then you must
create a network bridge on the host that is connected to the NIC that connects to your LAN. Follow
these steps to create a network bridge:
1. We will create a bridge named ‘br0’. Add to your network controller configuration file (i.e.
/etc/sysconfig/network-scripts/ifcfg-em1) this line:
BRIDGE=br0
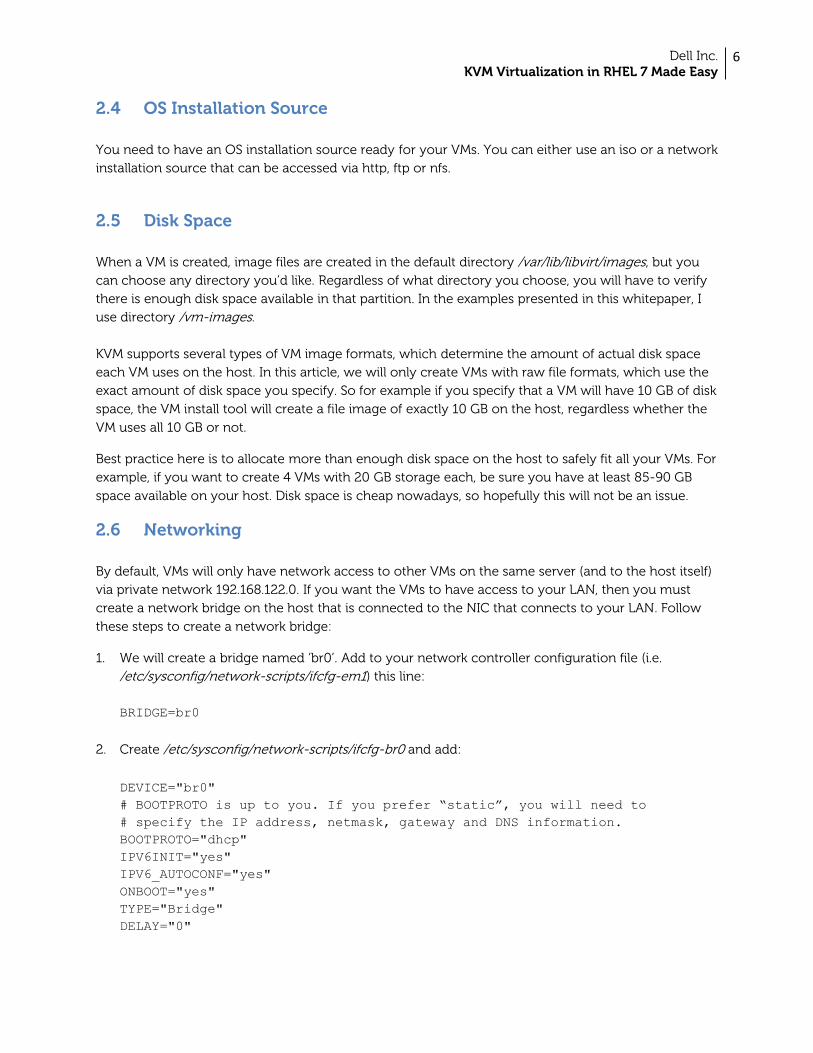
2. Create /etc/sysconfig/network-scripts/ifcfg-br0 and add:
DEVICE="br0"
# BOOTPROTO is up to you. If you prefer “static”, you will need to
# specify the IP address, netmask, gateway and DNS information.
BOOTPROTO="dhcp"
IPV6INIT="yes"
IPV6_AUTOCONF="yes"
ONBOOT="yes"
TYPE="Bridge"
DELAY="0"
Dell Inc. KVM Virtualization in RHEL 7 Made Easy
7
3. Enable network forwarding. Add to /etc/sysctl.conf:
net.ipv4.ip_forward = 1
And read the file:
# sysctl -p /etc/sysctl.conf
4. Restart the ‘NetworkManager’ service so that the bridge you just created can get an IP address:
# systemctl restart NetworkManager
2.7 Firewalld
In RHEL 6, the default packet filtering and forwarding service is ‘iptables’. In RHEL 7, the default service
is ‘firewalld’, which provides the same packet filtering and forwarding capabilities as iptables, but
implements rules dynamically and has additional features such as network zones, which give you
added flexibility when managing different networks.
Please note that the iptables tool is still available in RHEL 7, and in fact it is used by firewalld to talk to
the kernel packet filter (it is the iptables service that has been replaced by firewalld). If you prefer, you
can install the iptables-service package to use the iptables service instead of firewalld. Firewall settings
are entirely up to you and beyond the scope of this document.
For the examples in this whitepaper, I did not modify any default firewalld settings and did not have
to specify any packet forwarding rules for VMs like I did with the iptables service in RHEL 6. In other
words, for a development or proof-of-concept environment, you don’t have to mess with firewalld.
2.8 SELinux
If you are using SELinux in Enforcing mode, then there are some things to consider. The most
common issue is when you use a non-default directory for your VM images. If you use a directory
other than /var/lib/libvirt/images, then you must change the security context for that directory. For
example, let’s say you select /vm-images to place your VM images:
1. Create the directory:
# mkdir /vm-images
2. Install the policycoreutils-python package (which contains the semanage SELinux utility):
# yum -y install policycoreutils-python
3. Set the security context for the directory and everything under it:
# semanage fcontext --add -t virt_image_t '/vm-images(/.*)?'
Verify it:
Dell Inc. KVM Virtualization in RHEL 7 Made Easy
8
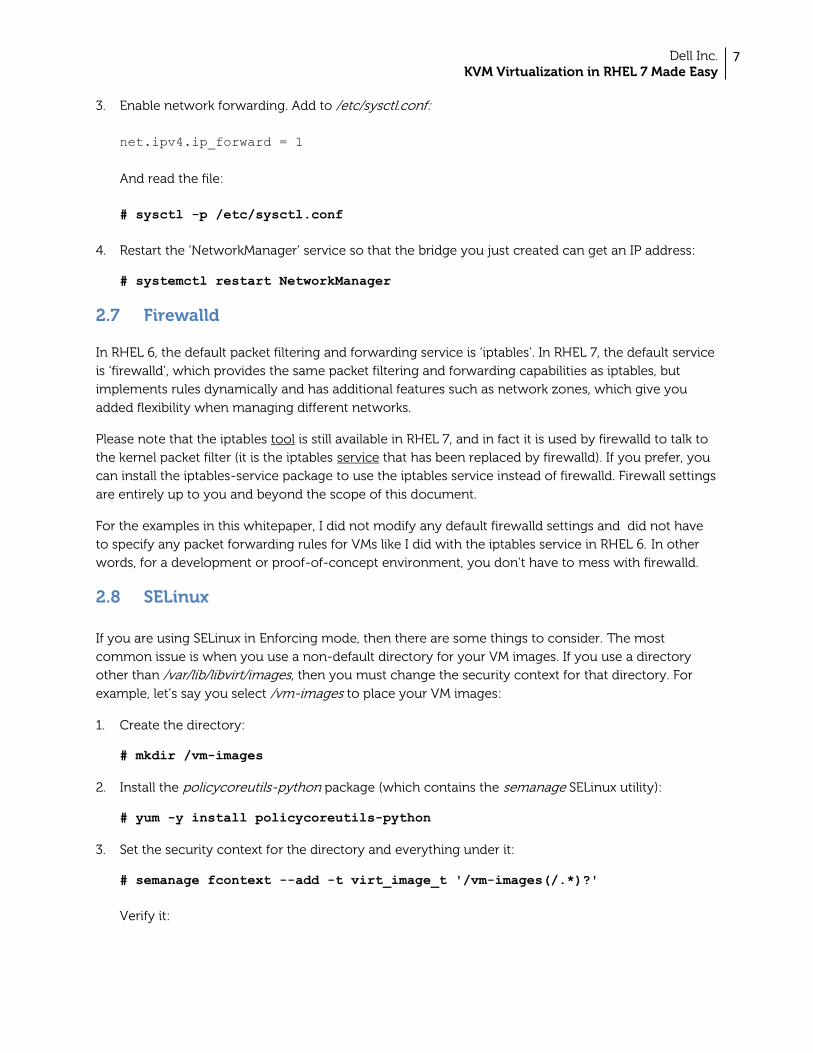
# semanage fcontext -l | grep virt_image_t
/var/lib/imagefactory/images(/.*)? all files system_u:object_r:virt_image_t:s0
/var/lib/libvirt/images(/.*)? all files system_u:object_r:virt_image_t:s0
/vm-images(/.*)? all files system_u:object_r:virt_image_t:s0
4. Restore the security context. This will effectively change the context to virt_image_t:
# restorecon -R -v /vm-images
Verify that the context was changed:
# ls –aZ /vm-images
drwxr-xr-x. root root system_u:object_r:virt_image_t:s0 .
dr-xr-xr-x. root root system_u:object_r:root_t:s0 ..
5. If you are going to export the directory /vm-images as a samba or NFS share, there are SELinux
Booleans that need to be set as well:
# setsebool -P virt_use_samba 1
# setsebool -P virt_use_nfs 1
3 Creating VMs
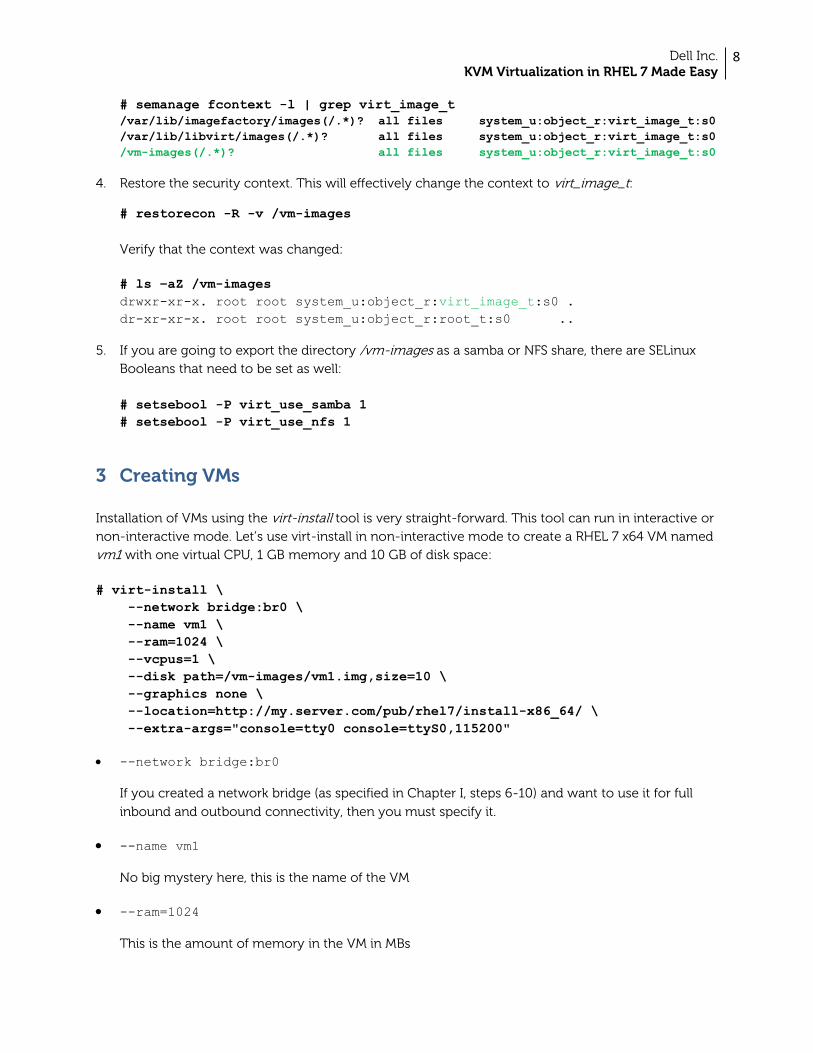
Installation of VMs using the virt-install tool is very straight-forward. This tool can run in interactive or
non-interactive mode. Let’s use virt-install in non-interactive mode to create a RHEL 7 x64 VM named
vm1 with one virtual CPU, 1 GB memory and 10 GB of disk space:
# virt-install \
--network bridge:br0 \
--name vm1 \
--ram=1024 \
--vcpus=1 \
--disk path=/vm-images/vm1.img,size=10 \
--graphics none \
--location=http://my.server.com/pub/rhel7/install-x86_64/ \
--extra-args="console=tty0 console=ttyS0,115200"
--network bridge:br0
If you created a network bridge (as specified in Chapter I, steps 6-10) and want to use it for full
inbound and outbound connectivity, then you must specify it.
--name vm1
No big mystery here, this is the name of the VM
--ram=1024
This is the amount of memory in the VM in MBs
Dell Inc. KVM Virtualization in RHEL 7 Made Easy
9
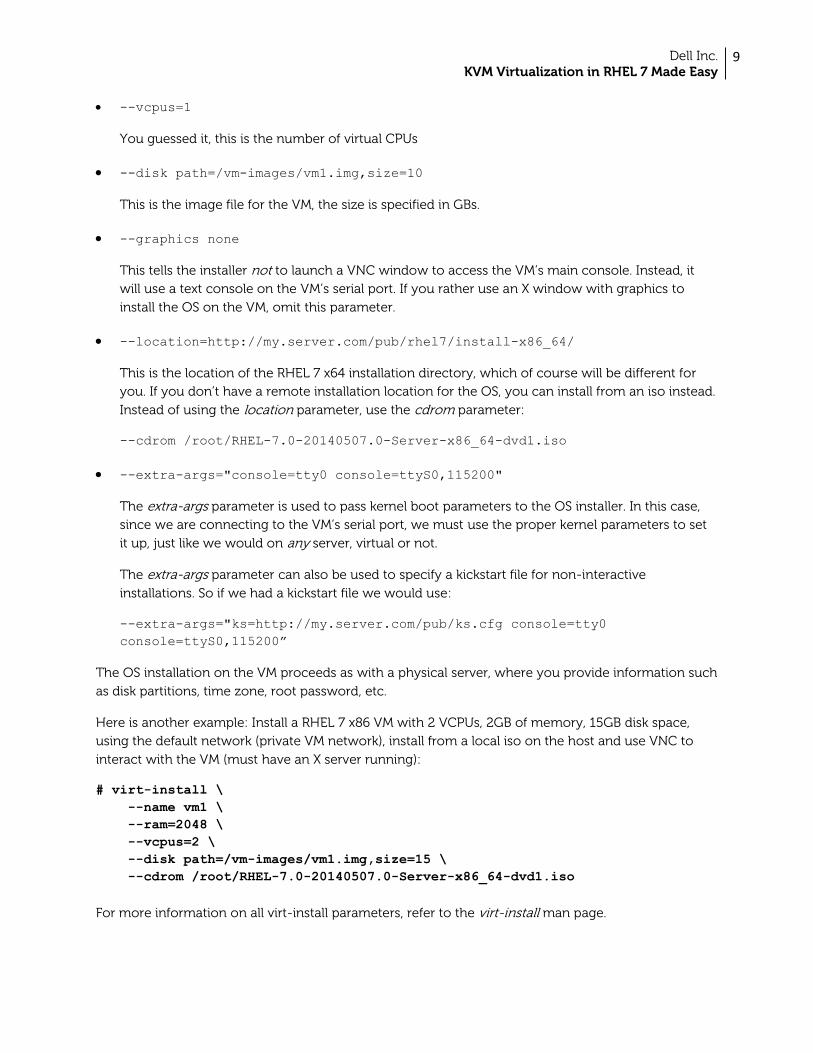
--vcpus=1
You guessed it, this is the number of virtual CPUs
--disk path=/vm-images/vm1.img,size=10
This is the image file for the VM, the size is specified in GBs.
--graphics none
This tells the installer not to launch a VNC window to access the VM’s main console. Instead, it
will use a text console on the VM’s serial port. If you rather use an X window with graphics to
install the OS on the VM, omit this parameter.
--location=http://my.server.com/pub/rhel7/install-x86_64/
This is the location of the RHEL 7 x64 installation directory, which of course will be different for
you. If you don’t have a remote installation location for the OS, you can install from an iso instead.
Instead of using the location parameter, use the cdrom parameter:
--cdrom /root/RHEL-7.0-20140507.0-Server-x86_64-dvd1.iso
--extra-args="console=tty0 console=ttyS0,115200"
The extra-args parameter is used to pass kernel boot parameters to the OS installer. In this case,
since we are connecting to the VM’s serial port, we must use the proper kernel parameters to set
it up, just like we would on any server, virtual or not.
The extra-args parameter can also be used to specify a kickstart file for non-interactive
installations. So if we had a kickstart file we would use:
--extra-args="ks=http://my.server.com/pub/ks.cfg console=tty0
console=ttyS0,115200”
The OS installation on the VM proceeds as with a physical server, where you provide information such
as disk partitions, time zone, root password, etc.
Here is another example: Install a RHEL 7 x86 VM with 2 VCPUs, 2GB of memory, 15GB disk space,
using the default network (private VM network), install from a local iso on the host and use VNC to
interact with the VM (must have an X server running):
# virt-install \
--name vm1 \
--ram=2048 \
--vcpus=2 \
--disk path=/vm-images/vm1.img,size=15 \
--cdrom /root/RHEL-7.0-20140507.0-Server-x86_64-dvd1.iso
For more information on all virt-install parameters, refer to the virt-install man page.

Dell Inc. KVM Virtualization in RHEL 7 Made Easy
10
4 Cloning VMs
If you want several VMs with the same OS and same configuration, I recommend cloning existing VMs
rather than installing the OS on each one, which can quickly become a time-consuming & tedious
task. In this example, we clone vm1 to create a new VM clone called vm1-clone:
1. Suspend the VM to be cloned. This is a requirement since it ensures that all data and network I/O
on the VM is stopped.
# virsh suspend vm1
2. Run the virt-clone command:
# virt-clone \
--connect qemu:///system \
--original vm1 \
--name vm1-clone \
--file /vm-images/vm1-clone.img
This operation will take 2-3 minutes, depending on the size of the VM.
3. When done, you can resume the original VM:
# virsh resume vm1
4. The cloned VM is placed in shutdown mode. To start it:
# virsh start vm1-clone
The cloned VM is an exact copy of the original VM, all VM properties (VCPUs, memory, disk space) and
disk contents will be the same. The virt-clone command takes care to generate a new MAC address
for the VM clone and updates the proper network controller configuration file (i.e.
/etc/sysconfig/network-scripts/ifcfg-em1), thus avoiding duplicate MAC addresses.
For more information, refer to the virt-clone man page.
5 Managing VMs
These are some of the commands I use to administer my VMs, and to be honest I don’t use them very
often, but they can be handy. As always, for a list of all available commands, your best bet is the virsh
man page.
5.1 Common tasks
List all VMs on a host, running or otherwise:
# virsh list --all
Dell Inc. KVM Virtualization in RHEL 7 Made Easy
11
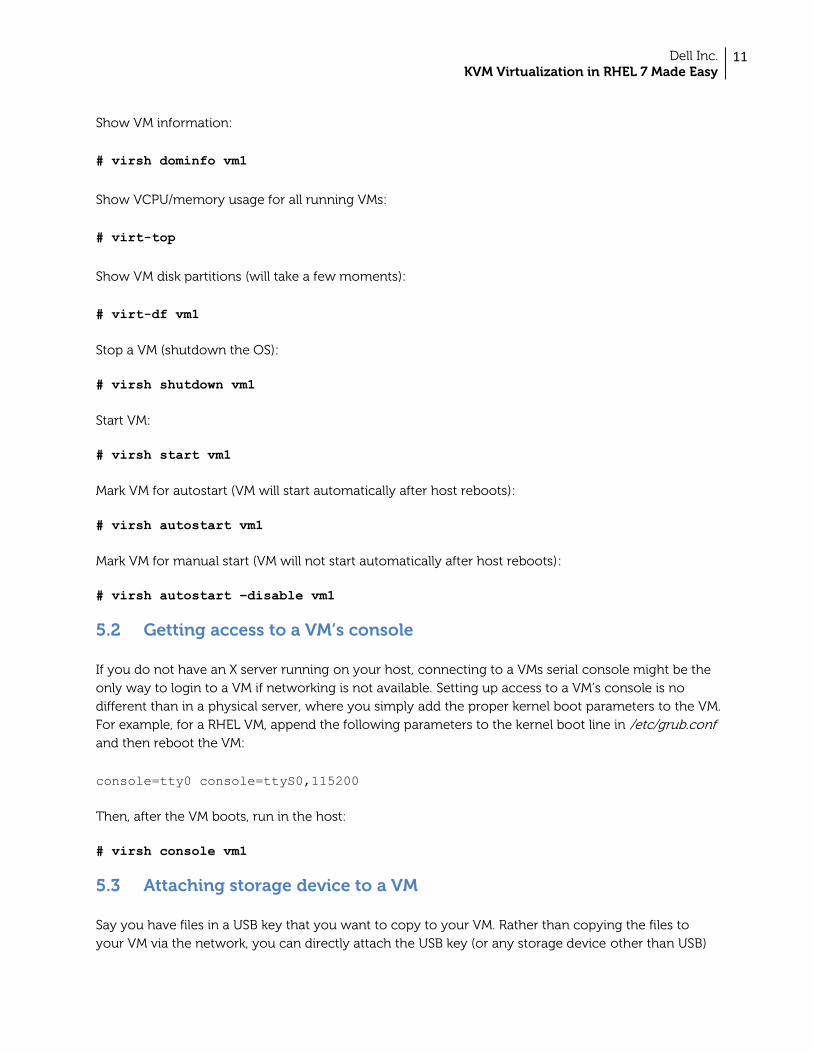
Show VM information:
# virsh dominfo vm1
Show VCPU/memory usage for all running VMs:
# virt-top
Show VM disk partitions (will take a few moments):
# virt-df vm1
Stop a VM (shutdown the OS):
# virsh shutdown vm1
Start VM:
# virsh start vm1
Mark VM for autostart (VM will start automatically after host reboots):
# virsh autostart vm1
Mark VM for manual start (VM will not start automatically after host reboots):
# virsh autostart –disable vm1
5.2 Getting access to a VM’s console
If you do not have an X server running on your host, connecting to a VMs serial console might be the
only way to login to a VM if networking is not available. Setting up access to a VM’s console is no
different than in a physical server, where you simply add the proper kernel boot parameters to the VM.
For example, for a RHEL VM, append the following parameters to the kernel boot line in /etc/grub.conf
and then reboot the VM:
console=tty0 console=ttyS0,115200
Then, after the VM boots, run in the host:
# virsh console vm1
5.3 Attaching storage device to a VM
Say you have files in a USB key that you want to copy to your VM. Rather than copying the files to
your VM via the network, you can directly attach the USB key (or any storage device other than USB)
Dell Inc. KVM Virtualization in RHEL 7 Made Easy
12
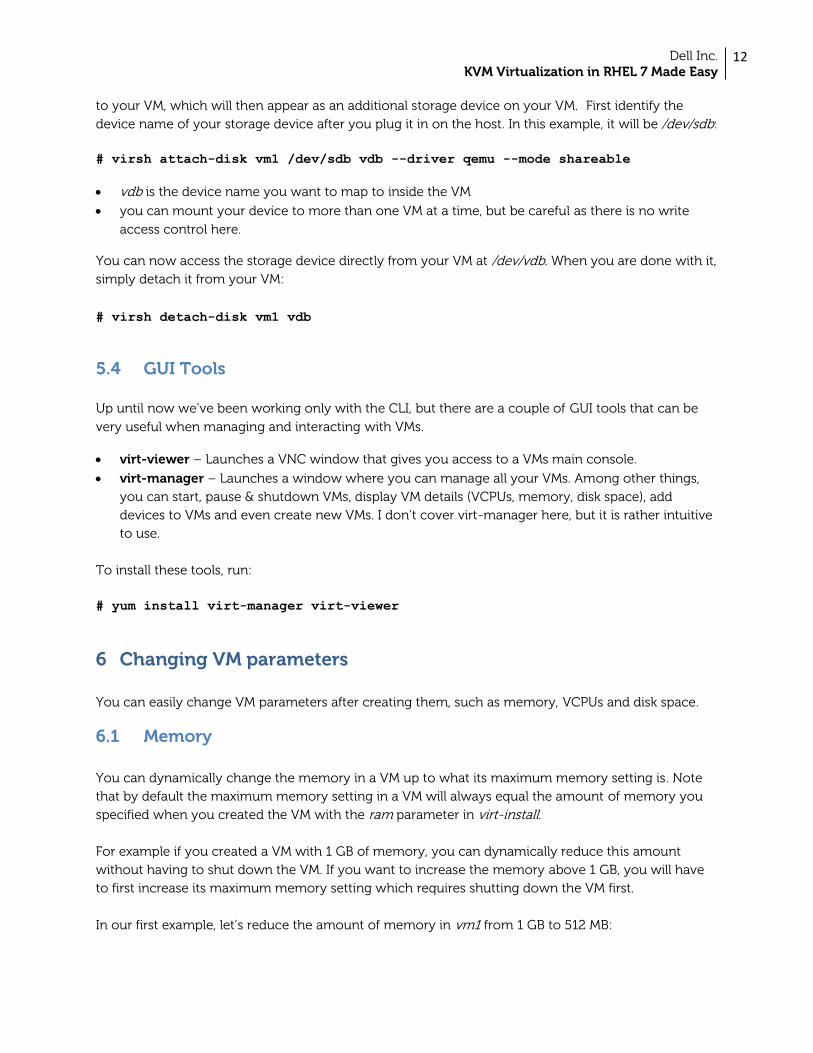
to your VM, which will then appear as an additional storage device on your VM. First identify the
device name of your storage device after you plug it in on the host. In this example, it will be /dev/sdb:
# virsh attach-disk vm1 /dev/sdb vdb --driver qemu --mode shareable
vdb is the device name you want to map to inside the VM
you can mount your device to more than one VM at a time, but be careful as there is no write
access control here.
You can now access the storage device directly from your VM at /dev/vdb. When you are done with it,
simply detach it from your VM:
# virsh detach-disk vm1 vdb
5.4 GUI Tools
Up until now we’ve been working only with the CLI, but there are a couple of GUI tools that can be
very useful when managing and interacting with VMs.
virt-viewer – Launches a VNC window that gives you access to a VMs main console.
virt-manager – Launches a window where you can manage all your VMs. Among other things,
you can start, pause & shutdown VMs, display VM details (VCPUs, memory, disk space), add
devices to VMs and even create new VMs. I don’t cover virt-manager here, but it is rather intuitive
to use.
To install these tools, run:
# yum install virt-manager virt-viewer
6 Changing VM parameters
You can easily change VM parameters after creating them, such as memory, VCPUs and disk space.
6.1 Memory
You can dynamically change the memory in a VM up to what its maximum memory setting is. Note
that by default the maximum memory setting in a VM will always equal the amount of memory you
specified when you created the VM with the ram parameter in virt-install.
For example if you created a VM with 1 GB of memory, you can dynamically reduce this amount
without having to shut down the VM. If you want to increase the memory above 1 GB, you will have
to first increase its maximum memory setting which requires shutting down the VM first.
In our first example, let’s reduce the amount of memory in vm1 from 1 GB to 512 MB:
Dell Inc. KVM Virtualization in RHEL 7 Made Easy
13
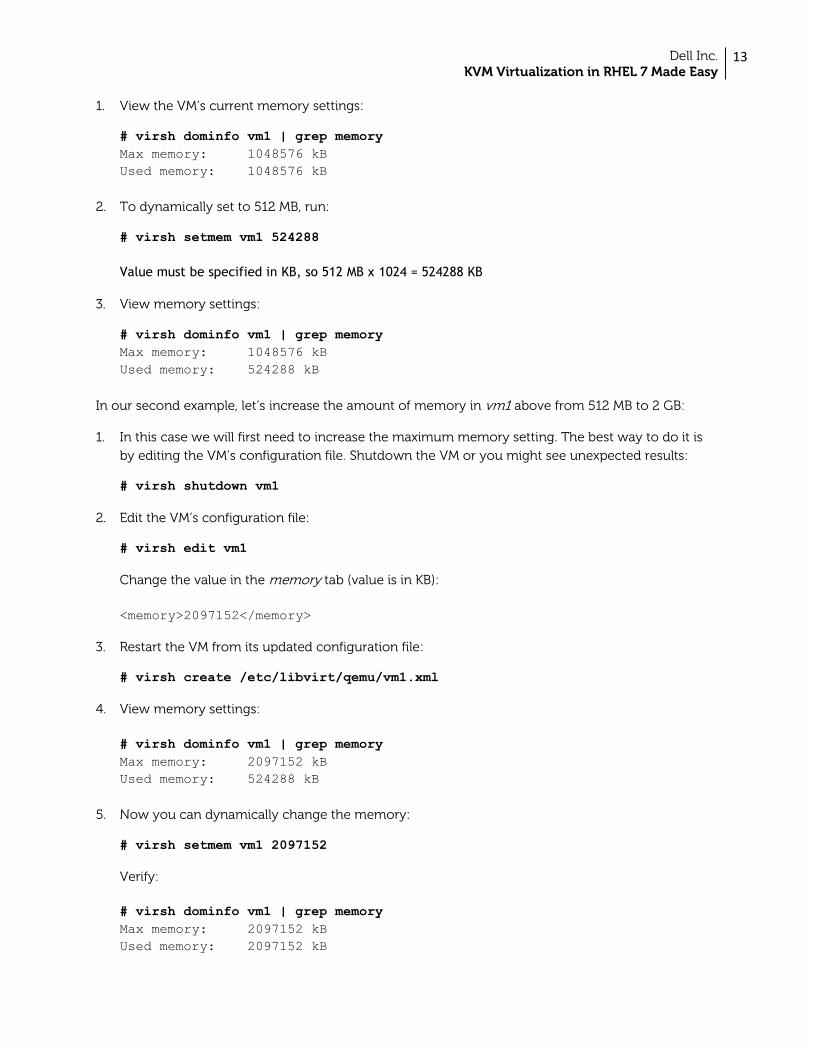
1. View the VM’s current memory settings:
# virsh dominfo vm1 | grep memory
Max memory: 1048576 kB
Used memory: 1048576 kB
2. To dynamically set to 512 MB, run:
# virsh setmem vm1 524288
Value must be specified in KB, so 512 MB x 1024 = 524288 KB
3. View memory settings:
# virsh dominfo vm1 | grep memory
Max memory: 1048576 kB
Used memory: 524288 kB
In our second example, let’s increase the amount of memory in vm1 above from 512 MB to 2 GB:
1. In this case we will first need to increase the maximum memory setting. The best way to do it is
by editing the VM’s configuration file. Shutdown the VM or you might see unexpected results:
# virsh shutdown vm1
2. Edit the VM’s configuration file:
# virsh edit vm1
Change the value in the memory tab (value is in KB):
<memory>2097152</memory>
3. Restart the VM from its updated configuration file:
# virsh create /etc/libvirt/qemu/vm1.xml
4. View memory settings:
# virsh dominfo vm1 | grep memory
Max memory: 2097152 kB
Used memory: 524288 kB
5. Now you can dynamically change the memory:
# virsh setmem vm1 2097152
Verify:
# virsh dominfo vm1 | grep memory
Max memory: 2097152 kB
Used memory: 2097152 kB
Dell Inc. KVM Virtualization in RHEL 7 Made Easy
14
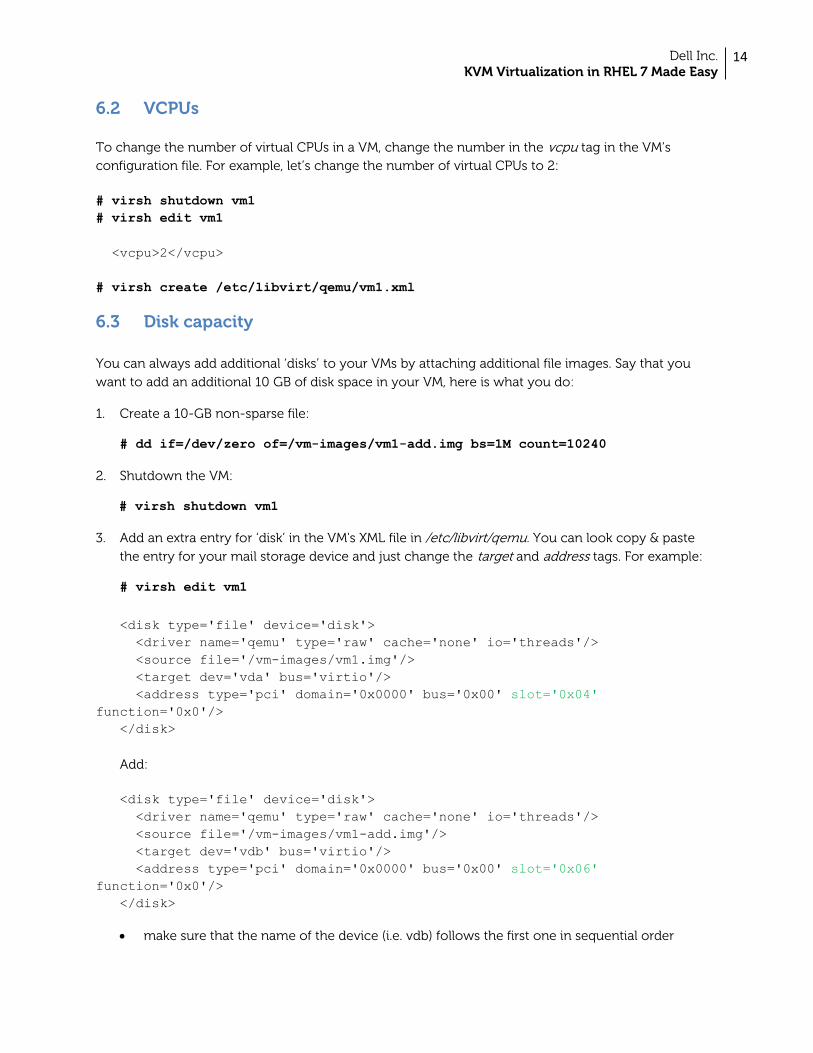
6.2 VCPUs
To change the number of virtual CPUs in a VM, change the number in the vcpu tag in the VM’s
configuration file. For example, let’s change the number of virtual CPUs to 2:
# virsh shutdown vm1
# virsh edit vm1
<vcpu>2</vcpu>
# virsh create /etc/libvirt/qemu/vm1.xml
6.3 Disk capacity
You can always add additional ‘disks’ to your VMs by attaching additional file images. Say that you
want to add an additional 10 GB of disk space in your VM, here is what you do:
1. Create a 10-GB non-sparse file:
# dd if=/dev/zero of=/vm-images/vm1-add.img bs=1M count=10240
2. Shutdown the VM:
# virsh shutdown vm1
3. Add an extra entry for ‘disk’ in the VM's XML file in /etc/libvirt/qemu. You can look copy & paste
the entry for your mail storage device and just change the target and address tags. For example:
# virsh edit vm1
<disk type='file' device='disk'>
<driver name='qemu' type='raw' cache='none' io='threads'/>
<source file='/vm-images/vm1.img'/>
<target dev='vda' bus='virtio'/>
<address type='pci' domain='0x0000' bus='0x00' slot='0x04'
function='0x0'/>
</disk>
Add:
<disk type='file' device='disk'>
<driver name='qemu' type='raw' cache='none' io='threads'/>
<source file='/vm-images/vm1-add.img'/>
<target dev='vdb' bus='virtio'/>
<address type='pci' domain='0x0000' bus='0x00' slot='0x06'
function='0x0'/>
</disk>
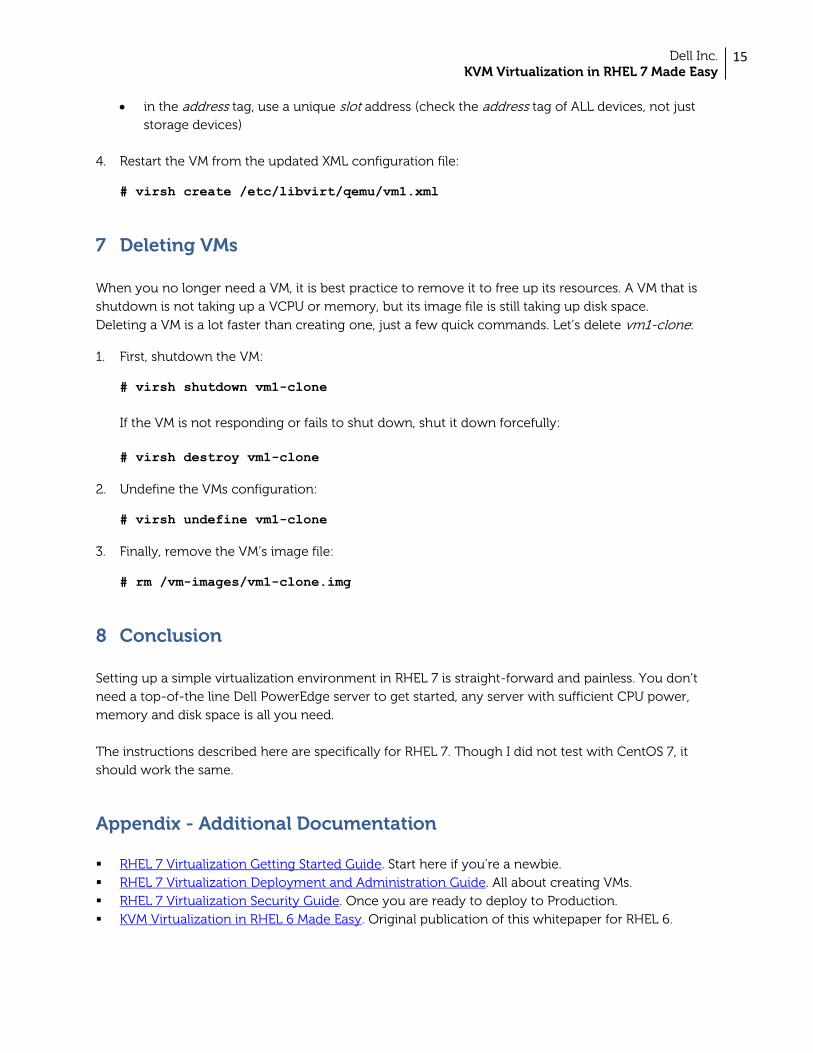
make sure that the name of the device (i.e. vdb) follows the first one in sequential order
Dell Inc. KVM Virtualization in RHEL 7 Made Easy
15
in the address tag, use a unique slot address (check the address tag of ALL devices, not just
storage devices)
4. Restart the VM from the updated XML configuration file:
# virsh create /etc/libvirt/qemu/vm1.xml
7 Deleting VMs
When you no longer need a VM, it is best practice to remove it to free up its resources. A VM that is
shutdown is not taking up a VCPU or memory, but its image file is still taking up disk space.
Deleting a VM is a lot faster than creating one, just a few quick commands. Let’s delete vm1-clone:
1. First, shutdown the VM:
# virsh shutdown vm1-clone
If the VM is not responding or fails to shut down, shut it down forcefully:
# virsh destroy vm1-clone
2. Undefine the VMs configuration:
# virsh undefine vm1-clone
3. Finally, remove the VM’s image file:
# rm /vm-images/vm1-clone.img
8 Conclusion
Setting up a simple virtualization environment in RHEL 7 is straight-forward and painless. You don’t
need a top-of-the line Dell PowerEdge server to get started, any server with sufficient CPU power,
memory and disk space is all you need.
The instructions described here are specifically for RHEL 7. Though I did not test with CentOS 7, it
should work the same.
Appendix - Additional Documentation
RHEL 7 Virtualization Getting Started Guide. Start here if you’re a newbie.
RHEL 7 Virtualization Deployment and Administration Guide. All about creating VMs.
RHEL 7 Virtualization Security Guide. Once you are ready to deploy to Production.
KVM Virtualization in RHEL 6 Made Easy. Original publication of this whitepaper for RHEL 6.