kubernetes: up and running - tectonic by coreos · this preview edition of kubernetes: up and...
TRANSCRIPT
Kelsey Hightower
DIVE INTO THE FUTURE OF INFRASTRUCTURE
Kubernetes Up & Running
Compliments of

This Preview Edition of Kubernetes: Up and Running, Chapters 1 and 2, is a work in progress. The final book is currently scheduled
for release in January 2016 and will be available at oreilly.com and other retailers once it is published.
Kelsey Hightower
Boston
Kubernetes: Up and RunningDive into the Future of Infrastructure
978-1-491-92477-8
LSI
Kubernetes: Up and Runningby Kelsey Hightower
Copyright © 2015 Kelsey Hightower. All rights reserved.
Printed in the United States of America.
Published by O’Reilly Media, Inc., 1005 Gravenstein Highway North, Sebastopol, CA 95472.
O’Reilly books may be purchased for educational, business, or sales promotional use. Online editions arealso available for most titles (http://safaribooksonline.com). For more information, contact our corporate/institutional sales department: 800-998-9938 or [email protected] .
Editor: Brian Anderson
See http://www.oreilly.com/catalog/errata.csp?isbn=0636920039426 for release details.
The O’Reilly logo is a registered trademark of O’Reilly Media, Inc. Kubernetes: Up and Running, the coverimage, and related trade dress are trademarks of O’Reilly Media, Inc.
While the publisher and the author have used good faith efforts to ensure that the information andinstructions contained in this work are accurate, the publisher and the author disclaim all responsibilityfor errors or omissions, including without limitation responsibility for damages resulting from the use ofor reliance on this work. Use of the information and instructions contained in this work is at your ownrisk. If any code samples or other technology this work contains or describes is subject to open sourcelicenses or the intellectual property rights of others, it is your responsibility to ensure that your usethereof complies with such licenses and/or rights.

For Klarissa and Kelis, who keep me sane. And for my Mom, who taught me a strongwork ethic and how to rise above all odds. —Kelsey Hightower

Table of Contents
Preface. . . . . . . . . . . . . . . . . . . . . . . . . . . . . . . . . . . . . . . . . . . . . . . . . . . . . . . . . . . . . . . . . . . . . . . vii
1. Introduction. . . . . . . . . . . . . . . . . . . . . . . . . . . . . . . . . . . . . . . . . . . . . . . . . . . . . . . . . . . . . . . . 1Kubernetes Features 3Kubernetes Design Overview 3
Concepts 4The Kubernetes Control Plane 4The Kubernetes Node 5
Summary 6
2. Deploying Kubernetes. . . . . . . . . . . . . . . . . . . . . . . . . . . . . . . . . . . . . . . . . . . . . . . . . . . . . . . . 7Overview 7
Consistent Data Store 7Controller Services 8Worker Services 8
Kubernetes Nodes 8System Requirements 9Configuring the Docker Daemon 10Configuring the Network 11Validating the Networking Configuration 13
Bootstrapping the Kubernetes Controller Node 13Bootstrapping etcd 14Deploying the API Server 14Deploying the Controller Manager 15Deploying the Scheduler 16
The Kubernetes Client 17Bootstrapping Kubernetes Worker Nodes 17
Deploying the Kubelet 17
v

Deploying the Service Proxy 18Cluster Add-ons 19
DNS 20Kubernetes UI 21Securely Exposing the API Server 21
Summary 22
vi | Table of Contents

Preface
Containers have changed the way applications are packaged, distributed, anddeployed in the modern datacenter. Containers provide the prefect abstraction forcomplex applications in the form of an image, which bundle applications, along withtheir dependencies, into a single artifact that’s easy to distribute and run under a con‐tainer runtime engine such as Docker or rkt.
Containers offer a lighter, more agile alternative to virtual machines for isolationbetween applications, and raises the bar in terms of performance, resource utilization,and portability between platforms. The ease of building and running containers hasled to very high density application deployments, which in turn has driven a need formore robust tools for container management.
This book covers Kubernetes. Kubernetes was written by Google to act as a livingdocument chronicling the lessons Google has learned from the last 10 years of run‐ning containers at scale. As a result, Kubernetes is the world’s premier container man‐agement system, and enables robust patterns to deal with the wonderful problemscontainers are creating. I wrote this book for Developers and System administratorswho are looking to manage containers at scale using proven distributed computingconcepts while also leveraging modern advances in datacenter automation.
My goal with this book is to document the Kubernetes platform and provide practicalexamples of how to deploy and manage applications with Kubernetes.
This book does not make many assumptions regarding your understanding of con‐tainers, cluster management, and scheduling applications across a large cluster ofmachines. Instead, this book will guide you from building your first container tostanding up a complete Kubernetes environment. Along this journey you will beintroduced to every component in a Kubernetes cluster, and you will be shown howto leverage each of these pieces in designing highly efficient patterns for applicationdeployments.
vii

This book is also meant to serve as a reference guide for Kubernetes including thevarious APIs and components that make up the platform.
viii | Preface
1 Large-scale cluster management at Google with Borg: http://research.google.com/pubs/pub43438.html
CHAPTER 1
Introduction
Kubernetes is an open source automation framework for deploying, managing, andscaling applications. It is the essence of an internal Google project known as Borg 1,infused with the lessons learned from over a decade of experience managing applica‐tions with Borg (and other internal frameworks) at scale.
Google scale.
But it is said that 99% of the world will never reach Google scale, and this raises thequestion: “Why should I care about Kubernetes?”
One word: Efficiency.
Efficiency can be measured by the ratio of the useful work performed by a machine orprocess to the total amount of energy spent doing so. When it comes to deployingand managing applications many of the tools and processes available are not what Iwould call efficient. When discussing efficiency it’s often helpful to think of the costof running a server, and the human cost required to manage it.
Running a server incurs a cost based on power usage, cooling requirements, data cen‐ter space, and raw compute power. Once a server is racked and powered on(orclicked and spun-up), the meter literally starts running. Any idle CPU time is moneywasted. Thus, it becomes part of the system administrator’s responsibilities to keeputilization at acceptable (ie high) levels, which requires ongoing management. This iswhere containers and the Kubernetes workflow come in. Kubernetes provides tools
1
which automate the distribution of applications across a cluster of machines, ensur‐ing higher levels of utilization than what is possible with traditional tooling.
Once applications are deployed, humans are often employed to keep an eye on things,and hold the responsibility of responding to failures, managing application configu‐rations, performing updates, and monitoring. Many of these tasks are handled using acollection of unrelated tools that lack synergy thus requiring one-off glue utilities tofill the gaps. Kubernetes provides a common API and self-healing framework whichautomatically handles machine failures and streamlines application deployments, log‐ging, and monitoring.
Why are things so inefficient?
Think about the foundation on which many automation tools are built. Most toolsstem from the days of the runbook. Runbooks held the exact details on how to deployand configure an application on a target machine. Administrators would follow run‐books blindly and only after costly outages would runbooks be updated in an attemptto prevent future outages. But no matter how large the runbooks grew, the outagesnever stopped. Turns out the critical flaw in the system was the humans.
See, people make mistakes. We make typos, fall asleep, or flat out skip a step or two. Ifonly there was a way to remove the human element from the deployment process.
Enter deployment scripts.
Oh those were the good old days, we would write scripts for everything, which even‐tually made runbooks obsolete. If you wanted to deploy an application or update aconfiguration file, you ran a shell script on a specific machine. If you wanted to getreally fancy you could leverage SSH in a for loop and deploy an application to multi‐ple systems at a time.
Scripting application deployments started a movement known to some as Infrastruc‐ture as Code. This era of automation spawned a new class of management tools that Ilike to call scripting frameworks, which the industry at large calls configuration man‐agement. These configuration management systems provide a common set of reusa‐ble code that help people manage machines and the applications deployed to them.Configuration management moved the industry to faster application deploymentsand fewer mistakes. There was only one problem: software started eating the world.
Even as the ability to deploy applications got faster, the efficiency of doing so did notimprove very much. We exchanged runbooks and deployment meetings for Infra‐structure as Code where you write software to deploy software. Which also meansyou need to follow software development processes for application managementcode.
2 | Chapter 1: Introduction
The other issue that is not as obvious to many is that configuration management, likethe runbooks of yore, treat machines as first class citizens. “Applications are thingsthat run on machines”, says Config Management. “And machines belong to Applica‐tions”, it states in redundant affirmation. The strong coupling between applicationsand machines has caused tools based on imperative scripting models to hit their max‐imum level of efficiency, especially compared to modern, robust, and scalable de-coupled approaches.
Kubernetes FeaturesKubernetes centers around a common API for deploying all types of software rangingfrom web applications, batch jobs, and databases. This common API is based on adeclarative set of APIs and cluster configuration objects that allow you to express adesired state for your cluster.
Rather than manually deploying applications to specific servers, you describe thenumber of application instances that must be running at a given time. Kubernetes willperform the necessary actions to enforce the desired state. For example, if you declare5 instances of your web application must be running at all times, and one of thenodes running an instance of the web application fails, Kubernetes will automaticallyreschedule the application on to another node.
In addition to application scheduling, Kubernetes helps automate application config‐uration in the form of service discovery and secrets. Kubernetes keeps a global viewof the entire cluster, which means once applications are deployed Kubernetes has theability to track them, even in the event they are re-scheduled due to node failure. Thisservice information is exposed to other apps through environment variables andDNS, making it easy for both cluster native and traditional applications to locate andcommunicate with other services running within the cluster.
Kubernetes also provides a set of APIs that allows for custom deployment workflowssuch as rolling updates, canary deploys, and blue-green deployments.
Kubernetes Design OverviewKubernetes aims to decouple applications from machines by leveraging the founda‐tions of distributed computing and application containers. At a high level Kubernetessits on top of a cluster of machines and provides an abstraction of a single machine.
Kubernetes Features | 3
Concepts
ClustersClusters are the set of compute, storage, and network resources where pods aredeployed, managed, and scaled. Clusters are made of nodes connected via a “flat” net‐work, in which each node and pod can communicate with each other. A typicalKubernetes cluster size ranges from 1 - 200 nodes, and it’s common to have morethan one Kubernetes cluster in a given data center based on node count and serviceSLAs.
PodsPods are a colocated group of application containers that share volumes and a net‐working stack. Pods are the smallest units that can be deployed within a Kubernetescluster. They are used for run once jobs, can be deployed individually, but long run‐ning applications, such as web services, should be deployed and managed by a repli‐cation controller.
Replication ControllersReplication Controllers ensure a specific number of pods, based on a template, arerunning at any given time. Replication Controllers manage pods based on labels andstatus updates.
ServicesServices deliver cluster wide service discovery and basic load balancing by providinga persistent name, address, or port for pods with a common set of labels.
LabelsLabels are used to organize and select groups of objects, such as pods, based on key/value pairs.
The Kubernetes Control PlaneThe control plane is made up of a collection of components that work together toprovide a unified view of the cluster.
etcdetcd is a distributed, consistent key-value store for shared configuration and servicediscovery, with a focus on being: simple, secure, fast, and reliable. etcd uses the Raftconsensus algorithm to achieve fault-tolerance and high-availability. etcd provides
4 | Chapter 1: Introduction

the ability to “watch” for changes, which allows for fast coordination between Kuber‐netes components. All persistent cluster state is stored in etcd.
Kubernetes API ServerThe apiserver is responsible for serving the Kubernetes API and proxying clustercomponents such as the Kubernetes web UI. The apiserver exposes a REST interfacethat processes operations such as creating pods and services, and updating the corre‐sponding objects in etcd. The apiserver is the only Kubernetes component that talksdirectly to etcd.
SchedulerThe scheduler watches the apiserver for unscheduled pods and schedules them ontohealthy nodes based on resource requirements.
Controller ManagerThere are other cluster-level functions such as managing service end-points, which ishandled by the endpoints controller, and node lifecycle management which is han‐dled by the node controller. When it comes to pods, replication controllers providethe ability to scale pods across a fleet of machines, and ensure the desired number ofpods are always running.
Each of these controllers currently live in a single process called the Controller Man‐ager.
The Kubernetes NodeThe Kubernetes node runs all the components necessary for running application con‐tainers and load balancing service end-points. Nodes are also responsible for report‐ing resource utilization and status information to the API server.
DockerDocker, the container runtime engine, runs on every node and handles downloadingand running containers. Docker is controlled locally via its API by the Kubelet.
KubeletEach node runs the Kubelet, which is responsible for node registration, and manage‐ment of pods. The Kubelet watches the Kubernetes API server for pods to create asscheduled by the Scheduler, and pods to delete based on cluster events. The Kubeletalso handles reporting resource utilization, and health status information for a spe‐cific node and the pods it’s running.
Kubernetes Design Overview | 5
ProxyEach node also runs a simple network proxy with support for TCP and UDP streamforwarding across a set of pods as defined in the Kubernetes API.
SummaryClustering is viewed by many as an unapproachable dark art, but hopefully the highlevel overviews and component breakdowns in this chapter have shone some light onthe subject, hopefully the history of deployment automation has shown how far we’vecome, and hopefully the goals and design of Kubernetes have shown the path for‐ward. In the next chapter we’ll take our first step toward that path, and take a detailedlook at setting up a multi-node Kubernetes cluster.
6 | Chapter 1: Introduction

CHAPTER 2
Deploying Kubernetes
OverviewThis chapter will walk you through provisioning a multi-node Kubernetes clustercapable of running a wide variety of container based workloads. Kubernetes requiresa specific network layout where each pod running in a given cluster has a dedicatedIP address. The Kubernetes networking model also requires each pod and node havethe ability to directly communicate with every other pod and node in the cluster.These requirements may seem arbitrary, but it allows for a cluster that can utilizetechniques like automatic service discovery, and fine-grained application monitoring,while avoiding pitfalls like port collisions.
This chapter covers:
• Provisioning cluster nodes• Configuring a Kubernetes compatible network• Deploying Kubernetes services and client tools
A Kubernetes cluster consists of a consistent data store, and a collection of controllerand worker services.
Consistent Data StoreAll cluster state is stored in a key-value store called etcd. etcd is a distributed, consis‐tent key-value store for shared configuration and service discovery, with a focus onbeing:
• Simple: curl’able user facing API (HTTP+JSON)
7

• Secure: optional SSL client cert authentication• Fast: benchmarked 1000s of writes per second• Reliable: properly distributed using Raft
The usage of a strongly consistent data store is critical to proper operation of aKubernetes cluster. Cluster state must be consistant to ensure cluster services haveaccurate information when making scheduling decisions and enforcing end-user pol‐icies and desired state.
Controller ServicesController services provide the necessary infrastructure for declaring and enforcingdesired cluster state. The controller stack includes the following components:
• API Server• Controller Manager• Scheduler
Controller services are deployed to controller nodes. Separating controller andworker services helps protect the SLA of the critical infrastructure services they pro‐vide.
Worker ServicesWorker services are responsible for managing pods and service endpoints on a givensystem. The worker stack includes the following components:
• Kubelet• Service Proxy• Docker
Docker, the container runtime engine, facilitates the creation and destruction of con‐tainers as determined by the Kubelet.
Kubernetes NodesNodes must have network connectivity between them, ideally in the same datacenteror availability zone. Nodes should also have a valid hostname that can be resolvedusing DNS by other nodes in the cluster. For example, the machines in the lab havethe following DNS names:
8 | Chapter 2: Deploying Kubernetes
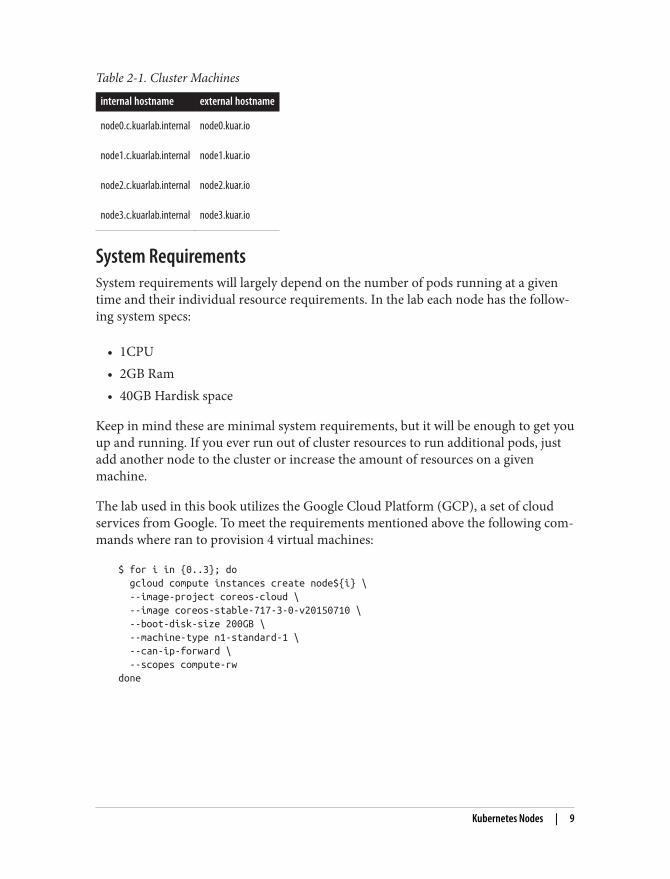
Table 2-1. Cluster Machines
internal hostname external hostname
node0.c.kuarlab.internal node0.kuar.io
node1.c.kuarlab.internal node1.kuar.io
node2.c.kuarlab.internal node2.kuar.io
node3.c.kuarlab.internal node3.kuar.io
System RequirementsSystem requirements will largely depend on the number of pods running at a giventime and their individual resource requirements. In the lab each node has the follow‐ing system specs:
• 1CPU• 2GB Ram• 40GB Hardisk space
Keep in mind these are minimal system requirements, but it will be enough to get youup and running. If you ever run out of cluster resources to run additional pods, justadd another node to the cluster or increase the amount of resources on a givenmachine.
The lab used in this book utilizes the Google Cloud Platform (GCP), a set of cloudservices from Google. To meet the requirements mentioned above the following com‐mands where ran to provision 4 virtual machines:
$ for i in {0..3}; do gcloud compute instances create node${i} \ --image-project coreos-cloud \ --image coreos-stable-717-3-0-v20150710 \ --boot-disk-size 200GB \ --machine-type n1-standard-1 \ --can-ip-forward \ --scopes compute-rwdone
Kubernetes Nodes | 9

IP Forwarding
Most cloud platforms will not allow machines to send packetswhose source IP address does not match the IP assigned to themachine. In the case of GCP, instances can be deployed with the --can-ip-forward flag to disable this restriction. The ability to do IPforwarding is critical to the network setup recommended later inthis chapter.
Configuring the Docker DaemonThe Kubernetes network model requires each pod to have a unique IP address withinthe cluster. Currently Docker is responsible for allocating pod IPs based on the subnetused by the Docker bridge. To satisfy the pod IP uniqueness constraint we mustensure each Docker host has a unique subnet range. In the lab I used the followingmapping to configure each Docker host:
#FIXME what do you think of having the first cluster be c0? so it’d be node0.c0.kuar‐lab.internal. and the bip would be 10.0.0.1/24 for that node? It’ll make for a smootherexample of switching context between clusters later on in the book.
Table 2-2. Docker BridgeMapping
hostname bip
node0.c.kuarlab.internal 10.200.0.1/24
node1.c.kuarlab.internal 10.200.1.1/24
node2.c.kuarlab.internal 10.200.2.1/24
node3.c.kuarlab.internal 10.200.3.1/24
The location of the Docker configuration file varies between Linux distributions, butin all cases the --bip flag is used to set the Docker bridge IP.
Download the Docker unit file:
$ sudo curl https://kuar.io/docker.service \ -o /etc/systemd/system/docker.service
Edit the Docker unit file:
[Unit]Description=Docker Application Container EngineDocumentation=http://docs.docker.io
10 | Chapter 2: Deploying Kubernetes

[Service]ExecStart=/usr/bin/docker --daemon \
--bip=10.200.0.1/24 \ --iptables=false \ --ip-masq=false \ --host=unix:///var/run/docker.sock \ --storage-driver=overlayRestart=on-failureRestartSec=5
[Install]WantedBy=multi-user.target
The bip must be unique across all nodes
In the above configuration Docker will no longer manage iptablesor setup the firewall rule necessary for containers to reach theinternet. This will be resolved in the Getting Containers Onlinesection.
Start the Docker service:
$ sudo systemctl daemon-reload$ sudo systemctl enable docker$ sudo systemctl start docker
Repeat the above steps on each node.
Configuring the NetworkNow that each node has a Docker daemon configured with a unique bridge IP, rout‐ing must be setup between the nodes. Routing is an advanced concept, but at a highlevel each bridge IP requires a route entry. There are many options for setting uproutes between nodes including the following:
• static routes on each node• static routes on a central router or default gateway• use an overlay network
In this chapter we will leverage static routes on a central router. See Appendix X formore details on setting up other routing configurations including overlay networks.
In the lab I ran the following commands to establish routes between each node.
Kubernetes Nodes | 11
1 Network Address Translation (NAT) is a way to map an entire network to a single IP address.
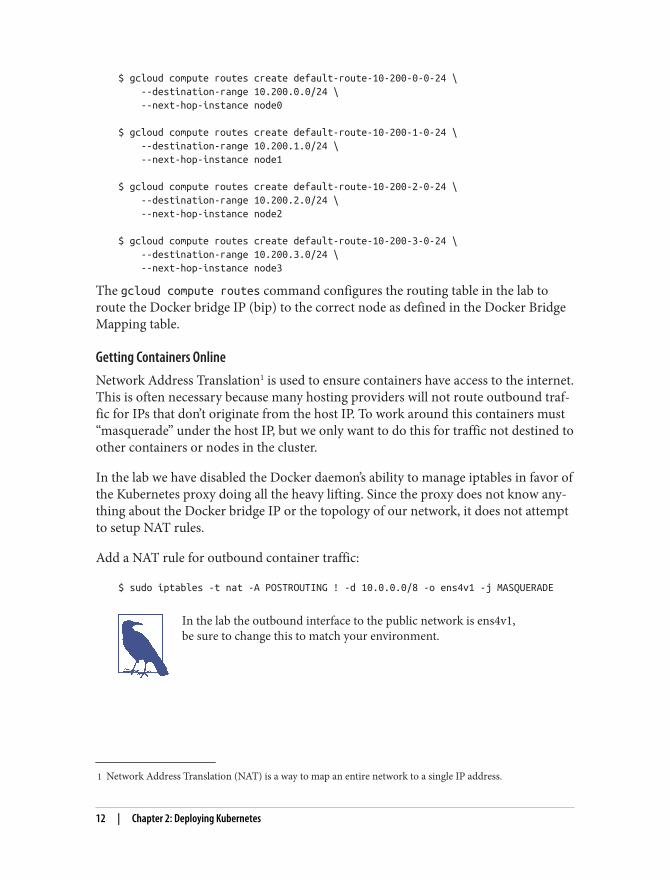
$ gcloud compute routes create default-route-10-200-0-0-24 \ --destination-range 10.200.0.0/24 \ --next-hop-instance node0
$ gcloud compute routes create default-route-10-200-1-0-24 \ --destination-range 10.200.1.0/24 \ --next-hop-instance node1
$ gcloud compute routes create default-route-10-200-2-0-24 \ --destination-range 10.200.2.0/24 \ --next-hop-instance node2
$ gcloud compute routes create default-route-10-200-3-0-24 \ --destination-range 10.200.3.0/24 \ --next-hop-instance node3
The gcloud compute routes command configures the routing table in the lab toroute the Docker bridge IP (bip) to the correct node as defined in the Docker BridgeMapping table.
Getting Containers OnlineNetwork Address Translation1 is used to ensure containers have access to the internet.This is often necessary because many hosting providers will not route outbound traf‐fic for IPs that don’t originate from the host IP. To work around this containers must“masquerade” under the host IP, but we only want to do this for traffic not destined toother containers or nodes in the cluster.
In the lab we have disabled the Docker daemon’s ability to manage iptables in favor ofthe Kubernetes proxy doing all the heavy lifting. Since the proxy does not know any‐thing about the Docker bridge IP or the topology of our network, it does not attemptto setup NAT rules.
Add a NAT rule for outbound container traffic:
$ sudo iptables -t nat -A POSTROUTING ! -d 10.0.0.0/8 -o ens4v1 -j MASQUERADE
In the lab the outbound interface to the public network is ens4v1,be sure to change this to match your environment.
12 | Chapter 2: Deploying Kubernetes

Validating the Networking ConfigurationUsing the Docker client we can start two containers running on different hosts andvalidate our network setup. Open a new terminal and launch a busybox container:
$ ssh [email protected]$ docker run -t -i --rm busybox /bin/sh
At this point you are now running inside the busybox container. Print the IP addressof the container using the ip command:
# ip -f inet addr show eth0
4: eth0: <BROADCAST,UP,LOWER_UP> mtu 1460 qdisc noqueue state UP group default inet 10.200.0.2/24 scope global eth0 valid_lft forever preferred_lft forever
Open another terminal and launch a busybox container on a different node:
$ ssh [email protected]$ docker run -t -i --rm busybox /bin/sh
At the command prompt ping the IP address of the first busybox container:
# ping -c 3 10.200.0.2
PING 10.200.0.2 (10.200.0.2): 56 data bytes64 bytes from 10.200.0.2: seq=0 ttl=62 time=0.914 ms64 bytes from 10.200.0.2: seq=1 ttl=62 time=0.678 ms64 bytes from 10.200.0.2: seq=2 ttl=62 time=0.667 ms
--- 10.200.0.2 ping statistics ---3 packets transmitted, 3 packets received, 0% packet lossround-trip min/avg/max = 0.667/0.753/0.914 ms
If you get simliar output it means you’ve successfully setup routes between twoDocker hosts. Type the exit command at both busybox command prompts to exitthe containers.
Bootstrapping the Kubernetes Controller NodeIn the lab node0.kuar.io has been marked as the controller node for the Kubernetescluster, and will host the controller services in addition to etcd. All controller serviceswill be managed using systemd.
Start by logging into the controller node:
$ ssh [email protected]
Bootstrapping the Kubernetes Controller Node | 13
Bootstrapping etcdetcd will be provisioned on the controller node and provide the storage backend forthe Kubernetes API server.
Download the etcd unit file:
$ sudo curl https://kuar.io/etcd.service \ -o /etc/systemd/system/etcd.service
Review the etcd unit file:
[Unit]Description=etcdDocumentation=https://github.com/coreos/etcd
[Service]ExecStartPre=/usr/bin/mkdir -p /opt/binExecStartPre=/usr/bin/curl https://kuar.io/etcd \ -o /opt/bin/etcd \ -z /opt/bin/etcdExecStartPre=/usr/bin/chmod +x /opt/bin/etcdExecStart=/opt/bin/etcd \ --advertise-client-urls http://127.0.0.1:2379 \ --data-dir /var/lib/etcd \ --listen-client-urls http://127.0.0.1:2379 \ --listen-peer-urls http://127.0.0.1:2380 \ --name etcd0Restart=on-failureRestartSec=5
[Install]WantedBy=multi-user.target
Start the etcd service:
$ sudo systemctl daemon-reload$ sudo systemctl enable etcd$ sudo systemctl start etcd
The etcd service is only available to local services running on node0.kuar.io. This wasdone intentionally as this etcd instance is dedicated to the Kubernetes API server.
Deploying the API ServerThe API server will run on the controller node and expose the Kubernetes API toother services within the cluster.
Download the kube-apiserver unit file:
14 | Chapter 2: Deploying Kubernetes
$ sudo curl https://kuar.io/kube-apiserver.service \ -o /etc/systemd/system/kube-apiserver.service
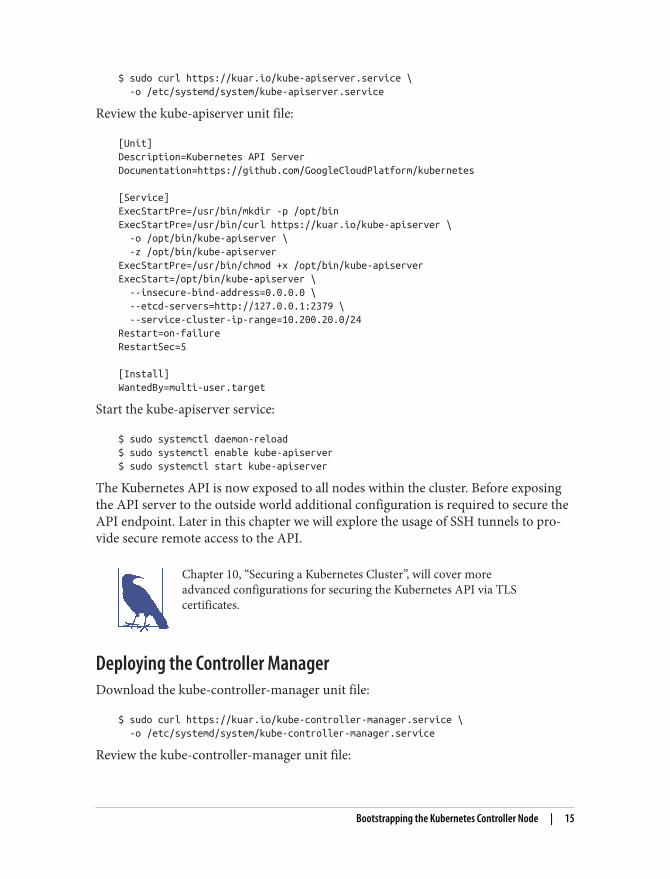
Review the kube-apiserver unit file:
[Unit]Description=Kubernetes API ServerDocumentation=https://github.com/GoogleCloudPlatform/kubernetes
[Service]ExecStartPre=/usr/bin/mkdir -p /opt/binExecStartPre=/usr/bin/curl https://kuar.io/kube-apiserver \ -o /opt/bin/kube-apiserver \ -z /opt/bin/kube-apiserverExecStartPre=/usr/bin/chmod +x /opt/bin/kube-apiserverExecStart=/opt/bin/kube-apiserver \ --insecure-bind-address=0.0.0.0 \ --etcd-servers=http://127.0.0.1:2379 \ --service-cluster-ip-range=10.200.20.0/24Restart=on-failureRestartSec=5
[Install]WantedBy=multi-user.target
Start the kube-apiserver service:
$ sudo systemctl daemon-reload$ sudo systemctl enable kube-apiserver$ sudo systemctl start kube-apiserver
The Kubernetes API is now exposed to all nodes within the cluster. Before exposingthe API server to the outside world additional configuration is required to secure theAPI endpoint. Later in this chapter we will explore the usage of SSH tunnels to pro‐vide secure remote access to the API.
Chapter 10, “Securing a Kubernetes Cluster”, will cover moreadvanced configurations for securing the Kubernetes API via TLScertificates.
Deploying the Controller ManagerDownload the kube-controller-manager unit file:
$ sudo curl https://kuar.io/kube-controller-manager.service \ -o /etc/systemd/system/kube-controller-manager.service
Review the kube-controller-manager unit file:
Bootstrapping the Kubernetes Controller Node | 15
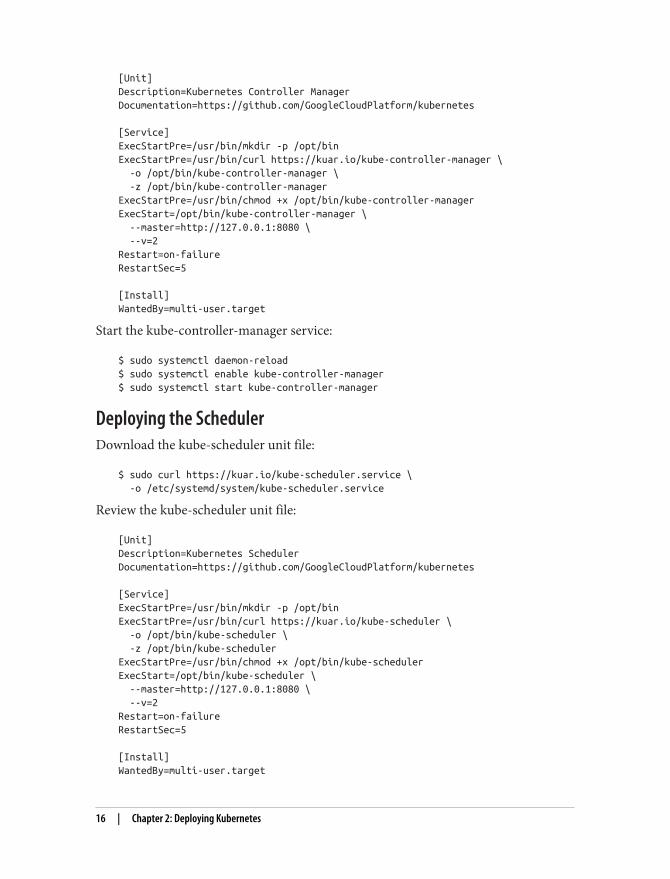
[Unit]Description=Kubernetes Controller ManagerDocumentation=https://github.com/GoogleCloudPlatform/kubernetes
[Service]ExecStartPre=/usr/bin/mkdir -p /opt/binExecStartPre=/usr/bin/curl https://kuar.io/kube-controller-manager \ -o /opt/bin/kube-controller-manager \ -z /opt/bin/kube-controller-managerExecStartPre=/usr/bin/chmod +x /opt/bin/kube-controller-managerExecStart=/opt/bin/kube-controller-manager \ --master=http://127.0.0.1:8080 \ --v=2Restart=on-failureRestartSec=5
[Install]WantedBy=multi-user.target
Start the kube-controller-manager service:
$ sudo systemctl daemon-reload$ sudo systemctl enable kube-controller-manager$ sudo systemctl start kube-controller-manager
Deploying the SchedulerDownload the kube-scheduler unit file:
$ sudo curl https://kuar.io/kube-scheduler.service \ -o /etc/systemd/system/kube-scheduler.service
Review the kube-scheduler unit file:
[Unit]Description=Kubernetes SchedulerDocumentation=https://github.com/GoogleCloudPlatform/kubernetes
[Service]ExecStartPre=/usr/bin/mkdir -p /opt/binExecStartPre=/usr/bin/curl https://kuar.io/kube-scheduler \ -o /opt/bin/kube-scheduler \ -z /opt/bin/kube-schedulerExecStartPre=/usr/bin/chmod +x /opt/bin/kube-schedulerExecStart=/opt/bin/kube-scheduler \ --master=http://127.0.0.1:8080 \ --v=2Restart=on-failureRestartSec=5
[Install]WantedBy=multi-user.target
16 | Chapter 2: Deploying Kubernetes

Start the kube-scheduler service:
$ sudo systemctl daemon-reload$ sudo systemctl enable kube-scheduler$ sudo systemctl start kube-scheduler
At this point the controller services are up and running on node0.kuar.io.
The Kubernetes ClientThe official Kubernetes client is kubectl: a command line tool for interacting with theKubernetes API. kubectl can be used to verify the overall health of the cluster. Firstlogin to the controller node:
$ ssh [email protected]
Download and install kubectl:
$ sudo curl -o /opt/bin/kubectl https://kuar.io/linux/kubectl$ sudo chmod +x /opt/bin/kubectl
Next, check the health status of the cluster components:
$ /opt/bin/kubectl get cs
NAME STATUS MESSAGE ERRORcontroller-manager Healthy ok nilscheduler Healthy ok niletcd-0 Healthy {"health": "true"} nil
At this point we have a working Kubernetes control plane and can move on to addingworker nodes.
Bootstrapping Kubernetes Worker NodesDeploying the KubeletThe kubelet is responsible for managing pods, mounts, node registration, and report‐ing metrics and health status to the API server. The kubelet must be deployed to eachworker node.
$ ssh [email protected]
Download the kubelet unit file:
$ sudo curl https://kuar.io/kubelet.service \ -o /etc/systemd/system/kubelet.service
Edit the kubelet unit file:
The Kubernetes Client | 17
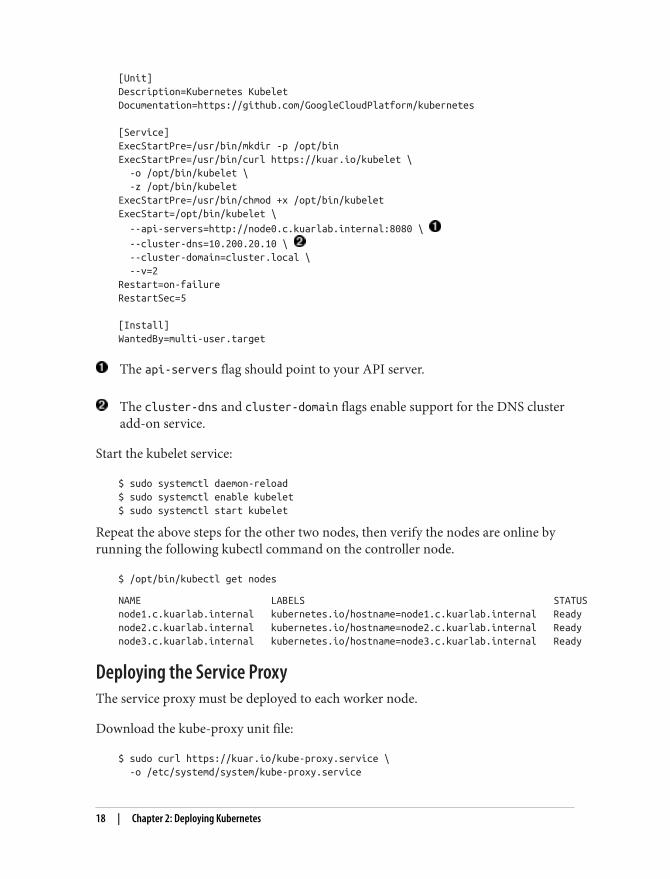
[Unit]Description=Kubernetes KubeletDocumentation=https://github.com/GoogleCloudPlatform/kubernetes
[Service]ExecStartPre=/usr/bin/mkdir -p /opt/binExecStartPre=/usr/bin/curl https://kuar.io/kubelet \ -o /opt/bin/kubelet \ -z /opt/bin/kubeletExecStartPre=/usr/bin/chmod +x /opt/bin/kubeletExecStart=/opt/bin/kubelet \
--api-servers=http://node0.c.kuarlab.internal:8080 \
--cluster-dns=10.200.20.10 \ --cluster-domain=cluster.local \ --v=2Restart=on-failureRestartSec=5
[Install]WantedBy=multi-user.target
The api-servers flag should point to your API server.
The cluster-dns and cluster-domain flags enable support for the DNS clusteradd-on service.
Start the kubelet service:
$ sudo systemctl daemon-reload$ sudo systemctl enable kubelet$ sudo systemctl start kubelet
Repeat the above steps for the other two nodes, then verify the nodes are online byrunning the following kubectl command on the controller node.
$ /opt/bin/kubectl get nodes
NAME LABELS STATUSnode1.c.kuarlab.internal kubernetes.io/hostname=node1.c.kuarlab.internal Readynode2.c.kuarlab.internal kubernetes.io/hostname=node2.c.kuarlab.internal Readynode3.c.kuarlab.internal kubernetes.io/hostname=node3.c.kuarlab.internal Ready
Deploying the Service ProxyThe service proxy must be deployed to each worker node.
Download the kube-proxy unit file:
$ sudo curl https://kuar.io/kube-proxy.service \ -o /etc/systemd/system/kube-proxy.service
18 | Chapter 2: Deploying Kubernetes

Edit the kube-proxy unit file:
[Unit]Description=Kubernetes ProxyDocumentation=https://github.com/GoogleCloudPlatform/kubernetes
[Service]ExecStartPre=/usr/bin/mkdir -p /opt/binExecStartPre=/usr/bin/curl https://kuar.io/kube-proxy \ -o /opt/bin/kube-proxy \ -z /opt/bin/kube-proxyExecStartPre=/usr/bin/chmod +x /opt/bin/kube-proxyExecStart=/opt/bin/kube-proxy \
--master=http://node0.c.kuarlab.internal:8080 \ --v=2Restart=on-failureRestartSec=5
[Install]WantedBy=multi-user.target
The master flag should point to your API server.
Start the kube-proxy service:
$ sudo systemctl daemon-reload$ sudo systemctl enable kube-proxy$ sudo systemctl start kube-proxy
Repeat the above steps for the other two nodes to complete the deployment of theworker nodes.
Cluster Add-onsKubernetes ships with additional functionality through cluster add-ons, which are acollection of Services and Replication Controllers (with pods) that extend the utilityof your cluster. While cluster add-ons are not strictly required, they are considered aninherent part of a Kubernetes cluster.
There are four primary cluster add-ons:
• Cluster monitoring• DNS• Kubernetes UI• Logging
Cluster Add-ons | 19

We’ll cover the Kubernetes UI and DNS add-ons in this chapter and defer monitoringand logging until the discussion on cluster administration later in the book.
DNSKubernetes offers a DNS cluster add-on that provides DNS A and SRV records forKubernetes services. The heavy lifting is done by SkyDNS, an etcd backed DNS serverthat supports dynamic updates from the Kubernetes API.
Download the SkyDNS replication controller configuration:
$ wget https://kuar.io/skydns-rc.yaml
Edit the SkyDNS rc config:
$ vim skydns-rc.yaml
- name: kube2sky image: gcr.io/google_containers/kube2sky:1.11 resources: limits: cpu: 100m memory: 50Mi args: # command = "/kube2sky" - -domain=cluster.local
- -kube_master_url=http://node0.c.kuarlab.internal:8080
The kube_master_url flag should point to your API server.
Create the SkyDNS replication controller:
$ /opt/bin/kubectl create -f skydns-rc.yaml
Next create the SkyDNS service:
$ /opt/bin/kubectl create -f https://kuar.io/skydns-svc.yaml
Services can now be looked up by service name from pods deployed by the Kubelet:
$ service-name.default.svc.cluster.local
Cluster configs
The DNS add-on was setup using cluster configs hosted on aremote site. This should be considered a potential security risk.Consider downloading untrusted cluster configs and reviewingthem before deploying to your cluster.
20 | Chapter 2: Deploying Kubernetes

Kubernetes UIThe Kubernetes UI provides a read-only web console for viewing cluster state andmonitoring node resource utilization and cluster events. kubectl can be used todeploy the kube-ui add-on.
Launch a Kubernetes UI replication controller:
$ /opt/bin/kubectl create -f https://kuar.io/kube-ui-rc.yaml
Next create the service for the UI:
$ /opt/bin/kubectl create -f https://kuar.io/kube-ui-svc.yaml
At this point the Kubernetes UI add-on should be up and running. The KubernetesAPI server provides access to the UI via the /ui endpoint. However the KubernetesAPI is not accessable remotely due to the lack of security.
Securely Exposing the API ServerInstead of exposing the API server to the public internet over an insecure port, a SSHtunnel can be can be create between the remote client and API server.
Create a SSH tunnel between a remote client machine and the controller node:
$ ssh -f -nNT -L 8080:127.0.0.1:8080 [email protected]
The UI is available at http://127.0.0.1:8080/ui on the client machine.
Cluster Add-ons | 21

SummaryNow that’s how you bootstrap a Kubernetes cluster! At this point you have a multi-node Kubernetes cluster with a single controller node and three workers. Addingadditional workers is a matter of provisioning new machines and repeating the stepsto add the machine to the cluster network, then deploying an instance of the kubeletand proxy services. It should also be noted that the cluster setup in this chapter lacksproper security and high-availability for the controller components, both will beaddressed in later chapters. In the meanwhile don’t expose the Kubernetes API orKubelet endpoints on the public internet.
By manually setting up your cluster you now have a better understanding of the com‐ponents and details of Kubernetes. However, you should consider automating thebootstrap process, especially in large scale environments. What’s the point of a clusterif you have to hand-roll each node?
22 | Chapter 2: Deploying Kubernetes