k' sonar curriculum handbook - · pdf file5 'k' sonar instruction manual table...
TRANSCRIPT
1
'K' Sonar Curriculum Handbook
Terrie Terlau, PhD
American Printing House for the Blind, Inc. Louisville, Kentucky
William M. Penrod, EdD, COMS
Coordinator, Orientation and Mobility Program University of Louisville, Louisville, Kentucky
Copyright © 2008,
American Printing House for the Blind, Inc. All rights reserved.
American Printing House for the Blind, Inc. 1839 Frankfort Avenue
P.O. Box 6085 Louisville, Kentucky 40206-0085
Phone: 502-895-2405 Customer Service: 800-223-1839

2
3
IMPORTANT NOTICE The ‘K’ Sonar should NEVER be used as the only mobility aid during actual travel. It must ALWAYS be used in combination with a cane, a dog guide, or a human guide because, by itself, it does not provide information necessary for safe travel. The ‘K’ Sonar does not detect drop-offs.

4
5
'K' Sonar Instruction Manual Table of Content
Chapter One—Getting Started 13 About the Curriculum 13 Purpose and Structure 13
The Instructional Approach Used in This Curriculum 14 About Cane Skills 15 How to Use This Curriculum 16 Repetition of Material in This Manual 18
About the ‘K’ Sonar 18 ‘K’ Sonar History 18
Physics of Sound and Ultrasound: A Brief Look 20 ‘K’ Sonar Functionality 20 ‘K’ Sonar Ranges 21 'K' Sonar Coverage Area, the Flattened Cone 22 The Language of 'K' Sonar Perception 22 ‘K’ Sonar Limitations 23 Who Can Benefit From ‘K’ Sonar Instruction 23
Chapter Two—'K' Sonar Terminology, Hand Positions, and Controls 25 Hand Scan Position 25 Trailing Positions 27
Upward Scan Position 29 Mounting the 'K' Sonar on the Cane 30 Cane Position and Recommended Grip 32 Cane Position and Alternate Grip 33 Cane Technique 34 'K' Sonar Headphones 38 'K' Sonar Controls 38
Battery Charger Port 39
Chapter Three—The Basics: Pitch-Distance Relationship, the Stop Point, and Facing Objects Squarely 41 Chapter Objectives 41 Theoretical Considerations 43 Exercise 3.1—Introducing the ‘K’ Sonar and the Pitch-Distance Relationship 45 Exercise objective 45
Exercise summary 45

6
Materials 47 Location 47
Instructor Notes 47 Procedure 50
Exercise 3.2—Integrating Scan Position and the Pitch-Distance Relationship 53 Exercise objective 53
Exercise summary 53 Materials 55
Location 55 Instructor notes 55 Procedure 57
Exercise 3.3—Hand-Scanning and Facing an Object Squarely 59
Exercise objective 59 Exercise summary 59 Materials 61
Location 61 Instructor notes 61 Procedure 64
Exercise 3.4—Describing Pitch-Distance Relationship and Maintaining Alignment With a Wall While Walking Toward It and Backing Away 67 Exercise objective 67
Exercise summary 67 Materials 69
Location 69 Instructor notes 69 Procedure 71
Exercise 3.5—Facing an Object Squarely and Stopping at the Stop point with the ‘K’ Sonar Cane-Mounted 73 Exercise objective 73
Exercise summary 73 Materials 75
Location 75 Instructor notes 75 Procedure 78
Exercise 3.6—Walking Straight Toward the Wall Using Touch or Constant
Contact Technique 83

7
Exercise objective 83 Exercise summary 83 Materials 85
Location 85 Instructor notes 85 Procedure 88
Exercise 3.7—Introduction to Tone Color 91 Exercise objective 91
Exercise summary 91 Materials 93
Location 93 Instructor Notes 93 Procedure 94
Chapter Four—Obstacle Avoidance 97 Chapter Objectives 97 Theoretical Considerations 99 Introduction 99 Finding Props and Assistants 99
The basics: Small objects and the spaces between them—Exercises 4.1-4.4 100
Obstacle avoidance: From mock-ups to real life— Exercises 4.5-4.6 101
Pedestrians: The obstacles that move— Exercises 4.7-4.9 102
Exercise 4.1—Working With One Pole 103 Exercise objective 103
Exercise summary 103 Materials 105 Location 105 Instructor notes 105 Procedure 106
Exercise 4.2—Working With Two Poles 109 Exercise objective 109
Exercise summary 109 Materials 111
Location 111 Instructor notes 111 Procedure 114
Exercise 4.3—Working With Three Poles 117 Exercise objective 117
Exercise summary 117 Materials 119 Location 119
8
Instructor notes 119 Procedure 123
Exercise 4.4—Larger and Smaller Openings 129 Exercise objective 129
Exercise summary 129 Materials 131 Location 131 Instructor notes 131 Procedure 134
Exercise 4.5—Obstacle Courses and Beyond 139 Exercise objective 139
Exercise summary 139 Materials 141 Location 141 Instructor notes 141 Procedure 143
Exercise 4.6—Obstacles in the Real World 149 Exercise objective 149
Exercise summary 149 Materials 151 Location 151 Instructor notes 151 Procedure 154
Exercise 4.7—Following a Pedestrian in Lines or Cues 159 Exercise objective 159
Exercise summary 159 Materials 161 Location 161 Instructor notes 161 Procedure 163
Exercise 4.8—Avoiding a Pedestrian 167 Exercise objective 167
Exercise summary 167 Materials 169 Location 169 Instructor notes 169 Procedure 171
Exercise 4.9—Working With Crowds 175 Exercise objective 175
Exercise summary 175 Materials 177 Location 177

9
Instructor notes 177 Procedure 179
Chapter Five—Openings, Protuberances, and the Building Line 183 Chapter Objectives 183 Theoretical Considerations 185 Introduction 185
Feature Location: Using touch technique and trailing with ‘K’ Sonar 185 Using touch technique with ‘K’ Sonar cane-mounted 189
Exercise 5.1—Open Doors, Intersecting Corridors, and Closed Doors 193 Exercise objective 193
Exercise summary 193 Materials 197 Location 197 Instructor notes 197 Procedure 202
Exercise 5.2—Hedges, Concrete Walls, and Wooden Fences 211 Exercise objective 211
Exercise summary 211 Materials 213 Location 213 Instructor notes 214 Procedure 217
Exercise 5.3—Veering Outdoors 221 Exercise objective 221
Exercise summary 221 Materials 223 Location 223 Instructor notes 223 Procedure 225
Exercise 5.4—Protuberances in the Building Line 229 Exercise objective 229
Exercise summary 229 Materials 231 Location 231 Instructor notes 231 Procedure 234
Exercise 5.5—Recesses in

10
the Building Line 239 Exercise objective 239
Exercise summary 239 Materials 241 Location 241 Instructor notes 241 Procedure 244
Exercise 5.6—Openings in the Building Line 249 Exercise objective 249
Exercise summary 249 Materials 251 Location 251 Instructor notes 251 Procedure 254
Exercise 5.7—Material Changes in the Building Line 259 Exercise objective 259
Exercise summary 259 Materials 261 Location 261 Instructor notes 261 Procedure 265
Exercise 5.8—Locating Landmarks From Building Line Cues 269 Exercise objective 269
Exercise summary 269 Materials 271 Location 271 Instructor notes 271 Procedure 274
Chapter Six—Recognizing Street-Side Objects 279 Chapter Objectives 279 Theoretical Considerations 281 Introduction 281
Location of street-side objects 281 Estimating object dimensions and material: Clues for object recognition 281 Working with complex objects 282
Pulling it all together 283 Exercise 6.1—Scanning Simple Objects
11
for Location, Height, Width, and Material 285 Exercise objective 285
Exercise summary 285 Materials 287 Location 287 Instructor notes 288 Procedure 293
Exercise 6.2—Scanning Features of Complex Objects 297 Exercise objective 297
Exercise summary 297 Materials 299 Location 299 Instructor notes 300 Procedure 305
Exercise 6.3—Recognizing Street-Side Objects With Cars Parked Next to Them 313 Exercise objective 313
Exercise summary 313 Materials 315 Location 315 Instructor notes 315 Procedure 318
Exercise 6.4—Pulling it All Together 323 Exercise objective 323
Exercise summary 323 Materials 325 Location 325 Instructor notes 325 Procedure 329
End Notes 337 References 338

12

13
Chapter One Getting Started
Welcome to the 'K' Sonar Instructor's Manual. This chapter includes essential information about the curriculum provided in this manual and about the ‘K’ Sonar Perceptual Aid. About the Curriculum
Purpose and Structure
The purpose of this manual is to provide you with a comprehensive system for teaching students to use the ‘K’ Sonar effectively. This curriculum sequences skills in a specific order according to: difficulty level (from easy to difficult); complexity (from simple to complex); and ease of skill integration (from easy to integrate to more difficult to integrate).
This chapter provides essential information about: materials in this manual and how to use them; ‘K’ Sonar history and underlying ultrasound science; specific conventions used for describing and discussing ‘K’ Sonar feedback; and selection of students who may benefit from ‘K’ Sonar instruction. Chapter Two offers descriptions and pictures of correct methods for: holding the 'K' Sonar; hand-scanning; mounting the ‘K’ Sonar on a cane; holding and positioning the cane with the ‘K’ Sonar cane-mounted; and using the ‘K’ Sonar controls, headphones, and battery charger.
Chapters Three through Six comprise the teaching curriculum and include chapter objectives; theoretical considerations; and a series of sequenced exercises that teach skills needed to meet chapter objectives. All exercises include the following sections: exercise objective; exercise summary; materials; location; instructor notes; and procedure (a series of detailed steps that can be used when teaching exercise skills).
In Chapter Three, the student learns the following basic ‘K’ Sonar skills: locating and facing a large object squarely; interpreting the pitch-distance relationship; scanning when the ‘K’ Sonar is hand-held and cane-mounted; and stopping one step before the cane will encounter an object. In Chapter Four, the student learns to: apply basic skills to smaller objects; locate and walk through openings between objects; locate and move around obstacles without touching them with the cane in contrived and real-life situations; and follow a person in a line or cue. Chapter Five teaches the student to detect details about the building line including openings, recesses, protuberances, and other building-line landmarks and destinations. Finally, Chapter Six teaches the student to: detect street-side objects; recognize and identify common street-side objects; and use such objects as landmarks or destination indicators.

14
The Instructional Approach Used in This Curriculum
This curriculum uses an integrated approach in which information from the ‘K’ Sonar is intricately linked to information provided by the cane. When the ‘K’ Sonar is cane-mounted, the cane’s functionality expands. In addition to its usual functionality, the cane becomes a directional indicator or pointer for the ‘K’ Sonar because it gives the student the horizontal direction in which to find the environmental feature described by the ‘K’ Sonar’s multidimensional feedback. The ‘K’ Sonar and the cane, when attached to one another and used as a single unit, provide a far richer information set than they do when used together without being attached. In this case, the whole is greater than the sum of its parts.
Basic 'K' Sonar scanning/interpretation skills are first taught using only the ‘K’ Sonar and not the cane; the student holds the 'K' Sonar in the cane hand and focuses on specific types of 'K' Sonar sounds, their meanings, and possible motor responses to them. After the student has mastered these basic skills when hand-scanning, he learns to use these same scanning/interpretation skills when the 'K' Sonar is mounted on the cane; now the student learns to integrate 'K' Sonar information with information received from the cane and uses both types of information seamlessly to perform specific tasks.
Another approach to 'K' Sonar instruction, not utilized in this manual, teaches a cane user the sequence of 'K' Sonar skills when the device is hand-held. The 'K' Sonar is mounted on the cane only after high proficiency in sequenced 'K' Sonar hand-scanning skills has been acquired. Using this approach, Leslie Kay’s instructional materials offer some excellent strategies for teaching ‘K’ Sonar use when it is hand-held.1
The authors of this manual find that skill in using the 'K' Sonar mounted on the cane is not a simple sum of 'K' Sonar hand-scanning skills and cane skills. When the 'K' Sonar is mounted on the cane, the movement of the cane through its arc determines the scanning movement of the 'K' Sonar; at any given instant, the clearest information provided by the 'K' Sonar refers to space along and above the horizontal arc of the cane. When using the 'K' Sonar mounted on the cane, the student receives information in another sensory modality (hearing) which expands on the haptic, proprioceptive, kinesthetic, and cognitive information obtained from the cane and the student's body/mind. The authors propose that teaching the 'K' Sonar skill with a hand scan and then immediately teaching the expanded version of this skill when the 'K' Sonar is cane-mounted is the most effective strategy for helping a student learn to take full advantage of this 'K' Sonar-cane synergy.
Certain activities—such as trailing with the ‘K’ Sonar to locate small building-line or street-side features, or scanning to locate obstacles at chest, shoulder, face, or head height—are most effectively accomplished when the

15
student uses the cane in one hand and holds the ‘K’ Sonar in the other hand in upward scan or trailing positions. Curriculum exercises provide practice in determining when to remove the ‘K’ Sonar from the cane and when to use it cane-mounted.
About Cane Skills
Because this curriculum uses an integrated cane-‘K’ Sonar approach, it is essential that a student has acquired excellent cane skills before beginning ‘K’ Sonar instruction. Exercises do not provide review of cane skills, but instead focus on the use of the cane in combination with the ‘K’ Sonar. The following discussion of specific cane techniques used with the ‘K’ Sonar may be helpful.
• Using touch technique: Touch technique, when used in this handbook, refers to both two-point touch and constant contact touch techniques; constant contact technique is a variation of touch technique in which the cane does not leave the surface being previewed (Hill & Ponder, 1976; Jacobson, 1993: LaGrow and Weesies, 1994). The constant contact variation works particularly well with the ‘K’ Sonar. The student should use his preferred variant of touch technique. However, if the student uses two-point touch technique as described by Hill and Ponder (1976) instead of the constant contact variant, maintaining the appropriate rhythm and staying in step become more critical.
• Negotiating stairways: When the ‘K’ Sonar is cane-mounted, the user should remove headphones from his ears when the stairwell has been detected or when the user is in close proximity to a stairwell.
• Negotiating doorways: The only modification to traditional techniques (Hill & Ponder, 1976; Jacobson, 1993: LaGrow & Weesies, 1994) is that, when contacting the door and using the cane in a vertical position and touching the door to locate the handle or door knob, the user should ensure that the cane is placed on the door so that the cane itself protects the K Sonar device from making potential damaging contact with the door handle or knob.
• Following in a line or cue: When using the ‘K’ Sonar to move with a line or cue, the cane is used as appropriate for the situation. The ‘K’ Sonar is held in the non-cane hand above the cane and pointing toward the next person ahead in line. The ‘K’ Sonar remains focused on the person ahead so that movements forward and turns can be detected immediately.
• Using the scissors technique: A scissors technique can also be used when the ‘K’ Sonar is detached from the cane (Hill & Ponder, 1976; Jacobson, 1993; LaGrow & Weessies, 1994). Here, the student uses touch technique; scans with the ‘K’ Sonar held above the cane in his other hand; and moves the ‘K’ Sonar in the opposite direction in which he moves the cane. Some students may prefer using the scissors

16
technique most of the time because this technique allows the student to obtain a full ‘K’ Sonar view of environmental detail. However, this technique eliminates the cane-‘K’ Sonar synergy that occurs when the ‘K’ Sonar is cane-mounted. The integrated approach to cane-‘K’ Sonar instruction proposed here does not focus on the scissors technique, but instead assumes that the student will use the ‘K’ Sonar cane-mounted unless he needs to trail with it or use it to look for obstacles at chest, shoulder, face, or head height.
• Using the ‘K’ Sonar hand-held only when needed: Some students may prefer to use the ‘K’ Sonar only when they are looking for a specific landmark or destination. Such students would either trail with the ‘K’ Sonar hand-held while using touch technique or use the scissors technique described above when they needed to locate something specific. Instead of keeping the ‘K’ Sonar mounted on the cane, these students might store it in a secure pocket in clothing or a pack or purse and bring it out only when they wanted to use it. This is a very appropriate way to use the ‘K’ Sonar in daily travel, and students choices should be respected. However, instruction should not be modified for these students until Chapter Six when cane-mounted activities can be omitted.
How to Use This Curriculum Although skilled adult travelers who are blind can use this manual to
develop their own ‘K’ Sonar skills, this curriculum has been designed primarily for orientation and mobility instructors who will teach ‘K’ Sonar skills to students ranging in age from middle school to elder.
If you are a skilled adult traveler who is blind, read this manual and do as many exercises as you can. The authors strongly recommend that you work with a sighted friend who can give you visual feedback, particularly when you work with more advanced skills covered in Chapters Five and Six. A number of exercises require a human guide for part or all of the activities. Although you may be able to learn essential skills in other ways, the authors strongly recommend that you work with a sighted friend when guiding is required. The cassette that accompanied your ‘K’ Sonar gives you samples of ‘K’ Sonar sounds and descriptions of what these sounds convey; familiarity with sounds and meanings on this cassette will help you recognize the meaning of ‘K’ Sonar sounds when you do these exercises.
Always remember that the ‘K’ Sonar must not be used as your only travel aid; you must only use it in combination with a cane, a dog guide, or a human guide. The ‘K’ Sonar does not detect drop-offs and, by itself, does not give you enough information to be safe. When doing exercises that require hand scanning, make sure that you use an area without steps or drop-offs, and without car or pedestrian traffic.

17
Activities in this curriculum are designed to teach ‘K’ Sonar use in combination with the long cane. However, dog guide users may find the ‘K’ Sonar helpful in locating landmarks that guide dogs circumvent. Persons walking with human guides may also find ‘K’ Sonar use helpful in expanding their awareness of environmental features that they pass.
If you are an orientation and mobility instructor who plans to teach the use of the ‘K’ Sonar, you must begin by learning to use it yourself; but don’t panic—You do not have to do every activity in every exercise! The Instructor Notes section of each exercise tells you what you need to know in order to teach skills involved in the exercise.
The Manual’s authors suggest that you set aside a half-hour a day for a week or two for your own ‘K’ Sonar training, and take the following steps:
• Read the first two chapters of this manual thoroughly; • Practice holding the ‘K’ Sonar correctly, mounting it on the cane, and
holding the cane in the recommended or alternate positions noted in Chapter Two;
• Read all sections of Chapters Three and Four, and practice exercise activities described in the Instructor Notes for each exercise;
• Read Location and Instructor Notes sections for all exercises in Chapters Five and Six;
• Use the ‘K’ Sonar hand-held and cane-mounted indoors and outside to acquire a gut-level understanding of: The pitch-distance relationship, Your stop point, The cane as a pointer for the ‘K’ Sonar, The silence of openings or gaps between obstacles, and The difference in the level and type of information acquired by
trailing with the ‘K’ Sonar or using it cane-mounted.
When preparing specific lessons, you must reread all sections of exercises that you plan to use. The Procedure section of each exercise offers a step-by-step method for teaching the skill of interest. You are not expected to memorize or read these detailed steps when teaching. Rather, the Procedure section provides a “play-by-play” description of a lesson that works; after reading a procedure section, you may feel as if you have just observed a solid O&M instructor teaching the skill. As you break down a skill into steps that a given student can handle, draw on specific techniques used in the Procedure section to develop the instructional plan that matches a particular student’s needs and learning style.
Exercise activities are written to meet the needs of students who grasp ‘K’ Sonar sounds and their meanings more slowly. As you work through an exercise with a student, you can and should move on to the next exercise activity when you see that the student has mastered the current one.

18
A student who learns ‘K’ sonar skills quickly will not be challenged by the very small increases in task difficulty in the exercises and will quickly become bored with the repetition of easy, contrived activities. When such a student demonstrates mastery of the exercise objective, you can move on to the next exercise or involve the student in some real-life situations in which the skills can be practiced. Repetition of Material in This Manual
When you first look through this manual, you will notice repetition of material between and within exercises. There are three kinds of repetition that have been intentionally used in this manual.
First, the Exercise Summary, at the beginning of each exercise, lists a series of activities that the student will complete in the exercise. The Instructor Notes section repeats this summary, but provides additional explanatory material after each activity. The Exercise Summary allows you to quickly glimpse what will be covered in the exercise. The Instructor Notes help you understand the rationale for each activity. You may find it helpful to print out Exercise Summaries and bring them with you for exercises you plan to use in a particular lesson.
The second type of repetition involves the description of the exercise location. Although the same location is used in a number of exercises, the details of the location are provided in each exercise. This way, each exercise stands alone; that is, it includes all of the information that you would need in order to set up and conduct the activities in the exercise. If you printed the exercise you planned to use in a lesson, you could take it with you and not need to refer to other parts of the manual for information relevant to the lesson.
The third type of repetition involves specific material from the Instructor Notes. Many exercises include a note about the importance of setting up and doing the exercise in advance and another note about how and when to use a speaker instead of headphones. These procedures are essential to most exercises; however, they are used in slightly different ways depending on the specific activities involved. You are encouraged to read these notes carefully; although they may seem repetitious, they are tailored to the activities of each particular exercise. About the ‘K’ Sonar ‘K’ Sonar History2
During World War II, SONAR (Sound Navigation and Ranging) technology proved to be an excellent object location, detection, and identification system. Such SONAR systems sent Ultrasound, sound waves that are much higher in pitch than the human ear can hear, into the ocean; and SONAR operators analyzed the reflections of those ultrasound echoes that were
19
returned to ultrasound receivers. Using SONAR systems, SONAR operators could locate the position of enemy submarines for targeting.
In the 1950s, Lesley Kay, a British engineer, was instrumental in developing advances in such SONAR systems for the British Navy. Using a broad-band, sweep ultrasound rather than a single tone pulse ultrasound, Dr. Kay’s new SONAR systems provided clearer and more detailed information about the location of submerged objects such as enemy submarines and land mines. In 1959, when the Queen Mother visited a school for the blind to open a new swimming pool and other facilities there, Dr. Kay began to consider applications of the broad-band sweep ultrasound that he used in his work for the British Navy to the information needs of persons who were blind. The finding that bats used this more complex broad-band sweep ultrasound to fly safely and find food effectively supported Kay's position that this kind of ultrasound could give persons who were blind the ability to "see with sound."
After Dr. Kay became the Head of the Electrical Engineering Department at Canterbury University of New Zealand in 1965, he continued to develop a series of increasingly sophisticated devices that provided detailed information about the environment via multiple tones with varying pitches and tone colors. Perhaps the best known of Dr. Kay's devices are the Sonic Torch and the Sonicguide. The monaural Sonic Torch, a hand-held device, indicated the distance of objects from the user and gave information about the type of material of which objects were made by presenting the user with a pitch/tone pattern or sound signature for all objects in its range. The Sonicguide, a binaural device, presented the user with two sound pictures, one acquired from the left and the other acquired from the right side of the user. Integrating this data, the user could perceive and actively recognize objects and obstacles on both sides at the same time.
Although these devices obtained numerous proponents, they did not become widely used by persons who were blind in part because of their bulkiness and their high cost. Advances in technology have enabled Dr. Kay to produce the 'K' Sonar, a smaller, lighter, and more affordable device that provides the same detailed environmental information via Kay's sweep ultrasound process.
20
Physics of Sound and Ultrasound: A Brief Look To teach students to use the 'K' Sonar effectively, it is essential to have a
basic understanding of the nature and function of ultrasound. Ultrasound is sound at frequencies or pitches too high for the human ear to hear. Because ultrasound is simply sound at high frequencies, it behaves like sound in terms of how it reflects from objects or is absorbed by them. To understand the types of information that the 'K' Sonar provides via ultrasound, it is necessary to understand some basic principles of sound in general.
Sound can be defined as "a wave which is created by vibrating objects and propagated through a medium from one location to another."3 When sound, carried through the air, encounters a solid object, some of the sound is reflected back from the object, some is absorbed by the material of which the object is made, and the rest is transmitted through the object. In general, hard, less porous materials reflect more sound than do more porous materials, and more porous materials absorb more sound than do less porous ones. Persons who are blind and orientation and mobility instructors wearing blindfolds pay close attention to the qualities of sound made by their canes and footsteps echoing off of neighboring objects and buildings, and learn a great deal about their surroundings via the use of this human echolocation ability.
Ultrasound is sound whose pitch is higher than the human ear can hear—frequencies higher than 20 kHz. The ultrasound transmitter on the 'K' Sonar sends out sweep ultrasound, and its ultrasound receiver picks up and analyzes the ultrasound that is reflected back from objects in range. The resulting ultrasound echoes are then transformed into sound that the human ear can hear.
The complex sweep ultrasound used by the 'K' Sonar provides detailed information about the presence and nature of environmental features in its range. ‘K’ Sonar Functionality
The 'K' Sonar is an electronic travel device that uses ultrasound to acquire information about the environment and translates this information into patterns of sound that can be heard and interpreted. Its sweep ultrasound produces multidimensional data about objects in its range. A user can hear one, two, or more tones at once, depending on how many objects are within the range of the 'K' Sonar's ultrasound. The pitch of each of these tones varies according to the distance of each object from the 'K' Sonar unit; the closer the object to the 'K' Sonar, the lower the pitch of the tone corresponding to that object. The ‘K’ Sonar tone color also varies according to the characteristics of the material of which an object is made. The more porous the material, the more muted the tone color; and the more compact the material, the more bright and full the tone color.
21
The 'K' Sonar enhances both obstacle detection/avoidance and object/landmark recognition/location. Basic skills required to achieve these benefits from the ‘K’ Sonar include an understanding of the pitch-distance relationship; the stop point; and variations in tone color.
The pitch distance relationship is learned fairly quickly by most students; the lower the pitch of the ‘K’ Sonar tone, the closer the object is to the ‘K’ Sonar.
The stop point is the spot at which the next step will bring the cane into contact with the obstacle. Each student’s stop point is unique to the student. A student recognizes the stop point by noting the specific low pitch of the ‘K’ Sonar tone that occurs at the point that the cane tip will touch the object when the student takes the next step. The stop point is the last point at which a student can take action to avoid touching the object with the cane. If the student moves around objects at or before his stop point, he can maintain a faster pace and move more gracefully around obstacles. It should be noted that, if a student is using the ‘K’ Sonar in combination with a dog guide or a human guide, the stop point refers to a point one arm’s length back from an obstacle.
Students grasp the pitch-distance relationship and the stop point by repeatedly experiencing them and by trial-and-error learning. Early exercises provide extensive practice in developing these skills.
Object recognition is harder to define because it depends on multi-dimensional sound cues and the brain’s associations with the meanings of the points along various sound dimensions. With a few exceptions, this manual does not support the teaching of a direct, one-to-one correspondence between an object and the 'K' Sonar sound made in response to that object. Instead, exercises expose students to the 'K' Sonar sounds related to different types of textures, materials, and environmental features and allow students to integrate this information internally with the direct experience of the surface or feature involved. ‘K’ Sonar Ranges
The 'K' Sonar can be set to two ranges: a 2-meter range (approximately 6.6 feet) and a 5-meter range (approximately 16.5 feet). You and your students can determine which range is currently active by listening to the rhythmic, percussive beat or pulsing sound that is always emitted by the device. When the beat is fast, the 'K' Sonar is set for 2 meters, and when the beat is slow, the 'K' Sonar is set for 5 meters. When you change between these two ranges by pressing the front toggle button, you can readily hear the difference between the fast and slow rhythms.
If an object is in range when you change ranges, you will also notice a sharp difference in pitch. An object nearly 2 meters away would result in a very high pitch sound in the 2-meter range because the object is almost 100% of the range away from the 'K' Sonar; it is nearly at the end of the 2-
22
meter range, as far away as the 'K' Sonar can detect in this range. However, the same object in the same distance relationship with the 'K' Sonar would result in a moderately low pitched tone in the 5-meter range. In this range, the object is slightly less than 40% of the range away from the 'K' Sonar, much closer to the device relatively speaking than it was in the 2-meter range.
It is important not to confuse the change in pitch that occurs when an object is in range with the change in the rate of the basic beat or pulse that is present regardless of whether an object is in range. The basic beat or pulse, not the pitch, is the feature that tells you the range to which the unit is set.
The 5-meter range is used in most outdoor exercises. The 2-meter range should be used when scanning for overhanging obstacles and when negotiating crowded areas outdoors. Some individuals prefer the 2-meter range outdoors because the 5-meter range provides too much information. After basic skills have been acquired, let your students determine which range they prefer for general outdoor use. 'K' Sonar Coverage Area, the Flattened Cone
When ultrasound leaves the 'K' Sonar, it not only moves in a straight line away from the 'K' Sonar, but it also disperses into a wider and wider spread as it moves. Its dispersion pattern resembles a flattened cone with the narrow end just in front of the 'K' Sonar. Near the end of the 'K' Sonar range, the very wide end of the cone narrows slightly, or flattens. This means that the vertical and horizontal dimensions of the area that the 'K' Sonar can "see" become larger farther away from the 'K' Sonar. The 'K' Sonar might detect a pole placed 10 feet north and 5 feet east of a student, but might not detect the same pole if it was placed 1 foot north and 5 feet east of the student. The Language of 'K' Sonar Perception
The 'K' Sonar does not provide the scope and detail of information obtained through vision. However, it does offer significant perceptual enhancements to persons with no functional vision who become skilled in its use. As such it is appropriate—and even necessary—to discuss 'K' Sonar experience in the same terms that we use for other types of perception.
Exercises refer to and help the student think of 'K' Sonar sounds as being "produced" by objects and their features. Close "sounds" low-pitched and far "sounds" high. Facing something squarely "sounds" louder and clearer than facing something at an angle. A tall wide object such as a smooth concrete wall "makes" a louder noise than "does" a narrow object such as a telephone pole. A rough wall "has" more hiss or multiple tones than a smooth wall, and hedges "hiss" so much that there is almost no tone in the sound.
23
Clearly, this language is inaccurate in terms of what is actually happening. Of course, the walls, poles, and hedges do not make sounds. Rather, the 'K' Sonar receives different patterns of ultrasound reflection back from these objects and translates these patterns into the consistent "sound signatures" for those objects. ‘K’ Sonar Limitations
One limitation of the ‘K’ Sonar is that, when mounted on a cane, the 'K' Sonar does NOT expand the upper range of coverage beyond that provided by the cane. It does not provide information about obstacles at chest, shoulder, face, or head height. A partial solution to this problem can be achieved by teaching the student to anticipate areas that are likely to contain such obstacles; when traveling through such areas, the student learns to detach the 'K' Sonar from the cane and hold it in the upward scan position in the non-cane hand while continuing to use the cane normally.
A second issue is the need to listen to the ‘K’ Sonar through headphones. Travelers who are blind must hear their environment; anything that reduces auditory information may be problematic. To resolve this issue, the ‘K’ Sonar kit includes a headphone with very small tips that enter the ear. This headphone maintains the integrity of external sound to a remarkable degree. A second type of headphone, not provided with the ‘K’ Sonar kit, transmits sound through tiny speakers held just above the ear openings; this headphone also seems to maintain a very high degree of integrity of external sound.4 Induction headphones, not provided with the ‘K’ Sonar, introduce sound through the bones behind the ear and may offer a third solution to the problem.5 Regardless of the type of headphones that are used, persons should always remove headphones from their ears when approaching and crossing intersections or when walking through areas that include business driveways, parking lots, or alleys—where traffic might cross the path of travel.
A third limitation discussed previously is that the ‘K’ Sonar does NOT detect drop-offs; therefore, it must ALWAYS be used in combination with either a cane, or a dog guide, or a human guide. Who Can Benefit From ‘K’ Sonar Instruction
Decisions about whether to introduce the 'K' Sonar to a specific student and when to do so should be based on a thorough orientation and mobility assessment. Before a student begins ‘K’ Sonar instruction, the following prerequisite conditions MUST be met:
• Demonstrates concept development: The student must understand environmental positional concepts as identified by Hill and Blasch (1980), Penrod and Blasch (2005), and Skellenger and Hill (2005). Such concepts include:

24
Body parts; Shapes; Common environmental objects and materials; Positional relationships, e.g., self-to-object and object-to-object; Concepts of laterality; Facing an object squarely versus facing it at an angle; Distal relationships, e.g., far and near; Parallel and perpendicular; A head-on collision; Passing without colliding; An object moving across the student’s path of travel very close to
the student; An object moving across the student’s path of travel farther out
from the student; Directions based on positions on a clock face; Environmental concepts, e.g., curb, grass line, sidewalk, etc.
• Demonstrates mastery of mobility skills: The student must demonstrate mastery of mobility skills in the following areas (Blasch, Weiner, and Welsh, Eds., 1997): Cane use including touch technique in indoor and outdoor
environments; Indoor travel and outdoor residential and business travel; Unlighted and lighted street-crossings.
• Meets the following general criteria: Are in middle school or beyond; Have an interest in learning or a willingness to explore an auditory
electronic travel device; Have no or very little functional vision, or have an extremely
narrow field of vision such that the 'K' Sonar can provide information about nearby objects that are outside of the student’s visual field;
Possess unimpaired hearing; Possess average or above average general cognitive ability.
In teaching the 'K' Sonar or any other travel aid, the O&M instructor is
advised to pay attention to the unique perspective of each individual student. There are as many approaches to teaching the 'K' Sonar as there are students. Some students will do well with our very structured approach, while others will learn more effectively with a more free-flowing approach. Some will catch on quickly and some will not. Some will find the aid useful and some will not. Trust yourself and your students—and enjoy!
25
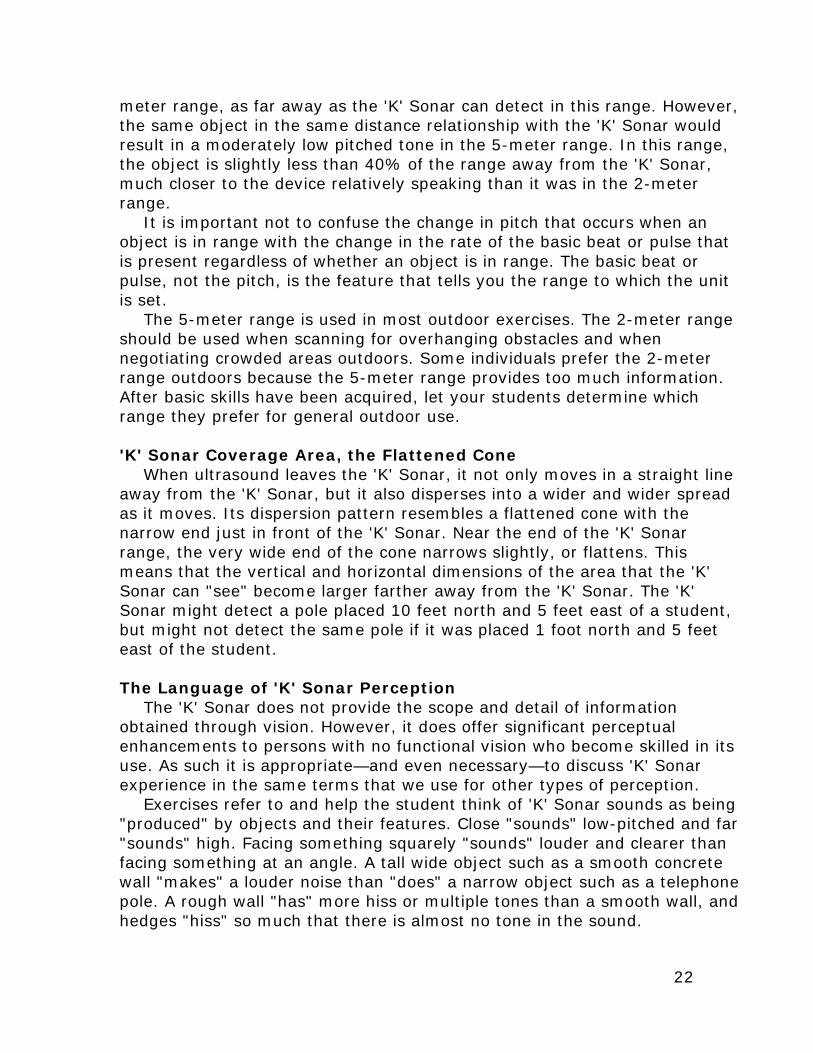
Chapter Two 'K' Sonar Terminology, Hand Positions, and Controls This chapter provides specific information about the 'K' Sonar terminology, hand positions, and controls. Precise attention to this information is needed in order to use the 'K' Sonar to its greatest potential. Examine pictures and try various holds as they are described. Hand Scan Position
When the 'K' Sonar is used alone, it is held in the hand scan position. The 'K' Sonar is held in the cane-using hand with the upper arm relaxed alongside the body, and the elbow bent at a 90 degree angle so that the 'K' Sonar points straight ahead. Note that the arm is at the side, not at the body midline. (See Figure 1).
Figure 1: Arm Placement in Hand Scan Position
In hand scan position, the person’s cane-using hand holds the top
of the 'K' Sonar. The thumb is on one side of the 'K' Sonar and the fingers are on the other. If held in the right hand, the thumb rests near the three control buttons. The mesh in the front of the 'K' Sonar must point straight ahead. (See Figure 2).

26
Figure 2: Hand Placement in Hand Scan Position
When scanning by hand, the ‘K’ Sonar is moved in an arc from the
center (See Figure 2) to the left end of the scanning arc (See Figure 3) back to the center, and then to the right end of the scanning arc. (See Figure 4).
Figure 3: Hand Scan Position at Left End of Scan (Flexion)

27
Figure 4: Hand Scan Position at Right End of Scan (Hyperextension)
Trailing Positions
When using a cane and needing to locate certain types of landmarks or destinations (e.g., open doors along a corridor, a bus stop sign post), it is often helpful to hold the ‘K’ Sonar in the non-cane hand and trail the area of interest with it. In these situations, right-handed cane users hold the ‘K’ Sonar in their left hand; and left-handed cane users hold the ‘K’ Sonar in their right hand.

28
Figure 5: Trailing to the Left With the Left Hand
Figure 6: Trailing to the Right With the Left Hand

29
Figure 7: Trailing to the Left With the Right Hand
Figure 8: Trailing to the Right With the Right Hand
Upward Scan Position
When the ‘K’ Sonar is cane-mounted, it cannot detect obstacles at chest, shoulder, face, or head height. When traveling in an area where such obstacles are frequently found (e.g., a tree-lined street with low-hanging branches), the student uses her cane and detects obstacles at chest, shoulder, face, and head height with the ‘K’ Sonar held in her free hand in the upward scan position. Right-handed cane users hold the ‘K’ Sonar in their left hand; and left-handed cane users hold the ‘K’ Sonar in their right hand. In this position, the ‘K’ Sonar points straight ahead and upward at a 45 degree angle. (See Figure 9 and Figure 10).

30
Figure 9: Upward Scan Position in the Left Hand
Figure 10 Upward Scan Position in the Right Hand
Mounting the 'K' Sonar on the Cane
The 'K' Sonar can be mounted only on canes with golf grips. The 'K' Sonar has an open shaft on the bottom that can be slid onto a cane. In Figure 11, the 'K' Sonar is turned up-side-down so that the open shaft is visible.

31
Figure 11: Open Shaft on the 'K' Sonar
To attach the ‘K’ Sonar to a cane, hold the 'K' Sonar with the open shaft
pointing down and away from you. As shown in Figure 12, place the cane inside the 'K' Sonar shaft at a point on the cane below the golf grip. The user should make sure that the device is snug at all times, especially if the cane tip has accidentally been stuck in a sidewalk crack or curb.
Figure 12: Cane Inside Open Shaft
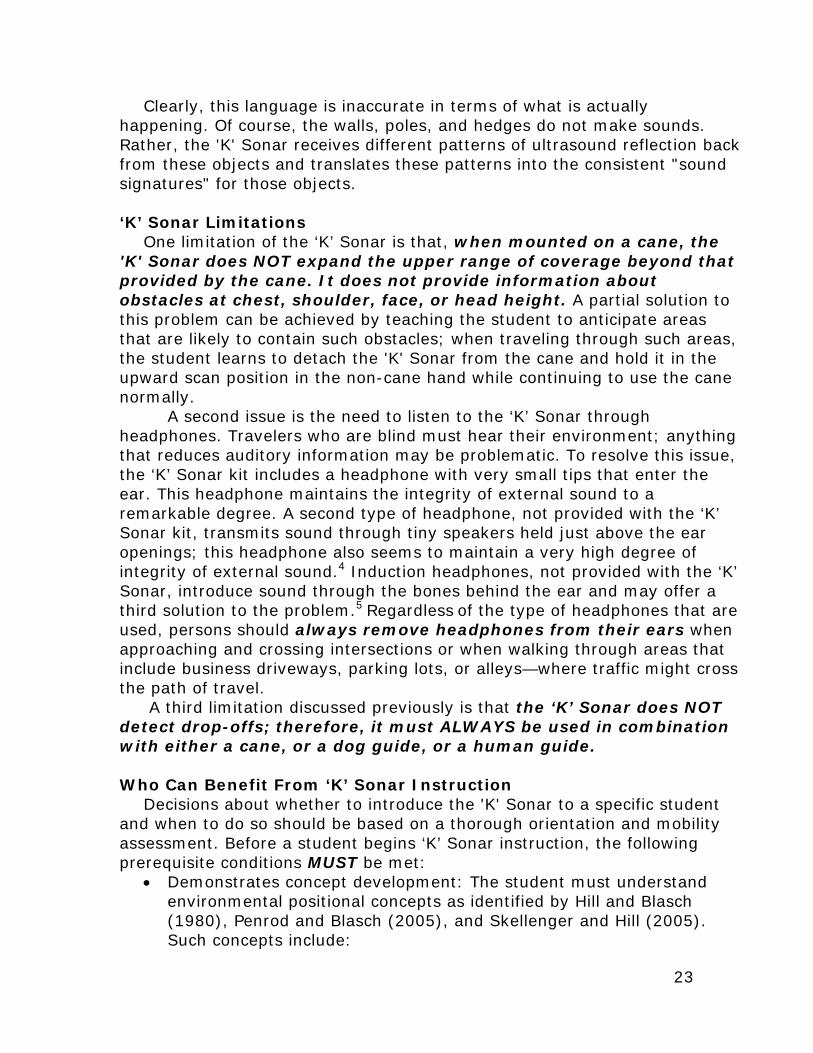
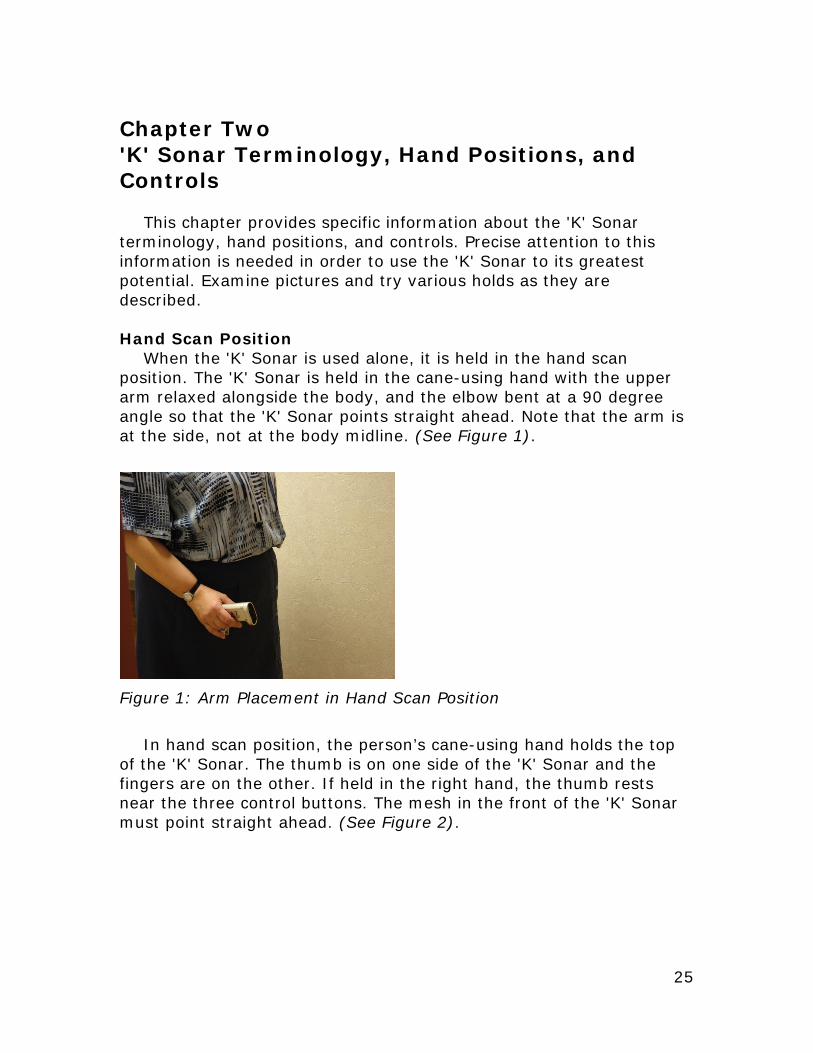
Move the 'K' Sonar up the cane (See Figure 13) and onto the golf grip,
pulling until the shaft will go no farther. Twist the 'K' Sonar on the golf grip so that the side of the 'K' Sonar is parallel to the flat side of the golf grip, corresponding to the user’s index finger. (See Figure 14).
32
Figure 13: 'K' Sonar Being Guided to Golf Grip
Figure 14: Final Mounted Position
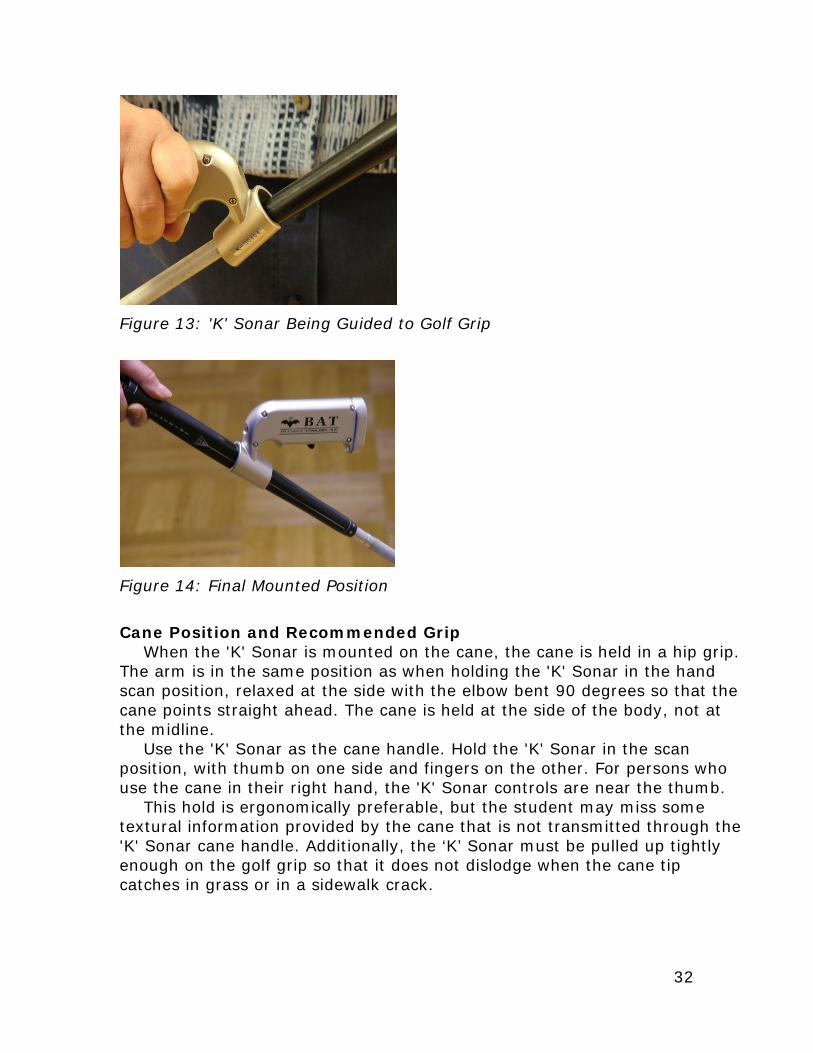
Cane Position and Recommended Grip
When the 'K' Sonar is mounted on the cane, the cane is held in a hip grip. The arm is in the same position as when holding the 'K' Sonar in the hand scan position, relaxed at the side with the elbow bent 90 degrees so that the cane points straight ahead. The cane is held at the side of the body, not at the midline.
Use the 'K' Sonar as the cane handle. Hold the 'K' Sonar in the scan position, with thumb on one side and fingers on the other. For persons who use the cane in their right hand, the 'K' Sonar controls are near the thumb.
This hold is ergonomically preferable, but the student may miss some textural information provided by the cane that is not transmitted through the 'K' Sonar cane handle. Additionally, the ‘K’ Sonar must be pulled up tightly enough on the golf grip so that it does not dislodge when the cane tip catches in grass or in a sidewalk crack.

33
Figure 15: Recommended Grip, Hand Holds the 'K' Sonar
Cane Position and Alternate Grip
If desired, the student can hold the cane's golf grip next to the 'K' Sonar. Here, the index finger lies along the ‘K’ Sonar’s metal shaft where it covers the golf grip. The student’s hand controls the cane and rests close enough to the ‘K’ Sonar to reach its controls if needed. The alternate grip allows the student to obtain all tactile information transmitted by the cane about the surface ahead. If the cane becomes stuck, there is no risk of detaching a poorly mounted 'K' Sonar.
The top portion of the 'K' Sonar must always rest above the cane. If the student holds the golf grip behind the ‘K’ Sonar, its weight can shift the cane to the left or right side; in this position, the ‘K’ Sonar will be on the left or right side of the cane and will provide distorted and incomplete information. When using the alternate grip, the student must hold the cane along, not behind, the ‘K’ Sonar.

34
Figure 16: Alternate Grip, Hand Holds Golf Grip
Figure 17: Alternate Grip Becomes Unbalanced When Hand is Behind the ‘K’ Sonar
Cane Technique
The 'K' Sonar works best with two point touch or constant contact cane techniques. The left and right ends of the arc provide good cane coverage when using either the Recommended or Alternate cane grips.
The recommended grip achieves a slightly better angle relative to the ground for the 'K' Sonar. The device is tilted slightly too far toward the ground when the golf grip is held; the downward tilt is less pronounced when the 'K' Sonar is held.

35
Figure 18: Recommended Grip, Arc Left (Flexion)
Figure 19: Recommended Grip, Arc Center (Extension)
36
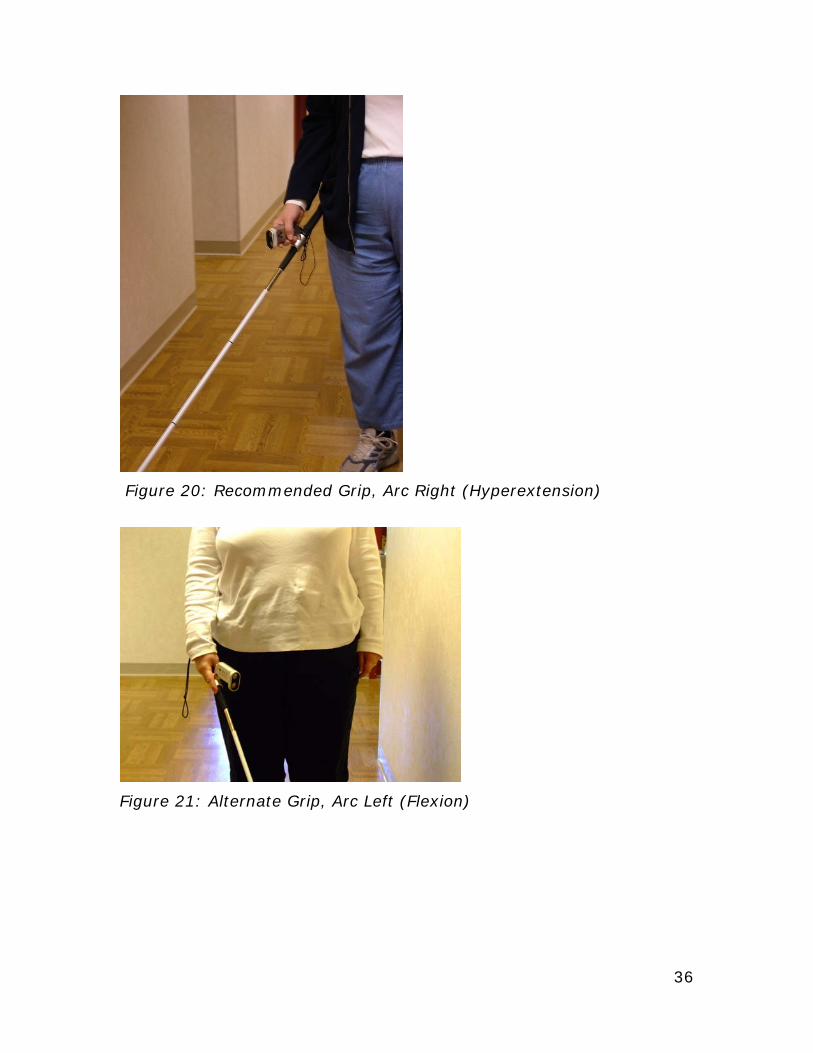
Figure 20: Recommended Grip, Arc Right (Hyperextension)
Figure 21: Alternate Grip, Arc Left (Flexion)
37
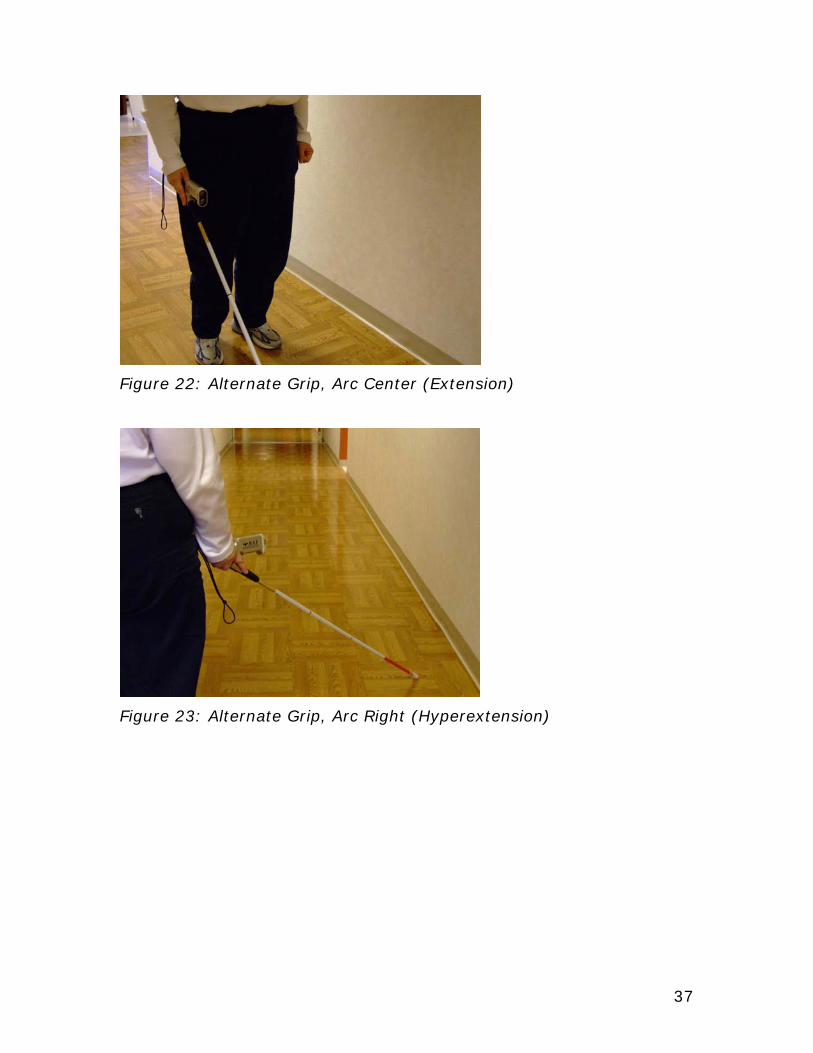
Figure 22: Alternate Grip, Arc Center (Extension)
Figure 23: Alternate Grip, Arc Right (Hyperextension)

38
'K' Sonar Headphones It is essential that persons who are blind, when traveling, obtain complete
auditory information from the ambient environment. The 'K' Sonar headphones are designed to block out as little sound as possible. Their tips barely enter the ears and the headphones do not cover the ears. With practice, students can learn to process both the 'K' Sonar sounds and auditory environmental information at the same time.
However, the 'K' Sonar should not be used when persons who are blind listen for traffic patterns, cross streets, or are in other traffic intensive situations. In such situations, students should remove the headphones from their ears and pull them down around the back of their necks.
Figure 24: Headphones for the 'K' Sonar
'K' Sonar Controls The 'K' Sonar turns itself on when headphones are plugged in and turns
off when headphones are unplugged. The headphone jack is located in the back of the 'K' Sonar just above the open shaft.

39
Figure 25: 'K' Sonar Headphone Jack
The 'K' Sonar has three controls on its left side. The front button toggles
the range between 2- and 5-meters. The top back button raises volume and the bottom back button lowers volume.
Figure 26: 'K' Sonar Controls
Battery Charger Port
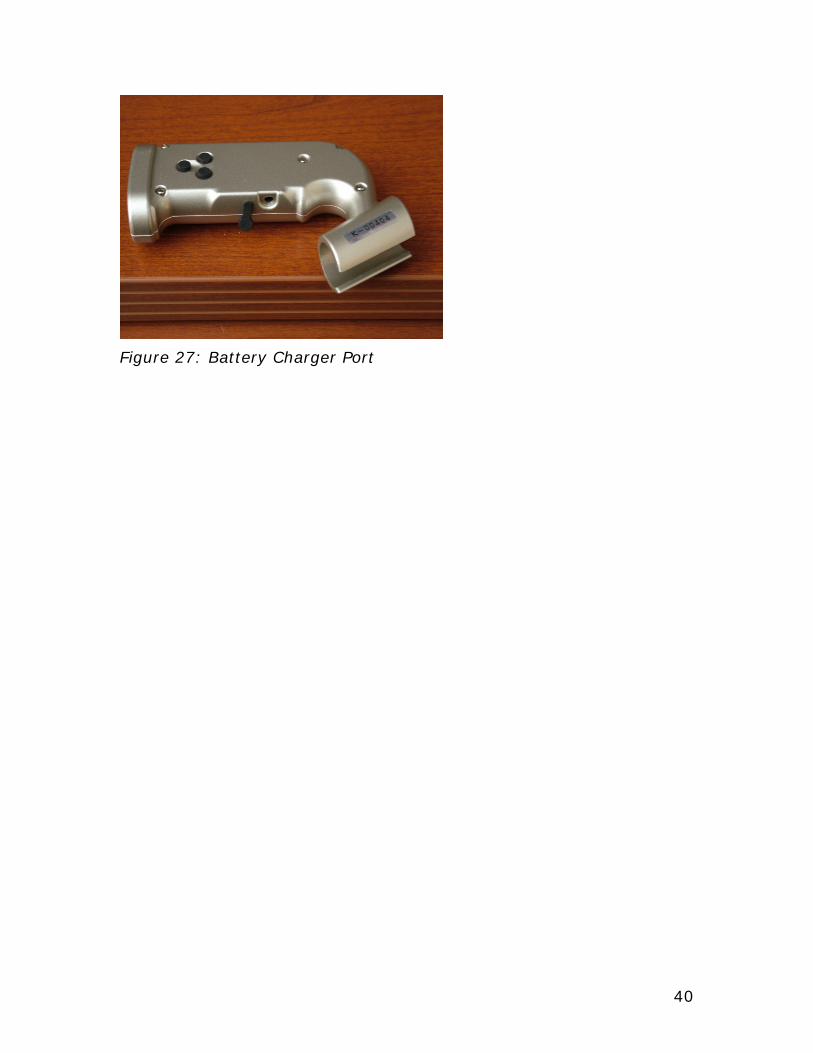
The 'K' Sonar's rechargeable battery is a cell phone battery which supports up to six hours of continuous use. The battery recharges overnight. Figure 27 shows the battery charger port on the bottom of the 'K' Sonar.
40
Figure 27: Battery Charger Port
41
Chapter Three The Basics: Pitch-Distance Relationship, the Stop Point, and Facing Objects Squarely Chapter Objectives
The student will learn to: • Turn the ‘K’ Sonar on and off by connecting and disconnecting the
speaker or headphones. • Increase and decrease volume by using ‘K’ Sonar volume control
buttons. • Change ranges by using the range control button. • Perceive, verbalize, and act on the pitch-distance relationship. • Determine when the 'K' Sonar is facing a large object squarely or at an
angle. • Stop forward motion at the stop point, the place where the student
must stop or make evasive movements in order to not touch an object with the cane with his next step.
• Maintain a relatively straight line when moving toward and away from large objects by monitoring 'K' Sonar sounds.
• Perceive that the tone color of the 'K' Sonar is different when it is pointed at a person than when it is pointed at a smooth concrete wall.

42

43
Theoretical Considerations
In this chapter, the student learns skills that are essential for later applications of the ‘K’ Sonar to object avoidance and landmark location tasks. Although instructors have some latitude in how and when to use exercises in later chapters, the sequence and procedures for exercises in this chapter should be followed precisely to ensure that basic skills are acquired.
Spread these exercises across a number of O&M lessons. Some students will catch on quickly. As long as they are accurate in their interpretations of 'K' Sonar feedback and in their physical responses to it, and as long as they retain what they have learned from lesson to lesson, let them go at their own pace.
All exercises in this chapter should be conducted in an uncluttered open area bounded on one side by a smooth concrete wall with no pipes, windows, or other protuberances in 'K' Sonar range. The 'K' Sonar produces louder, fuller sounds when pointed straight at a large, smooth object such as a concrete wall. When first using the 'K' Sonar, a student needs to hear tones that are as full as possible in order to distinguish different nuances such as pitch (which changes as the student moves toward and away from an object) and muted tone or distortion (which occurs when the 'K' Sonar is pointed at an angle toward, rather than straight toward, an object). To grasp the pitch-distance relationship (the closer the object, the lower the pitch) and the concept of facing an object squarely—both of which are essential prerequisites for the successful performance of object location or avoidance—the student needs clear unambiguous feedback that is provided by a large, hard, smooth, relatively nonporous surface. The area used for these exercises should also contain no other objects such as poles or parked cars because their presence would complicate what the student hears. The 'K' Sonar produces a tone for each object in its range, and cluttered space results in multiple tones. Conducting early training in an area with only one object in range means that the student will have to deal with only one tone at a time.
Make sure that you are not standing in 'K' Sonar range. If you are in range, the student will hear a second tone derived from ultrasound being reflected back from you. Make sure that you are standing behind or next to the student, not ahead of him.
When using the human guide technique, you should always be on the non-cane side of the student. Because most students use the cane in their right hand, you will typically guide on the left side. However, you will guide on the right side for students who use the cane in their left hand.
Many exercises direct you to guide the student to a wall and then guide him backwards away from it. Although this may be an unusual experience for the student, it is essential for him to back up from the wall as well as to
44
walk toward it in order to learn the pitch-distance relationship. He will need to back up from the wall with you as guide and later by himself. Try these moves with the student before using them in the ‘K’ Sonar lesson so that the student is comfortable backing up before doing so with the ‘K’ Sonar.
At first, use a small external speaker to play 'K' Sonar sounds aloud instead of having your student listen through the headphones. Use any small amplified speaker or speaker system that has a 1/8" stereo male connector, the type of connector that is used on PC headsets. You will need to turn on amplification on the speaker with the speaker's on-off button, and the speaker will need batteries to amplify. Although a small amount of clarity is lost by using the speaker instead of the headphones, it is essential that, at least at first, you and your student both hear the sounds that the 'K' Sonar makes. When you and the student both hear 'K' Sonar sounds, you can point out specific changes of pitch and fullness of tone that occur during the exercises.
Do not use a Y connector and two sets of headphones with the 'K' Sonar. It is possible, though not recommended, to plug a Y connector into the 'K' Sonar headphone jack and then use two sets of headphones—one for you and one for the student—instead of the speaker. Although you both can then hear 'K' Sonar sounds through headphones and eliminate the possible distortion from the speaker, the volume of 'K' Sonar sounds is reduced when the signal is split, creating a more serious problem than speaker distortion. Cables from you and your student's headphones can also become unpleasantly tangled when using this procedure.

45
Exercise 3.1 Introducing the ‘K’ Sonar and the Pitch Distance Relationship Exercise objective:
The student will use ‘K’ Sonar volume, range and headphone jack controls, will identify changes in ‘K’ Sonar feedback that results when controls are changed, and will be introduced to the pitch-distance relationship. Exercise summary:
• First, the student becomes familiar with the ‘K’ Sonar’s purpose and overall function.
• Second, the student learns to hold the ‘K’ Sonar in scan position. • Third, the student identifies and uses the ‘K’ Sonar headphone/speaker
jack, volume up and down controls, and the range control. • Fourth, the student integrates hand movements that change ‘K’ Sonar
controls with changes in ‘K’ Sonar feedback that result; he identifies changes in volume as he pushes volume up and volume down buttons, and he identifies whether the ‘K’ Sonar is set to the 2-meter or 5-meter ranges as he presses the range control button.
• Fifth, the student stands approximately 9 feet back from a smooth concrete wall and holds the speaker in his cane hand; the instructor holds the ‘K’ Sonar in scan position pointed straight toward the wall. The instructor guides the student forward to touch the wall and then backward to the original point several times, verbalizing the pitch distance relationship as the pitch changes.
• Sixth, the student describes the pitch-distance relationship—the closer the object, the lower the tone; and verbalizes this relationship as he is guided toward and then backward away from the wall.

46

47
Materials: 'K' Sonar, speaker Location:
• The area used in this exercise is usually outdoors, near a smooth concrete wall with no windows, pipes, or other protuberances. There should be approximately 30 feet of clear space in front of the wall and preferably 20-30 feet of clear space to left and right along the wall.
• There should be no other objects in the exercise area. • Pedestrian or vehicle traffic should not move through the area during
the lesson; the student needs to hear only ‘K’ Sonar feedback related to the wall, not additional feedback related to traffic moving through the area.
• The area should be reasonably smooth and level; the student needs to back up as well as walk forward through the area.
• The wall should be clean because the student needs to touch it. • A smooth concrete indoor wall can be used if a large enough indoor
area with no other objects or pedestrian traffic can be found.
Instructor Notes: This exercise provides the student with a basic orientation to the ‘K’
Sonar and introduces him to scan position and the pitch-distance relationship in six sequenced activities.
• First, the student learns the ‘K’ Sonar’s overall function. Before he begins to use the device, he should know that the ‘K’ Sonar gives information, through sound, that will let him know how close an object is and something about the object’s material make-up. The student also needs to know that the ‘K’ Sonar will be used, much of the time, as an attachment on his cane, though he will sometimes find it more helpful to remove the ‘K’ Sonar and hold it in his non-cane hand to scan for specific types of landmarks. If he understands that the ‘K’ Sonar may help him avoid obstacles without touching them with his cane and locate landmarks and destinations that are not readily visible to the cane, he may have more of an investment in learning to use the ‘K’ Sonar.
• Second, the student learns to hold the ‘K’ Sonar in scan position. Although you will need to review scan position at various times during early ‘K’ Sonar lessons, the student is introduced to this grip now so that he can operate controls with appropriate finger and hand movements.
• Third, the student identifies and uses the ‘K’ Sonar headphone/speaker jack, volume up and down controls, and the range control. The earphone/speaker jack serves as the off/on switch for the ‘K’ Sonar. When headphones or a speaker is plugged into the jack, the unit is on;

48
and when nothing is plugged into the jack, the unit is off. The student should learn from the beginning to plug in the output device when he is ready to use the ‘K’ Sonar and to unplug it when he is finished. The volume up and volume down controls change volume in small increments when pressed, but can be held down to change volume levels in large increments; depending on whether volume up or volume down is pressed and held down, volume will raise or lower for as long as the button is held down or until the maximum or minimum volume is reached. The range control toggles between the 2-meter and 5-meter ranges. In the 2-meter range, the ‘K’ Sonar produces a fast, underlying percussive pulse; and in the 5-meter range, it produces a slower pulse. The speed of the pulse, not the pitch of the tone, indicates the currently-set range of the ‘K’ Sonar. When the unit is turned off by removing the plug from the headphone jack, it will hold its current range setting; when a speaker or headphone is again plugged into the jack, the ‘K’ Sonar will be set to the same range that was used just before the plug was removed.
• Fourth, the student integrates changing ‘K’ Sonar controls with the meaning of what he hears after he has changed a particular control. He identifies changes in volume as he pushes volume up and volume down buttons; and he identifies whether the ‘K’ Sonar is set to the 2-meter or 5-meter range as he presses the range control button. You will need to be very certain of ‘K’ Sonar sounds associated with changing volume and range so that you can verbalize the sound changes that occur as your student presses the control buttons. After you have verbalized specific changes several times as the student changes the volume and range, the student should begin to verbalize these changes himself. You will be prompted to help your student review feedback regarding range changes at later points in this manual when the 2-meter range is used.
• Fifth, the student stands approximately 9 feet back from a smooth concrete wall and holds the speaker in his cane hand; the instructor holds the ’K’ Sonar in scan position pointed straight toward the wall. The instructor guides the student forward to touch the wall and then backward to the original point several times, verbalizing the pitch distance relationship as the pitch changes. You should discuss with the student the meaning of lower-higher pitch changes: the closer the object, the lower the pitch; the farther the object, the higher the pitch. Continue to verbalize “closer, lower; farther, higher” as you and the student move toward or away from the wall.
• Sixth, the student describes the pitch-distance relationship—the closer the object, the lower the pitch; and verbalizes this relationship as he is guided toward and then backward away from the wall. He tells you when he hears low and when he hears high pitches, and hums a low

49
and then a high note. These activities help you assess whether the student has the ability to discriminate pitch. Even if a student can not reliably demonstrate high and low notes by vocalizing them, he may be able to hear the pitch differences that characterize ‘K’ Sonar feedback.
You may need to spend extra time working with the feedback that
indicates range changes. When focusing on the same object and changing the range, the ‘K’ Sonar pitch, as well as the underlying percussive pulse, will change; however, the pulse, not the pitch, conveys the range change. When the ‘K’ Sonar is pointed at an object and is not moved closer to or farther away from it as the range is changed, its pitch will change. Although an object’s actual distance from the ‘K’ Sonar remains the same when the range is changed, the distance of the object from the ‘K’ Sonar expressed as a fraction of the length of the range does change. In the 5-meter range, an object 1.9 meters away from the ‘K’ Sonar is in the middle of the range and produces a mid-level pitch. However, the same object, which is still 1.9 meters away from the ‘K’ Sonar, is nearly at the end of the range when the ‘K’ Sonar is set to the 2-meter range; and it now produces a very high-pitched tone.
When guiding in this exercise, stand on the student’s non-cane side; the student will hold your arm with his non-cane hand so that his cane hand is free to hold the ‘K’ Sonar. When guiding in this way, you will carry the student’s cane. You will guide the student forward toward the wall and backward away from it. Some students may never have been guided backwards and may need to practice this movement before doing it while using the ‘K’ Sonar.
When the student carries the ‘K’ Sonar and you carry the speaker, point it toward the student’s face. It is important that the speaker is held close to the student so that he can take in all of the nuances of ‘K’ Sonar sound.
Review pictures and descriptions of ‘K’ Sonar controls and scan position in Chapter Two before doing this exercise with your student. Do the exercise activities yourself at the place where you will teach to make sure that you can hear the nuances of ‘K’ Sonar sound that you will describe to your student.
It may be helpful to explain a bit about ultrasound theory to your student during this exercise, but keep information brief and to the point. The ‘K’ Sonar sends out waves of very high-pitched sound that people can’t ‘hear; objects in ‘K’ Sonar range reflect sound back to the ‘K’ Sonar; the ‘K’ Sonar interprets the ultrasound reflections that it receives and gives feedback in sound that people can hear about what is around the student. This information provides the foundation for later work, and can be repeated when needed later.
50
Procedure: • Step 1 – Begin at a point approximately 9 feet back from the wall and
facing it; do not plug headphones or a speaker into the ‘K’ Sonar. Show the student the 'K' Sonar and its controls without headphones or a speaker. Explain that it can provide information about what is near the student. As the student examines the device, show him the location of control buttons and other features. Explain that the ‘K’ Sonar can be hand-held or put on a cane using the open channel in the 'K' Sonar. Emphasize that the ‘K’ Sonar can only be used in combination with a cane, dog guide, or human guide because the ‘K’ Sonar will not detect drop-offs and therefore cannot keep the student safe if used alone.
• Step 2 – Introduce scan position. In this position, the front of the 'K' Sonar, which is covered by mesh, points straight ahead; and the top of the 'K' Sonar is parallel with the ground. The student holds the 'K' Sonar in his cane hand, relaxes his arm against his side, and keeps his elbow bent at 90 degrees. He holds the 'K' Sonar at the back of the unit, with his palm across the top, his thumb on one side, and his fingers on the other side. If he uses the cane in his right hand, he holds the 'K' Sonar in the right hand; his fingers rest on the right side of the unit, with his thumb resting near the three control buttons so that it can reach slightly forward to push them. If he uses the cane in his left hand, he holds the 'K' Sonar in the left hand; here, his thumb rests on the right side of the unit, and his fingers rest on the left side, near the control buttons. In this position, he can reach forward with his index finger to push the controls.
• Step 3 – Show the student the small speaker that you will use for this exercise so that you and the student can both hear the 'K' Sonar sounds and discuss them. Explain why you are using the speaker in early lessons. Show the student the location of the output jack. Tell the student that plugging the speaker into the jack turns the unit on and unplugging the speaker turns it off.
• Step 4 – Instruct the student to plug the speaker in and hold the 'K' Sonar in scan position. Ask the student to hold the speaker in his non-cane hand. If this is not possible, hold the speaker for the student in the hand that is closer to him. The student may be fascinated by the sounds coming from the speaker when it is plugged in. Allow the student to listen briefly to these sounds. Explain that the sounds can be used to tell him something about what is around him. Do not allow the student to fixate on these sounds. Move on to the next step instead.
• Step 5 – Show the student the volume up and volume down buttons. Instruct the student to push each one, and listen to the resulting sounds. Verbalize whether the sound is becoming louder or softer. Ask

51
the student to push the volume buttons in any order he chooses; instruct the student to say whether the sound is louder or softer. Instruct the student to hold down the volume up or volume down button. Volume will continue to increase or decrease until the highest or lowest volume is reached, as long as the appropriate volume button is held down. Ask the student to say whether volume is louder or softer as a button is held down.
• Step 6 – Demonstrate the range change button; slow pulses indicate the 5-meter range and fast pulses indicate the 2-meter range. You can also say 6- and 16-foot ranges instead of meters. Instruct the student to push the range button and say the range, repeating this several times. The pitch of the sound will change when the range is changed. Help the student distinguish between the pitch change, which is irrelevant for this exercise, and the change in speed of the drum-like underlying sound pulse, which is the range change indicator.
• Step 7 – Instruct the student to set the 'K' Sonar to the 5-meter range, to unplug the speaker, and to give you the ‘K’ Sonar. Tell him that you will hold the ‘K’ Sonar in scan position for the next activity.
• Step 8 – Make sure that you and the student are still approximately 9 feet back from the wall and facing the wall squarely; also make sure that you are holding the 'K' Sonar in scan position pointing straight toward the wall. Then plug the speaker into the 'K' Sonar. Walk toward the wall until the student touches it, then back away from the wall to your original position. Tell the student to listen to the pitch changes coming from the 'K' Sonar speaker.
• Step 9 – Stop when you and your student are approximately 9 feet from the wall and facing it squarely. Say that the clearest, loudest tone is heard when the 'K' Sonar is facing something squarely, not at an angle. Stand still with your student and listen to the 'K' Sonar's clear tone.
• Step 10 – Again, walk to the wall and then back up approximately 9 feet from the wall. Verbalize that the pitch gets lower when approaching the wall and that it gets higher when backing away from the wall.
• Step 11 – Repeat this walking pattern. Ask the student to verbalize pitch by saying "Lower" or "Higher" as the pitch changes.
• Step 12 – If the student has difficulty identifying whether pitch is becoming lower or higher, stop, unplug the speaker, and demonstrate by singing a high note and then a low one. Ask the student to sing a high note and then a low one. Tell the student that ‘K’ Sonar high notes often sound screechy and that ‘K’ Sonar low notes often sound like a growl. Then plug the speaker into the ‘K’ Sonar and guide the student back toward the wall, asking him whether the pitch is

52
becoming higher or lower. Ask the same question as you guide the student backwards away from the wall.
• Step 13 – Ask the student to verbalize what high and low pitches mean in terms of ‘K’ Sonar feedback: lower=closer to the wall; higher=farther away from the wall.

53
Exercise 3.2 Integrating Scan Position and the Pitch-Distance Relationship Exercise objective:
The student will learn to hold the ‘K’ Sonar in scan position and will integrate scan position with the pitch-distance relationship. Exercise summary:
• First, the student reviews scan position, holding the ‘K’ Sonar accurately and pointing it straight in the direction the student is facing. He receives verbal and hand-over-hand instruction and corrective feedback as needed.
• Second, holding the ’K’ Sonar in scan position, the student listens to ‘K’ Sonar feedback as he is guided approximately 9 feet forward toward the wall and then approximately 9 feet backward away from the wall; he states the pitch-distance relationship as he holds the ‘K’ Sonar in scan position—moving closer to the wall, the pitch gets lower; moving farther from the wall, the pitch gets higher. He also receives corrective feedback about scan position.
• Third, after disconnecting the speaker from the ‘K’ Sonar, the student examines the ‘K’ Sonar headphones, is told never to use them when crossing streets or walking through areas with many active driveways, and listens to and describes environment sounds heard when headphones are worn and ‘K’ Sonar is not connected.
• Fourth, standing approximately 9 feet from the wall and facing it, the student connects the headphones to the ‘K’ Sonar, holds ‘the K’ Sonar in scan position, is guided forward to the wall and then backward to the original point, and describes the pitch-distance relationship as he moves. He receives corrective feedback about his scan position as he moves.

54

55
Materials: 'K' Sonar, headphones, speaker Location:
• The area used in this exercise is usually outdoors, near a smooth concrete wall with no windows, pipes, or other protuberances. There should be approximately 30 feet of clear space in front of the wall and preferably 20-30 feet of clear space to the left and right along the wall.
• There should be no other objects in the exercise area. • Pedestrian or vehicle traffic should not move through the area during
the lesson; the student needs to hear only ‘K’ Sonar feedback related to the wall, not additional feedback related to traffic moving through the area.
• The area should be reasonably smooth and level; the student needs to back up as well as walk forward through the area.
• The wall should be clean because the student needs to touch it. • A smooth concrete indoor wall can be used if a large enough indoor
area with no other objects or pedestrian traffic can be found. Instructor notes:
This exercise helps the student develop a more accurate scan position grip, deepen his kinesthetic/proprioceptive understanding of the pitch-distance relationship, and use ‘K’ Sonar headphones in four sequenced activities.
• First, the student reviews scan position, holding the ‘K’ Sonar accurately and pointing it straight in the direction the student is facing. He receives verbal and hand-over-hand instruction and corrective feedback as needed. Although scan position was introduced in the previous exercise, it may need to be reviewed or taught several times in consecutive lessons in order for the student to grasp the ‘K’ Sonar quickly and correctly. Being able to hold the ‘K’ Sonar correctly in scan position without needing to think about how to do so is essential for later work. Whenever necessary during these exercises, re-teach accurate scan position and include additional practice if your student has difficulty holding the ‘K’ Sonar correctly.
• Second, holding the ’K’ Sonar in scan position, the student listens to ‘K’ Sonar feedback as he is guided approximately 9 feet forward toward the wall and then approximately 9 feet backward away from the wall; he states the pitch-distance relationship as he holds the ‘K’ Sonar in scan position—moving closer to the wall, the pitch gets lower; moving farther from the wall, pitch gets higher. He also receives corrective feedback about scan position.
• Third, after disconnecting the speaker from the ‘K’ Sonar, the student examines the ‘K’ Sonar headphones, is told never to use them when

56
crossing streets or walking through areas with many active driveways, and listens to and describes environment sounds heard when the headphones are worn and the ‘K’ Sonar is not connected. Although ‘K’ Sonar headphones do cut off some environmental sound, their design allows a great deal more environmental information to be heard than do headphones with more traditional designs. The ‘K’ Sonar headphones do not cover the ear; only tiny headphone tips actually enter the ear, leaving the rest of the ear opening open to the environment. To help the student understand that the headphones themselves do not block out much environmental information, the student is asked to listen to the environmental sounds when wearing the headphones and to compare what he hears with what the instructor hears without headphones. The student should be told that headphones must not be worn when crossing streets or when traveling through areas with highly-trafficked driveways. Although a relatively small amount of environmental sound is masked by the headphones and ‘K’ Sonar sounds, the student needs his entire auditory capacity free to listen for moving traffic.
• Fourth, standing approximately 9 feet from the wall and facing it, the student connects the headphones to the ‘K’ Sonar, holds the ‘K’ Sonar in scan position, is guided forward to the wall and then backward to the original point, and describes the pitch-distance relationship as he moves. He receives corrective feedback about his scan position as he moves. This activity, repeated several times if needed, helps the student integrate headphone use and the more intense quality of the ‘K’ Sonar feedback when received directly by both ears from the headphones with the kinesthetic/auditory/manual experience of scan position and the pitch-distance relationship.
Holding the 'K' Sonar in scan position, taught in this exercise, means
holding it still in the correct position. This is distinguished from holding it in a scan position and moving it in an arc, which is done in later exercises. When holding the 'K' Sonar in scan position, the device is not moving; when scanning with the 'K' Sonar, it is held in scanning position and moved in a left-right arc. Review the picture and description of scan position in Chapter Two before teaching it to your student. Do this exercise yourself before teaching it to make sure that you can hear the pitch changes that you will ask your student to hear.
During this and several other exercises, your student will first use the speaker so that you both can hear 'K' Sonar sounds, and then will repeat tasks using headphones. It is necessary for your student to use headphones as much as possible because more complex sounds are best perceived and integrated when heard through headphones. When your student uses headphones, you will no longer hear the 'K' Sonar output; however, you can

57
assume it by watching the position of the 'K' Sonar relative to the objects involved. If your student has difficulty hearing 'K' Sonar sounds through the headphones, try the exercise again with the speaker, and then with the headphones. Procedure:
• Step 1 – Begin without a speaker or headphones connected to the ‘K’ Sonar. Instruct your student to hold the 'K' Sonar in scan position. Assist with verbal directions and hand-over-hand instruction as needed until an accurate scan position is achieved. Review Chapter Two for a description and photo of the hand scan position.
• Step 2 – Guide the student to a position approximately 9 feet back from the wall and facing the wall squarely. As you guide, the student holds the 'K' Sonar in scan position in his cane hand and holds your arm with his other hand. Hold the speaker close to the student’s face. When you and the student are approximately 9 feet from the wall, plug the speaker into the 'K' Sonar.
• Step 3 – Tell the student that he is facing the wall squarely, not at an angle. Give him feedback about how he holds the ‘K’ Sonar in scan position—let him know that he is pointing the ‘K’ Sonar straight toward the wall, holding it out straight ahead of him; or tell him that he is holding it at an angle and help him correct his hand position. Discuss the full, loud tone that occurs when he points the ‘K’ Sonar straight toward the wall. Stand still and listen to the fairly high, full ‘K’ Sonar tone.
• Step 4 – Guide the student to the wall, then back up approximately 9 feet from the wall. Give verbal reinforcement for straight scan position and verbally suggest changes if the student tilts the ‘K’ Sonar to the left or the right.
• Step 5 – Review the pitch-distance relationship; ask the student to verbalize the relationship between pitch and distance from the wall as the student is guided forward to and then backward away from the wall: farther from the wall, higher; nearer to the wall, lower.
• Step 6 – Point out the growling low note made when the 'K' Sonar is about 20 inches from the wall.
• Step 7 – Repeat Steps 4 to 6 several times, until the student is able to quickly and accurately state the pitch and distance change as you move.
• Step 8 – Unplug the speaker and guide the student to a point approximately 9 feet back from the wall and facing it. Introduce the student to the 'K' Sonar headphones. Show him that these headphones do not cover his ears because only the tips go into his ears. Explain that, because his ears are not covered, he should be able to hear much of the sound around him while using the 'K' Sonar headphones.

58
• Step 9 – Tell the student to put the headphones on, plug them into the 'K' Sonar, and then hold the 'K' Sonar in scan position pointed directly at the wall. Discuss with the student what he can hear in the external environment while wearing the headphones and hearing 'K' Sonar sounds. Ask him to tell you the specific sounds he hears in addition to the 'K' Sonar sound. If you hear sounds that he does not mention, tell him what you hear and ask him to listen for it specifically. Show the student how to quickly take off the headphones by pushing them down around the back of his neck when he needs to hear external sounds more clearly.
• Step 10 – Guide the student to the wall and then guide him backwards approximately 9 feet from the wall. Give verbal reinforcement for a straight scan position, and suggest changes if the student turns the ‘K’ Sonar to the left or the right.
• Step 11 – Guide the student up to the wall, and then back up from the wall again. Ask him to verbalize the relationship between pitch and distance from the wall as he moves: nearer to the wall, lower; farther from the wall, higher.

59
Exercise 3.3 Hand-Scanning and Facing an Object Squarely Exercise objective:
The student will move the ‘K’ Sonar in a scanning arc; he will recognize when the 'K' Sonar is pointing straight at a large object and when it is pointing to the object at an angle by using only 'K' Sonar feedback. Exercise summary:
• First, standing at a point approximately 9 feet from the wall and facing it squarely, the student holds the ‘K’ Sonar in scan position pointed toward the wall. The instructor moves the student’s hand in a slow left-right-left scanning arc and points out differences in tone when the ‘K’ Sonar points squarely at the wall in the middle of the scan and when it points to the wall at an angle in the left and right ends of the scan. The instructor holds the speaker, which is connected to the ‘K’ Sonar.
• Second, standing approximately 9 feet back from the wall and facing it squarely, the student continues to hold the ‘K’ Sonar in scan position and tells the instructor when the ‘K’ Sonar points squarely at the wall, as the instructor moves the student’s hand in the left-right-left scanning arc.
• Third, standing approximately 9 feet back from the wall and facing it squarely, the student holds the ‘K’ Sonar in scan position, moves it in a left-right-left scanning arc, and indicates verbally when the ‘K’ Sonar points squarely at the wall.
• Fourth, as the instructor and student stand approximately 9 feet back from the wall and facing it, the instructor turns the student to the right to a 2:00 o’clock position. The student scans in the left-right-left arc, stops scanning when the ‘K’ Sonar points straight toward the wall, and turns his body in the direction in which his lower arm is pointing so that he again faces the wall. He verifies that he is facing the wall with ‘K’ Sonar feedback.
• Fifth, as the instructor and student stand approximately 9 feet back from the wall and facing it, the instructor turns the student to the left to a 10:00 o’clock position. The student scans in the left-right-left arc, stops scanning when the ‘K’ Sonar points straight toward the wall, and turns his body in the direction in which his lower arm is pointing so that he again faces the wall. He verifies that he is facing the wall with ‘K’ Sonar feedback.
• Sixth, standing approximately 9 feet back from the wall and facing it squarely, the student disconnects the speaker and connects the

60
headphones, moves the ‘K’ Sonar in a scanning arc, and stops scan movement when the ‘K’ Sonar points squarely at the wall.
• Seventh, standing approximately 9 feet back from the wall and facing it squarely, the student turns slightly left, scans, stops scanning when the 'K' Sonar points squarely at the wall, and faces the wall again by turning to face the direction in which his arm now points. The student then turns slightly to the right and repeats this activity.

61
Materials: 'K' Sonar, speaker, headphones Location:
• The area used in this exercise is usually outdoors, near a smooth concrete wall with no windows, pipes, or other protuberances. There should be approximately 30 feet of clear space in front of the wall and preferably 20-30 feet of clear space to left and right along the wall.
• There should be no other objects in the exercise area. • Pedestrian or vehicle traffic should not move through the area during
the lesson; the student needs to hear only ‘K’ Sonar feedback related to the wall, not additional feedback related to traffic moving through the area.
• The area should be reasonably smooth and level; the student needs to back up as well as walk forward through the area.
• The wall should be clean because the student needs to touch it. • A smooth concrete indoor wall can be used if a large enough indoor
area with no other objects or pedestrian traffic can be found. Instructor notes:
In this exercise, your student learns to hand-scan with the ‘K’ Sonar and to face an object squarely by using ‘K’ Sonar feedback in the following seven sequenced activities.
• First, standing at a point approximately 9 feet from the wall and facing it squarely, the student holds the ‘K’ Sonar in scan position pointed toward the wall. The instructor moves the student’s hand in a slow left-right-left scanning arc and points out differences in tone when ‘K’ Sonar points squarely at the wall in the middle of the scan and when it points to the wall at an angle in the left and right ends of the scan. The speaker is used for this activity and is held by the instructor. Standing slightly behind the student’s shoulder ensures that you are not in ‘K’ Sonar range and allows you to be close enough to move your student’s hand in the appropriate arc and to hold the speaker where both you and your student can hear it clearly. Make sure your student knows that he is facing the wall squarely and that the ‘K’ Sonar points directly at the wall when he holds it straight out from his hip in scan position. Discuss the changes in tone that occur as the ‘K’ Sonar moves from midpoint of the arc (straight out from the student’s hip) to the left or right ends of the arc; the tone is loudest and clearest in the middle of the arc because the ‘K’ Sonar points straight at the wall, and is softest and thinnest near the end of the arc because it is pointing at the wall at an angle.

62
• Second, standing approximately 9 feet back from the wall and facing it squarely, the student continues to hold the ‘K’ Sonar in scan position and tells the instructor when the ‘K’ Sonar points squarely at the wall. The instructor moves the student’s hand in the left-right-left scanning arc and continues to hold the speaker. It is recommended that you remain in the position just behind the student’s shoulder on the ‘K’ Sonar side for this activity. Tell the student that now he will tell you when he hears the loudest, clearest tone. Remind him that he is still facing the wall squarely and that the loudest, clearest tone should therefore occur when the ‘K’ Sonar is in the middle of its scan, pointing straight out from the student’s hip. If the student does not point out a tone in the middle of the scanning arc, review the previous activity.
• Third, standing approximately 9 feet back from the wall and facing it squarely, the student holds the ‘K’ Sonar in scan position, moves it in a left-right-left scanning arc, and indicates verbally when the ‘K’ Sonar points squarely at the wall. In this activity, the student moves the ‘K’ Sonar in the scanning arc without hand-over-hand assistance. You will give verbal feedback about his accuracy, making sure that he does not tilt the ‘K’ Sonar or make the scanning arc too quickly You will still hold the speaker so that you and your student can hear ‘K’ Sonar feedback. Remind your student to continue to tell you when he hears the loudest, clearest ‘K’ Sonar tone.
• Fourth, as the instructor and student stand approximately 9 feet back from the wall and facing it, the instructor turns the student to the right to a 2:00 o’clock position. The student scans in the left-right-left arc, stops scanning when the ‘K’ Sonar points straight toward the wall, and turns his body in the direction in which his lower arm is pointing so that he again faces the wall. He verifies that he faces the wall with ‘K’ Sonar feedback. Now you will tell the student that he should turn slightly to the right so that he is no longer facing the wall directly. Turn his shoulders and ask him to align his body in this new direction. Keep your position behind the student’s ‘K’ Sonar arm and continue to hold the speaker. Ask your student to tell you when he hears the loudest, clearest ‘K’ Sonar tone and to stop ‘K’ Sonar movement at that point. Remind him that the loudest, clearest tone occurs when the ‘K’ Sonar points directly at an object. Ask him to turn back toward the wall by aligning his body in the direction in which his ‘K’ Sonar forearm is pointing when the loudest, clearest tones occur. You will provide feedback as the student completes this activity.
• Fifth, as the instructor and student stand approximately 9 feet back from the wall and facing it, the instructor turns the student to the left to the 2:00 o’clock position. The student scans in the left-right-left arc, stops scanning when the ‘K’ Sonar points straight toward the wall, and turns his body in the direction in which his lower arm is pointing so

63
that he again faces the wall. He verifies that he is facing the wall with ‘K’ Sonar feedback. In this activity, you will: help your student turn slightly to the left; ask him to scan with the ‘K’ Sonar; tell him to stop scanning when he hears the loudest, clearest tone; and instruct him to face the wall by turning his body in the direction the ‘K’ Sonar points when this tone occurs. If your student has difficulty with this activity, you may need to review earlier exercises.
• Sixth, standing approximately 9 feet back from the wall and facing it squarely, the student disconnects the speaker and connects headphones, moves the ‘K’ Sonar in a scanning arc, and stops scan movement when the ‘K’ Sonar points squarely at the wall. Here, the student experiences the loudest, clearest ‘K’ Sonar tone that occurs as it points squarely at an object through headphones. Headphones may help your student focus more completely on ‘K’ Sonar feedback and discern differences in tone more clearly.
• Seventh, standing approximately 9 feet back from the wall and facing it squarely, the student turns slightly left, scans, stops scanning when the 'K' Sonar points squarely at the wall, and faces the wall again by turning to face the direction in which his arm now points. The student then turns slightly to the right and repeats this activity. Direct your student to turn slightly to the left away from the wall, to scan, to listen for the loudest, clearest ‘K’ Sonar tone, and to face the wall squarely again by turning in the direction of the loudest, clearest ‘K’ Sonar tone. When the student again faces the wall, ask him to turn slightly to the right away from the wall and repeat this activity.
As you first read the description of this exercise, you may think that it is very repetitive. Your student will spend much of his time moving the ‘K’ Sonar in a scanning arc and turning away from realigning himself with the wall. However, if you look closer, each activity gives the student a bit more control of the process. Because the ‘K’ Sonar and concepts related to it are new to the student, this exercise increases difficulty and complexity of the task in very small steps.
When the ‘K’ Sonar points squarely at the wall, all of its ultrasound hits the wall and reflects back to the ‘K’ Sonar. The ‘K’ Sonar makes one tiny part of the tone for each bit of ultrasound that reflects back to it. The loud, clear tone that the student hears when the ‘K’ Sonar points directly at an object means that most or all of the ultrasound is reflected back from the object. When the ‘K’ Sonar is turned so that only a small part of its ultrasound hits the wall and the rest moves out through the air, only a small amount of ultrasound is reflected back from the wall to the ‘K’ Sonar, which in turn makes a much smaller sound.
Learning to move the ‘K’ Sonar in a smooth arc of the correct length is a crucial part of productive hand scanning. This motion mimics the movement
64
of the ‘K’ Sonar when it is cane-mounted. The process of aligning the body in the direction that the ‘K’ Sonar points when the loudest tone is heard is also an essential building block for later ‘K’ Sonar success. This skill requires the integration of auditory information, proprioceptive and kinesthetic sensations, and motor activity. Although hand-over-hand is not an appropriate teaching method for many activities, it is important here so that the student can begin to experience the slow wrist/hand movement that maximizes information that can be gained from the ‘K’ Sonar. After experiencing the correct hand motion for two activities and hearing the ‘K’ Sonar sounds that accompany the correct scan motions, the student should be ready to begin scanning on his own. You will need to monitor the student’s scanning movements throughout the next several exercises and provide positive reinforcement or corrective verbal feedback when needed.
Clearly, you will need to possess good hand-scanning skills in order to teach these to your student hand-over-hand. You will also need to know the precise sounds that the wall produces when you face it squarely at a distance of approximately 9 feet and hand scan with the ‘K’ Sonar. Although you will hear these sounds with your student when the speaker is used in the first part of this exercise, you will not be able to hear them when your student uses headphones in the second part. You will need to comment on how the ‘K’ Sonar sounds by watching where it points and knowing the sounds that are made when it is pointed squarely at the wall or when it is pointed at the wall at various angles. Practice these and other ‘K’ Sonar skills before teaching them.
You will need to touch your student’s hand when teaching scanning skills, and you will touch his shoulders to help him turn away from the wall. Discuss these issues with your student before the lesson; make sure that he is comfortable being touched and that he gives you permission to touch him in these ways.
If your student has difficulty performing activities that are done with headphones, reconnect the speaker, listen to and discuss important ‘K’ Sonar sounds with your student, and rework the activity with him. Procedure:
• Step 1 – Guide the student to a position approximately 9 feet from the wall, and tell him to hold the 'K' Sonar in scan position.
• Step 2 – Guide the student's hand in a smooth arc from approximately 10:00 o’clock to approximately 2:00 o’clock, starting in the center at 12:00 o’clock, moving to the left to 10:00 o’clock, back to 12:00 o’clock, then to 2:00 o’clock, then back to 12:00 o’clock, etc.
• Step 3 – Tell the student to plug the headphones into the 'K' Sonar. Guide the student’s hand in the same arc described above. Ask the student to listen to the 'K' Sonar sound.

65
• 7Step 4 – Remind the student that he is facing the wall squarely, and that his hand holding the 'K' Sonar points straight toward the wall when the ‘K’ Sonar is in the middle of the scanning arc. Discuss the change in sound when the 'K' Sonar faces the wall squarely—when the student's hand is pointed straight—and when the 'K' Sonar is pointed at an angle to the wall, as in the right and left ends of the arc. The clearest, loudest tone occurs when the 'K' Sonar faces the wall squarely. Tones become softer in volume and more distorted when the ‘K’ Sonar faces the wall at an angle.
• Step 5 – Guide the student in this scanning motion, and ask the student to say when the loudest clearest tone is heard. Be sure that the student maintains correct scan position as you guide his hand.
• Step 6 – Tell the student to scan independently with the 'K' Sonar and stop scanning when it points straight at the wall. Ask the student to verbalize how he knows this.
• Step 7 – Encourage the student to continue scanning, and to stop the scan occasionally when the 'K' Sonar is pointing straight at the wall. When he stops the scan, the student should tell you how he knows that the 'K' Sonar is pointing at the wall. Give verbal feedback regarding correct scanning movement and scan position.
• Step 8 – Assist the student to turn to the left to approximately 10:00 o’clock. Instruct the student to scan in the same smooth arc as above. Ask the student to stop scanning and say “now” when the loudest, clearest tone is heard, verbalizing that this is when the 'K' Sonar points straight at the wall.
• Step 9 – Assist the student to turn to the right to approximately 2:00 o’clock. Ask the student to scan using the same smooth arc as above, saying “now” when the loudest clearest tone is heard. Remind the student that this tone indicates that the 'K' Sonar is pointing straight at the wall at that instant.
• Step 10 – Assist the student to turn to the left to 10:00 o’clock. Ask the student to scan with the 'K' Sonar and stop scanning when it points straight at the wall. Ask the student to verbalize how he knows this.
• Step 11 – Assist the student to turn to the right to 2:00 o’clock. Ask the student to scan with the 'K' Sonar and stop scanning when it points straight at the wall. Ask the student to verbalize how he knows this.
• Step 12 – Ask the student to turn slightly to the left and then to scan with the 'K' Sonar. Tell the student to stop scanning when the 'K' Sonar points straight at the wall.
• Step 13 – Ask the student to hold his 'K' Sonar arm still and turn so that he faces the direction in which his arm is pointing. Verbalize that
66
the student wants to face the direction from which the loudest, clearest 'K' Sonar sound is heard.
• Step 14 – Ask the student to turn to the right and then to scan with the 'K' Sonar. Tell the student to stop scanning when the 'K' Sonar points straight at the wall.
• Step 15 – Ask the student to hold his 'K' Sonar arm still and turn so that he faces the direction in which the arm is pointing. Verbalize that the student wants to face the direction from which the loudest, clearest 'K' Sonar sound is heard.
• Step 16 – Guide the student to approximately 6 feet from the wall, facing it squarely. Ask the student to scan and stop when the 'K' Sonar faces the wall. Discuss that the pitch is lower because the student is closer to the wall.
• Step 17 – Ask the student to turn slightly to the left and scan, stopping when the 'K' Sonar points at the wall. Ask the student to turn so that he too is facing the wall.
• Step 18 – Ask the student to turn slightly to the right and scan, stopping when the 'K' Sonar points at the wall. Ask the student to turn so that he too is facing the wall.

67
Exercise 3.4 Describing Pitch-Distance Relationship and Maintaining Alignment With a Wall While Walking Toward It and Backing Away Exercise objective:
The student will experience the pitch-distance relationship while walking forward toward and backward away from a wall and will maintain a straight, squared off position relative to the wall as he moves forward and back. Exercise summary:
• First, the student is guided or directed to a point approximately 9 feet back from the wall and facing it squarely. He connects the headphones and holds the 'K' Sonar in scan position pointing straight out from his hip. The student takes one step forward, stops, tells the instructor that the pitch got lower because he moved closer to the wall, moves the ‘K’ Sonar in a left-right-left scanning arc to make sure he still faces the wall squarely, and repeats this process until he touches the wall.
• Second, the student explores the kinesthetic experience of approaching the wall squarely and approaching it at an angle. Standing flat against the wall and facing it squarely, he steps back and then forward one step and finds that his nose touches the wall first. When he takes one step backward, turns left to face the 10:00 o’clock position, and steps forward, the right side of his face touches the wall first. When he takes one step backward, turns right to face the 2:00 o’clock position, and steps forward, the left side of his face touches the wall first.
• Third, the student holds the 'K' Sonar in scan position pointing straight out from his hip. The student takes one step backward from the wall, stops, tells the instructor that the pitch became higher because he moved farther from the wall, moves the ‘K’ Sonar in a left-right-left scanning arc to make sure he still faces the wall squarely, and repeats this process until the instructor tells him to stop approximately 9 feet back from the wall.
• Fourth, the student walks to, touches, and backs away from the wall at a faster pace; he pauses only briefly between each step to scan and readjust his alignment with the wall when needed by facing in the direction of the loudest, clearest ‘K’ Sonar tone. The instructor tells the student to stop when he is approximately 9 feet back from the wall.
• Fifth, the student again walks to and backs away from the wall without pausing between steps. He holds the ‘K’ Sonar in the middle of the scanning arc straight out from his hip. If he hears the tone change in

68
volume and clarity, he stops and rescans to locate the loudest, clearest tone and alters his direction accordingly. The instructor prompts him to listen to ‘K’ Sonar tone changes if the student does not notice that he is not aligned correctly, and also tells him to stop when he is approximately 9 feet back from the wall.
• Sixth, the student approaches and backs away from the wall using a distance of approximately 12 feet. The instructor prompts if the student does not correct his alignment with the wall and tells him to stop backing up at the appropriate point.
• Seventh, the student approaches and backs away from the wall using a distance of approximately 15 feet. The instructor prompts if the student does not correct his alignment with the wall and tells him to stop backing up at the appropriate point.

69
Materials: ‘K’ Sonar, headphones, speaker Location:
• The area used in this exercise is usually outdoors, near a smooth concrete wall with no windows, pipes, or other protuberances. There should be approximately 30 feet of clear space in front of the wall and preferably 20-30 feet of clear space to the left and right along the wall.
• There should be no other objects in the exercise area. • Pedestrian or vehicle traffic should not move through the area during
the lesson; the student needs to hear only ‘K’ Sonar feedback related to the wall, not additional feedback related to traffic moving through the area.
• The area should be reasonably smooth and level; the student needs to back up as well as walk forward through the area.
• The wall should be clean because the student needs to touch it. • A smooth concrete indoor wall can be used if a large enough indoor
area with no other objects or pedestrian traffic can be found. Instructor notes:
This exercise helps the student integrate the pitch-distance relationship, alignment with an object, and movements toward and away from an object in seven sequenced steps.
• First, the student is guided or directed to a point approximately 9 feet back from the wall and facing it squarely. He connects the headphones and holds the 'K' Sonar in scan position pointing straight out from his hip. The student takes one step forward, stops, tells the instructor that the pitch became lower because he moved closer to the wall, moves the ‘K’ Sonar in a left-right-left scanning arc to make sure he still faces the wall squarely, and repeats this process until he touches the wall. You will need to prompt the student to do this series of actions for the first several steps, after which he will probably do them automatically.
• Second, the student explores the kinesthetic experience of approaching the wall squarely and approaching it at an angle. Standing flat against the wall and facing it squarely, he steps back and then forward one step and finds that his nose and the full front of his body touch the wall. When he takes one step backward, turns left to face the 10:00 o’clock position, and steps forward, the right side of his face and body touch the wall. When he takes one step backward, turns right to face the 2:00 o’clock position, and steps back to the wall, he finds that the left side of his face and body touch the wall.
• Third, the student holds the 'K' Sonar in scan position pointing straight out from his hip. The student takes one step backward from the wall, stops, tells the instructor that the pitch became higher because he

70
moved farther from the wall, moves the ‘K’ Sonar in a left-right-left scanning arc to make sure he still faces the wall squarely, and repeats this process until the instructor tells him to stop approximately 9 feet back from the wall. Although the student may not be comfortable walking backwards, telling him that the ground behind him is flat and clear of obstacles may help him feel more confident about doing so. As with approaching the wall, you may need to prompt the student to do each action for the first several steps.
• Fourth, the student walks to, touches, and backs away from the wall again at a faster pace; he pauses only briefly between each step to scan and readjust alignment with the wall when needed by facing in the direction of the loudest, clearest ‘K’ Sonar tone. The instructor tells the student to stop when he is approximately 9 feet back from the wall. Now, the student does not verbalize the pitch-distance relationship and moves more quickly. Although he still scans to check his alignment between steps, he can use a shorter, quicker hand movement. Encourage him to check ‘K’ Sonar tone as quickly as possible between steps.
• Fifth, the student again walks to and backs away from the wall without pausing between steps. He holds the ‘K’ Sonar in the middle of the scanning arc straight out from his hip. If he hears the tone change in volume and clarity, he stops and rescans to locate the loudest, clearest tone and alters his direction accordingly. The instructor prompts him to listen to ‘K’ Sonar tone changes if he does not notice that he is not aligned correctly, and also tells him to stop when he is approximately 9 feet back from the wall. Now the student should move fairly fluidly toward and away from the wall. You will need to watch his direction carefully and intervene if you see him begin to walk at an angle toward the wall.
• Sixth, the student approaches and backs away from the wall using a distance of approximately 12 feet. The instructor prompts if the student does not correct his alignment with the wall and tells him to stop backing up at the appropriate point. Lengthening the distance in this activity allows the student to hear higher tones that characterize objects fairly near the end of the ‘K’ Sonar’s range.
• Seventh, the student approaches and backs away from the wall using a distance of approximately 15 feet. The instructor prompts if the student does not correct his alignment with the wall and tells him to stop backing up at the appropriate point. At the 15-foot distance, the student hears very high tones that characterize objects at the end of the ‘K’ Sonar range.
If the student has difficulty walking straight toward the wall and backing
up away from it, repeat this exercise with the speaker instead of
71
headphones. Discuss with the student the changes in the clarity of the 'K' Sonar sound as the student becomes angled in relation to the wall. Try walking behind the student and holding the speaker near the back of his head.
Make sure that you can do this exercise before using it with the student. In order to help him hear differences in ‘K’ Sonar tone when he is walking toward the wall squarely or at an angle, you too must be able to hear these tone differences. Procedure:
• Step 1 – The student wears headphones, which are not yet connected to the ‘K’ Sonar. Guide or direct the student to a position approximately 9 feet from the wall and facing it squarely.
• Step 2 – Instruct the student to connect the headphones and hold the 'K' Sonar in scan position, pointing toward the loudest, clearest tone.
• Step 3 – Instruct the student to take one step toward the wall. Comment on the lowering of pitch because the ‘K’ Sonar is closer to the wall.
• Step 4 – Ask the student to check that he is still squarely facing the wall by scanning with the 'K' Sonar, finding the loudest, clearest tone, and turning in that direction if he is not already facing that way.
• Step 5 – Instruct the student to take another step toward the wall. Ask him to describe the pitch change and to tell you why it changed.
• Step 6 – Ask the student to stand still and scan with the ‘K’ Sonar to determine if he is still facing the wall squarely. He should correct his position relative to the wall if necessary.
• Step 7 – Repeat this process until the student bumps the wall. The student should scan with the 'K' Sonar after each step to make sure he is facing the wall. Ask the student to notice the low growling tone of the 'K' Sonar when it is close to the wall. This is a clear indicator of immediate proximity to a large object.
• Step 8 – As the student touches the wall, make sure that he notices that he is facing it squarely. As he stands at the wall facing it, ask him to turn slightly to the left and then slightly to the right. When he faces the wall squarely, his nose will hit the wall if he walks into it. When he faces the wall at an angle, only one side of his face will touch the wall; the other side of his face will still be in obstacle-free space.
• Step 9 – Instruct the student to take one step back from the wall, scan with the ‘K’ Sonar, and make sure that he is still facing the wall squarely. Ask him whether the ‘K’ Sonar pitch changed as he backed away from the wall; if so, did it become higher or lower, and why.
• Step 10 – Repeat this procedure until the student is approximately 9 feet away from the wall.
72
• Step 11 – Instruct the student to scan, face the wall squarely, and walk slowly toward it, scanning with the 'K' Sonar and moving in the direction of the loudest, clearest 'K' Sonar sound. Remind the student that pitch lowers as he approaches the wall. If necessary, he can stop and scan with the ‘K’ Sonar to check his angle of approach. However, he should try to monitor his approach by noting the position of the loudest, clearest tones as he scans and walks toward the wall.
• Step 12 – Ask the student to practice the sequence of walking toward and then backing away from the wall while scanning with the 'K' Sonar and gradually increasing speed. The student maintains squared off orientation to the wall because of the 'K' Sonar sounds. If the student begins to angle and does not notice the change in ‘K’ Sonar sound, ask him to stop and scan and realign with the wall. When the student backs away from the wall, tell him to stop when you estimate that he is approximately 9 feet from the wall.
• Step 13 – If the student repeatedly misses ‘K’ Sonar cues that he is not facing the wall squarely, connect the speaker, hold it behind the students head, walk behind him, and continue the slow movement toward and away from the wall. Stop to discuss any ‘K’ Sonar tone changes that you hear that indicate he is no longer facing the wall squarely.
• Step 14 – Repeat Step 14, but allow the student to back approximately 12 feet away from the wall.
• Step 15 – Repeat step 14, but allow the student to back approximately 15 feet away from the wall.

73
Exercise 3.5 Facing an Object Squarely and Stopping at the Stop point with the ‘K’ Sonar Cane-Mounted Exercise objective:
When the 'K' Sonar is cane-mounted, the student will use 'K' Sonar feedback to face the wall squarely, to interpret the pitch-distance relationship accurately, and to stop at the stop point independently. Exercise summary:
• First, the student examines the 'K' Sonar mounted on his cane and practices attaching and removing it from his cane.
• Second, the student is taught to hold the cane using the hip grip, or the alternate grip as appropriate (see Chapter Two, Figures 15 and 16). Using either of these methods, the student observes that his cane hand, the 'K' Sonar, and the cane tip all point in the same horizontal direction. The loudest, clearest ‘K’ Sonar tones correspond to the object at which the student’s cane hand points.
• Third, guided to a position approximately 9 feet back from the wall and facing the wall squarely, the student moves his cane in an arc and notes the clear sound in the middle of the arc when his hand and his cane point straight toward the wall. He notices quieter, more distorted 'K' Sonar tones when his cane moves into the left and right ends of the arc.
• Fourth, standing approximately 9 feet from the wall, the student turns slightly toward the left, moves his cane in an arc, and stops cane movement when his cane points straight toward the wall (when he hears the loudest, clearest tones). He turns to face the wall squarely by turning his body in the direction in which his cane points. He then verifies that he faces the wall squarely by moving his cane in an arc and noting that the loudest, clearest tone occurs when the cane points straight out from his hip.
• Fifth, standing approximately 9 feet from the wall, the student turns slightly to the right, moves his cane in an arc, and stops cane movement when his cane points straight toward the wall (when he hears the loudest, clearest tones). He turns to face the wall squarely by turning his body in the direction in which his cane points. He then verifies that he faces the wall squarely by moving his cane in an arc and noting that the loudest, clearest tone is straight ahead of his hip.
• Sixth, the student is guided to a point approximately 9 feet from the wall and facing it squarely; holding his cane in the middle of the arc and pointed toward the wall, he takes one step at a time, stopping

74
when his cane touches the wall. After each step, he states how and why the 'K' Sonar pitch changed and then moves the cane in an arc to check his alignment with the wall.
• Seventh, the student is guided back to a point approximately 9 feet from the wall and facing it squarely. He walks to the wall at his regular pace, holding his cane in the hip grip position in the middle of the cane arc, pointing straight from his hip. If the 'K' Sonar tone becomes softer or more distorted, he stops and re-aligns himself with the wall. He explains how and why the 'K' Sonar pitch changed as he walked to the wall.
• Eighth, the student is guided back to a point approximately 9 feet from the wall and facing it squarely. He walks to the wall at his regular pace, holding his cane in the hip grip position in the middle of the cane arc. He corrects alignment based on 'K' Sonar feedback. He stops when he estimates that his cane will touch the wall if he takes another step; he is directed to his stop point if necessary. The stop point is described to the student as the point where the cane will touch an object when the student takes his next step.
• Ninth, the student is guided to a point approximately 9 feet back from the wall. He faces it squarely, walks toward it, and is cued by the instructor to stop at his stop point. The student checks his stop point by stepping forward and touching the wall with his cane. He then takes one step backward and listens to the 'K' Sonar pitch that corresponds to his stop point.
• Tenth, the student holds his cane at the midpoint of the arc and backs away from the wall, maintaining his alignment with the wall using 'K' Sonar feedback. Being told to stop when he is approximately 9 feet back from the wall, he faces the wall squarely, walks toward it, and stops at his stop point without being cued. He verifies his stop point, returns to it, and listens to 'K' Sonar tones that correspond to it. He repeats this procedure using distances of approximately 12 and 15 feet back from the wall.

75
Materials: ‘K’ Sonar, headphones, speaker, cane Location:
• The area used in this exercise is usually found outdoors, near a smooth concrete wall with no windows, pipes, or other protuberances. There should be approximately 30 feet of clear space in front of the wall and preferably 20-30 feet of clear space to the left and right along the wall.
• There should be no other objects in the exercise area. • Pedestrian or vehicle traffic should not move through the area during
the lesson; the student needs to hear only ‘K’ Sonar feedback related to the wall, not additional feedback related to traffic moving through the area.
• The area should be reasonably smooth and level; the student needs to back up as well as walk forward through the area.
• The wall should be clean because the student needs to touch it. • A smooth concrete indoor wall can be used if a large enough indoor
area with no other objects or pedestrian traffic can be found. Instructor notes:
This exercise introduces the use of the ‘K’ Sonar cane-mounted and helps the student apply skills in interpreting the pitch-distance relationship and in facing an object squarely in ten sequenced activities.
• First, the student examines the 'K' Sonar mounted on his cane and practices attaching and removing it from his cane. The student should examine the hollow shaft of the ‘K’ Sonar as it fits around the cane grip and should then slide the ‘K’ Sonar down the grip and pull it off of the cane. Students who are not strong enough to pull the ‘K’ Sonar down from its tight attachment to the grip may require your assistance. Many students quickly learn to move the open side of the ‘K’ Sonar’s hollow shaft over the cane and to pull the ‘K’ Sonar up onto the cane grip. The process of orienting the ‘K’ Sonar correctly may be a bit difficult until a student has had experience using the ‘K’ Sonar cane-mounted. Spend only a few minutes teaching this procedure. Make sure that the student understands that he will learn to do this in time and that he should not expect to do this procedure correctly right away.
• Second, the student is taught to hold the cane using the hip grip, or the alternate grip as appropriate (see Chapter Two, Figures 15 and 16). Using the ‘K’ Sonar as the cane handle (see Figure 15) is more ergonomic, but it cuts down on textural feedback transmitted up the cane. The Alternate Grip (see Figure 16) is less ergonomic, but retains full access to surface feedback through the cane. Make sure that the
76
student observes that his cane hand, the 'K' Sonar, and the cane tip all point in the same horizontal direction. The loudest, clearest ‘K’ Sonar tones correspond to the object toward which the student’s cane hand points.
• Third, guided to a position approximately 9 feet back from the wall and facing the wall squarely, the student moves his cane in the arc that is used in touch technique (Hill and Ponder, 1976; (1976) He notes the clear sound in the middle of the arc when his hand and his cane point straight toward the wall. He notices quieter, more distorted 'K' Sonar tones when his cane moves into the left and right ends of the arc. This parallels the student’s auditory and kinesthetic experience when hand-scanning with the ‘K’ Sonar; the added feature here is the weight and length of the cane. The student should have very little difficulty with this activity because it parallels what he has already learned when hand scanning with the ‘K’ Sonar.
• Fourth, standing approximately 9 feet from the wall, the student turns slightly to the left, moves his cane in an arc, and stops cane movement when his cane points straight toward the wall (when he hears the loudest, clearest tones). He turns to face the wall squarely by turning his body in the direction in which his cane points. He then verifies that he faces the wall squarely by moving his cane in an arc and noting that the loudest, clearest tone occurs when the cane points straight out from his hip. The student should have very little difficulty with this activity because it parallels what he has already learned when hand scanning with the ‘K’ Sonar. The cane becomes a pointer for the ‘K’ Sonar; as long as the ‘K’ Sonar is mounted on the cane with the correct orientation, the loudest, clearest tone refers to the object straight ahead of the cane hand and in the same horizontal direction in which the cane points. Turning in the direction of the loudest, clearest tone is easier when the ‘K’ Sonar is cane-mounted because the student obtains the direction in which to face from the cane, not just from his hand.
• Fifth, standing approximately 9 feet from the wall, the student turns slightly to the right, moves his cane in an arc, and stops cane movement when his cane points straight toward the wall (when he hears the loudest, clearest tones). He turns to face the wall squarely by turning his body in the direction in which his cane points. He then verifies that he faces the wall squarely by moving his cane in an arc and noting that the loudest, clearest tone is straight ahead of his hip. The student should find this activity fairly easy for the same reasons discussed for the previous activity.
• Sixth, the student is guided to a point approximately 9 feet from the wall and facing it squarely; holding his cane in the middle of the arc and pointed toward the wall, he takes one step at a time, stopping
77
when his cane touches the wall. After each step, he states how and why the 'K' Sonar pitch changed and then moves the cane in an arc to check his alignment with the wall. Now the student applies what he has already learned about the pitch-distance relationship and maintaining alignment with an object when hand-scanning to the situation in which the ‘K’ Sonar is cane-mounted. Because ‘K’ Sonar feedback and kinesthetic/proprioceptive experience are similar in both situations, the student should find this activity fairly easy.
• Seventh, the student is guided back to a point approximately 9 feet from the wall and facing it squarely. He walks to the wall at his regular pace, holding his cane in the hip grip position in the middle of the cane arc, pointing straight ahead of his hip. If the 'K' Sonar tone becomes softer or more distorted, he stops and re-aligns himself with the wall. He explains how and why the 'K' Sonar pitch changed as he walked to the wall. Again, the student applies what he has learned when hand-scanning to the cane-mounted situation.
• Eighth, the student is guided back to a point 9 approximately feet from the wall and facing it squarely. He walks to the wall at his regular pace, holding his cane in the hip grip position in the middle of the cane arc. He corrects alignment based on 'K' Sonar feedback. He stops when he estimates that his cane will touch the wall if he takes another step; he is directed to his stop point if he stops too soon or touches the wall with his cane. The stop point is described to the student as the point where his cane will touch an object when the student takes his next step. He listens to the 'K' Sonar pitch that corresponds to his stop point. This helps the student internalize the pitch of ‘K’ Sonar tones at his stop point. Integrating the pitch of a stop point does not correspond to the conscious memorization of a particular pitch or note. Instead, repeated experience of the pitch at the point after which the student will touch an object with his cane allows him to recognize this pitch range automatically. With practice, the experience of the lower pitch range corresponding to his stop point and the response of either stopping or moving around the obstacle become part of an automatic, fluid sensory-motor pattern.
• Ninth, the student is guided to a point approximately 9 feet back from the wall. He faces it squarely, walks toward it, and is cued by the instructor to stop at his stop point. The student checks his stop point by stepping forward and touching the wall with his cane. He then takes one step backward and listens to the 'K' Sonar pitch that corresponds to his stop point.
• Tenth, the student holds his cane at the midpoint of the arc and backs away from the wall, maintaining his alignment with the wall using 'K' Sonar feedback. Being told to stop when he is approximately 9 feet back from the wall, he faces the wall squarely, walks toward it, and
78
stops at his stop point without being cued. He verifies his stop point, returns to it, and listens to the 'K' Sonar tones that correspond to it. He repeats this procedure using distances of approximately 12 and 15 feet back from the wall. For this activity, the student can estimate his stop point within a range of one to two paces back from the point when his cane touches the wall. If he stops three or more paces from the wall or if he touches the wall with his cane, he has missed his stop point.
In this exercise, the student is asked to apply skills learned when using the ‘K’ Sonar hand-held to the situation in which it is cane-mounted. Although this exercise covers a very large amount of material, most of the material is not really new to the student. Most of the ‘K’ Sonar sounds and the hand and body movements that the student experiences in this exercise are very similar to those he experienced when he held the ‘K’ Sonar in his hand. The primary exception is the concept of the stop point, which only has meaning when the ‘K’ Sonar is cane-mounted. However, the concept of the stop point is integrally connected to the understanding of the pitch-distance relationship, which was developed in previous exercises.
As always, it is important that you do these activities yourself before teaching them to a student. You need to understand the similarities and differences between the sensory-motor experience of doing these activities when using the ‘K’ Sonar hand-held and when using it cane-mounted. Although the advantages of the integration of the cane with the ‘K’ Sonar are discussed in this manual, the process must be experienced in order to be truly understood—and you must understand it in order to convey it to your student. Procedure:
• Step 1 – Mount the ‘K’ Sonar on the cane (See Chapter Two, Figures 11-14 ). Show the student the results. Show him that the ‘K’ Sonar is positioned directly above the cane when the cane is oriented so that the golf grip lies along the student’s index finger.
• Step 2 – Remove the ‘K’ Sonar from the cane; ask the student to examine the cylindrical shaft in the back of the ‘K’ Sonar and to point out the open slit in the back of the cylinder. Holding his cane in his non-dominant hand and the ‘K’ Sonar in his dominant hand, he should turn the ‘K’ Sonar so that the cylinder’s opening fits over the cane shaft below the golf grip. Then he should pull the ‘K’ Sonar onto the golf grip and turn it until the flat side of the golf grip is positioned correctly for his index finger and the ‘K’ Sonar is resting directly above the cane. After it is positioned correctly, he should pull the ‘K’ Sonar as far up on the golf grip as possible; as the golf grip widens, the ‘K’ Sonar is held more securely in place by the cylinder.
79
• Step 3 – Make sure that the ‘K’ Sonar fits tightly on the grip and that it is oriented appropriately (See Chapter Two, Figure 14).
• Step 4 – Teach the student the cane hip grip. The cane-holding arm is in the 'K' Sonar scanning position: the arm is relaxed at the side, and the elbow is at a 90 degree angle. The 'K' Sonar serves as the cane handle, with the student’s thumb on one side of the 'K' Sonar and the student’s fingers on the other side. (See Chapter Two, Figure 15).
• Step 5 – Tell the student to hold the cane in the hip grip position learned above. Make sure that the student understands that the 'K' Sonar and the cane tip are always pointing in the same horizontal direction. Explore this tactually with the student if necessary. The student’s cane tip, his cane hand, and the ‘K’ Sonar are pointing toward whatever the student hears with the clearest, loudest ‘K’ Sonar tone.
• Step 6 – Guide the student to a position approximately 9 feet back from the wall and facing it. Tell him that he is facing the wall squarely. Ask him to plug the headphones into the 'K' Sonar. Tell him that the clear, loud tone from the 'K' Sonar shows that the 'K' Sonar is pointing straight at the wall. Remind him that the cane tip is pointing at the wall as well because the 'K' Sonar and the cane tip are always pointing in the same horizontal direction.
• Step 7 – Instruct the student to stand still and move the cane from side to side, using touch technique. Ask him to describe changes in the 'K' Sonar sound when the cane is on the left, in the center, and on the right side of the arc. Are these tone changes familiar? They should sound fairly similar to tone changes heard when hand scanning with the ‘K’ Sonar.
• Step 8 – As the student continues to stand still and move the cane in an arc, ask him to stop moving the cane when the 'K' Sonar, and therefore the cane, points straight toward the wall. Ask him to tell you how he knows that the ‘K’ Sonar and the cane are pointing straight toward the wall.
• Step 9 – Ask the student to turn slightly to the left, stand still, and move his cane from side to side in an arc. Instruct the student to stop the cane when it points straight at the wall, when the loudest, clearest tone is heard from the 'K' Sonar. Instruct the student to hold his cane arm still and turn to face the direction in which the cane is pointing. The student should check that he now faces the wall squarely by again moving the cane in an arc and stopping the movement when the loudest, clearest tone is heard. If he is facing in the same direction as the cane is pointing when he hears the loudest, clearest tone, he knows he is facing the wall squarely.
• Step 10 – Ask the student to turn slightly to the right, stand still, and move his cane from side to side in an arc. Instruct the student to stop

80
cane movement when the cane points straight at the wall, when the loudest, clearest tone is heard. Instruct the student to hold his cane arm still and turn to face the direction in which the cane is pointing. The student should check that he now faces the wall squarely by moving the cane from side to side in an arc and stopping the arc when the loudest, clearest tone is heard. If he is facing in the same direction as the cane is pointing when he hears the loudest, clearest tone, he knows he is facing the wall squarely.
• Step 11 – Tell the student to hold the cane in the hip grip position, straight ahead of his hip, in the center of the arc. Tell him to take one step at a time toward the wall, and to stop after each step to check whether he is facing the wall squarely by moving the cane in an arc and facing the direction of the loudest, clearest tone. Ask the student to tell you how and why the pitch changed as he approached the wall. The student should stop when the cane touches the wall. Depending on length of stride and cane, the student could take 3-6 steps before the cane touches the wall.
• Step 12 – Guide the student to a point approximately 9 feet back from the wall. Instruct him to face the wall squarely and approach the wall at a normal pace, holding the cane in hip grip position, at the center of the arc. Remind the student to correct his approach if the ‘K’ Sonar tone becomes softer or distorted. Tell the student to stop when the cane touches the wall. Ask him how and why the pitch changed as he walked toward the wall.
• Step 13 – Guide the student to a point approximately 9 feet back from the wall and facing it squarely. Ask him to walk to the wall at a normal pace and to stop when he thinks his cane will touch the wall with his next stride. If he does not stop in time, tell him to take one step back when his cane touches the wall. If he stops too soon, tell him to continue walking and to take one step back when his cane touches the wall. If he stops appropriately, ask him to take another step forward so that his cane will touch the wall and then to step back to his stop point.
• Step 14 – As the student stands at his stop point listening to the ‘K’ Sonar tone that corresponds to it, discuss the stop point in more detail. The stop point is the place where the student will touch an object with his cane if he takes another step. As the ‘K’ Sonar’s pitch becomes lower, the student knows that he is moving closer to an object; when the pitch reaches a particular point, the student has reached his stop point. Tell him that, after more practice recognizing his stop point, he will learn to move around objects without touching them with his cane. Ask the student to stand still for a few seconds and listen to the ‘K’ Sonar pitch that indicates his stop point.
81
• Step 15 – Guide the student to a point approximately 9 feet back from the wall. Tell him to face the wall squarely, hold his cane in the middle of the arc, and walk to the wall maintaining his alignment with it. Tell him that you will cue him to stop at his stop point. Ask him to check his stop point by taking another step toward the wall and noting that his cane touches the wall. Ask him to step back to his stop point and listen to its sound for several seconds.
• Step 16 – Guide the student to a point approximately 9 feet back from the wall. Tell him to approach the wall squarely holding his cane in the middle of the arc and to stop at his stop point. Tell him that you will not cue him about his stop point this time.
• Step 17 – If the student goes too far and touches the wall with his cane or if he stops three or more strides before the wall, ask him to locate his stop point by touching the wall with his cane held in the middle of the arc and stepping back one pace. Ask him to stand still for a few seconds, listening to the ‘K’ Sonar tone at his stop point.
• Step 18 – If the student stops appropriately, ask him to check his estimate of the stop point by taking another step or two and noting that the cane touches the wall. He should then back up one step and listen to ‘K’ Sonar feedback at his stop point.
• Step 19 – Ask the student to back up from the wall, maintaining a straight line of direction by sound from the 'K' Sonar. Tell the student to stop when he has reached a point approximately 12 feet back from the wall. Repeat Steps 16-18. If the student has trouble stopping at the stop point, provide additional practice and do not continue with this exercise.
• Step 20 – Ask the student to back up from the wall, maintaining a straight line of direction by sound from the 'K' Sonar. Tell him to stop when he has reached a point approximately 15 feet back from the wall. Repeat Steps 16-18.

82

83
Exercise 3.6 Walking Straight Toward the Wall Using Touch Technique Exercise objective:
The student will maintain a straight line of direction while walking toward the wall using the 'K' Sonar cane-mounted and touch technique and will enhance his skill in stopping at his stop point. Exercise summary:
• First, guided to a point approximately 12 feet back from the wall, the student mounts the ‘K’ Sonar on the cane, connects the headphones, moves the cane in several arcs, and listens to the clear tones in the center and distorted tones on the ends of the arc. The instructor explains that this pattern will continue when the student walks toward the wall using his cane.
• Second, the student walks toward the wall using touch technique, the instructor cues him to stop at his stop point, and he checks his stop point by stepping forward and touching the wall with his cane.
• Third, guided to a point approximately 12 feet back from the wall, the student faces the wall squarely, walks toward the wall using touch technique, stops at his stop point without being cued, and checks his stop point by stepping forward and touching the wall with his cane.
• Fourth, guided to a point approximately 12 feet back from the wall and facing it in the 10:00 o’clock position, the student begins to walk forward using touch technique. After several steps, he is told to stop, check his alignment with the wall, face it squarely, and then continue toward it, stopping at and checking his stop point.
• Fifth, guided to a point approximately 12 feet back from the wall and facing it at the 10:00 o’clock position, the student walks toward the wall using touch technique, corrects his alignment with the wall as he moves, and stops at and checks his stop point.
• Sixth, guided to a point approximately 12 feet back from the wall and facing it in the 2:00 o’clock position, the student begins to walk forward using touch technique. After several steps, he is told to stop, check his alignment with the wall, face it squarely, and then continue toward it, stopping at and checking his stop point.
• Seventh, guided to a point approximately 12 feet back from the wall and facing it in the 2:00 o’clock position, the student walks toward the wall using touch technique, corrects his alignment with the wall as he moves, and stops at and checks his stop point.
• Eighth, guided to a point approximately 15 feet back from the wall and facing it in the 2:00 o’clock position, the student corrects his alignment with the wall as he walks, and stops at his stop point. He then repeats

84
this process after being guided to a point approximately 15 feet back from the wall and facing it in the 10:00 o’clock position.
• Ninth, being guided to positions farther back from the wall (e.g., approximately 18 feet, 21 feet) and facing the wall in the 10:00 or the 2:00 o’clock positions, the student corrects his alignment with the wall as he walks toward it using his cane and stopping at his stop point.
85
Materials: ‘K’ Sonar, headphones, speaker, cane Location:
• The area used in this exercise is usually outdoors, near a smooth concrete wall with no windows, pipes, or other protuberances. There should be approximately 30 feet of clear space in front of the wall and preferably 20-30 feet of clear space to the left and right along the wall.
• There should be no other objects in the exercise area. • Pedestrian or vehicle traffic should not move through the area during
the lesson; the student needs to hear only ‘K’ Sonar feedback related to the wall, not additional feedback related to traffic moving through the area.
• The area should be reasonably smooth and level; the student needs to back up as well as walk forward through the area.
• The wall should be clean because the student needs to touch it. • A smooth concrete indoor wall can be used if a large enough indoor
area with no other objects or pedestrian traffic can be found.
Instructor notes: In this exercise, the student applies his understanding of the meaning of
‘K’ Sonar feedback when he scans by hand, to the situation in which he uses his cane with the ‘K’ Sonar cane-mounted. Although the angle and breadth of the arc traveled by the ‘K’ Sonar is slightly different when hand-held and when cane-mounted, ‘K’ Sonar feedback and its meaning are very similar in these two situations. In both situations, to approach an object squarely, the loudest, clearest ‘K’ Sonar tones must occur when the ‘K’ Sonar is in the center of the arc, pointing straight ahead of the student’s hip; and in both situations the student must turn his body to correct if the loudest, clearest tones are heard elsewhere in the arc. The following nine sequenced activities in this exercise help the student integrate cane use with his perceptual-motor ‘K’ Sonar skills.
• First, guided to a point approximately 12 feet back from the wall, the student mounts the ‘K’ Sonar on the cane, connects the headphones, moves the cane in several arcs, listens to the clear tones of the ‘K’ Sonar in the center of the arc, and hears its distorted tones in the ends of the arc. The instructor explains that this pattern will continue when the student walks toward the wall using his cane. Discuss the similarities of this pattern to the pattern experienced when hand scanning. In both cases, the student knows that he faces an object squarely when the loudest, clearest ‘K’ Sonar tones occur in the middle of the arc and when the quieter, distorted tones occur nearer to the left and right ends of the arc. Help the student understand cognitively and tactually/kinesthetically that the ‘K’ Sonar, when correctly

86
attached to the cane, points in the same horizontal direction as does the cane. The student can think of the cane as a physical pointer for the ‘K’ Sonar because the cane extends out in the direction in which the highest concentration of ‘K’ Sonar ultrasound is traveling.
• Second, the student walks toward the wall using touch technique, the instructor cues him to stop at his stop point, and he checks his stop point by stepping forward and touching the wall with his cane. Now the student must focus on the new experience of cane movement and ‘K’ Sonar sound combined in order to maintain a straight approach to the wall. Even though he has shown that he can estimate his stop point, tell him to stop when he reaches it in this activity because the new experience of moving the cane and hearing ‘K’ Sonar tones corresponding to the cane position requires the student’s full concentration.
• Third, guided to a point approximately 12 feet back from the wall, the student faces the wall squarely, walks toward the wall using touch technique, stops at his stop point without being cued, and checks his stop point by stepping forward and touching the wall with his cane. Now the student is asked to focus on new experience and also to stop at his stop point on his own.
• Fourth, guided to a point approximately 12 feet back from the wall and facing it in the 10:00 o’clock position, the student begins to walk forward using touch technique. After several steps, he is told to stop, check his alignment with the wall, face it squarely, and then continue toward it, stopping at and checking his stop point. Now the student experiences an initial misalignment with the wall; he is not initially told to check his alignment and is allowed to take several steps facing the wall obliquely. The loudest, clearest tones from the wall will be in the right end of the cane arc as he begins to walk. He may automatically correct his direction or tell you that he is not facing the wall squarely. IF he does not notice in the first two steps, stop him and ask him to check his alignment. At this point, the student is expected to be able to correct his alignment and to stop at his stop point without being cued.
• Fifth, guided back to a point approximately 12 feet back from the wall and facing it in the 10:00 o’clock position, the student walks toward the wall using touch technique, corrects his alignment with the wall as he moves, and stops at and checks his stop point. If the student does not correct his alignment on his own in his first several steps, he may need to be reminded to check his alignment. Remind him of the importance of paying attention to the loudest, clearest ‘K’ Sonar tones and to where they occur in the cane arc.
• Sixth, guided to a point approximately 12 feet back from the wall and facing it at the 2:00 o’clock position, the student begins to walk

87
forward using touch technique. After several steps, he is told to stop, check his alignment with the wall, face it squarely, and then continue toward it, stopping at and checking his stop point. Now the loudest, clearest ‘K’ Sonar tones from the wall will be in the left end of the cane arc. If the student does not automatically alter his direction toward the wall, remind him to do so after the first two steps.
• Seventh, guided to a point approximately 12 feet back from the wall and facing it in the 2:00 o’clock position, the student walks toward the wall using touch technique, corrects his alignment with the wall as he moves, and stops at and checks his stop point. As the student becomes accustomed to hearing the loudest, clearest ‘K’ Sonar tones from the wall near the ends of the cane arc, he also becomes accustomed to correcting his approach to the wall.
• Eighth, guided to a point approximately 15 feet back from the wall and facing it in the 2:00 o’clock position, the student corrects his alignment with the wall as he walks, and stops at his stop point. He then repeats this process after being guided to a point approximately 15 feet back from the wall and facing it in the 10:00 o’clock position. When the student stands approximately 15 feet back from the wall, the wall is in the far end of the ‘K’ Sonar’s 5-meter range; consequently, the wall will produce a very high-pitched tone. Some students may have difficulty distinguishing the loudest, clearest ‘K’ Sonar tones from the thinner, more distorted ones when the pitch is very high. Remind the student to notice his alignment with the wall as he walks toward it.
• Ninth, being guided to positions farther back from the wall (e.g., approximately 18 feet, 21 feet) and facing the wall in the 10:00 o’clock or the 2:00 o’clock position, the student corrects his alignment with the wall as he walks toward it using his cane and stopping at his stop point. Now the student is guided to positions in which the wall is out of the ‘K’ Sonar’s 5-meter range. As the student begins to walk, he hears only the percussive pulse that underlies all ‘K’ Sonar sound. He will need to focus on his alignment to the wall after he begins to hear the tone that indicates that the wall is now in range.
Before you use this exercise with your student, do the activities yourself.
It is necessary for you to experience the cane as the ‘K’ Sonar’s pointer before you can describe the relationship between the cane and the ‘K’ Sonar to your student.
If your student has difficulty with these activities, use a speaker and discuss the tones that you hear in relation to the direction in which the cane is pointing when you hear the tones.

88
Procedure: • Step 1 – Guide the student to a point approximately 12 feet back from
the wall. Ask him to mount the ‘K’ Sonar on his cane, to connect the headphones, and to face the wall squarely using methods already learned.
• Step 2 – Ask the student to stand still and move his cane in an arc several times, listening to the loudest, clearest tones in the middle of the arc and the more distorted, quieter tones at both ends of the arc. Tell the student that this pattern will remain the same when he walks straight toward the wall using touch technique; the loudest, clearest ‘K’ Sonar tones will still occur in the middle of the arc when the cane points straight ahead of his hip, and the quieter, more distorted tones will still occur at both ends of the cane arc.
• Step 3 – Tell the student to walk to the wall using touch technique. He should walk slowly and listen to the 'K' Sonar as he approaches the wall. Tell him that he will maintain his alignment with the wall if he walks in the direction of the clear tones, keeping them in the center of the arc. The quieter, more distorted tones should occur at the ends of the arc. You will say stop when he reaches his stop point.
• Step 4 – Instruct the student to check his stop point by holding his cane in the middle of the arc, taking another step forward, and touching the wall with his cane. Tell the student to step back and listen again to the sound of his stop point.
• Step 5 – If the student walks at an angle toward the wall in Step 3, repeat Step 3 using a speaker instead of headphones. Walk behind him, holding the speaker near his head. Ask him to point out the loudest clearest tones and to tell you whether his cane points straight ahead or to the left or right when he hears them. If the student continues to have difficulty with this step, stop using this exercise; and review Exercise 3.5.
• Step 6 – Guide the student to a point approximately 12 feet from the wall. Ask him to face the wall squarely and approach the wall, using touch technique. Tell him to stop at his stop point and to then check his stop point by walking forward and touching the wall with his cane.
• Step 7 – Guide the student to a point approximately 12 feet back from the wall and facing it in the 10:00 o’clock position. Ask him to start walking straight ahead, using touch technique. After he takes several steps, tell him to stop and to tell you where the loudest, clearest tone occurs in relation to his cane arc. Ask him to correct his alignment toward the wall and walk toward it, stopping at his stop point and checking his stop point as before.
• Step 8 – Guide the student to a point approximately 12 feet back from the wall and facing it in the 10:00 o’clock position. Tell him to start walking straight ahead, using touch technique, and to correct his

89
alignment toward the wall as he walks. He should stop at his stop point and check it as before.
• Step 9 – Repeat Steps 7 and 8, but this time position the student to face the wall in the 2:00 o’clock position.
• Step 10 – If the student has difficulty detecting alignment with the wall when using touch technique, repeat Steps 7-9 using a speaker instead of headphones. Walk behind the student as he does the activities, and hold the speaker near his head. Ask the student to tell you when he hears the loudest, clearest tone, and point it out to him if he misses it. Ask him about the direction in which the cane points when this tone is heard.
• Step 11 – If the student continues to have difficulty correcting his alignment with the wall when he uses his cane, do not proceed with this exercise. Review Exercise 3.5.
• Step 12 – Guide the student to a point approximately 15 feet back from the wall and facing it at an angle to the right. Ask him to check his alignment toward the wall while walking, turn to face it squarely as he walks, and stop at his stop point. Verbalize that, if he hears the loudest, clearest tone on the left side of his arc, he should turn left so that it is in the center of his arc; similarly, if the loudest, clearest tone is in the right end of his arc, he should turn right to put it in the center of his arc.
• Step 13 – Repeat Step 12, but this time position the student to face the wall at an angle to the left.
• Step 14 – Repeat Steps 12 and 13 several times at farther distances back from the wall—approximately 18 feet, 21 feet, etc. Position the student at the 10:00 o’clock or the 2:00 o’clock position, but do not alternate the 10:00 and 2:00 o’clock positions in a predictable manner. At farther distances from the wall, the wall will be out of ‘K’ Sonar range; the student will hear the percussive pulse of the ‘K’ Sonar without tone. Tone will begin after he takes several steps toward the wall. Remind him to check his alignment to the wall when he is close enough to it to receive ‘K’ Sonar feedback.

90

91
Exercise 3.7 Introduction to Tone Color Exercise objective:
The student will locate a person and will recognize and describe the difference in 'K' Sonar tone color when he faces the concrete wall and when he faces a person. Exercise summary:
• First, with the ‘K’ Sonar cane-mounted, the student stands approximately 9 feet from the wall with his back to the wall. He uses ‘K’ Sonar feedback to point the cane toward and then to face a person who stands 9 feet from him. The person is positioned first at 12:00 o'clock relative to the student; second, at 2:00 o’clock relative to the student, and third at 10:00 o’clock relative to the student.
• Second, with the ‘K’ Sonar cane-mounted, the student turns around 180 degrees to face the wall. He faces the wall squarely, listens to ‘K’ Sonar feedback, and compares the tone he heard when facing the person with the tone he hears when facing the wall.
• Third, with the ‘K’ Sonar cane-mounted, the student turns around 180 degrees to face the person who is positioned to be at 12:00 relative to the student when he turns around. The student listens to ‘K’ Sonar feedback from the person, turns 180 degrees to face the wall, and listens to ‘K’ Sonar feedback from the wall. The student and instructor discuss differences in tone color when facing the person and when facing the wall; and the instructor provides an explanation of this phenomenon.

92
93
Materials: 'K' Sonar, headphones, cane, an assistant Location:
• The area used in this exercise is usually outdoors, near a smooth concrete wall with no windows, pipes, or other protuberances. There should be approximately 30 feet of clear space in front of the wall and preferably 20-approximately 30 feet of clear space to the left and right along the wall.
• There should be no other objects in the exercise area. • Pedestrian or vehicle traffic should not move through the area during
the lesson; the student needs to hear only ‘K’ Sonar feedback related to the wall, not additional feedback related to traffic moving through the area.
• The area should be reasonably smooth and level; the student needs to back up as well as walk forward through the area.
• The wall should be clean because the student needs to touch it. • A smooth concrete indoor wall can be used if a large enough indoor
area with no other objects or pedestrian traffic can be found.
Instructor Notes: The following three activities introduce the student to variations in ‘K’
Sonar tone color, which can vary according to the material make-up of the object being scanned. An assistant is used in this exercise because there is a very noticeable tone color difference between a person and the concrete wall.
• First, with the ‘K’ Sonar cane-mounted, the student stands approximately 9 feet from the wall with his back to the wall. He uses ‘K’ Sonar feedback to point the cane toward and then to face a person who stands approximately 9 feet from him. The person is positioned first at 12:00 o'clock relative to the student; second, at 2:00 o’clock relative to the student, and third at 10:00 o’clock relative to the student. This is the first time that the student has used the ‘K’ Sonar to locate a narrower object. He moves his cane in a wide arc; notes the point in the arc where the loudest, clearest sound occurs; and faces the object by turning in the direction in which his cane points. The person should speak when the student faces him to give auditory confirmation that the student has correctly located the person.
• Second, with the ‘K’ Sonar cane-mounted, the student turns around 180 degrees to face the wall. He faces the wall squarely, listens to ‘K’ Sonar feedback, and compares the tone he heard when facing the person with the tone he hears when facing the wall. The differences in the tone color when the student faces the person and when he faces the wall are striking.

94
• Third, with the ‘K’ Sonar cane-mounted, the student turns around 180 degrees to face the person who is positioned to be at 12:00 relative to the student. The student listens to ‘K’ Sonar feedback from the person, turns 180 degrees to face the wall, and listens to ‘K’ Sonar feedback from the wall. The student and instructor discuss differences in tone color when facing the person and when facing the wall; and the instructor provides an explanation of this phenomenon.
Tone color refers to the difference in audible characteristics, excluding pitch, produced by the ‘K’ Sonar in response to different materials possessing various degrees of reflective or absorptive properties. The concrete that makes up the wall is solid. This means that it allows relatively little ultrasound to penetrate or move through it. Instead, it reflects most of the ultrasound back to the ‘K’ Sonar—and results in a very full, blaring tone. The person, on the other hand, is made predominately of water, a more porous substance. Far less ultrasound is reflected back to the ‘K’ Sonar from the person than was reflected back from the wall because ultrasound travels through the more porous materials of which the person is made. The tone heard when the ‘K’ Sonar points at the person is more muted and warbly. The student can gradually learn to recognize many objects he passes because of their specific tone color patterns.
Differences in tone color have to be experienced in order to be understood. You will need to experience the tones produced by the wall and by your assistant before you can teach this concept to your student. When you set up this exercise with your assistant, stand in the student’s place and do the activities yourself.
When working with an assistant, plan with him how you will communicate where he is to stand or how he is to move. Keep your conversation with him at a minimum during the lesson. The assistant does not need any special skills related to orientation and mobility or teaching persons with visual impairments. He does need to be able to move quietly and follow your directions. Procedure:
• Step 1 – Tell the student that an assistant will be helping with this exercise. Introduce the student and assistant; tell the student that the assistant will not talk and will move quietly so that the student can learn to locate a person by using the 'K' Sonar, and not by using other sound cues.
• Step 2 – Guide the student to a point approximately 9 feet from the wall, facing away from the wall. Stand behind the student so that you are not in 'K' Sonar range.
• Step 3 – Cue the assistant to move to a point approximately 9 feet in front of the student, at a 12 o'clock position relative to the student.

95
Tell the student that his job is to locate the other person by using ‘K’ Sonar feedback. Tell the student to stand still; move the cane in a wide, slow arc; and stop moving the cane when the cane points in the direction of the loudest, clearest 'K' Sonar tone.
• Step 4 – Ask the student to face the assistant by turning his body in the direction in which his cane points. Then ask the assistant to speak so that the student can verify that he is facing the person.
• Step 5 – Cue the assistant to move to the 2:00 o'clock position relative to the student. Ask the student to move his cane in a wide, slow arc, and to stop moving his cane when it points toward the person (the loudest, clearest tone). The student should face the person (turn his body in the direction in which his cane points). Ask the assistant to speak so that the student can verify that he is facing the person.
• Step 6 – Repeat Step 5, with the assistant now standing in the 10:00 o’clock position relative to the student.
• Step 7 – Remind the student that the wall is behind him. Ask him to turn toward the wall, stand still, and check that he is facing the wall squarely by moving the cane in an arc. He should stop moving his cane when the 'K' Sonar and his cane are pointing straight at the wall. Ask the student to describe the quality of the sound he hears, and ask if the sound seemed different when he was facing the person. Remember to move behind the student when he turns toward the wall so that you are out of 'K' Sonar range.
• Step 8 – Ask the student to turn half way around with his back toward the wall. Cue your assistant to stand approximately 9 feet in front of the student at a 12:00 o’clock position. Tell your student to locate your assistant as before. Tell your student to listen to the quality of 'K' Sonar sound when pointing to a person and to describe this quality.
• Step 9 – Ask the student to turn half way around to face the wall and to note the ‘K’ Sonar sound. Ask him to describe the quality of the sound he hears when facing the wall.
• Step 10 – Repeat Steps 8 and 9 several times. Discuss the differences in tone quality that the student hears when he faces the wall and when he faces your assistant. The 'K' Sonar sounds more shrill and sharp when the student faces the wall and more mellow, perhaps warbly, and muted when he faces the person. Explain that different materials result in different tone colors; hard dense materials like the wall sound shrill, and softer materials such as a person or a pile of cushions sound more mellow. Explain that the student can gradually learn to recognize many of the objects he passes by the kinds of tone qualities the 'K' Sonar makes in response to the materials with which they are made.

96

97
Chapter Four Obstacle Avoidance Chapter Objectives
Exercises in this chapter are designed to accomplish the following seven objectives.
• The student will use 'K' Sonar feedback to locate a single narrow object such as a pole, a tree, or a telephone pole when the 'K' Sonar is hand-held and cane-mounted.
• The student will stop at the stop point before touching narrow objects with a cane based on 'K' Sonar feedback.
• The student will use 'K' Sonar feedback to locate and walk to narrow objects in different series and patterns when the 'K' Sonar is hand-held and cane-mounted.
• The student will use 'K' Sonar feedback to move between and around narrow objects when the 'K' Sonar is hand-held and cane-mounted.
• The student will maintain awareness of distance and location of single and multiple objects when they are in the far, middle, and near distance when the 'K' Sonar is cane-mounted.
• The student will use 'K' Sonar feedback to move around objects with varying amounts of space on either side without touching objects with the cane.
• The student will use 'K' Sonar feedback to follow a person 4-6 feet ahead.

98

99
Theoretical Considerations Introduction
In Chapter Three, students used 'K' Sonar feedback to recognize, face, and stop before bumping large objects. Activities in Chapter Three taught them to understand the pitch-distance relationship and to stop at their stop point. In Chapter Four, students apply these basic skills to the detection and avoidance of smaller obstacles. Finding Props and Assistants
Exercise activities in this chapter require the instructor to set up specific environments using poles in various configurations, naturally-occurring environmental features such as furniture, and people who move into specified locations or configurations. Locating poles, setting them up in advance, and finding volunteers can be difficult and time-consuming. However, it is essential to locate materials and set up exercises as they are described; activities presented in this chapter are sequenced according to skill and difficulty level. The student first learns basic skills for handling small obstacles, next applies these skills to obstacle avoidance, and finally uses them to deal with pedestrians, the obstacles that move.
Make poles using PVC pipe with a diameter of 1.5-2 inches. Cut the pipe into 5-foot lengths. You will need a total of three 5-foot-long pieces. Then mount each piece in a wooden platform that is heavy enough to ensure stability. The authors suggest using platforms that are 8 inches wide and 18 inches long. You will need to create your poles only once because they are sturdy and durable; you can use them whenever you teach the ‘K’ Sonar in the future.
Figure 28 shows a piece of PVC pipe serving as a vertical obstacle or pole. The pipe is mounted in a wooden frame as described above to maintain stability.

100
Figure 28 Pole Made With PVC Pipe in Wooden Platform
Several exercises require the use of two assistants and one requires the use of a simulated crowd. You may be able to find assistants in the school your student attends; helping in an O&M lesson might be a relevant class activity for students in science classes, particularly if you demonstrate the ‘K’ Sonar to the class before they are asked to volunteer. Students involved in Future Teachers of America or in groups or clubs that offer community service might also serve as volunteers. Other sources of volunteer help might be your student’s friends, members of church groups, Lyons Clubs, community service organizations made up of senior citizens, or your local volunteer center. The basics: Small objects and the spaces between them—Exercises 4.1-4.4
The first three exercises require the use of one, two, and three poles respectively; and the fourth exercise requires the use of two volunteers. The student first learns to locate, walk to, and walk past one pole; and then applies these skills to two-pole and three-pole situations. She first learns to recognize poles when the 'K' Sonar is hand-held; second, when it is cane-mounted and the cane is held in the middle of the arc; and third, when it is cane-mounted and touch technique is used. In the fourth exercise, as volunteers are placed in varying configurations around the student, the student develops a more integrated understanding of obstacles and the spaces between them.
When compared to the concrete wall used in previous exercises, a pole is a very small object. It makes a sharp clear tone, but the tone is only heard when the 'K' Sonar points at or nearly at the pole. Exercise 4.1 allows the
101
student to experience one pole as the only object in 'K' Sonar range. The student can notice the brief sound made by the pole as she scans with the 'K' Sonar because this is the only sound the student will hear as she scans. She then learns to slow her scan, move more subtly, and locate the precise source of the loudest, clearest tone. This fine tuning process usually involves a series of smaller and smaller left-right scanning motions. The student then uses skills learned with larger objects to walk to and walk past the pole without bumping it or touching it with the cane.
In Exercise 4.2, the student uses these new skills to perceive and avoid two poles in 'K' Sonar range. Now she must not only perceive but also keep track of the location of two subtle objects as she approaches, stops for, and walks between them. She also learns to notice and walk toward the silent area between the poles and to walk to either pole or through the opening between them when she uses touch technique.
Exercise 4.3 presents the student with now-familiar scenarios using three poles. As she walks to each pole and moves between poles, the student learns to track, locate, and avoid multiple objects—a skill that is essential for obstacle avoidance in complex environments.
As indicated above, poles should be 5 feet tall; this height ensures that the pole will be tall enough to be in 'K' Sonar range when the student holds the 'K' Sonar in scan position. The poles must be 1.5-2 inches in diameter. If the poles are thinner, they will not be reliably detectable; if the poles are thicker, students may locate them without developing subtle scanning skills needed for later work.
In Exercise 4.4, two volunteers are moved to various points on a circle around the student. As the student identifies clock-face locations of volunteers and walks to and between them, she integrates 'K' Sonar feedback; kinesthetic, proprioceptive, and cognitive experiences; and motor responses related to openings of varying sizes and shapes.
Obstacle avoidance: From mock-ups to real life—Exercises 4.5-4.6
Using the 'K' Sonar to avoid obstacles requires that a student successfully complete the following series of tasks: recognize an obstacle ahead; note its location in relation to the path of travel; take stock of the amount of open space on either side of the obstacle; decide which way to move around the obstacle based on the amount of open space available; move around the obstacle before contacting it; and return to the original path of travel. Exercise 4.5 presents the student with a series of increasingly difficult obstacle avoidance situations: moving around a large obstacle with a great deal of space on all sides; avoiding smaller obstacles with a barrier on one side; avoiding smaller obstacles with barriers on both sides and varying amounts of open space on each side; and avoiding large, naturally-occurring obstacles on the sidewalk. Exercise 4.6 continues the progression through increasingly-difficult real-life situations: avoiding large obstacles with a great

102
deal of open space on both sides; avoiding large obstacles with smaller amounts of space on both sides; and avoiding small obstacles with varying amounts of open space on both sides.
Exercise 4.6 introduces the student to the process of noticing each piece of 'K' Sonar feedback across the entire cane arc; although only those objects that lie in or near the student's path of travel require action to be avoided, numerous objects exist at the ends of the cane arc on the sidewalk edge and on the building line. This skill will be developed further in subsequent chapters that deal with landmark location and object recognition.
When hand-held in the upward scan position, the 'K' Sonar can be used to detect obstacles that overhang the path of travel at chest, shoulder, face, or head height. The final activity in Exercise 4.6 teaches the student how to locate such obstacles and to make informed decisions about moving around or ducking under them.
Pedestrians: The obstacles that move—Exercises 4.7-4.9
A student can use feedback from the 'K' Sonar to follow a pedestrian in a line or cue at a respectful distance and, in most situations, to avoid bumping into a pedestrian or touching him/her with the cane. 'K' Sonar feedback can also help the student move through crowds more effectively and confidently.
In Exercise 4.7, the student learns to follow a pedestrian: to stop and start moving in sync with the pedestrian's moves; to speed up and slow down with the pedestrian; to track the pedestrian who makes increasingly sharp turns; and to maintain a respectful distance behind the pedestrian. The student then applies these skills to real-life situations—lines at the bank, post office, school cafeteria, etc.
In Exercise 4.8, the student learns to recognize several types of pedestrian movement patterns according to the 'K' Sonar sound signature associated with them. Although situations may not be so clearly defined in real-life, approach scenarios demonstrated by volunteers help the student develop some basic avoidance strategies. A pedestrian's head-on approach can be recognized by the clear tone in the center of the cane arc at 12:00 o'clock that becomes lower in pitch quickly; in response, the student learns to stop, pull the cane into the vertical position, and allow the pedestrian to move around her. The student also can recognize the sound signature that occurs when a pedestrian crosses the student's path at close range and can stop to allow the pedestrian to pass without collision.
Exercise 4.9 offers activities designed to help the student move through crowds. First providing a variety of crowd scenarios demonstrated by volunteers, the exercise next brings the student into contact with real pedestrians on crowded sidewalks.

103
Exercise 4.1 Working With One Pole Exercise objective:
The student will locate, walk to, and stop before the cane touches a pole based on 'K' Sonar feedback. Exercise summary:
• First, standing approximately 6 feet back from the pole and holding the 'K' Sonar in the cane hand in scanning position, the student will locate, face, and walk to the pole.
• Second, standing approximately 6 feet back from the pole and holding the cane with the 'K' Sonar cane-mounted, the student will locate, face, and walk to the pole.
• Third, standing approximately 9 feet back from the pole and holding the cane with the 'K' Sonar cane-mounted, the student will walk smoothly toward the pole and will stop at the stop point when instructed to do so.
• Fourth, standing approximately 9 feet back from the pole and holding the cane with the 'K' Sonar cane-mounted, the student will walk toward the pole and stop at the stop point without assistance from the instructor.

104

105
Materials: Pole approximately 5-feet tall and 1.5-2 inches in diameter, 'K' Sonar, cane, headphones, speaker Location:
The area used in this exercise is clear space outdoors with at least 20 feet of open space in all directions from the pole.
• Poles made of PVC pipe and mounted in wooden frames work best on flat concrete or asphalt as in a playground or parking lot.
• The area should not be used by other persons during the O&M lesson. Instructor notes:
In this exercise, the student develops the subtle scanning skills that are needed to locate a narrow object which, unlike the concrete wall, appears in only a very small portion of the scanning arc. The process of subtle scanning is similar to the process of fine tuning a radio station on radios with dials. To scan subtly, the student moves the 'K' Sonar very slowly throughout the scanning arc so that no sound can be missed. When the student hears a sound, she stops the scan movement and then moves the 'K' Sonar only a very small distance to the right and left to pinpoint the object's precise location. By scanning slowly and with increasingly small movements, she can stop the scan when the 'K' Sonar points straight toward the narrow pole.
A narrow object such as a pole may seem to produce a barely noticeable sound when a student moves the 'K' Sonar fairly quickly through the arc. However, when the 'K' Sonar is moved slowly, the sound can be isolated; when the fine tuning approach locates the object precisely, the tone becomes louder and clearer. Like the concrete wall used in previous exercises, the pole will produce the loudest, clearest tone when the 'K' Sonar points directly toward it.
This exercise teaches the student to locate and move around a narrow object by using 'K' Sonar feedback in four sequenced activities.
• First, when guided to a point approximately 6 feet back from a pole, the student holds the 'K' Sonar in the cane hand in scanning position. She scans slowly and subtly to locate the pole. After she has located it, she faces the pole and walks to it. If you use a speaker for this activity, you can help the student notice the initial quick "bleep" of the pole when the student first scans past it. You can also use hand-over-hand methods to show her how slowly she must move the 'K' Sonar to "fine tune" the sound of the pole. She then holds the 'K' Sonar pointed toward the pole and walks in the direction of the clearest tone to locate the pole tactually. After each step, she stops and rescans subtly to relocate the pole and check her line of travel toward it.
• Second, when guided to a point approximately 6 feet back from the pole, the student holds the cane with the 'K' Sonar cane-mounted. She

106
locates, faces, and walks to the pole. Now the student learns to scan subtly when the 'K' Sonar is cane-mounted; to do this, she must move the cane in an arc very slowly, stop the movement when she hears the "bleep" of the pole, and then move the cane very slowly and subtly to the left and right until the cane tip and the 'K' Sonar point directly toward the pole. She knows when the cane points directly toward the pole because of the loud, clear quality of the tone. She then walks to the pole, stopping after each step to move the cane in a small arc to make sure that the cane is still pointing toward the pole. With each of these cane arcs, she can relocate the pole and realign herself with it by facing in the direction of the loudest, clearest 'K' Sonar sound.
• Third, when guided to a point approximately 9 feet back from a pole, the student holds the cane with the 'K' Sonar cane-mounted. She walks smoothly toward the pole and stops at the stop point when instructed to do so. Now the student maintains her line of direction toward the pole by listening to the loudest, clearest tone that she hears and by correcting her line of travel so that this tone always occurs in the middle of the cane arc, when the cane is pointing straight ahead of her hip. You tell the student to stop at her stop point, when she would touch the pole with the cane if she took another step. Standing still, listening to the 'K' Sonar tone at her stop point, and taking another step forward to touch the pole with the cane can help her learn to recognize this point on her own.
• Fourth, when guided to a point approximately 9 feet back from the pole, the student holds the cane with the 'K' Sonar cane-mounted. She walks toward the pole and stops at her stop point without assistance in locating it. After working with the stop point in the previous chapter and experiencing it with the pole in the third activity of this exercise, the student recognizes it for herself. She walks smoothly toward the pole and stops before touching the pole with the cane.
Select the area you will use for this exercise and set up the pole in
advance of the lesson. Perform exercise activities yourself before doing them with the student. You must be able to hear and describe subtle 'K' Sonar sounds that indicate the presence and location of the pole as you teach your student to recognize these cues. Procedure:
• Step 1 – Show the student the pole; she should examine its height and width tactually. Then guide her to a point approximately 6 feet back from the pole and facing it. Instruct her to connect the headphones or the speaker to the 'K' Sonar.

107
• Step 2 – Tell her to hold the 'K' Sonar in scan position and to scan in a smooth, slow left-right scan pattern. Ask her how many sounds she hears when she scans through the arc.
• Step 3 – After several scans, instruct the student to stop scanning when the object in range produces a loud, clear tone. Then ask her to fine tune her scan by moving the 'K' Sonar very slowly and with very small movements until she is sure that she hears the loudest, clearest tone. The 'K' Sonar should now be pointing directly toward the pole. Ask the student to face the direction in which the ‘K’ Sonar points.
• Step 4 – Instruct the student to take one step straight ahead, stop, and fine tune her scan to make sure that she is still facing the pole. She should face the direction of the loudest, clearest 'K' Sonar tone. Remind her that the pitch gets lower as she approaches the pole.
• Step 5 – Repeat Step 4 until the student contacts the pole. She should verify that she has reached the pole by touching it.
• Step 6 – Instruct the student to back up approximately 6 feet, telling her when to stop. Repeat Steps 4 and 5 more quickly. If the student maintains her line of direction toward the pole, she does not need to stop and scan after each step.
• Step 7 – Guide the student to a point approximately 6 feet back from the pole. Ask her to mount the 'K' Sonar on the cane. Teach or review this skill as needed.
• Step 8 – Instruct the student to stand still and move the cane from side to side in an arc. Tell her to stop cane movement when she hears a loud, clear tone and then to fine tune her scan—move the cane in a very small, slow arc from side to side. She should stop cane movement when she hears the loudest, clearest tone. Both the 'K' Sonar and the cane should be pointing toward the pole.
• Step 9 – Ask the student to take one step forward in the direction the cane is pointing. The student should not move the cane in an arc as she takes this step.
• Step 10 – After the student has taken the step toward the pole, ask the student to stand still and again verify the location of the pole by fine tuning the scan—moving the cane slowly and subtly to find the loudest, clearest tone. She should make sure that she is still facing the direction in which the cane points.
• Step 11 – Ask the student to take another step toward the pole and then to stop and verify the location of the pole by fine tuning the scan. When she is sure that the 'K' Sonar is pointing straight toward the pole, she should make any adjustments in her position required so that she is facing in the direction the cane points.
• Step 12 – Depending on the length of her stride, the student should take a second, third, or a fourth step, checking her position relative to the pole between steps by fine tuning the scan. She should examine
108
her position relative to the pole tactually when the cane touches the pole.
• Step 13 – Guide the student approximately 9 feet back from the pole. Ask her to stand still, move the cane from side to side in an arc, and locate the pole. Ask her to then fine tune her scan so that she is sure that the 'K' Sonar and the cane tip point directly toward the pole.
• Step 14 – Ask the student to walk slowly toward the pole, using touch technique. Remind the student that she should move so that the clearest sound from the pole occurs in the center of the arc, when the cane and the 'K' Sonar point straight ahead of her hip.
• Step 15 – Call "Stop." when the student reaches her stop point, where her next step would cause the cane to touch the pole.
• Step 16 – Ask the student to check out her stop point by taking another step, locating the pole with the cane, and then touching the pole.
• Step 17 – Ask the student to back up; tell her to stop when she is approximately 9 feet from the pole. Ask her to stand still, move the cane in an arc from side to side, and locate the pole. Ask her to then fine tune her scan so that she is sure that the 'K' Sonar and the cane tip point directly toward the pole.
• Step 18 – Repeat Steps 14 through 16. • Step 19 – Guide the student approximately 9 feet back from the pole.
Ask her to stand still, locate the pole, and tell you when she is facing it squarely. Do not give specific directions for locating the pole.
• Step 20 – If she is not facing the pole squarely, discuss her methods with her. Did she fine tune the scan? Did she make sure that she was facing in the direction in which the cane was pointing?
• Step 21 – Ask her to rescan and face the pole squarely. If she has difficulty doing so, use the speaker; listen to tones and discuss scanning procedures.
• Step 22 – When the student faces the pole squarely, ask her to walk toward the pole, using touch technique. Ask the student to stop when she believes she is at her stop point, where the cane will touch the pole with her next step.
• Step 23 – Give verbal instruction if needed and repeat until the student stops near the stop point without instruction.

109
Exercise 4.2 Working With Two Poles Exercise objective:
The student will locate, walk to, and walk between two narrow objects. Exercise summary:
• First, standing approximately 7 feet back from the midpoint between two poles placed 5 feet apart and using the 'K' Sonar hand-held, the student locates and points the 'K' Sonar toward each pole.
• Second, standing approximately 7 feet back from the midpoint between two poles placed 5 feet apart and using the 'K' Sonar cane-mounted, the student locates and points the cane toward each pole.
• Third, standing approximately 7 feet back from the midpoint between two poles placed 5 feet apart and using the 'K' Sonar cane-mounted, the student locates the pole on the right, points the cane toward it, keeps the cane pointed directly toward it as she walks to it, stops at the stop point, and verifies the location tactually.
• Fourth, standing approximately 7 feet back from the midpoint between two poles placed 5 feet apart and using the 'K' Sonar cane-mounted, the student locates the pole on the left, points the cane toward it, keeps the cane pointed directly toward it as she walks to it, stops at the stop point, and verifies the location tactually.
• Fifth, standing approximately 7 feet back from the midpoint between two poles placed 5 feet apart and using the 'K' Sonar cane-mounted, the student locates the pole on the left, walks to it using touch technique, stops at the stop point, and verifies the location tactually.
• Sixth, standing approximately 7 feet back from the midpoint between two poles placed 5 feet apart and using the 'K' Sonar cane-mounted, the student locates the pole on the right, walks to it using touch technique, stops at the stop point, and verifies the location tactually.
• Seventh, standing approximately 7 feet back from the midpoint between two poles placed 5 feet apart and using the 'K' Sonar cane-mounted, the student locates the point between the two poles where the least sound occurs and keeps the cane pointed directly toward this area as she walks between the poles.
• Eighth, standing approximately 7 feet back from the midpoint between two poles placed 5 feet apart and using the 'K' Sonar cane-mounted, the student locates the point between the two poles where the least sound occurs and walks between the poles using touch technique.

110

111
Materials: Two poles 5 feet tall and 1.5-2 inches in diameter, 'K' Sonar, cane, headphones, speaker Location:
The area used in this exercise consists of a clear space outdoors with at least 20 feet of open space in all directions from the poles.
• Poles made of PVC pipe and mounted in wooden frames work best on flat concrete or asphalt as in a playground or parking lot.
• The area should not be used by other persons during the O&M lesson.
Instructor notes: In this exercise, the student must deal with two narrow objects that are
in 'K' Sonar range at the same time. Standing approximately 7 feet back from the midpoint between the two poles placed 5 feet apart, the student becomes the third point in a triangle. One pole is ahead of her on the left, and the other is ahead of her on the right. Although she has already done most of these activities in exercise 4.1 with one pole, she is now doing them with two poles in 'K' Sonar range at the same time. She must keep track of two features in the space ahead of her, ignore peripheral signals from the other pole when she is working with only one, and use information from both poles when she looks for the empty space between them.
Most activities in this exercise are to be done when the 'K' Sonar is cane-mounted. In exercise 4.1, the student learned to locate a narrow object with precision in the simpler situation where the 'K' Sonar was hand-held, and then in the more complex situation when it was cane-mounted. If the student has learned to locate one pole with the 'K' Sonar cane-mounted, she should be able to apply this skill to tasks involving two poles without needing to first use the 'K' Sonar hand-held. There is also a significant advantage inherent in using the cane-mount for obstacle location. When a student scans for and locates a desired object or area, the 'K' Sonar points directly toward it, and the cane provides a line of direction toward it because the cane points straight toward the object. The cane makes it easier for many students to align themselves with the feature of interest because it forms a physical line in the direction that the student should walk. In this exercise, the student will use the cane's line of direction to align herself both with objects to be located and with clear space between objects. Recognizing the clear space between objects allows the student to move toward and into obstacle-free space.
In this exercise, the student applies scanning and fine tuning skills learned in the previous exercise to complete the following activities.
• First, after being guided to a point approximately 7 feet back from the midpoint between the two poles placed 5 feet apart, the student holds the 'K' Sonar in scan position, moves it in an arc, and locates each

112
pole, using fine tuning methods learned in exercise 4.1. The student points the 'K' Sonar toward each pole and indicates whether it is on the left or right side of the arc.
• Second, the student uses the 'K' Sonar cane-mounted to locate each pole. The student points the cane toward each pole and indicates whether it is on the left or right side of the arc.
• Third, the student locates the pole on the right, points the cane directly toward it, and walks to the pole. She keeps the cane pointed in the direction of the loudest, clearest tone and follows the direction of the cane to the pole. She stops at the stop point and verifies her location tactually.
• Fourth, after being guided back to the original point, the student locates the pole on the left, points the cane directly toward it, and walks to the pole. She keeps the cane pointed in the direction of the loudest, clearest tone and follows the direction of the cane to the pole. She stops at the stop point and verifies her location tactually.
• Fifth, after being guided back to the original point, the student walks to the pole on the left using touch technique. She stops at the stop point and verifies her location tactually. As with locating the single pole in the previous exercise, the student must keep the loudest, clearest tone in the center of the cane arc; if the loudest, clearest tone drifts away from the center, she must turn in the direction of the tone so that it is again in the center of the arc. However, she must also remember that there is another pole in range that could cause a peripheral tone. As she moves toward the pole on the left, she might hear tone on the far right end of the arc that is derived from the presence of the second pole.
• Sixth, after being guided back to the original point, the student walks to the pole on the right using touch technique. She stops at the stop point and verifies her location tactually. Again, she must alter her line of travel to keep the loudest, clearest tone in the center of the cane arc. She must also remember that the pole on the left may cause another tone to be heard in the far left end of the arc.
• Seventh, after being guided back to the original point, the student stands still and moves the cane in an arc to locate the point between the two poles where the least sound occurs. She keeps the cane pointed toward the area of least sound and walks between the poles in the direction the cane is pointing. If some tone is heard when the 'K' Sonar points to the open area between the poles, the student will hear the pitch of this tone become lower as she walks toward this open space. However, the tone will not change in volume or quality if she walks straight. If the tone becomes louder, she should stop and use fine tuning cane movements to relocate the area of least sound.

113
• Eighth, after being guided back to the original point, the student walks between the two poles using touch technique. Here, she keeps the area of least sound in the middle of the cane arc. She will notice sound on the left side of the arc from the left pole and on the right side of the arc from the right pole. As in the previous activity, if she hears any tone when the 'K' Sonar points toward the open area between the poles, this tone will become lower in pitch as she approaches the poles. However, it will only change in volume or tone quality if she veers toward one pole or the other. She should correct her approach as needed by turning so that the least amount of sound is heard when the cane is in the center point of the arc.
Depending on many factors such as materials of which the poles are
made and actual distances between poles, the student may hear no tone or faint tones from one or both poles when the cane points toward the midpoint between the poles. If neither pole is in range when she points the cane straight ahead, she will hear the percussive sound that underlies all 'K' Sonar feedback, but no tone. If the poles are close enough to one another, a small amount of ultrasound may be reflected back from them, and she may hear faint tones in addition to the percussive pulse. When she hears some tone from the open space between the poles, she should fine tune the scan of the opening by moving the cane slightly to the left and slightly to the right of the point of least tone; she knows that she is pointing toward the center of the clear space when the volume of tone increases when she moves the 'K' Sonar to the left and to the right.
You may find it helpful to use the speaker when the student examines this empty space for the first time. By doing so, you can point out and discuss various aspects of the sound that indicates empty space.
Select the area that you will use before the lesson. Set up the two poles, and use the 'K' Sonar and a cane to do the exercise activities. Make sure that you can hear and understand the meaning of 'K' Sonar feedback from poles and that you can use that feedback to perform exercise tasks. This experience will help you explain the meaning of 'K' Sonar feedback to the student.
In the course of this exercise, you will repeatedly guide the student to a point halfway between the poles and approximately 7 feet back from them. It is important that distances are accurate because changes in distance will result in different patterns of 'K' Sonar feedback. Use a tape measure to locate the point halfway between the poles and to then locate the point approximately 7 feet back from it. The student should stand so that the cane hand, when holding the cane in hip grip position, is above the point you have measured. Right-handed cane users will stand slightly to the left of this point and left-handed cane users will stand slightly to the right of it. Mark the place where the student will stand so that you can locate it easily.

114
Procedure:
• Step 1 – Guide the student to a point approximately 7 feet back from the midpoint between the two poles that are 5 feet apart. The student should plug headphones into the 'K' Sonar and hold it in the cane hand in scan position.
• Step 2 – Instruct the student to stand still and scan with the 'K' Sonar, using the full left-center-right-center-left scan movement several times, and to listen to what is in front of her. Ask her how many clear sounds she hears. Ask her to scan farther to the left and right to check a wider area if necessary.
• Step 3 – Ask the student to scan again and to stop scanning when she hears an object straight ahead of the 'K' Sonar. Ask if this object is on her left or right. Ask her to fine tune the scan with slow, subtle left-right hand movements.
• Step 4 – Ask the student to scan again and to stop the scan when she locates another object. Ask her to fine tune the scan with slow, subtle left-right hand movements. Ask if the second object is on her right or left.
• Step 5 – Ask the student to mount the 'K' Sonar on the cane. Tell her to stand still, move the cane from side to side in an arc, and listen to what is in front of her. Ask her how many clear sounds she hears. Ask her to move the cane farther to the left and right to check a wider area if necessary.
• Step 6 – Ask the student to continue moving the cane in an arc and to stop cane movement when she hears an object straight ahead of the 'K' Sonar. Ask if this object is on her left or right.
• Step 7 – Ask the student to stand still and locate another object by moving the cane from side to side in an arc. Tell her to stop moving the cane when she hears another object straight ahead of the 'K' Sonar. Ask if the second object is on her right or left.
• Step 8 – Ask the student to move the cane from side to side in an arc and to stop cane movement when the cane points toward one object, then move the cane and stop it when it points toward the second object. Ask the student to verbalize “left” or “right” according to which way the cane is pointing when an object is heard.
• Step 9 – Instruct the student to move the cane from side to side in an arc to locate the pole on the right with the 'K' Sonar.
• Step 10 – Instruct the student to keep the cane pointing toward the loud, clear tone from the pole, move toward the pole on her right, and stop at her stop point. Remind her to stop and move the cane slightly to the left and right to relocate the loud, clear tone if she notices that the tone from the pole is becoming distorted or muted.

115
• Step 11 – Guide the student back to original position. Ask the student to stand still and move the cane from side to side in an arc to locate the pole on her left.
• Step 12 – Instruct the student to keep the cane pointing toward the loud, clear tone from the pole, move toward the pole on her left, and stop at her stop point. Remind her to stop and move the cane slightly left and right to relocate the loud, clear tone if she notices that the tone from the pole is becoming distorted or muted.
• Step 13 – Repeat Steps 9-12 several times until the student can locate and move toward each pole, and stop close to her stop point for each pole.
• Step 14 – Guide the student back to the original position. Instruct her to locate the pole on the left by moving the cane from side to side in an arc, to walk to it while using touch technique, and to stop at her stop point. She should keep the loudest, clearest tone from this pole in the center of the arc and should move in the direction of this tone. She may hear the pole on the right in the right end of her arc.
• Step 15 – Guide the student back to the original point. Instruct her to locate the pole on her right by moving the cane from side to side in an arc, to walk to it while using touch technique, and to stop at her stop point. She should keep the loudest, clearest tone from this pole in the center of the cane arc and should move in the direction of this tone. She may hear the pole on the left in the left end of her arc.
• Step 16 – Guide the student back to the original position. Ask her to move the cane from side to side in an arc and point the cane toward the left pole, the right one, and then the left again. Ask the student to say the direction of the object as the student points to it.
• Step 17 – Ask the student to move the cane slightly to the right and locate the opening between the left and right poles, where there is the least amount of sound. Remind her that, when nothing is in 'K' Sonar range, she will hear the drum-like pulse but no tone. She may hear small amounts of tone when she points the cane toward the area between the poles because the 'K' Sonar may still receive a small amount of ultrasound reflection from the poles. Use the speaker and discuss the meaning of the sound produced by the opening.
• Step 18 – Ask the student to keep the cane tip pointing toward the area of least sound and to walk slowly, correcting direction as needed, between the left and right poles. If she hears some tone when the cane points toward the opening, this tone will become lower in pitch as she approaches the opening because she is moving closer to the poles. However, the volume and quality of the tone will remain the same if she is walking straight toward the opening. The tone from the poles will disappear when the student walks between them. Because the
116
poles are fairly close together, the student may bump or knock down a pole in this process.
• Step 19 – Guide the student back to the original position. Ask the student to locate the opening between the poles and walk through it again.
• Step 20 – Guide the student back to the original position. Ask the student to point the cane tip toward the area of least sound between the poles, face this area, and walk toward it, between the poles, using touch technique. Remind her that she should move so that the area of least sound remains in the middle of the arc. She may hear sound on the left side of her arc from the pole on the left and on the right side of her arc from the pole on the right. If she hears some tone when the cane points to the area between the poles, this tone will lower in pitch as she moves toward the poles, but will not change in volume or quality unless she veers toward one of the poles.

117
Exercise 4.3 Working With Three Poles Exercise objective:
The student will locate and walk to each of three poles, and will walk between poles based on 'K' Sonar feedback. Exercise summary:
The student begins all activities in this exercise by standing approximately 7 feet back from the center pole of three poles placed 5 feet apart. She uses the 'K' Sonar cane-mounted for all activities.
• First, the student locates each pole using 'K' Sonar feedback, repeatedly moves the cane in a slow arc, and calls left, center, and right as the cane points to respective poles.
• Second, the student points the cane directly toward and turns to face each pole.
• Third, the student points the cane directly toward the left pole, keeps the cane pointed directly toward it as she walks to it, stops at the stop point, and then touches the pole with the cane and her hands.
• Fourth, the student points the cane directly toward the center pole, keeps the cane pointed directly toward it as she walks to it, stops at the stop point, and then touches the pole with the cane and her hands.
• Fifth, the student points the cane directly toward the right pole, keeps the cane pointed directly toward it as she walks to it, stops at the stop point, and then touches the pole with the cane and her hands.
• Sixth, the student points the cane directly toward the left pole, faces it, repeatedly moves the cane in an arc to hear the 'K' Sonar sounds when the pole is in center of the arc, keeps the pole in the center of the arc, and uses touch technique to walk to the pole. She stops at the stop point and then touches the pole with the cane and her hands.
• Seventh, the student points the cane directly toward the center pole, faces it, repeatedly moves the cane in an arc to hear the 'K' Sonar sounds when the pole is in the center of the arc, keeps the pole in the center of the arc, and uses touch technique to walk to the pole. She stops at the stop point and then touches the pole with the cane and her hands.
• Eighth, the student points the cane directly toward the right pole, faces it, repeatedly moves the cane in arc to hear the 'K' Sonar sounds when the pole is in center of the arc, keeps the pole in the center of the arc, and uses touch technique to walk to the pole. She stops at the stop point and then touches the pole with the cane and her hands.
• Ninth, the student moves the cane to find the area between the left and center poles where the least sound is heard and keeps the cane pointed directly toward this area as she walks between the poles.

118
• Tenth, the student moves the cane to find the area between the center and right poles where the least sound is heard and keeps the cane pointed directly toward this area as she walks between the poles.
• Eleventh, the student moves the cane to find the area between the left and center poles where the least sound is heard, uses touch technique, keeps the silent space in the middle of the arc, keeps the tone from the poles in the left and right parts of the arc, and walks between the left and center poles.
• Twelfth, the student moves the cane to find the area between the center and right poles where the least sound is heard, uses touch technique, keeps the silent space in the middle of the arc, keeps the noise from the poles on the left and right parts of the arc, and walks between the center and right poles.

119
Materials: Three poles approximately 5 feet tall and 1.5-2 inches in diameter in a straight line 5 feet apart; 'K' Sonar; cane; headphones; speaker Location:
The area used in this exercise consists of a clear space outdoors with at least 20 feet of open space in all directions from poles.
• Poles made of PVC pipe and mounted in wooden frames work best on flat concrete or asphalt as in a playground or parking lot.
• The area should not be used by other persons during the O&M lesson.
Instructor notes: Building on skills learned in the previous two exercises, activities in this
exercise require the student to locate, keep track of, and walk to each of three poles. The student also walks between these poles. Poles are set up in a straight line 5 feet apart. The student begins all activities at a point approximately 7 feet back from the center pole. The overall pattern is that of a short, wide capital T. The three poles form the wide top bar of the T with the student standing at the foot of the shorter vertical bar.
All activities are done with the 'K' Sonar cane-mounted so that the student can experience the advantage of the 'K' Sonar-cane connection. The cane and the 'K' Sonar point in the same direction. When the student hears the loudest, clearest 'K' Sonar tone from a pole, the cane is pointing directly toward the pole; and the student can align herself with the cane's direction in order to face the pole. Similarly, when the student hears the quietest 'K' Sonar feedback in the area between poles, the cane points toward the center of this opening; and the student can align herself with the cane to face the opening.
The student first familiarizes herself with the 'K' Sonar sounds associated with this pattern of poles, next walks to each pole while holding the cane pointed toward it, and then uses touch technique to walk to each pole. Finally, she walks between poles keeping the cane pointed toward the opening and then using touch technique. This sequence helps the student build the connection between information from the 'K' Sonar, the cane, and her body; she first approaches her goal (the pole or the gap between poles) keeping the appropriate sound (loud clear tone or quietest sound) straight ahead of the cane tip; this gives her perceptual/motor feedback about what she should hear in the center of her arc when approaching the goal using her chosen cane technique. She then uses her chosen cane technique to walk to the goal and maintains a line of direction in which the appropriate sound occurs when the cane points straight ahead.
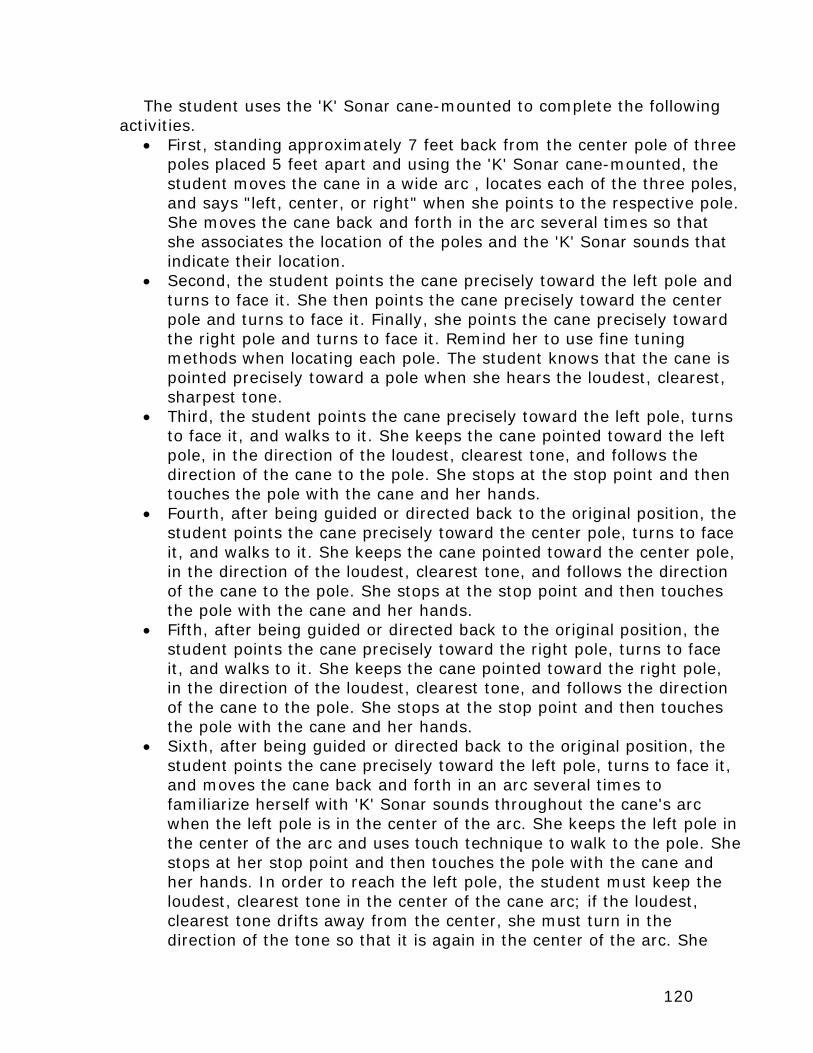
120
The student uses the 'K' Sonar cane-mounted to complete the following activities.
• First, standing approximately 7 feet back from the center pole of three poles placed 5 feet apart and using the 'K' Sonar cane-mounted, the student moves the cane in a wide arc , locates each of the three poles, and says "left, center, or right" when she points to the respective pole. She moves the cane back and forth in the arc several times so that she associates the location of the poles and the 'K' Sonar sounds that indicate their location.
• Second, the student points the cane precisely toward the left pole and turns to face it. She then points the cane precisely toward the center pole and turns to face it. Finally, she points the cane precisely toward the right pole and turns to face it. Remind her to use fine tuning methods when locating each pole. The student knows that the cane is pointed precisely toward a pole when she hears the loudest, clearest, sharpest tone.
• Third, the student points the cane precisely toward the left pole, turns to face it, and walks to it. She keeps the cane pointed toward the left pole, in the direction of the loudest, clearest tone, and follows the direction of the cane to the pole. She stops at the stop point and then touches the pole with the cane and her hands.
• Fourth, after being guided or directed back to the original position, the student points the cane precisely toward the center pole, turns to face it, and walks to it. She keeps the cane pointed toward the center pole, in the direction of the loudest, clearest tone, and follows the direction of the cane to the pole. She stops at the stop point and then touches the pole with the cane and her hands.
• Fifth, after being guided or directed back to the original position, the student points the cane precisely toward the right pole, turns to face it, and walks to it. She keeps the cane pointed toward the right pole, in the direction of the loudest, clearest tone, and follows the direction of the cane to the pole. She stops at the stop point and then touches the pole with the cane and her hands.
• Sixth, after being guided or directed back to the original position, the student points the cane precisely toward the left pole, turns to face it, and moves the cane back and forth in an arc several times to familiarize herself with 'K' Sonar sounds throughout the cane's arc when the left pole is in the center of the arc. She keeps the left pole in the center of the arc and uses touch technique to walk to the pole. She stops at her stop point and then touches the pole with the cane and her hands. In order to reach the left pole, the student must keep the loudest, clearest tone in the center of the cane arc; if the loudest, clearest tone drifts away from the center, she must turn in the direction of the tone so that it is again in the center of the arc. She

121
must also remember that two other poles are in range. As she walks toward the pole on the left, she will hear a fairly clear tone in the right part of the arc from the center pole and a softer tone in the right end of the arc from the pole on the right. All tones will become lower in pitch as she approaches the left pole.
• Seventh, after being guided or directed back to the original position, the student points the cane precisely toward the center pole, turns to face it, and moves the cane back and forth in an arc several times to familiarize herself with 'K' Sonar sounds throughout the cane's arc when the center pole is in the center of the arc. Keeping the center pole in the center of the arc, she uses touch technique to walk to the pole. She stops at her stop point and then touches the pole with the cane and her hands. In order to reach the center pole, the student must keep the loudest, clearest tone from this pole in the center of the cane arc. However, two other poles are in range. As she walks toward the center pole, she will hear a fairly clear tone in the left part of the arc from the pole on the left and a fairly clear tone in the right part of the arc from the pole on the right. All tones will become lower in pitch as she approaches the center pole.
• Eighth, after being guided or directed back to the original position, the student points the cane precisely toward the right pole, turns to face it, and moves the cane back and forth in an arc several times to familiarize herself with 'K' Sonar sounds throughout the cane's arc when the right pole is in the center of the arc. Keeping the right pole in the center of the arc, she uses touch technique to walk to the right pole. She stops at her stop point and then touches the pole with the cane and her hands. In order to reach the right pole, the student must keep the loudest, clearest tone in the center of the cane arc. However, two other poles are in range. As she walks toward the pole on the right, she will hear a fairly clear tone in the left part of the arc from the center pole and a softer tone in the left end of the arc from the pole on the left. All tones will become lower in pitch as she approaches the right pole.
• Ninth, after being guided or directed back to the original position, the student stands still and moves the cane in a slow arc to locate the area between the left and center poles. She uses fine tuning cane movements to locate the area where the least sound is heard. Keeping the cane pointed precisely toward the area of least sound, she walks between the poles in the direction in which the cane is pointing. Some tone may be heard when the 'K' Sonar points between the poles because all three poles may still be in 'K' Sonar range. However, the student knows that the 'K' Sonar and the cane are pointed toward the area of least sound in the center of the open area between the poles when slight movements of the cane to the left or right cause the sound

122
to get louder. As she walks toward the opening, volume increases only if she veers toward the left or center pole. If the tone becomes louder, she should stop, use fine tuning cane movements to relocate the area of least sound, and turn to face the direction in which the cane is pointing. The pitch of the 'K' Sonar sound will become lower as she walks toward this open space because the 'K' Sonar is coming closer to the poles that are in range. 'K' Sonar sound will disappear after the student walks between the poles.
• Tenth, after being guided or directed back to the original position, the student stands still and moves the cane in a slow arc to locate the area between the center and right poles. She uses fine tuning cane movements to locate the area where the least sound is heard. She keeps the cane pointed precisely toward the area of least sound as she walks between the poles in the direction in which the cane is pointing. The student may hear some tone when the caned points between the poles because all three poles may still be in 'K' Sonar range. However, if the cane is pointed toward the area of least sound, slight cane movements to the left or right will produce louder tones. As she walks toward the opening, volume increases only if she veers toward the center or right pole. If the tone becomes louder, she should stop and use fine tuning cane movements to relocate the area of least sound. 'K' Sonar sound will disappear after the student walks between the poles.
• Eleventh, after being guided or directed back to the original position, the student stands till and moves the cane in a slow arc to locate the area between the left and center poles. She points the cane toward the area of least sound, faces it, and then moves the cane in a wide arc to familiarize herself with 'K' Sonar sounds throughout the arc when she faces the opening between these poles. Keeping the quietest area in the center of the arc, she uses touch technique to walk between the poles. She will hear clear tones in the left and right parts of the arc from the left and center poles; and the right pole will produce a fainter tone in the right end of the arc. The pitch of all tones will lower as the student moves closer to the poles. However, if tones in the center of the arc become louder, the student should stop, rescan for the quietest area, and turn to face it before taking her next step. 'K' Sonar sound will disappear after she walks between the poles.
• Twelfth, after being guided or directed back to the original position, the student stands still and moves the cane in a slow arc to locate the area between the center and right poles. She points the cane toward the area of least sound, faces it, and then moves the cane in a wide arc to familiarize herself with 'K' Sonar sounds throughout the arc when she faces the opening between these poles. Keeping the quietest area in the center of the arc, she uses touch technique to walk

123
between the poles. She will hear clear tones in the left and right parts of the arc from the center and right poles; and the left pole will produce a fainter tone in the left end of the arc. The pitch of all tones will lower as the student moves closer to the poles. If tones in the center of the arc become louder, the student should stop, rescan for the quietest area, and turn to face it before taking her next step. 'K' Sonar sound will disappear after she walks between the poles.
Use a tape measure to set up poles in advance and to mark the student's starting point. Be reasonably precise in your measures. A discrepancy of an inch or two won't make a difference, but a discrepancy of 6 inches will.
Do this exercise prior to using it with the student. Make sure that you understand perceptually what it means to keep the clearest, loudest tone in the center of your cane arc, and how it is to experience the quietest area between poles. You need this level of understanding to discuss the student's experiences and to help her notice relevant aspects of 'K' Sonar feedback.
Use the speaker and discuss sounds and their meanings with the student. This is particularly useful if the student has difficulty picking out specific sounds or sound qualities. When using the speaker, stand or walk behind the student and point it at the back of her head. Make sure to stay out of 'K' Sonar range. Also make sure that the student is comfortable with you in close proximity to her. Procedure:
• Step 1 – Guide the student approximately 7 feet back from the center pole. Instruct her to stand still and move the cane from side to side in an arc, extending the arc to the left and right to widen the area of scan. Ask her to tell you how many objects she finds in 'K' Sonar range.
• Step 2 – Ask the student to continue moving the cane in an arc, to stop the cane when it points directly toward an object, and to tell you whether the object is on her left, straight ahead, or on her right. She should do this for two or three arcs so that she becomes accustomed to hearing objects and calling out their locations.
• Step 3 – Ask the student to locate and face the left pole. She should fine tune her scan so that the cane is pointing precisely toward the pole.
• Step 4 – Ask the student to locate and face the center pole. She should fine tune her scan so that the cane is pointing precisely toward the pole.
• Step 5 – Ask the student to locate and face the right pole. She should fine tune her scan so that the cane is pointing precisely toward the pole.

124
• Step 6 – Ask the student to locate and face the left pole, keep the cane pointing directly toward it, and walk to it. If she begins to lose the loud, clear tone of the pole, she should stop and use fine tuning cane movements to relocate it. She will hear the lowering of pitch as she approaches the left pole. She should stop at her stop point—before the cane touches the pole. After stopping appropriately, she should take another step and touch the pole with the cane and her hands to verify her position.
• Step 7 – Guide or direct the student approximately 7 feet back from the center pole. Ask the student to locate and face the center pole, keep the cane pointing directly toward it, and walk to it. If she begins to lose the loud, clear tone of the pole, she should stop and use fine tuning cane movements to relocate it. She will hear the lowering of pitch as she approaches the center pole. She should stop at her stop point—before the cane touches the pole. After stopping appropriately, she should take another step and touch the pole with the cane and her hands to verify her position.
• Step 8 – Guide or direct the student approximately 7 feet back from the center pole. Ask her to locate and face the right pole, keep the cane tip pointing toward it, and walk to it. If she begins to lose the loud, clear tone of the pole, she should stop and use fine tuning cane movements to relocate it. She will hear the lowering of pitch as she approaches the right pole. She should stop at her stop point—before the cane touches the pole. After stopping appropriately, she should take another step and touch the pole with the cane and her hands to verify her position.
• Step 9 – If the student has difficulty walking to the specified pole, use the speaker so that you and the student can hear and discuss specific 'K' Sonar sounds. Repeat Steps 2-5, and try again. If she still has difficulty doing so, stop this exercise and review relevant activities from Exercise 4.1 and 4.2.
• Step 10 – Guide or direct the student approximately 7 feet back from the center pole. Ask the student to locate the left pole, point the cane tip toward it, face it, and move the cane in an arc, listening to sounds from the left, center, and right of the arc. Ask the student to describe the differences between tones heard on the left side, the center, and the right side of the arc. If the student has difficulty doing so, use a speaker and consider the tones together. Note the silence on the left end of the arc, the clear tone from the left pole in the center of the arc, and any sound heard on the right end of the arc coming from the center and right poles. It is important that the student can differentiate the loudest, clearest tone coming from the left pole heard in the center of the arc from thinner, softer, more distorted tones

125
heard in the right portion of the arc that may come from the center and right poles.
• Step 11 – Ask the student to use touch technique, walk to the left pole, and stop at her stop point. The student should keep the clear tone from the left pole in the center of the arc, no sound in the left part of the arc, and less clear sounds from the center and right poles in the right part of the arc. The clear tone from the left pole will become lower in pitch as the student approaches it. After stopping appropriately, she should take another step and touch the pole with the cane and her hands to verify her position.
• Step 12 – Guide or direct the student approximately 7 feet back from the center pole. Ask her to stand still and move the cane from side to side in an arc. Ask the student to describe the differences between tones heard on the left and right sides of the arc from the tone heard in the center. She should hear the clear tone from the center pole in the middle of the arc and less clear tones from the left and right poles in the left and right ends of the arc respectively. If the student has difficulty doing so, use a speaker and consider the tones together.
• Step 13 – Ask the student to use touch technique, walk to the center pole, and stop at her stop point. She should keep the loudest, clearest tone from the center pole in the middle of the cane arc and the quieter sounds from the left and right poles on the left and right sides of the arc respectively. The clear tone from the center pole will become lower in pitch as the student approaches it. After stopping appropriately, she should take another step and touch the pole with the cane and her hands to verify her position.
• Step 14 – Guide or direct the student approximately 7 feet back from the center pole. Ask her to locate the right pole, face it, and move the cane from side to side in an arc. Ask her to describe what she hears. The student should notice quiet in the right part of the arc, the clear tone of the right pole in the center of the arc, and other quieter tones from the center and the left poles in the left part of the arc. If she is unsure of what she hears, use the speaker and discuss sounds with her.
• Step 15 – Ask the student to use touch technique, walk to the right pole, and stop at her stop point. She should keep the loudest, clearest tone from the right pole in the middle of the cane arc, no sound in the right part of the arc, and less clear sounds from the center and left poles in the left part of the arc. The clear tone from the right pole will become lower in pitch as the student approaches it. After stopping appropriately, she should take another step and touch the pole with the cane and her hands to verify her position.

126
• Step 16 – If, after two or three tries, the student has difficulty walking to the specified pole using touch technique, review activities in Exercises 4.1 and 4.2 and continue this exercise in a later lesson.
• Step 17 – Guide or direct the student approximately 7 feet back from the center pole. Ask her to point the cane toward the left pole and then to move the cane back and forth in a slow arc between the left pole and the center pole. As she moves the cane between these poles, ask her to pay attention to the quieter space between the two poles. Listen to this quieter space with the speaker so that you and the student can discuss it.
• Step 18 – Ask the student to move the cane very slowly through the space between the left and center poles, using fine-tuning methods to locate the area of least 'K' Sonar sound. From Exercise 4.2, she knows that she will hear the percussive pulse of the 'K' Sonar and perhaps some tone from the left and center poles. The area of least sound is found when volume increases if the cane is moved slightly to either side. The point where the least amount of sound is heard should be the center point between the left and center poles. The student’s cane tip should now point toward the center of this opening.
• Step 19 – Ask the student to turn her body slightly to face the direction in which the cane tip points. Ask her to keep the cane tip pointing toward the area of least sound and walk toward this area, following the direction of the cane. If she hears an increase of sound, she should stop and move the cane in a slow and very narrow arc to relocate the area of least sound and realign herself with it before taking her next step. If any tone is present, it will lower in pitch as she approaches the opening. Tone will disappear as she moves between the poles. The student’s cane or the student’s body may touch the left or center pole as the student moves between poles.
• Step 20 – Repeat Steps 18 and 19 once or twice until the student can walk between the poles fairly smoothly.
• Step 21 – Guide or direct the student approximately 7 feet back from the center pole. Ask her to point the cane in the direction of the center pole and then to move the cane back and forth in a slow arc between the center pole and the right pole. As she moves the cane between these poles, ask her to pay attention to the quieter space between the two poles. Listen to this quieter space with the speaker so that you and the student can discuss it. Does this space sound similar to the space between the left and center poles?
• Step 22 – Ask the student to move the cane very slowly through the space between the center and right poles, using fine-tuning methods to locate the area of least 'K' Sonar sound. She will hear the percussive pulse of the 'K' Sonar and perhaps some tone from the center and right poles. The area of least sound is found when volume

127
increases if the cane is moved slightly to either side. The point where the least amount of sound is heard should be the center point between the center and right poles. The student’s cane tip should now point toward the center of this opening.
• Step 23 – Ask the student to turn her body slightly to face the direction in which the cane tip points. Ask her to keep the cane tip pointing toward the area of least sound and walk toward this area, following the direction of the cane. If she hears an increase of sound, she should stop and move the cane in a slow and very narrow arc to relocate the area of least sound and realign herself with it before taking her next step. If any tone is present, it will lower in pitch as she approaches the opening. Tone will disappear as she moves between the poles. The student’s cane or the student’s body may touch the center or right pole as the student moves between poles.
• Step 24 – Repeat Steps 22 and 23 once or twice until the student can walk between the poles fairly smoothly.
• Step 25 – Guide or direct the student approximately 7 feet back from the center pole. Ask the student to stand still and, moving the cane from side to side in an arc, locate the space between the left and center poles, the area between these poles where the least amount of sound is heard. The student's cane should now be pointing to the middle of this opening.
• Step 26 – Ask the student to turn her body slightly to face the direction in which the cane tip points. The student should now be facing the gap between poles. Ask the student to walk toward the opening between the poles, using touch technique. Instruct the student to keep the quietest spot in the center of the arc, when the cane points straight ahead of her hip. The student will hear a loud, clear sound from the left pole in the left part of the arc; another loud, clear sound from the center pole in the right part of the arc; and a quieter tone from the right pole in the far right end of the arc. Tones heard in various parts of the arc will become lower in pitch as the student moves closer to the poles, and all sound will disappear when the student walks between the poles. The student’s cane or the student’s body may touch the left or center pole as the student moves between poles.
• Step 27 – Repeat Steps 25 and 26 once or twice until the student can walk between the poles fairly smoothly.
• Step 28 – Guide or direct the student approximately 7 feet back from the center pole. Ask her to stand still and, moving the cane from side to side in an arc, locate the space between the center and right poles, the area between these poles where the least amount of sound is heard. The student's cane should now be pointing to the middle of this opening.

128
• Step 29 – Ask the student to turn her body slightly to face the direction in which the cane tip points. The student should now be facing the gap between poles. Ask the student to walk toward the opening between the poles, using touch technique. Instruct the student to keep the quietest spot in the center of the arc, when the cane points straight ahead of her hip. The student will hear a quieter tone from the left pole in the far left end of the arc; a loud, clear sound from the center pole in the left part of the arc; and another loud, clear sound from the right pole in the right part of the arc. Tones heard in various parts of the arc will become lower in pitch as the student moves closer to the poles, and all tone will disappear when the student walks between the poles. The student’s cane or the student’s body may touch the center or right pole as the student moves between poles.
• Step 30 – Repeat Steps 28 and 29 once or twice until the student can move between the poles fairly smoothly.
• Step 31 – If, after several tries, the student cannot walk between specified poles, return to activities in Exercises 4.1 and 4.2.
• Step 32 – Additional Activities: If the student is successful with and enjoys this exercise, add another pole or two, and move poles into alternate configurations. Ask her to locate them, walk to them, and walk between them. You and the student can also construct a pattern walk—set up four or five poles 5 feet apart in a straight line so that the student can weave between them in various patterns.
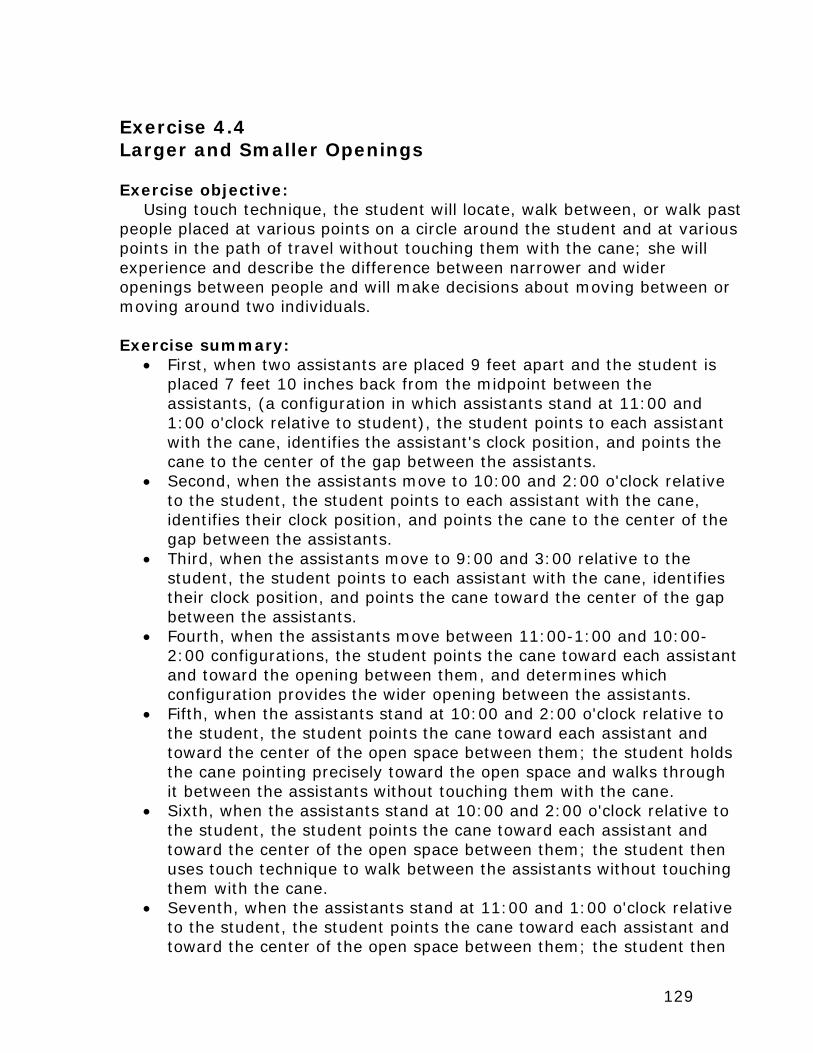
129
Exercise 4.4 Larger and Smaller Openings Exercise objective:
Using touch technique, the student will locate, walk between, or walk past people placed at various points on a circle around the student and at various points in the path of travel without touching them with the cane; she will experience and describe the difference between narrower and wider openings between people and will make decisions about moving between or moving around two individuals. Exercise summary:
• First, when two assistants are placed 9 feet apart and the student is placed 7 feet 10 inches back from the midpoint between the assistants, (a configuration in which assistants stand at 11:00 and 1:00 o'clock relative to student), the student points to each assistant with the cane, identifies the assistant's clock position, and points the cane to the center of the gap between the assistants.
• Second, when the assistants move to 10:00 and 2:00 o'clock relative to the student, the student points to each assistant with the cane, identifies their clock position, and points the cane to the center of the gap between the assistants.
• Third, when the assistants move to 9:00 and 3:00 relative to the student, the student points to each assistant with the cane, identifies their clock position, and points the cane toward the center of the gap between the assistants.
• Fourth, when the assistants move between 11:00-1:00 and 10:00-2:00 configurations, the student points the cane toward each assistant and toward the opening between them, and determines which configuration provides the wider opening between the assistants.
• Fifth, when the assistants stand at 10:00 and 2:00 o'clock relative to the student, the student points the cane toward each assistant and toward the center of the open space between them; the student holds the cane pointing precisely toward the open space and walks through it between the assistants without touching them with the cane.
• Sixth, when the assistants stand at 10:00 and 2:00 o'clock relative to the student, the student points the cane toward each assistant and toward the center of the open space between them; the student then uses touch technique to walk between the assistants without touching them with the cane.
• Seventh, when the assistants stand at 11:00 and 1:00 o'clock relative to the student, the student points the cane toward each assistant and toward the center of the open space between them; the student then

130
holds the cane pointing precisely toward the open space and walks through it between the assistants without touching them with the cane.
• Eighth, when the assistants stand at 11:00 and 1:00 o'clock relative to the student, the student points the cane toward each assistant and toward the center of the open space between them; the student then uses touch technique to walk between the assistants without touching them with the cane.
• Ninth, when the assistants stand 25 and approximately 40 feet ahead of the student in the student’s path of travel, the student walks toward them, detects them, and moves around them without touching them with the cane.
• Tenth, when one assistant stands approximately 25 feet ahead of the student and one foot to the left of the student’s path of travel and when the other stands approximately 27 feet ahead of the student and one foot to the right of the student’s path of travel, the student walks toward and around them without touching them with the cane.
• Eleventh, when the assistants stand in other instructor-determined configurations near the student’s path of travel, the student walks around them without touching them with the cane.

131
Materials: Two assistants, 'K' Sonar, cane, headphones, speaker Location:
The exercise area consists of a flat, open space that is at least 60 feet long and 25 feet wide as in a gym or empty parking lot with no obstacles or drop-offs.
• The area must not be in use by others during the lesson. • The only persons present in the area should be the student, instructor,
and instructor's assistants. Instructor notes:
In this exercise, the student expands what she has learned about locating, moving to, and moving between poles to situations involving other people. Other persons are preferred to poles for this exercise because they must move a great deal. If you cannot locate assistants for this exercise, you can move the poles used in previous exercises to required locations.
The student may comment on the different 'K' Sonar tone color for people than for poles; in general, people sound less sharp and more mellow and watery. Let the student know that you will deal with these differences more in later exercises. Tell the student in advance that assistants will be present in this lesson. Let her know who they will be, and ask if she is comfortable working with them. If she is not comfortable with one or both of them, try to locate other assistants. At the beginning of the lesson, let the student and assistants exchange greetings.
In this exercise, the student completes the following eleven obstacle detection and avoidance activities.
• First, with assistants standing at 11:00 o'clock and 1:00 o'clock relative to the student, the student moves the cane in a slow arc, locates and points to each assistant with the cane, and moves the cane back and forth between each assistant saying "left" or "right" as appropriate. The student identifies the assistants' clock position. She then points the caned to the area of least sound in between the assistants, the center of the opening between them. To achieve the configuration where assistants stand at 11:00 and 1:00 o’clock, place assistants 9 feet apart, and place the student 7 feet 10 inches back from the midpoint between these assistants. These measurements should bring the assistants to the appropriate clock positions and should allow the student to work with distances between 7 and 9 feet, a good range for detecting fairly subtle 'K' Sonar information. After placing the student and assistants at the measured spots, adjust the assistants' locations as necessary so that they stand at 11:00 and 1:00 relative to the student.

132
• Second, move the assistants to 10:00 and 2:00 o'clock relative to the student. The student moves the cane in a slow arc, points to each assistant with the cane, identifies the assistant's clock position, and points the caned to the area of least sound between the assistants, the center of the opening between the assistants. From this point on, you don't need to measure assistant placement; the student always begins from the same point and you can visually gage the new clock positions to which you direct the assistants.
• Third, move the assistants to 9:00 and 3:00 o’clock relative to the student. The student moves the cane in a slow arc, points to each assistant with the cane, identifies the assistant's clock position, and points the caned to the area of least sound, the center of the opening between assistants.
• Fourth, move the assistants between two configurations: 11:00-1:00 o’clock and 10:00-2:00 o’clock. Tell the student that she is to compare these configurations. The student moves the cane in a slow arc, points the cane toward each assistant and toward the opening between them, and determines which configuration provides the wider opening between assistants.
• Fifth, when the assistants stand at 10:00 and 2:00 o'clock relative to the student, the student points the cane toward each assistant and at the area of least sound, the center of the open space between them; the student then holds the cane pointing straight ahead of her toward the center of the open space and follows the cane through the area of least sound, passing between the assistants. 'K' Sonar sound disappears after the student passes between assistants.
• Sixth, the student is guided or directed back to her original position where the assistants remain at 10:00 and 2:00 o’clock relative to her. The student points the cane toward each assistant and then toward the center of the open space between them, the area of least sound. She walks between assistants using touch technique, keeping the area of least sound in the center of the cane arc. She hears tones on the left and right sides of the arc from the assistants on her left and right. Tones will lower in pitch as she approaches the midpoint between the assistants. After she passes the midpoint between them, tones will disappear.
• Seventh, the student is guided or directed back to her original position and the assistants are motioned to positions at 11:00 and 1:00 o’clock relative to her. The student points the cane toward each assistant and toward the area of least sound, the center of the open space between them; the student then holds the cane pointing straight ahead of her toward the center of the open space and follows the cane through the area of least sound, passing between assistants. 'K' Sonar sound disappears after the student passes between the assistants.

133
• Eighth, the student is guided or directed back to her original position where the assistants remain at 11:00 and 1:00 o’clock relative to her. The student points the cane toward each assistant and toward the center of the open space between them, the area of least sound. She then walks between the assistants using touch technique, keeping the area of least sound in the center of the cane arc. She will hear tones on the left and right sides of the arc from the assistants on her left and right. Tones will lower in pitch as she approaches the midpoint between the assistants and will disappear after she moves between them.
• Ninth, the student is guided or directed back to her original position, and the assistants are motioned to positions approximately 25 and 40 feet ahead of the student in her path of travel. The instructor stands approximately 50 feet ahead of the student, faces her, and talks to her occasionally to help her maintain a straight line of travel in which she will encounter the assistants as obstacles. Using touch technique, the student walks toward the assistants, detects them, and moves around them without touching them with the cane.
• Tenth, the student is guided or directed back to her original position. One assistant is placed approximately 25 feet ahead of the student and 1 foot to the left of her path of travel. The second assistant is placed approximately 27 feet ahead of the student and 1 foot to the right of her path of travel. The instructor stands approximately 40 feet ahead of the student, faces her, and talks to her occasionally to help her maintain a straight line of travel in which she will encounter the assistants as obstacles. Using touch technique, the student walks toward the assistants, detects them, and moves around them without touching them with the cane.
• Eleventh, when the instructor places assistants in other configurations near the path of travel, the student uses touch technique, walks toward the assistants, detects them, and moves around them without touching them with the cane.
To do this exercise well, you need to develop your plans for placing the
assistants and practice with them in advance. You will need to place the assistants in new locations throughout the exercise without verbalizing where they are to go. Assistants will not be able to ask you questions about your instructions during the exercise; and they must also move as quietly as possible when following your directions. These precautions reduce the amount of auditory information about the assistants' locations available to the student, making her rely on the 'K' Sonar for such information. Of course, any student who has learned to use her ears will gather some information about the assistants' locations as they move; the point here is to minimize obvious sound cues.

134
When you work out details with your assistants, measure and mark the assistants' first clock position and the student's starting point. After following the measurements as provided, make sure that the assistants are in the 11:00 and 1:00 o’clock positions relative to the student's starting point. If they are not, readjust positions, and mark positions for use in the lesson. Also mark assistant positions that are far ahead of the student on the path of travel, and mark the point where you will stand.
As you run through positions with your assistants, do this exercise yourself. Stand in for the student. Make sure that you can hear the assistants and the gaps between the assistants with the 'K' Sonar, and that you can distinguish narrower from wider gaps. Procedure:
• Step 1 – Position the assistants approximately 9 feet apart. Guide the student approximately 7 feet 10 inches back and midway between them. At this point, the assistants should be at 11:00 and 1:00 o'clock relative to the student. Stand behind the student to be out of range.
• Step 2 – Ask the student to stand still and move the cane in a wide scanning arc, and to tell you what she hears. How many objects are in range? Are they on the left or right? How many on each side?
• Step 3 – Ask the student to continue moving the cane in an arc, stop the cane's movement when it points directly toward the assistant in the left part of the arc, and state the clock location of the assistant relative to herself. Remind her that the cane points directly toward the assistant when the student hears the loudest, clearest tone and that she may need to use fine tuning cane movements—move the cane slightly past the assistant and then back again—to make sure that she has found the loudest, clearest tone.
• Step 4 – Ask the student to move the cane in an arc, stop the cane's movement when it points directly toward the assistant in the right part of the arc, and state the clock location of the assistant relative to herself. Remind her that the cane points directly toward the assistant when the student hears the loudest, clearest tone and that she may need to use fine tuning cane movements—move the cane slightly past the assistant and then back again—to make sure that she has found the loudest, clearest tone.
• Step 5 – Ask the student to move the cane in a slow arc, stopping the cane briefly when it points toward each assistant and calling left and right as appropriate.
• Step 6 – Ask the student to consider the empty space between the assistants. Ask what 'K' Sonar information will tell her that she has found the opening? Based on what she knows about the location of the assistants, where does she expect to find the opening?

135
• Step 7 – Ask the student to move the cane in a slow arc and to find the quieter area between the assistants. Ask her to stop cane movement when the cane points to this quiet area. What is the clock location of this area? How does this compare to the student's prediction in the previous Step?
• Step 8 – Motion to the assistants to move to 10:00 o'clock and 2:00 o'clock relative to the student. Ask the student to move the cane in a wide arc and locate each assistant. What is different about their position now? Are they farther apart or closer together than they were previously?
• Step 9 – Ask the student to point the cane toward the assistant on her left and to state the clock position of this assistant relative to herself. If the student does not point the cane directly toward the assistant, remind her to fine tune her scan. Describe the procedure if she needs prompting.
• Step 10 – Ask the student to point the cane toward the assistant on her right and to state the clock position of this assistant relative to herself. If the student does not point the cane directly toward the assistant, remind her to fine tune her scan. Describe the procedure if she needs prompting.
• Step 11 – Tell the student that the assistants will move between two configurations or patterns. In one, the opening between them will be narrow and in another the opening will be wider. Her job is to tell you which configuration has the wider opening.
• Step 12 – Motion the assistants back to their original 11:00 and 1:00 o’clock positions. Ask the student to stand still and move the cane in a wide, slow arc to locate the assistants.
• Step 13 – Ask the student to point the cane toward the left assistant, move it in a slow arc till it points to the right assistant, and then back to the left assistant.
• Step 14 – Motion the assistants to move to their 10:00 and 2:00 o'clock positions. Ask the student to move the cane in a wide slow arc to locate the assistants
• Step 15 – Ask the student to point the cane toward the left assistant, move it in a slow arc till it points to the right assistant, and then back to the left assistant.
• Step 16 – Ask the student whether this position or the previous one has the wider opening between the assistants.
• Step 17 – If the student cannot answer this question, review previous Steps in this exercise. If she has difficulty answering this question, point out that there is more silent space between the assistants in the second position than in the first.
• Step 18 – With the assistants staying in the 10:00 and 2:00 o’clock positions, ask the student to move the cane in a slow arc between

136
them and stop the cane when it points to the part of the opening that she would walk through to avoid bumping them, the quietest part of the arc.
• Step 19 – Ask the student to keep the cane pointing to the quietest part of the arc and to walk, following the direction of the cane, through the opening between the assistants.
• Step 20 – Guide or direct the student back to her original position. Ask her to locate the quietest area between the assistants and to walk toward this area using touch technique. Remind her to keep the quietest area in the middle of the arc as she walks forward through the opening between the assistants. She hears the left assistant in the left part of her arc and the right assistant in the right part of her arc. The middle of the arc includes a moderate amount of tone because the assistants are fairly close together. The student moves toward the quietest area of sound, the area of sound where volume increases when the cane moves slightly left or right.
• Step 21 – Guide or direct the student back to her original position. Motion the assistants back to the 11:00 and 1:00 positions. Ask the student to move the cane in a slow arc between the assistants and stop the cane when it points to the part of the opening that she would walk through to avoid bumping them, the quietest part of the arc.
• Step 22 – Ask the student to keep the cane pointing to the quietest part of the arc and to walk, following the direction of the cane, through the opening between the assistants.
• Step 23 – Guide or direct the student back to her original position. Ask her to point the cane toward the center of the opening between the assistants, the area of least sound, and then to walk between the assistants using touch technique. She hears the left assistant clearly in the left part of the arc and the right assistant clearly in the right part of the arc. The middle of the arc includes a fairly large amount of tone because the assistants are closer together than they were in the previous activity. The student moves toward the quietest area of sound, the area where the volume increases when the cane moves slightly left or right.
• Step 24 – Guide or direct the student back to her original position. Discuss the experience of walking between the assistants when they were at 11:00 and 1:00 o'clock and when they were at 10:00 and 2:00 o'clock. Which was easier? Which required more thought and focus? Help the student verbalize that narrower spaces between obstacles may require more concentration and attention than do wide spaces.
• Step 25 – Motion the assistants to 9:00 and 3:00 o’clock positions relative to the student. Ask the student to stand still and move the cane in an arc, pointing out objects in range by stopping the cane

137
movement when it points directly toward an object. Make sure that the student extends the arc so that the cane points directly toward the object (i.e., if she hears an object in the arc peripheries, she turns the cane even farther in the direction of the sound until she hears the loud, clear tone).
• Step 26 – Ask the student to tell you the left-right and the clock face positions of each assistant. Discuss whether the gap between them is larger or smaller than before and whether it would be easy or hard to walk between them.
• Step 27 – Ask the student to move the cane in an arc through the quiet space between assistants and then to walk between them using touch technique.
• Step 28 – Guide or direct the student back to her original position and discuss the experience. Could she hear the assistants at the ends of the cane arc as she walked between them? Were they so far away that they were out of 'K' Sonar range?
• Step 29 – Motion one assistant to approximately 25 feet ahead of the student and the second assistant to approximately 40 feet ahead. The assistants should be positioned so that, if the student walks fairly straight, they will be in the path of travel. Tell the student that she is to walk straight ahead using the cane and listening to the information from the 'K' Sonar. When she hears an obstacle, she is to stop briefly and tell you, walk 2 or 3 steps closer to it, stop, move the cane in an arc to hear the position of the obstacle, tell you her plan for moving around it, and then move around it. Discuss how she will do this (i.e., move into the quiet space on either side of the obstacle's sound). Move to a position approximately 50 feet ahead of the student, and speak to her occasionally to help her walk straight toward the assistants.
• Step 30 – Ask the student to begin walking. When she stops and tells you she hears the 'K' Sonar tone from the assistant, ask her to take 2 or 3 steps closer to the assistant, to stop and move the cane in a slow arc, and to tell you where the assistant is in terms of a clock face and what direction she would go to find clear space. Direct her to move around the assistant and continue walking.
• Step 31 – If the student bumps the assistant with the cane, repeat Step 30, with verbal feedback if the student does not seem to pick up on 'K' Sonar cues. Use a speaker, walk directly behind the student, and discuss 'K' Sonar sounds that she hears as she approaches and then moves around the assistant.
• Step 32 – After the student has passed the first assistant without bumping her with the cane, repeat Steps 30 and 31 with the second assistant.

138
• Step 33 – Guide or direct the student to her original position. Motion one assistant approximately 25 feet ahead of the student and about 1 foot to the right of the student's path of travel; motion the second assistant to a point approximately 27 feet ahead of the student and 1 foot to the left of the student's path of travel. Tell the student that she will hear two obstacles at the same time, two tones with different pitches and with the strongest, loudest tone for each obstacle at a different point in the cane arc. Walk to a position approximately 50 feet ahead of the student, and speak to her occasionally to help her walk straight toward the assistants.
• Step 34 – Tell the student to begin walking toward you and to stop when she hears 'K' Sonar tones that indicate the presence of an obstacle. After she notices the assistants with the 'K' Sonar, ask her to wait while you return to a position behind her, where you can converse more easily.
• Step 35 – Ask the student to take 2 or 3 more steps closer to the assistants so that she is approximately 7-9 feet from the first assistant. Ask her to stand still, move the cane in an arc, and listen to the location of the assistants. How many tones does she hear, where are the tones on the cane arc, and where are the assistants in terms of a clock face? Are the tones at the same or different pitches? Which assistant is nearer to her, the one on the left or the one on the right? Is there very much quiet, open space between them? Ask her how she would move to go past the assistants without touching them with the cane. What direction would she go to find clear space? Based on the amount of space between them, does the student think she could move between the assistants without bumping them? Or would she prefer to move into silent space to the left or right of both of them?
• Step 36 – Direct her to move around the assistants. • Step 37 – If the student bumps an assistant with the cane, discuss her
strategy for moving around them to determine what didn't work. Guide her back to a position approximately 7 feet back from the assistants, and use a speaker. Listen to sounds heard when she stands still and moves her cane in an arc. Discuss questions raised in Step 35.
• Step 38 – When the student moves around the assistants without bumping them with the cane, guide or direct her back to her original position, motion the assistants to a different configuration, and direct the student to walk toward them. She should stop when she hears 'K' Sonar sound, move a few steps closer to get a clear sense of the assistants locations, and then walk around the assistants without touching them with the cane.

139
Exercise 4.5 Obstacle Courses and Beyond Exercise objective:
The student will learn to move through obstacle courses of increasing complexity set up in an empty space such as a parking lot or playing field and an indoor corridor and then will avoid obstacles on a sidewalk based on 'K' Sonar feedback. Exercise summary:
• First, using touch technique with the 'K' Sonar cane-mounted, the student faces a single obstacle surrounded by empty space and walks around it without touching it with her cane based on ‘K’ Sonar feedback. The instructor guides or directs the student to points facing obstacles to be circumvented.
• Second, using touch technique with the 'K' Sonar cane-mounted, the student avoids obstacles and does not touch them with the cane as she walks around four or five obstacles placed 20 to 30 feet apart and varying in distance from a wall, bleachers, a fence, or another barrier. The obstacle arrangement must force the student to walk around outside of some obstacles and must allow the student to remain on the inside of others.
• Third, using touch technique with the 'K' Sonar cane-mounted, the student walks through an obstacle course set up in a corridor, with some obstacles forcing the student to go left around them, some forcing her to go right, and others allowing for left or right choices.
• Fourth, using touch technique with the 'K' Sonar cane-mounted, the student avoids obstacles without touching them with her cane as she walks down the sidewalk with the building line on one side and a quiet street on the other side.

140

141
Materials: Cane, 'K' Sonar, headphones, speaker Location:
The activities in this exercise are done in four distinct areas. • The first area must be wide open and must include isolated large
objects with ample open space around them. A playground with scattered trees and shrubs or a parking lot with very few cars in it would work well. There must be at least 30 feet of open space in all directions around the objects so that only one object at a time is in 'K' Sonar range when the student is within 10 feet of the object. The instructor guides or directs the student to points facing obstacles to be circumvented.
• The second area must be open, but must include a wall, fence, bleachers, or other boundary-establishing feature on one edge and must include an obstacle course set up by the instructor. Without the boundary, the student could move freely to either side of an obstacle as she did in the first activity. The boundary requires her to interpret 'K' Sonar indicators about the size of open spaces through which she can move.
• The third area is comprised of a corridor in a building in which the instructor has set up an obstacle course. The boundary on both sides forces the student to refine her skills in interpreting indicators of width and size of obstacles and clear space.
• The fourth area is comprised of a sidewalk with a building line or yards on one side and a street on the other. Here, the student notices objects to the far left and right sides of the cane arc as well as obstacles that are more clearly in her travel path. She learns to focus on objects nearer the center of the cane arc because these are the obstacles that are in her path of travel. She must listen to their width, and move around them to one side or the other. The side she chooses should be the side with the most clear space as indicated by 'K' Sonar feedback.
• Select inside and outside areas that are free of personal and vehicular traffic; the only 'K' Sonar information that the student should receive should be from the area boundaries and stationery obstacles.
• If some areas are clear of traffic at specific times, use them at such times and not at times when pedestrian or vehicular traffic is present
• All areas should be safe and free of crime. Instructor notes:
It is important that areas you choose are clear of pedestrian or vehicular traffic for several reasons. Moving pedestrians are more difficult to detect
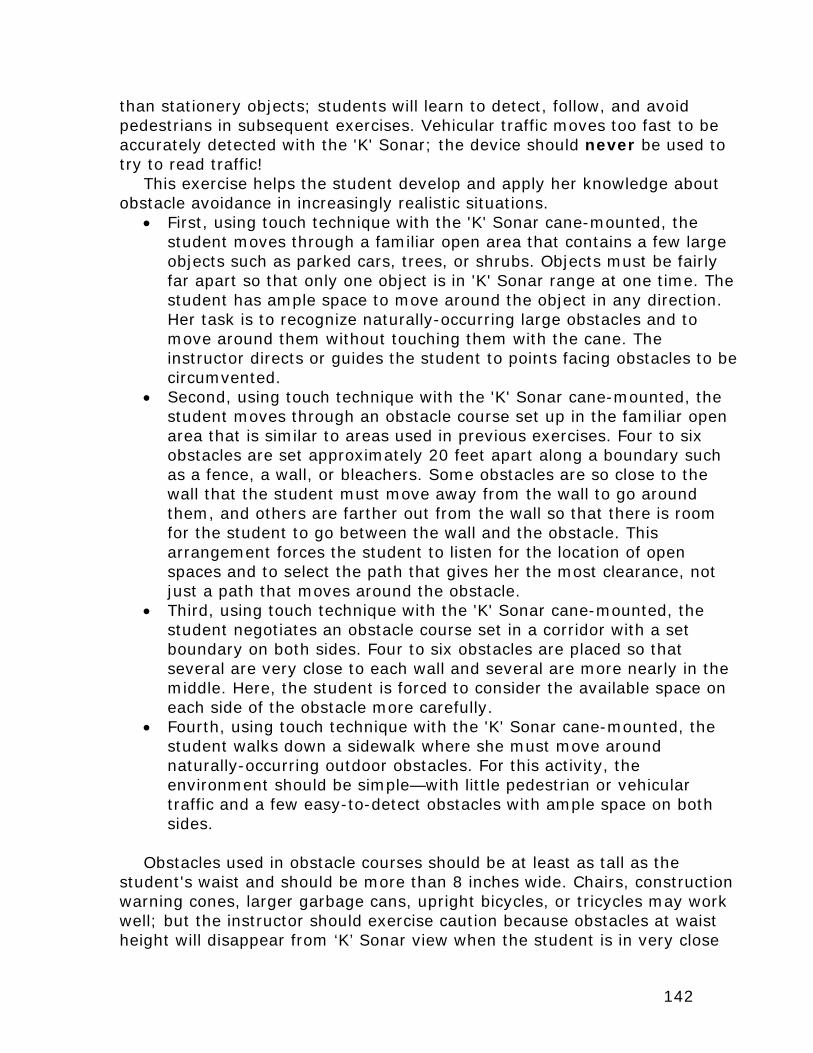
142
than stationery objects; students will learn to detect, follow, and avoid pedestrians in subsequent exercises. Vehicular traffic moves too fast to be accurately detected with the 'K' Sonar; the device should never be used to try to read traffic!
This exercise helps the student develop and apply her knowledge about obstacle avoidance in increasingly realistic situations.
• First, using touch technique with the 'K' Sonar cane-mounted, the student moves through a familiar open area that contains a few large objects such as parked cars, trees, or shrubs. Objects must be fairly far apart so that only one object is in 'K' Sonar range at one time. The student has ample space to move around the object in any direction. Her task is to recognize naturally-occurring large obstacles and to move around them without touching them with the cane. The instructor directs or guides the student to points facing obstacles to be circumvented.
• Second, using touch technique with the 'K' Sonar cane-mounted, the student moves through an obstacle course set up in the familiar open area that is similar to areas used in previous exercises. Four to six obstacles are set approximately 20 feet apart along a boundary such as a fence, a wall, or bleachers. Some obstacles are so close to the wall that the student must move away from the wall to go around them, and others are farther out from the wall so that there is room for the student to go between the wall and the obstacle. This arrangement forces the student to listen for the location of open spaces and to select the path that gives her the most clearance, not just a path that moves around the obstacle.
• Third, using touch technique with the 'K' Sonar cane-mounted, the student negotiates an obstacle course set in a corridor with a set boundary on both sides. Four to six obstacles are placed so that several are very close to each wall and several are more nearly in the middle. Here, the student is forced to consider the available space on each side of the obstacle more carefully.
• Fourth, using touch technique with the 'K' Sonar cane-mounted, the student walks down a sidewalk where she must move around naturally-occurring outdoor obstacles. For this activity, the environment should be simple—with little pedestrian or vehicular traffic and a few easy-to-detect obstacles with ample space on both sides.
Obstacles used in obstacle courses should be at least as tall as the
student's waist and should be more than 8 inches wide. Chairs, construction warning cones, larger garbage cans, upright bicycles, or tricycles may work well; but the instructor should exercise caution because obstacles at waist height will disappear from ‘K’ Sonar view when the student is in very close

143
proximity and may become a trip hazard. This happens because of the ‘K’ Sonar’s cone-shaped pattern of ultrasound emission. If a waist-high object is very close to the student, it will be below the narrow end of the ultrasound emission and will not be detected by the ‘K’ Sonar.
In the outdoor obstacle course with one boundary, place several obstacles close to the boundary so that the student must walk around the obstacle on the outside, the side away from the boundary. Place other obstacles approximately 5 to 6 feet away from the boundary so that the student has ample room to walk on the inside (boundary side) of the obstacle.
Close doors of rooms on both sides of the corridor during the third part of the exercise. Try to locate a corridor that is long enough to hold the entire obstacle course. If possible, do not use corridors with other corridors branching from them. An open door or a branching corridor usually results in lack of tone when the 'K' Sonar and cane are near the end of the arc pointing toward the door or corridor; in this exercise, students need consistent tones produced by both side walls of the corridor so that they can maintain a clear perception of the boundaries of the corridor and the obstacles in it.
When students avoid obstacles on the sidewalk, remind them that they may hear 'K' Sonar sounds from the building line on one end of the arc and from obstacles on the street side on the other end of the arc. Remind them that they need to pay attention to the obstacles in the middle of the arc because these are the obstacles directly ahead of them.
Set up obstacle courses and walk through them using the 'K' Sonar in advance. Similarly, use the 'K' Sonar to walk through your chosen sidewalk area in advance. Make sure that you can distinguish all obstacles with the 'K' Sonar. If you are in doubt about a particular item for inclusion in the obstacle courses, choose something with a more detectable sound signature. Similarly, if you are not satisfied with the clarity of sound produced by the obstacles in the outdoor walking area that you select, find a different area. Students will deal with more subtle sound signatures in the next chapter; at this point, they need unambiguous feedback. Procedure
• Step 1 – Guide or direct the student to a position facing a large object such as a tree, a parked car, or a large pillar. The student should be approximately 20 feet away from the object. There should be no other objects within approximately 30 feet of the student.
• Step 2 – Instruct the student to walk forward, using touch technique with the ‘K’ Sonar cane-mounted. Ask her to tell you when the ‘K’ Sonar indicates that an object is in its range. If the student veers away from the object that you intend her to notice, give verbal instructions to help her stay on course.

144
• Step 3 – When the student tells you that an object is in range, ask her to continue walking, to stop at the stop point, and to move around the object without touching it with the cane. Remind her that she can stop and scan the object by moving her cane in a wide arc to get more information about the object's size and shape. If the student would like assistance, use the speaker and discuss what she hears and her strategies for moving around the obstacle.
• Step 4-If the student has difficulty with this task, return to relevant activities in previous exercises before continuing.
• Step 5 – After the student has approached and moved around the first large object successfully, direct her toward other objects in the area and repeat Steps 1-4.
• Step 6 – Set up an outdoor obstacle course with four to six objects that are at least as tall as the student's waist and more than 8 inches wide (e.g., chairs, small tables, construction warning cones, garbage cans, upright bicycles, tricycles, etc.). Place obstacles approximately 20 feet apart at varying distances from an area boundary such as a fence, wall, building, or bleachers. Several obstacles should be 18-24 inches from the boundary, several should be approximately 2 to 4 feet from the boundary, and several should be approximately 5 to 6 feet from the boundary. Do not let the student hear you preparing the obstacle course.
• Step 7 – Ask the student to walk along the boundary using the touch technique with the 'K' Sonar cane-mounted. Tell her that her goal is to hear obstacles with the 'K' Sonar and to move around them without touching them with the cane. Tell her to stop and tell you when she hears an obstacle ahead. Tell her that she will hear sound from the wall or boundary when the cane moves through the part of the arc toward the boundary, and that the sound from the boundary will disappear when the cane is in the part of the arc away from it. An obstacle ahead will produce an additional tone in the 'K' Sonar feedback. As she approaches an obstacle, she may notice two tones at once, or an increase in the volume of the sound. The obstacle also will produce sound in a portion of the arc that had been previously silent or almost silent.
• Step 8 – When the student stops for an obstacle, ask her to point the cane toward the boundary and then to move it away from the boundary in a wide arc. Using a clock face with herself in the center point of the circle, ask her to tell you where, on the arc, she hears sound and where she hears either silence or minimal sound. Ask her to point the cane toward either silence or minimal sound and to state whether she will move left or right to go toward this point around the obstacle. When the student is very close to a waist-high obstacle, it will disappear from ‘K’ sonar feedback; therefore, it is important for
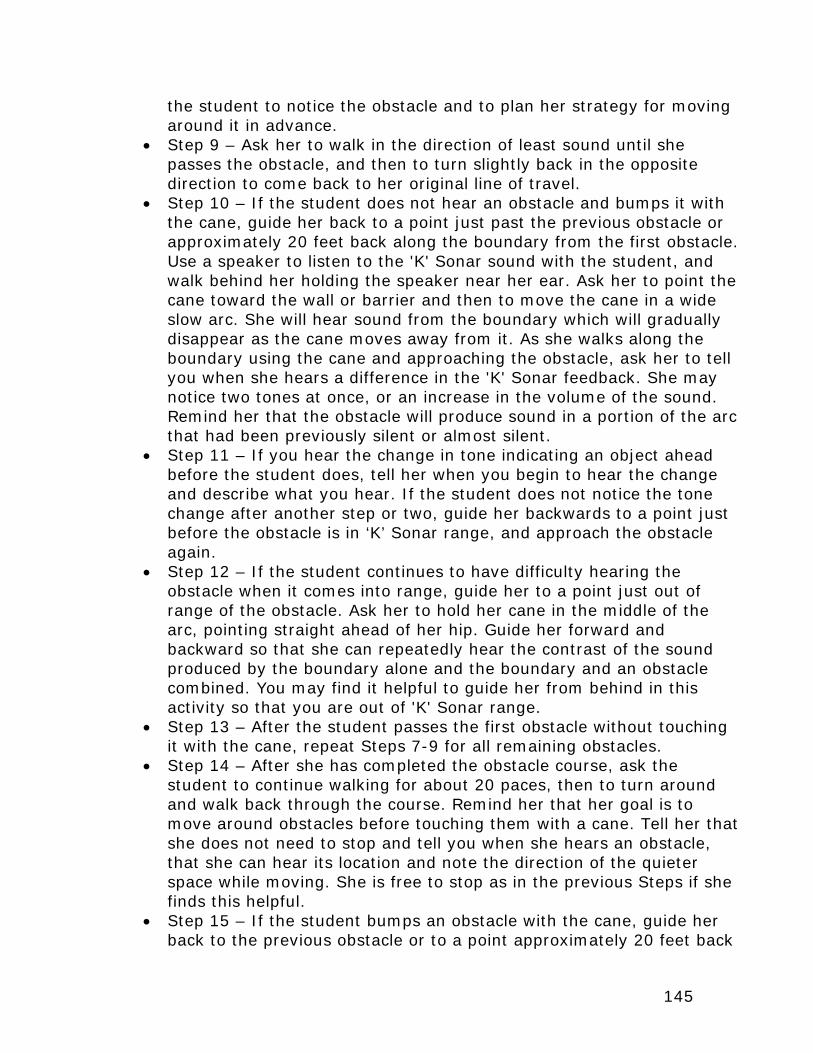
145
the student to notice the obstacle and to plan her strategy for moving around it in advance.
• Step 9 – Ask her to walk in the direction of least sound until she passes the obstacle, and then to turn slightly back in the opposite direction to come back to her original line of travel.
• Step 10 – If the student does not hear an obstacle and bumps it with the cane, guide her back to a point just past the previous obstacle or approximately 20 feet back along the boundary from the first obstacle. Use a speaker to listen to the 'K' Sonar sound with the student, and walk behind her holding the speaker near her ear. Ask her to point the cane toward the wall or barrier and then to move the cane in a wide slow arc. She will hear sound from the boundary which will gradually disappear as the cane moves away from it. As she walks along the boundary using the cane and approaching the obstacle, ask her to tell you when she hears a difference in the 'K' Sonar feedback. She may notice two tones at once, or an increase in the volume of the sound. Remind her that the obstacle will produce sound in a portion of the arc that had been previously silent or almost silent.
• Step 11 – If you hear the change in tone indicating an object ahead before the student does, tell her when you begin to hear the change and describe what you hear. If the student does not notice the tone change after another step or two, guide her backwards to a point just before the obstacle is in ‘K’ Sonar range, and approach the obstacle again.
• Step 12 – If the student continues to have difficulty hearing the obstacle when it comes into range, guide her to a point just out of range of the obstacle. Ask her to hold her cane in the middle of the arc, pointing straight ahead of her hip. Guide her forward and backward so that she can repeatedly hear the contrast of the sound produced by the boundary alone and the boundary and an obstacle combined. You may find it helpful to guide her from behind in this activity so that you are out of 'K' Sonar range.
• Step 13 – After the student passes the first obstacle without touching it with the cane, repeat Steps 7-9 for all remaining obstacles.
• Step 14 – After she has completed the obstacle course, ask the student to continue walking for about 20 paces, then to turn around and walk back through the course. Remind her that her goal is to move around obstacles before touching them with a cane. Tell her that she does not need to stop and tell you when she hears an obstacle, that she can hear its location and note the direction of the quieter space while moving. She is free to stop as in the previous Steps if she finds this helpful.
• Step 15 – If the student bumps an obstacle with the cane, guide her back to the previous obstacle or to a point approximately 20 feet back

146
from the first obstacle. Ask her to try the approach again, stopping and talking about it with you if she needs to do so.
• Step 16 – Construct the indoor obstacle course in a corridor no more than 15 feet wide. Use chairs, small tables, desks, and tall trash cans for obstacles. As with the outdoor course, obstacles should be at least as tall as the student's waist and more than 8 inches wide. Close doors along the corridor, and select a time when there will be no other passers-by. If you must use a corridor with branching corridors, tell the student to expect no or very minimal tone when passing them. Don't let the student hear you set up the obstacle course. Obstacles should be fifteen to twenty feet apart if possible.
• Step 17 – Ask the student to change the 'K' Sonar to the 2-meter range. Review this range with the student before using it. This is the range of choice for indoor work.
• Step 18 – Direct or guide the student to a position near the right wall of the corridor and approximately 25 feet back from the first obstacle. Ask her to move the cane in a slow arc, from center to right to center to left to center. Then ask her to describe what she hears. Use the speaker to listen with the student. As the cane moves toward the right wall, she will hear a lower-pitched tone from the right wall that becomes lower in pitch and perhaps louder as the cane moves to the right end of the arc. As the cane moves back toward center, the right wall will become higher in pitch and may become softer. As she moves the cane to the left of center, she may hear a high-pitched tone from the left wall that becomes lower in pitch and louder as the cane moves to the left end of the arc. The left wall becomes higher in pitch and perhaps quieter as the cane moves back to the right toward the center point. In narrow corridors, the student may hear tones from both walls at the same time when the cane points straight ahead. In wider corridors, she may not hear the left wall at all until the cane points almost directly toward 9:00 o'clock.
• Step 19 – Tell the student that her goal is to walk around obstacles without touching them with the cane. Remind her that she is walking between two walls of the corridor and that she will probably hear wall sound from both sides of the corridor. Ask the student to walk down the corridor using the cane in touch technique, with the 'K' Sonar cane-mounted. Ask her to stop and tell you when she hears an obstacle.
• Step 20 – If the student does not notice an obstacle as she approaches it, guide her approximately 15 feet back from the obstacle and repeat the approach using the speaker. Tell her when you first hear the obstacle and how you know it is there. Obstacles often produce a tone in a part of the arc that had been previously silent. They sometimes result in one louder, fuller tone or in two tones at the same time.

147
• Step 21 – After you discuss how to identify the presence of the obstacle, guide the student back to a point approximately 15 feet before the obstacle, and repeat the approach again, asking the student to tell you when she first hears the obstacle.
• Step 22 – When the student notices the obstacle ahead, ask her to approach it and to stop at or before her stop point.
• Step 23 – After she has stopped, she should examine the area by moving her cane in a wide, slow arc. In addition to listening to the low-pitched tone from the obstacle, she is to listen for relatively silent areas of the arc or for areas of the arc in which she hears only high-pitched tones. Remind her to listen to the tones on each side of the obstacle, to note the walls on both ends of the arc, and to determine whether there is more space on the left or on the right side of the obstacle. She should plan to move around the obstacle on the side with more space if possible.
• Step 24 – Ask her to describe how she will move around the obstacle and her reasons for this plan.
• Step 25 – Ask the student to walk around the obstacle and then to angle slightly back in the opposite direction to come back to her original line of travel. Give positive verbal reinforcement if the student does not bump the obstacle and does not touch the obstacle with her cane. If the space is so narrow that she cannot walk around the obstacle without touching it with the cane, give verbal reinforcement if she does not bump the obstacle with her body.
• Step 26 – If the student bumps the obstacle or touches it with her cane and has enough clear space to avoid it, guide or direct her back approximately 6 feet. Use a speaker and ask the student to move her cane in a slow wide arc while standing still. Ask her what she hears—where is the obstacle, and on which side of the obstacle will she find the largest amount of open space?
• Step 27 – After the student describes the space around the obstacle and her plan for moving around it, listen to the 'K' Sonar feedback with her as she carries out her plan. If the 'K' Sonar tells her that she is heading toward the obstacle and not toward open space, point this out and help her correct her direction.
• Step 28 – If the student continues to have problems moving around the obstacle, review activities that taught obstacle avoidance in larger spaces before continuing with this exercise.
• Step 29 – Guide or direct the student to the outside area that you have pre-selected, and ask her to change the ‘K’ Sonar range to 5 meters. Tell her that she will walk down the sidewalk using the cane with the 'K' Sonar cane-mounted, and to walk around obstacles in the path of travel without bumping them with a cane.
148
• Step 30 – Tell the student to stop when she hears an obstacle ahead, to make a long, slow arc with the cane, and to listen to the area of sound (the obstacle) and to the quieter areas on either side of the obstacle. Ask her to point with the cane in the direction in which she hears the largest area of silence or high pitched tones.
• Step 31 – When the student indicates an obstacle ahead, ask her to angle in the direction of the largest area of silence or high-pitched tones, walk through this area, and then angle back to her previous line of travel.
• Step 32 – If the student bumps an obstacle with the cane, guide her back to the previous obstacle or to a point approximately 20 feet back from the first obstacle. Ask her to try the approach again, stopping and talking about it with you if she needs to do so.
• Step 33 – After successfully moving around the first obstacle, ask her to continue walking around obstacles. She can stop and look for the best way around the obstacle as in the previous Step or she can gather this information without stopping.
• Step 34 – After she has completed the obstacle course, ask the student to continue walking for about 10 paces, then turn around and walk back through the course. Remind her that her goal is to move around obstacles before touching them with the cane. Tell her that she does not need to stop and tell you when she hears an obstacle, that she can hear its location and note the direction of the quieter space while moving. She is free to stop if she finds it helpful.

149
Exercise 4.6 Obstacles in the Real World Exercise objective:
The student will move around obstacles of various sizes without touching them with the cane and will use the upward scan position to locate and move around obstacles at chest, shoulder, face, and head height. Exercise summary:
• First, when walking down the sidewalk using touch technique with the 'K' Sonar cane-mounted, the student moves around fairly large obstacles that have at least 6 feet of clearance on one side and does not touch the obstacles with the cane. She then resumes her original line of travel.
• Second, when walking down the sidewalk using touch technique with the 'K' Sonar cane-mounted, the student moves around fairly large obstacles that have fairly small amounts (less than 6 feet) of clearance on each side and does not touch the obstacles with the cane. She then resumes her original line of travel.
• Third, when walking down the sidewalk using touch technique with the 'K' Sonar cane-mounted, the student moves around smaller obstacles that have varying amounts of clearance and does not touch obstacles with the cane. She then resumes her original line of travel.
• Fourth, when walking down the sidewalk using touch technique with the 'K' Sonar cane-mounted, the student announces "left", center", and "right" whenever an object is heard in the relevant section of the arc, moves around the obstacles in the path of travel without touching them with the cane, and then resumes her original line of travel.
• Fifth, when walking down the sidewalk with overhanging obstacles, using touch technique, and holding the 'K' Sonar in the upward scan position, the student stops when an overhanging obstacle comes into 'K' Sonar range, scans the obstacle for width and height, determines how to move past the obstacle, moves past it, and resumes her former travel path.

150

151
Materials: 'K' Sonar, speaker, headphones, cane Location:
The area must include a sidewalk with a building line on one side, a street on the other, and obstacles near the middle of the sidewalk that require the student to move around them.
• It may be necessary to work in several locations in order to find the types of obstacles and walking space needed for this exercise: Large obstacles with 6 feet or more of open space on at least one
side of them; Large obstacles with less than 6 feet of space on both sides of
them; Small obstacles with varying amounts of space around them; Obstacles that protrude at the height of the student's chest, neck,
face, or head. • The area should not include business driveways or alleys from which
traffic might emerge. • The area should be relatively safe for daytime travel. • The student will examine only overhanging obstacles tactually.
Instructor notes:
When the cane is the only tool for obtaining object preview, the student must touch an obstacle with the cane and then scan the object's width with the cane before determining the best path for moving around the object. This approach works well. However, it takes more time to move around obstacles with this method; momentum (and sometimes sense of the straight line of travel) is lost when the student stops after the cane touches the object. If the student is moving quickly and if the cane tip becomes caught in a crack or other feature of the obstacle, the student may experience the hard impact of the top of the cane in her stomach or side. Depending on how the cane tip touches the object and on how much force the student uses in moving the cane as she scans and then moves around the object, banging sounds may attract unwanted attention from the public. With the longer range of the 'K' Sonar's object preview, the student can hear the width of the object as the cane moves in its regular arc several steps before touching the object with the cane; determine a path around the object before touching it with the cane; and move around it and back into the former line of travel without losing momentum, slowing down, or attracting attention.
Cane use alone provides no object preview for obstacles that are at chest, neck, face, or head height. When the 'K' Sonar is set in the 2-meter range, held in the non-cane hand at about waist level, and pointed upward at a 45

152
degree angle, the student can hear higher-level obstacles; hand-scan them for width; and move around them without coming into physical contact with them. A disadvantage of the 'K' Sonar for higher-level obstacle detection is that it must be removed from the cane; an individual cannot obtain information about obstacles at chest, shoulder, face, or head height when the 'K' Sonar is cane-mounted.
To avoid cane contact with obstacles when the 'K' Sonar is cane-mounted, the student must focus on 'K' Sonar feedback from the middle of the arc. When loud, clear 'K' Sonar tones are heard as the cane points straight ahead of the student's hip, the student knows that she is likely to bump an obstacle with the cane if she continues to walk straight. Because the cane is held straight out from one side of the body and not from the midline, the obstacle critical area of the arc includes more of the curve toward the non-cane side of the body than toward the cane side. Obstacles heard in this area will be bumped with the cane unless the student changes her line of travel to move around them.
The following structured activities help the student refine obstacle avoidance and clearance estimation; integrate awareness of objects in the left, center, and right areas of the cane arc; and learn to scan for overhead obstacles.
• First, when walking down a sidewalk using touch technique with the 'K' Sonar cane-mounted, the student moves around fairly large obstacles that have at least 6 feet of clearance on at least one side without touching these obstacles with the cane. As the cane, and consequently the 'K' Sonar, moves through the arc, large obstacles are easier to detect than are smaller ones because the sounds resulting from large obstacles are heard across a larger portion of the arc than are the sounds resulting from smaller obstacles. This means that large obstacles are heard for a longer period of time than are smaller ones; the student therefore has a longer time to process and understand large obstacles. Similarly, the larger the clear space on either side of the obstacle, the easier it is to hear the clear space and to move toward it.
• Second, when walking down a sidewalk using touch technique with the 'K' Sonar cane-mounted, the student moves around fairly large obstacles that have fairly small amounts (less than 6 feet) of clear space on each side and does not touch obstacles with her body. Although obstacles are still large and therefore easy to detect, the student now must manage the more difficult task of locating narrower clear spaces through which to move. When the obstacle is close to another object such as the building line or a street-side feature, the student will hear some tone when the 'K' Sonar points to the clear space between the objects because both objects are in 'K' Sonar range. The student must move toward the area of highest pitch and
153
lowest volume of tone, where both the obstacle and the nearby object are as far away from the 'K' Sonar as possible. She will not hear the absence of tone characteristic of larger openings between objects.
• Third, when walking down a sidewalk using touch technique with the 'K' Sonar cane-mounted, the student moves around smaller obstacles that have varying amounts of clear space around them and does not touch obstacles with the cane. To detect these smaller obstacles, the student must listen more closely for tones of briefer duration that are heard during fewer degrees of the arc. She may need to stop and move the cane in a very slow arc to pinpoint the location of a smaller obstacle, a process similar to the subtle hand movements used to scan for fine detail in previous exercises. She also must deal with varying amounts of clear space on either side of the obstacle.
• Fourth, when walking down a sidewalk using touch technique with the 'K' Sonar cane-mounted, the student announces "left", "center", and "right" whenever an object is heard in the relevant section of the arc. She moves around obstacles in the path of travel without touching them with the cane or her body and then resumes her original line of travel. In this activity, you must help the student pay attention not only to obstacles in mid-arc, but also to objects in the left and right ends of the arc. When the student hears an object anywhere in the arc, she announces its location as left, middle, or right. At first, she may need to walk more slowly than usual so that she has time to perceive 'K' Sonar feedback and then state its direction verbally. If the student has difficulty verbalizing the direction, she can use a non-directional word such as "there" or "yes" when she perceives an object in range. Because the building line is continuous and street-side objects are not, the student will report far more objects on the building-line end of the arc than on the street-side end. The student should be able to detect large objects at the ends of the arc; however, she may miss a smaller object because the cane may be pointed away from it when she passes it. She will need to repeat the approach for any larger object at the ends of the arc that she misses, but should not be asked to repeat the approach for smaller objects that cannot be reliably detected when the 'K' Sonar is cane-mounted .The attention to all objects detected throughout the arc is necessary for instructional purposes; but the student should be reminded that she does not need to attend to all objects in ‘K’ Sonar range in real-life travel situations.
• Fifth, when walking down a sidewalk with obstacles at or above chest height, using touch technique, and holding the 'K' Sonar in the upward scan position, the student stops when an upper-level obstacle comes into 'K' Sonar range. She scans the obstacle for width and height, determines how to move past this obstacle, moves past it or deals with it in some other way, and resumes her former line of travel. When

154
the student travels through an area where she expects to find obstacles such as tree limbs or overhanging bushes that are at chest, neck, face, or head height, she can remove the 'K' Sonar from the cane, set it for the 2-meter range, and hold it in the non-cane hand at waist height, pointed upward at approximately a 45 degree angle. When she hears the clear, loud tones indicating that the 'K' Sonar is pointing directly toward an obstacle, she scans the obstacle to determine its width and height. Sometimes, there is a clear path around the obstacle, but sometimes there is not. When hedges grow out halfway across the sidewalk, the student can walk on the other side of the sidewalk until the hedges come to an end. On the other hand, when a tree in the yard on the right has long branches that hang over the sidewalk and part of the street, there may not be an obstacle-free path down the sidewalk; after scanning the branches, the student may choose to duck under them.
Select the areas for this exercise in advance. When you try these
activities in the area you have selected, make sure that you can distinguish large and small obstacles, spaces around them, and obstacles at chest height or above based on 'K' Sonar feedback. If such features are not distinguishable, find other locations to use with the student.
If the student experiences difficulty locating obstacles or finding a clear path around them, use the speaker instead of headphones so that both you and the student can hear and discuss sounds that indicate obstacles and clear space. When using the speaker while the student walks with the cane, walk close enough behind the student to maintain slack in the wire connecting the 'K' Sonar to the speaker. Hold the speaker facing the back of the student's head. Make sure that you remain out of 'K' Sonar range. You should also make sure that the student is comfortable with you in her personal space. As soon as the student shows awareness of the changes in sound patterns that indicate obstacles and clear space, ask her to switch to headphones. Procedure:
• Step 1 – Direct or guide the student to a sidewalk with large obstacles in the center such as planters, trees, benches, or bus shelters. There should be at least 6 feet of open space on both sides of these obstacles. Remind the student that she can notice and move around obstacles in her path by listening to 'K' Sonar feedback. Ask her to mount the 'K' Sonar on the cane, to use touch technique, and to stop and tell you when she notices a mid-arc obstacle. Such obstacles occur between approximately 11:00 o'clock and 1:00 o'clock on the arc.
• Step 2 – If the student does not hear an obstacle with the 'K' Sonar and touches the obstacle with the cane, guide her back to a point

155
approximately 6 feet before the obstacle. Ask her to move the cane in a slow arc. If she cannot hear the tones in the center of the arc that indicate an obstacle ahead, plug in a speaker, and prompt her when these tones occur. She should continue to make the slow arc until she notices the tones in mid-arc.
• Step 3 – When the student stops for an obstacle, ask her to move the cane in a slow, wide arc, listening for areas to the left or right of the obstacle that contain the least amount of 'K' Sonar sound. Ask the student to describe tones she hears on either side of the obstacle. Does she hear only the percussive background sound of the 'K' Sonar? This is a clear indication that there is a great deal of open space on that side of the obstacle. Does she hear higher-pitched and lower-volume tones on either side of the obstacle? This indicates that some objects are in range peripherally, but that there may be some clear space in which to walk around the obstacle.
• Step 4 – Ask the student to describe how she will move to pass the obstacle and why she chose that direction.
• Step 5 – Ask the student to move around the obstacle as she planned. Discuss the results after she has passed it.
• Step 6 – If the student bumps the obstacle with the cane or with her body as she moves around it, guide her back to a point approximately 6 feet before the obstacle. Ask her to scan again and to discuss what she hears with you. Listen to the 'K' Sonar tones through a speaker with the student. Discuss the meaning of the 'K' Sonar tones that you hear. Then follow her with the speaker as she moves around the object. Prompt her when 'K' Sonar tones become too low on either side of her, indicating that the cane is about to touch an obstacle, and direct her to move so that the low tones become higher-pitched again.
• Step 7 – Repeat Steps 3-6 for the next obstacle in the area. • Step 8 – Ask the student to walk through the remainder of the area,
stopping to scan when she hears an obstacle, determining the best path past it, and then moving around it and returning to her original line of travel. If she bumps the obstacle with the cane or her body, ask her to try passing the obstacle again.
• Step 9 – At the end of the area, ask the student to turn around and walk back through the area. When she hears an obstacle, ask her not to stop, but to listen for clear space as she moves. She should move around obstacles without touching them with the cane based on the amount and direction of the clear space that she hears with the 'K' Sonar.
• Step 10 – Guide or direct the student to an area with large obstacles in the path of travel and with less than 6 feet of clear walking space on both sides of the obstacles. Ask the student to stop when she hears an obstacle ahead, scan to determine the amount and location of clear

156
space, decide how she will move around the obstacle, and discuss her findings with you.
• Step 11 – Ask the student to move around the obstacle as she planned. Discuss the results after she has passed it.
• Step 12 – If the student bumps the obstacle with the cane or her body as she moves around it, guide her back to a point approximately 6 feet before the obstacle, and ask her to scan again. Ask her to discuss what she hears. Listen to the 'K' Sonar tones through a speaker with the student. Discuss the meaning of the 'K' Sonar tones that you hear. Then follow her with the speaker as she moves around the object. Prompt her when 'K' Sonar tones become too low on either side, indicating that the cane is about to touch the obstacle, and direct her to move so that the low tones become higher-pitched again.
• Step 13 – Ask the student to continue walking through the area, and then to turn around and return through it. She should stop when she hears an obstacle, decide how to move around it based on the amount of clear space on either side of the obstacle, move around it without touching it with the cane or her body, and resume her original line of travel.
• Step 14 – Guide or direct the student to an area with smaller obstacles in the path of travel such as utility or telephone poles. There should be varying amounts of space on either side of these obstacles. Ask the student to walk through the area, to stop when she notices an obstacle in mid-arc, to scan for clear space around the obstacle, to move past it, and to resume her original line of travel.
• Step 15 – If the student does not notice a smaller obstacle until she touches it with her cane, guide her to a point approximately 6 feet before it, and listen with her through a speaker as she moves the cane in an arc. Point out the existence of the obstacle when you hear its 'K' Sonar sound. When the student hears the obstacle, ask her to continue moving the cane in a slow, wide arc. She should plan how she will move around the obstacle, discuss her plans with you, and then move around the obstacle.
• Step 16 – The student should continue through the area, then turn around and walk back through it, moving around small obstacles without touching them with the cane or her body.
• Step 17 – Guide or direct the student to an area that includes obstacles of various sizes with varying amounts of clear space on either side of them, and that also includes street-side objects and a building line with some openings and recesses. In order for the student to perceive building-line and street-side features with the 'K' Sonar, the sidewalk should be no more than 20 feet wide. Ask the student to say "left" when she hears an object on the left end of the arc; "center" when she hears an obstacle in the mid-range of the arc; and "right"

157
when she hears an object in the right end of the arc. Because the building line is often continuous and street-side objects are not, the student will report far more objects at the building-line end of the arc than at the street-side end. The student should also move around all center obstacles, stopping and scanning for clear areas if needed.
• Step 18 – If the student does not notice an obstacle based on 'K' Sonar feedback and touches it with her cane, direct or guide her to a point approximately 6 feet back from it, and ask her to approach it again without attending to objects at the ends of the arc. After she moves around the object successfully, direct or guide her approximately 6 feet back from it again, and ask her to move around the obstacle while calling "left," "center," and "right" for objects in 'K' Sonar range.
• Step 19 – If the student misses a large street-side or building-line object, guide her back to a point approximately 6 feet before it, and ask her to listen for it again. The student may miss smaller objects at the ends of the arc because she hears 'K' Sonar information from one end of the arc only once every other stride. Take no action if the student does not notice a smaller object on the left or right end of the arc.
• Step 20 – The student should walk through the area, then turn around and return through it, avoiding obstacles based on 'K' Sonar feedback and calling the direction of objects in 'K' Sonar range.
• Step 21 – Guide or direct the student to an area with obstacles that protrude at the level of her chest, neck, face, or head. Discuss such obstacles with the student. Tree branches and hedges that have grown out over the sidewalk are the most frequently occurring obstacles of this type. Such foliage hangs lower than usual after a rain. The student can use the 'K' Sonar to obtain advanced awareness of such obstacles.
• Step 22 – Ask the student to hold the 'K' Sonar in her non-cane hand in scan position and to angle her hand upward about 45 degrees. This grip is called the upward scan position (see Chapter 2, Figures 9 and 10). It is used in combination with the 2-meter range to locate obstacles that would otherwise hit the student at chest level or above, an area that is not protected by the cane. The shorter, 2-meter 'K' Sonar range is used to minimize the amount of feedback the student receives. If the longer range was used, the student would receive feedback from all of the tree branches that were 16 feet or less ahead and above the student; restricting the range to 2 meters means that the student can more readily determine when an object is low enough to bump her chest, neck, face, or head.
• Step 23 – Guide the student to a point approximately 4 feet back from a chest or head-high obstacle. Ask her to set the 'K' Sonar to the 2-meter range. Remind her that the 'K' Sonar's percussive background

158
pulse will be faster in this range. Ask her to hold the 'K' Sonar in the upward scan position and to describe what she hears. Give her an auditory indicator of the actual location of the obstacle by tapping or shaking it. Then guide her to it so that she can examine it tactually.
• Step 24 – Guide the student back to the original position, and ask her to point the 'K' Sonar directly at the obstacle based on 'K' Sonar feedback.
• Step 25 – Ask the student to hold the 'K' Sonar in the upward scan position and to move her wrist in a slow left-right scanning arc. Ask her to describe what she hears on the street-side and on the building-side of the arc. Does the obstacle seem to disappear toward the street, or does it produce the same clear tone throughout the arc? Increasingly high pitch or the absence of 'K' Sonar tone on either side of the obstacle indicates clear space on that side. Discuss possibilities for avoiding or walking under the obstacle. She can move around it if there is higher-pitched or quiet 'K' Sonar space. If there is no higher-pitched or quiet space, she can duck down and walk forward using her cane, knowing that she may bump the obstacle.
• Step 26 – Ask the student to follow her plan for moving around this obstacle, using touch technique and holding the 'K' Sonar in her non-cane hand in the upward scan position. After she has passed this obstacle, discuss her plan and how effective it was.
• Step 27 – Ask the student to continue walking down the sidewalk using touch technique and holding the 'K' Sonar in the upward scan position in the non-cane hand. Tell her to stop when she hears 'K' Sonar feedback.
• Step 28 – If the student does not stop before bumping into an overhead obstacle, guide her approximately 4 feet back from the obstacle, use a speaker, and ask her to hold the ‘K’ Sonar in the upward scan position. Listen and describe what you hear. Guide the student a few steps farther back from the obstacle and ask her to approach it again, stopping when she hears the obstacle.
• Step 29 – When the student stops for an obstacle, ask her to scan in the side-to-side arc and determine whether there is possible clear space around the obstacle. She should discuss with you what she hears and her plan for going around or under the obstacle. She should then follow her plan, move past the obstacle, and return to her former line of travel.
• Step 30 – After the student passes several overhanging obstacles successfully by either moving around them or ducking under them, she does not need to stop and discuss them with you; she should continue through the area locating and dealing with overhanging obstacles. At the end of the area, she should turn around and walk back through it, dealing with overhead obstacles appropriately.

159
Exercise 4.7 Following a Pedestrian in Lines or Cues Exercise objective:
The student will follow a pedestrian (the instructor's assistant) at different speeds, around increasingly sharp turns, and in actual lines or cues based on 'K' Sonar feedback. Exercise summary:
• First, the student holds the cane at the midpoint of the arc and holds the 'K' Sonar in the non-cane hand above the cane and pointing straight ahead in the same direction as the cane. The student stands approximately 6 feet behind the assistant; hand scans in the left-right-left arc with the ‘K’ Sonar; turns her body to face the loudest, clearest 'K' Sonar tone; tells the assistant to move, stop, and move again; and follows the assistant as he/she does so.
• Second, the student holds the cane at the midpoint of the arc and holds the 'K' Sonar in the non-cane hand above the cane and pointing straight ahead in the same direction as the cane. The student stands approximately 6 feet behind the assistant, scans with the ‘K’ Sonar to check her alignment with the assistant, and then follows the assistant who walks several paces, stops, and walks again. Instead of telling the assistant when to move, the student perceives the assistant's movement and responds to it using 'K' Sonar feedback.
• Third, the student uses touch technique and holds the 'K' Sonar in the non-cane hand above the cane. She scans to check her alignment with the assistant and follows the assistant who walks in a straight line.
• Fourth, the student uses touch technique and holds the 'K' Sonar in the non-cane hand pointed toward the assistant. The student checks her alignment with the assistant and follows at a relatively constant distance while the assistant changes speed at unpredictable intervals.
• Fifth, the student uses touch technique with the 'K' Sonar held above the cane in the non-cane hand pointing directly at the assistant. The student turns when necessary so that she can follow the loudest, clearest ‘K’ Sonar tones from the assistant who changes direction with slow, wide-angled turns.
• Sixth, the student uses touch technique with the 'K' Sonar held above the cane in the non-cane hand pointing directly at the assistant. The student follows the assistant through increasingly sharp turns; when the assistant turns sharply, the student notices the disappearance of the loud, clear tones from ‘K’ Sonar feedback. She moves the ‘K’ Sonar in a wide, left-right-left scan, turns in the direction of the loudest, clearest tones, and continues to follow the assistant.

160
• Seventh, while standing in a line or cue, using cane technique appropriate for the situation, and holding the ‘K’ Sonar in the non-cane hand above the cane and pointed toward the assistant, the student follows the assistant through the line.

161
Materials: K' Sonar, cane, headphones, speaker, one assistant
Location:
Activities in this exercise take place in at least three different areas. • The first area is an open indoor or outdoor space, at least 50 feet long
and 20 feet wide, with no obstacles or other permanent objects that could be in 'K' Sonar range when the student is following the assistant.
• The second and third areas are real-life lines or cues in which the student follows the assistant—for example, grocery stores, banks, cafeterias, post offices.
Instructor notes: In this exercise, the student develops the ability to follow the assistant—
moving, turning, and changing pace with the assistant and maintaining a constant comfortable distance between herself and the assistant. She then applies these skills to real-life situations involving moving up through a line or cue. In all following activities, the student holds the ‘K’ Sonar in her non-cane hand focused on the assistant. Continuous ‘K’ Sonar feedback is needed to make turns and pace changes in sync with the assistant.
The student develops these skills by completing the following sequence of increasingly difficult activities.
• First, the student holds the cane at the midpoint of the arc, straight ahead of her hip. She holds the ‘K’ Sonar in her non-cane hand above the cane pointing in the same direction as the cane. She scans to make sure that she is turned toward the assistant, who stands approximately 6 feet ahead of her. There is approximately 3 feet of space between the student’s cane tip and the assistant, a reasonably comfortable distance between strangers waiting in a line or cue. She asks the assistant to move 2 steps forward. The K’ Sonar pitch becomes higher as the assistant moves farther away from the ‘K’ Sonar. The student takes several steps in the direction of the loudest, clearest ‘K’ Sonar tone and stops when the pitch returns to its former lower level. The student should tell the assistant when to move and stop during this first activity. Knowing precisely when the assistant moves forward helps the student associate increasing 'K' Sonar pitch with the assistant's movement away from her; the unchanging higher pitch with the assistant's new, more distant location; and the decreasing pitch with the decreasing distance between herself and the assistant as she moves toward the new position. She learns to stop at an appropriate distance from the assistant by experiencing the return of the 'K' Sonar tone to the same lower pitch she heard before she told the assistant to move. As she repeats this activity, she initiates its separate steps (assistant moving forward and stopping; student

162
moving forward and stopping) more quickly so that steps blend together into a single sequenced action.
• Second, the student holds the cane at the midpoint of the arc, straight ahead of her hip. She holds the ‘K’ Sonar in her non-cane hand above the cane pointing in the same direction as the cane. She scans to make sure that she is turned toward the assistant, who stands approximately 6 feet ahead of her. Remind the student to keep the ‘K’ Sonar pointed toward the assistant and to follow him/her, moving up when he/she moves and stopping when he/she stops. In this activity, you, not the student, tell the assistant when to move. Use nonverbal communication with the assistant so that the student must rely on 'K' Sonar feedback to hear the assistant move forward and stop; after the student moves up to the new position appropriately, cue the assistant to move up again.
• Third, the student uses touch technique and holds the 'K' Sonar in the non-cane hand above the cane. She scans with the ‘K’ Sonar to check her alignment with the assistant and follows the assistant who walks in a straight line. If the ‘K’ Sonar tone becomes softer or distorted, she should scan with the ‘K’ Sonar and turn in the direction of the loudest, clearest tone so that the assistant is again straight ahead of her. She must also keep the pitch from changing as she follows. If the pitch becomes higher, she should move faster; if the pitch becomes lower, she should slow down.
• Fourth, the student uses touch technique and holds the 'K' Sonar in the non-cane hand pointed toward the assistant. The student checks her alignment with the assistant and follows at a relatively constant distance while the assistant changes speed from slow to moderate to fast at unpredictable intervals. This activity helps the student realize that she may need to move faster or slower, depending on speed changes made by the person she is following. It also helps her stay focused on the pitch of the 'K' Sonar's tone, making sure that she moves at whatever speed is needed to keep it at a moderately low pitch that indicates a reasonable distance between herself and the person ahead of her.
• Fifth, the student uses touch technique with the 'K' Sonar held above the cane in the non-cane hand pointing directly at the assistant. The student turns when necessary so that she can follow the loudest, clearest ‘K’ Sonar tone from the assistant who changes direction with slow, wide-angled turns. In this activity, the assistant begins to vary direction, turning slightly, walking straight for a few steps, and turning again. When the assistant turns at a 20 or 30 degree angle, the ‘K’ Sonar tone becomes softer or somewhat distorted. Until now, this change happened only when the student veered away from the assistant. Now the student experiences the same sensation because

163
the assistant has veered away from her. If the student does not notice this change, the assistant will walk out of 'K' Sonar range at some point. In order to continue following, the student must notice this change of tone, scan with the ‘K’ Sonar to again locate the loud, clear tone, and turn in its direction.
• Sixth, the student uses touch technique in an open area with the 'K' Sonar held above the cane in the non-cane hand pointing directly at the assistant. The student follows the assistant through increasingly sharp turns; when the assistant turns sharply, the student notices the disappearance of the loud, clear tone from ‘K’ Sonar feedback. She moves the ‘K’ Sonar in a wide, left-right-left scan, turns in the direction of the loudest, clearest tones, and continues to follow the assistant.
• Seventh, while standing in a line or cue, using cane technique appropriate for the situation, and holding the ‘K’ Sonar in the non-cane hand above the cane and pointed toward the assistant, the student follows the assistant through the line. The student must notice 'K' Sonar feedback from other objects in range so that she can distinguish the person she is following from nearby objects.
Try all activities in this exercise in advance with your assistant. Stand in
for the student. You must understand how these activities feel and sound so that you can help your student learn to listen for salient 'K' Sonar feedback. Make sure that your assistant understands what you want him/her to do. You will need a communication system that allows you to remind the assistant of the next task without verbalizing it to the student.
The selection of a large, wide open area is very important for initial following activities. When learning to follow, it is helpful to expose the student only to information about the object being followed. If other obstacles are in 'K' Sonar range at the same time as the assistant, the student will need to determine which of several 'K' Sonar tones refer to the person to be followed. The assistant also needs sufficient maneuvering space to move through wide turns and then through tighter ones.
Procedure:
• Step 1 – Direct or guide the student to a position approximately 6 feet behind the assistant. Ask the student to hold the cane in the center of the arc, pointed straight ahead of her hip. She should hold the ‘K’ Sonar in her non-cane hand above the cane and pointing in the same direction as the cane. She should scan slowly with the ‘K’ Sonar and stop when the loudest, clearest tone is heard. she should make sure that she faces the direction of this loud, clear tone. Because the 'K' Sonar points squarely at the assistant who is approximately 6 feet ahead, a fairly low-pitched, full, clear tone results.

164
• Step 2 – The student should tell the assistant to take 3 steps forward and then stop. After the assistant has done so, ask the student to describe what she has heard from the 'K' Sonar. When the assistant moves forward, 'K' Sonar pitch increases; when the assistant stops, the pitch stops increasing—that is, the pitch stays the same at the new higher level.
• Step 3 – Ask the student to move forward until the pitch is at the same lower level as it was before the assistant moved. Remind her that the 'K' Sonar should be pointed toward the loudest, clearest tone; she can scan with the ‘K’ Sonar between steps to check this if she wishes. If the student moves too close to the assistant, instruct her to check out the distance by taking another step and touching the assistant with the cane. Tell her to back up 3 steps from the assistant and listen to the 'K' Sonar pitch when she is at an appropriate distance.
• Step 4 – When the student is in the appropriate position, approximately 3 steps behind the assistant, direct her to tell the assistant to move forward again. The assistant should take 3 more steps forward.
• Step 5 – Ask the student to move toward the assistant. If the student stops too close to or too far away from the assistant, instruct her to check her position; if she stops at an appropriate distance, give her positive verbal reinforcement.
• Step 6 – Repeat Steps 2-5 several times until the student begins to follow the assistant in a more natural, fluid manner.
• Step 7 – Tell the student that you will signal the assistant to move forward, stop, and move forward again, without giving the student advanced notice of the assistant’s movements. Now, the student must rely totally on ‘K’ Sonar feedback to determine when the assistant moves forward. Tell the student to observe the assistant moving forward, to move up appropriately when the assistant stops, and to keep the ‘K’ Sonar pointed toward the assistant in readiness for his/her next move.
• Step 8 – Nonverbally cue the assistant to move forward 3 or 4 paces; to stop and wait for the student to follow; and then to move forward again. Alter the amount of distance that the assistant moves and the length of time the assistant stands still. Give the student ongoing feedback about her following activities so that she has external corroboration of what she is perceiving from the 'K' Sonar, or correction if she is misinterpreting 'K' Sonar feedback. For example, if the student does not move when the assistant moves, ask the student what she heard from the 'K' Sonar. She should hear the pitch getting higher, as an indicator that there is more distance between her and

165
the assistant. When distance opens up ahead of her in a line, it is her turn to move forward.
• Step 9 – Ask the student to use touch technique as she follows the assistant. Remind her that she should keep the ‘K’ Sonar pointed toward the assistant; if tones become quieter or distorted, she should scan to relocate the assistant and align herself appropriately.
• Step 10 – Nonverbally cue the assistant to move 3 steps forward, then to stop to wait for the student, and then move 3 more steps forward. Repeat this sequence several times, giving the student ongoing feedback about her following activities.
• Step 11 – Nonverbally cue the assistant to begin moving at varying speeds—fairly fast, moderate, and slow. Actual movement speeds will depend on the student's typical pace and should be practiced in advance with the assistant. Continue giving the student feedback about her actions.
• Step 12 – After several such speed changes, stop the activity and ask the student to describe her experience. Discuss how the 'K' Sonar pitch moves quickly from lower to higher as the assistant speeds up, and how the pitch rapidly becomes lower when the assistant slows down. The student's task is to move at whatever pace is needed to maintain the pitch at a constant, moderately low level.
• Step 13 – Nonverbally cue the assistant to begin moving again at varying speeds. Give the student ongoing feedback about her following activities. If the student experiences difficulties changing her pace, use a speaker, walk directly behind her, and discuss 'K' Sonar pitch changes that alert her to the need to change her pace.
• Step 14 – Nonverbally cue the assistant to angle slightly to the right or left when moving forward. When the assistant angles, ‘K’ Sonar tone becomes quieter and more distorted; to continue to follow, the student must scan with the ‘K’ Sonar and locate and turn toward the loudest, clearest tone. If the student continues to follow, give feedback on her success. If she loses the assistant, remind her to scan and relocate him/her. Discuss the experience of following someone who turns.
• Step 15 – Tell the student that the assistant will now make some more noticeable turns when moving forward. The student will detect these turns because of noticeable changes in ‘K’ Sonar volume and distortion or because, in the case of very sharp turns, the ‘K’ Sonar tone will disappear. When such a change occurs, the student should make very wide scans with the ‘K’ Sonar, locate its tone, and turn to align herself with the loudest, clearest tone again.
• Step 16 – Nonverbally cue the assistant to move forward and to make wide turns, up to 45 degrees. Give positive feedback about following, or process what happened if the student loses the assistant.

166
• Step 17 – Tell the student that the assistant will make sharper turns and will slow down or speed up the pace. Continue to give the student feedback about her following activities. If the student is not successful, return to previous Steps in this exercise.
• Step 18 – Nonverbally cue the assistant to make a 90 degree turn. Stop the assistant and process this experience with the student. If the student was able to follow the assistant through the 90 degree turn, ask her to verbalize what 'K' Sonar information cued her about this turn. If she was not successful, ask her what she noticed from the 'K' Sonar and discuss how she could use this information to locate and continue to follow the assistant. For example, if the loud, clear tone ahead "disappeared," and if a tone with increasing pitch was heard at the extreme left or right end of a wide scan with the ‘K’ Sonar, the student could continue to follow by turning in the direction of the tone and aligning herself with its clearest, loudest manifestation.
• Step 19 – Continue this process with more 90 degree turns, discussing them with the student as needed, until the student is able to follow the assistant around such turns.
• Step 20 – Nonverbally cue the assistant to include sharper turns, as much as 180 degrees. Continue to give feedback and to discuss what the student hears from the 'K' Sonar. Discuss types of lines or cues in which 90 and 180 degree turns are often made.
• Step 21 – Practice following the assistant using touch technique with the 'K' Sonar held in the non-cane hand in familiar line settings, such as a cafeteria line or line coming into the classroom. Then try some unfamiliar lines.
• Step 22 – If the student has mastered this activity and enjoys it, explore additional lines—lines marked with ropes or ribbons where persons change direction at either 90 or 180 degree angles; several lines moving parallel to one another, etc.

167
Exercise 4.8 Avoiding a Pedestrian Exercise objective:
The student will avoid collisions with a pedestrian based on 'K' Sonar feedback. Exercise summary:
• First, while standing still and holding the cane at the midpoint of the arc with the 'K' Sonar cane-mounted, the student recognizes that the assistant approaches her on a collision course.
• Second, while standing still and holding the cane at the midpoint of the arc with the 'K' Sonar cane-mounted, the student recognizes that the assistant approaches her on an offset parallel course that will not result in a collision.
• Third, while walking in an open area and using touch technique with the 'K' Sonar cane-mounted, the student recognizes a collision approach, stops, pulls the cane in vertically, and waits for the assistant to move around her. The student does not stop when the assistant approaches on an offset parallel course.
• Fourth, holding the cane at the midpoint of the arc and standing still in obstacle free space, the student distinguishes the assistant’s movement across the path of travel close to the student from the assistant’s movement across the path of travel far from the student based on 'K' Sonar feedback.
• Fifth, while walking in an open area and using touch technique with the 'K' Sonar cane-mounted, the student stops when the assistant crosses the path of travel close to the student and does not stop when the assistant crosses the path of travel farther away from the student.
• Sixth, while walking in an open area and using touch technique with the 'K' Sonar cane-mounted, the student recognizes the assistant’s movements at varying distances and angles and stops to avoid collision when necessary.

168
169
Materials: 'K' Sonar, cane, headphones, speaker, one assistant Location:
The area for this exercise must include obstacle-free space that is at least 50 feet long and 30 feet wide.
• The area can be indoors or outdoors. • The area must not have steps or drop-offs. • There should be no pedestrian or vehicular traffic through the area at
the time of the lesson. Instructor notes:
In this exercise, the student focuses on the kinds of pedestrian movements that can be detected by the 'K' Sonar and learns to respond appropriately to avoid a collision. The pedestrian role is taken by an assistant. When the student becomes aware of a potential collision situation, she prevents the collision by stopping to let the assistant pass. Although the student could use ‘K’ Sonar feedback to move out of a pedestrian’s path, this approach can lead to disaster if both the pedestrian and the student attempt to move out of each other’s way at the same time.
The following six sequenced activities teach the student to detect specific types of pedestrian movement with the 'K' Sonar and to stop for the pedestrian to pass when a collision is possible.
• First, the student stands still and holds the cane at the midpoint of the arc with the 'K' Sonar cane-mounted. The assistant stands approximately 25 feet ahead of the student, faces her, and moves quickly toward the student on a head-on collision course. The student knows that the assistant is facing her squarely because the 'K' Sonar tone is full and clear; the student also knows that the assistant is moving toward her quickly because the pitch of the 'K' Sonar tone moves quickly down the scale from high to low. Rapid pitch change from high to low and loud, clear, distortion-free tone are the indicators of a collision course. Before the tone reaches the low growl of the student's stop point, the student should pull her cane in vertically and wait for the assistant to move around her.
• Second, the student stands still and holds the cane at the midpoint of the arc with the 'K' Sonar cane-mounted. The assistant stands approximately 20 feet ahead of and approximately 4 feet to the left of the student and walks quickly toward the student. In this situation, the assistant passes the student without danger of collision. The 'K' Sonar does not point squarely at the assistant because he/she is approximately 4 feet to the left of the student. Consequently, a relatively small amount of ultrasound reflects back from the assistant, resulting in a quieter, thinner 'K' Sonar tone. As the assistant
170
approaches the student, the 'K' Sonar tone becomes lower in pitch. The thinner, quieter, more distorted 'K' Sonar tone and quickly lowering pitch are indicators of a pedestrian who will pass the student without colliding. To help the student integrate the experience of this 'K' Sonar sound signature and its meaning, this non-collision approach pattern is repeated several times on both sides of the student and with varying angles of approach.
• Third, as the student walks in an open area using touch technique with the 'K' Sonar cane-mounted, the assistant makes a series of collision and non-collision approaches toward the student. The student recognizes the full, clear tone of a collision approach; she stops, pulls her cane in vertically, and waits for the assistant to go around her. The student continues to walk when she hears thinner, softer tone of a non-collision approach. Using touch technique gives the student some additional information about the assistant 's angle of approach. If the student hears a loud, clear tone in the center of the cane arc and if the pitch of that tone moves from high to low quickly, the student knows that she and the assistant are on a collision course. If, on the other hand, the student hears the loudest, clearest 'K' Sonar tone in the right or left end of the arc, the student knows that she and the assistant are not on a collision course.
• Fourth, as the student stands still and holds the cane in the center of the arc with the 'K' Sonar cane-mounted, the assistant walks across the student's path of travel several times 12 to 15 feet ahead and several times 6 to 9 feet ahead. Crossing the student's path produces a thin tone that becomes slightly lower and much fuller, and then becomes higher and thin again. This changing tone corresponds to the changing distance and angle between the assistant and the 'K' Sonar. When crossing a student's path, the assistant enters 'K' Sonar range far out on the periphery of the ultrasound transmission pattern. Because very little ultrasound reaches the assistant, he/she reflects very little ultrasound back to the 'K' Sonar, and a very thin tone is produced. As the assistant moves toward the student's travel path, the pitch lowers slightly because the assistant is moving closer to the 'K' Sonar; and the tone becomes fuller because the assistant, moving into increasingly high levels of ultrasound concentration, reflects increasing amounts of ultrasound back to the 'K' Sonar. As the assistant crosses the student's travel path and moves into the periphery of ultrasound transmission, the tone becomes higher in pitch and thinner in quality again. When this entire sound signature is very high in pitch, the assistant is crossing the student's path far ahead of the student and will be out of the way long before the student reaches a point at which collision can occur. However, when this sound pattern is more moderate in pitch, the assistant is crossing the student's path closer to

171
the student—and the assistant and student may reach the same point at the same moment. In order to avoid a collision, the student must be able to recognize the sound signature of a pedestrian approaching her travel path at close range— the moderately-low thin tone that becomes slightly lower in pitch and much fuller in quality. In this situation, the student stops and pulls her cane into vertical position to avoid a collision.
• Fifth, as the student walks in an open area using touch technique with the 'K' Sonar cane-mounted, the assistant crosses the student's path at varying distances ahead of the student. The student stops and waits for the assistant to move across her path when the assistant is fairly close to the student, and ignores the assistant 's movements when the assistant crosses her path farther ahead. If the student has difficulty determining when she should stop to let the assistant cross in front of her, set up specific collision and non-collision situations; use a speaker, and discuss salient 'K' Sonar cues with the student in each situation.
• Sixth, as the student walks in an open area using touch technique with the 'K' Sonar cane-mounted, the assistant approaches the student head-on, walks past the student at an angle that will not result in a collision, and crosses the student's path at varying distances ahead of the student. The student avoids colliding with the assistant or touching the assistant with the cane.
Throughout this exercise, the assistant will need to approach the student
from specific directions and at specific angles. During some of these approaches, the student will be standing still, but in others she will be moving. You will need to nonverbally cue the assistant about the type of approach to use next. These considerations support the need for advanced planning and practice with your assistant before teaching this exercise.
Select the area you will use, and complete these activities as if you were the student; make sure that you can distinguish 'K' Sonar feedback that you will ask your student to distinguish. You may also find it helpful to mark out student and assistant starting positions for these activities.
Procedure:
• Step 1 – Ask the student to mount the 'K' Sonar on the cane and to hold the cane in the middle of the arc straight ahead of her hip. Cue the assistant to stand facing the student approximately 20 feet away and to walk quickly toward the student, stopping 2 paces away from the student's cane tip.
• Step 2 – Ask the student what she heard from the 'K' Sonar and how she would interpret this information. A pedestrian moving straight toward the student on a collision course produces tones that begin

172
high and slide down the scale as the pedestrian moves closer. Tones are also full, loud, and clear because the pedestrian is facing the 'K' Sonar squarely. If the pedestrian does not stop, the student and pedestrian will collide. Discuss methods for preventing a collision. Encourage the student, both in this exercise and in actual travel, to stop and pull her cane into vertical position so that a pedestrian has clear space in which to move around the student. Although the student could detect clear space around a pedestrian with the ‘K’ Sonar, it is preferable for the pedestrian to move around the student; if both the student and the other person tried to move out of one another’s path, they could easily move in the same direction and collide anyway.
• Step 3 – Tell the student that the assistant will approach her on a collision course, and that the student should pull her cane into the vertical position and allow the assistant to move around her. Cue the assistant to return to the original position approximately 20 feet ahead of the student, to walk quickly toward the student, and top move around the student.
• Step 4 – Discuss the results. Did the student pull in her cane to give the assistant clear space to move around her? If the student did not recognize the collision sound signature, repeat this step, using the speaker and discussing ‘K’ Sonar tones.
• Step 5 – Signal the assistant to move to a position approximately 20 feet ahead of the student and approximately 4 feet to the student's left. Tell the student that the assistant will walk in the student's direction, but will be several feet to the student's left—not on a collision course. Ask the student to hold the cane at the midpoint of the arc, straight ahead of her hip, and to listen to 'K' Sonar feedback as the assistant approaches and passes the student. Signal the assistant to walk quickly in a straight line so that the assistant will pass the student's left side. Ask the student to describe what she heard.
• Step 6 – Discuss the 'K' Sonar feedback with your student. When the assistant is not facing the 'K' Sonar squarely, the resulting tone is somewhat distorted, thinner, and quieter in volume. The pitch moves from high to low as the assistant approaches the 'K' Sonar. However, the tone remains thin and/or distorted as the assistant passes the student and moves out of 'K' Sonar range.
• Step 7 – If the student has difficulty describing her experience of this activity, repeat Steps 5 and 6 using a speaker and discussing the thinner quality of 'K' Sonar feedback that indicates an offset—rather than a head-on—approach.
• Step 8 – Cue the assistant to move to a position approximately 20 feet ahead of the student and approximately 4 feet to the student's right. The assistant should walk back toward the student, passing the
173
student on the student's right side without bumping her. Ask the student to listen to 'K' Sonar feedback and then discuss her interpretation with you. Was the assistant heading toward the student on a collision course or on an offset course? How can the student tell? What cues can the student use to tell the difference? If necessary, repeat this activity using a speaker and discussing 'K' Sonar feedback as it occurs.
• Step 9 – Tell the student that the assistant will walk toward the student, sometimes on a collision course and sometimes on an offset course. Ask the student to tell you when the assistant is walking straight toward her on a collision course and when the assistant is walking toward her on an offset course that will not result in a collision. The student is to pull her cane into the vertical position and stand still when the assistant gets very close to the student on a collision course (e.g., when the pitch becomes lower and the tone is full and loud). The student should not move her cane when the assistant approaches her on a non-collision course (e.g., when the pitch becomes lower and the tone is thin and distorted). Cue the assistant for three head-on and three parallel approaches.
• Step 10 – After the student has responded appropriately to collision and parallel approaches, tell the student to walk straight ahead using touch technique with the 'K' Sonar cane-mounted. The assistant will approach the student on a collision or a parallel course. The student should stop and move her cane into a vertical position when the assistant approaches head-on, but should continue walking when the assistant approaches on a parallel course. The student will recognize a head-on collision approach when the loudest, clearest tones occur in the middle of the cane arc and become lower in pitch as she moves forward. When the assistant approaches her on a parallel course, the loudest, clearest tones will be heard in the left or right sides of the arc, not straight ahead at the 12:00 position. Cue the assistant for three collision and three non-collision approaches.
• Step 11 – If the student does not respond appropriately to a collision approach, repeat Step 10 using the speaker so that you and the student can discuss 'K' Sonar feedback as it occurs. You can tell the assistant to "freeze" in a particular spot in order to spend more time discussing 'K' Sonar feedback at that point.
• Step 12 – Ask the student to hold the cane pointing straight ahead of her hip in the middle of the arc. Signal the assistant to walk from the student's left to right, crossing her path at a 90 degree angle 12 to 15 feet ahead of the student. Ask the student to describe and interpret 'K' Sonar feedback. When the assistant enters 'K' Sonar range, the initial sound is very thin in quality and high in pitch. The tone lowers slightly in pitch and becomes very full in quality when the assistant moves

174
across the student's path, and then becomes higher in pitch and very thin in quality as the assistant moves away from the student's travel path. This tone progression—very high and thin to slightly lower and full to very high and thin—indicates that a pedestrian is crossing the student's path far ahead of the student.
• Step 13 – Signal the assistant to cross the student's path from left to right 6 to 9 feet ahead of the student. The student will notice the same pitch/quality shift from higher/thinner to lower/fuller to higher/thinner that she heard in the previous Step. However, the 'K' Sonar pitch will be considerably lower than it was in the previous activity because the assistant is much closer to the student as he/she crosses the student's path. Ask the student to interpret the meaning of the 'K' Sonar feedback that she hears.
• Step 14 – Ask the student to walk straight ahead using touch technique with the 'K' Sonar cane-mounted. Tell the student that the assistant will walk across her path of travel at various distances from her. If the 'K' Sonar pitch is very high, the assistant is far ahead of the student and will be out of the student's path before she gets close enough to collide. However, if the 'K' Sonar pitch is moderately low, the assistant is crossing the student's path at a point much nearer to the student. In this case, the student should stop until the assistant has crossed her path to avoid bumping the assistant with the cane or colliding.
• Step 15 – If the student does not avoid a collision, repeat this activity using the speaker so that you and the student can discuss 'K' Sonar feedback as it occurs. You can tell the assistant to freeze in a particular spot in order to spend more time discussing 'K' Sonar feedback at that point.
• Step 16 – Tell the student to use touch technique with the 'K' Sonar cane-mounted and to avoid colliding with the assistant. Explain that the assistant will approach her in many ways—head-on, on a parallel course, and across her path at various distances from her. She should stop when necessary to avoid collisions . Cue the assistant to make at least two of each of the following approaches: head-on collision; parallel course, non-collision; intersecting path closer to student; intersecting path farther from student.

175
Exercise 4.9 Working With Crowds Exercise objective:
The student will walk within or move through crowds and will avoid colliding with and touching pedestrians with the cane based on 'K' Sonar feedback. Exercise summary:
• First, while walking in an open area and using touch technique, the student moves through a loosely-packed group of four stationary volunteers and compares how well she avoids collisions when using each of the following ‘K’ Sonar strategies: cane-mounted in the 5-meter range; cane-mounted in the 2-meter range; hand-held in the 2-meter range.
• Second, while using touch technique and holding the 'K' Sonar (set to the 2-meter range) in the non-cane hand above the cane pointed straight ahead, the student moves through various formations of a larger group of volunteers, including one in which volunteers simulate a moving crowd, without touching them with the cane; she moves the ‘K’ Sonar in a slight scanning arc as needed to acquire sufficient information to avoid bumping volunteers.
• Third, while walking down the sidewalk and using touch technique with the 'K' Sonar (set to the 2-meter range) held above the cane in the non-cane hand, the student moves through moderate pedestrian traffic without touching pedestrians with the cane .She hand-scans with the ‘K’ Sonar as needed to obtain information about pedestrian location.
• Fourth, while walking down the sidewalk using touch technique and holding the 'K' Sonar (set to the 2-meter range) in the non-cane hand above the cane pointed straight ahead, the student travels through a crowd of moving pedestrians without touching them with the cane she moves the ‘K’ Sonar in a slight scanning arc as needed to acquire sufficient information to avoid bumping pedestrians.

176

177
Materials: 'K' Sonar, speaker, headphones, cane Location:
This exercise requires two or three areas as follows: • First, a large open space, either outside or inside, with sufficient
obstacle-free space to allow a student to walk 40 or 50 feet without encountering an object in 'K' Sonar range;
• Second, a sidewalk with moderate pedestrian traffic; • Third, a sidewalk with heavy pedestrian traffic. • You can use the same area at different times of day for moderate and
heavy crowd work if it has moderate pedestrian traffic much of the day but is crowded at lunch and rush hours.
• The sidewalk should not have business driveways or alleys from which traffic might emerge.
• Stationery central and street-side obstacles may exist on the sidewalk, but they are not necessary for this exercise.
Instructor notes:
Building on the student's ability to avoid collisions with single pedestrians, this exercise teaches the student to avoid more than one pedestrian at a time and to move within and through crowds. The first two activities in this exercise utilize volunteers who have agreed to help you. Such individuals might be teachers, classmates, other students at a rehabilitation center, or the student's family and friends. The last two activities help the student apply pedestrian avoidance strategies to actual crowd situations.
When navigating crowds, a student can use 'K' Sonar feedback to either move with a crowd or move through it. To move with the crowd, the student locates an area within the crowd characterized by higher-pitched, lower-volume tones; after placing herself into this relatively open area of the crowd, the student can moderate her pace so that she maintains a constant distance from persons in the crowd ahead of her. She can also use 'K' Sonar feedback to move through the crowd. To do this, she listens for areas of higher pitch and lower volume and moves from one such area to another. She will need to pay close attention to her line of travel when moving through a crowd in this way.
The following four activities help the student refine the ability to avoid moving pedestrians in normal and crowded situations.
• First, while walking in an open area and using touch technique, the student walks through a group of four volunteers three times. Volunteers stand still in a rough square approximately 6 feet from one another. Each time she walks through the group, the student uses the ‘K’ Sonar in a different way: cane-mounted in the 5-meter range; cane-mounted in the 2-meter range; and hand-held in the 2-meter

178
range. The student compares how well she avoids collisions when using each of these ‘K’ Sonar strategies. The instructor then discusses problems that occur when using the ‘K’ Sonar cane-mounted or in the 5-meter range when moving through a crowd. Although the ‘K’ Sonar may work well for smaller, thinner crowds when it is cane-mounted, negotiating denser crowds requires information that can only be obtained from a very wide ‘K’ Sonar scan; a cane arc wide enough to obtain ‘K’ Sonar information would constitute a tripping hazard for other pedestrians in the crowd. The 5-meter range provides too much information when used in a dense crowd; although the student needs to know only the location of those pedestrians close to her, the 5-meter range gives her a cacophony of tones resulting from persons up to 16 feet away.
• Second, the instructor adds several more volunteers to the group and cues the larger group to move into various formations. In one formation, two volunteers could stand next to one another, making it impossible for the student to walk between them without colliding; in another formation, volunteers could depict the letter M; and in a third formation, volunteers could depict a densely-packed crowd with only one path through the group wide enough for the student to walk without bumping the volunteers with her cane. Finally, the instructor signals the group to begin walking together so that they now simulate a moving crowd. The student uses touch technique and walks through each different crowd formation. She holds the 'K' Sonar (set to the 2-meter range) in her non-cane hand above the cane; and moves the ‘K’ Sonar in a slight scanning arc as needed to acquire sufficient information to avoid bumping volunteers. The student applies what she has learned in previous exercises to the task of finding clear space to move through these increasingly difficult crowd configurations.
• Third, the student walks down a sidewalk with moderate pedestrian traffic using touch technique and holds the ‘K’ Sonar, operating in the 2-meter range, above the cane in her non-cane hand. She moves the ‘K’ Sonar in a scanning motion as needed to obtain sufficient information to avoid collisions and to avoid touching pedestrians with her cane. She notes when pedestrians are far away from her and when they are closer to her, ignores those who are farther from her, and stops for those with whom she might collide.
• Fourth, the student walks down a sidewalk using touch technique and holds the ‘K’ Sonar (set to the 2-meter range) above the cane in her non-cane hand. She moves the ‘K’ Sonar in a scanning motion as needed to obtain sufficient information to avoid collisions. The student travels through a crowd of moving pedestrians without touching them with the cane unnecessarily. Moving with the crowd is generally easier than moving through it. Initially, encourage the student to locate a
179
relatively open area in the crowd (an area of high-pitched, thinner tones) and to hold her place in this area by keeping pitches corresponding to pedestrians ahead of or beside her as constant as possible. If the student shows mastery and interest, encourage her to look for other relatively open areas in the crowd farther ahead and to move from one such area to another.
It is essential to prepare this exercise in advance. Select appropriate areas and volunteers, and do all activities. Make sure that you can detect volunteer positions and move through crowds using a cane based on 'K' Sonar feedback. Make sure that all volunteers understand their roles at various times in the exercise so that you can communicate with them by pointing and by other visual means during the lesson. Volunteers should walk as quietly as possible and should keep talk to a minimum so that the student cannot discern details of their location by hearing them.
As with other activities involving volunteer assistants, the student should be told in advance that volunteers will participate in her next lesson. She should also be told the names of the volunteers. If she expresses concern about working with a specific volunteer, locate another with whom she is more comfortable. The student and volunteers should greet one another appropriately, but should not have additional contact during the lesson.
When working in a simulated or real crowd, you may find it helpful to walk close behind the student so that you can discuss 'K' Sonar sounds, their meanings, and the student's next moves with the student. You may also find it helpful in simulated situations to use a speaker instead of headphones so that you and the student can hear 'K' Sonar feedback; standing behind the student will allow both of you to hear the speaker clearly. Procedure:
• Step 1 – Signal your group of four volunteers to move out into the open area and take positions previously discussed. They should each stand approximately 6 feet from one another in a rough square. Direct or guide the student to a point approximately 20 feet behind one of the volunteers. Tell her to walk forward using touch technique with the 'K' Sonar in the 5-meter range and cane-mounted until she is moderately close to the volunteer (i.e., the tone from the volunteer is in the middle pitch range). Ask the student to make a wide, slow arc with the cane and then describe her impressions of the group and how she might move through it based on 'K' Sonar feedback.
• Step 2 – Tell the student to follow her plan for moving through the group. Ask her to discuss her experience. What happened? Did she have room to walk between people? If she bumped a volunteer with the cane, how might she avoid doing this in the future?

180
• Step 3 – Ask the student to face the group again, set the ‘K’ Sonar to the 2-meter range, and move the cane in a wide slow arc to determine where to enter the group. The student should tell you her plan for moving through the group and then carry it out.
• Step 4 – Ask the student to turn and face the group again. She should remove the ‘K’ Sonar from the cane and hold it in her non-cane hand above the cane and pointing straight ahead. Ask the student to scan the group with the ‘K’ Sonar and determine how she will enter the group based on ‘K’ Sonar feedback. She should then walk through the group using touch technique and hand-scan with the ‘K’ Sonar to detect volunteers and avoid bumping into them or touching them with her cane.
• Step 5 – Discuss the experience with the student. Was it easier to locate and move around volunteers when the ‘K’ Sonar was cane-mounted or hand-held? Was it easier to avoid collisions when the ‘K’ Sonar was set to the 2-meter range? Explain that the student may find it easier to navigate large or more densely packed crowds when she uses her cane and scans with the ‘K’ Sonar in her non-cane hand. The 2-meter range often works well when navigating crowds because it provides a manageable amount of information about the location of pedestrians closest to the student, and does not provide additional sound cues related to pedestrians 10-15 feet away. Did the student obtain enough information about pedestrian location when she held the ‘K’ Sonar straight ahead of her; or did she need the additional information obtained by scanning with the ‘K’ Sonar? Introduce the scissors technique described in Chapter One if appropriate.
• Step 6 – After discussing preferred strategies for moving through crowds, ask the student to walk through the group of volunteers several more times, using her cane and holding the ‘K’ Sonar in her non-cane hand. Arrange volunteers so that the student can practice moving through varying amounts of space between people in the crowd. Place some volunteers next to one another so that the student cannot move between them. Bring several more volunteers into the group so that the crowd simulation can be more realistic.
• Step 7 – Guide or direct the student to a position approximately 5 feet from the group of volunteers. Tell her that now people in the crowd will be moving around. Ask her to walk through this crowd, to stop to avoid a collision, and to move toward areas of highest pitch and lowest volume. Signal volunteers to begin moving when the student enters the crowd.
• Step 8 – Discuss results with the student after she has moved through or around the crowd. Did she hear moving pedestrians—tones that slid in pitch either up or down the scale? Was she successful in avoiding them? What was easy? What was hard?
181
• Step 9 – Repeat Steps 7 and 8 with a denser crowd configuration. Signal volunteers to move closer to one another. Tell the student that she will now experience a moving crowd that is more dense. Direct or guide her to a point approximately 4 feet from the nearest volunteer. Ask her to hand-scan widely with the ‘K’ Sonar in the 2-meter range and consider how she might approach this crowd. Does she notice any openings toward which to move—areas of high pitch or areas of no tone?
• Step 10 – Ask the student to walk toward the crowd. Signal the crowd to move as the student enters it. The student should move toward points of lowest volume and highest pitch until she has moved through the crowd. She should consult with you when in doubt about a direction. Follow directly behind her so that you can more easily communicate with her about what she is hearing. If the student seems to have difficulty deciding on an appropriate direction, use a speaker so that both you and the student can hear and discuss K' Sonar feedback. You can ask the crowd to freeze at any point so that you and the student can take more time to process ‘K’ Sonar information.
• Step 11 – Discuss the experience with the student. If she had difficulty avoiding volunteers, repeat Step 10.
• Step 12 – In an area with moderate pedestrian traffic, ask the student to walk down the sidewalk using touch technique and holding the ‘K” sonar, operating in the 2-meter range, above the cane in her non-cane hand. Tell her to avoid obstacles and pedestrians, and to avoid touching pedestrians with the cane whenever possible. Ask her to move into areas of higher pitch and lower volume, and to stop for pedestrians or obstacles that are fairly close to her.
• Step 13 – When she stops to avoid a collision or moves around an obstacle or pedestrian in her path, note what she did and offer positive verbal reinforcement.
• Step 14 – If she bumps a pedestrian or touches someone with her cane, discuss what happened and what she might do to prevent this in the future. Provide accurate feedback; sometimes it is impossible to avoid a pedestrian who steps into the student's path or who changes direction quickly.
• Step 15 – Continue walking down the block using this process. If the student has problems avoiding obstacles and pedestrians, skip the remainder of this exercise. If she improves or is motivated to continue, ask her to turn around at the end of the block and walk back through the moderately crowded area.
• Step 16 – In an area with heavy pedestrian traffic and crowds, ask the student to use touch technique and hold the ‘K’ Sonar, operating in the 2-meter range, above the cane in her non-cane hand. Remind her that she should move toward the lowest volume, highest pitch sounds in

182
order to not bump another pedestrian or obstacle. Walk directly behind her so that you can hear and be heard. Tell her to use street sounds to maintain a reasonably straight line of direction.
• Step 17 – When the student passes a person in the crowd without bumping the person with the cane, ask the student what she did to make this happen. If the student bumps a person in the crowd, discuss what she might have done to avoid the person.
• Step 18 – If the student has difficulty avoiding pedestrians and shows no improvement in this skill, stop this activity. However, if she shows improvement and is motivated to continue, walk for several blocks in crowded settings and continue to discuss the experience with the student.
183
Chapter Five Openings, Protuberances, and the Building Line Chapter Objectives
Exercises in this chapter are designed to accomplish four objectives. • First, the student will locate open doors and intersecting corridors on
either side of a corridor and will locate closed doors on the near wall of a corridor.
• Second, the student will expand his ability to recognize different tone colors that provide information about types of surfaces and objects he is passing.
• Third, the student will learn to detect when he is veering from or toward a building line by interpreting 'K' Sonar sounds.
• Fourth, the student will learn to recognize 'K' Sonar pitch and tone color patterns that indicate protuberances, recesses, openings, and material changes occurring on the building line side of the path of travel; and he will learn to use this information to locate specific landmarks and destinations.

184
185
Theoretical Considerations Introduction
Now that the student has developed solid skills in interpreting the pitch-distance relationship, stopping at the stop point, and locating and moving around obstacles in the path of travel, it is time to shift instructional focus in the direction of environmental feature identification. In this chapter, the student will learn to recognize and respond appropriately to the 'K' Sonar pitch and tone color changes that result from open and closed doors and intersecting corridors indoors and from openings and protuberances in the building line outdoors. Knowing about these environmental details at a distance expands the range of landmarks available to the traveler who is blind and makes it possible for him to follow directions to a destination based on landmarks that his cane does not touch.
Environmental features can be located using ‘K’ Sonar feedback without physical or cane contact with the features in two ways: first, using touch technique and holding the ‘K’ Sonar in the non-cane hand in trailing position and pointing directly at the area of interest; and second, using touch technique with the ‘K’ Sonar cane-mounted. Advantages, disadvantages, and instructional strategies proposed in this Handbook for each approach are discussed below. Feature Location: Using touch technique and trailing with ‘K’ Sonar
The easiest way to locate features along the building line or corridor wall is to use touch technique and hold the ‘K’ Sonar in trailing position in the non-cane hand pointed toward the building line or corridor wall. When doing this, the student hears full, loud, clear tones that convey information about the building line or corridor. Protuberances, recesses, and changes in materials on the building line and intersecting corridors, open and closed doors, and changes of material along a corridor wall can be recognized easily because the student obtains continuous, clear ‘K’ Sonar feedback from the building line or wall. In addition, if the ‘K’ Sonar is held constant, this approach can indicate whether the user is walking parallel to, veering toward, or veering away from the building line or corridor wall. Exercises in this chapter help students locate environmental features and maintain a straight line of travel based on associated ‘K’ Sonar sound signatures obtained from this approach as follows:
• Indoor features: The 'K' Sonar is always set to the 2-meter range for tracking indoor features. Because indoor features are generally closer together than are outdoor ones, the 5-meter range gives too much information about too many features at the same time. When the student walks down the right side of a corridor without veering and points the 'K' Sonar directly at the right wall, the 'K' Sonar produces a fairly low-pitched tone that changes in pitch only when there is a
186
significant change in the distance between the 'K' Sonar and the nearest surface.
• Right-side openings, rooms, and intersecting corridors: If the student passes an open room while pointing the 'K' Sonar straight toward the corridor wall, he hears an abrupt increase in pitch or a complete disappearance of tone, depending on whether an object in the room is in 'K' Sonar range. When the student crosses an intersecting corridor, he usually hears the absence of tone which lasts for a longer time than the tone change associated with open doors because corridors are usually wider than room openings.
• Left-side openings, rooms, and intersecting corridors: The student hears and tracks open doors and intersecting corridors on the left side of the corridor while he walks on the right by altering the direction in which he points the 'K' Sonar. Holding the 'K' Sonar in the non-cane hand in trailing position pointed toward the left allows the student to track these features on the left side of the corridor.
• Closed recessed doors on the near side of the corridor: The ‘K’ Sonar tone changes to a slightly lower note as the student passes the recess, then changes to its former higher note; this happens because the recessed door is slightly farther away from the ‘K’ Sonar than is the wall.
• Closed doors with protruding door frames on the near side of the corridor: The student hears a lower-pitched tone from the near side of the protruding door frame; as this tone disappears, he hears another lower-pitched tone from the door frame on the far side of the door. He continues to hear the slightly higher pitched tone of the wall and door in combination with the lower pitched tones of the near and far sides of the door frame.
• Building-line protuberances: A protuberance is indicated by a sharp decrease in 'K' Sonar pitch followed by a sharp increase. Pitch changes from higher to lower, and then from lower back to higher. A protuberance is closer to the student than is the building line and therefore results in a lower pitch than does the building line. Protuberances beyond the cane's reach that are detected with the 'K' Sonar can serve as landmarks.
• Building-line recesses: A recess, the negative image of a protuberance, is generally indicated by the opposite pattern of 'K' Sonar pitch changes: a sharp increase in 'K' Sonar pitch followed by a sharp decrease. Pitch changes from lower to higher, and then from higher back to lower. The end of a recess in the building line (usually a door) is farther from the student than is the building line and therefore results in a higher pitch than does the building line. However, recesses can take a variety of shapes—deep, shallow, wide, narrow. Because of this variety of form, recesses produce many different patterns of the
187
low-high-low pitch change sound signature. Recesses detected with the 'K' Sonar often indicate doorways, destinations that the student can locate and enter fluidly without using touch-trailing cane technique or close tactual or cane contact with the building line. Recesses can also serve as landmarks for other destinations.
• Openings: An opening in the building line is usually indicated by the absence of 'K' Sonar tone. If the opening is wide enough so that its side walls are out of 'K' Sonar range as the student passes the middle of the opening, the student hears the rhythmic pulse that always underlies 'K' Sonar tone, but hears no tone. In this situation, there is nothing in 'K' Sonar range; all of its ultrasound travels down the opening and none is reflected back to the 'K' Sonar. If the student is holding the 'K' Sonar in trailing position in the non-cane hand pointed directly at the building line, he will hear the thinning tone and increasing pitch as he moves past the near edge of the opening. The tone thins as the student passes the near edge because less and less ultrasound reflects off of this edge and more and more travels into the opening. At the same time, the pitch of the near edge becomes higher because the distance between the near edge of the opening and the student increases as the student walks past the opening. If the opening is wide, the student will hear the absence of tone as he moves out of range of the near side. However, as he approaches the far side of the opening, he will begin to hear a thin, higher-pitched tone which will become fuller and lower in pitch as he approaches the far edge of the opening. This tone becomes fuller as the student approaches the far edge of the opening because more and more ultrasound reflects off of it and less and less ultrasound travels down the opening. The tone decreases in pitch as the student approaches the far edge of the opening because the distance between this edge and the student is decreasing as he moves toward it.
• Openings as destinations or landmarks: Openings can serve as destinations to be located (e.g., walk between the restaurant and the neighboring building to reach the outdoor seating area behind the restaurant); or as landmarks (e.g., the computer repair shop is the third recess beyond the bank plaza). 'K' Sonar feedback about a large opening as the student passes it also can help the student maintain a straight line of travel and avoid drifting into the opening.
• Hedges, concrete walls, and wooden fences: The tone color of the 'K' Sonar changes in response to materials that make up the surface at which the unit is pointed. A dense, less porous material such as smooth concrete absorbs very little ultrasound and reflects most back to the 'K' Sonar; its tone color is full, bright, and shrill. A wooden fence is more porous and therefore absorbs more ultrasound; its tone color is less shrill and a bit more muted or mellow than is that of a smooth

188
concrete wall. Hedges, which reflect ultrasound pulses back from each individual leaf and stem, make a multi-tonal "hissing" pattern that sounds almost like a field of summer cicadas. These three tone color distinctions are the easiest to make; tones produced in response to these three features are significantly different, easy to discriminate, and fun to learn. For the first time, the student who is blind can discriminate between a hedge, a concrete wall, and a wooden fence without tactual or cane contact with it.
• More subtle tone color changes in the building line: The student learns to recognize more subtle changes of tone color in the building line that could indicate shifts between rough concrete, glass, smooth concrete, metal, or wood; although one-to-one correspondence between a specific material making up a small building detail and its 'K' Sonar tone color may not be possible, such changes in tone color serve as landmarks that can be recognized. A building might be recognized by its frequent changes in tone color—resulting from its alternating small glass windows and brick trim; another structure might be recognized because of its relatively infrequent changes in tone color—resulting from large areas of glass window alternating with smooth concrete.
• Protuberances, recesses, openings, and tone color shifts in the building line: Combining previously learned information, the student integrates a variety of 'K' Sonar sound signatures to follow "visual" directions that would be meaningless without information from the 'K' Sonar. Veering: To hear veering, the student must discern gradually decreasing or increasing 'K' Sonar pitch changes that occur as he drifts toward or away from a building line. Veering can be detected by 'K' Sonar feedback only when the unit is pointing at a continuous surface such as the building line. Street-side and central features do not give reliable information about veering because they generally do not occur regularly enough for the student to discern a gradual pitch change. Learning to keep the pitch generally constant may help the student walk a straighter line. If the pitch is gradually increasing, the student is veering away from the corridor wall or building line and should correct by angling toward it; if the pitch is gradually decreasing, the student is veering toward the corridor wall or building line and should correct by angling away from it. Returning to a non-changing pitch indicates that the student has completed the correction. Abrupt changes in pitch indicate other building-line features, but gradual changes usually indicate veering.
To help the student learn to locate specific environmental features on the
building line or along a corridor when trailing with the ‘K’ Sonar, this curriculum uses the following general sequence of instructional activities:
189
• The student explores the feature with the ‘K’ Sonar, with the cane, and with touch;
• The student holds the ‘K’ Sonar in trailing position pointed toward the building line or corridor wall and is guided past several examples of the feature of interest by the instructor.
• The student walks past several examples of the feature of interest using touch technique and holds the ‘K’ Sonar in his non-cane hand in trailing position pointed toward the features of interest.
One major disadvantage of trailing with the ‘K’ Sonar to locate
environmental features is the inability to use the ‘K’ Sonar for object avoidance while trailing with it. When pointed directly at a feature of interest to the left or the right of the path of travel, the ‘K’ Sonar provides no or very minimal information about objects directly ahead of the individual. A second disadvantage of this approach is that, with the cane in one hand and the ‘K’ Sonar in the other, the individual has no hands free. He must reattach the ‘K’ Sonar to the cane or store it in a pocket or bag before he can open a door or do any other task involving hand use. Using touch technique with ‘K’ Sonar cane-mounted
This technique, familiar to the student because of its use in avoiding obstacles, is more convenient than the trailing technique discussed previously. Now, keeping the ‘K’ Sonar on the cane, the user has one hand free to perform necessary tasks. The ‘K’ Sonar can also be used for obstacle avoidance while an individual is using it to look for a specific environmental feature.
However, this approach has some major disadvantages. It is impossible to reliably locate small features and somewhat challenging to locate larger ones using this approach for two reasons.
First, the user hears information about the building line or corridor wall only one time every other step, when the cane—and therefore the ‘K’ Sonar—are near the end of the arc pointing toward the building line or corridor wall. He does not have the continuous feedback about the building line or corridor wall that he obtains when trailing. He must remember pitch and tone color on the building line side while the cane and ‘K’ Sonar move through the rest of the arc. He hears new ‘K’ Sonar tones indicating distance and degree of porousness of other features in ‘K’ Sonar range when the unit moves through the rest of the cane arc; but he must hold the tonal information about the building line or corridor wall in memory to track the changes in pitch and tone color that occur when the cane and ‘K’ Sonar return to the end of the arc near the building line or corridor wall.
Second, the ‘tonal information about the building line or corridor wall obtained from the ‘K’ Sonar is lower in volume, more distorted in quality, and therefore more difficult to interpret when the ‘K’ Sonar is cane-mounted
190
than when it is held in trailing position pointed directly at the area of interest. At the end of the cane arc, the cane and therefore the ‘K’ Sonar point at an oblique angle toward the building line or corridor wall. Because the ‘K’ Sonar is not pointing at the building line or wall squarely, only some of its ultrasound is reflected back from the wall; this results in the same lower volume and tone distortion heard when a student, holding the ‘K’ Sonar straight ahead of him in scan position, is not facing a wall squarely. If another object is fairly close to the building line or corridor wall, it may also be in ‘K’ Sonar range; ultrasound, reflecting back from such an object, will add another tone to the already complex sound signature.
Despite these challenges, individuals who show interest and ability can learn to locate larger environmental features when the ‘K’ Sonar is cane-mounted. This Handbook provides sequenced, structured learning activities that help students locate environmental features both when trailing with the ‘K’ Sonar and when using it cane-mounted. If a student shows enthusiasm and aptitude for learning the 'K' Sonar and if using the device seems to enhance his ability to travel independently, you might teach him specific feature location when the ‘K’ Sonar is hand-held and when it is cane-mounted. If another student loses patience with repetitive tasks and does well when results are attained quickly, you might omit sections of exercises that teach the more difficult task of feature location when the 'K' Sonar is cane-mounted and use only those sections that teach this skill when the 'K' Sonar is hand-held.
The student MUST learn to recognize a building line or corridor feature when trailing with the ‘K’ Sonar before he can learn the more difficult task of locating the feature when the ‘K’ Sonar is cane-mounted. To help the student learn to locate specific features of interest along a building line or along a corridor when using touch technique with the ‘K’ Sonar cane-mounted, this curriculum uses the following general sequence of instructional activities. Note that the first two activities are the same as those used to teach feature location when trailing with the ‘K’ Sonar.
• The student explores the feature with the ‘K’ Sonar, with the cane, and with touch.
• The student holds the ‘K’ Sonar in trailing position pointed toward the building line or corridor wall while being guided past several examples of the feature of interest by the instructor.
• The student walks past several examples of the feature of interest using touch technique and holding the ‘K’ Sonar in his non-cane hand in trailing position pointed toward the features of interest.
• The student mounts the ‘K’ Sonar on the cane and holds the cane at the end of the arc pointed toward the features of interest while being guided past several of these features by the instructor. This instructional strategy simulates the oblique angle of the cane and ‘K’ Sonar in relation to the building line or corridor wall when touch
191
technique is used with the ‘K’ Sonar cane-mounted and the cane is at the end of the arc closest to the feature of interest. The student hears the ‘K’ Sonar’s tone distortion and any additional tones resulting from other objects in range; but this instructional strategy maintains the continuous feedback from the wall or building line that characterized the trailing method. The student must learn to recognize the uninterrupted sound signature associated with a feature when the tone is distorted before he can learn to recognize it by hearing it intermittently, one time every other step.
• The student uses touch technique with the ‘K’ Sonar cane-mounted: After the student has learned to recognize a building line or corridor feature when the ‘K’ Sonar tone is distorted, he begins to walk slowly past several of these features using touch technique. He is instructed to listen closely to sounds he hears when the cane is at the far end of the arc on the side of the feature of interest, to remember the tone heard, and compare it with the next tone he hears from this area of the arc.
In order to recognize sound signatures associated with features of interest when ‘K’ Sonar tones are distorted, the student must learn to perceive the underlying similarity between a clear and a distorted ‘K’ Sonar sound signature. To help students recognize this underlying similarity, the auditory, kinesthetic, and proprioceptive experiences of the clear and distorted forms of a sound signature for a given feature must be as similar as possible; the only differences between these two forms should be in degree of ‘K’ Sonar clarity and the potential presence of more than one ‘K’ Sonar tone at a time. Instructors are encouraged to maintain similarity of student experience when the student trails with the ‘K’ Sonar and when he mounts it on the cane and points the cane obliquely at the feature of interest by:
• Walking past several examples of the feature of interest in the same order in both cases: In order to recognize the underlying similarities between the clear and distorted sounds signatures associated with the feature of interest, it is essential that the student hears the same sound sequence in clear and then in distorted form. If the instructor turned around at the end of the trailing activity with its clear tones and guided the student back through the area in the opposite direction for the cane-mounted activity with its distorted tones, the student would hear the distorted sequence in reverse order. To present the student with a sequence of sound signatures that vary only in degree of distortion, the instructor must guide the student back to the point at which the clear trailing sequence was started and there begin to guide the student through the distorted, cane-mounted sequence.
• Preventing the student from hearing ‘K’ Sonar feedback between the clear and distorted ‘K’ Sonar sequences: Intervening 'K' Sonar

192
feedback makes it more difficult to experience the underlying similarity of 'K' Sonar patterns in these two cases. This means that the student must unplug the headphones or speaker from the 'K' Sonar after he has passed the features of interest when hand-trailing and reconnect it when he has been guided back to the starting point to hear the same ‘K’ Sonar sequence in its distorted form (when the ‘K’ Sonar is cane-mounted and the cane is held at the end of the arc closest to the feature of interest).
• Directing the student to hold the ‘K’ Sonar when trailing with it and when it is cane-mounted and pointing obliquely at the wall in the same hand he uses to hold the cane when using touch technique: this strategy maintains similarity of proprioceptive and kinesthetic experience; the cane hand held the ‘K’ Sonar in the situation where feedback was clear and the cane hand holds the cane and ‘K’ Sonar in the situation where the feedback is distorted. After feature location skills have been mastered, the student will trail with the ‘K’ Sonar held in his non-cane hand while using touch technique; but the cane hand should be used to hold the ‘K’ Sonar and to hold the cane with the ‘K’ Sonar cane-mounted when learning to recognize specific sound signatures in their more distorted form.
• Guiding the student on the student’s side away from the feature of interest: if the instructor walks on the same side of the student as the feature, the instructor will be detected by the ‘K’ Sonar instead of the feature of interest. In all guiding situations, there must be clear space between the student and the feature being examined.
• Carrying the student’s cane while guiding the student as the student hand-trails with the ‘K’ Sonar: Whenever the student holds the ‘K’ Sonar in his hand in trailing position while being guided, the instructor carries the student’s cane for him because both of the student’s hands are occupied. In this situation, the student holds the ‘K’ Sonar in the hand that usually holds his cane, and he uses his other hand to hold the instructor’s arm.

193
Exercise 5.1 Open Doors, Intersecting Corridors, and Closed Doors Exercise objective:
The student will walk straight along the right side of a corridor, will locate open doors and intersecting corridors that occur on either side of the corridor, and will locate closed doors on the right side of the corridor using 'K' Sonar feedback. Exercise summary:
All activities in this exercise use the 2-meter range unless otherwise indicated.
• First, holding the 'K' Sonar in his right hand in trailing position pointed right, the student is guided straight along the right wall of the corridor with no openings or protrusions and listens to the unchanging pitch that occurs when the distance between the student and the wall does not change.
• Second, after being directed or guided back to the starting point, the student holds the 'K' Sonar in his right hand in trailing position pointed right and is guided along the corridor in a line of travel that veers away from and toward the wall, so he can experience the gradual raising and lowering of the 'K' Sonar pitch and interpret its meanings.
• Third, after being directed or guided back to the starting point, the student walks straight down the corridor along the right wall, holds the 'K' Sonar in trailing position in his non-cane hand pointed toward the right wall, and uses either touch technique. The student keeps the 'K' Sonar pitch as constant as possible, moving right when the pitch becomes too high and moving left when the pitch becomes too low.
• Fourth, after being directed or guided back to the starting point, the student walks straight along the right wall with the 'K' Sonar cane-mounted, uses either touch technique, and corrects veering toward or away from the wall based on 'K' Sonar feedback about distance from the right wall that is heard once every other stride when the cane points to the right wall. The student discusses whether it is easier to walk straight when the 'K' Sonar is hand-held or cane-mounted.
• Fifth, the student removes the 'K' Sonar from the cane and is directed or guided to a corridor with open doors and cross-corridors on the right side. The instructor guides on the student's left side, and the student holds the 'K' Sonar in trailing position in his right hand pointed right. The student notes 'K' Sonar sound changes, examines corridor features tactually to determine why such changes occur, and indicates whether changes are due to open doors or intersecting corridors.

194
• Sixth, after being directed or guided to the starting point of the previous activity, the student is guided along the right wall of the corridor as he holds the 'K' Sonar in trailing position in his right hand pointing toward the wall. He notifies the instructor when he hears openings, pays attention to how much time elapses as he passes openings, and predicts whether openings are rooms or intersecting corridors. The instructor provides positive reinforcement and feedback about accuracy.
• Seventh, after being directed or guided to another corridor with open doors and cross-corridors, the student uses either touch technique to walk straight along the right wall, holds the 'K' Sonar in trailing position in his non-cane hand pointed to the right, and predicts whether 'K' Sonar sounds indicate open doors or intersecting corridors. The instructor provides positive reinforcement and feedback about accuracy.
• Eighth, after being directed or guided to the starting point for the previous activity, the student mounts the 'K' Sonar on the cane, uses either touch technique to walk straight along the right wall, predicts whether 'K' Sonar sounds indicate open doors or intersecting corridors, receives feedback regarding accuracy for openings detected, and is told when he passes openings that he does not detect. The student then discusses pros and cons of looking for open doors and intersecting corridors when the 'K' Sonar is hand-held or cane-mounted.
• Ninth, the student removes the 'K' Sonar from the cane and is directed or guided to a corridor with open doors and at least one intersecting corridor on the left side. The instructor walks on the right side of the corridor with the student holding the instructor's left arm. The student holds the 'K' Sonar in his left hand in trailing position pointed toward the left wall and points out open doors and cross-corridors on the left side of the corridor. The instructor must guide on the student's right side so that the space between the left wall and the student's left hand, holding the 'K' Sonar, is open. The instructor reminds the student that the left wall results in a higher-pitched tone than the right because the 'K' Sonar is farther away from the left wall and that openings on the left wall result in either an absence of 'K' Sonar sound or a very high-pitched tone. Depending on the corridor's width, the student may need to set the 'K' Sonar to the 5-meter range so that he can pick up information from the other side of the corridor.
• Tenth, the student is guided or directed to the corridor with closed doors, examines door features that will be detected by the 'K' Sonar, and discusses pitch changes that will be associated with these features. The instructor, on the left side of the student, guides him to a position approximately 6 feet back along the corridor before the
195
door, asks him to connect the speaker to the 'K' Sonar, and guides him past the door, discussing 'K' Sonar feedback related to door features previously examined.
• Eleventh, the instructor, on the left side of the student, guides him along the right wall of the corridor with closed doors. The student, now using the headphones, holds the 'K' Sonar in trailing position in his right hand pointed right and tells the instructor to stop when changes in 'K' Sonar feedback indicate a closed door. The student examines the wall tactually to verify his conclusion.
• Twelfth, after being directed or guided back to the starting point near the corridor wall with closed doors on the right side, the student walks down the right side of the corridor using touch technique and holding the 'K' Sonar in trailing position in his right hand pointed right. The student stops after passing each closed door and identifies it based on 'K' Sonar feedback. The instructor confirms and directs the student to re-consider closed doors that were missed. The student discusses whether closed doors could be located if the 'K' Sonar was cane-mounted.
• Thirteenth, using touch technique, the student follows a series of routes of increasing complexity involving corridors with plus and T intersections, open rooms, and closed doors. The student discusses whether or not to use the 'K' Sonar hand-held or cane-mounted for each step of the route. He uses the 'K' Sonar as planned, tells the instructor when the current landmark is reached, and evaluates the effectiveness of 'K' Sonar use.

196

197
Materials: 'K' Sonar, headphones, speaker, cane
Location: The location consists of a building or buildings with the following simple
and complex corridor layouts. • One corridor with few openings or protuberances on one side • Two corridors with open doors and at least one intersecting corridor on
the same side • Two corridors with closed doors on one side • Corridor layouts including corridors that intersect in a plus layout and
T-corridor intersections approached from the bottom of the vertical bar of the T or from the end of the top bar
• Corridors should be empty during this lesson. Pedestrians serve as obstacles. The student needs the opportunity to learn indoor navigation without needing to avoid obstacles at the same time.
Instructor notes: During most of the outdoor exercises done previously, the student has
used the 5-meter 'K' Sonar range. The student will use the 2-meter range for most of the activities in this exercise. In the 2-meter range, he will hear more detailed information about the near environment within 6.3 feet of the 'K' Sonar, and no information about the environment beyond 6.3 feet. Indoor landmarks and features are generally closer together than are outdoor ones, and the 2-meter range restricts the amount of information provided by the 'K' Sonar to a manageable amount. However, some people prefer to use the longer 5-meter range indoors. It may also be necessary to change to the 5-meter range in many corridors that are more than 6 feet wide, particularly if the student wants to look for landmarks on the opposite side of the corridor.
You will need to refresh the student's memory about the 2-meter range which was briefly examined during initial 'K' Sonar orientation. The 2-meter range has a quicker background percussive pulse than does the 5-meter range. In the 2-meter range, the highest pitches occur when objects are slightly more than 6 feet away from the 'K' Sonar.
The student practices walking along the right wall of a corridor because this is standard pedestrian procedure in the United States. If you are teaching in a country where pedestrians walk on the left side of the corridor or sidewalk, use the left side of the corridor.
In this exercise, the student uses 'K' Sonar feedback to walk straight down a corridor and locate openings and protuberances along the corridor in thirteen sequenced activities.
• First, the student holds the 'K' Sonar in his right hand in trailing position pointed to the right, as he is guided along the right wall of a simple corridor with as few as possible protuberances or openings. He

198
listens to the unchanging pitch that occurs when the distance between him and the corridor wall stays the same. It is important that you walk on the left side of the student as you guide him and that you walk straight. If you veer toward or away from the wall, you will cause the 'K' Sonar pitch to become lower or higher respectively.
• Second, after being directed or guided back to the starting point, the student holds the 'K' Sonar in his right hand in trailing position pointed to the right. He is again guided along the corridor, but this time not in a straight line. Veer to the left away from the wall and ask the student what happens to 'K' Sonar pitch and what this means. Veer toward the wall and ask the student the same question. Help the student verbalize that, when veering away from the wall, the 'K' Sonar pitch is higher because the wall is farther away from it; and when veering toward the wall, the 'K' Sonar pitch is lower because the wall is closer to it.
• Third, after being directed or guided back to the starting point, the student walks along the right wall of the corridor, holds the 'K' Sonar in trailing position in the non-cane hand pointed toward the right wall, and uses either touch technique. The student should walk far enough out from the wall to avoid touching the wall with his cane when it is in the right end of the arc. The student keeps the 'K' Sonar pitch as constant as possible, moving toward the right wall when the pitch becomes too high and moving away from the right wall when the pitch becomes too low.
• Fourth, after being directed or guided back to the starting point, the student mounts the 'K' Sonar on the cane, walks straight along the right wall of the corridor, and uses either touch technique. The student should walk far enough away from the right wall that the cane does not touch it in the right end of the arc. The student listens to the pitch of the right wall when the cane is at the right end of the arc, remembers this pitch from one arc to the next, and keeps this pitch constant. He recognizes that he is drifting toward the right wall if the pitch at the right end of the arc is lower than it was during the previous arc. In narrower corridors, the left wall may be heard at the left end of the arc as a high-pitched tone because it is close enough to be in 'K' Sonar range. If the student is walking straight and if no openings or protuberances are present in the left wall, its tone remains at the same high pitch if the student walks straight. If he veers toward the left wall, the pitch in the left end of the arc becomes lower; if he veers toward the right wall, the pitch in the left end of the arc becomes higher. If the student can track pitches at the extreme left and right ends of the arc, he has feedback about whether he is veering or walking straight from both sides of the corridor. He can also change the 'K' Sonar range to 5-meters in wider corridors to obtain this same information.
199
• Fifth, the student removes the 'K' Sonar from the cane and is directed or guided to a corridor with open doors and at least one intersecting corridor. The student, being guided on the left by the instructor, walks down the corridor holding the 'K' Sonar in trailing position in his right hand pointed to the right. He tells the instructor when the 'K' Sonar pitch changes or when its tone disappears; examines corridor features to determine why the 'K' Sonar sound changes in this way; and verbalizes why the change in sound occurs. Openings result in higher-pitched tones or no tones depending on where objects are placed inside a door or cross-corridor. If more than 6.3 feet of open space is available, the 'K' Sonar will produce its underlying percussive pulse but no tone, because no object is in its range. If there is an object in range inside the open door or cross-corridor, the 'K' Sonar tone will increase in pitch, indicating that an object is in range but that it is significantly farther away from the 'K' Sonar than is the corridor wall. Discuss differences between the sound of crossing an intersecting corridor and passing an open room. The intersecting corridor is usually wider than the door of a room; when crossing an intersecting corridor, the student hears the high-pitched tone or the absence of tone for a longer period of time than he does when he passes the open doorway of a room.
• Sixth, after being directed or guided to the starting point for the previous activity, the student is guided along the right wall of the corridor as he holds the 'K' Sonar in his right hand pointing toward the wall. He notifies the instructor when he hears an opening, pays attention to how much time elapses as he walks past the opening, and predicts whether the opening is a room or a cross-corridor according to how long the tone change lasts. Assuming that the student will walk at about the same speed when being guided and when using a cane, the length of time that the sound alteration lasts is a reasonable predictor of the width of the opening. The instructor provides positive reinforcement and feedback about the student's accuracy.
• Seventh, after being directed or guided to another corridor with open doors and intersecting corridors, the student holds the 'K' Sonar in trailing position in the non-cane hand pointed toward the right and uses either touch technique to walk straight down the right side of the corridor. Again, his cane should not touch the right wall, and he should maintain a straight line of travel based on 'K' Sonar sounds. He mentions changes in the pitch of 'K' Sonar tone, predicts whether these changes indicate open doors or intersecting corridors, and receives verbal feedback.
• Eighth, after being directed or guided to the starting point for the previous activity, the student mounts the 'K' Sonar on his cane, uses either touch technique to walk straight along the right wall, predicts whether the 'K' Sonar sounds indicate open doors or intersecting
200
corridors, receives feedback regarding accuracy for openings detected, and is told when he passes openings that he does not detect. The student then discusses pros and cons of looking for open doors and intersecting corridors when the 'K' Sonar is hand-held or cane-mounted.
• Ninth, the student removes the 'K' Sonar from the cane and is directed or guided to a corridor with at least one intersecting corridor and with open doors on the left side of the corridor. He is told to hold the 'K' Sonar in his left hand in trailing position pointed toward the left wall and to point out open doors and cross corridors on the left while walking on the right side. In this activity, you must guide the student on his right side so that space between the left wall of the corridor and the student's left hand, holding the 'K' Sonar, is open. Remind him that, as he walks on the right side of the corridor, the left wall results in a higher-pitched tone than would the right because the 'K' Sonar is farther away from the left wall than it is from the right wall. Also remind him that openings on the left wall will result in either the absence of 'K' Sonar tone or in a very high-pitched tone. Depending on the width of the corridor, the student may need to set the 'K' Sonar to the 5-meter range so that he can pick up information from the other side of the corridor. In preparing for this lesson, try the 2-meter range first; if you cannot hear the left wall with the 2-meter range, change to the 5-meter range and try again.
• Tenth, the student disconnects the headphones from the 'K' Sonar and is directed or guided to a corridor with closed doors on the right side. The student and instructor examine the features of one closed door and discuss specific 'K' Sonar feedback that will be associated with these features. The student is then guided to a point approximately 6 feet back along the wall, with the instructor guiding on the left side of the student. The student connects the speaker to the 'K' Sonar, holds the 'K' Sonar in trailing position pointed toward the right wall, and listens to and discusses 'K' Sonar feedback as related to the features previously examined. Use a closed door that you have already examined with the 'K' Sonar and that you know to be easily heard in 'K' Sonar feedback. Discuss how specific pitch changes relate to specific features of the closed door. If the door has a protruding frame, the higher-pitched tone occurs and becomes lower as the near edge of the door is approached. This tone disappears when the 'K' Sonar has passed the near edge of the door. As the near-edge tone disappears, the high-pitched tone from the far edge appears, lowers in pitch as the 'K' Sonar moves toward the far edge, and then disappears when the student has passed the door. If doors are recessed and have no protruding door frame, the student will hear the low-pitched tone from the wall, a slightly higher-pitched tone from the recessed door, and

201
then the lower-pitched tone from the wall on the other side of the door. If the door is not recessed at all and there is no door frame extending outward from the wall, the student may hear a brief increase in pitch from the protruding door knob. If the door knob is metal, its tone may also be more shrill than the tone of the surrounding material.
• Eleventh, after the student has been directed or guided to the beginning of this corridor, he is guided along the right wall and holds the 'K' Sonar in his right hand in trailing position pointed to the right. The 'K' Sonar should be 3 to 4 feet from the wall. The student uses the speaker or headphones, depending on whether he is ready to listen for subtle 'K' Sonar cues without instructor input. He stops after he has passed closed doors and checks his conclusion by tactually examining the area of the wall associated with relevant 'K' Sonar feedback. If the student passes a closed door without recognizing it, tell him, and guide him to a point before the door so that he can listen to relevant feedback again.
• Twelfth, after being directed or guided back to the starting point near the wall of the corridor with closed doors, the student continues to hold the 'K' Sonar in trailing position in the right hand pointed toward the right wall and walks along the right side of the corridor using touch technique. He stops and indicates that he has passed a closed door based on 'K' Sonar feedback. You should confirm the student's conclusion and ask him to re-examine the area of any closed doors that he has missed. After this activity, discuss with the student whether closed doors could be located when the 'K' Sonar is cane-mounted.
• Thirteenth, the student follows a series of routes of increasing complexity involving corridors with plus and T intersections, open rooms, and closed doors. Tell the student the complete series of directions before he begins the route, and then repeat each new direction after he has completed the current step. Before beginning each step of a route, the student discusses whether or not to use the 'K' Sonar cane-mounted or hand-held. He uses the 'K' Sonar in the way he has planned, tells you when he has located the current landmark, and considers whether he could have been more effective if he had used the 'K' Sonar in a different way.
Many newer buildings minimize the number of objects that protrude from a corridor wall. For this reason, activities that examine protuberances have not been developed for this exercise. However, if any of the corridors in buildings that you use for this exercise include objects that stick out from the wall (e.g., drinking fountains or fire alarm boxes), point these out to the student as he passes them while using the 'K' Sonar in trailing position

202
pointed toward them. Discuss the 'K' Sonar sound pattern that is associated with them. Because the protuberance is closer to the 'K' Sonar than the wall from which it protrudes, the 'K' Sonar's tone will lower in pitch as the student passes the protuberance. If the student hears the low tone that indicates the wall drop even lower and then return to its original pitch, and if the change in pitch is sudden in both directions, the student has probably passed a protuberance. If the student hears a gradually changing pitch in a downward direction, he is probably drifting toward the wall. These topics will be handled in more detail in later outdoor exercises.
Make sure that you perform activities in this exercise in advance. It is important that you know how open doors, intersecting corridors, and specific closed doors will sound so that you can help your student recognize these sound signatures.
Note in advance the specific corridors you will use for specific activities. Also write down the direction in which your student will walk in each corridor.
Minimize the amount of travel between corridors for consecutive activities. If a corridor has desired features on both sides, and if consecutive activities require the student to examine the same side of the corridor, you could simply ask your student to turn around and walk back down the same corridor he used previously. Although he is walking through the same space, he is now examining features on the opposite side of the corridor; the pattern of these features is different from the pattern he experienced when he first walked down the corridor.
In the seven activities in which you guide the student, you will need to carry the student's cane; at such times, one of your student's hands holds the 'K' Sonar and the other holds your arm. If you use a speaker at the same time as you carry the cane, try holding the speaker in the hand of your guiding arm. You might find it helpful to practice holding your arm in guiding position and holding a speaker in your guiding hand pointed toward the area where your student's face will be.
You may find it helpful to use a speaker for early activities in this exercise or for any activity that is hard for the student to perform. Because speaker use requires you to walk immediately behind the student when he uses the cane, make sure he is comfortable having you in his personal space. If you use the speaker, remember to remain out of 'K' Sonar range and to point the speaker toward the student's face.
Procedure:
• Step 1 – Direct or guide the student to a corridor with no openings or protuberances along one of its walls. The corridor wall needs to be as smooth as possible to minimize the pitch changes produced by the 'K' Sonar when it is pointed toward the wall and the student walks parallel

203
to the wall. Ask the student to hold the 'K' Sonar in trailing position in his right hand pointed toward the wall.
• Step 2 – Guide the student down the corridor parallel to the right wall, walking on his left side and allowing enough space between the student and the right wall so that if he was using his cane, the cane would not touch the wall at the right end of its arc. Ask him to listen to the low, unchanging pitch of the 'K' Sonar.
• Step 3 – At the end of the corridor, ask the student to tell you what the unchanging low tone of the 'K' Sonar told him about his path along the right wall of the corridor. Help him verbalize that the low tone, which did not change in pitch, resulted from the fact that the 'K' Sonar remains the same distance from the wall as the student walks.
• Step 4 – Direct or guide the student back to the beginning of the corridor, and tell him that he will again trail with the 'K' Sonar in his right hand pointing toward the wall. However, tell the student that you will not walk straight down the corridor. Instead, you will show him how the 'K' Sonar will sound if he veers away from or toward the wall.
• Step 5 – As you guide the student down the corridor, again walk on his left side. Allow enough space between the student and the right wall so that if he was using his cane, the cane would not touch the wall at the right end of its arc. Ask him to pay attention both to the direction in which you move and to the changes in 'K' Sonar pitch that result from this action.
• Step 6 – Begin by walking parallel to the wall; after 5 or 6 steps, veer noticeably to the left, walk a few steps, and then stop. Ask the student what change he heard in 'K' Sonar tone and what this change meant.
• Step 7 – If the student cannot tell you that the pitch of the 'K' Sonar became higher when you moved away from the wall, ask the student to unplug the headphones or speaker from the 'K' Sonar. Return to your starting point. Plug a speaker into the 'K' Sonar, repeat Step 6, and discuss your movement and the 'K' Sonar pitch change as you move.
• Step 8 – If the student cannot detect and verbalize the meaning of the pitch change after you repeat Steps 6 and 7 several times, do not proceed with this exercise and return to appropriate exercises that teach the pitch-distance relationship.
• Step 9 – After the student completes Step 6 successfully, begin guiding again, and ask the student to tell you when the pitch changes. After walking parallel to the wall for a few steps, angle back toward the wall. Stop after you have angled toward the wall for a few steps and ask the student what change he heard from the 'K' Sonar and what this change means.
• Step 10 – If the student cannot tell you that the pitch of the 'K' Sonar became lower when you moved back toward the wall, ask the student

204
to unplug the headphones or speaker from the 'K' Sonar. Return to your starting point, but begin in the middle of the corridor so that you can guide the student at an angle toward the right wall. Plug a speaker into the 'K' Sonar, repeat Step 9, and discuss your movement and the 'K' Sonar pitch change as you move.
• Step 11 – If the student cannot detect and verbalize the meaning of the pitch change after you repeat Steps 9 and 10 several times, don't proceed with this exercise, and return to appropriate exercises that teach the pitch-distance relationship.
• Step 12 – Direct or guide the student back to the starting point far enough from the right wall that the cane will not touch it in the far right end of the arc. Ask the student to hold the 'K' Sonar in trailing position in his non-cane hand pointed toward the right wall, to use his cane in touch technique, and to walk down the corridor without veering. He should move so that the 'K' Sonar maintains a constant pitch. If the 'K' Sonar tone increases in pitch, he should angle slightly toward the wall; and if the 'K' Sonar tone decreases in pitch, he should angle slightly away from the wall.
• Step 13 – If the student does not veer, tell him to stop at the end of the corridor. Give positive verbal reinforcement for not veering. Ask the student to discuss what he heard from the 'K' Sonar and what this feedback told him.
• Step 14 – If the student veers and corrects, give positive verbal reinforcement. Ask him to stop and discuss what he heard and what he did in response.
• Step 15 – If the student veers to the left or right and does not correct after 4 or 5 steps, ask him to stop and give him feedback on his veering. Discuss 'K' Sonar pitch changes that can tell him he is veering. Then ask him to disconnect the headphones from the 'K' Sonar. Return to the starting point, connect a speaker to the 'K' Sonar, walk behind the student holding the speaker pointed at his head, and ask him to walk down the corridor as in Step 12. Note 'K' Sonar pitch changes; if the student cannot hear and process these in terms of his veering, do not continue with this exercise; return to exercises dealing with the pitch-distance relationship.
• Step 16 – Direct or guide the student back to the original position. Ask him to mount the 'K' Sonar on the cane, use headphones, and use touch technique as he walks straight down the corridor near its right wall. Tell the student that he should not touch the right wall with his cane, correcting his line of travel if he does so. Tell the student that, if he walks straight, the 'K' Sonar will produce the same low-pitched tone on the right end of the arc all the time. If the corridor is narrow, the student may also hear the same high-pitched tone in the left end of the arc. If the corridor is wide enough for the left wall to be out of 'K'

205
Sonar range when the student walks on the right side, he will hear no sound on the left end of the arc unless there is an obstacle in the corridor. If he wants to hear both walls of the corridor, he can change the 'K' Sonar range to 5-meters.
• Step 17 – If the student walks straight without veering, tell him to stop at the end of the corridor, give verbal reinforcement, and ask about 'K' Sonar pitch and what the pitch told him.
• Step 18 – If the student veers and corrects in 4 or 5 steps, offer verbal reinforcement after his correction, ask him to stop, and discuss what he heard from the 'K' Sonar that told him he had veered.
• Step 19 – If the student veers away from the right wall and does not correct his line of travel in 4 or 5 steps, ask him to stop and give feedback about his veering. Ask him to disconnect the headphones, and guide him back to the original position. Ask him to connect the speaker to the 'K' Sonar. Walk behind the student holding the speaker pointed at his head, and ask him to walk down the corridor as in Step 12. Note 'K' Sonar pitch changes when the student veers; if the student cannot hear and process these in terms of his veering, do not continue with this exercise; return to exercises dealing with the pitch-distance relationship.
• Step 20 – Ask the student to disconnect the headphones and to remove the 'K' Sonar from the cane. Direct or guide him to another corridor with open doors and at least one intersecting corridor on the right side. Tell the student to connect the headphones and hold the 'K' Sonar in the right hand in trailing position pointed to the right. Tell him to tell you to stop whenever he hears a change in 'K' Sonar pitch, and guide him on his left side down the corridor. The student should hear a distinct rise in pitch or an absence of tone when the 'K' Sonar passes an open door.
• Step 21 – If the student reports a change in 'K' Sonar feedback when passing an open door, give positive verbal reinforcement. Ask the student to use the 'K' Sonar to walk to the area where the pitch changed. The student should then determine what caused the change.
• Step 22 – Help the student verbalize that passing an opening results in a quick increase of 'K' Sonar pitch or a disappearance of 'K' Sonar tone. If an object is inside an open room in 'K' Sonar range, (e.g., less than 6.3 feet from the room entrance), the pitch will raise; if there is no object within 6.3 feet of the room entrance, the student will hear the percussive pulse of the 'K' Sonar but no actual tone.
• Step 23 – If the student recognizes and can explain the change in 'K' Sonar sound when he passes a room, continue guiding him down the corridor, asking him to tell you when he notices other such changes in 'K' Sonar feedback. For each such change, stop, ask the student to examine the area where 'K' Sonar feedback changes, and to describe
206
the meaning of the change in terms of the area's characteristics (e.g., an open door, an intersecting corridor).
• Step 24 – If the student does not tell you to stop after passing an open room or intersecting corridor, stop and give feedback about the opening. Ask the student to disconnect the headphones, guide him back to a point before the opening, and ask him to connect the speaker. Discuss 'K' Sonar feedback with the student as you guide him past the opening again. If, after appropriate repetition, the student continues to pass open rooms without noticing 'K' Sonar pitch changes, do not proceed with this exercise, and review appropriate exercises dealing with the pitch-distance relationship.
• Step 25 – After you guide the student past an intersecting corridor and he identifies it as the reason for the change in 'K' Sonar feedback, ask him if he notices any differences between feedback for this intersection and feedback for an open door. Suggest that door openings are usually smaller than intersecting corridors. If the student walks at about the same pace when passing a room and when crossing an intersecting corridor, the 'K' Sonar feedback signaling such openings is usually shorter in duration for the room than for the intersecting corridor.
• Step 26 – Demonstrate the difference in duration for 'K' Sonar feedback in these situations as follows. Ask the student to disconnect the 'K' Sonar headphones, and guide him back a few feet before an open door. Ask him to reconnect the headphones, guide him past the open door, and then past the intersection. If he does not notice a difference in feedback, repeat this process several times until he does.
• Step 27 – Direct or guide the student back to the beginning of this corridor, and guide him down it again. Tell him to hold the 'K' Sonar in his right hand in trailing position pointing to the right and to tell you when he passes an open room or an intersecting corridor. Review appropriate exercises if he does not detect and distinguish these features.
• Step 28 – Direct or guide the student to another corridor with open doors and intersecting corridors on the right side. Have the student hold the 'K' Sonar in trailing position in the non-cane hand pointed toward the right and use either touch technique to walk straight down the right side of the corridor. Again, his cane should not touch the right wall, and he should maintain a straight line of travel based on 'K' Sonar sounds. Have him identify changes in the pitch of 'K' Sonar tones and predict whether they indicate open doors or intersecting corridors. Give verbal feedback.
• Step 29 – Ask the student to disconnect the headphones from the 'K' Sonar. Direct or guide him back to the beginning of the corridor with open doors and cross-corridors on the right, and ask him to mount the 'K' Sonar on the cane and to reconnect the headphones. Tell him that

207
he will walk down the corridor using touch technique without touching the wall with his cane, listen to 'K' Sonar feedback when the cane is in the right end of the arc once every other stride, and tell you when he passes open rooms or intersecting corridors based on 'K' Sonar feedback. Tell him that you will give him feedback about the accuracy of openings he notices and that you will also tell him if he passes any openings that he does not notice.
• Step 30 – As the student walks down this corridor, give him verbal feedback when he correctly identifies an opening and tell him when he passes an opening without noticing it. After the student has completed this activity, discuss the pros and cons of locating open doors and intersecting corridors with the 'K' Sonar when hand-held and when cane-mounted. When used on the cane, larger openings such as intersecting corridors may be visible to the 'K' Sonar when it is in the side of the arc toward the opening; however, smaller openings can occur when the 'K' Sonar is in the left half of the arc. An opening must be as wide as at least two of the student's strides to show up reliably when the student uses the 'K' Sonar cane-mounted.
• Step 31 – Ask the student to remove the 'K' Sonar from the cane. Direct or guide him to another corridor with open doors and at least one intersecting corridor on the left side. Tell him that you will guide him down the corridor on his right side, that he will hold the 'K' Sonar in his left hand in trailing position pointed toward the left wall, and that he will report open doors or intersecting corridors based on 'K' Sonar feedback. If the corridor is wide, the student may need to change to the 5-meter range so that the left wall and the first few feet of an open room or intersecting corridor are in 'K' Sonar range.
• Step 32 – Give positive reinforcement for open doors and intersecting corridors that the student identifies correctly. If the student misses an opening, tell him so and guide him back to a point before the opening so that he can try again.
• Step 33 – Ask the student to disconnect the headphones from the 'K' Sonar. Direct or guide him to a corridor with closed doors on its right side. Show him a door that you know to be easy to hear with the 'K' Sonar. Describe salient features as he examines them. If the door is recessed, point out that the door is farther back from where the student will walk than is the corridor wall. If the door is fairly flush with the corridor and has a protruding door frame, point out that the near edge of the frame and the far edge of the frame stick out from the wall and that they are both slightly closer to the student when he walks down the corridor than is the corridor wall. If the door is flush with the wall and has no protruding door frame, point out the door knob which protrudes from the door and is closer to the student when he walks down the corridor than is the corridor wall. Discuss with the

208
student how the particular configuration of these characteristics will sound as the 'K' Sonar moves past them.
• Step 34 – After the student has examined specific features of the door that will be represented in 'K' Sonar feedback, guide him approximately 6 feet back down the corridor from the door. Ask him to hold the 'K' Sonar in his right hand pointed toward the right wall and to connect the speaker to the 'K' Sonar. Hold the speaker pointing toward the student's face, and guide him on the left side so that you are not between the 'K' Sonar and the wall. Move slowly past the closed door, and describe specific pitch changes that you hear from the speaker as you pass the near edge and then the far edge of the door. Describe these pitch changes as they relate to the specific configuration of the door that you and the student have just examined. If the closed door is recessed, you and the student will hear a slightly higher tone when you pass the door because it is farther back from the 'K' Sonar than is the hall wall; the lower tone of the hall wall will precede and follow the slightly higher tone of the door. If the door is flush with the wall and has a doorframe that protrudes from the wall, you and the student will hear a higher tone that lowers in pitch as you approach the protrusion of the doorframe nearest you. The tone will become lower in pitch and then disappear as the 'K' Sonar passes the first protrusion of the doorframe, but at the same time as the tone lowers or disappears, you and the student will hear the higher tone from the doorframe protrusion on the far side of the door opening that will also lower in pitch and then disappear as the 'K' Sonar passes the far edge of the doorframe. If the door is flush with the wall and has a protruding door knob, the student will hear a slightly higher-pitched tone as the 'K' Sonar passes the door knob; if the door knob is made of metal, its tone may be more shrill than the tone of the surrounding wall and door.
• Step 35 – After you pass the door, guide the student back to a point before the door, and ask him to point the 'K' Sonar toward the wall in trailing position as you again pass the door. After passing the door, discuss 'K' Sonar pitch changes that are associated with specific features of the door. Step 34 describes three typical configurations of closed doors and patterns of pitch change associated with them.
• Step 36 – Ask the student to disconnect the speaker, guide him to the beginning of the corridor with closed doors, ask him to connect the speaker or headphones (whichever you and the student think are appropriate), and ask him to hold the 'K' Sonar in his right hand in trailing position pointed toward the wall. Guide on the left, and ask the student to tell you when he has passed a closed door. Give verbal feedback when he is correct and when he is not.
209
• Step 37 – When the student passes a closed door without noting it, guide him to a point approximately 6 feet back down the corridor. Ask him to connect the speaker to the 'K' Sonar so that both of you can listen to feedback from the right wall again. If the student does not hear the door when guided past it a second time, discuss the 'K' Sonar feedback that you hear as you guide the student past the door again.
• Step 38 – If the student reports a door that is not there, guide him to a point approximately 6 feet back down the corridor before the area in question. Ask him to connect the speaker to the 'K' Sonar, and guide him past the area again. Discuss the 'K' Sonar feedback and, if changes were heard, ask the student to examine the wall tactually to determine what features might be associated with such changes.
• Step 39 – Ask the student to disconnect the speaker or headphones, and direct or guide him back to the beginning of the corridor with closed doors. Ask him to walk down the corridor using touch technique and holding the 'K' Sonar in his non-cane hand in trailing position pointed toward the right wall. Ask him to tell you when he has passed a closed door and to verify this with his cane and with touch.
• Step 40 – Give immediate feedback if the student passes a door without noticing it. Ask him to turn around, walk about 6 paces back down the corridor, and to turn around again and approach the door.
• Step 41 – If the student reports a door that is not there, he will realize his error when he checks the wall. Ask if he notices any features that could account for the change of tone that he heard.
• Step 42 – Direct or guide the student to an area of a building with a variety of features that have been examined in this exercise: open doors on either side of the corridor; intersecting corridors in a variety of configurations; and closed doors on the right side of the corridor. Give the student the simplest route in the series that you have prepared. Discuss whether he will use the 'K' Sonar hand-held or cane-mounted to locate landmarks in this route, and then request that the student locate the first landmark of the route. After the student has located each landmark, repeat the subsequent exercises and discuss whether the student will use the 'K' Sonar hand-held or cane-mounted to locate it. Examples of routes, from simple to complex, might include:
Locate the second open room on the right, then turn left and walk straight to the exit door.
After the first open room on the left, turn left down the intersecting corridor. Find the second closed door on the right and enter the room.
Find the second corridor on the right, turn right passing three open rooms on the right, then turn down the corridor on the left and enter the fourth door on the right.

210
211
Exercise 5.2 Hedges, Concrete Walls, and Wooden Fences Exercise objective:
The student will recognize 'K' Sonar tone color differences associated with concrete walls, wooden fences, and hedges; and will identify these features based on 'K' Sonar feedback. Exercise summary:
• First, the student faces a smooth concrete wall to which he is guided, listens to 'K' Sonar sounds while moving the cane in an arc with the 'K' Sonar cane-mounted, examines the wall corresponding to the sounds with the cane and with touch, and describes the tone color associated with the wall.
• Second, the student faces hedges to which he is guided, listens to 'K' Sonar sounds while moving the cane in an arc with the 'K' Sonar cane-mounted, investigates the hedge corresponding to the sounds with the cane and with touch, and describes the tone color associated with the hedges and bushes.
• Third, the student identifies hedges and a smooth concrete wall when guided past them with the 'K' Sonar held in trailing position and pointed at them.
• Fourth, the student faces a wooden fence to which he is guided, listens to 'K' Sonar sounds while moving the cane in an arc with the 'K' Sonar cane-mounted, examines the fence corresponding to the sounds with cane and with touch, and describes the tone color associated with the wooden fence.
• Fifth, the student identifies hedges and a wooden fence when guided past them with the 'K' Sonar held in trailing position and pointed at them.
• Sixth, the student identifies hedges, a smooth concrete wall, and a wooden fence when guided past them with the 'K' Sonar held in trailing position and pointed at them.
• Seventh, the student identifies hedges, a smooth concrete wall, and a wooden fence when guided past them with the 'K' Sonar cane-mounted and the cane held at the end of the arc toward them.
• Eighth, the student identifies hedges, a smooth concrete wall, and a wooden fence when walking through the exercise area using touch technique with the 'K' Sonar cane-mounted.
• Ninth, the student identifies hedges, a smooth concrete wall, and a wooden fence when walking through the exercise area using touch technique and holding the 'K' Sonar in the non-cane hand in trailing position pointed toward them.

212

213
Materials: 'K' Sonar, headphones, speaker, cane Location:
The area used in this exercise is comprised of a sidewalk or other walking area, perhaps in a small business or a residential district, that contains hedges, a smooth concrete wall, and at least one wooden fence. The various physical configurations of these landmarks are necessary to carry out the activities in this exercise. The area used in this exercise is comprised of a sidewalk or other walking area, perhaps in a small business or a residential district that contains hedges, a smooth concrete wall, and at least one wooden fence. Various physical configurations of these landmarks are necessary to carry out the activities in this exercise.
• Several hedges and a smooth concrete wall should be close to one another and should not have a wooden fence on the building line between them.
• Several hedges and one or two wooden fences should also be close to one another and should not have concrete walls on the building line between them.
• Hedges, wooden fences, and concrete walls should be located on the building line close enough together to be used for activities involving the identification and differentiation of all three features.
• Hedges, fences, and walls in this exercise area need to be at least as tall as the student's shoulder, approximately 4 feet in height.
• There should be little or no traffic on the street and no obstacles to avoid on the sidewalk as the student walks past concrete walls, hedges, and wooden fences. Traffic noise interferes with concentration on tone color differences needed for initial learning, and obstacle avoidance takes attention away from 'K' Sonar sounds.
• Hedges should not have sharp or rough foliage. • Avoid areas with steep upward slopes from the sidewalk to the
buildings. If the slope toward the buildings is steep enough, ground cover may be in 'K' Sonar range, especially for the shorter student. Grass and packed earth may mimic the sound signatures of hedges and fences.
• The building line should not include components with sound signatures similar to those of the hedge, concrete wall, or wooden fence. Do not use areas in which the following features are in 'K' Sonar range on the building line side of the student: trees; tall grass or weeds; metal fences; buildings made of brick.
• If possible, the building line should not include major protuberances or recesses.
• All areas should be rated low for crime.

214
• Because the student will examine these features tactually, they should be relatively clean and safe to touch.
• The area should be relatively free of pedestrian traffic when the student does this exercise. Pedestrians serve as obstacles and may also try to intervene when they see the student touching fences, hedges, and walls.
Instructor notes: In this exercise, you will teach the student to distinguish three building line components based on differences in tone color or quality of the 'K' Sonar sound signatures associated with them. The student may not be able to identify two of these components—the smooth concrete wall and the wooden fence—when contrasted with similar-sounding materials; however, when compared only with one another and with hedges, the smooth concrete wall, and the wooden fence produce very distinct 'K' Sonar sounds. Learning to hear major tone color contrasts between these three features builds a foundation for hearing more subtle contrasts examined in later exercises. Recognizing these features in passing, without touching them, can also be an exciting, motivational experience for the student who has never before been able to recognize such features at a distance.
The 'K' Sonar sound associated with hedges/bushes is so distinct that, after completing activities in this exercise, the student should be able to always identify shrubbery that is in 'K' Sonar range and use this as a clear landmark or location identifier. A hedge is perceived as a "mushy" tone, sounding almost insect-like. Many tones occur at about the same pitch simultaneously because each leaf reflects ultrasound back to the 'K' Sonar, which produces one tone for each of the reflections that it receives. The student should be able to recognize the tone color produced by hedges/bushes and identify them readily because nothing else sounds quite like a hedge.
Because of earlier work with smooth concrete walls, the student will recognize the full, sharp tone produced when the 'K' Sonar points toward the smooth concrete wall in this exercise. This tone is loud, sharp, and full because very little ultrasound is absorbed by the wall. Most of the ultrasound reflects back to the 'K' Sonar, which translates this high level of ultrasound into the full, loud, clear tone. The clear, full, loud tone produced by smooth concrete walls is very different from the insect-like tone produced by hedges and can be easily recognized when compared with them. However, a thick metal wall might sound fairly similar to a smooth concrete one. Such tones generally indicate less porous materials. Exercise 5.7 deals more directly with these more subtle tone color variations.
The wooden fence provides a sample of a fairly porous material; its tone will generally be softer and more airy than the tone of the concrete wall. The student should have little difficulty recognizing the tone produced by a

215
wooden fence when compared to the wall and the hedge. However, when compared with a wooden building, a wooden fence might not be as identifiable.
This exercise teaches the student to integrate the perception of hedges, wooden fences, and smooth concrete walls with the 'K' Sonar sounds associated with them in nine sequenced activities.
• First, the student is guided to a point approximately 6 feet from a smooth concrete wall. Using the 'K' Sonar cane-mounted, he is told to make sure that he faces the wall squarely and to scan the object ahead of him with the 'K' Sonar by moving his cane in an arc several times while standing still. He is then asked to examine the object tactually and to associate the specific 'K' Sonar tone color with the smooth concrete wall.
• Second, the student is guided to a point approximately 6 feet from a hedge. Using the 'K' Sonar cane-mounted, he is told to make sure that he faces the object squarely and to scan the object with the 'K' Sonar by moving his cane in an arc several times while standing still. He is then asked to examine the object tactually and to associate the specific 'K' Sonar tone color with hedges.
• Third, the student identifies the hedge and the concrete wall when being guided past them and holding the 'K' Sonar in the cane-hand in trailing position pointed toward the building line.
• Fourth, the student is guided to a point 6 approximately feet from a wooden fence. Using the 'K' Sonar cane-mounted, he is told to make sure that he faces the object squarely and to scan the object ahead of him with the 'K' Sonar by moving his cane in an arc several times while standing still. He is then asked to examine the object tactually and to connect the specific 'K' Sonar tone color with the fence.
• Fifth, the student identifies the hedge and the wooden fence when being guided past them and holding the 'K' Sonar in trailing position pointed toward the building line.
• Sixth, the student identifies the hedge, the concrete wall, and the wooden fence when being guided past them and holding the 'K' Sonar in trailing position pointed toward the building line.
• Seventh, the student identifies the hedge, the concrete wall, and the wooden fence when being guided past them with the 'K' Sonar cane-mounted and holding the cane at the end of the arc pointed toward the building line. When compared to the previous trailing activity, the student notices the lower volume and slight distortion in sound because now the 'K' Sonar is not pointing directly at the building line. This is how hedges, concrete walls, and wooden fences are heard during cane use when the 'K' Sonar is cane-mounted.
• Eighth, the student identifies the hedge, the concrete wall, and the wooden fence when using touch technique with the 'K' Sonar cane-

216
mounted by noting the tone color each time the cane is at the end of the arc closest to the building line, an event that occurs once every other stride. In this situation, the features of interest must be wider than two of the student's strides to be recognizable. If a feature is narrow enough for the student to step past it when the 'K' Sonar is not pointed toward the building line, the 'K' Sonar cannot detect the feature.
• Ninth, the student identifies the hedge, the concrete wall, and the wooden fence when using touch technique and holding the 'K' Sonar in trailing position in the non-cane hand pointed toward the building line. In this situation, the student can detect smaller features and may be more accurate in identifying larger ones because the student receives continuous 'K' Sonar feedback from the building line. He hears the tone color of hedges, concrete walls, and wooden fences during the entire time that he walks past them, not once briefly every other stride.
This exercise includes four activities in which you guide the student past hedges, wooden fences, and smooth concrete walls in the building line. When guiding, you can only walk in one direction because the student must always be on the building line side, his cane-hand must be closer to the building line, and his non-cane hand must hold your arm. When two guiding activities use the same area and one occurs immediately after the other, you must guide the student back to the starting point before proceeding to the second activity in order for the student to maintain the correct position relative to the building line during each activity.
When you guide the student as he holds the 'K' Sonar in his cane-hand in trailing position pointed at the building line, you will carry the student's cane because both of the student's hands are occupied. His cane hand holds the 'K' Sonar, and his non-cane hand holds your arm.
Before doing this exercise, make sure that the student does not have allergies to plants/hedges, that he is not tactually defensive, and that he does not mind touching unknown objects. In initial examinations of hedges and other features, you can tell the student the name of the object before asking him to touch it. However, make sure that he has described the 'K' Sonar sound that he hears in response to the feature before you tell him the feature's name.
Select the areas in which to do this exercise in advance so that you are sure that tone color changes resulting from hedges, concrete walls, and wooden fences are discernable and so that you can discuss differences in tone color with your student. Walk through the area first using a cane with the 'K' Sonar held in trailing position pointed toward the building line and second with the 'K' Sonar cane-mounted and with the cane held at the end of the arc pointed toward the building line. The features of interest may

217
sound slightly different under these two conditions because in the first the 'K' Sonar points straight toward the building line and in the second it points toward the building line at an angle.
It may be helpful at first to listen to 'K' Sonar sound patterns with your student through a speaker so that both you and your student can hear and discuss changes in tone color. While guiding, try to hold the speaker 10-12 inches from the student and pointed toward his face. When the student faces the building line to examine a feature, stand behind the student and hold the speaker facing the back of the student's head. Make sure that you remain out of 'K' Sonar range. You should also make sure that your student is comfortable with you in his personal space. As soon as the student shows awareness of the changes in sound patterns being discussed, ask him to switch to headphones. Return to the speaker if the student experiences difficulty with a more advanced step in the lesson. Procedure:
• Step 1 – Guide the student to a point approximately 6 feet from a smooth concrete wall. With the 'K' Sonar cane-mounted, ask the student to stand still, to move his cane in a wide, slow arc, and to face the object squarely. Ask him to move his cane in several more arcs while standing still and to describe the 'K' Sonar sound that he hears. Does this type of 'K' Sonar tone sound familiar?
• Step 2 – Ask the student to approach the object and touch it for identification. Discuss the wall and the reasons why the tone it makes is so loud and clear—the wall is made of very densely-packed material. The student should understand that dense materials make clear, loud tones because they reflect most of the ultrasound back to the 'K' Sonar.
• Step 3 – Guide the student to a point approximately 6 feet from a hedge. With the 'K' Sonar cane-mounted, ask the student to stand still; to move his cane in a wide, slow arc; and to face the object squarely. Ask him to move his cane in several more arcs while standing still and to describe the 'K' Sonar sound that he hears. Does this type of 'K' Sonar tone sound familiar?
• Step 4 – Ask the student to approach the object and touch it for identification. Discuss the hedge and the reasons why the tone it makes is so mushy or insect-like. The hedge is made of many individual leaves and stems, and the 'K' Sonar makes a sound for each one; the student hears a large number of small sounds at the same time, one for each small part of the hedge. The student should understand that all bushes or hedges will have a similar, recognizable type of tone color.
• Step 5 – Ask the student to remove the 'K' Sonar from his cane and to give the cane to you to carry for him. Instruct the student to hold the
218
'K' Sonar in trailing position pointed toward the building line. Guide him on the side opposite the building line past hedges and the concrete wall; stop when he is next to the wall and ask him what object he hears.
• Step 6 – If he does not know, repeat Steps 1 and 2. • Step 7 – When he has identified the wall correctly, guide him further;
stop when the 'K' Sonar points toward the hedge and ask him what object he hears.
• Step 8 – If he does not know, repeat Steps 3 and 4. • Step 9 – Ask the student to compare the sounds of the wall and the
hedge. Help the student make and verbalize the connections that hard surfaces make loud, shrill sounds, and the many leaves on bushes cause multiple, mushy, or insect-like sounds.
• Step 10 – Ask the student to mount the 'K' Sonar on the cane. Guide him to a point approximately 6 feet from a wooden fence, facing him toward it. Ask him to stand still; move his cane in a wide, slow arc; and face the object squarely. Ask him to move his cane in several more arcs while standing still and to describe the type of 'K' Sonar sound that he hears. Does it sound like hedges, like the concrete wall, or like something else?
• Step 11 – Ask the student to approach the object and touch it for identification. Discuss the fence and the reasons why the tone it makes is more airy, whistley, or muted. The fence is made of wood, which has pores or very tiny openings in it. Wood is not as dense a material as concrete, so it makes a softer, more airy, muted sound than concrete does, and it does not sound mushy or insect-like as do hedges. The student should understand that more porous materials make softer, more muted, airy tones because they absorb much of the ultrasound, reflecting less back to the 'K' Sonar.
• Step 12 – Ask the student to remove the 'K' Sonar from his cane and to give the cane to you to carry for him. Instruct the student to hold the 'K' Sonar in trailing position pointed toward the building line. Guide him on the side opposite the building line past hedges and a wooden fence; stop when he is next to the fence and ask him what object he hears.
• Step 13 – If he does not know, repeat Steps 10 and 11. • Step 14 – When he has identified the fence correctly, guide him
further; stop when the 'K' Sonar points toward the hedge and ask him what object he hears.
• Step 15 – If he does not know, repeat Steps 3 and 4. • Step 16 – Ask the student to compare the sounds of the fence and the
hedge. Help the student make and verbalize the connections that porous surfaces make muted, airy sounds, and that the many leaves on bushes cause multiple, mushy, or insect-like sounds.
219
• Step 17 – In an area where all three features of interest are present, guide the student on the non-cane side as the student holds the 'K' Sonar in trailing position with the cane hand pointed toward the building line. Stop next to each feature of interest–the hedge, the concrete wall, and the wooden fence. Ask the student which of these objects he hears. If the student does not know, repeat appropriate teaching activities.
• Step 18 – Ask the student to verbalize the differences in tone color that he hears from hedges, the concrete wall, and the wooden fence.
• Step 19 – Ask the student to unplug the speaker or headphones from the 'K' Sonar. Guide the student back to the beginning of the area with concrete walls, hedges, and wooden fences; and turn 180 degrees so that the building line is on the student's cane side. Ask the student to mount the 'K' Sonar on his cane, to connect the headphones, and to move the cane in an arc while standing still. Ask the student to stop cane movement when the cane is at the end of its arc, pointed in the direction of the building line. Tell the student to hold his cane in this position as you guide him along the building line. Explain that, when holding his cane in this position, he will hear the building line as it will sound when he is walking independently, with his cane at the end of the arc toward the building line.
• Step 20 – Ask the student to tell you to stop when he hears a hedge, smooth concrete wall, or wooden fence. When he tells you to stop, ask him which of the three features he hears.
• Step 21 – If the student misses a hedge, smooth concrete wall, or wooden fence that is in 'K' Sonar range, point it out to him, guide him back to a point approximately 6 feet before the feature, and ask him to listen carefully for 'K' Sonar tone color changes.
• Step 22 – Continue this process for all hedges, smooth concrete walls, and wooden fences in the exercise area.
• Step 23 – At the end of the building line, ask the student to turn around 180 degrees, so that he is ready to walk back through the area. If you have been listening to sounds with the student through the speaker, ask the student to disconnect the speaker and connect the headphones. Switch back to the speaker only if you need to discuss specific 'K' Sonar sounds that the student does not identify correctly.
• Step 24 – Instruct the student to walk through the exercise area using touch technique with the 'K' Sonar cane-mounted and to stop and tell you when he hears a hedge, smooth concrete wall, or a wooden fence. Remind him to pay close attention to the 'K' Sonar information on the end of the arc toward the building line. Verbalize that, to hear these features in the building line, the student must notice and track the tone color of the 'K' Sonar each time the cane is at the end of the arc

220
closest to the building line, an event which occurs one time every other stride. The student will hear a multitude of other pitch changes as the 'K' Sonar moves through the cane arc; but noticing building line features depends solely on the tone color changes that he hears once every other stride when the cane points toward the building line.
• Step 25 – When the student does not detect a hedge, concrete wall, or wooden fence that is in 'K' Sonar range, ask him to stop. Tell him that he just passed the feature (name it specifically), guide him back to a point approximately 6 feet before the feature, and ask him to listen for it again as he walks past it using his cane. Tell him that this skill may grow with practice and that you will show him an easier way to track these features next.
• Step 26 – At the end of the exercise area, instruct the student to turn around 180 degrees so that he is ready to walk back through the area. Ask him to remove the 'K' Sonar from the cane and hold it in his non-cane hand in trailing position, at about chest height, and pointed at the building line. Review trailing position if necessary.
• Step 27 – Instruct the student to walk through the exercise area using touch technique and to point out hedges, smooth concrete walls, and wooden fences. Give positive verbal reinforcement for correct answers. Ask him to redo a section of the walk when he passes a feature without naming it or when he names it incorrectly.
• Step 28 – Discuss whether it was easier to locate hedges, smooth concrete walls, and wooden fences when the 'K' Sonar was hand-held or when it was cane-mounted. Verbalize that large features on the building line can be located when using the cane with the 'K' Sonar cane-mounted but that small features can only be located when using the cane and holding the 'K' Sonar in trailing position in the non-cane hand pointed toward the building line.
221
Exercise 5.3 Veering Outdoors Exercise objective:
The student will determine when he is veering toward or away from the building line and will correct his line of travel based on 'K' Sonar sounds. Exercise summary:
• First, the student, holding the 'K' Sonar in trailing position pointed toward the building line, identifies gradual pitch changes indicative of veering as instructor guides him on the non-cane side and veers toward and away from the building line. Gradually increasing or higher pitch indicates veering away from the building line; gradually decreasing or lower pitch indicates veering toward the building line.
• Second, the student, guided by the instructor, uses the 'K' Sonar cane-mounted with the cane held at the end of the arc toward the building line and indicates when the instructor veers toward or away from the building line.
• Third, the student indicates when he veers and corrects for veering when walking through the exercise area using touch technique with the 'K' Sonar cane-mounted.
• Fourth, the student indicates when he veers and corrects for veering when walking through the exercise area using touch technique and holding the 'K' Sonar in the non-cane hand in trailing position pointed toward the building line.

222

223
Materials: The 'K' Sonar, speaker, headphones, cane Location:
• The area for this exercise consists of a city sidewalk with a building line composed of smooth concrete. The wall surface should have no or few openings and no or few protuberances and should be nearly one block long.
• There should be no traffic and no obstacles to avoid as the student walks past the line of concrete wall.
• The area should be rated low for crime. Instructor notes:
In this exercise, the student applies indoor veering detection skills learned in Exercise 5.1 to an outdoor setting. He recognizes 'K' Sonar pitch changes associated with veering away from a line of travel parallel to the building line and corrects his outdoor line of travel by bringing the 'K' Sonar tone back to its original pitch. Gradually increasing pitch indicates that the student is veering away from the building line, and gradually decreasing pitch indicates that the student is veering toward the building line. More abrupt 'K' Sonar pitch changes often result from building line feature changes such as recesses and protuberances.
At first, the student may be able to detect only major veering errors (e.g., veering at a 45-degree angle toward or away from the building line). With practice, more subtle veering may be detected, particularly when the student uses the cane and holds the 'K' Sonar in the non-cane hand in trailing position pointed toward the building line. As the student develops skill in recognizing gradual pitch changes, he also gains skill in angling his body so that the pitch changes are negated, (i.e., moving so as to bring the 'K' Sonar tone back to its original pitch).
Although most students can learn to detect and correct major veering, many may not be able to hear the very small pitch changes that accompany more subtle veering. If the student does not show progress when doing this exercise, feel free to omit it or come back to it at a later time.
In this exercise, veering detection and correction is taught through four sequenced activities.
• First, the student holds the 'K' Sonar in trailing position pointed toward the building line. As you guide him, he detects and identifies changes of direction that you make as you veer away from and then toward the building line and integrates directional changes with 'K' Sonar pitch changes that accompany them.
• Second, the student mounts the 'K' Sonar on the cane and holds the cane at the end of the arc toward the building line. As you guide him, he detects and identifies changes of direction that you make as you veer away from and then toward the building line and integrates

224
directional changes with 'K' Sonar pitch changes that accompany them.
• Third, the student, using touch technique with the 'K' Sonar cane-mounted, detects and identifies his intentional and non-intentional veering and corrects his line of direction accordingly.
• Fourth, the student, using touch technique and holding the 'K' Sonar in trailing position in his non-cane hand pointed toward the building line, identifies, detects, and corrects his non-intentional veering.
This exercise includes two activities in which you guide the student past a concrete wall. When guiding, you can walk in one direction only because the student must always be on the building line side, his cane hand must be closer to the building line, and his non-cane hand must hold your arm. Each guiding activity requires you to guide the student through the same area. In order for the student to maintain the correct position relative to the building line during each activity, you must guide the student back to the starting point before proceeding to the second activity.
When you are guiding the student as he holds the 'K' Sonar in his cane-hand pointed at the building line, you will carry the student's cane because both of the student's hands are occupied—his cane hand holds the 'K' Sonar and his non-cane hand holds your arm.
It is important to select the area in which to do this exercise in advance for two reasons. First, you must make sure that the area is truly appropriate for this exercise: there must be no major protuberances, angles, or recesses in the building line; and the walking area must be wide enough to allow you to veer at a 45-degree angle toward and away from the building line for at least four paces. Second, you need to practice veering and listening to 'K' Sonar pitch changes so that you can understand what your student will be hearing and explain the meaning of the sounds to him.
As you practice exercise activities, begin by veering at wide angles–about 45 degrees—toward and away from the building line. You should be able to hear the tone becoming gradually higher in pitch as you veer away from and becoming gradually lower in pitch as your veer toward the building line. Next, make your angle slightly narrower, veering less dramatically, and notice the pitch changes that result. Determine how much you need to veer in order to clearly hear a pitch change in the 'K' Sonar. This experience will give you visual/kinesthetic memory of how much to veer initially to give your student a very definite pitch change and how much you can reduce the veering and still give your student a reasonably noticeable pitch change later in the exercise. Verbalize to yourself whether the pitch gets higher or lower as you veer away from and toward the building line, and verbalize what pitch change you will need to hear to know that you are again walking parallel to the building line. You might say, for example, "Pitch sliding higher means I'm veering away; I need to bring pitch lower by angling slightly

225
toward the building line." Practicing these verbalizations as you perform the physical actions will make it easier for you to teach your student how to use these 'K' Sonar pitch changes to correct veering.
It may be helpful at first to listen to 'K' Sonar sounds with your student through a speaker so that both you and your student can hear and discuss pitch differences associated with veering. While guiding, try to hold the speaker near the student’s face. After the student begins to understand 'K' Sonar pitch changes associated with veering, ask the student to switch to headphones. Procedure:
• Step 1 – Discuss concepts of walking parallel to, veering toward, and veering away from the building line.
• Step 2 – Position yourself to guide the student on the non-cane side. Carry his cane for him. Ask him to hold the 'K' Sonar in his cane hand in trailing position pointed toward the building line. Tell him that you will guide him parallel to the building line for a while; he should hear a constant pitch (not increasing or decreasing) because the 'K' Sonar remains the same distance away from the building line as you walk. Explain that you will then veer away from the building line and the 'K' Sonar pitch will increase. You will then veer toward the building line and the 'K' Sonar pitch will decrease. The pitch change will be gradual, not abrupt.
• Step 3 – Begin walking parallel to the building line so that the student is approximately 6 to 9 feet away from the building. Discuss the fact that the pitch is not changing, and ask the student what this means in terms of veering.
• Step 4 – Veer noticeably at a 45-degree angle away from the building line. The student should feel your change of direction as he hears the pitch increase from the 'K' Sonar. Ask the student if he felt you veer and heard the pitch increase. Verbalize the connection between your change of direction and the increase in 'K' Sonar pitch—veering away from the wall makes the pitch slide higher.
• Step 5 – Veer back toward the wall at a 45-degree angle. Ask the student if he felt you move and if he noticed anything different about the 'K' Sonar pitch. The pitch should get lower as you veer back toward the wall. Verbalize the connection between your change of direction and the decrease in 'K' Sonar pitch—veering closer to the wall makes the pitch slide lower. As you stop veering and walk parallel to the wall again 'K' Sonar pitch should stop changing.
• Step 6 – Continue to guide the student, and ask him to tell you when he feels you veer and when the pitch of the 'K' Sonar slides up or down. Continue to veer at fairly wide angles so that your body motion and the amount of pitch change are fairly noticeable. If the student
226
does not point out a veer, stop and discuss what you just did and how the 'K' Sonar responded.
• Step 7 – When you reach the end of the exercise area, ask the student to disconnect the speaker or headphones, guide him back to the beginning of the exercise area, turn around 180 degrees so that the student is on the building line side again, and ask him to mount the 'K' Sonar on his cane and connect the headphones. Ask him to move the cane in an arc while standing still and to stop cane movement when the cane is at the end of its arc pointed toward the building line. Tell the student to hold his cane in this position as you guide him along the building line. Explain that this is the way the 'K' Sonar will point to the building line when he is using his cane. Tell him to let you know when you veer, what change he hears in the 'K' Sonar pitch, and what change would tell him that he was again walking parallel to the building.
• Step 8 – Walk parallel to the building for 8 to 10 strides, and then veer either toward or away from the building. If the student comments on change of pitch when you veer, stop and discuss—did the pitch lower or raise? What does this mean in terms of how far the wall is from the student? Did you veer away from the wall or toward it? What would you need to do to correct your line of travel?
• Step 9 – If the student does not comment on change of pitch when you veer away from the wall, stop and discuss.
• Step 10 – Continue this process until you reach the end of the exercise area. The student should be able to tell you when you veer, whether you have veered toward or away from the building line, which 'K' Sonar pitch change accompanied your veering, and which 'K' Sonar pitch change would indicate that you had corrected the veer.
• Step 11 – At the end of the exercise area, instruct the student to turn around 180 degrees and to walk down the block using touch technique, paying particular attention to the pitch of the 'K' Sonar when his cane points toward the building line. Tell him that you will give him directions to veer on purpose while he is walking.
• Step 12 – Ask the student to veer away from the building line and listen to the gradual increase in pitch made by the 'K' Sonar once every other stride when the cane is at the end of the arc toward the building line. The student will need to veer for at least 4 steps in order to notice the pitch change at the end of the arc.
• Step 13 – Ask the student to veer toward the building line and listen to the gradual decrease in pitch made by the 'K' Sonar once every other stride when the cane is at the end of the arc toward the building line. The student will need to veer for at least 4 steps in order to notice the pitch change at the end of the arc.

227
• Step 14 – After the student has veered away from and toward the building line and has listened to the 'K' Sonar while doing so, discuss with the student what he has noticed about 'K' Sonar sounds as he veered. Verbalize that, to hear whether he is veering, the student must notice and track the pitch of the 'K' Sonar each time the cane is at the end of the arc closest to the building line, an event which occurs one time every other stride. The student may hear other pitch changes as the 'K' Sonar moves through the cane arc. These changes indicate the presence of other objects in 'K' Sonar range in other parts of the arc; but tracking whether he his veering depends solely on the pitch changes that he hears one time every other stride when the cane points toward the building line.
• Step 15 – Repeat Steps 13 and 14. • Step 16 – As the student continues to walk, ask him to tell you
whether the 'K' Sonar pitch is constant or whether it changes when the cane points toward the building line. How does the student interpret this?
• Step 17 – If the student has veered naturally, ask him to try to correct his line of travel relative to the building line based on 'K' Sonar pitch. If the student has difficulty tracking subtle changes in 'K' Sonar pitch when the cane points toward the building line, tell him that you will show him an easier method next.
• Step 18 – At the end of the exercise area, ask the student to turn around 180 degrees, remove the 'K' Sonar from the cane and hold it in trailing position in his non-cane hand pointed toward the building line. Ask him to walk back down the block, using touch technique, trailing the building line with the 'K' Sonar and attempting to keep the pitch of the 'K' Sonar tones constant as he walks. Remind him that he now receives continuous 'K' Sonar feedback from the building line that he can hear immediately when the pitch becomes higher or lower and that he can correct veering by moving so that the pitch returns to its former level.
• Step 19 – As the student walks down the block, give positive verbal reinforcement if he veers and corrects. If he veers and does not correct, offer feedback with corrective directions, and discuss 'K' Sonar sounds.

228
229
Exercise 5.4 Protuberances in the Building Line Exercise objective:
The student will recognize 'K' Sonar sound patterns associated with protuberances in the building line and will identify these features based on 'K' Sonar feedback. Exercise summary:
• First, the student faces sections of buildings to which he is guided, listens to 'K' Sonar sounds while moving the cane in an arc with the 'K' Sonar cane-mounted, investigates features corresponding to sounds with the cane and with touch, and associates specific pitch change patterns with protuberances or projections from the building line.
• Second, the student identifies protuberances when guided, with the 'K' Sonar held in trailing position in the cane hand pointed toward the building line.
• Third, the student identifies protuberances when guided, with the 'K' Sonar cane-mounted and the cane held at the end of its arc toward the building line.
• Fourth, the student identifies protuberances when walking through the exercise area using touch technique with the 'K' Sonar cane-mounted.
• Fifth, the student identifies protuberances when walking through the exercise area using touch technique and holding the 'K' Sonar in his non-cane hand in trailing position pointed toward the building line.

230

231
Materials: 'K' Sonar, speaker, headphones, cane Location:
• The area consists of a wall or building line with protuberances such as attached columns, pillars, window trim that extends out beyond windows, or window air conditioners that protrude from a building fairly close to the ground.
• Protuberances should be close enough to each other to allow quick and easy movement between them and should involve one building line in a one block or similar amount of space. Protuberances can be in front of buildings or behind buildings, as long as there is a flat sidewalk-like area where the student can walk along the building line.
• There should be no obstacles in the path of travel so that the student can concentrate on hearing 'K' Sonar sounds from the building line without needing to move around obstacles.
• Because the student will examine the area of a protuberance in the building line tactually, the buildings should be relatively clean and safe to touch.
• The area should be relatively free of pedestrian traffic when the student does this exercise. Pedestrians serve as obstacles and may also try to intervene when they see the student hand-trailing the building line.
Instructor notes:
Passing a protuberance is perceived as an abrupt change from higher to lower to higher 'K' Sonar pitch.
In this exercise, you will set up situations designed to help the student examine, understand, and integrate the location of protuberances in the building line based on 'K' Sonar sounds. The ability to perceive these features at a distance makes them available to the student as landmarks and location indicators.
This exercise teaches the student to integrate the perception of protuberances with the 'K' Sonar sounds associated with them in five sequenced activities.
• First, the student faces the protuberance, examines it in detail, and connects 'K' Sonar sounds with specific spatial relationships. When facing a protuberance and moving the cane in an arc, the student hears the lower pitch of the protuberance when the cane is in the midpoint of the arc, a position straight ahead of the student's hip. As the cane moves toward either end of the arc, the student usually hears two tones, one lower and one higher; the lower tone corresponds to the protuberance and the higher tone corresponds to the building line beyond the protuberance, which is further away from the student. When the cane is at the end of its arc, the student usually hears only

232
one higher pitched tone, corresponding to the building line. The physical examination of the protuberance in this exercise helps the student integrate the shape of the protuberance with the resulting 'K' Sonar sounds.
• Second, the student identifies 'K' Sonar sound indicators of protuberances when being guided along the building line and holding the 'K' Sonar in trailing position in the cane hand pointed toward the building line. Protuberances will sound like abrupt pitch shifts from higher to lower back to higher pitches as the student moves past the building line that is farther away, past the protuberance that is closer, and then past the building line that is again farther away. The student may hear two tones at the same time when passing a protuberance—one higher-pitched tone from the building line and another lower pitched tone from the protuberance.
• Third, the student identifies 'K' Sonar sound indicators of protuberances when being guided along the building line and holding the cane at the end of the arc pointed toward the building line. When compared to the previous trailing activity, the student will notice the lower volume and slightly distorted sound because now the 'K' Sonar is not pointing directly at the building. This is how protuberances will sound when the student uses a cane with the 'K' Sonar cane-mounted.
• Fourth, the student identifies protuberances when using touch technique with the 'K' Sonar cane-mounted by noting the pitch each time the cane is at the end of the arc closest to the building line, an event which occurs one time every other stride. In this situation, a protuberance must be wider than two of the student's strides to be recognizable. If a protuberance is narrow enough for the student to step past it when the 'K' Sonar is not pointed toward the building line, the 'K' Sonar cannot detect the protuberance. The student recognizes protuberances when he hears the relatively high pitch when the cane points toward the building line, then a lower pitch when the cane points toward the protuberance, and finally a higher pitch when the cane points toward the building line again. The student may hear other pitch changes as the 'K' Sonar moves through the cane arc; noticing a protuberance depends solely on the pitch changes that occur once every other stride when the cane points toward the building line.
• Fifth, the student identifies protuberances when using touch technique and holding the 'K' Sonar in trailing position in the non-cane hand pointed toward the building line. In this situation, the student can detect narrower, shallower protuberances more easily because the continuous 'K' Sonar contact with the building line means that all protuberances are in 'K' Sonar range when the student walks past them; a narrow protuberance will not be missed because the 'K' Sonar never points away from the building line. When the student walks past

233
a protuberance using this technique, he hears a continuous tone sequence in the high-low-high pitch pattern that describes the protuberance. It is much easier to track and interpret this pattern when trailing with the 'K' Sonar than it is to remember, compare, and recognize this pitch pattern when the 'K' Sonar is cane-mounted and the relevant pitches are heard once every other stride when the cane is at the end of the arc closest to the building line.
Activities in this exercise help the student learn when to keep the 'K' Sonar cane-mounted and when to trail with it based on the type of protuberance he wants to locate. Most students will learn to recognize 'K' Sonar sounds that correspond to fairly wide, deep protuberances in the building line when they are walking down the sidewalk using a cane with the 'K' Sonar cane-mounted. However, in order to detect small protuberances, the student must remove the 'K' Sonar from the cane, continue to use the cane, and hold the 'K' Sonar in trailing position in the non-cane hand, pointed toward the building line.
This exercise includes two activities in which you guide the student and two activities in which the student uses his cane. When guiding, you can only walk in one direction because the student must always be on the building line side, his cane hand must be closer to the building line, and his non-cane hand must hold your arm. In order for the student to maintain the correct position relative to the building line during both activities, you must guide the student back to the starting point before proceeding to the second activity.
It is essential to select the area for this exercise in advance so that you are sure that pitch changes resulting from protuberances are discernable. Walk through the area first using a cane with the 'K' Sonar held in trailing position pointed toward the building line, and second with the 'K' Sonar cane-mounted and with the cane held at the end of the arc pointed toward the building line. Protuberances may sound slightly different under these two conditions because in the first condition the 'K' Sonar points straight toward the building line, and in the second condition it points toward the building line at an angle.
When you examine the area to use in this exercise, remember that the student will trail the protuberance and the building line around it. Make sure that you can see inside buildings so that you can select a time for this examination when a door in the student's path is not about to be opened by someone entering or leaving the building.
It may be helpful at first to listen to 'K' Sonar sound patterns with your student through a speaker so that both you and your student can hear and discuss these changes. While guiding, try to hold the speaker near the student’s face. When the student faces the building line to examine a protuberance, stand behind the student and hold the speaker facing the

234
back of the student's head. Make sure that you remain out of 'K' Sonar range. You should also make sure that your student is comfortable with you in his personal space. As soon as the student shows awareness of the changes in sound patterns being discussed, ask him to switch to headphones. Return to the speaker if the student experiences difficulty with a more advanced step in the lesson. Procedure:
• Step 1 – Guide the student to a point approximately 8 feet back from a protuberance in a wall—a large pipe, a column, an air conditioner. The protuberance should be 2-5 feet wide and 2-5 feet deep. Ask the student to mount the 'K' Sonar on his cane. Ask the student to stand still, move his cane in an arc, and notice and describe changes in 'K' Sonar pitch across the arc. The lowest pitch is directly in front of the student, when the cane points straight ahead of the student's hip. At some point in the cane arc, depending on the width of the protuberance, the pitch becomes higher. The amount of the pitch increase depends on the depth of the protuberance (how far it sticks out from the building). The farther the protuberance sticks out from the building, the greater the distance between the student and the base building line will be, and consequently the higher will be the pitch produced by the 'K' Sonar when the cane is turned far enough for the ultrasound to reflect off of the building. The 'K' Sonar may also produce two tones at the same time—one lower-pitched tone corresponding to the protuberance and a higher-pitched tone corresponding to the building line. This happens when the cane is at a point in its arc where the 'K' Sonar receives reflections from both the protuberance (nearer to the student) and the building line (farther from the student) at the same time.
• Step 2 – Ask the student what he knows about the location of near and far objects based on the 'K' Sonar sounds that occur as he stands still and moves his cane in an arc.
• Step 3 – Ask the student to examine the part of the building line that corresponds to the higher-pitched tone in the left side of his cane arc. He should move toward this tone, using his cane, and examine the area by touch. If you are using a speaker, tell the student that you will move with him, holding the speaker behind his head as he moves.
• Step 4 – Guide the student back to the original position and ask him to locate and examine the object that is causing the lower-pitched tone. He should move toward this tone, using his cane, and examine the area by touch.
• Step 5 – Guide the student back to the original position and ask him to examine the part of the building line that corresponds to the higher-

235
pitched tone in the right side of his cane arc. He should move toward this tone, using his cane, and examine the area by touch.
• Step 6 – Guide the student back to the original position. Ask the student to unplug the headphones or speaker from the 'K' Sonar and give you his cane. He will do this activity without 'K' Sonar feedback. Ask him to examine the protuberance, hand-trail it to the building line on both sides, then hand-trail back from the building line, around the protuberance, and back to the building line on the other side.
• Step 7 – Guide the student back to the original position. Give him his cane, and ask him to reconnect the speaker or headphones to the 'K' Sonar. Ask the student to move his cane in an arc and describe 'K' Sonar tones in terms of what they tell him about the protuberance now, after he has examined it.
• Step 8 – Guide the student approximately 8 feet back from another protuberance, which is 2-5 feet wide and 2-5 feet deep. Repeat Steps 2-7.
• Step 9 – Guide the student approximately 8 feet back from another protuberance, which is 2-5 feet wide and 2-5 feet deep. Ask the student to consider the protuberance through 'K' Sonar sounds as he stands still and moves his cane in an arc. Ask him to describe what he perceives without physically examining the protuberance. If he has difficulty describing his perception, ask him to examine the protuberance using his cane and hands. Then guide him to the original position and discuss what he hears in relation to the physical protuberance.
• Step 10 – Ask the student to unplug the speaker or headphones from the 'K' Sonar, remove it from the cane, and give the cane to you. Guide the student to the beginning of the area with protuberances. Position yourself and the student so that the building line is on the student's cane side as you begin to walk through the area with protuberances. Ask the student to hold the 'K' Sonar in his cane hand in trailing position pointed toward the building line.
• Step 11 – Ask the student to tell you to stop when he hears a protuberance; tell him that protuberances may sound like abrupt pitch shifts and may also produce several tones at once. Discuss how protuberances move abruptly from higher to lower pitches, and then back to higher ones. Veering results in a more gradual pitch change.
• Step 12 – If the student misses a protuberance that is in 'K' Sonar range, point it out to him, guide him back to a point approximately 6 feet before the protuberance, and ask him to listen carefully for 'K' Sonar pitch changes.
• Step 13 – Continue this process for all protuberances in the exercise area.

236
• Step 14 – Ask the student to unplug the speaker or headphones from the 'K' Sonar. Guide the student on the non-cane side back to the beginning of the area with protuberances, and turn 180 degrees so that the building line is on the student's cane side. Ask the student to mount the 'K' Sonar on his cane and to move the cane in an arc while standing still. Ask the student to stop cane movement when the cane is at the end of its arc, pointed in the direction of the building line. Tell the student to hold his cane in this position as you guide him along the building line. Explain that, when holding his cane in this position, he will hear the building line as it will sound when he is using his cane and the cane is at the end of the arc toward the building line.
• Step 15 – Ask the student to tell you to stop when he hears a protuberance. Remind him that he will hear building-line sounds less clearly, with a bit of distortion introduced, because the 'K' Sonar is no longer pointing directly at the building line.
• Step 16 – If the student misses a protuberance that is in 'K' Sonar range, point it out to him, guide him back to a point approximately 6 feet before the protuberance, and ask him to listen carefully for 'K' Sonar pitch changes.
• Step 17 – Continue this process for all protuberances in the exercise area.
• Step 18 – At the end of the building line, ask the student to turn around 180 degrees, so that he is ready to walk back through the area. If you have been listening to sounds with the student through the speaker, ask the student to disconnect the speaker and connect the headphones. Only switch back to the speaker if the student has difficulty recognizing a protuberance and you need to hear and discuss 'K' Sonar feedback with him.
• Step 19 – Instruct the student to walk through the exercise area using touch technique with the 'K' Sonar cane-mounted and to stop and tell you when he hears a protuberance from the building. Remind him to pay close attention to the 'K' Sonar information on the end of the arc toward the building line. Verbalize that, to hear a protuberance in the building line, the student must notice and track the pitch of the 'K' Sonar each time the cane is at the end of the arc closest to the building line, an event which occurs one time every other stride. The student will hear a multitude of other pitch changes as the 'K' Sonar moves through the cane arc; but noticing a protuberance depends solely on the pitch changes that he hears once every other stride when the cane points toward the building line.
• Step 20 – When the student does not detect a protuberance that is in 'K' Sonar range, ask him to stop. Tell him that he just passed a protuberance, guide him back to a point approximately 6 feet before the protuberance, and ask him to listen for it again as he walks past it

237
using his cane. Tell him that this skill may grow with practice and that you will show him an easier way to track protuberances next.
• Step 21 – Instruct the student to turn around 180 degrees, so that he is ready to walk back through the exercise area. Ask him to remove the 'K' Sonar from the cane and hold it in his non-cane hand in trailing position, at about chest height, and pointed at the building line. Review trailing position if necessary.
• Step 22 – Instruct the student to walk through the exercise area, using touch technique, and to stop and point out each protuberance in the building line.
• Step 23 – Give positive verbal reinforcement for protuberances that the student identifies correctly. If the student passes a protuberance without identifying it, ask him to retrace his steps and listen for the protuberance again.
• Step 24 – Discuss which method was the easiest for locating protuberances. Verbalize that the student may notice major protuberances from the building line when using his cane with the 'K' Sonar cane-mounted, and that, if he needs to be more precise or to locate smaller ones, using his cane and holding the 'K' Sonar in trailing position in the non-cane hand may be easier and more effective.

238

239
Exercise 5.5 Recesses in the Building Line Exercise objective:
The student will recognize 'K' Sonar sound patterns associated with recesses in the building line and will identify these features based on 'K' Sonar feedback. Exercise summary:
• First, the student faces sections of a wall with recesses to which he is guided, listens to 'K' Sonar sounds while moving the cane in an arc with the 'K' Sonar cane-mounted, investigates features corresponding to sounds with the cane and with touch, and associates specific pitch change patterns with recesses in the building line.
• Second, the student identifies recesses when guided, with the 'K' Sonar held in trailing position in his cane hand pointed toward the building line.
• Third, the student identifies recesses when guided, with the 'K' Sonar cane-mounted and the cane held at the end of its arc toward the building line.
• Fourth, the student identifies recesses when walking down the block using touch technique with the 'K' Sonar cane-mounted.
• Fifth, the student identifies recesses when walking down the block using touch technique and holding the 'K' Sonar in his non-cane hand in trailing position pointed toward the building line.

240
241
Materials: 'K' Sonar, headphones, speaker, cane Location:
• The area consists of a wall or building line with small and large recesses such as doorways set back into the building line.
• Recesses should be close enough to each other to allow quick and easy movement between them and should be located in one building line in one block or a similar amount of space.
• Because the student will examine the area of a recess in the building line tactually, the buildings should be relatively clean and safe to touch.
• There should be no obstacles in the path of travel so that the student can concentrate on hearing 'K' Sonar sounds from the building line without needing to move around obstacles.
• The area should be relatively free of pedestrian traffic when the student does this exercise. Pedestrians serve as obstacles and may also try to intervene when they see the student hand-trailing the building line.
Instructor notes:
Passing a recess is perceived as an abrupt change from lower to higher to lower 'K' Sonar pitch.
In this exercise, you will set up situations designed to help the student examine, understand, and integrate the location of recesses in the building line based on 'K' Sonar sounds. Recesses indicate doors and other important landmarks; detecting them with the 'K' Sonar at a distance allows the student to not only recognize, approach and enter them more gracefully and quickly, but also to use them as location indicators or landmarks while walking past them.
This exercise helps the student integrate the perception of recesses with the 'K' Sonar sounds associated with them in five sequenced activities.
• First, the student faces the recess, examines it in detail, and associates 'K' Sonar sounds with specific spatial relationships. When facing a recess and moving the cane in an arc, the student hears the higher pitch of the recess when the cane is in the midpoint of the arc, in a position straight ahead of the student's hip. As the cane moves toward either end of the arc, the student usually hears two tones at the same time, one slightly lower and one slightly higher; the higher tone corresponds to the door or other solid material at the end of the recess and the lower tone corresponds to the side wall of the recess which is closer to the student. When the cane is at either end of its arc, the student usually hears only one lower pitched tone, corresponding to the building line outside of the recess. The physical
242
examination of the recess helps the student integrate the shape of the recess with the resulting 'K' Sonar sounds.
• Second, the student identifies 'K' Sonar sound indicators of recesses when being guided along the building line and holding the 'K' Sonar in trailing position in his cane hand pointed toward the building line. The student moves past the building line that is closer, past the recess whose end is farther away, and then past the building line that is again closer. The student may hear two tones at the same time when passing a recess—one lower-pitched tone from the building line and another higher pitched tone from the end of the recess.
• Third, the student identifies 'K' Sonar sound indicators of recesses when being guided along the building line, holding the cane at the end of the arc pointed toward the building line with the 'K' Sonar cane-mounted. When compared to the previous trailing activity, the student will notice the lower volume and slightly distorted sound because the 'K' Sonar is pointing obliquely at the building. This is how recesses are heard during cane use when the 'K' Sonar is cane-mounted.
• Fourth, the student identifies recesses when using a cane with the 'K' Sonar cane-mounted by noting the pitch each time the cane is at the end of the arc closest to the building line, an event which occurs one time every other stride. In this situation, a recess must be 4-6 feet wide and 2-3 feet deep to be recognized easily because it must be in 'K' Sonar range reliably when the cane is in the half of the arc toward the building line. If the student steps past a narrow recess while the 'K' Sonar is in the half of the arc away from the building line, the 'K' Sonar will not be focused on the recess when the student passes it. The student recognizes recesses when, after hearing a relatively low pitch when the cane points toward the non-recessed building line, he hears a higher pitch when the cane points toward the recess, and finally a lower pitch when the cane points toward the non-recessed building line again. The student will hear a multitude of other pitch changes as the 'K' Sonar moves through the cane arc; noticing a recess depends solely on the pitch changes that occur once every other stride when the cane points toward the building line.
• Fifth, the student identifies recesses when using a cane and holding the 'K' Sonar in trailing position in the non-cane hand pointed toward the building line. In this situation, the student can detect narrower, shallower recesses more easily because the continuous 'K' Sonar contact with the building line means that all recesses are in 'K' Sonar range when the student walks past them; a narrow recess will not be missed because the 'K' Sonar never points away from the building line. It is much easier to track and interpret this pattern when trailing with the 'K' Sonar than it is to remember, compare, and recognize this pitch pattern when the 'K' Sonar is cane-mounted and the relevant pitches

243
are heard once every other stride when the cane is at the end of the arc closest to the building line.
Activities in this exercise help the student learn when to keep the 'K' Sonar cane-mounted and when to trail with it based on the type of recess he wants to locate. Most students will learn to recognize 'K' Sonar sounds that correspond to fairly wide, deep recesses in the building line when they are walking down the sidewalk using their canes with the 'K' Sonar cane-mounted. However, in order to detect small recesses, the student must remove the 'K' Sonar from the cane, continue to use the cane, and hold the 'K' Sonar in trailing position in the non-cane hand, pointed toward the building line.
This exercise includes two activities in which you guide the student and two activities in which the student uses his cane. When guiding, you can only walk through the area in one direction because the student must always be on the building line side, his cane hand must be closer to the building line, and his non-cane hand must hold your arm. In order for the student to maintain the correct position relative to the building line during each guiding activity, you must guide the student back to the starting point before proceeding to the second activity.
It is essential to select the area for this exercise in advance so that you are sure that pitch changes resulting from recesses are discernable. First, walk through the area using a cane with the 'K' Sonar held in trailing position pointed toward the building line. Second, walk through the area with the 'K' Sonar cane-mounted and with the cane held at the end of the arc pointed toward the building line. Recesses may sound slightly different under these two conditions because in the first the 'K' Sonar points straight toward the building line, and in the second it points toward the building line at an angle. Make sure that you can hear 'K' Sonar pitch changes that correspond to the recesses that you pass.
When you examine the area to use in this exercise, remember that the student will trail the recess and the building line around it. Make sure that you can see inside buildings with recessed doorways so that you can select a time for this examination when the door is not about to be opened by someone entering or leaving the building.
It may be helpful at first to listen to 'K' Sonar sound patterns with your student through a speaker so that both you and your student can hear and discuss these changes. While guiding, try to hold the speaker near the student’s face. When the student faces the building line to examine a recess, stand behind the student and hold the speaker facing the back of the student's head. Make sure that you remain out of 'K' Sonar range. You should also make sure that your student is comfortable with you in his personal space. As soon as the student shows awareness of the changes in sound patterns being discussed, ask him to switch to headphones. Return to

244
the speaker if the student experiences difficulty with a more advanced step in the lesson. Procedure:
• Step 1 – Guide the student approximately 6 feet back from the midpoint of a recess in the wall or building line 4-6 feet wide and 4-6 feet deep, for example, a recessed doorway. Ask the student to stand still, move his cane in an arc, and notice and describe changes in the 'K' Sonar tones across the arc. The highest pitch is directly in front of the student, when the cane points straight ahead of the student's hip. The deeper the recess, the higher the pitch. At some point in the cane arc, depending on the width of the recess, the pitch becomes lower because ultrasound will reflect off of the walls on either side of the recess at points closer and closer to the student as the arc moves outward on either side. Lower tones also will occur when ultrasound reflects off of the non-recessed wall of the building line. The 'K' Sonar may also produce two tones at the same time—one higher-pitched tone corresponding to the door or wall at the far end of the recess and a lower-pitched tone corresponding to the inner side wall of the recess.
• Step 2 – Ask the student what he knows about the location of far and near objects based on the 'K' Sonar sounds that occur as he stands still and moves his cane in an arc.
• Step 3 – Ask the student to examine the part of the building line that corresponds to the lower-pitched tone in the left side of his cane arc. He should move toward this tone, using his cane, and examine the area by touch. If you are using a speaker, tell the student that you will move with him, holding the speaker behind his head as he moves.
• Step 4 – Guide the student back to the original position, and ask him to locate and examine the object that is causing the higher-pitched tone. He should move toward this tone, using his cane, and examine the area by touch.
• Step 5 – Guide the student back to the original position, and ask him to examine the part of the building line that corresponds to the lower-pitched tone in the right side of his cane arc. He should move toward this tone, using his cane, and examine the area by touch.
• Step 6 – Guide the student back to the original position. Ask him to unplug the speaker or headphones from the 'K' Sonar and to give you his cane. Encourage him to examine the recess, walk to the end of the recess (the door) and follow it out to the building line. Then ask him to hand-trail back from the building line, into the recess, across the back of the recess, and back out of it to the building line on the other side.
• Step 7 – Guide the student back to the original position. Give him his cane, and ask him to reconnect the speaker or headphones to the 'K' Sonar. Ask the student to move his cane in an arc and describe 'K'
245
Sonar tones in terms of what they tell him about the recess now, after he has examined it.
• Step 8 – Guide the student approximately 6 feet back from the midpoint of another recess in the wall or building line, 4-6 feet wide and 4-6 feet deep. Repeat Steps 2-7.
• Step 9 – Guide the student approximately 6 feet back from another recess, which is 4-6 feet wide and 4-6 feet deep. Ask the student to examine the recess through 'K' Sonar sounds as he moves his cane in an arc while standing still. Ask him to describe what he perceives without physically examining the feature. If he has difficulty describing his perception, ask him to examine the recess using his cane and hands. Then guide him to the original position and discuss what he hears in relation to the physical features.
• Step 10 – Ask the student to unplug the headphones or speaker from the 'K' Sonar, remove it from the cane, and give the cane to you. Guide the student to the beginning of the area with recesses. Position yourself and the student so that the building line is approximately 6 feet from the student on the student's cane side as you begin to walk through the area. Ask the student to reconnect the speaker or headphones to the 'K' Sonar and to hold the 'K' Sonar in trailing position in his cane hand pointed toward the building line.
• Step 11 – Ask the student to tell you to stop when he hears a recess. Tell him that recesses may sound like abrupt pitch shifts and may also produce several tones at once. Discuss how recesses move abruptly from lower to higher pitches, then back to lower ones.
• Step 12 – Give positive verbal reinforcement for recesses that the student identifies correctly.
• Step 13 – If the student misses a recess that is in 'K' Sonar range, point it out to him, guide him back to a point before the recess, and ask him to listen carefully for 'K' Sonar pitch changes.
• Step 14 – Continue this process for all recesses in the exercise area. • Step 15 – Ask the student to unplug the headphones or speaker from
the 'K' Sonar. Guide him on the non-cane side back to the beginning of the area with recesses, and turn 180 degrees so that the building line is on the student's cane side. Ask him to mount the 'K' Sonar on his cane, reconnect the headphones, and move the cane in an arc while standing still. Ask him to stop cane movement when the cane is at the end of its arc, pointing toward the building line. Tell him to hold his cane in this position as you guide him along the building line. Explain that, when holding his cane in this position, he will hear the building line as it will sound when he uses his cane and the cane is at the end of its arc pointing toward the building line.
• Step 16 – Ask the student to tell you to stop when he hears a recess. Remind him that 'K' Sonar feedback may be softer in volume and
246
slightly distorted because the 'K' Sonar is no longer pointing straight at the building line. Begin to guide him through the area.
• Step 17 – Give positive verbal reinforcement for recesses that the student identifies correctly.
• Step 18 – If the student misses a recess that is in 'K' Sonar range, point it out to him, guide him back to a point before the recess, and ask him to listen carefully for 'K' Sonar pitch changes.
• Step 19 – Continue this process for all recesses in the block. • Step 20 – At the end of the exercise area, ask the student to turn
around 180 degrees. He should be approximately 7 feet from the wall. If you have been listening to sounds with the student through the speaker, ask the student to disconnect the speaker and give him headphones. Only switch back to the speaker if the student has difficulty recognizing a recess and if you want to hear and discuss 'K' Sonar feedback with him.
• Step 21 – Instruct the student to walk down the block using touch technique and to stop and tell you when he hears a recess in the building line. Verbalize that, to hear a recess in the building line, the student must pay attention to and track the pitch of the 'K' Sonar each time the cane is at the end of the arc closest to the building line, an event which occurs one time every other stride. The student will hear other pitch changes as the 'K' Sonar moves through the cane arc, but noticing a recess depends solely on the pitch changes that he hears once every other stride when the cane points toward the building line.
• Step 22 – Give positive verbal reinforcement for recesses that the student identifies correctly.
• Step 23 – If the student passes a recess that was in 'K' Sonar range when the cane pointed toward the building line, tell him, guide him back to a point approximately 8 feet before the recess, and ask him to listen for it again. Tell him that this skill may grow with practice and that you will show him an easier way to track recesses next.
• Step 24 – Instruct the student to remove the 'K' Sonar from the cane and hold it in his non-cane hand in trailing position, at about chest height, and pointed at the building line.
• Step 25 – Instruct the student to walk down the block, using touch technique, and to point out recesses in the building line.
• Step 26 – Give positive verbal reinforcement for recesses that the student identifies correctly.
• Step 27 – If the student passes a recess that was in 'K' Sonar range when the cane pointed toward the building line, tell him, guide him back to a point approximately 6 feet before the recess, and ask him to listen for it again.
• Step 28 – Discuss whether locating recesses was easier when the 'K' Sonar was cane-mounted or when it was hand-held. Verbalize that the
247
student may notice major recesses in the building line when using his cane with the 'K' Sonar cane-mounted. However, if he needs to be more precise or to locate smaller recesses, using his cane and holding the 'K' Sonar in trailing position in the non-cane hand is easier and more effective.

248

249
Exercise 5.6 Openings in the Building Line Exercise objective:
The student will recognize 'K' Sonar sound patterns associated with openings in the building line and will distinguish these from sound patterns associated with recesses. Exercise summary:
• First, the student faces openings in the building line (e.g., spaces between buildings, alleys, driveways) to which he is guided; listens to the 'K' Sonar sounds while moving the cane in an arc with the 'K' Sonar cane-mounted; investigates features corresponding to the sounds with the cane and with touch; and associates specific pitch change patterns with openings in the building line.
• Second, the student identifies openings when guided, with the 'K' Sonar held in trailing position in the cane hand pointed toward the building line.
• Third, the student identifies openings when guided, with the 'K' Sonar cane-mounted and the cane held at the end of its arc toward the building line.
• Fourth, the student identifies openings when walking down the block using touch technique with the 'K' Sonar cane-mounted.
• Fifth, the student identifies openings when walking down the block using touch technique and holding the 'K' Sonar in his non-cane hand in trailing position pointed toward the building line.
• Sixth, the student, when possible, distinguishes recesses from openings in the building line when using touch technique and holding the 'K' Sonar in his non-cane hand in trailing position pointed toward the building line.

250
251
Materials: 'K' Sonar, headphones, speakers, cane Location:
• This exercise requires two areas with different characteristics. • One area consists of a wall or building line with gaps or openings such
as small parking lots, alleys, driveways, open gates, or gaps between buildings. These openings should be close enough to allow quick and easy movement between them and should involve one building line in a one block or similar amount of space.
• Another area should contain recesses, openings, and a small parking lot (large opening).
• Both areas should be rated low for crime. • Openings, with the exception of parking lots, should not be fully or
partially blocked by obstacles such as garbage cans, vehicles, or other objects. Nothing should be straight ahead of the 'K' Sonar for at least 20 feet when it is pointed down the center of the opening.
• Because the student will examine some aspects of the area tactually, the buildings should be relatively clean and safe to touch.
• There should be no obstacles in the path of travel so that the student can concentrate on hearing 'K' Sonar sounds from the building line without needing to move around obstacles.
• The area should be relatively free of pedestrian traffic when the student does this exercise. Pedestrians serve as obstacles and may also try to intervene when they see the student examining the opening with hands and cane.
Instructor notes:
This exercise requires the student to cross—and sometimes walk in—vehicular traffic paths (e.g., alleys, driveways, or small parking lots). Select areas with very little traffic and with good visibility. Let your student know in advance that you may tell him to stop because of approaching traffic. Emphasize that the student should never have the 'K' Sonar headphones in his ears when walking through areas in which he is likely to encounter traffic when traveling alone. Using the 'K' Sonar to detect alleys and parking lots is appropriate only in small business districts or other areas with very little traffic.
Openings are perceived as the absence or near absence of 'K' Sonar tone. Unlike recesses, openings have no wall or door at the end. Such openings may indicate parking lots, driveways, alleys, gaps between buildings, open gates, and other important features and landmarks. Detecting such openings with the 'K' Sonar at a distance allows the student to recognize, approach, and enter them more gracefully and quickly; to avoid drifting into them

252
without being aware of it; and to use them as location indicators or landmarks while walking past them.
This exercise helps the student integrate the perception of openings with the 'K' Sonar sounds associated with them in six sequenced activities.
• First, when facing a fairly wide opening and moving the cane in an arc with the 'K' Sonar cane-mounted, the student hears the absence of 'K' Sonar sound when the cane is in the midpoint of the arc, pointed straight ahead of the student's hip. The absence of sound indicates that nothing is in 'K' Sonar range because the 'K' Sonar is pointed straight down the middle of the opening. As the cane moves toward either end of the arc, the student hears the tone corresponding to the side of the opening at which the 'K' Sonar is now pointed. Physical examination of the opening helps the student integrate the shape of the opening with the resulting 'K' Sonar sounds.
• Second, the student identifies 'K' Sonar sound indicators of openings when being guided along the building line, holding the 'K' Sonar in trailing position in the cane hand pointed toward the building line. As he walks past an opening, the student receives the following sequence of 'K' Sonar feedback: a thinning of 'K' Sonar tone and an increase in pitch as the student passes the near edge of the opening and this near edge moves out of 'K' Sonar range; a cessation of tone as the student passes the middle of the opening and the 'K' Sonar points into the opening; and a return of tone that lowers in pitch as the student approaches the far edge of the opening and this far edge comes into 'K' Sonar range.
• Third, the student identifies 'K' Sonar sound indicators of openings when being guided along the building line, holding the cane at the end of the arc pointed toward the building line, and with the 'K' Sonar cane-mounted. When compared to the previous trailing activity, the student will notice the lower volume and slight distortion in sound because now the 'K' Sonar is not pointing directly at the building. This is how openings are heard during cane use when the 'K' Sonar is cane-mounted and the cane is at the end of its arc toward the building line.
• Fourth, the student identifies openings when using touch technique with the 'K' Sonar cane-mounted by noting the pitch each time the cane is at the end of the arc closest to the building line, an event which occurs one time every other stride. In this situation, an opening must be wider than two of the student's strides to be recognizable. If an opening is narrow enough for the student to step past it when the 'K' Sonar is not pointed toward the building line, the 'K' Sonar cannot detect the opening. The student recognizes openings when, after hearing a relatively low-pitched tone when the cane points toward the building line, he hears silence when the cane points toward the opening, and then a relatively low-pitched tone when the cane

253
approaches the far side of the opening. The student will hear other pitch changes as the 'K' Sonar moves through the cane arc; noticing an opening depends solely on the pitch changes that occur once every other stride when the cane points toward the building line.
• Fifth, the student identifies openings when using touch technique and holding the 'K' Sonar in trailing position in the non-cane hand pointed toward the building line. In this situation, the student can detect narrower openings more easily because the continuous 'K' Sonar contact with the building line means that all openings are in 'K' Sonar range when the student walks past them. When the student walks past an opening using this technique, he hears the lower-pitched tone from the building line increase in pitch as he passes the near edge of the opening, a cessation of tone as he passes the opening, and then a higher-pitched tone that lowers in pitch as he approaches the far edge of the opening. It is much easier to track and interpret this pattern when trailing with the 'K' Sonar than it is to remember, compare, and recognize this pattern when the 'K' Sonar is cane-mounted and the relevant pitches are heard once every other stride.
• Sixth, the student distinguishes openings from recesses when using touch technique and holding the 'K' Sonar in trailing position in the non-cane hand pointed toward the building line. In this situation, an opening is perceived as a lower-pitched tone which becomes higher and disappears, followed by the absence of tone, followed by a higher-pitched tone that becomes lower in pitch. A recess is perceived as a lower-pitched tone, followed by a higher-pitched tone, followed by a lower-pitched tone.
Activities in this exercise help the student learn when to keep the 'K' Sonar cane-mounted and when to trail with it based on the type of opening he wants to locate. Most students will learn to recognize 'K' Sonar sounds that correspond to fairly wide openings in the building line when they are walking down the sidewalk using their canes with 'K' Sonar cane-mounted. However, the student will find it easier to detect smaller openings if he uses the cane and holds the 'K' Sonar in trailing position in his non-cane hand, pointed toward the building line.
This exercise includes two activities in which you guide the student and three activities in which the student uses his cane. When guiding, you can only walk in one direction because the student must always be on the building-line side. Therefore, you must guide the student back to the starting point before proceeding to the second guiding activity.
Select the areas for this exercise in advance. The first area must include a fairly large number of varied openings such as small parking lots, alleys, driveways, gaps between buildings, or open gates, but it should have few or no recesses. The second area should include both openings and recesses.

254
Use and listen to the 'K' Sonar as you walk through the exercise areas to verify that openings and recesses are discernable. First, walk through the area using a cane with the 'K' Sonar held in trailing position pointed toward the building line. Second, walk through the area with the 'K' Sonar cane-mounted and with the cane held at the end of the arc pointed toward the building line. Openings and recesses may sound slightly different under these two conditions because in the first the 'K' Sonar points straight toward the building line, and in the second it points toward the building line at an angle. Make sure that you can hear 'K' Sonar pitch changes that correspond to most of the openings and recesses that you pass.
As with other exercises in which tactual examination of the building line may be involved, make sure in advance that you have a good view into buildings so that you can direct your student to examine them at times when persons are not about to enter or exit.
It may be helpful at first to listen to 'K' Sonar sound patterns with your student through a speaker so that both you and your student can hear and discuss these pitch changes. While guiding, try to hold the speaker near the student’s face. When the student faces and examines an opening in the building line, stand behind the student and hold the speaker facing the back of the student's head. Make sure that you remain out of 'K' Sonar range. You should also make sure that your student is comfortable with you in his personal space. As soon as the student shows awareness of the changes in sound patterns being discussed, ask him to switch to headphones. Return to the speaker if the student experiences difficulty with a more advanced step in the lesson.
Procedure:
• Step 1 – Guide the student approximately 6 feet back from the midpoint of the entrance to a narrow alley, driveway, or gap between two buildings that is approximately 8-12 feet wide. Ask the student to stand still and hold the cane straight ahead. The student should hear the rhythmic pulse of the 'K' Sonar, but there should be an absence of tone because there is no object straight ahead of the 'K' Sonar and nothing in its range. A few small tones may be heard if the opening is narrow enough because the 'K' Sonar may pick up faint ultrasound reflections from either or both walls, but there will be no clear, loud tone because the 'K' Sonar is not facing an object directly ahead. Ask the student to describe what he hears from the 'K' Sonar, and ask him how he interprets the absence or near absence of 'K' Sonar tone.
• Step 2 – Ask the student to move his cane in an arc while standing still and to notice changes in 'K' Sonar pitch across the arc. As the cane moves toward either end of the arc, the student will begin to hear tones that become lower in pitch because the 'K' Sonar is moving with the cane closer and closer to either side of the opening. Usually, the

255
'K' Sonar will not produce two tones at the same time when scanning an opening because, unlike recesses, there is no back wall of the opening from which ultrasound can also reflect.
• Step 3 – Ask the student what he now knows about the location of far and near objects based on the 'K' Sonar sounds that occur as he stands still and moves his cane in an arc.
• Step 4 – Ask the student to focus on the tones that he does hear while moving his cane in an arc—first, to move toward the left tone and examine its source with the cane and with touch, and then to move toward the tone on the right and examine its source with the cane and with touch. If you are using a speaker, tell the student that you will move with him, holding the speaker behind his head as he moves.
• Step 5 – Guide the student back to the original position, and ask him to walk into the absence of tone straight ahead of him. If it is safe to do so, ask the student to walk into the opening as far as he can go, using touch technique with the 'K' Sonar cane-mounted. If the opening is an alley, ask the student to walk down it until it comes out on another street.
• Step 6 – Ask the student to name and describe the environment. Discuss 'K' Sonar information that tells the student when he is walking into such an opening: the student hears few or no tones when the cane is in the middle of its arc and hears tones from the building line on both sides as the cane nears the ends of its arc.
• Step 7 – Ask the student to turn around and walk back through the opening or alley, continuing to listen to 'K' Sonar sounds that indicate buildings on either side and open space in the middle. Discuss this experience with the student.
• Step 8 – Guide the student approximately 6 feet back from the midpoint of another opening—perhaps one that is wider or narrower than the first and different from it in purpose or structure. Repeat Step 2-7.
• Step 9 – Ask the student to unplug the speaker or headphones from the 'K' Sonar, to remove it from the cane, and to give his cane to you. Guide the student on the non-cane side to a point where at least three alleys, driveways, open gates, or other openings occur in fairly close proximity. Position yourself and the student so that the building line is on the student's cane side as you begin to walk through the area. Ask the student to hold the 'K' Sonar in his cane hand in trailing position pointed toward the building line.
• Step 10 – Ask the student to tell you to stop when he hears an opening. Discuss how openings move abruptly from lower pitches to the absence of tone, then back to lower pitches. Recesses result in an abrupt shift from low to high pitches, but openings result in a shift from tone to no tone.

256
• Step 11 – Give positive verbal reinforcement when the student identifies an opening correctly.
• Step 12 – If the student misses an opening, point it out to him, guide him back to a point approximately 6 feet before the opening, and ask him to listen carefully for the absence of 'K' Sonar tone that indicates an opening.
• Step 13 – Continue this process for all openings in the exercise area. • Step 14 – Ask the student to disconnect the headphones or speaker.
Guide the student on the non-cane side back to the beginning of the area with openings, and turn 180 degrees so that the building line is on the student's cane side. Ask the student to mount the 'K' Sonar on his cane and to reconnect the headphones or speaker. Ask him to move the cane in an arc while standing still and to stop cane movement when the cane is at the end of its arc pointed in the direction of the building line. Tell the student to hold his cane in this position as you guide him along the building line. Explain that, when holding his cane in this position, he will hear the building line as it will sound when he is using his cane and the cane is at the end of the arc toward the building line.
• Step 15 – Ask the student to tell you to stop when he hears an opening. Discuss how openings move abruptly from lower pitches to the absence of tone, then back to lower pitches. Recesses result in an abrupt shift between low and high pitches, but openings result in a shift between tone to no tone. Remind the student that 'K' Sonar feedback may be softer in volume and slightly distorted because the 'K' Sonar is no longer pointing straight at the building line.
• Step 16 – Give positive verbal reinforcement when the student identifies an opening correctly.
• Step 17 – If the student misses an opening, point it out to him, guide him back to a point approximately 6 feet before the opening, and ask him to listen carefully for the absence of 'K' Sonar tone that indicates an opening.
• Step 18 – Continue this process for all openings in the exercise area. • Step 19 – At the end of the exercise area, instruct the student to turn
around 180 degrees. If you have been listening to sounds with the student through the speaker, ask the student to disconnect the speaker and to connect headphones. Only switch back to the speaker if the student has difficulty recognizing an opening and you need to hear and discuss sound changes with him.
• Step 20 – Tell the student to walk down the block using touch technique with the 'K' Sonar cane-mounted and to stop and tell you when he hears an opening in the building line. Remind him to pay close attention to the 'K' Sonar information on the end of the arc toward the building line. Verbalize that, to hear an opening in the

257
building line, the student must notice and track the presence-absence of tone of the 'K' Sonar each time the cane is at the end of the arc closest to the building line, an event which occurs one time every other stride. The student will hear many other sounds when the cane is in other parts of the arc, but detecting an opening depends solely on the change from tone to no tone that he hears once every other stride when the cane points toward the building line.
• Step 21 – Give positive verbal reinforcement when the student identifies an opening correctly.
• Step 22 – Alert the student when he passes an opening that he missed; guide him back to a point approximately 6 feet before the opening and ask him to listen for it again. Tell him that this skill may grow with practice and that you will show him an easier way to track openings next.
• Step 23 – At the end of the exercise area, ask the student to turn around 180 degrees, remove the 'K' Sonar from the cane, and hold it in his non-cane hand in trailing position, at about chest height, and pointed at the building line.
• Step 24 – Instruct the student to walk down the block, using touch technique and to point out openings in the building line.
• Step 25 – Give positive verbal reinforcement when the student identifies an opening correctly.
• Step 26 – If the student misses an opening, point it out to him, guide him back to a point approximately 6 feet before the opening, and ask him to listen carefully for the absence of 'K' Sonar tone that indicates an opening.
• Step 27 – Discuss whether it was easier to locate openings when the 'K' Sonar was hand-held or cane-mounted. Verbalize that the student may notice major openings in the building line when using his cane with the 'K' Sonar cane-mounted. However, if he needs to be more precise or to locate smaller openings, using his cane and holding the 'K' Sonar in trailing position in the non-cane hand is easier and more effective.
• Step 28 – If the second exercise area is close to the first, give your student directions and instruct him to walk to it using touch technique. Guide him to the beginning of the second area if it is inappropriate for any reason for the student to walk there independently. Tell your student that, in this new area, he will find both recesses and openings. Instruct him to remove the 'K' Sonar from the cane and hold it in his non-cane hand in trailing position, at about chest height, and pointed at the building line.
• Step 29 – Instruct the student to walk down the block, using touch technique, and to point out recesses and openings. Before beginning,
258
ask the student to tell you how he will hear the difference between a recess and an opening.
• Step 30 – Give positive verbal reinforcement when the student identifies an opening or a recess correctly.
• Step 31 – If the student does not stop and identify a recess or opening that he has passed, ask him to stop, guide him back approximately 6 feet before the feature, and ask him to listen carefully for an indication of it.
• Step 32 – If the student identifies a recess as an opening or vise versa, guide him back again, use the speaker instead of headphones, and discuss what you hear with him as he walks past the feature. Tell him to stop when the tone disappears for an opening or when a higher tone appears in the case of a recess.
• Step 33 – Continue this process until the student reaches the end of the second exercise area.
259
Exercise 5.7 Material Changes in the Building Line Exercise objective:
The student will recognize 'K' Sonar tone color changes that indicate changes in materials that make up building fronts. Exercise summary:
• First, the instructor walks on the street side and guides the student past buildings made of different building materials. Each building material should cover an area larger than four-six of the student's strides. Buildings should have no major protuberances, recesses, or openings. The student holds the 'K' Sonar in trailing position pointed toward the building line, identifies changes in tone color that indicate changes of building materials, and then examines each change with cane and touch.
• Second, the student identifies changes in building material when guided through the area with the 'K' Sonar cane-mounted with the cane held at the end of its arc and pointed toward the building line.
• Third, the student identifies changes in building materials when walking through the area using touch technique with 'K' Sonar cane-mounted.
• Fourth, the student identifies changes in building materials when walking through the area using touch technique and holding the 'K' Sonar in his non-cane hand in trailing position and pointed toward the building line.
• Fifth, the student, using touch technique and holding the 'K' Sonar in trailing position in his non-cane hand pointed toward the building line, walks past the second section of buildings that include many consecutive changes in building material over a small area (i.e., materials change at least once in an area smaller than three of the student's strides) and with no major protuberances, recesses, or openings. The student describes similarities and differences between this and the previous area.
• Sixth, the student, using touch technique and holding the 'K' Sonar in trailing position pointed toward the building line, walks past the second section of buildings again and identifies the building material changes.

260

261
Materials: 'K' Sonar, headphones, speaker, cane Location:
• This exercise requires two areas each consisting of a sidewalk with a building line on one side and a street or parking lot on the other with features often found in a small business district or a line of stores sharing a common parking lot.
• In the first area, some neighboring buildings are made of different materials such as rough concrete, smooth concrete, brick, metal, wood, or glass. Each material should cover a fairly large area of the building; the student should be able to hear one material for at least 4-6 strides before he hears the tone color shift indicating a different building material. In the second area, changes in building materials occur frequently—some of the changes in tone color indicating differences in building materials should occur once every step or two. Frequently-changing building line materials include: windows separated by concrete, brick, or metal; concrete or brick buildings with fairly flush wooden doors; buildings with fairly flush large trim made of a different material than the building.
• Both areas should be relatively free of protuberances, recesses, and openings.
• Both areas should be rated low for crime. • Because the student will examine some aspects of the area tactually,
the buildings should be relatively clean and safe to touch. • There should be no obstacles in the path of travel so that the student
can concentrate on hearing 'K' Sonar sounds from the building line without needing to move around obstacles.
• Areas should be relatively free of pedestrian traffic when the student does this exercise. Pedestrians serve as obstacles and may also try to intervene when they see the student examining the building with hands and cane.
Instructor notes:
Changes in building material are perceived as changes in tone color. The student can derive much landmark-related information by tracking the changes in building materials. Some students will learn to associate specific tone colors with glass, wood, metal, smooth concrete, and rough concrete.
As you move through this exercise, you can ask the student if he notices whether any specific tone colors seem to go with specific materials. If he begins making such associations, build on them by asking him if he has an idea of the material he is hearing. However, the student does not need to recognize the precise material to benefit from the change of tone color that tells him that the material itself has changed. The student may recognize a

262
landmark or destination according to the number of tone color changes in the building line determined by the number of materials used to make up the building's street-side wall.
In this exercise, the student learns to associate changes in 'K' Sonar tone color with changes in building material in six sequenced activities.
• First, the instructor guides the student past buildings that have relatively few protuberances, openings, and recesses and that have street-facing walls made primarily of one material, with each material covering an area larger than four-six of the student's strides. At least some neighboring buildings should be made of different materials. Walking on the building-line side, the student holds the 'K' Sonar in trailing position pointed toward the building line, identifies changes in tone color that indicate changes of building materials, and then examines each change with cane and touch.
• Second, as the instructor guides the student through this area again, the student identifies changes in building material while holding his cane at the end of its arc pointing toward the building line with the 'K' Sonar cane-mounted. When holding the cane in this position, the 'K' Sonar tones are lower in volume and slightly distorted because the unit points obliquely at the building line.
• Third, the student walks through this area using touch technique with the 'K' Sonar cane-mounted and identifies changes in building materials. The student hears the building line only once every other stride when the cane is in the end of the arc pointing toward the building line. Because building line materials do not change rapidly in this area, the student should be able to identify most changes, even though he does not obtain continuous information about the building line from the 'K' Sonar.
• Fourth, the student walks through this area using touch technique, holds the 'K' Sonar in the non-cane hand in trailing position pointed toward the building line, and identifies changes in building materials. Discuss whether changes are easier to identify when the student receives continuous information from trailing with the 'K' Sonar or when he receives intermittent information from using touch technique with the 'K' Sonar cane-mounted.
• Fifth, the student, using touch technique and holding the 'K' Sonar in trailing position in his non-cane hand pointed toward the building line, walks past a series of buildings in the second part of the area that have relatively few protuberances, openings, and recesses. However, the street-side walls of these buildings have many consecutive changes in material over a small area; materials should change at least once in an area smaller than three of the student's strides. After passing five or six quick material changes, the student describes how

263
this second area is similar to and different from the first area in this exercise.
• Sixth, the student continues walking through the second exercise area, using touch technique, and holding the 'K' Sonar in trailing position pointed toward the building line. He identifies changes in building materials based on 'K' Sonar feedback and then examines building fronts tactually to learn more about the materials involved. Discuss how trailing with the 'K' Sonar allows the student to hear smaller, more complex building line details.
It is essential to select the areas for this exercise in advance. The first location should include buildings or large sections of a building made out of different materials. At first, it is not helpful to use a building with many consecutive changes in material over a small area—for example, a glass window, a concrete strip, and another glass window in a 5-foot-long section of the building. When first learning to perceive subtle differences in tone color, the student needs a longer exposure to one type of tone (for example, the time it would take the student to take three or more strides) before shifting to another type of tone. In the second exercise area, building material changes should occur in close proximity to one another. As the student develops the skill to perceive tone color shifts, he can use the cane and trail the building line with the 'K' Sonar to detect rapid tone color shifts indicative of small contiguous sections made of different materials.
Make sure in advance that changes in building material are associated with discernable changes in 'K' Sonar tone color in both exercise areas. The 'K' Sonar can produce reliable tone color changes based on ultrasound reflection patterns for specific materials, but many unpredictable variables may contribute to how ultrasound reflects from specific structures. Before asking the student to differentiate between tone color shifts resulting from changes in material, it is crucial that you listen to these tone color changes yourself to determine whether there is a significant enough difference for the student to notice.
First, walk through the areas with the 'K' Sonar cane-mounted and with the cane held at the end of the arc pointed toward the building line. Second, walk through the areas using a cane with the 'K' Sonar held in trailing position pointed toward the building line. If, at first, you have difficulty noticing the change in tone color corresponding to a change in material, do what you would ask your student to do. Move back before the material changed; listen to the 'K' Sonar sound when the unit is pointed at this material; listen to the changing tone as you walk slowly past the change point; and then stop and listen closely when the 'K' Sonar points to the new material. You can also move repeatedly forward and backward past the point of change to hear the instant of tone color change again and again. If, after practice, you cannot discern most of the tone color changes that correspond

264
to building material changes, you may need to locate more appropriate exercise areas.
Present your student with structures that offer significant tone color differences earlier in this exercise, and use structures with more subtle differences later. This strategy offers the student more discernable stimuli first, allowing him to proceed from easier to more difficult discriminations.
This exercise includes two activities in which you guide the student and four activities in which the student uses his cane. When guiding, you can only walk in one direction because the student must always be on the building line side. Therefore, you must guide the student back to the starting point before proceeding to the second guiding activity.
Activities in this exercise help the student learn when to keep the 'K' Sonar cane-mounted and when to trail with it based on the size of the various materials of interest in the building line. When the 'K' Sonar is cane-mounted, the student can only perceive a change in material on the building line when his cane points toward it, an event that occurs once every other stride. A new material on the building line must extend for a distance of at least two of the student's strides in order for the student to notice it reliably. To be useful as a very visible landmark, the material needs to extend for 4 to 6 strides or more; in this situation, the student hears the new tone color of the 'K' Sonar consecutively two, three, or more times in a row when the cane points toward the building line. The student can detect detailed changes in building materials much more accurately when he uses his cane and holds the 'K' Sonar pointed toward the building line in trailing position. If it is important for the student to track landmark cues based on subtle changes in structure and material of the building line, he should use this technique. On the other hand, gross structure and material changes in the building line can be detected when the 'K' Sonar is cane-mounted, a far less cumbersome procedure. As the student tries both methods in this exercise, he will begin to understand the trade off—detail versus ease of use—and can begin to determine the types of circumstances in which he will use each technique.
It may be helpful at first to listen to the 'K' Sonar sound patterns with your student through a speaker so that both you and your student can hear and discuss these more subtle tone-color changes. While guiding, hold the speaker near the student’s face. When the student faces the building line to examine a material, stand behind the student and hold the speaker facing the back of the student's head. Make sure that you remain out of 'K' Sonar range. You should also make sure that your student is comfortable with you in his personal space. As soon as the student shows awareness of the changes in sound patterns being discussed, ask him to switch to headphones. Return to the speaker if the student experiences difficulty with a more advanced Step in the lesson.
265
Procedure: • Step 1 – For Steps 1-23, use the first exercise area—the block or
section of buildings in which materials making up the buildings change relatively infrequently. Ask the student to connect the speaker and point the 'K' Sonar at the building line, holding it in trailing position in the hand closer to the building line. Guide the student on the street side so that he holds your arm with the hand that is farther from the building line. Remind the student that different building materials result in different 'K' Sonar tone colors.
• Step 2 – Guide the student past a large section of building line made of one material followed by another large section of building line made of a second material. You may find this configuration in a small business district where buildings are close together or in a line of stores sharing a common parking lot. Three to four steps before the building line material changes, tell the student to listen carefully because the building material is about to change.
• Step 3 – Stop about 2 steps after the materials have changed and ask the student whether he heard a change in tone color. If he did, ask him to describe it. Tell him to listen to the change as you "replay" it by guiding the student backward past the change and then forward past it quickly. Discuss your perception of the tone color change as well.
• Step 4 – If the student notices no change in tone color and you do, ask him to listen as you guide him backwards past the change, then forward past it again. Do this several times in a row.
• Step 5 – If the student still does not notice a change, repeat Steps 2-4 using another point where building materials change.
• Step 6 – After the student has heard the shift in tone color several times, ask him to examine both materials with his cane, the 'K' Sonar, and touch. Direct him to walk to the first material, hear the 'K' Sonar sounds associated with the material, touch the material, and then name the material. Name it for him if he does not know the name. The student then walks to the second material and repeats this process.
• Step 7 – Ask the student to disconnect the speaker and connect headphones. Guide the student past another building, cuing him about 2 steps before the building materials change. Stop 2 steps after the change and ask him to describe what he heard.
• Step 8 – Ask the student to examine the two different materials with his cane, with the 'K' Sonar, and by touch. Ask him to name the materials involved, or name them for him.
• Step 9 – Tell the student that you will no longer cue him in advance. Ask him to tell you when he hears materials change. Continue to guide him past the building line.
• Step 10 – Whenever the student notes a change in tone color, ask him to examine the two materials involved with his cane, with the sounds

266
made by the 'K' Sonar in response to each material, and with touch. Ask the student to name these materials and describe their tone colors
• Step 11 – Ask the student to unplug the headphones from the 'K' Sonar. Discuss with the student whether he sees any identifiable pattern in type of material and type of 'K' Sonar tone color. Discuss with him how he can use the awareness of changes in building materials, with or without an idea of what the material might be, as landmark information.
• Step 12 – Guide the student on the non-cane side back to the beginning of the first exercise area, and turn 180 degrees so that the building line is on the student's cane side and you are on the street side. The student should be approximately 7 feet away from the building. Ask him to mount the 'K' Sonar on his cane and to connect the headphones. Ask him to move his cane in an arc while standing still and to stop cane movement when the cane is at the end of its arc, pointed in the direction of the building line. Tell the student to hold his cane in this position as you guide him along the building line. Explain that, when holding the cane in this position, he will hear the building line as it will sound when he is using his cane, with the cane at the end of the arc toward the building line.
• Step 13 – Ask the student to tell you to stop when he hears a change in tone color. Discuss what this means. Guide the student to the first and then to the second material. Ask the student to examine and identify these materials.
• Step 14 – If the student misses a tone color shift that you are certain is fairly obvious, point it out to him, and guide him back to a point approximately 2 strides before the change of material. Ask him to listen carefully for the 'K' Sonar tone color change and to tell you if he hears it.
• Step 15 – Repeat this process until you have reached the end of the first exercise area.
• Step 16 – At the end of the exercise area, ask the student to turn around 180 degrees and mount the 'K' Sonar on his cane. Ask him to walk down the block using touch technique and to stop and tell you when he hears a change of building material. Remind him to pay close attention to the 'K' Sonar information on the end of the arc toward the building line. Verbalize that, to hear a change of material in the building line, the student must notice and track the tone color of the 'K' Sonar each time the cane is at the end of the arc closest to the building line, an event which occurs one time every other stride. The student may hear a number of different tone colors as the 'K' Sonar moves through the cane arc; but noticing a material change depends solely on the tone color changes that he hears once every other stride when the cane points toward the building line.
267
• Step 17 – Give positive verbal reinforcement when the student identifies a change of material correctly.
• Step 18 – When the student does not detect a change in tone color that you know to be distinct, ask him to stop. Tell him that he just passed a change of material, guide him back to a point 2 strides before the change, and ask him to listen for it again as he walks past it using his cane. Tell him that this skill may grow with practice and that you will show him an easier way to track tone color changes next.
• Step 19 – At the end of the block or area, ask the student to turn around 180 degrees, to remove the 'K' Sonar from the cane, and to hold it in his non-cane hand in trailing position at chest height pointed toward the building line.
• Step 20 – Instruct the student to walk down the block, using touch technique, and to point out specific changes in materials that make up buildings.
• Step 21 – Give positive verbal reinforcement when the student identifies a change of material correctly.
• Step 22 – When the student does not detect a change in tone color that you know to be distinct, ask him to stop. Tell him that he just passed a change of material, guide him back to a point 2 strides before the change, and ask him to listen for it again.
• Step 23 – Discuss whether it was easier to locate changes in building materials when the 'K' Sonar was hand-held or cane-mounted.
• Step 24 – Direct or guide the student to the second exercise location in which buildings include many consecutive changes in material over a small area. Tell the student to continue using his cane and to continue trailing the building line with the 'K' Sonar in his non-cane hand. Tell him to notice changes in tone color and mention them to you.
• Step 25 – After the student has walked through the area, stop and ask him to describe what he has heard. How is this area similar to the previous one? How is it different? Help him verbalize that this second area has many more material changes in a small area than did the first.
• Step 26 – Ask the student to turn around and walk back through this area. Ask him to stop when he hears a change in tone color, to use 'K' Sonar feedback to locate the point where materials change, and to examine the change tactually.
• Step 27 – Ask the student whether he would prefer to look for these quick changes in building material when trailing as he just did or with the 'K' Sonar cane-mounted. Discuss and demonstrate, if needed, how many changes the student would miss if he heard the building line only once every other stride.

268

269
Exercise 5.8 Locating Landmarks From Building Line Cues Exercise objective:
The student will identify changes in building material in combination with protuberances, recesses, and openings in the building line; and will use all of these cues to locate specified landmarks and destinations. Exercise summary:
• First, the instructor, walking on the street side, guides the student past buildings made of varying materials and with major protuberances, recesses, and openings. The student holds the 'K' Sonar in trailing position pointed toward the building line; identifies changes in 'K' Sonar tone color and pitch that indicate building material changes in combination with protuberances, recesses, and openings; and then examines features with his cane and with touch.
• Second, the student identifies changes in building material in combination with protuberances, recesses, and openings when guided through the area with the 'K' Sonar mounted on the cane and the cane held at the end of its arc toward the building line.
• Third, the student identifies changes in building material in combination with protuberances, recesses, and openings when walking through the area using touch technique with the 'K' Sonar cane-mounted.
• Fourth, the student identifies changes in building material in combination with protuberances, recesses, and openings when walking through the area using touch technique with the 'K' Sonar held in trailing position in his non-cane hand and pointed toward the building line.
• Fifth, the student, using touch technique, follows instructions related to changes in building materials in combination with protuberances, recesses, and openings to locate and enter specific businesses. The student chooses whether to use the 'K' Sonar hand-held or cane-mounted for each step of the route.

270
271
Materials: 'K' Sonar, headphones, speaker, cane Location:
• The area consists of a block or section of a small business district where the building line includes protuberances, recesses, and openings; and where a variety of building materials are present. Some adjoining buildings should be made of distinct materials such as rough concrete, smooth concrete, brick, metal, wood, or glass. The area may also include some frequently-changing building line materials such as windows separated by concrete, brick, or metal; concrete or brick buildings with wooden doors; and buildings with large trim made of a different material than the building.
• The area should be rated low for crime. • Because the student will examine some aspects of the area tactually,
the buildings should be relatively clean and safe to touch. • There should be no obstacles in the path of travel so that the student
can concentrate on hearing 'K' Sonar sounds from the building line without needing to move around obstacles.
• The area should be relatively free of pedestrian traffic when the student does this exercise. Pedestrians serve as obstacles and may also try to intervene when they see the student examining a building with hands and cane.
Instructor notes:
This exercise should be done only under direct, one-on-one instruction by an orientation and mobility instructor because it requires the student to cross vehicular traffic paths (e.g., alleys, driveways, or small parking lots) while wearing 'K' Sonar headphones. Make sure that the exercise area offers you an excellent view of traffic moving toward you and your student. Choose an area with as little traffic as possible. Conduct your lesson at a time of day in which traffic is light. Let your student know in advance that you may tell him to stop because of approaching traffic. Emphasize that the student should never have the 'K' Sonar headphones in his ears when walking through areas in which he is likely to encounter traffic except in an O&M lesson in which his instructor specifically tells him to do so.
In this exercise, the student integrates skills learned previously in this chapter so that simultaneous changes of 'K' Sonar pitch and tone color become interpretable. A tone color shift heard at the same time that a low tone became higher and heard again as the high tone became lower might indicate a recessed glass door in a concrete building. On the other hand, the same pitch change without a noticeable change of tone color might indicate a recessed wooden door in a wooden building. The ability to distinguish such features based on 'K' Sonar sounds enhances efficiency of object location

272
because the student can now perceive and utilize dimensions of environmental information that are not otherwise accessible.
This exercise helps the student identify simultaneous material and structural changes in the building line in five sequenced activities.
• First, the instructor walks on the street side and guides the student past buildings made of varying materials and with major protuberances, recesses, and openings. The student holds the 'K' Sonar in trailing position pointed toward the building line; identifies changes in 'K' Sonar tone color and pitch that indicate building material changes in combination with protuberances, recesses, and openings; and checks predictions with cane and touch.
• Second, the instructor again walks on the street side and guides the student past buildings made of varying materials and with major protuberances, recesses, and openings. The student mounts the 'K' Sonar on the cane and holds the cane at the end of the arc pointed toward the building line; identifies changes in 'K' Sonar tone color and pitch that indicate building material changes in combination with protuberances, recesses, and openings; and then checks his predictions with cane and touch. IN this situation, 'K' Sonar feedback is slightly distorted and softer in volume because the 'K' Sonar points to the building line at an oblique angle.
• Third, the student identifies changes in building material in combination with protuberances, recesses, and openings when walking through the area using touch technique with the 'K' Sonar cane-mounted. IN this situation, the student notes the pitch/tone color each time the cane is at the end of the arc closest to the building line, once every other stride. Interpreting this complex 'K' Sonar feedback is difficult and sometimes impossible when feedback is not heard continuously.
• Fourth, the student identifies changes in building material in combination with protuberances, recesses, and openings when walking through the area using touch technique and holding the 'K' Sonar in trailing position in the non-cane hand pointed toward the building line. Because the student hears building line feedback continuously in this situation, building line features are easier to identify and use as landmarks or destinations.
• Fifth, the student uses touch technique with the 'K' Sonar cane-mounted or in trailing position as needed to locate destinations based on directions using building line features and materials.
Select the area for this exercise in advance. The area must be different from the areas used in exercises 5.4 through 5.7 because this area must include changes in building material, protuberances, recesses, and openings. You may not find all materials and features represented in any single area;

273
choose an area for this exercise that will expose the student to as many types of materials and features as possible.
Use and listen to the 'K' Sonar as you walk through the exercise area to verify that material changes and building line features are discernable. Do the activities in this exercise as if you were your student: use a cane and trail the building line with the 'K' Sonar; and use a cane with the 'K' Sonar cane-mounted. You will probably hear far more feature and tone color changes when you trail with the 'K' Sonar than when it is cane-mounted because smaller changes are easily missed when the 'K' Sonar scans in sync with the cane's movement. When you preview the area, take time to construct and write down directions to four or five locations. These directions should be based on features and materials in the building line that the student hears with the 'K' Sonar. Note the starting point and ordinal direction of travel for each set of directions that you create; when you give the student directions, make sure that he starts at the starting point and is facing in the ordinal direction that you have noted.
This exercise includes two activities in which you guide the student and three activities in which the student uses his cane. When guiding, you can only work in one direction because the student must always be on the building line side. Therefore, you must guide the student back to the starting point before proceeding to the second guiding activity.
If the student has difficulty hearing the combined change of pitch and tone color, you may find it helpful to "replay" the sound several times by repeatedly moving past the area of change. In the previous exercise, you "replayed" the tone color changes by guiding the student backward and then forward passed the point in the building line where the change occurred. Because only tone color differences were of concern, the sequence of the tone color changes did not matter; the student could obtain repeated exposure to the shift in tone color as he walked either forward or backward past the change. However, in this exercise, changes usually involve both tone color and pitch, and direction of the tone sequence matters. If a recessed door is followed closely by a protuberance in the building line, the sequence of pitch changes is different when the student moves backward past these features than it is when he moves forward past them. Therefore, when "replaying" the 'K' Sonar sounds in this exercise, you should not guide the student backward past the area of interest; instead, turn around, guide the student back to a point before the change area, turn around again, and move past the area of change in the original direction. The student should remove the headphones as you guide him back and put them on when he is ready to pass the area of change again.
You will count the changes that the student notices in two situations: when the 'K' Sonar is cane mounted and the student walks through the area using a cane; and when the 'K' Sonar is held in the non-cane hand in trailing position pointed at the building line and the cane is being used. The student

274
will typically notice more changes and will detect smaller changes when the 'K' Sonar points continuously toward the building line (the second situation) than when the 'K' Sonar is cane mounted and points to the building line only once every other stride (the first situation). Telling the student how many and what type of changes he noticed in each of these situations helps him make better decisions about when to keep the 'K' Sonar cane-mounted and when to trail with it in the non-cane hand while using the cane.
It may be helpful at first to listen to 'K' Sonar tone color and pitch changes with your student through a speaker so that both you and your student can hear and discuss these changes. While guiding, try to hold the speaker near the student’s face. When the student faces the building line to scan or examine a building-line feature, stand behind the student and hold the speaker facing the back of the student's head. Make sure that you remain out of 'K' Sonar range. You should also make sure that your student is comfortable with you in his personal space. As soon as the student shows awareness of ‘K’ Sonar pitch and tone color changes that accompany changes in building-line features and materials, ask the student to switch to headphones. Procedure:
• Step 1 – Before beginning, remind the student of previous learning: a shift to a lower pitch and back up again indicates a protuberance; a shift to a higher pitch and back down again indicates a recess; the absence of tone indicates an opening; and the change in tone color indicates a change of building material. Tell him that you will cue him approximately 2 steps before a material or a feature change and that you will stop several paces after it has occurred to discuss what he hears.
• Step 2 – Guide the student through the area you have selected, with the student walking on the building line side and you walking on the street side. Ask the student to hold the 'K' Sonar in trailing position pointed toward the building line in the hand that is closer to the buildings.
• Step 3 – Two to three steps before the change in the building line, tell the student to listen carefully for the change. Stop about 2 steps after the change and ask the student what change he heard and what he learned from hearing it. If the student does not articulate the change completely, ask him if the pitch changed, if the tone color changed, or if both changed.
• Step 4 – If the student hears no change in pitch or tone color, tell the student to listen to the change again as you replay it. To do this, ask the student to disconnect the speaker or headphones. Guide him back to a point several steps before the change, ask him to reconnect the speaker or headphones, and guide him past the change again.

275
• Step 5 – If the student still does not notice a change, repeat Step 3 at a point where material and feature changes are more pronounced.
• Step 6 – After the student has heard the shift in pitch/tone color and has expressed an opinion about what this change means, ask him to examine the building with his cane, with the 'K' Sonar, and by touch. Ask him to describe what he finds as it relates to the 'K' Sonar pitch or tone color changes.
• Step 7 – Repeat Steps 3-6 for the next building change. • Step 8 – Tell the student that you will no longer cue him about
changes in advance. Ask him to tell you when he hears a change in pitch or tone color, or hears an absence of sound.
• Step 9 – When the student notes a change that he passes, ask him to describe it and to tell you what he thinks it means. He can then obtain tactual feedback about his prediction.
• Step 10 – If the student misses a major change, tell him so. Ask him to disconnect the speaker or headphones, guide him to a point several steps before the change, and ask him to reconnect the speaker or headphones. Ask him to listen for the change, describe it to you, and check his predictions tactually.
• Step 11 – Ask the student to disconnect the speaker or headphones. Guide him back to the beginning of the exercise area, and turn 180 degrees so that the building line is on the student's cane side and you are on the street side. Ask him to mount the 'K' Sonar on his cane and reconnect the headphones; he should use headphones for the remainder of this exercise. Ask him to move the cane in an arc while standing still and to stop cane movement when the cane is at the end of its arc pointed in the direction of the building line. Tell the student that holding his cane in this position as you guide him along the building line shows him the building line as it will sound when he is using his cane with the 'K' Sonar cane-mounted and with the cane at the end of the arc toward the building line.
• Step 12 – Ask the student to tell you to stop when he hears a change in pitch and/or tone color. Ask the student to describe the change in 'K' Sonar sound that he hears and the change in the building line that corresponds to the 'K' Sonar sounds.
• Step 13 – Give positive verbal reinforcement when the student identifies a building line feature and material change correctly.
• Step 14 – If the student misses a tone color shift that you are certain is fairly obvious, point it out to him, guide him back to a point approximately 2 steps before the change of material, and ask him to listen carefully for the 'K' Sonar tone color change.
• Step 15 – If the student misinterprets a material change or a feature or does not give enough information, ask him to examine the building

276
line with his cane and by touch. Then ask him to describe the change in the building that accounts for the change in 'K' Sonar sounds.
• Step 16 – Repeat this process until you have reached the end of the exercise area.
• Step 17 – Ask the student to turn around 180 degrees, to walk back through the exercise area using touch technique with the 'K' Sonar cane-mounted, and to stop and describe each change that he notices in building materials and features. Remind him to pay close attention to the 'K' Sonar information on the end of the arc toward the building line. Verbalize that, to hear a change of material in the building line, the student must notice and track the pitch and tone color of the 'K' Sonar each time the cane is at the end of the arc closest to the building line, an event which occurs one time every other stride. Tell the student that you will count the number of changes that he notices.
• Step 18 – At the end of the exercise area, ask the student to turn around 180 degrees, to remove the 'K' Sonar from the cane, and to hold it in his non-cane hand in trailing position, at about chest height, pointed toward the building line.
• Step 19 – Instruct the student to walk through the area, using touch technique and holding the 'K' Sonar in the non-cane hand in trailing position pointed toward the building line. Ask him to point out and describe each change that he notices in building materials and features. Tell him that you will count the number of changes that he notices as he walks through the area.
• Step 20 – Give positive verbal reinforcement when the student identifies a building line feature and material change correctly.
• Step 21 – If the student misses a pitch change or tone color shift that you are certain is fairly obvious, point it out to him, guide him back to a point approximately 2 steps before the change of feature or material, and ask him to listen carefully for the 'K' Sonar pitch and tone color change.
• Step 22 – Discuss with the student how many changes he noticed when using the cane with the 'K' Sonar cane-mounted and when using the cane and trailing with the 'K' Sonar. Discuss which method worked best for locating large changes and which worked best for locating more subtle changes.
• Step 23 – Instruct the student to turn around 180 degrees so that he is ready to walk through the exercise area again. Give him your first set of location instructions and tell him that he can choose when to keep the 'K' Sonar cane mounted and when to trail with it. Tell him that he may not solicit assistance to locate the destination. Tell him that you will give him all of the instructions first and that you will also prompt him with the next instruction after he has located the current landmark. Sample instructions might be:
277
"Find the ice cream store. It is the second narrow opening after the second alley."
"Enter the sporting goods store. The sporting goods store is the second wide entrance after the first building with the large plate glass windows and metal trim that sticks out from them."
"Go inside the florist shop. To get there, pass the concrete building with three small windows, the two buildings that have a small gap between them, and the store with the large recessed doorway. The florist entrance is the second small recess after the store."
• Step 24 – After the student has followed your instructions, discuss the experience, his strategies for locating landmarks, etc.
• Step 25 – Repeat Steps 23 and 24 with a second set of location instructions.

278

279
Chapter Six Recognizing Street-Side Objects Chapter Objectives
Exercises in this chapter are designed to accomplish five objectives. • First, students will determine height, width, material, and other
features of street-side objects. • Second, students will recognize 'K' Sonar pitch and tone color patterns
that indicate street-side landmarks/obstacles such as bus shelters, planters, mail boxes, etc.
• Third, students will recognize ‘K’ Sonar sound patterns characteristic of parked cars and will use this knowledge to focus on foreground landmarks when cars are parked beside them.
• Fourth, students will make optimal decisions about whether to use 'K' Sonar cane-mounted or hand-held when looking for specific types of landmarks or destinations.
• Fifth, students will use ‘K’ Sonar skills of obstacle avoidance and landmark location on both the street side and the building line to locate specific landmarks and destinations.

280

281
Theoretical Considerations
Introduction Sounds heard when the 'K' Sonar points toward the street provide
information about location, size, and material of street-side features such as parked cars, mail boxes, trees, bus shelters, planters, and bus-stop signposts. Usually, there is no continuous line of features between the student and the street; features appear and disappear from 'K' Sonar view as the student walks past them. However, because the student has learned how to interpret the pitch-distance relationship and tone color for the continuous tones from the building line, she is now able to apply this knowledge to non-continuous 'K' Sonar sounds corresponding to features on the street side.
Location of street-side objects
It may seem odd to consider the location of street-side objects; their name defines them as objects that are on the sidewalk near the street. However, when the ‘K’ Sonar is set to the 5-meter range, it can indicate the presence of objects that are approximately 16 feet away. When the ‘K’ Sonar is pointed toward a narrower street, it will point out objects on the near and far sides of the street.
Most of the time, it is desirable to use landmarks that are nearer to the student, on the same side of the street. At times, however, a landmark across the street can be very useful. Objects on the same side of the street are closer to the student and produce ‘K’ Sonar tones that are relatively low in pitch; objects across the street from the student are farther away and produce tones that are relatively high in pitch. Students must be able to quickly identify whether an object is on the same or the opposite side of the street so that they can ignore extraneous feedback and focus on the information that they need.
Exercises in this chapter include activities that help students develop this understanding. For both simple and more complex objects, students distinguish object location based on the pitch range of ‘K’ Sonar feedback and then integrate auditory information with proprioceptive/kinesthetic awareness of these objects by crossing the street to tactually identify the objects that produced higher pitches and by taking 2 or 3 steps across the sidewalk to tactually identify objects that produced lower pitches.
Estimating object dimensions and material: Clues for object recognition
Street-side features vary in width, height, materials, and amount of complexity. Using the subtle scanning style learned previously, students can estimate an object’s width; and tone color changes give hints about the material make-up of an object. The student scans for height by moving the

282
‘K’ Sonar vertically up and down; the vertical point where ‘K’ Sonar feedback from the object stops provides an estimate of the object’s height.
After a student has developed skills in estimating an object’s dimensions and material make-up, she can offer educated guesses about what the object is. In familiar areas, where the same street-side objects are heard routinely, the student can easily identify specific landmarks by hearing their ‘K’ Sonar sound signatures. Some students can learn to recognize objects with distinct sound signatures (such as phone poles, trees, fire hydrants, bus shelters, and planters) in unknown areas simply by hearing the objects’ sound signatures. Exercise 6.1, Scanning Simple Objects for Location, Height, Width, and Material, teaches the basic skills needed to recognize simple street-side objects.
Information about size, shape, and material obtained from the 'K' Sonar can help students identify desired street-side objects and move toward them without needing to shore line the street side of the sidewalk and to locate and identify each object with the cane. For example, if a student passes an object that sounds like metal, seems, when hand-scanned, to be approximately 5 feet tall, and is not very wide, and if she knows that there is a single mailbox on the block near the street, she can turn in the direction of the sound and check out the object with her cane and with touch. Similarly, she can locate the street-side bus-stop bench because it produces a more "mellow" tone, seems to be fairly long, and is approximately 4 feet tall.
Poles holding buttons that pedestrians must push to obtain a pedestrian-length walk interval are located at many light-controlled intersections. Stopping before an unfamiliar intersection and hand-scanning with the 'K' Sonar can help a student locate objects on the corner and distinguish poles from shorter features such as waste cans and newspaper boxes. The student can then walk directly to such poles to check if they have ped call buttons.
Working with complex objects
Complex objects are those that produce a variety of ‘K’ Sonar tone colors and pitches; they tend to have many pieces that connect to each other at a variety of angles and that are made of several materials. Complex objects may be one large object; several simple objects clustered very close together; or two objects positioned one behind the other, so that one is heard in the foreground and the other in the background. Objects with complex sound signatures include: a parked car; a bicycle rack with bicycles attached; a long bench with people sitting on it; a trash receptacle, a bus-stop signpost, and a telephone pole standing next to each other; and a large tree with a car parked on the street beside it. ‘K’ Sonar feedback from complex objects includes many tones at slightly different pitches and with varying tone colors. Exercises 6.2 and 6.3 help students sort out a variety of complex objects.

283
Pulling it all together Exercise 6.4, the final exercise in this manual, presents a series of
activities that combine object avoidance, building-line feature identification, and street-side object recognition skills. To successfully complete exercise activities, the student must first use various combinations of two types of skill and finally must use a combination of all of these skills. Use exercise 6.4 as a guide for creating additional activities for your students. The ‘K’ Sonar can provide information about a variety of landmarks and destinations that your students cannot access with a cane alone. If a student enjoys using the ‘K’ Sonar, create routes that use its unique information and enjoy it too.

284

285
Exercise 6.1 Scanning Simple Objects for Location, Height, Width, and Material Exercise objective:
The student will use 'K' Sonar feedback to locate, describe, and classify/identify non-clustered, simple objects that are on the same side of the street as the student; and to recognize and ignore objects on the opposite side of the street. Exercise summary:
• First, holding the 'K' Sonar in scan position, the student is guided to positions facing the street approximately 6 feet from a series of objects on the same side of the street as the student; then the student is guided to positions approximately 6 feet from the street and facing a series of objects on the opposite side of the street. The student scans each object, predicts whether it is near or far, and then is guided to the object to check her distance prediction.
• Second, holding the 'K' Sonar in scan position, the student is guided to positions facing the street and approximately 6 feet back from objects on the same side of the street and approximately 6 feet back from the street when objects are on the opposite side of the street. The student scans each object, predicts whether it is on the same or opposite side of the street, and then is guided to the object to check her distance prediction.
• Third, holding the 'K' Sonar in scan position, the student is guided to positions facing the street approximately 6 feet from increasingly narrow street-side objects, (e.g. a bench, a large tree, a telephone pole, a signpost) on the same side of the street as the student. The student learns to scan more subtly (uses increasingly smaller horizontal hand movements) to locate an object and estimate its width. The student describes results and examines the object tactually to check her predictions.
• Fourth, holding the 'K' Sonar in scan position, the student is guided to positions facing the street approximately 6 feet from increasingly tall street-side objects, (e.g. fire hydrants, trash receptacles, newspaper boxes, parking meters, telephone poles, trees) on the same side of the street as the student. The student uses subtle horizontal scan movements to locate an object and estimate its width. She learns to scan vertically for height, describes results, and examines the object tactually to test her predictions.
• Fifth, holding the 'K' Sonar in scan position, the student is guided to positions facing the street approximately 6 feet from street-side
286
objects made of wood and then to positions facing the street approximately 6 feet from street-side objects made of metal. Finally, the student is guided to a position approximately 6 feet from a glass bus shelter. All objects are on the same side of the street as the student. The student faces each object squarely; scans for height and width; listens to different tone colors produced by wood, metal, and glass; and checks the object’s shape and material tactually.
• Sixth, when guided, with the 'K' Sonar held in trailing position pointed toward the street, the student locates and faces street-side objects and indicates whether they are on the same or on the opposite side of the street. For objects on the same side of the street, the student listens to the different tone colors of metal, wood, and glass; scans for width, height, and tone color; states impressions of the object's shape and material; and checks her impressions tactually.
• Seventh, when guided with the ‘K’ Sonar cane-mounted and the cane held at the end of the arc pointing toward the street, the student notes the presence of and faces street-side objects, and indicates whether the object is on the same or opposite side of the street. For same-side objects, the student scans for width and tone color; predicts width and material; and checks her predictions tactually.
• Eighth, as the student walks down the block using touch technique with the 'K' Sonar cane-mounted, the instructor and student point out street-side objects. The student faces those objects that she perceives, moves her cane in a wide arc, notes whether the object is on the same or opposite side of the street, predicts whatever she can about the object’s form and material for same-side objects, checks impressions tactually, and discusses limitations of 'K' Sonar when it is cane-mounted for locating street-side objects and for determining object features.
• Ninth, when walking through the area using touch technique and holding the 'K' Sonar in her non-cane hand in trailing position pointed toward the street, the student stops and faces street-side objects; notes whether the object is on the same or opposite side of the street; predicts height, width, material, and possible identity for same-side objects; and checks predictions tactually.

287
Materials: 'K' Sonar, speaker, headphones, cane Location:
• The area consists of a sidewalk with a building line on one side, a somewhat narrow street on the other side, and a variety of types of street-side objects on both sides of the street.
• The street must be fairly narrow so that objects on both sides of it are in range of the ‘K’ Sonar, when it is set to the 5-meter range.
• The area should have street-side objects on both sides of the street, but such objects must not be directly opposite one another. On a fairly narrow street, ultrasound can reflect from objects on the far side of the street as well as from those on the near side. Objects on the far side of the street will produce much higher-pitched tones than those on the near side because of their greater distance from the 'K' Sonar. It is fairly easy for students to determine whether an object is on the same or opposite side of the street based on the pitch of 'K' Sonar feedback. However, every street-side object in this area must be the only object in 'K' Sonar range when the student faces the street and scans from a position approximately 6 feet back from it. Two objects can not be located directly across the street from one another because both objects, being in 'K' Sonar range, will reflect ultrasound back to the 'K' Sonar, resulting in a complex tonal pattern different from that produced by each object by itself.
• Wide, medium-wide, and narrow objects such as benches, trees with large trunks, fire hydrants, telephone poles, and signposts are required on both sides of the street.
• Short, medium-height, and tall objects such as fire hydrants, newspaper boxes, mail boxes, metal traffic signposts, telephone poles, and trees are required on both sides of the street.
• On both sides of the street, the area must include: objects made of wood such as trees and telephone poles; and objects made of metal such as newspaper boxes, signposts, and trash receptacles. At least one object made of glass such as a bus shelter must be in the area.
• It is helpful if cars parked in the area are owned by you, your colleagues, or other persons who don't mind that their cars will be touched by your student.
• In this area, cars must not be parked next to trees or other street-side objects because students need a "clear" 'K' Sonar "view" of each object by itself. A car parked next to an object produces a different and more complex pattern of ultrasound reflections and 'K' Sonar feedback than does either the car or the object alone. Initially, students need to hear tone color and shape variations of only one object at a time so that they can associate tone color, shape, and complexity features with specific objects. In the next exercise,

288
students will learn to recognize more complex patterns produced by several objects that are close together.
• The street should have low levels of vehicular traffic during this exercise. Cars passing on the street reflect ultrasound during the instant that they are in 'K' Sonar range, resulting in a brief, shrill squawk from the 'K' Sonar. It is useful at this position for the student to notice an occasional brief squawk and to learn its meaning; however, the primary focus of this exercise is the interpretation of feedback from one object at a time, and the frequent "squawks" produced by heavier traffic are to be avoided.
• If possible, the sidewalk should not contain obstacles in the middle. Features mentioned above should be near the street side so that the student does not need to focus on obstacle avoidance while developing new 'K' Sonar skills.
• Because a student will examine the street-side objects tactually, these objects should be relatively clean and safe to touch.
• The area should be relatively free of pedestrian traffic when the student does this exercise. Pedestrians serve as obstacles and may also try to intervene when they see the student tactually examining a bus shelter, phone pole, or other feature.
• The area should not include business driveways or alleys from which traffic might emerge.
• The area should be relatively safe for daytime travel. Instructor notes:
As the student walks down the street holding the 'K' Sonar in trailing position pointed toward the street, an object on the sidewalk near the street is perceived as a tone preceded and followed by the percussive background sound of the 'K' Sonar. When nothing is in 'K' Sonar range, the student hears the percussive pulse but no tone. When the street-side object comes into 'K' Sonar range, it produces a tone with pitch indicative of the distance the object is from the 'K' Sonar. This pitch may change slightly, starting higher when the object first comes into range ahead of the student, sliding lower as the student approaches the object, reaching its lowest pitch when the student is directly opposite the object, then becoming higher and disappearing as the student moves beyond the object. The volume of the tone will also change—beginning soft when the object first comes into range, becoming louder as the student approaches the object, being loudest when the student is opposite the object, and then becoming softer as the student moves beyond the object. When the student moves past the object, its tone stops and only the percussive background sound of the 'K' Sonar is heard.
Students need to learn the differences in 'K' Sonar pitch that indicate objects near the end of the range on the opposite side of the street and objects in the nearer part of the range on the same side of the street.
289
Usually, objects on the same side of the street are used as landmarks because their features are more easily perceivable from 'K' Sonar feedback. However, as students develop skill, they may be able to locate and recognize large objects across the street (e.g., bus shelters, large trees, hedges in a front yard).
In this exercise, you will set up situations that help the student focus on street-side objects—their distance from the student, their width, their height, and their tone color—as means to predict objects' features and identity. You will teach: more subtle scanning movements so that a student can pick out and point directly at a narrow object such as a signpost; specific horizontal and vertical scanning techniques for estimating height, and width; and auditory discrimination skills enabling the student to distinguish tone color differences between wood, metal, and other materials. These skills can help students predict the identity of objects based on their materials and features and locate desired destinations such as bus shelters, bus-stop benches, bus-stop signposts, trash receptacles, and poles that hold pedestrian walk buttons. They can also help students use landmarks that are out of the cane's range—the building just past the planter; the driveway just before the fire hydrant.
This exercise teaches students to integrate the perception of relatively simple street-side objects and their characteristics with 'K' Sonar sounds associated with them in nine sequenced activities.
• First, the student, holding the 'K' Sonar in scan position, is guided to positions facing the street and approximately 6 feet back from a street-side object that is on the same side of the street as the student. The relatively low pitch of the sound is discussed, and the student is guided to the object to check the object's location. The student is then guided to positions facing the street and approximately 6 feet back from it directly opposite an object on the far side of the street within 'K' Sonar range. The relatively high pitch of the sound is discussed, and the student is guided across the street to the object to check the object's location.
• Second, the student, holding the 'K' Sonar in scan position, is guided to face a series of objects on the same or on the opposite side of the street as the student. The student stands approximately 6 feet back from an object on the same side of the street or approximately 6 feet back from the street for an object on the opposite side of the street. The student points the 'K' Sonar directly at the object, listens for pitch, and indicates whether the object is on the same or opposite side of the street.
• Third, the student is guided to a series of positions that face the street and are approximately 6 feet back from progressively narrower objects on the same side of the street as the student (such as a bench paralleling the street, a wide tree, a mailbox, a telephone pole, and a
290
signpost). Holding the 'K' Sonar in scan position, the student points the 'K' Sonar toward the object and scans in a slow arc, noticing when the sound from the object disappears on either side of the arc. If the student faces the object squarely, the sound from a wide object might disappear at 9:00 on the left side of the arc and 3:00 on the right. On the other hand, the 'K' Sonar sound from a fairly narrow object might disappear at 11:00 on the left and 1:00 on the right. A very narrow object might produce sound for only a few degrees of the arc, (e.g., the distance that the hour hand travels between 11:50 and 12:10). To detect very narrow objects, the student must make very small and slow hand movements when scanning. Using these subtle scan movements, she locates the left and right edges of a narrow object and then points the 'K' Sonar directly at the object. The student must hold her hand very still to keep such an object in focus. For those who remember using radios with dials, this process feels similar to fine tuning a radio station. After inspecting an object's width with the 'K' Sonar, the student categorizes objects as very wide, wide, narrow, or very narrow; and then checks her impression tactually.
• Fourth, the student is guided to a series of positions that face the street and are approximately 6 feet back from progressively taller objects on the same side of the street as the student (such as fire hydrants, trash receptacles, newspaper boxes, parking meters, telephone poles, trees). Holding the 'K' Sonar in scan position, the student points it toward the object and then raises the 'K' Sonar until the sound from the object stops. If the sound continues when the student holds the 'K' Sonar as high as possible, she knows the object is much taller than herself. Otherwise, she notes the height at which the tone stops and categorizes objects as tall, medium, or short. She then moves to the object to inspect its actual height.
• Fifth, the student is guided to a series of positions that face the street and are approximately 6 feet back from several objects made of wood, several objects made of metal, and an object made of glass on the same side of the street as the student. Holding the 'K' Sonar in scan position, the student points it toward the object; listens to the tone color of the 'K' Sonar sound; and identifies its material tactually. After experiencing tone colors of several metal objects such as parking meters or street signposts, then experiencing tone colors of several wooden objects such as telephone poles and trees, and finally experiencing the tone color of glass as in a glass bus shelter, the student can begin to make some predictions about materials based on 'K' Sonar tone color. Metal sounds thinner and more shrill, wood sounds more muted, and glass produces a recognizable whistley quality. Additional practice with these fairly standard objects out of sequence may help the student sharpen this skill.

291
• Sixth, holding 'K' Sonar in trailing position pointed toward the street, the student is guided past objects of varying dimensions and materials on the same or opposite side of the street. The student notes street-side objects as she moves past them; stops; uses 'K' Sonar information to turn and face them; and indicates whether they are on the same or on the opposite side of the street. For objects on the same side of the street, the student estimates their height, width, and material. She predicts as much information about the object as she can and then checks her predictions tactually.
• Seventh, with the 'K' Sonar cane-mounted and holding the cane at the end of the arc pointed toward the street, the student is guided past objects of varying dimensions and materials on the same or opposite side of the street. The student notes objects on the street side; stops and faces them; moves her cane in a slow, wide arc; and indicates whether objects are on the same or opposite side of the street. For objects on the same side of the street, the student continues to move her cane in a slow, wide arc to estimate width; and listens to tone color when the cane points directly at the object. She discusses what can and cannot be determined about objects when the 'K' Sonar is cane-mounted. Height can not be estimated unless the student raises the cane off of the ground and holds it at varying heights, an action that is awkward and attracts unwanted attention from the public.
• Eighth, as the student walks down the block and uses the cane with the 'K' Sonar cane-mounted, the student and the instructor each point out street-side objects that they observe and indicate whether the object is on the same or opposite side of the street. The instructor and the student discuss the fact that the cane, and consequently the 'K' Sonar, points toward the street for only one instant for every two steps that the student takes. Therefore, the instructor, who has continuous visual or 'K' Sonar feedback about street-side objects, notices many more objects than does the student. The student turns to face objects that she notices; scans them for width and tone color; predicts any information that she can about their characteristics and identity; and checks her predictions tactually. She then discusses limitations of the 'K' Sonar when cane-mounted in locating objects on the street side and in the quantity and quality of information obtained about those objects.
• Ninth, while walking down the block and using touch technique with the 'K' Sonar held in the non-cane hand in trailing position pointed toward the street, the student notes street-side objects; indicates whether they are on the same or opposite side of the street; scans same-side objects for height and width; considers their tone color; makes educated guesses about their identity; and checks her predictions tactually.

292
Although this exercise includes a large number of activities, most skills
that underlie these activities already have been taught in other contexts. Students scanned the width of protuberances from the building line and used tone color to hypothesize the materials of which building faces were made. They also are very familiar with the process of facing an object and scanning it to learn more about its features and materials. Scanning for height, though not done previously, builds on previously learned scanning skills. The primary focus in this exercise is to help students apply previously-developed awareness of the meaning of 'K' Sonar pitch and tone color feedback to the location and understanding of street-side objects.
You must select the area for this exercise in advance. The area should have no parked cars in the lane next to street-side objects and should have very little traffic on the street. A parked car or a stream of moving cars in the lane nearest the object being examined adds a ‘K’ Sonar background tone to the sound of the object of interest and makes initial learning far more difficult. Multiple-object situations will be explored in a later exercise, after the student has acquired solid skills in dealing with single street-side objects.
The area for this exercise should include parked cars on both sides of the street if possible, as long as cars are not parked next to or across from another object. For all activities that require your student to examine tone color, use only street-side objects that produce fairly simple 'K' Sonar feedback. Such objects are fairly simple in construction and shape; are made primarily of one type of material; and are 3 feet or more apart. They include guy wires, signposts, parking meters, telephone poles, trees of various sizes, mail boxes, benches, trash receptacles, and newspaper boxes. They do not include bicycle racks, planters, cars, or clusters of objects closer than 3 feet from one another such as a bicycle fastened to a signpost, a signpost and a trash receptacle next to one another, or a bench next to a bus shelter. You can and should use these more complex objects when teaching distance, height, and width; however, complex objects feature a number of different tone colors and should not be used when teaching basic tone color discriminations in this exercise.
Make sure in advance that street-side objects and their salient features are discernable based on 'K' Sonar feedback. Scan objects for height and width to verify that no extraneous object in 'K' Sonar range produces sound when the unit is positioned above or to the side of the object of interest. You must also determine that tone color differences between materials making up street-side objects are discernable in 'K' Sonar feedback. Scan objects for height, width, pitch, and tone color; then determine whether you can, with your eyes closed, recognize the object’s size, shape, and material based on 'K' Sonar feedback. Remember that recognizing features of objects and identifying them through 'K' Sonar feedback is a complex skill; some

293
instructors and students will learn to do this quickly and well and others will not. If you cannot discern tone color differences that indicate different materials in street-side objects, check your perceptions with a colleague or another 'K' Sonar student. If others, familiar with the 'K' Sonar, cannot distinguish tone color differences resulting from wooden phone poles, metal parking meters, and a glass bus shelter, look for another area with more discernable objects. On the other hand, if colleagues can hear and process tone color differences between such objects, consider using the area.
This exercise includes six activities in which you guide the student and three activities in which the student uses her cane. When guiding, you can only walk in one direction because the student must always be on the street side. Therefore, you must guide the student back to the starting position before proceeding to the next guiding activity.
It may be helpful at first to listen to 'K' Sonar tone color and pitch changes through a speaker so that both you and your student can hear and discuss these changes. While guiding, try to hold the speaker near the student’s face. When the student faces street-side objects to scan or examine them, stand behind the student and hold the speaker facing the back of the student's head. Make sure that you remain out of 'K' Sonar range. You should also make sure that your student is comfortable with you in her personal space. As soon as the student shows awareness of the tone color changes that accompany changes in materials, ask the student to switch to headphones. Procedure:
• Step 1 – Ask the student to point the 'K' Sonar toward the street, holding it in trailing position in the hand closer to the street. Guide the student on the building-line side so that she holds your arm with the hand that is farther from the street. Tell the student to let you know when she hears an object in 'K' Sonar range. Walk slowly so that the student hears feedback from narrow street-side objects long enough to recognize and process it.
• Step 2 – If a student does not mention an object that she passes, tell her that you just passed an object, and "replay" it by guiding the student backward past the object and then forward past it again. Ask if she heard the tone produced by the object as she passed it.
• Step 3 – If a student does not hear the tone resulting from an object when you guide her back and forth past it several times, repeat Steps 1 and 2 with another object.
• Step 4 – When the student tells you that she hears a street-side object, guide her to a position approximately 6 feet back from it and facing it directly. Ask her to scan it with the 'K' Sonar in the left-right-left hand scanning arc and to describe its width based on when 'K' Sonar sounds stop on the left and on the right ends of the arc. If the
294
center of an object is at 12:00 o'clock relative to the 'K' Sonar, a wide object might produce a tone between 9:00 and 3:00 on the scanning arc; a narrow object might produce a tone between 11:00 and 1:00 on the scanning arc; and a very narrow object might produce a tone covering only a few degrees of the scanning arc. Tell the student to move the 'K' Sonar very slowly and to use very slight hand movements when examining a narrow object.
• Step 5 – Guide the student to the object, and ask her to identify it tactually. Ask her to check its width. Discuss the relationship between the 'K' Sonar feedback and the object's actual width.
• Step 6 – Continue to guide the student, reminding her to tell you when she hears another street-side object. If she misses an object, repeat Steps 1-2.
• Step 7 – When the student notices another object, guide her to a position approximately 6 feet back from the object and facing it. Ask her to scan it for width and to tell you whether it is wide, middle wide, or narrow. Guide her to the object, asking her to identify it tactually and to compare its actual width with the width she estimated from 'K' Sonar feedback.
• Step 8 – At the end of the area, after the student has checked all street-side objects for width, ask her to unplug the headphones or speaker from the 'K' Sonar, guide the student back to the beginning of the block or section, and turn 180 degrees so that you are again walking on the building-line side and the student is again walking on the street side. Guide the student through the area, asking her to point out street-side objects.
• Step 9 – If a student misses an object that you pass, repeat Steps 1 and 2.
• Step 10 – When the student points out an object, guide her to a position approximately 6 feet back from it and facing it. Ask her to scan in an arc, stopping the scan when it points directly at the object. Ask the student to raise the 'K' Sonar as high as she can and to notice whether the tone from the object stops.
• Step 11 – Guide the student to the object. Ask her to examine it tactually, and identify it. Ask her to pay particular attention to its height. If the object is short enough so that the 'K' Sonar tone stopped when the student raised the 'K' Sonar, discuss the relationship between the height of the object and the height at which the 'K' Sonar sound stopped.
• Step 12 – When the student notices another object, guide her to a position approximately 6 feet back from the object and facing it, ask her to turn and face the object and scan it for height. If the student can raise the 'K' Sonar higher than the top of the object, ask the student to keep her 'K' Sonar hand at a level above the top of the

295
object – the position where the 'K' Sonar tone stopped. Guide her to the object and ask her to identify it tactually. Ask her to compare the position where the 'K' Sonar tone stopped with the top of the object.
• Step 13 – Continue guiding the student past other street-side objects. When she hears an object with the 'K' Sonar, ask her to face it, scan for height, tell you whether she thinks it is short, mid-height, or tall, and guide her to the object to check her hypothesis. Make sure she identifies the object after examining it tactually.
• Step 14 – At the end of the work area, after the student has checked every object for height, tell the student that she will now listen to tone color to determine the material of which an object is made. Guide the student to a position approximately 6 feet from a metal object such as a utility pole, a lamp post, or a pole holding a bus-stop or other sign. Ask the student to scan the object, paying particular attention to tone color. Ask the student to describe the tone—is it loud or soft, bright or muted? Generally, metal is brighter or shriller than wood.
• Step 15 – Guide the student to the object. Ask her to identify it tactually and to tell you what it is made of.
• Step 16 – Guide the student to a position approximately 6 feet from another metal pole, and ask her to scan it with the 'K' Sonar. Remind her to pay particular attention to tone color as she scans. Ask her to describe the tone color to you. Then guide her to the object. She should examine the object tactually, identify it to you, and tell you whether it is made of metal, plastic, wood, or another material.
• Step 17 – Now guide the student to a position approximately 6 feet back from a wooden object such as a tree or telephone pole. Ask her to scan it, paying particular attention to the tone color. Ask her to describe the tone color to you. Is the tone soft or loud, muted or bright? Does this object sound different from or similar to the two objects she just scanned? Wood usually sounds more muted than metal.
• Step 18 – Guide the student to the object; ask her to identify it and to tell you what it is made of.
• Step 19 – Guide the student to a position approximately 6 feet back from another wooden object and repeat Steps 17 and 18.
• Step 20 – Guide the student to a position approximately 6 feet back from a glass object such as a bus shelter. Ask her to scan it, paying particular attention to the tone color. Ask her to describe the tone color to you. Is the tone soft or loud, muted or bright? Does this object sound different from or similar to the metal or wood objects she just scanned? Glass makes a clear whistley sound when compared to the shrillness of metal and the muted quality of wood
• Step 21 – Guide the student to the object; ask her to identify it and to tell you what it is made of.

296
• Step 22 – Guide the student to a position approximately 6 feet back from a metal object. Ask her to scan it and describe the tone color. Ask if she can make a guess about whether the object is made of metal, wood or glass based on how it sounds. Then guide the student to the object, ask her to identify it tactually, and to tell you the material of which it is made.
• Step 23 – Repeat Step 22 with a wooden object. • Step 24 – Repeat Step 22 with a glass object. • Step 25 – Guide the student back to the beginning of the area and ask
her to tell you when she passes a street-side object as you guide her. When she hears an object, ask her to stop, face it, and scan it for height, width, and tone color. Ask her to describe her impressions based on 'K' Sonar sounds. Then ask her to approach the object, examine it tactually, and tell you how her impressions fit with the actual object.
• Step 26 – If the student's impressions based on 'K' Sonar feedback tend to match the actual height, width, and material of the object, start asking her to predict the identity of the object based on these impressions before she examines it tactually. If the student seems to have memorized the order of particular objects and to be responding based on this rather than on 'K' Sonar feedback, move into another area and repeat this Step.

297
Exercise 6.2 Scanning Features of Complex Objects Exercise objective:
The student will use 'K' Sonar feedback to identify height, width, materials, and structural features of more complex street-side objects; will be able to recognize salient features of parked cars; will distinguish complex objects on the same side of the street from those on the opposite side; and will use 'K' Sonar feedback to locate poles holding ped call buttons that provide a pedestrian walk phase at a light-controlled intersection. Exercise summary:
• First, holding the 'K' Sonar in scan position, the student is guided to positions approximately 6 feet back from the street and facing a series of cars parked on the same side of the street as the student. The student uses the subtle scan technique for noting height, width, and different tone colors at different points in the structure; and then checks her impressions tactually.
• Second, holding the 'K' Sonar in scan position, the student is guided to approximately positions approximately 6 feet back from the street and facing a series of cars parked across the street from the student. The student scans subtly for height, width, and tone color; discusses her impressions of the object’s shape and distance; and then is guided to the object to check her impressions tactually.
• Third, holding the 'K' Sonar in scan position, the student is guided to positions approximately 6 feet back from the street and facing a series of cars parked on the same or opposite side of the street. The student predicts object location (the same or opposite side of the street). For objects on the same side of the street, she predicts height; width; and whether the object is made of one type or of multiple types of materials. She then checks her predictions tactually.
• Fourth, holding the 'K' Sonar in scan position, the student is guided to positions facing the street and approximately 6 feet back from a complex object (not a car) on the same side of the street as the student. Complex objects have an articulated structure; are made of more than one material; or are a cluster of smaller objects (e.g., bicycle racks with bicycles attached, planters with plants in them, benches with persons sitting on them, a telephone pole and a trash receptacle next to each other). The student scans for height and width; uses the subtle scan technique to note differences in tone colors, structural variations, and types of material involved; and checks her predictions tactually.

298
• Fifth, holding the 'K' Sonar in scan position, the student is guided to positions approximately 6 feet back from the street and facing a complex object (not a car) on the opposite side of the street. The student scans for height and width; uses the subtle scan technique to note differences in tone color, structural variation, and type of material involved; and checks her predictions tactually.
• Sixth, holding the 'K' Sonar in scan position, the student is guided to positions approximately 6 feet back from the street and facing a complex object—a car, an object cluster, or other complex objects —and indicates whether they are on the same or on the opposite side of the street. For objects on the same side of the street, she indicates whether the object is made of one or several materials; predicts whether the object is a car; describes features and materials; and checks her impressions tactually.
• Seventh, when guided, with the 'K' Sonar held in trailing position pointed toward the street, the student locates and faces complex street-side objects—cars, other complex objects, or object clusters—and indicates whether they are on the same or opposite side of the street. For objects on the same side of the street, the student rescans, listens to different tone colors of metal, wood, and glass; scans for width, height, complexity; states her impressions of the object's shape and material; predicts whether the object is a car, a cluster, or a single object; and checks her impressions tactually.
• Eighth, when walking through the area using touch technique and holding the 'K' Sonar in her non-cane hand in trailing position pointed toward the street, the student stops and faces street-side objects; notes whether objects are on the same or opposite side of the street; predicts height, width, structure, material(s), object clustering, and possible identity for same-side objects; and checks predictions tactually.

299
Materials: 'K' Sonar, speaker, headphones, cane Location:
• The area consists of a sidewalk with a building line on one side and a fairly narrow street on the other with a variety of street-side objects.
• The street must be fairly narrow so that objects on both sides of it are in range of the ‘K’ Sonar, when it is set to the 5-meter range.
• Simple structures such as signposts, trees, telephone poles, guy wires, mailboxes, and newspaper boxes are required in one part of the area.
• More complex objects such as parked cars, planters with plants in them, bicycle racks with bicycles fastened to them, clusters of street-side objects with less than 12-18 inches of space between them; and parked cars are required in a second part of the area.
• There must be only one near or distant object or object cluster in 'K' Sonar range on the street side at one time. If a near and a distant object are both in 'K' Sonar range at the same time, some ultrasound will pass through and around the near object to be reflected back off of the distant object, resulting in a set of lower pitches related to the near object and higher pitches related to the far one. Although this situation occurs in real-life, students must first make appropriate associations between objects and their 'K' Sonar sound signatures before they can interpret feedback from the combination of near and distant objects at the same time. In practical terms, this means that No cars can be parked next to or across the street from other objects in the area, that no object can occur next to or across the street from a parked car, and that no two objects can be directly across the street from one another.
• If possible, the sidewalk should not contain obstacles in the middle. Features mentioned above should be near the street side so that the student does not need to focus on obstacle avoidance while developing new 'K' Sonar skills.
• Because a student will examine the street-side objects tactually, these objects should be relatively clean and safe to touch.
• The area should be relatively free of pedestrian traffic when the student does this exercise. Pedestrians serve as obstacles and may also try to intervene when they see the student tactually examining a bus shelter, phone pole, or other feature.
• The area should not include business driveways or alleys from which traffic might emerge.
• Because a student will examine the street-side objects tactually, these objects should be relatively clean and safe to touch.
• The area should be relatively safe for daytime travel.

300
Instructor notes: In this exercise, you and your student will use systematic procedures for
the interpretation of complex sound signatures produced in response to complex objects. Objects are complex if they are made of more than one type of material and therefore result in more than one tone color; if their external structure is articulated and detailed, made of numerous intersecting parts that connect at varying angles; or are object clusters in which two or more objects are spaced so close together that openings between them are not easy to discern from 'K' Sonar feedback. Street-side objects examined in the previous exercise such as telephone poles, trees, signposts, mailboxes, newspaper boxes, and trash receptacles present fairly straight-forward sound signatures; however parked cars, bicycle racks with bicycles, planters with plants in them, and a telephone pole next to a trash receptacle present more complex sound signatures because they are often composed of many small pieces of material that connect to one another at varied angles or are composed of several distinctive types of material. Each piece of material that comprises a complex object may return a specific ultrasound reflection to the 'K' Sonar, resulting in a number of tones with slightly different pitches and tone colors. At first exposure, complex objects may sound like an orchestra out of tune. However, scanning for height and width, listening to tone color, and associating multiple tones with separate pieces of material comprising the object help students decode complex sound signatures, discriminate object materials and features, and use complex objects as landmarks or destinations.
Learning to understand more complex 'K' Sonar sound signatures allows students to make educated guesses about the identity of many complex objects because 'K' Sonar feedback helps them narrow down the possibilities. They may still need to walk to and touch a likely object to be sure of its identity. However, by ruling out items with features that do not match a desired landmark, students can use street-side objects as landmarks without needing to walk on the edge of the sidewalk to check each object with the cane.
Although most object identifications are fairly tentative, parked cars offer such a unique complex sound signature that they can be identified with high levels of accuracy. Parked cars present unique tone colors in specific places; the shrill metal of the sides of the car, the whistle sound of glass windows, and the muted sound of the tires/wheels each occur at a predictable spot relative to one another. Recognition of parked cars is an important skill for students who plan to use the 'K' Sonar to look for street-side landmarks. In many business and downtown districts, parked cars dominate the street-side landscape. If students do not recognize and filter out the sound signatures of parked cars in these areas, they will experience a barrage of fairly useless information that may mask 'K' Sonar feedback from important street-side landmarks. It is worthwhile to spend some extra time helping students

301
develop the ability to recognize parked cars so that they can relegate them to the level of background noise rather than foreground signal. The next exercise will help students detach foreground information from the background car sound when a street-side object sits next to a parked car.
This exercise uses a systematic approach to help students associate the tactual/kinesthetic perceptions of car materials and structure with the auditory/kinesthetic perceptions of 'K' Sonar sounds when the unit is pointed at specific parts of a car. The student is first asked to discover what she can from 'K' Sonar feedback; after scanning a car without knowing what it is, the student discusses tone color changes, height, width and any other impressions she may have developed. She is then guided to the car to examine it tactually. The student should face the side of the car during the tactual examination because the 'K' Sonar will be facing the side of cars in later travel. The student tactually examines the tires/wheels, windows, and metal sides; listens to the 'K' Sonar sounds as she points it toward these features; scans each feature subtly to detect the tone color differences as the 'K' Sonar moves from the center of the feature, to the edge, to the neighboring material, and then back to the original feature; focuses the 'K' Sonar on the center of a feature and maintains this focus while slowly backing up from the car; locates salient car features from a distance of approximately 6 feet without touching the car; and recognizes the linear sequence of changing tone colors when pointing the 'K' Sonar toward the street and walking past the car.
As noted in the previous exercise, the 'K' Sonar provides information about objects on the opposite side of fairly narrow streets. Because objects across the street are farther away from the 'K' Sonar than are objects on the same side of the street, 'K' Sonar tones related to opposite-side objects are significantly higher in pitch than tones related to objects on the same side of the street. Most of the time, same-side objects are used for landmarks; and information about objects across the street is extraneous. This exercise incorporates activities that help students recognize opposite-side complex objects. Students can then ignore the higher-pitched information or, in case they need to use it as a landmark, pay attention to it.
This exercise teaches students to recognize features of more complex objects and to develop more advanced street-side landmark location strategies in eight sequenced activities.
• First, the student is guided to positions approximately 6 feet from various cars on the same side of the street as the student. She is directed to scan slowly and subtly; and told to notice height, width, and as many different tone colors as possible. After describing what she has learned about the object's height, width, and materials from 'K' Sonar feedback, she inspects the car tactually. For the first car, the student must touch the car's various materials—glass windows, metal body, rubber tires, etc. Then she is directed to scan each feature
302
subtly, while she backs away from the car to her original position. From this position, she rescans the car carefully, locating the whistley sound of glass windows, the shrill sound of the metal body, and the more muted sound of the tires. Recognizing the unique sound signatures of cars helps students tune them out or separate them from sound signatures of other more relevant objects nearby.
• Second, the student is guided to positions approximately 6 feet from the street and facing various cars parked across the street. She is directed to scan slowly and subtly and to gather as much information about width, height, materials, and distance of the object as she can. Having had experience with higher pitched tones of objects across the street in the previous exercise, the student should recognize a similar situation here. Some students may be able to identify parked cars across the street because specific tone colors occur at predictable points (e.g., windows and tire/wheel areas); and because cars, being parked in the street, are closer to the student than are other objects on the opposite sidewalk. However, some students may not recognize sound patterns characteristic of a car because of the difference in pitch between the nearer car in the previous activity and the more distant car here. Details of tone color differences may also not be as clear and detectable when the car is across the street. After the student describes what she has learned based on 'K' Sonar feedback, she is guided to the car for tactual identification. She is reminded that the high pitch of 'K' Sonar tones shows her when objects are across the street.
• Third, the student is guided to positions approximately 6 feet from the street and facing cars that are parked either on the near or far side of the street. She is asked to determine whether the object is on the same or opposite side of the street and is told whether her estimate is correct. If the object is on the same side of the street, she is asked to scan subtly, to listen for height, width, and tone color changes, and to gather as much information about the object's features as possible. She is asked to describe the objects features, dimensions, and materials and to predict the object's identity. She is then guided to the car and identifies it tactually. She is reminded that cars and other objects across the street produce higher pitched tones and that car's features are more difficult to detect when they are farther away. By the end of this activity, the student may not yet be certain that the objects being scanned are cars, but should be able to indicate quickly and accurately whether the object is on the same or opposite side of the street. As previously noted, this ability helps students tune out higher pitched information from across the street and focus primarily on lower pitched information about closer objects. In the rare instance

303
when a landmark on the other side of the street is useful, the student will also know how to listen for the higher-pitched 'K' Sonar feedback.
• Fourth, the student is guided to positions approximately 6 feet from various other complex objects (not cars) on the same side of the street as the student. The student is reminded to scan subtly and slowly, to check height and width, and to identify as many different tone colors as she can. In addition, she is told to check height at various points along the horizontal width of the object to determine whether some parts are taller than others; to check width at various vertical heights to determine if some parts are wider than others; and to carefully scan points where higher or lower pitches occur to determine if some parts are positioned closer to her or farther from her, (i.e., whether the depth dimension of the item is drastically different at different points). After discussing what she has learned about the object's height, width, and materials, she should inspect the object tactually. The student must touch and understand the features that produce the complex 'K' Sonar feedback—various materials; parts that vary in height, width, or depth; or individual objects that make up a cluster. The student is directed back to her original position; is told to rescan the object; and is told to locate and describe the various materials, parts, or objects in the cluster that she has just examined tactually.
• Fifth, the student is guided to positions approximately 6 feet back from the street and facing a series of complex objects (not cars) on the opposite side of the street. The student is directed to pay attention to distance, height, width, materials, and general complexity. After sharing her impressions of these features, she is guided to the object for tactual examination. What can and cannot be detected when scanning objects across the street is discussed. If the street is very wide, she may not be able to detect such objects; the narrower the street, the closer and more noticeable the object. The primary purpose of recognizing objects that are across the street is to be able to ignore them and focus on same-side objects.
• Sixth, the student is guided to positions facing the street where she will examine a series of complex objects (including cars) that are on the same or opposite side of the street. The student is guided approximately 6 feet back from objects when they are on the same side of the street and approximately 6 feet back from the street when objects are on the opposite side of the street. The student is told that she will be examining cars, objects made of different materials, objects with complex shapes, and clusters of objects and that objects can be on either side of the street. She is directed to scan details carefully and to indicate whether the object is on the same or opposite side of the street. She is told whether her distance estimate is correct. If the

304
object is on the same side of the street, she should determine whether the object is made of one or several materials, predict whether the object is a car, and describe features and materials. She is guided to the object to check her predictions tactually; is then directed back to her original position; and is told to locate and describe the various materials, parts, or objects in the cluster that she has just examined tactually.
• Seventh, the student is guided through the area and holds the 'K' Sonar in the street-side hand pointed toward the street in trailing position. She is told that she will pass cars, other complex objects, and object clusters. She is told to stop and face each street-side object when she hears it, to scan it subtly and slowly, and then to indicate whether the object is on the same or opposite side of the street. She receives verbal confirmation for correct answers and is guided to any objects that she classified incorrectly so that she can experience their actual distance. She is asked to rescan objects on the same side of the street and then to predict height, width, structure, material(s), object clustering, and possible identity. The student is guided to the object to verify her impressions tactually.
• Eighth, the student walks through the area using touch technique and holding the 'K' Sonar in the non-cane hand pointed toward the street in trailing position. She is told to stop and face each street-side object that she detects with the 'K' Sonar, to scan it slowly for detail, and to indicate whether the object is on the same or opposite side of the street. She receives verbal confirmation for correct answers and is guided to any objects that she classified incorrectly so that she can experience their actual distance. She is asked to rescan objects on the same side of the street and then to predict height, width, structure, material(s), object clustering, and possible identity. The student is guided to the object to verify her impressions tactually.
Be particularly careful about asking students to touch cars parked on the
street whose owners you do not know. It is important for a student to touch cars when making the connection between the car and the 'K' Sonar sounds produced by ultrasound reflections from the car. Park in the area yourself and ask colleagues to do so as well. If your student is not already aware of such issues, discuss car alarms that can be triggered when someone touches or walks very close to a parked car, and explain that a car owner might be concerned if she saw an unknown person touching her property.
As in previous exercises, it is crucial that you select the area for this exercise in advance. You must make sure that all street-side objects and their salient features are clearly discernable based on 'K' Sonar feedback. You must also make sure that only one object or object cluster is in 'K' Sonar range at one time; two objects must not be directly across the street
305
from one another if the street is narrow enough to bring the far object into 'K' Sonar range. Scan objects for height and width to make sure that no extraneous object in 'K' Sonar range produces sound when the unit is pointed above or to the side of the object of interest. Make sure that you can relate specific tone color differences within an object to differences in the object's materials, and make sure that you can discern tone color differences when pointing the 'K' Sonar toward substantially different materials that make up a complex object. Try, with your eyes closed, to discern size, shape, material, and pattern of complex objects from 'K' Sonar sounds. If possible, take a guide with you, wear a blindfold for one section of the area, and practice scanning and interpreting 'K' Sonar feedback from street-side structures without looking at them immediately before scanning them.
Remember that recognizing features of objects and identifying them through 'K' Sonar feedback is a complex skill; some instructors and students will learn to do this quickly and well and others will not. If you cannot discern tone color differences that indicate different materials in street-side objects, check your perceptions with a colleague or another 'K' Sonar student. If others, skilled with the 'K' Sonar, cannot distinguish 'K' Sonar feedback well enough to determine height, width, material, or pattern of many objects in the area, look for another area with more discernable objects. On the other hand, if colleagues can hear and process 'K' Sonar feedback for most of the objects in the area, consider using the area.
It may be helpful at first to listen to 'K' Sonar sound patterns through a speaker so that both you and your student can hear and discuss sound signatures associated with various objects. While guiding, try to hold the speaker near your student’s face. When the student faces the street to examine an object, stand behind the student and hold the speaker facing the back of the student's head. Make sure that you remain out of 'K' Sonar range. You should also make sure that your student is comfortable with you in her personal space. As soon as the student shows awareness of the changes in sound patterns being discussed, ask her to switch to headphones. Return to the speaker if the student experiences difficulty with a more advanced step in the lesson. Procedure:
• Step 1 – Guide the student to a point facing the street, approximately 6 feet from a car parked along the same side of the street as the student, preferably in a spot without a parking meter. Because it is important for the student to touch this car, use your own car or a car belonging to someone who agrees in advance to help you with this exercise. Ask the student to scan for answers to the following questions: Is the object narrow, wide, or very wide? The car is very wide according to the 'K' Sonar scan because the student is facing the side of the car. Is the object tall, medium height, or short? Is the

306
object the same height at all points along its width? The student may need to sidestep to scan for height at both ends and in the middle of the object.
• Step 2 – After she has shared her impressions of the object without knowing that it is a car, guide her to a point near the front or back car door, and ask her to identify the object tactually. She should notice that it is short in front at the hood, and much taller where passengers sit. Ask her to discuss what she observes in the car's overall shape, height, and width, compared to what she observed when she scanned for these features in Step 1.
• Step 3 – Direct the student to examine one or two glass side windows tactually and with the 'K' Sonar. The student should face the car, touch the window with one hand, move the hand out of the way, and point the 'K' Sonar directly at the window about 10 inches back from it. After listening to the clear, whistley tone that results from the glass, she should scan horizontally and vertically with very subtle hand movements. She should listen to the shrill tone when the 'K' Sonar points toward the metal next to the window and to the whistle sound when it points back toward the window glass. She should back up slowly for a few steps and then move slowly forward toward the car, noticing that the clear whistley tone becomes higher in pitch as she moves away from the car window and then becomes lower in pitch as she moves toward it. If the tone color changes drastically as she moves, she will need to scan subtly to regain direct focus on the window.
• Step 4 – Direct the student to examine the tire/wheel area tactually and with the 'K' Sonar. She should face the car, stoop or lean down, touch the area with her hand, move her hand back about 12 inches, and point the 'K' Sonar directly at the tire/wheel. After listening to the muted multiple tones that result from the combination and location of metal and rubber in this part of the car, she will scan horizontally and vertically with very subtle hand movements. She should listen to the shrill tone when the 'K' Sonar points to the metal of the car body next to the tire and to the muted multiple tones when it points back at the tire/wheel area. She should stoop or lean down so that she can point the 'K' Sonar straight at the tire/wheel area; in this position, she should back up slowly for a few steps, and then move slowly forward toward the car. She will listen to the muted multiple ‘K’ Sonar tones become higher in pitch as she moves away and then become lower in pitch as she moves back toward the car. If tone color changes drastically as she moves, she will need to scan subtly to regain direct focus on the tire/wheel area.
• Step 5 – Direct the student to examine one of the car doors tactually and with the 'K' Sonar. The student should face the car, touch the door

307
with one hand, move her hand out of the way, and point the 'K' Sonar directly at the door about 12 inches back from it. After listening to the shrill multiple tones from the metal door and other metal parts of the car in range, she will back up slowly for a few steps, and then move slowly forward toward the car. She should listen to the shrill multiple tones become higher in pitch as she moves away and then become lower in pitch as she moves back toward the car. If tone color changes drastically as she moves, she will need to scan subtly to regain direct focus on the metal side of the car.
• Step 6 – Guide the student approximately 6 feet back from the car and ask her to scan carefully and subtly, looking for the tone colors that she experienced from the windows, the tire/wheel area, and the metal door. Remind her that she may need to stoop down or angle the 'K' Sonar downward to locate the tires and that she will need to hold the 'K' Sonar slightly upward to locate the windows. Because the windows are relatively small compared to the surrounding metal, she may need to use subtle hand movements when she scans for them. Ask her to name the features that she locates.
• Step 7 – Guide the student to a point approximately 6 feet back from another car without identifying the object. Ask her to scan carefully and subtly and to describe her impressions of width and height. Is the object the same height at all points? Which part is shorter, taller? Guide the student to the car and ask her to identify it.
• Step 8 – Ask the student to take several steps back from the car. Ask her to locate a window based on 'K' Sonar feedback alone and to confirm her findings by touch. She is then to keep the window in 'K' Sonar focus as she backs away from the car and then moves back toward it. She will hear the clear whistley tone of the window become higher in pitch as she backs away and become lower in pitch as she moves back toward the car. She may have to scan subtly to relocate the window if she loses its particular sound signature.
• Step 9 – Ask the student to take several steps back from the car. Ask her to locate the tire/wheel area based on 'K' Sonar feedback alone and to confirm her findings by touch. She may need to stoop or bend over in order to locate this area; and she may need to remain in this position for the remainder of this step. She is then to keep the tire/wheel area in 'K' Sonar focus as she backs away from the car and then moves back toward it. She will hear the multiple muted tones of the tire/wheel become higher in pitch as she backs away and become lower in pitch as she moves back toward the car. She may have to scan subtly to relocate this area if she loses its particular sound signature.
• Step 10 – Repeat Steps 7 through 9 for another car. If your student shows no progress or motivation in this activity, skip this step.

308
• Step 11 – Guide the student to a point approximately 6 feet back from the street and facing a car that is parked directly across the street from the student. Ask her to scan and describe her impressions of the object's width, height, and tone color. Ask her if the object is near or farther away from her. Then guide the student to the car across the street. Ask her to identify it tactually.
• Step 12 – Guide the student back to the original position and ask her to scan the car again. Ask her to scan for windows, the tire/wheel area, and the metal sides of the car. Discuss whether such features can be located when the car is across the street. Discuss what cues she can use to know that the object is across the street (i.e., higher pitch of 'K' Sonar tones, difficulty focusing in on and recognizing specific features).
• Step 13 – Repeat Steps 11 and 12 with another car. • Step 14 – Guide the student to positions approximately 6 feet back
from the street and facing a car that is parked either on the student's side of the street or directly across the street from her. Ask her to scan the object for distance, general dimensions, and materials. Ask her which side of the street the object is on, and tell her whether her estimate is right or wrong. For an object on the same side of the street, ask her to scan subtly; to listen for height, width, and tone color changes; and to gather as much information about the object's features as possible. Ask her to describe the object’s features, dimensions, and materials and to predict the object's identity. Guide her to the car for tactual identification.
• Step 15 – Repeat Step 14 with one or two additional cars. • Step 16 – Guide the student to a point approximately 6 feet from a
complex object that is not a car and that is on the same side of the street as the student. A complex object is made up of more than one material; has many parts with varying dimensions and angles of connection to one another; and may be either a single object (such as a car or a bicycle rack) or several objects clustered together (such as a planter with plants, a bicycle rack with bicycles attached, a waste receptacle and a phone pole very close together). As discussed in the notes above, the student's specific findings will depend on the material and construction of the object being scanned. Ask the student to scan the object for detail. Does the object produce one or two tones with the same or slightly different pitches as from a solid object, or does the object produce a number of tones with slightly different pitches as from an object with many slats or parts? Do tones vary in shrillness, loudness, or mutedness as from objects made of different materials? Does the object vary in height, being taller at some points than at others? Does the object vary in width, being wider at some points than at others?
309
• Step 17 – After the student describes the object as fully as possible based on 'K' Sonar feedback, guide her to the object for tactile examination. Discuss features and materials that may have contributed to 'K' Sonar feedback.
• Step 18 – Guide the student back to the original point and ask her to scan the object again, describing correspondences between 'K' Sonar feedback and physical features of the object.
• Step 19 – Repeat Steps 16-18 for several more complex objects that are not cars. Make sure that at least one of these objects is a cluster of single objects. After the student has initially scanned and identified a cluster of objects tactually, she should try to isolate single objects in the cluster when she rescans. As more objects are scanned and examined, many students will show increasing understanding of the relationship of complex 'K' Sonar sound signatures to features of complex objects, and will be able to make educated guesses about the identity of such objects.
• Step 20 – Guide the student to a point approximately 6 feet from a complex object that is not a car and that is directly across the street from the student. Ask her to scan for distance, height, and width and to listen to tone color. Ask the student whether the object is on the same or opposite side of the street. Ask her to describe height, width, and material. After the student describes the object as fully as possible based on 'K' Sonar feedback, guide her to the object for tactile examination. If the student was able to describe any features or materials of the object based on the 'K' Sonar scan, discuss features and materials that may have contributed to 'K' Sonar feedback.
• Step 21 – Guide the student to the original position approximately 6 feet back from the street and across from the object. Ask her to scan the object again. Discuss whether it is easier to detect height, width, and materials for objects on the same or on the opposite side of the street. Also discuss what cues she can use to know that the object is across the street (i.e., higher pitch of 'K' Sonar tones, difficulty focusing in on the object, and difficulty recognizing specific features).
• Step 22 – Guide the student to a position facing the street in 'K' Sonar range of a complex object (cars included) that is either on the same or on the opposite side of the street as the student. The student should stand approximately 6 feet back from objects on the same side of the street and approximately 6 feet back from the street for objects on the opposite side of the street. Tell the student that objects may be on the same or opposite side of the street, and that they may include cars, object clusters, or other complex objects. Ask the student to scan the object thoroughly. Ask her whether the object is on the same or opposite side of the street. Ask her to tell you as much as she can about the object based on 'K' Sonar feedback. If the student is correct

310
about the object's location, give her verbal verification. If she is incorrect, guide her to the object so that she can experience the actual distance between herself and the object. Then guide her back to the original position.
• Step 23 – For objects on the same side of the street, ask the student to scan subtly; describe width, height, and materials; and predict whether the object is a car. Guide the student to the object for tactual identification. Ask her to discuss the relationship between the object's characteristics that she examines tactually and the feedback she received from the 'K' Sonar.
• Step 24 – If your student is not motivated to or cannot describe various aspects of complex 'K' Sonar sound signatures and associate aspects of these sound patterns with object features and materials, skip the remainder of this exercise, and review Exercise 6.1.
• Step 25 – Ask the student to point the 'K' Sonar toward the street, holding it in trailing position in the hand closer to the street. Guide the student on the building-line side so that she holds your arm with the hand that is farther from the street. Tell the student to let you know when she hears an object on the same side of the street. Tell her to ignore objects that are across the street for this exercise. Walk slowly so that the student hears feedback from narrow street-side objects long enough to recognize and process it.
• Step 26 – If the student does not mention an object that she passes on the same side of the street, tell her that you just passed an object, and "replay" it by guiding the student backward past the object and then forward past it again. Ask if she heard the tone produced by the object as she passed it the second time.
• Step 27 – When the student hears an object on the same side of the street, guide her to a point approximately 6 feet back from it and facing it. Ask her to scan for height and width, and to listen to the tone color and the number and quality of tones as she scans up and down and from side to side. Ask her to describe how many tones she hears, whether they are of the same or different pitches, and the qualities of the tone color(s) that she hears. Ask her to make some predictions about features of the object she is scanning based on this feedback. Ask her to predict whether the object is a car and to tell you how confident she is about this prediction.
• Step 28 – Guide the student to the object, and ask her to examine and identify it. Ask her to discuss how features of the object relate to features of the sound signature she heard when scanning it with the 'K' Sonar.
• Step 29 – Continue to guide the student through the area, repeating Steps 27, 28, and 29 as appropriate.

311
• Step 30 – At the end of the area, turn around 180 degrees. Ask the student to walk through the area using touch technique. The student should hold the 'K' Sonar in the non-cane hand in trailing position pointed toward the street. Ask the student to stop and tell you when she hears a street-side object based on 'K' Sonar feedback.
• Step 31 – If a student does not stop and does not mention an object that she passes, tell her that she just passed an object, and "replay" it by guiding the student backward past the object and then forward past it again. Ask if she heard the tone produced by the object as she passed it.
• Step 32 – When a student hears an object, ask her to turn to face it, checking her position by scanning with the 'K' Sonar. She should scan for height and width; and listen to the different tones, pitches, and tone colors that result throughout the scan. After she has thoroughly scanned the object, ask her to describe the object's features and to predict what the object might be. She can suggest several objects that might produce 'K' Sonar sound features like those she is hearing.
• Step 33 – Ask the student to use her cane to walk to the object, to examine it with her cane and with touch, to identify it, and to describe the relationship of features she touches to the 'K' Sonar sounds she heard when scanning it.
• Step 34 – Repeat Steps 32-34 for all objects in the work area. • Step 35 – If the student has learned to line up to cross intersections
properly, and if she understands the necessity of locating and pushing the pedestrian call buttons in order to receive the full amount of crossing time at a light controlled intersection, explain that you are going to show her how to use the 'K' Sonar to locate poles that may hold such buttons. The student should generally understand where such poles are supposed to be located and should also understand that poles can be placed inappropriately. Select intersections that do not have locator tones for accessible pedestrian signals; locator tones will show the student the location of the pole without the need to scan with the 'K' Sonar. If the student has not yet developed these skills, proceed to the next exercise.
• Step 36 – Give the student a short route to follow that includes a light-controlled intersection with a ped call button on a pole and with one or two other shorter items (trash receptacles, newspaper boxes, etc). If possible, the pole with the ped call button should be the only object on the corner that is substantially taller than the student. Ask the student to line up appropriately to cross the perpendicular street.
• Step 37 – Ask the student to hold the 'K' Sonar in the non-cane hand and to scan the area to her left and right for poles—objects taller than she is. Ask her to tell you when she scans shorter objects as well as

312
when she scans the tall pole. Ask her to point to the pole with the 'K' Sonar and to turn and face it.
• Step 38 – When the student locates the pole, ask her to walk to it, using touch technique and holding the 'K' Sonar in the non-cane hand. Ask her to check whether it has a ped call button. If so, ask her to push it and then to walk back to a point where she is lined up to cross the perpendicular street.
• Step 39 – Repeat Steps 36-38 for another intersection. However, this time, ask the student to line up to cross the parallel street. After locating the pole with information from the ‘K’ Sonar and pushing the ped call button, the student should walk back to a point where she is lined up to cross the parallel street.
• Step 40 – Repeat Steps 36-39, but this time choose corners with more than two or three objects nearby. If possible, select corners that include more than one tall item so that the student must check out two or three tall pole-like objects to locate the pole with the ped call button. Help the student decide which pole to check out first based on probable locations of poles that include ped call buttons.
313
Exercise 6.3 Recognizing Street-Side Objects With Cars Parked Next to Them Exercise objective:
The student will be able to distinguish width, height, and other characteristics of street-side objects when parked cars are located on the street next to these objects based on 'K' Sonar feedback, and will increase skill in hand-scanning for street-side objects. Exercise summary:
• First, the student is guided to a position facing the street and approximately 6 feet back from a car in a parking place with a parking meter. She is directed to scan for everything in 'K' Sonar range. She then scans the parking meter and the car for tone, height, and width; tactually examines both objects; and discusses the relationship of 'K' Sonar sounds to physical features and materials of the parking meter and of the car.
• Second, when guided approximately 6 feet back from a tree, telephone pole, or other object that stands next to an empty parking space, the student scans and describes the item in terms of tone color and dimensions; the student may also hear the parking meter as she scans near the end of the arc. The student checks her predictions by tactually examining what she has scanned.
• Third, when guided approximately 6 feet back from the same tree, telephone pole, or other object that now has a car parked in the space next to it, the student is told that she is facing the same object and that now there is a car parked in the background. The student scans, listening to numbers of tones, their pitches, and their tone colors. The student may also hear the parking meter as she scans near the end of the arc. The student and instructor discuss what the student hears. The student is guided to all objects in range including the parked car to examine them tactually.
• Fourth, the student is guided to a point approximately 6 feet in front of a parked car with one wider object (a large tree, planter, bench) between the car and the student; she is told that she faces an object in the foreground with a car in the background. She examines the object and the car with the 'K' Sonar, cane, and touch.
• Fifth, when guided to positions facing the street and approximately 6 feet back from objects on the sidewalk, some of which have cars parked next to them and some of which do not, the student scans

314
thoroughly; indicates whether or not there is a second object in the background; and describes the height and width of the nearer object.
• Six, when guided, with the 'K' Sonar held in trailing position pointed toward the street, the student distinguishes narrow and wider street-side objects based on 'K' Sonar feedback regardless of whether there is a car parked next to such objects.
• Seventh, when using touch technique with the 'K' Sonar held in trailing position in the non-cane hand pointed toward the street, the student distinguishes narrow and wider street-side objects based on 'K' Sonar feedback regardless of whether there is a car parked next to such objects.
• Eighth, using a cane and holding the 'K' Sonar in the non-cane hand in trailing position pointed toward the street, the student locates specific destinations based on street-side landmarks that you provide.

315
Materials: 'K' Sonar, speaker, headphones, cane Location:
• The area consists of a sidewalk with a building line on one side and a street on the other.
• This exercise uses two feature sets that may be found in the same area, or may require the use of two different areas.
• One area must have parking meters and cars parked on the street next to the sidewalk and must have at least three parking spots without a tree, bench, or other object beside them.
• The second area must include parking meters, parked cars in the street next to the sidewalk, and street-side objects (such as trees, telephone poles, or benches) between the student's path of travel and the parked cars.
• The sidewalk should contain few or no obstacles in the middle. Instead, features mentioned above should be near the street side so that the student does not need to focus on obstacle avoidance while developing new 'K' Sonar skills.
• The area should be relatively free of pedestrian traffic when the student does this exercise. Pedestrians serve as obstacles and may also try to intervene when they see the student tactually examining a car or a street-side object.
• The area should not include business driveways or alleys from which traffic might emerge.
• The area should be relatively safe for daytime travel. • Because a student will examine the street-side objects tactually, these
objects should be relatively clean and safe to touch. Instructor notes:
In the previous exercises dealing with street-side objects, students worked with one object or object cluster in the foreground and no other objects in the background because they needed an unambiguous experience of the sound signatures of complex foreground objects. However, many important landmarks on the street side may have a car parked next to them on the street. A parked car next to an object that the student is examining with 'K' Sonar feedback adds additional 'K' Sonar tones to those resulting from the object of interest. After learning how parked cars sound alone in Exercise 6.2, the student can now learn to separate the sounds of a parked car in the background from the foreground sounds resulting from the object of interest.
Activities described below help students review ‘K’ Sonar sounds produced by parking meters and parked cars and then recognize sound signatures of trees, telephone poles, benches, and other street-side objects when combined with the sound signatures of cars parked next to them.
316
• First, the student is guided to a position facing the street and approximately 6 feet back from a car in a parking place with a parking meter. She is directed to scan for everything in 'K' Sonar range. She scans the parking meter and the car for tone, height, and width; tactually examines all objects in range; and then discusses the relationship of 'K' Sonar sounds to physical features and materials of the parking meter and of the car.
• Second, when guided approximately 6 feet back from a tree, telephone pole, or other object that stands next to an empty parking space, the student scans and describes the item in terms of tone color and dimensions; the student may also hear the parking meter as she scans near the ends of the arc. The student checks her predictions by tactually examining the objects.
• Third, when guided approximately 6 feet back from the same tree, telephone pole, or other object that now has a car parked in the space next to it, the student is told that the object she just examined is in the foreground and that a car is parked in the background. The student scans, listening to numbers of tones, their pitches, and their tone colors. She may also hear the parking meter as she scans in the ends of the arc. The student and instructor discuss what the student hears, and the student is guided to the object and the parked car to examine them tactually.
• Fourth, the student is guided to a point approximately 6 feet back from and facing a wide object such as a tree with a large trunk, or a bench or planter with a parking meter; there is a car parked on the street next to the object. The student is told that she faces an object on the sidewalk in the foreground and that a car and parking meter are in the background. The student scans the foreground object for height and width and listens to its tone color. The student also listens for higher pitched tones in the background indicating the presence of the car and for the shrill metallic tones of the parking meter. The student and instructor may listen to these sounds together with a speaker and discuss which parts of the sound signature relate to the foreground object and which parts relate to the car in the background. The background tones related to the car are lower in pitch, softer in volume, and probably different in tone color from those of the foreground object.
• Fifth, when guided to positions facing the street and approximately 6 feet back from objects on the sidewalk, some of which have cars parked next to them and some of which do not, the student scans thoroughly, indicates whether or not there is a second object in the background, and describes the height and width of the nearer object.
• Sixth, holding the 'K' Sonar in the street-side hand in trailing position pointed toward the street, the student is guided through the area with

317
narrow and wide street-side objects, some of which have cars parked beside them on the street, and some of which do not. There should also be parked cars with no other object between the student and the car. The instructor tells the student what kinds of objects, cars, and car/object combinations she can expect to encounter in this area. When the student hears an object, she stops; turns to face it; scans it fully with the 'K' Sonar; and discusses its features based on 'K' Sonar feedback. The instructor may facilitate the discussion by asking her what material she predicts the object is made of, what width and height it is, whether there is a car parked behind it, whether the object itself is a car, etc.
• Seventh, using touch technique and holding the 'K' Sonar in the non-cane hand in trailing position pointed toward the street, the student listens for street-side objects; stops and turns to face the object; scans fully with the 'K' Sonar; and predicts the object's height, width, material, and probable identity based on 'K' Sonar feedback. She also indicates whether a car is parked in the background and whether she hears more than one object in the foreground.
• Eighth, using touch technique and holding the 'K' Sonar in the non-cane hand in trailing position pointed toward the street, the student follows specific directions that you provide based on street-side landmarks to arrive at a specific destination. Remember to use only permanent objects in your directions; parked cars can move and others arrive. You might ask the student to find the mailboxes located between the planter and the telephone pole, or to sit down on the bench just after the bus-stop signpost and just before the newspaper box.
Be particularly careful about asking students to touch cars parked on the
street whose owners you do not know. It is important for a student to touch several cars when making the connection between ‘K’ Sonar sound signatures and objects. You might find it helpful to use your own car as the first car example in Step 4. You might also try to arrange with colleagues to park their cars in the area of interest on the day you are doing this exercise. If your student is not already aware of such issues, discuss car alarms that can be triggered when someone touches or walks very close to a parked car. Explain that a car owner might be concerned if she saw an unknown person touching her property.
Pre-selecting the areas for this exercise is essential. Take the time to teach yourself to recognize 'K' Sonar sounds associated with parking meters and parked cars and to discern the sound signature of a parked car in the background of another object. If you cannot distinguish these sounds after practice, test the area with another colleague or student who is skilled in the perception and interpretation of 'K' Sonar information.

318
Remember that some students will develop high levels of skill at identifying objects based on 'K' Sonar sounds, and others will be able to predict only very general characteristics of objects. Any increase in knowledge about objects that are out of the cane's range can make a difference in locating landmarks and destinations. As always, if a student has low motivation for learning some of these more advanced skills or if she shows no ability in distinguishing more subtle 'K' Sonar tones and making consequent object feature predictions, discontinue this exercise.
It may be helpful at first to listen to 'K' Sonar sound patterns through a speaker so that both you and your student can hear and discuss these complex sound signatures. While guiding, try to hold the speaker near the student’s face. When the student faces the street to examine an object, stand behind her and hold the speaker facing the back of the student's head. Make sure that you remain out of 'K' Sonar range. You should also make sure that your student is comfortable with you in her personal space. As soon as the student shows awareness of the changes in sound patterns being discussed, ask her to switch to headphones. Return to the speaker only if the student experiences difficulty with a more advanced step in the lesson. Procedure:
• Step 1 – Guide the student to a point facing the street, approximately 6 feet back from a car parked in a spot with a parking meter. Ask the student to scan every object in 'K' Sonar range, paying close attention to height, width, and tone color. Ask the student how many objects she has located. Ask her to predict features about these objects. Ask the student to approach the objects and check her predictions tactually. She should identify objects and describe how 'K' Sonar sound patterns relate to actual physical structure and material of the parking meter and car.
• Step 2 – Guide the student to a position facing the street and approximately 6 feet back from a telephone pole or fairly narrow tree next to an empty parking space. Ask the student to scan every object in 'K' Sonar range, paying close attention to height, width, and tone color. Ask the student how many objects she has located, what they are made of, how tall they are. Can she predict features or the identity of an object? Ask the student to approach the object and check her predictions tactually. She should identify objects and describe how 'K' Sonar sound patterns relate to actual physical structure and material of the parking meter and tree/pole.
• Step 3 – Guide the student to the same starting point as in Step 2. However, before doing so, move your car or arrange for a car to be moved into the parking spot next to the tree or telephone pole. This activity is most effective when an assistant can move a car into the
319
spot while the student watches with the 'K' Sonar. Tell the student that she is facing the same object as before, in the foreground, but that now a car is parked in the background. Ask the student to scan for all objects in range, paying attention to height, width, tone color, and multiplicity of tones with varying pitches. The car will produce higher pitches because it is farther away from the student; and the foreground object will produce lower pitches. A parking meter will produce a lower pitch when compared to the car and will have a screechy tone color characteristic of metal objects. Ask the student to point the 'K' Sonar at the tree/pole in the foreground, then at the car in the background (at a point where the pole/tree is not in front of the car), and then at the parking meter. Following this detailed 'K' Sonar scan, the student should approach each of these objects and identify them tactually.
• Step 4 – Guide the student to a position facing the street and approximately 6 feet back from a wider object such as a planter, bench, or wide tree with a car parked next to it. Tell the student that she faces an object in the foreground and a car in the background. Ask her to scan all objects in range. Ask her to point at the foreground object, to examine its height and width, and to make predictions about its height, width, and identity. Then ask her to point to the car with the 'K' Sonar at a spot not blocked by the foreground object. Finally, ask her to point to the parking meter. Using 'K' Sonar feedback to locate each object, she should identify each object tactually. Discuss the relationship between features of each object and its 'K' Sonar sound signature.
• Step 5 – Guide the student to a position facing the street and approximately 6 feet back from an object that may or may not have a car parked next to it. Ask the student to scan all objects in 'K' Sonar range, to indicate whether there is a car in the background, and to describe the height and width of the nearer object. Ask the student to move to all objects in 'K' Sonar range and to check her predictions tactually.
• Step 6 – Repeat Step 5 with four to six more objects, making sure that some foreground objects are narrow and others are wide, and that some have cars parked next to them and some do not.
• Step 7 – Ask the student to hold the 'K' Sonar in her street-side hand in trailing position pointed toward the street. Tell her that you will guide her through an area including as many types of street-side objects and combinations of objects as possible: simple objects with no cars parked next to them; complex objects with no cars parked next to them; parked cars with no objects next to them; parking meters with empty parking spots; and simple and complex objects with cars parked in the background. Ask the student to stop and tell
320
you when she hears an object on the same side of the street. She should then face the object and scan it completely. After a thorough scan, she should describe the object’s features, indicate whether a car is in the background, and name the object.
• Step 8 – Ask the student to walk to each object, examine it tactually, and to discuss similarities and differences between her predictions and the object's actual features and materials. Direct the student back to her original position approximately 6 feet from the object and ask her to rescan. She should describe pitch, tone color, and multiple-single tones in relation to materials and features that she now knows the object to possess.
• Step 9 – Continue to guide the student through the area, repeating Steps 7 and 8 with three to six other street-side objects with and without cars parked next to them. As the student gains experience, her accuracy at predicting features of the foreground object should improve.
• Step 10 – Discuss the importance of trailing with the 'K' Sonar when looking for street-side objects. When the 'K' Sonar is cane-mounted, it points toward the street only once every other step. Street-side objects are often narrow enough to be missed when the 'K' Sonar is pointing elsewhere. To locate most street-side objects, the 'K' Sonar must point continuously toward the street. Ask the student to walk through the area using touch technique and holding the 'K' Sonar in trailing position pointed toward the street. Ask the student to tell you when she hears an object. She should stop and face the object; scan for its height and width; consider tone color; and make predictions about its characteristics and possible identity. If a car is parked in the background, the student should ignore the car and focus only on the foreground object. If the student scans an object with the tone color and height of a parking meter in the ends of the scan arc, she should consider the possibility that a car may be in the background; this awareness can help her separate out the 'K' Sonar feedback about the foreground object. She should use 'K' Sonar feedback to approach the foreground object and check her predictions tactually.
• Step 11 – If the student passes a same-side object without stopping to examine it, tell her that she has passed an object. Ask if she noticed any 'K' Sonar sounds. Guide the student backwards and forwards past the object, asking if she hears the object. If the student does not hear the object, use a speaker to play 'K' Sonar feedback out loud; and discuss the sound that you hear as you guide the student past the object again.
• Step 12 – If the student finds Steps 10 and 11 very difficult and shows no improvement in predicting characteristics of street-side objects, return to activities in Exercise 6.1.
321
• Step 13 – If the student shows interest and ability in predicting features of street-side objects whether or not a car is in the background, direct the student to follow a short route to a destination, using only street-side objects as landmarks. Remind the student to scan for openings or doorways with the 'K' Sonar when she turns to enter a building or locate a destination. Tell her that she can pass the destination to check out the next landmark and turn around to reach the destination if she finds this helpful. Examples of such routes might include: Locate the gift shop near the end of the block, just past a large
planter near the street. After you pass one phone pole, a signpost, and a tree, and before
you pass the newspaper boxes, enter the computer store. Stop at the gate located after a large tree and before the fire
hydrant.

322

323
Exercise 6.4 Pulling it All Together Exercise objective:
The student will locate building-line features and street-side objects; will notice and move around obstacles and pedestrians in the path of travel before contacting them with a cane based on 'K' Sonar feedback; and will shift the 'K' Sonar from cane-mounted to hand-held in order to obtain information needed to achieve specific travel goals. Exercise summary:
• First, with the 'K' Sonar cane-mounted, the student walks down a sidewalk using touch technique. She counts large openings (recesses and gaps) in the building line and moves around obstacles in the path of travel without touching them with her cane based on ‘K’ Sonar feedback.
• Second, with the 'K' Sonar cane-mounted, the student walks down a sidewalk using touch technique. She counts large objects on the street side and moves around obstacles in the path of travel without touching them with her cane based on ‘K’ Sonar feedback.
• Third, with the 'K' Sonar cane-mounted, the student walks down a sidewalk using touch technique. She follows directions based on major building-line features and large street-side objects that can only be perceived through 'K' Sonar feedback while using this feedback to move around obstacles in the path of travel without touching them with her cane.
• Fourth, using touch technique and holding the 'K' Sonar in her non-cane hand, the student follows directions based on building-line details and small street-side objects that can only be perceived through 'K' Sonar feedback when the unit is held in trailing position.
• Fifth, deciding when to use 'K' Sonar cane-mounted or hand-held, the student follows several sets of directions and then longer routes based on both large and small building-line and street-side features that can only be perceived through 'K' Sonar feedback. In addition, when feasible, she uses 'K' Sonar feedback to avoid obstacles in the path of travel.

324

325
Materials: 'K' Sonar, speaker, headphones, cane Location:
• This exercise may require the use of several areas, depending on location of specific features needed for various activities.
• One area must include primarily large street-side features; a building line with large gaps and openings; and central obstacles.
• A second area must include primarily small street-side objects; small building-line openings and recesses; and central obstacles.
• A third area must include both large and small street-side objects; central obstacles; and both large and small building-line openings and recesses.
• In all areas, the sidewalk should not have business driveways or alleys from which traffic might emerge.
• Building-line and street-side objects in all areas should be relatively clean because students may need to touch them to check 'K' Sonar predictions and impressions.
• All locations should be safe for daytime travel. Instructor notes:
In this exercise, the student uses cane-mounted 'K' Sonar feedback from across the entire arc to integrate the processes of obstacle avoidance and of location/recognition of large landmarks and destinations. This exercise also forces the student to make judgments about when it is necessary to remove the 'K' Sonar from the cane and use it in trailing position in order to locate smaller, more subtle landmarks and destinations.
As discussed in previous exercises, openings or recesses in the building line and features along the street must be fairly large in order for a student to reliably recognize them when she uses the 'K' Sonar cane-mounted. To locate these large features, students must learn to notice and respond to ‘K’ Sonar feedback from all parts of the arc–-the middle for pedestrian and obstacle avoidance, and the left and right ends for large landmark/destination location on the street side or building line.
To locate smaller features on the building line or on the street side reliably, the student must hold the 'K' Sonar in trailing position pointed in the direction of interest. However, when the student holds the 'K' Sonar in trailing position to look for smaller features, she cannot use it for obstacle avoidance because the 'K' Sonar points 90 degrees to the left or right and consequently gives no information about obstacles in the path of travel.
When a person uses the 'K' Sonar in real life, she makes ongoing judgments about the type of information she wants and needs in the moment. Does she primarily want information about obstacles in the path of travel so that she can move faster and more gracefully around such obstacles, information attainable when the 'K' Sonar is cane-mounted; or

326
does she primarily want information about smaller building-line and street-side features or about above-the-cane obstacles, information attainable when the 'K' Sonar is held in the non-cane hand? At the end of this exercise, the student will be presented with route directions that will require her to make such judgments. If the student does not understand the tradeoff between small landmark detection and obstacle avoidance, she is likely to make incorrect decisions about how to use the 'K' Sonar. Using a cane mount to find small landmarks will cause her to walk past them without noticing them; and using trailing position to locate large landmarks will cause her to make unnecessary cane contact with obstacles.
The following structured activities help the student first integrate previously-developed skills of object location/recognition and obstacle avoidance, and second make ongoing determinations of when to use the 'K' Sonar cane-mounted or hand-held. These activities build on previous exploration and discussion of the kinds of features that can be detected with a cane mount and the kinds that require hand-held use of the 'K' Sonar.
• First, walking down a sidewalk using touch technique with the 'K' Sonar cane-mounted, the student counts large openings (recesses and gaps) in the building line and moves around obstacles in the path of travel without touching them with the cane based on ‘K’ Sonar feedback. This activity requires the student to pay attention to both the middle and the building-line end of the arc—attending to the middle of the arc is necessary for obstacle avoidance; and attending to the building-line end is necessary for noticing large openings in the building line. The student is directed to walk through the area of interest and then turn around to walk through the area in the opposite direction so that she learns to listen for building-line openings on both the left and right ends of the arc. The number of openings that the student counts when she walks in one direction may differ from the number she counts when walking in the opposite direction; this can happen because the cane and consequently the 'K' Sonar may point directly at a small opening when the student walks in one direction but may be at the other end of the arc pointing away from this small opening when the student walks in the other direction. As students become more skilled, they can use large protuberances in the building line as landmarks while avoiding obstacles; however, openings and recesses are emphasized here because they are often very important indicators of destinations. Activities in this exercise do not require students to distinguish recesses in the building line from gaps between buildings or other openings. Although students may develop this ability as they become more skilled, the distinctions between openings and recesses often require continuous building-line information attainable only when the 'K' Sonar is hand-held in trailing position pointed toward the building.

327
• Second, walking down a sidewalk using touch technique with the 'K' Sonar cane-mounted, the student counts large objects on the street side and moves around obstacles in the path of travel without touching them with the cane based on ‘K’ Sonar feedback. This activity requires the student to pay attention to both the middle and the street-side end of the arc—attending to the middle of the arc is necessary for obstacle avoidance; and attending to the street-side end is necessary for noticing large features on the sidewalk near the street. Again, the student walks through the area, turns around, and returns through it in the opposite direction so that she learns to listen for street-side objects when they occur at both the left and right ends of the arc. The number of street-side objects that the student counts when she walks in one direction may differ from the number she counts when walking in the opposite direction because the cane and consequently the 'K' Sonar may point directly at a small object when the student walks in one direction but may be at the other end of the arc pointing away from this small object when the student walks in the other direction. Tone color of street-side objects is sometimes discernable when such objects are heard one time every other step; more accurate information about materials and dimensions of street-side objects usually requires constant information gained from trailing with the 'K' Sonar and from additional hand-scanning.
• Third, walking down a sidewalk using touch technique with the 'K' Sonar cane-mounted, the student follows directions based on major building-line features and large street-side objects that can only be perceived through 'K' Sonar feedback and also uses 'K' Sonar feedback to move around obstacles in the path of travel without touching them with the cane. These activities require the student to listen to 'K' Sonar information from the entire arc—paying attention to sound from both ends of the arc is necessary to identify features on the building line and street side; and paying attention to sound from the center of the arc is necessary for obstacle avoidance. The directions given to the student are dependent on the type and location of building-line and street-side features in the area. Routes should require the student to locate both building-line and street-side features. Routes should also include travel in both directions through the area so that the student must listen for building-line and street-side features regardless of the relative position of the building line and street. Begin with simple directions—for example, the first doorway after the first or second street-side object. As the student experiences success, directions can become more complex. Give the full set of directions initially, but also repeat information about each landmark when the student is ready to locate it.

328
• Fourth, walking down a sidewalk using touch technique and holding the 'K' Sonar in trailing position pointed toward the street or the building line as needed, the student follows directions based on building-line details and small street-side features that can only be perceived through 'K' Sonar feedback. The student is told in advance to hold the 'K' Sonar in the hand and not to mount it on the cane for these activities because landmarks and destinations are too subtle to notice reliably when the 'K' Sonar is cane mounted. However, the student must decide whether to point the 'K' Sonar to the left or the right in trailing position, depending on the location of the next landmark. Because the 'K' Sonar is not cane-mounted, it does not enable students to move around obstacles without touching them with the cane. The directions given to the student are dependent on the type and location of building-line and street-side features in the area. Routes should require students to locate both building-line and street-side features. Routes should also require the student to travel in both directions through the area so that she learns to listen for building-line and street-side features regardless of the relative position of the building line and street. Begin with simple directions—find the second small business entrance after the first telephone pole. Directions can become more complex after the student has experienced initial success. Give the full set of directions initially, but also repeat information about each landmark when the student is ready to locate it.
• Fifth, walking down the sidewalk using touch technique and deciding when to use the 'K' Sonar cane-mounted or hand-held, the student follows several sets of directions and then longer routes based on both large and small building-line and street-side features that can only be perceived through 'K' Sonar feedback; the student also, when feasible, uses 'K' Sonar feedback to avoid obstacles in the path of travel. Specific directions depend on the type and location of relevant features in the area being used. However, make sure that some sets of directions include both large and small building-line and street-side landmarks; this makes it necessary for the student to move the ‘K’ Sonar between hand-held and cane-mounted positions frequently, depending on the specific type of landmark or destination to be located. Routes should include travel in both directions through the area so that the student must listen for building-line and street-side features regardless of the relative position of the building line and street.
In the fifth set of activities, the student is told that she will determine
when to mount the 'K' Sonar on the cane and when to hold it in her hand based on the kinds of directions given. The student's choices should be
329
respected, but pros and cons should be discussed. If the student chooses to hold the 'K' Sonar when only large landmarks are given, she is rejecting the ability to avoid obstacles without touching them with her cane; such a student may prefer to handle obstacles in the traditional manner, or she may not want to attach the 'K' Sonar to and remove it from the cane depending on the type of landmark she is seeking.
In all activities where directions are provided, the student should be given the entire series of directions before beginning the route. However, directions to the next landmark are also given again as the student needs them. This relieves the student of the need to memorize a route so that she can concentrate more fully on the 'K' Sonar skills she is learning.
Select areas for this exercise in advance. Make sure that obstacles, building-line openings, and street-side features can be heard with the 'K' Sonar. Check small building-line openings and street-side features by holding the 'K' Sonar in trailing position pointed toward the feature of interest as you walk past it. Check large building-line openings and street-side features by mounting the 'K' Sonar on the cane and walking past the feature using touch technique. Remember that a feature is considered large only if it extends along the path of travel for at least two of the student's strides. If the feature does not extend this far, it can be missed if the student passes it when the cane is moving through the opposite half of the arc. When using the 'K' Sonar cane-mounted, make sure that you can also hear obstacles and detect clear space in which to move around them.
Prepare your landmark directions in advance. Make sure that all of the large landmarks and destinations pass the ”2-stride" test described above, and make sure that the small features and destinations are not too subtle to be heard when the 'K' Sonar is hand-held.
Cars parked on the same side of the street as the student can serve as large landmarks, but keep in mind that they are not permanent. Don't consider an area to have large features in it if parked cars are the only large feature unless you are completely certain that cars will be parked in the area when your student does this exercise.
Procedure:
• Step 1 – Guide or direct the student to the beginning of an area with large recesses and openings on the building line and obstacles in the middle of the sidewalk. Ask the student to mount the ‘K’ Sonar on her cane. Tell her that she will walk down the sidewalk using touch technique and use ‘K’ Sonar feedback to avoid obstacles without touching them with her cane. In addition, she will count each opening that she passes out loud. Both recesses in a building and gaps between buildings should be considered as openings. Remind her that now she will be listening to the middle of the arc for obstacles and to the building-line end of the arc for openings. If she loses track of how

330
many openings she has counted, she can say "opening" instead of a number. Tell her that you will give her verbal feedback about her accuracy.
• Step 2 – When the student recognizes a building-line opening correctly, give positive verbal reinforcement.
• Step 3 – When the student passes a large building-line opening without counting or mentioning it, ask her to stop, guide her to a point approximately 6 feet before the opening, and ask her to listen for it as she moves past it again. Give positive verbal reinforcement when she notes it. Remember that building-line openings smaller than the length of at least two of the student's strides are not reliably noticed when the 'K' Sonar is cane-mounted; do not ask the student to reexamine such small openings when she does not mention them to you.
• Step 4 – When the student moves around an obstacle without touching it with the cane, give positive verbal reinforcement.
• Step 5 – When the student bumps an obstacle with the cane, guide her back to a point approximately 6 feet before the obstacle and ask her to try moving around it again. If the student needs additional assistance, ask her to stop before she touches the obstacle with the cane. Ask her to move the cane in a wide, slow arc and then to tell you her plan for moving around the obstacle. When the student moves around the obstacle without touching it with the cane, give positive verbal reinforcement.
• Step 6 – When the student reaches the end of the area, ask her to turn around and walk back through it. Ask her to begin counting building-line openings again and to continue to move around obstacles without touching them with the cane. Repeat Steps 2-6 as appropriate for obstacles and landmarks that occur as the student returns through the area.
• Step 7 – If the student experiences difficulty integrating obstacle avoidance with identification of building-line openings and shows no improvement in doing so, do not continue with this exercise. Return to activities involving each of these tasks separately so that the student can develop stronger skills in each area before integrating them.
• Step 8 – Guide or direct the student to the beginning of an area with large objects on the street side and obstacles in the middle of the sidewalk. Large street-side objects might include bus shelters, benches, long planters, or parked vehicles on the same side of the street as the student. Ask the student to mount the ‘K’ Sonar on her cane. Tell her that she will walk down the sidewalk using touch technique and, as in the previous activity, use ‘K’ Sonar feedback to avoid obstacles without touching them with her cane. She will also count each object on the street side of her line of travel out loud as she passes it. She does not need to determine features or identity of

331
objects that she passes. Remind her that now she will be listening to the middle of the arc for obstacles and to the street-side end of the arc for large objects. If she loses track of how many objects she has counted, she can say "object" instead of a number. Tell her that you will give her verbal feedback about her accuracy.
• Step 9 – When the student recognizes the existence of a street-side object correctly, give positive verbal reinforcement.
• Step 10 – When the student passes a large street-side object without counting or mentioning it, ask her to stop, guide her to a point approximately 6 feet before the object, and ask her to listen for it as she moves past it again. Give positive verbal reinforcement when she notes it. Remember that street-side objects narrower than the length of at least two of the student's strides are not reliably noticed when the 'K' Sonar is cane-mounted; do not ask the student to reexamine such small objects when she does not mention them to you.
• Step 11 – When the student moves around an obstacle without touching it with the cane, give positive verbal reinforcement.
• Step 12 – When the student bumps an obstacle with the cane, guide her back to a point approximately 6 feet before the obstacle, and ask her to try moving around it again. If she needs additional assistance, stop her before the obstacle. Ask her to move the cane in a wide, slow arc and then to tell you her plan for moving around the obstacle. When the student moves around the obstacle without touching it with the cane, give positive verbal reinforcement.
• Step 13 – When the student reaches the end of the area, ask her to turn around and walk back through it. Ask her to begin counting street-side objects again and to continue to move around obstacles without touching them with the cane.
• Step 14 – Repeat Steps 9 through 12 as appropriate as the student returns through the area.
• Step 15 – If the student experiences difficulty integrating obstacle avoidance with identification of street-side features and shows no improvement in doing so, do not continue with this exercise. Return to activities involving each of these tasks separately so that the student can develop stronger skills in each area before integrating them.
• Step 16 – Use an area with large building-line openings (including recesses and gaps), with large street-side objects, and with path-of-travel obstacles. Guide or direct the student to the starting point in a route with landmarks and a destination that she can hear with the 'K' Sonar when it is cane-mounted. Tell her that you will give her the full set of directions before she begins to walk, but that you will also repeat each new landmark as she walks. Make the first set of directions short, with only one landmark before the destination. You might, for example, ask the student to find the computer store, which

332
is the first doorway after the bus shelter by the street. Make subsequent sets of directions increasingly complex—you might ask the student to find the large cluster of objects on the street side after the sporting goods store which is the second large opening after the bus shelter. You can reuse landmarks and destinations in the area as directions become longer and more complex. Guide the student to a beginning point for each new set of directions. Make sure that the student travels in both directions through the area so that she experiences the street side and the building line on both her left and her right sides.
• Step 17 – Give the student the first set of directions. Tell her to walk down the sidewalk using touch technique, move around obstacles without touching them with the cane, listen for each landmark, tell you when she notices the landmark, and locate the destination. Repeat the first landmark as she begins to walk. Tell her the next landmark or the destination as soon as she has identified the current landmark.
• Step 18 – When the student locates a landmark or destination, give positive verbal reinforcement. Then repeat the next landmark or destination, or begin the next set of directions.
• Step 19 – When the student passes a landmark or destination without notifying you, guide her back to a point approximately 6 feet before the feature, repeat the description of the feature, and ask the student to locate it. Remember that building-line openings and street-side objects narrower than the length of at least two of the student's strides are not reliably noticed when the 'K' Sonar is cane-mounted; do not use such small landmarks in this activity. If you accidentally include a small building-line or street-side landmark, do not ask the student to reexamine such small features if she passes them without noticing them.
• Step 20 – When the student moves around an obstacle without touching it with the cane, give positive verbal reinforcement.
• Step 21 – When the student bumps an obstacle with the cane, guide her back to a point approximately 6 feet before the obstacle, and ask her to try moving around it again. If she needs additional assistance, ask her to stop before she touches the obstacle with the cane. Ask her to move the cane in a wide, slow arc and then to tell you her plan for moving around the obstacle.
• Step 22 – If, after trying three or four sets of directions, the student continues to experience difficulty integrating obstacle avoidance with identification of large building-line openings and street-side features and shows no improvement in doing so, do not continue with this exercise. Return to activities involving each of these tasks separately

333
so that the student can develop stronger skills in each area before integrating them.
• Step 23 – Direct or guide the student to an area with primarily smaller building-line openings (including recesses and gaps), with primarily smaller street-side objects, and with path-of-travel obstacles. Tell her that you will give her directions to a destination based on landmarks that she can hear with the 'K' Sonar when it is held in the hand in trailing position. Tell her that you will give her the full set of directions before she begins to walk, but that you will also repeat each landmark when she needs to listen for it. Directions should increase in complexity to match the student's developing skill level. The first set of directions should be short—for example, find the recessed entrance to the flower shop that is after the first telephone pole. Subsequent sets of directions should be increasingly complex—for example, find the fire hydrant after the bus-stop sign which is just past the third opening/recess in the building line. You can reuse landmarks and destinations in the area as directions become longer and more complex. Guide or direct the student to a beginning point for each new set of directions. Make sure that the student travels in both directions through the area so that she experiences the street side and the building line on both her left and her right sides.
• Step 24 – Give the student the first set of directions. Tell her that she will walk down the sidewalk using touch technique and will hold the 'K' Sonar in her non-cane hand in trailing position. She will tell you when she notices each landmark, and she will locate the destination. She will touch obstacles with her cane and move around them in the traditional way because the 'K' Sonar is not cane mounted.
• Step 25 – Repeat the first landmark. Ask the student to show you how she will hold the 'K' Sonar to locate the first landmark, and ask her to tell you why she will hold it this way. Give verbal reinforcement when the student points the 'K' Sonar in the correct direction for locating the first landmark.
• Step 26 – If the student does not point the 'K' Sonar in the correct direction for locating the first landmark, ask her to point the 'K' Sonar toward the street and then toward the building line. Ask her to repeat the location of the first landmark or repeat it for her. Ask her whether the landmark is near the street or is part of the building line. Then ask her to point the 'K' Sonar in the correct direction for locating this landmark.
• Step 27 – After the student has pointed the 'K' Sonar in the correct direction for locating the first landmark, ask her to walk through the area using touch technique. Repeat the landmark she is to locate and remind her to tell you when she hears it. Remind her that she can
334
stop, turn and face an object, and scan it for height, width, and tone color if this will help her identify a landmark.
• Step 28 – If the student passes the first landmark without mentioning it to you, tell her that she passed it. Guide her back to a point approximately 6 feet before the landmark, and ask her to listen for it again.
• Step 29 – When the student correctly indicates the first landmark, give positive verbal reinforcement. Repeat the second landmark or destination to her.
• Step 30 – Repeat Steps 24 through 29 as needed for two-four more routes of increasing complexity.
• Step 31 – If the student has difficulty with this activity and shows no improvement with practice, do not continue with this exercise. Return to previous exercises for teaching building-line and street-side feature recognition when the 'K' Sonar is hand-held.
• Step 32 – Guide or direct the student to an area that contains both large and small objects on the street side, both large and small openings and recesses on the building line, and obstacles in the middle of the sidewalk. Tell the student that you will give her directions that include both large and small landmarks that are on the street side or on the building line. Tell her that she can mount the 'K' Sonar on the cane or hold it in her hand, depending on what works best for her in each situation. Discuss the pros and cons of using the 'K' Sonar hand-held and cane-mounted when looking for large landmarks, when looking for small ones, and when wanting to avoid obstacles without touching them with a cane. Whenever a student needs to locate a small landmark, the 'K' Sonar must be hand-held, not cane-mounted. If the student wants to avoid obstacles without touching them with a cane, the unit must be cane-mounted.
• Step 33 – The first set of directions using large and small landmarks should be fairly short and simple. For example, you might ask the student to locate the dentist's office after the third parking meter. After giving her the first set of directions, ask her whether she will use the 'K' Sonar on the cane or whether she will trail with it, and discuss her reasons for her choice.
• Step 34 – After the student has satisfactorily explained how she will use the 'K' Sonar for this activity, ask her to walk down the sidewalk using touch technique. Repeat the first landmark and remind her to tell you when she locates it.
• Step 35 – If the student misses the first landmark, guide her back to a point approximately 6 feet before it and ask her to listen for it again. Give positive reinforcement for correct responses.
• Step 36 – Remind the student of subsequent landmarks after she has located the current one.

335
• Step 37 – If the student uses the 'K' Sonar cane-mounted to locate a small landmark, stop and discuss problems with this strategy with her.
• Step 38 – If the student trails with the 'K' Sonar to locate a series of large landmarks, stop and discuss this strategy with her. This may be her preferred method of 'K' Sonar use, but make sure that she understands that she loses the ability to move around obstacles before coming into cane contact with them.
• Step 39 – If the student shows no progress in landmark location when she is free to trail or use the 'K' Sonar cane-mounted, return to exercises on obstacle avoidance and street-side and building-line landmark location.
• Step 40 – If the student shows progress in deciding how to use the 'K' Sonar according to what a specific situation requires, continue offering consecutively longer and more complex landmark/destination location activities.

336

337
End Notes Chapter 1 1Kay, Leslie. ‘K’ Sonar: The Handbook. Retrieved on 4/23/08 from http://www.batforblind.co.nz/training.php 2Our History. Information retrieved on 3/23/098 from http://www.batforblind.co.nz/history.php 3Henderson, Tom. (2007). The Physics Classroom . Retrieved on 4/23/08 from http://www.glenbrook.k12.il.us/GBSSCI/PHYS/Class/sound/u11l1a.html 4At the time of this writing, AirDrives™ headphones were available for sale via the World Wide Web. These headphones rest outside of the openings of the ears. Information about AirDrives™ can be found at: http://airdrives.com/lowkey.html Information retrieved from this website on 4/28/08. 5At the time of this writing, Outi™ were available for purchase on the World Wide Web. These headphones direct sound and vibration to the bones behind the ear. Although a small portion of the headphone rests near the ear opening, the headphones do not cover most of the opening. Additional information about these headphones can be found at: http://zelcocom.nationprotect.net/Merchant2/merchant.mvc?Screen=PROD&Product_Code=033X2&Category_Code=NewProducts Information retrieved from this website on 4/28/08.
338
References Hill, E., & Blasch, B. (1980). Concept development. In L. Welsh & B. Blasch
(Eds.), Foundations of orientation and mobility (pp. 265-290). Hill, E. W., & Ponder, P. (1976). Orientation and mobility techniques: A
guide for the practitioner. New York: American Foundation for the Blind. Jacobson, W. H. (1993). The art and science of teaching orientation and
mobility to persons with visual impairments. New York: AFB Press. LaGrow, S. J., & Weessies, M. J. (1994). Orientation and mobility:
Techniques for independence. Palmerston North, New Zealand: Dunmore Press.
Penrod, W., & Blasch, B. (2005). Tooth fairies and the appropriateness of
electronic travel devices for children. Division of Visual Impairment Quarterly, 51(1), 23-25.
Skellenger, A., & Hill, E. (2005). The preschool learner. In B. B. Blasch, W.
R. Wiener, & R. L. Welsh (Eds.), Foundations of orientation and mobility (pp. 407-438).