ita: indice - lehner-versand.ch · devono essere oggetto di raccolta ... non coprire mai la...
TRANSCRIPT

1
ITA: INDICE Simbologia………...……………………………………………………………………………..………………….. p. 2 Avvertenze per l’utilizzo………...…………………………………………………………………………… p. 3 Informazioni d’uso………...……………………………………...…………………………………………….. p. 4 G10078………...……………………………………...……………………………………...……………..…………. p. 5 Nomenclatura….....……………………………………...……………………..…………………………………. p. 5 Al primo utilizzo…..………………………...…………………………………………………………………… p. 6 Introduzione alle funzioni……………………………...……………………………………………………. p. 6 Consigli per la cottura….....…………………………………...………………………………………………. p. 8 Funzionamento….....…………………………..………………...………………………………………………... p. 8 Manutenzione e pulizia...………………………..………………………………...……………..………….. p. 9 Caratteristiche tecniche………...……………………………………...………………………………………. p. 9 Risoluzione dei problemi…..…………………………………...……………………………………...….… p. 9 Ricettario….....…………………………..………………………....………………………………………………... p. 10 Trattamento dei rifiuti delle apparecchiature elettriche ed elettroniche………...……………………………………...……………………………………...……………... p. 54
ENG: INDEX Symbols………...……………………………………………………………………………..………………………. p. 2 General information………...……………………………………...………………………………………..….. p. 15 Safety instructions………...……………………………………………………………..………………………. p. 16 G10078………...……………………………………...……………………………………...……………..…………. p. 17 First use…..………………………………….…...…………………………………………………………………… p. 17 Functions introduction……………..…………………...……………………………………………………. p. 18 Hints for cooking……….....…………………………………...………………………………………………. p. 20 Operating the bread machine...…………………………...………………………………………………... p. 20 Maintenance and Cleaning...………………………..………………………………...……………..…….. p. 20 Technical features………...……………………………………...…………………………..…………………. p. 21 Troubleshooting…..…………………………………...……………………………………..........................….… p. 21 Recipy book………..…………………………………...……………………………………..........................….… p. 22 Waste of electric and electronic equipment (WEEE Directive)………….…...……………………………………...……………………………………...……………... p. 52
PORTUGUESE………..……………………………………...……………………………………… p. 26
ESPAÑOL ……………….…………………………...……………………………………...……………...... p. 34
DEUTCH ……………….…………………………...……………………………………...……………...... p. 41

2
CLASSI DI PROTEZIONE / PROTECTION CLASSES
ATTENZIONE RISCHIO DI SCOSSE ELETTRICHE
NON ESPORRE A PIOGGIA E UMIDITA’
WARNING ELECTRIC SHOCK RISK
DO NOT EXPOSE TO RAIN OR MOISTURE
ATTENZIONE: NON APRITE L’APPARECCHIO. ALL’INTERNO NON VI SONO COMANDI MANIPOLABILI DALL’UTENTE NE’ PARTI DI RICAMBIO. PER TUTTE LE OPERAZIONI DI SERVIZIO RIVOLGERSI AD UN CENTRO DI ASSISTENZA AUTORIZZATO. Se l’apparecchio ha impresso i simboli sottostanti, significa che le caratteristiche tecniche sono corrispondenti al simbolo.
Questo simbolo segnala la presenza all’interno del prodotto di componenti operanti ad alta tensione; non apritelo in nessun caso. This symbol warns the user that un-insulated dangerous voltage inside the system may cause an electrical shock. Do not open the case.
Questo simbolo indica che l’apparecchio appartiene alla CIasse I : ciò significa che l’apparecchio ha una spina che comprende il polo di messa a terra e va usata esclusivamente su prese provviste di messa a terra. Class I Appliance symbol. This means the appliance must have the chassis connected to electrical earth/ground by an earth conductor.
Attenzione: questo simbolo indica all’utente istruzioni importanti da leggere e da rispettare durante l’utilizzo del prodotto. Caution: this symbol reminds the user to read carefully the important operations and maintenance instructions in this owner’s guide.

3
AVVERTENZE PER L’UTILIZZO Di seguito sono riportate importanti indicazioni riguardanti l’installazione, l’uso e la manutenzione; conservare con cura questo libretto per ogni ulteriore consultazione; utilizzare il prodotto solo nel modo indicato dal presente libretto di istruzioni; ogni altro uso è da considerare improprio e pericoloso; perciò il costruttore non può essere considerato responsabile nel caso in cui vi siano danni derivanti da usi impropri, erronei ed irragionevoli; prima dell’uso assicurarsi dell'integrità dell'apparecchio; in caso di dubbio non utilizzarlo e rivolgersi al personale dell’assistenza; non lasciare gli elementi dell'imballaggio (sacchetti in plastica, polistirolo espanso, chiodi, graffette, ecc.) alla portata dei bambini in quanto sono potenziali fonti di pericolo; inoltre, ricordiamo che questi, devono essere oggetto di raccolta differenziata; accertarsi che i dati di targa siano compatibili con quelli della rete elettrica; l'installazione deve essere effettuata in base alle istruzioni del costruttore considerando la potenza massima dell'apparecchio indicata in targa; un’errata installazione può causare danni a persone, animali o cose, per i quali il costruttore non può essere considerato responsabile; non lasciare l'apparecchio inutilmente inserito; meglio staccare la spina dalla rete di alimentazione quando l'apparecchio non viene utilizzato; nel caso fosse necessario l’uso di adattatori, prese multiple e prolunghe utilizzare solo quelli conformi alle vigenti norme di sicurezza; in ogni caso non superare mai i limiti di assorbimento indicati sull'adattatore semplice e/o sulle prolunghe, nonché quello di massima potenza marcato sull'adattatore multiplo; qualora l’apparecchio sia fuori uso e si sia deciso di non ripararlo, si raccomanda di renderlo inutilizzabile tagliando il cavo di alimentazione; non maneggiare o toccare il prodotto con mani bagnate o a piedi nudi.
- Non utilizzare il prodotto in caso di danni al cavo di alimentazione, alla spina o in caso di cortocircuiti; fare riparare il prodotto da un centro di assistenza autorizzato.
- Non avvicinare il cavo di alimentazione a oggetti taglienti o a superfici calde e non tirarlo per staccare la spina.
- Non esporre il prodotto a condizioni atmosferiche dannose come pioggia, umidità, gelo, ecc. Conservarlo in luoghi asciutti.
- Questo apparecchio può essere utilizzato da bambini dagli 8 anni in su e da persone con ridotte capacità fisiche, sensoriali o mentali o con mancanza di esperienza o conoscenza se a loro è stata assicurata un’adeguata sorveglianza oppure se hanno ricevuto istruzioni circa l’uso in sicurezza dell’apparecchio; le operazioni di pulizia e di manutenzione non devono essere effettuate da bambini a meno che non abbiano più di 8 anni e siano sorvegliati
- Non per uso commerciale. Solo per uso domestico
Le operazioni di pulizia devono essere effettuate dopo aver staccato la spina: in caso di guasto e/o di cattivo funzionamento non manomettere l'apparecchio. Per l'eventuale riparazione rivolgersi solamente ad un centro autorizzato dal costruttore e richiedere l'utilizzo di ricambi originali. Il mancato rispetto di quanto sopra può' compromettere la sicurezza dell'apparecchio e far decadere i termini di garanzia.
4
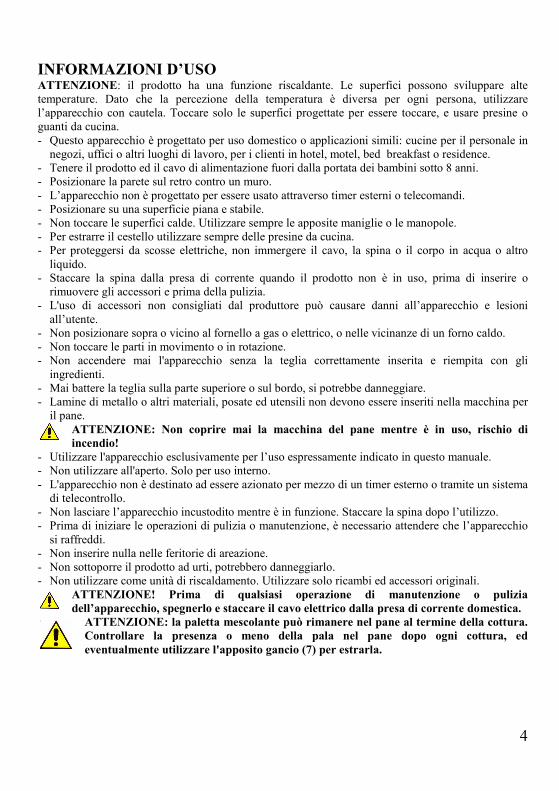
INFORMAZIONI D’USO ATTENZIONE: il prodotto ha una funzione riscaldante. Le superfici possono sviluppare alte temperature. Dato che la percezione della temperatura è diversa per ogni persona, utilizzare l’apparecchio con cautela. Toccare solo le superfici progettate per essere toccare, e usare presine o guanti da cucina. - Questo apparecchio è progettato per uso domestico o applicazioni simili: cucine per il personale in
negozi, uffici o altri luoghi di lavoro, per i clienti in hotel, motel, bed breakfast o residence. - Tenere il prodotto ed il cavo di alimentazione fuori dalla portata dei bambini sotto 8 anni. - Posizionare la parete sul retro contro un muro. - L’apparecchio non è progettato per essere usato attraverso timer esterni o telecomandi. - Posizionare su una superficie piana e stabile. - Non toccare le superfici calde. Utilizzare sempre le apposite maniglie o le manopole. - Per estrarre il cestello utilizzare sempre delle presine da cucina. - Per proteggersi da scosse elettriche, non immergere il cavo, la spina o il corpo in acqua o altro
liquido. - Staccare la spina dalla presa di corrente quando il prodotto non è in uso, prima di inserire o
rimuovere gli accessori e prima della pulizia. - L'uso di accessori non consigliati dal produttore può causare danni all’apparecchio e lesioni
all’utente. - Non posizionare sopra o vicino al fornello a gas o elettrico, o nelle vicinanze di un forno caldo. - Non toccare le parti in movimento o in rotazione. - Non accendere mai l'apparecchio senza la teglia correttamente inserita e riempita con gli
ingredienti. - Mai battere la teglia sulla parte superiore o sul bordo, si potrebbe danneggiare. - Lamine di metallo o altri materiali, posate ed utensili non devono essere inseriti nella macchina per
il pane. ATTENZIONE: Non coprire mai la macchina del pane mentre è in uso, rischio di incendio!
- Utilizzare l'apparecchio esclusivamente per l’uso espressamente indicato in questo manuale. - Non utilizzare all'aperto. Solo per uso interno. - L'apparecchio non è destinato ad essere azionato per mezzo di un timer esterno o tramite un sistema
di telecontrollo. - Non lasciare l’apparecchio incustodito mentre è in funzione. Staccare la spina dopo l’utilizzo. - Prima di iniziare le operazioni di pulizia o manutenzione, è necessario attendere che l’apparecchio
si raffreddi. - Non inserire nulla nelle feritorie di areazione. - Non sottoporre il prodotto ad urti, potrebbero danneggiarlo. - Non utilizzare come unità di riscaldamento. Utilizzare solo ricambi ed accessori originali.
ATTENZIONE! Prima di qualsiasi operazione di manutenzione o pulizia dell’apparecchio, spegnerlo e staccare il cavo elettrico dalla presa di corrente domestica.
ATTENZIONE: la paletta mescolante può rimanere nel pane al termine della cottura. Controllare la presenza o meno della pala nel pane dopo ogni cottura, ed eventualmente utilizzare l'apposito gancio (7) per estrarla.
5
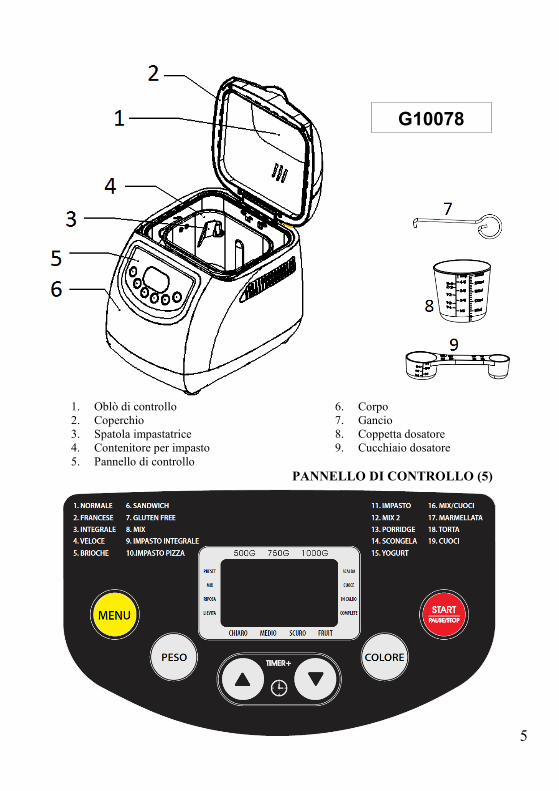
1. Oblò di controllo 2. Coperchio 3. Spatola impastatrice 4. Contenitore per impasto 5. Pannello di controllo
6. Corpo 7. Gancio 8. Coppetta dosatore 9. Cucchiaio dosatore
PANNELLO DI CONTROLLO (5)
G10078
6
AL PRIMO UTILIZZO L'apparecchio potrebbe emettere un po’ di fumo e un odore caratteristico quando si accende per la prima volta. Questo è normale e smetterà presto. 1. Posizionare l’apparecchio su una superficie piana e stabile ed assicurarsi che sia dotato di
sufficiente aerazione. 2. Verificare che tutte le parti e gli accessori siano integri e privi di danni. 3. Pulire tutte le parti come indicato nel paragrafo "Pulizia e manutenzione". 4. Impostare la macchina per il pane in modalità “cottura” (Funzione 19) e fare funzionare a vuoto per
circa 10 minuti. Dopo il completo raffreddamento, pulire nuovamente l’apparecchio. 5. Asciugare le parti ed assemblarle correttamente, così che la macchina sia pronta per l'utilizzo.
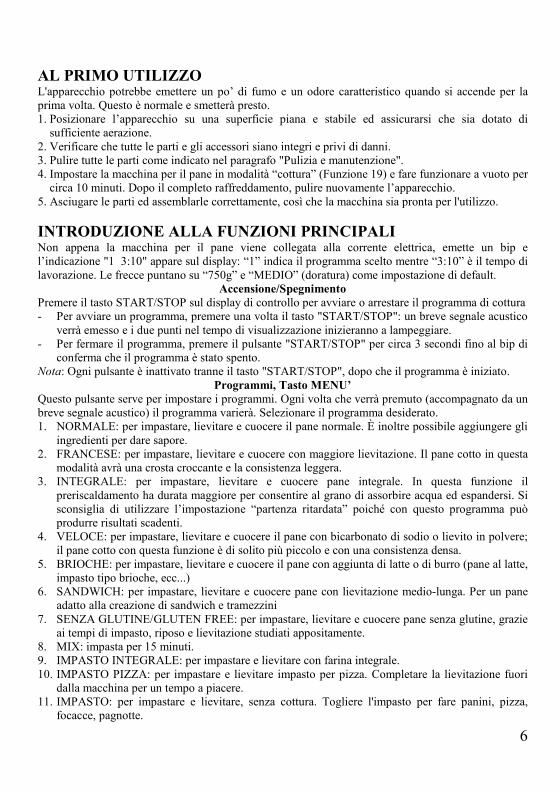
INTRODUZIONE ALLA FUNZIONI PRINCIPALI Non appena la macchina per il pane viene collegata alla corrente elettrica, emette un bip e l’indicazione "1 3:10" appare sul display: “1” indica il programma scelto mentre “3:10” è il tempo di lavorazione. Le frecce puntano su “750g” e “MEDIO” (doratura) come impostazione di default.
Accensione/Spegnimento Premere il tasto START/STOP sul display di controllo per avviare o arrestare il programma di cottura - Per avviare un programma, premere una volta il tasto "START/STOP": un breve segnale acustico
verrà emesso e i due punti nel tempo di visualizzazione inizieranno a lampeggiare. - Per fermare il programma, premere il pulsante "START/STOP" per circa 3 secondi fino al bip di
conferma che il programma è stato spento. Nota: Ogni pulsante è inattivato tranne il tasto "START/STOP", dopo che il programma è iniziato.
Programmi, Tasto MENU’ Questo pulsante serve per impostare i programmi. Ogni volta che verrà premuto (accompagnato da un breve segnale acustico) il programma varierà. Selezionare il programma desiderato. 1. NORMALE: per impastare, lievitare e cuocere il pane normale. È inoltre possibile aggiungere gli
ingredienti per dare sapore. 2. FRANCESE: per impastare, lievitare e cuocere con maggiore lievitazione. Il pane cotto in questa
modalità avrà una crosta croccante e la consistenza leggera. 3. INTEGRALE: per impastare, lievitare e cuocere pane integrale. In questa funzione il
preriscaldamento ha durata maggiore per consentire al grano di assorbire acqua ed espandersi. Si sconsiglia di utilizzare l’impostazione “partenza ritardata” poiché con questo programma può produrre risultati scadenti.
4. VELOCE: per impastare, lievitare e cuocere il pane con bicarbonato di sodio o lievito in polvere; il pane cotto con questa funzione è di solito più piccolo e con una consistenza densa.
5. BRIOCHE: per impastare, lievitare e cuocere il pane con aggiunta di latte o di burro (pane al latte, impasto tipo brioche, ecc...)
6. SANDWICH: per impastare, lievitare e cuocere pane con lievitazione medio-lunga. Per un pane adatto alla creazione di sandwich e tramezzini
7. SENZA GLUTINE/GLUTEN FREE: per impastare, lievitare e cuocere pane senza glutine, grazie ai tempi di impasto, riposo e lievitazione studiati appositamente.
8. MIX: impasta per 15 minuti. 9. IMPASTO INTEGRALE: per impastare e lievitare con farina integrale. 10. IMPASTO PIZZA: per impastare e lievitare impasto per pizza. Completare la lievitazione fuori
dalla macchina per un tempo a piacere. 11. IMPASTO: per impastare e lievitare, senza cottura. Togliere l'impasto per fare panini, pizza,
focacce, pagnotte.
7
12. MIX 2: impasta per un tempo impostabile da 8 a 45 minuti. 13. PORRIGDE: per fare il porridge (o zuppa d'avena). 14. SCONGELA: scalda a 50 gradi, temperatura adatta allo scongelamento. 15. YOGURT: per fare lo yogurt da latte e fermenti lattici. 16. MIX/CUOCI: mescola e poi cuoce, senza lievitazione. 17. MARMELLATA: per realizzare confetture e marmellate 18. TORTA: impastare, lievitare e cuocere (con soda o lievito in polvere) torte e ciambelle. 19. CUOCI: solo cottura (senza impasto e lievitazione). Può essere anche usato per prolungare la
cottura di un programma. Livelli di Doratura, tasto COLORE
Questo pulsante serve per scegliere il livello di doratura della crosta del pane. Premere il tasto ripetutamente e la freccia sul display si sposterà tra le seguente opzioni: “CHIARO” (doratura leggera), “MEDIO” (doratura media) “SCURO” (doratura più scura).
Dimensioni, tasto PESO Premere questo pulsante ripetutamente per selezionare tra i formati di pane: 500g, 750g, 1000g.
Partenza ritardata Se si desidera che l'apparecchio non si accenda immediatamente, è possibile utilizzare questo pulsante per impostare la partenza. Il tempo impostato include anche il tempo di cottura del programma selezionato. In un primo momento selezionare il programma (pulsante MENU) ed il grado di doratura (pulsante COLOR), quindi premendo TIME+ o TIME– è possibile impostare la partenza ritardata da un minimo di 10 minuti ad un massimo di 15 ore. Esempio: sono le 20:30 e desiderate che il pane sia pronto la mattina successiva alle 7 (cioè dopo 10 ore e 30 minuti). - Selezionare programma, doratura e dimensione della pagnotta tramite gli appositi pulsanti. - Premere il pulsante TIME+ o TIME- per aggiungere tempo fino a quando 10:30 non viene
visualizzato sul display LCD. - Premere il tasto STOP/START per attivare il programma. - Sul display LCD apparirà il conto alla rovescia per visualizzare il tempo rimanente. Otterrete pane
fresco alle 7:00 del mattino, che rimarrà in caldo per 1 ora circa. Nota: con la partenza ritardata, si consiglia di non utilizzare ingredienti freschi e facilmente deperibili (come uova, latte fresco, frutta, cipolle ecc..). 2. CARATTERISTICHE FUNZIONALI DI BASE
Funzione di mantenimento del calore (programmi 1,2,3,4,5,6,7,16,18) Il pane può essere mantenuto automaticamente al caldo per 60 minuti dopo la cottura. Se si desidera prendere il pane prima, disattivare il programma premendo il tasto START/STOP sul display di controllo.
Effetto memoria Se l'alimentazione è stata interrotta durante il corso di panificazione, il processo continuerà automaticamente entro 10 minuti, senza premere il pulsante START/STOP. Se l’interruzione di corrente supera i 10 minuti, la memoria non può essere mantenuta e la macchina dovrà essere riavviata. Tuttavia, se l’apparecchio non ha superato la fase dell’impasto prima dell’interruzione di elettricità, è possibile premere il START/STOP per continuare il programma dall'inizio.
Condizioni ambientali di utilizzo La temperatura ambientale suggerita per un utilizzo ottimale della macchina del pane deve essere compresa tra 15 e 34°C.

8
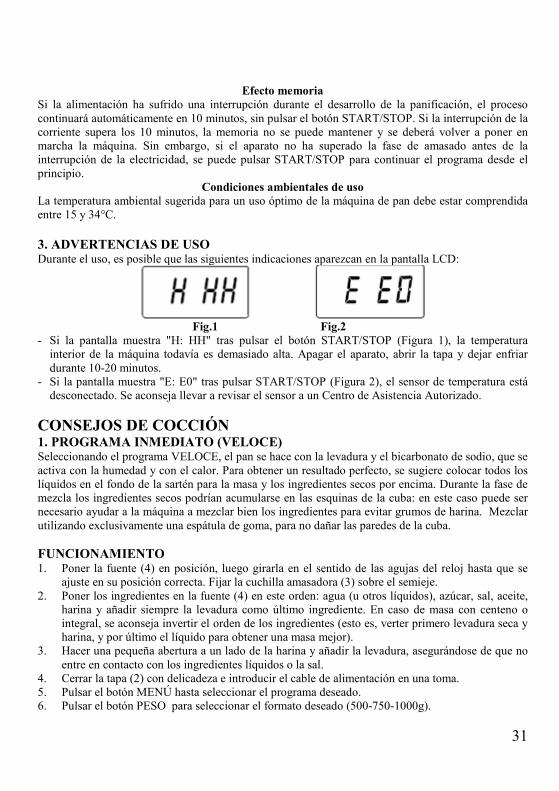
3. AVVERTENZE D’USO Durante l’utilizzo, è possibile che le seguenti indicazioni compaiano sul display LCD: - Se il display visualizza "H: HH" dopo aver premuto il tasto START/STOP (Figura 1), la
temperatura interna della macchina è ancora troppo elevata. Spegnere l’apparecchio, aprire il coperchio e lasciare raffreddare per 10-20 minuti.
- Se il display mostra "E: E0" dopo aver premuto START/STOP (Figura 2), il sensore di temperatura è scollegato. Si consiglia di fare controllare il sensore con attenzione da un Centro Assistenza Autorizzato.
Fig.1 Fig.2
CONSIGLI PER LA COTTURA 1. PROGRAMMA VELOCE Selezionando il programma VELOCE, il pane viene realizzato con il lievito e il bicarbonato di sodio, che è attivato dall’umidità e dal calore. Per ottenere un risultato perfetto, si suggerisce di collocare tutti i liquidi nel fondo del tegame per l’impasto e gli ingredienti secchi in cima. Durante la fase di miscelazione gli ingredienti secchi potrebbero raccogliersi negli angoli della vaschetta: in questo caso può essere necessario aiutare la macchina a mescolare bene gli ingredienti per evitare grumi di farina. Mescolare utilizzando esclusivamente una spatola di gomma, per non danneggiare il contenitore.
FUNZIONAMENTO 1. Mettere il contenitore (4) in posizione, quindi ruotarlo in senso orario finché non scattano in
posizione corretta. Fissare la spatola impastatrice (3) sopra il semiasse. 2. Mettere gli ingredienti nella teglia (4) in questo ordine: acqua (o altri liquidi), zucchero, sale, olio,
farina ed aggiungere sempre il lievito come ultimo ingrediente. In caso di impasto con segale o integrale, si consiglia di invertire l'ordine degli ingredienti (cioè di versare prima lievito secco e farina, e infine il liquido per ottenere un impasto migliore).
3. Fare una piccolo buco su un lato della farina e aggiungere il lievito, assicurandosi che non venga a contatto con gli ingredienti liquidi o il sale.
4. Chiudere il coperchio (2) con delicatezza e inserire il cavo di alimentazione in una presa. 5. Premere il pulsante MENU fino a selezionare il programma desiderato. 6. Premere il pulsante PESO/LOAF per selezionare il formato desiderato (500-750-1000g). 7. Se necessario, impostare la partenza ritardata, premendo TIME+ o TIME-. 8. Premere il pulsante START/STOP per accendere la macchina. Nota: con i programmi NORMALE/SOFT, FRANCESE/FRENCH, INTEGRALE/WHOLE WHEAT, VELOCE/QUICK, BRIOCHE, SANDWICH, SENZA GLUTINE/GLUTEN FREE e TORTA/CAKE, durante la fase di impasto la macchina emetterà alcuni bip, per chiedervi di aggiungere ingredienti. Se desiderate, aprite il coperchio e aggiungere ingredienti al bip. 9. Una volta terminata la cottura, l’apparecchio emetterà 10 segnali acustici. Aprire il coperchio (2)
e, dopo aver indossato dei guanti da forno, afferrare saldamente la maniglia della teglia (4). Girarla in senso antiorario e tirare delicatamente la padella verso l'alto. Se necessario, utilizzare una spatola antiaderente per allentare delicatamente i lati del pane.
ATTENZIONE: la teglia (4) ed il pane possono essere molto caldi! Maneggiare sempre con cura e utilizzare guanti da forno.

9
10. Rovesciare la teglia (4) su una superficie pulita e agitare delicatamente fino a quando il pane non uscirà.
11. Lasciare raffreddare il pane per circa 20 minuti prima di affettare. 12. Al termine della cottura, qualora non si sia premuto il pulsante START/STOP, il pane viene
mantenuto in caldo automaticamente per 1 ora. 13. Quando la macchina non è in uso, si consiglia di scollegare il cavo di alimentazione. Nota: prima di affettare il pane, utilizzare il gancio (7) per rimuovere la lama impastatrice (3) nascosta sul fondo della pagnotta. Il pane è caldo, non usare mai le mani per estrarla.
MANUTENZIONE E PULIZIA ATTENZIONE: Staccare la spina dalla presa di corrente e lasciare raffreddare la macchina prima di effettuare qualsiasi operazione di manutenzione o della pulizia.
La teglia (4), la lama (3), l’oblò di controllo (1), il coperchio (2) e il corpo della macchina (6) possono essere puliti utilizzando un panno leggermente umido. Non utilizzare alcun detergente chimico e abrasivo e non immergere mai il corpo in acqua o altro liquido per la pulizia. Asciugare completamente la teglia (4) e la lama impastatrice (3) prima di rimontarle. Qualora la barra di impasto sia difficile da rimuovere dal perno, riempire il contenitore con acqua calda e lasciare in ammollo per circa 30 minuti. Prima di riporre la macchina del pane, accertarsi che si sia raffreddata completamente e che sia stata pulita ed asciugata; mettere il cucchiaio dosatore (9), la coppetta (8), il gancio (7) e la lama impastatrice (3) nella teglia (4), e chiudere il coperchio (2). Conservare in luogo asciutto e pulito, lontano dalla portata dei bambini.
CARATTERISTICHE TECNICHE • Alimentazione: AC 220-240V~ 50/60 Hz. Potenza: 550W • Capacità: MAX 1 Kg • Display digitale e 19 programmi • 3 livelli di doratura • Partenza ritardata (10min – 15h) • Funzione di mantenimento del calore per 1 ora • Accessori: teglia antiaderente, coppetta e cucchiaio dosatore, gancio
RISOLUZIONE DEI PROBLEMI Problema Causa Soluzione
Esce del fumo dall’unità - Elemento riscaldante sporco - Primo utilizzo: olio di lavorazione rimasto sull’elemento riscaldante.
- Scollegare la macchina e pulire l'elemento riscaldante. - Durante il primo utilizzo, fare funzionare a secco con coperchio aperto.
Impasto non uniforme e cattiva cottura
- Il programma selezionato non è corretto. - Coperchio aperto troppo spesso durante la lavorazione. - Impastatrice non può mescolare adeguatamente.
- Selezionare altro programma. - Non aprire il coperchio, lasciare il pane al caldo dopo la cottura. - Controllare che non vi sia nulla che ostruisce le lame impastatrici. Se il problema persiste, contattare un Centro Riparazioni Autorizzato

10
Rumori durante l’uso e l’impasto non è miscelato correttamente
La teglia non è installata correttamente e l’impasto è troppo grande per essere mescolato
Fissare la teglia in modo corretto, ricontrollare le dosi nella ricetta.
Pagnotta troppo grande Troppo lievito, troppa farina o troppa acqua. Temperatura ambiente troppo elevata.
Controllare la ricetta e i fattori ambientali.
Pagnotta tropo piccola, il pane non è lievitato
- Nessun lievito o poco lievito tra gli ingredienti. - Temperatura dell’acqua alta. - Il sale è venuto a contatto con il lievito - Temperatura ambiente bassa.
- Controllare di aver inserito la quantità corretta di lievito. - Controllare la temperatura dell’acqua. - Aumentare la temperatura della stanza.
L’impasto è talmente grande che esce dalla teglia
- Troppi liquidi - Troppo lievito
Ridurre la quantità di liquidi e di lievito.
Il pane cade al centro della teglia durante la cottura dell’impasto
- La farina usata non corretta. - Il lievito non è in temperatura corretta - Troppa acqua/liquidi.
- Controllare il tipo di farina. - Il lievito deve essere a temperatura ambiente. - Diminuire la quantità di acqua o liquidi nella ricetta.
L’interno della pagnotta è vuoto - Troppa acqua, troppo lievito o no sale. - La temperatura dell’acqua è troppo elevata.
- Ridurre la quantità d’acqua o di lievito, controllare di aver messo sale - Controllare la temperatura dell’acqua.
Il display mostra “H:HH” dopo aver premuto il pulsante di avvio/stop
La temperatura all’interno della macchina è troppo elevata.
Premere Stop e staccare l’unità dalla presa di corrente. Estrarre la teglia, usando i guanti da forno, e lasciare raffreddare la macchina per 10-20 minuti circa. Se il problema dovesse persistere, contattare un Centro Riparazioni Autorizzato.
RICETTARIO Il pane è alla base dell’alimentazione quotidiana, e ogni città ha le sue specialità. Le varietà di pane sono perciò praticamente infinite. L’obiettivo di questo ricettario è fornire le basi e le idee per poter poi scatenare la fantasia e creare le proprie personali ricette nel migliore dei modi.
La macchina del pane è ottima anche per i celiaci, poiché permette di fare un buon pane anche con farina ed ingredienti senza glutine.
ALCUNI CONSIGLI 1) L’ordine di inserimento degli ingredienti è importante. Inserire gli ingredienti nello stesso
ordine dell’elenco ingredienti. 2) Durante la prima fase del programma, la macchina emette dei “beep”. Se si hanno
ingredienti aggiuntivi (es. cereali, olive, ecc…), inserirli al momento del “beep”. 3) Se al termine del programma pensate che la cottura esterna non sia completata, è possibile
prolungare la cottura con il programma 19. 4) A programma terminato, togliere la teglia con delle presine, capovolgerla su una griglietta
ed estrarre il pane. Far raffreddare il pane sulla griglia.
11
5) Se la spatola impastatrice rimane incastrata nel pane, estrarla senza usare oggetti metallici. Meglio toglierla con le dita quando il pane è freddo.
6) Se la spatola impastatrice rimane incastrata nel perno, versare acqua calda e detersivo delicato per stoviglie ed attendere che l’incrostazione ammorbidisca.
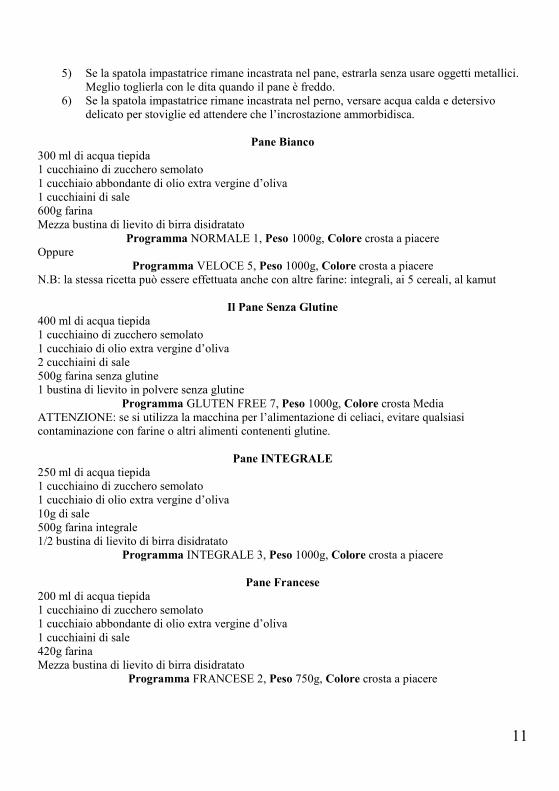
Pane Bianco
300 ml di acqua tiepida 1 cucchiaino di zucchero semolato 1 cucchiaio abbondante di olio extra vergine d’oliva 1 cucchiaini di sale 600g farina Mezza bustina di lievito di birra disidratato
Programma NORMALE 1, Peso 1000g, Colore crosta a piacere Oppure
Programma VELOCE 5, Peso 1000g, Colore crosta a piacere N.B: la stessa ricetta può essere effettuata anche con altre farine: integrali, ai 5 cereali, al kamut
Il Pane Senza Glutine 400 ml di acqua tiepida 1 cucchiaino di zucchero semolato 1 cucchiaio di olio extra vergine d’oliva 2 cucchiaini di sale 500g farina senza glutine 1 bustina di lievito in polvere senza glutine
Programma GLUTEN FREE 7, Peso 1000g, Colore crosta Media ATTENZIONE: se si utilizza la macchina per l’alimentazione di celiaci, evitare qualsiasi contaminazione con farine o altri alimenti contenenti glutine.
Pane INTEGRALE 250 ml di acqua tiepida 1 cucchiaino di zucchero semolato 1 cucchiaio di olio extra vergine d’oliva 10g di sale 500g farina integrale 1/2 bustina di lievito di birra disidratato
Programma INTEGRALE 3, Peso 1000g, Colore crosta a piacere
Pane Francese 200 ml di acqua tiepida 1 cucchiaino di zucchero semolato 1 cucchiaio abbondante di olio extra vergine d’oliva 1 cucchiaini di sale 420g farina Mezza bustina di lievito di birra disidratato
Programma FRANCESE 2, Peso 750g, Colore crosta a piacere
12
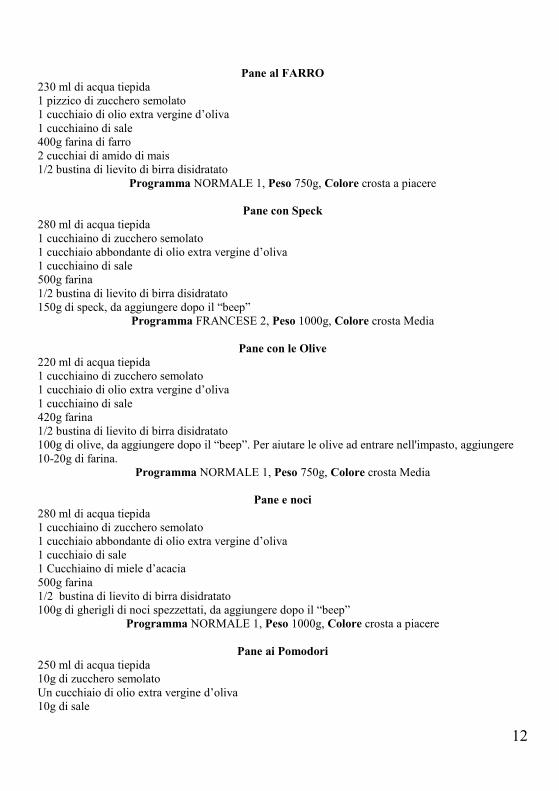
Pane al FARRO 230 ml di acqua tiepida 1 pizzico di zucchero semolato 1 cucchiaio di olio extra vergine d’oliva 1 cucchiaino di sale 400g farina di farro 2 cucchiai di amido di mais 1/2 bustina di lievito di birra disidratato
Programma NORMALE 1, Peso 750g, Colore crosta a piacere
Pane con Speck 280 ml di acqua tiepida 1 cucchiaino di zucchero semolato 1 cucchiaio abbondante di olio extra vergine d’oliva 1 cucchiaino di sale 500g farina 1/2 bustina di lievito di birra disidratato 150g di speck, da aggiungere dopo il “beep”
Programma FRANCESE 2, Peso 1000g, Colore crosta Media
Pane con le Olive 220 ml di acqua tiepida 1 cucchiaino di zucchero semolato 1 cucchiaio di olio extra vergine d’oliva 1 cucchiaino di sale 420g farina 1/2 bustina di lievito di birra disidratato 100g di olive, da aggiungere dopo il “beep”. Per aiutare le olive ad entrare nell'impasto, aggiungere 10-20g di farina.
Programma NORMALE 1, Peso 750g, Colore crosta Media
Pane e noci 280 ml di acqua tiepida 1 cucchiaino di zucchero semolato 1 cucchiaio abbondante di olio extra vergine d’oliva 1 cucchiaio di sale 1 Cucchiaino di miele d’acacia 500g farina 1/2 bustina di lievito di birra disidratato 100g di gherigli di noci spezzettati, da aggiungere dopo il “beep”
Programma NORMALE 1, Peso 1000g, Colore crosta a piacere
Pane ai Pomodori 250 ml di acqua tiepida 10g di zucchero semolato Un cucchiaio di olio extra vergine d’oliva 10g di sale
13
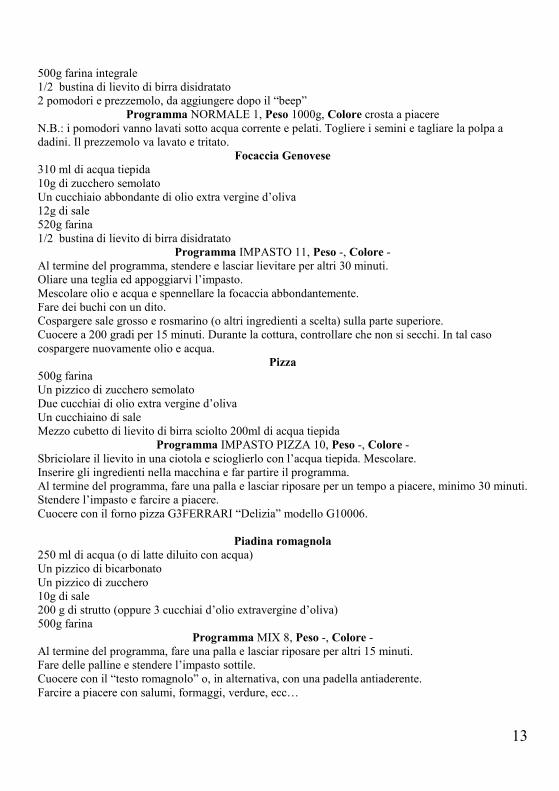
500g farina integrale 1/2 bustina di lievito di birra disidratato 2 pomodori e prezzemolo, da aggiungere dopo il “beep”
Programma NORMALE 1, Peso 1000g, Colore crosta a piacere N.B.: i pomodori vanno lavati sotto acqua corrente e pelati. Togliere i semini e tagliare la polpa a dadini. Il prezzemolo va lavato e tritato.
Focaccia Genovese 310 ml di acqua tiepida 10g di zucchero semolato Un cucchiaio abbondante di olio extra vergine d’oliva 12g di sale 520g farina 1/2 bustina di lievito di birra disidratato
Programma IMPASTO 11, Peso -, Colore - Al termine del programma, stendere e lasciar lievitare per altri 30 minuti. Oliare una teglia ed appoggiarvi l’impasto. Mescolare olio e acqua e spennellare la focaccia abbondantemente. Fare dei buchi con un dito. Cospargere sale grosso e rosmarino (o altri ingredienti a scelta) sulla parte superiore. Cuocere a 200 gradi per 15 minuti. Durante la cottura, controllare che non si secchi. In tal caso cospargere nuovamente olio e acqua.
Pizza 500g farina Un pizzico di zucchero semolato Due cucchiai di olio extra vergine d’oliva Un cucchiaino di sale Mezzo cubetto di lievito di birra sciolto 200ml di acqua tiepida
Programma IMPASTO PIZZA 10, Peso -, Colore - Sbriciolare il lievito in una ciotola e scioglierlo con l’acqua tiepida. Mescolare. Inserire gli ingredienti nella macchina e far partire il programma. Al termine del programma, fare una palla e lasciar riposare per un tempo a piacere, minimo 30 minuti. Stendere l’impasto e farcire a piacere. Cuocere con il forno pizza G3FERRARI “Delizia” modello G10006.
Piadina romagnola 250 ml di acqua (o di latte diluito con acqua) Un pizzico di bicarbonato Un pizzico di zucchero 10g di sale 200 g di strutto (oppure 3 cucchiai d’olio extravergine d’oliva) 500g farina
Programma MIX 8, Peso -, Colore - Al termine del programma, fare una palla e lasciar riposare per altri 15 minuti. Fare delle palline e stendere l’impasto sottile. Cuocere con il “testo romagnolo” o, in alternativa, con una padella antiaderente. Farcire a piacere con salumi, formaggi, verdure, ecc…
14
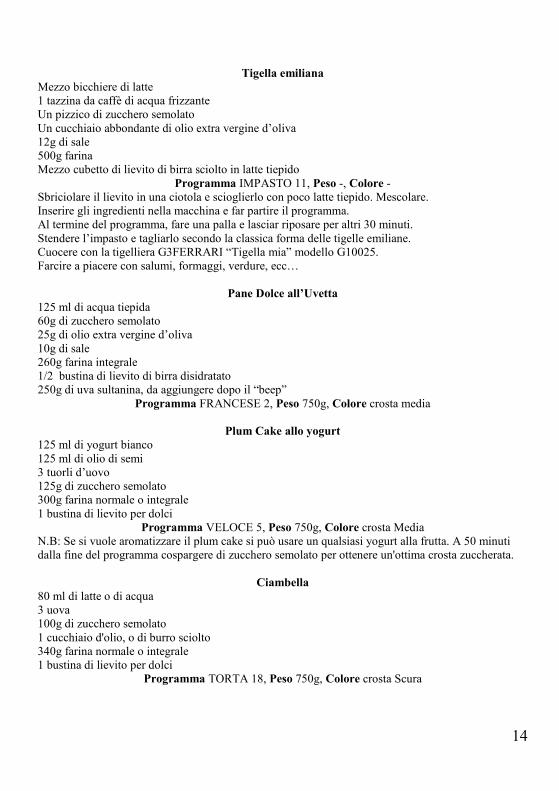
Tigella emiliana Mezzo bicchiere di latte 1 tazzina da caffè di acqua frizzante Un pizzico di zucchero semolato Un cucchiaio abbondante di olio extra vergine d’oliva 12g di sale 500g farina Mezzo cubetto di lievito di birra sciolto in latte tiepido
Programma IMPASTO 11, Peso -, Colore - Sbriciolare il lievito in una ciotola e scioglierlo con poco latte tiepido. Mescolare. Inserire gli ingredienti nella macchina e far partire il programma. Al termine del programma, fare una palla e lasciar riposare per altri 30 minuti. Stendere l’impasto e tagliarlo secondo la classica forma delle tigelle emiliane. Cuocere con la tigelliera G3FERRARI “Tigella mia” modello G10025. Farcire a piacere con salumi, formaggi, verdure, ecc…
Pane Dolce all’Uvetta 125 ml di acqua tiepida 60g di zucchero semolato 25g di olio extra vergine d’oliva 10g di sale 260g farina integrale 1/2 bustina di lievito di birra disidratato 250g di uva sultanina, da aggiungere dopo il “beep”
Programma FRANCESE 2, Peso 750g, Colore crosta media
Plum Cake allo yogurt 125 ml di yogurt bianco 125 ml di olio di semi 3 tuorli d’uovo 125g di zucchero semolato 300g farina normale o integrale 1 bustina di lievito per dolci
Programma VELOCE 5, Peso 750g, Colore crosta Media N.B: Se si vuole aromatizzare il plum cake si può usare un qualsiasi yogurt alla frutta. A 50 minuti dalla fine del programma cospargere di zucchero semolato per ottenere un'ottima crosta zuccherata.
Ciambella 80 ml di latte o di acqua 3 uova 100g di zucchero semolato 1 cucchiaio d'olio, o di burro sciolto 340g farina normale o integrale 1 bustina di lievito per dolci
Programma TORTA 18, Peso 750g, Colore crosta Scura

15
N.B: Con uno sbattitore elettrico mescolare bene zucchero, uova e latte, ed inserire il composto nel contenitore. Sopra al composto aggiungere gli altri ingredienti. A 50 minuti dalla fine del programma cospargere di zucchero semolato per ottenere un'ottima crosta zuccherata.
Il Panettone 190 ml di latte intero 130g di zucchero semolato 5g di sale 130g di burro fuso 4 tuorli d’uovo Scorza di limone e scorza d’arancia 2 bustine di vanillina 50g di canditi 50g di uvetta 1 cucchiaino di colorante giallo (facoltativo) 400g farina, si consiglia Manitoba 2 bustine di lievito di birra disidratato Procedimento Inserire gli ingredienti nell’ordine. Utilizzare il programma MIX 2 12, per una durata di 10 minuti e poi lasciar riposare per un’ora con il coperchio chiuso. Utilizzare nuovamente il programma MIX 2 12, per una durata di 10 minuti e poi lasciar riposare per un’ora con il coperchio chiuso. Cuocere con il seguente programma:
Programma NORMALE 1, Peso 1000g, Colore crosta media
YOGURT Versare 1 litro di latte fresco in una casseruola e, mantenendo una fiamma bassa, mescolare fino al raggiungimento dei 42°C-44°C. Versare la polvere di fermenti lattici (proporzione con il latte è 1:500, per informazioni consultare la confezione dei fermenti) o lo yogurt naturale (1 vasetto da 125ml per 800cc di latte) in un bicchiere. Prendere 200ml del latte preparato in precedenza e aggiungervi la polvere o lo yogurt mescolando per bene fino alla solubilizzazione. A questo punto, versare la miscela ottenuta nel rimanente latte e mescolare accuratamente. Versare la miscela di latte direttamente nel contenitore (4).
Programma YOGURT 15, Peso -, Colore - NOTA: per aiutare la fermentazione, soprattutto nel caso di latte di soia, si consiglia di aggiungere un cucchiaio di zucchero.
ENGLISH: SAFETY INSTRUCTIONS The following are important notes on the installation, use and maintenance; save this instruction manual for future reference; use the equipment only as specified in this guide; any other use is considered improper and dangerous; therefore, the manufacturer cannot be held responsible in the event of damages caused by improper, incorrect or unreasonable use;before use, ensure the equipment is undamaged; if in doubt, do not attempt to use it and contact the authorized service center; do not leave packing materials (i.e. plastic bags, polystyrene foam, nails, staples, etc.) within the reach of children as they are potential sources of danger; always remember that they must be separately collected; make sure that the rating information given on the technical label are compatible with those
16
of the electricity grid; the installation must be performed according to the manufacturer's instructions considering the maximum power of the appliance as shown on the label; an incorrect installation may cause damage to people, animals or things, for which the manufacturer cannot be considered responsible thereof; do not leave the unit plugged; better to remove the plug from the mains when the device is not in use; if it is necessary to use adapters, multiple sockets or electrical extensions, use only those that comply with current safety standards; in any case do not exceed the power consumption limits indicated on the electrical adapter and / or extensions, as well as the maximum power shown on multiple adaptor; if the unit is out of order and you do not want to fix it, it must be made inoperable by cutting power cord.
- Do not handle or touch the appliance with wet hands or bare feet.
- Do not use the appliance in the event of damage to the power cord, plug, or in case of short circuits; to repair the product only address an authorized service center.
- Do not allow the power cord to get closer to sharp objects or in contact with hot surfaces; do not pull it to disconnect the plug.
- Do not expose the appliance to harmful weather conditions such as rain, moisture, frost, etc.. Always store it in a dry place.
- This appliance can be used by children aged from 8 years and above and persons with reduced physical, sensory or mental capabilities or lack of experience and knowledge if they have been given supervision or instruction concerning use of the appliance in a safe way and understand the hazards involved; children shall not play with the appliance; cleaning and user maintenance shall not be made by children without supervision.
- Not for commercial use. Household use only
Cleaning operations should be carried out after unplugging the unit; in case of failure and / or malfunction do not tamper with the unit; to repair the appliance, always contact the service center authorized by the manufacturer and request the use of original spare parts; failure to comply with the above may compromise the unit safety and invalidate the warranty.
GENERAL INFORMATION WARNING: This appliance includes a heating function. Surfaces, other than the functional surfaces may develop high temperatures. Since temperatures are perceived differently by different people, this device should be used with CAUTION. Hold the appliance exclusively to grip surfaces intended to hold and use such heat protection measures as heat protection Gloves or pot holders. - This appliance is intended to be used in household and similar applications such as: staff kitchen areas in
shops, offices and other working environments; by clients in hotels, motels and other residential type environments; farm houses, bed and breakfast type environments.
- Keep the appliance and its cord out of reach of children less than 8 years. - The rear surface of appliances shall be placed against a wall. - The appliances is not intended to be operated by means of an external timer or separate remote-
control system. - Place the appliance on a flat and stable surface. - Do not touch hot surfaces. Always use the handles or knobs.
17
- To prevent electrical shock, do not immerse power cord, plug or the body in water or other liquid. - Do not touch moving or rotating parts of the unit. Disconnect the plug from the outlet when the
appliance is not in use, before putting on or taking off accessories and before cleaning. - The use of attachments not recommended by the manufacturer may cause damages or injuries
which are not covered by the warranty. - Do not place the appliance over or near the gas/electric stove, or near a hot oven. - Never operate the unit without the tray properly inserted and filled with the ingredients. - Never knock the pan on the top or on the board, since this may cause serious damages. - Metal sheets or other materials, utensils and cutlery should not be inserted in the bread machine,
this may increase the risk of fire or electrical shock. WARNING! Never cover the unit while it is running, this may cause RISK OF BURNS. - Operate the device only as intended in this owner’s guide. - Do not use outdoors. Indoor use only. - Unit is not designed to be operated by means of an external timer or via a remote control system. - Before cleaning or maintenance, it is necessary to wait for the unit to completely cool down. Do
not insert anything in the ventilation windows. - Use original spare parts and accessories only. - Never leave the appliance unattended while it is running. Remove the plug after each use. - Do not use the appliance as a heating unit.
CAUTION: Before starting any cleaning or maintenance, switch off the unit and unplug the power cord from the mains socket. CAUTION: kneading blade can remain in the bread after cooking. Control if the blade is stuck in the bread after every cooking, and eventually use the hook (7) to take it out.
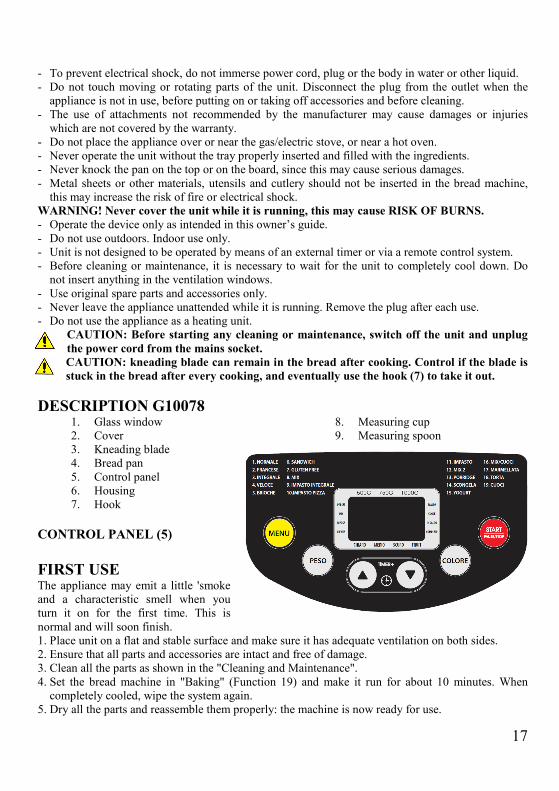
DESCRIPTION G10078 1. Glass window 2. Cover 3. Kneading blade 4. Bread pan 5. Control panel 6. Housing 7. Hook
8. Measuring cup 9. Measuring spoon
CONTROL PANEL (5)
FIRST USE The appliance may emit a little 'smoke and a characteristic smell when you turn it on for the first time. This is normal and will soon finish. 1. Place unit on a flat and stable surface and make sure it has adequate ventilation on both sides. 2. Ensure that all parts and accessories are intact and free of damage. 3. Clean all the parts as shown in the "Cleaning and Maintenance". 4. Set the bread machine in "Baking" (Function 19) and make it run for about 10 minutes. When
completely cooled, wipe the system again. 5. Dry all the parts and reassemble them properly: the machine is now ready for use.

18
MAIN FUNCTIONS INTRODUCTION As soon as the bread machine is connected to the electricity, it emits a beep and the words "1 3:10" appears on the display after a short period of time: "1" indicates the selected program while "3:10" is the processing time. The arrows point to "750g" and "MEDIO" (browning level / MEDIUM) as the default setting.
Start/Stop Press the START/STOP button on control panel to start or stop the cooking program selected. To start a program, press once the button "START/STOP": a short beep will sound and the colon in the time display will start to flash. To stop the program, press the "START/STOP" for about 3 seconds until the beep confirms that the program has been shut down. Note: after the program begins, any other button is disable except "START/STOP".
Programs – MENU’ This button is used to set the different programs. Each time you press (accompanied by a short beep) the program will vary. Select the desired program. 1. BASIC (NORMALE): to knead, rise and bake traditional bread. You can also add extra
ingredients to give some flavor. 2. FRENCH (FRANCESE): to knead, rise and bake with a longer rising time. The bread baked in
this way will have a crispy crust and light texture. 3. WHOLE WHEAT (INTEGRALE): to knead, rise and bake whole wheat bread. Preheating has
longer duration to allow the grain to absorb water and expand. It is recommended not to use the "Delay time" function.
4. QUICK (VELOCE): to knead, rise and bake bread with baking soda or baking powder, bread baked with this function is usually smaller and with a thick consistency.
5. BRIOCHE: to knead, rise and bake bread with milk or butter adding (milk bread, dough like brioches, etc...)
6. SANDWICH: to knead, rise and bake bread with medium-long rising. For a bread very good for paninis and sandwiches.
7. GLUTEN FREE (SENZA GLUTINE): to knead, rise and bake gluten free bread thanks to mixing, rising and resting times specificallyu studied for gluten free flours.
8. MIX: mixes for 15 minutes. 9. WHOLE WHEAT DOUGH (IMPASTO INTEGRALE)/: kneading and rising, no cooking, for
whole weat dough. 10. PIZZA DOUGH (IMPASTO per PIZZA): kneading and rising a pizza dough. Complete rising out
of the machine for the time you prefer. 11. IMPASTO/DOUGH: per impastare e lievitare, senza cottura. Togliere l'impasto per fare panini,
pizza, focacce, pagnotte. 12. MIX 2: kneads for a time that can be set between 8 and 45 minutes. 13. PORRIGDE: to make porridge. 14. DEFROST (SCONGELA): heats at 50 degrees, temperature suitable for defrost. 15. FERMENT (YOGURT): to make yogurt from milk and and lactobacillus. 16. STIR/BAKE (MIX/CUOCI): mix and cook, without rising. 17. JAM (MARMELLATA): to make jams and marmalades. 18. CAKE (TORTA): to knead, rise and bake (leavened with soda or baking powder) cakes. 19. BAKE (CUOCERE): cooking only (no knead and rise). It can also be used for extra cooking
19
Browning level (COLORE) This button is used to select the level of browning of the crust of the bread. Press the button repeatedly, and the arrow on the display will move between the following options: "CHIARO" (light golden brown), "MEDIO" (medium browned) "SCURO" (darker browning).
Loaf - (PESO) Press this button repeatedly to select one of the following formats of bread: 500g, 750g, 1000g.
Delay time (+/-) If you want the machine does not turn on immediately, you can use this button to set the starting time. Please note the delay time includes the cooking time of the program. At first, select the program (MENU button) and the degree of browning (COLOR button), then press TIME + or TIME- you can set a delayed start from a minimum of 10 minutes to a maximum of 15 hours. Example: It is 8:30 pm and you want the bread to be ready the next morning at 7 am (ie after 10 hours and 30 minutes). - Select the program, the browning level and the size of the loaf by using the proper buttons. - Press the TIME + or TIME- button to add time until 10:30 appears on the display. - Press the STOP/START key to activate the program. - The LCD display will show the countdown for the remaining time. You will get fresh bread at
7:00 in the morning, which will remain warm for about 1 hour. Note: With this function, it is recommended not to use fresh and highly perishable ingredients (such as eggs, milk, fruits, onions, etc. ..). 2. BASIC FEATURES
Keep warm (programs 1,2,3,4,5,6,7,16,18) The bread can be automatically kept warm for 60 minutes after cooking. If you want to take the bread first, disable the program by pressing the START/STOP button on the control panel.
Memory If the power is interrupted during the course of baking, the process will continue automatically within 10 minutes, without pressing any button. If the power outage exceeds 10 minutes, the memory cannot be maintained and the appliance must be restarted. However, if the device has not passed the stage of the dough process before the interruption, you can press the START/STOP button to continue the program from the beginning.
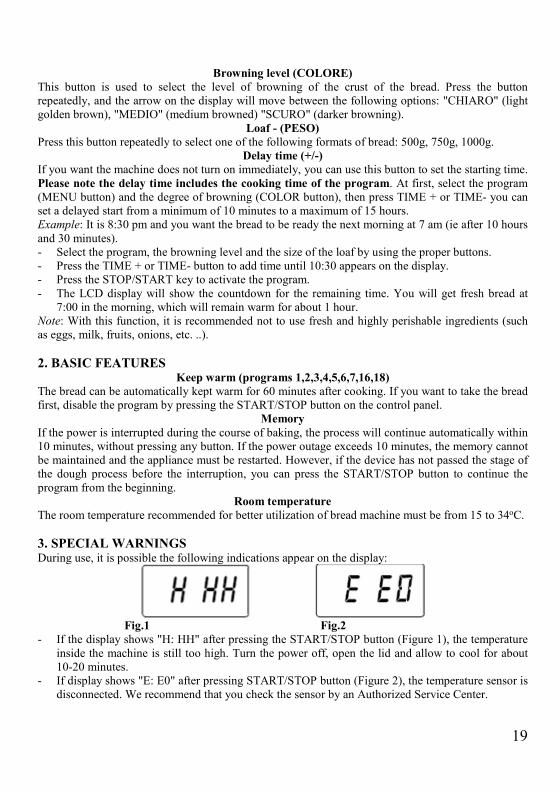
Room temperature The room temperature recommended for better utilization of bread machine must be from 15 to 34oC. 3. SPECIAL WARNINGS During use, it is possible the following indications appear on the display:
Fig.1 Fig.2 - If the display shows "H: HH" after pressing the START/STOP button (Figure 1), the temperature
inside the machine is still too high. Turn the power off, open the lid and allow to cool for about 10-20 minutes.
- If display shows "E: E0" after pressing START/STOP button (Figure 2), the temperature sensor is disconnected. We recommend that you check the sensor by an Authorized Service Center.
20
HINTS FOR A BETTER BAKING 1. QUICK PROGRAM (VELOCE) Selecting the program QUICK, the bread is made with yeast and sodium bicarbonate, which is activated by moisture and heat. To get a perfect result, it is suggested to place all liquids in the bottom of the pan and the dry ingredients on top. During the step of mixing, dry ingredients may collect in the corners of the tray: in this case it may be necessary to help the machine to thoroughly mix the ingredients to avoid lumps of flour. Mix by using a rubber spatula to avoid damaging the pan.
OPERATING 1. Put the pan (4) in place, then turn it clockwise until it clicks into place. Attach the kneading blade
(3) over the drive shafts. 2. Put all ingredients into the baking pan (4) in this order: water (or other liquid), sugar, salt, flour
and always stir the yeast as the last ingredient. In the case of mixture with rye or whole wheat, it is recommended to reverse the order of the ingredients
3. Make a small hole on one side of the flour and add the yeast, making sure not to come in contact with liquid ingredients or salt.
4. Close the cover (2) and gently insert the power cord into an outlet. 5. Press the MENU button to select the desired program. 6. Press the LOAF/PESO button to select the desired size (500-750-1000g). 7. If necessary, set the delay time by pressing TIME+ or TIME- buttons. 8. Press the START/STOP button to turn on the machine. Note: with programs NORMALE/BASIC, FRANCESE/FRENCH, INTEGRALE/WHOLE WHEAT, VELOCE/QUICK, BRIOCHE, SANDWICH, SENZA GLUTINE/GLUTEN FREE e TORTA/CAKE, the machine will emit some beeps to warn you to add ingredients. If you want, open the lid and add extra ingredients at the beep. 9. Once finished cooking, you will hear 10 beeps. Open the cover (2) and, after having wear oven
mitts, firmly grasp the handle of the pan (4). Turn it counterclockwise and gently pull the pan straight up. If necessary, use a nonstick spatula to gently loosen the sides of the bread.
CAUTION: bread pan (4) and bread cuold be very hot! Handle with care and always wear oven mitts.
10. Overturn the pan (4) on a clean surface and gently shake until the bread will come out. 11. Allow the bread to cool for about 20 minutes before slicing. 12. At the end of cooking, if you have not pressed the START/STOP button, the bread is kept warm
automatically for 1 hour. 13. When the bread machine is not in use, you should unplug the power cord. Note: before slicing the bread, use hook (7) to remove kneading blade (3) hidden on the bottom of the loaf. The bread is hot, so never use your hands to pull it out.
MAINTENANCE AND CLEANING CAUTION: Unplug the appliance and let it cool down completely before starting any cleaning or maintenance operations.
The pan (4), the blade (3), the glass window (1), the cover (2) and the body (6) can be cleaned using a damp cloth. Do not use any chemical detergents and abrasive and never immerse the body in water or other liquids. Thoroughly dry the pan (4) and the kneading blade (3) before reassembling. If the bar of dough is hard to remove from the pin, fill the container with hot water and let soak for about 30 minutes.
21
Before storing the bread machine, ensure it has cooled down completely and that it has been cleaned and dried; put the spoon (9), the cup (8), the hook (7) and the kneading blade (3) into the pan (4), and close the cover (2). Store in a clean and dry place, out of reach of children.
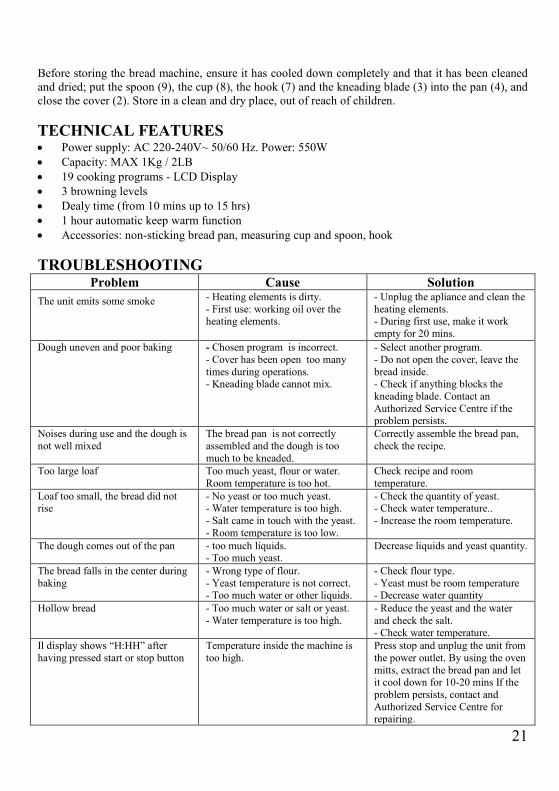
TECHNICAL FEATURES • Power supply: AC 220-240V~ 50/60 Hz. Power: 550W • Capacity: MAX 1Kg / 2LB • 19 cooking programs - LCD Display • 3 browning levels • Dealy time (from 10 mins up to 15 hrs) • 1 hour automatic keep warm function • Accessories: non-sticking bread pan, measuring cup and spoon, hook
TROUBLESHOOTING Problem Cause Solution
The unit emits some smoke - Heating elements is dirty. - First use: working oil over the heating elements.
- Unplug the apliance and clean the heating elements. - During first use, make it work empty for 20 mins.
Dough uneven and poor baking - Chosen program is incorrect. - Cover has been open too many times during operations. - Kneading blade cannot mix.
- Select another program. - Do not open the cover, leave the bread inside. - Check if anything blocks the kneading blade. Contact an Authorized Service Centre if the problem persists.
Noises during use and the dough is not well mixed
The bread pan is not correctly assembled and the dough is too much to be kneaded.
Correctly assemble the bread pan, check the recipe.
Too large loaf Too much yeast, flour or water. Room temperature is too hot.
Check recipe and room temperature.
Loaf too small, the bread did not rise
- No yeast or too much yeast. - Water temperature is too high. - Salt came in touch with the yeast. - Room temperature is too low.
- Check the quantity of yeast. - Check water temperature.. - Increase the room temperature.
The dough comes out of the pan - too much liquids. - Too much yeast.
Decrease liquids and yeast quantity.
The bread falls in the center during baking
- Wrong type of flour. - Yeast temperature is not correct. - Too much water or other liquids.
- Check flour type. - Yeast must be room temperature - Decrease water quantity
Hollow bread - Too much water or salt or yeast. - Water temperature is too high.
- Reduce the yeast and the water and check the salt. - Check water temperature.
Il display shows “H:HH” after having pressed start or stop button
Temperature inside the machine is too high.
Press stop and unplug the unit from the power outlet. By using the oven mitts, extract the bread pan and let it cool down for 10-20 mins If the problem persists, contact and Authorized Service Centre for repairing.
22
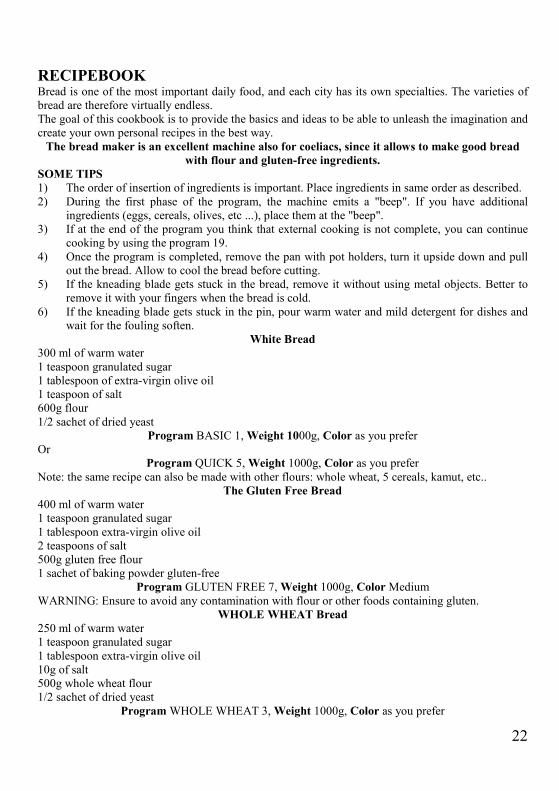
RECIPEBOOK Bread is one of the most important daily food, and each city has its own specialties. The varieties of bread are therefore virtually endless. The goal of this cookbook is to provide the basics and ideas to be able to unleash the imagination and create your own personal recipes in the best way.
The bread maker is an excellent machine also for coeliacs, since it allows to make good bread with flour and gluten-free ingredients.
SOME TIPS 1) The order of insertion of ingredients is important. Place ingredients in same order as described. 2) During the first phase of the program, the machine emits a "beep". If you have additional
ingredients (eggs, cereals, olives, etc ...), place them at the "beep". 3) If at the end of the program you think that external cooking is not complete, you can continue
cooking by using the program 19. 4) Once the program is completed, remove the pan with pot holders, turn it upside down and pull
out the bread. Allow to cool the bread before cutting. 5) If the kneading blade gets stuck in the bread, remove it without using metal objects. Better to
remove it with your fingers when the bread is cold. 6) If the kneading blade gets stuck in the pin, pour warm water and mild detergent for dishes and
wait for the fouling soften. White Bread
300 ml of warm water 1 teaspoon granulated sugar 1 tablespoon of extra-virgin olive oil 1 teaspoon of salt 600g flour 1/2 sachet of dried yeast
Program BASIC 1, Weight 1000g, Color as you prefer Or
Program QUICK 5, Weight 1000g, Color as you prefer Note: the same recipe can also be made with other flours: whole wheat, 5 cereals, kamut, etc..
The Gluten Free Bread 400 ml of warm water 1 teaspoon granulated sugar 1 tablespoon extra-virgin olive oil 2 teaspoons of salt 500g gluten free flour 1 sachet of baking powder gluten-free
Program GLUTEN FREE 7, Weight 1000g, Color Medium WARNING: Ensure to avoid any contamination with flour or other foods containing gluten.
WHOLE WHEAT Bread 250 ml of warm water 1 teaspoon granulated sugar 1 tablespoon extra-virgin olive oil 10g of salt 500g whole wheat flour 1/2 sachet of dried yeast
Program WHOLE WHEAT 3, Weight 1000g, Color as you prefer

23
French bread 200 ml of warm water 1 teaspoon granulated sugar 1,5 tablespoon extra-virgin olive oil 1 tablespoon of salt 420g flour 1/2 sachet of dried yeast
Program FRENCH 2, Weight 750g, Color as you prefer
Spelt Bread 230 ml of warm water 1 pinch of sugar 1 tablespoon extra-virgin olive oil 1 teaspoon of salt 400g spelled flour 2 tablespoons of cornstarch 1/2 sachet of dried yeast
Program BASIC 1, Weight 750g, Color as you prefer
Bread with Bacon 280 ml of warm water 1 teaspoon granulated sugar 1 tablespoon of extra-virgin olive oil 1 teaspoon of salt 500g flour 1/2 sachet of dried yeast 150g bacon, to be added after the "beep"
Program FRENCH 2, Weight 1000g, Color Medium Bread with Olive
220 ml of warm water 1 teaspoon granulated sugar 1 tablespoon extra-virgin olive oil 1 teaspoon of salt 420g flour 1/2 sachet of dried yeast 100g of olives, to be added after the "beep"
Program BASIC 1, Weight 750g, Color Medium Bread with nuts
280 ml of warm water 1 teaspoon granulated sugar 1 tablespoon of extra-virgin olive oil 1 tablespoon of salt 1 teaspoon of acacia honey 500g flour 1/2 sachet of dried yeast 100g of chopped walnuts, to be added after the "beep"
Program BASIC 1, Weight 1000g, Color as you like it
24
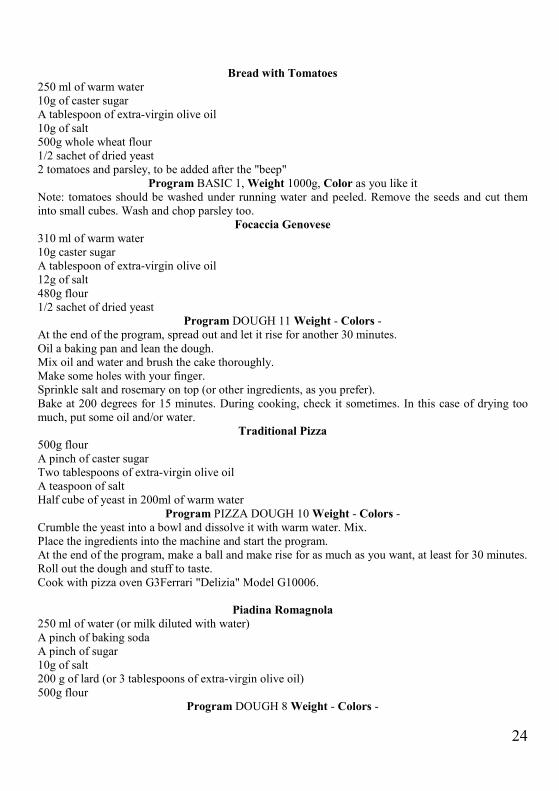
Bread with Tomatoes 250 ml of warm water 10g of caster sugar A tablespoon of extra-virgin olive oil 10g of salt 500g whole wheat flour 1/2 sachet of dried yeast 2 tomatoes and parsley, to be added after the "beep"
Program BASIC 1, Weight 1000g, Color as you like it Note: tomatoes should be washed under running water and peeled. Remove the seeds and cut them into small cubes. Wash and chop parsley too.
Focaccia Genovese 310 ml of warm water 10g caster sugar A tablespoon of extra-virgin olive oil 12g of salt 480g flour 1/2 sachet of dried yeast
Program DOUGH 11 Weight - Colors - At the end of the program, spread out and let it rise for another 30 minutes. Oil a baking pan and lean the dough. Mix oil and water and brush the cake thoroughly. Make some holes with your finger. Sprinkle salt and rosemary on top (or other ingredients, as you prefer). Bake at 200 degrees for 15 minutes. During cooking, check it sometimes. In this case of drying too much, put some oil and/or water.
Traditional Pizza 500g flour A pinch of caster sugar Two tablespoons of extra-virgin olive oil A teaspoon of salt Half cube of yeast in 200ml of warm water
Program PIZZA DOUGH 10 Weight - Colors - Crumble the yeast into a bowl and dissolve it with warm water. Mix. Place the ingredients into the machine and start the program. At the end of the program, make a ball and make rise for as much as you want, at least for 30 minutes. Roll out the dough and stuff to taste. Cook with pizza oven G3Ferrari "Delizia" Model G10006.
Piadina Romagnola
250 ml of water (or milk diluted with water) A pinch of baking soda A pinch of sugar 10g of salt 200 g of lard (or 3 tablespoons of extra-virgin olive oil) 500g flour
Program DOUGH 8 Weight - Colors -
25
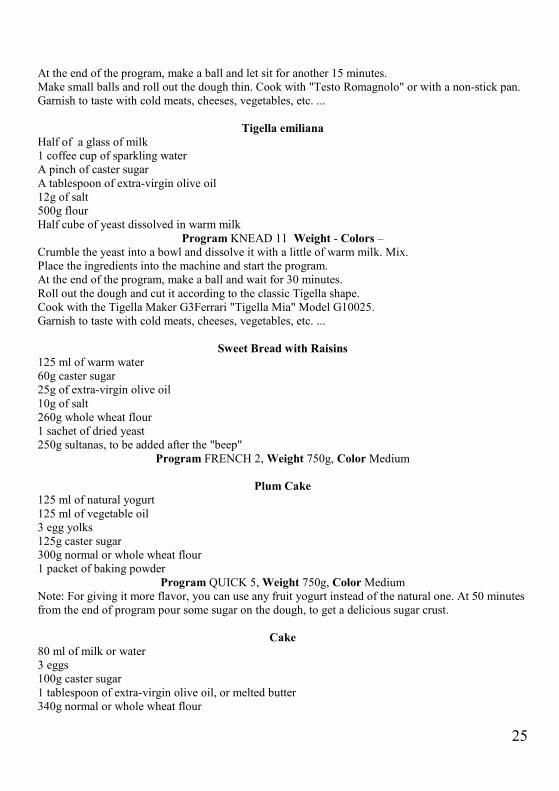
At the end of the program, make a ball and let sit for another 15 minutes. Make small balls and roll out the dough thin. Cook with "Testo Romagnolo" or with a non-stick pan. Garnish to taste with cold meats, cheeses, vegetables, etc. ...
Tigella emiliana
Half of a glass of milk 1 coffee cup of sparkling water A pinch of caster sugar A tablespoon of extra-virgin olive oil 12g of salt 500g flour Half cube of yeast dissolved in warm milk
Program KNEAD 11 Weight - Colors – Crumble the yeast into a bowl and dissolve it with a little of warm milk. Mix. Place the ingredients into the machine and start the program. At the end of the program, make a ball and wait for 30 minutes. Roll out the dough and cut it according to the classic Tigella shape. Cook with the Tigella Maker G3Ferrari "Tigella Mia" Model G10025. Garnish to taste with cold meats, cheeses, vegetables, etc. ...
Sweet Bread with Raisins
125 ml of warm water 60g caster sugar 25g of extra-virgin olive oil 10g of salt 260g whole wheat flour 1 sachet of dried yeast 250g sultanas, to be added after the "beep"
Program FRENCH 2, Weight 750g, Color Medium
Plum Cake 125 ml of natural yogurt 125 ml of vegetable oil 3 egg yolks 125g caster sugar 300g normal or whole wheat flour 1 packet of baking powder
Program QUICK 5, Weight 750g, Color Medium Note: For giving it more flavor, you can use any fruit yogurt instead of the natural one. At 50 minutes from the end of program pour some sugar on the dough, to get a delicious sugar crust.
Cake 80 ml of milk or water 3 eggs 100g caster sugar 1 tablespoon of extra-virgin olive oil, or melted butter 340g normal or whole wheat flour
26
1 packet of baking powder Program CAKE 18, Weight 750g, Color Dark
N.B: With and electric mixer, mix well sugar, eggs and milk, then pour the mixture in the container. Put other ingredients over the mixture. At 50 minutes from the end of program pour some sugar on the dough, to get a delicious sugar crust.
Panettone (typical Italian Christmas cake) 190 ml of whole milk 130g caster sugar 5g of salt 130g of melted butter 4 egg yolks Lemon zest and orange zest 2 packets of vanilla 50g candied fruits 50g of raisins 1 teaspoon yellow dye (optional) 400g flour, Manitoba is recommended 2 sachets of dried yeast Procedure Place the ingredients in the same order. Use the program MIX 2 12, for 10 minutes and then allow to stand for an hour with the lid closed. Use again program MIX 2 12, for 10 minutes and then allow to stand for an hour with the lid closed. Cook with the following program:
Program BASIC 1, Weight 1000g, Color Medium
YOGURT Pour 1 liter of fresh milk in a pan and, maintaining a low flame, stirring until it reaches 42-44°C temperature. Pour the powder of lactobacillus (the proportion with milk is 1:500, for more information, please see the packaging), or the plain yogurt (125ml for 800ml of milk) in a glass. Take 200ml of the milk just heated and add to it the powder or the yogurt, mixing well until the solubilisation. At this point, pour the mixture into the remaining milk and mix well. Pour the mixture of milk directly into the container (4).
Program YOGURT 15, Weight -, Color - NOTE: to help fermentation, expecially in case of soymilk, it is suggested to add one spoon of sugar.
PORTUGUÊS: ADVERTÊNCIAS As indicações seguintes são muito importantes no que se refere à instalação, uso e manutenção deste aparelho; conserve com cuidado este manual para eventuais futuras consultas; utilize o aparelho apenas do modo indicado neste manual de instruções; qualquer outro tipo de utilização deverá considerar-se inadequado e perigoso; por isso, o fabricante não poderá ser considerado responsável na eventualidade de ocorrerem danos resultantes de uso indevido, errado ou irresponsável; antes de utilizar, certifique-se da integridade do aparelho; em caso de dúvida não o utilize e dirija-se à assistência técnica autorizada; não deixe partes da embalagem (sacos de plástico, esferovite, pregos,
27
agrafos, etc.) ao alcance das crianças, uma vez que constituem potenciais fontes de perigo; além disso, recordamos que essas partes devem ser objecto de recolha diferenciada de resíduos; certifique-se de que os dados constantes da placa são compatíveis com os da rede eléctrica; a instalação deve ser efectuada de acordo com as instruções do fabricante, considerando a potência máxima do aparelho indicada na placa; uma errada instalação poderá causar danos a pessoas, animais ou objectos, pelos quais o fabricante não poderá ser considerado responsável; não deixar o aparelho inutilmente ligado à corrente; é preferível retirar a ficha da tomada eléctrica quando o aparelho não estiver a ser utilizado; caso seja necessário o uso de adaptadores, tomadas múltiplas e extensões, utilizar só as que estiverem conformes às normas de segurança em vigor; em qualquer caso, nunca ultrapassar os limites de absorção indicados no adaptador simples e/ou nas extensões, nem os de máxima potência indicados nos adaptadores múltiplos; sempre que o aparelho estiver fora de uso e seja decidido não o reparar, recomenda-se a sua inutilização, cortando-lhe o cabo de alimentação; não manusear ou tocar o aparelho com as mãos molhadas ou os pés descalços.
- Não utilizar o aparelho no caso de o cabo de alimentação ou a ficha se encontrarem danificados, ou em caso de curto-circuitos; Nessa eventualidade, leve o aparelho a um centro de assistência autorizado.
- Não aproximar o cabo de alimentação de objectos cortantes ou de superfícies quentes, e não o puxar para arrancar a ficha da tomada eléctrica.
- Não expor o aparelho a condições atmosféricas adversas, como chuva, humidade, gelo, etc. Conserve-o em lugares secos.
- Este aparelho pode ser utilizado por crianças com mais de 8 anos e por pessoas com reduzida capacidade física, sensorial ou mental, ou ainda com falta de experiência na sua utilização, desde que lhes seja assegurada uma adequada supervisão ou se tiverem sido instruídas no uso do aparelho em segurança; as operações de limpeza e de manutenção não devem ser efectuadas por crianças, a menos que tenham mais de 8 anos e sejam supervisionadas.
- Não indicado para uso comercial. Só para uso doméstico. As operações de limpeza devem ser efectuadas depois de se ter desligado a ficha da tomada eléctrica. Em caso de avaria e/ou de mau funcionamento, não intervenha sobre o aparelho. Para uma eventual reparação dirija-se unicamente a um centro autorizado pelo fabricante e solicite peças de substituição originais. A não observância destas indicações pode comprometer a segurança do aparelho e tornar inválidos os termos da garantia.
INFORMAÇÕES DE USO ATENÇÃO: este aparelho inclui uma função de aquecimento. Algumas superfícies, mesmo que não a placa propriamente dita, poderão atingir temperaturas elevadas. Uma vez que a sensibilidade à temperatura difere de pessoa para pessoa, este aparelho deverá ser usado com CUIDADO. Coloque o aparelho exclusivamente sobre superfícies com aderência e preparadas para o efeito, e use as necessárias medidas de protecção contra o calor, como pegas ou luvas. - Mantenha o aparelho e o cabo de alimentação fora do alcance de crianças com menos de 8 anos de
idade. A parte de trás dos electrodomésticos deve ficar virada para uma parede. - Este aparelho não foi concebido para ser utilizado por intermédio de um temporizador externo ou de
um sistema de comando à distância autónomo.
28
- Este aparelho foi concebido para uso doméstico ou equivalente, em situações como as de refeitórios em pequenas empresas ou outros ambientes de natureza laboral; por clientes de hotéis, motéis ou outro tipo de acomodação turística, como turismo rural ou residencial. - Colocar sobre una superficie plana y estable. - No tocar las superficies calientes. Utilizar siempre las correspondientes asas o las empuñaduras. - Para extraer la cesta utilizar siempre unos guantes de cocina. - Para protegerse de descargas eléctricas, no sumergir el cable, la clavija o el cuerpo en agua u otro
líquido. - Sacar la clavija de la toma de corriente cuando no se use el producto, antes de introducir o retirar
los accesorios y antes de la limpieza. - El uso de accesorios no recomendados por el fabricante puede causar daños al aparato y lesiones al
usuario. - No colocar por encima o cerca del hornillo de gas o eléctrico, o en las proximidades de un horno
caliente. - No tocar las partes en movimiento o en rotación. - No encender nunca el aparato sin la fuente correctamente introducida y llena con los ingredientes. - No pegar nunca la fuente a la parte superior o al borde, ya que podría dañarse. - En la máquina para pan no se deben introducir láminas de metal u otros materiales, así como
cubiertos y utensilios. ATENCIÓN: ¡No cubrir nunca la máquina de pan mientras esté en funcionamiento, riesgo de incendio!
- Utilizar el aparato exclusivamente para el uso que se indica de manera expresa en este manual. - No utilizar al aire libre. Solo para uso interior. - El aparato no está destinado para su accionamiento por medio de un temporizador externo o
mediante un sistema de control a distancia. - No dejar nunca el aparato sin supervisión mientras esté en funcionamiento. Sacar la clavija después
del uso. Antes de iniciar las operaciones de limpieza o mantenimiento, es necesario esperar a que el aparato se enfríe.
- No introducir nada en las ranuras de ventilación. - No someter el producto a golpes, podrían dañarlo. - No utilizar como unidad de calefacción. Utilizar recambios y accesorios originales. ¡ATENCIÓN! Antes de cualquier operación de mantenimiento o limpieza del aparato, apagarlo y sacar el cable eléctrico de la toma de corriente doméstica.
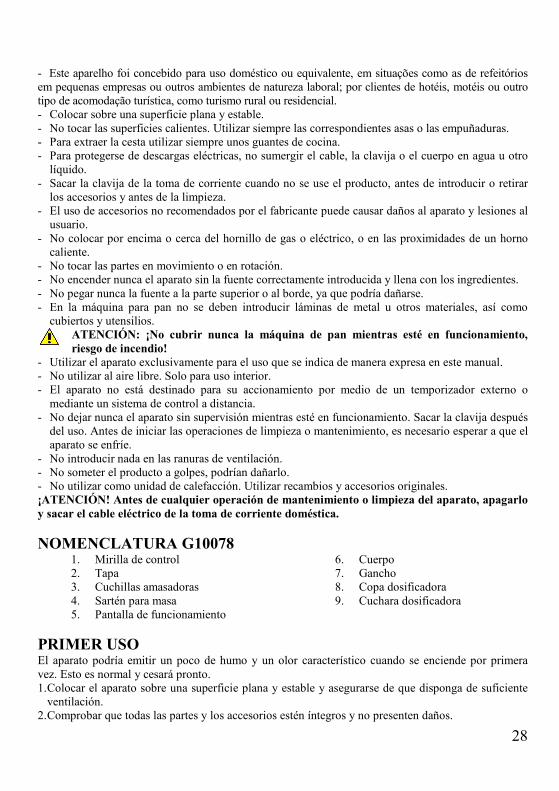
NOMENCLATURA G100781. Mirilla de control 2. Tapa 3. Cuchillas amasadoras 4. Sartén para masa 5. Pantalla de funcionamiento
6. Cuerpo 7. Gancho 8. Copa dosificadora 9. Cuchara dosificadora
PRIMER USO El aparato podría emitir un poco de humo y un olor característico cuando se enciende por primera vez. Esto es normal y cesará pronto. 1. Colocar el aparato sobre una superficie plana y estable y asegurarse de que disponga de suficiente
ventilación. 2. Comprobar que todas las partes y los accesorios estén íntegros y no presenten daños.
29
3. Limpiar todas las partes como se indica en el apartado “Limpieza y mantenimiento”. 4. Ajustar la máquina para pan en la modalidad “cocción” (Función 19) y ponerla en funcionamiento
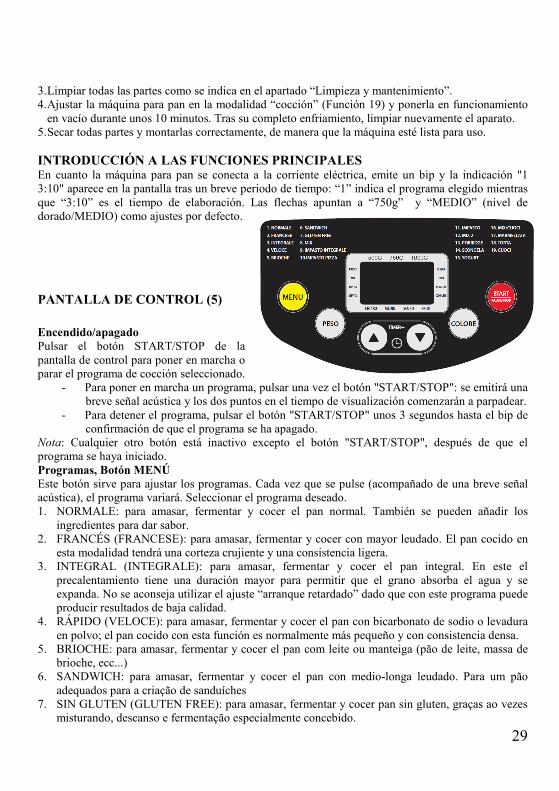
en vacío durante unos 10 minutos. Tras su completo enfriamiento, limpiar nuevamente el aparato. 5. Secar todas partes y montarlas correctamente, de manera que la máquina esté lista para uso. INTRODUCCIÓN A LAS FUNCIONES PRINCIPALES En cuanto la máquina para pan se conecta a la corriente eléctrica, emite un bip y la indicación "1 3:10" aparece en la pantalla tras un breve periodo de tiempo: “1” indica el programa elegido mientras que “3:10” es el tiempo de elaboración. Las flechas apuntan a “750g” y “MEDIO” (nivel de dorado/MEDIO) como ajustes por defecto. PANTALLA DE CONTROL (5)
Encendido/apagado Pulsar el botón START/STOP de la pantalla de control para poner en marcha o parar el programa de cocción seleccionado.
- Para poner en marcha un programa, pulsar una vez el botón "START/STOP": se emitirá una breve señal acústica y los dos puntos en el tiempo de visualización comenzarán a parpadear.
- Para detener el programa, pulsar el botón "START/STOP" unos 3 segundos hasta el bip de confirmación de que el programa se ha apagado.
Nota: Cualquier otro botón está inactivo excepto el botón "START/STOP", después de que el programa se haya iniciado. Programas, Botón MENÚ Este botón sirve para ajustar los programas. Cada vez que se pulse (acompañado de una breve señal acústica), el programa variará. Seleccionar el programa deseado. 1. NORMALE: para amasar, fermentar y cocer el pan normal. También se pueden añadir los
ingredientes para dar sabor. 2. FRANCÉS (FRANCESE): para amasar, fermentar y cocer con mayor leudado. El pan cocido en
esta modalidad tendrá una corteza crujiente y una consistencia ligera. 3. INTEGRAL (INTEGRALE): para amasar, fermentar y cocer el pan integral. En este el
precalentamiento tiene una duración mayor para permitir que el grano absorba el agua y se expanda. No se aconseja utilizar el ajuste “arranque retardado” dado que con este programa puede producir resultados de baja calidad.
4. RÁPIDO (VELOCE): para amasar, fermentar y cocer el pan con bicarbonato de sodio o levadura en polvo; el pan cocido con esta función es normalmente más pequeño y con consistencia densa.
5. BRIOCHE: para amasar, fermentar y cocer el pan com leite ou manteiga (pão de leite, massa de brioche, ecc...)
6. SANDWICH: para amasar, fermentar y cocer el pan con medio-longa leudado. Para um pão adequados para a criação de sanduíches
7. SIN GLUTEN (GLUTEN FREE): para amasar, fermentar y cocer pan sin gluten, graças ao vezes misturando, descanso e fermentação especialmente concebido.

30
8. MIX: amassar para 15 minutos. 9. MISTURA INTEGRAL (IMPASTO INTEGRALE): para amasar, fermentar com farinha integral. 10. MISTURA PIZZA (IMPASTO PIZZA): para amasar y fermentar la mistura para la pizza.
Completar a subida para fora da máquina por um tempo a gosto. 11. MISTURA (IMPASTO): para amasar y fermentar, sin cocción. Quitar la masa para hacer paninis,
pizzas, focaccia, pagnotte. 12. MIX 2: amassar para un tiempo da 8 a 45 minutos. 13. PORRIGDE: para fazer o porridge (o mingau). 14. DEGELO (SCONGELA): aqueceu-se a 50 graus, a temperatura adequadas para a descongelação. 15. YOGURT: para fazer o iogurte de leite e fermentos lácteos. 16. MIXAR/COZINAR (MIX/CUOCI): misturar y cozer, sem fermento. 17. MERMELADA/JAM: para realizar confituras y mermeladas. 18. TORTA: para amasar, fermentar y cocer (fermentación con bicarbonato de sodio o levadura en
polvo) masas para tartas. 19. COCER (CUOCI): solo cocción (sin masa y fermentación). Se puede usar también para prolongar
la cocción de un programa. Niveles de dorado, botón COLORE
Este botón sirve para elegir el nivel de dorado de la corteza del pan. Pulsar el botón repetidamente y la flecha de la pantalla se desplazará entre las siguientes opciones: “CHIARO” (dorado ligero), “MEDIO” (dorado medio), “SCURO” (dorado más oscuro).
Dimensiones, botón PESO Pulsar este botón repetidamente para seleccionar entre los siguientes formatos de pan: 500g, 750g, 1000g. Arranque retardado Si se desea que el aparato no se encienda inmediatamente, se puede utilizar este botón para ajustar el arranque. El tiempo ajustado incluye también el tiempo de cocción del programa seleccionado. En un primer momento seleccionar el programa (botón MENÚ) y el grado de dorado (botón COLORE), luego pulsando TIME+ o TIME– se puede ajustar el arranque retardado desde un mínimo de 10 minutos hasta un máximo de 15 horas. Ejemplo: son las 20:30 y usted desea que el pan esté listo a la mañana siguiente a las 7 (esto es, 10 horas y 30 minutos después). - Seleccionar el programa, el nivel de dorado y el tamaño de la hogaza mediante los botones
correspondientes. - Pulsar el botón TIME+ o TIME- para añadir tiempo hasta que 10:30 aparezca mostrado en la
pantalla LCD. - Pulsar el botón STOP/START para activar el programa. - En la pantalla LCD aparecerá la cuenta atrás para visualizar el tiempo restante. Obtendrá pan
fresco a las 7:00 de la mañana, que permanecerá caliente durante 1 hora aproximadamente. Nota: con el arranque retardado, se aconseja no utilizar ingredientes frescos y fácilmente perecederos (como huevos, leche fresca, fruta, cebollas, etc.). 2. CARACTERÍSTICAS FUNCIONALES BÁSICAS
Función de mantenimiento del calor (programas 1,2,3,4,5,6,7,16,18) El pan se puede mantener automáticamente caliente durante 60 minutos después de la cocción. Si se desea tomar el pan antes, desactivar el programa pulsando el botón START/STOP en la pantalla de control.
31
Efecto memoria Si la alimentación ha sufrido una interrupción durante el desarrollo de la panificación, el proceso continuará automáticamente en 10 minutos, sin pulsar el botón START/STOP. Si la interrupción de la corriente supera los 10 minutos, la memoria no se puede mantener y se deberá volver a poner en marcha la máquina. Sin embargo, si el aparato no ha superado la fase de amasado antes de la interrupción de la electricidad, se puede pulsar START/STOP para continuar el programa desde el principio.
Condiciones ambientales de uso La temperatura ambiental sugerida para un uso óptimo de la máquina de pan debe estar comprendida entre 15 y 34°C. 3. ADVERTENCIAS DE USO Durante el uso, es posible que las siguientes indicaciones aparezcan en la pantalla LCD:
Fig.1 Fig.2 - Si la pantalla muestra "H: HH" tras pulsar el botón START/STOP (Figura 1), la temperatura
interior de la máquina todavía es demasiado alta. Apagar el aparato, abrir la tapa y dejar enfriar durante 10-20 minutos.
- Si la pantalla muestra "E: E0" tras pulsar START/STOP (Figura 2), el sensor de temperatura está desconectado. Se aconseja llevar a revisar el sensor a un Centro de Asistencia Autorizado.
CONSEJOS DE COCCIÓN 1. PROGRAMA INMEDIATO (VELOCE) Seleccionando el programa VELOCE, el pan se hace con la levadura y el bicarbonato de sodio, que se activa con la humedad y con el calor. Para obtener un resultado perfecto, se sugiere colocar todos los líquidos en el fondo de la sartén para la masa y los ingredientes secos por encima. Durante la fase de mezcla los ingredientes secos podrían acumularse en las esquinas de la cuba: en este caso puede ser necesario ayudar a la máquina a mezclar bien los ingredientes para evitar grumos de harina. Mezclar utilizando exclusivamente una espátula de goma, para no dañar las paredes de la cuba. FUNCIONAMIENTO 1. Poner la fuente (4) en posición, luego girarla en el sentido de las agujas del reloj hasta que se
ajuste en su posición correcta. Fijar la cuchilla amasadora (3) sobre el semieje. 2. Poner los ingredientes en la fuente (4) en este orden: agua (u otros líquidos), azúcar, sal, aceite,
harina y añadir siempre la levadura como último ingrediente. En caso de masa con centeno o integral, se aconseja invertir el orden de los ingredientes (esto es, verter primero levadura seca y harina, y por último el líquido para obtener una masa mejor).
3. Hacer una pequeña abertura a un lado de la harina y añadir la levadura, asegurándose de que no entre en contacto con los ingredientes líquidos o la sal.
4. Cerrar la tapa (2) con delicadeza e introducir el cable de alimentación en una toma. 5. Pulsar el botón MENÚ hasta seleccionar el programa deseado. 6. Pulsar el botón PESO para seleccionar el formato deseado (500-750-1000g).

32
7. Si es necesario, ajustar el arranque retardado pulsando TIME+ o TIME-. 8. Pulsar el botón START/STOP para encender la máquina. Nota: con los programas NORMALE, FRANCESE, INTEGRALE/, RAPIDO/VELOCE, BRIOCHE, SANDWICH, SIN GLUTEN/GLUTEN FREE e TORTA, durante la fase de amasado la máquina emitirá alguns sinais sonoros, para pedirle que añada ingredientes. Si lo desea, abra la tapa y añada ingredientes ante el bip. 9. Una vez terminada la cocción, el aparato emitirá 10 señales acústicas. Abrir la tapa (2) y, tras
ponerse los guantes de horno, agarrar firmemente el asa de la fuente (4). Girarla en sentido contrario a las agujas del reloj y tirar con delicadeza de la sartén hacia arriba. Si es necesario, utilizar una espátula antiadherente para aflojar con suavidad los lados del pan.
ATENCIÓN: ¡la fuente (4) y el pan pueden estar muy calientes! Manejar siempre con cuidado y utilizar guantes de horno. 10. Verter la fuente (4) sobre una superficie limpia y agitar con suavidad hasta que salga el pan. 11. Dejar enfriar el pan durante unos 20 minutos antes de cortar en rebanadas. 12. Al término de la cocción, en caso de que no se haya pulsado el botón START/STOP, el pan se
mantiene caliente automáticamente durante 1 hora. 13. Cuando la máquina no se esté usando, se aconseja desconectar el cable de alimentación. Nota: antes de cortar en rebanadas el pan, utilizar el gancho (7) para retirar la cuchilla amasadora (3) escondida en el fondo de la hogaza. El pan está caliente, no usar nunca las manos para extraerla. MANTENIMIENTO Y LIMPIEZA
ATENCIÓN: Sacar la clavija de la toma de corriente y dejar enfriar la máquina antes de efectuar cualquier operación de mantenimiento o de limpieza.
La fuente (4), la cuchilla (3), la mirilla de control (1), la tapa (2) y el cuerpo de la máquina (6) se pueden limpiar utilizando un paño ligeramente húmedo. No utilizar ningún detergente químico y abrasivo y no sumergir nunca el cuerpo en agua u otro líquido para la limpieza. Secar completamente la fuente (4) y la cuchilla amasadora (3) antes de volver a montarlas. En caso de que la barra amasadora sea difícil de quitar del perno, llenar el recipiente con agua caliente y dejar en remojo unos 30 minutos. Antes de volver a colocar la máquina de pan, asegurarse de que se haya enfriado por completo y que se haya limpiado y secado; poner la cuchara dosificadora (9), la copa (8), el gancho (7) y la cuchilla amasadora (3) en la fuente (4), y cerrar la tapa (2). Conservar en lugar seco y limpio, lejos del alcance de los niños.
CARACTERÍSTICAS TÉCNICAS • Alimentación: AC 220-240V~ 50/60 Hz. Potencia: 550W • Capacidad: MÁX. 1 Kg • Pantalla digital • 19 programas • 3 niveles de dorado • Arranque retardado (10min – 15h) • Función de mantenimiento del calor durante 1 hora • Patas antideslizantes • Accesorios: fuente antiadherente, copa y cuchara dosificadora, gancho
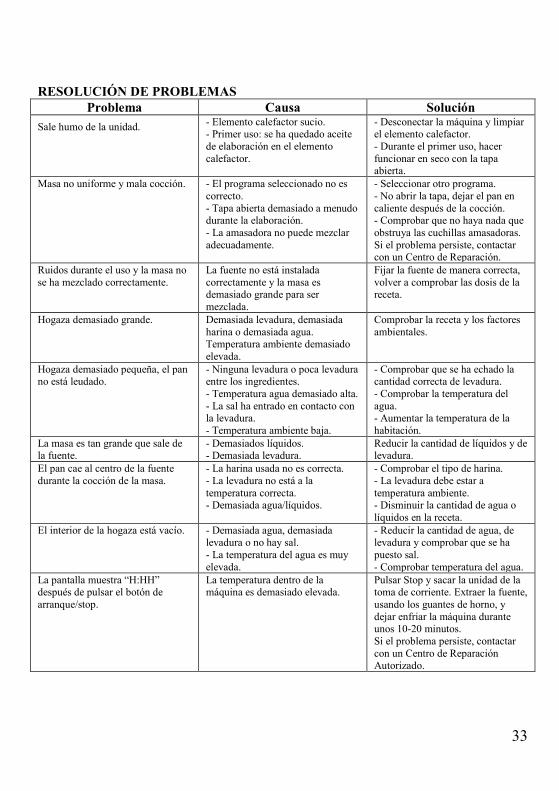
33
RESOLUCIÓN DE PROBLEMAS Problema Causa Solución
Sale humo de la unidad. - Elemento calefactor sucio. - Primer uso: se ha quedado aceite de elaboración en el elemento calefactor.
- Desconectar la máquina y limpiar el elemento calefactor. - Durante el primer uso, hacer funcionar en seco con la tapa abierta.
Masa no uniforme y mala cocción. - El programa seleccionado no es correcto. - Tapa abierta demasiado a menudo durante la elaboración. - La amasadora no puede mezclar adecuadamente.
- Seleccionar otro programa. - No abrir la tapa, dejar el pan en caliente después de la cocción. - Comprobar que no haya nada que obstruya las cuchillas amasadoras. Si el problema persiste, contactar con un Centro de Reparación.
Ruidos durante el uso y la masa no se ha mezclado correctamente.
La fuente no está instalada correctamente y la masa es demasiado grande para ser mezclada.
Fijar la fuente de manera correcta, volver a comprobar las dosis de la receta.
Hogaza demasiado grande. Demasiada levadura, demasiada harina o demasiada agua. Temperatura ambiente demasiado elevada.
Comprobar la receta y los factores ambientales.
Hogaza demasiado pequeña, el pan no está leudado.
- Ninguna levadura o poca levadura entre los ingredientes. - Temperatura agua demasiado alta. - La sal ha entrado en contacto con la levadura. - Temperatura ambiente baja.
- Comprobar que se ha echado la cantidad correcta de levadura. - Comprobar la temperatura del agua. - Aumentar la temperatura de la habitación.
La masa es tan grande que sale de la fuente.
- Demasiados líquidos. - Demasiada levadura.
Reducir la cantidad de líquidos y de levadura.
El pan cae al centro de la fuente durante la cocción de la masa.
- La harina usada no es correcta. - La levadura no está a la temperatura correcta. - Demasiada agua/líquidos.
- Comprobar el tipo de harina. - La levadura debe estar a temperatura ambiente. - Disminuir la cantidad de agua o líquidos en la receta.
El interior de la hogaza está vacío. - Demasiada agua, demasiada levadura o no hay sal. - La temperatura del agua es muy elevada.
- Reducir la cantidad de agua, de levadura y comprobar que se ha puesto sal. - Comprobar temperatura del agua.
La pantalla muestra “H:HH” después de pulsar el botón de arranque/stop.
La temperatura dentro de la máquina es demasiado elevada.
Pulsar Stop y sacar la unidad de la toma de corriente. Extraer la fuente, usando los guantes de horno, y dejar enfriar la máquina durante unos 10-20 minutos. Si el problema persiste, contactar con un Centro de Reparación Autorizado.

34
ESPAÑOL: ADVERTENCIAS DE USO A continuación se presentan importantes indicaciones sobre la instalación, el uso y el mantenimiento. Conservar con cuidado este manual para cualquier consulta posterior; utilizar el producto solo de la manera que indica este manual de instrucciones; cualquier otro uso se considera inadecuado y peligroso; por ello el fabricante no puede ser considerado responsable en caso de que se produzcan daños derivados de usos inadecuados, erróneos o irracionales; antes del uso asegurarse de la integridad del aparato; en caso de duda no utilizarlo y dirigirse al personal de asistencia; no dejar los elementos del embalaje (bolsas de plástico, poliestireno expandido, clavos, grapas, etc.) al alcance de los niños ya que son fuentes potenciales de peligro; además, cabe recordar que los citados elementos deben ser objeto de una recogida selectiva; asegurarse de que los datos de la placa sean compatibles con los de la red eléctrica; la instalación se debe efectuar en función de las instrucciones del fabricante considerando la potencia máxima del aparato indicada en la placa; una instalación errónea puede causar daños a personas, animales o cosas, por los cuales el fabricante no puede ser considerado responsable; no dejar el aparato conectado si no está en funcionamiento; conviene sacar la clavija de la red de alimentación cuando el aparato no se utilice; en caso de que sea necesario el uso de adaptadores, tomas múltiples o prolongaciones, utilizar solo las conformes a las normas de seguridad vigentes; en todo caso no superar nunca los límites de absorción indicados en el adaptador sencillo y/o en las prolongaciones, así como el de potencia máxima marcado en el adaptador múltiple; en caso de que al aparato esté fuera de uso y se haya decidido no repararlo, se recomienda inutilizarlo cortando el cable de alimentación; no manejar o tocar el producto con las manos húmedas o los pies descalzos.
- No utilizar el producto en caso de daños en el cable de alimentación, en la clavija o en caso de cortocircuitos; llevar a reparar el producto por parte de un centro de asistencia autorizado.
- No acercar el cable de alimentación a objetos cortantes o a superficies calientes y no tirar del mismo para sacar la clavija.
- No apto para uso comercial. Solo para uso doméstico
- No exponer el producto a condiciones atmosféricas adversas como lluvia, humedad, hielo, etc. Conservarlo en lugares secos.
- Este aparato puede ser utilizado por niños a partir de 8 años y por personas con capacidades físicas, sensoriales o mentales reducidas o con falta de experiencia o conocimiento si a dichas personas se ha asegurado una supervisión adecuada o bien si han recibido instrucciones sobre el uso seguro del aparato; las operaciones de limpieza y de mantenimiento no deben ser efectuadas por niños a no ser que tengan más de 8 años y estén supervisados.
Las operaciones de limpieza deben efectuarse después de haber sacado la clavija. En caso de avería y/o de funcionamiento anómalo no manipular el aparato. Para una posible reparación, dirigirse únicamente a un centro autorizado por el fabricante y solicitar el uso de recambios originales. El incumplimiento de lo indicado anteriormente puede comprometer la seguridad del aparato y anular las condiciones de la garantía.

35
INFORMACIÓN GENERAL ATENCIÓN: el producto tiene una función de calentamiento. Las superficies pueden desarrollar altas temperaturas. Dado que la percepción de la temperatura es distinta para cada persona, utilizar el aparato con cautela. Tocar solo las superficies diseñadas para ser tocadas, y usar agarradores o guantes de cocina. - Mantener el producto y el cable fuera del alcance de los niños menores de 8 años. - Colocar la pared de la parte posterior contra un muro. - El aparato no está diseñado para su uso a través de temporizadores externos o mandos a distancia. - Este aparato está diseñado para uso doméstico o similares: cocinas para el personal de tiendas,
oficinas u otros centros de trabajo, para clientes de hoteles, moteles, hostales y similares. - Colocar sobre una superficie plana y estable. - No tocar las superficies calientes. Utilizar siempre las correspondientes asas o las empuñaduras. - Para extraer la cesta utilizar siempre unos guantes de cocina. - Para protegerse de descargas eléctricas, no sumergir el cable, la clavija o el cuerpo en agua u otro
líquido. - Sacar la clavija de la toma de corriente cuando no se use el producto, antes de introducir o retirar
los accesorios y antes de la limpieza. - El uso de accesorios no recomendados por el fabricante puede causar daños al aparato y lesiones al
usuario. No colocar por encima o cerca del hornillo de gas o eléctrico, o en las proximidades de un horno caliente.
- No tocar las partes en movimiento o en rotación. - No encender nunca el aparato sin la fuente correctamente introducida y llena con los ingredientes. - No pegar nunca la fuente a la parte superior o al borde, ya que podría dañarse. - En la máquina para pan no se deben introducir láminas de metal u otros materiales, así como
cubiertos y utensilios. ATENCIÓN: ¡No cubrir nunca la máquina de pan mientras esté en funcionamiento, riesgo de incendio!
- Utilizar el aparato exclusivamente para el uso que se indica de manera expresa en este manual. - No utilizar al aire libre. Solo para uso interior. - El aparato no está destinado para su accionamiento por medio de un temporizador externo o
mediante un sistema de control a distancia. - No dejar nunca el aparato sin supervisión mientras esté en funcionamiento. Sacar la clavija después
del uso. - Antes de iniciar las operaciones de limpieza o mantenimiento, es necesario esperar a que el aparato
se enfríe. - No introducir nada en las ranuras de ventilación. - No someter el producto a golpes, podrían dañarlo. - No utilizar como unidad de calefacción. Utilizar recambios y accesorios originales.
¡ATENCIÓN! Antes de cualquier operación de mantenimiento o limpieza del aparato, apagarlo y sacar el cable eléctrico de la toma de corriente doméstica.
NOMENCLATURA G10078 1 Mirilla de control 2 Tapa 3 Cuchillas amasadoras 4 Sartén para masa 5 Pantalla de funcionamiento 6 Cuerpo 7 Gancho 8 Copa dosificadora 9 Cuchara dosificadora
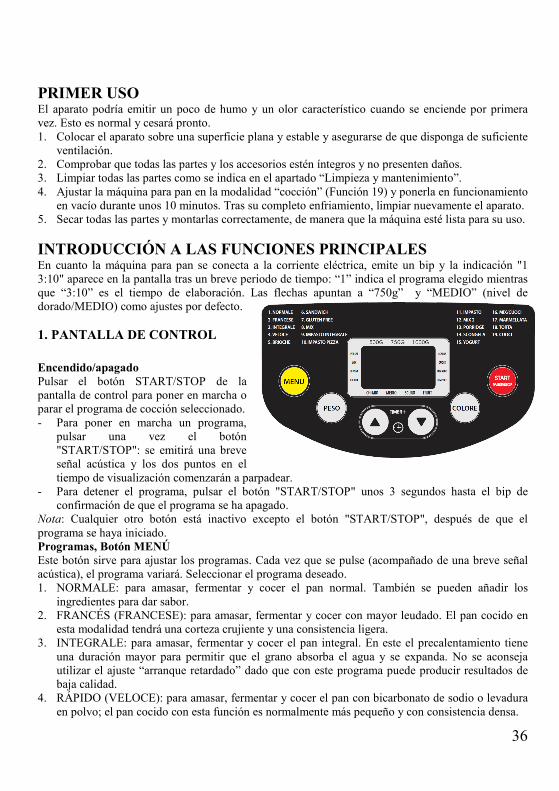
36
PRIMER USO El aparato podría emitir un poco de humo y un olor característico cuando se enciende por primera vez. Esto es normal y cesará pronto. 1. Colocar el aparato sobre una superficie plana y estable y asegurarse de que disponga de suficiente
ventilación. 2. Comprobar que todas las partes y los accesorios estén íntegros y no presenten daños. 3. Limpiar todas las partes como se indica en el apartado “Limpieza y mantenimiento”. 4. Ajustar la máquina para pan en la modalidad “cocción” (Función 19) y ponerla en funcionamiento
en vacío durante unos 10 minutos. Tras su completo enfriamiento, limpiar nuevamente el aparato. 5. Secar todas las partes y montarlas correctamente, de manera que la máquina esté lista para su uso.
INTRODUCCIÓN A LAS FUNCIONES PRINCIPALES En cuanto la máquina para pan se conecta a la corriente eléctrica, emite un bip y la indicación "1 3:10" aparece en la pantalla tras un breve periodo de tiempo: “1” indica el programa elegido mientras que “3:10” es el tiempo de elaboración. Las flechas apuntan a “750g” y “MEDIO” (nivel de dorado/MEDIO) como ajustes por defecto. 1. PANTALLA DE CONTROL
Encendido/apagado Pulsar el botón START/STOP de la pantalla de control para poner en marcha o parar el programa de cocción seleccionado. - Para poner en marcha un programa,
pulsar una vez el botón "START/STOP": se emitirá una breve señal acústica y los dos puntos en el tiempo de visualización comenzarán a parpadear.
- Para detener el programa, pulsar el botón "START/STOP" unos 3 segundos hasta el bip de confirmación de que el programa se ha apagado.
Nota: Cualquier otro botón está inactivo excepto el botón "START/STOP", después de que el programa se haya iniciado. Programas, Botón MENÚ Este botón sirve para ajustar los programas. Cada vez que se pulse (acompañado de una breve señal acústica), el programa variará. Seleccionar el programa deseado. 1. NORMALE: para amasar, fermentar y cocer el pan normal. También se pueden añadir los
ingredientes para dar sabor. 2. FRANCÉS (FRANCESE): para amasar, fermentar y cocer con mayor leudado. El pan cocido en
esta modalidad tendrá una corteza crujiente y una consistencia ligera. 3. INTEGRALE: para amasar, fermentar y cocer el pan integral. En este el precalentamiento tiene
una duración mayor para permitir que el grano absorba el agua y se expanda. No se aconseja utilizar el ajuste “arranque retardado” dado que con este programa puede producir resultados de baja calidad.
4. RÁPIDO (VELOCE): para amasar, fermentar y cocer el pan con bicarbonato de sodio o levadura en polvo; el pan cocido con esta función es normalmente más pequeño y con consistencia densa.
37
5. BRIOCHE: para amasar, fermentar y cocer el pan con leche o mantequilla. 6. SANDWICH: para amasar, fermentar y cocer el pan con medio-largo leudado. Para un pan
adecuado para la creación de sándwiches y bocadillos 7. SIN GLUTEN/GLUTEN FREE: para amasar, fermentar y cocer pan sin gluten, gracias a los
tiempos de agitación, de descanso y de levadura especialmente estudiado. 8. MIX: amasar por 15 minutos. 9. MASA INTEGRAL (IMPASTO INTEGRALE): para amasar y fermentar con harina integral. 10. MASA PIZZA (IMPASTO PIZZA): para amasar y fermentar masa por pizza. Completar el
levantamiento fuera de la máquina durante un tiempo al gusto. 11. MASA (IMPASTO): para amasar y fermentar, sin cocción. Quitar la masa para hacer paninis,
pizzas, focaccia, pagnotte. 12. MIX 2: amasar por un tiempo da 8 a 45 minutos. 13. PORRIGDE: para hacer el porridge (gachas de avena). 14. DESCONGELAR (SCONGELA): calienta a 50 grados, temperatura adecuada para descongelar 15. YOGURT: para hacer que el yogur de leche y fermentos lácticos. 16. MIXAR y COCER (MIX/CUOCI): amasa y luego hornea, sin levadura. 17. MERMELADA/JAM: para realizar confituras y mermeladas. 18. MASA/DOUGH: para amasar y fermentar, sin cocción. Quitar la masa para hacer paninis, pizzas,
focaccia, pagnotte. 19. TARTA (TORTA): para amasar, fermentar y cocer (fermentación con bicarbonato de sodio o
levadura en polvo) masas para tartas. 20. COCER (CUOCI): solo cocción (sin masa y fermentación). Se puede usar también para prolongar
la cocción de un programa. Niveles de dorado, botón COLORE
Este botón sirve para elegir el nivel de dorado de la corteza del pan. Pulsar el botón repetidamente y la flecha de la pantalla se desplazará entre las siguientes opciones: “CHIARO” (dorado ligero), “MEDIO” (dorado medio), “SCURO” (dorado más oscuro).
Dimensiones, botón PESO Pulsar este botón repetidamente para seleccionar entre los siguientes formatos de pan: 500g, 750g, 1000g.
Arranque retardado Si se desea que el aparato no se encienda inmediatamente, se puede utilizar este botón para ajustar el arranque. El tiempo ajustado incluye también el tiempo de cocción del programa seleccionado. En un primer momento seleccionar el programa (botón MENÚ) y el grado de dorado (botón COLOR), luego pulsando TIME+ o TIME– se puede ajustar el arranque retardado desde un mínimo de 10 minutos hasta un máximo de 15 horas. Ejemplo: son las 20:30 y usted desea que el pan esté listo a la mañana siguiente a las 7 (esto es, 10 horas y 30 minutos después). - Seleccionar el programa, el nivel de dorado y el tamaño de la hogaza mediante los botones
correspondientes. - Pulsar el botón TIME+ o TIME- para añadir tiempo hasta que 10:30 aparezca mostrado en la
pantalla LCD. - Pulsar el botón STOP/START para activar el programa. - En la pantalla LCD aparecerá la cuenta atrás para visualizar el tiempo restante. Obtendrá pan
fresco a las 7:00 de la mañana, que permanecerá caliente durante 1 hora aproximadamente.

38
Nota: con el arranque retardado, se aconseja no utilizar ingredientes frescos y fácilmente perecederos (como huevos, leche fresca, fruta, cebollas, etc.). 2. CARACTERÍSTICAS FUNCIONALES BÁSICAS
Función de mantenimiento del calor (programas 1,2,3,4,5,6,7,16,18) El pan se puede mantener automáticamente caliente durante 60 minutos después de la cocción. Si se desea tomar el pan antes, desactivar el programa pulsando el botón START/STOP en la pantalla de control.
Efecto memoria Si la alimentación ha sufrido una interrupción durante el desarrollo de la panificación, el proceso continuará automáticamente en 10 minutos, sin pulsar el botón START/STOP. Si la interrupción de la corriente supera los 10 minutos, la memoria no se puede mantener y se deberá volver a poner en marcha la máquina. Sin embargo, si el aparato no ha superado la fase de amasado antes de la interrupción de la electricidad, se puede pulsar START/STOP para continuar el programa desde el principio.
Condiciones ambientales de uso La temperatura ambiental sugerida para un uso óptimo de la máquina de pan debe estar comprendida entre 15 y 34°C. 3. ADVERTENCIAS DE USO Durante el uso, es posible que las siguientes indicaciones aparezcan en la pantalla LCD:
Fig.1 Fig.2 Si la pantalla muestra "H: HH" tras pulsar el botón START/STOP (Figura 1), la temperatura interior de la máquina todavía es demasiado alta. Apagar el aparato, abrir la tapa y dejar enfriar durante 10-20 minutos. Si la pantalla muestra "E: E0" tras pulsar START/STOP (Figura 2), el sensor de temperatura está desconectado. Se aconseja llevar a revisar el sensor a un Centro de Asistencia Autorizado.
CONSEJOS DE COCCIÓN 1. PROGRAMA INMEDIATO (QUICK) Seleccionando el programa QUICK, el pan se hace con la levadura y el bicarbonato de sodio, que se activa con la humedad y con el calor. Para obtener un resultado perfecto, se sugiere colocar todos los líquidos en el fondo de la sartén para la masa y los ingredientes secos por encima. Durante la fase de mezcla los ingredientes secos podrían acumularse en las esquinas de la cuba: en este caso puede ser necesario ayudar a la máquina a mezclar bien los ingredientes para evitar grumos de harina. Mezclar utilizando exclusivamente una espátula de goma, para no dañar las paredes de la cuba.
FUNCIONAMIENTO 1. Poner la fuente (4) en posición, luego girarla en el sentido de las agujas del reloj hasta que se
ajuste en su posición correcta. Fijar la cuchilla amasadora (3) sobre el semieje. 2. Poner los ingredientes en la fuente (4) en este orden: agua (u otros líquidos), azúcar, sal, aceite,
harina y añadir siempre la levadura como último ingrediente. En caso de masa con centeno o
39
integral, se aconseja invertir el orden de los ingredientes (esto es, verter primero levadura seca y harina, y por último el líquido para obtener una masa mejor).
3. Hacer una pequeña abertura a un lado de la harina y añadir la levadura, asegurándose de que no entre en contacto con los ingredientes líquidos o la sal.
4. Cerrar la tapa (2) con delicadeza e introducir el cable de alimentación en una toma. 5. Pulsar el botón MENÚ hasta seleccionar el programa deseado. 6. Pulsar el botón PESO para seleccionar el formato deseado (500-750-1000g). 7. Si es necesario, ajustar el arranque retardado pulsando TIME+ o TIME-. 8. Pulsar el botón START/STOP para encender la máquina. Nota: con los programas NORMALE, FRANCESE, INTEGRALE, RAPIDO/VELOCE, BRIOCHE, SANDWICH, SIN GLUTEN/GLUTEN FREE e TARTA/TORTA, durante la fase de amasado la máquina emitirá algunos pitidos, para pedirle que añada ingredientes. Si lo desea, abra la tapa y añada ingredientes ante el bip. 9. Una vez terminada la cocción, el aparato emitirá 10 señales acústicas. Abrir la tapa (2) y, tras
ponerse los guantes de horno, agarrar firmemente el asa de la fuente (4). Girarla en sentido contrario a las agujas del reloj y tirar con delicadeza de la sartén hacia arriba. Si es necesario, utilizar una espátula antiadherente para aflojar con suavidad los lados del pan.
ATENCIÓN: ¡la fuente (4) y el pan pueden estar muy calientes! Manejar siempre con cuidado y utilizar guantes de horno.
10. Verter la fuente (4) sobre una superficie limpia y agitar con suavidad hasta que salga el pan. 11. Dejar enfriar el pan durante unos 20 minutos antes de cortar en rebanadas. 12. Al término de la cocción, en caso de que no se haya pulsado el botón START/STOP, el pan se
mantiene caliente automáticamente durante 1 hora. 13. Cuando la máquina no se esté usando, se aconseja desconectar el cable de alimentación. Nota: antes de cortar en rebanadas el pan, utilizar el gancho (7) para retirar la cuchilla amasadora (3) escondida en el fondo de la hogaza. El pan está caliente, no usar nunca las manos para extraerla.
MANTENIMIENTO Y LIMPIEZA ATENCIÓN: Sacar la clavija de la toma de corriente y dejar enfriar la máquina antes de efectuar cualquier operación de mantenimiento o de limpieza.
La fuente (4), la cuchilla (3), la mirilla de control (1), la tapa (2) y el cuerpo de la máquina (6) se pueden limpiar utilizando un paño ligeramente húmedo. No utilizar ningún detergente químico y abrasivo y no sumergir nunca el cuerpo en agua u otro líquido para la limpieza. Secar completamente la fuente (4) y la cuchilla amasadora (3) antes de volver a montarlas. En caso de que la barra amasadora sea difícil de quitar del perno, llenar el recipiente con agua caliente y dejar en remojo unos 30 minutos. Antes de volver a colocar la máquina de pan, asegurarse de que se haya enfriado por completo y que se haya limpiado y secado; poner la cuchara dosificadora (9), la copa (8), el gancho (7) y la cuchilla amasadora (3) en la fuente (4), y cerrar la tapa (2). Conservar en lugar seco y limpio, lejos del alcance de los niños.
CARACTERÍSTICAS TÉCNICAS • Alimentación: AC 220-240V~ 50/60 Hz. Potencia: 550W • Capacidad: MÁX. 1 Kg • Pantalla digital y 19 programas

40
• 3 niveles de dorado • Arranque retardado (10min – 15h) • Accesorios: fuente antiadherente, copa y cuchara dosificadora, gancho
RESOLUCIÓN DE PROBLEMAS
Problema Causa Solución
Sale humo de la unidad. - Elemento calefactor sucio. - Primer uso: se ha quedado aceite de elaboración en el elemento calefactor.
- Desconectar la máquina y limpiar el elemento calefactor. - Durante el primer uso, hacer funcionar en seco con la tapa abierta.
Masa no uniforme y mala cocción. - El programa seleccionado no es correcto. - Tapa abierta demasiado a menudo durante la elaboración. - La amasadora no puede mezclar adecuadamente.
- Seleccionar otro programa. - No abrir la tapa, dejar el pan en caliente después de la cocción. - Comprobar que no haya nada que obstruya las cuchillas amasadoras. Si el problema persiste, contactar con un Centro de Reparación Autorizado.
Ruidos durante el uso y la masa no se ha mezclado correctamente.
La fuente no está instalada correctamente y la masa es demasiado grande para ser mezclada.
Fijar la fuente de manera correcta, volver a comprobar las dosis de la receta.
Hogaza demasiado grande. Demasiada levadura, demasiada harina o demasiada agua. Temperatura ambiente demasiado elevada.
Comprobar la receta y los factores ambientales.
Hogaza demasiado pequeña, el pan no está leudado.
- Ninguna levadura o poca levadura entre los ingredientes. - Temperatura del agua demasiado alta. - La sal ha entrado en contacto con la levadura. - Temperatura ambiente demasiado baja.
- Comprobar que se ha echado la cantidad correcta de levadura. - Comprobar la temperatura del agua. - Aumentar la temperatura de la habitación.
La masa es tan grande que sale de la fuente.
- Demasiados líquidos. - Demasiada levadura.
Reducir la cantidad de líquidos y de levadura.
El pan cae al centro de la fuente durante la cocción de la masa.
- La harina usada no es correcta. - La levadura no está a la temperatura correcta. - Demasiada agua/líquidos.
- Comprobar el tipo de harina. - La levadura debe estar a temperatura ambiente. - Disminuir la cantidad de agua o líquidos en la receta.
El interior de la hogaza está vacío. - Demasiada agua, demasiada levadura o no hay sal. - La temperatura del agua es muy elevada.
- Reducir la cantidad de agua, de levadura y comprobar que se ha puesto sal. - Comprobar la temperatura del agua.
La pantalla muestra “H:HH” después de pulsar el botón de arranque/stop.
La temperatura dentro de la máquina es demasiado elevada.
Pulsar Stop y sacar la unidad de la toma de corriente. Extraer la fuente, usando los guantes de horno, y
41
dejar enfriar la máquina durante unos 10-20 minutos. Si el problema persiste, contactar con un Centro de Reparación Autorizado.
DEUTCH: HINWEISE: Verwenden Sie das Gerät nur nach den Anweisungen in dieser Bedienungsanleitung. Jede anderweitige Verwendung gilt als unsachgemäß und gefährlich, und der Hersteller kann für Schäden haftbar gemacht werden, die durch eine unsachgemäße, falsche oder unvernünftige Verwendung verursacht werden. Stellen Sie vor der Verwendung sicher, dass das Gerät unversehrt ist. Im Zweifelsfall verwenden Sie es nicht und wenden Sie sich an den Kundendienst. Verpackungsmaterial (Plastiktüten, Styropor, Nägel, Klammern usw.) muss für Kinder unzugänglich aufbewahrt werden, da es eine potenzielle Gefahrenquelle darstellt. Wir möchten Sie in diesem Zusammenhang auch daran erinnern, dass Verpackungsabfall der Mülltrennung zugeführt werden muss. Stellen Sie sicher, dass die Angaben auf dem Typenschild mit denen des Stromnetzes übereinstimmen. Die Installation muss gemäß den Anweisungen des Herstellers unter Berücksichtigung der maximal auf dem Typenschild angegeben Leistung erfolgen. Eine unsachgemäße Installation kann zu Verletzungen von Personen, Tieren oder zu Sachschäden führen, für die der Hersteller nicht haftbar gemacht werden kann. Wenn Adapter, Mehrfachsteckdosen und Verlängerungskabel erforderlich sind, verwenden Sie nur solche, die die geltenden Sicherheitsstandards erfüllen. In keinem Fall dürfen die am einfachen Adapter und/oder an den Verlängerungskabeln angegebenen Verbrauchsgrenzen sowie die maximale Leistung überschritten werden, die auf dem Mehrfachadapter angegeben ist. ACHTUNG:
- Fassen Sie das Gerät nicht mit nassen Händen an und verwenden Sie es nicht barfuß. - Verwenden Sie das Gerät im Falle von Schäden am Netzkabel, Stecker oder im Falle von
Kurzschlüssen nicht und lassen Sie es in einer Vertragswerkstatt reparieren. - Verwenden Sie das Netzkabel nicht in der Nähe von scharfen Gegenständen oder heißen
Oberflächen und ziehen Sie den Netzstecker nicht am Netzkabel aus der Steckdose. - Setzen Sie das Gerät keinen ungünstigen Wetterbedingungen, wie z. B. Regen, Feuchtigkeit,
Frost, aus und bewahren Sie es an einem trockenen Ort auf. - Gestatten Sie den Gebrauch des Geräts ohne Aufsicht weder Kindern noch Personen, die die
Gefahren nicht einschätzen können. - Nicht für den gewerblichen Gebrauch bestimmt. Nur für den Hausgebrauch bestimmt. Im Falle eines Defekts und/oder von Fehlfunktionen das Gerät nicht öffnen. Für Reparaturen wenden Sie sich an eine vom Hersteller autorisierte Werkstatt (Vertragswerkstatt) und fordern Sie den Einsatz von Original-Ersatzteilen. Die Nichtbeachtung der obigen Vorschriften kann die Sicherheit beeinträchtigen und zur Folge haben, dass die Garantie erlischt.
ALLGEMEINE HINWEISE WARNUNG: Dieses Gerät enthält eine Heizfunktion. Oberflächen, außer die funktionellen Oberflächen können hohe Temperaturen entwickeln. Da die Temperaturen von verschiedene Personen unterschiedlich wahrgenommen werden, sollte dieses Gerät mit VORSICHT verwendet
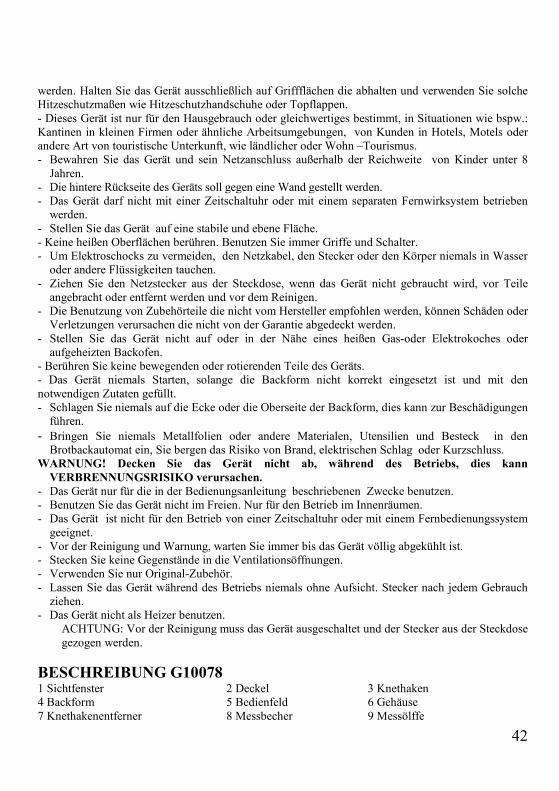
42
werden. Halten Sie das Gerät ausschließlich auf Griffflächen die abhalten und verwenden Sie solche Hitzeschutzmaßen wie Hitzeschutzhandschuhe oder Topflappen. - Dieses Gerät ist nur für den Hausgebrauch oder gleichwertiges bestimmt, in Situationen wie bspw.: Kantinen in kleinen Firmen oder ähnliche Arbeitsumgebungen, von Kunden in Hotels, Motels oder andere Art von touristische Unterkunft, wie ländlicher oder Wohn –Tourismus. - Bewahren Sie das Gerät und sein Netzanschluss außerhalb der Reichweite von Kinder unter 8
Jahren. - Die hintere Rückseite des Geräts soll gegen eine Wand gestellt werden. - Das Gerät darf nicht mit einer Zeitschaltuhr oder mit einem separaten Fernwirksystem betrieben
werden. - Stellen Sie das Gerät auf eine stabile und ebene Fläche. - Keine heißen Oberflächen berühren. Benutzen Sie immer Griffe und Schalter. - Um Elektroschocks zu vermeiden, den Netzkabel, den Stecker oder den Körper niemals in Wasser
oder andere Flüssigkeiten tauchen. - Ziehen Sie den Netzstecker aus der Steckdose, wenn das Gerät nicht gebraucht wird, vor Teile
angebracht oder entfernt werden und vor dem Reinigen. - Die Benutzung von Zubehörteile die nicht vom Hersteller empfohlen werden, können Schäden oder
Verletzungen verursachen die nicht von der Garantie abgedeckt werden. - Stellen Sie das Gerät nicht auf oder in der Nähe eines heißen Gas-oder Elektrokoches oder
aufgeheizten Backofen. - Berühren Sie keine bewegenden oder rotierenden Teile des Geräts. - Das Gerät niemals Starten, solange die Backform nicht korrekt eingesetzt ist und mit den notwendigen Zutaten gefüllt. - Schlagen Sie niemals auf die Ecke oder die Oberseite der Backform, dies kann zur Beschädigungen
führen. - Bringen Sie niemals Metallfolien oder andere Materialen, Utensilien und Besteck in den
Brotbackautomat ein, Sie bergen das Risiko von Brand, elektrischen Schlag oder Kurzschluss. WARNUNG! Decken Sie das Gerät nicht ab, während des Betriebs, dies kann
VERBRENNUNGSRISIKO verursachen. - Das Gerät nur für die in der Bedienungsanleitung beschriebenen Zwecke benutzen. - Benutzen Sie das Gerät nicht im Freien. Nur für den Betrieb im Innenräumen. - Das Gerät ist nicht für den Betrieb von einer Zeitschaltuhr oder mit einem Fernbedienungssystem
geeignet. - Vor der Reinigung und Warnung, warten Sie immer bis das Gerät völlig abgekühlt ist. - Stecken Sie keine Gegenstände in die Ventilationsöffnungen. - Verwenden Sie nur Original-Zubehör. - Lassen Sie das Gerät während des Betriebs niemals ohne Aufsicht. Stecker nach jedem Gebrauch
ziehen. - Das Gerät nicht als Heizer benutzen.
ACHTUNG: Vor der Reinigung muss das Gerät ausgeschaltet und der Stecker aus der Steckdose gezogen werden.
BESCHREIBUNG G10078 1 Sichtfenster 2 Deckel 3 Knethaken 4 Backform 5 Bedienfeld 6 Gehäuse 7 Knethakenentferner 8 Messbecher 9 Messölffe
43
VOR DER ERSTEN VERWENDUNG Das Gerät kann ein wenig Rauch und einen typischen Geruch freisetzen, wenn Sie das Gerät zum ersten Mal nutzen, Das ist normal und wird bald beendet. 1. Stellen Sie das Gerät auf einer flachen, stabilen Oberfläche, achten Sie bitte darauf, dass auf beiden
Seiten ausreichend Platz für die Belüftung vorhanden ist. 2. Stellen Sie sicher, ob alle Zubehörteile vollständig und unbeschädigt sind. 3. Reinigen Sie alle Teile gemäß den Anweisungen im Abschnitt “ Reinigung und Warnung”. 4. Stellen Sie den Brotbackautomat in “Backen” (Funktion 19) und etwa 10 Minuten laufen lassen.
Wenn Komplet abgekühlt, reinigen Sie erneut das System. 5. Trocknen Sie alle Zubehörteile sorgfältig; Das Gerät ist nun betriebsbereit. EINFÜHRUNG ZUR HAUPTFUNKTIONEN Sobald der Brotbackautomat an der Stromversorgung angeschlossen ist, ist ein Piepen zu hören "1 3:10" wird nach einer kurzen Zeit im Display angezeigt: "1" zeigt das voreingestellte Programm an, während "3:10" die Bearbeitungszeit. Die Pfeilen zeigen zu "750g" und "MEDIO" (MITTEL/Bräunung) sind die eingestellten Vorgaben. Start/Stopp Zum Starten und Beenden des ausgewählten Programms, drücken Sie die Start/Stopp- Taste um ein Programm zu starten. Um das Programm zu starten, drücken Sie die "START/STOPP" Taste: Ein Piepton zeigt an, das das Programm und der Doppelpunkt im Display beginnt zu blinken Um das Programm zu stoppen drücken Sie die "START/STOPP" Taste für ca. 3 Sekunden bis den Peiepton anzeigt, dass das Programm ausgeschaltet wurde. Bemerkung: Nach Programm-Start werden alle Knöpfe deaktiviert außer "START/STOP". Programm – MENÜ’ Diese Taste wird für die Einstellung der verschieden Programms verwendet. Nach jedem Tastendruck (begleitet von einem kleinen piepen ) ändert sich die Programmanzeige. Die gewünschten Programme wählen. 1. BASIC (NORMALE): einfaches Kneten, aufgehen lassen und Backen von traditionelles Brot. Sie
können auch extra Zutaten hinzufügen zur Geschmacksverbesserung. 2. FRANZÖSICH (FRANCESE): Kneten, aufgehen lassen und Backen von Brot mit verlängerte
Gehzeit. Das Brot hat eine knusprige Kruste und eine leichte Textur. 3. VOLLKORN (INTEGRALE): Kneten, Aufgehen lassen und Backen von Brot aus Vollkornmehl.
Vorwärmen bei einer längeren Laufzeit, um zu erlauben, dass das Korn das Wasser aufnimmt und sich ausdehnt. Es ist nicht ratsam die Funktion der Zeitverzögerung zu nutzen.
4. SCHNELL (VELOCE): Kneten, Aufgehen lassen und Backen von Brot mit Back Soda oder Backpulver, Brot mit dieser Funktion gebacken ist normalerweise kleiner und dichter.
5. BRIOCHE: Kneten, Aufgehen lassen und Backen von Brot mit Milch oder 6. SANDWICH: Kneten, aufgehen lassen und Backen von Brot mit verlängerte Gehzeit. Für ein
geeignetes Brot zur Schaffung von Sandwiches 7. GLUTENFREI (GLUTEN FREE): Kneten, Aufgehen lassen und Backen von Gluten freies Brot
dank der verlängere Zeit. 8. MIX: ohne Kneten 15 minuten. 9. VOLLKORN (IMPASTO INTEGRALE): Kneten und Aufgehen mit Vollkornmehl. 10. TEIG PIZZA (IMPASTO PIZZA): per impastare e lievitare impasto per pizza. 11. TEIG (IMPASTO): Kneten und Aufgehen lassen ohne Backvorgang. Entnehmen Sie den Teig

44
und nutzen Sie ihn zur Herstellung von Sandwiches, Pizza, Brotlaibe. 12. MIX 2: ohne Kneten 8-45 Minuten lang. 13. PORRIGDE: zu machen porridge (Haferbrei). 14. AUFTAUEN (SCONGELA): erhitzt die Temperatur geeignet zum Abtauen bis 50 Grad,. 15. YOGURT: die Milch Joghurt und Milchsäurebakterien zu machen. 16. MIX/ BAKEN (MIX/CUOCI): Mischungen und backt, ohne Sauerteig. 17. MARMELADE (MARMELLATA): Kochen von Marmelade und Konfitüre.. 18. KUCHEN (TORTA): kneten und Aufgehen lassen und Backen (Gesäuert mit Soda und
Backpulver) Kuchen. 19. BACKEN (CUOCERE): nur zum Kochen (ohne Kneten oder Aufgehen lassen). Zum extra
Kochen benutzt werden BRÄUNUNG (COLOR)
Wählen Sie anhand dieser Taste den gewünschten Bräunungsgrad der Brotkruste. Der Knopf mehrfach drücken und der Pfeil im Display bewegt sich zwischen folgenden Optionen: "CHIARO" (Leicht/Goldbräunung), "MEDIO" (Mittelbräunung) "SCURO" (Dunkelbräunung).
BROT (PESO) Der Knopf mehrfach drücken, und wählen Sie dann eines der folgenden verfügbaren Brot Formate: 500g, 750g, 1000g.
Zeitverzögerung (+/-) Wenn Sie wünschen, dass das Gerät nicht sofort mit dem Backen beginnt, können Sie mithilfe dieser Taste die Startzeit einstellen. Bitte beachten Sie, dass die Verzögerungszeit die Laufzeit des Backprogrammes enthält. Zuerst, wählen Sie das gewünschte Menü (MENU Taste) und – Bräunungsgrad (FARBETASTE), dann drücken Sie die ZEIT + oder ZEIT Taste – Sie können die Verzögerungszeitvorwahl, Minimum von 10 Minuten auf Maximum von 15 Stunden einstellen
Beispiel: Nehmen wir an, es ist 20:30 und Sie wünschen, dass Ihr Brot am nächsten Morgen um 7 Uhr (nach 10 Stunde und 30 Minuten) fertig gebacken ist.
Mit dem entsprechenden Knopf, das gewünschte Programm zum Bräunungsvorgang und Brotgröße wählen,
- ZEIT + oder ZEIT- Taste drücken bis 10:30 auf dem Display erscheint. - Die STOPP/START Taste drücken, um das Programm zu starten - Der LCD Display wird der Countdown zur ablaufenden, restlichen Zeit anzeigen. Sie werden um
7 Uhr frisches Brot bekommen, der für etwa 1 Stunde warm bleibt. Bemerkung Mit dieser Funktion ist es nicht empfohlen, verderblichen Zutaten wie (Eier, frisches Milch, Früchte oder Zwiebeln, etc. … zu verwenden) 2. FUNKTIONSMODELS
Warmfunktion (programm 1,2,3,4,5,6,7,16,18) Das Brot kann automatisch bis zu 60 Minuten nach dem Backen warm gehalten werden. Wenn Sie das Brot während des Warmhaltens herausnehmen wollen, schalten Sie das Programm mittels der START/STOPP-Taste im Bedienungsfeld aus.
Speichefunktion Wenn die Stromversorgung während der Brotherstellung unterbrochen wird, kann der Vorgang automatisch innerhalb von 10 Minuten fortgesetzt werden, ohne einen Knopf zu drücken. Wenn die Unterbrechung mehr als 10 Minuten beträgt, kann der Automat das Programm nicht speichern und das Gerät muss neu gestartet werden. Aber, war der Teig bei Stromausfall erst in der ersten Knetphase und hat die Aufgehphase noch nicht erreicht, können Sie den START/STOPP – Knopf erneut drücken und das Programm von vorne starten.

45
Umgebung Wir empfehlen eine Raumtemperatur zwischen 15 und 34C für eine bessere Ausleistung vom Brotbackautomat. 3. SPEZIELLE WARNHINWEISE Während der Nutzung, ist es möglich das folgende Anzeige im Display erscheinen: - Zeigt das Display "H: HH" nach dem START/STOP – Taste drücken (Bild 1),bedeutet das, dass
die Temperatur in der Backform noch zu hoch ist, Das Programm muss beendet werden. Öffnen Sie den Deckel und lassen Sie das Gerät vollständig abkühlen 10-20 Minuten.
- Wenn das Display "E:E0" anzeigt, nachdem Sie “START/STOP”- Taste gedrückt haben, (Bild 2), ist der Temperatur Sensor beschädigt, und muss von einem qualifizierten Kundendienst geprüft werden.
HINWEISE ZUR BESSERN BACKEN 1. SCHNELL PROGRAMM (VELOCE) Wählen Sie die SCHNELL Taste, das Brot wird mit Backpulver oder Soda hergestellt, die durch Flüssigkeit und Hitze aktiviert werden. Um gute Ergebnisse zu erzielen wird empfohlen, die Flüssigkeit zuerst in die Brotform zu geben, die trockenen Zutaten in den oberen Teil. In der ersten Knetphase kann es dazu kommen, dass die trockenen Zutaten sich in den Ecken der Brotform sammeln, nun ist es nötig, nachzuhelfen und die Zutaten zu verrühren, um ein Verklumpen zu vermeiden. Mix mit Hilfe einer Gummispatel, damit die Wände vom Brotbackautomat nicht beschädigt werden. INBETRIEBNAHMA 1. Stellen Sie die Brotform (4) in die richtige Position und drehen Sie die Backform im
Uhrzeigersinn, rastet die Form ein, hören Sie ein Klick. Stecken Sie den Knethaken (3) auf die Antriebswelle.
2. Legen Sie die Zutaten in die Backform (4) in dieser Reihenfolge: Wasser (oder andere Flüssigkeiten), Zucker, Salz, Mehl und geben Sie die Hefe immer als letzter Zutat hinzu. Im Falle von Mischung mit Roggen oder Vollkorn, es wird empfohlen, die Reihenfolge der Zutaten umgekehrt hineinfügen.
3. Machen Sie ein kleines Loch einseitig in das Mehl und geben Sie die Hefe hinein, stellen Sie sicher, dass die Hefe nicht mit Flüssigkeiten oder Salz in Berührung kommt.
4. Schließen Sie den Deckel (2) und stecken Sie den Stecker in die Steckdose. 5. Drücken Sie die MENU Taste bis Sie das gewünschte Programm ausgewählt haben 6. Wählen Sie das gewünschte LAIBGRÖSSE/GEWICHT (PESO) Taste bis Sie die gewünschte
Größe wählen (500-750-1000g). 7. Wenn notwendig, stellen Sie die Zeitverzögerung anhand der ZEIT + oder ZEIT Taste. 8. Drücken Sie die START/STOPP – Taste um den Brotautomat zu starten. Bemerkung: Mit dem Programm BASIC/NORMALE, FRANZÖSICH/FRANCESE, VOLLKORN/INTEGRALE, SCHNELL/VELOCE, BRIOCHE, SANDWICH, GLUTENFREI/GLUTEN FREE e KUCHEN/TORTA eingestellt, ertönt während des Betriebs einige Pieptöne, nun können Sie weiter Zutaten hinzufügen. Wenn Sie wollen, öffnen Sie den Deckel und legen Sie die Zutaten hinein.
9. Wenn der Backvorgang beendet ist, hören Sie 10 Pieptöne. Öffnen Sie den Deckel (2) nach dem
46
Sie Ofenhandschuhen antragen, greifen Sie kräftig der Backbrotgriff (4). Drehen Sie die Backform entgegen der Uhrzeigerrichtung und heben Sie die anschließend aus dem Gerät. Wenn notwendig, nutzen Sie den Teigschaber, um das Brot an den Seiten vorsichtig zu lockern. ACHTUNG: Die Brotform (4) und das Brot können sehr heiß sein! Seien Sie vorsichtig und tragen Sie immer Ofenhandschuhe.
10. Drehen Sie die Brotform (4) halten Sie diese über eine saubere Oberfläche und schütteln die Form vorsichtig bis das Brot heraus fällt.
11. Lassen Sie das Brot ca. 20 Minuten abkühlen bevor Sie es in Schieben schneiden. 12. Nach dem Backvorgang, wenn Sie nicht die START/STOPP – Taste gedrückt haben, wird das
Brot automatisch eine Stunde lang warm gehalten. 13. Nach Verwendung oder bei Nichtgebrauch, trennen Sie das Gerät durch ziehen des Netzsteckers
von der Stromversorgung. Bemerkung: Bevor Sie den Laib in Scheiben schneiden, entfernen Sie mit dem Knethakenentferner (7) den Knethaken (3) dieser steckt in der Unterseite des Brotes. Der Laib ist noch heiß, ziehen Sie bitte nicht mit den Fingern.
WARNUNG UND REINIGUNG ACHTUNG: Ziehen Sie vor der Ausführung von Reinigungsarbeiten den Netzstecker aus der Steckdose und lassen Sie das Gerät vollständig abkühlen.
Die Brotform (4), der Knethaken (3), das Sichtfenster (1), der Deckel (2) und das Gehäuse (6) können mit einem feuchten Tuch abgewaschen werden. Benutzen Sie keine scharfen oder aggressiven Reiniger, tauchen Sie niemals das Gehäuse in Wasser oder andere Flüssigkeiten. Wenn die Teigstange aus dem Bolzen schwer zu entfernen ist, füllen Sie den Behälter mit Wasser und für 30 Minuten einweichen lassen. Bevor der Brotbackautomat zur Aufbewahrung eingepackt wird, stellen Sie sicher, dass er komplett abgekühlt, sauber und trocken ist, der Messlöffel (9), der Messbecher (8), der Knethakenentferner (7) der Knethaken (3) in die Backform (4), und den Deckel schließen. (2). In eine stabile und trockene Oberfläche aufräumen und aus der Reichweite von Kinder.
TECHNISCHE DATEN • Stromversorgung: AC 220-240V~ 50/60 Hz. Leistung: 550W • Kapazität: MAX 1Kg / 2LB • LCD Display, 19 Backprogrammen • Zeitverzögerung (von 10 min. bis zu 15 Stunden) • 1 Stunde automatische Warmfunktion • Zubehör: nicht klebend Brotform, Messbecher und Messlöffel, Haken FEHLERBEHERUNG
Problem Grund Lösung
Das Gerät emittiert
Rauch
- Heizelementen sind schmutzig. - Ersten Gebrauch: kann Öl an den Heizelementen haften.
- Ziehen Sie den Stecker aus der Steckdose und reinigen Sie die Heizelemente. -Wenn Sie das Gerät zum ersten Mal nutzen, lassen Sie es während 20 min. leer laufen.
Unregelmäßiges Teig und unangemessenes
- Das gewählte Programm ist nicht geeignet. - Der Deckel wurde mehrmals
-Wählen Sie das richtige Programm. - Öffnen Sie den Deckel nicht während des Gehvorgangs, lassen Sie den Brot drinnen.

47
Backen geöffnet während dem Vorgang. - Der Knethaken kann sich kaum drehen.
- Überprüfen Sie, ob etwas den Knethaken blockiert. Sollte das Problem andauern, kontaktieren Sie bitte den Kundendienst Service.
Sie hören den Motor arbeiten aber der Teig wird nicht geknetet.
Dir Backform ist nicht gut befestigt oder die Teigmenge ist zu groß, um geknetet zu werden.
Überprüfen Sie, ob die Backform gut befestigt ist. Die Backform richtig aufstellen.
Das Brot ist zu groß. Zuviel Hefe, Mehl oder Wasser. Es kann sein, dass die Umgebungstemperatur zu hoch ist.
Überprüfen Sie das Rezept und die Raumtemperatur.
Das Brot ist zu klein oder ist nicht aufgegangen.
- Keine oder zu wenig Hefe. - Wassertemperatur ist zu hoch.. - Salz kam in Kontakt mit der Hefe. - Umgebungstemperatur ist zu niedrig.
- Überprüfen Sie die Hefemenge. - Überprüfen Sie die Wassertemperatur - Die Umgebungstemperatur erhöhen.
Der Teig ist so groß, dass es über den Rand der Form hinauswächst.
- zu viel Flüssigkeit. - zu viel Teig.
Reduzieren Sie die Flüssigkeit und Teigmenge.
Das Brot fällt in der Mitte zusammen wenn Sie es backen.
- Das Mehl ist nicht geeignet. - Die Hefetemperatur ist nicht geeignet. - Zu viel Wasser oder andere Flüssigkeiten.
- Überprüfen Sie das Mehl - Nutzen Sie Hefe bei Raumtemperatur. - Wasser oder andere Flüssigkeitsmenge verringern.
Die Mitte des Brotes ist hohl.
- Sie nutzen zu viel Wasser, Salz oder Hefe. - Die Wassertemperatur ist zu hoch.
- Reduzieren Sie die Menge an Hefe und Wasser, Salz überprüfen. - Überprüfen Sie die Wassertemperatur.
Das Display zeigt “H:HH” nachdem Sie den Start oder Stopp Knopf gedrückt haben.
Die Temperatur im Brotautomaten ist zu hoch.
Drücken Sie die Stopp Taste und ziehen Sie den Stecker aus der Steckdose. Tragen Sie Ofenhandschuhe, entnehmen Sie die Brotform und während ca. 10-20 min. abkühlen lassen. Sollte das Problem andauern, kontaktieren Sie bitte den Kundendienst Service
REZEPTE Brot ist eines der wichtigsten tägliche Nahrung, und jede Stadt hat ihre eigenen Spezialitäten. Die Varietäten des Brots sind deshalb endlos. Das Ziel dieses Kochbuchs, ist die Basis und Ideen zu liefern, damit Sie Ihre Phantasie loslassen und in der Lage sind Ihre eigenen persönlichen Rezepte zu schaffen.
Das Brotbackmaschine ist ein ausgezeichneter Brotbackautomat für „coeloacs“, da es ermöglicht, gutes Brot mit Mehl und Gluten freie Zutaten zu machen
EINIGE TIPPS Sobald das Programm beendet ist, entfernen Sie die Brotform mit Topflappen, umdrehen und das Brot entfernen. Lassen Sie das Brot vor dem Schneiden abkühlen. Wenn das Knethaken im Brot steckt, mit einem nicht metallischen Gegenstand entfernen. Es ist besser mit den Fingern zu entfernen, wenn es kalt ist.
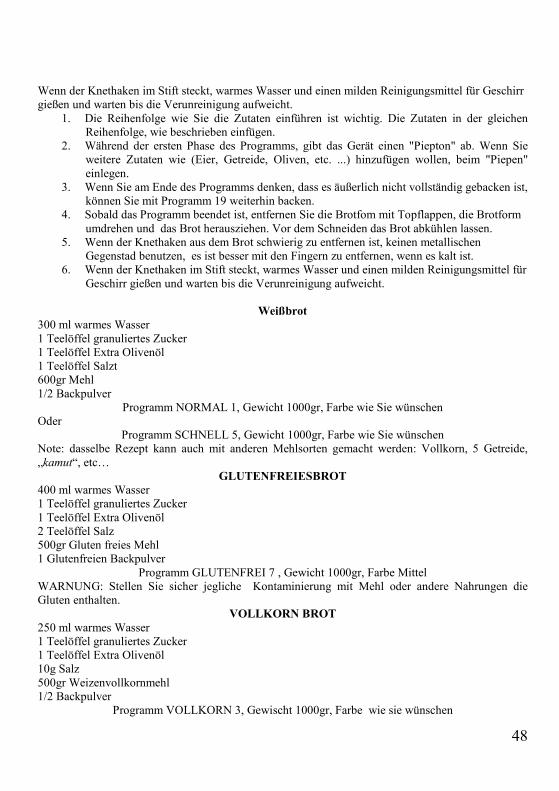
48
Wenn der Knethaken im Stift steckt, warmes Wasser und einen milden Reinigungsmittel für Geschirr gießen und warten bis die Verunreinigung aufweicht.
1. Die Reihenfolge wie Sie die Zutaten einführen ist wichtig. Die Zutaten in der gleichen Reihenfolge, wie beschrieben einfügen.
2. Während der ersten Phase des Programms, gibt das Gerät einen "Piepton" ab. Wenn Sie weitere Zutaten wie (Eier, Getreide, Oliven, etc. ...) hinzufügen wollen, beim "Piepen" einlegen.
3. Wenn Sie am Ende des Programms denken, dass es äußerlich nicht vollständig gebacken ist, können Sie mit Programm 19 weiterhin backen.
4. Sobald das Programm beendet ist, entfernen Sie die Brotfom mit Topflappen, die Brotform umdrehen und das Brot herausziehen. Vor dem Schneiden das Brot abkühlen lassen.
5. Wenn der Knethaken aus dem Brot schwierig zu entfernen ist, keinen metallischen Gegenstad benutzen, es ist besser mit den Fingern zu entfernen, wenn es kalt ist.
6. Wenn der Knethaken im Stift steckt, warmes Wasser und einen milden Reinigungsmittel für Geschirr gießen und warten bis die Verunreinigung aufweicht.
Weißbrot 300 ml warmes Wasser 1 Teelöffel granuliertes Zucker 1 Teelöffel Extra Olivenöl 1 Teelöffel Salzt 600gr Mehl 1/2 Backpulver
Programm NORMAL 1, Gewicht 1000gr, Farbe wie Sie wünschen Oder
Programm SCHNELL 5, Gewicht 1000gr, Farbe wie Sie wünschen Note: dasselbe Rezept kann auch mit anderen Mehlsorten gemacht werden: Vollkorn, 5 Getreide, „kamut“, etc…
GLUTENFREIESBROT 400 ml warmes Wasser 1 Teelöffel granuliertes Zucker 1 Teelöffel Extra Olivenöl 2 Teelöffel Salz 500gr Gluten freies Mehl 1 Glutenfreien Backpulver
Programm GLUTENFREI 7 , Gewicht 1000gr, Farbe Mittel WARNUNG: Stellen Sie sicher jegliche Kontaminierung mit Mehl oder andere Nahrungen die Gluten enthalten.
VOLLKORN BROT 250 ml warmes Wasser 1 Teelöffel granuliertes Zucker 1 Teelöffel Extra Olivenöl 10g Salz 500gr Weizenvollkornmehl 1/2 Backpulver
Programm VOLLKORN 3, Gewischt 1000gr, Farbe wie sie wünschen
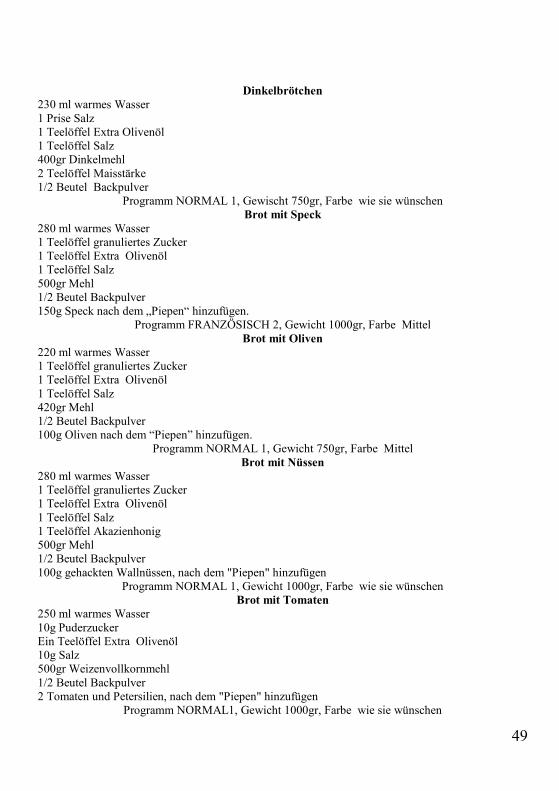
49
Dinkelbrötchen 230 ml warmes Wasser 1 Prise Salz 1 Teelöffel Extra Olivenöl 1 Teelöffel Salz 400gr Dinkelmehl 2 Teelöffel Maisstärke 1/2 Beutel Backpulver
Programm NORMAL 1, Gewischt 750gr, Farbe wie sie wünschen Brot mit Speck
280 ml warmes Wasser 1 Teelöffel granuliertes Zucker 1 Teelöffel Extra Olivenöl 1 Teelöffel Salz 500gr Mehl 1/2 Beutel Backpulver 150g Speck nach dem „Piepen“ hinzufügen.
Programm FRANZÖSISCH 2, Gewicht 1000gr, Farbe Mittel Brot mit Oliven
220 ml warmes Wasser 1 Teelöffel granuliertes Zucker 1 Teelöffel Extra Olivenöl 1 Teelöffel Salz 420gr Mehl 1/2 Beutel Backpulver 100g Oliven nach dem “Piepen” hinzufügen.
Programm NORMAL 1, Gewicht 750gr, Farbe Mittel Brot mit Nüssen
280 ml warmes Wasser 1 Teelöffel granuliertes Zucker 1 Teelöffel Extra Olivenöl 1 Teelöffel Salz 1 Teelöffel Akazienhonig 500gr Mehl 1/2 Beutel Backpulver 100g gehackten Wallnüssen, nach dem "Piepen" hinzufügen
Programm NORMAL 1, Gewicht 1000gr, Farbe wie sie wünschen Brot mit Tomaten
250 ml warmes Wasser 10g Puderzucker Ein Teelöffel Extra Olivenöl 10g Salz 500gr Weizenvollkornmehl 1/2 Beutel Backpulver 2 Tomaten und Petersilien, nach dem "Piepen" hinzufügen
Programm NORMAL1, Gewicht 1000gr, Farbe wie sie wünschen
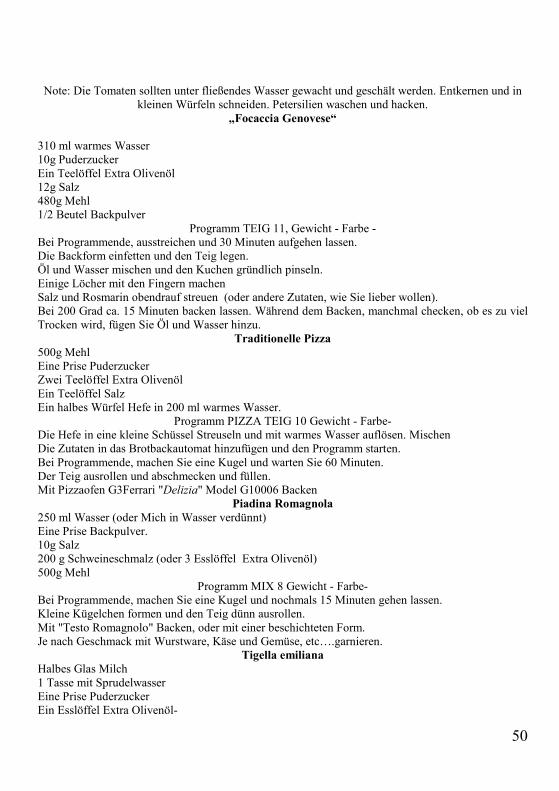
50
Note: Die Tomaten sollten unter fließendes Wasser gewacht und geschält werden. Entkernen und in kleinen Würfeln schneiden. Petersilien waschen und hacken.
„Focaccia Genovese“
310 ml warmes Wasser 10g Puderzucker Ein Teelöffel Extra Olivenöl 12g Salz 480g Mehl 1/2 Beutel Backpulver
Programm TEIG 11, Gewicht - Farbe - Bei Programmende, ausstreichen und 30 Minuten aufgehen lassen. Die Backform einfetten und den Teig legen. Öl und Wasser mischen und den Kuchen gründlich pinseln. Einige Löcher mit den Fingern machen Salz und Rosmarin obendrauf streuen (oder andere Zutaten, wie Sie lieber wollen). Bei 200 Grad ca. 15 Minuten backen lassen. Während dem Backen, manchmal checken, ob es zu viel Trocken wird, fügen Sie Öl und Wasser hinzu.
Traditionelle Pizza 500g Mehl Eine Prise Puderzucker Zwei Teelöffel Extra Olivenöl Ein Teelöffel Salz Ein halbes Würfel Hefe in 200 ml warmes Wasser.
Programm PIZZA TEIG 10 Gewicht - Farbe- Die Hefe in eine kleine Schüssel Streuseln und mit warmes Wasser auflösen. Mischen Die Zutaten in das Brotbackautomat hinzufügen und den Programm starten. Bei Programmende, machen Sie eine Kugel und warten Sie 60 Minuten. Der Teig ausrollen und abschmecken und füllen. Mit Pizzaofen G3Ferrari "Delizia" Model G10006 Backen
Piadina Romagnola 250 ml Wasser (oder Mich in Wasser verdünnt) Eine Prise Backpulver. 10g Salz 200 g Schweineschmalz (oder 3 Esslöffel Extra Olivenöl) 500g Mehl
Programm MIX 8 Gewicht - Farbe- Bei Programmende, machen Sie eine Kugel und nochmals 15 Minuten gehen lassen. Kleine Kügelchen formen und den Teig dünn ausrollen. Mit "Testo Romagnolo" Backen, oder mit einer beschichteten Form. Je nach Geschmack mit Wurstware, Käse und Gemüse, etc….garnieren.
Tigella emiliana Halbes Glas Milch 1 Tasse mit Sprudelwasser Eine Prise Puderzucker Ein Esslöffel Extra Olivenöl-
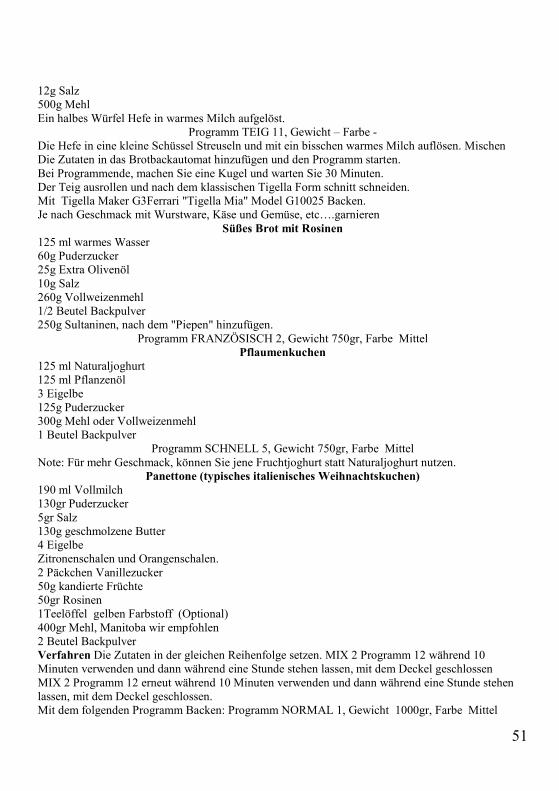
51
12g Salz 500g Mehl Ein halbes Würfel Hefe in warmes Milch aufgelöst.
Programm TEIG 11, Gewicht – Farbe - Die Hefe in eine kleine Schüssel Streuseln und mit ein bisschen warmes Milch auflösen. Mischen Die Zutaten in das Brotbackautomat hinzufügen und den Programm starten. Bei Programmende, machen Sie eine Kugel und warten Sie 30 Minuten. Der Teig ausrollen und nach dem klassischen Tigella Form schnitt schneiden. Mit Tigella Maker G3Ferrari "Tigella Mia" Model G10025 Backen. Je nach Geschmack mit Wurstware, Käse und Gemüse, etc….garnieren
Süßes Brot mit Rosinen 125 ml warmes Wasser 60g Puderzucker 25g Extra Olivenöl 10g Salz 260g Vollweizenmehl 1/2 Beutel Backpulver 250g Sultaninen, nach dem "Piepen" hinzufügen.
Programm FRANZÖSISCH 2, Gewicht 750gr, Farbe Mittel Pflaumenkuchen
125 ml Naturaljoghurt 125 ml Pflanzenöl 3 Eigelbe 125g Puderzucker 300g Mehl oder Vollweizenmehl 1 Beutel Backpulver
Programm SCHNELL 5, Gewicht 750gr, Farbe Mittel Note: Für mehr Geschmack, können Sie jene Fruchtjoghurt statt Naturaljoghurt nutzen.
Panettone (typisches italienisches Weihnachtskuchen) 190 ml Vollmilch 130gr Puderzucker 5gr Salz 130g geschmolzene Butter 4 Eigelbe Zitronenschalen und Orangenschalen. 2 Päckchen Vanillezucker 50g kandierte Früchte 50gr Rosinen 1Teelöffel gelben Farbstoff (Optional) 400gr Mehl, Manitoba wir empfohlen 2 Beutel Backpulver Verfahren Die Zutaten in der gleichen Reihenfolge setzen. MIX 2 Programm 12 während 10 Minuten verwenden und dann während eine Stunde stehen lassen, mit dem Deckel geschlossen MIX 2 Programm 12 erneut während 10 Minuten verwenden und dann während eine Stunde stehen lassen, mit dem Deckel geschlossen. Mit dem folgenden Programm Backen: Programm NORMAL 1, Gewicht 1000gr, Farbe Mittel
52
RIFIUTI APPARECCHIATURE ELETTRICHE ED ELETTRONICHE Al termine del suo periodo di vita, il prodotto va smaltito seguendo le direttive vigenti riguardo alla raccolta differenziata e non deve essere trattato come un normale rifiuto di nettezza urbana. Il prodotto va smaltito presso i centri di raccolta autorizzati allo scopo, o restituito al rivenditore, qualora si voglia sostituire il prodotto con uno equivalente nuovo. Il costruttore si occuperà dello smaltimento del prodotto secondo quanto prescritto dalla legge. Il prodotto è composto di parti non biodegradabili e di sostanze potenzialmente inquinanti per l’ambiente se non correttamente smaltite; altre parti possono essere riciclate. E’ dovere di tutti contribuire alla salute ecologica dell’ambiente seguendo le corrette procedure di smaltimento. Il simbolo mostrato a lato indica che il prodotto risponde ai requisiti richiesti dalle nuove direttive introdotte a tutela dell’ambiente (2002/96/EC, 2003/108/EC, 2002/95/EC) e che deve essere smaltito correttamente al termine del suo periodo di vita. Chiedere informazioni al comune di residenza in merito alle zone dedicate allo smaltimento dei rifiuti. Chi non smaltisce il prodotto nel modo indicato in questo paragrafo ne risponde secondo le leggi vigenti. Se il prodotto è di piccole dimensioni (dimensioni esterne inferiori a 25cm) è possibile riportare il prodotto al rivenditore senza obbligo di nuovo acquisto.
WASTE OF ELECTRIC AND ELECTRONIC EQUIPMENT The product is made of non-biodegradable and potentially polluting substances if not properly disposed of; other parts can be recycled. It’s our duty to contribute to the ecological health of the environment following the correct procedures for disposal. The crossed out wheelie bin symbol indicates the product complies with the requirements of the new directives introduced to protect the environment (2002/96/EC, 2003/108/EC, 2002/95/EC) and must be properly disposed at the end of its lifetime. If you need further information, ask for the dedicated waste disposal areas at your place of residence. Who does not dispose of the product as specified in this section shall be liable according to the law.
RESÍDUOS DE APARELHIOS ELÉCTRICOS E ELÉCTRÓNICOS O aparelho é composto de algumas partes não biodegradáveis e de substâncias potencialmente tóxicas para o ambiente, se não forem correctamente eliminadas; outras partes podem ser recicladas. É dever de todos contribuir para a saúde ecológica do ambiente. Observando os correctos procedimentos de eliminação. O símbolo mostrado ao lado indica que o aparelho responde aos requisitos exigidos pelas novas directivas introduzidas pela tutela do ambiente (2002/96/EC, 2003/108/EC, 2002/95/EC) e que deve ser eliminado correctamente no final do seu período de vida. Peça informações na câmara municipal da sua área de residência, se precisar de saber a localização dos centros de recolha deste tipo de resíduos. Quem não eliminar o aparelho do modo indicado neste parágrafo responde segundo as leis em vigor.
RESIDUOS DE APARATOS ELÉCTRICOS Y ELECTRÓNICOS El producto está hecho de sustancias no biodegradables y potencialmente contaminantes si no se desechan adecuadamente, otras partes pueden ser recicladas. Es nuestro deber de contribuir a la salud ecológica del medio ambiente siguiendo los procedimientos adecuados para su eliminación. El contenedor tachado símbolo indica que el producto cumple con los requisitos de las nuevas directivas adoptadas para proteger el medio ambiente (2002/96/CE, 2003/108/CE, 2002/95/CE) y debe desecharse adecuadamente al final de su vida útil. Si necesita más información, pregunte por las áreas de disposición de residuos dedicados a su lugar de residencia. Quién no disponer del producto como se especifica en esta sección será responsable conforme a la ley.
ENTSORGUNG VON ELEKTRO- UND ELEKTRONIKALTGERÄTEN Das Symbol auf der rechten Seite zeigt, dass das Gerät den Anforderungen der neuen Richtlinien entspricht, die eingeführt wurden, um die Umwelt zu schützen (2002/96/EG, 2003/108/EG, 2002/95/EG), und ordnungsgemäß am Ende seiner Lebensdauer entsorgt werden muss. Erkundigen Sie sich an Ihrem Wohnort, wo sich entsprechende Deponien für die Entsorgung von Elektroschrott befinden. Wenn Sie das Gerät nicht gemäß den in diesem Absatz genannten Vorschriften entsorgen, haften Sie nach den gesetzlichen Bestimmungen.

53
Per conoscere l'assistenza più vicina a Voi, o richiedere questo manuale in formato
elettronico, contattare il numero di telefono 0541/694246, fax 0541/756430, o l'indirizzo E-
Mail [email protected] e chiedere del responsabile Centri Assistenza.
To find the nearest service center, please call the telephone number 0541 694246, fax
number 0541 756430 or contact us at [email protected] asking for the service
centers supervisor.
La TREVIDEA S.r.l. si riserva il diritto di apportare a questi apparecchi
modifiche ELETTRICHE - TECNICHE - ESTETICHE e/o sostituire parti senza
alcun preavviso, ove lo ritenesse più opportuno, per offrire un prodotto
sempre più affidabile, di lunga durata e con tecnologia avanzata.
TREVIDEA S.r.l. si scusa inoltre per eventuali errori di stampa.
L'apparecchio è conforme ai requisiti richiesti dalle direttive dell'Unione
Europea ed è pertanto marcato con il marchio CE
Appliance is conform to the pertinent European regulation and is
therefore marked with the CE mark.
www.g3ferrari.it TREVIDEA S.r.l.
TREVIDEA S.R.L. – Strada Consolare Rimini – San Marino n. 62 – 47924 –
RIMINI (RN) - ITALY
MADE IN CHINA