isometric drawing for dvd - jmcintyre -...
TRANSCRIPT
©2008 by Teacher to Teacher Press www.t t tpress.com (530) 547-4687
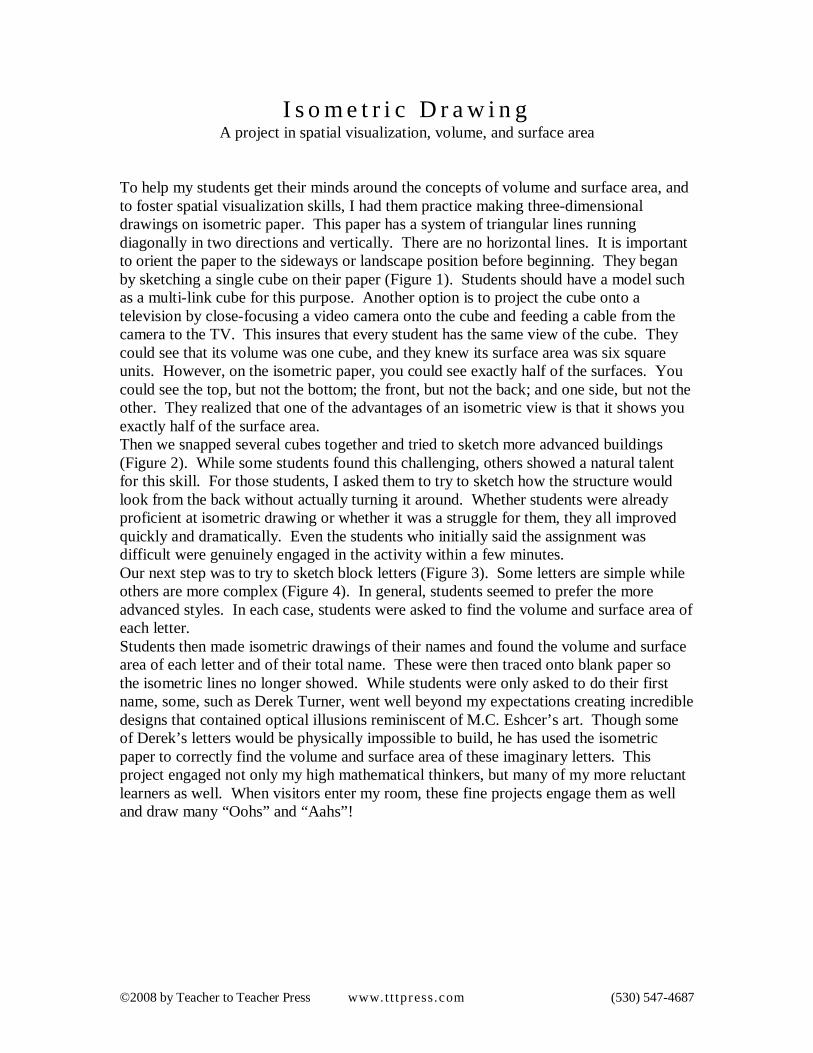
I s o m e t r i c D r a w i n gA project in spatial visualization, volume, and surface area
To help my students get their minds around the concepts of volume and surface area, andto foster spatial visualization skills, I had them practice making three-dimensionaldrawings on isometric paper. This paper has a system of triangular lines runningdiagonally in two directions and vertically. There are no horizontal lines. It is importantto orient the paper to the sideways or landscape position before beginning. They beganby sketching a single cube on their paper (Figure 1). Students should have a model suchas a multi-link cube for this purpose. Another option is to project the cube onto atelevision by close-focusing a video camera onto the cube and feeding a cable from thecamera to the TV. This insures that every student has the same view of the cube. Theycould see that its volume was one cube, and they knew its surface area was six squareunits. However, on the isometric paper, you could see exactly half of the surfaces. Youcould see the top, but not the bottom; the front, but not the back; and one side, but not theother. They realized that one of the advantages of an isometric view is that it shows youexactly half of the surface area.Then we snapped several cubes together and tried to sketch more advanced buildings(Figure 2). While some students found this challenging, others showed a natural talentfor this skill. For those students, I asked them to try to sketch how the structure wouldlook from the back without actually turning it around. Whether students were alreadyproficient at isometric drawing or whether it was a struggle for them, they all improvedquickly and dramatically. Even the students who initially said the assignment wasdifficult were genuinely engaged in the activity within a few minutes.Our next step was to try to sketch block letters (Figure 3). Some letters are simple whileothers are more complex (Figure 4). In general, students seemed to prefer the moreadvanced styles. In each case, students were asked to find the volume and surface area ofeach letter.Students then made isometric drawings of their names and found the volume and surfacearea of each letter and of their total name. These were then traced onto blank paper sothe isometric lines no longer showed. While students were only asked to do their firstname, some, such as Derek Turner, went well beyond my expectations creating incredibledesigns that contained optical illusions reminiscent of M.C. Eshcer’s art. Though someof Derek’s letters would be physically impossible to build, he has used the isometricpaper to correctly find the volume and surface area of these imaginary letters. Thisproject engaged not only my high mathematical thinkers, but many of my more reluctantlearners as well. When visitors enter my room, these fine projects engage them as welland draw many “Oohs” and “Aahs”!
©2008 by Teacher to Teacher Press www.t t tpress.com (530) 547-4687
Figure 1
Figure 2
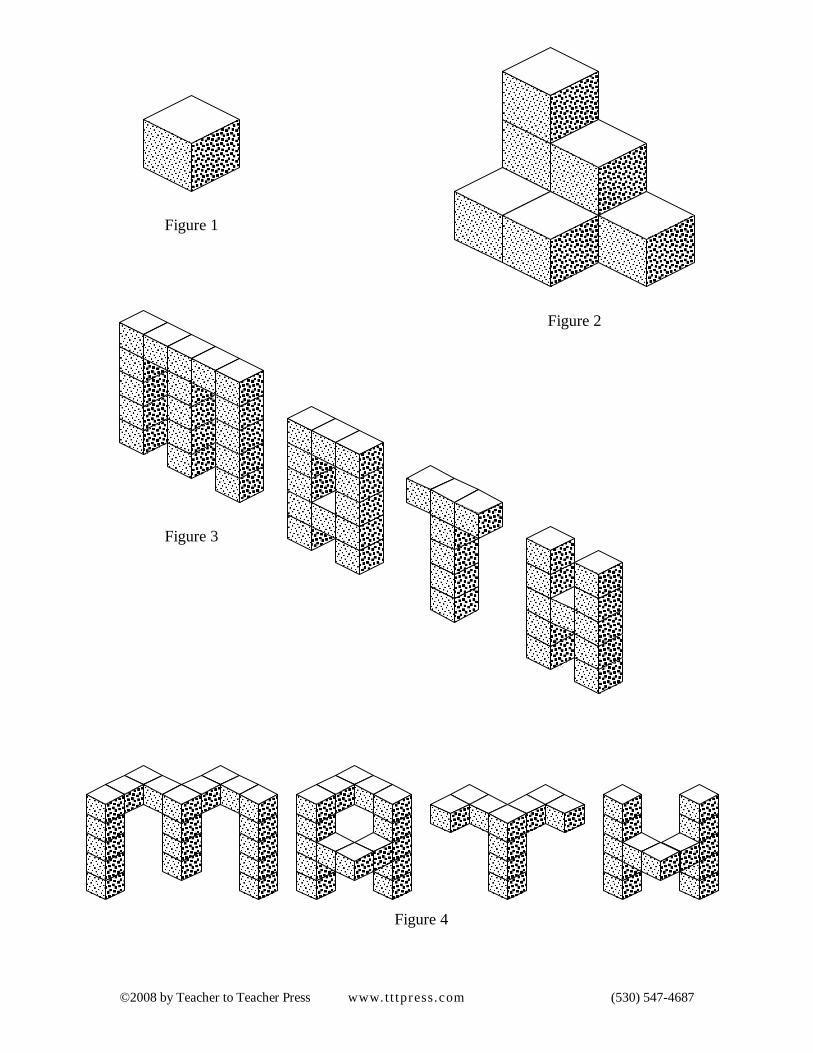
Figure 3
Figure 4
©2008 by Teacher to Teacher Press www.t t tpress.com (530) 547-4687
*
*
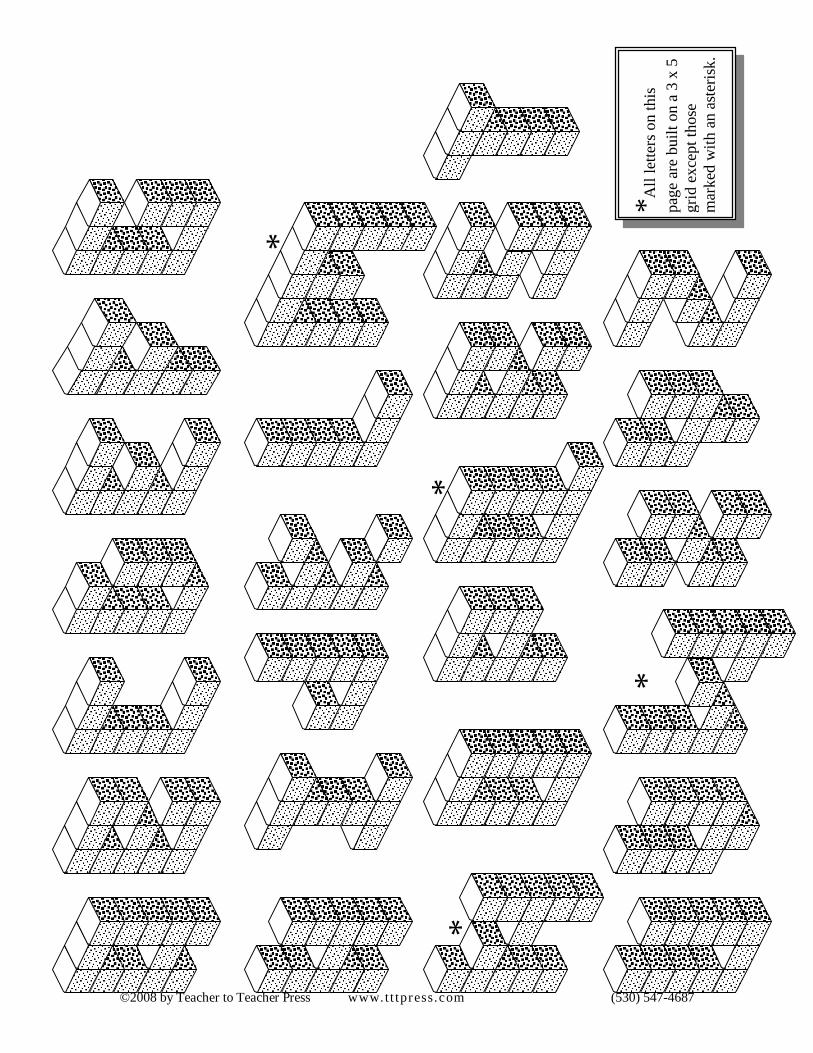
*All
lette
rs o
n th
ispa
ge a
re b
uilt
on a
3 x
5gr
id e
xcep
t tho
sem
arke
d w
ith a
n as
teris
k.
*
*
©2008 by Teacher to Teacher Press www.t t tpress.com (530) 547-4687
©2008 by Teacher to Teacher Press www.t t tpress.com (530) 547-4687
TOP
Nam
e___
____
____
____
____
____
____
ISO
MET
RIC
DR
AW
ING
PA
PER