intra-operative thoracoscopic assisting techniques · intra-operative thoracoscopic assisting...
TRANSCRIPT

Intra-Operative Thoracoscopic
Assisting Techniques S.Scott Balderson PA-C
Clinical Instructor, Duke Surgical Physician Assistant Residency
Division of Thoracic Surgery
Thoracic Oncology Program
Duke Comprehensive Cancer Center
Duke University Medical Center
Durham, NC

Disclosures
Covidien Consultant
W.L. Gore Consultant

AKA: How to Help Your Surgeon
Overcome The Learning Curve
Barriers to Adoption
– Qualified Assistance
– Specific Equipment
– Specific Instruments

Objectives
Thoracoscopic Case Preparation
– Team, Equipment and Instruments, Positioning
– Equipment
– Instruments
– Positioning
Thoracoscopic Assisting Techniques
– The Camera Pilot
– Tricks of the trade
– helpful thoracoscopic assisting maneuvers

Basic Concepts in VATS
Best results with a dedicated team
Visualization is an important key to success
– Difficult angles
– Multiple instruments through the same incision
– High rent district

Basic Concepts in VATS
No insufflation needed
– Ribs maintain the workspace once the lung is
collapsed
No ports needed
– Only one port is usually used for the camera
– Allows multiple instruments per incision
Incision Placement is critical
– Ribs limit motion of the camera
• Too much torque on ribs will cause post-op neuropathic
pain

The Thoracoscopic Lobectomy Team
Surgeon
Camera Pilot
– Goal is seamless view with minimal communication and
correction by the surgeon
Scrub tech
– Should know the instruments and backup plans (sponge stick)
– Should aspire to familiarize with the intended steps and
common maneuvers of the procedure
• Sxn-disecting clamp-sxn-stapler
Circulator
– Should know the types of staple loads used and where to find
them quickly
– Support Personnel who are familiar with ordering procedures

Building a Team
Consistency
– Consistent assistants are more important than the
level of training
• Partner, Resident, Physician Assistant, Nurse, Scrub Tech
– However, the higher the level of training and/or
experience, the better the procedural insight,
understanding of thoracic anatomy, etc.
– Ex. Understanding the difference between a PTX vs
Tension PTX

Building a Team
Communication
– Clarify the names of instruments
• Often local names
– “long curved empty”
– “Scanlan clamp”
– Clairity is essential among Surgeon, Scrub,
Circulator and First Assist (Camera Pilot)
– Over time the surgeon and camera pilot should
develop a language that quickly and efficiently
communicates the needs of the surgeon
– “ The Sterile Cockpit”

The First Assistant = Camera Pilot
What to look for in a Camera Pilot
– Interest in minimally invasive surgery
• Passion, patience, reverence (root word of passion is..)
– Experience in thoracic surgery
– Willingness to learn thoracoscopic anatomy
• (hilar perspective as opposed to “fissure” perspective)
– Knowledge of instrumentation
– Knowledge of equipment
– A resonant appreciation for the technical contribution to the
case
Of the above only Interest is mandatory the rest can be
learned and developed

Camera Pilot
Poor Camera operation can make for a
painfully long case
– When the scope has to be removed to be cleaned
– When the pilot has difficulty reintroducing the
scope into a complex hemithorax
• Smudge
• Reproducing the a consistent view in scope angle and
horizon
Poor Camera operation can impact the safety
of a case
– If the surgeon cannot visualize……

Camera Operations
Camera Pilot needs a working knowledge of the
function of the camera/scope/monitors
– Proper use of 30 degree, flexible tip or other scope
optimizes the surgeon’s view
– In the HD world it is VERY IMPORTANT to
understand how the technology functions and what
the technological implications are for the surgeon.
• Ex. Low light = grainy picture = loss of resolution= loss of
ability to visualize planes…
– Helpful in troubleshooting

Camera Operations
Camera Pilot should understand the steps for
the intended procedure
– Allows anticipation of the surgeon’s next move
The camera view is very much a dance, the
surgeon must be allowed to move within the
frame as opposed to being led.
– The pilot must know (or ask) what should be in the
center of the screen (instrument, structure etc)
Goal is for the only perception of movement on
the monitor to be the maneuvers of the surgeon
The Pilot must come to appreciate the value
and contribution of controlling the surgeon’s
eyes

Thoracoscopic Equipment

Thoracoscopic Equipment

Thoracoscopic Equipment- Storz

Thoracoscopic Equipment- Storz
Thoracoscope - Design
ALL Thoracoscopes are VERY fragile.
10lbs of force will break a 10mm scope
– The weight of the camera alone can damage the
outside casing
– A dent in the casing means that light fibers can be
broken.
– Think of the times where you THINK the scope is in
focus but it is not in certain areas of the field.
3lbs of force will snap a 5 mm scope
– Will bow 20 degrees before resistance can be
detected

Thoracoscope Design

Thoracoscopic Equipment - Olympus

Thoracoscopic Equipment- Olympus

Thoracoscopic Equipment- Olympus

Beware Scope Damage

Determining the damaged scope

Chipped Distal Lens

Broken Light Fibers

Rod Lens No Longer Lines Up
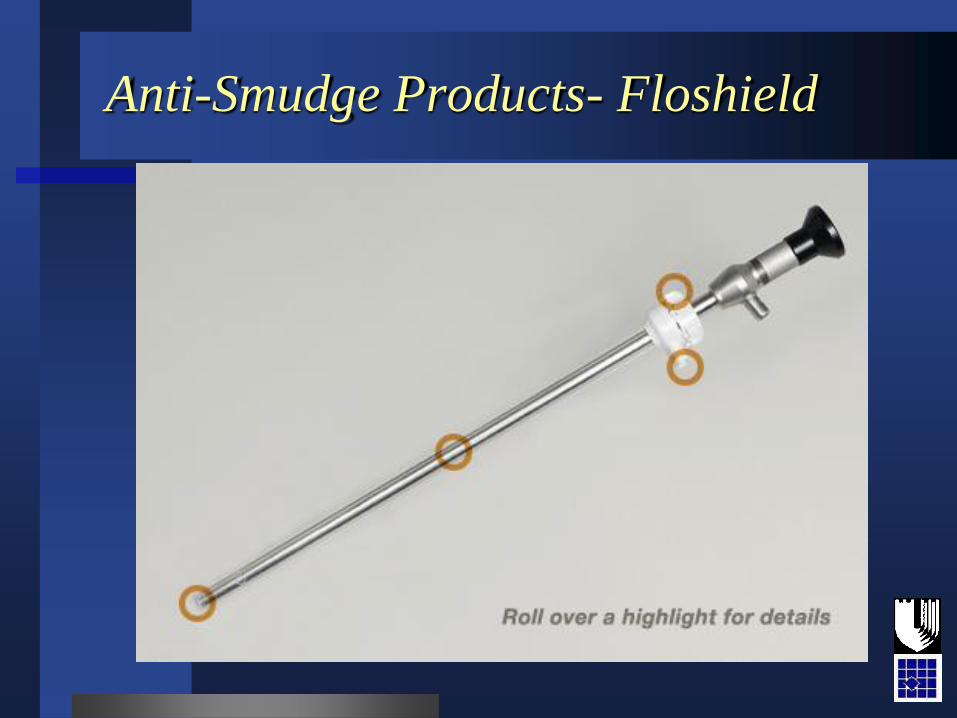
Anti-Smudge Products- Floshield

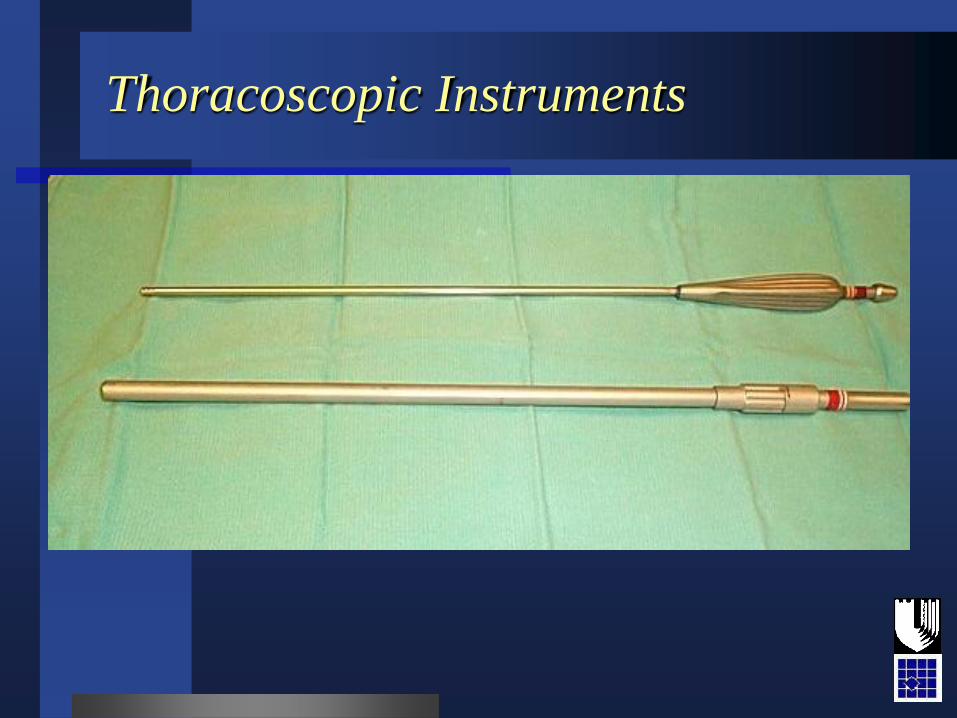
Thoracoscopic Instruments

Thoracoscopic Instruments

Thoracoscopic Instruments- Scanlan

Thoracoscopic Instruments
Thoracoscopic Instruments

Thoracoscopic Instruments- Wexler

Thoracoscopic Instruments-
Covidien

Thoracoscopic Instruments-
Covidien
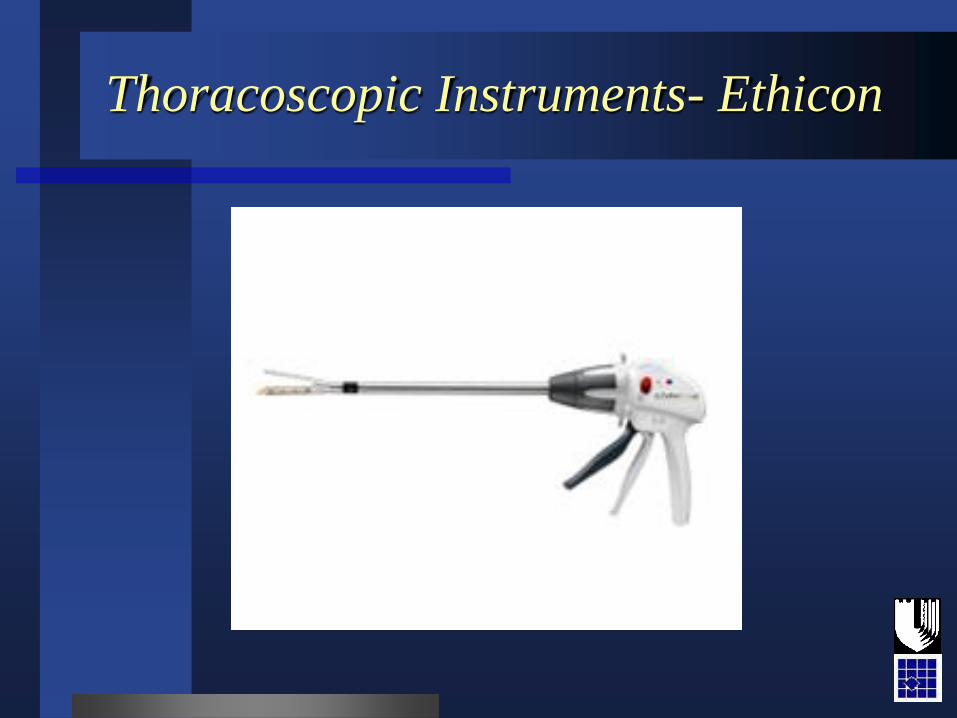
Thoracoscopic Instruments- Ethicon

Patient positioning- Bean Bag

Patient Positioning
Standard lateral decubitis position
– Flex the bed
• Helps keep the camera from hitting the hip which limits
camera angles
– Slightly posteriorly rotated
• Makes the anterior incision a little easier to access

Patient Positioning- Bean Bag

Patient Positioning- Secure Strap
Location (Anterior)

Patient Positioning- Stability
Posterior

Patient Positioning- Secure to Table

Patient Positioning- Table Break
(flex)

Patient Positioning- Axilla and
Securing Arms

Patient Positioning- Axilla

Incisions
Two incisions will allow almost any operation
– 10 mm camera port
• 7th or 8th intercostal space, posterior axillary line
– 3-4 cm anterior access incision
• 4th or 5th intercostal space, anterior axillary line

Patient Positioning- Marking
Incision

Putting it all together to start a case
Consistent approach is an operative strategy
Use of a consistent patient position and
incisions provides consistent exposure for the
surgeon
Consistent exposure, regardless of the planned
anatomic resection, provides the surgeon a
familiar field to develop consistent maneuvers
Beware the theory of triangulation etc.
Predictable and Consistent angles of approach
and retraction are key to a successful
procedure

Part 2
Tricks

Camera Operations
There must be a clear method of
communicating the visual (exposure) needs of
the surgeon as:
The pilot has three perspectives to maintain:
the focal length, camera head rotation and the
scope angle.

Camera Operations
Focal Length
A depth of field must be developed
– Facilitates depth perception
– Close but not too close
• If too close, the camera can affect the instrument angles
available to the surgeon
• A tight focal length can be helpful during delicate
dissection but hurtful for frame of reference
– Anticipate when to pan in and out
• Understanding the action being performed
– Adjusting retraction vs. fine dissection on the artery

Focal length- loss of reference

Focal Length – reference
(the power of panning out 2cm!!)

Camera Operations
Camera head rotation controls:
Horizon • Refers to the structure on which the camera view is based.


Camera Operations
– Third control is the barrel of the light cord
which controls the scope angle (exception:
Olympus)
– Clock face
• Refers to the barrel of the light cord on
the scope relative to the position of the
hour hand on a clock
• Functionally, this reference can allow the
surgeon to request a different angle
without having to reach across to adjust
the scope angle.


Camera Operations
Together the focal length, horizon and scope
angle facilitate visual feedback to create as
close to a three dimensional view as possible
Optimizing these controls also minimize the
incidence of intercostal nerve irritation
– Beware intercostal compression injury
– 10mm vs 5mm scope – fragility


Duke beats UNC!!!