intermec ethernet adapter
TRANSCRIPT

Intermec Ethernet Adapter
P/N 068748-004
Installation Guide
Intermec Technologies Corporation6001 36th Avenue WestP.O. Box 4280Everett, WA 98203-9280
U.S. service and technical support: 1.800.755.5505U.S. media supplies ordering information: 1.800.227.9947
Canadian service and technical support: 1.800.688.7043Canadian media supplies ordering information: 1.800.268.6936
Outside U.S. and Canada: Contact your local Intermec servicesupplier.
The information contained herein is proprietary and is provided solelyfor the purpose of allowing customers to operate and/or serviceIntermec manufactured equipment and is not to be released,reproduced, or used for any other purpose without written permission ofIntermec.
Information and specifications in this manual are subject to changewithout notice.
1998-1999 by Intermec Technologies CorporationAll Rights Reserved
The word Intermec, the Intermec logo, JANUS, IPL, TRAKKER,Antares, Adara, Duratherm, EZBuilder, EasyCoder, Precision Print,PrintSet, Virtual Wedge, and CrossBar are either trademarks orregistered trademarks of Intermec.
Throughout this manual, trademarked names may be used. Rather thanput a trademark ( or ) symbol in every occurrence of a trademarkedname, we state that we are using the names only in an editorial fashion,and to the benefit of the trademark owner, with no intention ofinfringement.

iii
ContentsOverview of the Ethernet Adapter 5
Connecting the External Ethernet Adapter toYour Printer 7
Downloading the IP Address 9
Installing for a Macintosh Network 11
Installing for a NetWare Network 12Using NDPS or AXIS NetPilot to Install the
Ethernet Adapter 12Setting Up Print Queues and Advanced Operating
Parameters 13
Installing for a UNIX Network 14
Installing for a Windows Network 16Windows 95, 98, and NT 17Windows 3.1 and Windows for Workgroups 17Windows Clients Using LANtastic 19Printing From a Windows Network 19
Installing for an OS/2 Network 19
Configuring the Centronics Interface Timing 21
Web Management 22

5
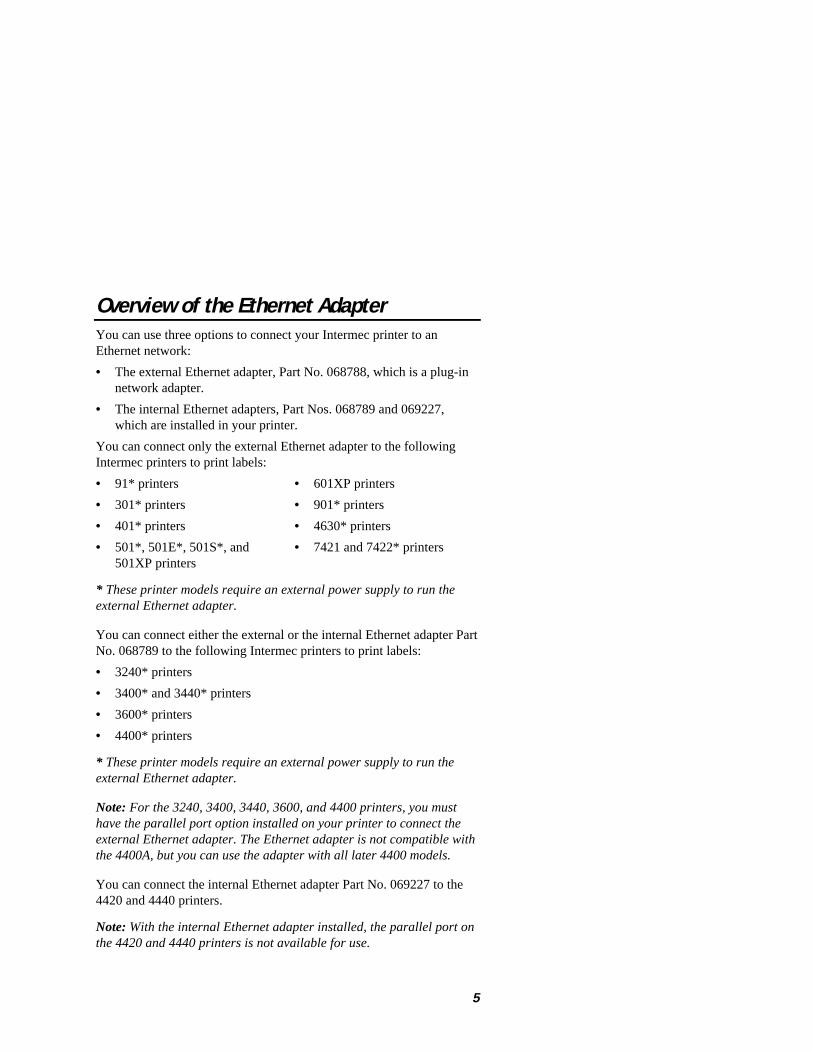
Overview of the Ethernet AdapterYou can use three options to connect your Intermec printer to anEthernet network:
• The external Ethernet adapter, Part No. 068788, which is a plug-innetwork adapter.
• The internal Ethernet adapters, Part Nos. 068789 and 069227,which are installed in your printer.
You can connect only the external Ethernet adapter to the followingIntermec printers to print labels:
• 91* printers • 601XP printers
• 301* printers • 901* printers
• 401* printers • 4630* printers
• 501*, 501E*, 501S*, and501XP printers
• 7421 and 7422* printers
* These printer models require an external power supply to run theexternal Ethernet adapter.
You can connect either the external or the internal Ethernet adapter PartNo. 068789 to the following Intermec printers to print labels:
• 3240* printers
• 3400* and 3440* printers
• 3600* printers
• 4400* printers
* These printer models require an external power supply to run theexternal Ethernet adapter.
Note: For the 3240, 3400, 3440, 3600, and 4400 printers, you musthave the parallel port option installed on your printer to connect theexternal Ethernet adapter. The Ethernet adapter is not compatible withthe 4400A, but you can use the adapter with all later 4400 models.
You can connect the internal Ethernet adapter Part No. 069227 to the4420 and 4440 printers.
Note: With the internal Ethernet adapter installed, the parallel port onthe 4420 and 4440 printers is not available for use.

6
Use the following illustrations to familiarize yourself with the externalor internal Ethernet adapter.
External Ethernet Adapter
10BaseTconnector
Externalpowersupplyconnector
PowerLED
Network LED
Parallel port connector
Test button
AXISI.001
+
Internal Ethernet Adapter
O
I
NetworkLED
PowerLED
Test button
10BaseTconnector
AXISI.002
7
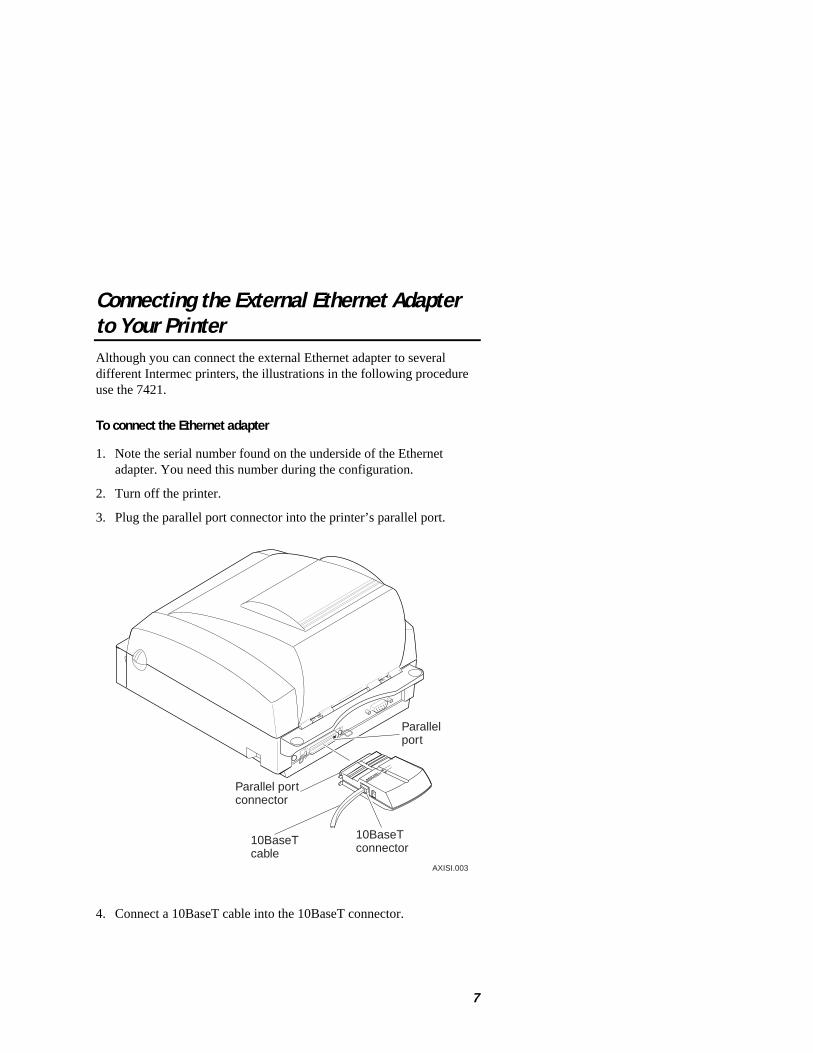
Connecting the External Ethernet Adapterto Your PrinterAlthough you can connect the external Ethernet adapter to severaldifferent Intermec printers, the illustrations in the following procedureuse the 7421.
To connect the Ethernet adapter
1. Note the serial number found on the underside of the Ethernetadapter. You need this number during the configuration.
2. Turn off the printer.
3. Plug the parallel port connector into the printer’s parallel port.
AXISI.003
10BaseTconnector
Parallelport
Parallel portconnector
10BaseTcable
4. Connect a 10BaseT cable into the 10BaseT connector.
8
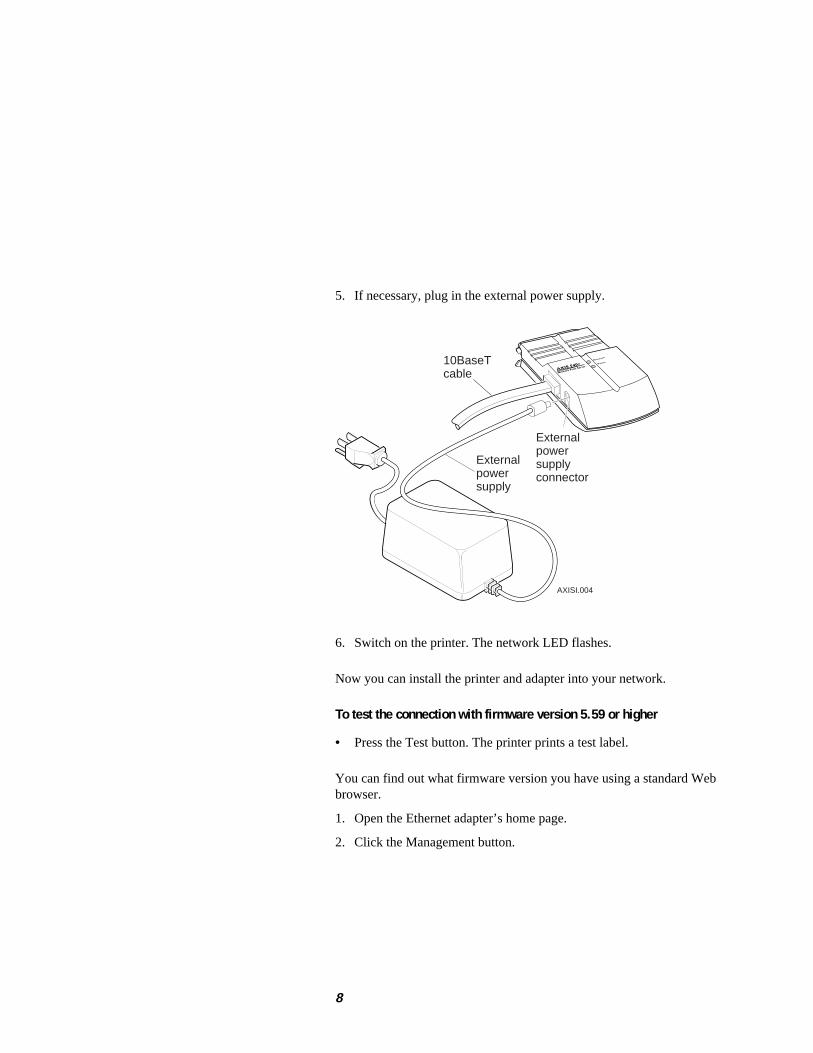
5. If necessary, plug in the external power supply.
AXISI.004
10BaseTcable
External powersupplyconnector
Externalpowersupply
6. Switch on the printer. The network LED flashes.
Now you can install the printer and adapter into your network.
To test the connection with firmware version 5.59 or higher
• Press the Test button. The printer prints a test label.
You can find out what firmware version you have using a standard Webbrowser.
1. Open the Ethernet adapter’s home page.
2. Click the Management button.
9
To test the connection with a firmware version lower than 5.59
Note: Data Line Print mode is available on the following printermodels: 3240, 3400, 3440, 3600, 4400, 4420, and 4440.
1. Turn off your printer.
2. Press and hold the Feed/Pause button while you turn on the printer.The printer prints the hardware configuration test label.
3. Release the Feed/Pause button. The printer is now in Data LinePrint mode.
4. Press and release the Test button on the Ethernet adapter. Theprinter prints each character with its hexadecimal equivalentunderneath.
5. To enter normal Print mode, turn the printer power off and then onagain.
Downloading the IP AddressThis section explains how to use ARP (address resolution protocol) todownload the IP address to the Ethernet adapter. For other methods ofdownloading the IP address, see the Intermec Ethernet Adapter User’sManual (Part No. 068749).
Note: Do not use the example IP address when installing your Ethernetadapter. Always consult your network administrator before assigningan IP address.
To download the IP address for Windows
1. Start a DOS window.
2. Type the following command:
arp -s nnn.nnn.n.nnn nn-nn-nn-nn-nn-nn
ping nnn.nnn.n.nnn
arp -d nnn.nnn.n.nnn
where:
nnn.nnn.n.nnn is the IP address for the Ethernet adapter
nn-nn-nn-nn-nn-nn is the Ethernet address for the Ethernet adapter
10
Example:
arp -s 192.168.3.191 00-40-8c-10-00-86
ping 192.168.3.191
arp -d 192.168.3.191
The host will return Reply from 192.168.3.191 ... or asimilar message. This reply indicates that the address has been set andcommunications established.
To download the IP address in a UNIX environment
• Type the following command:
arp -s host_name nn:nn:nn:nn:nn:nn temp
ping host_name
where:
host_name is the name mapped to the Ethernet adapter’sIP address.
nn:nn:nn:nn:nn:nn is the Ethernet address for the adapter.
Example:
arp -s npsname 00:40:8c:10:00:86 temp
ping npsname
The host will return npsname is alive or a similar message. Thismessage indicates that the address has been set and communicationsestablished.
When you execute the ping command for the first time, you mayexperience a longer response time than is usual.
The ARP command can vary between different UNIX systems.Berkeley System Distribution (BSD) type systems expect the host nameand node address in reverse order. Furthermore, IBM AIX systemsrequire the additional argument ether. For example:
arp -s ether host name 00:40:8c:10:00:86 temp
11
Installing for a Macintosh Network
Note: You need to supply a printer driver or a network compatibleapplication to work with the Intermec printers.
To install for a Macintosh network
1. Open the Chooser window by selecting Chooser in the Apple menu.
2. Click on your printer driver icon.
3. If your network has more than one zone, click the name of thedefault zone.
4. Click the name of the printer you want. The default printer name isshown as:
AXISnnnnnn_port
where:nnnnnn is the last six digits of the serial number.
port is LPT1.
For example: AX540B35_LPT1
5. Click the close box.
The AppleTalk Configuration is now complete. Repeat this procedurefor each Macintosh that will print to the Intermec printer.
To choose a printer to print
1. Select Chooser in the Apple menu.
2. Click on your printer driver icon.
3. If your network has more than one zone, click the default zone.
4. Click the name of the printer you want.
5. Click the close box. You may now print from the application asnormal.

12
Installing for a NetWare NetworkThis section covers the following:
• Using Novell Distributed Print Services (NDPS) or AXISNetPilot to install the Ethernet adapter
• Setting up print queues and advanced operating parameters
Using NDPS or AXIS NetPilot to Install theEthernet AdapterWhen installing your Ethernet adapter into a NetWare network, youhave three options:
• Install your Ethernet adapter using NDPS for a public accessprinter.
• Install your Ethernet adapter using NDPS for a controlled accessprinter.
• Install your Ethernet adapter using AXIS NetPilot.
If you are using NDPS, you must install the HP Gateway together withNDPS on your file server. Otherwise you must install your Ethernetadapter with the AXIS NetPilot Installation Wizard.
To install an Ethernet adapter in a NetWare network using NDPS(public access printer)
1. Make sure that the HP Gateway is configured to automaticallycreate a public access printer.
2. Connect the Ethernet adapter to the NetWare network, if it is notalready connected.
The HP Gateway automatically creates a public access printer. Any usercan access this printer.
To install an Ethernet adapter in a NetWare network using NDPS(controlled access printer)
1. Make sure that the HP Gateway is not configured to automaticallycreate a public access printer.
13
2. Connect the Ethernet adapter to the NetWare network, if it is notalready connected.
3. Use the NetWare Administrator to create an NDPS printer as anobject in the directory.
As a directory object, access to the NDPS printer is controlled. It is notavailable as a public access printer.
To install an Ethernet adapter in a NetWare network usingAXIS NetPilot
Note: AXIS NetPilot software requires a Windows platform that usesNetWare or NetBIOS/NetBEUI.
1. Load the AXIS NetPilot software. For help, see the IntermecEthernet Adapter User’s Manual.
2. After loading the software, double-click on the AXIS NetPilot icon.AXIS NetPilot then scans the network for all connected Ethernetadapters. Ethernet adapters previously installed using the AXISNetPilot appear as Network Print Servers and uninstalled units arelisted as New Axis Units.
3. Select your Ethernet adapter from the New Axis Units sub-folderand then click the Install icon. The Installation Wizard guides youthrough the basic installation.
Click the Help icon if you need help during the installation procedure.
After AXIS NetPilot finishes configuring the Ethernet adapter, waitabout one minute before trying to communicate with the Ethernetadapter.
Setting Up Print Queues and Advanced OperatingParameters
To set up print queues
1. Open the Network Print Servers folder and then select the networkprint server you want to set up.
14
2. Choose Network from the Toolbar or Setup menu. A new Networkenvironments window opens. From this window, you may createnew print queues, connect to previously established queues, andselect the mode of operation (Print Server or Remote Printer) foreach printer.
To set up the advanced operating parameters
1. Open the Network Print Servers folder and select the Network PrintServer you want to set up.
2. Choose Properties from the Toolbar or Setup menu.
A set of tabbed Property Pages opens that allows you to refine thechosen mode of operation, such as password protection, frame typeselection, or the queue polling interval.
The NetWare configuration is now complete.
To verify that the Ethernet adapter is functioning correctly, you shouldprint a label from within a Windows application, such as MicrosoftWord. When you select Print from the File menu, make sure that yourIntermec printer is selected as the Active Printer.
Installing for a UNIX Network
Note: You must have UNIX root privileges for this configurationprocedure.
To install for a UNIX network
1. Acquire an unused IP address from your Network Administrator andchoose a unique name for the Ethernet adapter.
2. Add your Ethernet adapter IP address and host name to your systemhost table by adding the following line to the /etc/hosts file:
IP_address host_name
Example:
192.36.253.96 salesdept
3. Update your alias name databases (YP/NIS).

15
4. Perform the following commands to download the IP address andverify correct Internet communication:
arp -s host_name node_address temp
ping host_name
where:
host_name is the name assigned to your Ethernet adapter.node_address is the serial number of the Ethernet adapter.
Example:
arp -s salesdept 00:40:8c:10:00:86 temp
ping salesdept
5. Log in to the Ethernet adapter and upload the axinstall script.
Example:
>ftp salesdept
Name (salesdept:thomas): root
Password: pass (not visible)
ftp> get axinstall
ftp> bye
6. Execute the script sh axinstall .
The display dialog will then guide you through the installation ofline printer daemon (LPD), file transfer protcol (FTP), or PROSonto your UNIX system.
The UNIX configuration is now complete.
Note: The node address is based on the serial number of the Ethernetadapter, but you can make the node address a locally administratedaddress. To set the IP address, you can use the dynamic hostconfiguration protocol (DHCP), reverse address resolution protocol(RARP), or bootstrap protocol (BOOTP) commands. For help, see theIntermec Ethernet Adapter User’s Manual (Part No. 068749).
16
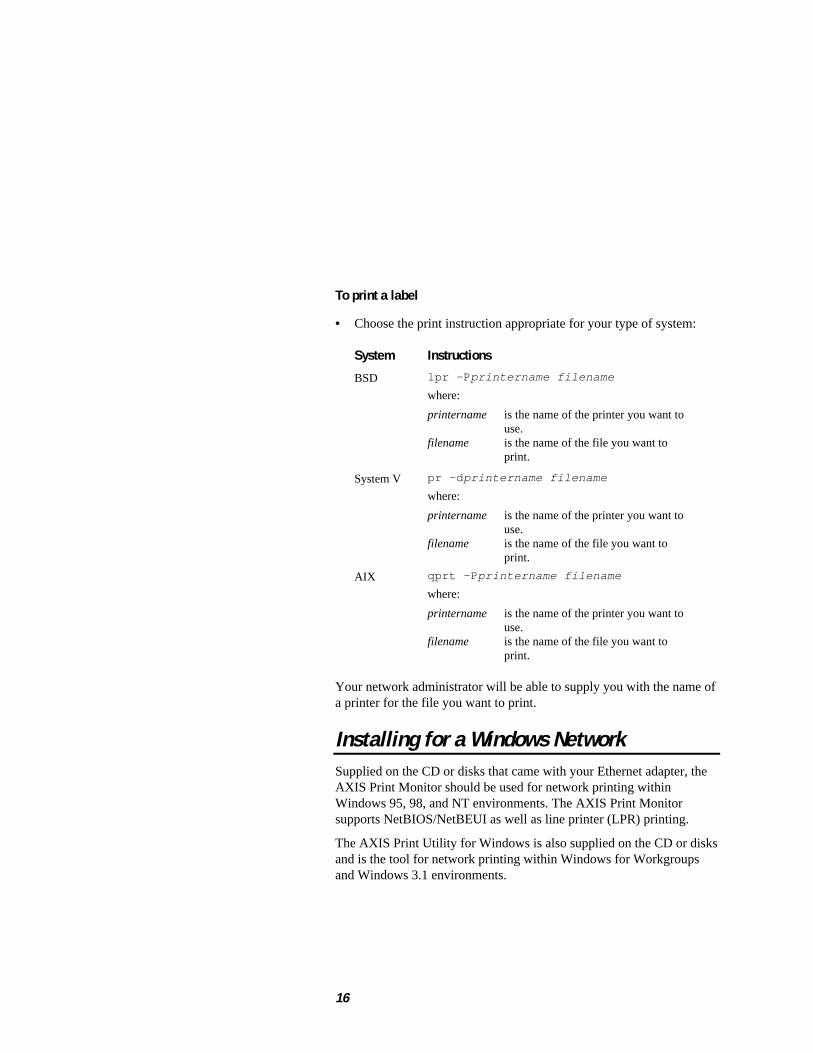
To print a label
• Choose the print instruction appropriate for your type of system:
System Instructions
BSD lpr -P printername filename
where:
printername is the name of the printer you want to use.
filename is the name of the file you want to print.
System V pr -d printername filename
where:
printername is the name of the printer you want to use.
filename is the name of the file you want to print.
AIX qprt -P printername filename
where:
printername is the name of the printer you want to use.
filename is the name of the file you want to print.
Your network administrator will be able to supply you with the name ofa printer for the file you want to print.
Installing for a Windows NetworkSupplied on the CD or disks that came with your Ethernet adapter, theAXIS Print Monitor should be used for network printing withinWindows 95, 98, and NT environments. The AXIS Print Monitorsupports NetBIOS/NetBEUI as well as line printer (LPR) printing.
The AXIS Print Utility for Windows is also supplied on the CD or disksand is the tool for network printing within Windows for Workgroupsand Windows 3.1 environments.
17
Windows 95, 98, and NTAlthough the AXIS Print Monitor user dialog varies slightly betweenWindows 95, 98, and NT, the functionality is exactly the same.
To install an Ethernet adapter for a Windows 95, 98, or NT network
Note: The AXIS Print Monitor needs to be installed on eachworkstation performing peer-to-peer printing. The AXIS Print Monitoris not needed on the client platforms for client/server printing.
1. Start the Add Printer Wizard by selecting Settings then Printersfrom the Start Menu and double-clicking on the Add Printer icon.
2. Select Local Printer (Windows 95 and 98) or My Computer(Windows NT).
3. Click OK.
4. Follow the rest of the Add Printer Wizard’s instructions to performthe remaining steps of the installation process.
If you want to install a printer to a new LPR port, refer to the IntermecEthernet Adapter User’s Manual (Part No. 068749).
Windows 3.1 and Windows for WorkgroupsFor peer-to-peer printing, all Windows 3.1 and Windows forWorkgroups users requiring access to a network printer need to installthe AXIS Print Utility for Windows onto their workstations. Peer-to-peer printing does not require a file server and is recommended forsmaller networks.
Client/server printing is suitable for larger networks and requires onlyone user to install the AXIS Print Utility for Windows software ontotheir workstation.
Note: Windows 3.1 requires network support such as LAN Server orLAN Manager Workstation software to be installed in order to redirecta local printer port to a network device.
Note: AXIS Print Utility for Windows must be running when you printthrough your Ethernet adapter. We recommend that you copy the AXISPrint Utility icon into your StartUp file.

18
To install peer-to-peer printing
1. Double-click the AXIS Print Utility icon.
2. In the Port menu, click Add.
3. In the NPS Port list, select the Ethernet adapter port to be installed.The port appears as name.LP1, where name is AX followed by thelast six digits of the Ethernet adapter’s serial number, for example,AX540B35.LP1. You can change this name using AXIS NetPilot.
4. Accept or change the suggested Windows port name, and type anycomments in the Description field. Make a note of the Windowsport name as you will need it later.
5. Click OK to install the Windows port.
6. In the Port menu, click Connect to display the Windows Printersdialog.
7. Select a printer driver from the list of Installed Printers, or clickAdd to install a new driver. Click Connect.
8. Select the Windows port name defined in Step 4 that should now belisted at the bottom of the Ports list.
9. Click OK to close the Connect dialog and Close to close Printers.
The setup is completed and you can now print through your Ethernetadapter.
To install client/server printing
Note: Only install client/server printing on a Windows for Workgroupsworkstation.
1. Install AXIS Print Utility for Windows onto the file server.
2. Set up your Ethernet adapter from the file server as described in thepeer-to-peer printing section earlier in this guide, but check theShare box for your printer.
All the Windows clients can now use your shared printers, and you donot need to install the AXIS Print Utility on the clients.

19
Windows Clients Using LANtasticFrom any Windows client, you can use the Ethernet adapter for networkprinting within LANtastic environments. Choose your utility softwarebased on the Windows client you use. For help, see the appropriateWindows section earlier in this guide. Please ensure that yourLANtastic client is running the desired printing protocol.
Printing From a Windows Network
To print from a Windows network
1. Select Print from the File menu within your application.
2. If the printer you want to use is the default printer, print from yourapplication as normal.
3. If the required printer is not selected as the default printer, clickSetup in the Print Document window and then select the name of therequired printer.
4. Set up any of the parameters as needed, such as paper size andsource.
Note: Make sure the paper size matches the size of your label stock.
5. Click OK and then print the file as you normally would.
Installing for an OS/2 Network
Note: AXIS Print Utility for OS/2 must be running when you printthrough your Ethernet adapter. We recommend that you copy the AXISPrint Utility icon into your StartUp file.
To install an Ethernet adapter for an OS/2 network
1. Make sure that the NetBEUI protocol is active. If necessary, useMPTS/LAPS (LAN Server) or SETUP (LAN Manager) to activateit.
2. Insert the Print Utilities for OS/2 disk into your disk drive, and openan OS/2 window. Run the install.exe program.

20
3. With the AXIS Print Utility running, install your Ethernet adapterby clicking Install. The port appears as name.LP1, where name isAX followed by the last six digits of the Ethernet adapter’s serialnumber, for example AX540B35.LP1. You can change this nameusing AXIS NetPilot.
4. Select the ports you want to install, then click Install.
5. Repeat this procedure for each server using the Ethernet adapter.
To create a Print Queue (OS/2 version 1.X)
1. Double-click the Print Manager icon, click Setup, then selectPrinters.
2. Click Add to make a new printer definition, then type a name ofyour choice in the Name field.
3. Select \PIPE\name.LP1 from the Device list, then select a printerdriver suitable for your printer.
4. Click Add then click OK to confirm the printer definition.
5. Click Setup then select Queues.
6. Click Add to create a print queue and type a name in the Namefield.
7. Click Add then click OK to confirm the queue definition.
To create a Print Queue (OS/2 version 2.X and above)
1. Double-click the Templates folder, then drag the Printer icon to theWorkplace Shell (or into a folder) while pressing the mouse buttondown.
2. Type a name of your choice in the Name field.
3. Select \PIPE\name.LP1 from the Port list, and select a printer driversuitable for your printer from the Standard Printer list.
4. Click OK to confirm the printer definition.
21
To share print queues
• Open an OS/2 window and issue the following command:
NET SHARE queue_name /PRINT
where:
queue_name is the name of the queue to be created.
To print from an OS/2 workstation
Note: Ask your network administrator for the queue name of the printeryou print to.
1. Select Print from the File menu within your application.
2. In the Print Document window, select the queue name for therequired printer.
3. Print the file as you normally would.
Configuring the CentronicsInterface TimingBefore you can print to an Intermec printer, you must set the Centronicsinterface timing to standard.
To set the Centronics interface timing
1. Download the IP address. For help, see “Downloading the IPAddress” earlier in this guide.
2. Open the Ethernet adapter’s home page. For help, see the followingsection, “Web Management.”
3. From the home page, click the Configuration button.
4. From the Configuration screen, click Output.
5. Click the down arrow by Centronics Interface Timing LPT1 andselect STNDRD.
6. Click the Submit Output Settings button.
7. Close your Web browser.

22
Web ManagementAfter assigning an IP address and an optional host name to the Ethernetadapter, you can access your Ethernet adapter from any standard Webbrowser. To do this, simply enter the IP address or the host name of theEthernet adapter as a URL in your browser, as follows:
http://192.36.253.96
or
http://salesdept
The Home Page of the Ethernet adapter will now be displayed in yourbrowser, where links to the Ethernet adapter’s Configuration,Management, Status, Account, and Help services are readily available.