instructions luxout shade controller programming instructions · luxout shade controller...
TRANSCRIPT

LuXout Shade Controller Programming InstructionsI N S T R U C T I O N S
I-15 1221 Admiral Street Richmond VA 23220 800-817-1204 LuXoutShades.com
PACK CONTENTS• Remote (1)• Wall Fixing Screws & Anchors (2)• Mountable Magnetic Holder (1)• Instruction Manual (1)• 3V - CR2430 Battery (installed) (1)• White Single Gang Decorator Wall Plate (1)
(including 2 Mounting Screws) • Pre-programmed Guide
* OPTIONAL Tabletop Pedestal (if ordered)
TOOLS NEEDED:• Phillips Head Screwdriver• Flat Head Screwdriver
Important Note:One 5-channel controller is provided for each room with your order. One rechargeable battery charger is also provided for each room of shades with rechargeable battery motors.
1. FUNCTIONAL OVERVIEW
The LuXout 5 - Channel Control ler features a contemporary design and wire-free deployment making it retrofit ready for any location. Perfect for all internal motorized shade control applications, it can be mounted on any surface - wall or optional tabletop pedestal. The slim profile eliminates the need for any holes to be cut in the walls.
• Retrofit-Ready• Individual and/or Group Control• Compatible with Screwless Decorator Wall Plates• Functions as a Handheld or Optional Tabletop
Controller
FEATURES:
5-CHANNEL CONTROLLER

I-16 1221 Admiral Street Richmond VA 23220 800-817-1204 LuXoutShades.com
LuXout Shade Controller Programming InstructionsI N S T R U C T I O N S
TECHNICAL SPECIFICATIONS
Input VoltageTransmitting FrequencyTransmitting PowerOperating TemperatureTransmitting Distance
3V (CR2430)433.92 MHz10 milliwatt-10oC - 50oCup to 75 feet
REMOTEPROGRAMMING
BUTTONP2
Fig. 2
AC CHARGER(Rechargeable Battery
Motors Only)
Fig. 3 Fig. 4
MOTOR HEAD PROGRAMMING
BUTTONP1
STOP
UP DOWN
CHANNELS 1-5
BLUE LED STATUS LIGHT
OPTIONAL TABLETOP PEDESTAL
DECORATOR COVER PLATE
4.54 in.
2.77 in.
CONTROLLER
1.28 in.
2.60 in.
WALL PLATE
4.09 in.
2.95 in.
1.78 in.
0.11 in.
DIMENSIONS
(Inverted P1)
Fig. 1
LuXout Shade Controller Programming InstructionsI N S T R U C T I O N S
I-17 1221 Admiral Street Richmond VA 23220 800-817-1204 LuXoutShades.com
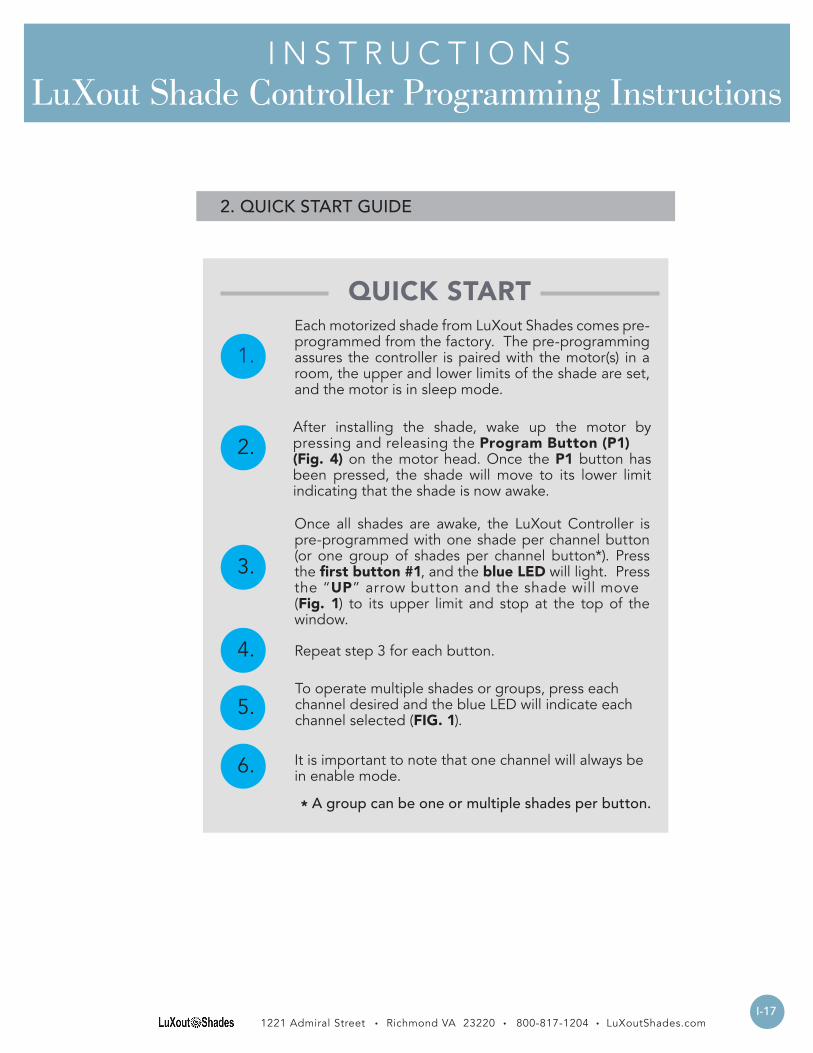
2. QUICK START GUIDE
5.
1.Each motorized shade from LuXout Shades comes pre-programmed from the factory. The pre-programming assures the controller is paired with the motor(s) in a room, the upper and lower limits of the shade are set, and the motor is in sleep mode.
2.After installing the shade, wake up the motor by pressing and releasing the Program Button (P1) (Fig. 4) on the motor head. Once the P1 button has been pressed, the shade will move to its lower limit indicating that the shade is now awake.
3.
Once all shades are awake, the LuXout Controller is pre-programmed with one shade per channel button (or one group of shades per channel button*). Press the first button #1, and the blue LED will light. Press the “UP” arrow button and the shade will move (Fig. 1) to its upper limit and stop at the top of the window.
4. Repeat step 3 for each button.
6. It is important to note that one channel will always be in enable mode.
* A group can be one or multiple shades per button.
QUICK START
To operate multiple shades or groups, press each channel desired and the blue LED will indicate each channel selected (FIG. 1).

LuXout Shade Controller Programming InstructionsI N S T R U C T I O N S
I-18 1221 Admiral Street Richmond VA 23220 800-817-1204 LuXoutShades.com
The battery comes installed when shipped with shade.
This motor has a 12V built-in Li-ion battery pack with integrated charge management. Max power input for recharging: 12.6V / 1000mAh
• During operation, if voltage drops to less than 10V, the motor will beep 10 times to prompt when it needs to be charged.
• Motor will stop running when the voltage is lower than 7V and will resume again when the voltage is greater than 7.5V.
• When charger is plugged in, a red LED light indicates the motor is currently charging. A green LED light indicates that battery is fully charged.
• Ensure cable is kept clear of fabric.• Ensure antenna is kept straight and away from metal objects.
• The 5-Channel Controller is magnetized and can be removed for hand held operation.
For rechargeable battery motors (Fig. 3 - see inside cover page)
4. CHARGING SHADES
Use the supplied fasteners and
anchors as needed to
attach the base. Slide controller into base.
Best Practice Tip: To insure best performance, program controller to motors prior to installation at the location the controller will be located. Then test radio performance for that location.
Open rear battery cover by gently separating switch covers with a flathead screwdriver.
a. Install CR2430 battery with positive side facing up. Snap covers back together.
b.
3. INSTALL AND/OR REPLACE CONTROLLER BATTERY
5. MOUNTING INSTRUCTIONS

LuXout Shade Controller Programming InstructionsI N S T R U C T I O N S
I-19 1221 Admiral Street Richmond VA 23220 800-817-1204 LuXoutShades.com
6. INITIAL SET UP
• Damage to shade may occur when operating motor prior to setting limits. Attention should be given.
• Reversing motor direction using this method is only possible during initial set-up.
6.2 CHECK MOTOR DIRECTIONThis has been done in factory prior to shipment.
To check travel direction of shade, press UP or DOWN
on controller.
To reverse shade direction, hold both
UP and DOWN.
MOTOR RESPONSE
2 secondsHold
Approx.Jogx 1
• Quick Press = Step• Long Press = Continuous Travel
6.1 PAIR MOTOR WITH CONTROLLERControllers purchased with shades already have the controller paired to the motor.
Select channel on controller.
Hold P1 button on motor head.
Hold STOP on controller.
MOTOR RESPONSE
2 secondsHold
Approx.Beep
x 1Jogx 1
MOTOR RESPONSE
2 secondsHold
Approx.Beep
x 3Jogx 2
CHANNELS1-5

LuXout Shade Controller Programming InstructionsI N S T R U C T I O N S
I-20 1221 Admiral Street Richmond VA 23220 800-817-1204 LuXoutShades.com
Initial limits are set to field measurements provided at time of order.
MOTOR RESPONSE
5 secondsHold
Approx.Beep
x 3Jogx 2
Move shade to the desired lowest position by pressing the DOWN or UP button.
Hold DOWN and STOP
on controller.
To save lower limit, hold
DOWN and STOP.
Adjusting Lower Limit - move to existing lower limit
Adjusting Upper Limit - move to existing upper limit
Hold UP and STOP on controller.
Move shade to the desired highest position by pressing the UP or DOWN button.
To save upper limit, hold
UP and STOP.
MOTOR RESPONSE
5 secondsHold
Approx.Beep
x 3Jogx 2
MOTOR RESPONSE
5 secondsHold
Approx.Beep
x 1Jogx 2
7. SETTING AND ADJUSTING LIMITS
• Quick Press = Step• Long Press = Continuous Travel
• Quick Press = Step• Long Press = Continuous Travel

LuXout Shade Controller Programming InstructionsI N S T R U C T I O N S
I-21 1221 Admiral Street Richmond VA 23220 800-817-1204 LuXoutShades.com
8. FAVORITE POSITION8.1 Setting Favorite Position
Move shade to the desired position by
pressing the UP or DOWN button on the controller and
stop shade at the favorite position.
Press STOP on controller.
MOTOR RESPONSEJogx 1
Beepx 1
MOTOR RESPONSEJogx 1
Beepx 1
MOTOR RESPONSEJogx 2
Beepx 3
Using the programming
stylus tool (included)
press P2 on controller.
Press STOP on controller
again.
8.2 Deleting Favorite Position
MOTOR RESPONSEBeep
x 1Jogx 1
MOTOR RESPONSEBeep
x 1Jogx 1
MOTOR RESPONSEBeep
x 1Jogx 1
Press P2 on controller.
Press STOP on controller.
Press STOP on controller.
8.3 Using Favorite Position
Hold STOP on
controller. 2 secondsHold
Approx.

LuXout Shade Controller Programming InstructionsI N S T R U C T I O N S
I-22 1221 Admiral Street Richmond VA 23220 800-817-1204 LuXoutShades.com
9. ADDING AND REMOVING CONTROLLERS & CHANNELS
A = Existing controller or channel (to keep)B = Controller or channel to add or remove
A. Select channel that operates
motor on existing controller.
B. Press P2.
A. Press P2 on existing controller
again.
A. Select desired
channel on new controller.
B. Press P2.
Channels1-5
MOTOR RESPONSE
1 secondHold
Approx.Beep
x 1Jogx 1
MOTOR RESPONSE
1 secondHold
Approx.Beep
x 1Jogx 1
MOTOR RESPONSE
1 secondHold
Approx.Beep
x 1Jogx 1
A.
B.
A.
B.
A.
Channels1-5
LuXout Shade Controller Programming InstructionsI N S T R U C T I O N S
I-23 1221 Admiral Street Richmond VA 23220 800-817-1204 LuXoutShades.com
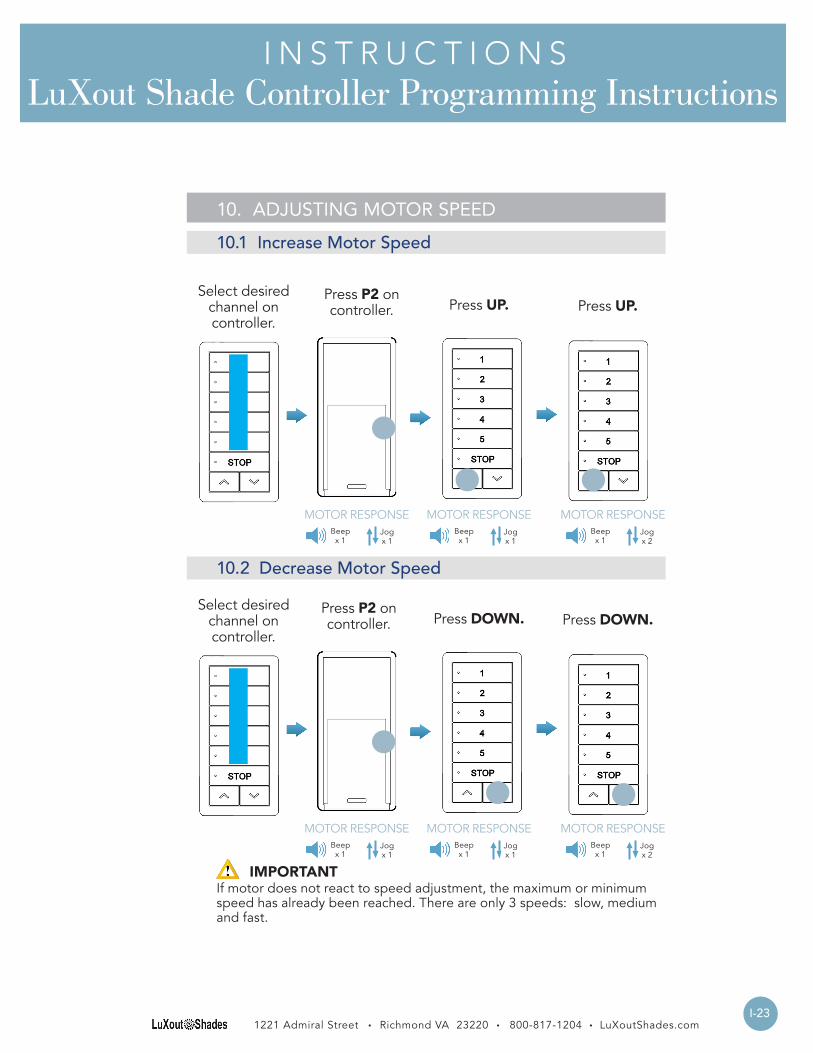
10. ADJUSTING MOTOR SPEED10.1 Increase Motor Speed
If motor does not react to speed adjustment, the maximum or minimum speed has already been reached. There are only 3 speeds: slow, medium and fast.
IMPORTANT
10.2 Decrease Motor Speed
Press P2 on controller.
Select desired channel on controller.
Press UP. Press UP.
MOTOR RESPONSEBeep
x 1Jogx 1
MOTOR RESPONSEBeep
x 1Jogx 1
MOTOR RESPONSEBeep
x 1Jogx 2
Press P2 on controller.
Select desired channel on controller.
Press DOWN. Press DOWN.
MOTOR RESPONSEBeep
x 1Jogx 1
MOTOR RESPONSEBeep
x 1Jogx 1
MOTOR RESPONSEBeep
x 1Jogx 2

LuXout Shade Controller Programming InstructionsI N S T R U C T I O N S
I-24 1221 Admiral Street Richmond VA 23220 800-817-1204 LuXoutShades.com
11. TROUBLESHOOTING
PROBLEM CAUSE REMEDY
Motor is not responding
Replace batterySwitch battery is discharged
Check battery polarityBattery is inserted incorrectly
Ensure controller is positioned away from metal objects
and that antenna on motor or receiver is kept straight and
away from metal.
Radio interference/shielding
Move controller to a closer position.
Receiver distance is too far from controller
Check power supply to motor is connected and active.
Power failure
Check that wiring is connected properly
Incorrect motor plug-in wire connection
Using “group” channels to adjust single motor limits
Cannot set limits on a single motor
(multiple motor response)
Reset the motor and lower limit.
Remember that upper limit is to be set using the UP and STOP
buttons, and the down limit is set using the DOWN and
STOP buttons.
Top limit was set using the
DOWN and STOP buttons.
Motor will not go down after setting
the top limit.
Motor still insleep mode
If motor is in sleep mode (we ship shades in sleep mode to protect
shade) press the P1 button on the motor. Shade will move.
Put motors that do not need adjustment into sleep mode. Recharge motor by pressing the P1 button until you get 2 jogs. If a plug-in motor,
unplug motors not needing adjustment. Then adjust
limits per section 7 (page 7).