instructions ashford table loom - four shaft · assembly instructions for the ashford table loom -...
TRANSCRIPT
Ashford GuaranteeThank you for purchasing this Ashford product. In theunlikely event there is any fault in manufacture we willreplace the item. To validate our guarantee please visitour website or write to us.Please also join our Ashford Club for the Wheel Magazine,competitions and more at www.ashfordclub.co.nz
Ashford Handicrafts Ltd.Factory and Showroom: 415 West Street,PO Box 474, Ashburton, New ZealandTelephone 64 3 308 9087Facsimile 64 3 308 8664Email: [email protected]: www.ashford.co.nz
INSTRUCTIONS
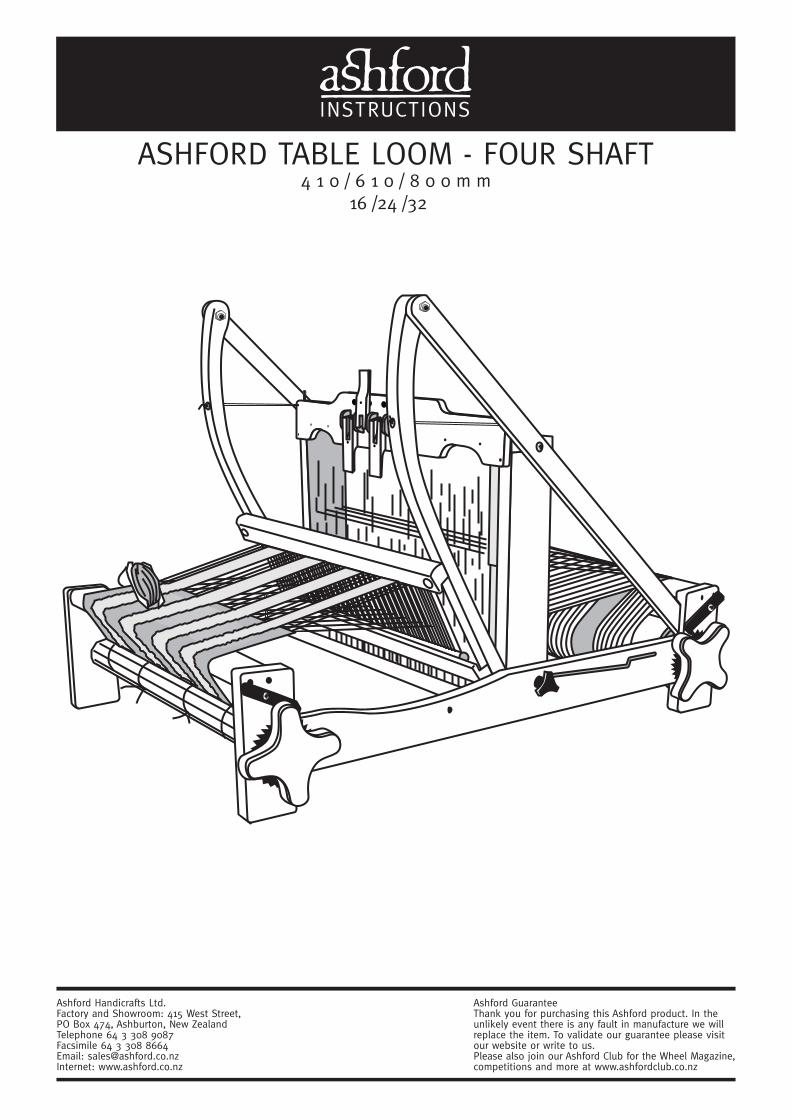
ASHFORD TABLE LOOM - FOUR SHAFT4 1 0 / 6 1 0 / 8 0 0 m m
16 /24 /32
2
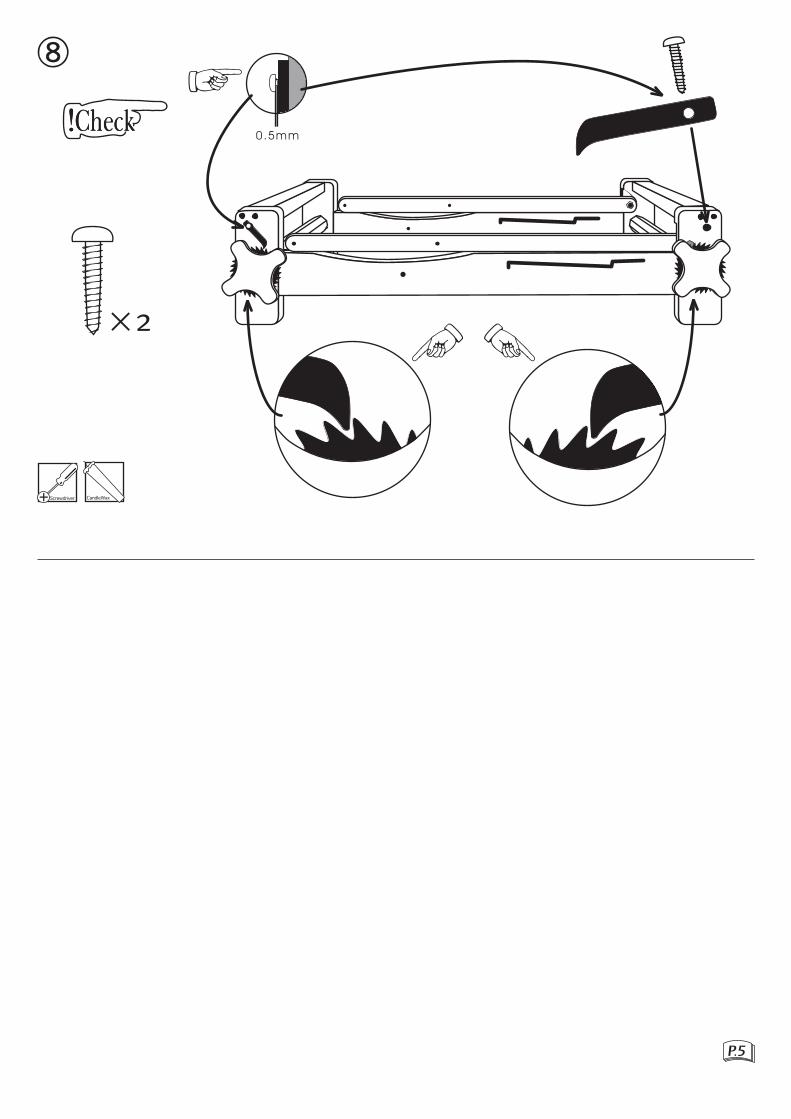
8
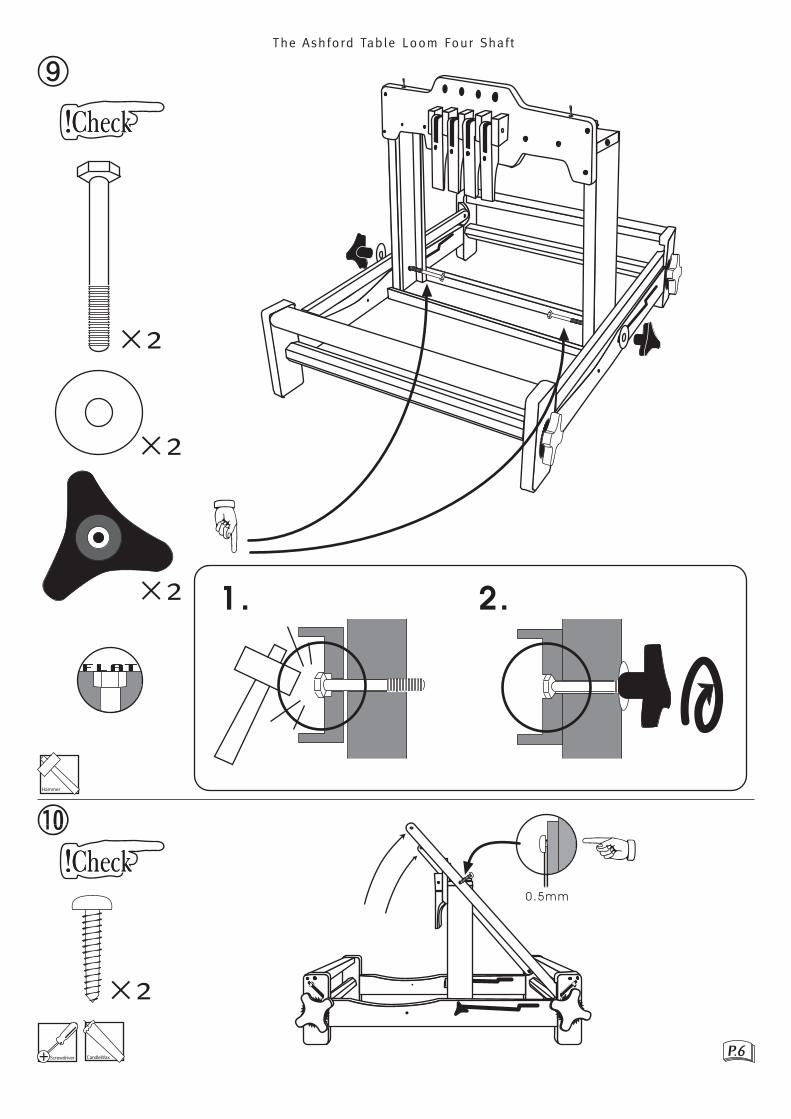
The Ashford Table Loom Four Shaft
4
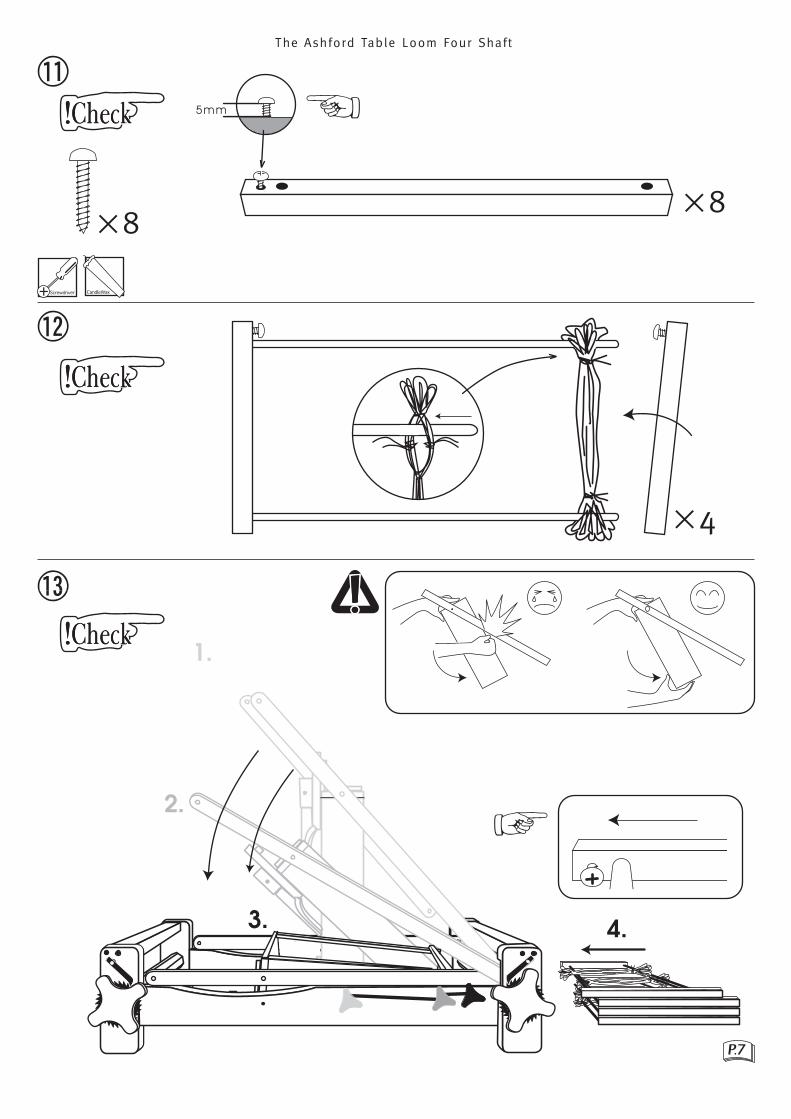
The Ashford Table Loom Four Shaft
6
4
2
410 mm(16") Loom
610 (24") &800 mm (32")Looms

2�����
Table
8
The Ashford Table Loom Four Shaft
2
2
4
4
The Ashford Table Loom Four Shaft
2
2
The Ashford Table Loom Four Shaft
2
2
2
2
The Ashford Table Loom Four Shaft
88
4

The Ashford Table Loom Four Shaft
The Ashford Table Loom Four Shaft

The Ashford Table Loom Four Shaft
2
2
2
2
2
2

The Ashford Table Loom Four Shaft
2
2
4
Folding check points
2

Real scale hardware list for Table Loom
Please note - tri Knobnow replaced withround knob.
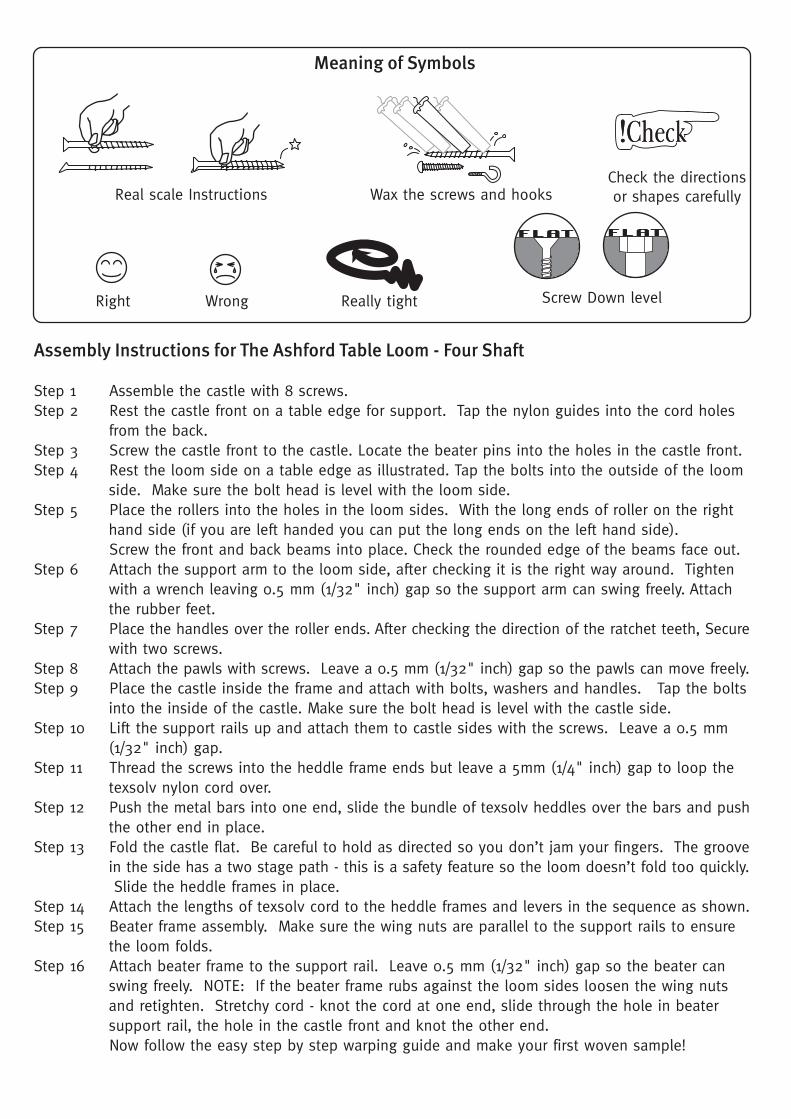
Assembly Instructions for The Ashford Table Loom - Four Shaft
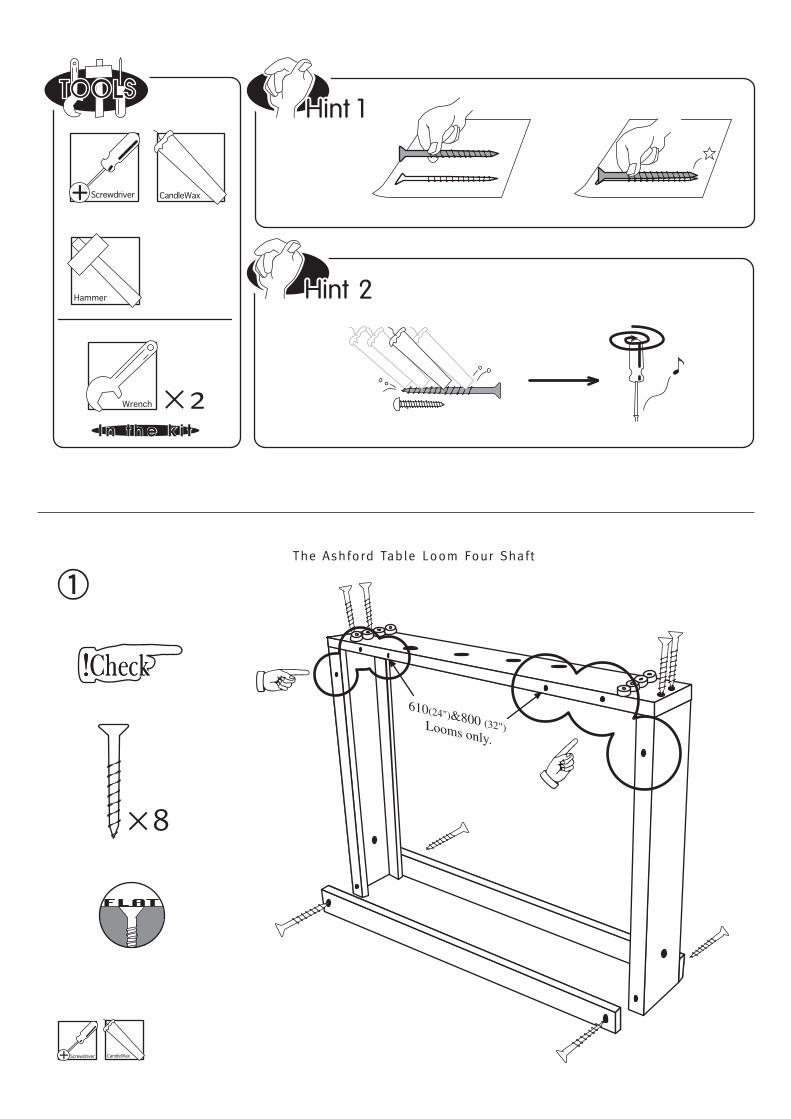
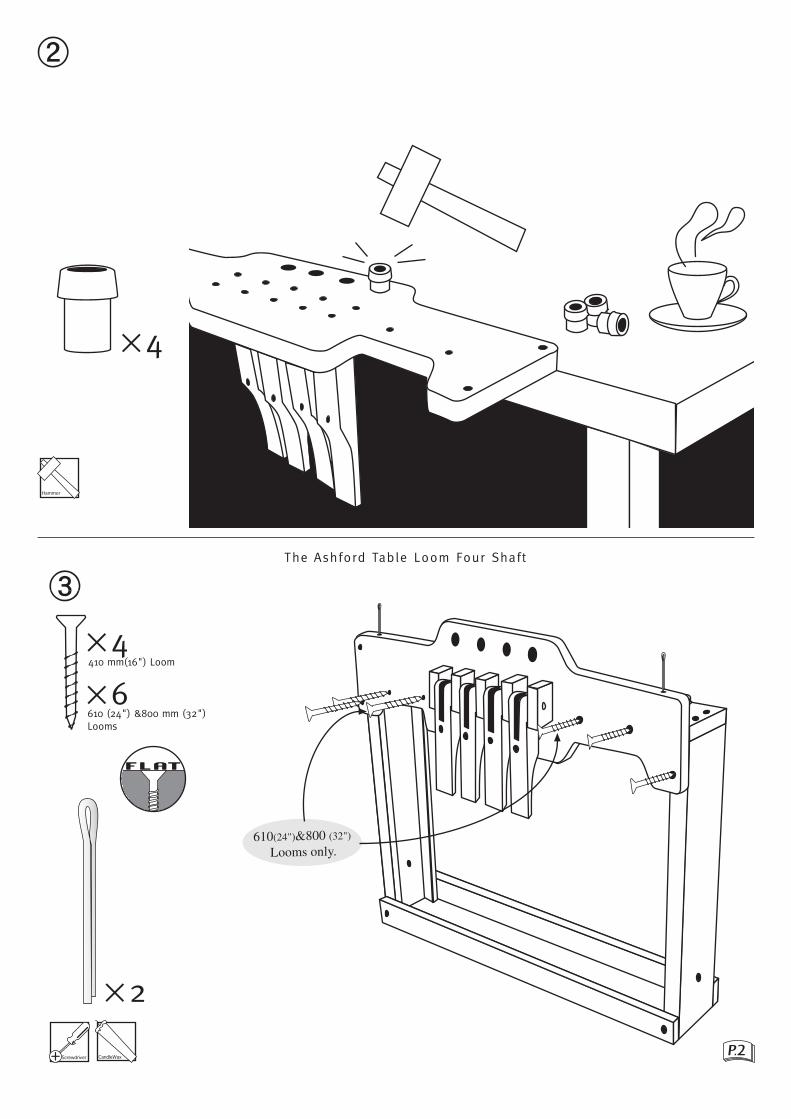
Step 1 Assemble the castle with 8 screws.Step 2 Rest the castle front on a table edge for support. Tap the nylon guides into the cord holes
from the back.Step 3 Screw the castle front to the castle. Locate the beater pins into the holes in the castle front.Step 4 Rest the loom side on a table edge as illustrated. Tap the bolts into the outside of the loom
side. Make sure the bolt head is level with the loom side.Step 5 Place the rollers into the holes in the loom sides. With the long ends of roller on the right
hand side (if you are left handed you can put the long ends on the left hand side).Screw the front and back beams into place. Check the rounded edge of the beams face out.
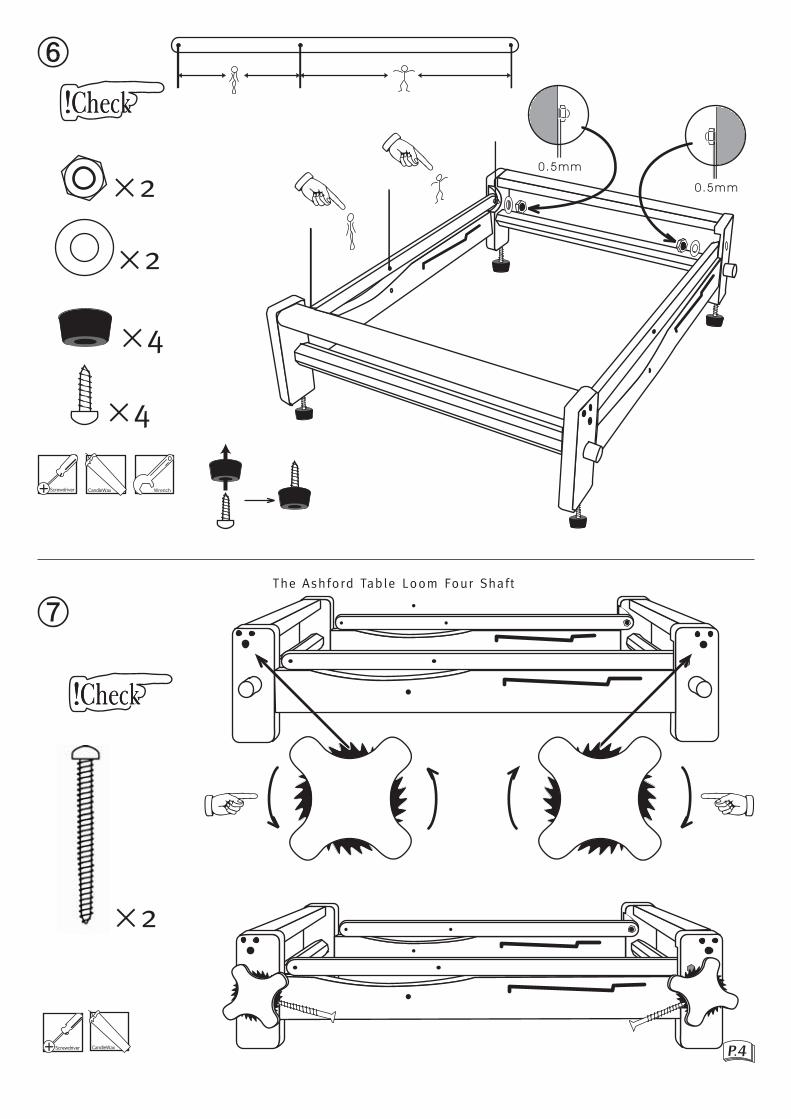
Step 6 Attach the support arm to the loom side, after checking it is the right way around. Tightenwith a wrench leaving 0.5 mm (1/32" inch) gap so the support arm can swing freely. Attachthe rubber feet.
Step 7 Place the handles over the roller ends. After checking the direction of the ratchet teeth, Securewith two screws.
Step 8 Attach the pawls with screws. Leave a 0.5 mm (1/32" inch) gap so the pawls can move freely.Step 9 Place the castle inside the frame and attach with bolts, washers and handles. Tap the bolts
into the inside of the castle. Make sure the bolt head is level with the castle side.Step 10 Lift the support rails up and attach them to castle sides with the screws. Leave a 0.5 mm
(1/32" inch) gap.Step 11 Thread the screws into the heddle frame ends but leave a 5mm (1/4" inch) gap to loop the
texsolv nylon cord over.Step 12 Push the metal bars into one end, slide the bundle of texsolv heddles over the bars and push
the other end in place.Step 13 Fold the castle flat. Be careful to hold as directed so you don’t jam your fingers. The groove
in the side has a two stage path - this is a safety feature so the loom doesn’t fold too quickly. Slide the heddle frames in place.
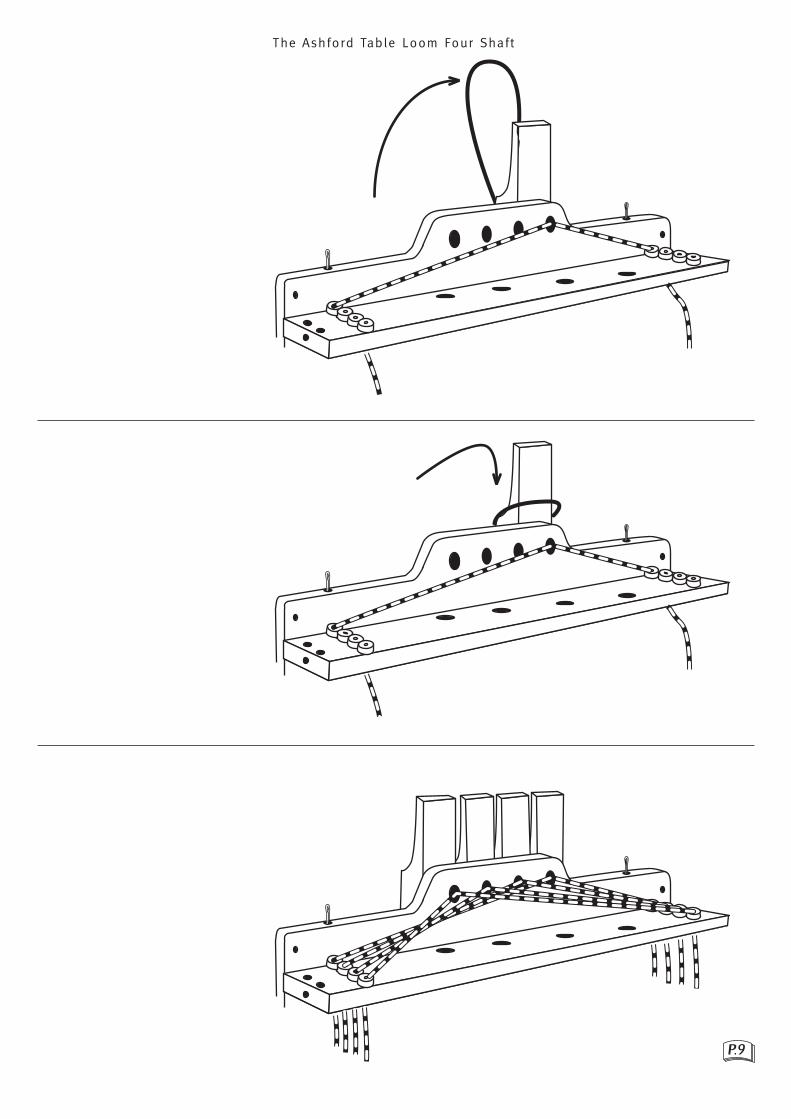
Step 14 Attach the lengths of texsolv cord to the heddle frames and levers in the sequence as shown.Step 15 Beater frame assembly. Make sure the wing nuts are parallel to the support rails to ensure
the loom folds.Step 16 Attach beater frame to the support rail. Leave 0.5 mm (1/32" inch) gap so the beater can
swing freely. NOTE: If the beater frame rubs against the loom sides loosen the wing nutsand retighten. Stretchy cord - knot the cord at one end, slide through the hole in beatersupport rail, the hole in the castle front and knot the other end.Now follow the easy step by step warping guide and make your first woven sample!
Real scale InstructionsCheck the directionsor shapes carefully
Screw Down levelRight Wrong Really tight
Wax the screws and hooks
Meaning of Symbols

TL4S