installation instructions for jmp genomics 5 installation instructions for jmp genomics 5.0 note: if...
TRANSCRIPT
Installation Instructions for JMP Genomics 5.0
These instructions briefly describe the process for installing JMP Genomics 5.0 on your Windows desktop machine.
Please note the following important items:
• You should verify that JMP Genomics 5.0 is successfully installed. See “Verify that JMP Genomics 5.0 has been successfully installed on your machine.,” p. 16 for detailed instruc-tions.
• JMP Genomics is not supported for use in any language other than English. However, it may be possible to install on a non-English machine See “Appendix II- Installing JMP Genomics on Computer Configured for Use with a Language other than English,” p. 22 for more infor-mation.
• CAUTION: There are two versions of JMP Genomics 5.0: one for 64-bit computers and one for 32-bit computers. You must load the proper configuration on your machine. JMP Genomics 32-bit does not work properly on 64-bit machines and is not supported. Likewise, JMP Genomics 64-bit does not work properly on 32-bit machines. If you have the wrong ver-sion for your machine, you should contact your JMP sales representative to receive the correct version of JMP Genomics.
• If you are upgrading from JMP Genomics 4.1 to JMP Genomics 5.0, you will need to manu-ally install JMP Genomics 5.0 a second time. See “Verify that JMP Genomics 5.0 has been successfully installed on your machine.,” p. 16 for more details.
Description of Your Package
Electronic Delivery
After you submit your signed paperwork for JMP Genomics 5.0, you will receive an email listing your site’s order number, an installation key code specific to this order and contact information for SAS Technical support.
The email will also contain a link to the SAS Download Manager. The SAS Download Manager application must be downloaded and used to generate a local SAS Software Depot before JMP Genom-ics 5.0 can be installed.
2 Installation Instructions for JMP Genomics 5.0
Note: If this is the first time you have installed SAS software on this machine, you will need to install the SAS Download Manager before you can install JMP Genomics 5.0. See “Appendix I - Installing the SAS Download Manager Application,” p. 17 for detailed instructions.
DVD Delivery
After you submit your signed paperwork for JMP Genomics 5.0, you will receive an email listing your site’s order number, an installation key code specific to this order and contact information for SAS Technical support.
You will then receive an installation package containing three DVDs. The DVDs contain both your software and the SAS Download Manager. The package also includes an information sheet listing your order number, an installation key code specific to your order and contact information for SAS Techni-cal support.
Before you install JMP Genomics 5.0Terminate all non-essential applications.
If the SAS Job Spawner is running as a service, it must be disabled.
Disable any anti-virus software that may be running.
Determine the version of the Windows operating system you are using and whether you are install-ing JMP Genomics on a 32 bit or 64 bit machine.
Installation
Step 1: Update your Java plug in
You should update your Java plug in to the current release (Version 6, Update 21) of 32 bit Java.
Note: You must install 32 bit Java regardless of whether your machine is 32 bit or 64 bit.
Open your browser and navigate to the Java Downloads (http://www.java.com/en/) site.
Download and install the Java plug in following the instructions on the Java web site.
Step 2: Open the email containing your order information.
Your order information, install key and other information is displayed at the top of the email.
Insta
llatio
n In
stru
ctio
ns fo
r JM
P G
en
om
ics 5
.0 Installation Instructions for JMP Genomics 5.0 3
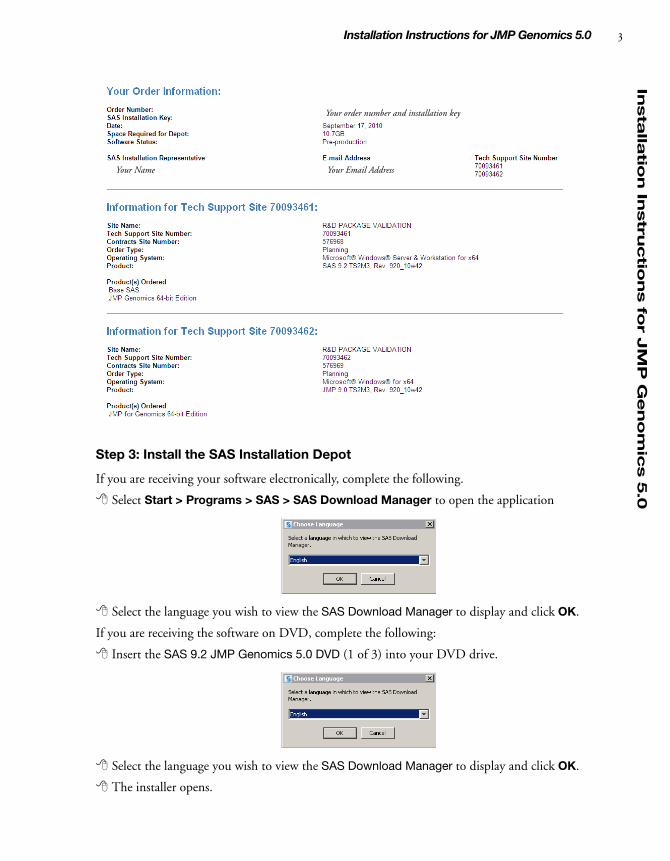
Step 3: Install the SAS Installation Depot
If you are receiving your software electronically, complete the following.
Select Start > Programs > SAS > SAS Download Manager to open the application
Select the language you wish to view the SAS Download Manager to display and click OK.
If you are receiving the software on DVD, complete the following:
Insert the SAS 9.2 JMP Genomics 5.0 DVD (1 of 3) into your DVD drive.
Select the language you wish to view the SAS Download Manager to display and click OK.
The installer opens.
sYour Name Your Email Address
Your order number and installation key
4 Installation Instructions for JMP Genomics 5.0
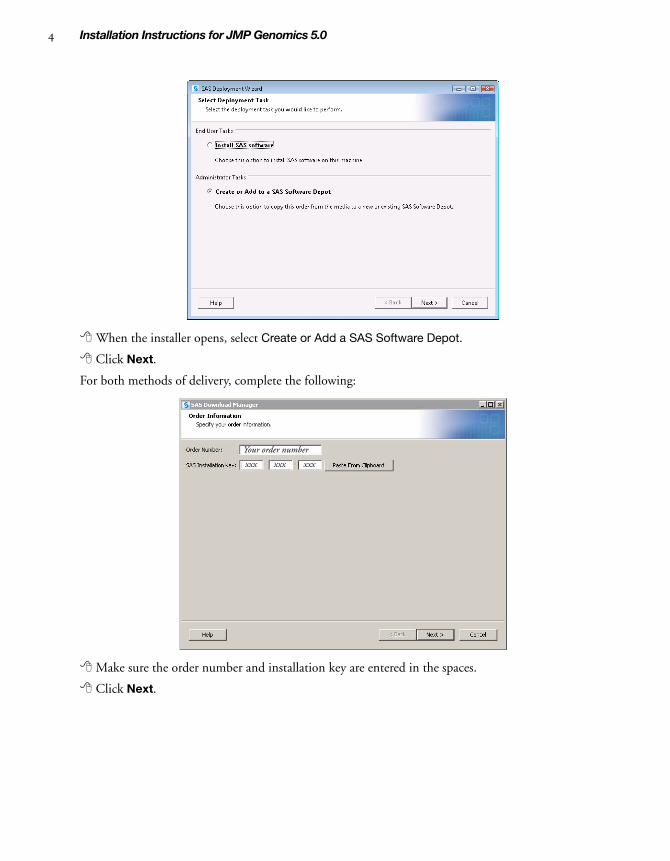
When the installer opens, select Create or Add a SAS Software Depot.
Click Next.
For both methods of delivery, complete the following:
Make sure the order number and installation key are entered in the spaces.
Click Next.
Your order number
xxx xxx xxx
Insta
llatio
n In
stru
ctio
ns fo
r JM
P G
en
om
ics 5
.0 Installation Instructions for JMP Genomics 5.0 5
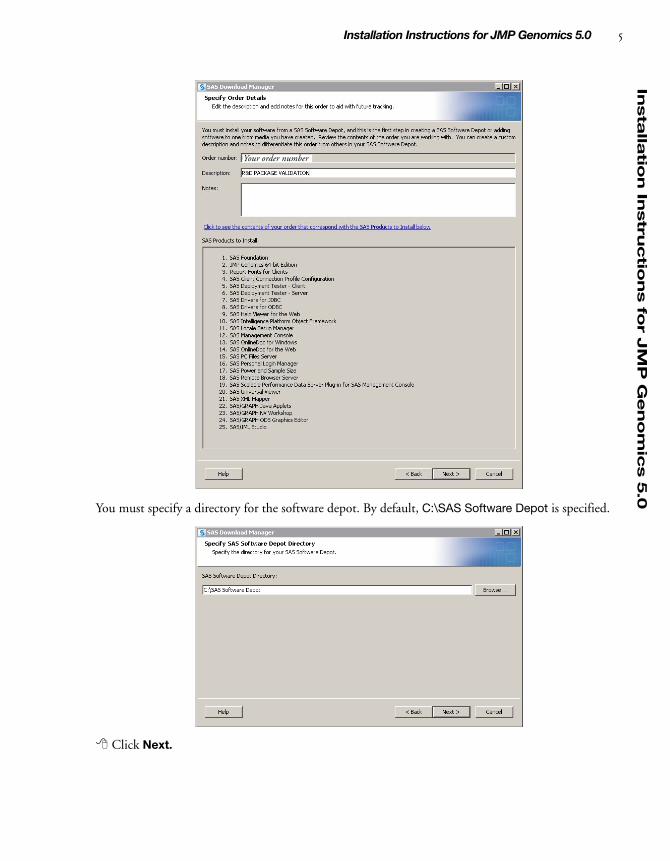
You must specify a directory for the software depot. By default, C:\SAS Software Depot is specified.
Click Next.
Your order number
6 Installation Instructions for JMP Genomics 5.0
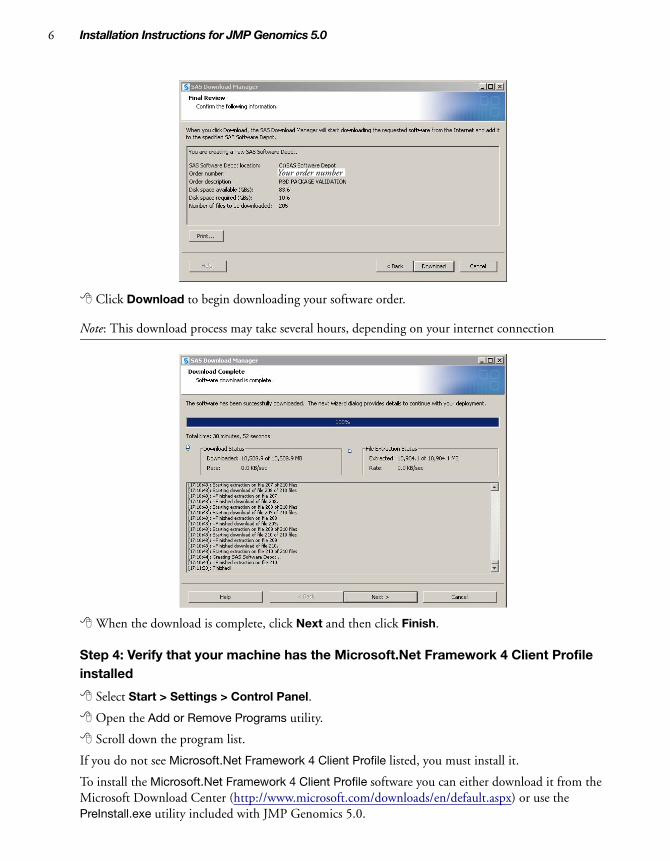
Click Download to begin downloading your software order.
Note: This download process may take several hours, depending on your internet connection
When the download is complete, click Next and then click Finish.
Step 4: Verify that your machine has the Microsoft.Net Framework 4 Client Profile installed
Select Start > Settings > Control Panel.
Open the Add or Remove Programs utility.
Scroll down the program list.
If you do not see Microsoft.Net Framework 4 Client Profile listed, you must install it.
To install the Microsoft.Net Framework 4 Client Profile software you can either download it from the Microsoft Download Center (http://www.microsoft.com/downloads/en/default.aspx) or use the PreInstall.exe utility included with JMP Genomics 5.0.
Your order number
Insta
llatio
n In
stru
ctio
ns fo
r JM
P G
en
om
ics 5
.0 Installation Instructions for JMP Genomics 5.0 7
To use the PreInstall.exe utility included with JMP Genomics 5.0, complete the following steps:
Navigate to the Extra folder in the SAS Software Depot folder. The default location for this direc-tory on 64-bit computers is C:\SAS Software Depot\JMP\JMP_Genomics_64-bit_Edition\5_0\Microsoft_Windows_for_x64\Extra. The default location for this directory on 32-bit computers is C:\SAS Software Depot\JMP\JMP_Genomics\5_0\Windows\Extra.
Copy the PreInstall.exe program from the Extra folder.
Navigate up one level in the directory and paste it in the folder one level above the Extra folder. (JMP\JMP_Genomic_64-bit_Edition\5_0\Microsoft_Windows_for_x64\ directory on 64-bit machines; JMP\JMP_Genomics\5_0\Windows\ on 32-bit machines).
Double-click on the PreInstall.exe to install the Microsoft.Net Framework 4 Client Profile to your computer.
Follow the Microsoft instructions to install the Microsoft.Net Framework 4 Client Profile.
Note: If your machine is not running the latest version of Microsoft Windows, you may be prompted to install the Windows Imaging Component (WIC) before installing the Microsoft.Net Framework 4 Client Profile software. To install the WIC on a 64-bit machine, navigate into the C:\SAS Software Depot\JMP\JMP_Genomics_64-bit_Edition\5_0\Microsoft_Windows_for_x64\Extra folder and dou-ble-click wic_x64_enu.exe. To install the WIC on a 32-bit machine, navigate into the C:\SAS Software Depot\JMP\JMP_Genomics\5_0\Windows\Extra folder and double-click wic_x86_enu.exe.
When the Microsoft.Net Framework 4 Client Profile installation has completed, your computer will automatically reboot.
Step 5: Verify that your machine has the Microsoft 2010 Redistributable Package installed
Select Start > Settings > Control Panel.
Open the Add or Remove Programs utility.
Scroll down the program list.
If you do not see the Microsoft 2010 Redistributable Package (Microsoft Visual C++ 2010 x64 Redistributable Package (x64) for 64-bit computers, Microsoft .NET Framework Version 2.0 Redistributable Package (x86) for 32-bit computers) listed, you must install it.
Note: You must install the correct Microsoft 2010 Redistributable Package software for your com-puter.
To install the Microsoft 2010 Redistributable Package software you can either download it from the Microsoft Download Center (http://www.microsoft.com/downloads/en/default.aspx) or use the PreInstall.exe utility included with JMP Genomics 5.0.
To use the PreInstall.exe utility included with JMP Genomics 5.0, complete the following steps:
Double-click on the relocated PreInstall.exe (see above) to install the correct Microsoft 2010 Redistributable Package to your computer.
8 Installation Instructions for JMP Genomics 5.0
Follow the instructions to install the software.
When the Microsoft 2010 Redistributable Package software installation has completed, your com-puter might automatically reboot.
To verify that the software has successfully installed, complete the following steps:
Select Start > Settings > Control Panel.
Open the Add or Remove Programs utility.
Scroll down the program list and verify that they are there.
Step 6: Install JMP Genomics
Note: The following example shows the installation of JMP Genomics 64-bit. The procedure for install-ing JMP Genomics 32-bit is the same.
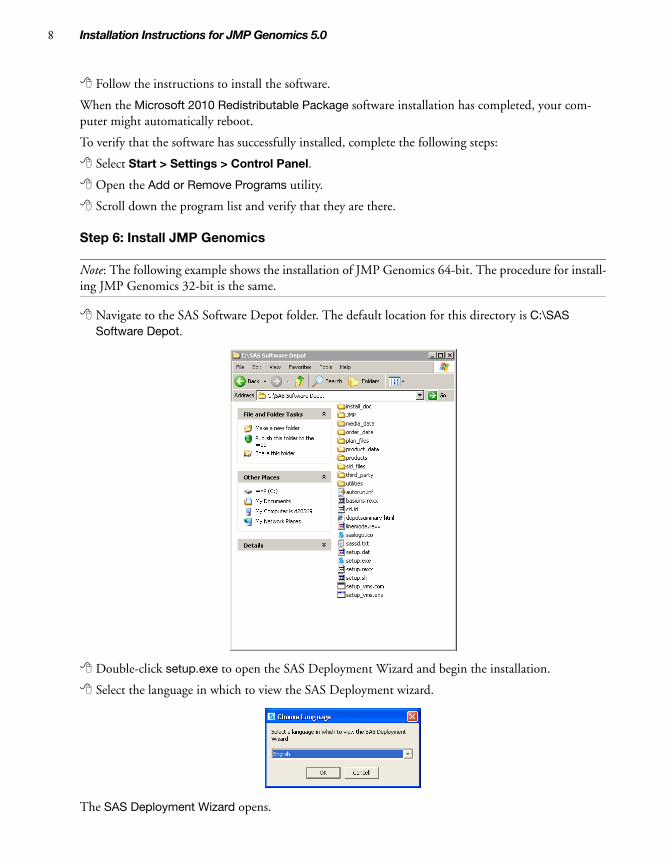
Navigate to the SAS Software Depot folder. The default location for this directory is C:\SAS Software Depot.
Double-click setup.exe to open the SAS Deployment Wizard and begin the installation.
Select the language in which to view the SAS Deployment wizard.
The SAS Deployment Wizard opens.
Insta
llatio
n In
stru
ctio
ns fo
r JM
P G
en
om
ics 5
.0 Installation Instructions for JMP Genomics 5.0 9
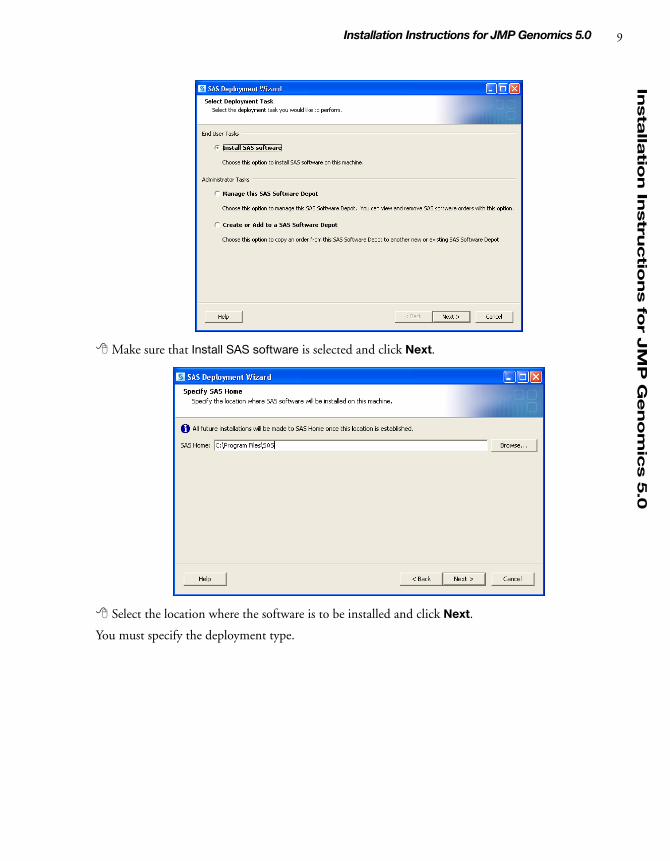
Make sure that Install SAS software is selected and click Next.
Select the location where the software is to be installed and click Next.
You must specify the deployment type.
10 Installation Instructions for JMP Genomics 5.0
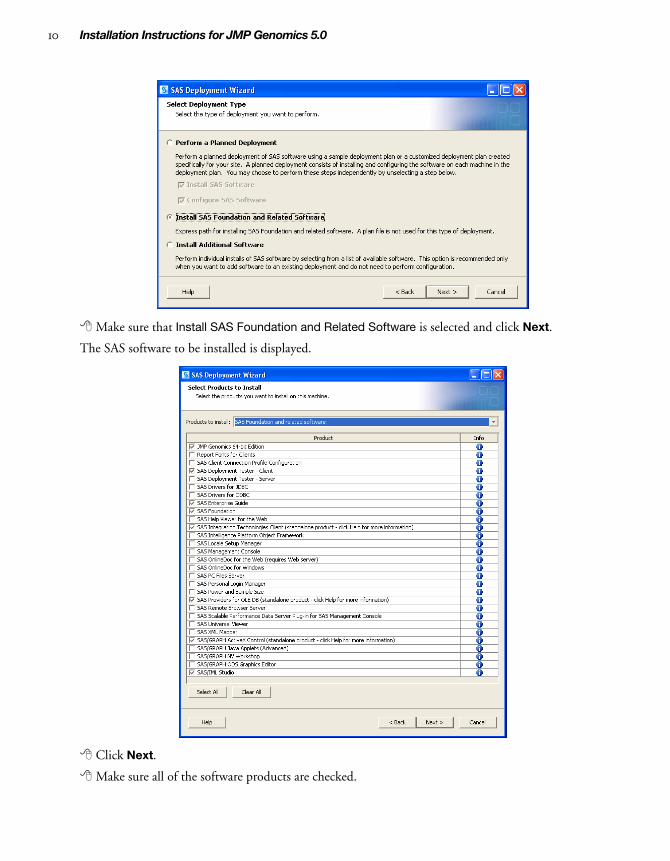
Make sure that Install SAS Foundation and Related Software is selected and click Next.
The SAS software to be installed is displayed.
Click Next.
Make sure all of the software products are checked.
Insta
llatio
n In
stru
ctio
ns fo
r JM
P G
en
om
ics 5
.0 Installation Instructions for JMP Genomics 5.0 11
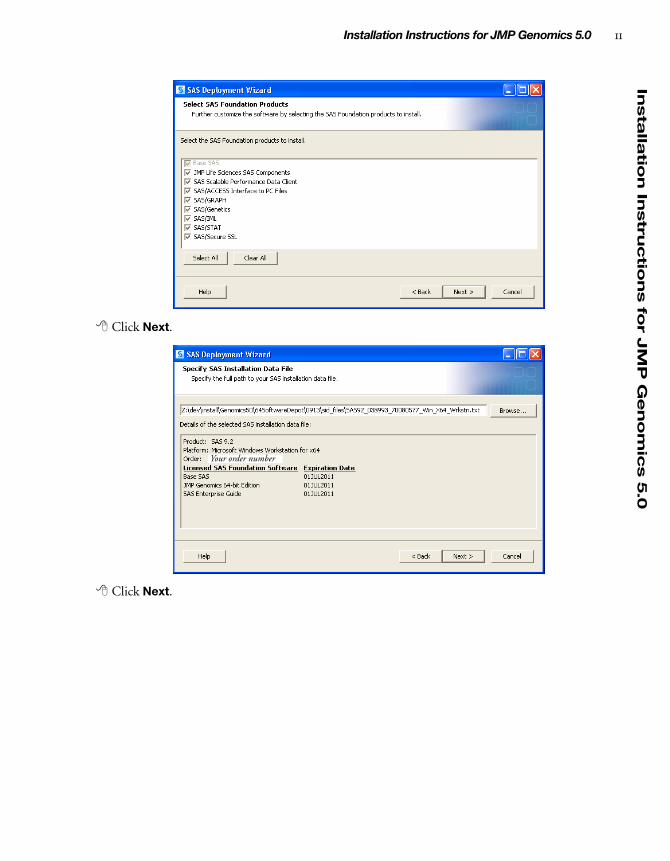
Click Next.
Click Next.
Your order number
12 Installation Instructions for JMP Genomics 5.0
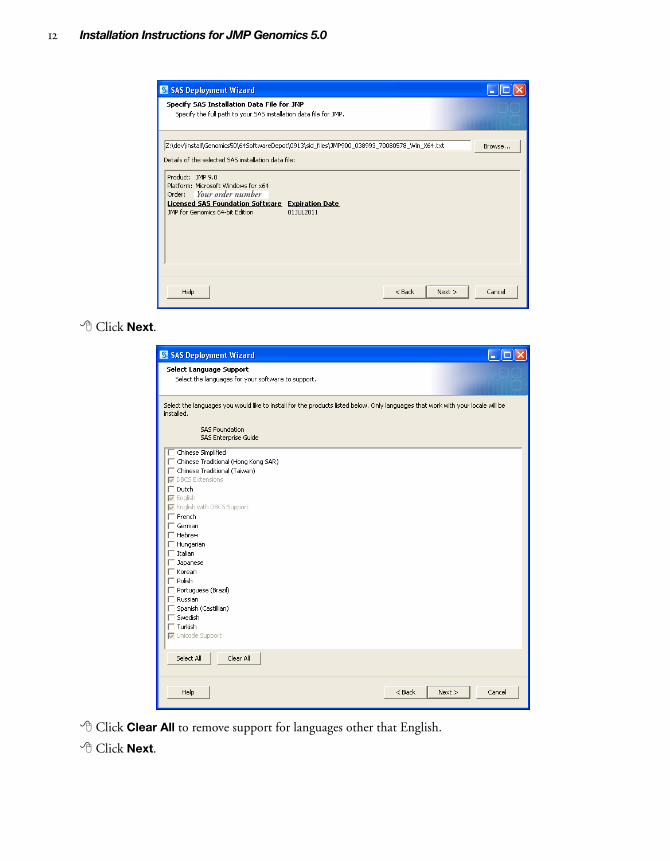
Click Next.
Click Clear All to remove support for languages other that English.
Click Next.
Your order number
Insta
llatio
n In
stru
ctio
ns fo
r JM
P G
en
om
ics 5
.0 Installation Instructions for JMP Genomics 5.0 13
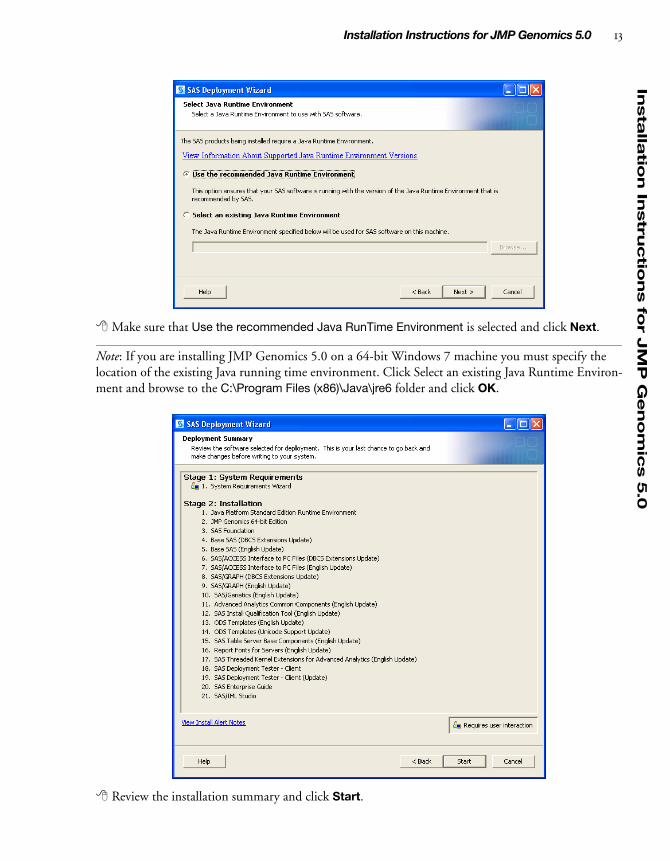
Make sure that Use the recommended Java RunTime Environment is selected and click Next.
Note: If you are installing JMP Genomics 5.0 on a 64-bit Windows 7 machine you must specify the location of the existing Java running time environment. Click Select an existing Java Runtime Environ-ment and browse to the C:\Program Files (x86)\Java\jre6 folder and click OK.
Review the installation summary and click Start.
14 Installation Instructions for JMP Genomics 5.0
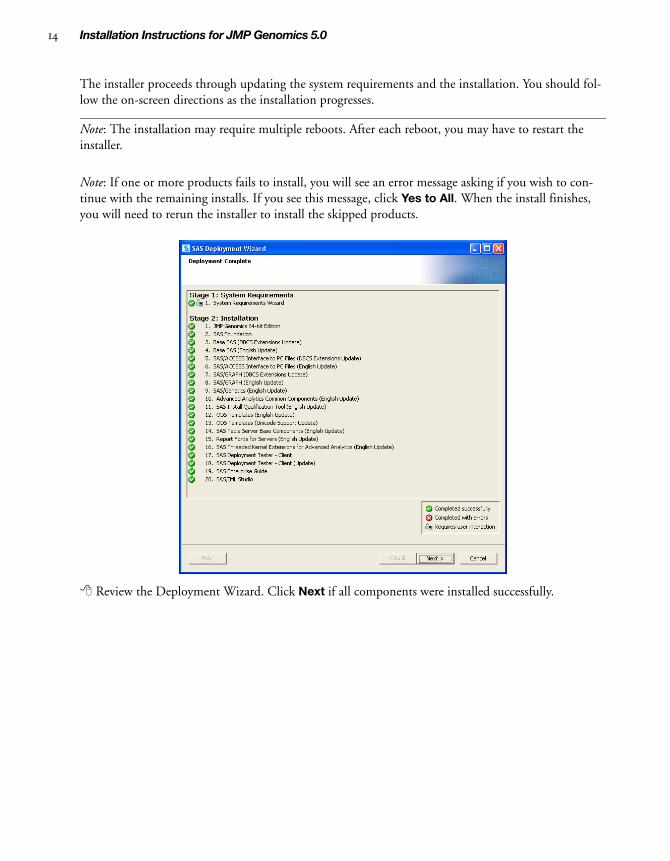
The installer proceeds through updating the system requirements and the installation. You should fol-low the on-screen directions as the installation progresses.
Note: The installation may require multiple reboots. After each reboot, you may have to restart the installer.
Note: If one or more products fails to install, you will see an error message asking if you wish to con-tinue with the remaining installs. If you see this message, click Yes to All. When the install finishes, you will need to rerun the installer to install the skipped products.
Review the Deployment Wizard. Click Next if all components were installed successfully.
Insta
llatio
n In
stru
ctio
ns fo
r JM
P G
en
om
ics 5
.0 Installation Instructions for JMP Genomics 5.0 15
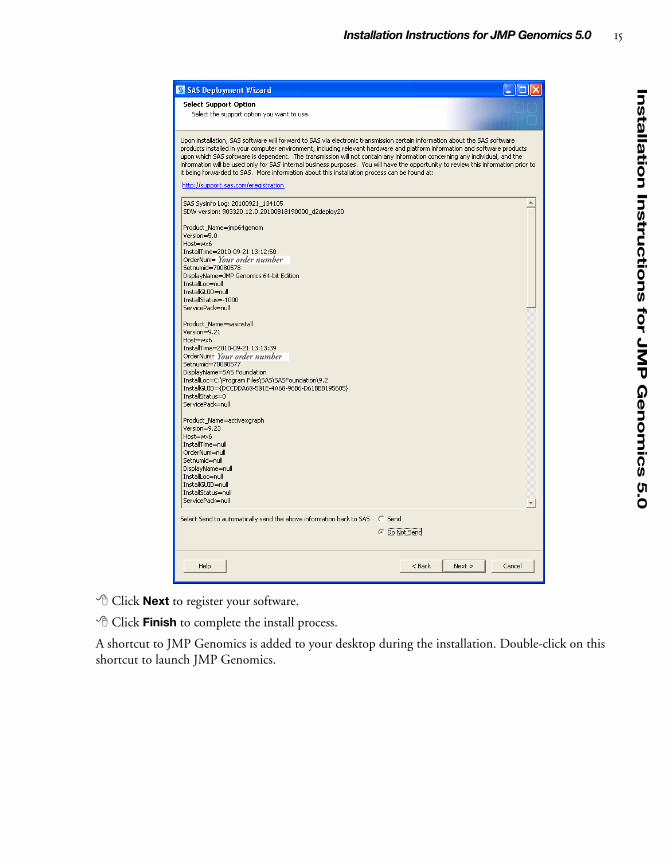
Click Next to register your software.
Click Finish to complete the install process.
A shortcut to JMP Genomics is added to your desktop during the installation. Double-click on this shortcut to launch JMP Genomics.
Your order number
Your order number
16 Installation Instructions for JMP Genomics 5.0
Verify that JMP Genomics 5.0 has been successfully installed on your machine.
If JMP Genomics has successfully been installed, all of the following events should be observed:
• The JMP Genomics icon has been added to your desktop.
• Double-clicking on the desktop icon opens JMP Genomics. The splash screen specifies JMP Genomics 5.0.
• JMP Genomics 5.0 is specified on the About JMP window (select Help > About JMP to view this window).
• The Genomics menu contains links to all of the new APs. Examples include the Genetics Rare Variants Workflow and the Genetics Q-K Analysis Workflow (found in the Workflows menu). Refer to the Release Notes (You should have received this document from Shannon Conners) for a complete list of new APs.
Note: Reasons for an incomplete installation may include but are not limited to: you are upgrading from JMP Genomics 4.1 to 5.0 or you are installing JMP Genomics on a SAS standard FDCC machine.
If any of these conditions are not observed, you must run the JMP portion of the installer manually.
Navigate into the JMP folder in the SAS Software Depot (C:\SAS Software Depot\JMP\JMP_Genomics\5_0\Windows for 32-bit machines or C:\SAS Software Depot\JMP\JMP_Genomics_64-bit_Edition\5_0\Microsoft_Windows_for_x64 for 64-bit machines).
Double-click setup.exe (in the appropriate folder) to re-install the JMP components.
If asked to Modify, Repair or Remove, choose Repair.
Launch JMP Genomics.
When it launches, JMP Genomics automatically rebuilds the dialogs and then displays the JMP Genomics 5.0 splash screen. You should verify that all of the conditions listed above are observed.
In some cases, the new APs are not listed in the menus even though both the splash screen and About JMP window specify JMP Genomics 5.0. If you observe this condition, you will need to generate the dialogs and rebuild the menus.
Click Genomics > General Utilities > Generate Dialogs from XML. A separate window will open while the dialogs are regenerated and will close when the process is complete.
Click View > Customize > Revert to Factory Defaults. Click Yes in the Alert window to rebuild the menus.
You should verify that all of the conditions listed above are observed.
Insta
llatio
n In
stru
ctio
ns fo
r JM
P G
en
om
ics 5
.0 Installation Instructions for JMP Genomics 5.0 17
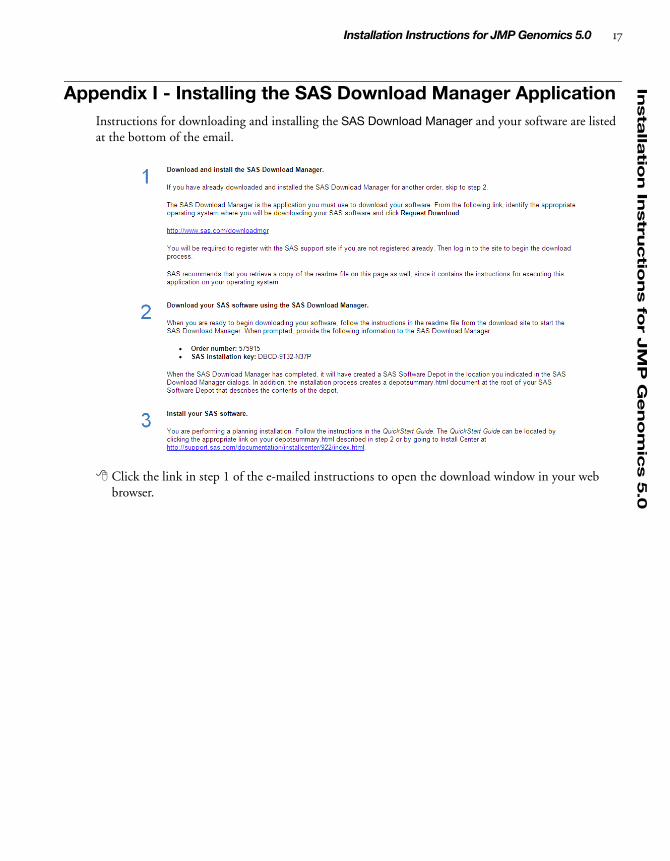
Appendix I - Installing the SAS Download Manager ApplicationInstructions for downloading and installing the SAS Download Manager and your software are listed at the bottom of the email.
Click the link in step 1 of the e-mailed instructions to open the download window in your web browser.
18 Installation Instructions for JMP Genomics 5.0
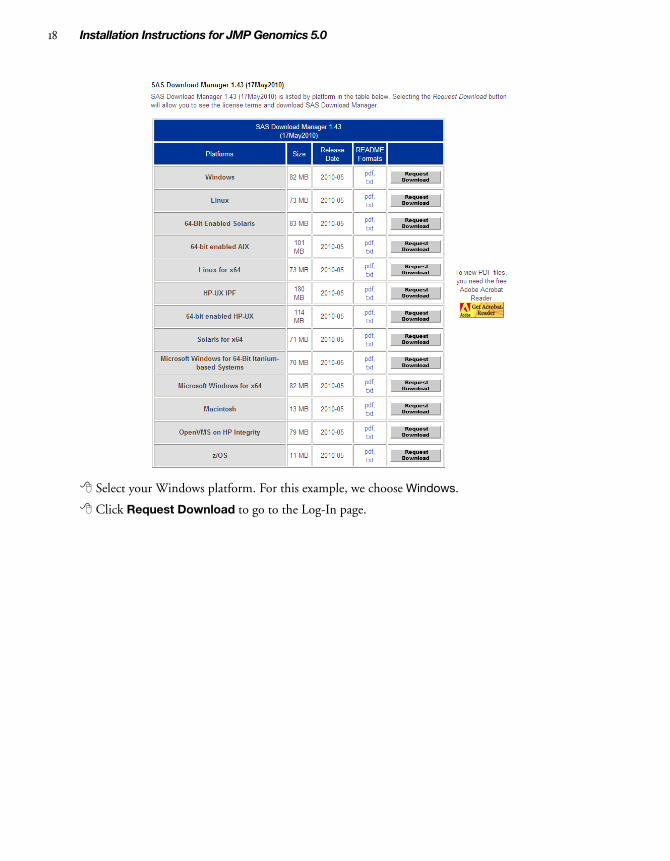
Select your Windows platform. For this example, we choose Windows.
Click Request Download to go to the Log-In page.
Insta
llatio
n In
stru
ctio
ns fo
r JM
P G
en
om
ics 5
.0 Installation Instructions for JMP Genomics 5.0 19
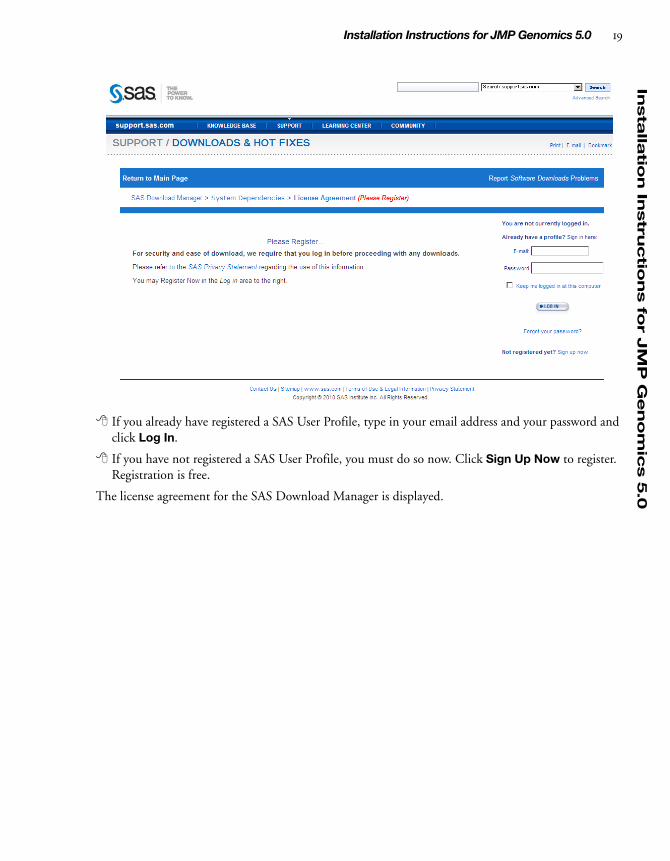
If you already have registered a SAS User Profile, type in your email address and your password and click Log In.
If you have not registered a SAS User Profile, you must do so now. Click Sign Up Now to register. Registration is free.
The license agreement for the SAS Download Manager is displayed.

20 Installation Instructions for JMP Genomics 5.0
Please read the agreement and click I Accept.
Click Download to download the SAS Download Manger.
Insta
llatio
n In
stru
ctio
ns fo
r JM
P G
en
om
ics 5
.0 Installation Instructions for JMP Genomics 5.0 21
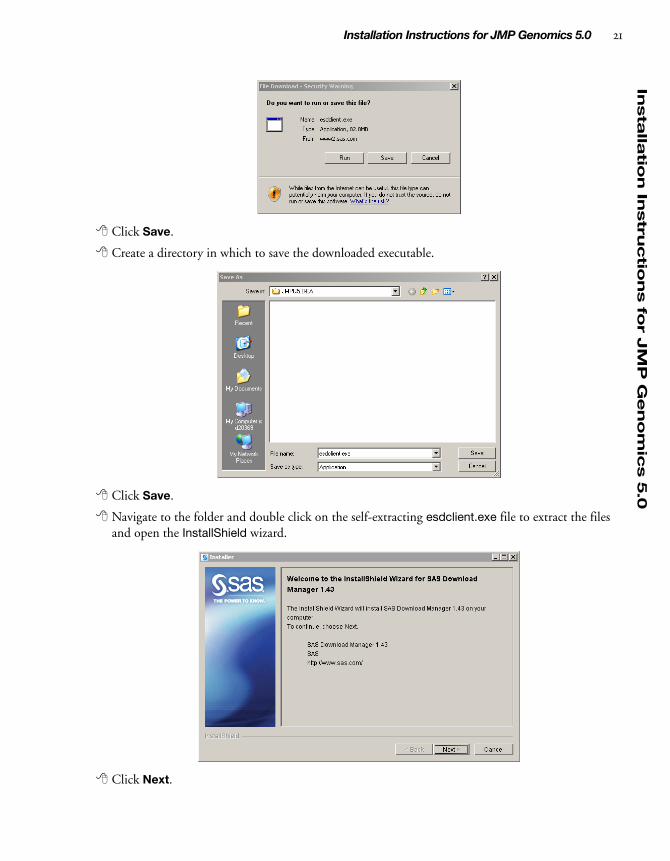
Click Save.
Create a directory in which to save the downloaded executable.
Click Save.
Navigate to the folder and double click on the self-extracting esdclient.exe file to extract the files and open the InstallShield wizard.
Click Next.
22 Installation Instructions for JMP Genomics 5.0
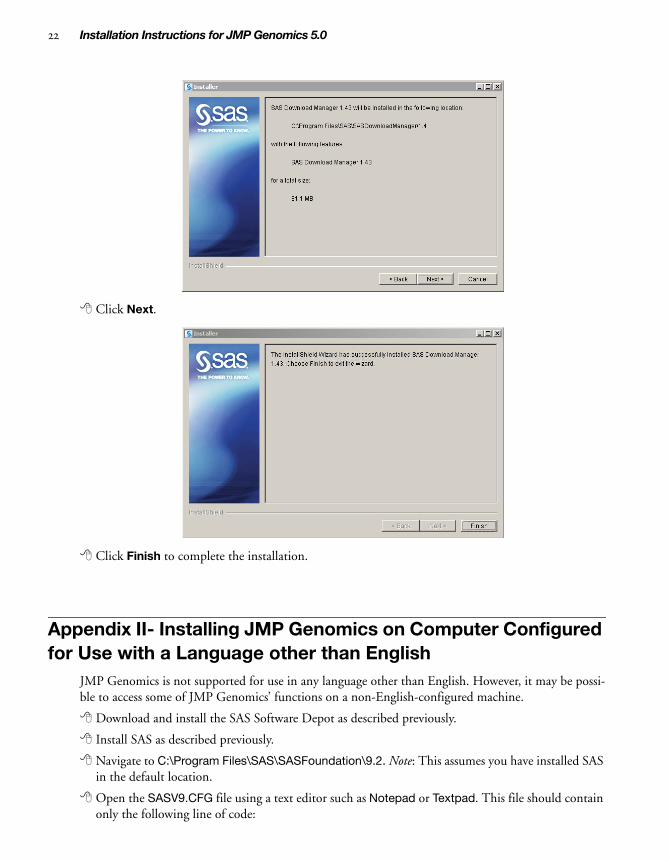
Click Next.
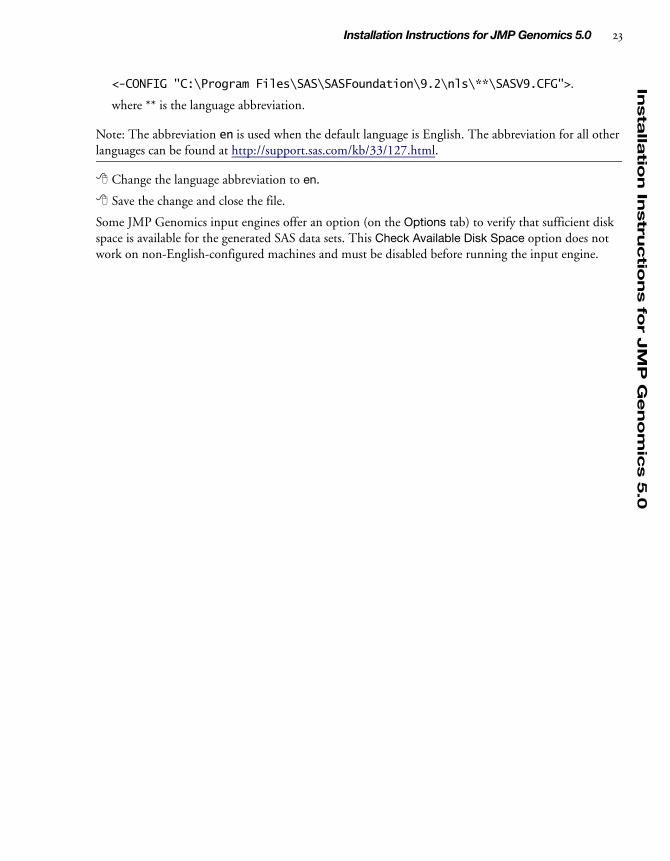
Click Finish to complete the installation.
Appendix II- Installing JMP Genomics on Computer Configured for Use with a Language other than English
JMP Genomics is not supported for use in any language other than English. However, it may be possi-ble to access some of JMP Genomics’ functions on a non-English-configured machine.
Download and install the SAS Software Depot as described previously.
Install SAS as described previously.
Navigate to C:\Program Files\SAS\SASFoundation\9.2. Note: This assumes you have installed SAS in the default location.
Open the SASV9.CFG file using a text editor such as Notepad or Textpad. This file should contain only the following line of code:
Insta
llatio
n In
stru
ctio
ns fo
r JM
P G
en
om
ics 5
.0 Installation Instructions for JMP Genomics 5.0 23
<-CONFIG "C:\Program Files\SAS\SASFoundation\9.2\nls\**\SASV9.CFG">.
where ** is the language abbreviation.
Note: The abbreviation en is used when the default language is English. The abbreviation for all other languages can be found at http://support.sas.com/kb/33/127.html.
Change the language abbreviation to en.
Save the change and close the file.
Some JMP Genomics input engines offer an option (on the Options tab) to verify that sufficient disk space is available for the generated SAS data sets. This Check Available Disk Space option does not work on non-English-configured machines and must be disabled before running the input engine.

24 Installation Instructions for JMP Genomics 5.0