instagram guide - a tactical approach - how-to instagram for brands
TRANSCRIPT

www.theonlinecircle.com
A step by step process
Instagram for brands
www.theonlinecircle.com
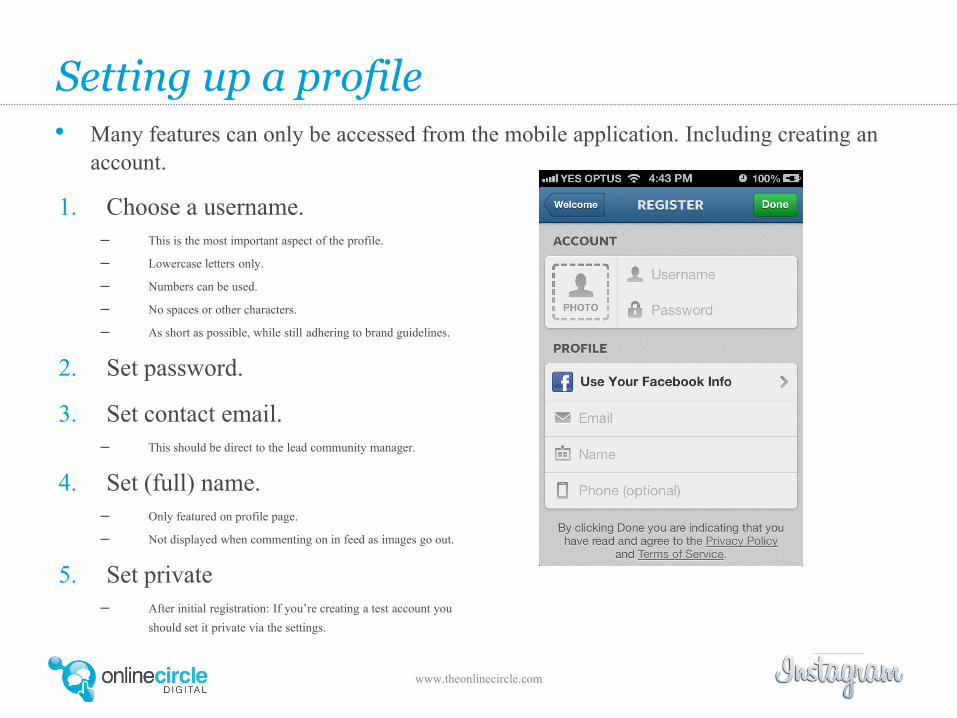
Setting up a profile• Many features can only be accessed from the mobile application. Including creating an
account.
1. Choose a username.
– This is the most important aspect of the profile.
– Lowercase letters only.
– Numbers can be used.
– No spaces or other characters.
– As short as possible, while still adhering to brand guidelines.
2. Set password.
3. Set contact email.
– This should be direct to the lead community manager.
4. Set (full) name.
– Only featured on profile page.
– Not displayed when commenting on in feed as images go out.
5. Set private
– After initial registration: If you’re creating a test account you
should set it private via the settings.
www.theonlinecircle.com
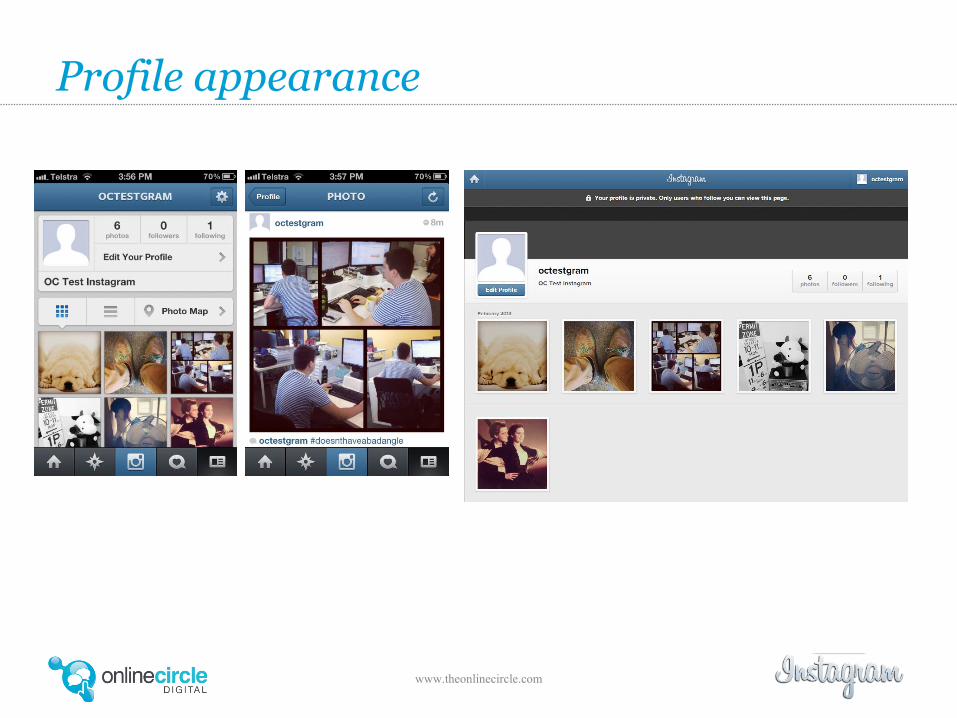
Profile appearance
www.theonlinecircle.com
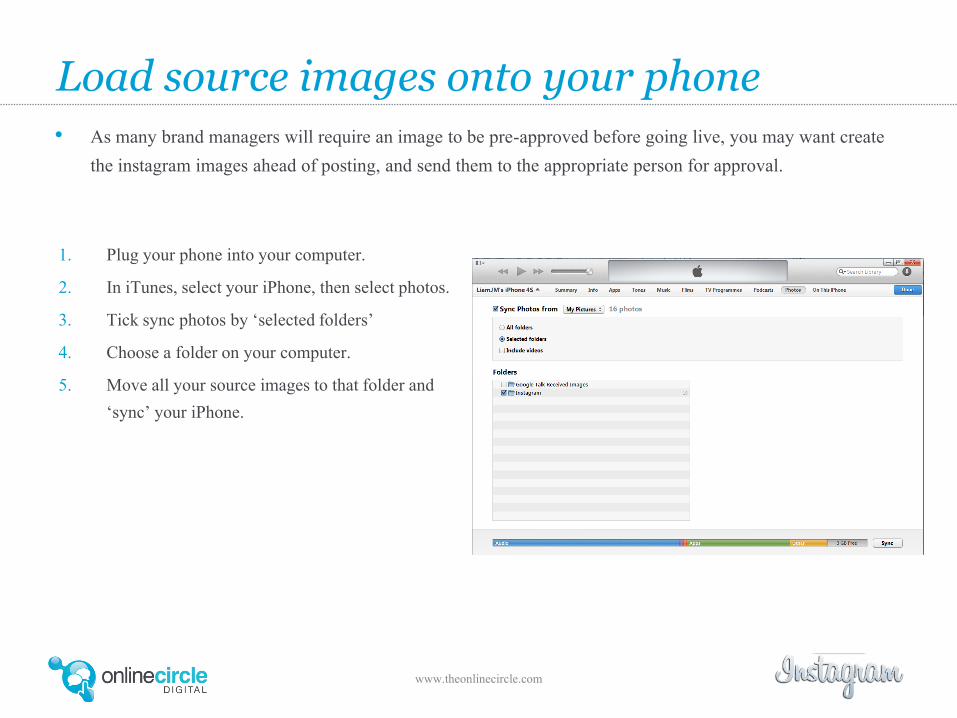
Load source images onto your phone
• As many brand managers will require an image to be pre-approved before going live, you may want create
the instagram images ahead of posting, and send them to the appropriate person for approval.
1. Plug your phone into your computer.
2. In iTunes, select your iPhone, then select photos.
3. Tick sync photos by ‘selected folders’
4. Choose a folder on your computer.
5. Move all your source images to that folder and
‘sync’ your iPhone.
www.theonlinecircle.com
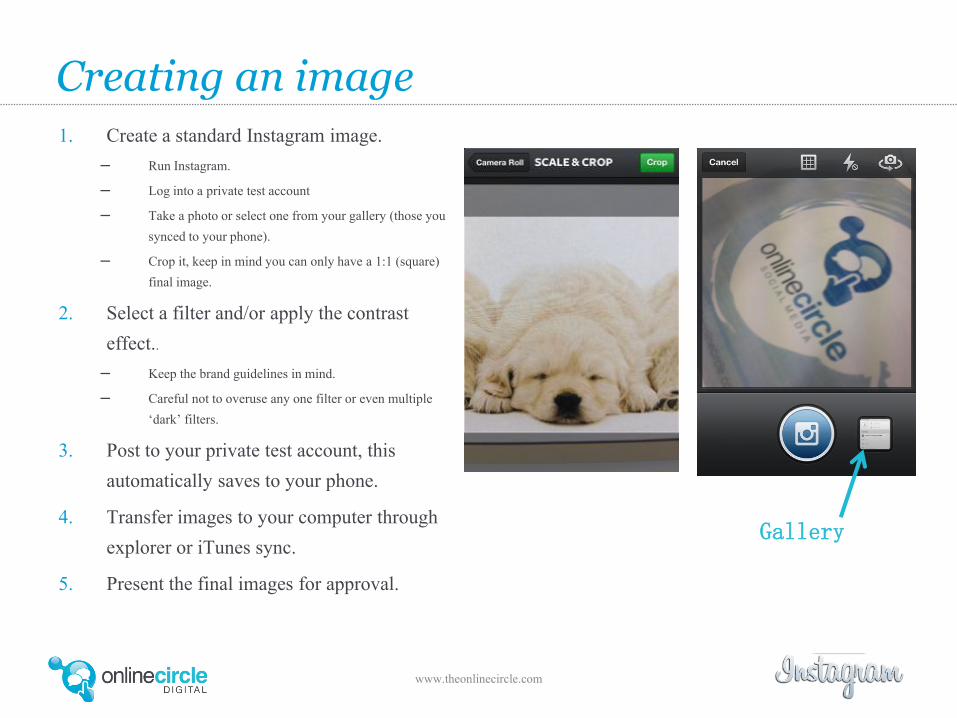
Creating an image1. Create a standard Instagram image.
– Run Instagram.
– Log into a private test account
– Take a photo or select one from your gallery (those you
synced to your phone).
– Crop it, keep in mind you can only have a 1:1 (square)
final image.
2. Select a filter and/or apply the contrast
effect..
– Keep the brand guidelines in mind.
– Careful not to overuse any one filter or even multiple
‘dark’ filters.
3. Post to your private test account, this
automatically saves to your phone.
4. Transfer images to your computer through
explorer or iTunes sync.
5. Present the final images for approval.
Gallery
www.theonlinecircle.com
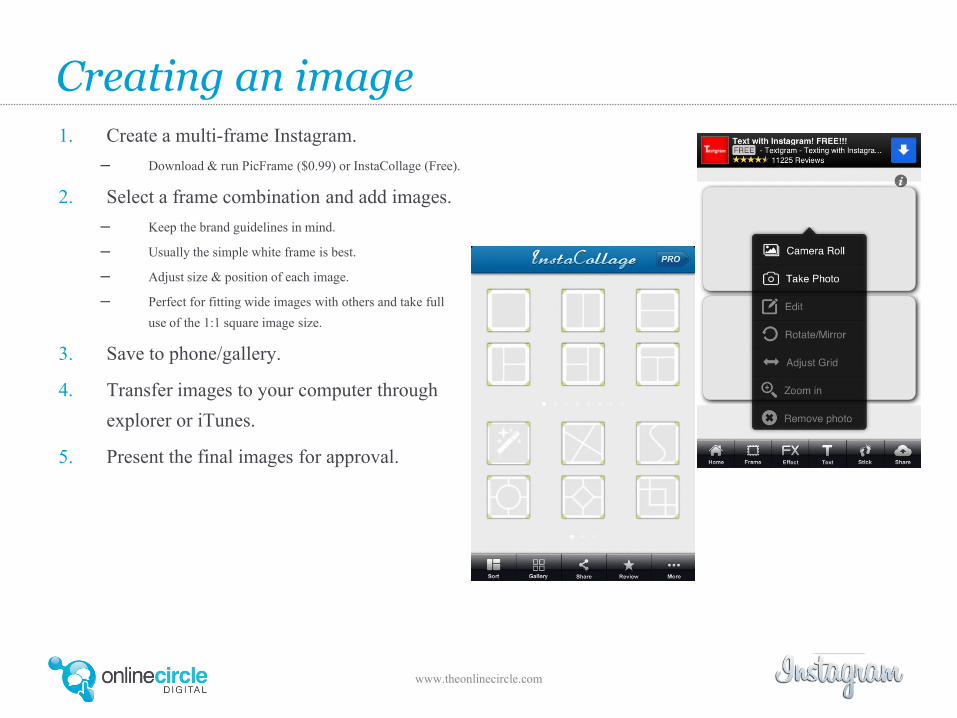
Creating an image1. Create a multi-frame Instagram.
– Download & run PicFrame ($0.99) or InstaCollage (Free).
2. Select a frame combination and add images.
– Keep the brand guidelines in mind.
– Usually the simple white frame is best.
– Adjust size & position of each image.
– Perfect for fitting wide images with others and take full
use of the 1:1 square image size.
3. Save to phone/gallery.
4. Transfer images to your computer through
explorer or iTunes.
5. Present the final images for approval.
www.theonlinecircle.com
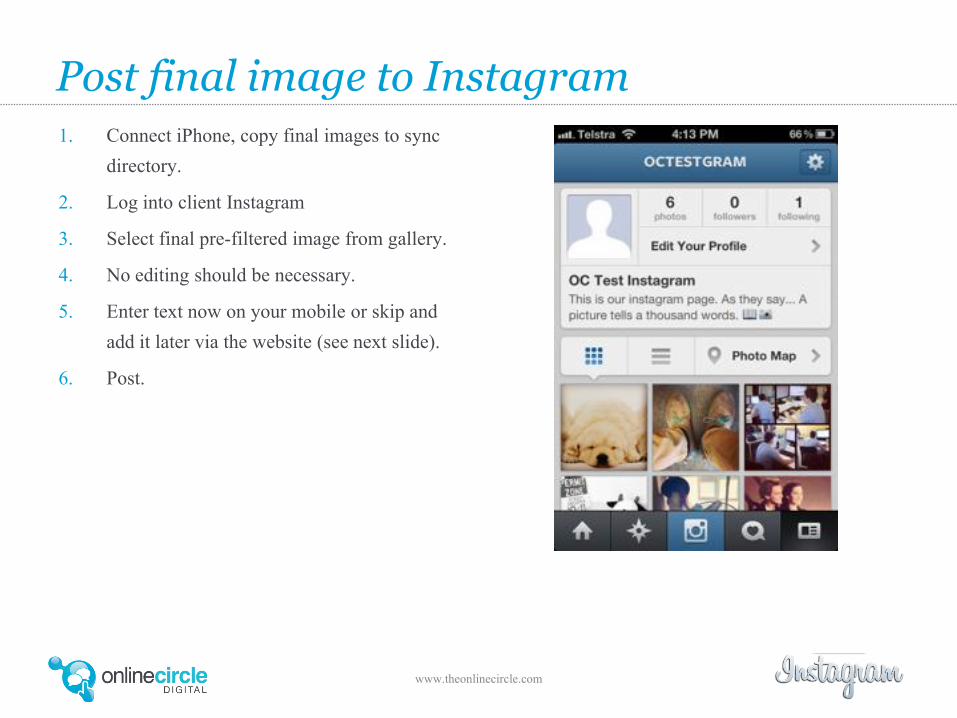
Post final image to Instagram1. Connect iPhone, copy final images to sync
directory.
2. Log into client Instagram
3. Select final pre-filtered image from gallery.
4. No editing should be necessary.
5. Enter text now on your mobile or skip and
add it later via the website (see next slide).
6. Post.

www.theonlinecircle.com
Applying copy via website1. Log into client Instagram via website.
– www.instagram.com/clientusername
2. Select live image.
3. Copy + paste approved copy including hashtags
from calendar.
– A short & concise description is usually best, for example
approx. 6 words and 3 - 6 hashtags.
4. Final review.
5. Post.
www.theonlinecircle.com
A step by step process
Instagram for brands