“in depth” snow measuring - cocorahs - … snow-national... · “in depth” snow measuring....
TRANSCRIPT

“In depth” Snow Measuring
Measuring Snow
• Snowfall measurement is typically more difficult than rainfall
• Snowfall measurement takes a little more time
Accurate and timely snowfall measurements can be extremely important to your local National Weather Service office, public works departments, media outlets, climatologists, and other scientists

Tools of the Trade
• Rain Gauge• Snow board
A 24”x16”piece of ½ or ¾”plywood painted white
• Yardstick or snow stick
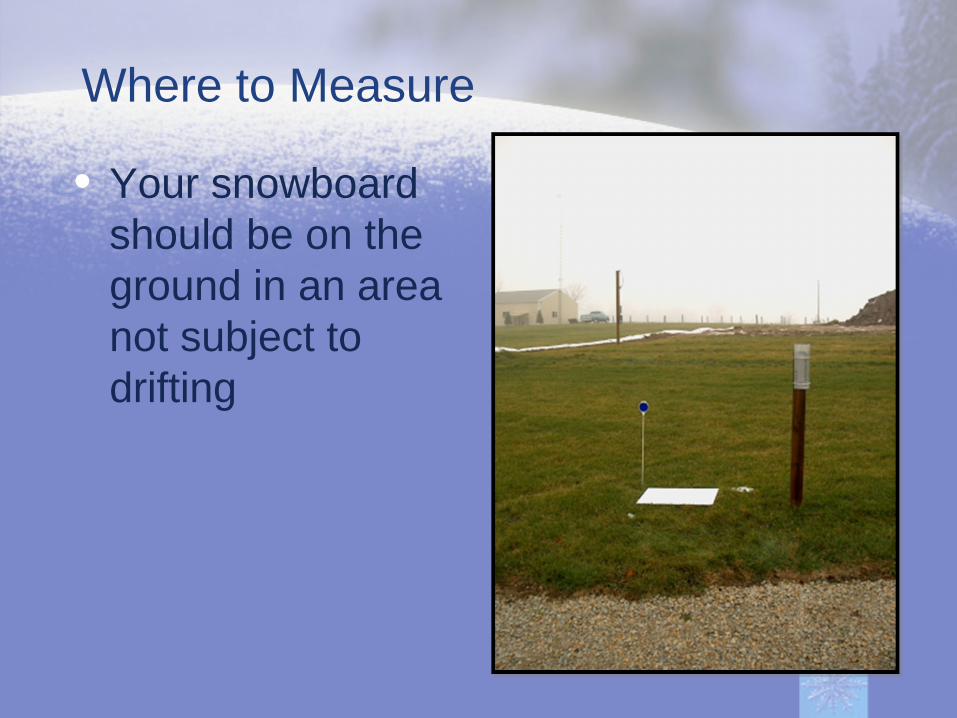
Where to Measure
• Your snowboard should be on the ground in an area not subject to drifting

Where to Measure
• It’s a good idea to mark the location of your snow board with a flag or reflector
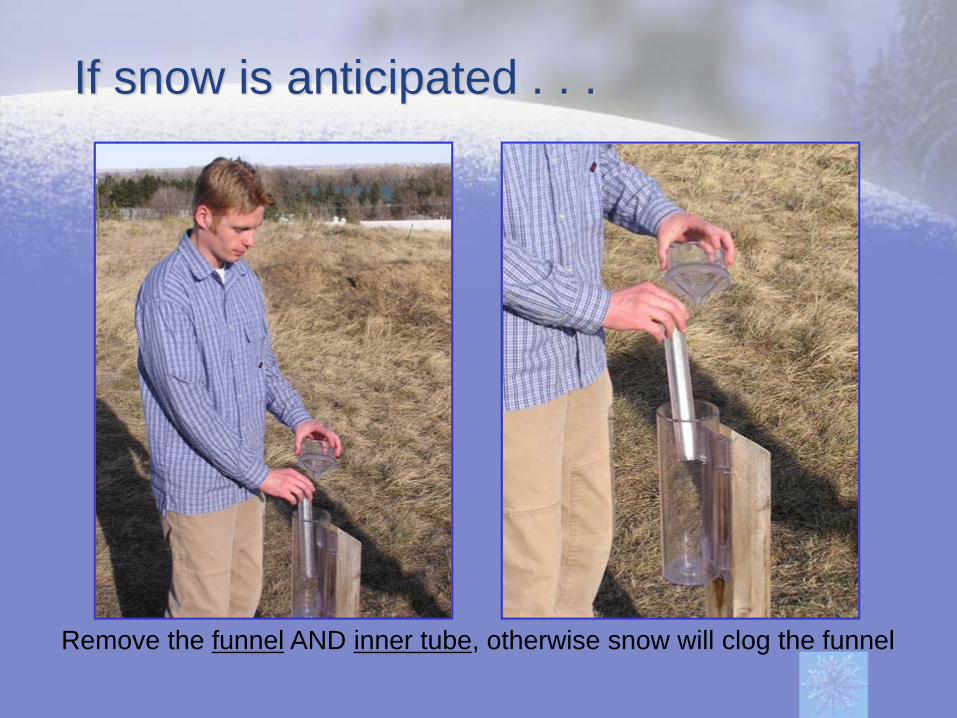
If snow is anticipated . . .
Remove the funnel AND inner tube, otherwise snow will clog the funnel
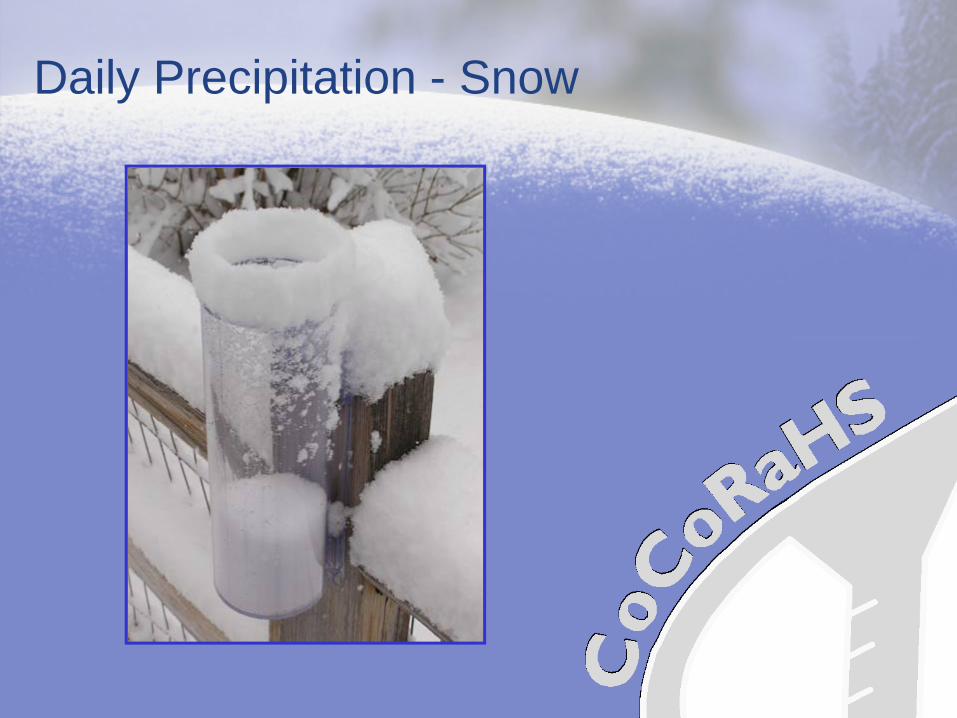
Daily Precipitation - Snow

you may have an accumulation of snow on the rim of your gauge

How do I know what to measure and what not to??
Take your snow-swatter and tap gently on the rim of the gauge
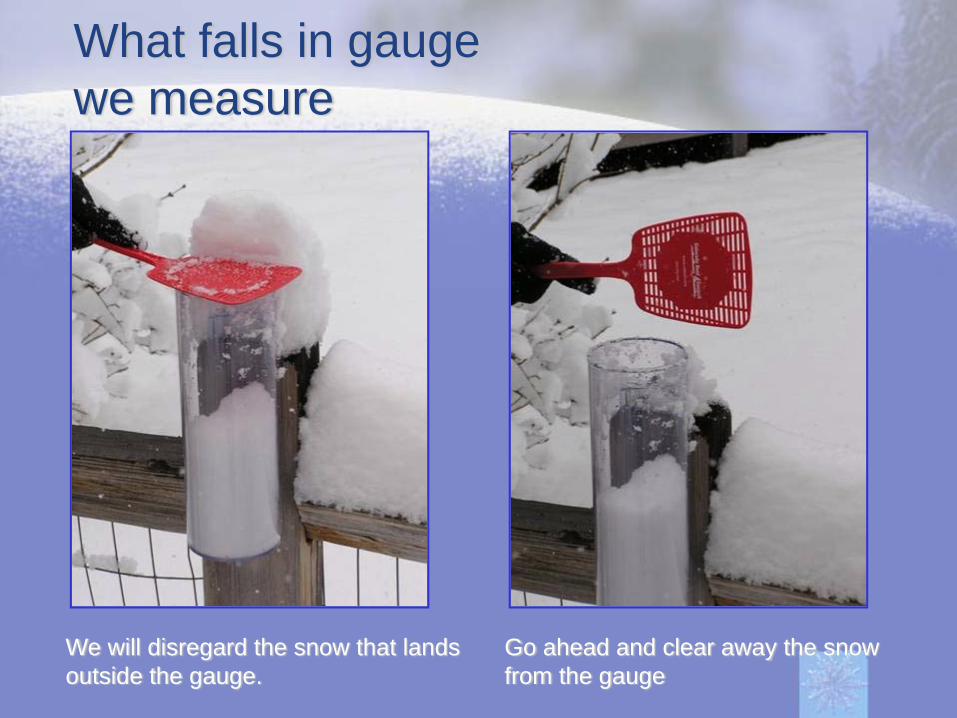
What falls in gauge we measure
Go ahead and clear away the snow from the gauge
We will disregard the snow that landsoutside the gauge.

Melting snowfall
Add some warm water to the inner cylinderNotice that you have two cylinders
Outer
Inner
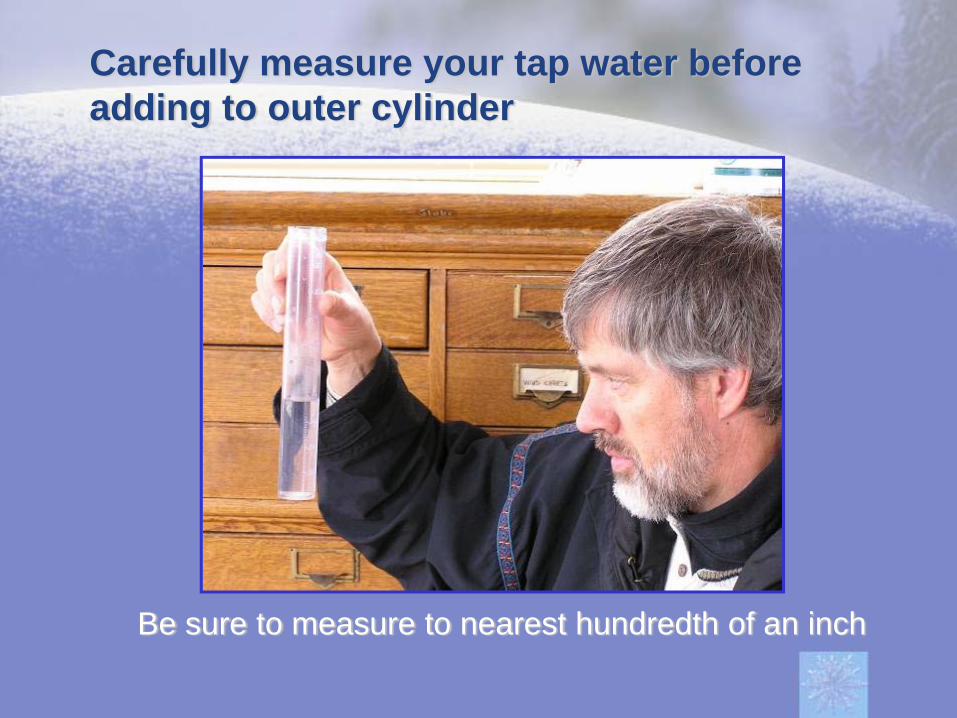
Carefully measure your tap water before adding to outer cylinder
Be sure to measure to nearest hundredth of an inch

Add the warm water to the snow sample
Allow sample to completely meltPour water directly into sample

Measure the liquefied snowfall sample
Pour snow sample into smaller tube Remember “Every drop counts!”
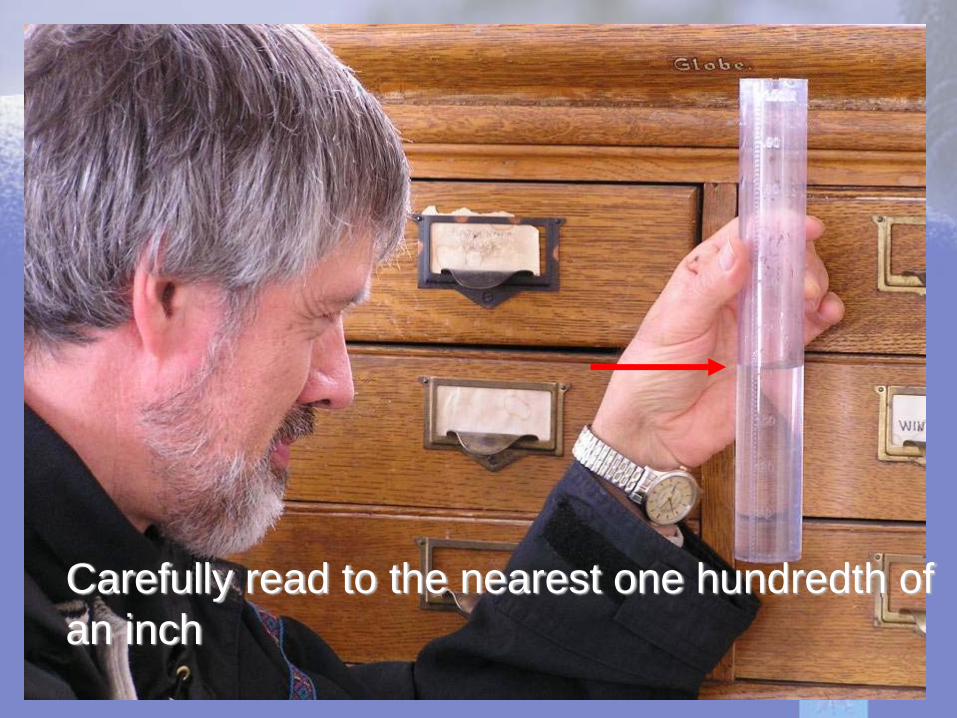
Carefully read to the nearest one hundredth of an inch

Remember to subtract the amount of warm water that you’ve added to the tube
Reading of 0.79 inches of waterminus 0.50 inches of water added gives a final reading of 0.29 inches
Tube full 0.79- Water added 0.50---------------------------------Final reading 0.29
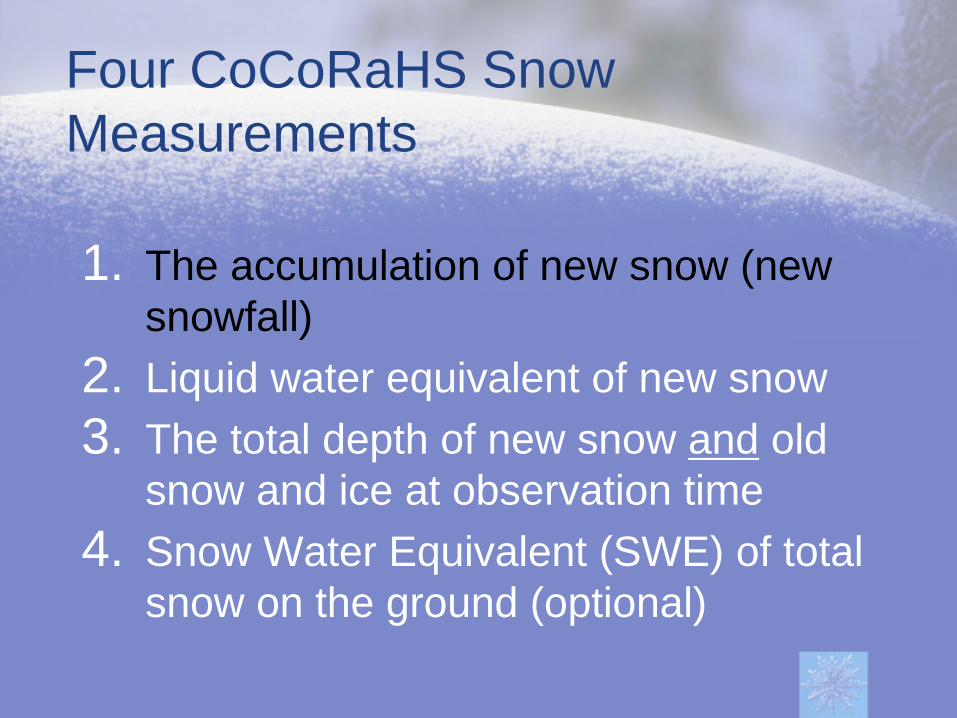
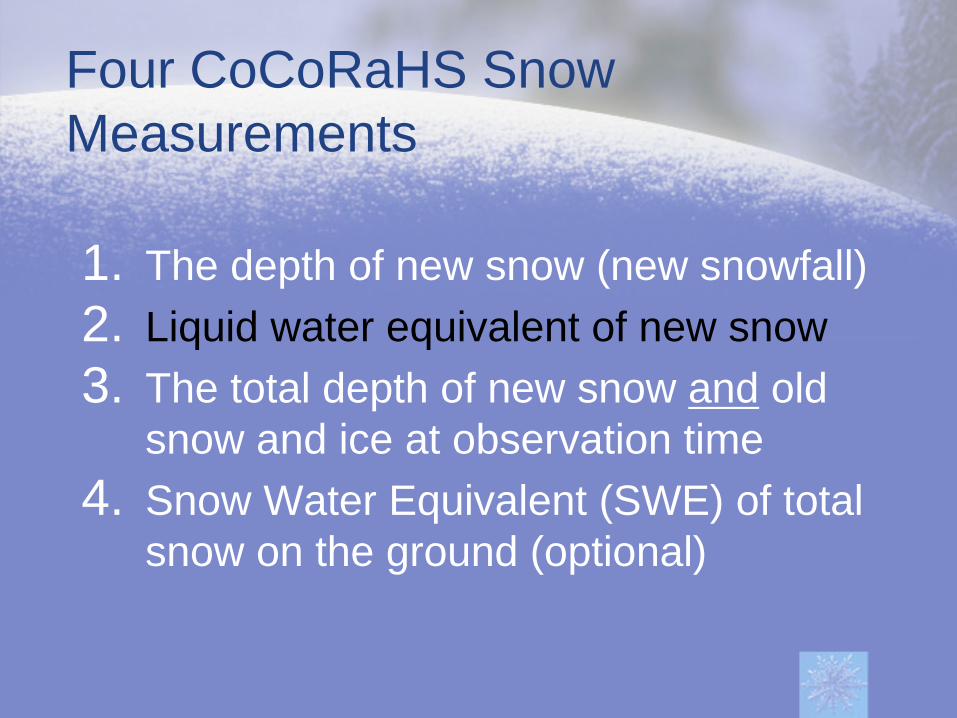
Four CoCoRaHS Snow Measurements
1. The accumulation of new snow (new snowfall)
2. Liquid water equivalent of new snow3. The total depth of new snow and old
snow and ice at observation time4. Snow Water Equivalent (SWE) of total
snow on the ground (optional)

Measuring the accumulation of New Snowfall
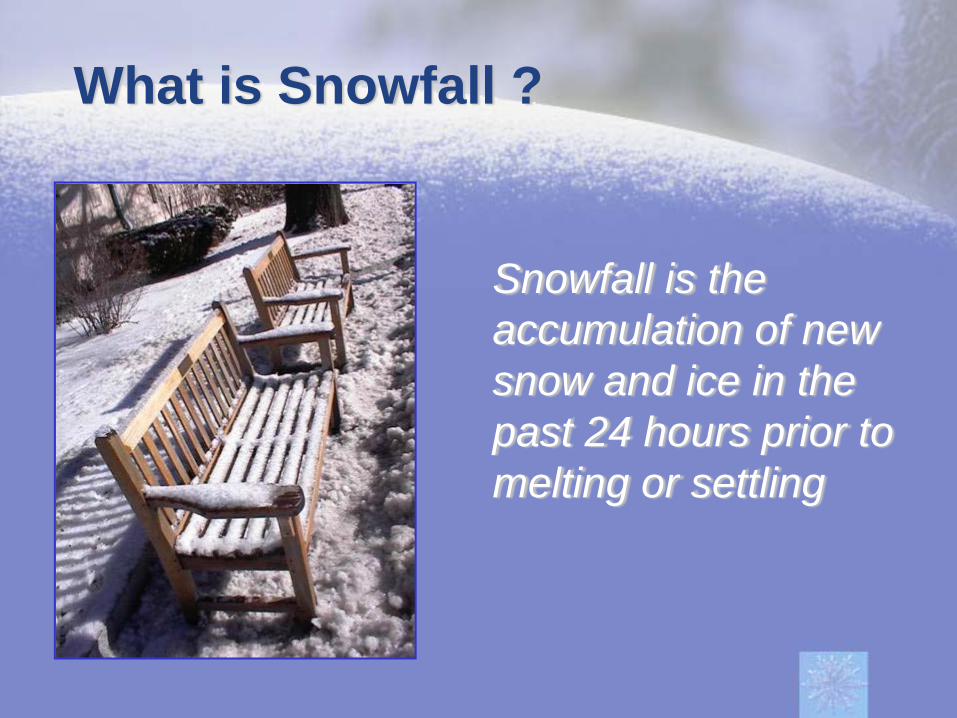
What is Snowfall ?
Snowfall is the accumulation of new snow and ice in the past 24 hours prior to melting or settling

The 10:1 Myth
• The adage that one inch of rain equals 10 inches of snow is a myth!
• The snow/water equivalent ratio is dependent on many factors, not just surface air temperature
• Snow to water ratios can vary from 8:1 or less to 20:1 or more!
Do NOT estimate snowfall by converting the liquid in your rain gage to a snowfall amount!

When to Measure New Snow
• Measure new snowfall as soon as possible after it ends, before settling and melting occur.
• This often will not be at your regular observation time.
Note that we do not ever measure the depth of the snow in the rain gauge itself. Any frozen precipitation in the rain gauge must first be melted, then measured.

1.2 inches
A Snow Event
Monday7:00 am
Tuesday7:00 am
Snow begins9:00 a.m.
Snow ends1:00 p.m.
2.4 inches of snow
Measure snow as close to 1:00 p.m as possible
Some melting and settling occurs
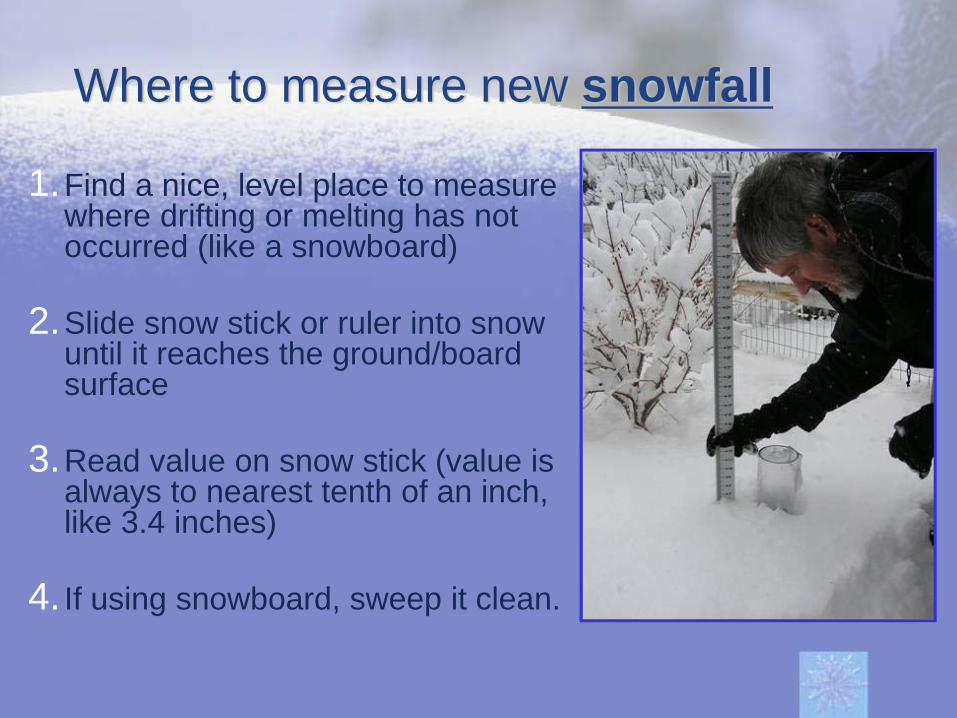
Where to measure new snowfall
1.Find a nice, level place to measure where drifting or melting has not occurred (like a snowboard)
2.Slide snow stick or ruler into snow until it reaches the ground/board surface
3.Read value on snow stick (value is always to nearest tenth of an inch, like 3.4 inches)
4. If using snowboard, sweep it clean.
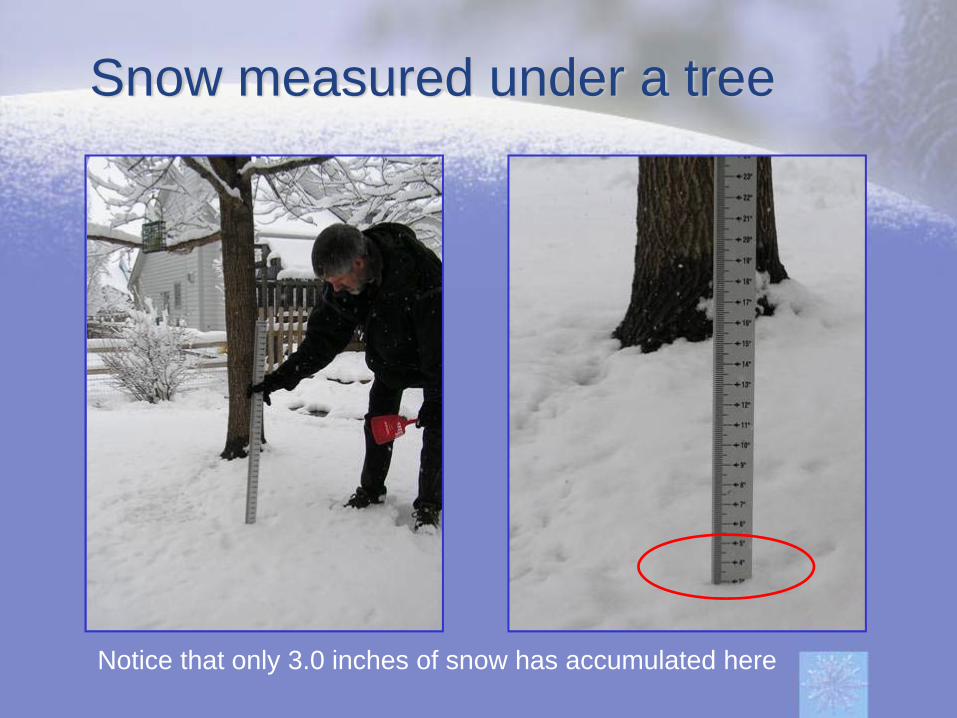
Snow measured under a tree
Notice that only 3.0 inches of snow has accumulated here

Snow measured in the open
Whereas 6.5 inches has fallen in the open

Angle of Measurement
Measure at eye level, as an angle will give you an inaccurate measurement
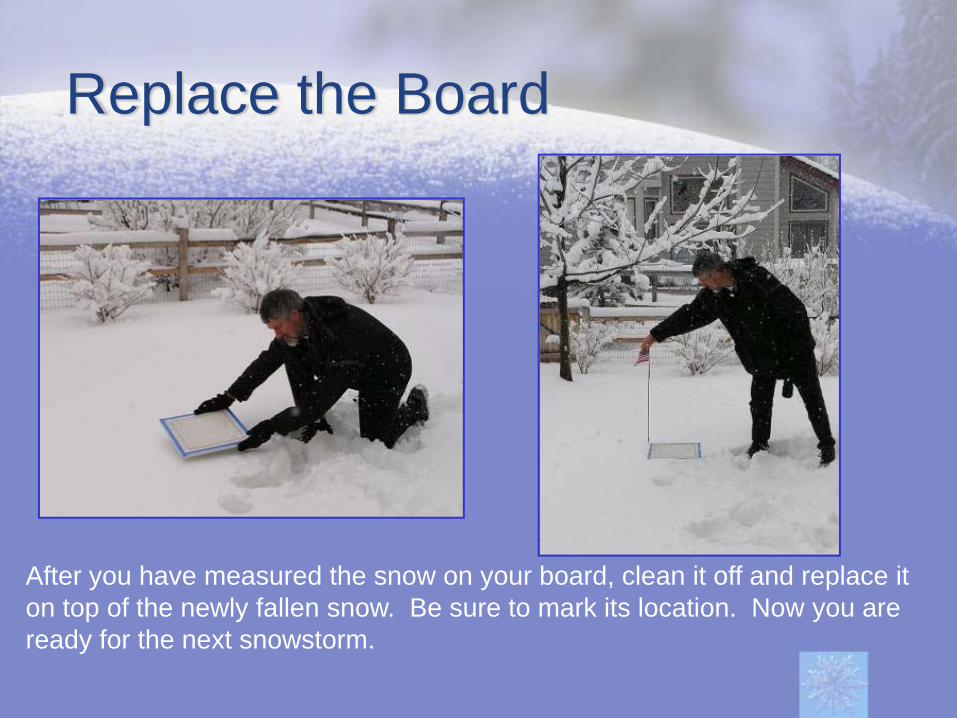
Replace the Board
After you have measured the snow on your board, clean it off and replace it on top of the newly fallen snow. Be sure to mark its location. Now you are ready for the next snowstorm.
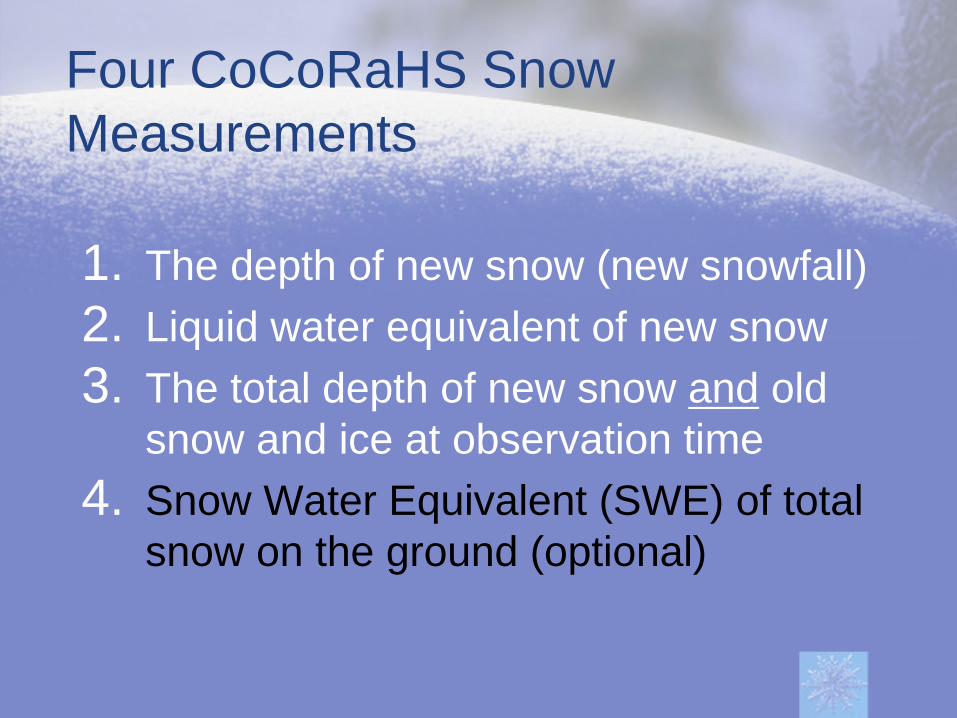
Four CoCoRaHS Snow Measurements
1. The depth of new snow (new snowfall)2. Liquid water equivalent of new snow3. The total depth of new snow and old
snow and ice at observation time4. Snow Water Equivalent (SWE) of total
snow on the ground (optional)

Measuring the Water Equivalent of New Snow

Taking a Snow Core of New Snow
• Use your snow board or other hard surface
• Take core after you have measured snow depth, but before you have cleared the board or surface of snow.
• For example, if you determined the total depth of the new snow is 4 inches, then take your core sample from an area where the depth of new snow is 4 inches.

Taking a Snow Core of New Snow
• Capture a core by inverting the outer cylinder and pushing straight down into the snow
• Use something thin and sturdy to slide under the cylinder (aluminum flashing, spatula, snow swatter)
Pho
to b
y Jo
n S
nurk
a

Taking a Snow Core of New Snow
• Melt and measure

Four CoCoRaHS Snow Measurements
1. The depth of new snow (new snowfall)2. Liquid water equivalent of new snow3. The total depth of new snow and old
snow and ice at observation time4. Snow Water Equivalent (SWE) of total
snow on the ground (optional)

Measuring the Total Depth of Snow on the Ground

Snow depth is the average depth of snow (including old snow and ice as well as new) that remains on the ground at observation time.
Pho
to b
y M
icha
el P
alec
ki

Measuring Total Snow on the Ground
• Snow is rarely uniform in coverage, so take several measurements and average them to obtain your total depth of snow.
• Slide snow stick through all layers of snow (new and old).
• Read value on snow stick and record (values are to the nearest ½” like 4.5 or 5.0).
• Don’t measure “artificial accumulations”, such as plowed piles, large drifts, or shoveled snow.
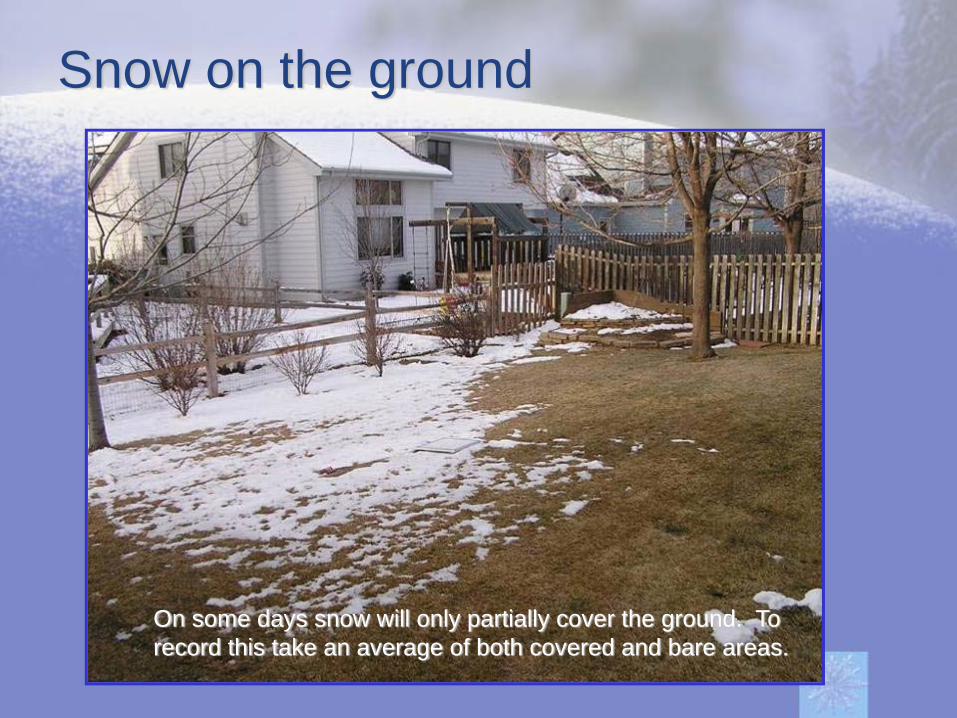
Snow on the ground
On some days snow will only partially cover the ground. To record this take an average of both covered and bare areas.

If half the ground has 2.0” and half the ground is bare, report 1.0” as your total depth.
If more than half the ground is bare report “T” (trace) and mention the range of depths in your comments.

PLEASE REMEMBER!
If possible, please report“Total Snow Depth”
EVERY day there is any snow on the ground!
Four CoCoRaHS Snow Measurements
1. The depth of new snow (new snowfall)2. Liquid water equivalent of new snow3. The total depth of new snow and old
snow and ice at observation time4. Snow Water Equivalent (SWE) of total
snow on the ground (optional)

Measuring Snow Water Equivalent (SWE
• This is a measurement that is useful to hydrologists and river forecasters.
• It provides an estimate of how much water is “on the ground” that can potentially run off into rivers and streams.
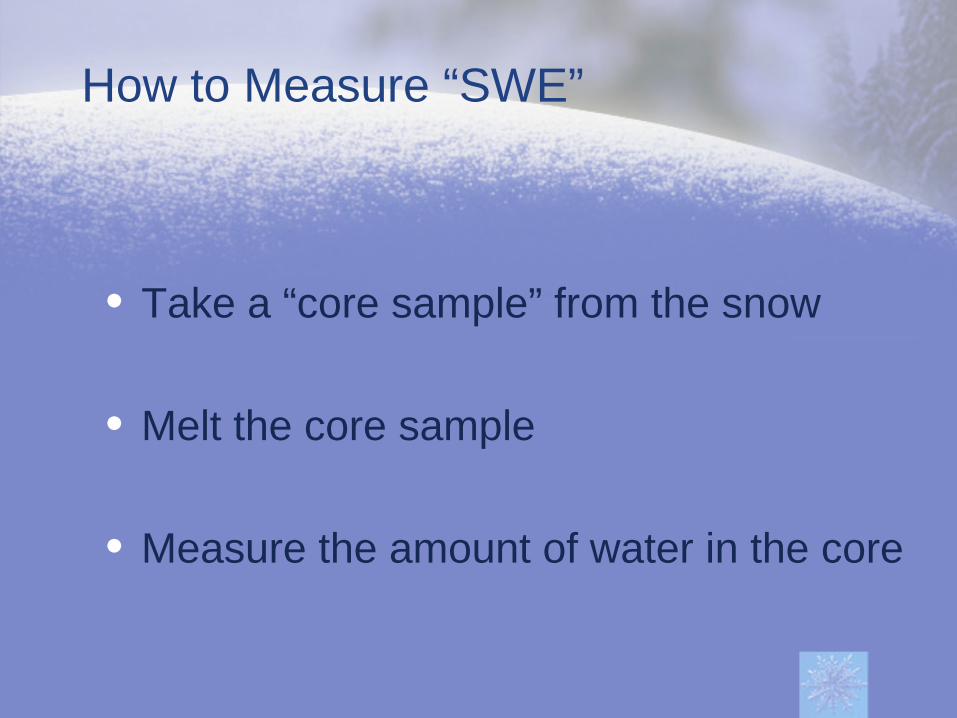
How to Measure “SWE”
• Take a “core sample” from the snow
• Melt the core sample
• Measure the amount of water in the core
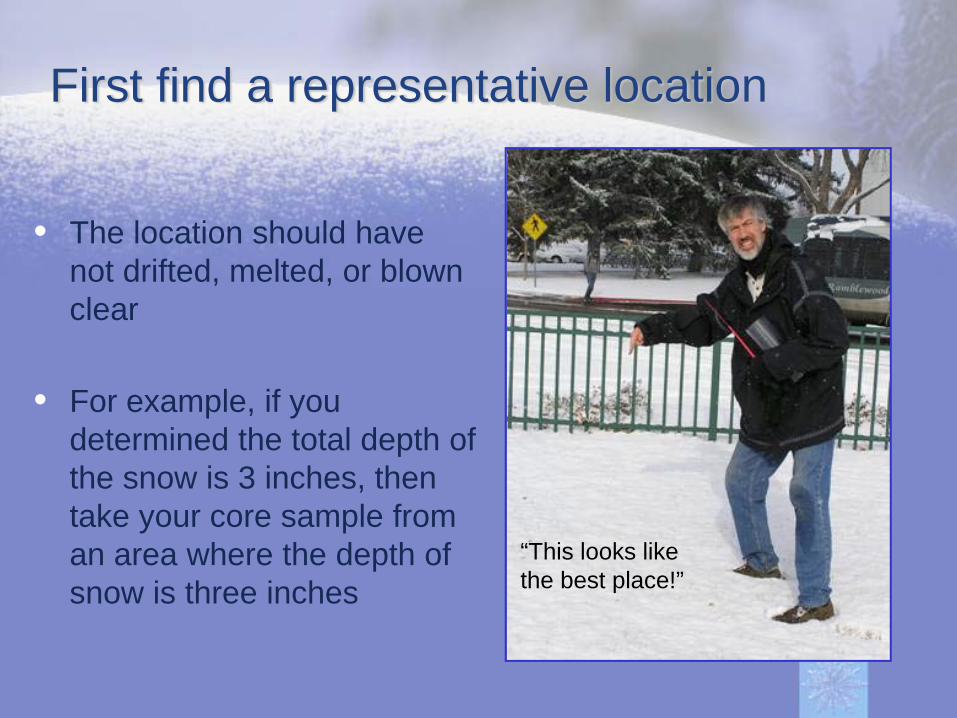
First find a representative location
• The location should have not drifted, melted, or blown clear
• For example, if you determined the total depth of the snow is 3 inches, then take your core sample from an area where the depth of snow is three inches
“This looks like the best place!”

Steps to cutting a core sample
Place gauge upside down andpush down into the snow
Clear snow from around the gauge
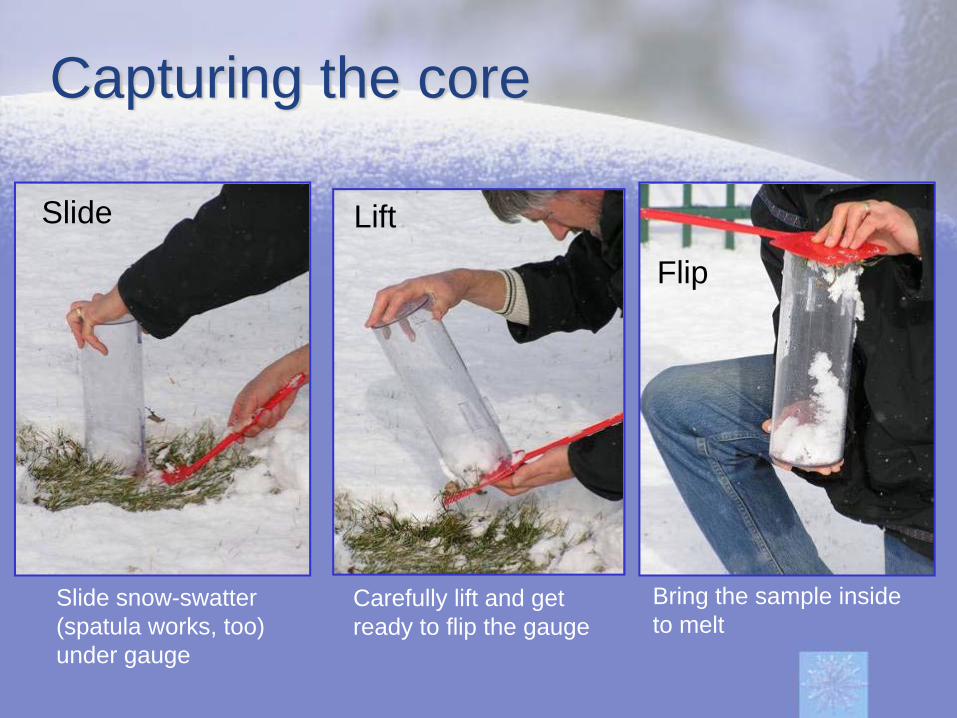
Capturing the core
Slide snow-swatter (spatula works, too) under gauge
Carefully lift and get ready to flip the gauge
Bring the sample inside to melt
Slide Lift
Flip
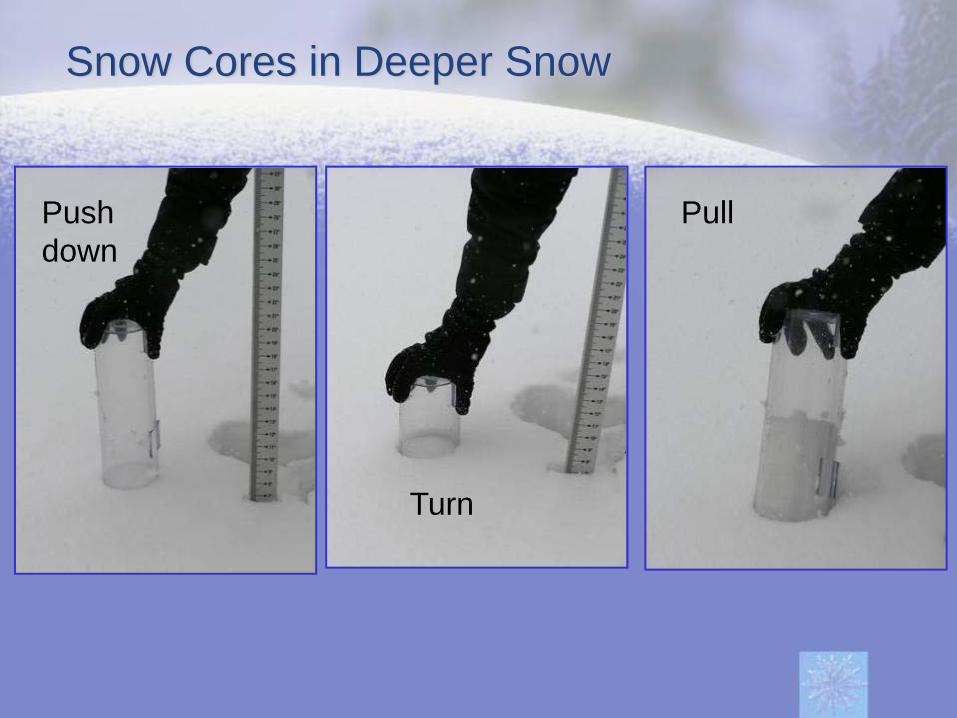
Snow Cores in Deeper Snow
Push down
Turn
Pull

In wetter snow, the core will come out in one piece
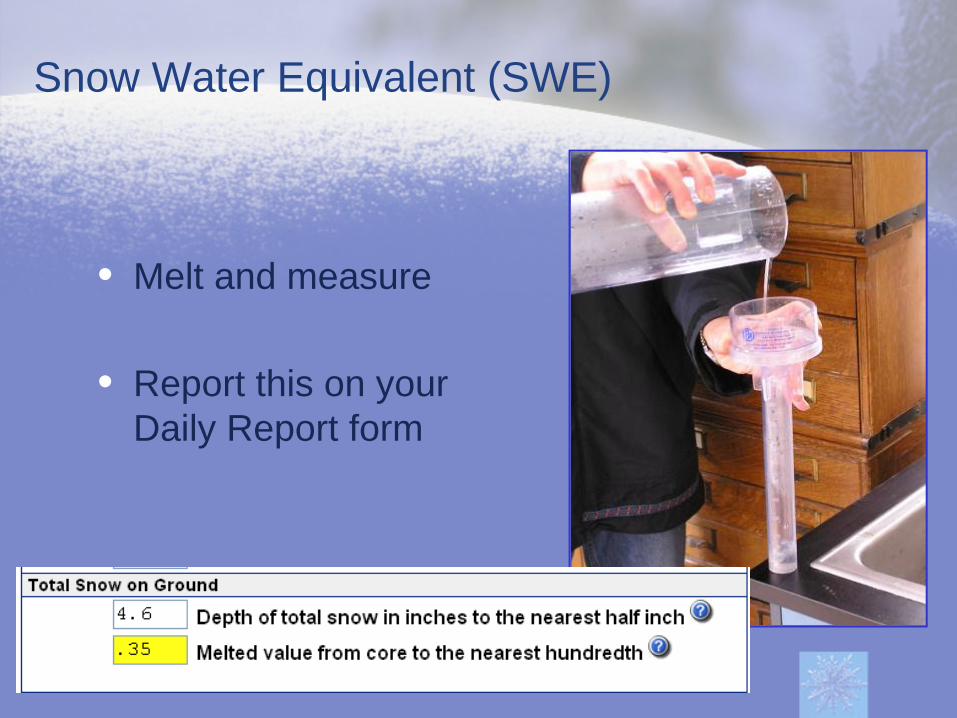
Snow Water Equivalent (SWE)
• Melt and measure
• Report this on your Daily Report form

Special Situations

Windy conditions may create a situation where the amount of snow in the gauge is not representative of what fell on the ground.
• In this case, we need to take a “core sample” from the snowboard or an area representative of the average new snow depth.
• Melt and measure the core sample
• If you feel this is more representative of the actual precipitation, then report this amount as your Daily Precipitation and make a note in the Comments. Include the melted amount from the snow that actually fell in the gauge in your comments

What if’s: Some additional situations you may encounter
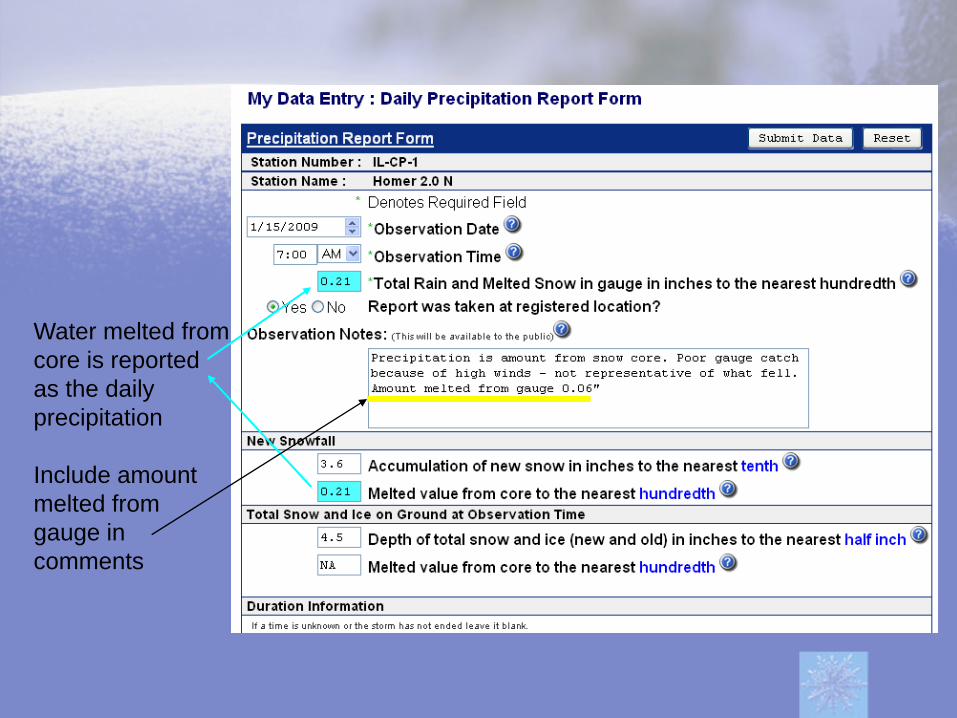
Water melted from core is reported as the daily precipitation
Include amount melted from gauge in comments

What if: Snow melts as it falls and never accumulates
• Report the precipitation in your gauge (melted) as the Daily Precipitation
• Report a Trace of new snow
• In your comments write "Snow melted as it fell"

What if: Snow or sleet is mixed with rain and doesn't actually accumulate on the ground
• Report the precipitation in your gauge (melted) as the Daily Precipitation
• Report a “T” Trace of new snow
• Make a note as above in your comments such as “Snow and sleet was mixed with rain but melted as it fell.”

What if: Snow and rain are mixed and there is snow that accumulates
• Report the precipitation in your gauge (melted) as the Daily Precipitation
• Report the maximum accumulation of the new snow as your new snowfall
If possible, it is best to measure the depth of the new snow as soon as possible after it ends before it has a chance to melt
• Make a note that you had mixed precipitation in your comments.

What if: Snow accumulates, melts, and accumulates again
• The snowfall is the sum of each accumulation before melting.
EXAMPLEThree separate snowfalls occur during the day. You go out andmeasure the snow after each has ended. The first snowfall is 2.0inches, the second is 1.5 inches, and the third is 1.0 inch. Thesnow melts after each snowfall, and there is nothing on thesnowboard at observation time the next morning.
The snowfall for the 24-hour period should be recorded as the sum of the individual events, or 4.5 inches.
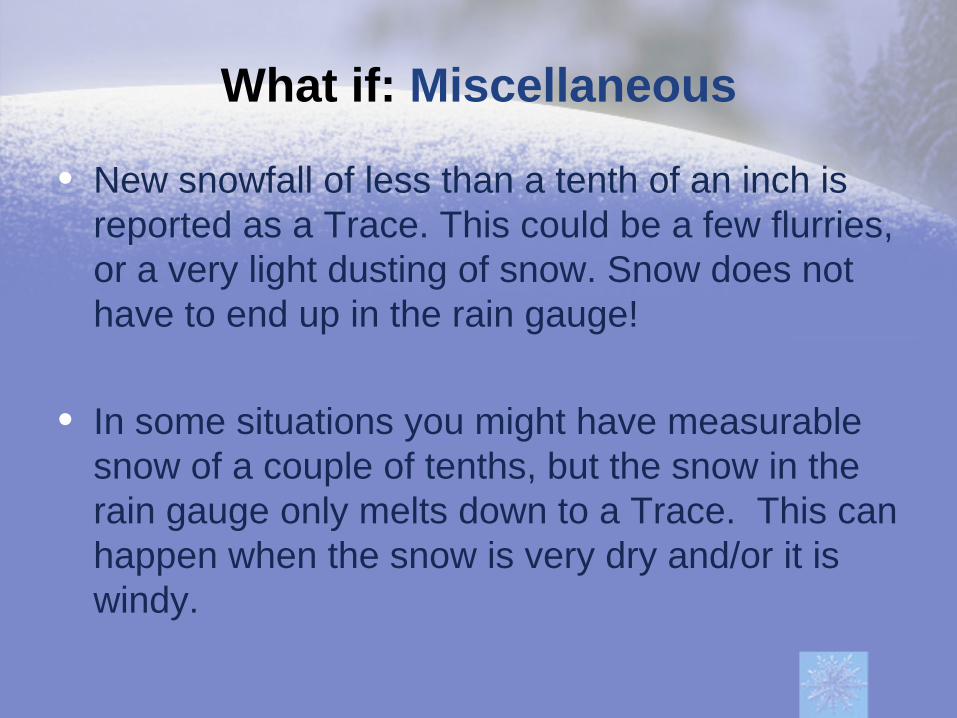
What if: Miscellaneous
• New snowfall of less than a tenth of an inch is reported as a Trace. This could be a few flurries, or a very light dusting of snow. Snow does not have to end up in the rain gauge!
• In some situations you might have measurable snow of a couple of tenths, but the snow in the rain gauge only melts down to a Trace. This can happen when the snow is very dry and/or it is windy.

How do I measure freezing rain?
“Freezing rain” is rain that falls in liquid form but freezes on contact with a surface.
Do NOT report freezing rain as "Snow". Melt and measure the moisture that has accumulated inside your gauge and report that as your daily precipitation amount.
Report ZERO for your new snow amount (assuming that it all fell as rain, and no sleet or snow fell or accumulated).
Report the total depth of freezing rain remaining on the ground at time of observation and enter that in the "Total Snow on Ground" column. Make a note in your comments section so that we know it's freezing rain.

Snow Measurement Review
• Melt any snow/ice in your rain gauge, and report this as your Daily Precipitation.
• Measure the accumulation of new snow on your snowboard.
• Take a core from your snowboard, melt, and report in the “New Snowfall” section (optional)
• Measure the total snow on the ground (new snow plus old snow and ice).
• Report the water equivalent of the total snow on ground (optional)