gt02dd gps tracker manual - winrich … · 1. summary working based on existing gsm/gprs network...
TRANSCRIPT
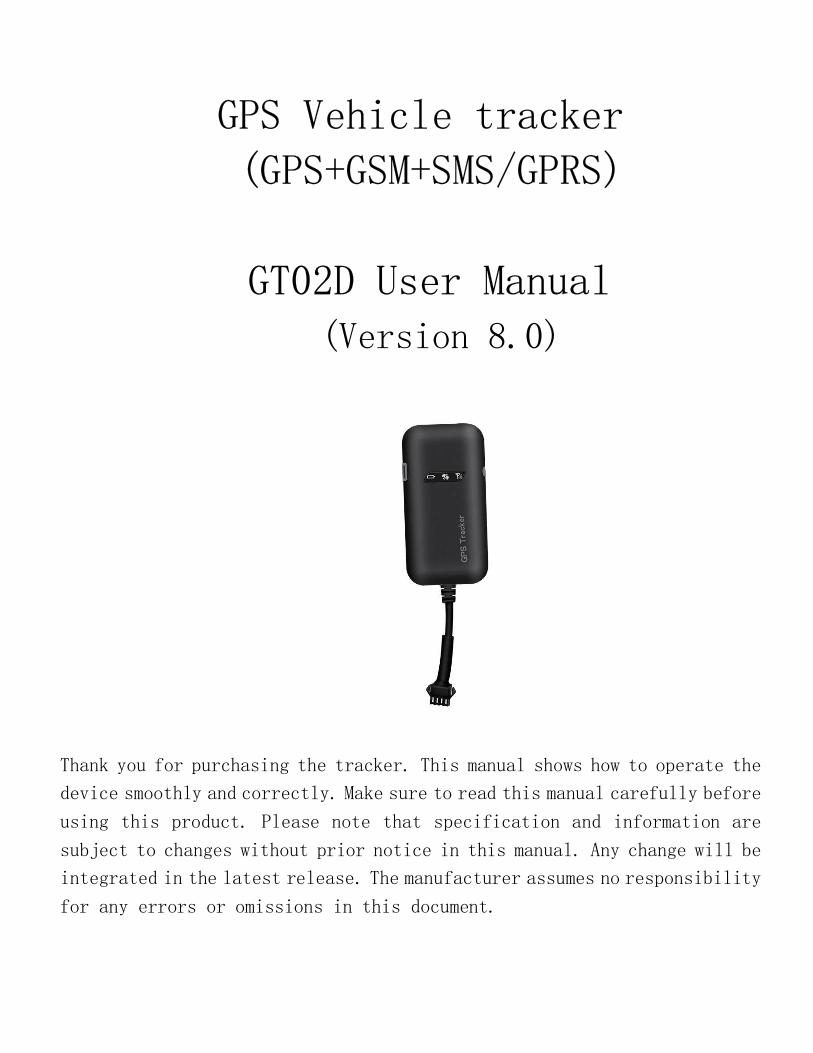
GPS Vehicle tracker
(GPS+GSM+SMS/GPRS)
GT02D User Manual
(Version 8.0)
Thank you for purchasing the tracker. This manual shows how to operate the
device smoothly and correctly. Make sure to read this manual carefully before
using this product. Please note that specification and information are
subject to changes without prior notice in this manual. Any change will be
integrated in the latest release. The manufacturer assumes no responsibility
for any errors or omissions in this document.
1. Summary
Working Based on existing GSM/GPRS network and GPS satellites, this product can locate and monitor any remote targets by SMS or internet.
Overview of the characteristics:
1.GPS position.
2.GSM 850/900/1800/1900MHZ.
3.With Shock sensor.
4.Power-Cut alarm.
5.Auto set APN.
6.Voltage 9-40V.
7.Oil-cut function.
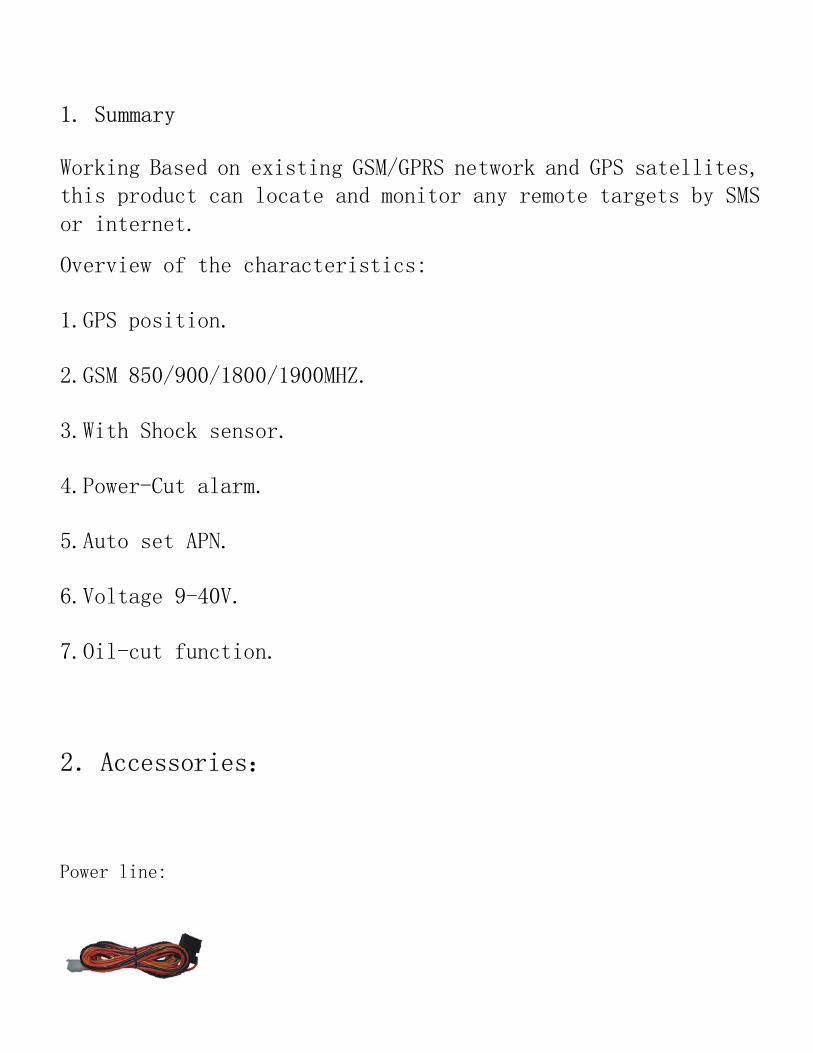
2.Accessories:
Power line:
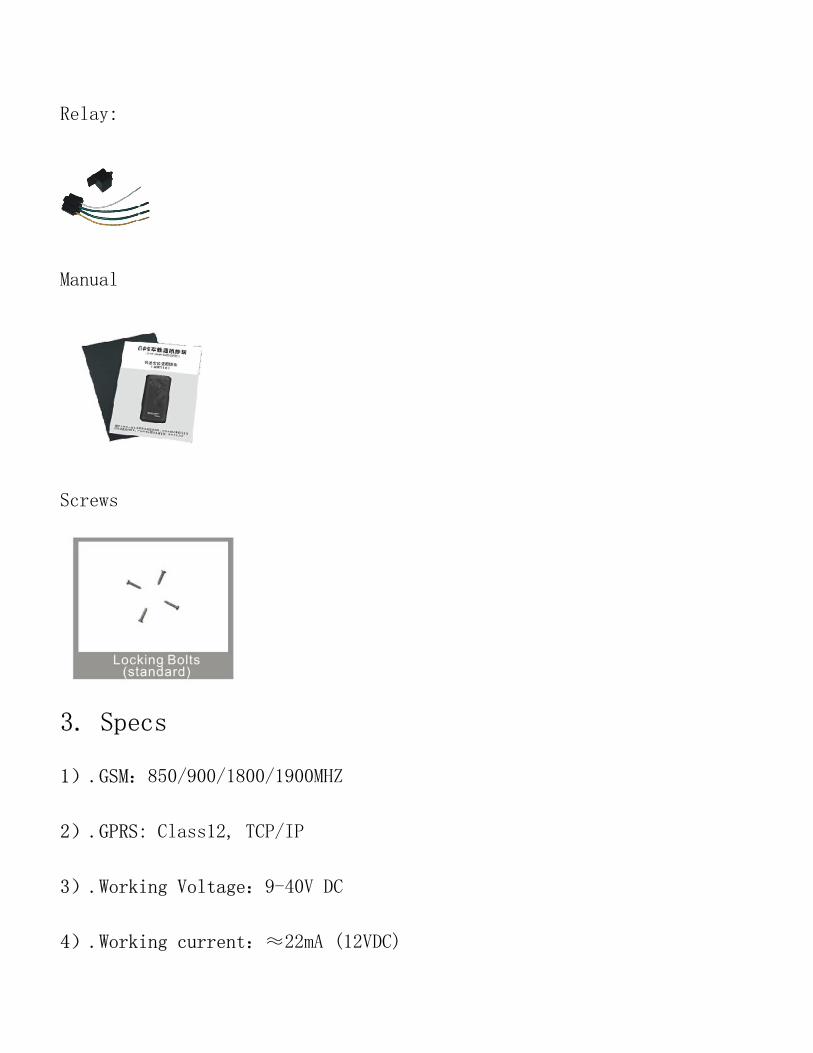
Relay:
Manual
Screws
3. Specs
1).GSM:850/900/1800/1900MHZ
2).GPRS: Class12, TCP/IP
3).Working Voltage:9-40V DC
4).Working current:≈22mA (12VDC)
5).Working current:≈12mA (24VDC)
6).GPS locating time:Cold start≈38s(Open sky)
Warm start≈32s
Hot start≈2s(Open sky)
7).GPS Precision:10m(2D RM)
8).Working temperature:-20℃~+70℃
9).Working humidity:20%~80%RH
10).Measurement:90(L) x 45(W) x 13.5(H) mm
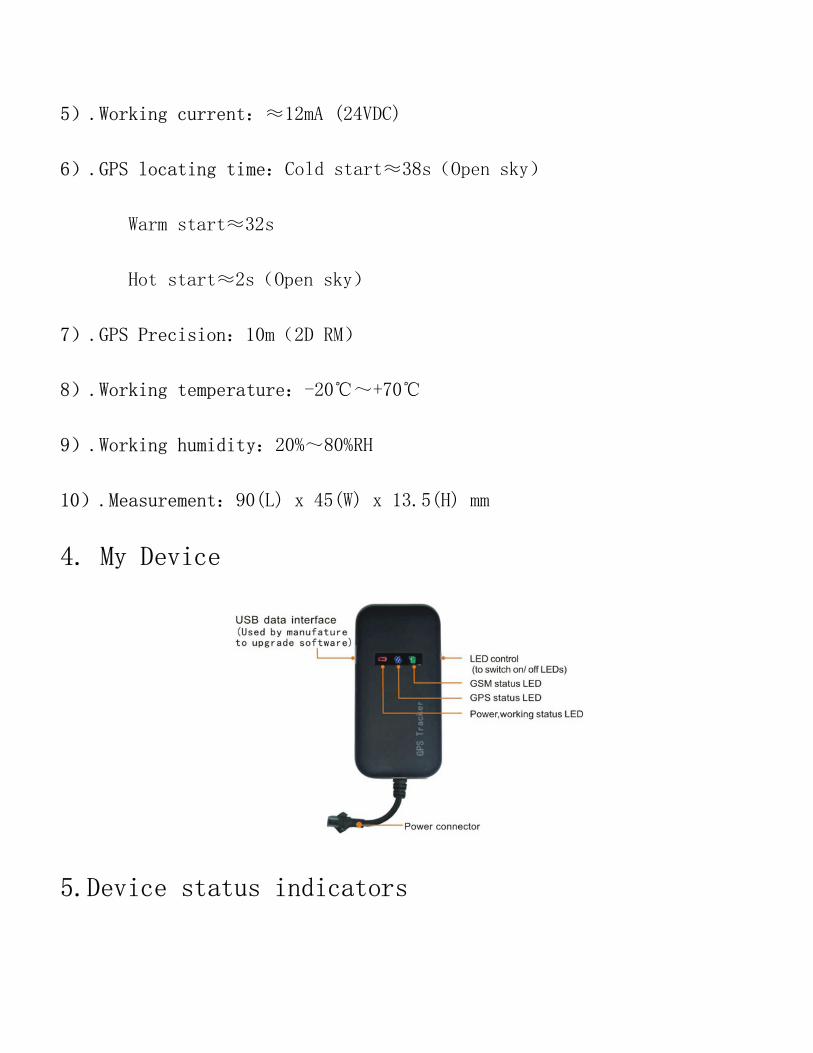
4. My Device
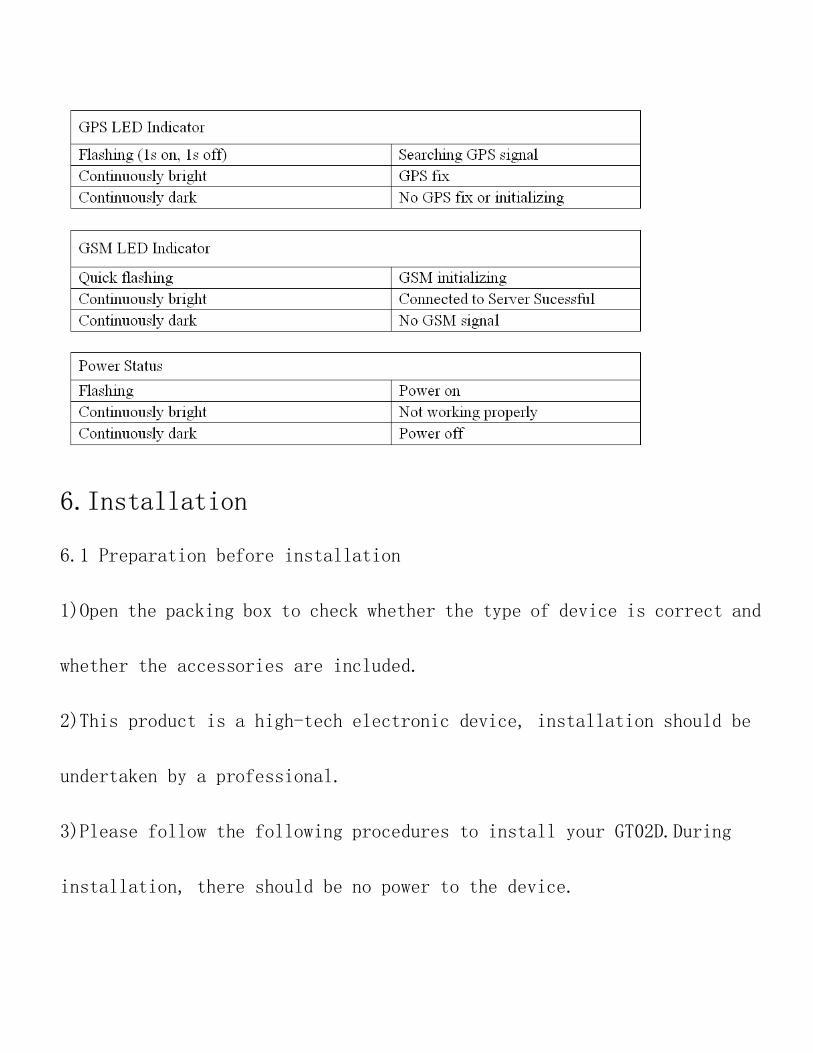
5.Device status indicators
6.Installation
6.1 Preparation before installation
1)Open the packing box to check whether the type of device is correct and
whether the accessories are included.
2)This product is a high-tech electronic device, installation should be
undertaken by a professional.
3)Please follow the following procedures to install your GT02D.During
installation, there should be no power to the device.
6.2 Installing SIM card: each GT02D need to insert a GSM SIM card. The SIM
card used should be enabled for GPRS.
1) Testing SIM card: to test SIM card, please install it into a normal
GSM mobile and ensure it can send and receive SMS, and enables for
GPRS.
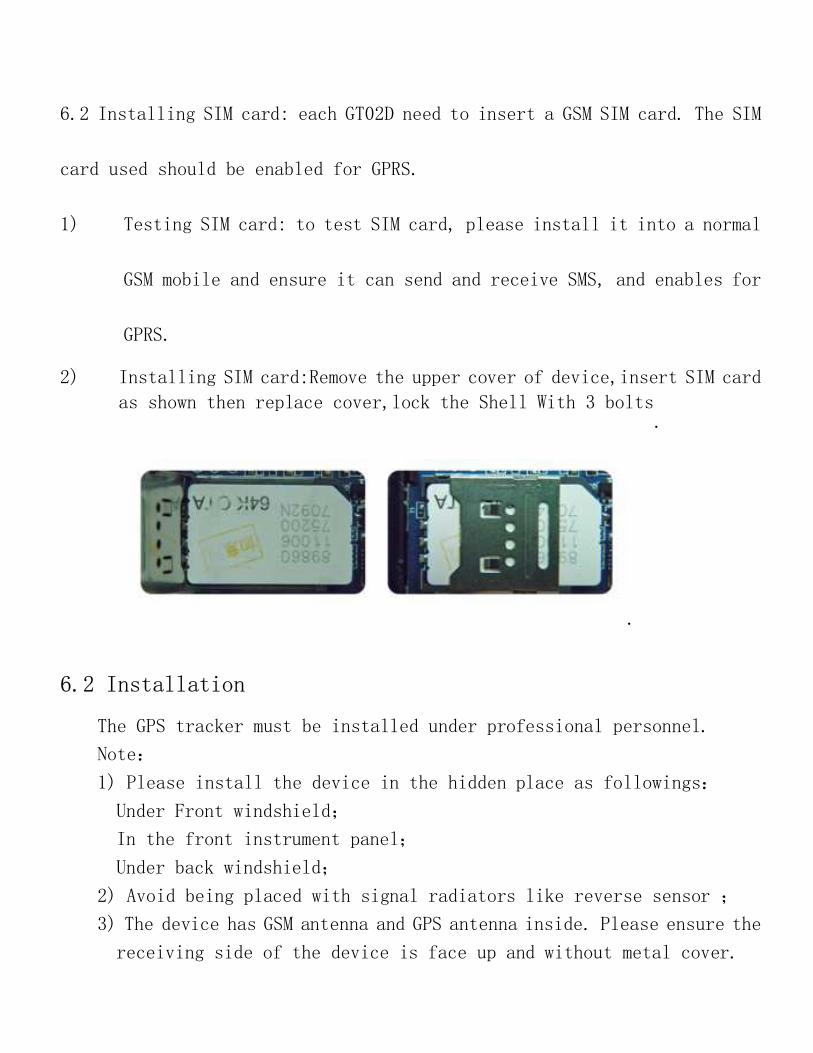
2) Installing SIM card:Remove the upper cover of device,insert SIM card
as shown then replace cover,lock the Shell With 3 bolts.
.
6.2 Installation
The GPS tracker must be installed under professional personnel.
Note:
1) Please install the device in the hidden place as followings:
Under Front windshield;
In the front instrument panel;
Under back windshield;
2) Avoid being placed with signal radiators like reverse sensor ;
3) The device has GSM antenna and GPS antenna inside. Please ensure the
receiving side of the device is face up and without metal cover.

Note: The metal cover will lessen the receiving of GPS signals.6. The
device connecting requirements.
6.3 Selecting installation place and fixing it.There are two kinds of
installation: covert and non covert.
If you need the covert installation, please refer installation to an auto
electrical contractor.
Note:
1) To prevent theft of the GT02D,the device should be installed as
covertly as possible.
2) Avoid placing the GT02D close to higher power electrical devices, such
as reversing radar, anti-theft device or other vehicle communication
equipment.
3) The GT02D should be fixed into position with cable ties or wide
double-side tape.
4)Your device has built-in GSM antenna and GPS antenna. During
installation, please make sure the receiving side face is up, with no
metal object above the device to interfere with GPS reception. The
following places are suggested for installation:

- Under the dash board below the front windshield;
- In the parcel shelf in the rear;
- In the front bumper( non-material face), please ensure the device cannot
get wet;
- Under the wiper version (non-metal), please ensure the device cannot get
wet;
Notice: If the windshield is pasted with metal thermal-protective coating,
it may affect the performance of the device. In this case, please change the
installation place after consulting the professional.
5)Non Covert Installation,
Firstly fix the device on the dash board below windshield.
7. Device wiring requirements 7.1 The device power supply is DC 9-40V. The red line is positive pole while
the black line is negative pole.
7.2 The negative pole of power supply connects with ground or the metals.
Please do not connect with other ground lines.
7.3 When finishing the power supply wire connection, please make the plug
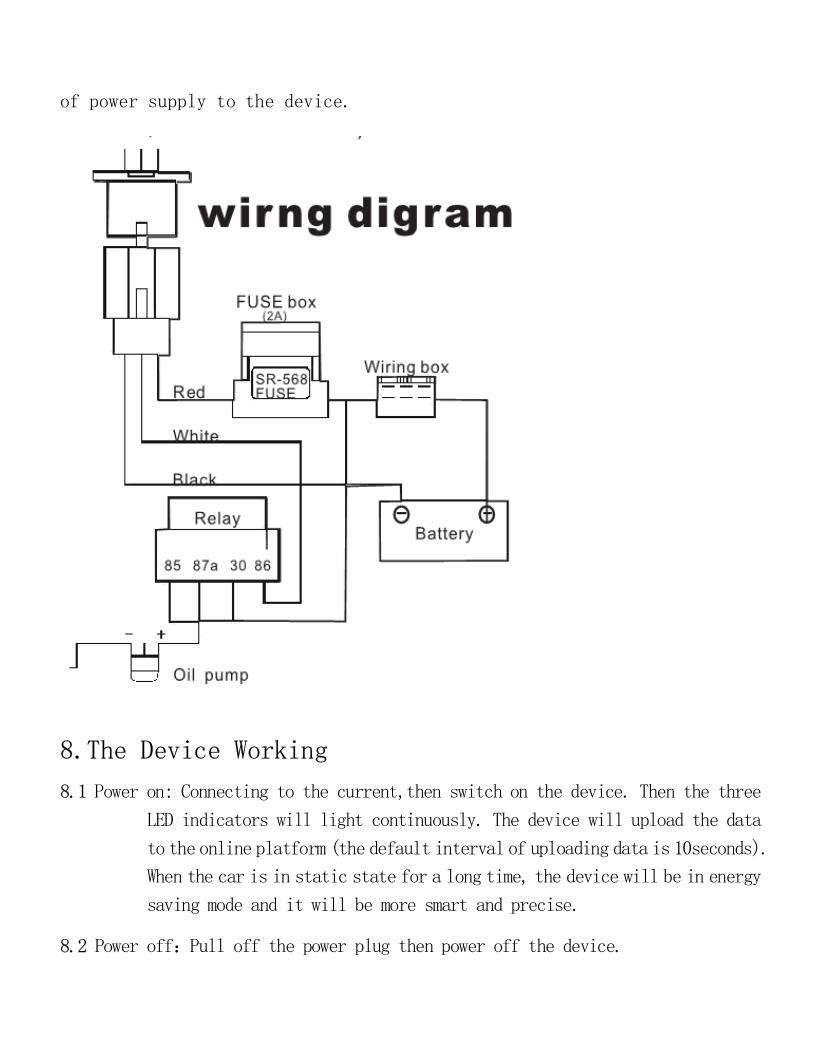
of power supply to the device.
8.The Device Working
8.1 Power on: Connecting to the current,then switch on the device. Then the three
LED indicators will light continuously. The device will upload the data
to the online platform (the default interval of uploading data is 10seconds).
When the car is in static state for a long time, the device will be in energy
saving mode and it will be more smart and precise.
8.2 Power off:Pull off the power plug then power off the device.
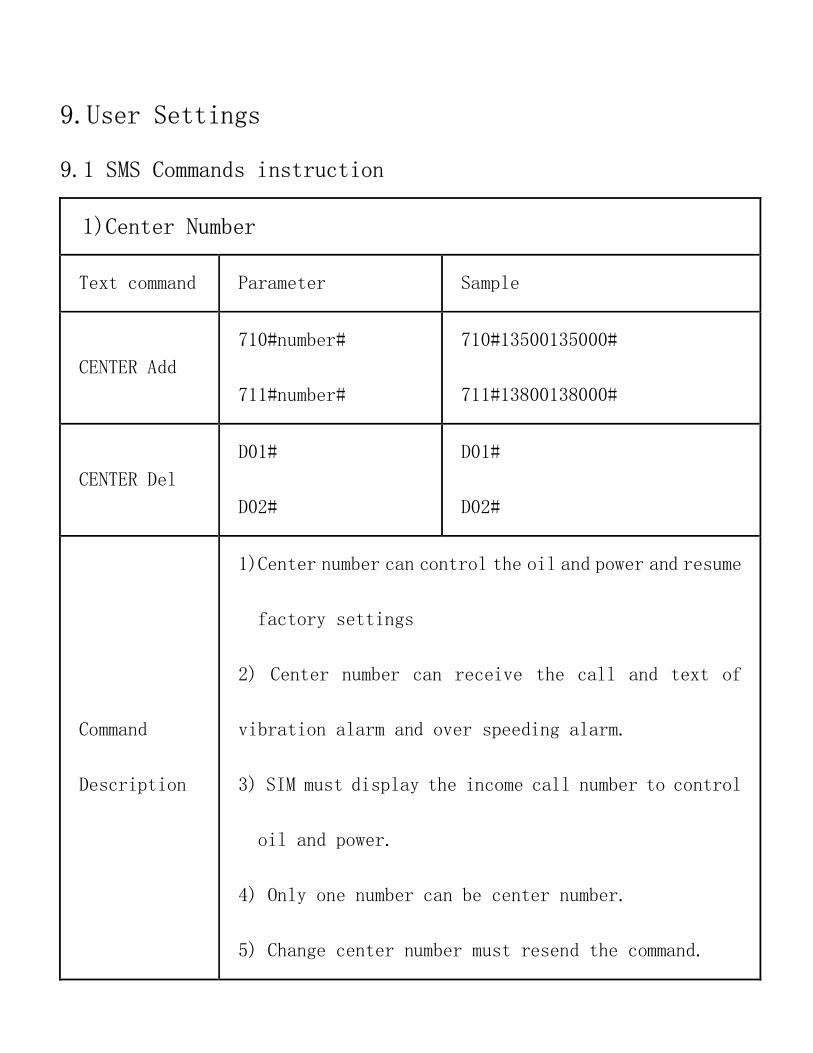
9.User Settings
9.1 SMS Commands instruction
1)Center Number
Text command Parameter Sample
CENTER Add
710#number#
711#number#
710#13500135000#
711#13800138000#
CENTER Del
D01#
D02#
D01#
D02#
Command
Description
1)Center number can control the oil and power and resume
factory settings
2) Center number can receive the call and text of
vibration alarm and over speeding alarm.
3) SIM must display the income call number to control
oil and power.
4) Only one number can be center number.
5) Change center number must resend the command.
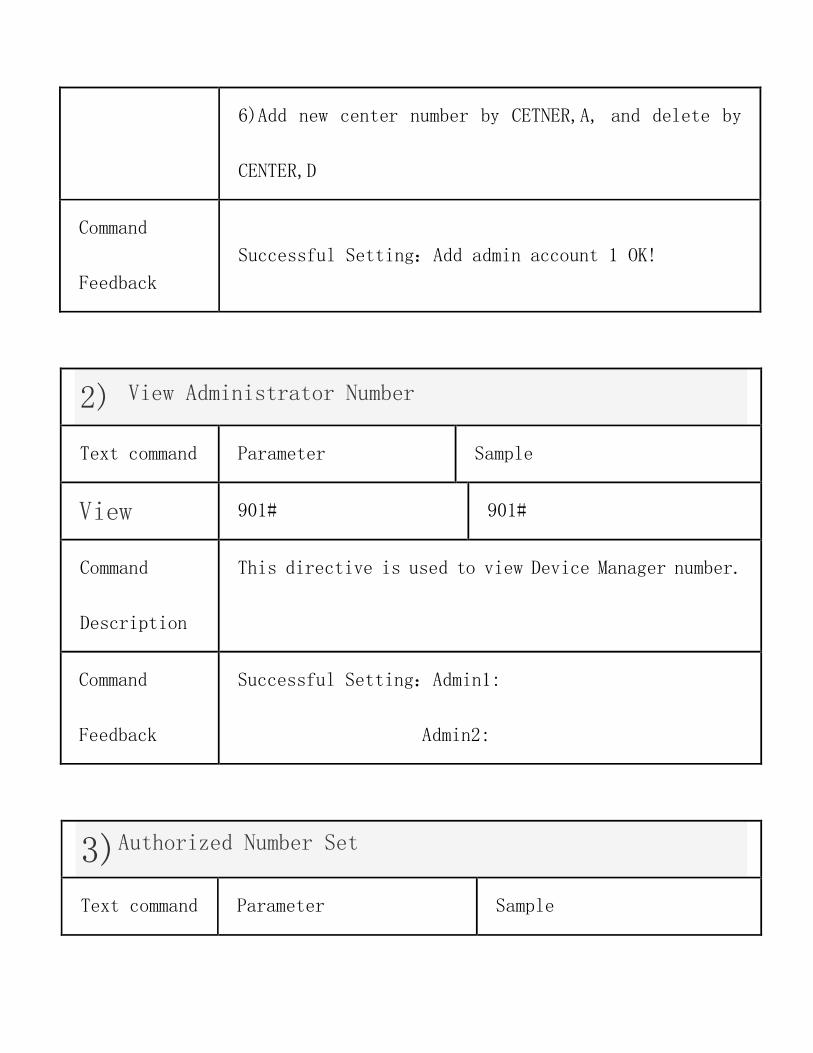
6)Add new center number by CETNER,A, and delete by
CENTER,D
Command
Feedback
Successful Setting:Add admin account 1 OK!
2) View Administrator Number
Text command Parameter Sample
View 901# 901#
Command
Description
This directive is used to view Device Manager number.
Command
Feedback
Successful Setting:Admin1:
Admin2:
3)Authorized Number Set
Text command Parameter Sample

Authorized
Add
101# number #
102# number #
103# number #
1:101#13800138000#
2:102#12345678912#
3:103#12345678912#
Authorized
Del
D11#
D12#
D13#
D11#
D12#
D13#
Command
Description
1) Authorization number for SMS control oil.
2) only three numbers to set the authorization number
3) change the authorization number needs to delete the
previous number
Command
Feedback
Successful Setting:Add Authorization account 1
OK!

4) View Authorized Number
Text command Parameter Sample
View
authorized
C10# C10#
Command
Description
This directive is used to view the equipment
authorization number
Command
Feedback
Successful Setting:
Authorization 1:
Authorization 2:
Authorization 3:
5)APN Setting
Text command Parameter Sample
APN Setting
APN#username#pass
word]
1:APN#intenet#123#123#
2: APN#internet#
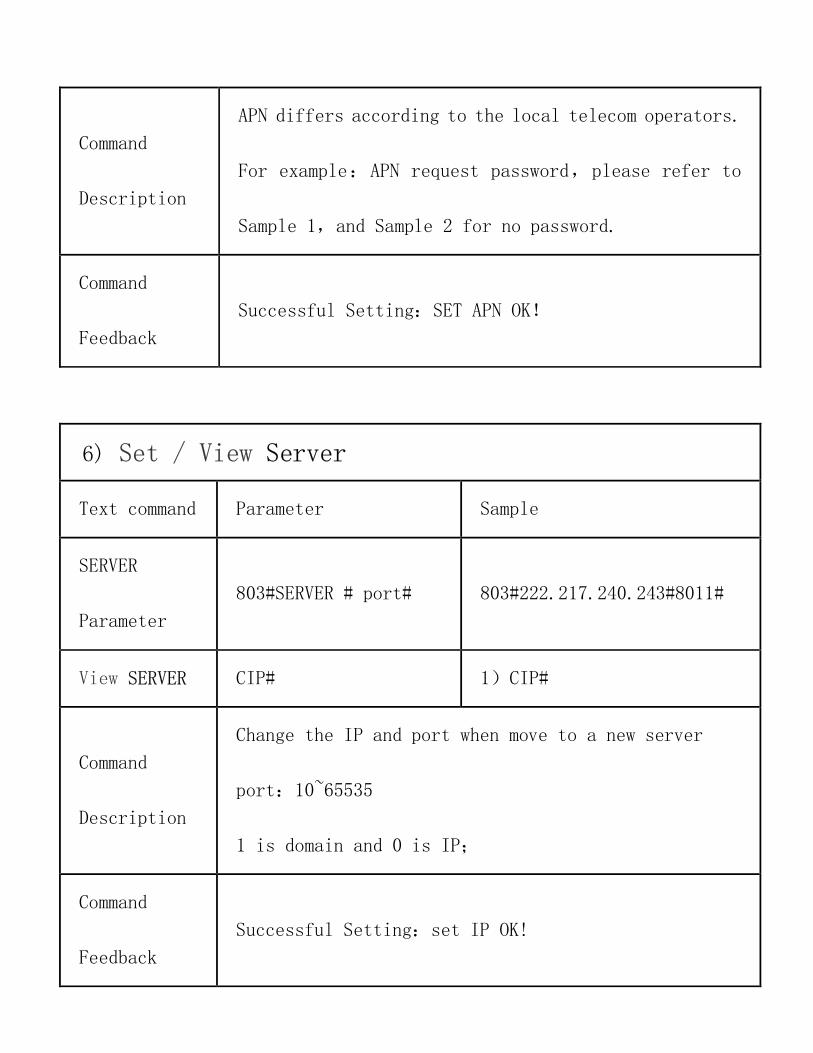
Command
Description
APN differs according to the local telecom operators.
For example:APN request password,please refer to
Sample 1,and Sample 2 for no password.
Command
Feedback
Successful Setting:SET APN OK!
6) Set / View Server
Text command Parameter Sample
SERVER
Parameter
803#SERVER # port# 803#222.217.240.243#8011#
View SERVER CIP# 1)CIP#
Command
Description
Change the IP and port when move to a new server
port:10~65535
1 is domain and 0 is IP;
Command
Feedback
Successful Setting:set IP OK!

7)Moving Time Interval
Text command Parameter Sample
TIMEER
Parameter
setting
730#uploading interval# 730#20#
Command
Description
Time scope:0,10~60 seconds; 0,no data uploading;
10~60,means time interval;the default value is 15
seconds!
Command
Feedback
Successful Setting:SET TIMER OK!
8)Static Time Interval
Text command Parameter Sample
STATIC SUP# time interval# SUP#5#
Command Timescope:1~60 seconds;The device has
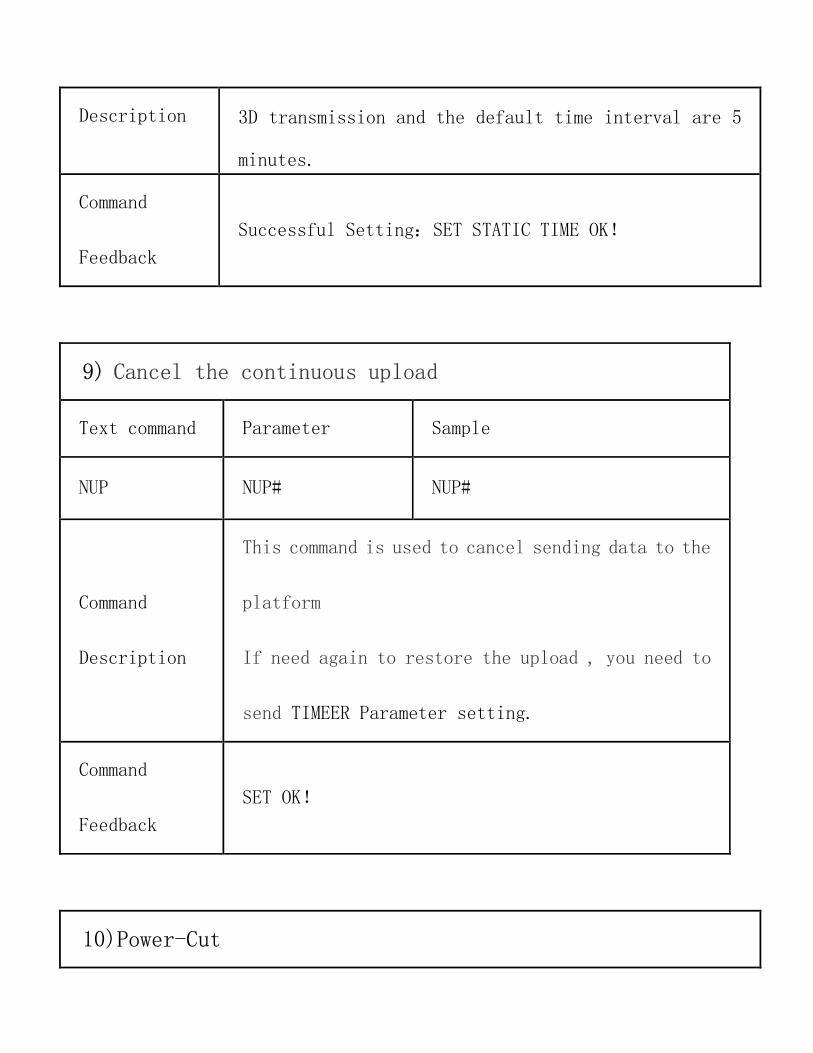
Description 3D transmission and the default time interval are 5
minutes.
Command
Feedback
Successful Setting:SET STATIC TIME OK!
9) Cancel the continuous upload
Text command Parameter Sample
NUP NUP# NUP#
Command
Description
This command is used to cancel sending data to the
platform
If need again to restore the upload , you need to
send TIMEER Parameter setting.
Command
Feedback
SET OK!
10)Power-Cut
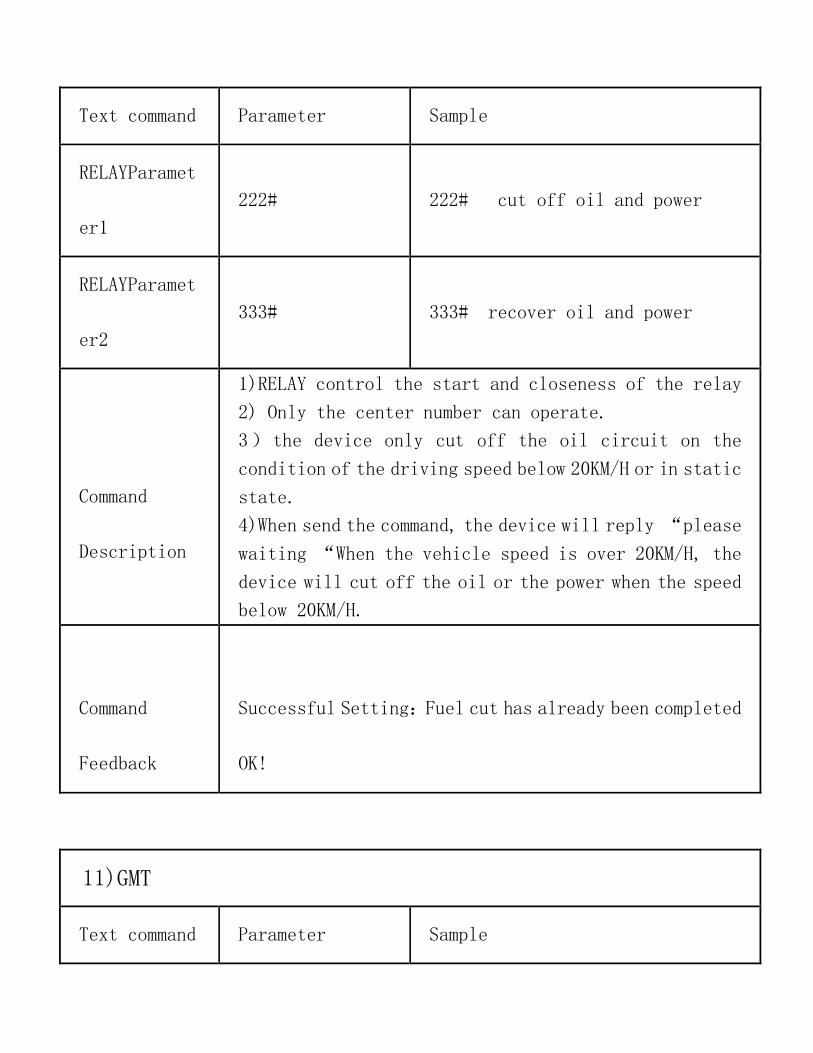
Text command Parameter Sample
RELAYParamet
er1
222# 222# cut off oil and power
RELAYParamet
er2
333# 333# recover oil and power
Command
Description
1)RELAY control the start and closeness of the relay
2) Only the center number can operate.
3)the device only cut off the oil circuit on the
condition of the driving speed below 20KM/H or in static
state.
4)When send the command, the device will reply “please
waiting “When the vehicle speed is over 20KM/H, the
device will cut off the oil or the power when the speed
below 20KM/H.
Command
Feedback
Successful Setting:Fuel cut has already been completed
OK!
11)GMT
Text command Parameter Sample
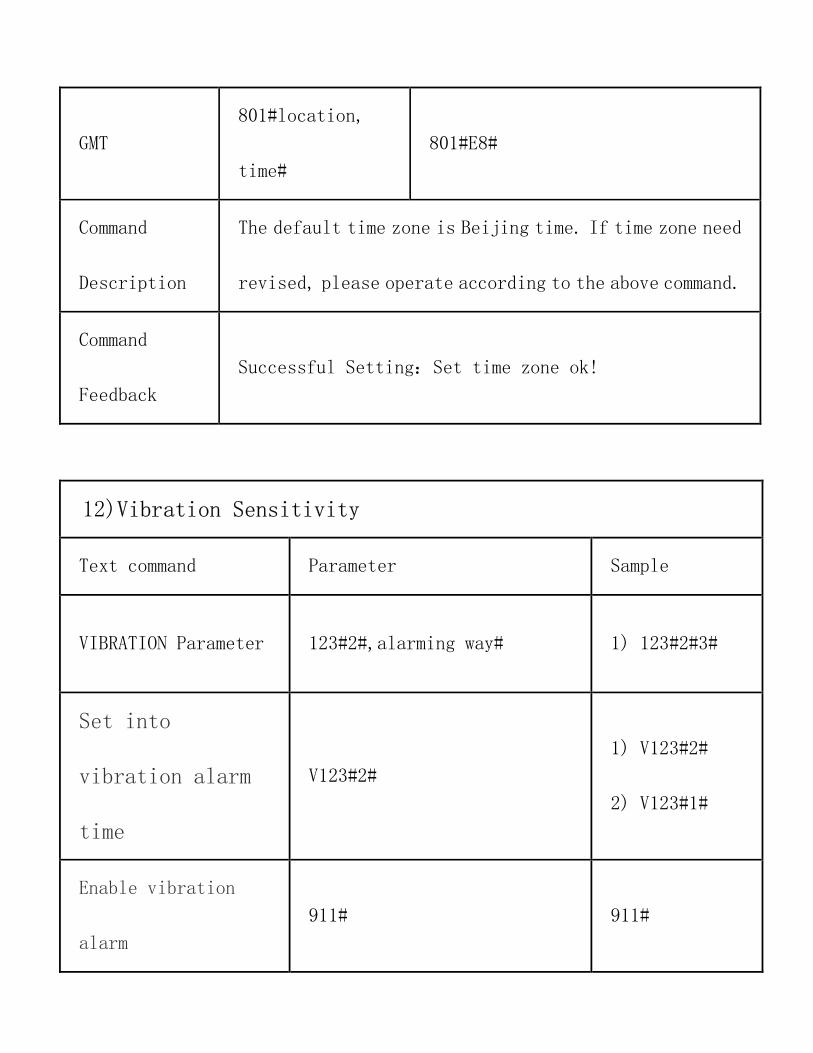
GMT
801#location,
time#
801#E8#
Command
Description
The default time zone is Beijing time. If time zone need
revised, please operate according to the above command.
Command
Feedback
Successful Setting:Set time zone ok!
12)Vibration Sensitivity
Text command Parameter Sample
VIBRATION Parameter 123#2#,alarming way# 1) 123#2#3#
Set into
vibration alarm
time
V123#2#
1) V123#2#
2) V123#1#
Enable vibration
alarm
911# 911#
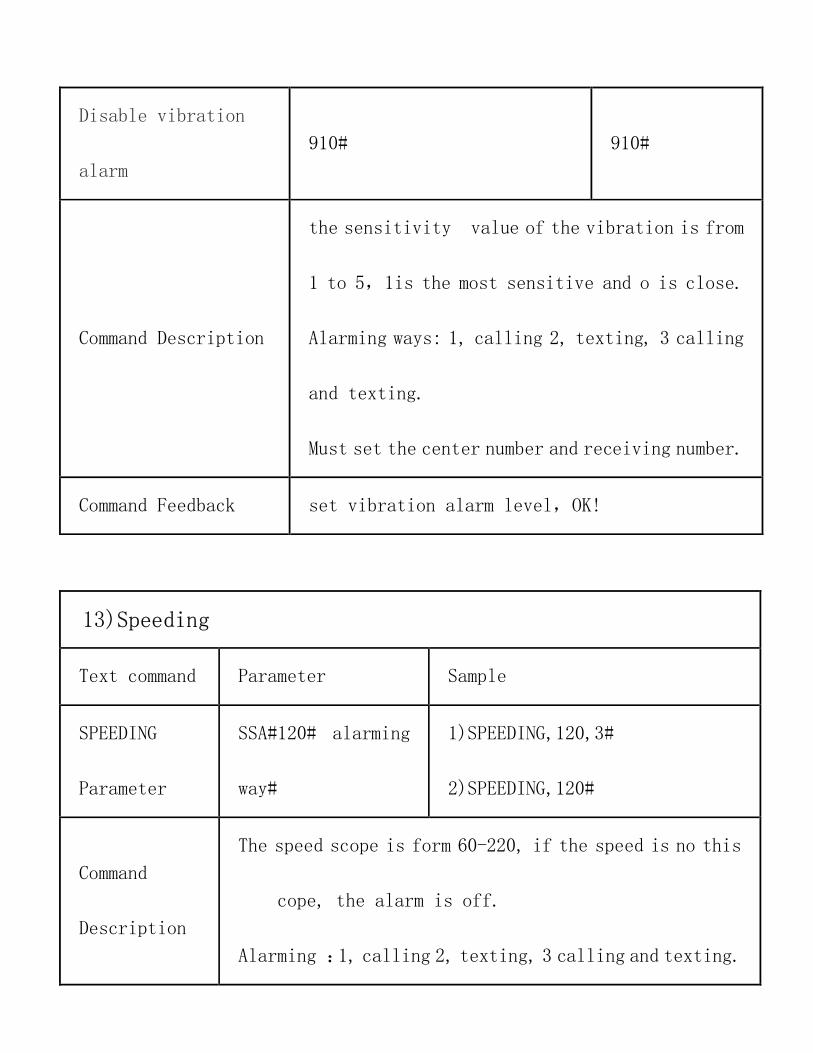
Disable vibration
alarm
910# 910#
Command Description
the sensitivity value of the vibration is from
1 to 5,1is the most sensitive and o is close.
Alarming ways: 1, calling 2, texting, 3 calling
and texting.
Must set the center number and receiving number.
Command Feedback set vibration alarm level,OK!
13)Speeding
Text command Parameter Sample
SPEEDING
Parameter
SSA#120# alarming
way#
1)SPEEDING,120,3#
2)SPEEDING,120#
Command
Description
The speed scope is form 60-220, if the speed is no this
cope, the alarm is off.
Alarming :1, calling 2, texting, 3 calling and texting.

Must set the center number and receiving number.
Command
Feedback
Successful Setting:set speeding alarm,OK!
14)Reset
Text command Parameter Sample
RESET 930# 930#
Command
Description
Reset the device
Command
Feedback
Successful Setting:Reset system, ok!
15)Factory
Text command Parameter Sample
Parameter 940# 940#
Command Restore the factory setting
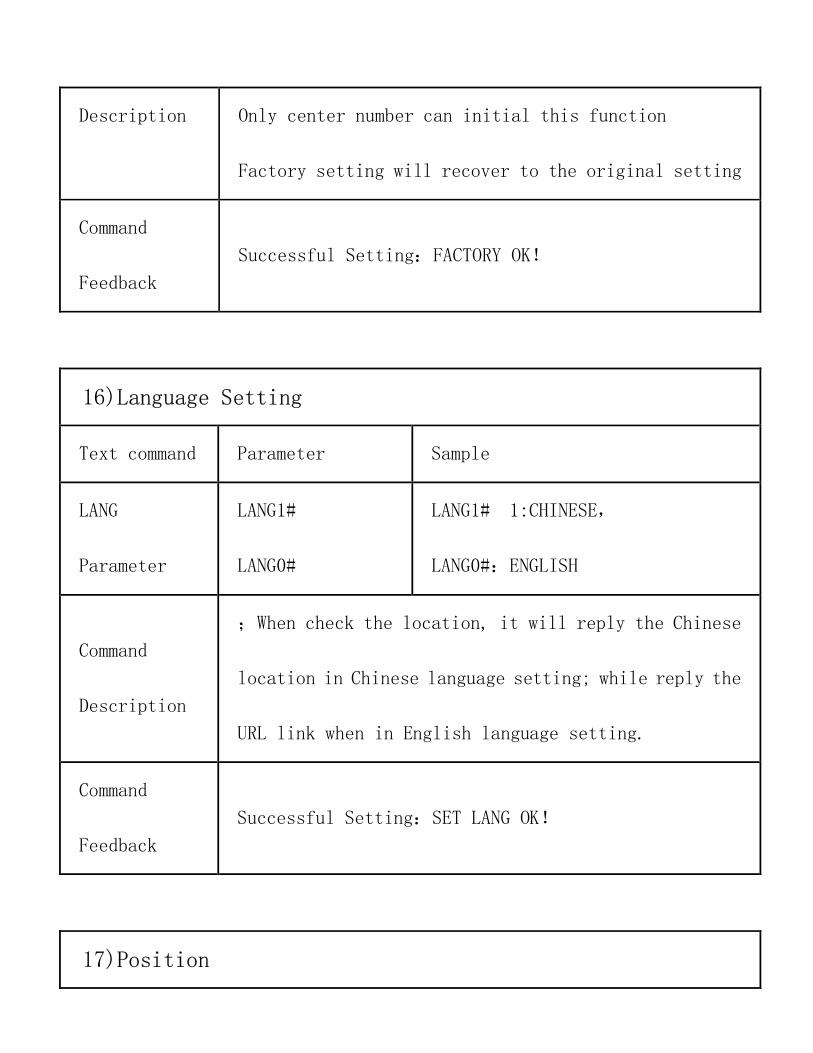
Description Only center number can initial this function
Factory setting will recover to the original setting
Command
Feedback
Successful Setting:FACTORY OK!
16)Language Setting
Text command Parameter Sample
LANG
Parameter
LANG1#
LANG0#
LANG1# 1:CHINESE,
LANG0#:ENGLISH
Command
Description
;When check the location, it will reply the Chinese
location in Chinese language setting; while reply the
URL link when in English language setting.
Command
Feedback
Successful Setting:SET LANG OK!
17)Position
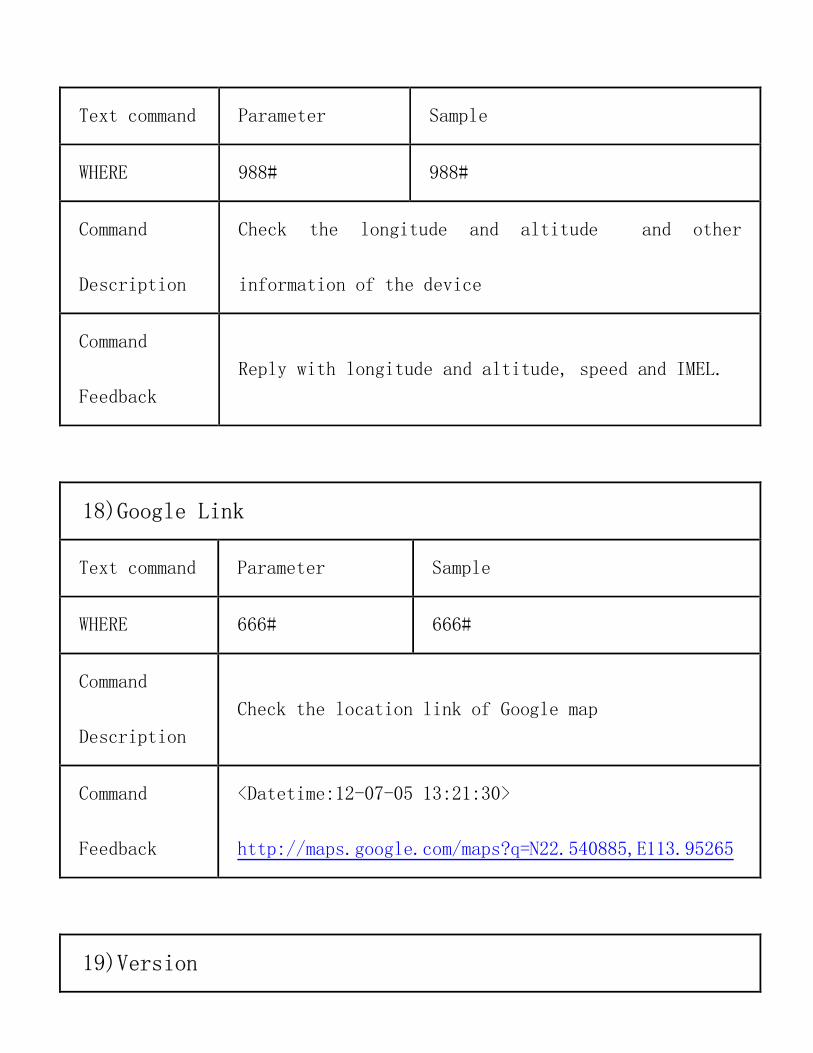
Text command Parameter Sample
WHERE 988# 988#
Command
Description
Check the longitude and altitude and other
information of the device
Command
Feedback
Reply with longitude and altitude, speed and IMEL.
18)Google Link
Text command Parameter Sample
WHERE 666# 666#
Command
Description
Check the location link of Google map
Command
Feedback
<Datetime:12-07-05 13:21:30>
http://maps.google.com/maps?q=N22.540885,E113.95265
19)Version
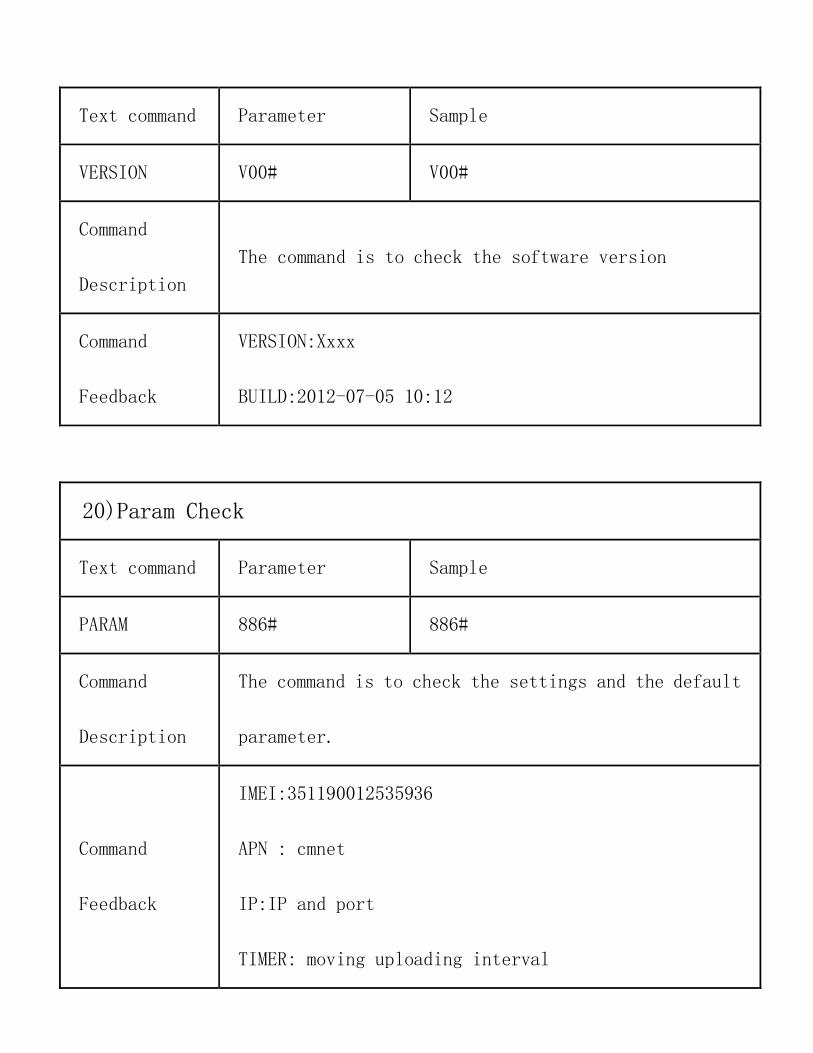
Text command Parameter Sample
VERSION V00# V00#
Command
Description
The command is to check the software version
Command
Feedback
VERSION:Xxxx
BUILD:2012-07-05 10:12
20)Param Check
Text command Parameter Sample
PARAM 886# 886#
Command
Description
The command is to check the settings and the default
parameter.
Command
Feedback
IMEI:351190012535936
APN : cmnet
IP:IP and port
TIMER: moving uploading interval
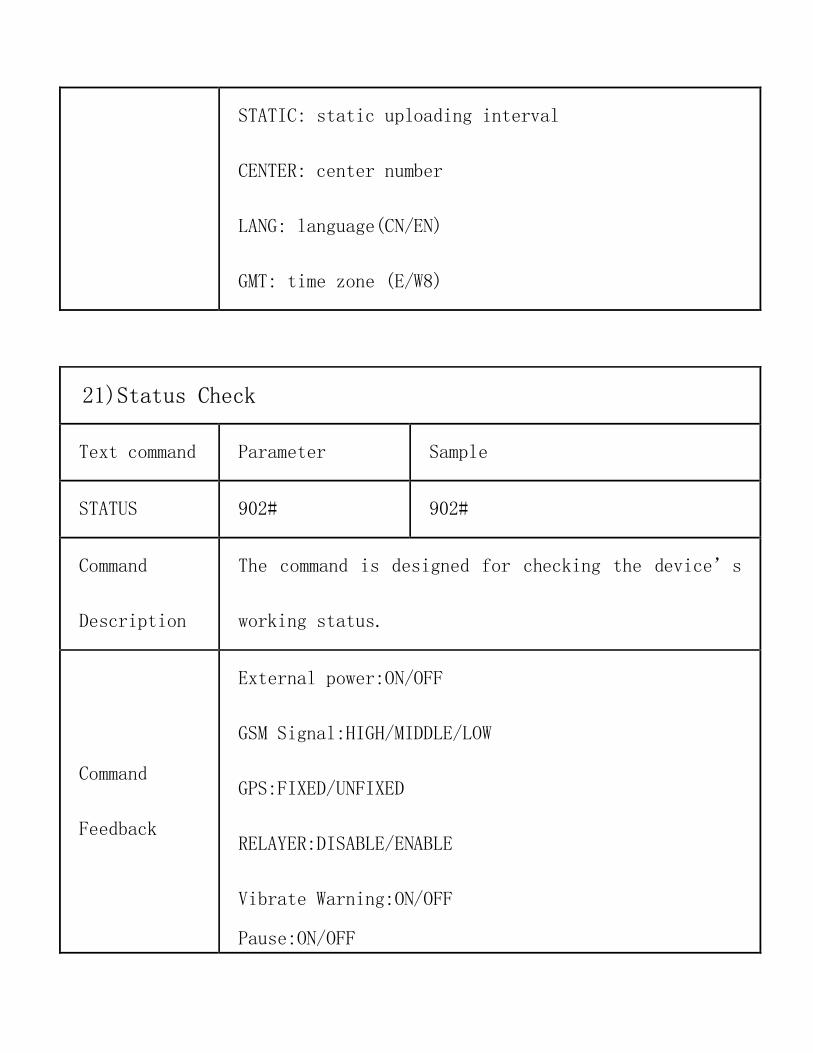
STATIC: static uploading interval
CENTER: center number
LANG: language(CN/EN)
GMT: time zone (E/W8)
21)Status Check
Text command Parameter Sample
STATUS 902# 902#
Command
Description
The command is designed for checking the device’s
working status.
Command
Feedback
External power:ON/OFF
GSM Signal:HIGH/MIDDLE/LOW
GPS:FIXED/UNFIXED
RELAYER:DISABLE/ENABLE
Vibrate Warning:ON/OFF
Pause:ON/OFF
10.Trouble shooting
10.1 The device is not online or offline on the web platform. 10.1.1 First, please check the three LED working state. If
possible. You can call the device’s number to check. ● If not connected, the device is out of signal. If the GSM
signals cannot reach your location, please drive to the open sky.
� If reminding the device SIM card is out of deposit, please make deposit by the telecom operator.
● If you can connect to the device when calling, the SIM card has
deposited and please check with your operator for GPRS function. You
also can check by searching the internet on your mobile phone.
● If reminding the device is power off, please turn back the device
and proceed as followings:
a)Check if the red LED is in constant glow. If the LED is dark, please
check the power connecting. If fuse is broken, please return the
device to the seller.
b)If the blue GSM LED is not in constant glow, please check the
installation of SIM card.
10.1.2 Please check the offline area in order to judge if the network
problem of operators.
10.2 When GPS cannot receive the signals, please drive in the open sky
and ensure there is no metal thins on the device.
10.3 When the device cannot receive the GSM signal, please check the

SIM card installation. If the GSM signals cannot reach your location
(such as the basement), please drive to the open sky.
10.4 The red LED is not glow when power on. Check the fuse of the power
line. If the fuse is fused, please change the fuse with the seller.