grandview reproducing genuine colorsfantasy... · grandview reproducing genuine colors iso9001:2000...
TRANSCRIPT
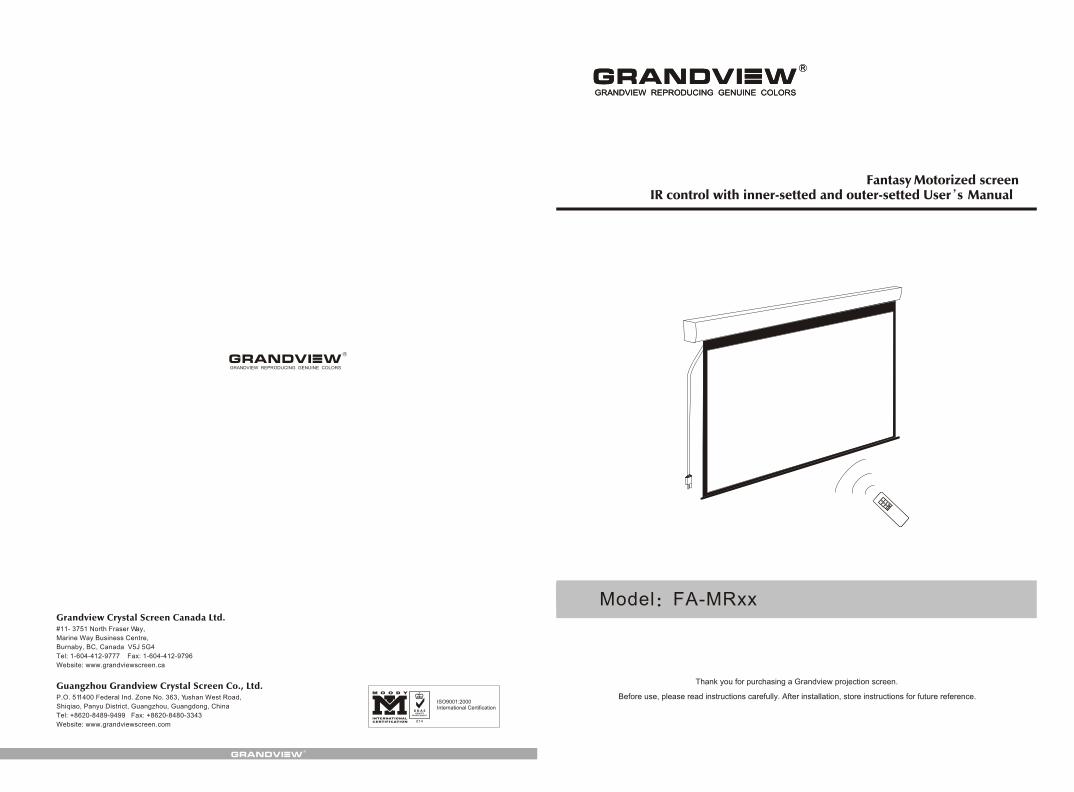
Model FA-MRxx
GRANDVIEW REPRODUCING GENUINE COLORS
GRANDVIEW REPRODUCING GENUINE COLORS
ISO9001:2000International Certification
Grandview Crystal Screen Canada Ltd.#11- 3751 North Fraser Way,
Marine Way Business Centre,
Burnaby, BC, Canada V5J 5G4
Tel: 1-604-412-9777 Fax: 1-604-412-9796
Website: www.grandviewscreen.ca
Guangzhou Grandview Crystal Screen Co., Ltd.P.O. 511400 Federal Ind. Zone No. 363, Yushan West Road,
Shiqiao, Panyu District, Guangzhou, Guangdong, China
Tel: +8620-8489-9499 Fax: +8620-8480-3343
Website: www.grandviewscreen.com
GRANDVIEW REPRODUCING GENUINE COLORS
Thank you for purchasing a Grandview projection screen.
Before use, please read instructions carefully. After installation, store instructions for future reference.
Fantasy User s M anual
Motorized screen IR control with inner-setted and outer-setted
1 6
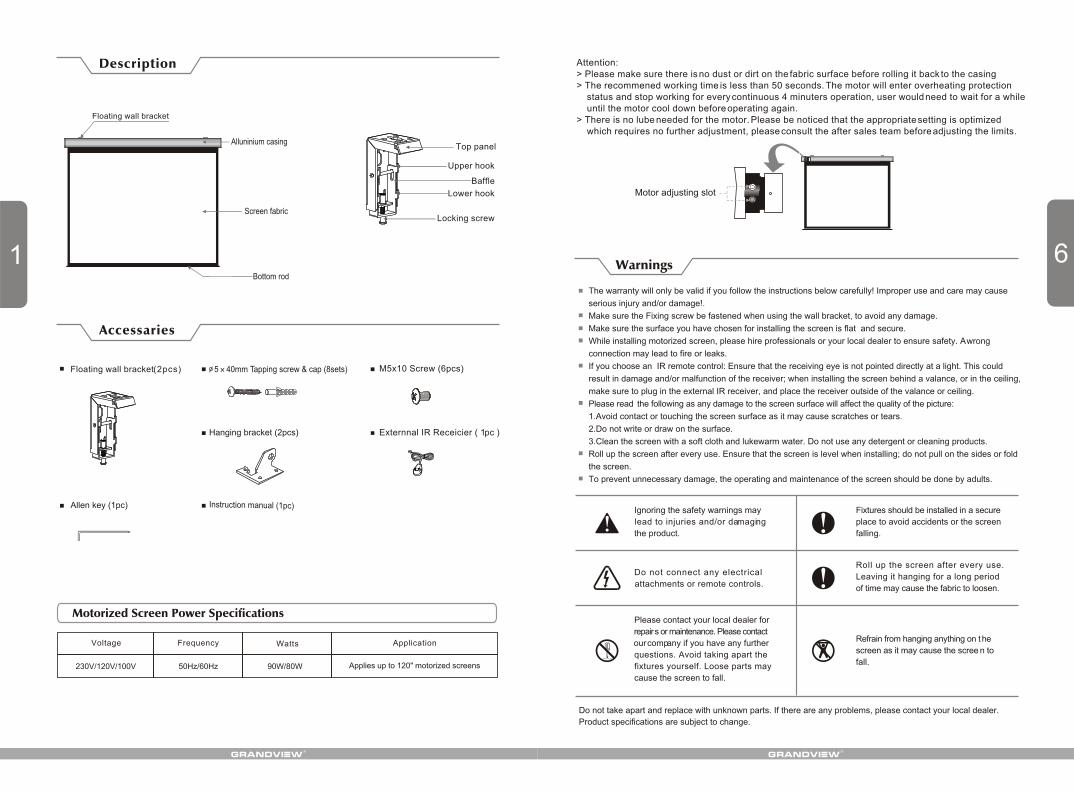
Alluninium casing
Screen fabric
Accessaries
Bottom rod
Description
Warnings
Motorized Screen Power Specifications
50Hz/60Hz230V/120V/100V
Voltage Frequency Watts Application
Applies up to 120" motorized screens90W/80W
Floating wall bracket
Motor adjusting slot
Allen key (1pc)
Floating wall bracket(2pcs) 5 40mm Tapping screw & cap (8sets) M5x10 Screw (6pcs)
Instruction manual (1pc)
Externnal IR Receicier ( 1 )pcHanging bracket (2pcs)
Ignoring the safety warnings may
lead to injuries and/or damaging
the product.
Refrain from hanging anything on t he
screen as it may cause the scree n to
fall.
Do not connect any electrical
attachments or remote controls.
Fixtures should be installed in a secure
place to avoid accidents or the screen
falling.
Roll up the screen after every use.
Leaving it hanging for a long period
of time may cause the fabric to loosen.
Please contact your local dealer for
repairs or maintenance. Please contact
our company if you have any further
questions. Avoid taking apart the
fixtures yourself. Loose parts may
cause the screen to fall.
Do not take apart and replace with unknown parts. If there are any problems, please contact your local dealer.
Product specifications are subject to change.
The warranty will only be valid if you follow the instructions below carefully! Improper use and care may cause
serious injury and/or damage!.
Make sure the Fixing screw be fastened when using the wall bracket, to avoid any damage.
Make sure the surface you have chosen for installing the screen is flat and secure.
While installing motorized screen, please hire professionals or your local dealer to ensure safety. A wrong
connection may lead to fire or leaks.
If you choose an IR remote control: Ensure that the receiving eye is not pointed directly at a light. This could
result in damage and/or malfunction of the receiver; when installing the screen behind a valance, or in the ceiling,
make sure to plug in the external IR receiver, and place the receiver outside of the valance or ceiling.
Please read the following as any damage to the screen surface will affect the quality of the picture:
1.Avoid contact or touching the screen surface as it may cause scratches or tears.
2.Do not write or draw on the surface.
3.Clean the screen with a soft cloth and lukewarm water. Do not use any detergent or cleaning products.
Roll up the screen after every use. Ensure that the screen is level when installing; do not pull on the sides or fold
the screen.
To prevent unnecessary damage, the operating and maintenance of the screen should be done by adults.
Locking screw
Top panel
Upper hook
Baffle
Lower hook
Attention:> Please make sure there is no dust or dirt on the fabric surface before rolling it back to the casing> The recommened working time is less than 50 seconds. The motor will enter overheating protection status and stop working for every continuous 4 minuters operation, user would need to wait for a while until the motor cool down before operating again.> There is no lube needed for the motor. Please be noticed that the appropriate setting is optimized which requires no further adjustment, please consult the after sales team before adjusting the limits.
25
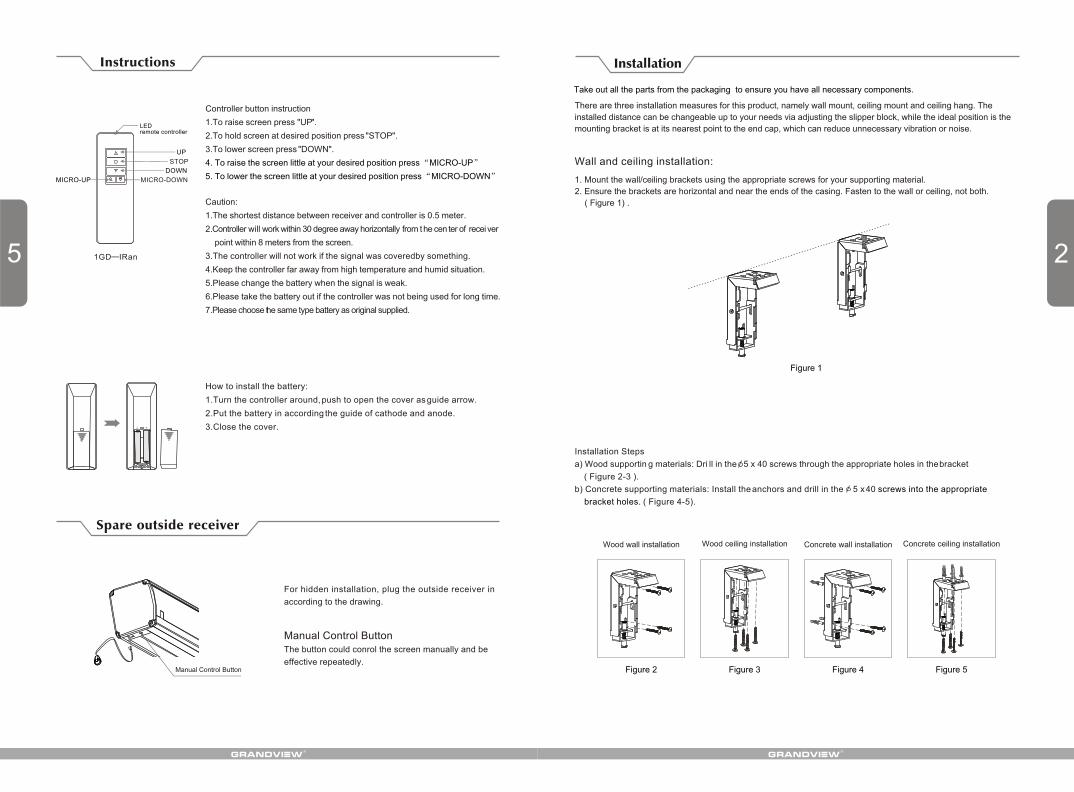
Instructions
Manual Control ButtonThe button could conrol the screen manually and be
effective repeatedly. Manual Control Button
Spare outside receiver
For hidden installation, plug the outside receiver in
according to the drawing.
Take out all the parts from the packaging to ensure you have all necessary components.
There are three installation measures for this product, namely wall mount, ceiling mount and ceiling hang. The
installed distance can be changeable up to your needs via adjusting the slipper block, while the ideal position is the
mounting bracket is at its nearest point to the end cap, which can reduce unnecessary vibration or noise.
Installation
1. Mount the wall/ceiling brackets using the appropriate screws for your supporting material.
2. Ensure the brackets are horizontal and near the ends of the casing. Fasten to the wall or ceiling, not both.
( Figure 1) .
Figure 1
Wood wall installation Wood ceiling installation Concrete wall installation Concrete ceiling installation
Figure 2 Figure 3 Figure 4 Figure 5
Wall and ceiling installation:
Installation Steps
a) Wood supportin g materials: Dri ll in the 5 x 40 screws through the appropriate holes in the bracket
( Figure 2-3 ).
b) Concrete supporting materials: Install the anchors and drill in the 5 x 40
( Figure 4-5).
screws into the appropriate
bracket holes.
How to install the battery:
1.Turn the controller around, push to open the cover as guide arrow.
2.Put the battery in according the guide of cathode and anode.
3.Close the cover.
UP
DOWN
STOP
LED remote controller
Controller button instruction
1.To raise screen press "UP .
2.To hold screen at desired position press STOP .
3.To lower screen press DOWN .
1.
2 will
3 will if
4
5
6
7
"
" "
" "
Caution:
The shortest distance between receiver and controller is 0.5 meter.
.Controller work within 30 degree away horizontally from the cen ter of receiver
point within 8 meters from the screen.
.The controller not work the signal was coveredby something.
.Keep the controller far away from high temperature and humid situation.
.Please change the battery when the signal is weak.
.Please take the battery out if the controller was not being used for long time.
.Please choose the same type battery as original supplied.
4. To raise the screen little at your desired position press MICRO-UP
5. To lower the screen little at your desired position press MICRO-DOWN
1GD IRan
MICRO-UP MICRO-DOWN

3 4
Up groove
Down groove
Figure 8 Figure 9
Figure 10 Figure 11
Figure 6 Figure 7
BaffleFixing screwA
1 2
Figure 12
Figure 13 Figure 14
Figure 15 Figure 16
Figure 17
Ceiling hang installation
4. Mount the projection screen by sliding the casing grooves over the bracket hooks. ( Figure 8-9 )
5. Tighten the locking screw to clamp the screen securely in place. ( Figure 10-11 )
3 ( Figure 6-7 ). Loosen the locking screw to lower the bracket clamp all the way down.
Each end of the screen casing needs to be supported by a hook (not provided). Ensure that the suspension system
(cable and/or hook) can support the weight of the screen.
1. To drill two same holes with an electric drill horizontally with wall, then fasten hangers (unprovided) onto the
ceiling. ( Figure 12 )
2. Use three M5x10mm screws to fasten the hanging brackets, to the wall and ceiling brackets as shown.
( Figure 13-14)
3. Attach the wall and ceiling brackets to the casing as shown in figures 15 and 16.
4. Place hooks through the hanging brackets to suspend the projection screen as shown. See figure 17.