furniture solutions instruction...
TRANSCRIPT
1
= Furniture Solutions =
Imported by Furniture Solutions (Aust) Pty Ltd New South Wales, Australia.For any assistance with assembly or for missing parts please contact:Place of purchase or Furniture Solutions on belowCustomer Service (Australia) Phone-1300 794 [email protected]
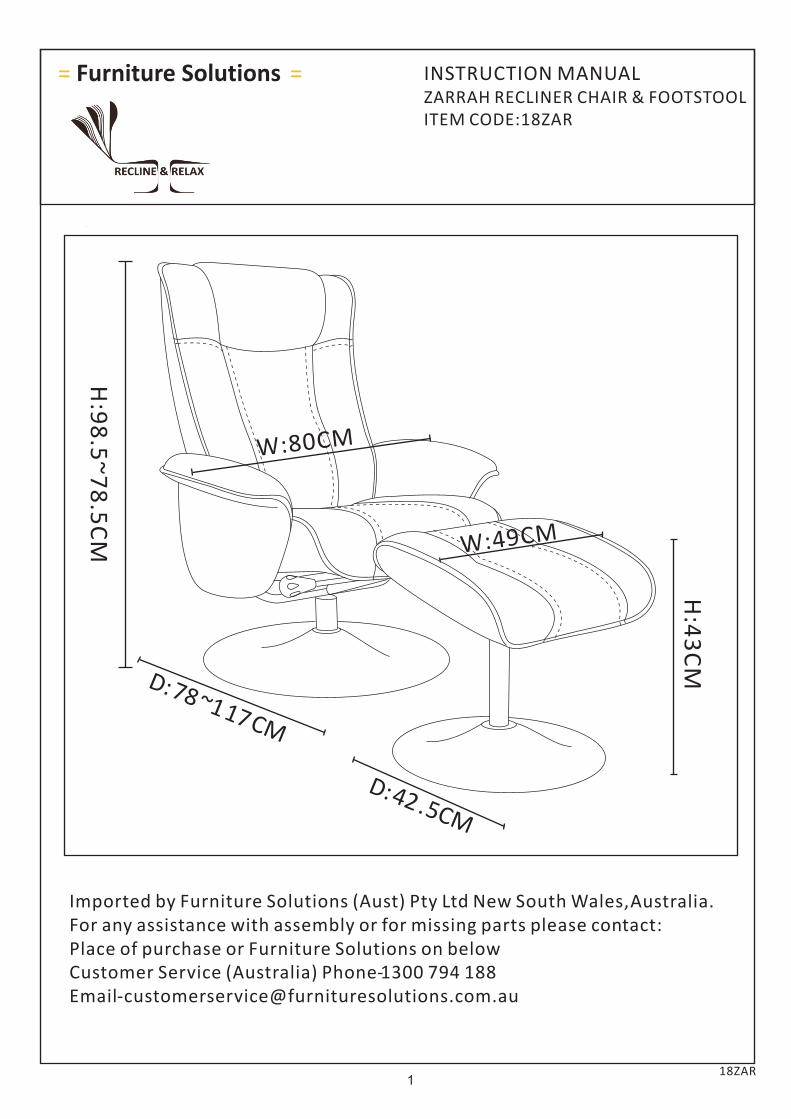
INSTRUCTION MANUALZARRAH RECLINER CHAIR & FOOTSTOOLITEM CODE: 18ZAR
18ZAR
H:9
8.5
~7
8.5
CM
D:78~117CM
D:42.5CM
W:80CM
H:4
3C
M
W:49CM
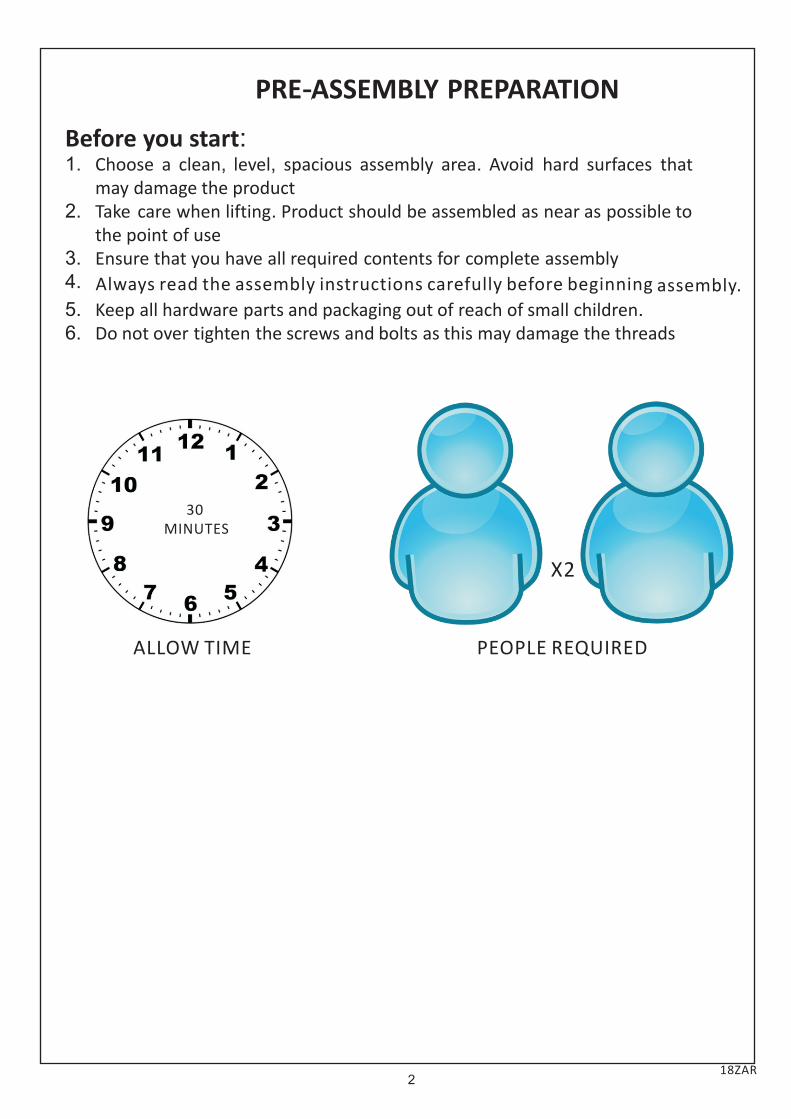
PRE-ASSEMBLY PREPARATION
2
Before
you
start
:
1.
Choose
a
clean,
level,
spacious
assembly
area
.
Avoid
hard
surfaces
that
may
damage
the
product
2. Take care when lifting. Product should be assembled as near as possible tothe point of use
3. Ensure that you have all required contents for complete assembly4.
5.
Keep
all
hardware
parts
and
packaging
out
of
reach
of
small
children
. 6. Do not over tighten the screws and bolts as this may damage the threads
Always read the assembly instructions carefully before beginning assembly.
30MINUTES
ALLOW TIME
X2
PEOPLE REQUIRED
18ZAR

3
PARTS LIST
A
B
C
D
E
F
G
1PC
4PCS
6PCS
1PC
1SETM6X20 4mm/6mm
Knob/Shaft
1PC
3PCS
M6X20
M8X35
1.Seat Cushion
6.Footstool base5.Chair Base
2.Backrest Cushion 3.Armrest Pads
4.Footstool Cushion
18ZAR
Footstool post
Chair post
1
2
4
56
3
3
4
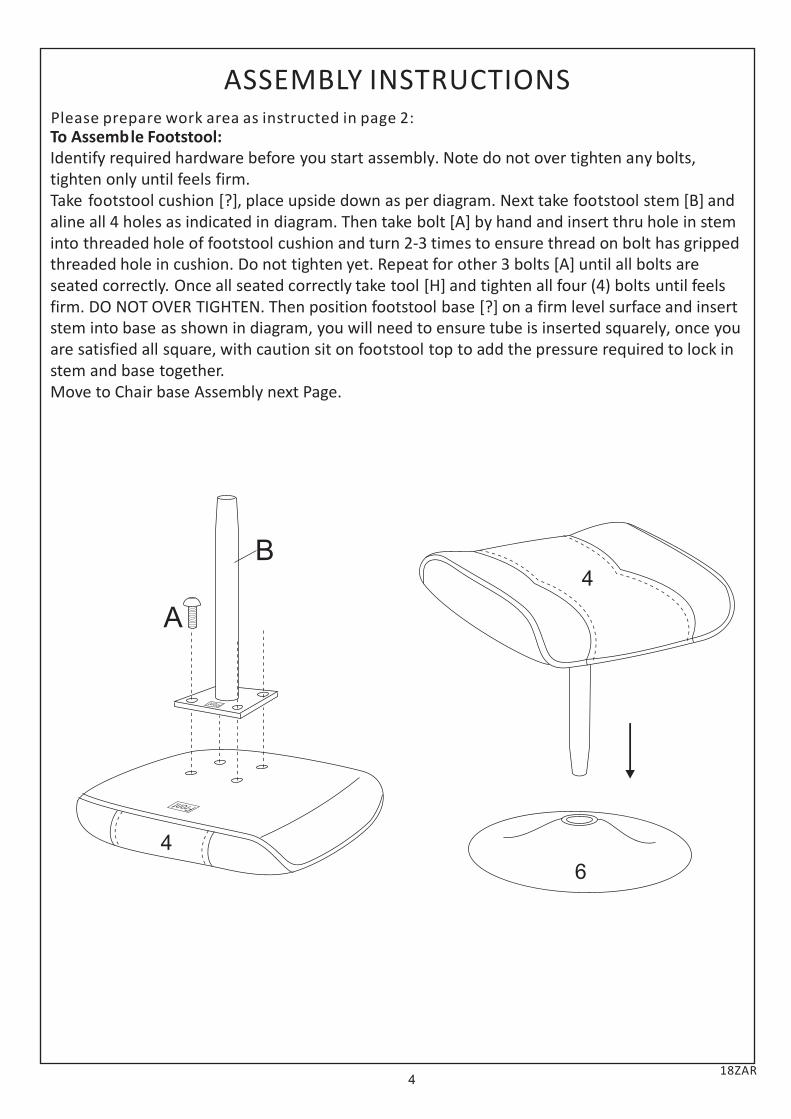
To Assemble Footstool:
Identify required hardware before you start assembly. Note do not over tighten any bolts,
tighten only until feels firm.
Take footstool cushion [?], place upside down as per diagram. Next take footstool stem [B] and
aline all 4
holes as
indicated in diagram.
Then
take
bolt [A]
by hand and insert
thru hole
in
stem into
threaded
hole
of
footstool
cushion and turn 2-3
times
to ensure
thread
on bolt
has gripped
threaded
hole in cushion.
Do not
tighten
yet.
Repeat
for
other
3 bolts
[A]
until all bolts
are seated
correctly.
Once
all
seated
correctly
take
tool
[H]
and tighten all four (4) bolts
until feels firm.
DO NOT
OVER
TIGHTEN. Then
position footstool
base
[?]
on a
firm
level
surface
and insert
stem
into base
as
shown in diagram,
you will need
to ensure
tube
is
inserted
squarely,
once
you are
satisfied all
square,
with caution
sit
on
footstool
top to add the
pressure
required
to lock
in stem
and base
together.
Move
to Chair
base
Assembly
next Page.
18ZAR
4
4
6
5
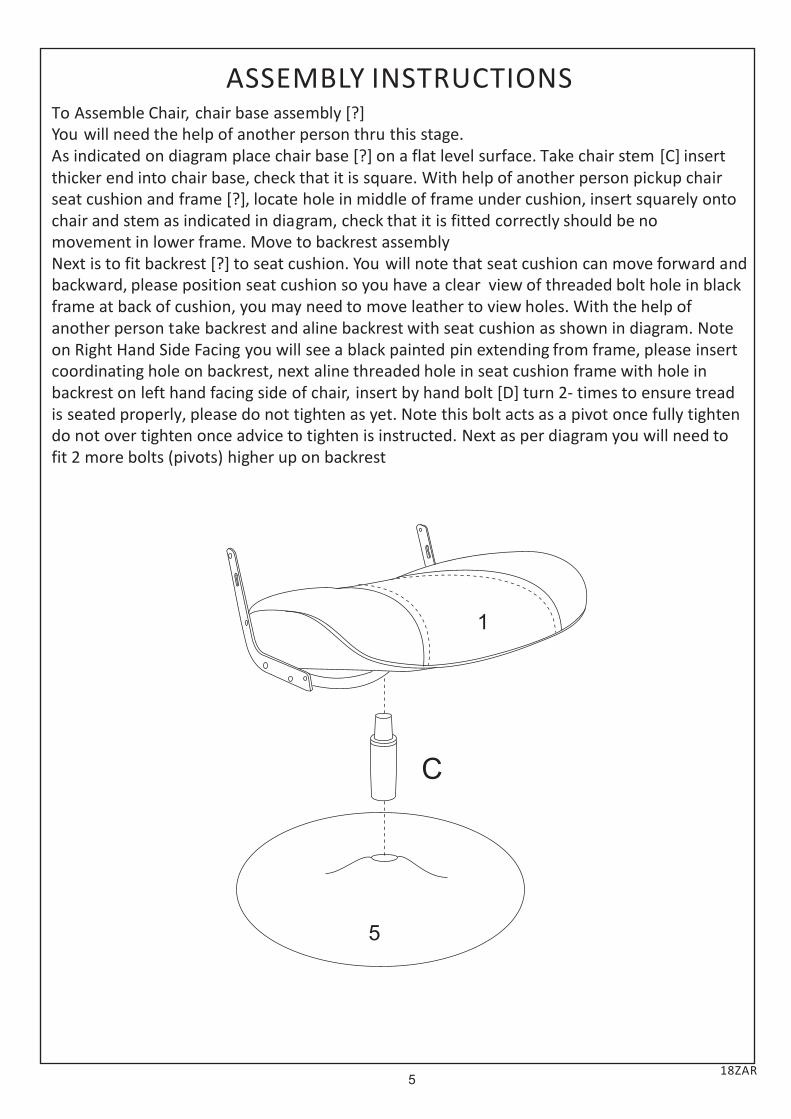
To Assemble Chair, chair base assembly [?]
You will need the help of another person thru this stage.
As indicated on diagram place chair base [?] on a flat level surface. Take chair stem [C] insert
thicker end into chair base, check that it is square. With help of another person pickup chair seat
cushion and frame
[?],
locate
hole in middle of
frame
under cushion,
insert squarely
onto
chair
and stem
as
indicated in diagram,
check
that it is
fitted
correctly
should
be
no movement
in lower
frame.
Move to backrest
assembly
Next is to fit backrest
[?]
to
seat
cushion.
You
will note that seat
cushion
can move
forward and backward,
please
position
seat
cushion so you have
a clear
view
of
threaded
bolt hole in black frame
at
back
of
cushion,
you may
need
to move
leather
to
view
holes. With the
help of another person take
backrest
and aline backrest
with seat
cushion as
shown in diagram.
Note on Right Hand Side Facing
you will
see
a
black painted pin extending
from
frame,
please
insert coordinating
hole
on backrest,
next
aline threaded
hole in seat
cushion
frame
with
hole in backrest
on
left hand facing side
of
chair,
insert
by hand bolt [D]
turn 2-
times
to ensure
tread is
seated
properly, please
do not
tighten as
yet.
Note
this
bolt acts
as
a
pivot
once
fully
tighten do
not over
tighten
once
advice
to tighten is instructed.
Next
as
per
diagram
you
will
need
to fit 2
more
bolts
(pivots)
higher up on backrest
18ZAR
1
5
6
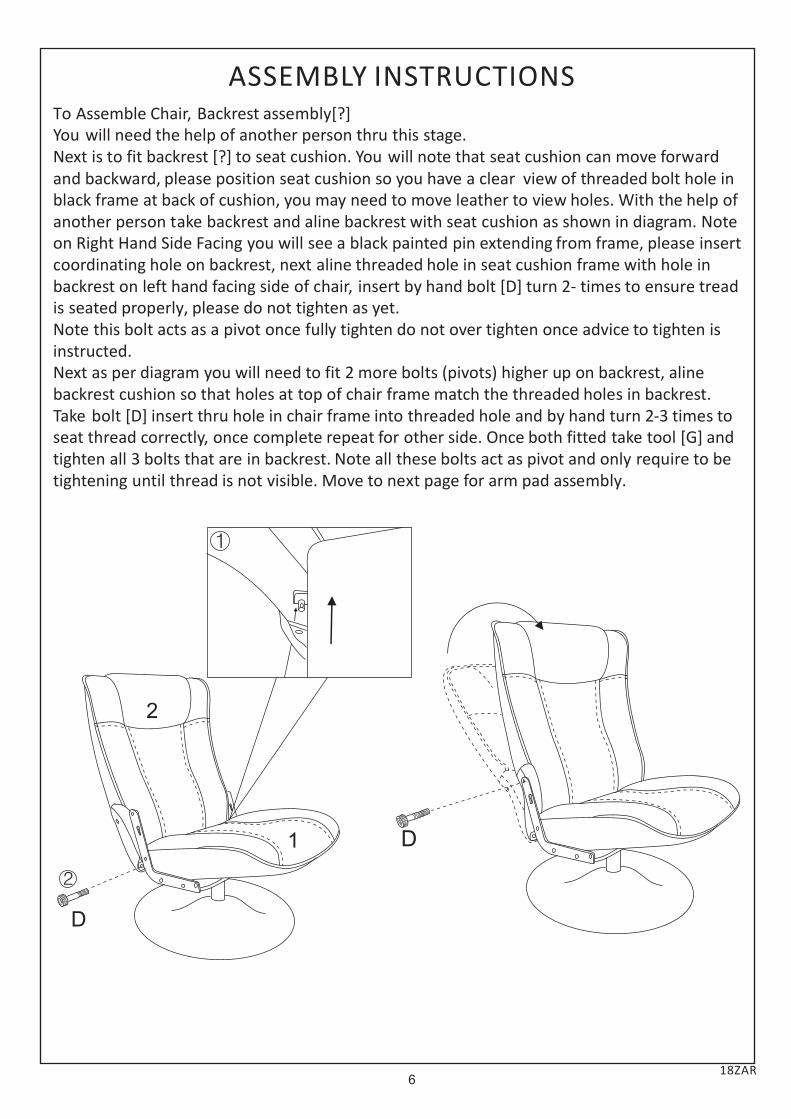
To Assemble Chair, Backrest assembly[?]
You will need the help of another person thru this stage.
Next is to fit backrest [?] to seat cushion. You will note that seat cushion can move forward
and backward,
please
position
seat
cushion so you have
a clear
view
of
threaded
bolt hole in black frame
at
back
of
cushion,
you may
need
to move
leather
to
view
holes. With the
help of
another person take
backrest
and aline backrest
with seat
cushion as
shown in diagram.
Note on Right Hand Side Facing
you will
see
a
black painted pin extending
from
frame,
please
insert
coordinating
hole
on backrest,
next
aline threaded
hole in seat
cushion
frame
with
hole in backrest
on
left hand facing side
of
chair,
insert
by hand bolt [D]
turn 2-
times
to ensure
tread is
seated
properly, please
do not
tighten as
yet.
Note
this
bolt acts
as
a
pivot
once
fully
tighten
do
not
over
tighten
once
advice
to tighten
is instructed.
Next
as
per
diagram
you will need
to fit
2
more
bolts
(pivots)
higher up on backrest,
aline backrest
cushion so that
holes
at
top
of
chair frame
match the
threaded
holes
in backrest. Take
bolt [D]
insert thru
hole in chair
frame
into
threaded
hole and by hand turn 2-3
times
to seat
thread
correctly,
once
complete
repeat
for
other
side. Once
both fitted
take
tool
[G]
and tighten
all
3
bolts
that are
in backrest.
Note
all
these
bolts
act
as
pivot and only
require
to
be tightening until thread
is
not
visible. Move
to next
page
for arm
pad assembly.
18ZAR
2
1
7
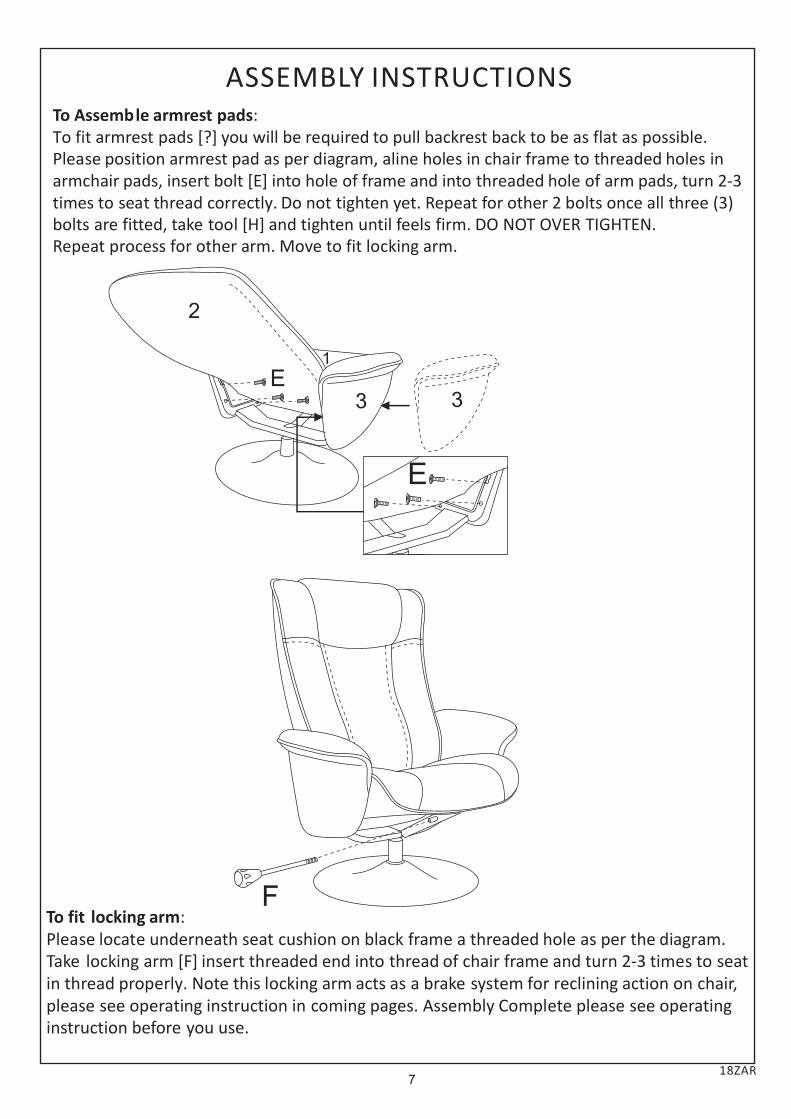
To fit locking arm:
Please locate underneath seat cushion on black frame a threaded hole as per the diagram. Take locking arm [F] insert threaded end into thread of chair frame and turn 2-3 times to seat
in thread
properly.
Note
this locking
arm
acts
as
a brake
system
for
reclining
action
on
chair, please
see operating
instruction in coming
pages. Assembly
Complete
please
see operating instruction before
you use.
To Assemble armrest pads:
To fit armrest pads [?] you will be required to pull backrest back to be as flat as possible. Please position armrest pad as per diagram, aline holes in chair frame to threaded holes in
armchair
pads, insert bolt [E]
into
hole
of frame
and into
threaded
hole
of
arm
pads, turn 2-3 times
to
seat
thread
correctly.
Do not
tighten
yet.
Repeat
for
other
2
bolts
once all
three
(3) bolts
are
fitted, take
tool [H]
and tighten
until feels
firm.
DO
NOT
OVER
TIGHTEN.
Repeat
process for other
arm.
Move
to fit locking
arm.
18ZAR
3 3
2
1
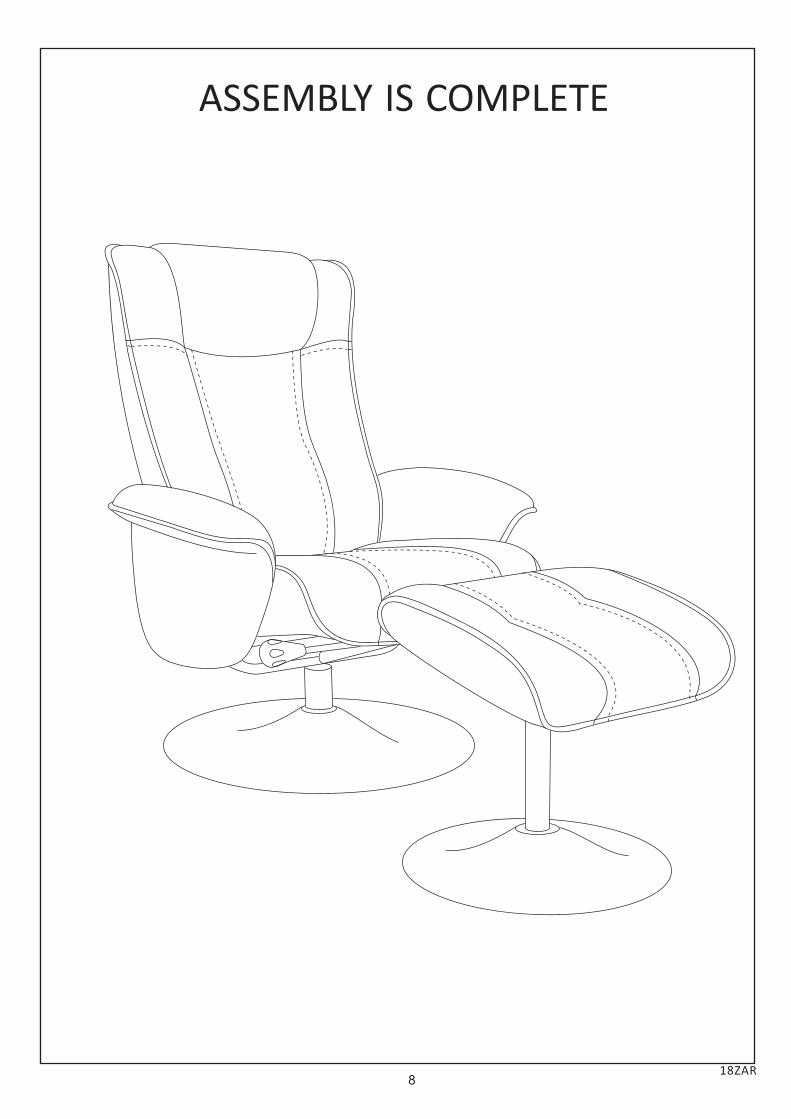
ASSEMBLY IS COMPLETE
818ZAR

918ZAR
10
CARE AND MAINTENANCE
Varieties of materials are used in construction of “Recliner” furniture range, Such as Stainless Steel;
Chrome
plated
steel:
Powder
coated
steel,
Timber,
Leather,
PU
synthetic fabric & a variety
fabrics.
All will require
some
form
of
maintenance to extend
the
life of
finishes
and general
appearance. Please
see
below
instruction unique to your chosen
model.
Zarrah
Covering : Leather Full Hide with CorrectedRecliner
Chair
and
footstool
Grain Base
:
Laminated timber
Leather
Covering;
Keep
dust free
at
all
times.
Regular
use
a damp soft
clean cloth and wipe down leather.
Pay
special
attention to
areas
where
skin touchers
leather.
IE :
Armrest
Pads,
Headrest,
front section of
chair and footrest tops.
Please
clean up spills
immediately. Ensure
to dry
properly before
use.
Periodic
Leather
Cleaning;
Every
3-4 months
you need
to give
leather
a good
clean to remove
excess
body oils.
Please
purchase a
propriety leather
cleaner
and follow
all
directions
indicated on packaging. You
could also purchase
a leather
conditioner/protector
to complement
the
leather
after
a
good
clean.
Frequency
of periodic cleaning can vary
due to colour of
leather,
use and
environment. A chair used
2
hours
a
day will require
less cleaning than a chair
used
8
hours a
day.
Areas
of
high humidity
will require
more
cleaning than areas of low
humidity.
Professional
Cleaning;
Even
the
most diligent house
keeper
cannot always
prevent
leather
from
aging or
looking tired.
We
recommend
you use the
services
of a
reputable
leather
cleaning service
when
your
cleaning
does not
appear
to make
a
difference
in appearance.
Things
to
know
about
leather;
The
surface
of leather
can be
affected
by chemicals used
in
hair spray,
gel,
mousse, perfume,
deodorants, some
medications,
alcohol and dye transference
from
clothing.
Please
factor
this into
your cleaning
regime.
Laminated
Timber
Base
and
Swivel
Action;
Please
remove
dust and
grit
on exposed
timber
as
required.
Every
3-4months
lay chair
over
on it’s back
please
wipe and or
vacuum action inside
chair
to
remove
excess
dust and
fluff, pay special attention to
swivel action at
base
of
chair,
ensure
all metal
components
are
clean
and free
of impediments.
18ZAR
11
SAFETY WARNINGS AND ADVICE
Notices and Advice
Please
be
advised that products are
limited
in design for residential
use only and are
not
suitable for commercial
use.
Please
be
advised that materials
used in
your furniture are
not
impervious
to neglect,
acts of
god,
abuse,
alcohol
spills,
improper
use
of
chemicals
such as
bleach or
any
solvent
based products.
Please
be
advised that heat
sources
such
as
direct
sunlight,
log
fires,
heaters
and air conditioners
can have
adverse
affects
on your furniture.
Please
be
advised that fitting,
bolts,
nuts and or
screws
should
be
checked
periodically
to ensure
they
have
not loosened
over
time.
Remember
do
not
overtighten.
Please
be
advised coverings
are
not
animal proof.
Claws
can
scratch
covering
&
saliva is acidic and can damage
finish of
covering.
DO NOT
•Place
in direct
sunlight.
•Place
in close proximity to
open
flame
or
heaters.
•Place
in direct
line
of air
conditioning
ducting.
•Leave
spills
or
food
on
sofa
clean
off immediately
•Pull loose
thread,
cut them
instead.
•Sit or
lean on arms
•Stand on chair
Safety warnings
•DO NOT:
•drop, drag
always
with the
help of
another person lift and place,
to avoid damage
to floor surface
&
base
of
recliner
chair.
•Sit on arms
or
back
when upright,
this
could damage
internal mechanism.
•Fold mechanism
with linen or
cushions on
sofa.
•Pull loose
thread,
cut them
instead.
•Jump,
flop or
stand on sofa.
•Always
release
both glide handles
before
you attempt
to
move
into upright
position.
•Ensure
swivel mechanism
on
chair base is
clear
of loose
threads,
long carpet
fibre’s
or simular items
18ZAR
12
2 Year Warranty
WARRANTY DETAIL
A two
(2) year
warranty
applies to product against any
defects
associated with faulty workmanship
for a period of
(2) year
from
date
of purchase.
Furniture
Solutions accepts
no responsibility
for defects
caused by
incorrect
assembly, mishandling,
acts
of god,
general
wear
&
tear
including fading,
creasing
of covering,
aging of foam
and fibre
filling
IE
Height
reduce
over
time,
stains
from
spills, chipping/scratching, exposure to
extreme
heat/cold,
mould/mildew,
hardware
corrosion,
misuse of
the
products
&
defects
caused by failure
in duty of
care
for the
product in accordance
with the
care
instructions. Warranty
is based
on normal household use and not for
commercial
use.
Warranty
only
extends to
original purchaser
and is
not
transferable,
except
when
given
as
a gift.
Notice:
While
every
effort
is
made
to use
quality materials
our products are
limited
in design for
domestic
use
only & are
not
suitable
for
commercial
use. Care should
be
taken
not to place product near
heat
sources.
Duty
of
care:
While
every
attempt
is
made
to
supply product
using quality
components
there
is always
a need
from
consumer
to
help ensure
long life
of use
for product.
Instruction
manuals
are
designed with the
nature
of
materials
used
in construction
of the
product.
*Proper
use
of item
only what it is
designed
to do
*Regular
maintenance and cleaning
In areas
of
high content of
salt air,
pollution & moisture
require
more
frequent
cleaning.
Claim
management:
To make
a
warranty
claim,
customers
can either
contact
the
retailer
where
the
purchase was
made
or
Furniture Solutions
on
contact
details
on page
one.
Proof
of
purchase
will be required
before
proceeding with any
claim. In the
case of
product defects
providing photos may
be
able
to
speed up
processing
of
the
claim. If
missing parts
please
refer
to assembly instructions
for identification
of
said part
and contact
either of
the
above.
“Our goods come with guarantees
that
cannot
be
excluded under the
Australian
Consumer Law. You are
entitled to a
replacement
or
refund
for a major failure
and
for
compensation for any
other
reasonably
foreseeable
loss
or
damage.
You
are
also entitled to have
the goods repaired
or
replaced
if the
goods fail to be of acceptable quality
and the
failure
does not amount
to a
major failure”.
18ZAR