frame(gif) and vector animation. two applications for creating animations 1.photoshop – gif...
Post on 21-Dec-2015
224 views
TRANSCRIPT
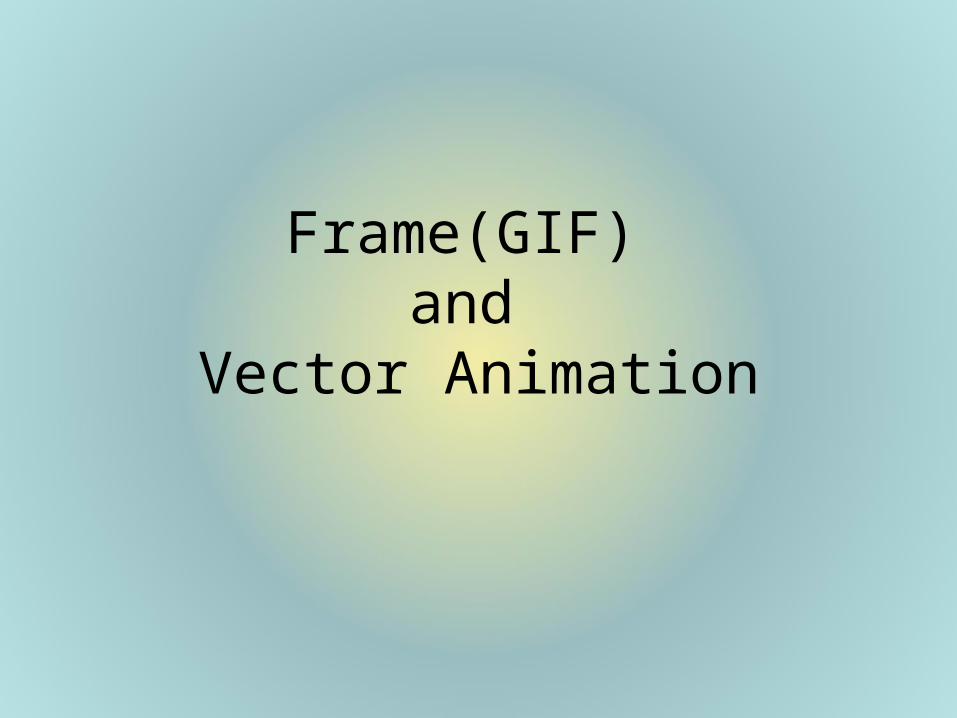
Frame(GIF) and
Vector Animation
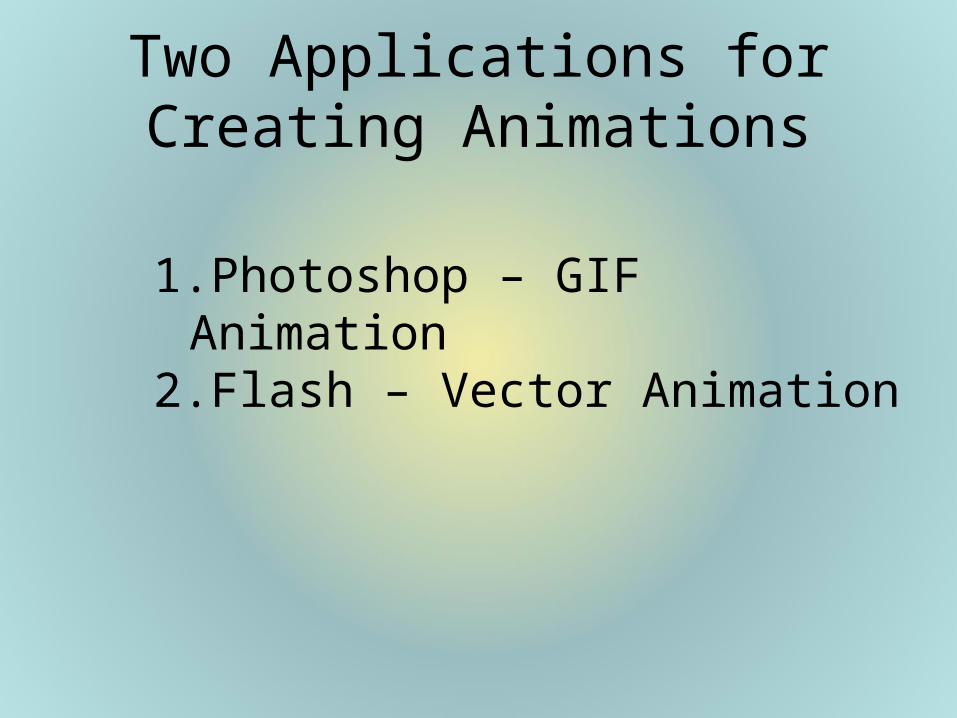
Two Applications for Creating Animations
1.Photoshop – GIF Animation2.Flash – Vector Animation
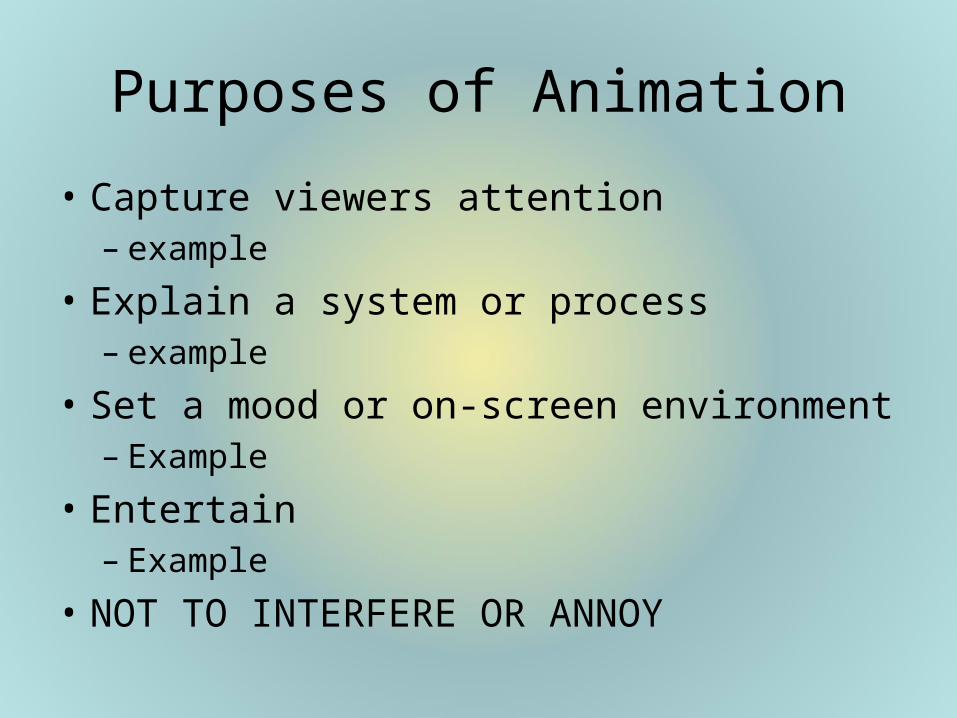
Purposes of Animation
• Capture viewers attention– example
• Explain a system or process– example
• Set a mood or on-screen environment– Example
• Entertain– Example
• NOT TO INTERFERE OR ANNOY
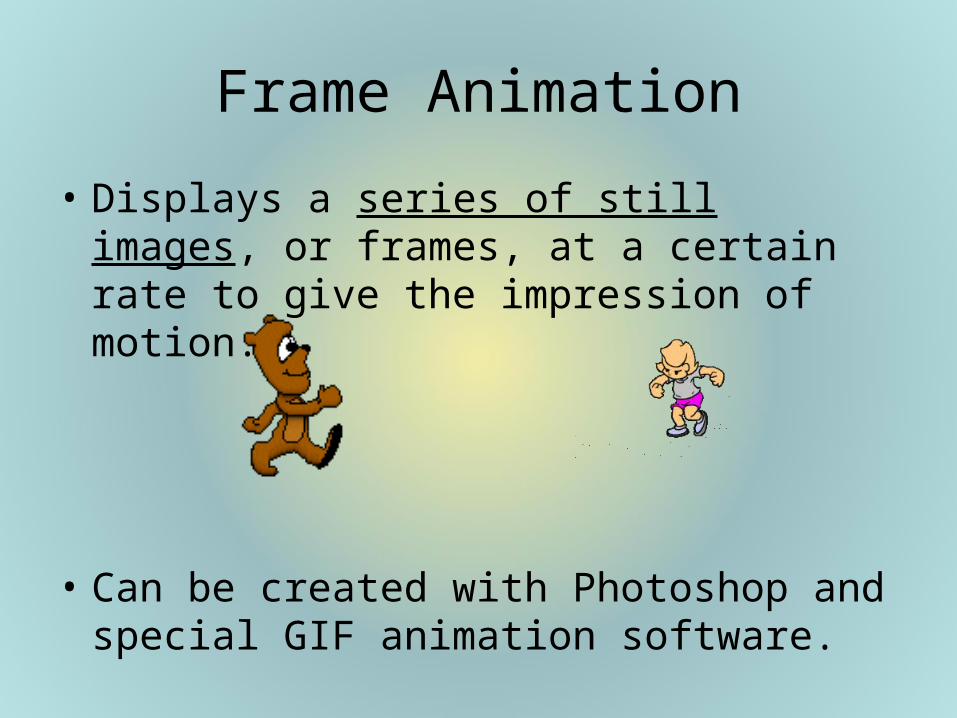
Frame Animation
• Displays a series of still images, or frames, at a certain rate to give the impression of motion.
• Can be created with Photoshop and special GIF animation software.
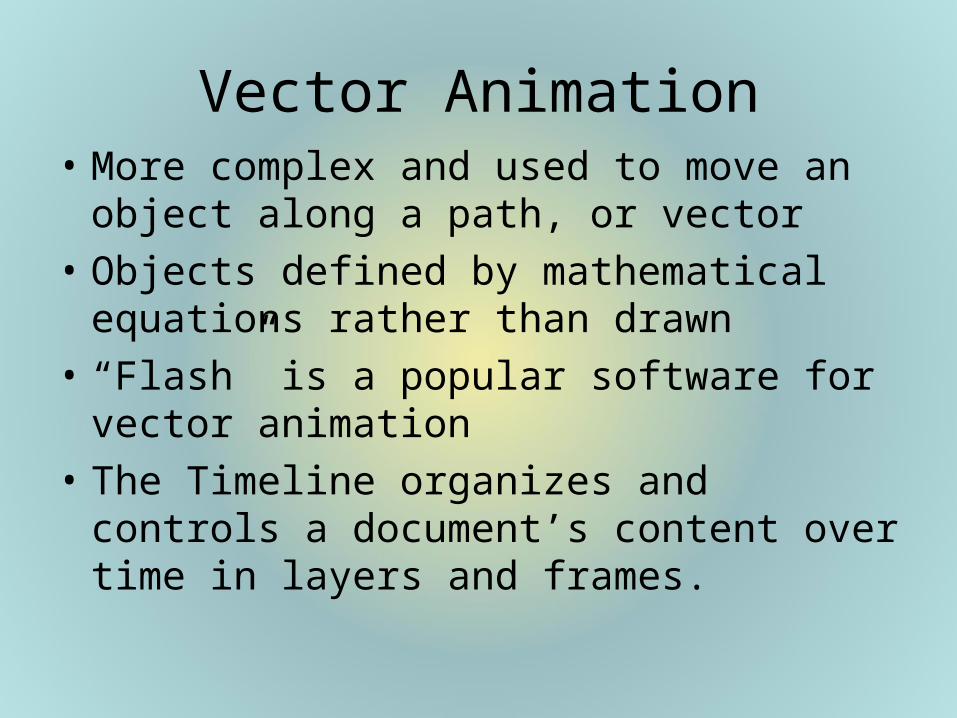
Vector Animation• More complex and used to move an object
along a path, or vector• Objects defined by mathematical equations
rather than drawn• “Flash” is a popular software for vector
animation• The Timeline organizes and controls a
document’s content over time in layers and frames.
Flash Animation
Example Project

Modify -> Document
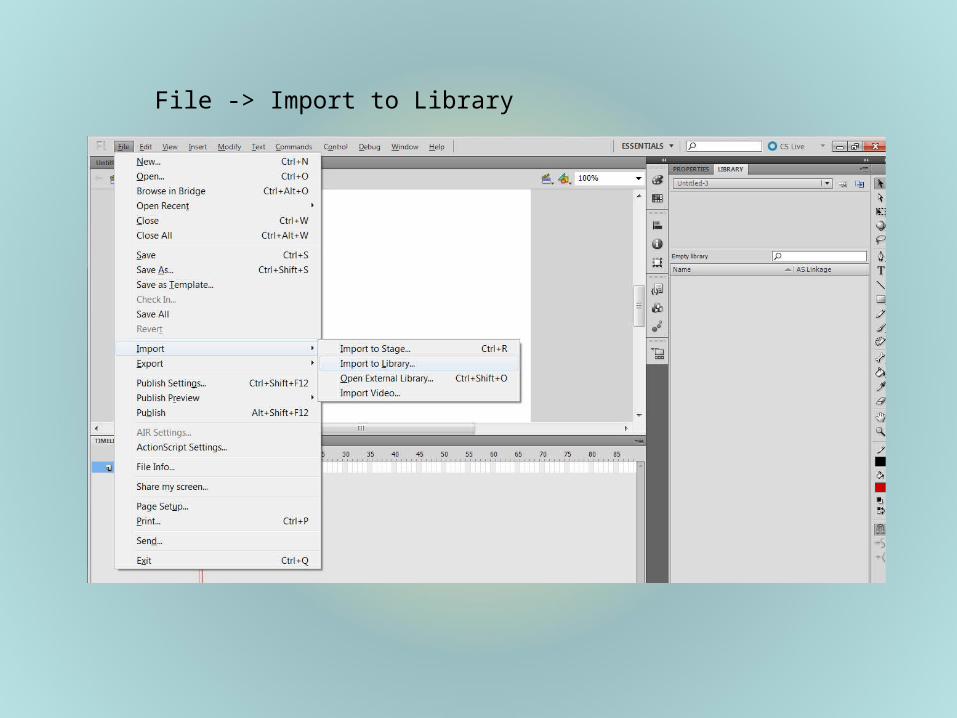
File -> Import to Library
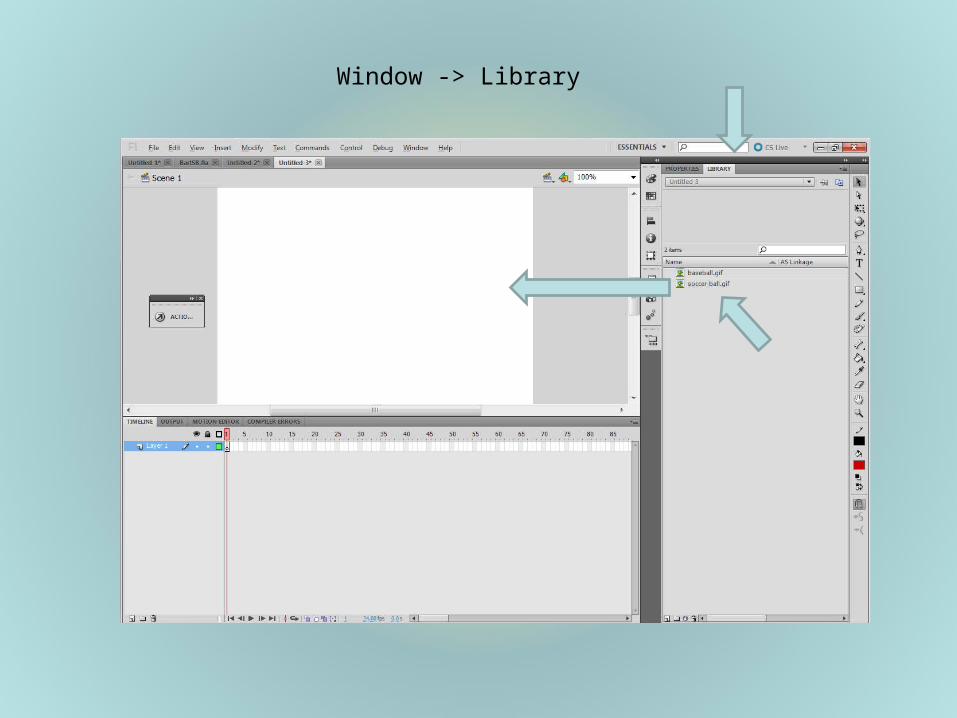
Window -> Library
Demo Project
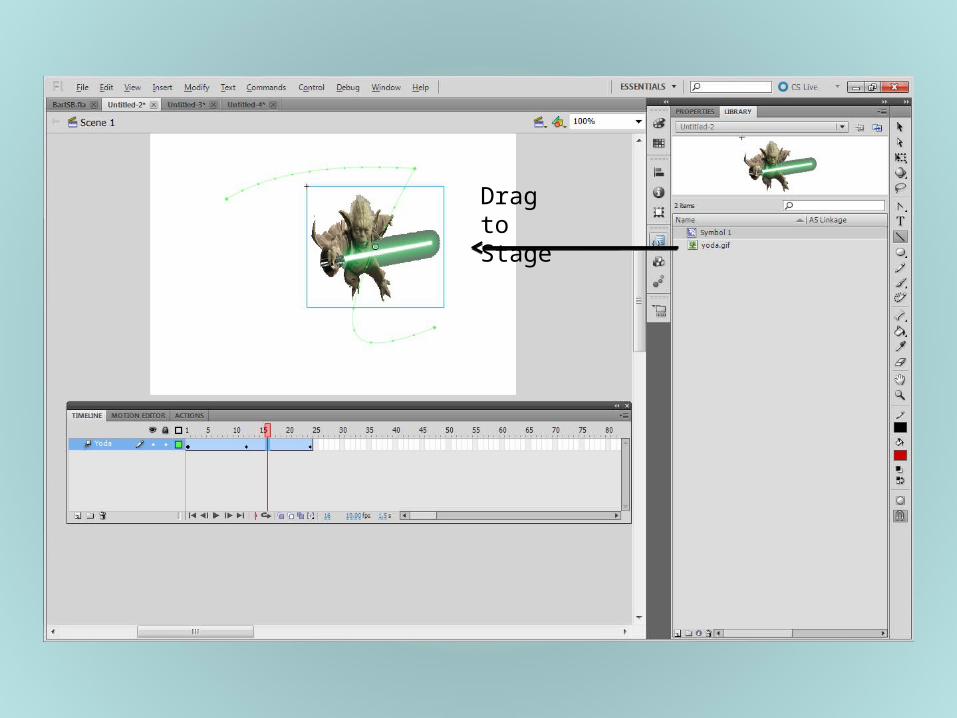
Drag to Stage
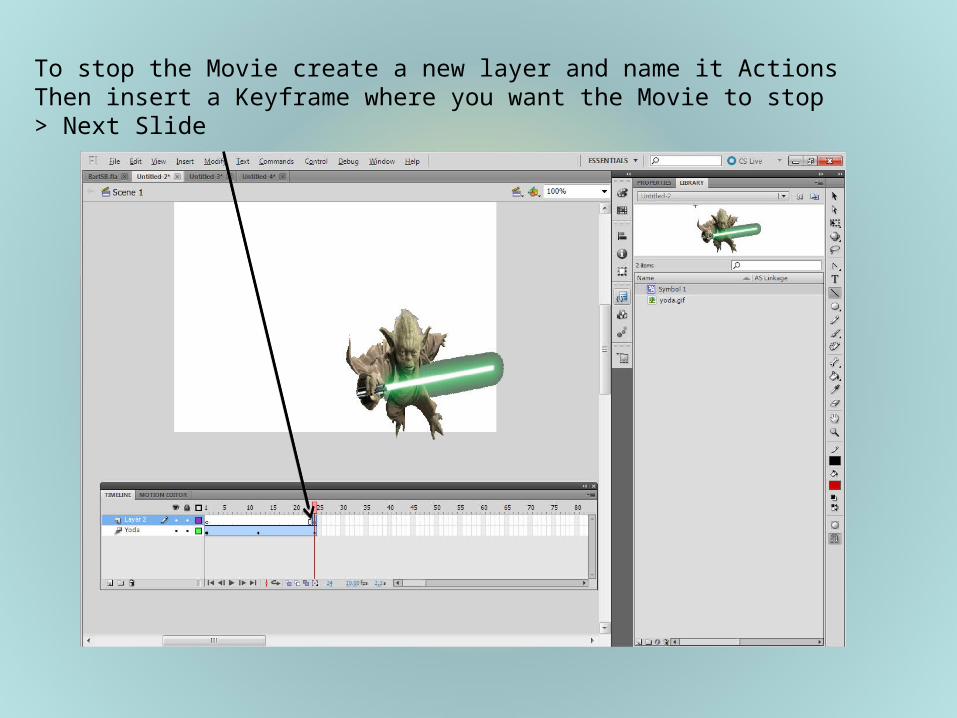
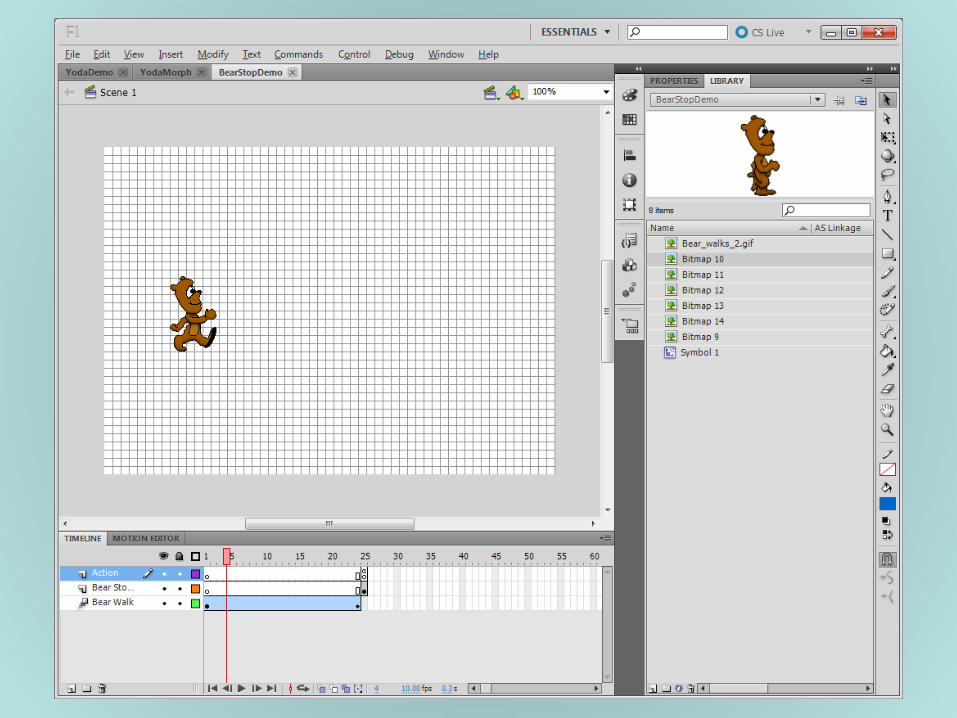
To stop the Movie create a new layer and name it ActionsThen insert a Keyframe where you want the Movie to stop> Next Slide
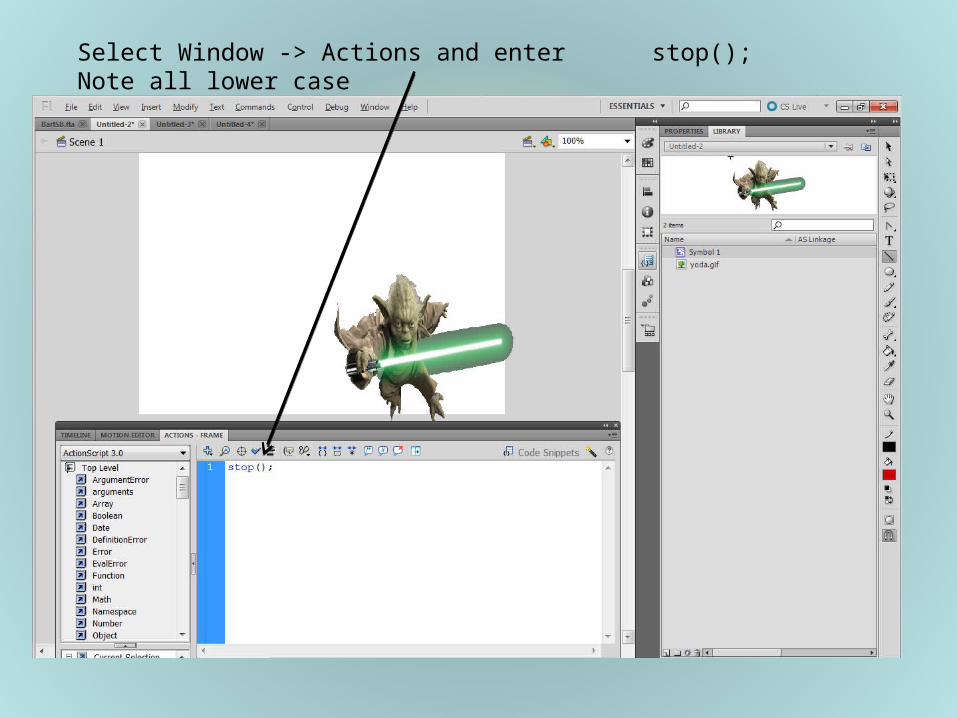
Select Window -> Actions and enter stop();Note all lower case
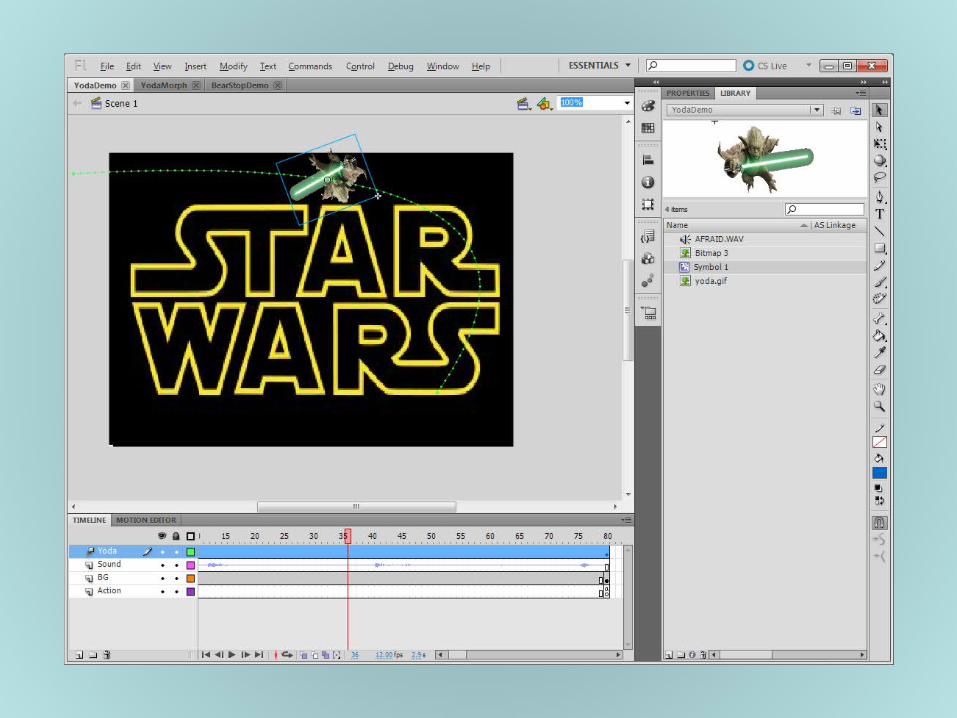
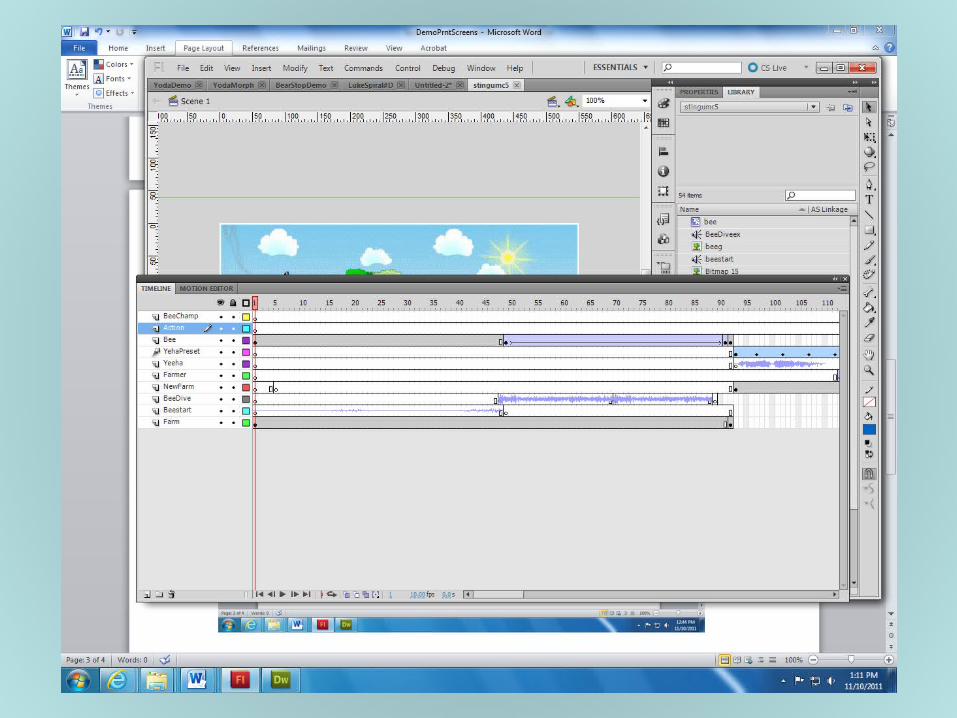
Example of Motion Tween
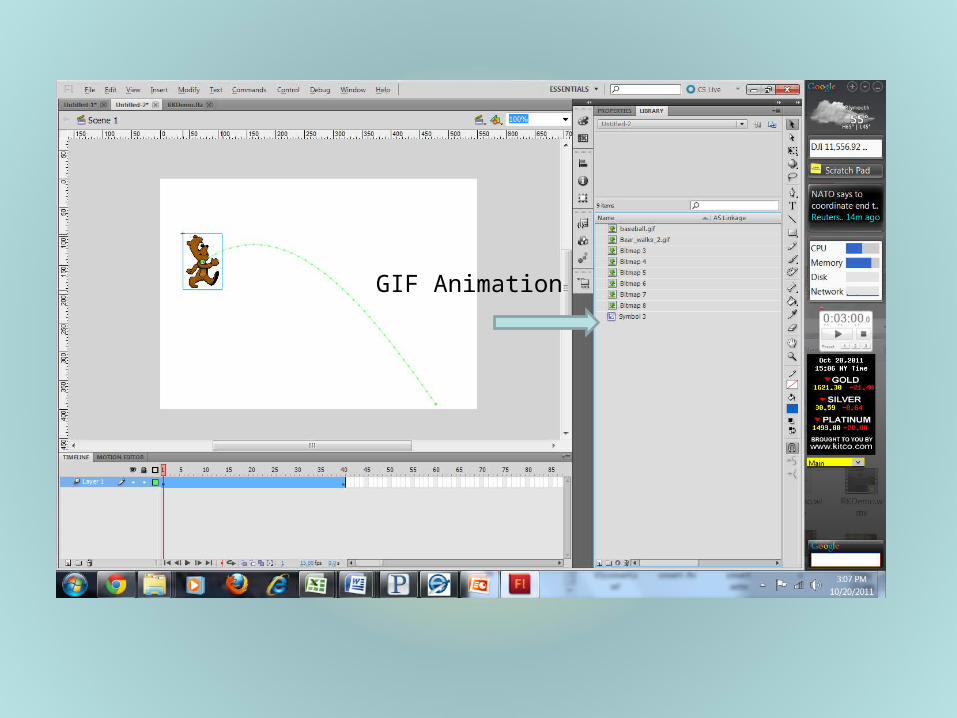
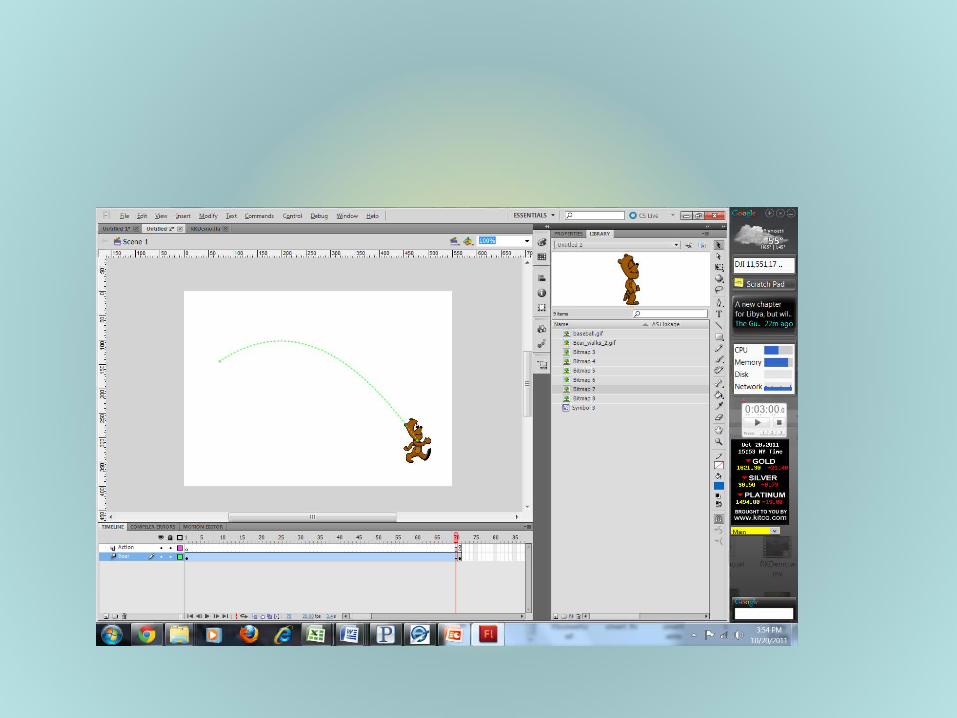
GIF Animation
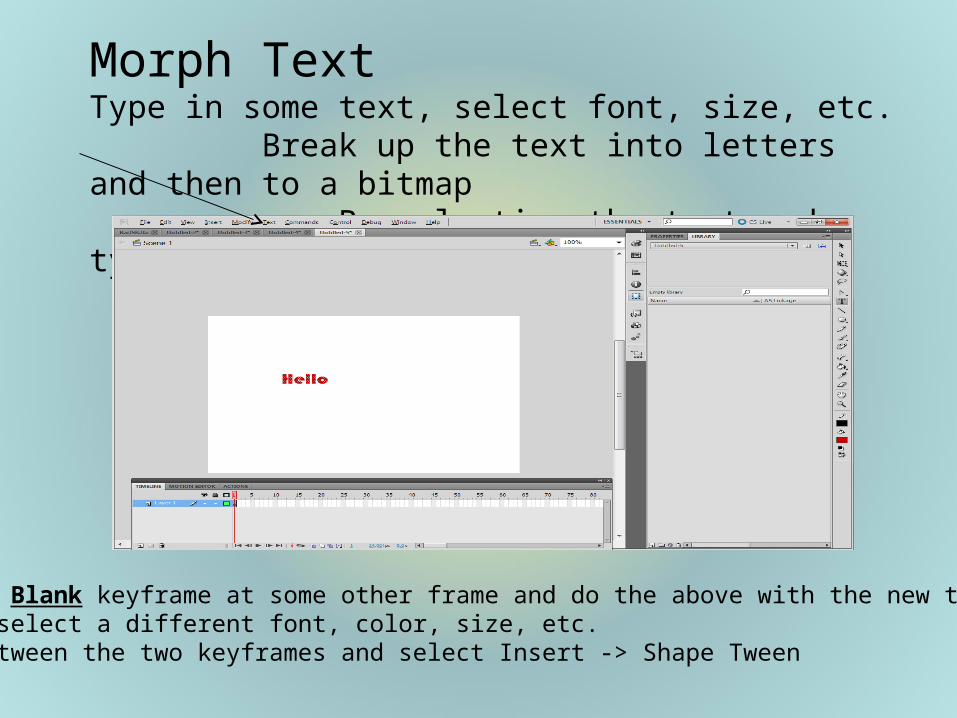
Morph TextType in some text, select font, size, etc. Break up the text into letters and then to a bitmap By selecting the text and type Ctrl-B twice
Insert a Blank keyframe at some other frame and do the above with the new text.You may select a different font, color, size, etc.Click between the two keyframes and select Insert -> Shape Tween
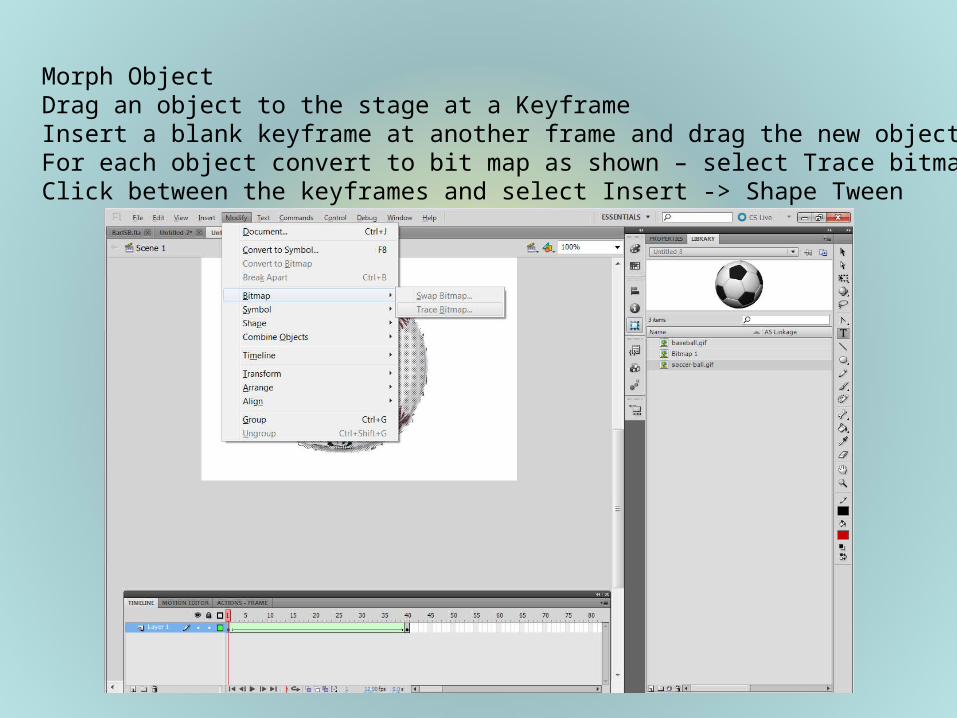
Morph ObjectDrag an object to the stage at a KeyframeInsert a blank keyframe at another frame and drag the new objectFor each object convert to bit map as shown – select Trace bitmapClick between the keyframes and select Insert -> Shape Tween
“Publish” your Flash Animation as a “shockwave” a .swf file format and embed(plugin) on your webpage.
OR
Publish as an html web page which will have the swf already embedded on a webpage.
Do not try to put the .fla format file on your web page. This format can only be read by Flash.
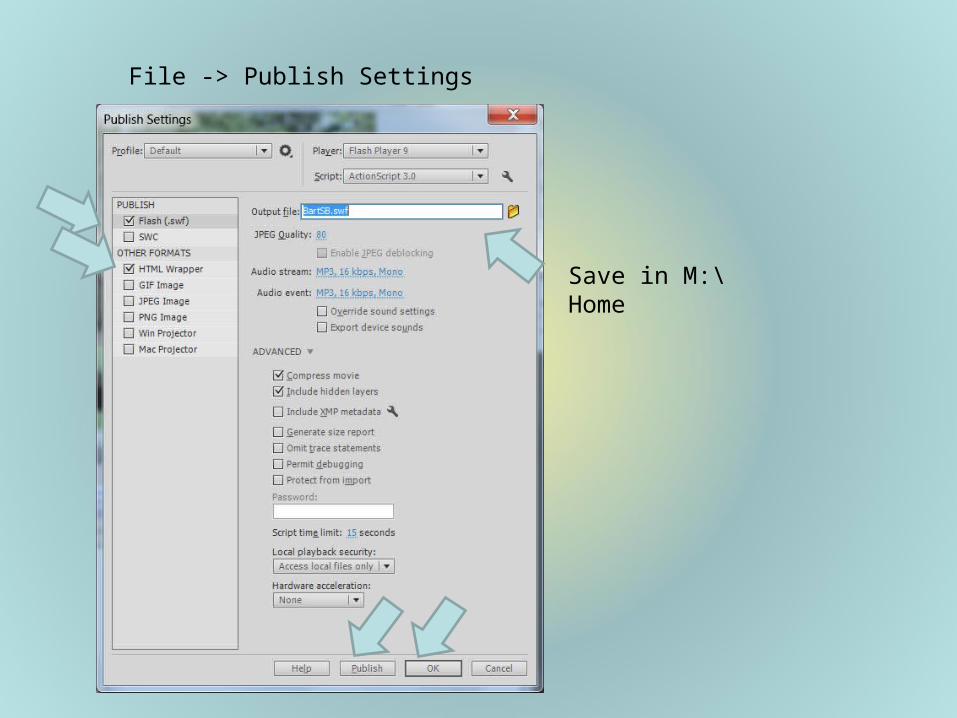
File -> Publish Settings
Save in M:\Home
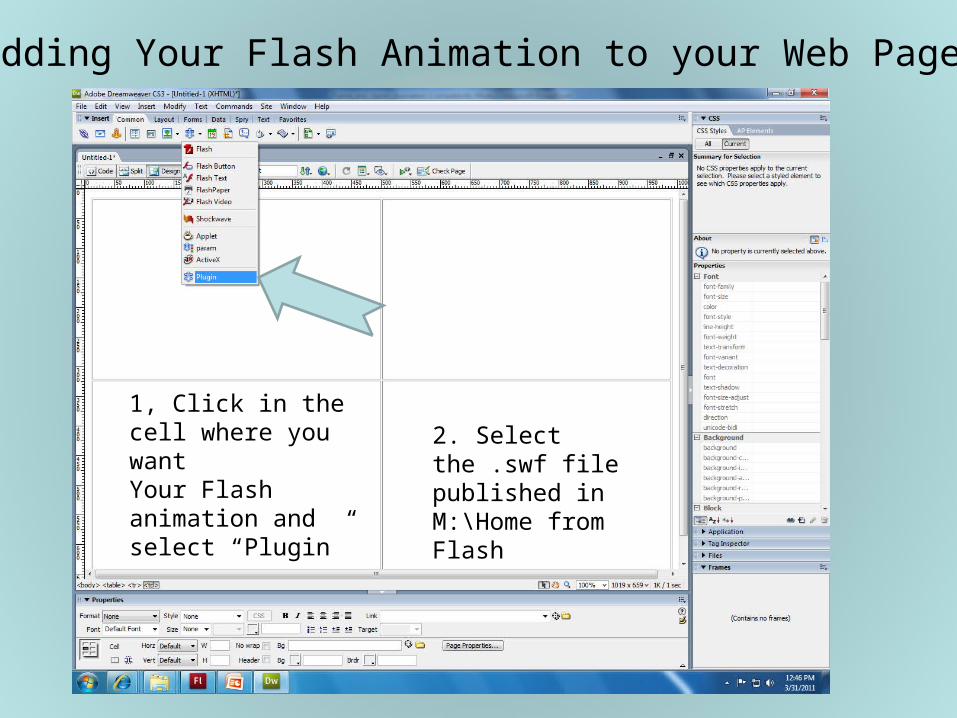
1, Click in the cell where you wantYour Flash animation and select “Plugin”
Adding Your Flash Animation to your Web Page
2. Select the .swf file published in M:\Home from Flash
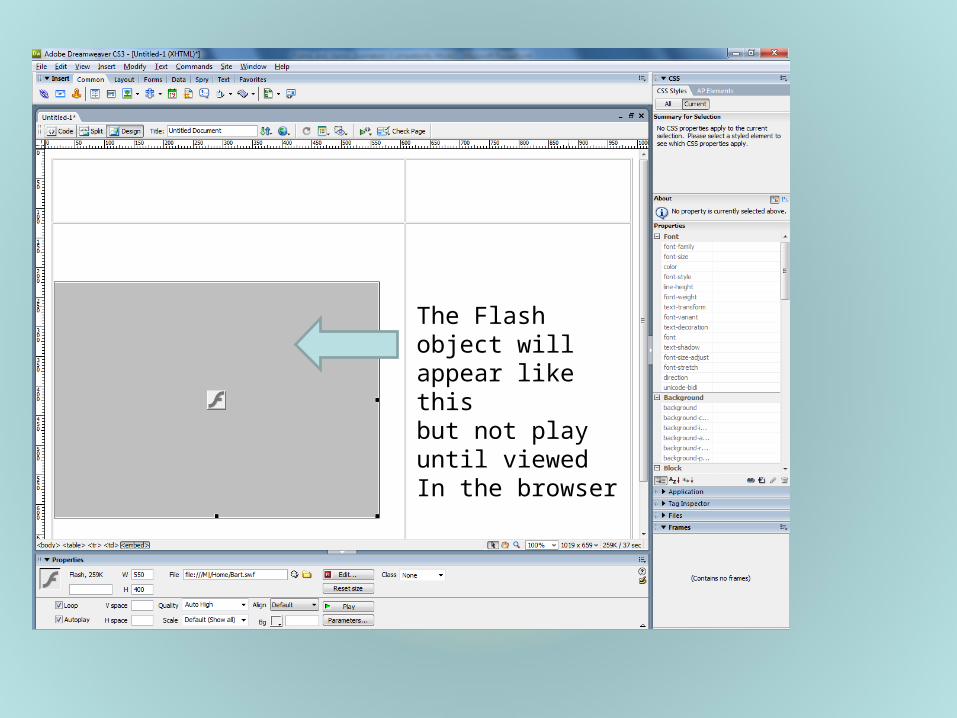
The Flash object will appear like this but not play until viewedIn the browser
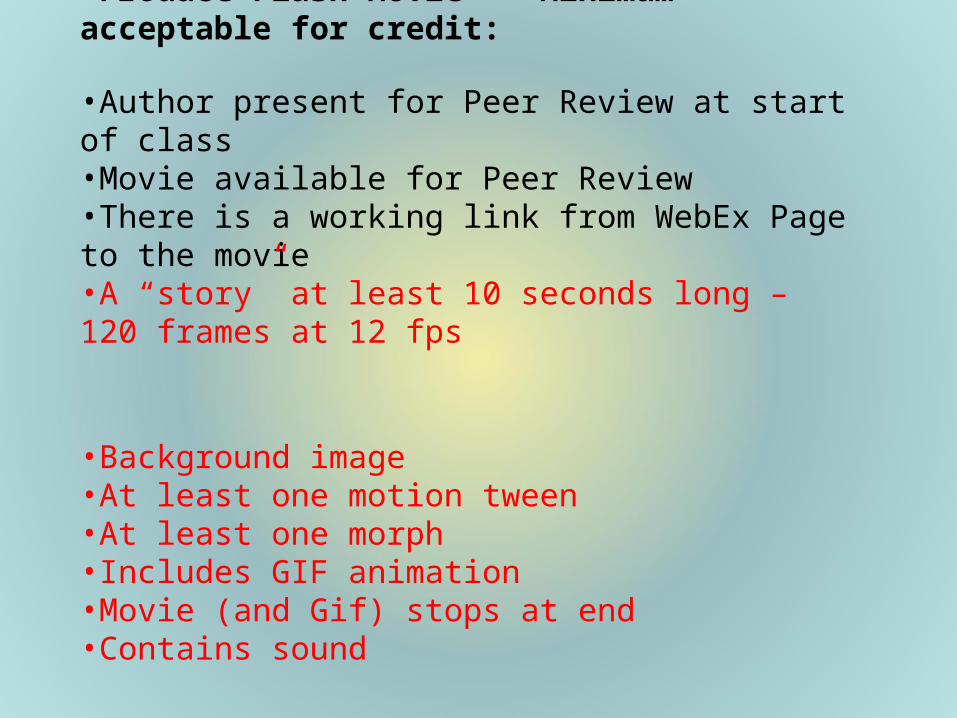
•Produce Flash Movie -- Minimum acceptable for credit:
•Author present for Peer Review at start of class•Movie available for Peer Review•There is a working link from WebEx Page to the movie•A “story” at least 10 seconds long – 120 frames at 12 fps
•Background image•At least one motion tween•At least one morph•Includes GIF animation•Movie (and Gif) stops at end•Contains sound
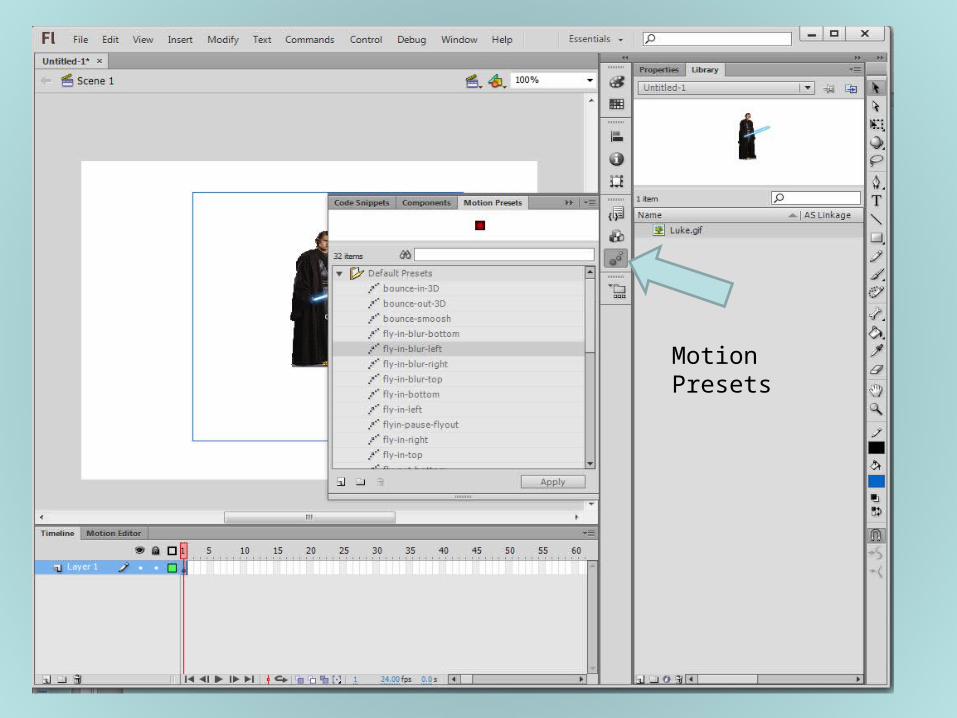
Motion Presets
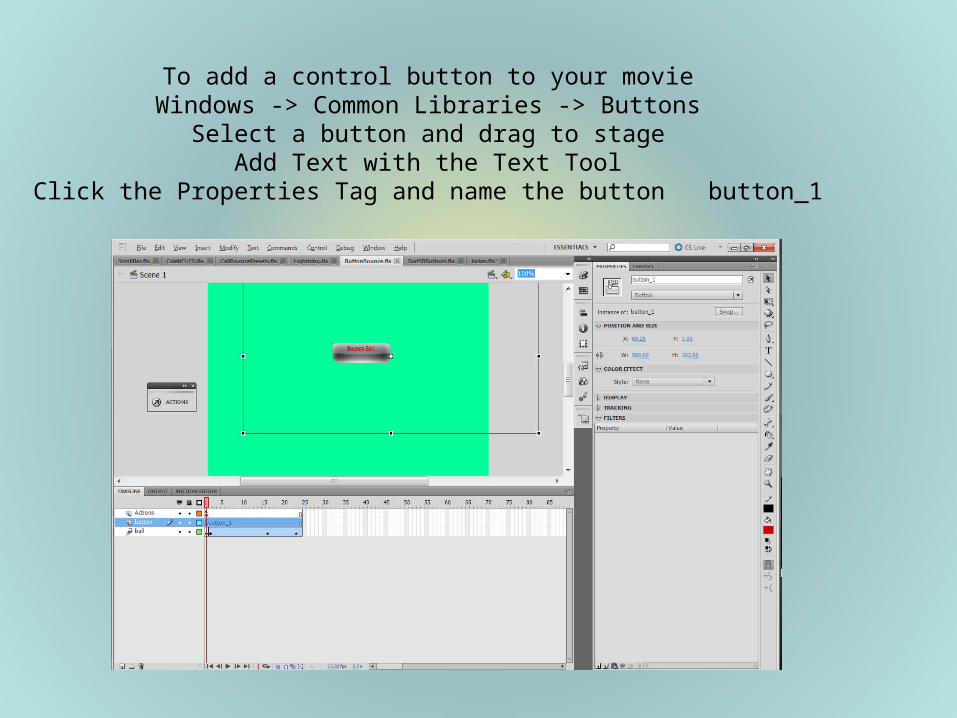
To add a control button to your movieWindows -> Common Libraries -> Buttons
Select a button and drag to stageAdd Text with the Text Tool
Click the Properties Tag and name the button button_1
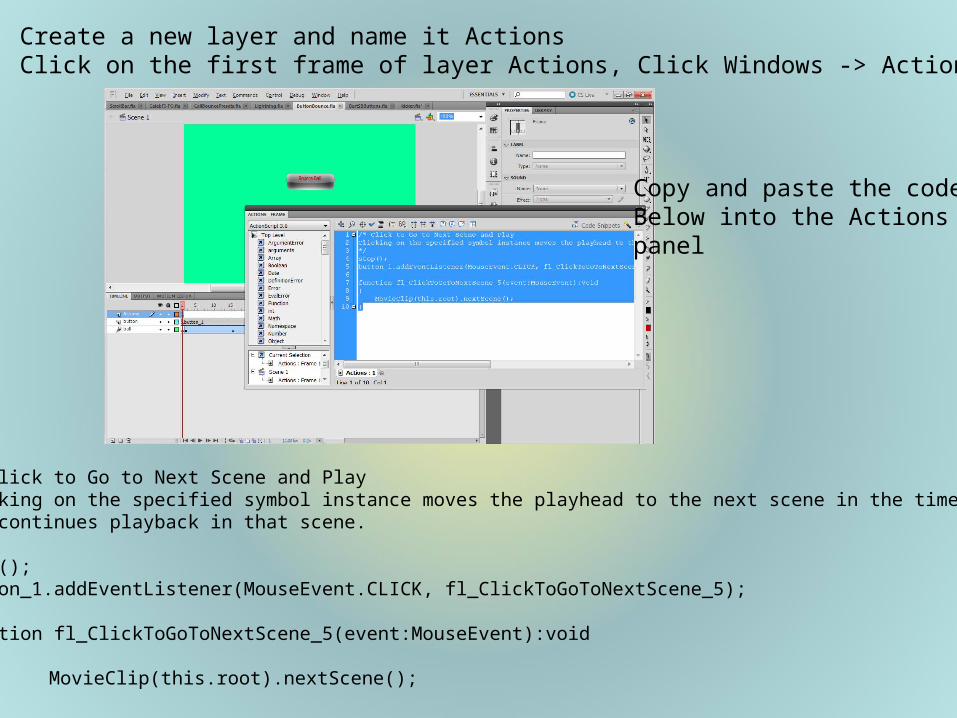
Create a new layer and name it ActionsClick on the first frame of layer Actions, Click Windows -> Actions
/* Click to Go to Next Scene and PlayClicking on the specified symbol instance moves the playhead to the next scene in the timeline and continues playback in that scene.*/stop();button_1.addEventListener(MouseEvent.CLICK, fl_ClickToGoToNextScene_5);
function fl_ClickToGoToNextScene_5(event:MouseEvent):void{
MovieClip(this.root).nextScene();}
Copy and paste the codeBelow into the Actionspanel
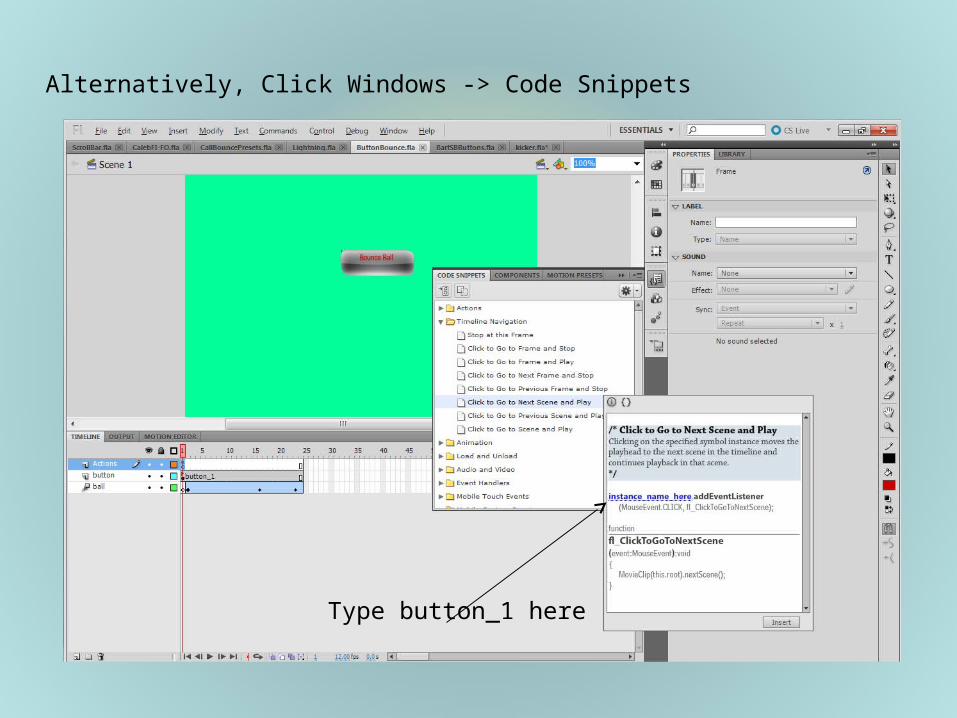
Type button_1 here
Alternatively, Click Windows -> Code Snippets