float valve replacement carb, float valve...up going out the overflow tube and out the bottom of the...
TRANSCRIPT
www.amervoyassoc.org
Float Valve Replacement By Bruce Kauffman
This is my third general article in reference to the CV carburetor joining Enrichen the Needle Jet and Pilot Jet Adjustment. These articles hopefully provide you with the knowledge and confidence needed to resolve the most common difficulties associated with the constant velocity carburetor. While the first two topics were more aimed at helping you to improve bottom end performance, this article is specifically aimed at fixing something that is broken. My goal here is to help you recognize the problem of aging float valves and how to replace them. In short, what the float valve does is stop the flow of gas into the bowl when full. This is done by a rubber cone on the valve being pressed into a brass seat in the carb body, which is pushed by the float in response to the rising level of fuel. When this valve fails or is incorrectly adjusted, the flow of fuel is not stopped over filling the bowl which typically ends up going out the overflow tube and out the bottom of the bowl, plus it will flood the idle mixture if you try to run the bike. A leaky float valve might appear as merely an idle problem as the symptoms can go away under power simply due to the fuel consumption rate. This problem can be hidden even further for those with a California model as the fuel overflow is secretly captured in a small tank unbeknownst to you while everyone else can see a small puddle of gas developing under their bike….. The fuel valve can stop sealing for two basic reasons, a piece of crap is preventing the valve from closing, or the rubber tip on the valve has gone bad due to age or fuel additives. The best way to flush out a piece of crap is to drain the bowl of all fuel using the drain screw under the bowl, and then refill the bowl by starting the bike. The inrush of gas into an empty bowl will remove the small particle in most cases; where as a bad value will simply continue to leak.
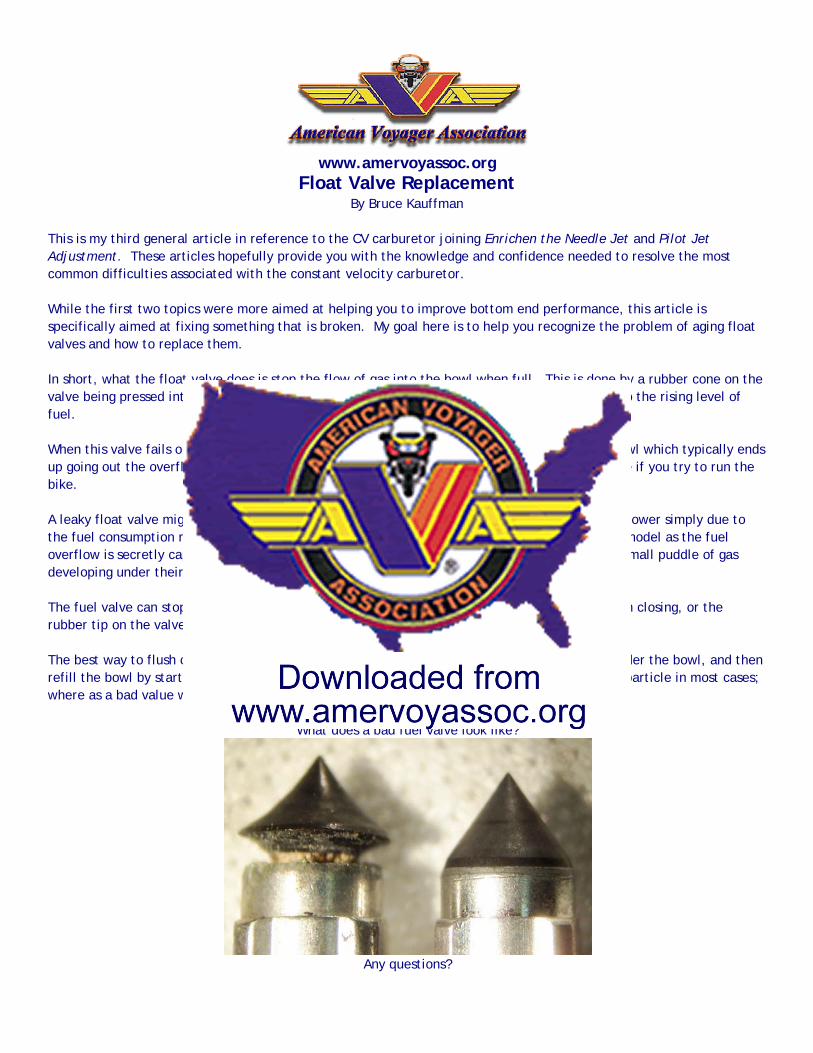
What does a bad fuel valve look like?
Any questions?
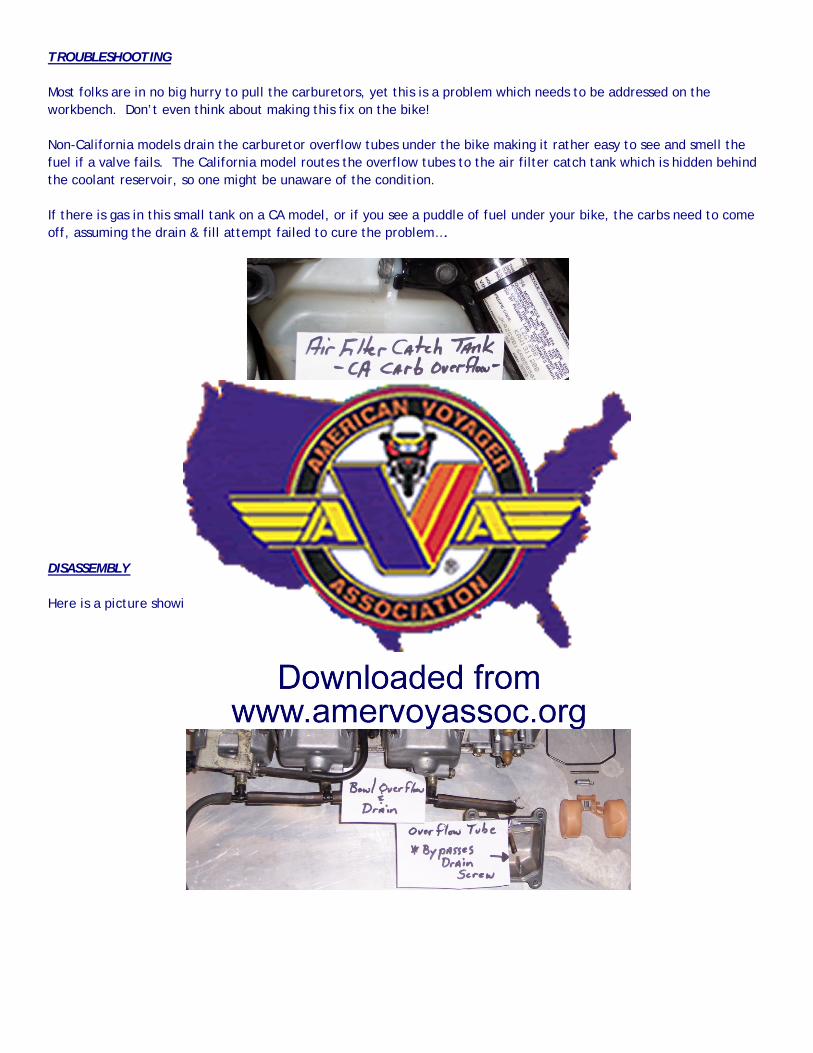
TROUBLESHOOTING Most folks are in no big hurry to pull the carburetors, yet this is a problem which needs to be addressed on the workbench. Don’t even think about making this fix on the bike! Non-California models drain the carburetor overflow tubes under the bike making it rather easy to see and smell the fuel if a valve fails. The California model routes the overflow tubes to the air filter catch tank which is hidden behind the coolant reservoir, so one might be unaware of the condition. If there is gas in this small tank on a CA model, or if you see a puddle of fuel under your bike, the carbs need to come off, assuming the drain & fill attempt failed to cure the problem….
DISASSEMBLY Here is a picture showing the basics in reference to the float valve replacement.

First step is to remove all four bowls, slide out the float pin, and lift out the float and valve. Please keep in mind I suggest taking the entire carb apart for a full clean, then reassemble. For the sake of this write, I will only talk of the bowl area.
Clean the gasket area on the carb and bowl to remove any crud. You might need new gaskets….
Clean the valve seat to ensure the new valves will seal correctly. I use a mini spring tool with a bit of abrasive pad being careful not to damage the seat. The desired result is to shine the sealing surface.
Blowing air into the fuel supply will purge out any dirt, yet as I mentioned, I prefer to have the entire carb
disassembled to ensure I get everything super clean…
ASSEMBLY
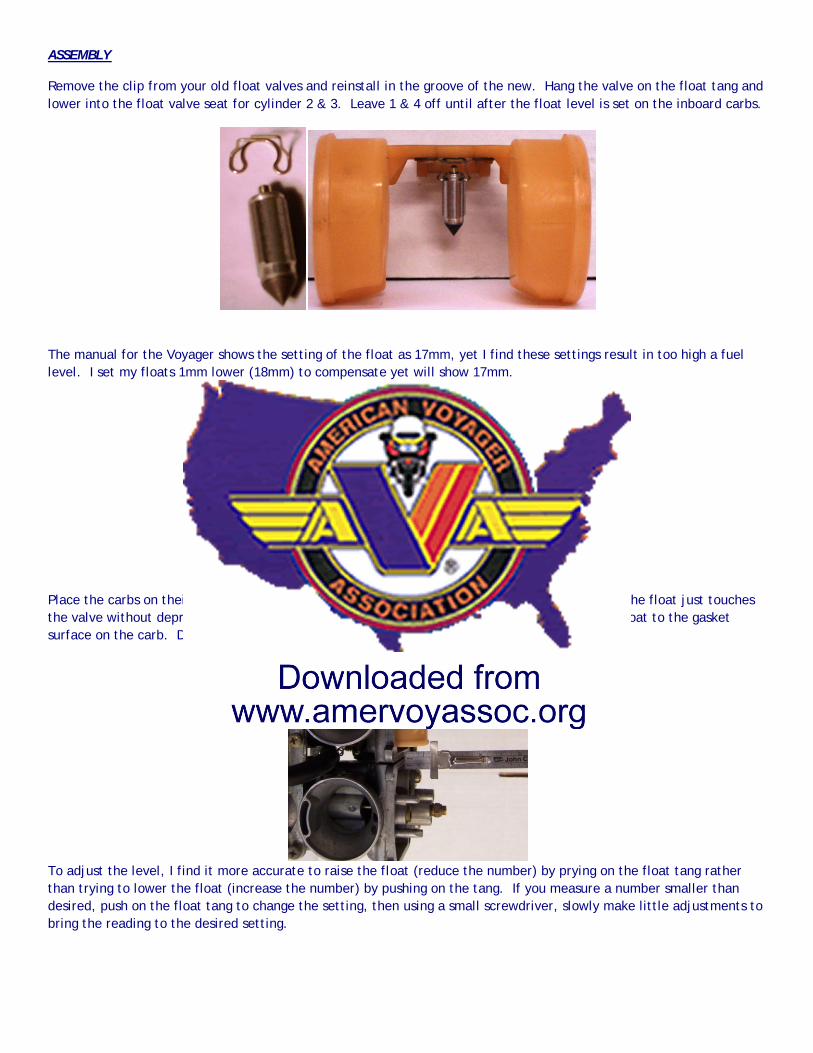
Remove the clip from your old float valves and reinstall in the groove of the new. Hang the valve on the float tang and lower into the float valve seat for cylinder 2 & 3. Leave 1 & 4 off until after the float level is set on the inboard carbs.
The manual for the Voyager shows the setting of the float as 17mm, yet I find these settings result in too high a fuel level. I set my floats 1mm lower (18mm) to compensate yet will show 17mm.
Note: A larger number lowers the float so the fuel shuts off sooner.
Place the carbs on their side so the float is not pressing on the float valve, find the point where the float just touches the valve without depressing the spring. This position should be 17mm from the bottom of the float to the gasket surface on the carb. Do not make this setting with the float resting on the valve!
To adjust the level, I find it more accurate to raise the float (reduce the number) by prying on the float tang rather than trying to lower the float (increase the number) by pushing on the tang. If you measure a number smaller than desired, push on the float tang to change the setting, then using a small screwdriver, slowly make little adjustments to bring the reading to the desired setting.

Once cyclinders 2 & 3 are set, then install 1 & 4 and repeat the process.
Make sure the mating surface of the carb and bowl is clean, then apply a light coat of grease to the gaskset. I suggest you turn the carbs upright with the floats downward, then lift one bowl and gasket up against the carb. Holding firmly in place, flip the carbs over to install the screws, repeating for each bowl. SUGGESTION: Replace the two 4mm X 14mm long screws on cylinder 1 which also hold the idle adjuster plus the float bowl. A 16mm long screw will prevent the carb body from getting stripped out when the screws are tightened down really good as the shorter screws do not engauge enough threads.
FUEL LEVEL TEST Don’t even think about putting those carbs back on the bike until you have verified your work! ALWAYS put fuel in the carbs BEFORE you spend the effort of getting them back into place, you will be glad you did if a problem exists, take it from someone who learned the hard way long ago…. Clamp the carbs in a vise with a soft cloth so as not to mare the aluminum and hook up an alternate fuel supply to the carbs. If you did a good job, fuel should not leak out, if it does, back to step 1……
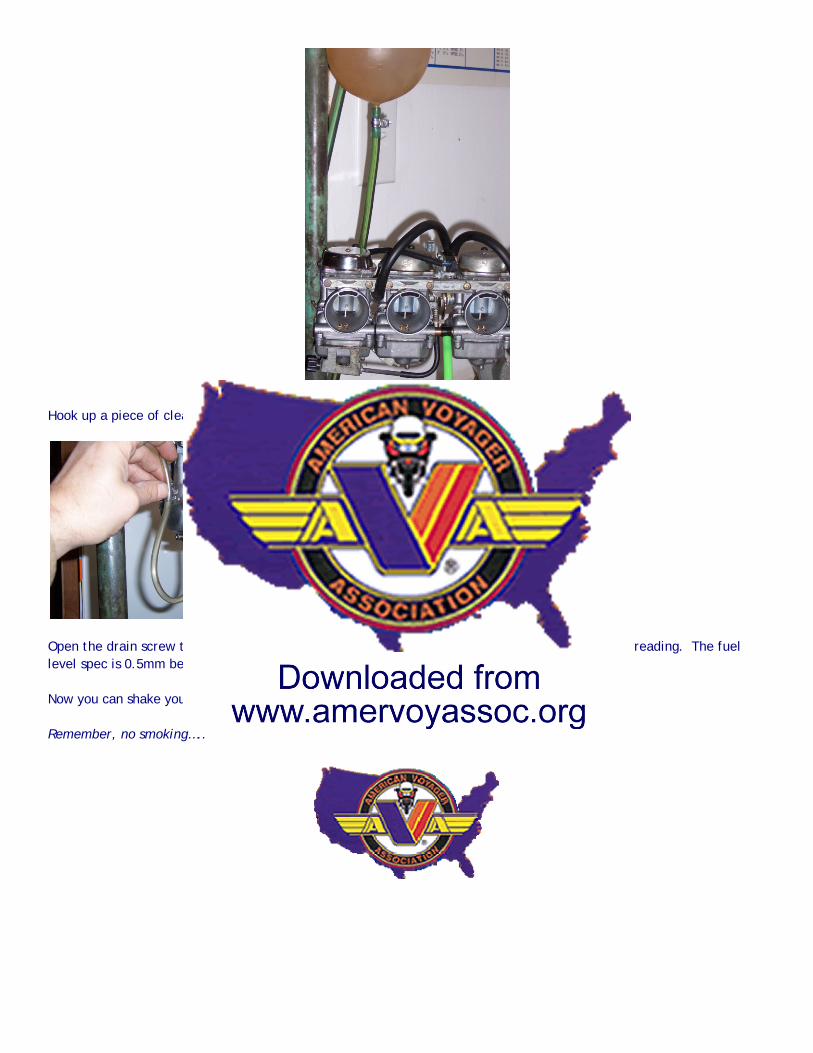
Hook up a piece of clear tubing to one of the bowls looping it back upwards as shown below.
Open the drain screw to allow fuel to fill the tube, then slowly lower the tube to get an accurate reading. The fuel level spec is 0.5mm below the top of the bowl, +/- 1mm. Check all four and adjust if necessary. Now you can shake your hips, throw your head back and shout “I’m Done!” Remember, no smoking…..