fas 604 rebuild
TRANSCRIPT
FAS 604 Target Pistol Strip and Rebuild
I recently bought a second hand FAS 604 which would not pressurise on cocking. After some investigation and a few phone calls, it turned out that this is not an uncommon problem with these pistols, caused by the deterioration of o-ring seals due to a combination of poor material and age. The accepted remedy is to strip the pistol, clean all components and replace all the o-ring seals (6 in total).
Never having completely stripped an airgun before (although I service my own scuba diving regulators and am familiar with the required cleanliness and care), I took plenty of photographs as I went along. It was suggested by DaveL that I could use these as the basis for an article, so here goes!
Thanks are due to DaveL of AirgunForum, Mr Clevely of Checkmate Guns and Lloyd of Blackpool Air Rifles all of whom provided help and advice. Various members of both AirgunForum and Airgun BBS also provided very welcome advice in a couple of threads I started - thanks to you all!
Note that Checkmate guns will service your 604 for you if you don't fancy doing it yourself and Mr Clevely comes highly recommended.
Tools, spares and consumables required
New Seals:Purchase a new seal kit including felt piston head wiper (while you are taking the whole thing apart you might as well change everything).
I found that seal kits are available from Checkmate Guns 01257 260132 and Blackpool Air Rifles 0870 4430264 (and probably elsewhere, but these are a good starting point) - make sure the kit you buy includes the felt wiper for the piston head - Checkmate Guns provide this as standard, BAR do not. All o-rings in the gun are standard sizes and it should be perfectly possible to buy them from an engineering supplier at a minimal cost (however the felt wiper would probably be more problematic). I elected to buy a kit for piece of mind on my first go - I'll probably source standard items if I do it again.
Lubricants:I bought a tube of Feinwerkbau 'special grease' (silicone based) - this is recommended as an assembly and working lubricant for viton and butyl gun o-rings - however it should not be allowed to come into contact with sliding metal bearings / surfaces. I used Abbey LT2 gun grease for metal to metal surfaces (very few as I did not disassemble the trigger group) and as an anti-gall assembly lube for steel screws into alloy components. A standard mineral based gun oil can be used for trigger components if required (my gun was adequately lubricated so I did not add more). As with all lubricants, less is more and minimal amounts should be used - a surface gloss on o-rings is sufficient - visible grease is too much.
Tools:A selection of metric / imperial allen keys / drivers will be needed (in typical Italian fashion, the gun seems to use a mixture!) a small 7/32" socket was used to remove the hammer spring nut. A sturdy pin punch is required to knock out the main action hinge pin (I made one from a piece of brass rod, so that I didn't mark the pin) and a small ~1.5mm pin punch is needed to remove the small roll pin holding the valve head onto the valve spindle. A suitable tool will be needed to remove the small circlip which locates the piston rod end locating pin (I used two plastic styli so as not to mark the

gun casing). I used a small ultrasonic bath to clean components (using warm water with a drop of detergent), although manual cleaning in water using soft brushes would be fine.
For the most part I worked at a well lit desk on a cotton cloth (to reduce bounces from stray components!) using a workbench for heavier operations.
Gun disassembly
First remove the palm shelf from the grip (one socket head screw), followed by the grip itself (one socket head screw accessed from the base of the grip) - withdraw the grip downwards.
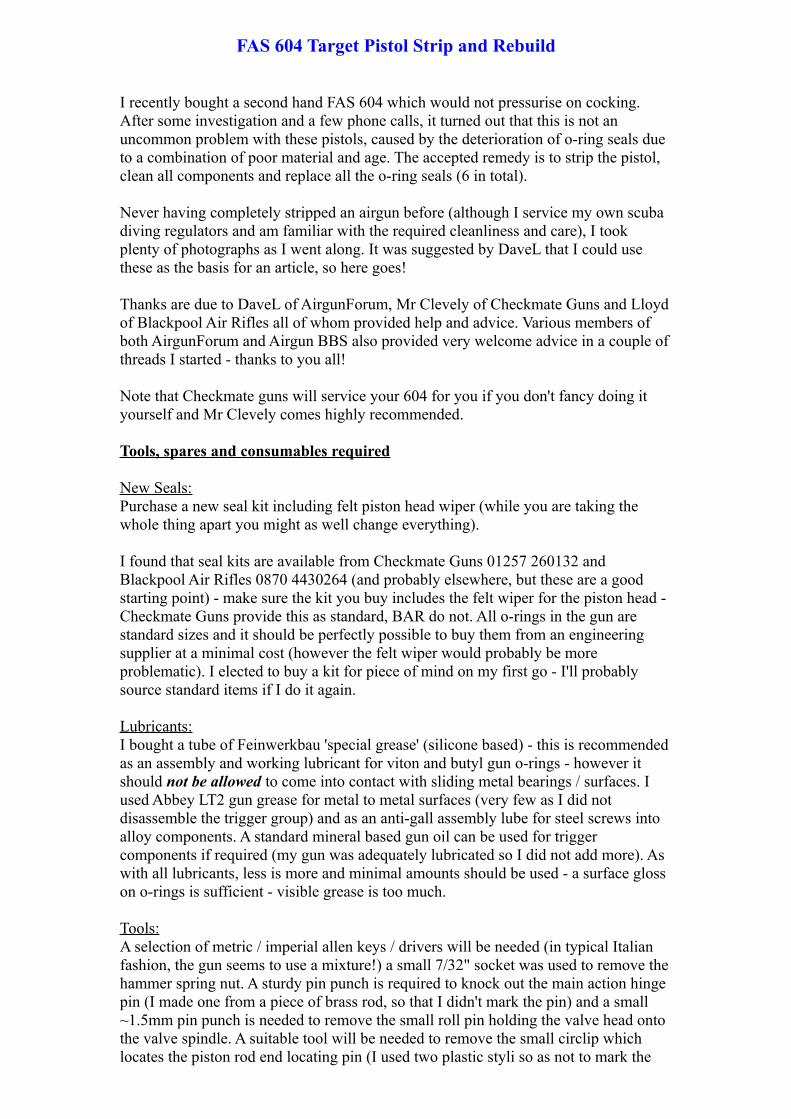
Then remove the small nut securing the end of the hammer spring rod:
Next remove the small circlip from one side of the pin which locates the end of the piston rod (I used plastic tools for this so that a slip didn't mark the casing):
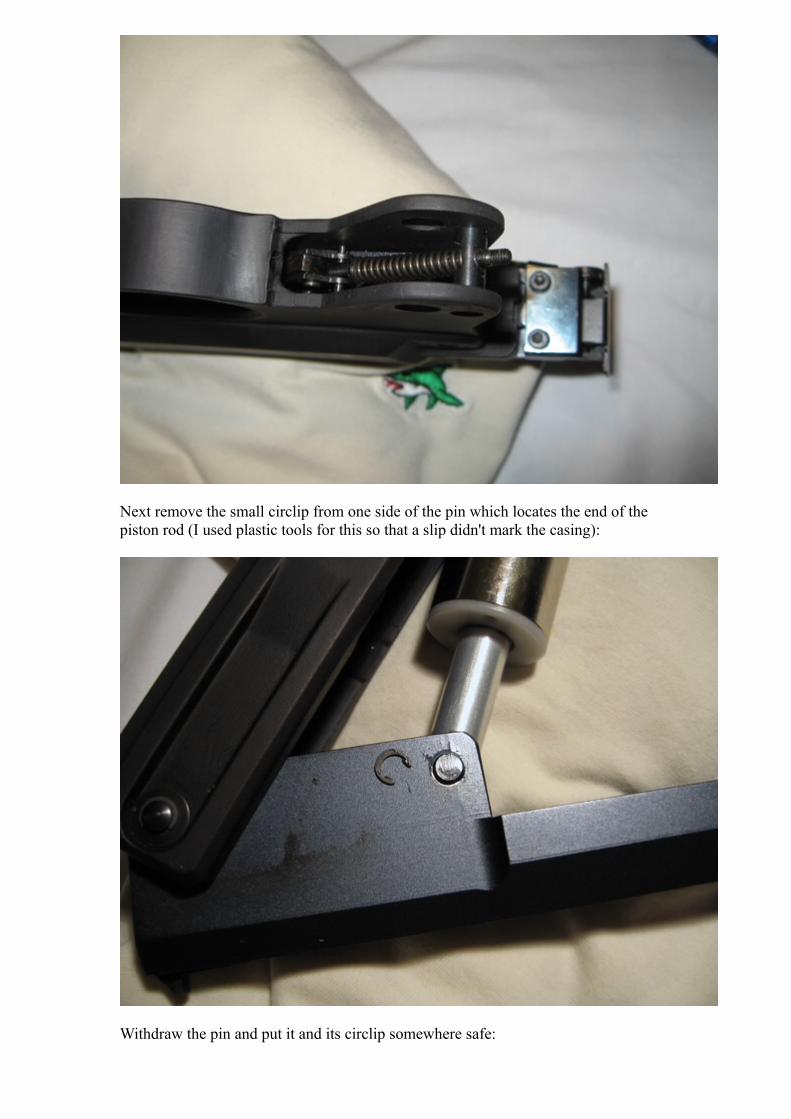
Withdraw the pin and put it and its circlip somewhere safe:

Next, with a sturdy pin punch, knock the pin on which the breech block and actions hinges almost out - it's much better to leave it captive on one side of the gun casing than to knock it all the way through (it would be a complete swine to reinstall). However, you obviously need to knock it far enough to allow the breech block to be withdrawn. I rested the gun on a hardwood block (padded with cloth and clamped in a vice) with a hole drilled in it for the pin - however note that there is a step in the gun casing which requires a small packer so that it is properly supported (sounds odd when written, but it'll be obvious when you see it!). This pin is a tight fit in the gun casing and needs quite a bit of force to remove - take care that a slip won't lead to a bent gun!:
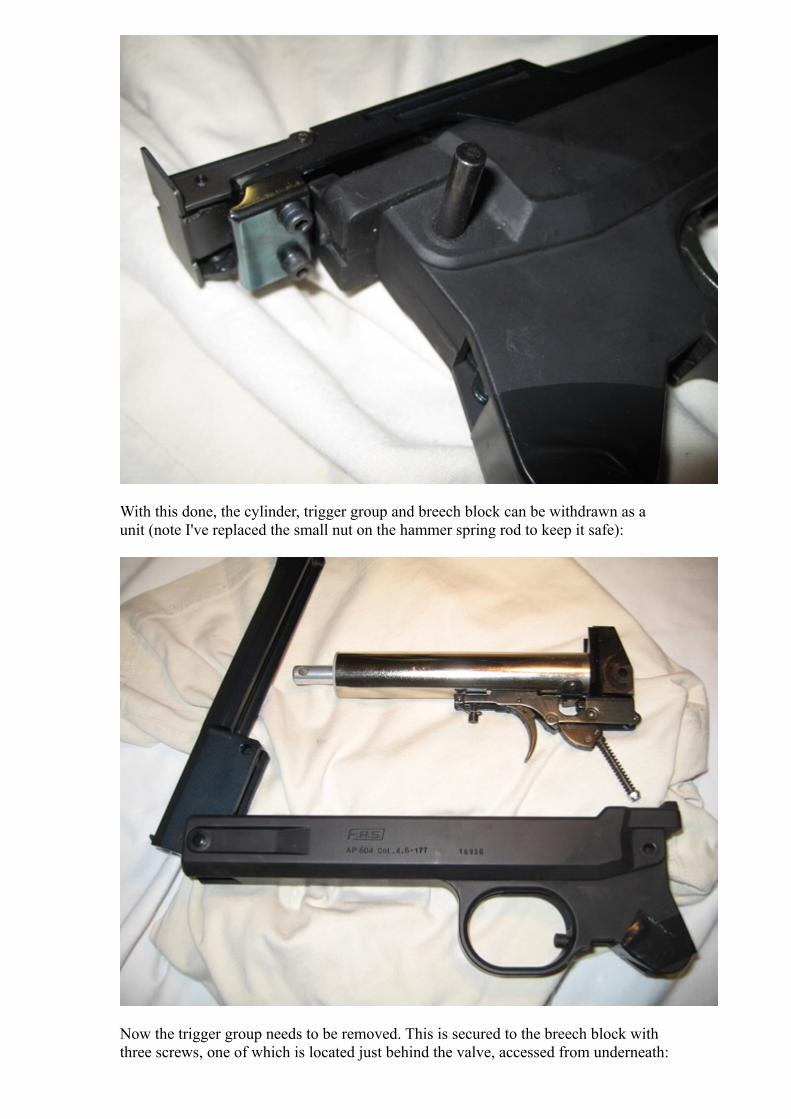
With this done, the cylinder, trigger group and breech block can be withdrawn as a unit (note I've replaced the small nut on the hammer spring rod to keep it safe):
Now the trigger group needs to be removed. This is secured to the breech block with three screws, one of which is located just behind the valve, accessed from underneath:

The other two screws go through the sides of the cylinder, threaded into the breech block. When removing these screws, note that pressure from the valve spring will try to force the trigger group away from the cylinder - hold it in place with your spare hand until all three screws are removed:
Holding the sear clear of the hammer with a finger tip, 'over cock' the hammer with
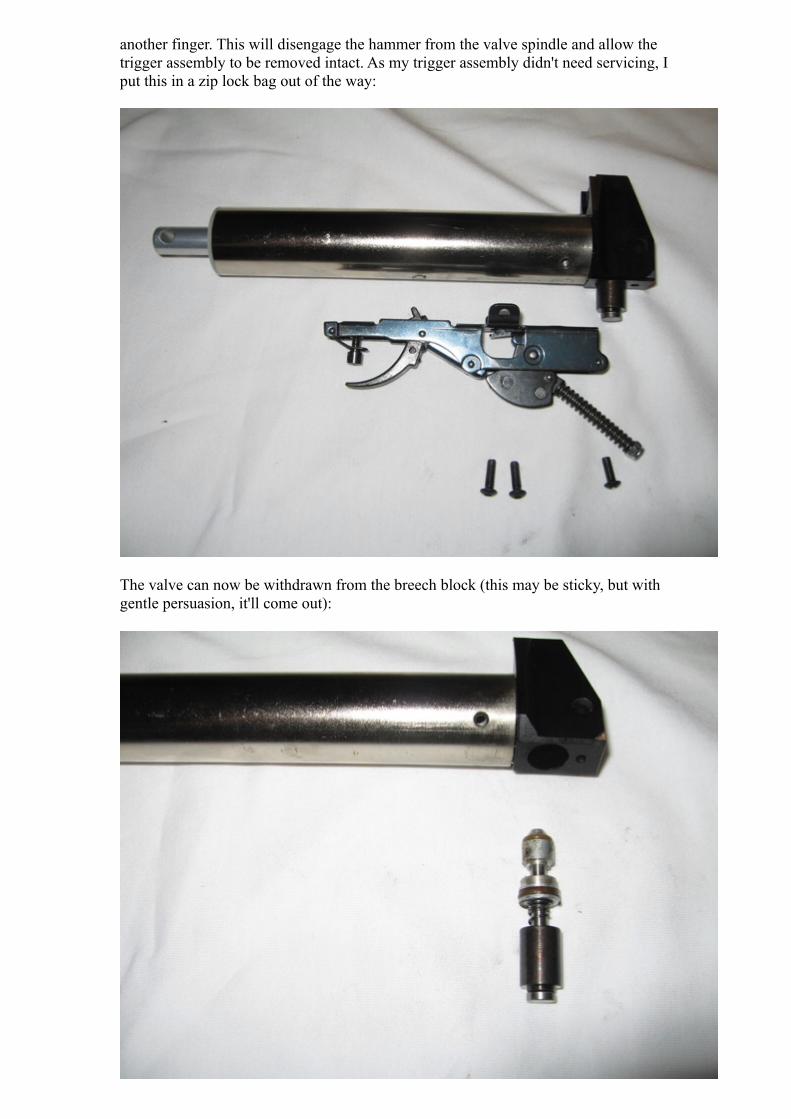
another finger. This will disengage the hammer from the valve spindle and allow the trigger assembly to be removed intact. As my trigger assembly didn't need servicing, I put this in a zip lock bag out of the way:
The valve can now be withdrawn from the breech block (this may be sticky, but with gentle persuasion, it'll come out):
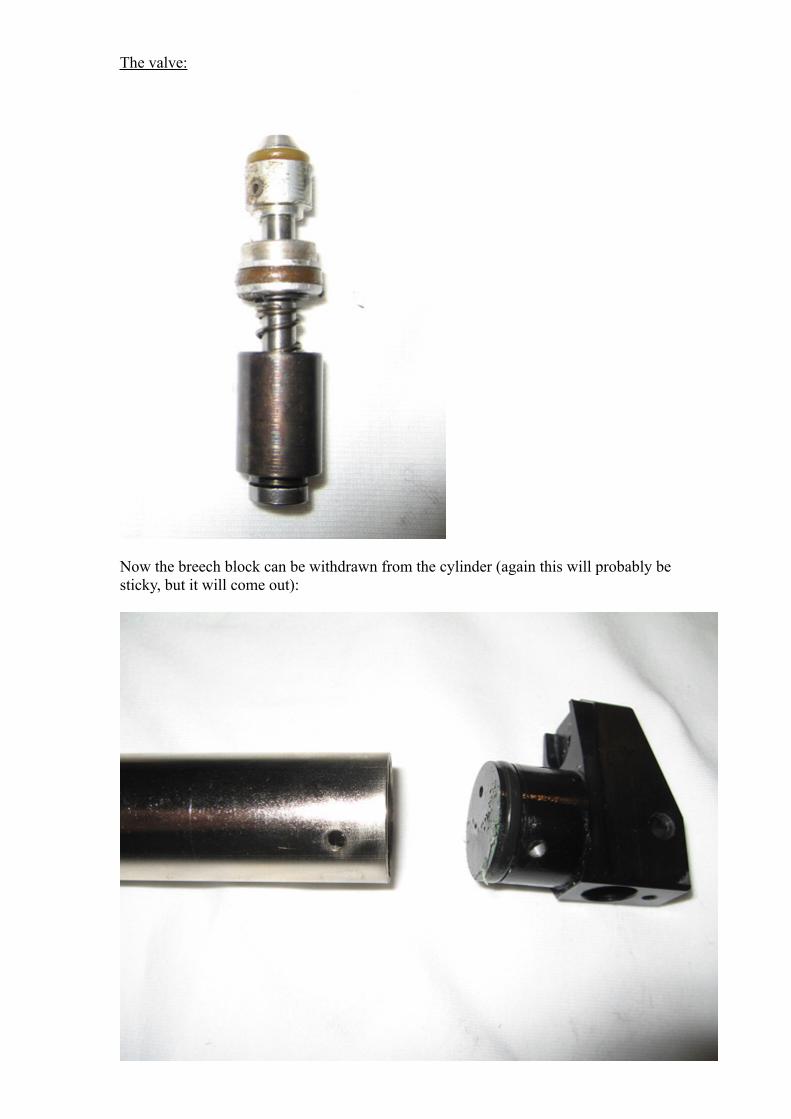
The valve:
Now the breech block can be withdrawn from the cylinder (again this will probably be sticky, but it will come out):
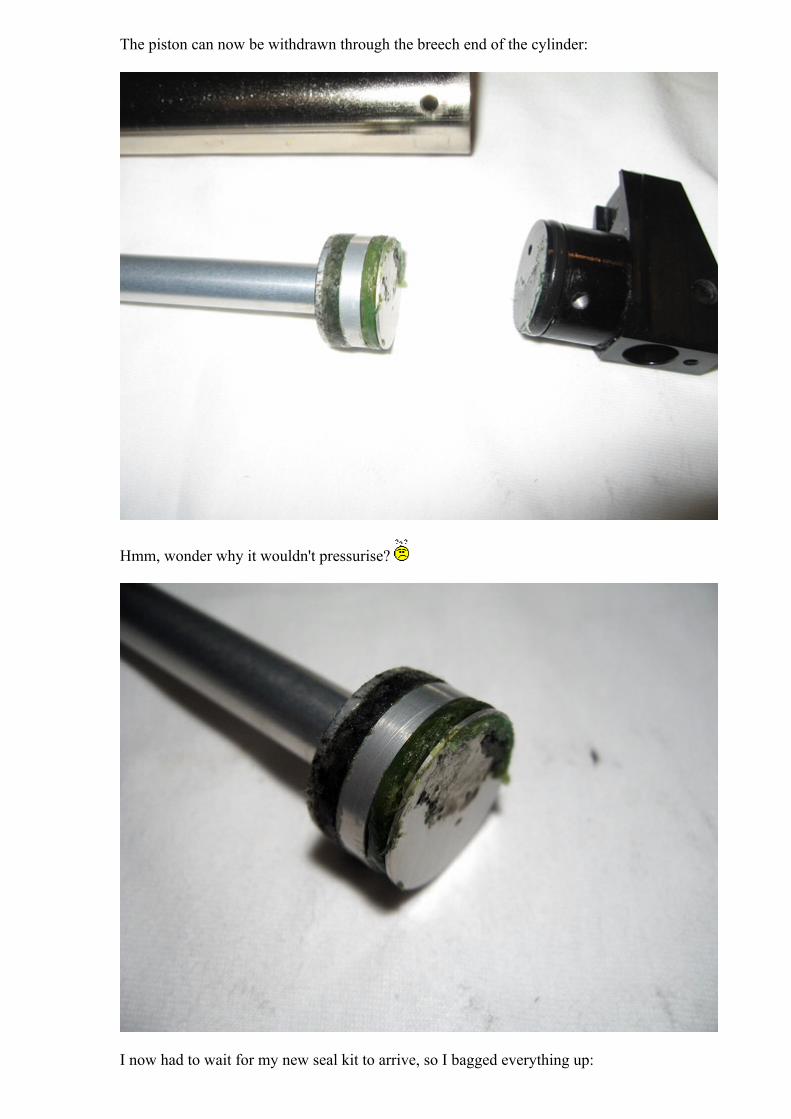
The piston can now be withdrawn through the breech end of the cylinder:
Hmm, wonder why it wouldn't pressurise?
I now had to wait for my new seal kit to arrive, so I bagged everything up:
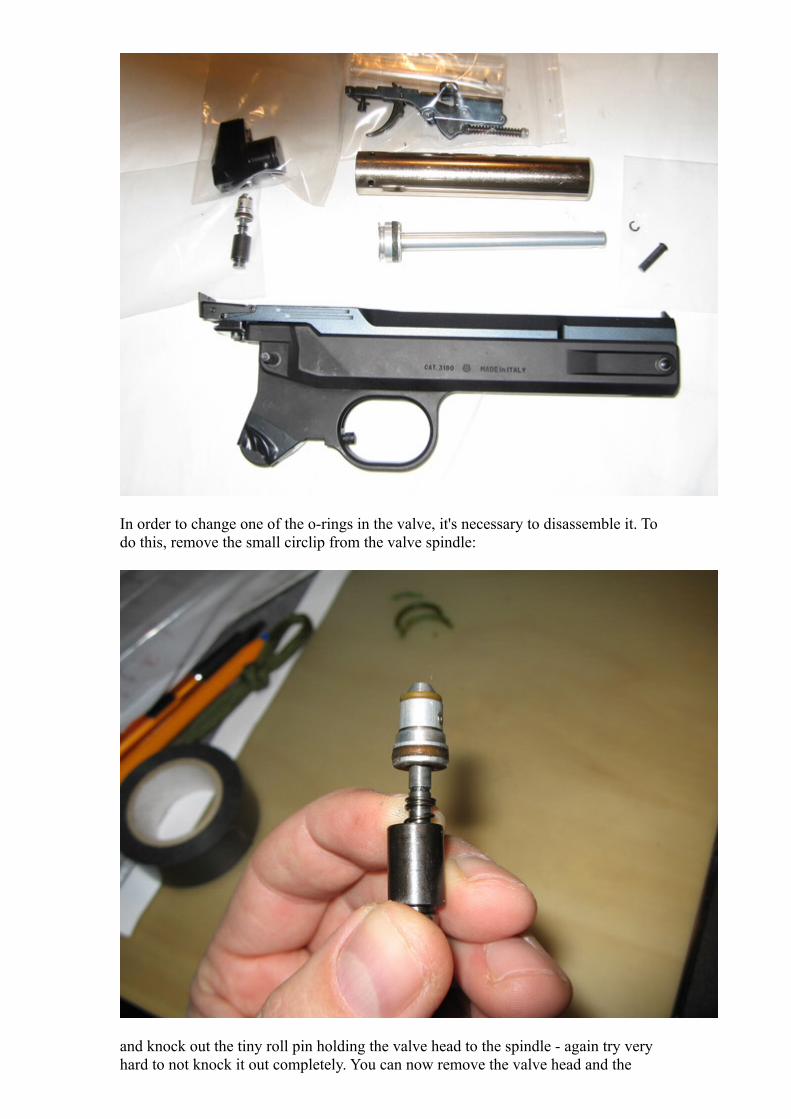
In order to change one of the o-rings in the valve, it's necessary to disassemble it. To do this, remove the small circlip from the valve spindle:
and knock out the tiny roll pin holding the valve head to the spindle - again try very hard to not knock it out completely. You can now remove the valve head and the

shuttle from the middle of the valve - the tricky o-ring seals the shuttle to the valve stem - this will be obvious when it's seen.
Now remove all the old o-rings from the components you've just liberated. Use plastic tools or finger nails for this, as many of the gun components (especially the valve) are a soft aluminium alloy and steel tools may irrevocably score the surface (if they are the original parts, you'll probably find the o-rings are a sticky brown mess that falls apart!).
Now clean all the valve parts, breech block, cylinder and piston - this can be done in an ultrasound bath (small versions of these are reasonably cheap), or with warm water and detergent. Once clean , immediately dry them carefully (a hair dryer is handy for this) - you don't want flash rust forming on the steel components. You may find it easier to clean the cylinder with the plastic end plug removed - this is threaded into the cylinder and needs peg spanner (home made in my case) to remove it.
Install your new seals onto the various components - don't use metal tools for this, manipulating with fingers should be more than enough to fit them (apart from the o-ring inside the valve shuttle which need to be prodded into place with a plastic tool. Lubricate the o-rings with a tiny smear of silicone grease.
Reassemble the valve taking care to get the parts in the right orientation / order:
Ready to rebuild:
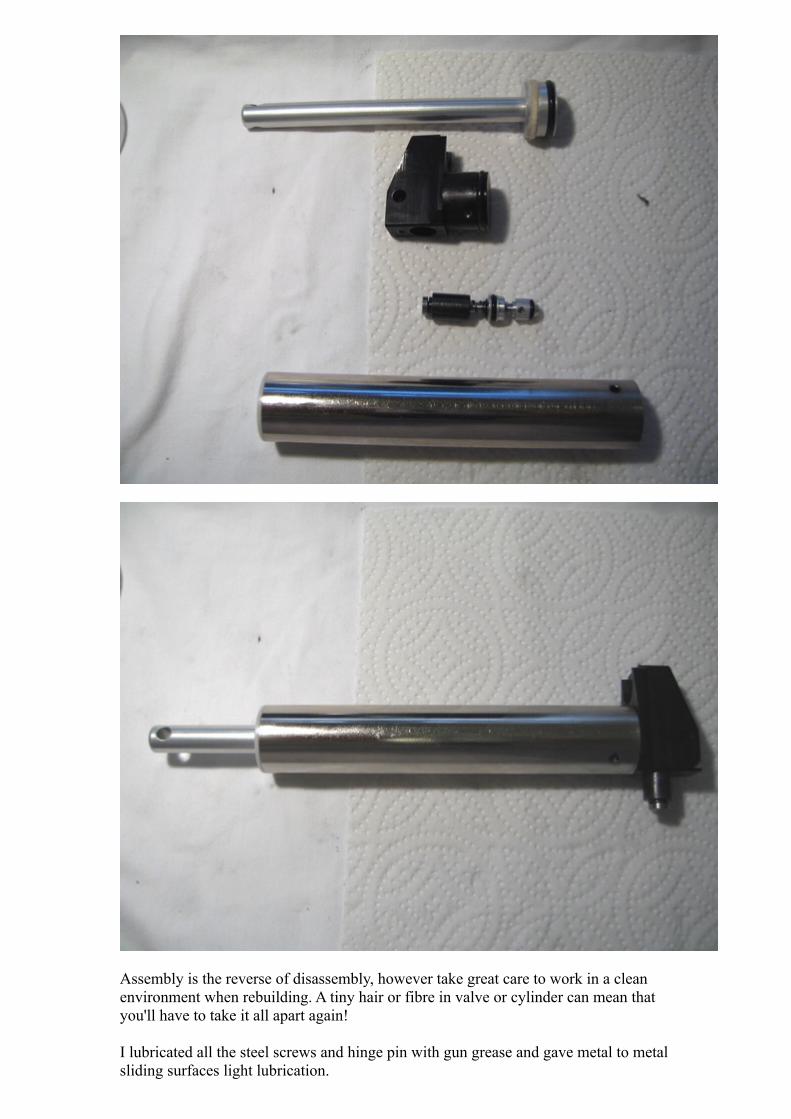
Assembly is the reverse of disassembly, however take great care to work in a clean environment when rebuilding. A tiny hair or fibre in valve or cylinder can mean that you'll have to take it all apart again!
I lubricated all the steel screws and hinge pin with gun grease and gave metal to metal sliding surfaces light lubrication.