facebook privacy setting
TRANSCRIPT
Facebook Privacy Setting Tutorial
By: Wong Jia Wen

Hello everyone today I will talk about how to set your Facebook Settings and help you control who you share information with. This slide will walk you through your Privacy Settings and will talk about how to protect your privacy by following some simple actions. Let’s get started. The first page you see is your newsfeed.
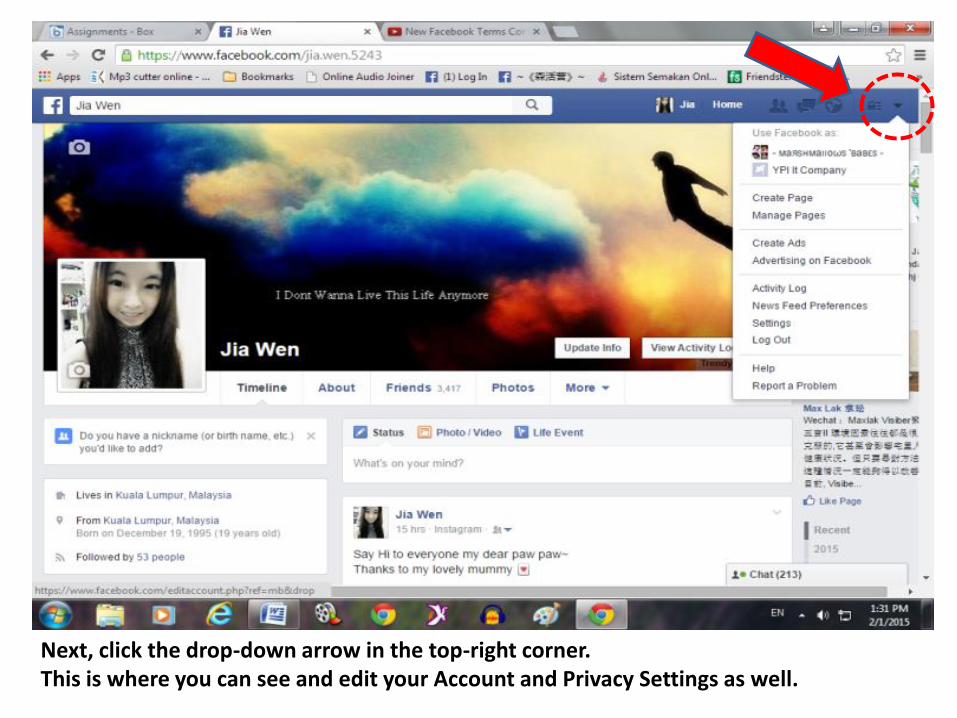
Next, click the drop-down arrow in the top-right corner. This is where you can see and edit your Account and Privacy Settings as well.
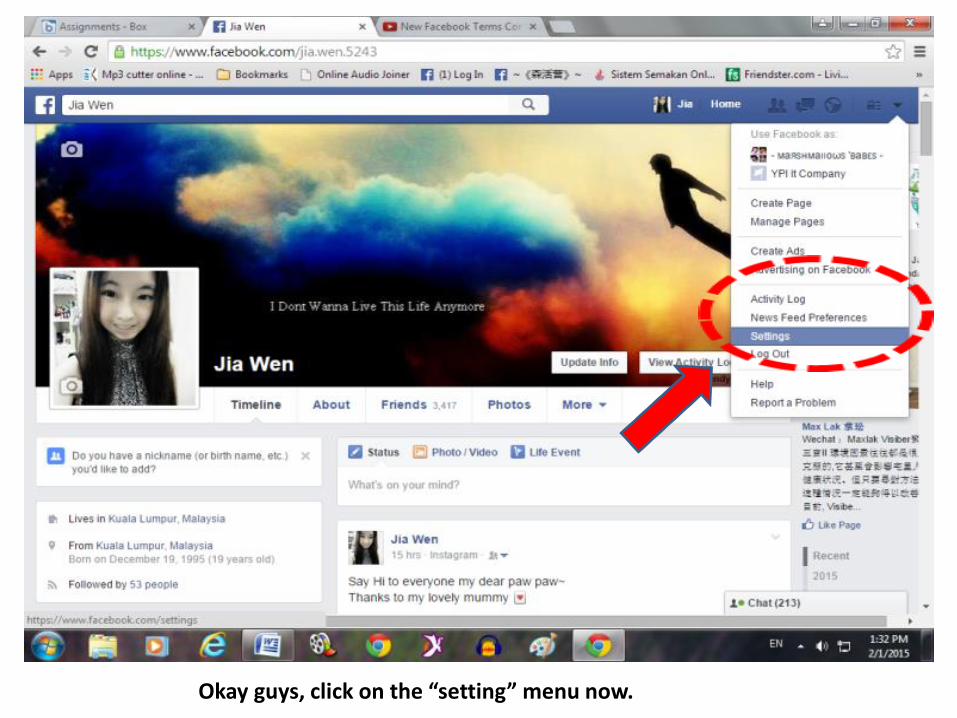
Okay guys, click on the “setting” menu now.
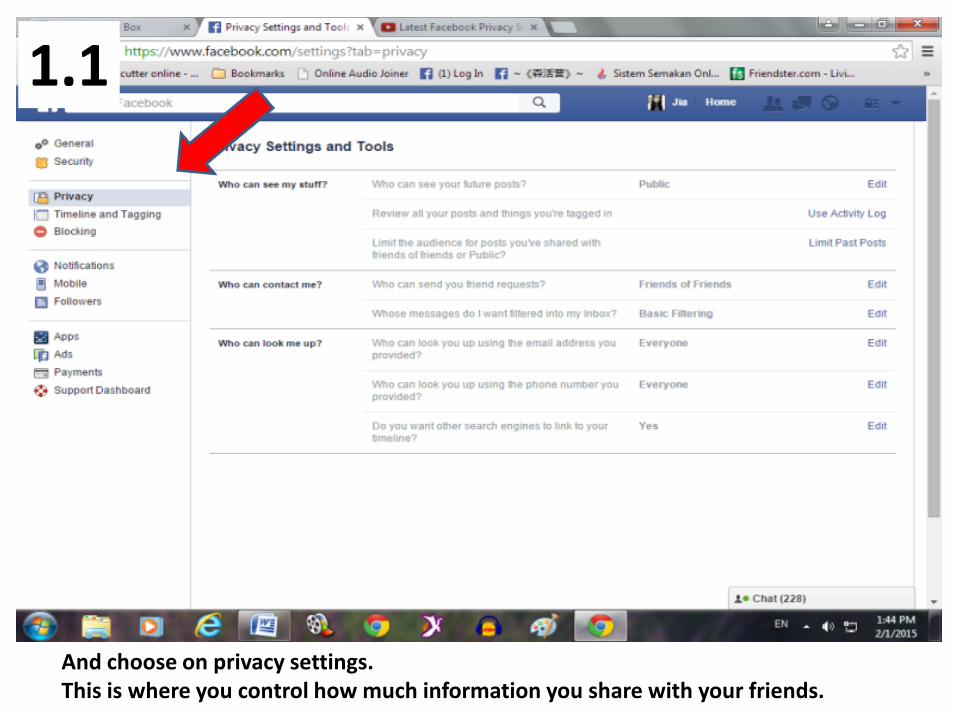
And choose on privacy settings. This is where you control how much information you share with your friends.
1.1
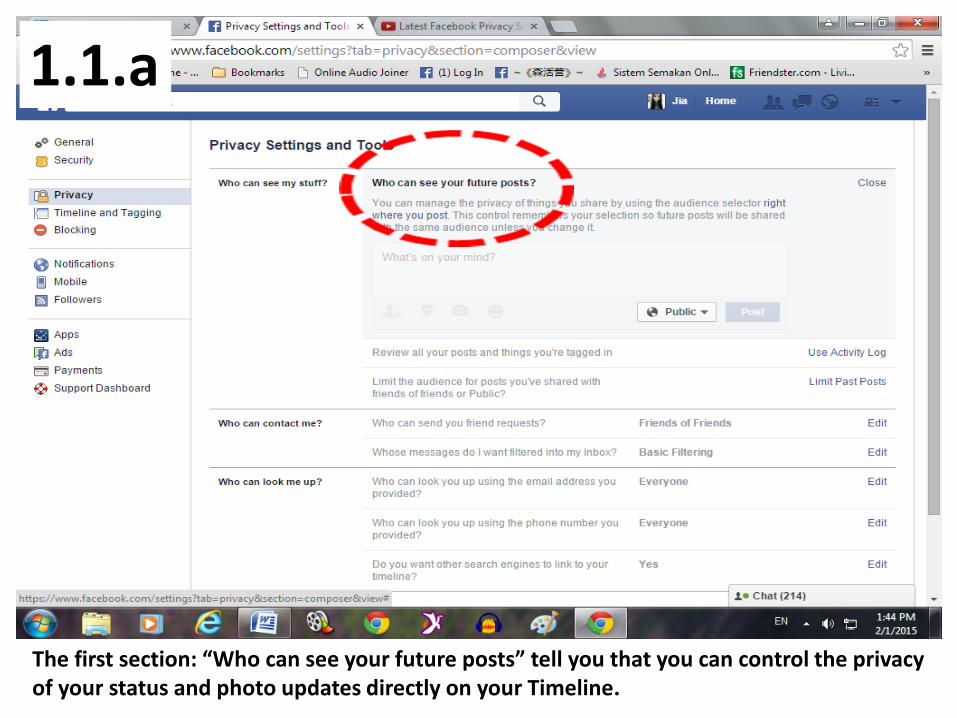
The first section: “Who can see your future posts” tell you that you can control the privacy of your status and photo updates directly on your Timeline.
1.1.a
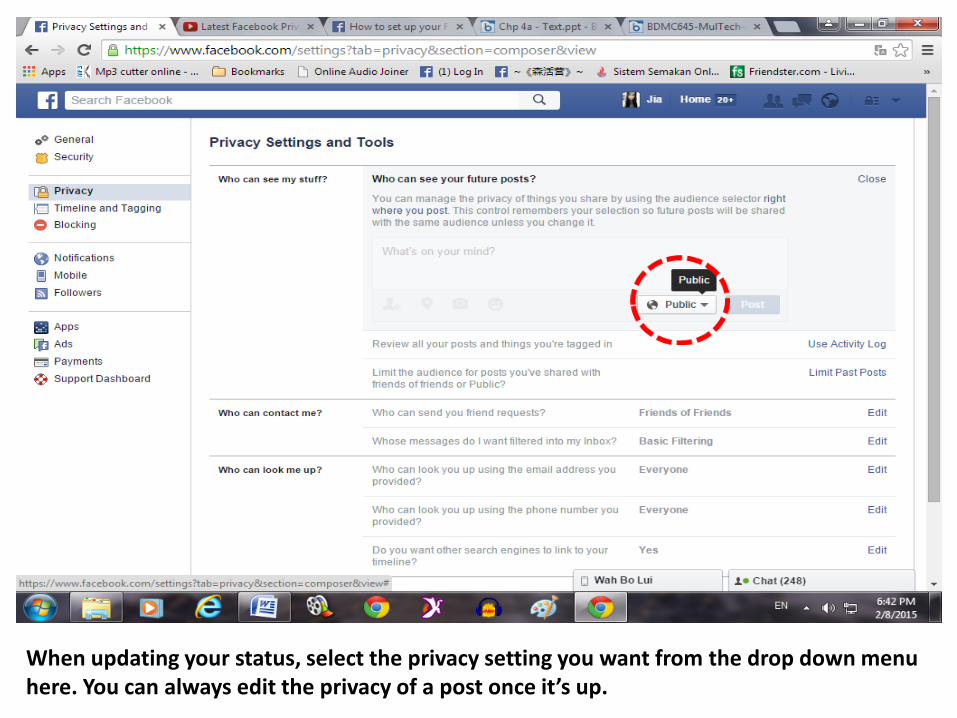
When updating your status, select the privacy setting you want from the drop down menu here. You can always edit the privacy of a post once it’s up.

Next, under Control Your Default Privacy you can select a favourite privacy setting from the few options here. “Public” means everyone on Facebook, even people you don’t know.

“Friends” means only your friend,

And “custom” will allow you to make a combination of the two. It’s safest just to share updates with your friends. Remember, you can always edit the privacy of a post once it’s up.

Next, let’s look at “Review all your post and things you’re tagged in”.
1.1.b

From this section, you can check out your recently activities like photo that you have liked, post that you had been tag and also commented you have did.

Here you can control who can find your profile in Facebook’s search, send you friend requests, send you Facebook messages, post to your wall, and see wall posts by others on your wall.
1.2

It is safest to select “friends”,
1.2.a

But it’s also OK to select “friends of friends.” You need to pick the setting you feel most comfortable with. Remember, it is not safe to accept friend requests or respond to messages from people you do not know in real life. It is OK to say no!
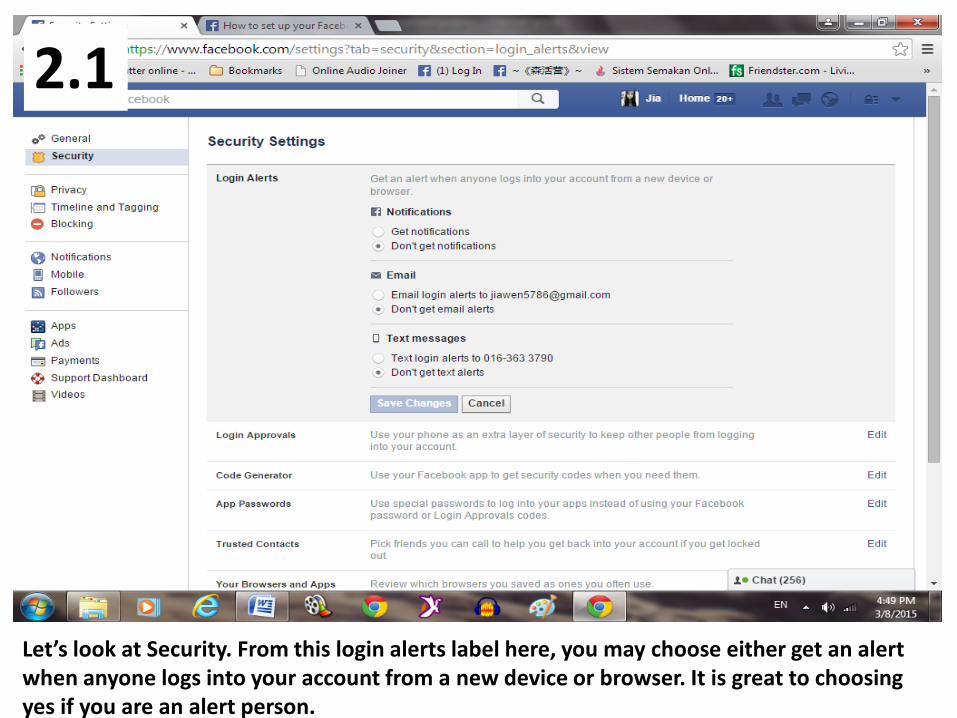
2.1
Let’s look at Security. From this login alerts label here, you may choose either get an alert when anyone logs into your account from a new device or browser. It is great to choosing yes if you are an alert person.
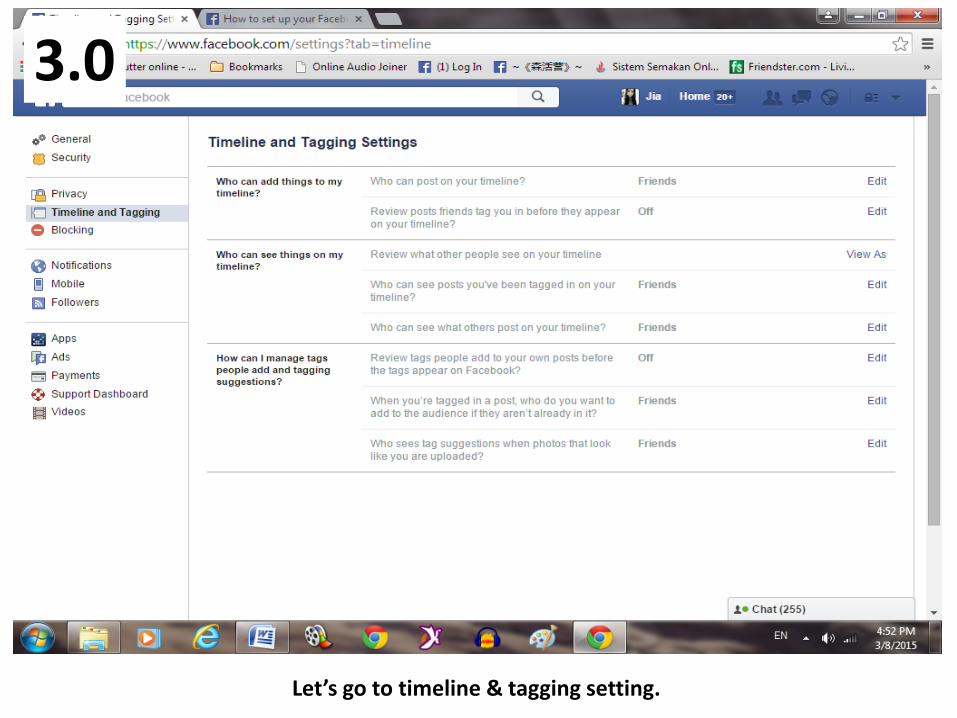
3.0
Let’s go to timeline & tagging setting.

3.1.a
From this section, you can choose to let your friends post on your timeline or not.
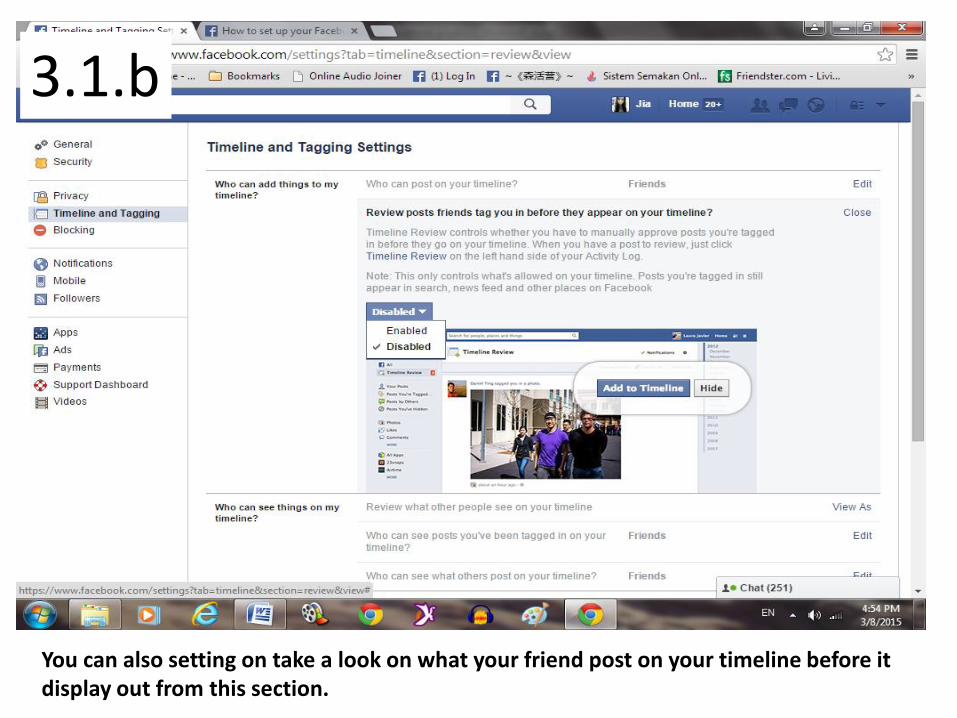
3.1.b
You can also setting on take a look on what your friend post on your timeline before it display out from this section.

When you comes to who can see things on my timeline, you can click on “view as” button on the right hand side to check out how others see on your timeline.
3.2.a
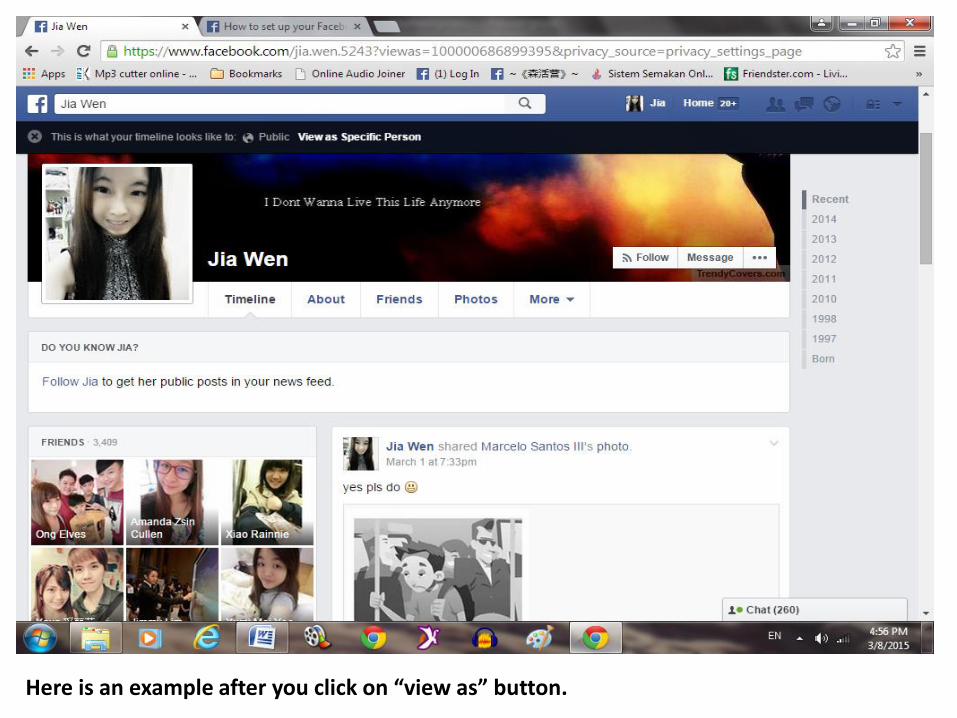
Here is an example after you click on “view as” button.

The next section is where you can block or restrict users and activities. If someone is making you feel unsafe or uncomfortable on Facebook and you want to block them – enter their name or email address here. This will mean that the person is no longer able to see or talk to you on Facebook. The person you block will not get a notification saying that you’ve blocked them.
4.1

After you click in “block” button, there are many similar outcome of the name you type list out on here.

So, double confirm and click on the person you want to block on here. Example, click on “block Madhana” button.

You can also block app invites, from games like Farmville, as well as event invites from people who you may want to stop getting invites from.
4.2

Facebook can be a fun place to connect and share with your friends. You can be safe online by setting up some safe settings to protect yourself and your friends. Double-check your settings often because Facebook can change things.

~Thank You~