email content control admin guide - tpx … content control admin guide ......
TRANSCRIPT

Cloud Services
10/23/2014
Email Content ControlAdmin Guide
1
CONTENTS
Introduction ................................................................................................................................................. 3
About Content Control ............................................................................................................................ 3
Configuration Overview for Content Control .......................................................................................... 3
Example Rules for Content Control ......................................................................................................... 5
Content Control Best Practice Settings .................................................................................................... 5
Applying Settings at Global and Domain Levels for Content Control ...................................................... 6
Emails from the Cloud Security Services .................................................................................................. 7
Support for Non-‐Latin-‐Based Languages ................................................................................................. 8
Defining General Settings .......................................................................................................................... 10
About General Settings in Email Content Control ................................................................................. 10
Defining an Administrator Email Address for Email Content Control .................................................... 10
Defining a Notification ‘Sent From’ Address for Email Content Control ............................................... 11
Defining a Default Time Zone for Email Content Control ...................................................................... 11
About Notifications for Email Content Control ...................................................................................... 12
Defining Default Notifications ............................................................................................................... 13
Defining Default Subject Line Tag Text for Email Content Control ........................................................ 13
Working with User Groups ........................................................................................................................ 14
About User Groups ................................................................................................................................ 14
Viewing User Groups ............................................................................................................................. 15
Creating a Custom User Group .............................................................................................................. 16
Editing a Custom User Group Manually ................................................................................................. 16
Creating a User for a Custom Group ...................................................................................................... 17
Editing a Custom User Group Using a CSV File ...................................................................................... 18
Working with Lists ..................................................................................................................................... 19
About Lists in Content Control .............................................................................................................. 19
Predefined Lists in Email Content Control ............................................................................................. 20
Valid and Invalid Characters in Lists ...................................................................................................... 20
Viewing Your Content Control Lists ....................................................................................................... 23
Viewing Which Content Control Rules Use a Specific List ..................................................................... 23
Creating a List in Email Content Control ................................................................................................ 23
Creating a SuperList in Email Content Control ....................................................................................... 24

2
Editing a List for Email Content Control ................................................................................................. 24
Deleting a List in Email Content Control ................................................................................................ 24
Rules in Content Control ............................................................................................................................ 25
About Rules in Content Control ............................................................................................................. 25
Viewing Email Content Control Rules .................................................................................................... 27
Managing Email Content Control Rules ................................................................................................. 28
Activating and Deactivating a Rule ........................................................................................................ 29
Changing the Position of a Rule ............................................................................................................. 29
Defining a Content Control Rule ............................................................................................................ 30
Defining “All” or “Any” Conditions ........................................................................................................ 30
Defining Sender and Recipient Conditions Using User Groups ............................................................. 31
Defining Sender and Recipient Conditions Using Domain Lists ............................................................. 32
Defining Email Content Conditions ........................................................................................................ 34
Email Templates in Content Control Rules ............................................................................................ 37
Defining Attachment Conditions ........................................................................................................... 44
Defining Time Interval Conditions ......................................................................................................... 45
About Actions and Notifications in Content Control ............................................................................. 46
Defining an Action for a Rule in Content Control .................................................................................. 47
Defining a Notification for a Rule in Content Control ............................................................................ 48
Defining a Subject Line Tag for a Content Control Rule ......................................................................... 49
Viewing a Summary of a Rule’s Conditions ........................................................................................... 49
Frequently Asked Questions ...................................................................................................................... 50

3
INTRODUCTION
ABOUT CONTENT CONTROL
Content Control is a managed email service that lets you identify and control any confidential, malicious, or inappropriate content that your employees send or receive. The service enables you to monitor and enforce your acceptable usage policy. Enforcing your acceptable usage policy helps to protect your employees and your brand, and safeguards against the increasing risk of litigation. You define a set of rules that reflect your organization’s email security policy.
The rules you define let you:
• Manage the size of inbound emails • Set restrictions for specific groups in your organization • Control the number of attachments received • Manage file formats • Monitor the use of keywords.
Rules can be set to apply within or outside certain periods. For example, you can allow large files to be delivered outside normal working hours only.
As well as the email itself, the Content Control service scans the contents of Microsoft Office documents that are attached to an email. You can detect specific words or phrases, or alphanumeric templates within the email or its Microsoft Office attachments. The service can also provide protection against specific file types. The scanning engine unpacks and looks inside compressed files to detect the file extensions or content that is defined in your rules. Content Control provides a comprehensive content scanning service that incorporates the content and attachments of the emails that go in and out of your organization.
CONFIGURATION OVERVIEW FOR CONTENT CONTROL
The Content Control service is configured in the portal.
The service lets you build a set of discrete rules to enforce your organization's email security policy. Each rule identifies emails that contain content or the attachments that contravene the policy.
An action is associated with each rule. For example, if an email contains a profanity, the action might be to redirect the message to an administrator.
You can establish rules as global settings that apply to all of your domains, or as custom settings that are unique to an individual domain.

4
Steps For details, see Planning Plan which rules, user groups, and lists you need to create
for all domains and for specific domains. It might be useful to create your rules for a single domain and test that they work to your requirements. Then you can copy them to all of your domains.
Applying Settings at Global and Domain Level for Content Control
General Settings Define general settings: • An administrator's email address. • An email address from which notifications
appear to be sent • The time zone • Default notifications. Those set at global level are
used unless domain-‐ or rule-‐level settings are defined. Those set for a domain are used for that domain's rules unless rule-‐level settings are defined.
About General Settings in Email Content Control
Users and groups Create custom user groups and view LDAP groups to specify as senders or recipients to use in the rule.
About User Groups
Lists Create lists of file names, text content, MIME types, domain names, and URLs to form the criteria for your rules.
About Lists in Content Control
Create rules Create rules by defining their conditions and actions. See the following steps.
Defining a Content Control Rule
Sender and recipient conditions
• Sender and recipient conditions (as specified in user groups and domain lists)
Defining Sender and Recipient Conditions Using User Groups
Content conditions Email content conditions, including: • The parts of the email to be scanned • Email size, encrypted files, importance levels,
password-‐protected files • The content to scan for -‐ as specified in your lists
Defining Email Content Conditions
Attachment conditions • Attachment conditions -‐ number and size of attachments, file names, MIME types, and spoofed attachments
Defining Attachment Conditions
Time interval conditions
• Conditions relating to the time an email is received or sent
Defining Time Interval Conditions
Actions and notifications
• Actions and notifications for detected mail About Actions and Notifications in Content Control
Viewing your rules Once your rules are defined, you can view a summary of each of them. The order of rules affects the order in which rules are scanned.
Viewing Email Content Control Rules

5
EXAMPLE RULES FOR CONTENT CONTROL
Some examples of Content Control rules are presented here. However, every organization is different. We recommend that you do not set up the following rules without understanding your businesses needs and aligning an email security policy with them.
Rule Description Block emails over 25MB Reduces the size of emails coming into the organization to save
bandwidth. All emails over 25MB can be blocked and deleted and notifications can be sent to all parties.
Redirect emails to/from suspicious domains
Monitors emails coming from or going out to competitors’ domains, restricting the passing on of intellectual property and poaching of employees.
Block profanity outbound Protects the organization's brand and reputation. For example, you can block an employee from sending out an email containing slander to a friend.
Redirect encrypted or password-‐protected mail
Enables portal administrators to monitor and control who sends and receives encrypted or password-‐protected messages.
Compress emails that are between 10 and 25MB
Reduces the bandwidth that large messages take up coming into the organization.
Block video file attachments Restricts who can receive video files to the marketing department only.
Stop scanning personal email The Log and exit action stops the processing of the rule set at a particular point because an email had been marked in a particular way. For example, you may be bound by legislation not to scan personal email. So the Log and exit action can be used to stop the scanning of all emails that are marked personal. Content Control still applies the rest of the rules to non-‐personal email for a particular group of senders or recipients.
CONTENT CONTROL BEST PRACTICE SETTINGS
When you are provisioned with the Content Control service, the service has no rules set up.
The rules you define for Content Control assist in monitoring and controlling your company’s acceptable use policy. It is recommended that initially you set up five rules to just log various aspects of content within emails, as follows:
• Log inbound emails over 2MB • Log outbound profanities • Log all encrypted email inbound and outbound • Block inbound emails over 10MB • Log audio and video files inbound and outbound
Then once you are familiar with the kinds of emails that are detected, you can feel more confident in blocking some, and redirecting others. The following are some common rules. But every organization is different. It is recommended that you do not set up these example rules without understanding your business’ needs and aligning an email security policy with them.

6
Common email Content Control rules:
Rule Description Block emails over 25MB Reduces the size of emails coming into the organization to save
bandwidth. All emails over 25MB can be blocked and deleted and notifications can be sent to all parties.
Redirect emails to/from suspicious domains
Monitors emails coming from or going out to competitors’ domains, restricting the passing on of intellectual property and poaching of employees.
Monitoring profanity outbound Protects the organization's brand and reputation. For example, by blocking an employee from sending out an email containing slander to a friend.
Redirect encrypted or password-‐protected mail
Enables your administrators to monitor and control who sends and receives encrypted or password-‐protected messages.
Compress emails that are between 10 and 25MB
Reduces the bandwidth that large messages take up coming into the organization.
APPLYING SETTINGS AT GLOBAL AND DOMAIN LEVELS FOR CONTENT CONTROL
You can apply Content Control settings for all domains (global settings). Or you can apply custom settings to individual domains.
At global level and domain level, you can specify the following information:
Rules A rule that is specified at the global level can use the lists and the user groups that are also specified at the global level. A domain level rule can use the lists and the groups that are specified at the global level or within the same domain. See About Rules in Content Control.
User Groups At global level, a user group can contain users from all of your domains. At the domain level, a user group can contain users from the selected domain. A user group that is defined for a specific domain can only be used in a rule that is specified for that same domain. See About User Group.
Lists You can specify lists at the global level to be used in rules across all domains. Or you can specify a list that is only used in a rule for a selected domain, at the domain level. You can also customize a list at rule level. It may be useful to create a default list (at the global or domain level) and then make additions or remove items at the rule level. See About Lists in Content Control.
General Settings The general settings are listed below. You can define these settings to apply at the global level, or if you require a specific setting for a specific domain, at the domain level. See About General Settings in Email Content Control.
• An administrator email address to which redirected or copied emails and notifications are sent See Defining an Administrator Email Address for Email Content Control.
• A "sent from" address for all notifications See Defining a Notification ‘Sent From’ Address for Email Content Control.
• The text for administrator, sender, and recipient notifications See About Notifications for Email Content Control.
• The time zone See Defining a Default Time Zone for Email Content Control.

7
On initial setup, each domain is set to use the global settings. All of your provisioned domains use the same settings.
You can customize a configuration specifically for the selected domain. When you select a specific domain to work with, the name of the domain is displayed as a heading.
To apply global settings:
1. Select Services > Email Services > Content Control. 2. Ensure Global Settings is selected from the drop-‐down list:
Three tabs display – Rules, Lists, and Settings.
To apply settings for a specific domain:
1. Select Services > Email Services > Content Control. 2. Select the domain from the Global Settings drop-‐down list.
Three tabs display – Rules, Lists, and Settings. If no domain-‐level settings have been defined yet, all fields in these pages are inactive and cannot be edited.
3. Select Apply custom settings.
The rules, lists, and settings that you can apply at domain level are now editable. The changes you make are applied only to the selected domain (if the changes are saved).
NOTE: If you define custom settings and then switch back to global settings, your custom settings for that domain are remembered. If you switch back to use custom settings, your settings are again displayed and applied when you click Save and exit.
EMAILS FROM THE CLOUD SECURITY SERVICES
An Exception List is built into the Content Control scanner. The Exception List enables high priority emails from the cloud security services to get through to you without being stopped. For example, the rules that you set up do not affect the virus alerts that we send. You can send spam samples and similar messages without the messages being stopped or copied. This list does not display in the portal.

8
SUPPORT FOR NON-LATIN-BASED LANGUAGES
The following character sets for non-‐Latin-‐based languages are supported.
• JIS Greek Letters – Unicode 13 Greek • JIS Cyrillic Letters – Unicode 14 Cyrillic • JIS Level One Kanji – Unicode 18 Japanese Hiragana and Katakana • JIS Level One Kanji – Unicode 21 CJK Symbols • JIS Level Two Kanji – Unicode 22 Ideograph Symbols • Japanese Katakana – Unicode 23 Half Width Forms • Japanese Normal Kanji – Unicode 25 Private Use Characters • Double Byte Numbers – Unicode 26 Hebrew • Double Byte Characters – Unicode 27 Arabic • Japanese Hiragana Characters – Unicode 28 Korean Hagul 1 • Double Byte Numbers with double byte space – DOS Baltic Rule • Double Byte Numbers with single-‐byte space – DOS Central Europe • Japanese Kanji by Hiragana – DOS Cyrillic • Japanese Kanji by Radical – DOS Greek • Ideographs by Radical – DOS Turkish • Korean Hanja by Hangul – DOS United States • Simplified Chinese by Pin Yin – DOS Western Europe • Traditional Chinese by Bopomofo – Windows Arabic • Unicode General Punctuation – Windows Baltic • Unicode Super Subscript – Windows Central Europe • Unicode 5 Arrows – Windows Cyrillic • Unicode 6 MATH – Windows Greek • Unicode 7 Misc Technical – Windows Hebrew • Unicode 8 Enclosed Alphanumeric – Windows Korean • Unicode 9 Box Drawings – Windows Japanese • Unicode 10 Block Elements – Windows Simplified Chinese • Unicode 11 Symbols – Windows Traditional Chinese • Unicode 12 Spacing Modifying Letters
The following encoding types are supported:
• JIS • Shift-‐JIS • EUC • UTF-‐8
Caution: The Content Control service recognizes the file names that are encoded in UTF-‐8. If other encodings have been used, these file names may not be recognized. Any Content Control rules based on the names or extensions of such files may not be applied.

9
The following email sections are scanned:
• Email body • Subject line • Email attachments
The following email formats are supported:
• Plain text Email Format • HTML Email Format • Rich Text Email Format
NOTE: This support is based on testing performed by the Quality Assurance team. The focus of the testing was on Japanese character sets and encoding. This testing was performed using Microsoft Windows-‐based operating systems, and Microsoft Outlook as the mail client. Future releases of Content Control may support non-‐Latin character sets fully, as well as other encodings that are not listed here. Future releases may also support alternative operating systems and mail clients.

10
DEFINING GENERAL SETTINGS
ABOUT GENERAL SETTINGS IN EMAIL CONTENT CONTROL
You can define the following general settings:
• An administrator email address to which redirected or copied emails and notifications are sent. • A "sent from" address, which lets you customize the email address the notifications are sent
from and to which recipients can reply to notifications • The text for administrator, sender, and recipient notifications • The time zone • The subject line text to be used when the action to Tag the subject line is selected
The general settings can be applied at the global or domain level. If you configure settings at the global level, these are inherited at the domain-‐ and then rule-‐level, unless any custom settings are defined at those levels. In other words:
• Domain-‐level settings inherit from global settings • Rule-‐level settings inherit from domain settings
DEFINING AN ADMINISTRATOR EMAIL ADDRESS FOR EMAIL CONTENT CONTROL
Before you can build any rules, you must define an administrator email address. The Administrator Email Address in the Settings tab specifies the default email address to which notifications, and copied and redirected emails, are sent.
You can specify an administrator email address for a specific rule. Doing so enables you to either copy or redirect an email that has triggered a specific rule to a specifically targeted email address. This enables the appropriate personnel to review the triggered email. For example, a breach of confidentiality might go to the Legal department, and a case of harassment might go to the Human Resources department.
Caution: Administrator email addresses bypass the Content Control scans.
Therefore, if you use this email address to test your rules, your results will not be accurate. Emails that are sent from or to this address will not activate any of your Content Control rules.
To define a general administrator email address:
1. Select Services > Email Services > Content Control. 2. Click the Settings tab. 3. In the Administrator Email Address section, enter the required email address. 4. Click Save.

11
To define a rule-specific administrator email address:
1. Select Services > Email Services > Content Control. 2. Click the name of the required rule. 3. Click the Actions and notifications tab. 4. Select the Use Custom Email address checkbox, and enter the required email address in the
Administrators email address box.
To change a rule-specific administrator email address back to the general
address:
1. Select Services > Email Services > Content Control. 2. Click the name of the required rule. 3. Click the Actions and notifications tab. 4. Uncheck the Use Custom Email address checkbox.
DEFINING A NOTIFICATION ‘SENT FROM’ ADDRESS FOR EMAIL CONTENT CONTROL
The Notification “sent from” address specifies the email address that notifications appear to come from. Thus, users can reply to an appropriate person rather than to a generic email address, from which a reply may bounce.
To define a notification “sent from” address:
1. Select Services > Email Services > Content Control. 2. Click the Settings tab. 3. In the Notification “sent from” address section, enter the required email address. 4. Click Save.
DEFINING A DEFAULT TIME ZONE FOR EMAIL CONTENT CONTROL
The Default Time Zone defines the time zone that is applied by default when you use conditions based on time intervals. If no time zone is specified, the system assumes UTC (Coordinated Universal Time). This is the same as GMT (Greenwich Mean Time). Where applicable, daylight saving is accounted for; for example, Europe/London (BST).
To define the default time zone:
1. Select Services > Email Services > Content Control. 2. Click the Settings tab. 3. In the Default Time Zone section, select the required time zone from the drop-‐down list. 4. Click Save.

12
ABOUT NOTIFICATIONS FOR EMAIL CONTENT CONTROL
When a suspect email is detected, you can define a notification to be sent to an email administrator, the sender, and the recipient. The text for each notification can be different. The portal provides the flexibility to define each of these notifications at three levels:
• Global level -‐ generic notifications for all domains. Use the text that we provide, or customize the text in the Settings tab with Global settings selected. We provide text for the following notifications:
o Default administrator notification o Default sender notification o Default recipient notification
• Domain level – notifications for a specific domain. Until you define these, the notifications are inherited from those defined at global level.
• Rule level – notifications for each rule. Unless you define these, notifications for all rules inherit the global level or domain level text depending on your current settings. When creating a new or editing an existing rule, you can define your custom notifications in the Actions and notifications tab.
This flexibility enables you to provide your users with explicit information surrounding a suspect email and which rule detected it. It also enables you to warn or advise users, rather than to take action on an email. For example, you notify the sender of an email that contains a video attachment that they can only send such emails after 18:00.
Placeholder options enable you to enter variables, such as the date, the name of an attached file, the name of the rule, etc.
Placeholder Description %d Date the email was sent. For example, "The email was sent on %d" %t Subject line of the email.
For example, "An email that is sent to you with the following subject line was blocked: %t" %p Plain text section of the email body -‐ not allowed in messages to
administrators For example, "An email containing the following text has been blocked: %p"
%y Suspect attachment file names For example, "An email containing the following attachments has been blocked: %y"
%e Envelope senders -‐ the actual sender of the email For example, "The sender address of the email was: %e"
%s Envelope senders -‐ the actual sender of the email For example, "The sender address of the email was: %e"
%S The sending server's IP address For example, "The sender's IP address was: %S"
%r Envelope recipients -‐ all recipients including bcc recipients For example, "The recipient address of the email was: %r"
%g Message body recipients -‐ not including bcc recipients. Not allowed in messages to recipient or administrator. For example, "The recipient address of the email was: %g"
%R Name of the rule that detected the message For example, "The email contravenes the following policy: %R"
%E Reason text from the rule that detected the message For example, "The email was blocked for the following reason: %E"
%% % -‐ use two percentage symbols to insert a %

13
DEFINING DEFAULT NOTIFICATIONS
When a suspect email is detected, you can define a notification to be sent to an email administrator, the sender, and the recipient. The text for each notification can be different. The portal provides the flexibility to define each of these notifications at global, domain, and specific rule levels:
Global notifications use the text that we provide. Or you can define your own text for your default notifications for use for all domains. Customize the text in the Settings tab with Global settings selected.
To define default notifications:
1. Select Services > Email Services > Content Control. 2. Click the Settings tab. 3. Select either Global settings or an individual domain from the Global settings drop-‐down list, as
required. 4. In the Default administrator/sender/recipient notification section (as required), select Use
custom notification. NOTE: If you define the notification at the global level, the Use default notification option refers to the notification text provided. If you define the notification at the domain level, the Use default notification option refers to the text that is defined at the global level. The default text could be either the provided text, or the custom text.
5. Enter the text you require for the subject line and body of the email. The placeholders are variables such as the date, the name of an attached file, the rule name, etc.
6. To see the variables, click View placeholder options. The variables can be typed or copied and pasted into the content of the rule.
7. Click Save.
DEFINING DEFAULT SUBJECT LINE TAG TEXT FOR EMAIL CONTENT CONTROL
You can set an action to Tag subject line. Tagging the subject line enables a detected email to be sent to the recipient with some extra text in the subject line. The tag text can warn the recipient that it may contain inappropriate content. If you select this action, you can define the text for the tag. You can specify a default subject line tag and a subject line tag for a specific rule.
To define default subject line tag text:
1. Select Services > Email Services > Content Control. 2. Click the Settings tab. 3. In the Subject line text section, enter the text for the tag in the Enter text box.
The default text for the subject line tag is unacceptable content. The maximum number of characters that the tag can have depends on the language you use. The tag text can contain non-‐Western characters.
4. Select the required option; whether to put the text before or after the existing subject line text.

14
WORKING WITH USER GROUPS
ABOUT USER GROUPS
A user group is a set of users to apply to in sender and recipient conditions in your Content Control rules and for your email disclaimers.
Users and groups can derive from these sources:
• Custom users and groups • Domains
Custom users and groups Create and edit custom users and user groups in the portal. Custom user groups can be viewed in the portal. You can also upload a CSV file listing custom users in a group. Custom groups are useful if you want to include users in the groups that are not stored in your directory data. For example, you can add external email addresses to your custom groups.
The following characteristics apply to user groups:
• A group can consist of a single user • A user may belong in more than one group • If a group is defined at the global level, it can contain users from different domains • A group must have at least one user assigned to it • A group can contain up to 1,000,000 users
You can view and manage custom groups and users, at the global and domain levels:
• Global level – enables groups to be managed across all domains. • Domain level – enables you to manage user groups specific to that domain.
You can use a group that is defined at the global level in a Content Control rule that is specific to an individual domain. A Content Control rule set for a domain applies only to those members of the user group who belong to that domain. Only groups defined at the global level can be assigned to email disclaimers.
NOTE: For Content Control rules, you can also detect email according to the domains that it is sent to or from. For this, use domain lists in your sender and recipient conditions.

15
VIEWING USER GROUPS
You can view your custom user groups in the portal.
To view your user groups:
1. Select Services > Email Services > Platform. 2. Click the User Groups tab.
The custom user groups available at the level you have selected (global or domain) are listed with the following details:
Group Name For custom groups, click on the group name to view full details of the group and its members in the Edit User Group page.
Group Type Displays that the group is a custom group.
Members Displays the number of users in the group.
Content Control Rules Displays whether the group is used in any rules.
Disclaimers Displays whether the group has a custom email disclaimer applied to it. You can only assign a group to a single custom disclaimer.
Last Updated Displays the date and time the group was last edited.
Only 500 groups are displayed at a time. To avoid too long a list, search using the Group name box and the Group type filter. The Group name search box accepts wildcards for partial matching. The wildcard * is interpreted as zero or more unknown characters, for example, W*d finds words including Wild and Withheld.
To view the members of a custom user group:
1. Select Services > Email Services > Platform. 2. In the User Groups tab, click the name of the group to view in the Group name column.
The Edit User Group page displays. The users in the group are listed in the Group members box.
3. To locate a specific group member, use the Email address search box. 4. Enter a full email address or a partial email address to search for.

16
CREATING A CUSTOM USER GROUP You can create a user group manually in the portal and add existing or new email addresses (users) to it.
You can also create and edit the users in a group in a CSV file and upload the file to the portal.
To create a custom user group:
1. Select Services > Email Services > Platform. 2. In the User Groups tab, click Create new group.
The Create Group page displays. 3. Enter a name for the user group.
The user group name must be unique, contain alphanumeric characters and spaces (but no other character types), and begin with an alphabetic character. Double-‐byte characters are not supported.
4. Search for an existing user by using the Email address search box. 5. Select the required user in the Available users box.
The search affects both the Available users and Group members boxes. Up to 500 users display. To display fewer users, refine your search criteria. The available users are those harvested from the emails that are sent from your organization, and those previously added manually or uploaded to a group.
6. Click Add. The email address is added to the Group members box.
7. Click Save.
EDITING A CUSTOM USER GROUP MANUALLY
You can maintain a custom user group manually in the portal. You can edit the group name, and add and remove users from the group.
You cannot delete a user group if it is in use in a Content Control rule or has a custom email disclaimer applied to it.
Deleting a user from a group does not permanently delete the user, but merely removes it from the user group or groups that it is associated with.
To edit a custom user group manually:
1. Select Services > Email Services > Platform. 2. In the User Groups tab, click on the name of the required group.
The Edit User Group page displays. 3. Edit the group name if required. 4. Edit the group details as required. 5. Locate a user using the Email address search box. Add or remove the users as required.
Only 500 users are displayed at a time. To avoid too long a list, narrow your search criteria. 6. Click Save.

17
To delete a custom user group:
1. 1 Select Services > Email Services > Platform. 2. 2 In the User Groups tab, select the checkbox next to the name of the group to delete. 3. 3 Click the Delete selected group(s) button. 4. 4 Click OK to confirm.
To delete a user from a custom user group:
1. Select Services > Email Services > Platform. 2. In the User Groups tab, select the checkbox next to the group name that contains the user to
delete. 3. Click Delete users.
The Delete Users window displays. 4. Locate an existing user, using the Search existing users box.
If you leave the box blank, an alphabetical list of all available users is displayed in the Existing users box. To avoid the list becoming too long, only the first 500 users are shown. If more than 500 users are available, use the search facility to reduce the list size.
5. Highlight the required user and click Delete Users. The address of the user to delete is displayed in the Deleted users box.
6. When you have selected the users to delete, click Delete Users at the bottom of the page.
CREATING A USER FOR A CUSTOM GROUP You can create a new user to add to a custom group.
To create a new user for a custom group:
1. Select Services > Email Services > Platform. 2. In the User Groups tab, locate and select the group for which to create the new user.
The Edit User Group page displays. 3. Add the new email address in the New users box. 4. Click Save.

18
EDITING A CUSTOM USER GROUP USING A CSV FILE
You can maintain a custom user group using a CSV file. Use a CSV (comma-‐separated values) file to create or edit a list of the users that belong to a user group. You can add new email addresses or edit existing ones offline. Then upload the list to the portal. The file to upload must be a CSV file.
You can download the list again at any time, to make further changes.
To download a list of users in a custom user group:
1. Select Services > Email Services > Platform. 2. In the User Groups tab, locate the name of the group to download and click the Download
button. A dialog box asks you whether to open or save the CSV file. The download operation may take some time to complete depending on the size of the list.
To edit a CSV list of users in a group:
1. Open a new or a previously downloaded CSV file. 2. Edit the file to your requirements.
The file contains a list of your users' email addresses in the first column. You can use the second column for associated descriptions (optional). To simplify the list, use wildcards to detect email addresses with slight differences in spelling, for example, fre*@domain.com represents [email protected] or [email protected].
3. Save the file as a CSV file.
To upload a list of users for a custom user group:
1. Select Services > Email Services > Platform. 2. In the User Groups tab, select the Upload button next to the name of the group to which to
upload the email addresses. The Upload users window displays.
3. In the Select file to upload field, enter the file path and file name to upload or click Browse to locate the file.
4. Select either:
Delete existing addresses and replace with uploaded addresses
The uploaded list replaces the existing list. Any entries in the existing list that are not in the uploaded list are lost.
Merge existing addresses with uploaded addresses
The uploaded list merges into the existing list. This is a useful way to add new entries to an existing list.
5. Click Upload. If the file contains invalid entries, an error message displays the first 100 invalid addresses but continues to upload all the valid addresses.
6. If this displays, click OK. A confirmation message displays.
7. Click OK.

19
WORKING WITH LISTS
ABOUT LISTS IN CONTENT CONTROL
The Content Control service works by matching terms or expressions, and other items of information, contained within various parts of an email. For example, to stop outbound the emails that contain potentially sensitive information, define a list of unacceptable terms. You can then create a rule to specify the list as the email content to trigger the rule.
The following types of content can be defined as lists:
Text content Sets of words and phrases, like profanities
MIME types Emails and attachments are compared against a selected list of MIME types, for example, applications, audio, video, and email types
File names Sets of file names or extensions
URLs Addresses for Web sites, for example, to detect the emails that direct users to competitor, job alert, or pornographic web sites, etc.
Domain names A list of domain names can be used in a similar way to user groups. For example, use a domain list to detect the emails that your employees send to your sister organizations.
You can also create a superlist. A superlist is a list that contains other lists of the same type. For example, lists of profanities in English, German, and French can be gathered into a European profanity superlist.
Lists can be defined at global and domain level. Several conditions use lists to detect content. These include sender, recipient, email content, and attachment conditions. For example, a domain list can be used as a sender or recipient condition. A URL list can be used as an email content condition. And a file name list can be used as an attachment condition. To manage lists across all domains, have Global settings selected. Manage lists specific to an individual domain, by selecting the required domain from the Global settings drop-‐down list.
You can also customize a list at the rule level. A customized list is specific to a rule's condition. You cannot use the customized list in other conditions within the same rule or in any other rules. You may want to create a default list (at global or domain level) and then make additions or remove items at the rule level. The changes you make at rule level do not affect the original list.
Lists defined at global level can be applied to an individual domain but cannot be modified at that level. However, they can be customized within a specific rule.
20
PREDEFINED LISTS IN EMAIL CONTENT CONTROL
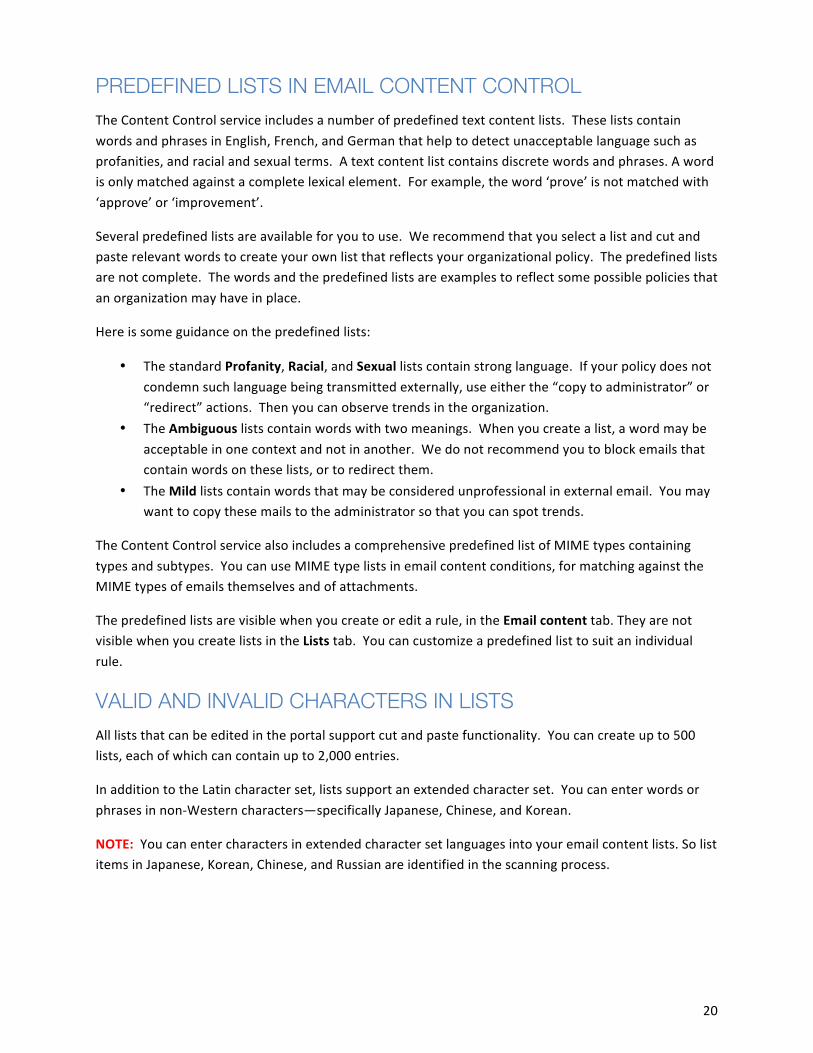
The Content Control service includes a number of predefined text content lists. These lists contain words and phrases in English, French, and German that help to detect unacceptable language such as profanities, and racial and sexual terms. A text content list contains discrete words and phrases. A word is only matched against a complete lexical element. For example, the word ‘prove’ is not matched with ‘approve’ or ‘improvement’.
Several predefined lists are available for you to use. We recommend that you select a list and cut and paste relevant words to create your own list that reflects your organizational policy. The predefined lists are not complete. The words and the predefined lists are examples to reflect some possible policies that an organization may have in place.
Here is some guidance on the predefined lists:
• The standard Profanity, Racial, and Sexual lists contain strong language. If your policy does not condemn such language being transmitted externally, use either the “copy to administrator” or “redirect” actions. Then you can observe trends in the organization.
• The Ambiguous lists contain words with two meanings. When you create a list, a word may be acceptable in one context and not in another. We do not recommend you to block emails that contain words on these lists, or to redirect them.
• The Mild lists contain words that may be considered unprofessional in external email. You may want to copy these mails to the administrator so that you can spot trends.
The Content Control service also includes a comprehensive predefined list of MIME types containing types and subtypes. You can use MIME type lists in email content conditions, for matching against the MIME types of emails themselves and of attachments.
The predefined lists are visible when you create or edit a rule, in the Email content tab. They are not visible when you create lists in the Lists tab. You can customize a predefined list to suit an individual rule.
VALID AND INVALID CHARACTERS IN LISTS
All lists that can be edited in the portal support cut and paste functionality. You can create up to 500 lists, each of which can contain up to 2,000 entries.
In addition to the Latin character set, lists support an extended character set. You can enter words or phrases in non-‐Western characters—specifically Japanese, Chinese, and Korean.
NOTE: You can enter characters in extended character set languages into your email content lists. So list items in Japanese, Korean, Chinese, and Russian are identified in the scanning process.

21
List type Description Valid and invalid characters and characteristics of list type Email content The content of an email can be
matched against entries in a predefined or a custom list of words and phrases. In Email Content Control: Text content lists can be used where email content conditions are required.
Digits are supported A space is not supported as a literal character. So foo<space>bar detects foo followed by bar regardless of the number of spaces you enter. The following characters are supported as literal characters and as a space: " & ‘ < > . _ + = { } [ ] :;@ ~ # | / , ! £ $ % ^ ( ) So content that contains one of these characters is detected. However, the same the content without the character is also detected. The following character is supported: -‐ The character ! at the beginning of a content phrase means NOT. Use ! to make an exception of a phrase that includes a word that you typically block. For example, to block breast but permit chicken breast, include breast and !chicken breast in your list. The ! must appear at the start of the phrase. Chicken !breast detects the literal "chicken !breast". The character backslash \ is treated as an escape character. The backslash enables you to treat special characters as literal characters. So to look for the character * rather than use it as a wildcard, enter \*. Two backslashes \\ detects the literal \. A backslash followed by a question mark \? detects the literal character ?. Wildcards are supported with the following characters (these are only recognized as wildcards and are not translated literally):
• * represents zero or more characters. Thus B*d stops Bold, Bid, and Billiard
• ? represents a single character. Thus B?d stops Bid, Bad, and Bod
MIME types In Email Content Control: MIME type lists can be used where email content and attachment conditions are required. The MIME types can be matched against entries in a predefined or a custom list of types. If you are unsure of useful file extensions for your custom MIME type lists, you can copy and paste entries from the predefined lists.
Digits are supported Spaces are not supported The following characters are not supported: ! " £ % ^ & ( ) = { } [ ] :;@ ‘ ~ # | \ < > ,? The following characters are supported: $ -‐ _ + .* is supported as a wildcard only / is supported as a type/subtype separator only Wildcards are supported to indicate all subtypes for the specified type, for example:
• type/* Entries must take one of the following forms:
• type/subtype specific type and subtype combination • type/* all subtypes for specified type
Validation of MIME type and subtype text is not performed.

22
List type Description Valid and invalid characters and characteristics of list type File names File names of email
attachments can be matched against entries in a custom list. In Email Content Control: File name lists can be used where attachment conditions are required.
Digits are supported Spaces are supported The following characters are not supported: " & :‘ | / \ < > ? The following characters are supported: ! £ $ % ^ ( ) -‐ _ + = { } [ ] ;@ ~ # ,. The use of * as a wildcard is allowed, for example: topsecr*, *.exe, and file*.com
URLs URL lists can be used to detected content in the form of a URL within an email body, header, or subject. URL lists enable you to restrict the communication of specified URLs around the business. Restricting the sending or receipt of URLs removes encouragement for employees to access specific Web sites. Use this in combination with the Web Security service to provide complete protection against a user accessing inappropriate or malicious Web sites.
URL entries must be of the following formats: • http://www.xxxxxx.com • https://www.xxxxx.com
Wildcards are supported with the following characters (these are only recognized as wildcards and are not translated literally):
• * represents zero or more characters • ? represents a single character
Thus:
• http://www.*.com stops all URLs that take the .com format
• http://www.ford*.com stops http://www.fordcar.com and http://www.fordescort.com
• http://www.ford.* stops http://www.ford.com, http://www.ford.co.uk, etc.
Domain lists Domain lists can be used where sender or recipient conditions are required. The sender or recipient of an email can be matched against entries in a custom list.
The use of digits is supported The use of spaces is not supported The following characters are not supported because they are not permitted in domain names by RFC standards: ! " £ $ % ^ ( ) _ + = { } [ ] :;@ ‘ ~ # | / \ < > ,? The following character is supported: -‐ The following character is supported as a sub-‐domain separator only: . You can use the * as a wildcard within the domain section, for example:
• *.example.com stops a subdomain of example.com, or
• example.* stops example.com, example.co.uk, and example.net
NOTE: You cannot define your own email template list. Predefined email and IM template lists are available to use when you create a rule. An email template detects specific alphanumeric characters in a set format (e.g., Social Security numbers, credit card numbers).

23
VIEWING YOUR CONTENT CONTROL LISTS
The Content Control service works by matching terms or expressions, and other items of information, contained within various parts of an email. These terms are defined in lists, for example, of unacceptable terms. You can then create a rule to specify the list as the email content to trigger the rule.
To view your lists:
1. Select Services > Email Services > Content Control. 2. Click the Lists tab.
The lists that you can modify at the level you have selected (global or domain) are displayed.
VIEWING WHICH CONTENT CONTROL RULES USE A SPECIFIC LIST
You can check to see which rules use a specific list.
To see the rules that use a specific list:
1. Select Services > Email Services > Content Control. 2. Click the Lists tab. 3. Locate the required list and select the link in the In Use column.
CREATING A LIST IN EMAIL CONTENT CONTROL
The Content Control service works by matching terms or expressions, and other items of information, contained within various parts of an email. These terms are defined in lists, for example of unacceptable terms. You can then create a rule to specify the list as the email content to trigger the rule.
To create a list:
1. Select Services > Email Services > Content Control. 2. In the Lists tab, click the Create new list option.
The Create List page displays. 3. Enter a name for the list.
The list name must have the following characteristics: • Be unique. • Contain alphanumeric characters and spaces only (and no other character types). • Begin with an alphabetic character. • Not exceed 50 characters.
4. Select the Ordinary list option. 5. Select the type of list to create from the Select list type drop-‐down list.
When you select a List type, explanation text provides you with hints specific to that list type. 6. In the List items box, enter the items for the list.
Cut and paste functionality is available in this box. 7. Click Save.

24
CREATING A SUPERLIST IN EMAIL CONTENT CONTROL
A superlist is a list that contains multiple lists of the same type, that is, email content, domain name, URL, MIME type, or file name. Lists linked into superlists enable, for example, lists of profanities in English, German, and French, to be gathered into a European profanity list.
If a change is made to an ordinary list that is contained within a superlist, the change affects the superlist too. A superlist can only contain lists of the same type.
To create a superlist:
1. Select Services > Email Services > Content Control. 2. In the Lists tab, click the Create new list option. The Create List page displays. 3. Enter a name for the superlist.
The superlist name must have the following characteristics: • Be unique. • Contain alphanumeric characters and spaces only (and no other character types). • Begin with an alphabetic character. • Not exceed 50 characters.
4. Select the SuperList option. 5. Select the type of superlist to create from the Select list type drop-‐down list.
The Select lists for your superlist box displays the available lists of the selected type. 6. Select the lists to add to the superlist by clicking on the list name.
The expressions from the selected lists are displayed in the List items box. 7. Click Save.
EDITING A LIST FOR EMAIL CONTENT CONTROL
You can edit the name of a list and the items within it. However, you cannot change the list type, due to the variation in expected content between different list types.
To edit a list:
1. Select Services > Email Services > Content Control. 2. In the Lists tab, locate the list to edit and click on its name in the List name column.
The Edit List page displays. 3. In the List items box, edit the items in the list as required.
Cut and paste functionality is available in this box. 4. Click Save.
DELETING A LIST IN EMAIL CONTENT CONTROL
You can only delete a list if it is not used in any rule. Also, you cannot delete any of the predefined lists.
To delete a list:
1. Select Services > Email Services > Content Control. 2. In the Lists tab, select the checkbox next to the list to delete. 3. Click the Delete selected list(s) option.
You are not asked to confirm the delete operation.
25
RULES IN CONTENT CONTROL
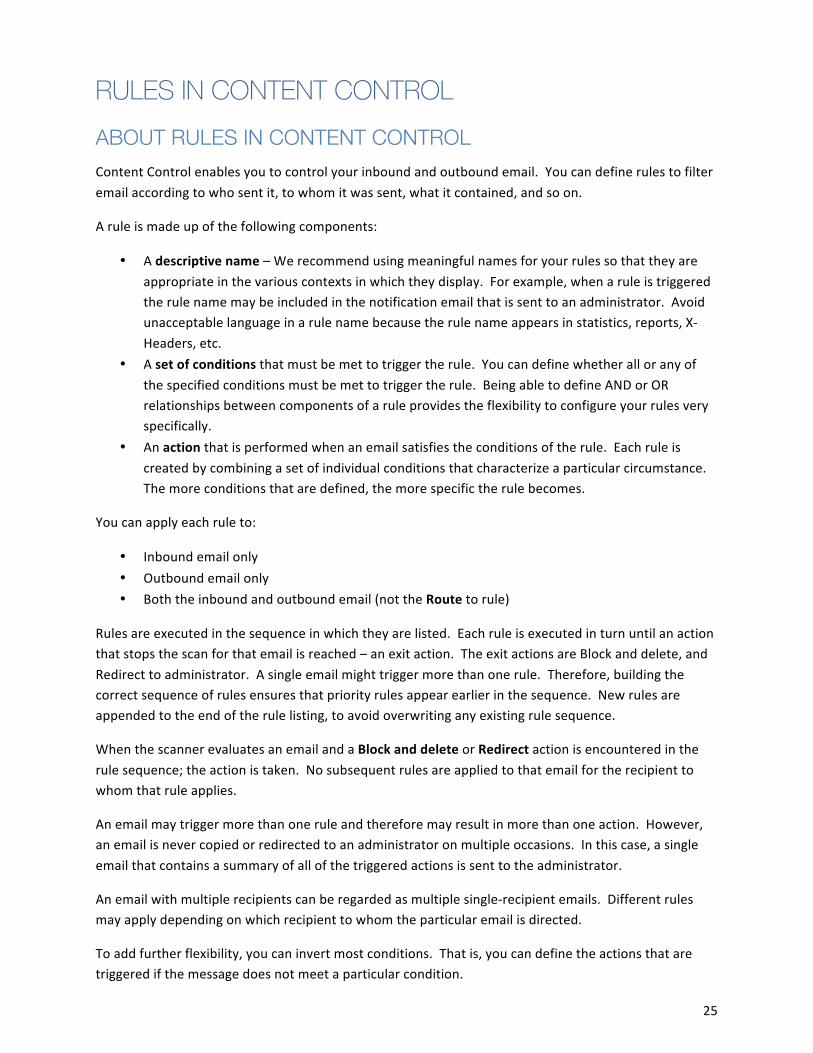
ABOUT RULES IN CONTENT CONTROL
Content Control enables you to control your inbound and outbound email. You can define rules to filter email according to who sent it, to whom it was sent, what it contained, and so on.
A rule is made up of the following components:
• A descriptive name – We recommend using meaningful names for your rules so that they are appropriate in the various contexts in which they display. For example, when a rule is triggered the rule name may be included in the notification email that is sent to an administrator. Avoid unacceptable language in a rule name because the rule name appears in statistics, reports, X-‐Headers, etc.
• A set of conditions that must be met to trigger the rule. You can define whether all or any of the specified conditions must be met to trigger the rule. Being able to define AND or OR relationships between components of a rule provides the flexibility to configure your rules very specifically.
• An action that is performed when an email satisfies the conditions of the rule. Each rule is created by combining a set of individual conditions that characterize a particular circumstance. The more conditions that are defined, the more specific the rule becomes.
You can apply each rule to:
• Inbound email only • Outbound email only • Both the inbound and outbound email (not the Route to rule)
Rules are executed in the sequence in which they are listed. Each rule is executed in turn until an action that stops the scan for that email is reached – an exit action. The exit actions are Block and delete, and Redirect to administrator. A single email might trigger more than one rule. Therefore, building the correct sequence of rules ensures that priority rules appear earlier in the sequence. New rules are appended to the end of the rule listing, to avoid overwriting any existing rule sequence.
When the scanner evaluates an email and a Block and delete or Redirect action is encountered in the rule sequence; the action is taken. No subsequent rules are applied to that email for the recipient to whom that rule applies.
An email may trigger more than one rule and therefore may result in more than one action. However, an email is never copied or redirected to an administrator on multiple occasions. In this case, a single email that contains a summary of all of the triggered actions is sent to the administrator.
An email with multiple recipients can be regarded as multiple single-‐recipient emails. Different rules may apply depending on which recipient to whom the particular email is directed.
To add further flexibility, you can invert most conditions. That is, you can define the actions that are triggered if the message does not meet a particular condition.

26
A rule's conditions define who, where, and what is to be detected in an email. The following tables describe these categories of conditions.
Who, where, and what
Condition Description
Who Sender A user group, a list of domains, a single email address, a single domain, or domains containing wildcards
Who Recipient A user group, a list of domains, a single email address, a single domain, or domains containing wildcards
Where Email body, subject line, attachment (including in Microsoft Office documents and archive), and header
Specify which parts of an email to scan for content (can include wildcards)
What Email content Lists of words and phrases What Email MIME type Lists of email MIME types What File attachment names and types Lists of file names, file types, and MIME types What URLs Lists of URLs What Templates Predefined formats, such as U.S. Social Security
numbers and credit card numbers What Spoofed file attachments Files masquerading as other types What Encrypted messages S/MIME encrypted content What Password-‐protected files Microsoft Office files that have been password-‐
protected What Overall size of the email The size of the email including any attachments What Priority/urgency of the email The priority that is applied to an email by the
sender: low, normal, or high What Number of attachments The number of attachments What Size of attachments The combined size of all attached files What Email receipt or send time Select from a set of time periods
27
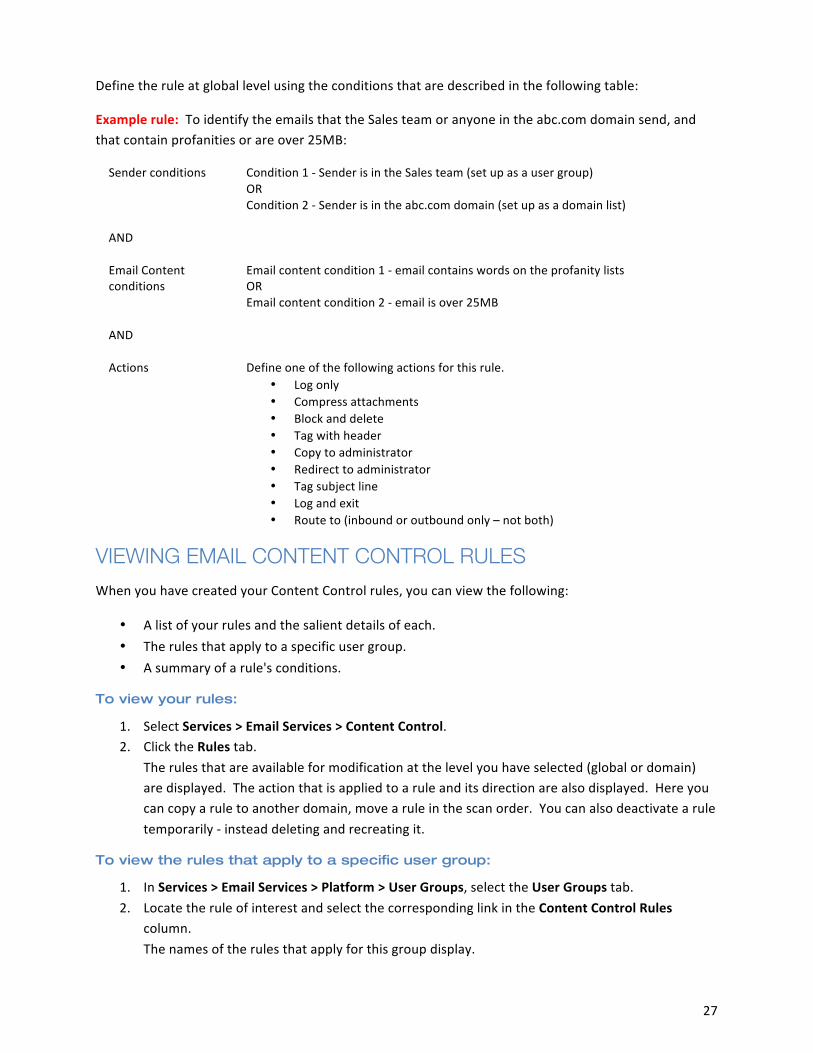
Define the rule at global level using the conditions that are described in the following table:
Example rule: To identify the emails that the Sales team or anyone in the abc.com domain send, and that contain profanities or are over 25MB:
Sender conditions Condition 1 -‐ Sender is in the Sales team (set up as a user group) OR Condition 2 -‐ Sender is in the abc.com domain (set up as a domain list)
AND
Email Content conditions
Email content condition 1 -‐ email contains words on the profanity lists OR Email content condition 2 -‐ email is over 25MB
AND
Actions Define one of the following actions for this rule. • Log only • Compress attachments • Block and delete • Tag with header • Copy to administrator • Redirect to administrator • Tag subject line • Log and exit • Route to (inbound or outbound only – not both)
VIEWING EMAIL CONTENT CONTROL RULES
When you have created your Content Control rules, you can view the following:
• A list of your rules and the salient details of each. • The rules that apply to a specific user group. • A summary of a rule's conditions.
To view your rules:
1. Select Services > Email Services > Content Control. 2. Click the Rules tab.
The rules that are available for modification at the level you have selected (global or domain) are displayed. The action that is applied to a rule and its direction are also displayed. Here you can copy a rule to another domain, move a rule in the scan order. You can also deactivate a rule temporarily -‐ instead deleting and recreating it.
To view the rules that apply to a specific user group:
1. In Services > Email Services > Platform > User Groups, select the User Groups tab. 2. Locate the rule of interest and select the corresponding link in the Content Control Rules
column. The names of the rules that apply for this group display.

28
To view the summary of a rule’s conditions:
1. Select Services > Email Services > Content Control. 2. In the Rules tab, click the name of the rule. 3. Click the Summary tab.
The conditions of the rule are set out so that you can see all of the conditions of the rule in an easy-‐to-‐read format.
MANAGING EMAIL CONTENT CONTROL RULES
When you have created your Content Control rules, you can edit them, delete them, and copy them to other domains.
Delete When you delete a rule, you are not asked to confirm the deletion. Instead of deleting a rule, if you think you may need to use the rule in the future, you can deactivate it.
Copy You can copy a rule to the same domain, to another domain, or to global level so that it applies to all domains. It may be useful to copy a rule that contains common conditions to the same domain, make minor amendments, and rename it. You can also use the copy functionality to set up a test rule set within a test domain. You can then transfer the rules to another domain without having to re-‐enter them. Only one rule can be copied at a time. The name of the copied rule is appended with (n), where n is the next incremented number required to ensure a unique rule name. The copied rule is appended to the end of the rule list to avoid overwriting your existing rule sequence. When a rule is copied, it retains the state of the original rule; that is, whether the rule is active or deactivated.
Edit You can edit a rule's name and any of the conditions and other settings for a rule.
To delete a rule:
1. Select Services > Email Services > Content Control. 2. In the Rules tab, select the checkbox to the left of the rule to delete. 3. Click the Delete selected option.
To copy a rule:
1. Select Services > Email Services > Content Control. 2. In the Rules tab, select the checkbox to the left of the rule to copy. 3. Click the Copy selected option. The Copy rule window displays. 4. Use the options to define whether to copy the rule to another domain or to global level.
If you copy the rule to another domain, select the domain to copy it to, from the drop-‐down list. 5. Click Save.
To edit a rule:
1. Select Services > Email Services > Content Control. 2. In the Rules tab, click on the name of the rule to edit. The Edit Rule pages display.
The tabs contain the settings for the rule to edit. 3. Navigate to the relevant tabs to make the changes you require. 4. Click Save and exit.

29
ACTIVATING AND DEACTIVATING A RULE
If you have a rule that you do not want to use, but might use in the future, you can deactivate it rather than delete it; you can then reactivate it as required.
To activate and deactivate a rule:
1. Select Services > Email Services > Content Control. 2. In the Rules tab, locate the required rule, and in the right-‐hand column click the Activate or De-‐
activate option to change the status. You do not need to save this change; it is effective immediately.
CHANGING THE POSITION OF A RULE
A single email might trigger more than one rule. Therefore, building the correct sequence of rules ensures that priority rules appear earlier in the sequence. Rules are executed in the sequence in which they are listed. Each rule is executed in turn until an action that stops the scan for that email is reached -‐ an exit action.
The exit actions are Block and delete, Redirect to administrator, and Log and exit. When the scanner evaluates an email: if an exit action is encountered in the rule sequence, that action is taken. No subsequent rules are applied to that email for the recipient to whom that rule applies.
You can move a rule within the list. Any rules with an exit action should be positioned before other rules. Any emails that are detected by that rule are acted on first and do not continue to be scanned for other rules. For example, the following two rules should be ordered as shown:
• Block and delete all email that is over 5MB • Copy emails that contain profanity to the administrator
Once the move has been validated, all subsequent rules are automatically re-‐sequenced.
NOTE: A rule that has the Route To action must be at the top of the list of rules. So, an email that is detected by the rule has the route correctly applied before any further actions are performed on the email by any subsequent rules.
To move a rule:
1. Select Services > Email Services > Content Control. 2. In the Rules tab, select the checkbox to the left of the rule to move. 3. Click the Move selected option.
The Move rule window displays. The drop-‐down list displays the existing rules in order.
4. Select the position to move the rule to, that is, above an existing rule. 5. Click Save.
The list of rules displays with the rule in its new position.

30
DEFINING A CONTENT CONTROL RULE
Most rules require that user groups (for sender and recipient conditions) and lists (for email content and attachment conditions) are defined. You can create up to 500 rules. Typically, between 5 and 10 are enough to define a comprehensive rule set.
You can define rules at global and domain level. The rules that are defined at the global level can be applied for an individual domain by copying the rule to the domain. Likewise, a rule that is defined for a domain can be copied to global level.
If you have defined any custom settings (for example, for a domain) and you switch back to using global settings, your custom settings are remembered. When you switch back to Use custom settings, your custom settings are displayed again.
To define a rule:
1. Select Services > Email Services > Content Control. 2. In the Rules tab, click the Create new rule option.
The Create Rule page displays. 3. Enter the rule title.
The rule title can contain up to 255 alphanumeric characters including spaces, but no other character types. The rule title displays at the top of all of the pages within these rule configuration tabs.
4. Using Apply to options at the top of the page, select whether the rule is to apply to inbound mail, outbound mail, or both.
5. Use the settings in each tab to define the conditions, actions, and notifications for the rule.
You can navigate between the tabs without saving the changes you make in an individual tab. The Save and exit option affects all of the rule's tabs collectively.
DEFINING “ALL” OR “ANY” CONDITIONS
You can define whether all or any of the conditions that are defined within a tab must be met to trigger the rule. That is, within the Sender, Recipient, Email content, or Attachment tabs.
As well as this flexibility within a tab, define whether any or all of the tabs themselves need to be met to trigger the rule. For example, specify that the sender and recipient conditions, or that the sender or recipient conditions, must be met.
To define any or all conditions within a tab:
1. Select Services > Email Services > Content Control. 2. Click the name of the required rule. 3. In the Rule conditions sections of the condition tabs, select whether at least one, or all of the
conditions in the tab should be met.

31
To define any or all conditions between tabs:
1. Select Services > Email Services > Content Control. 2. Click the name of the required rule. 3. Click the Summary tab. 4. In the Rule summary section, select whether at least one, or all, of the conditions that are
defined within each tab should be met.
DEFINING SENDER AND RECIPIENT CONDITIONS USING USER GROUPS
For a rule to apply to specific senders and recipients, use the Sender and Recipient tabs when creating a rule. For a rule to apply to all senders and recipients, do not define any sender or recipient conditions. You can build sender and recipient conditions based on:
• User groups • Domain lists
To define sender conditions using user groups:
1. Select Services > Email Services > Content Control. 2. Click the name of the required rule, or click Create new rule. 3. Click the Sender tab. 4. In the User groups section, select the Use user groups in this rule checkbox.
The custom user groups available to use in the rule at this level display. To locate specific user groups in the Selected groups list, use the search controls.
5. Select whether the rule should apply to senders in all, any, or none of the groups that you select next:
Senders in ANY of the selected groups The rule is triggered if an email that meets the rule’s conditions is sent to any of the users in the selected groups
Senders in ALL selected groups The rule is triggered if an email that meets the rule’s conditions is sent to all of the users in the selected groups
All senders EXCEPT those in selected groups The rule is triggered if an email that meets the rule’s conditions is sent to none of the users in the selected groups
6. To add a group to use in the rule, click the Add Group option. A list of the available groups displays.
7. Locate and select the groups to use in the rule. 8. Click the Add Selected option.
Newly added groups display in the Selected groups list. 9. To save the rule, click Save and exit.

32
To define recipient conditions using user groups:
1. Select Services > Email Services > Content Control. 2. Click the name of the required rule, or click Create new rule. 3. Click the Recipient tab. 4. In the User groups section, select the Use user groups in this rule checkbox.
The custom user groups available to use in the rule at this level display. To locate specific user groups in the Selected groups list, use the search controls.
5. Select whether the rule should apply to recipients in all, any, or none of the groups that you select next:
Recipients in ANY of the selected groups The rule is triggered if an email that meets the rule’s conditions is sent to any of the users in the selected groups
Recipients in ALL selected groups The rule is triggered if an email that meets the rule’s conditions is sent to all of the users in the selected groups
All recipients EXCEPT those in selected groups
The rule is triggered if an email that meets the rule’s conditions is sent to none of the users in the selected groups
6. To add a group to use in the rule, click the Add Group option. A list of the available groups displays. 7. Locate and select the groups to use in the rule. 8. Click the Add Selected option. Newly added groups display in the Selected groups list. 9. To save the rule, click Save and exit.
DEFINING SENDER AND RECIPIENT CONDITIONS USING DOMAIN LISTS
For a rule to apply to specific senders and recipients, use the Sender and Recipient tabs when creating a rule. For a rule to apply to all senders and recipients, do not define any sender or recipient conditions. You can build sender and recipient conditions based on:
• User groups • Domain lists
To define sender conditions using domain lists:
1. Select Services > Email Services > Content Control. 2. Click the name of the required rule, or click Create new rule. 3. Click the Sender tab. 4. In the Domain lists section, select the Use domain lists in this rule checkbox. The domain lists
that are available to use in the rule at this level are presented in the drop-‐down list. 5. Select whether the rule should apply to senders in any or none of the domains you define next.
Senders in ANY of the selected domains The rule is triggered if an email that meets the rule’s conditions is sent to any of the users in the selected domains
All senders EXCEPT those in selected domains
The rule is triggered if an email that meets the rule’s conditions is sent to none of the users in the selected domains
33
6. From the Select a list of domains drop-‐down list, either: • Select an existing list. The entries in the list are added to the Selected domain list box. • To add further entries to the Selected domain list box, click the Customize this list
checkbox. The box becomes editable for you to add domains. Any additional entries you add here are not saved to the original domain lists.
• Select <Custom list>. The Selected domain list box is editable, for you to enter your domain entries for this rule.
7. To save the rule, click Save and exit.
To define recipient conditions using domain lists:
1. Select Services > Email Services > Content Control. 2. Click the name of the required rule, or click Create new rule. 3. Click the Recipient tab. 4. In the Domain lists section, select the Use domain lists in this rule checkbox.
The domain lists that are available to use in the rule at this level are presented in the drop-‐down list.
5. Select the appropriate option depending on whether the rule should apply to recipients in any or none of the domains you define next.
Recipients in ANY of the selected domains
The rule is triggered if an email that meets the rule’s conditions is sent to any of the users in the selected domains
All recipients EXCEPT those in selected domains
The rule is triggered if an email that meets the rule’s conditions is sent to none of the users in the selected domains
6. From the Select a list of domains drop-‐down list, either: • Select an existing list. The entries in the list are added to the Selected domain list box. • To add further entries to the Selected domain list box, click the Customize this list
checkbox. The box becomes editable for you to add domains. Any additional entries you add here are not saved to the original domain lists.
• Select <Custom list>. The Selected domain list box is editable, for you to enter your domain entries for this rule.
7. To save the rule, click Save and exit.

34
DEFINING EMAIL CONTENT CONDITIONS
You can build email content conditions based on the following conditions.
Condition Description Email content Compare the content of the email against lists of predefined email content.
Some email clients change the format of the message when it is sent, which may lead to the specified content not being detected accurately. For example, double byte characters may be converted to single-‐byte characters in email headers. This format change is non-‐standard behavior in the email client software, rather than in the Content Control scanner. In this circumstance, detecting the specified content in the email body works as expected. But if the content only occurs in the header, it may not be detected. See your email client documentation for more details, or contact the support team. Click Support > Contact Us for details.
URL lists Compare the content of the email against lists of predefined URLs.
Email MIME types Compare the MIME type of the email against lists of predefined MIME types. An email MIME type condition relates to the MIME type of the actual email.
Email templates Compare the email template against lists of predefined email templates. For example, to detect social security numbers or credit card numbers. A predefined list of templates lets you monitor and control specific alphanumeric characters in a set format, e.g. social security numbers, or credit card numbers. The templates include all standard ways of formatting the type of data represented (for example, U.S. Social Security Numbers as ###-‐##-‐####, ### ## ####, ###/##/####, etc.). You can monitor information matching the templates going into or out of the organization. Be aware of potential confusion when using email templates while at the same time using the rule condition Scan Email header. Internal mail header information can sometimes take the same form as credit card or social security numbers. A similarity of format can result in some emails being blocked unexpectedly.
If a condition within a rule is set to Ignore, that condition is not used in that rule’s search parameters. In a new rule, every condition is initially set to Ignore.
To define the parts of the email to scan:
1. Select Services > Email Services > Content Control. 2. Click the name of the required rule, or click Create new rule. 3. Click the Email content tab. 4. In the Rule conditions section, select the checkboxes, as required:
Scan email body To scan for content in the body of emails
Scan email subject line To scan for any content that appears in the subject line of emails
Scan attachments To scan for content within attached Microsoft Office documents. This option provides protection against specific types of files, which are hidden within other files. If you scan for a term in an Office or PDF attachment, the term is detected in the email body.
Scan email header To scan for content in the header of emails. The subject line is also a header, so when this is selected, the rule also scans the subject for specified content.

35
To define email attribute conditions:
1. Select Services > Email Services > Content Control. 2. Click the Email content tab. 3. In the Email attributes section, select the options, as required:
Email is larger than Enter an email size in MB. Emails above this limit are detected. Email size is based on the size of the whole email, including encoded attachments
Email is encrypted To detect encrypted emails, that is, whether the email itself is encrypted. Only S/MIME encryption is detected
Email has importance level of
To detect emails with a specific importance level. Enter an importance level from the drop-‐down list. The available options are low, normal, and high
Email contains password-‐protected files
To detect the emails that contain password-‐protected files. This setting can help you identify if users send unauthorized confidential material out of the company
To define text content conditions:
1. Click the Email content tab. 2. In the Email content section, select whether to detect all or a specific number of phrases in the
list that you select next. Specifying a minimum number of items with which to match enables you to define a threshold that avoids an email being stopped. For example, an email may contain a name that happens to appear on a list. If real profanities occur in emails, the tendency is for more than one profanity to be used.
3. Do one of the following: • Select a list of content (or superlist) from the drop-‐down list.
The expressions in the selected list are displayed in the Selected content box. You can customize the content for this rule, by selecting the Customize this list checkbox. The box becomes editable. If you customize the list, the changes are not saved to the original list.
• To define text content for this rule only, select Custom list from the drop-‐down list. The Selected content box becomes editable.
• Enter the custom expressions for this rule.

36
To define URL content conditions:
1. Select Services > Email Services > Content Control. 2. Click the name of the required rule, or click Create new rule. 3. Click the Email content tab. 4. In the URL lists section, select whether the scan should detect all or any of the URLs in the list
that you select next. 5. Do one of the following:
• Select a list of URLs from the drop-‐down list. The URLs in the selected list display in the Selected URLs box.
• You can customize the content for this rule, by selecting the Customize this list checkbox. If you customize the list, the changes are not saved to the original list.
• To define URLs for this rule only, select Custom list from the drop-‐down list. The Selected URLs box becomes editable.
• Enter the custom URLs for this rule.
To define email MIME type conditions:
1. Select Services > Email Services > Content Control. 2. Click the name of the required rule, or click the Create new rule. 3. Click the Email content tab. 4. In the Email MIME types section, select whether the scan should detect one or none of the
MIME types in the list. 5. Do one of the following:
• Select a list of MIME types (or superlist) from the drop-‐down list. The items in the selected list display in the Selected MIME types box.
• You can customize the content for this rule, by selecting the Customize this list checkbox. If you customize the list, the changes are not saved to the original list.
• To define MIME types for this rule only, select Custom list from the drop-‐down list. The Selected MIME types box becomes editable.
• Enter the custom MIME types for this rule.
To define email template conditions:
1. Select Services > Email Services > Content Control. 2. Click the name of the required rules, or click Create new rule. 3. Click the Email content tab. 4. In the Email templates section, select whether the scan should detect any (rather than all) of
the templates that you select next. 5. Select a list of templates from the drop-‐down list.
The items in the selected list display in the Selected templates box.

37
EMAIL TEMPLATES IN CONTENT CONTROL RULES
Compare the content of an email against lists of predefined email templates; for example, to detect social security numbers or credit card numbers.
A predefined list of templates lets you monitor and control specific alphanumeric characters in a set format (e.g., social security numbers, credit card numbers). You can monitor information matching the templates going into or out of the organization. Depending on your organization's configuration, you may not see all of these templates.
NOTE: Be aware of potential confusion when using email templates while at the same time using the rule condition Scan Email header. Internal mail header information can sometimes take the same form as credit card or social security numbers. A similarity of format can result in some emails being blocked unexpectedly.
Template list Template name
Notes Examples of matches Examples of non-‐matches
All All A category holder that contains all of the regular expressions. You can select any combination of regular expressions from any of the templates.
ABA Routing Template
ABA Routing Template
Find matches for an ABA routing number. This is a 9-‐digit number. There is no match if there is an alphanumeric character or a hyphen in front of or at the end of the digits. There is no match if there is a plus symbol in front of the digits.
012345678 012345678 no 012345678~no
012345678no
AJL Credit Card AJL Credit Card
Find matches for AJL Credit Card numbers.
36159576425302 374615373757171 5269760516591108 4336687003806412 3833 975077 0420 3014-‐716500-‐6142 3469-‐737207-‐60884 3582-‐5049-‐2386-‐6975 4892 1817 0946 7063
1.36159576425302
Birthdate Birthdate template
Find matches for birth dates
DOB 01/01/1901 BIRTH 01/01/1901 BIRTHDAY 1-‐1-‐1901 BIRTH DAY 1.1.01 BIRTHDATE 01-‐01-‐1901 01-‐01-‐1901 DOB dob 01/01/1901 birth 1/01/1901 birthday 1-‐1-‐1901 birth day 01.01.01 birthdate 01-‐01-‐1901 01-‐01-‐1901 dob
01/01/1901 01.01.1901 01-‐01-‐1901 1.1.01 1/1/01 1-‐1-‐01

38
Template list Template name
Notes Examples of matches Examples of non-‐matches
Credit Card Numbers
Credit Cards (All matches)
Find matches for all kinds of credit card numbers. A LUHN algorithm check is applied. The separator can be a dash (-‐), a white space, or nothing. Credit card number prefixes: • American Express—34
or 37—length 15 • Diners Club/Carte
Blanche—300-‐305, 36, and 38—length 14
• Discover Card—6011,622126 to 622925, 644 to 649, 65—length 16
• JCB—3—length 16 • JCB—1800, 2131—
length 15 • MasterCard—51 to
55—length 16 • Visa—4—length 16
36334984144312 3633 498414 4312 3633-‐498414-‐4312 348526158792841 3485 261587 92841 3485-‐261587-‐92841 4402064770623264 4402 0647 7062 3264 4402-‐0647-‐7062-‐3264
15796851482832 14376871315261 31900597738008 32047800412648 37778165362375 3843776760017319 3647034435804432 47625697369931 45448191895224 47290380507287 5100-‐0000-‐0000-‐0000 3400-‐000000-‐00000 3000-‐000000-‐0000
Credit Card Numbers
Credit Card Numbers (Restricted Format Matches)
The same as the Credit Cards (All matches) template (see above) except the delimiter character cannot be a dash (-‐).
36334984144312 3633 498414 4312 348526158792841 3485 261587 92841 4402064770623264 4402 0647 7062 3264
3633-‐498414-‐4312 3485-‐261587-‐92841 4402-‐0647-‐7062-‐3264 15796851482832 14376871315261 31900597738008 32047800412648 37778165362375 3843776760017319 3647034435804432 47625697369931 45448191895224 47290380507287 5100-‐0000-‐0000-‐0000 3400-‐000000-‐00000
Credit Card Numbers
Custom Credit Card Numbers
Find matches for custom credit card numbers.
5100 0000 0000 0000 5200 0000 0000 0000 5300 0000 0000 0000 5400 0000 0000 0000 5500 0000 0000 0000 4000 0000 0000 0000 3400 000000 00000 3700 000000 00000 3000 000000 0000 3010 000000 0000 3020 000000 0000 3030 000000 0000 3040 000000 0000 3050 000000 0000 3600 000000 0000
0000 0000 0000 0000 0000 000000 00000 0000 000000 0000

39
Template list Template name
Notes Examples of matches Examples of non-‐matches
Credit Card Numbers Specific
Credit Card Numbers (Specific)
This template is now exactly same as the Credit Card All Matches template. It is maintained for compatibility purposes. Do not use this template in new Content Control rules.
Driver license Templates
General DL identifier for records
Find matches for the words driver license and similar spellings. The case of the text is ignored.
driver license driver licenses driving license Driver License driver licensing driverlicense dl # dl# lic # lic#
driver's license driver-‐license driv. license
Driver license Templates
MA, VA, KY, KS, AZ DL 1 Alpha 8 Numeric
Find matches for driver license expressions for the following US states—MA, VA, KY, KS, and AZ. The format of these is a single alphabet character followed by 8 digits.
A12345678 a12345678
123456789 AA1234567 A12345678a
Driver license Templates
Driver license
Generic Driver license template for the U.S.
B356 1258 4578 B356-‐1258-‐4578
B35612584578 B356 1258-‐4578
Driver license Templates
UK DL 1 Find matches for UK driving licenses. There is no match if the expression is at the beginning or the end of a line.
ABCDE101317ABCAB ABCD9 101317 AB9AB ABCD0 101317 AB0AB ABCD9163317ABCAB ABCDE101317ABCAB
ABCDEA01317ABCAB ABDDE 101317 ABC12
Driver license Templates
NJ DL 1 Alpha (1st Letter Last Name) 14 Numeric
Find matches for New Jersey driver licenses. The format of these is a single alphabet character followed by 14 numbers. There is no match if the expression is at the beginning or the end of a line.
A12345678901234 A123456789012345 AA12345678901234 A12345678901234A
Driver license Templates
FL, MD, MI, MNDL Letter plus 12 Digits
Find matches for Florida, Maryland, Michigan, and Minnesota driver licenses. The format is a single alphabet character followed by 12 numbers. There is no match if the expression is at the beginning or the end of a line.
A123456789012 AA123456789012 A1234567890123

40
Template list Template name
Notes Examples of matches Examples of non-‐matches
Driver license Templates
IL DL First Letter Of Last Name and 11 Digits
Find matches for Illinois driver licenses. The first letter of the last name is followed by 11 numbers. There is no match if the expression is at the beginning or the end of a line.
A12345678901 a12345678901
AB12345678901 A123456789012 A12345678901B
Driver license Templates
NY SC,CO, CT, HI, MS, NM, ND, OKDL 9 Numeric
Find matches for driver licenses for the following US states—NY, SC, CO, CT, HI, MS, NM, ND, OK. There is no match if the expression is at the beginning or the end of a line.
123456789 A123456789 1234567890 123456789A
Driver license Templates
CA DL 1 Alpha 7 Numeric
Find matches for California driver licenses. The format is a single alphabet character followed by 7 numbers. There is no match if the expression is at the beginning or the end of a line.
A12345678 AA12345678 A12345678
HIPAA Templates
Custom SSN MED
U.S. Social Security Number
123-‐12-‐1234 123-‐12-‐12345
HIPAA Templates
2011 HCPCS in Regex for HIPAA
Find matches for Healthcare Common Procedure Coding System (HCPCS) codes for HIPAA.
12345 123456 123456789 AB12345
H0001
HIPAA Templates
ICD 10 for HIPAA
Find matches for ICD-‐10 (International Classification of Diseases) codes for HIPAA.
A00.00xA S00.0xxA
A00.1
HIPAA Templates
ICD9 for HIPAA
Find matches for ICD-‐9 (International Classification of Diseases) codes for HIPAA.
E12.1 E12.12 12.1 12.12 123.1 123.12
AB12.1 123.12A
HIPAA Templates
CPT Category 1 or 2 or 3 Codes for HIPAA
Find matches for HIPAA CPT (Current Procedural Terminology) Category 1, 2 or 3.
CPT 12345 CPT blah 12345
CPT 1000F
HIPAA Templates
2010 FDA NDC Codes for HIPAA
Find matches for FDA (Food and Drug Administration) National Drug Codes.
1234-‐1234-‐12 12345-‐123-‐12 12345-‐1234-‐1
1234-‐12345-‐1
HIPAA Templates
Drug Codes U.S.
Find matches for HIPAA, NDC, and variants.
12345-‐1234-‐12 12345-‐123-‐12 12345-‐*123-‐12 12345-‐1234-‐1 12345-‐1234-‐*1 1234-‐1234-‐12 *1234-‐1234-‐12
1234-‐1234-‐123 AB1234-‐1234-‐12

41
Template list Template name
Notes Examples of matches Examples of non-‐matches
HIPAA Templates
U.S. ITIN Find matches for U.S. Individual Taxpayer Identification Numbers (ITIN).
912-‐89-‐1234 812-‐89-‐1234
Latvian Personal ID
Latvian Personal ID
Find matches for Latvia Identity Card Numbers. The format is DDMMYY-‐XNNNC. The first six numbers are a birth date. X is the century a person was born in (0 for XIX, 1 for XX and 2 for XXI). NNN is birth serial number in that day. C is checksum digit.
301299-‐11234 010199-‐11234 200299-‐21234
013199-‐11234 010199-‐31234
Social Security Numbers
SSN (Complete No Hyphen)
Find matches for social security numbers of the format AAAGGSSSS where AAA is the area number from 000 to 772. This is for valid SSNs prior to June 25th 2011.
123121234 000121234 123001234 123120000 A123121234 123121234 773121234
Social Security Numbers
SSN Complete
Find matches for social security numbers of the format AAA-‐GG-‐SSSS where AAA is the area code 000 to 772. This is for valid SSNs prior to June 25th 2011. The separator can be a space or a dash (-‐). This does not match valid SSNs followed by a dash. It does not match the number strings inside a math context or pure data list.
123-‐12-‐1234 123 12 1234
000-‐12-‐1234 123-‐00-‐1234 123-‐12-‐0000 A123-‐12-‐1234 773-‐12-‐1234 123-‐12-‐1234-‐
Social Security Numbers
SSN with space dash slash
Find matches for social security numbers of the format AAA-‐GG-‐SSSS where AAA is from 000 to 772. This is for valid SSNs prior to June 25th 2011. The separator "-‐" can be replaced by " " or "/" in all occurrences.
123-‐12-‐1234 123 12 1234 123/12/1234
000-‐12-‐1234 123-‐00-‐1234 123-‐12-‐0000 A123-‐12-‐1234 773-‐12-‐1234 123 12/1234
Social Security Numbers
US SSNs (All matches)
Find matches for social security numbers of the format AAA-‐GG-‐SSS, which include randomization SSNs and those prior to June 25th 2011. Matches all formats including these delimiters: , ' ! # $ % * + . If a SSN is followed by a separator and then by a digit, it is not a match.
123 45 6789 123/45/6789 123-‐45-‐6789 123456789

42
Template list Template name
Notes Examples of matches Examples of non-‐matches
Social Security Numbers
US SSNs (Restricted Format Matches)
The same as U.S. SSNs (All Matches) except that the delimiter can only be a slash (/) or a white space.
Social Security Numbers
Custom SSN Find matches for social security numbers of the format AAA-‐GG-‐SSSS where AAA is from 000 to 772. This is for valid SSNs prior to June 25th 2011.
123-‐12-‐1234 000-‐12-‐1234 123-‐00-‐1234 123-‐12-‐0000 A123-‐12-‐1234 123 12 1234 773-‐12-‐1234
Social Security Numbers
UK NINos Find matches for UK National Insurance Numbers. This only matches if there is a letter at the end. Though only A, B, C, or D is valid as the final letter, this template matches with any letter. The letter is not part of the matching sequence; it exists only to cause the JR 56 43 23 to match. Without the final letter, JR 56 43 23 does not match.
JR 56 43 23 A jr 56 43 23 a AA 11 11 11 A JR564323 AA111111 JR 56 43 23 Z AA 11 11 11 F
DA 11 11 11 A JR 56 43 23 AA 11 11 11
SSN Randomization Templates
SSNVS No Hyphen
Find matches for social security numbers of the format AAAGGSSS, which includes randomization SSNs and those prior to June 25th 2011.
123121234 000121234 123001234 123120000 A123121234 12312/1234 1231212341
SSN Randomization Templates
SSNVS space, dash, slash
Find matches for social security numbers of the format AAA-‐GG-‐SSSS where AAA is from 000 to 772. This is for valid SSNs prior to June 25th 2011. The separator "-‐" can be replaced by " " or "/" in all occurrences.
123-‐12-‐1234 123 12 1234 123/12/1234
000-‐12-‐1234 123-‐00-‐1234 123-‐12-‐0000 A123-‐12-‐1234 773-‐12-‐1234 123 12/1234
SSN Randomization Templates
SSNVS (Restricted Format Matches)
Find matches for social security numbers of the format AAA GG SSS, which includes randomization SSNs and those prior June 25th 2011. The separator " " can be replaced by "/" in all occurrences. It does not match if an SSN is followed by a separator and then by a number.
123 12 1234 123/12/1234
000 12 1234 123 00 1234 123 12 0000 A123 12 1234 123 12/1234 123 12 1234 1

43
Template list Template name
Notes Examples of matches Examples of non-‐matches
SSN Randomization Templates
SSNVS (All Matches)
Find matches for all social security numbers. It is very similar to SSNVS space dash slash, except it allows no separator. A LUHN algorithm check is not applied.
SSN Randomization Templates
SSNVS Complete
Find matches for social security numbers of the format AAA-‐GG-‐SSS, which includes randomization SSNs and those prior June 25th 2011. The separator "-‐" can be replaced by " " in all occurrences. It does not match if an SSN is followed by a separator and then by a number.
123-‐12-‐1234 123 12 1234
000-‐12-‐1234 123-‐00-‐1234 123-‐12-‐0000 A123-‐12-‐1234 123-‐12/1234 123-‐12-‐1234-‐1
SSN Randomization Templates
Custom SSN Find matches for social security numbers of the format AAA-‐GG-‐SSS, which includes randomization SSNs and those prior to June 25th 2011. It does not match if an SSN is followed by a separator and then by a number.
123-‐12-‐1234 000-‐12-‐1234 123-‐00-‐1234 123-‐12-‐0000 A123-‐12-‐1234 123-‐12/1234 123-‐12-‐1234-‐1
UK ID Templates
UK National Insurance
Find matches for UK National Insurance Numbers such as JG 121316 A. The last alphabet character can be omitted. No space is allowed between the 6 numbers.
JG 121316 A JG121316A JG121316 JG 121316
JG 12 13 16 A JG 12 13 16
UK ID Templates
UK Passport old type
Find matches for old type UK passports.
A1234A A12345 01234A 012345
a1234A 01234a
UK ID Templates
UK Electoral Role
Find matches for UK electoral role codes.
AB1 AB12 AB123 AB1234 ABC1 ABC1234
ab1 ab12345 ABCD1
UK ID Templates
UK Passport new type
Find matches for new type UK passports. The format is xxxxxxxxx, where x is a number.
123456789 1234567890 a123456789 123456789a

44
DEFINING ATTACHMENT CONDITIONS
You can build attachment conditions based on:
Attachment attributes Maximum size and number of attachments.
Attachment filenames Compares an attachment file name against a list of predefined file names.
Attachment types Compares an attachment’s MIME type against a list of predefined MIME types. Compares whether the file extension matches the implied contents. Identifies file-‐spoofing – where an attached file is sent under the guise of a different file extension.
Compressed archive and Microsoft Office attachments are also scanned. The scanner opens a compressed archive file and scans the file types within it. If a condition within a rule is set to Ignore, that condition is not used in that rule’s search parameters. In a new rule, every condition is initially set to Ignore.
To define attachment attribute conditions:
1. Select Services > Email Services > Content Control. 2. Click the name of the required rule, or click Create new rule. 3. Click the Attachment tab. 4. In the Attachments attributes section, select the options, as required:
Email contains an attachment larger than
To detect attachments above a certain size. Enter an attachment size in MB. Attachment size is based on the size of the encoded attachment.
Email contains more than x attachments
To detect emails with more than a specified number of attachments. Enter the number of attachments.
Attachment filename is spoofed
Compares whether the file extension matches the implied contents. Identifies file-‐spoofing -‐ where an attached file is sent under the guise of a different file extension.
To detect a file that is sent under the guise of another file type. The detection of file-‐spoofing involves checking an attached file to ensure that the file is of the type that it says that it is. The Anti-‐Virus service detects malicious files that may be spoofed. The Content Control service takes the detection of malicious files a step further and investigates all recognized file types. It determines whether they are spoofed or not. A rule that uses this attachment attribute condition ensures that users cannot get around an organization's email security policy by spoofing files.
To define attachment file name conditions:
1. Select Services > Email Services > Content Control. 2. Click the name of the required rule, or click Create new rule. 3. Click the Attachment tab. 4. In the Attachment filenames section, select whether the scan should detect any or none of the
file names that you select next. 5. Do one of the following:
• Select a list of filenames (or superlist) from the drop-‐down list. The file names in the selected list display in the Selected filenames box.
• You can customize the file names for this rule, by selecting the Customize this list checkbox. If you customize the list, the changes are not saved to the original list.
• To define file names for this rule only, select Custom list from the drop-‐down list. The Selected file names box becomes editable.
• Enter the custom file names for this rule.

45
To define attachment file type conditions:
1. Select Services > Email Services > Content Control. 2. Click the name of the required rule, or click Create new rule. 3. Click the Attachment tab. 4. In the Attachments types section, select whether the scan should detect one or none of the
MIME types in the Selected MIME types list. 5. Do one of the following:
• Select a predefined MIME type list (or superlist) from the drop-‐down list. The MIME types in the selected list are displayed in the Selected MIME types box.
• You can customize the MIME types for this rule, by selecting the Customize this list checkbox. If you customize the list, the changes are not saved to the original list.
• To define MIME types for this rule only, select Custom list from the drop-‐down list. The Selected MIME types box becomes editable.
• Enter the custom MIME types for this rule.
DEFINING TIME INTERVAL CONDITIONS
You can define conditions based on the time that an email is sent or received. A rule based on time conditions can be useful to limit email size to retain network bandwidth during the working day, for example.
Times are based on when the email arrives on a mail server within the Email Services infrastructure. They are then converted to the time zone specified.
To define time interval conditions:
1. Select Services > Email Services > Content Control. 2. Click the name of the required rule, or click Create new rule. 3. Click the Time intervals tab. 4. Select the Use time intervals in this rule checkbox. 5. Select whether the rule should apply to email that is scanned within or outside of the specified
time intervals. 6. To specify a time zone other than the default time zone, select the required time zone from the
drop-‐down list. The time zone that is selected determines daylight savings.
7. Enter the required times for the From this time and To this time values. Use the 24-‐hour clock format (e.g., 09.30). You must enter the intervals spanning midnight as two separate time intervals: one for the time interval leading up to midnight and one for the time interval following midnight the next day.
8. Select the required checkboxes to apply the time interval on the required days of the week. 9. Click the Add to selected option.
The time interval is displayed in the Selected time intervals box.

46
ABOUT ACTIONS AND NOTIFICATIONS IN CONTENT CONTROL
For each rule, you must define an action for the email that the rule detects. For each action, you can define an appropriate notification to be sent to an email administrator, the sender, and the recipient of the suspect email. Or you can use the default global or domain notifications. You can define the text of these notifications to suit the situation. Or use the default notification text that is defined at global level or domain level.
NOTE: Administrator notifications are activated by default. Sender and recipient notifications are off until turned on.
An email may trigger several rules. The rules may have different actions. So, the sequence in which the rules are applied is important. If an email triggers a rule that applies a Block and delete, Redirect to administrator, and Log and exit action, the email does not continue through any further rules. These are known as exit actions.
If an email triggers multiple rules that do not have exit actions, multiple notifications may be sent to the administrator; one for each rule triggered. In this case, each instance of the email is combined into a single email.
If a rule triggers a multi-‐recipient email to be blocked for a particular recipient, scanning continues for all other intended recipients.
For all action types, the Content Control statistics record that a rule has been triggered. Content Control adds the following information into the header of detected emails:
X-ContentInfo Displays the name of the rule matched
X-Content-Flag Set to ‘yes’ if content is detected
X-ContentReason Displays the reason that the email has been detected, that is, the suspect content and its location within the email
The following table describes the actions that are available.
Block and delete The email is prevented from reaching the intended recipients. It is permanently
deleted. The scanning process is terminated for this email. Redirect to administrator
The email is redirected so that it does not continue on to the intended recipients. Instead, it is sent to a nominated administrator of the Content Control service. The scanning process is terminated for this email.
Copy to administrator
The email is flagged to be copied to a nominated Content Control administrator once scanning is completed. The scanning process continues. The email is sent to the intended recipient.
Tag with header A comment is added into the email X-‐Header to indicate that the email has triggered a Content Control rule. The scanning process continues.
Tag subject line A tag is added to the subject line. You define the text for the tag. Tagging the subject line provides the benefit of warning a user before they open it that the email may contain unacceptable content. The scanning process continues.
Compress attachments
All email attachments of an email are individually converted to .zip files. By individually compressing each attachment, the attachment count and file naming is preserved, while the overall email size is reduced. If the email does not have any attachments, the action has no effect. The scanning process continues.

47
Log only The portal Content Control statistics record that a rule has been triggered. No other action is taken. The scanning process continues.
Log and exit The Log and exit action stops the processing of the rule set at a particular point because an email had been marked in a particular way. For example, you may be bound by legislation not to scan personal email. So the Log and exit action can be used to stop the scanning of all emails that are marked personal. Content Control still applies the rest of the rules to non-‐personal email for a particular group of senders or recipients.
Route to (inbound or outbound only – not both)
• Enables you to specify which of your registered inbound email routes each user's emails are delivered to. Choose from your existing inbound email routes. These are defined in Services > Email Services > Inbound Routes.
• Enables you to specify an outbound email IP or host name for each user's emails are delivered from.
DEFINING AN ACTION FOR A RULE IN CONTENT CONTROL
For each rule, you must define an action for the email that the rule detects.
When you set up a new rule initially, we recommend that you set a less severe action, such as Log only, Tag with header, Tag subject line, or Copy to administrator. You can then check that the rule works, before instigating a more severe action such as Redirect to administrator or Block and Delete.
To define an action:
1. Select Services > Email Services > Content Control. 2. Click the name of the required rule. 3. Click the Actions and notifications tab. 4. Select the required action from the drop-‐down list.
The possible actions are:
Block and delete The email is prevented from reaching the intended recipients. It is permanently deleted. The scanning process is terminated for this email.
Redirect to administrator
The email is redirected so that it does not continue on to the intended recipients. Instead, it is sent to a nominated administrator of the Content Control service. The scanning process is terminated for this email.
Copy to administrator
The email is flagged to be copied to a nominated Content Control administrator once scanning is completed. The scanning process continues. The email is sent to the intended recipient.
Tag with header A comment is added into the email X-‐Header to indicate that the email has triggered a Content Control rule. The scanning process continues.
The Tag suspected mail within header action is available for inbound emails only.
Tag subject line A tag is added to the subject line. You define the text for the tag. Tagging the subject line provides the benefit of warning a user before they open it that the email may contain unacceptable content. The scanning process continues.
The Tag subject line action is available for inbound emails only.
Compress attachments
All email attachments of an email are individually converted to .zip files. By individually compressing each attachment, the attachment count and file naming is preserved, while the overall email size is reduced. If the email does not have any attachments, the action has no effect. The scanning process continues.
Log only The Content Control statistics record that a rule has been triggered. No other action is taken. The scanning process continues.

48
Log and exit The Log and exit action stops the processing of the rule set at a particular point because an email had been marked in a particular way. For example, you may be bound by legislation not to scan personal email. So the Log and exit action can be used to stop the scanning of all emails that are marked personal. Content Control still applies the rest of the rules to non-‐personal email for a particular group of senders or recipients.
Route to (inbound or outbound only – not both)
For an inbound rule – enables you to specify which of your existing registered email routes each user's emails are delivered to. To define an inbound routing rule: • Select the Route to action. In the Named route box, select the required named route from the drop-‐down list. Your existing registered inbound email routes are defined in Services > Email Services > Inbound Routes. For an outbound rule – enables you to specify an IP or host name that your emails are routed to after Email Security has scanned them. For example, you can route them to a 3rd party to be branded.
To define an outbound routing rule: • Select the Route to action, and enter the primary and the secondary IP address or host name, as required. IPv6 IP addresses are not supported currently.
5. Click Save and exit.
DEFINING A NOTIFICATION FOR A RULE IN CONTENT CONTROL
You can define notifications (for the administrator, sender, and recipient) that are appropriate for a rule’s particular conditions and actions. In the Actions and notifications tab, the text for the notifications is displayed according to the current global or domain setting. The text boxes are not editable unless you select the Send custom notification to… option.
If a rule's action is to redirect an email or copy an email to the administrator, you must define the administrator's email address. The emails and notifications are sent to this address. The administrator email address can be specified at global level or domain level, or for a specific rule.
To define a notification for a rule:
1. Select Services > Email Services > Content Control. 2. Click the name of the required rule, or click Create new rule. 3. Click the Actions and notifications tab. 4. In each section, use the options to define whether:
• No notification is to be sent. • The default notification is to be sent.
The default text for the notification displays. • A custom notification is to be sent.
You define the text for the notification here. 5. To define a custom notification, enter the Subject line and Body text. Use placeholders to enter
variables like the date, the name of an attached file, the rule name, etc. To see the variables, click View placeholder options. The variables can be pasted and copied into the content of the rule.
6. To define an administrator email address specific to this rule, enter the address in the Notifications for this rule will be sent to this address box.
49
DEFINING A SUBJECT LINE TAG FOR A CONTENT CONTROL RULE
You can set a Tag subject line action. The detected email is sent to the intended path but with some extra text in the subject line. The text warns the recipient that the email may contain inappropriate content. If you select this action, you can define the text for the tag. You can specify a subject line tag for a specific rule or use the default subject line tag.
To define a subject line tag for a rule:
1. Select Services > Email Services > Content Control. 2. Click the name of the required rule, or click Create new rule. 3. Click the Actions and notifications tab. 4. In the Subject line text section, either:
• To use specific subject line text for this rule, select the Use custom subject line text checkbox, and enter the required text in the Enter text box.
• To use the default subject line text, ensure that the Use custom subject line text checkbox is unchecked.
The maximum number of characters depends on the language. The tag text can contain non-‐Western characters.
5. Select whether to put the text before or after the existing subject line text.
VIEWING A SUMMARY OF A RULE’S CONDITIONS
You can view a summary of each rule. The summary shows the sender and recipient, email content, and attachment conditions.
NOTE: You can specify whether all or at least one of the tabs must be satisfied to trigger the rule.
To view the summary of a rule:
1. Select Services > Email Services > Content Control. 2. In the Rules tab, click the name of the rule. 3. Click the Summary tab.
The conditions of the rule are set out so that you can see all of the conditions of the rule in an easy-‐to-‐read format.

50
FREQUENTLY ASKED QUESTIONS
Question Answer Where has the User Groups page moved to? You can now create and manage your user groups in Services >
Email Services > Platform > User Groups.
What characters can I use in a user group name?
User group names must be alphanumeric; spaces are allowed. Names can be up to 50 characters in length.
I have deleted users from a user group but they have re-‐appeared. Why?
The email address in question has sent outbound mail through the Email Services infrastructure and the address was harvested again.
How many user groups can I create? 500 per domain.
How many users can exist in a user group? 1,000,000.
Can I add a user group to another group? No. A user group can only contain email addresses. However, a single email address can exist in multiple user groups.
Why are some of my users not displayed in a user group that I added them to?
Only the first 500 users are displayed. You must search for the users that are not displayed.
I want to delete a user group but I am unable to select it; the box is grayed out. What should I do?
The user group is used in a rule. It cannot be deleted until it is removed from all of the rules it is used in.
What characters can I use in a list name? List names must be alphanumeric, spaces are allowed. Names can be up to 50 characters long.
Can I change the type of a list that already exists?
No. You must create a new list.
The cloud security services provided a set of default lists. Can I delete these?
No. The default lists cannot be deleted.
I can see lists available for selection when I create a new rule, but visiting the Lists page the settings are grayed out. What is happening?
You are at domain level. Lists created at default level can be applied to rules at domain level but cannot be edited. They are not editable in the Lists page at domain level.
We work for a global organization that operates in the countries that speak foreign languages. Is it possible to add word lists in any language?
Yes. You can configure a word list in any language, whether it is Latin-‐based, Asian, or Eastern European.
I want to use the default word lists for profanity. But a user's surname triggers a rule. How can I get around this?
You can either:
• Customize the list to remove the offending word, in the Email content tab for the rule.
• Use the threshold functionality. In the Email content tab, set the Email contains at least two of these terms option. Then at least two words on this list must be present to trigger the rule. An email is not stopped for having the surname in only once. The threshold can be increased up to 10 words, if necessary. Thus all emails containing profanity are stopped correctly, but any emails that include a sensitive word in an ambiguous context will not.
Can I concatenate lists together to create one large list?
Yes. Create a ‘superlist’ by selecting multiple lists of a single type. A superlist cannot include multiple list types. A superlist is automatically updated if one of the lists it includes is changed.

51
Question Answer Is it possible to stop specific MIME types coming into our organization by selecting them from a predefined list?
Yes. You can define a list of MIME types to scan for. However, if you need a rule that stops specific MIME types to protect the organization against harmful executables and malware, the Email Anti-‐Virus service detects these. So it may not be necessary to block all of these MIME types.
I want to set up rules within Content Control. But I am concerned that I may set up something and it blocks business critical email. What should I do?
When you create a set of rules, we recommend that you set the Log only action for the first 48 hours. Then you can monitor any irregular activity. If there is a problem and you cannot work out how to resolve it, contact the support team. Click Support > Contact Us for details.
I have subscribed to Content Control and am unable to add any rules. Why?
Make sure that you have defined an administrator email address and time zone in the Settings tab.
What characters can I use in a rule name? Rule names must be alphanumeric; spaces are allowed. Names can be up to 50 characters in length.
How many rules can I have? 500 per domain.
Can I configure a rule to be from a group of specific users OR a list of domains?
Yes. Use ‘and’ and ‘or’ relationships between different components of the rule to ensure that the rule meets your requirements.
I want a rule to monitor emails coming from [email protected], going to the marketing department, and which contain password-‐protected files, or are encrypted. Is this possible?
Yes. You can decide how you want to link each component of a rule together within each tab and between tabs. You can either link 'all the components’ or ‘any of the components.’
What order are my rules processed in? The order in which they are displayed within the portal.
I set an attachment size restriction of 2Mb. But emails are blocked with attachments smaller than this. Why?
Check that you have not set the size restriction on the Email content tab rather than the Attachments tab.
I have created a rule with multiple conditions and it does not stop any emails. Why?
Check that the AND and OR elements of your conditions are correct.
Can I get a quick view of which components are in the rule?
Yes. Go to the Summary tab, where you can see what conditions are in place for this rule.
I have set up all my rules in a test domain and I am happy that they are running correctly. How can I now switch them on for all of my other domains?
Use the Copy rule functionality to select each rule and copy it to another domain or to the global level.
I have set up a rule in a test domain, but it does not work when I test it. Why?
You can test the rule using an email that is sent from or to the email address that is specified as the Administrator email address. Administrator email addresses bypass the Content Control scans. Emails that are sent from or to this address do not activate any of your Content Control rules.
I do not want our IT administrator to have to sift through all of the emails that have been triggered. Can I share the responsibility depending on which rule an email breaks?
Yes. You can set a separate email address for each rule, for redirect or copy actions. For example, the legal team can see emails that have breached confidentiality and the HR team can see emails that may cause harassment.
Is it possible to configure notifications for individual rules?
Yes. In the Actions and notifications tab, you can activate or deactivate each notification, adding new text or selecting the option that inherits text from default notifications.

52
Question Answer If I make a change to a rule, how long does it take to update and take effect?
Rules are updated every time that the infrastructure builds the configurations, collecting information, and distributing it across the infrastructure.
How can I add email addresses to Content Control?
When a user sends an outbound email, Content Control automatically harvests their email address for future use. User groups can also be synchronized from your LDAP directory source. Addresses can also be added manually to a user group or added for a specific rule.
Can I differentiate between the parts of the email to look in?
Yes. You can define whether to scan within the header, subject line, body, and the attachment of emails.
Does Content Control scan within Microsoft Office documents as well as the email?
Yes. The Content Control Service scans within Microsoft Office documents for words and phrases or regular expressions. Select the Scan attachments checkbox in the Email content tab.
Does Content Control automatically scan within archive files such as ZIP and RAR for file types?
Yes. Content Control can look inside archive files for file types or content that is hidden within them.
If I am sent a spoofed file like an XLS file renamed with a DOC extension, can this be detected?
Yes. If the spoofed file is malicious, Email Anti-‐Virus will already have detected it. However, you can define a rule to detect a spoofed file as an attachment condition.
Are email addresses case-‐sensitive? Yes. If you want to search for an email address, you must type it as it is recorded. Most email addresses are stored in lower case.
An email has triggered a rule. How can I find out why it was triggered?
You can look in the headers of the email where the rule name and the word that triggered the rule are displayed.
How do the templates work? The templates use a formula that stops all data that is in the same format as the template. For example, credit card numbers are always 16 digits, which are displayed in one of several formats.
How do wildcards work? Use a wildcard when there are alphanumeric characters to trigger a rule, but you do not want to state exactly the numbers or characters. For example, use a wildcard for patient numbers that have the first five characters as HGTYU and then any combination of letters or numbers. Use HGTYU*.